html basic setup
DESCRIPTION
HTML basic setup. - PowerPoint PPT PresentationTRANSCRIPT

HTML BASIC SETUPThere is a certain way that
an HTML file should be set up. The HTML section declares a beginning and an ending. Within the HTML, there should be a HEAD and a BODY. Within the head should be the SCRIPT. Each section starts with the section title and ends with a forward slash with the title.
<html><head><script></script></head><body></body></html>

Using the Font Tag
The font designates a section of text to have certain attributes such as size and face. Both commands appear inside the tag as parameters. Each parameter is assigned to a value with an equal sign and a quote. There are other parameters to set as well. The coder can chose any number of available parameters to set.
<font face="Bradley Hand ITC" size="6“>

USING THE <H1> - <H7> TAGS The <h1> through <h7> commands are
another popular way of making text appear at different sizes. They can also be set to have personalized attributes. Color, font type and size can be changed in the heading and then referenced easily throughout the document. A savvy user can create a professional look with the heading commands.

Adding Special Characters
Some characters don’t appear easily on the web pages. Characters that are used as commands such as the less than and greater than signs can be tricky. Spaces are usually ignored. By using some special character designations, an author can get any character they want. See a list at www.w3schools.com/tags/ref_entities.aspand check out the examples such as for a space or < for a less than sign.

REVIEW Html Basic Setup Using the Font Tag Using the <h1> - <h7> tags Adding Special Characters

Setting the Background Color
Setting the background is an easy way to add style to the page. By adding parameters to the body command such as <body bgcolor=“red”> or <body background="bgimage.jpg"> the entire page will have a new look. The color can be any color the author can think of or even millions of colors designated by numerical values.
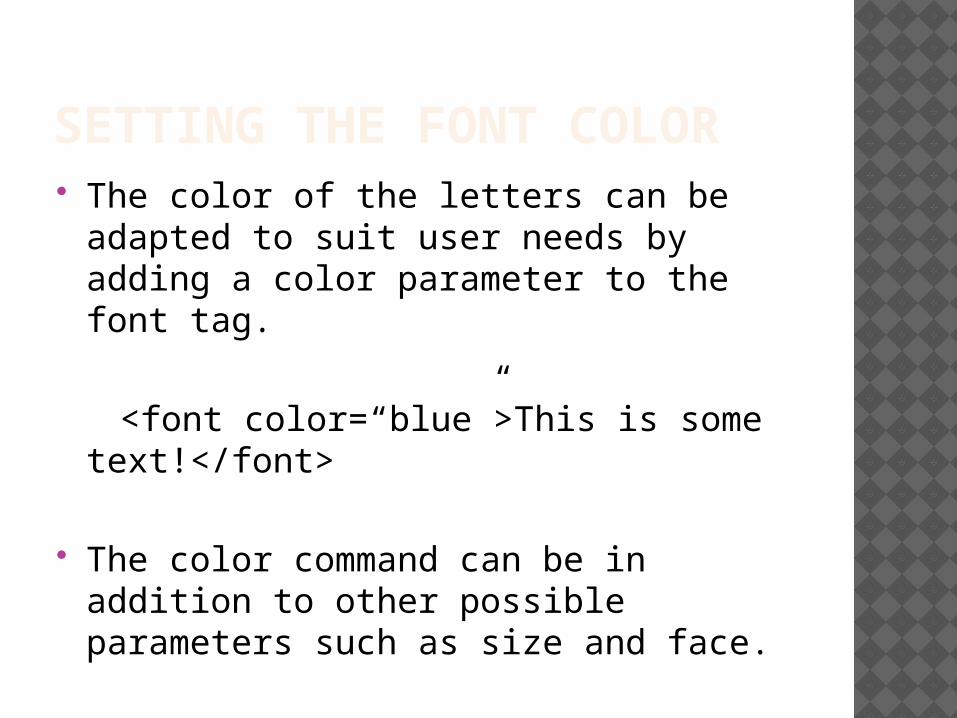
SETTING THE FONT COLOR The color of the letters can be adapted
to suit user needs by adding a color parameter to the font tag.
<font color=“blue”>This is some text!</font>
The color command can be in addition to other possible parameters such as size and face.

Setting the Highlight Color
An author can also highlight the text with certain colors.
<h2 style="background-color:red;">This is a heading</h2>
This can be applied to a heading or to a font. The style command is a powerful part of HTML that can also include many other options.

USING COMPLEX COLORS Many more colors are available in
addition to the standard red, yellow, green and blue etc. More eclectic colors such as aqua and peach can also be used. Additionally, the computer can use math to indicate millions of colors and shades. Check out this web site to see some of them:
www.w3schools.com/html/html_colors.asp
Review
Setting the Background ColorSetting the Font ColorSetting the Highlight ColorUsing complex colors

ADDING PICTURES USING LINE LINKING Any of the pictures posted online can be
placed on your web page. This is called line linking or hot linking. To do this, you find a full web link to a picture. Then, use it in the image command in this format:
<img src= “http://www.someonlinesite.com/picturename.jpg”>
*remember, the spacing and extra lines are ignored*

Adding Locally Called Pictures
Some times it is better to have the pictures on a web page to be in your controlled directory. Other sites can take measures to prevent you from using their pictures. Locally controlled directories enable an illustrator to edit the pictures. The tag is the same, except more simple because it refers to the local directory:
<img src=“yourfile.jpg”>

PLACING LINKS ON PICTURES The link command is one of the first to
developed on the World Wide Web. It is referred to by the <a> tag. For example, to link a picture to the class web site, would be like this:
<a href=“http://www.scottbunin.com”><img src=“yourfile.jpg”> </a>

Organizing Pictures
There are a few ways to organized pictures on a page to have them show up where you want. The size of the picture can be made congruent for multiple pictures. The pictures can be centered or shown on different lines. The following example centers, sizes and shows two pictures on different lines.
<center><img length=“200” height=“200”
src=“yourfile.jpg”> <br><img length=“200” height=“200”
src=“yourfile.jpg”> </center>

Adding Pictures Using Line Linking Adding Locally Called Pictures Placing Links on Pictures Organizing Pictures

Creating Your Own Tables
Tables can be a great way to organize objects, pictures or text on a page. To declare a table, use the <table> tag. To declare a row for the table, use the <tr> command. To show the different data in each row, use the <td> command. A 3 by 3 table:
<table><tr> <td> </td> <td> </td> <td> </td> </tr><tr> <td> </td> <td> </td> <td> </td> </tr><tr> <td> </td> <td> </td> <td> </td> </tr></table>

USING ONLINE TABLE GENERATORS Some times you can get a nice bit of
HTML code from online websites. Try going to html-tables.com or doing a search for HTML online table generator. Find one that suits your own style. It makes it easer to change the size of the different cells inside the table. By using an online HTML generator, anyone can make nice tables quickly.

Organizing Pictures With a Table
After your table is set up, this would be a great place to put a collection of pictures. Put the picture using the <img> tag as previously discussed. Place each image inside of the <td> </td>. Set all the pictures to be the same size so the table aligns with a professional look. Have each of the pictures go to a link to have a fast and appealing link to a large amount of information.

ADDING A TABLE HEADING It is often a good idea to create a title at
the top of each column of a table. For example, if you were to list your favorite foods, you would put “foods” at the top of the list. To create a table heading, use the <th> tag instead of <td>. Also, consider different sizes of borders to make the table you want. <table border="1"><tr><th>Header 1</th></tr></table>

Review
Creating your own tablesUsing online table generatorsOrganizing Pictures With a TableAdding a Table Heading

CREATING A FORM WITH BUTTONS A web page that does not interact will
be less useful to an organization. Having buttons, check boxes, text boxes and the like enable a user to enter or select as needed. Declare a <form> section to have a user be able to click or type. The page can then be inscribed with programming such as JavaScript to react.

Using Radial Buttons
Using a radial places a small selection circle for a user to click. This is used on the class quizzes. The user selects only one and if they select another it changes. The input type is declared as “radio”. The value is what is shown as the question or the item to select. The name is used to refer to by a program such as JavaScript.
<form><input type="radio" name="sex" value="male">Male<br><input type="radio" name="sex" value="female">Female</form>

HIDDEN AND SHOWN TEXT It is often a good idea to have a web page visitor
be able to say who they are. By using the following setup on a form, a person can give their name, enter a password that is hidden text, and submit the data for processing. Then, we can have them sign a guest log or even send us money to purchase a product!
First name: <input type="text" name="fname"><br> Last name: <input type="text" name=
“password”><br><input type="submit" value="Submit">

Check Boxes
Some times a customer or web user will want to select more than one thing. For example, they could buy a pizza on our web site and they can pay to have lots of extra toppings. Check out this online tool to see how it works for this and any other HTML example:
www.w3schools.com/html/tryit.asp?filename=tryhtml_checkbox

REVIEW Creating a Form With Buttons Using Radial Buttons Hidden and Shown Text Check Boxes