hydraulic dough divider operation manual bmbt030
TRANSCRIPT
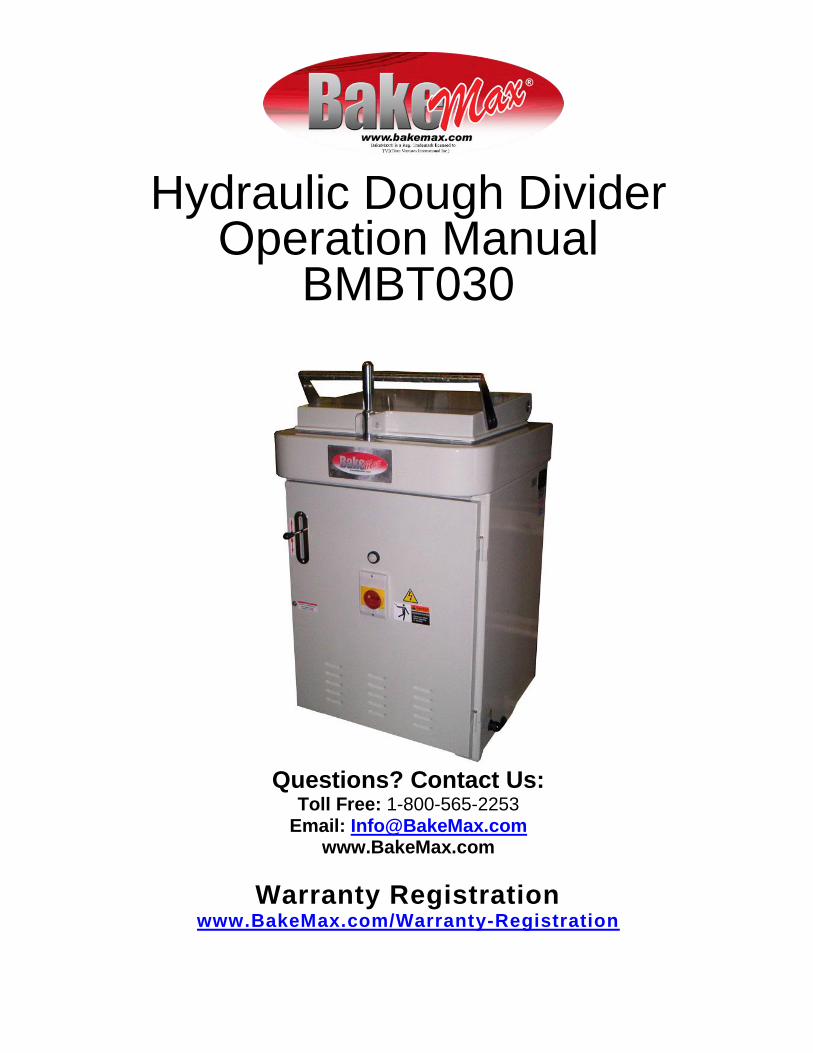
Hydraulic Dough Divider Operation Manual
BMBT030
Questions? Contact Us: Toll Free: 1-800-565-2253
Email: [email protected] www.BakeMax.com
Warranty Registration www.BakeMax.com/Warranty-Registration

2

3
BakeMax Hydraulic Dough Divider Operation Manual
Index
1. Machine Profile
2. Machine Specification And Main Parts Description
3. Moving Method
4. Machine Installation And Cautions
5. Operate Instruction And Safety Guide
6. Cleaning Method And Maintenance
7. Adjustment And Repair
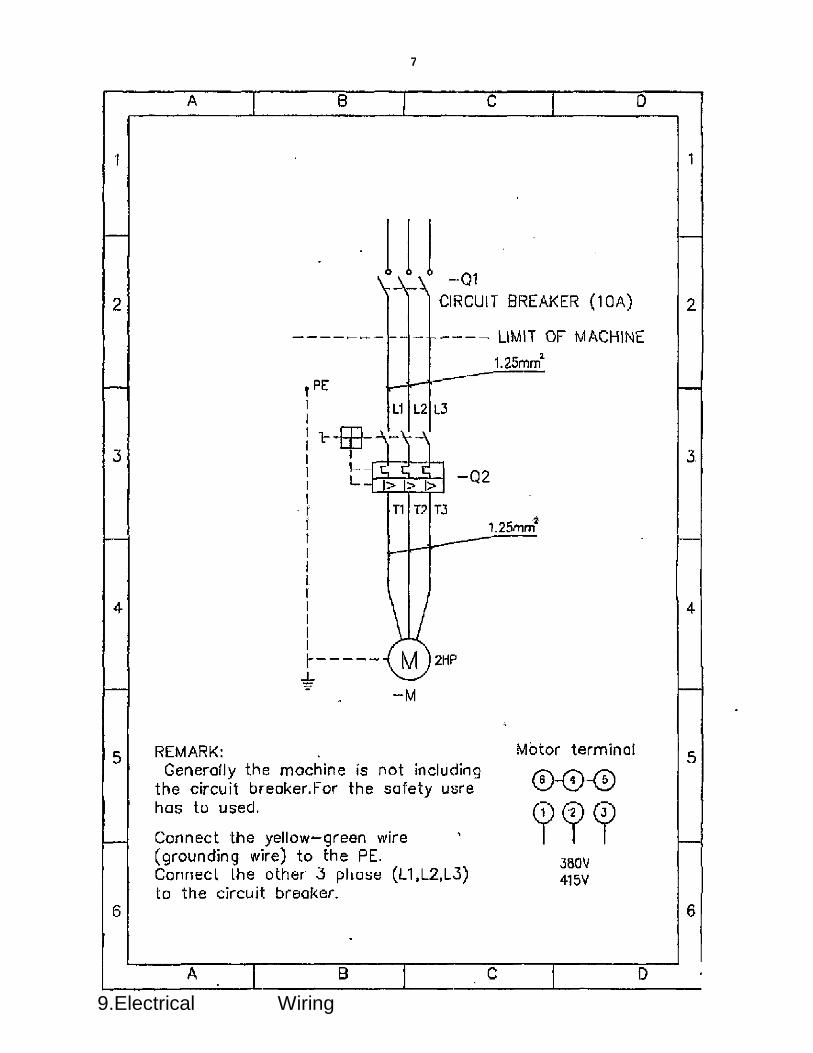
8. Electrical Wiring Diagram
9. Hydraulic Control System Diagram
10. Assembly Drawing And Parts List
11 Troubleshooting

4
1. Preface
Congratulations! You obtained the BakeMax Hydraulic Dough Divider. It will become
your best assistant for dividing dough. Please carefully read to operate and maintain the
equipment as per this manual.
2. Machine Profile
The BakeMax® Hydraulic Dough Divider divides 20 pcs dough. The surrounding of the
dividing chamber, top cover and dividing blade are all made of stainless steel. The
machine has a hydraulic drive to cut bottom plate. Once machine is started the cutting
blade will automatically divide dough after the set pressure is reached. Raise the control
handle upward. Once opened then push cutting bottom plate to the upper side and take
out dough. This machine meets the CE requirement of safety and hygiene.
3. Machine Specification And Main Parts Description
Machine Specification:
Machine Model BMBT030 Dough Capacity 3kg~16kg
Dough Dividing Weight 150g~800g/pcs
Dimension of Dividing Chamber 100x100mm
Power of Hydraulic Cylinder 1.5kw
Machine Weight 325kg
Shipping Weight 365kg
Machine Dimension (W*D*H) 638 x 664 x 1200mm

5
Main Parts Description:
No. Description
1 Top Cover
2 Handle of Top Cover
3 Lock of Top Cover
4 Control Handle
5 Power Switch
6 Power Indicator
7 Movable Caster
8 Plug of power supply
2 .
1

6
4. Moving Method 1) Move packaged machine to a proper place with a 2.5 Ton capacity
Forklift for unpacking wooden package.
2) Remove wooden plate from 4 sides of wooden crate so the bottom pallet is the
only wood left.
3) Use Nylon hoisting band (INKA. 2T. GREEN COLOR). Insert Nylon band through
upper section of machine body then hoist machine upward by Forklift machine.
Move the bottom pallet to place machine at installing position.
5. Machine Installation
Machine Installation:
1) Choose a dry level area.
2) Secure the machine at a position required to brake & lock the moving caster.
3) Correctly connect the power supply and protective switch as per voltage & power
specification shown on the name plate. Use caution that if protective switch of
power supply is located over than 1 M high.
4) Ensure inside of dividing chamber is clean without remains.
5) Run divider. Check if bottom cutting plate goes up & down when connected with 3
phase power supply. If running direction is wrong, please exchange any two
phases of power cables with each other and then to try running again to finish test
process.
Cautions:
1) The installation & testing of the machine operation must be done by a
professional technician as per specification shown on name plate and to follow
instruction of operation manual.
2) Choose a plain & dry place to secure the machine which will be helpful for
production and machine life.
3) Be sure upon installing that you leave adequate room for cleaning the machine.
4) This machine is designed to divide the proper amount of dough as specified by
this manual. Do not overload the machine.
5) Electrical wiring should be grounded.
6) Avoid power cables being pressed or pulled. Be sure to fasten it on the wall.
7) Brake & lock the machines moving casters. The machine should not be shaking
while operating. This will shorten the life of the machine.

7
6. Operation Instructions And Safety Guide
Operation Instructions:
l).Operation Description and Application
1. Raise up "T" operation handle. Cutting blade goes up, cuts dough when cutting
bottom plate goes up and reaches the set pressure.
2. Press down" j" operation handle, cutting blade as well as cutting bottom plate
goes down.
3. Power Supply switch knob for selecting power supply On & Off
4. Power indicator to display power supply On & Off status
5. Top cover lock. After pressed down on the top cover, automatic lock top cover
tightened
2). Operation Process
1. Turn on machine power supply switch
2. Press down on the operation handle placing the cutting bottom plate at the lowest
position.
3. Place the weighed dough in the chamber and press dough flatly by hand
4. Raise up "f" operation handle for dividing dough
5. Push top cover lock & open top cover
6. Raise up operation handle to take out the divided finished dough
7. After all of dough has been removed, press down on the operation handle to place
another weighed dough again
Safety Guide 1. The machine is allowed for dividing dough only as specified for total capacity. Do not
load over the indicated dough weight 20 kgs
2. When operating the machine all safety guards of the machine must be closed it can
be opened only by a professional technician to repair machine.
3. Operator should wear a standard working uniform and tie up hair & wear cap
4. Avoid wearing loose clothes or using long working objects to approach or insert into
machine.
5. Cautions: when running the machine persons are not allowed to approach machine
except the operator. The operator's body is also not allowed to lean against machine
6. Operation of each control switch button should be pressed by fingers only. Other
tools are not allowed.
7. Do not put goods on machine surface or safety guard.

8
7. Cleaning Method and Maintenance
Cautions: For hygienic safety it is necessary to clean, maintain machine daily. For
operator safety before to perform clean & maintenance job it is
absolutely a must to disconnect main power supply.
Cleaning Method
1. During cleaning, do not use water to spray or wash machine directly.
2. During cleaning, wet fabric can be used to clean the dividing chamber, dough
cutting tool and top cover.
3. After disconnected from power supply, you may clean all of machine outer
surface with wet fabric.
4. It is absolutely prohibited to use solvent detergent for cleaning this machine.
Since dough remains will cause hygienic problem, operators need to clean the Dough Divider very carefully & strictly every
day.
Maintenance 1. Always to keep dry, clean electrical wiring box inside and around the
machine housing and divider.
2. After daily work is finished, clean the whole set machine unit.
3. Regularly inspect safety items of the machine.
8. Adjustment and Maintenance Safety Items
1. Before you perform maintenance or make adjustments, study this operation
manual carefully.
2. Operation, maintenance and adjustment jobs must always be performed by a
professional technician.
3. When performing a maintenance job it is necessary to make sure the main power
supply has been disconnected.
7
9.Electrical Wiring

Diagram


13

14
11-2 Parts List Model: BMBT030
No. Parts Description No. Parts Description No. Parts Description
100 Lower Machine Body 170 Handle Rack 265 Steel Plate
105 Fastening Pad 175 Handle 325 Rear Machine Cover
120 Bolt Fastening Plate 178 Safety Cover 330 Front Machine Cover
125 Adjusting Bolt 180 Top Cover 335 Stop Plate
140 Stopper Fastening Shaft
182 Washer 340 Stop Plate
145 Stopper 185 Turning Shaft 345 Stop Plate
150 Dividing Blade Set 188 Chain Fastening Screw 350 Hydraulic Cylinder
155 Upper Holding Plate 190 Shaft Bushing S-l Heavy Duty Spring
156 Adjusting Screw 192 Shaft Bushing S-2 Middle Duty Spring
158 Washer 195 Shaft Holder H-l Hydraulic Unit
160 Middle Holding Plate 198 Chain Fastening Screw H-2 Manual Hydraulic Valve
162 Adjusting Screw 200 Welding Drawing ofUpper Machine Body
H-3 Oil Hose
164 Fixing Plate 250 Fastener of Top Cover P-l Switch Box+ Motor Starter
165 Lower Holding Plate 255 Fastening Pin L-l Power Indicator
168 Handle Rack 260 Fastening Handle W-l Middle Type Nylon Caster
W-2 Middle Type Nylon Caster With Brake
12. Troubleshooting :
No. Trouble Solution Handled by Remark
(1) Machine
Can Not
Run
1 • Check switch • power switch at ON position or check
operating method, then try to test machine again
Operator
1 • Check power supply & overload protector 2 • Check each wiring & terminal if it is in good status
3 • Check if ON/OFF switch damaged
4 • Check if each control component is loose or damaged
5 • Check if motor with strange smell burned-out status
Handled &
Repaired by
Professional
Technician
(2) Electrical
leakage
l. Check if humidity happened to electrical wiring box or
control panel
2.Check the sheath of each electric wire & cables been cut
& in weak insulation
3. Check if each electrical component touches machine
body
Handled &
Repaired by
Professional
Technician
(3)
Running
Noise
l. Check the noise source to judge its seriousness Operator 1. Check machine components damaged or touches
machine body.
Handled &
Repaired by
Professional
Technician

15

16