i n f o r m a t i o n' paint... · remedy light damage may be remedied by flatting , compound...
TRANSCRIPT

I N F O R M A T I O N'

A GUIDE TO IDENTIFYING AND SOLVING COMMON PAINT PROBLEMS
PPG Auto Refinish 1993 ©
TABLE OF CONTENTS
Defect Acid/Solvent Attack Bleaching Bleeding Blistering Blooming/Blushing Blowing/Air Trapping Chalking Cissing/Fish Eyes Clouding/Mottling Contamination/ Industrial Fallout Corrosion/Rusting Cracking Crazing/Checking Dirt/Seed Dry Spray Dull Finish/Abnormal Loss of Gloss Flaking/Peeling Inadequate Colour Coverage Lifting/Wrinkling Mapping Off Colour/Poor Colour Match Orange Peel Overs pray Pickling Panel Faults Pin holing Polishing Marks Runs/Sags Sand Scratches/Flatting Marks Scratches/Stone Chips Sinkage Slow Drying/Softness Solvent Popping Water Spotting Wax Incorporation/Retention Index and cross-reference of terms
Page No. 2 4 6 8
10 12 14 16 18
20 22 24 26 28
30 32 34 36 38 40 42 44 46 48 50 52 54 56 58 60 62 64 66 68 70 72

ACID/SOLVENT ATTACK
DESCRIPTION
CAUSE
Irregular patches of roughened, discoloured, partly stripped or disintegrating surface, possibly with crazing or cracking in the affected area. Traces of the attacking substance may be present.
Chemical corrosion of the paint film. This is often due to: a) Accidental spillage of corrosive substances such as
brake fluid , peroxide, or battery acid. b) Acid rain standing on the surface. c) Use of detergents on new surfaces.
PREVENTION a) Maintain good housekeeping practices, and protect
surfaces when working on vehicles. b) Protect vehicle during outside storage. c) Avoid using detergents on newly painted surfaces. d) Ensure the paint film is fully cured .
2

REMEDY Light damage may be remedied by flatting , compound
ing and polishing. In the event of more severe attack, remove the paint down to a sound surface, ensure that all traces of contaminants are removed , and repaint.
3

BLEACHING
DESCRIPTION
CAUSE
Yellowing of the surface corresponding to areas of filler in the substrate.
a) Excess quantities of peroxide used in the filler.
PREVENTION a) Use a feed machine for mixing filler, or take care to
calculate and measure peroxide quantities accurately.
4

REMEDY Rub down the affected area to the surface of the filler,
seal with isolator or epoxy primer and repaint.
5

BLEEDING
DESCRIPTION
CAUSE
Discolouration of the topcoat, either in the form of a halo, or, in severe cases , a complete colour change. This defect usually only occurs when spraying over red or maroon paint.
a) Absorption of pigment from the underlying paint, dissolved by the solvents of the new coat.
PREVENTION a) Test the original finish by spraying a small , flatted area. b) Use an approved bleeding inhibito r sealant. c) Remove any overspray from the surface before painting.
6

REMEDY Rub down to the original finish , seal with a
recommended sealer and repaint.
7
BLISTERING
DESCRIPTION
CAUSE
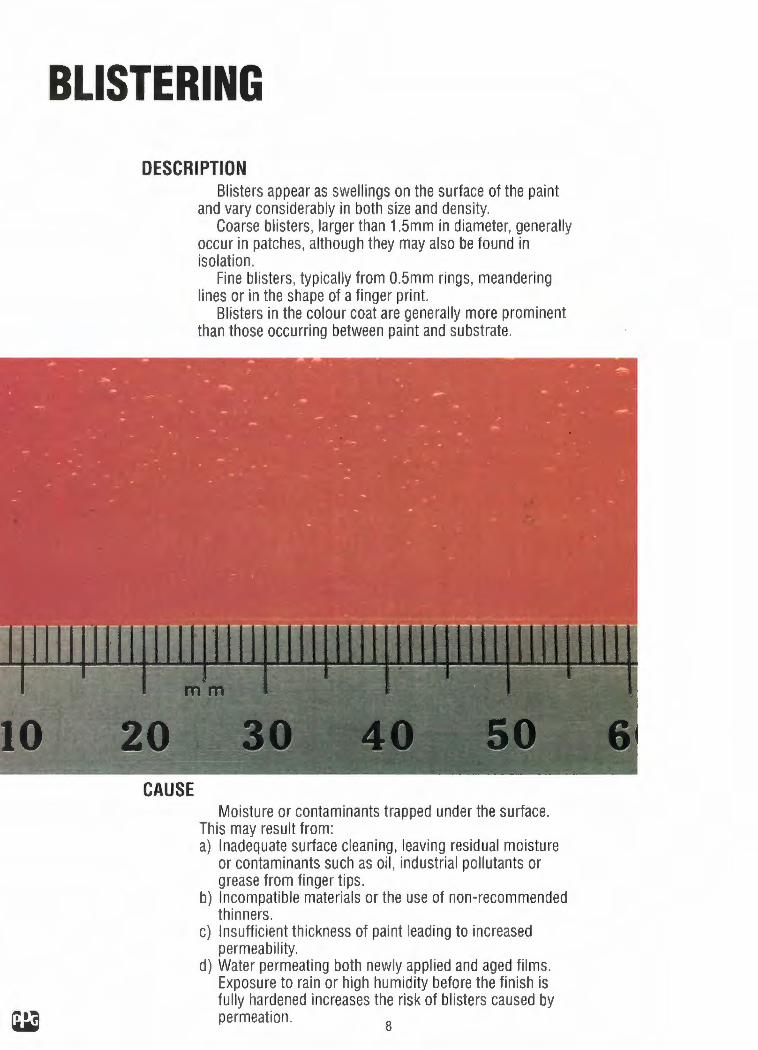
Blisters appear as swellings on the surface of the paint and vary considerably in both size and density.
Coarse blisters, larger than 1.5mm in diameter, generally occur in patches, although they may also be found in isolation.
Fine blisters, typically from 0.5mm rings, meandering lines or in the shape of a finger print.
Blisters in the colour coat are generally more prominent than those occurring between paint and substrate.
Moisture or contaminants trapped under the surface. This may result from : a) Inadequate surface cleaning , leaving residual moisture
or contaminants such as oil , industrial pollutants or grease from finger tips .
b) Incompatible materials or the use of non-recommended thinners .
c) Insufficient thickness of paint lead ing to increased permeability.
d) Water permeating both newly applied and aged films . Exposure to rain or high humidity before the finish is fully hardened increases the risk of blisters caused by permeation .
8

PREVENTION a) Protect vehic le surfaces when in store, and clean
surfaces scrupulous ly before spraying . b) Use only top quality recommended and approved
materials. c) Follow the correct spraying processes. d) Avoid exposure to moisture and extreme temperature
changes until the finish is fully hardened.
REMEDY Establish the depth and cause of the blister by pricking
out with a pin and examining under a low power magnifying glass.
Where the blisters occur between paint layers, the affected area may be sanded down to a sound surface and repainted .
In more severe cases , or where the blisters occur between the undercoat and the substrate , strip down to the substrate and repaint.
9

BLOOMING/BLUSHING
DESCRIPTION
CAUSE
A milky white haze or mist formed on the surface of the paint film .
Moisture condensing on, and being trapped in the wet film. This may be due to : a) Spraying during cold , wet or humid weather. b) Use of too fast or poor quality thinner. c) Compressed air pressure too high, and/or poor spray
gun set up. d) Fanning compressed air onto the film to speed up
solvent release. e) Draughty paint shop, or inadequate heating and/or air
movement.
PREVENTION a) If possible, avoid spraying air drying paint during rainy
or exceptionally cold or humid weather. If this is unavoidable, a non-bloom thinner should be used.
b) Use the correct grade of thinner. c) Reduce compressed air pressure to minimise the
cooling effect. d) Allow solvent release to take place naturally. e) Ensure that the paint shop is adequately heated , properly
ventilated and free from draughts.
10

REMEDY Slight blooming may be removed by the use of polishing
compound , after the paint film has hardened , or by spraying the affected area with non-bloom thinners.
In more severe cases , rub down the surface, and repaint using the correct grade of thinner or non-bloom thinner.
If these remedies fail to correct the fault , raise the temperature of the paint shop by a minimum of five degrees, avoid all direct draughts, flat and repaint the affected area.
Note: Blooming of the colour coat may ind icate that the undercoats have been similarly affected , the defect having gone unnoticed due to their matt finish. This may subsequently give rise to blistering or loss of intercoat adhesion.
11
I
w

BLOWING/AIR TRAPPING
DESCRIPTION
II
Large rounded air bubbles or blisters, usually occurring in the area of seams and boxed in corners , or over heavily filled or plastic surfaces.
"
111 I.I,, , , , , , , , , rm I '~I~ I , , , , , , , , , , , , , , , , , , , , , , , 111111111 µ, 11111111111 ~ 1111 ~ 11111 I Ii 11 IT 1111111 n 111 m 11111111111110 I IO 20 30 40 50 60 70 80 90 100 110 120
1
1l1l1l1l1l1i1l1l1i1l,1,1,1,11l1i1l1l1l1l111~i111l~1~11l111l1l1i1l1i1l1l1i1l111111111l1i1l1l1i1l111111111l1i1l1l1lil111l1@1l1hl1hl1l1hl1hl1l1l1l1l1l1l111l1l1l1l1hl1hl1l1hhl1iil1hhl1hl1hh11l1l1hhhhl1hl1hl1l1111il1JJ1hhhhl1
CAUSE Air trapped beneath the paint expands, resulting in the
detachment of the paint film from the substrate. This frequently resu lts from : a) Poor application of filler, stopper or primer resu lting in
entrapped air. b) Poor feather edging of chipped film . c) Bridging of seams and boxed corners by the paint film . d) Porosity and air pockets in the primer due to inferior or
insufficient thinner, the compressed air pressure too high , or dry spraying .
e) Failure to prepare and seal substrate correctly, especially when spraying GRP.
f) Excessive application of heat during drying.
12

PREVENTION a) Ensure correct application of filler, stopper or primer. b) Feather edges of chipped film properly. c) Avoid heavy paint application and ensure that the film
penetrates into seams and boxed corners . d) Always use recommended thinner and correct spraying
techniques. Apply primers in thin wet films. e) Examine the substrate for porosity, especially for gel
coat bubbles in GRP. Prepare and seal carefully. f) Avoid excessive application of heat during drying.
REMEDY The paint must be removed to the depth of the bubble ,
any underlying defect remedied and the area repainted .
13
CHALKING
· · 10.
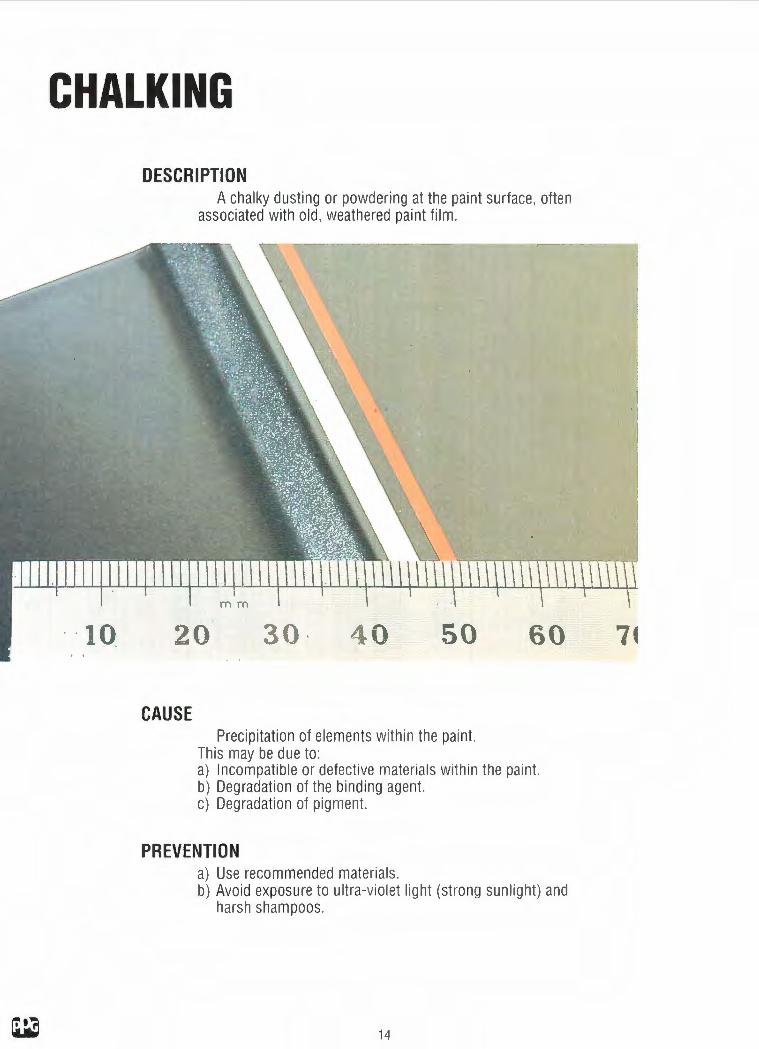
DESCRIPTION A chalky dusting or powdering at the paint surface , often
assoc iated with old , weathered paint film .
20 30, 50 60
CAUSE Precipitation of elements within the paint.
This may be due to : a) Incompatible or defective materials within the paint. b) Degradati on of the binding agent. c) Degradation of pigment.
PREVENTION a) Use recommended materials. b) Avoid exposure to ultra-violet light (strong sun li ght) and
harsh shampoos.
14

REMEDY Flat, compound and polish the surface to restore the
gloss. In severe cases repaint the topcoat.
15

CISSING/FISH EYES
DESCRIPTION
CAUSE
Small , crater like holes or indentations in the paint surface, varying in size from pinholes up to 1 cm in diameter. Usually the larger craters occur individually, whilst the smaller ones are often found in small densely packed clusters .
Small impurities are often visible in the centre of the r.r;:iter.
Variations in the surface tension of the paint. The most common reasons for this are: a) Silicone in the environment or on the surface of the
substrate; even minute traces are sufficient to cause cissing .
b) Contamination by other sources, such as grease, dried soap , detergent, spray dust, wax, or oil from the spray gun .
c) Incompatible elements in the primer. d) Saturation by fumes in the spray booth.
16

PREVENTION a) Thoroughly clean any silicone polishes from the surface
to be painted and avoid using silicone polishes in the vicinity of the paint shop. Prepare the surface using the same preparation procedure as that set out below.
b) Thoroughly clean the surface with wax and grease remover. Do not allow cleaning solvents to dry on the surface but remove with a clean dry cloth , using the cloth only once. Clean surfaces prior to sanding and always clean a larger area than that to be sanded . Ensure that all sanding dust is removed. Prepare bare metal surfaces with metal conditioner. Repeat the solvent cleaning operation prior to commencing spraying. Ensure that the spray gun and compressed air equipment is properly maintained.
c) Always use the recommended materials. d) Ensure that the spraying area is properly ventilated.
REMEDY Remove the paint completely from the affected area and
repaint, following the recommended preparation procedure. In extreme circumstances it may be necessary to use an
anti-cissing additive. Always consult the paint manufacturer before using such additives.
h ••
17

,'
CLOUDING/MOTTLING
DESCRIPTION
CAUSE
Colour variation in metallic paint, with patches of lighter or darker tint, often in streaks following the direction of spraying .
Irregular application density of the basecoat. This is a result of: a) Poor spraying technique. b) Poor pattern from the spray nozzle. c) Paint too wet, insufficiently mixed paint, poor quality or
wrong type of thinner. ct) Surface too hot or too cold.
18

PREVENTION a) Use the correct spraying technique. b) Adjust the nozzle to the correct pattern before
commencing spraying. d) Ensure that the paint is thoroughly mixed to the correct
consistency. Use only recommended thinner.
e) Ensure that the surface is within the recommended temperature range .
REMEDY If the clearcoat has not been applied , shade the base ,
otherwise rub down the surface and repaint.
19
CONTAMINATION/INDUSTRIAL FALL-OUT
• , .,
DESCRIPTION
CAUSE
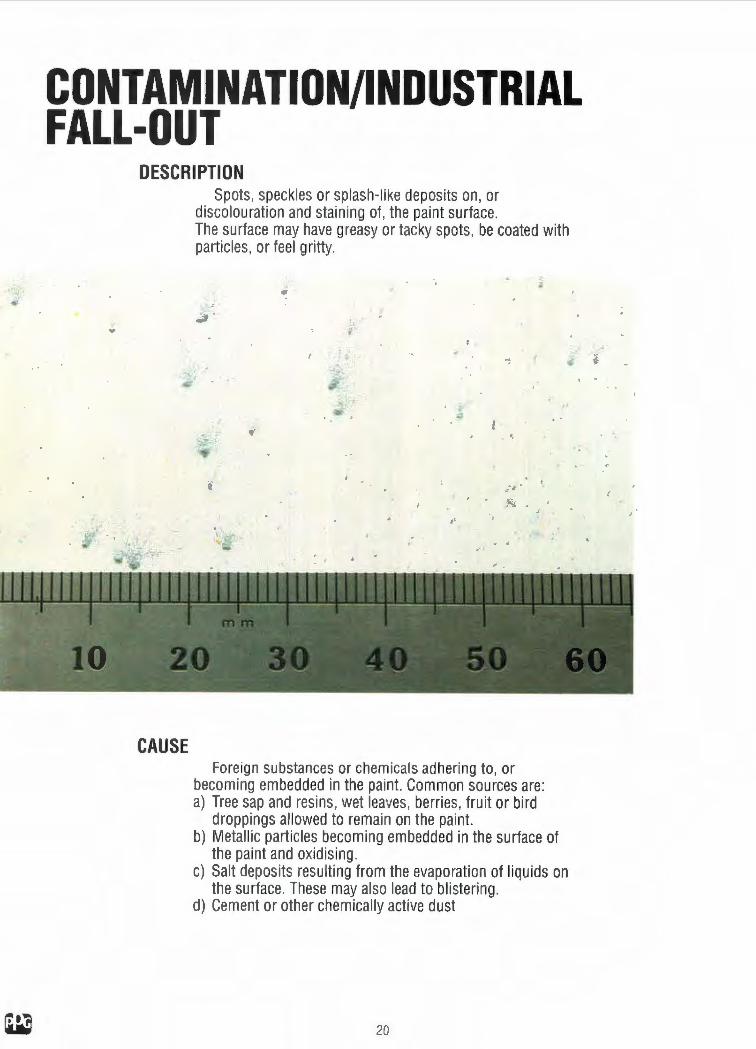
Spots, speckles or splash-like deposits on , or discolouration and staining of, the paint surface . The surface may have greasy or tacky spots, be coated with particles, or feel gritty.
. ·' : H l
l.
r
. '·
' ' J • . . .~s .
,.
Foreign substances or chemicals adhering to , or becoming embedded in the paint. Common sources are: a) Tree sap and resins , wet leaves, berries, fruit or bird
droppings allowed to remain on the paint.
,·
b) Metallic particles becoming embedded in the surface of the paint and oxidising .
c) Salt deposits resulting from the evaporation of liquids on the surface. These may also lead to blistering.
d) Cement or other chemically active dust
20
• ..

PREVENTION a) Do not allow any deposits to remain on the paint
surface. b) Ensure the paint film is fully cured . c) Store vehicles under cover and away from possible
sources of contamination . Take special care not to expose new paint finishes to environments likely to cause contamination .
d) If an oven or drying room is used ensure that the filtration system is working properly, and that no industrial fumes enter the room .
REMEDY Light staining may be removed by wash ing the surface
with a mild detergent solution , followed by washing with a 10% Oxalic acid solution to remove ferrous compounds. Rinse , compound and polish to restore the gloss. If discolouration and staining persist, rub down the surface and repaint.
21

CORROSION/RUSTING
DESCRIPTION
10
CAUSE
Loose paint, bubbling and discolouration of the paint film , especially around body fittings , panel edges and seams.
mm
20 30 40
Corrosion of the metal substrate, resulting in loss of adhesion of the paint. This is frequently caused by: a) Exposure of bare metal surfaces by accidental damage,
or by leaving drilled holes untreated. b) Exposure of bare metal surfaces due to destruction of
the paint film by contamination.
PREVENTION a) Ensure that all metal surfaces are treated with the
correct metal treatment fluids and etch primer prior to painting .
b) Repair any damage to the paint film as soon as possible. Always treat any newly exposed metal edges immediately.
22

REMEDY Strip the paint from the affected area down to the bare
metal , remove all existing corrosion , treat the surface with the correct metal treatment fluids and etch primer, and repaint.
23

CRACKING
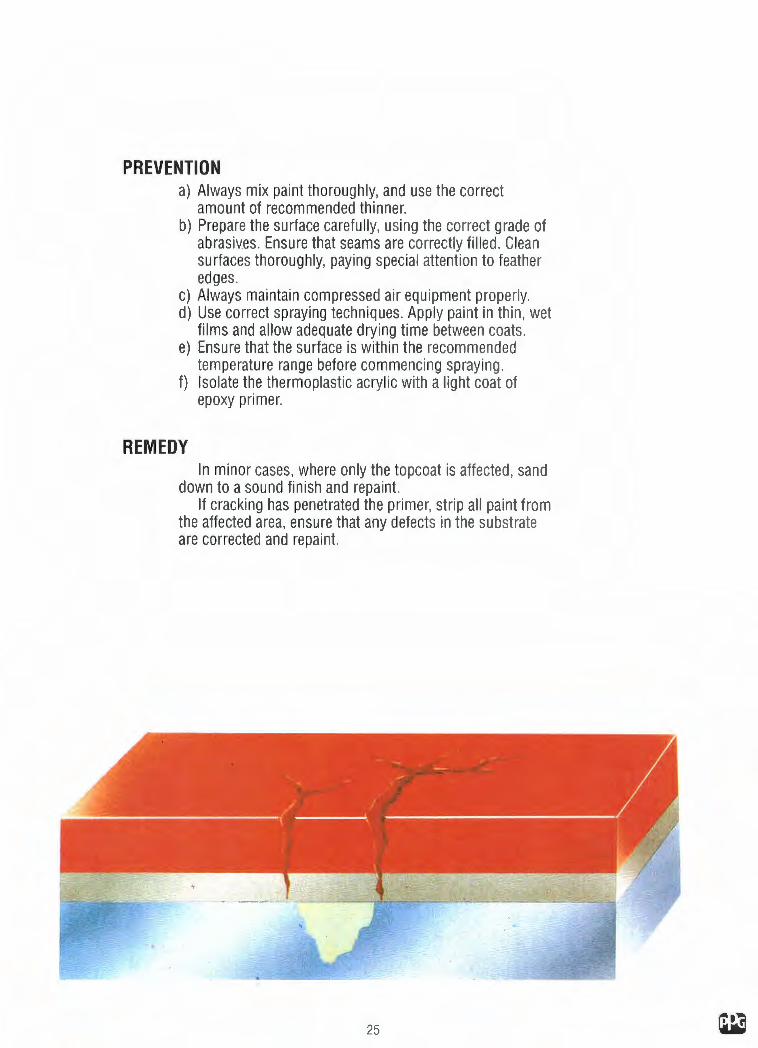
DESCRIPTION Random breaks or crevices in the paint film, often
adjacent to filled seams or panel edges. Cracks frequently take the form of a three pointed star. The depth of penetration of the paint film varies , severe cracks may penetrate to the substrate.
Fine cracks or splits may occur at the featheredge of a spot repair shortly after the application of the topcoat.
10.1111r11111 ~I' D!Q,, ~ rrrn 1111111 n ri n 1111 rrp 11 [fill 11 r 11
10 20 CAUSE
30 40' 50 60
Weaknesses such as blistering being exaggerated by weathering , or magnification of stresses normally present in the paint film. These stresses are increased by: a) Inadequate mixing of materials prior to application ,
insufficient thinning or the wrong grade of thinner. b) Poor preparation of the surface; too coarse abrasives,
inadequate cleaning or poor seam filling. c) Contamination by oil or water in the air line. d) Excessive film thickness and insufficient drying time
between coats , cold air fanning causing the surface to dry over trapped solvent.
e) Substrate too hot or too cold during spraying . f) Application of thermosetting topcoat over partially cured
paint film or thermoplastic acrylic topcoat.
24
PREVENTION a) Always mix paint thoroughly, and use the correct
amount of recommended thinner. b) Prepare the surface carefully, using the correct grade of
abrasives. Ensure that seams are correctly filled . Clean surfaces thoroughly, paying special attention to feather edges.
c) Always maintain compressed air equipment properly. d) Use correct spraying techniques. Apply paint in thin , wet
films and allow adequate drying time between coats. e) Ensure that the surface is within the recommended
temperature range before commencing spraying . f) Isolate the thermoplastic acrylic with a light coat of
epoxy primer.
REMEDY In minor cases , where only the topcoat is affected , sand
down to a sound finish and repaint. If cracking has penetrated the primer, strip all paint from
the affected area, ensure that any defects in the substrate are corrected and repaint.
25
CRAZING/CHECKING
. .
DESCRIPTION
•
CAUSE
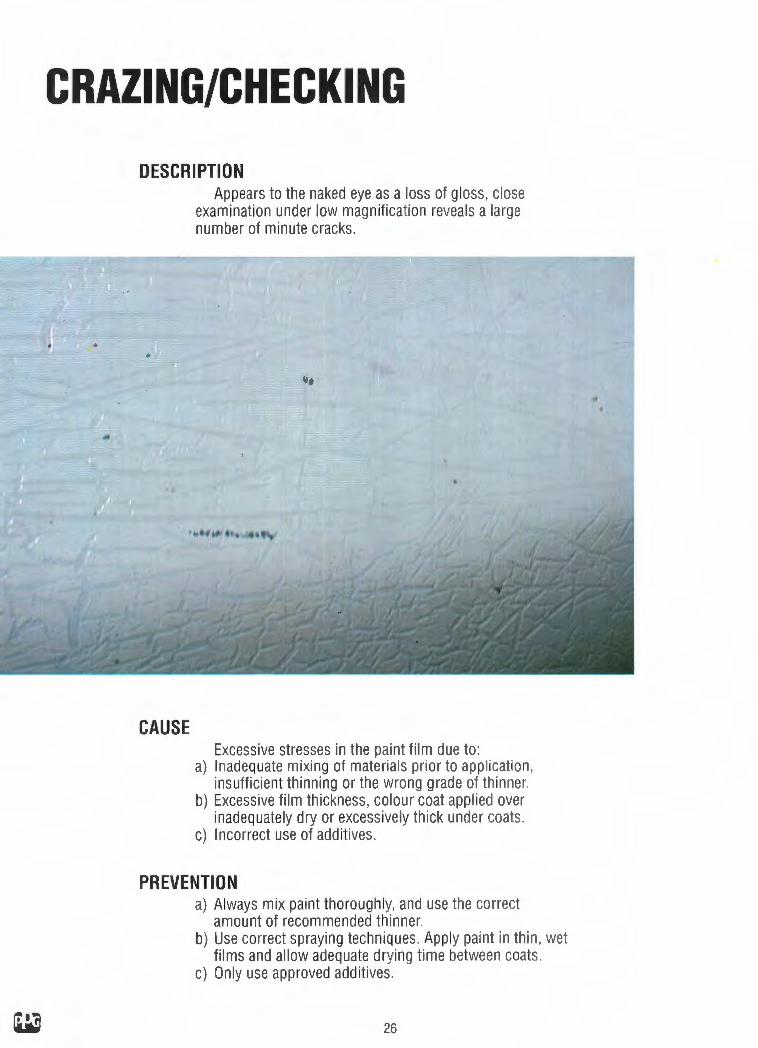
Appears to the naked eye as a loss of gloss, close examination under low magnification reveals a large number of minute cracks .
•
Excessive stresses in the paint film due to: a) Inadequate mixing of materials prior to application ,
insufficient thinning or the wrong grade of thinner. b) Excessive film thickness, colour coat applied over
inadequately dry or excessively thick under coats . c) Incorrect use of additives.
PREVENTION a) Always mix paint thoroughly, and use the correct
amount of recommended thinner. b) Use correct spraying techniques. Apply paint in thin , wet
films and allow adequate drying time between coats. c) Only use approved additives.
26

REMEDY Sand the affected area down to a sound , smooth finish
and repaint.
27

DIRT /SEED/BITS
DESCRIPTION
CAUSE
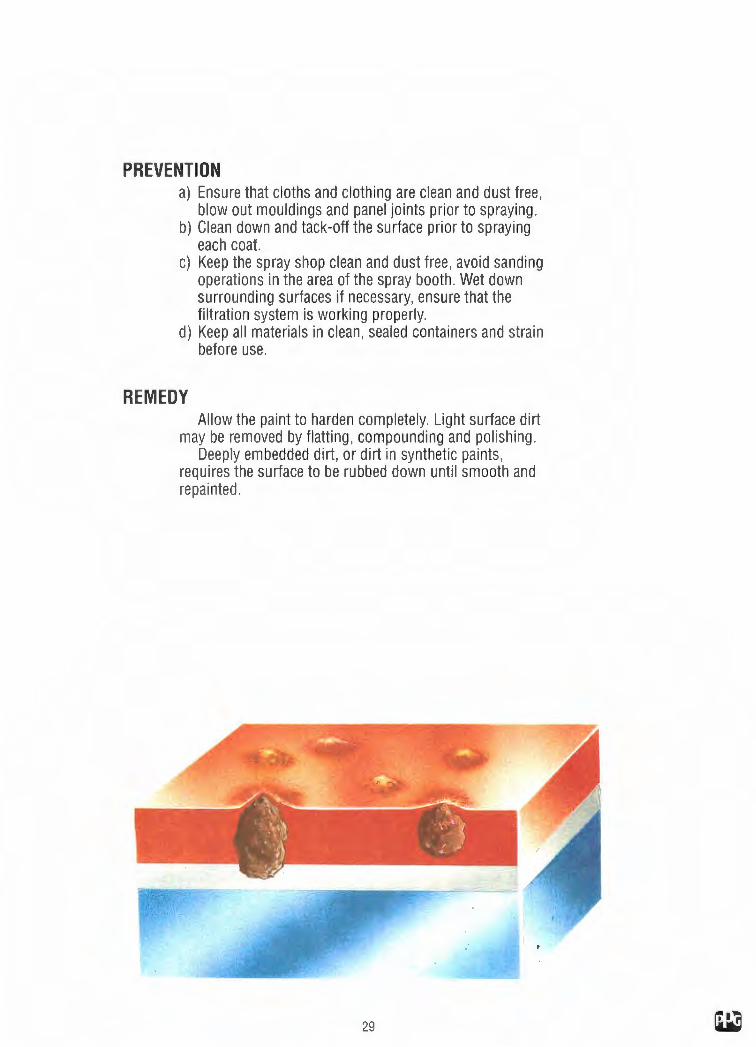
A rough , irregular surface to the paint film , is easily felt with the hand . The particles are often totally embedded in , and covered by the paint film.
Contaminating particles incorporated in the paint. These may be the result of: a) Dust, dirt or threads falling from cloth or clothing or
blown out of mouldings or panel joints during spraying , settling on the wet paint film .
b) Dust not properly removed from the surface prior to spraying .
c) Airborne particles settling on and becoming incorporated in the paint film during or immediately after spraying .
d) Dirt in the paint or thinners resu lting from open or rusty cans .
28
PREVENTION a) Ensure that cloths and clothing are clean and dust free ,
blow out mouldings and panel joints prior to spraying. b) Clean down and tack-off the surface prior to spraying
each coat. c) Keep the spray shop clean and dust free , avoid sanding
operations in the area of the spray booth . Wet down surrounding surfaces if necessary, ensure that the filtration system is working properly.
d) Keep all materials in clean , sealed containers and strain before use.
REMEDY Allow the paint to harden completely. Light surface dirt
may be removed by flatting , compounding and polishing . Deeply embedded dirt, or dirt in synthetic paints ,
requires the surface to be rubbed down until smooth and repainted.
29

DRY SPRAY
DESCRIPTION
CAUSE
A granu lar or coarse textu red finish with no gloss.
Paint being deposited on the surface in a powdery condition . a) Viscosity of paint too high , use of incorrect or poor
quality thinner. b) Poor spraying technique, dirty spray gun , compressed
air pressu re too high , gun held too far from the surface during spraying .
c) Spraying in draughts or in a high velocity airflow.
PREVENTION a) Use the correct proportion of recommended thinner. b) Use co rrect spraying techniques, ensure that equipment
is clean , set ai r pressure as low as possible, consistent with proper atomisation , spray from the correct distance .
c) Use a spray booth , and ensure that air circulation and ext raction is at the correct velocity.
30

REMEDY Flat, compound and polish . If the texture is too coarse
for this to correct the defect, rub down the topcoat and repa int. Metallic finishes must always be rubbed down and repainted .
31

DULL FINISH/ABNORMAL LOSS OF GLOSS
DESCRIPTION
CAUSE
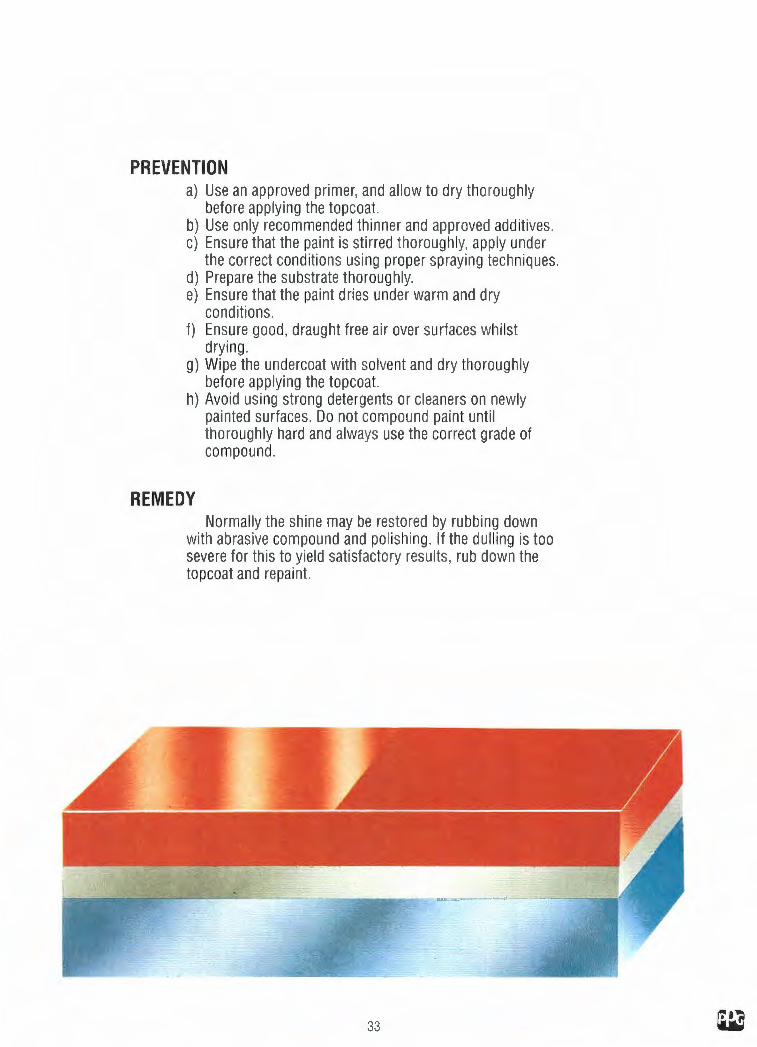
Althoug h apparently smooth and evenly applied , the surface lacks shine.
Microscopic roughness of the surface, which may result from : a) Poor hold out of primer, or the application of topcoat
over primer which is not thoroughly dry. b) Poor quality or incorrect thinner, or the use of additives
in the paint. c) Incorrectly prepared or poorly applied paint. d) Application over a poor substrate. e) Excessively slow drying due to high humidity or low
temperatu re. f) Solvent fumes or exhaust gases attacking the surface . g) Surface contamination by wax, grease, oil , soap or
water. h) The use of strong detergents or cleaners on a newly
painted surface, compounding too soon after painting or using compound which is too coarse .
32
PREVENTION a) Use an approved primer, and allow to dry thoroughly
before applying the topcoat. b) Use only recommended thinner and approved additives. c) Ensure that the paint is stirred thoroughly, apply under
the correct conditions using proper spraying techniques. d) Prepare the substrate thoroughly. e) Ensure that the paint dries under warm and dry
conditions. f) Ensure good , draught free air over surfaces whilst
drying. g) Wipe the undercoat with solvent and dry thoroughly
before applying the topcoat. h) Avoid using strong detergents or cleaners on newly
painted surfaces. Do not compound paint until thoroughly hard and always use the correct grade of compound.
REMEDY Normally the shine may be restored by rubbing down
with abrasive compound and polishing . If the dulling is too severe for this to yield satisfactory results , rub down the topcoat and repaint.
33 w
FLAKING/PEELING
DESCRIPTION
10
CAUSE
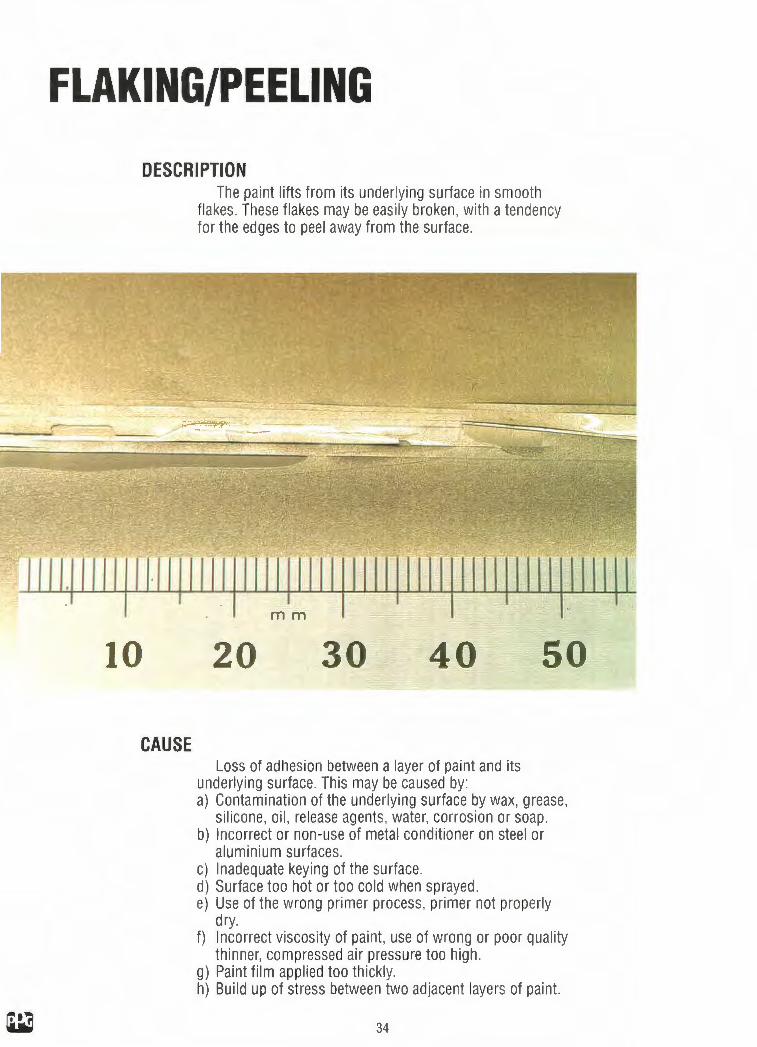
The paint lifts from its underlying surface in smooth flakes . These flakes may be easily broken, with a tendency for the edges to peel away from the surface.
20 30 40
Loss of adhesion between a layer of paint and its underlying surface. This may be caused by:
S8
a) Contamination of the underlying surface by wax, grease, silicone , oil , release agents , water, corrosion or soap.
b) Incorrect or non-use of metal conditioner on steel or aluminium surfaces.
c) Inadequate keying of the surface. d) Surface too hot or too cold when sprayed. e) Use of the wrong primer process, primer not properly
dry. f) Incorrect viscosity of paint, use of wrong or poor quality
thinner, compressed air pressure too high. g) Paint film applied too thickly. h) Build up of stress between two adjacent layers of paint.
34

PREVENTION a) Ensure that the surface to be painted is scrupulously
clean. Always dry the surface with clean cloths. b) Always use the correct metal conditioner on steel or
aluminium surfaces. Commence spraying with in 30 minutes of preparation to avoid the onset of corrosion.
c) Sand the surface properly before spraying , taking care to remove all sand ing dust.
d) Ensure that the surface is within the recommended temperature range during spraying and drying.
e) Use the correct primer process, and ensure that the primer is properly dry before continuing painting .
f) Thin the paint to the correct viscosity, using only recommended thinner. Set compressed air pressure as low as possible consistent with proper atomisation.
g) Apply paint in thin , wet layers. h) Use a range of products by a single paint manufacturer.
REMEDY Remove the detached paint from the affected area.
Prepare the underlying surface correctly and repaint.
35 w

w
INADEQUATE COLOUR COVERAGE
DESCRIPTION Underlying surfaces visible through the paint film , most
frequently in hard to spray areas, on lower panels or on sharp edges and contours .
mm
0 20
CAUSE Inadequate thickness or poor covering power of the
colour coat. This is frequently due to: a) Poor spraying technique. b) Inadequate lighting , insufficient or cramped working
space, inaccessibility of surfaces. c) Poor mixing of materials. d) Reduced thickness of the co lour coat due to excessive
compounding and polishing .
36
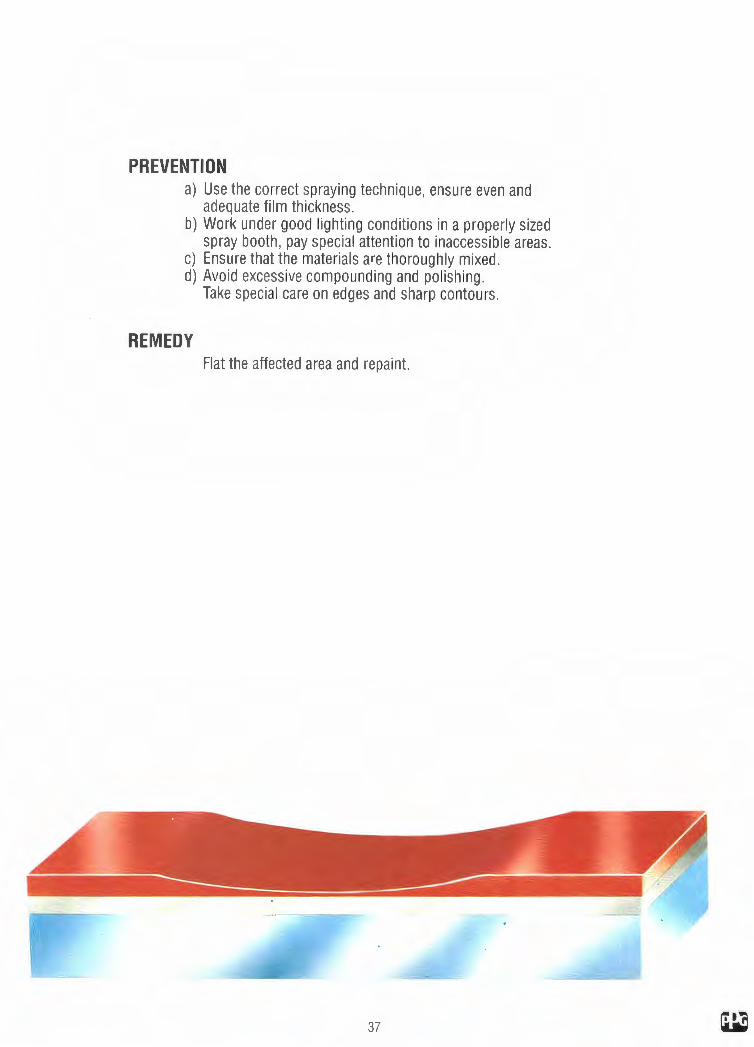
PREVENTION a) Use the correct spraying technique, ensure even and
adequate film thickness. b) Work under good lighting conditions in a properly sized
spray booth , pay special attention to inaccessible areas. c) Ensure that the materials are thoroughly mixed. d) Avoid excessive compounding and po li shing.
Take special care on edges and sharp contours.
REMEDY Flat the affected area and repaint.
37
LIFTING/WRINKLING
DESCRIPTION
10
CAUSE
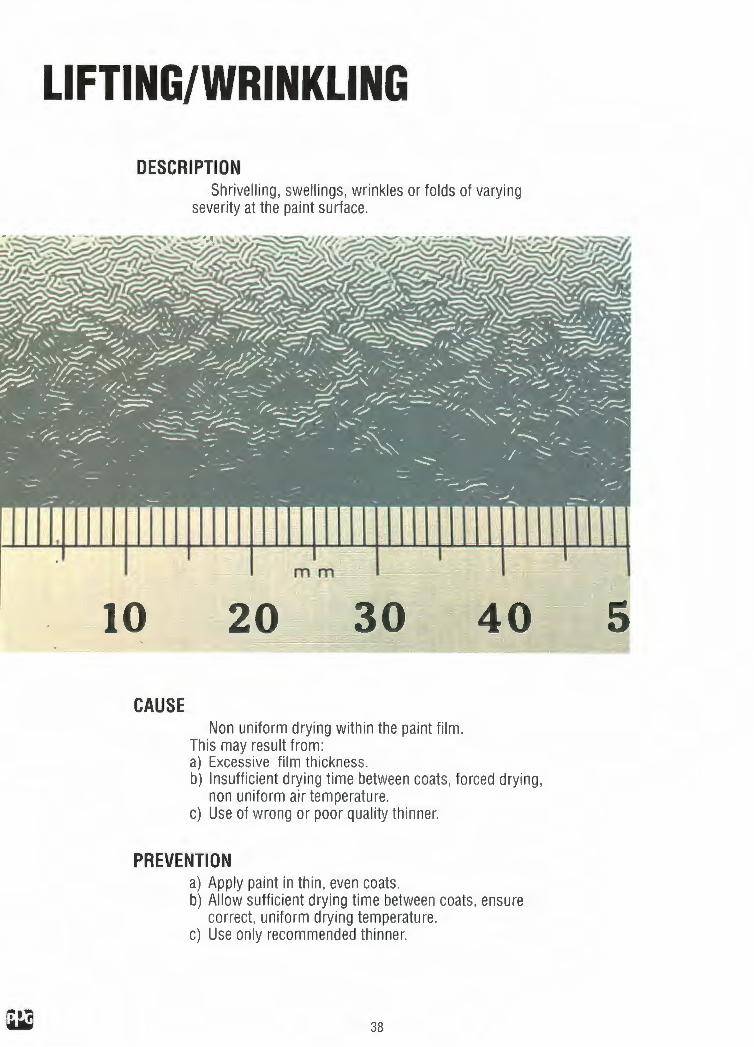
Shrivelling , swellings, wrinkles or folds of varying severity at the paint surface.
mm
20 30 40
Non uniform drying within the paint film . This may result from : a) Excessive film thickness. b) Insufficient drying time between coats , forced drying ,
non uniform air temperature . c) Use of wrong or poor quality thinner.
PREVENTION a) Apply paint in thin , even coats . b) Allow sufficient drying time between coats , ensure
correct, uniform drying temperature. c) Use only recommended thinner.
38
s
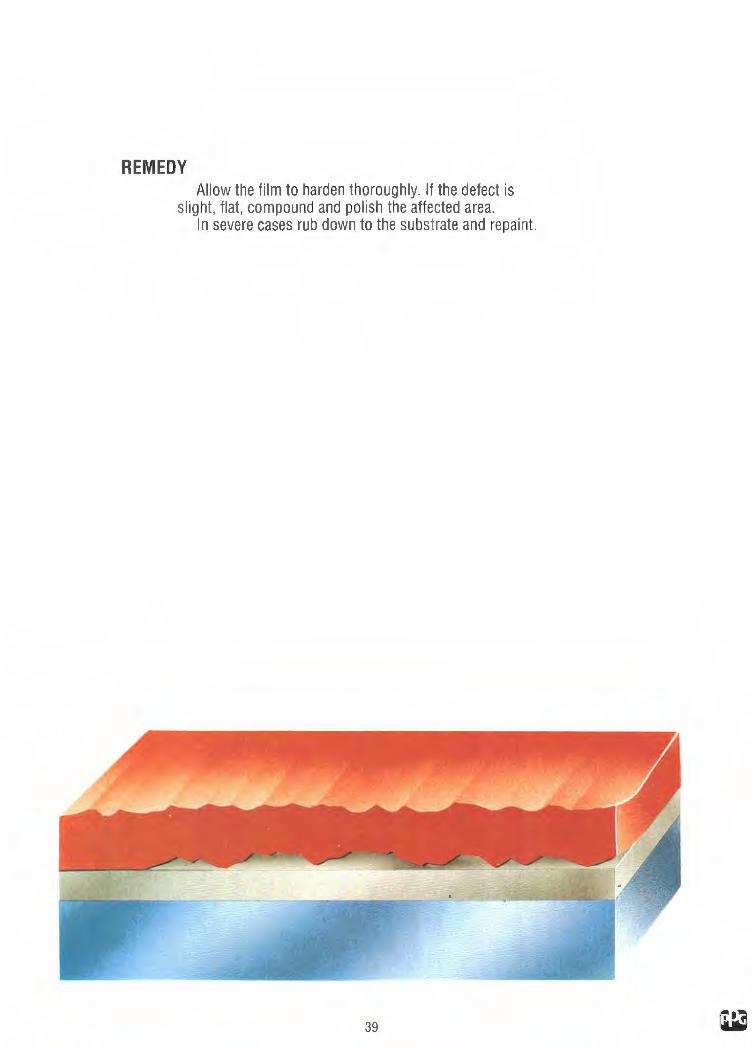
REMEDY Allow the film to harden thoroughly. If the defect is
slight, flat, compound and po li sh the affected area. In severe cases rub down to the substrate and repaint.
39

MAPPING
DESCRIPTION
.JO
CAUSE
Areas of the surface with a differing texture or degree of gloss, surrounded by clearly defined boundary or contour lines.
mm
20 30
a) Filler or stopper incorrectly mixed , or not properly finished , primed or sealed .
PREVENTION a) Mix filler or stopper co rrectly, apply and finish carefully
and correctly.
40
4(
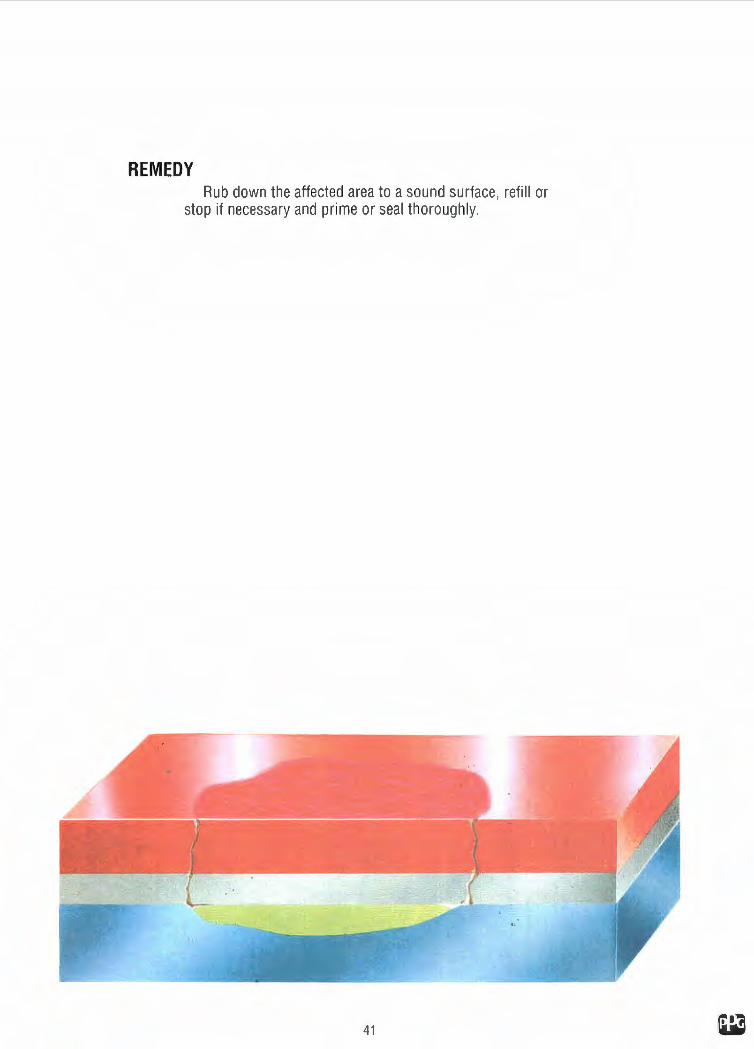
REMEDY Rub down the affected area to a sound surface , refill or
stop if necessary and prime or seal thoroughly.
41

OFF COLOUR/POOR COLOUR MATCH
DESCRIPTION
CAUSE
Adjacent areas exhibit differences in shade. This is most frequently noticeable on adjacent complete panels.
There is no single cause , the defect may result from a number of factors : a) Use of differing or incorrect materials. b) Inadequate mixing of the paint. c) Fading due to weathering or exposure. d) Incorrect application. e) Metameric distortion (colour variation in differing li ght) . f) Incorrect colour choice or use of the wrong variant of
the colour.
PREVENTION a) Use only recommended materials. b) Ensure that the paint is mixed thoroughly and correctly. c) Protect vehicles in storage . d) Apply materials correctly, use correct spraying
technique. e) Before painting the vehicle , spray a test panel with the
paint to be used and compare with the orig inal at different angles and in differing light.
f) Use the manufacturers colour system to select the correct colour and variant .
42

REMEDY Flat down the surface and repaint using the correct
colour and variant.
43

ORANGE PEEL
DESCRIPTION
CAUSE
Pebbled , uneven surface of the paint film , similar in appearance to orange skin.
Failure of the paint droplets to coalesce on the surface. This may be due to: a) Poor spraying technique , spray gun too far from surface ,
incorrect compressed air pressure, incorrect nozzle adjustment.
b) Excessively thick or thin film. c) Paint incorrectly mixed , wrong viscosity, poor quality or
incorrect thinner. d) Insufficient drying time between coats , cold air fanning
to speed drying. e) Incorrect ambient or surface temperature , draughts .
44

PREVENTION a) Use the correct spraying technique and ensure that
equipment is correctly adjusted . b) Apply paint in thin even coats . c) Ensure that the paint is correctly mixed , use only
recommended thinner with the correct grade . d) Allow sufficient drying time between coats. e) Spray within the recommended temperature range and
ensure proper ventilation.
REMEDY Rub out the orange peel, compound and polish.
In severe cases it may be necessary to flat and repaint the surface.
45
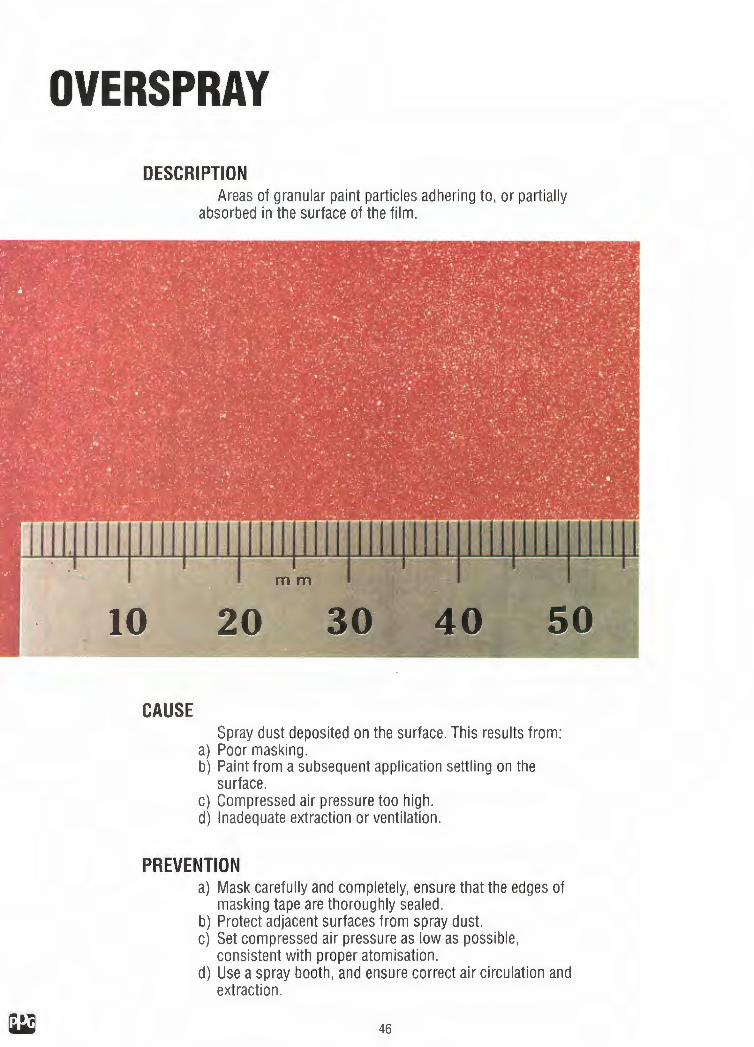
OVERS PRAY DESCRIPTION
CAUSE
Areas of granular paint particles adhering to , or partially absorbed in the surface of the film .
Spray dust deposited on the surface. This results from : a) Poor masking . b) Paint from a subsequent app lication settl ing on the
surface . c) Compressed air pressure too high . d) Inadequate extraction or ventilation.
PREVENTION a) Mask carefully and completely, ensure that the edges of
masking tape are thoroughly sealed . b) Protect ad jacent surfaces from spray dust. c) Set compressed air pressure as low as possible,
consistent with proper atomisation . d) Use a spray booth , and ensure correct air circulation and
extraction .
46

REMEDY Rub down with abrasive compound and polish .
47

PICKLING
10
DESCRIPTION
CAUSE
Swelling or wrinkling of the paint surface, varying in severity and most often occurring around feathered edges. The underlying paint may break through the topcoat.
a) Reaction with the underlying surface resulting from the application of nitro or thermosetting enamels over thermoplastic acrylics or airdrying synthetics.
PREVENTION a) Ensure compatibility of materials or that the underlying
layer is thoroughly sealed .
48

REMEDY Rub down the affected area, taking care not to uncover
any areas which could give rise to the same problem , seal the surface and repaint. In severe cases rub down the affected area to the substrate and repaint.
49

PANEL FAULTS
DESCRIPTION
CAUSE
Surface irregularities, typically appearing as ripples , curved, straight or crisscrossed grooves, or jagged or globular protrusions.
Conformation of the paint film to surface defects of the substrate. These may be due to : a) Press or mould irregularities, poor surface finishing of
the substrate, too coarse abrasion by file or disc, we ld spatter.
b) Poor or insufficient filling or stopping , incorrect stopper, inadequate flatting.
c) Insufficient app lication of primer. d) Applying colour over improperly dried high build primer.
50

PREVENTION a) Examine the surface carefully before spraying , and
correct any defects and irregularities. Use the correct grades of abrasive, use files or discs correctly, remove all weld spatter.
b) Fill or stop all defects, use the correct stopper, flat down correctly.
c) Apply an adequate thickness of primer and flat to a smooth surface.
d) All ow materials to dry or cure properly.
REMEDY Strip paint down to the substrate. Correct all defects,
prepare the surface correctly and repaint.
51 w

PINHOLING
DESCRIPTION
CAUSE
Small cavities , generally less than 1 mm in diameter, occurring over stopper, filler or GRP substrate.
Absorption of the paint into holes in the substrate. This is due to: a) Air inclusions in GRP resin. b) Inadequate preparation and sealing of the substrate. c) Poor quality filler or stopper. d) Poor mixing of filler, poor application of fille r or stopper.
52

PREVENTION a) Heat to above spraying temperature prior to preparation
to burst inclusions. Do not heat above 80°C to avoid distortion of the surface.
b) Inspect GRP su rfaces and filled or stopped areas carefully. Stop any pinholes, spot prime and flat until smooth before priming the complete surface .
c) Use only recommended materials. d) Mix filler correctly, apply filler and stopper in thin ,
smooth layers. Allow to harden fully before applying further layers and before rubbing down.
REMEDY Rub down the affected area to the prime r, stop any
pinholes, spot prime and flat until the surface is smooth , then repaint.
53
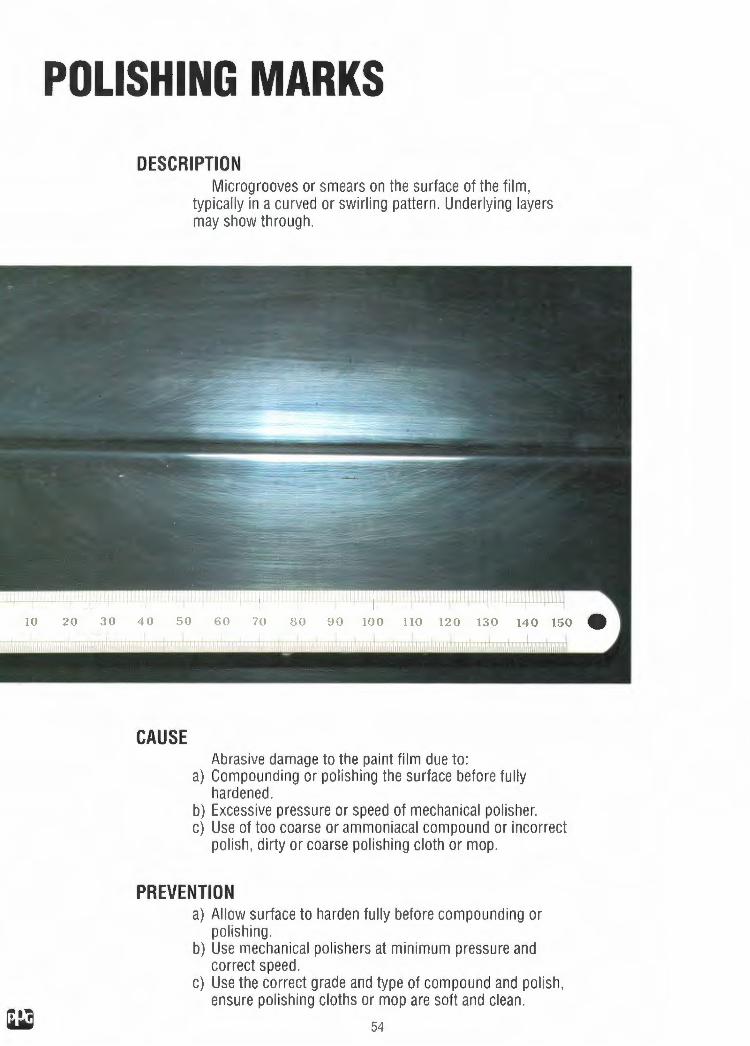
POLISHING MARKS
DESCRIPTION
CAUSE
Microgrooves or smears on the surface of the film , typically in a curved or swirling pattern. Underlying layers may show through .
Abrasive damage to the paint film due to: a) Compounding or polishing the surface before fully
hardened. b) Excessive pressure or speed of mechanical polisher. c) Use of too coarse or ammoniacal compound or incorrect
polish , dirty or coarse polishing cloth or mop.
PREVENTION a) Allow surface to harden fully before compounding or
polishing. b) Use mechanical po li shers at minimum pressure and
correct speed. c) Use the correct grade and type of compound and polish,
ensure polishing cloths or mop are soft and clean.
54
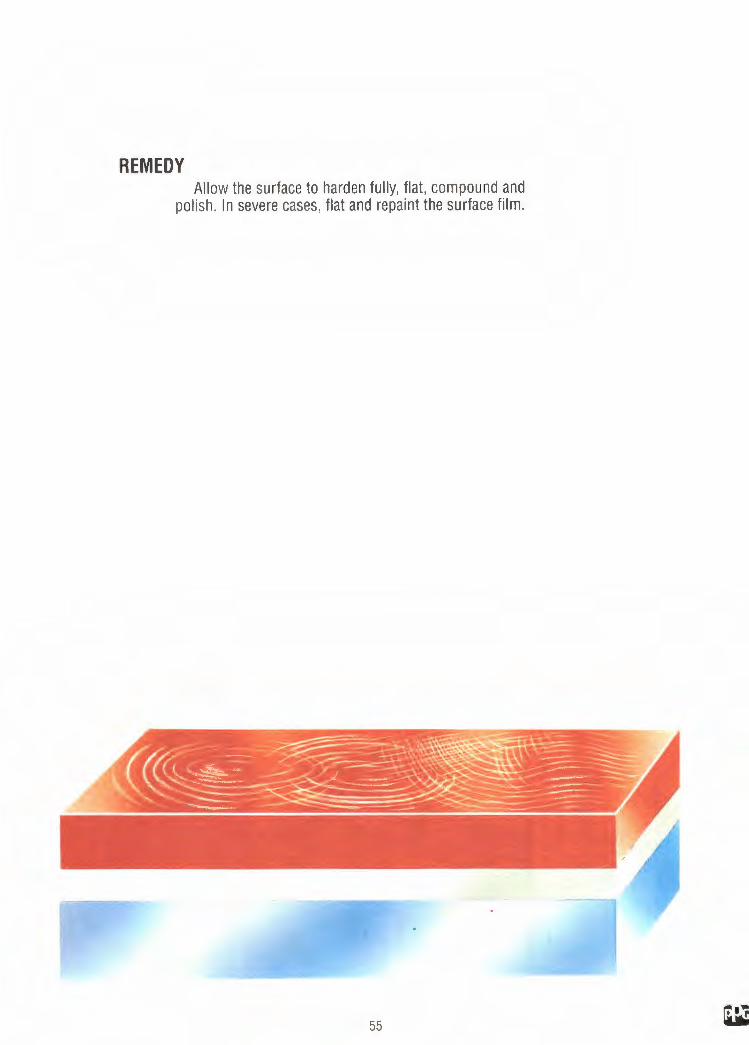
REMEDY Allow the surface to harden fully, flat , compound and
polish . In severe cases, flat and repaint the surface film .
55

RUNS/SAGS
DESCRIPTION
CAUSE
Well defined local thickening of the paint film in the form of a wavy line or shallow, rounded ridges , normally confined to sharply sloping or vertical surfaces .
Slumping of the paint film due to:
N 0
en 0
a) Excess thickness of application , air pressure too low, fan width too narrow, spray gun too close to the surface or moving too slowly.
b) Use of poor quality or incorrect thinner. c) Incorrect viscosity of the paint. d) Air or surface temperature too low. e) Contamination of the underlying surface.
PREVENTION a) Use the correct spraying technique and spray gun
settings. b) Use only recommended thinner. c) Ensure that the paint is mixed to the correct viscosity. d) Always spray within the recommended temperatures. e) Ensure that the surface is scrupulously clean .
56

REMEDY Allow the paint to harden thoroughly, rub down excess
paint, flat, compound and polish . In severe cases it may be necessary to rub down and repaint the surface.
Note: Due to separation of the metal flakes, metallic paints will normally require repainting .
57

w
SAND SCRATCHES/ FLATTING MARKS
DESCRIPTION
CAUSE
Surface scratches under the paint fi lm.
Shrinkage of the paint film during drying causes it to follow the contours of any scratches or other finishing marks in the underlying surface. The defect results from : a) Poor finishing of the underlying surface , abrasives too
coarse , inadequate flatting. inadequate stopping . b) Colour coat applied before the primer is properly hard . c) Insufficient paint thickness, or a too slow drying rate . d) Incorrect mixing of paint, use of wrong or poor quality
thinner.
PREVENTION a) Use the correct grade of abrasives, use stopper on any
deep scratches, flat the surface to a smooth finish. b) Ensure that the primer is fully hardened before applying
the colour coat. c) Apply the correct paint thickness, under correct drying
conditions. d) Mix the paint thoroughly, using only recommended
thinner. 58

REMEDY If the marks are light it may be sufficient to flat ,
compound and polish the affected area. In more severe cases the surface must be rubbed down until the marks are removed and then repainted.
59

SCRATCHES/STONE CHIPS
DESCRIPTION
CAUSE
Damaged and broken paint film , varying in depth and extent depending on the cause.
4 so
a) Impact damage, typically caused by stones thrown up from loose road surfaces, or scratching by sharp objects.
PREVENTION a) Damage caused on the road may be unavoidable, but
care should be taken to protect vehicles in storage, in the paint shop or in transit.
60

REMEDY Rub down the affected area, feather the edges of the
chips , restore the level with stopper and repaint.
61

SINKAGE
DESCRIPTION
CAUSE
Semi matt, hazy surface, usually extensive and showing minute pores under low magnification. Flatting marks may show on the surface.
Absorption of the gloss coat into the underlying paint. This may result from: a) Failure to seal or precoat porous surfaces, failure to spot
prime filler or stopper. b) Incorrect application of primer, excess primer,
insufficient, incorrect or poor quality thinner, insufficient stirring .
c) Poor preparation of primed surface, flatting before properly hard , abrasive too coarse, poor flatt ing .
d) Application of the topcoat before the primer is thoroughly hardened , insufficient colour coats .
PREVENTION a) Prepare the underlying surface correctly. b) Apply the correct thickness of primer, use the correct
quantity of recommended thinner. Mix primer thoroughly immediately before use.
c) Allow the primer to harden properly before flatting down, use the correct grade of abrasive, flat the surface evenly and smoothly.
d) Apply a sufficient number of .thin , wet films of colour coat.
REMEDY Allow the paint to harden fully, flat , compound and
polish . In severe cases , flat the affected area and repaint.
62

SLOW DRYING/SOFTNESS
DESCRIPTION
CAUSE
The paint film requires an excessive drying period , or fails to harden thoroughly.
Slow evaporation of solvent from the paint. This may be due to : a) Excessive thickness of the paint film . b) Poor atmospheric conditions during spraying or drying,
coldness, humidity, lack of air movement. c) Insufficient drying time between coats . d) Insufficient, poor quality or incorrect thinner.
PREVENTION a) Apply paint in thin wet films. b) Ensure adequate warmth and ventilation . Avoid spraying
in excessively humid conditions. c) Allow sufficient drying time between coats . d) Use the correct amount of recommended thinner.
64

REMEDY Move the vehicle to a warm , well ventilated area. Low
heat may be applied to improve drying, but care must be exercised to avoid wrinkling .
65
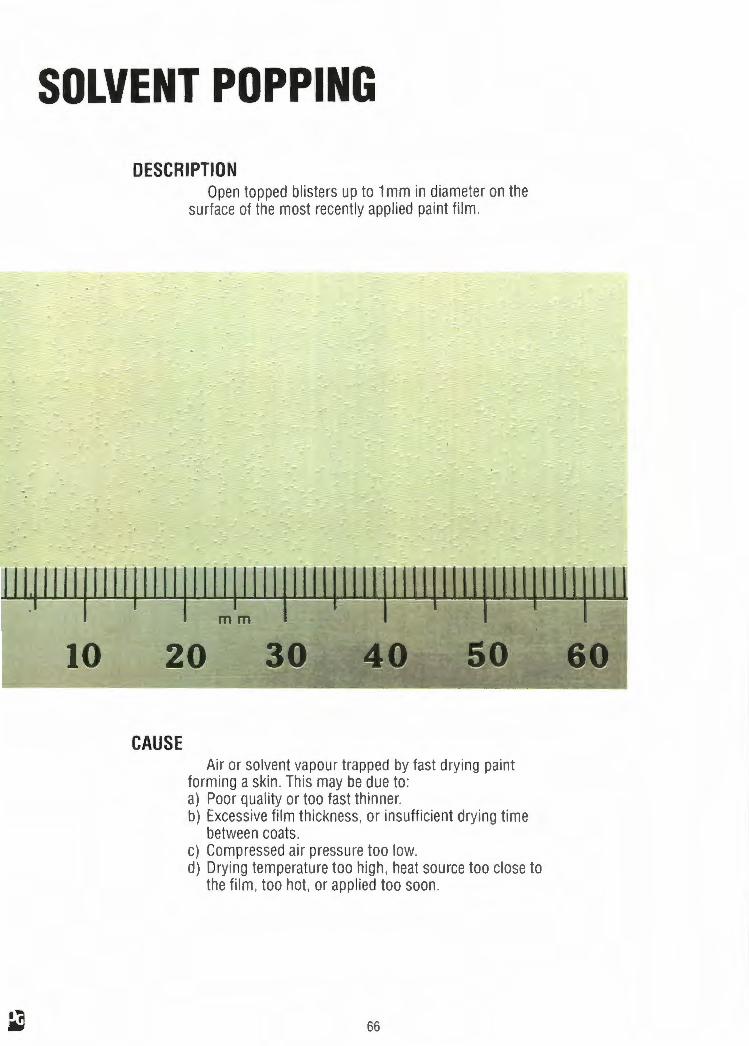
SOLVENT POPPING
DESCRIPTION
CAUSE
Open topped blisters up to 1 mm in diameter on the surface of the most recently applied paint film .
Air or solvent vapour trapped by fast drying paint forming a skin . This may be due to: a) Poor quality or too fast thinner. b) Excessive film thickness, or insufficient drying time
between coats. c) Compressed air pressure too low. d) Drying temperature too high , heat source too close to
the film , too hot, or applied too soon .
66

PREVENTION a) Ensure that the surface is scrupulously clean. b) Use only recommended thinner. c) Apply paint in thin , wet films . Allow sufficient drying
time between coats . d) Use correct compressed air pressure. e) Allow sufficient flash off time before force drying, ensure
that the correct drying temperature is not exceeded .
REMEDY
Do not allow the heat source to be placed too close to the surface.
Rub down to a smooth surface and repaint.
67

WATER SPOTTING
10
DESCRIPTION
CAUSE
Circular marks, normally up to 6mm in diameter, on the surface of the paint film . The marks are usually lighter in colour than the surrounding surface.
mm
20 30 40 50
Water droplets impacting on , and evaporating from , the surface. The marks may result from : a) Exposure of the paint film to rain or water splashes
before it has fu lly hardened . b) Rain or water splashes on an excessively thick fi lm of
wax polish .
PREVENTION a) Protect paint surfaces from water until fully hardened. b) Do not allow excessive wax build up on the surface.
68
60

REMEDY Dewax the affected area, flat lightly, compound and
polish , repeating if necessary. In severe cases repaint the topcoat.
69

WAX INCORPORATION/ RETENTION
DESCRIPTION
CAUSE
Smears or dull areas in the paint film . The affected areas may feel greasy.
Absorption of wax into the paint film due to : a) Application of wax polish before the paint has fully
hardened. b) Excessive or incorrect use of polish or compound . c) Poor polishing technique. d) Storage of wax protected vehicles under hot conditions.
PREVENTION a) Allow the surface to harden fully before polishing . b) Use only recommended products, use as instructed. c) Use correct polishing techniques, ensure that the gloss
level is even over the entire surface. d) Protect stored vehicles from excessive heat.
70

REMEDY Apply a solvent cleaner, followed by polishing with a
non-wax polish . Repeat the process until all wax has been bled from the surface, then repolish .
71

INDEX AND CROSS-REFERENCE OF TERMS This publicat ion is des igned to act as a guide to identify ing , preve nting and rectifying problems with paint. As a wide range of alte rnative names are used to describe paint problems, the more common ones are cross-referenced be low: Description Page No . Description Page No . Description Page No. Abnormal loss of gloss 32 Flat spots 62 Pop-ups 66 Acid attack 2 Flatting 62 Porosity 62 Air trapping 12 Flatting marks 58 Precipitation 14 Airborne contamination 20 Floatation 18 Puckering 38 Alligatoring 26 Floating 18 Raising 38 Bits 28 Flooding 18 Rippling 50 Bleaching 4 Gloss absorption 62 Rub through 36
Bleeding 6 Grinning through 36 Runs 56
Blistering 8 Grittiness 28 Rust specks 20
Blooming 10 Gun spits 56 Rusting 22
Blowing 12 & 52 Hair-lining 26 Sagging paint 56
Blowing off 34 Hazing 32 & 46 Sags 56
Blushing 10 Hold out 62 Sand scratches 58
Boil 66 Inadequate colour coverage 36 Sauce ring 16
Bridging 12 Inconsistency 44 Scratch swell ing 58
Bubbles 8 Industrial fallout 20 Scratches 58
Cement dust 20 Inter-coat adhesion failure 34 Seed 28
Chalking 14 Lack of paint 36 Shadowing 18
Checking 26 Lapping marks 18 Shell ing 34
Chipped paint 60 Levelling 44 Show th rough 36
Cissing 16 Lifting 38 Shrinkage 38
Clouding 10 & 18 Loss of gloss 32 Sinkage 62
Colour absorption 62 Low gloss 32 Slow drying 64
Contamination 20 Mapping 40 Smears 70
Contouring 40 & 50 Micro-blisters 8 Snail trails 8 Mismatch 42 Softness 64
Corrosion 22 Misting 10 Solvent attack 2
Cracking 26 Mottling 18 Solvent boil 66 Cracking seam filler 24 Off colour 42 Solvent popping 66 Crackling 48
Off shade 42 Specs 20 & 28 Craters 16 Orange peel 44 Splashes 2 & 20 Crazing 26 Overloading 56 Splitting 24 Crinkling 38 Overs pray 46 Spots 20 Crocodiling 26 Panel faults 50 Spott ing 20 Crow footing 26 Pebbling 44 & 56 Stone bruising 60 Curtains 56 Peeling 34 Stone ch ips 60 Deadening 32 Pickling 48 Streaking 18 De-lamination 34 Pimples 8 Striping 18 Dirt 28 Pin holing 52 & 66 Thin paint 36 Dirt inclusions 28 Pits 16 Transparent film 36 Dirt nibs 28 Polishing marks 54 Undercoat showi ng through 36 Disc marks 50 Poor adhesion 34 Undersprayed 36 Drips 56 Poor bond 34 Uneven application 18 Dry spray 30 Poor build 36 Water marking 68 Dull finish 32 Poor colour match 42 Water spotting 68 Dulling back 32 Poor coverage 36 Wax impregnati on 70 Fading 42 Poor flow 44 Wax incorporation 70 File marks 50 Poor gloss 32 Wax retention 70 Fingerprints 8 Poor hiding 36 Weld spatter 50 Fish eyes 16 Poor metal fini sh 50 Weld splash 50 Flaking 34 Poor wetting 30 Wrinkling 38
72