im01-0102 installation manual - amazon s3 · im01-0109 thread insert for concealed fixing hardware...
TRANSCRIPT
�
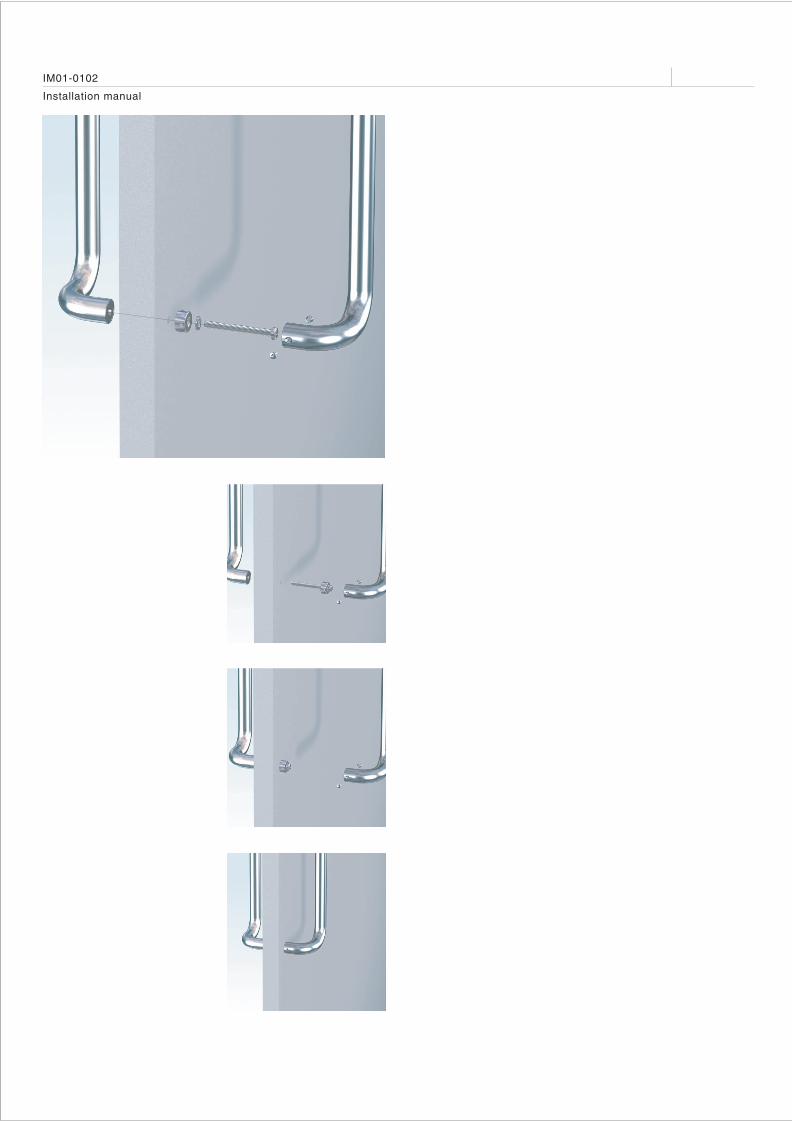
Installation manual
IM01-0102
�
�
Installation manual
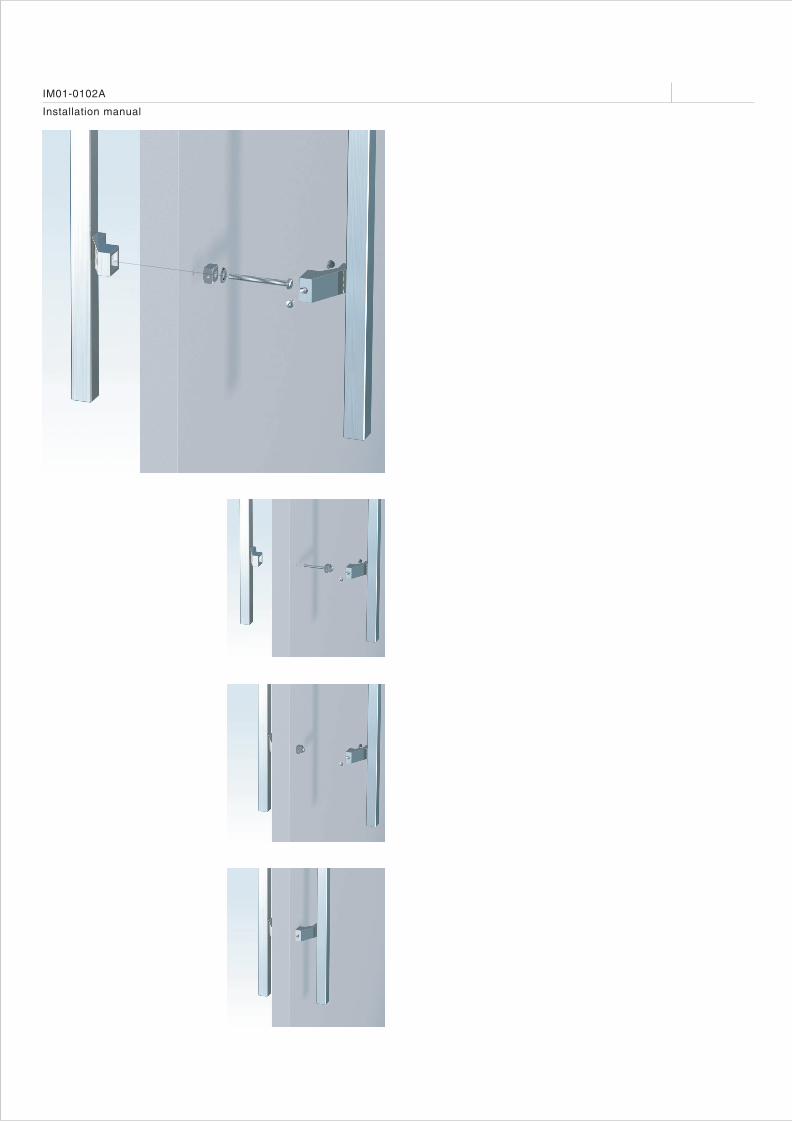
IM01-0102A

Installation manual
IM01-0103
Installation manual
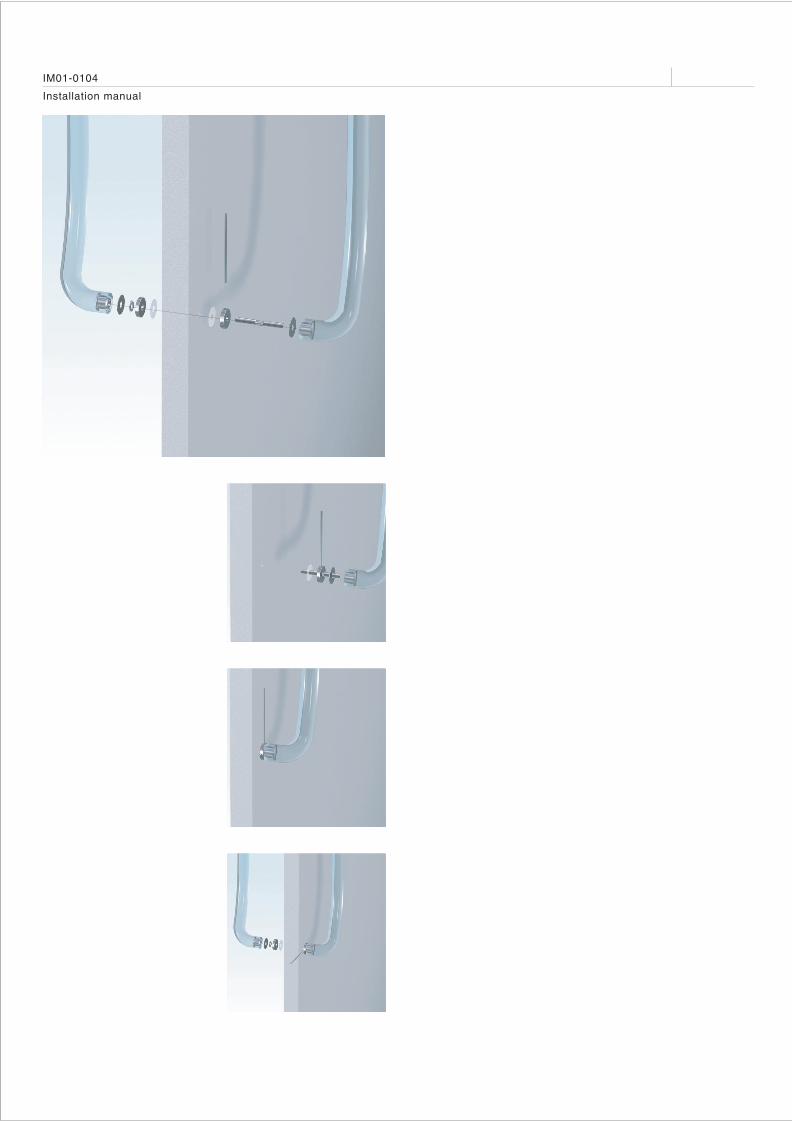
IM01-0104
�
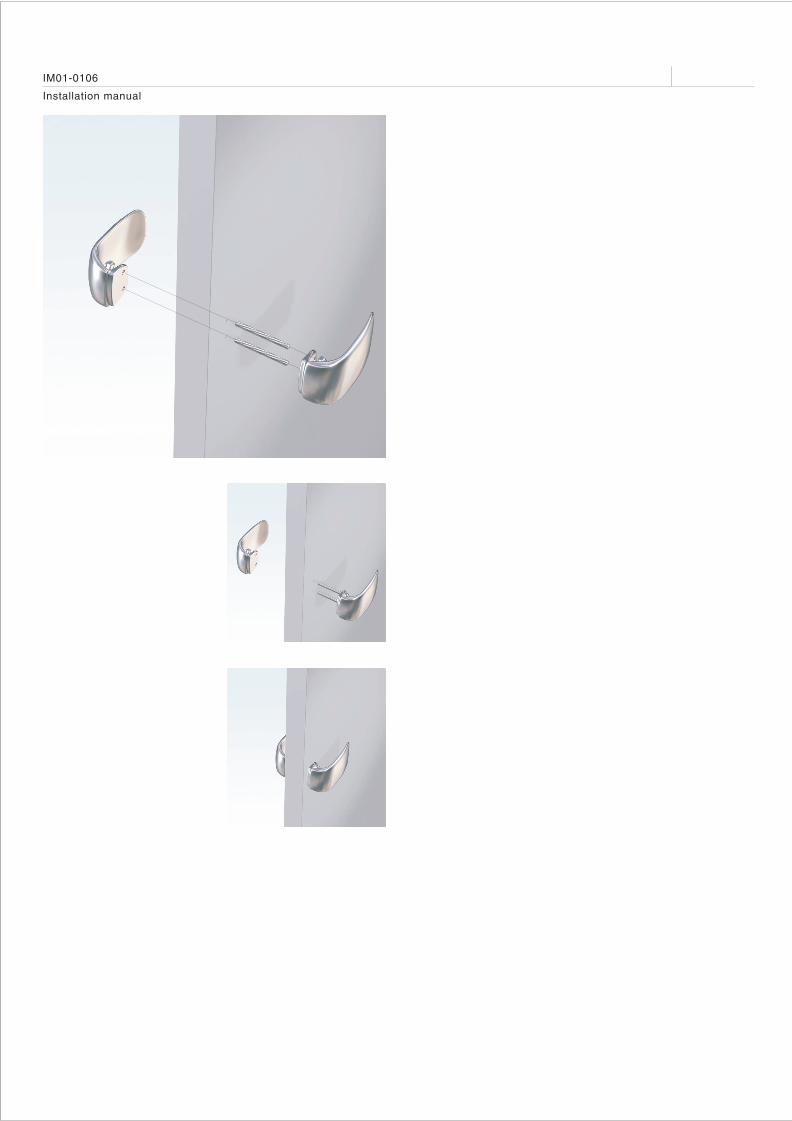
Installation manual
IM01-0106
�
�
Installation manual
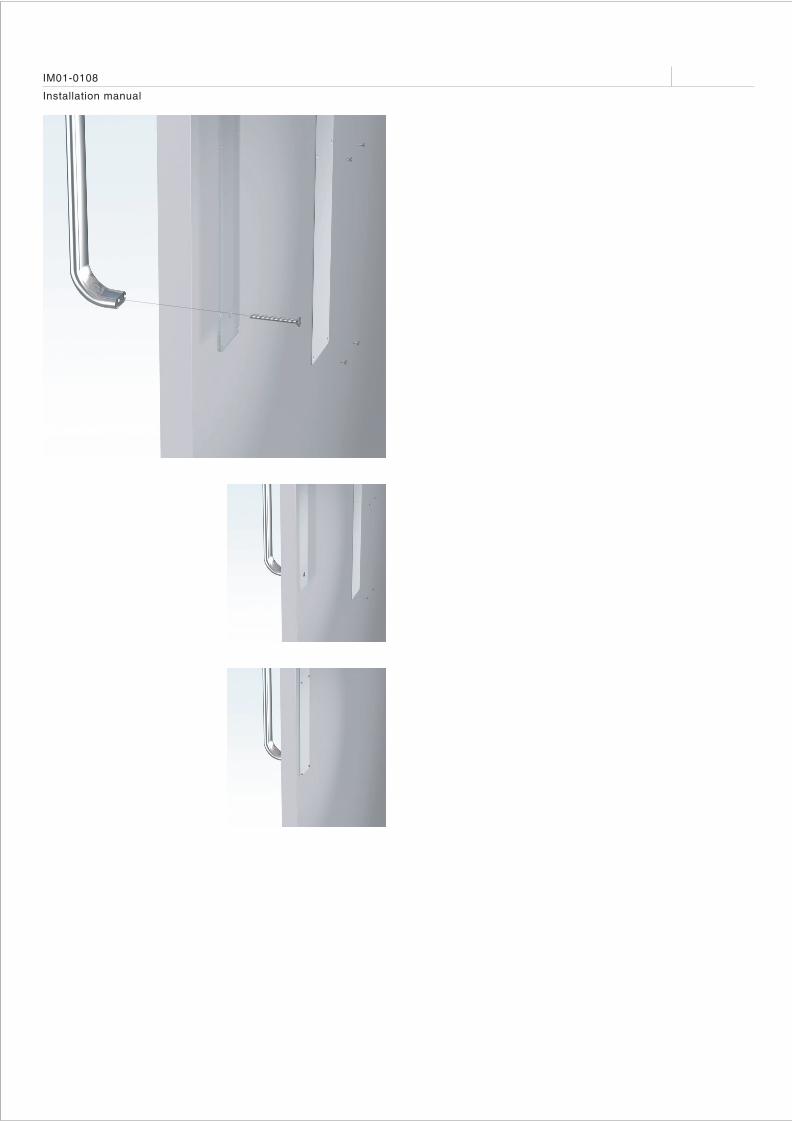
IM01-0108
�
Installation manual
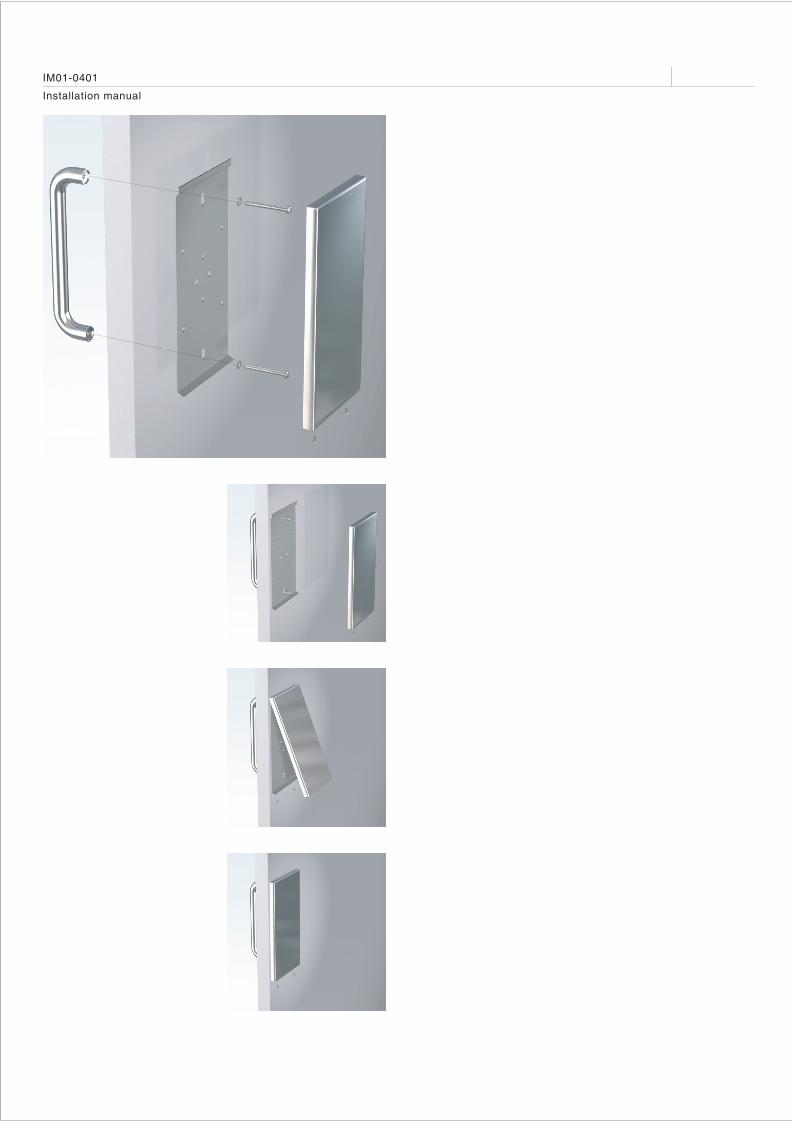
IM01-0401
�
Installation manual
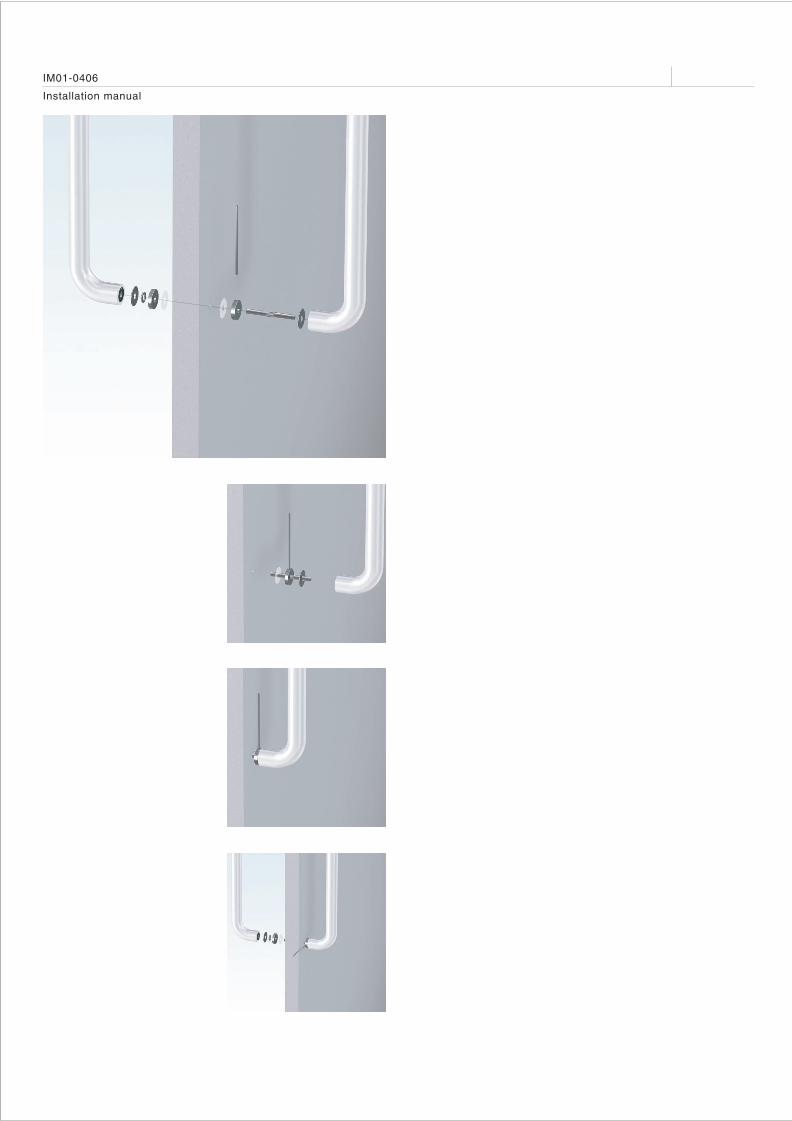
IM01-0406
�
Installation manual
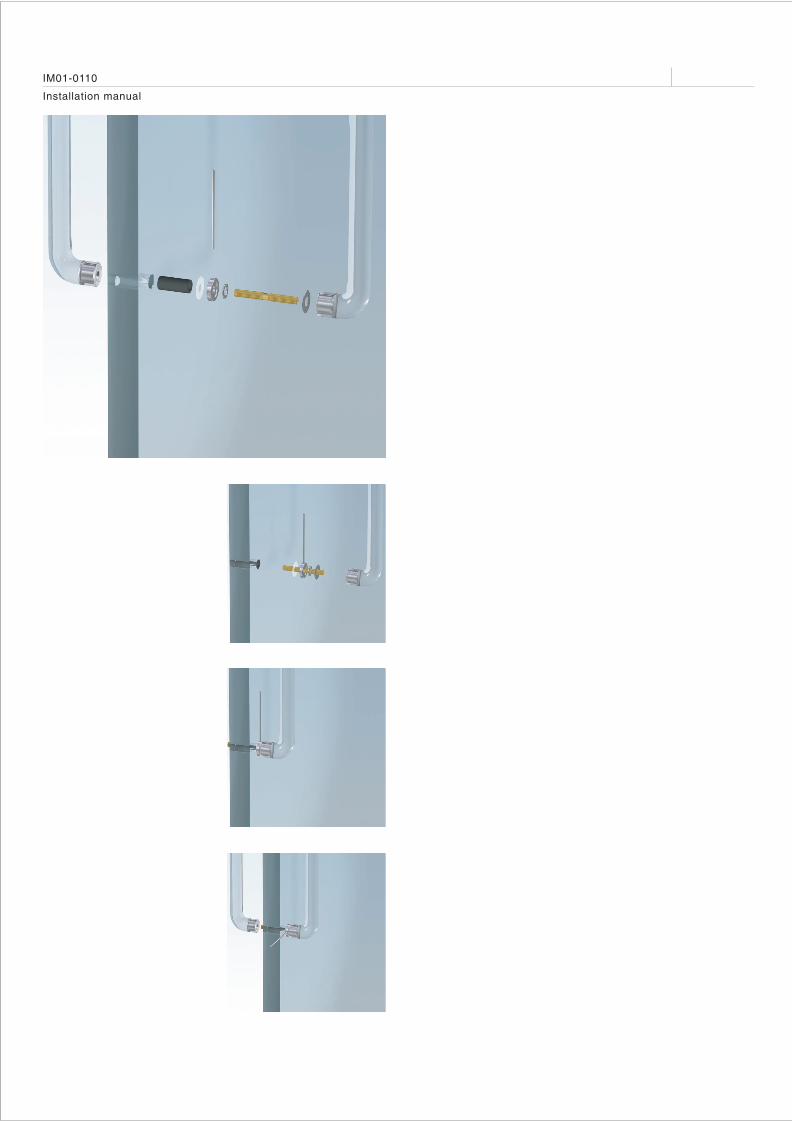
IM01-0110
�
�
�
�
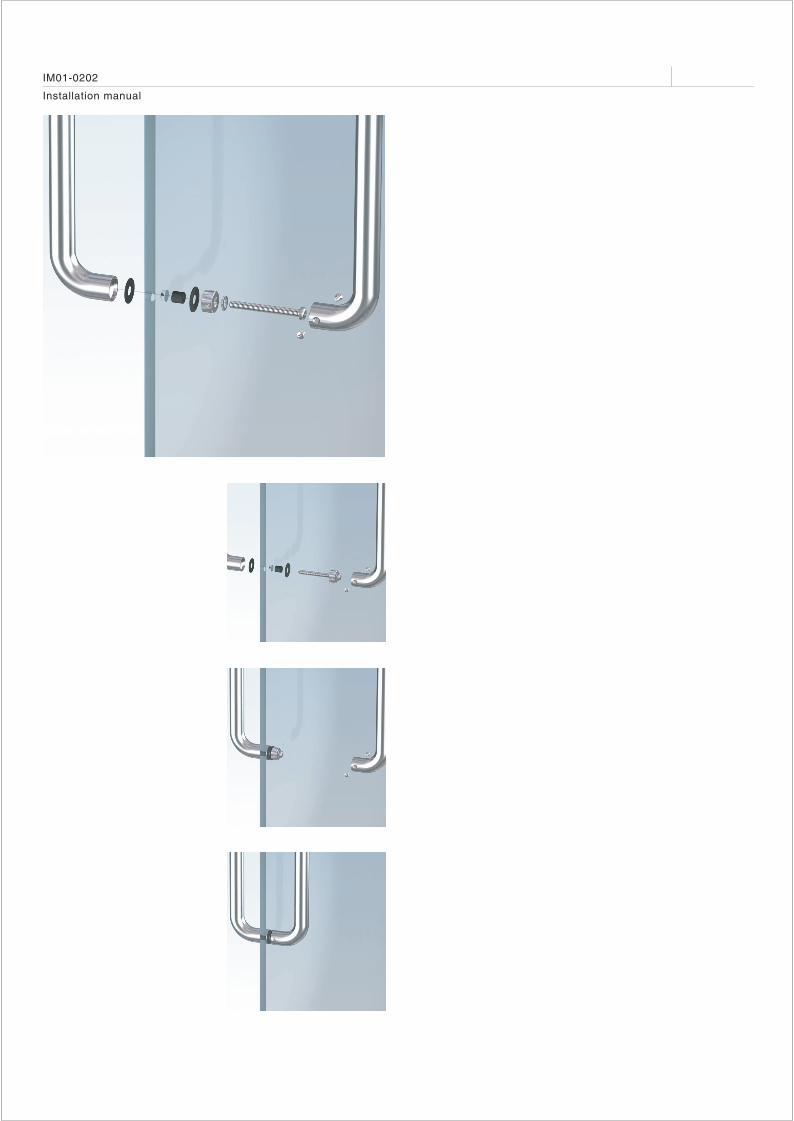
Installation manual
IM01-0202
�
�
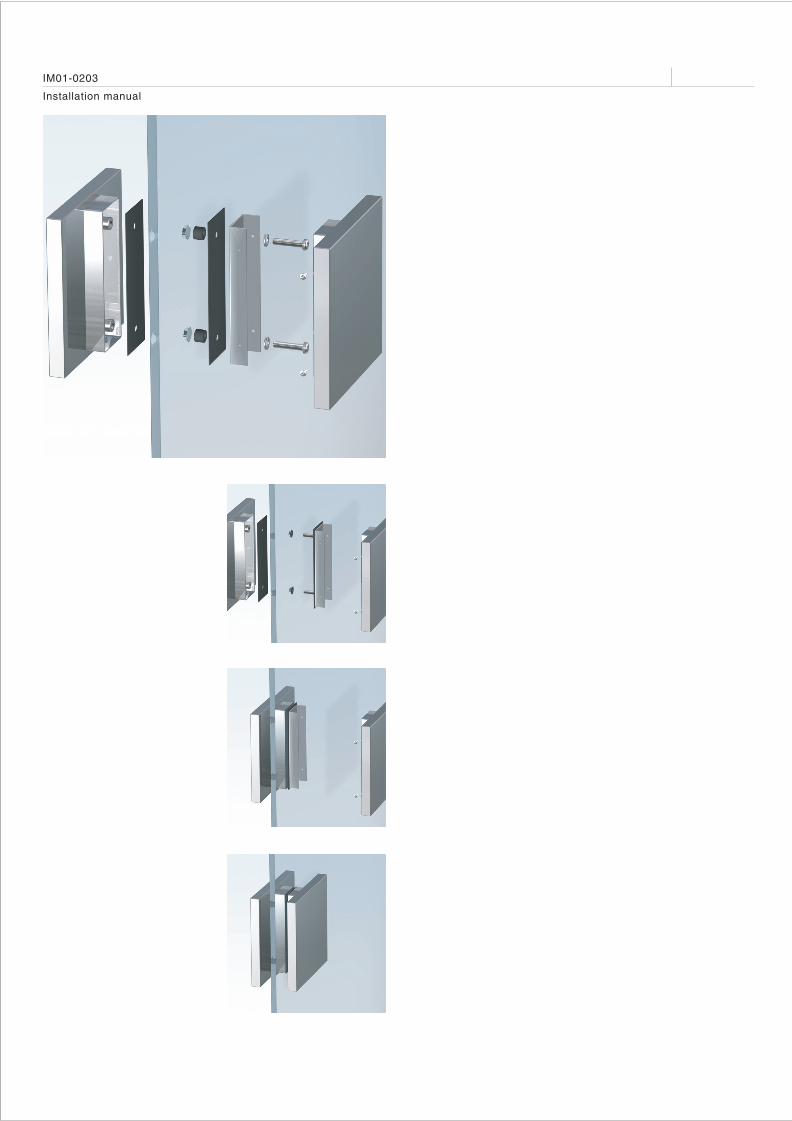
Installation manual
IM01-0203
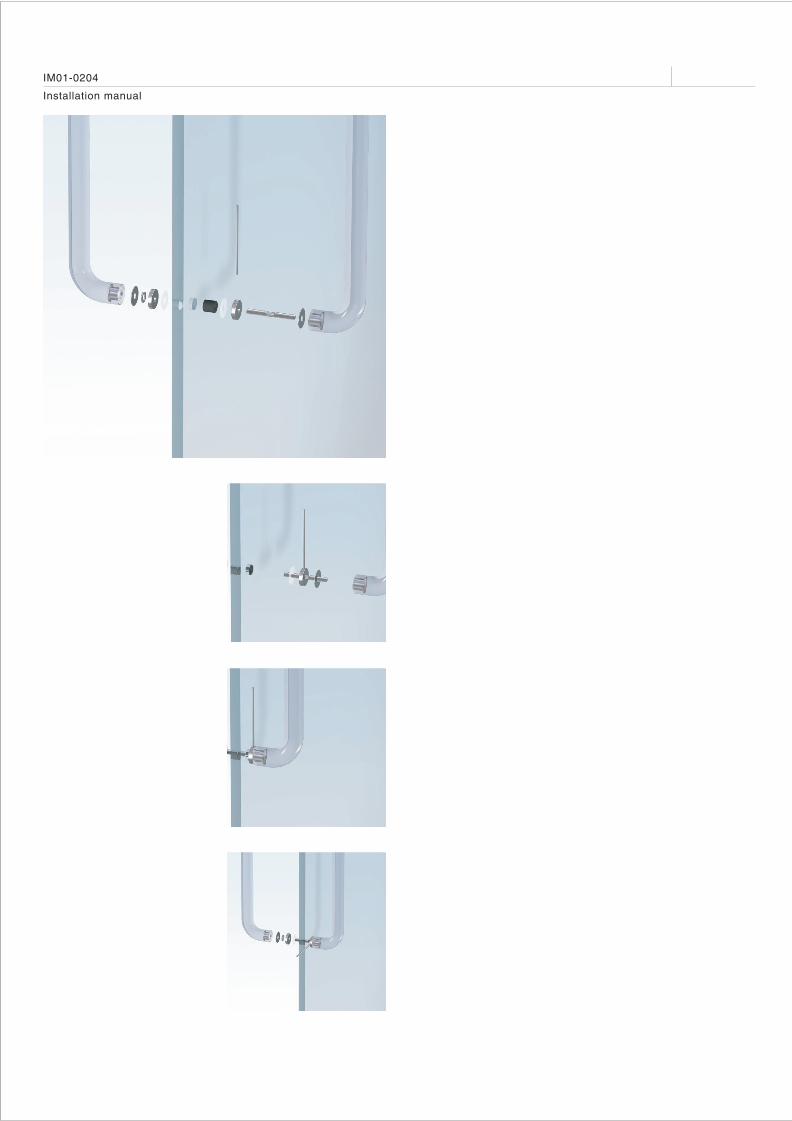
Installation manual
IM01-0204
�
�
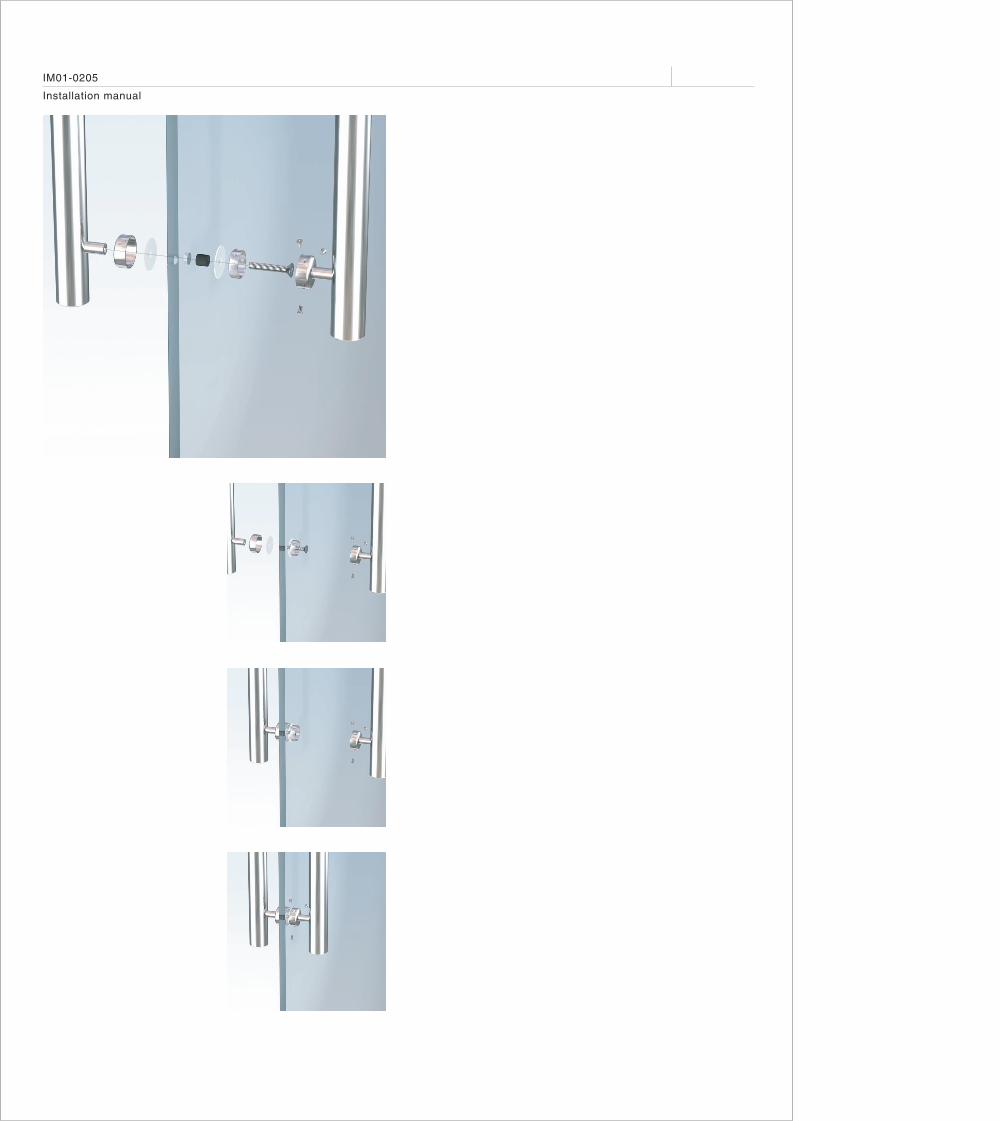
Installation manual
IM01-0205
�
�
Installation manual
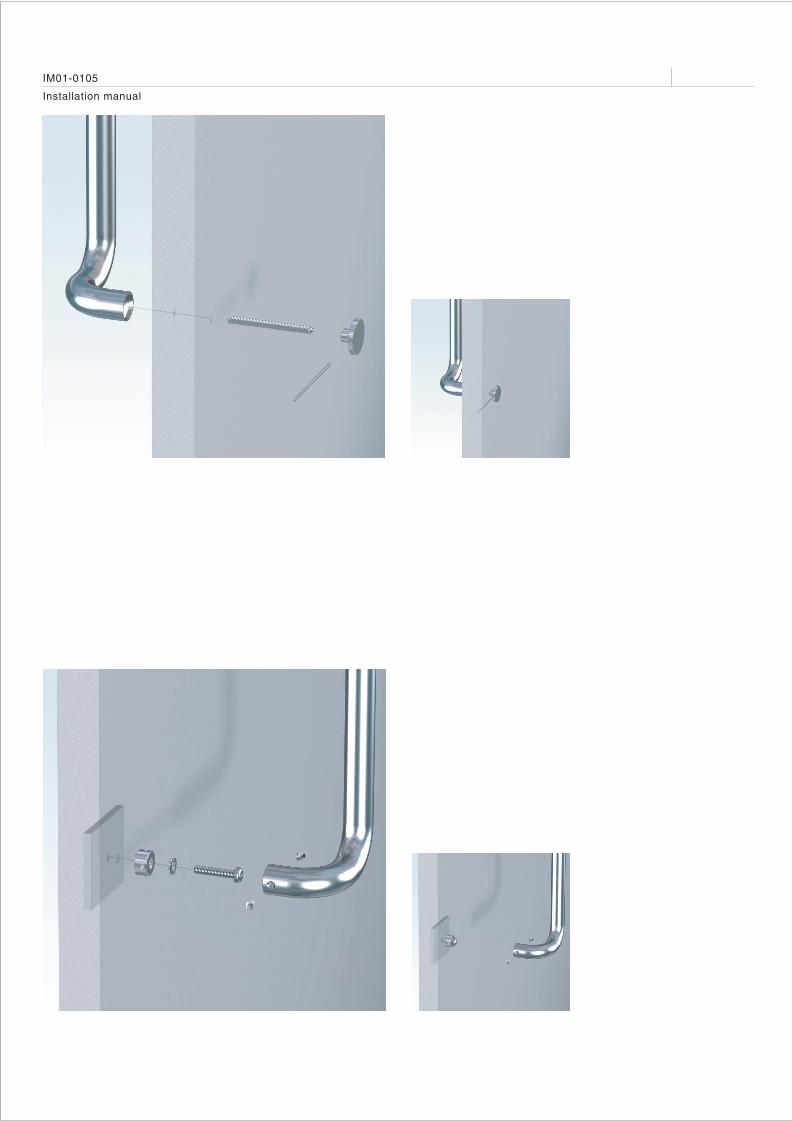
IM01-0105

�
�
Installation manual
IM01-0107
�
�
Installation manual
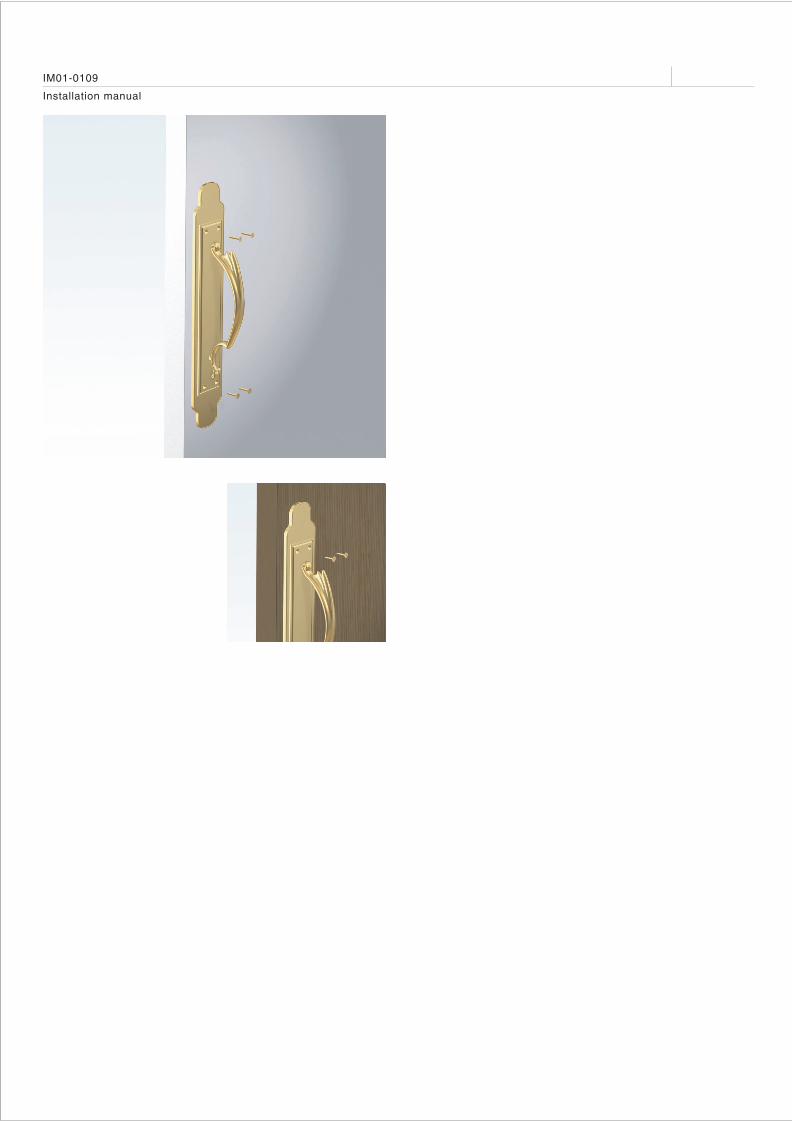
IM01-0109
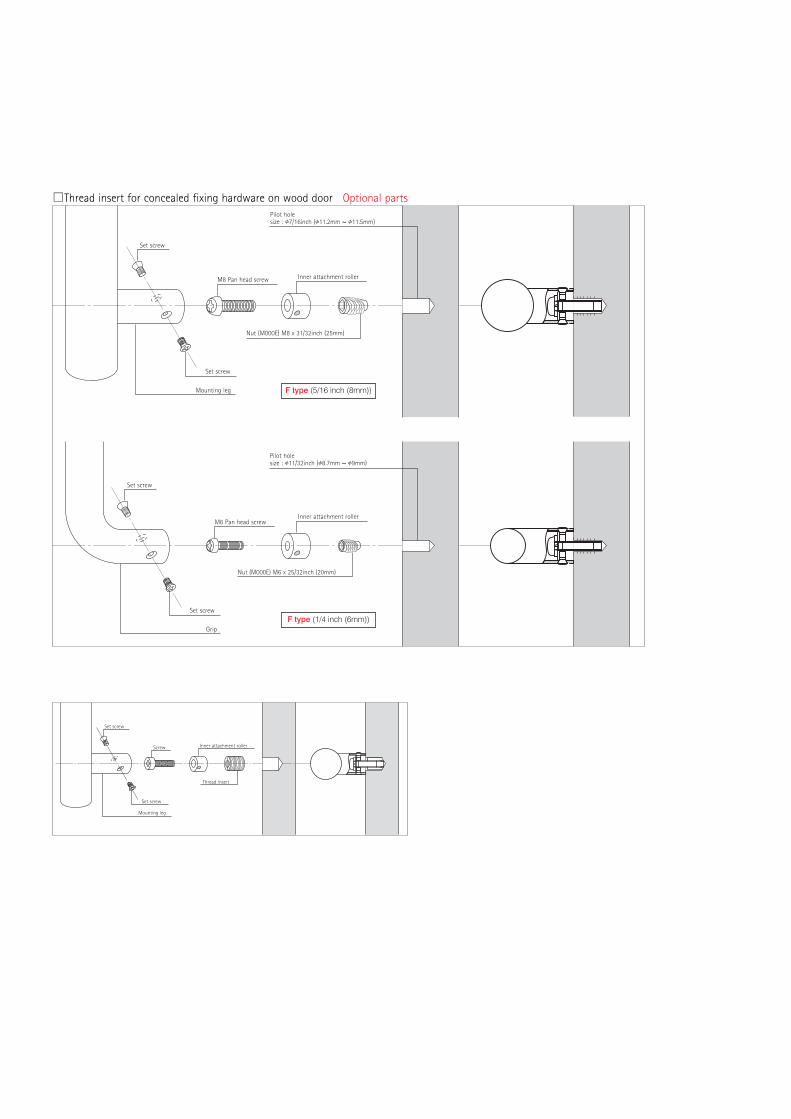
□Thread insert for concealed fixing hardware on wood door Optional parts
F type (5/16 inch (8mm))
F type (1/4 inch (6mm))
Set screw
Mounting leg
Screw
Thread insert
Inner attachment roller
Set screw
Mounting leg
Set screw
Grip
Set screw
Set screw
Set screw
Inner attachment roller
Inner attachment roller
M8 Pan head screw
Nut (M000E) M8 x 31/32inch (25mm)
Pilot holesize : $7/16inch ($11.2mm ~ $11.5mm)
M6 Pan head screw
Nut (M000E) M6 x 25/32inch (20mm)
Pilot holesize : $11/32inch ($8.7mm ~ $9mm)
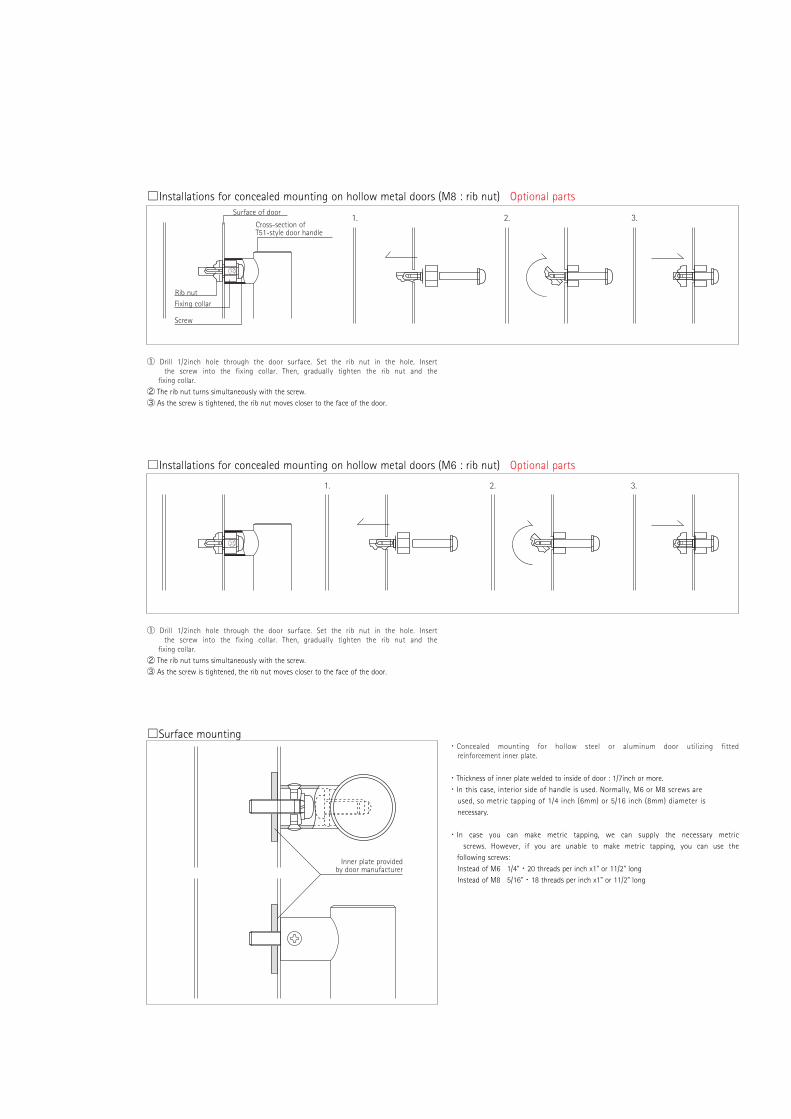
・Concealed mounting for hollow steel or aluminum door utilizing fitted reinforcement inner plate.�・Thickness of inner plate welded to inside of door : 1/7inch or more.・In this case, interior side of handle is used. Normally, M6 or M8 screws are used, so metric tapping of 1/4 inch (6mm) or 5/16 inch (8mm) diameter is necessary.
・In case you can make metric tapping, we can supply the necessary metric screws. However, if you are unable to make metric tapping, you can use the following screws: Instead of M6 1/4"・20 threads per inch x1" or 11/2" long Instead of M8 5/16"・18 threads per inch x1" or 11/2" long
□Installations for concealed mounting on hollow metal doors (M8 : rib nut) Optional parts
① Drill 1/2inch hole through the door surface. Set the rib nut in the hole. Insert the screw into the fixing collar. Then, gradually tighten the rib nut and the fixing collar.② The rib nut turns simultaneously with the screw.③ As the screw is tightened, the rib nut moves closer to the face of the door.
Surface of door
Cross-section of T51-style door handle
Screw
Fixing collarRib nut
1. 2. 3.
□Installations for concealed mounting on hollow metal doors (M6 : rib nut) Optional parts
① Drill 1/2inch hole through the door surface. Set the rib nut in the hole. Insert the screw into the fixing collar. Then, gradually tighten the rib nut and the fixing collar.② The rib nut turns simultaneously with the screw.③ As the screw is tightened, the rib nut moves closer to the face of the door.
1. 2. 3.
□Surface mounting
Inner plate providedby door manufacturer
FL
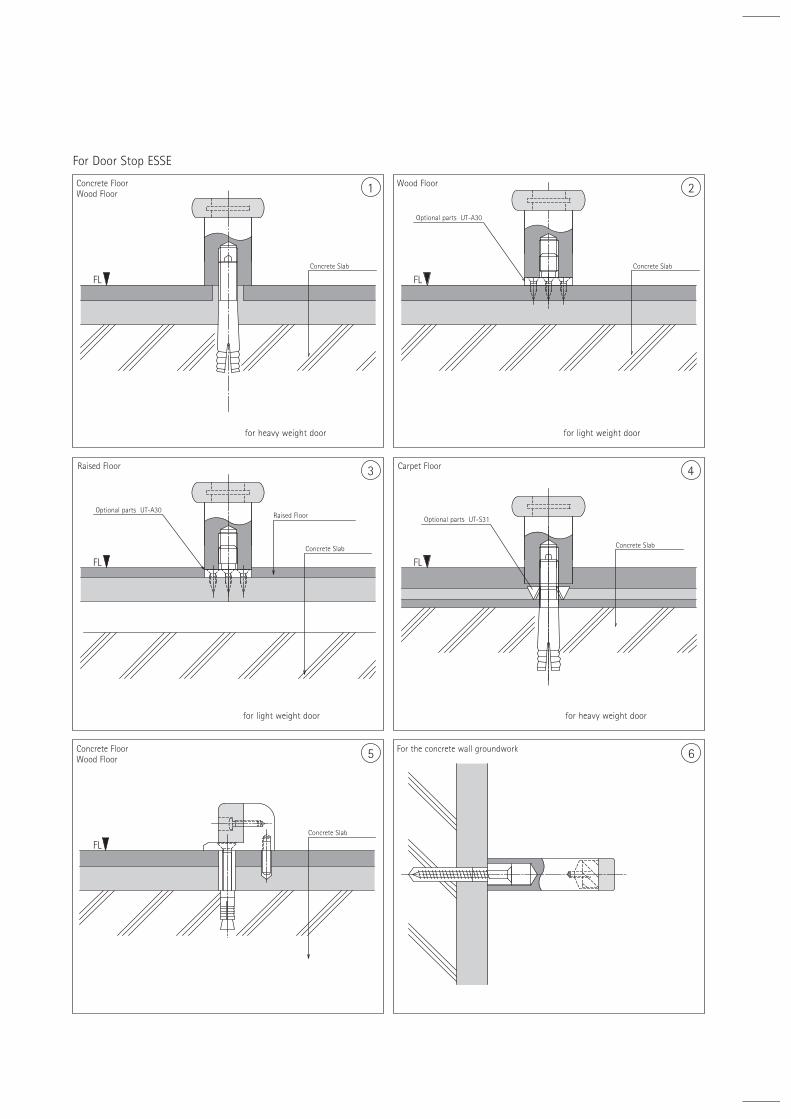
Concrete FloorWood Floor
for heavy weight door
Concrete Slab
1
6For the concrete wall groundwork5
Concrete Slab
Wood Floor
FL
4
Optional parts UT-S31
Concrete Slab
for heavy weight door
Carpet Floor
FL
Raised Floor
Raised Floor
3
Concrete Slab
Optional parts UT-A30
for light weight door
FL
2
Optional parts UT-A30
Concrete Slab
for light weight door
Wood Floor
FL
Concrete Floor
For Door Stop ESSE
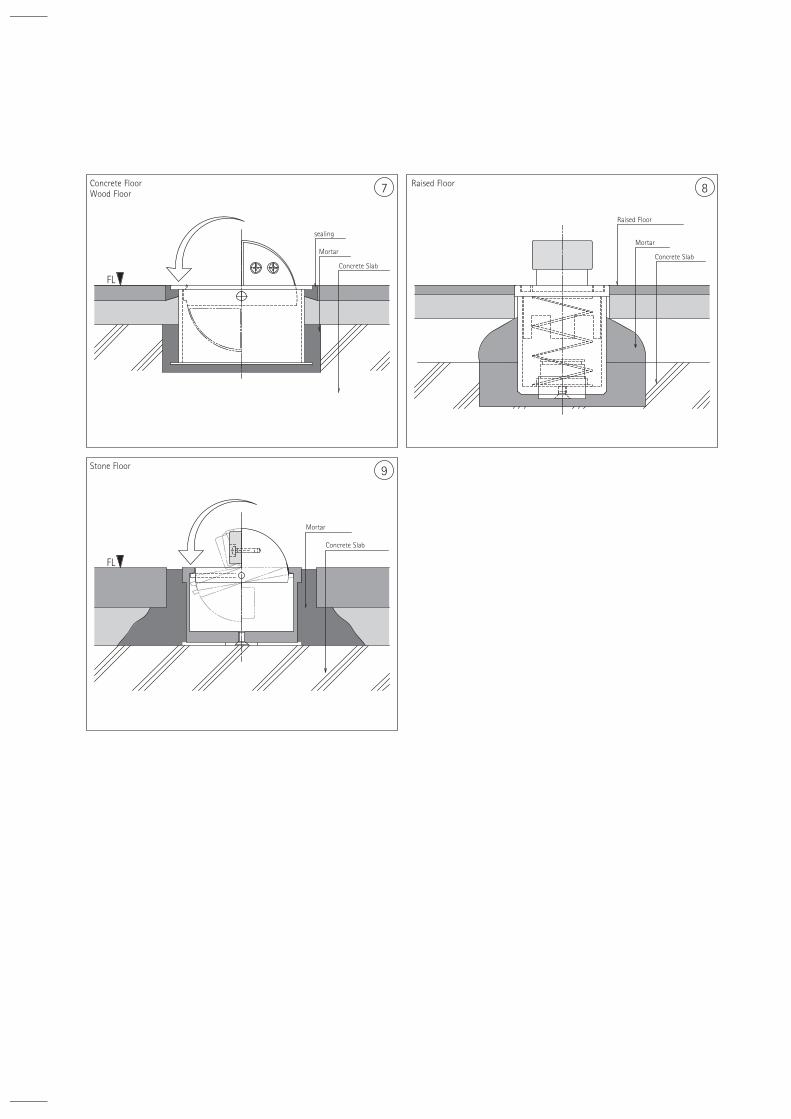
9
Concrete Slab
Mortar
Stone Floor
FL
Raised Floor
Raised Floor
8
Mortar
Concrete Slab
7
sealing
Mortar
Concrete Slab
Wood FloorConcrete Floor
FL