important - towergarden.com · grow healthy, delicious food. ... tower garden® growing system a...
TRANSCRIPT

www.TowerGarden.com | 1
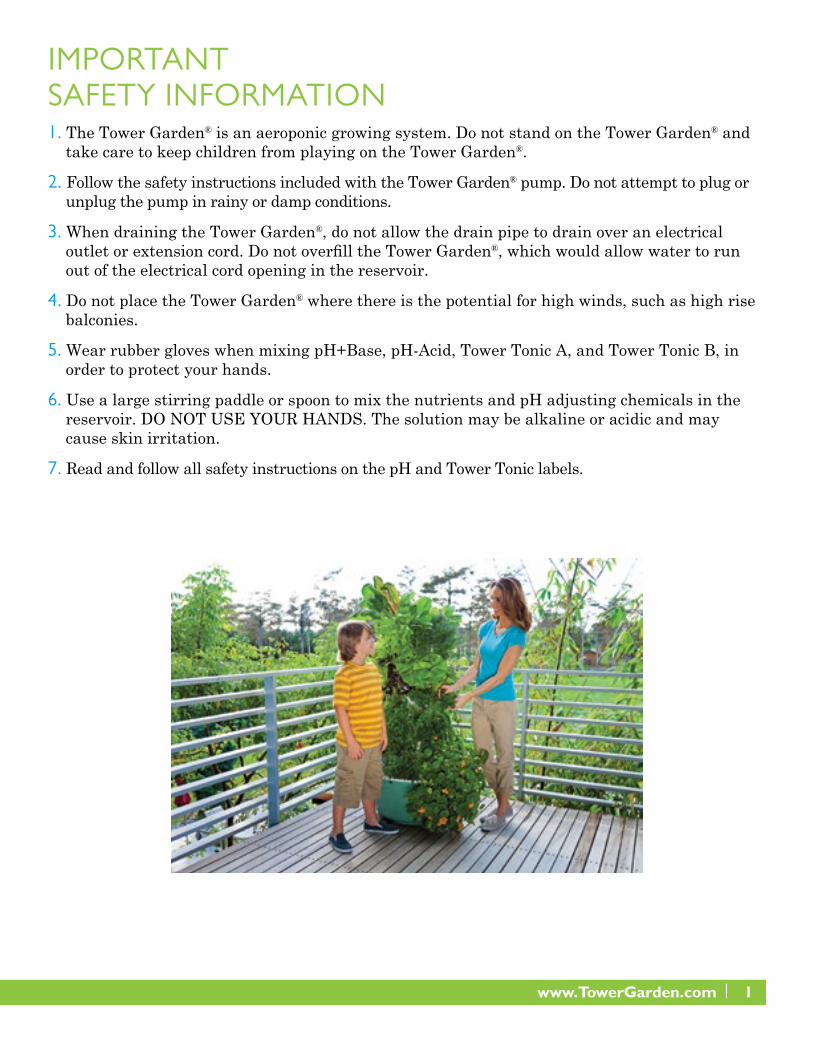
IMPORTANT SAFETY INFORMATION1. The Tower Garden® is an aeroponic growing system. Do not stand on the Tower Garden® and
take care to keep children from playing on the Tower Garden®.
2. Follow the safety instructions included with the Tower Garden® pump. Do not attempt to plug or unplug the pump in rainy or damp conditions.
3. When draining the Tower Garden®, do not allow the drain pipe to drain over an electrical outlet or extension cord. Do not overfill the Tower Garden®, which would allow water to run out of the electrical cord opening in the reservoir.
4. Do not place the Tower Garden® where there is the potential for high winds, such as high rise balconies.
5. Wear rubber gloves when mixing pH+Base, pH-Acid, Tower Tonic A, and Tower Tonic B, in order to protect your hands.
6. Use a large stirring paddle or spoon to mix the nutrients and pH adjusting chemicals in the reservoir. DO NOT USE YOUR HANDS. The solution may be alkaline or acidic and may cause skin irritation.
7. Read and follow all safety instructions on the pH and Tower Tonic labels.
2 | 1.866.235.0414
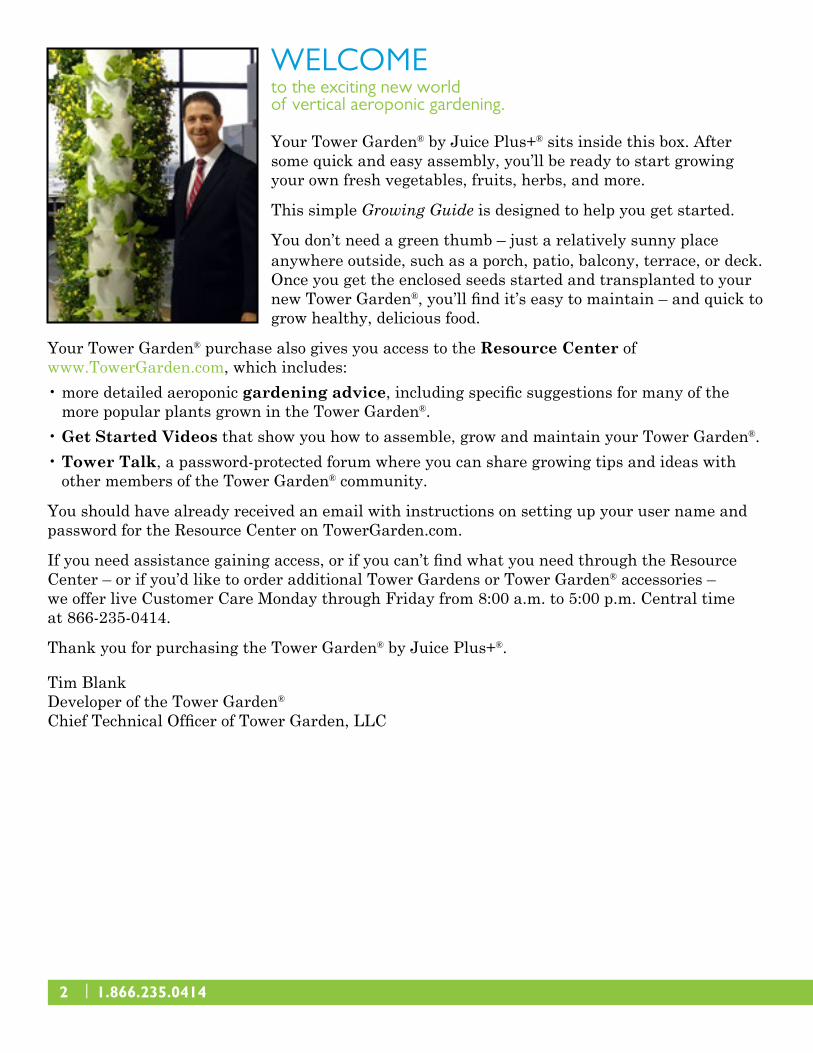
WELCOMEto the exciting new world of vertical aeroponic gardening.
Your Tower Garden® by Juice Plus+® sits inside this box. After some quick and easy assembly, you’ll be ready to start growing your own fresh vegetables, fruits, herbs, and more.
This simple Growing Guide is designed to help you get started.
You don’t need a green thumb – just a relatively sunny place anywhere outside, such as a porch, patio, balcony, terrace, or deck. Once you get the enclosed seeds started and transplanted to your new Tower Garden®, you’ll find it’s easy to maintain – and quick to grow healthy, delicious food.
Your Tower Garden® purchase also gives you access to the Resource Center of www.TowerGarden.com, which includes:• more detailed aeroponic gardening advice, including specific suggestions for many of the
more popular plants grown in the Tower Garden®. • Get Started Videos that show you how to assemble, grow and maintain your Tower Garden®. • Tower Talk, a password-protected forum where you can share growing tips and ideas with
other members of the Tower Garden® community.
You should have already received an email with instructions on setting up your user name and password for the Resource Center on TowerGarden.com.
If you need assistance gaining access, or if you can’t find what you need through the Resource Center – or if you’d like to order additional Tower Gardens or Tower Garden® accessories – we offer live Customer Care Monday through Friday from 8:00 a.m. to 5:00 p.m. Central time at 866-235-0414.
Thank you for purchasing the Tower Garden® by Juice Plus+®.
Tim BlankDeveloper of the Tower Garden®
Chief Technical Officer of Tower Garden, LLC

www.TowerGarden.com | 3
TOWER GARDEN® GROWING SYSTEM A Nutrient Reservoir B Pump C Swivel Hose D Reservoir Lid E Access Port Lid F Tower Sections (5) G Growing Ports (20) H Net Pots (25) I Shower Cap J Shower Cap Lid K Rods (2)
No tools required. Also included: • Tower Tonic • pH Supplies • Seed Starter Kit (with seeds) • Timer • Drain Pipe • Measuring Cup
AB
D
C
EH
K
EF
G
I
J
4 | 1.866.235.0414
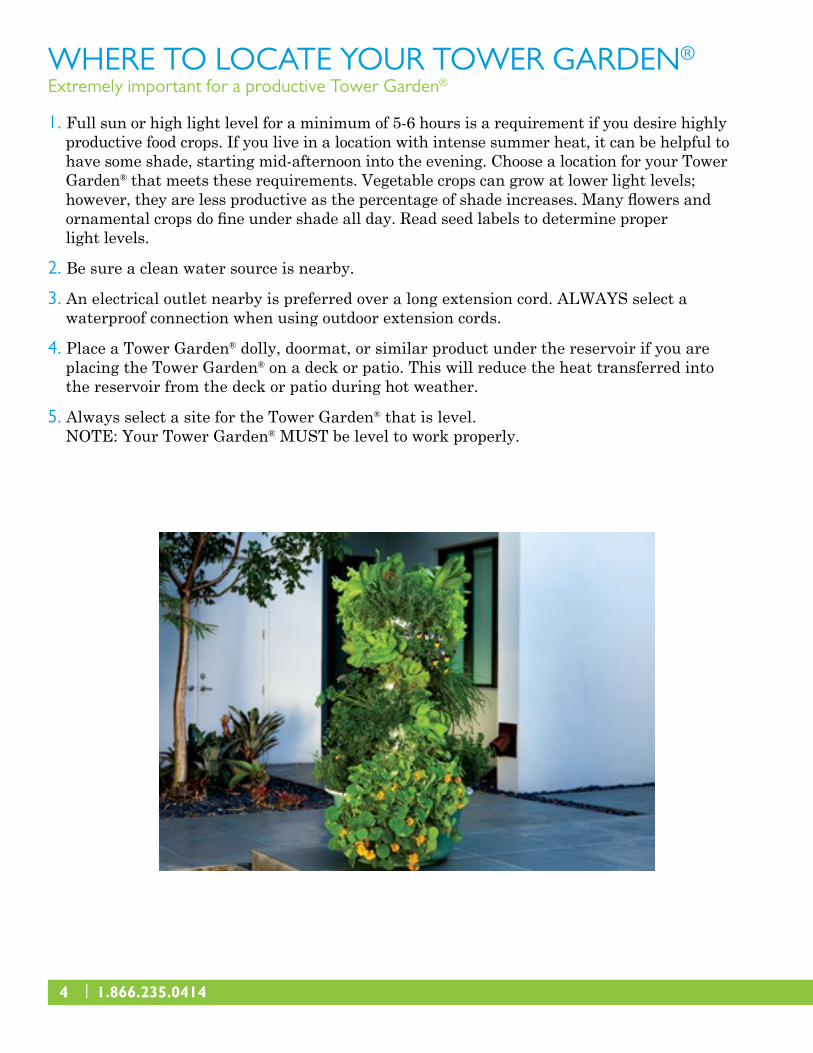
WHERE TO LOCATE YOUR TOWER GARDEN®
Extremely important for a productive Tower Garden®
1. Full sun or high light level for a minimum of 5-6 hours is a requirement if you desire highly productive food crops. If you live in a location with intense summer heat, it can be helpful to have some shade, starting mid-afternoon into the evening. Choose a location for your Tower Garden® that meets these requirements. Vegetable crops can grow at lower light levels; however, they are less productive as the percentage of shade increases. Many flowers and ornamental crops do fine under shade all day. Read seed labels to determine proper light levels.
2. Be sure a clean water source is nearby.
3. An electrical outlet nearby is preferred over a long extension cord. ALWAYS select a waterproof connection when using outdoor extension cords.
4. Place a Tower Garden® dolly, doormat, or similar product under the reservoir if you are placing the Tower Garden® on a deck or patio. This will reduce the heat transferred into the reservoir from the deck or patio during hot weather.
5. Always select a site for the Tower Garden® that is level. NOTE: Your Tower Garden® MUST be level to work properly.
www.TowerGarden.com | 5
HOW TO ASSEMBLE ITVisit the Resource Center or towergarden.com/youtube for assembly videos.
1. In order for the Tower Garden® to operate properly, make sure the nutrient reservoir is level.
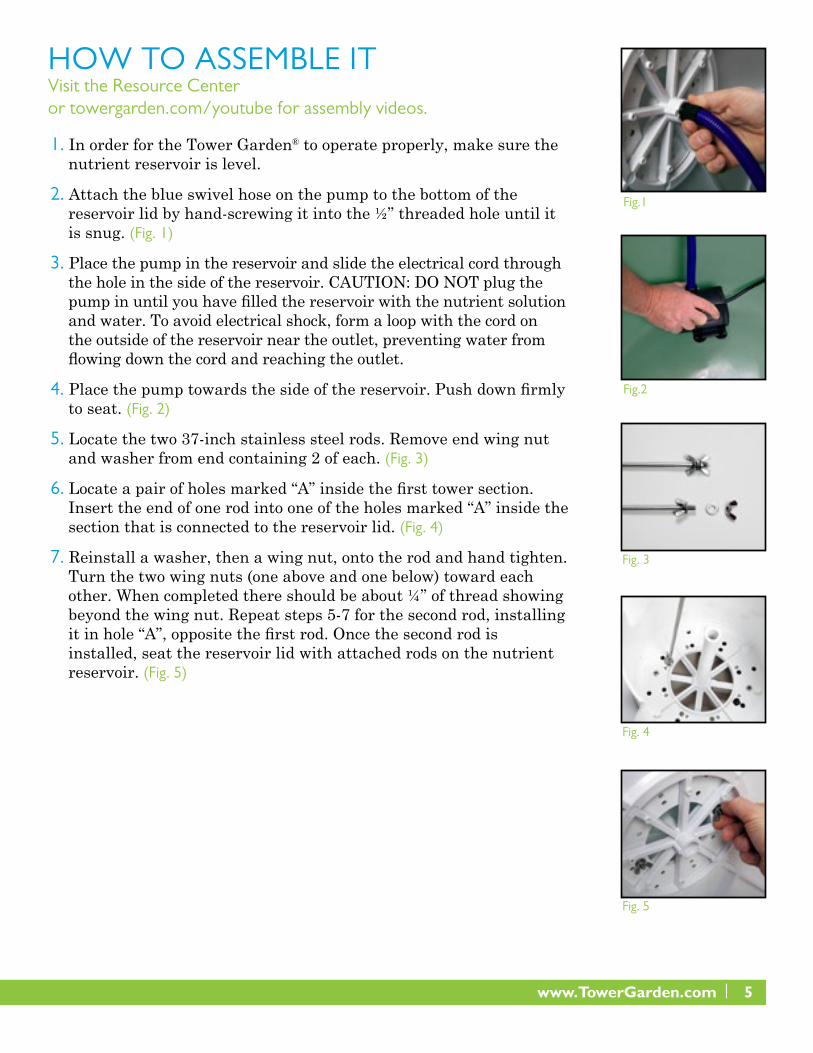
2. Attach the blue swivel hose on the pump to the bottom of the reservoir lid by hand-screwing it into the ½” threaded hole until it is snug. (Fig. 1)
3. Place the pump in the reservoir and slide the electrical cord through the hole in the side of the reservoir. CAUTION: DO NOT plug the pump in until you have filled the reservoir with the nutrient solution and water. To avoid electrical shock, form a loop with the cord on the outside of the reservoir near the outlet, preventing water from flowing down the cord and reaching the outlet.
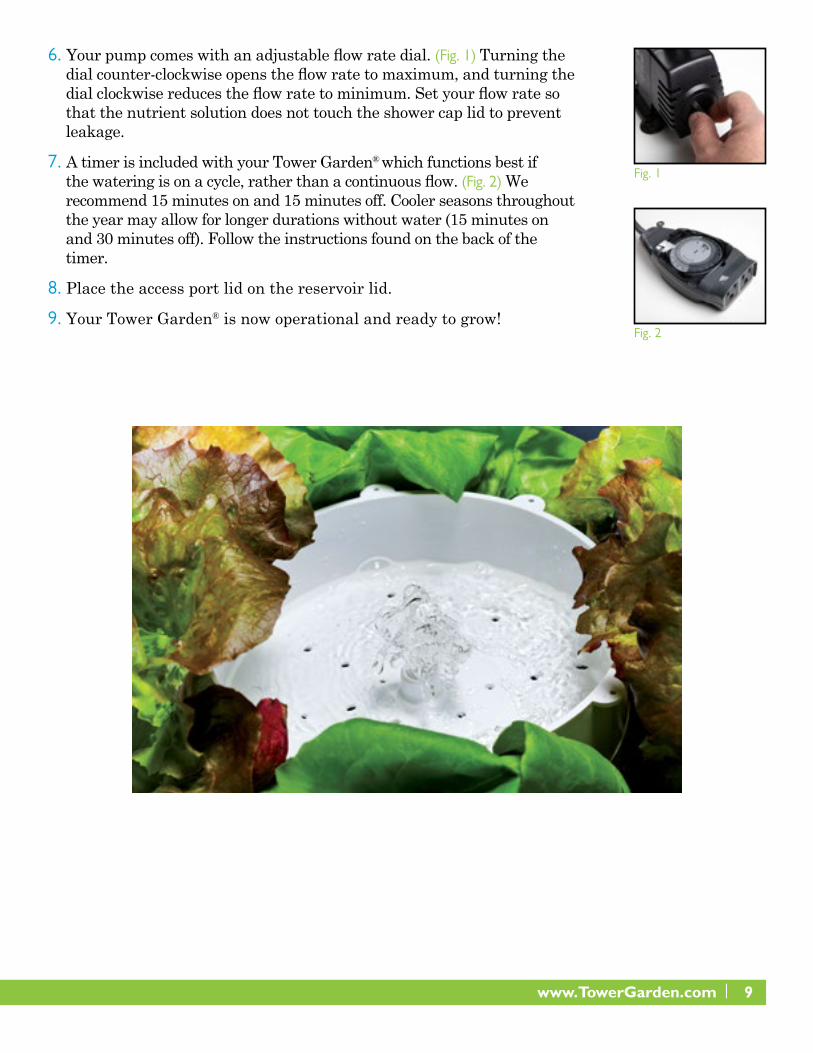
4. Place the pump towards the side of the reservoir. Push down firmly to seat. (Fig. 2)
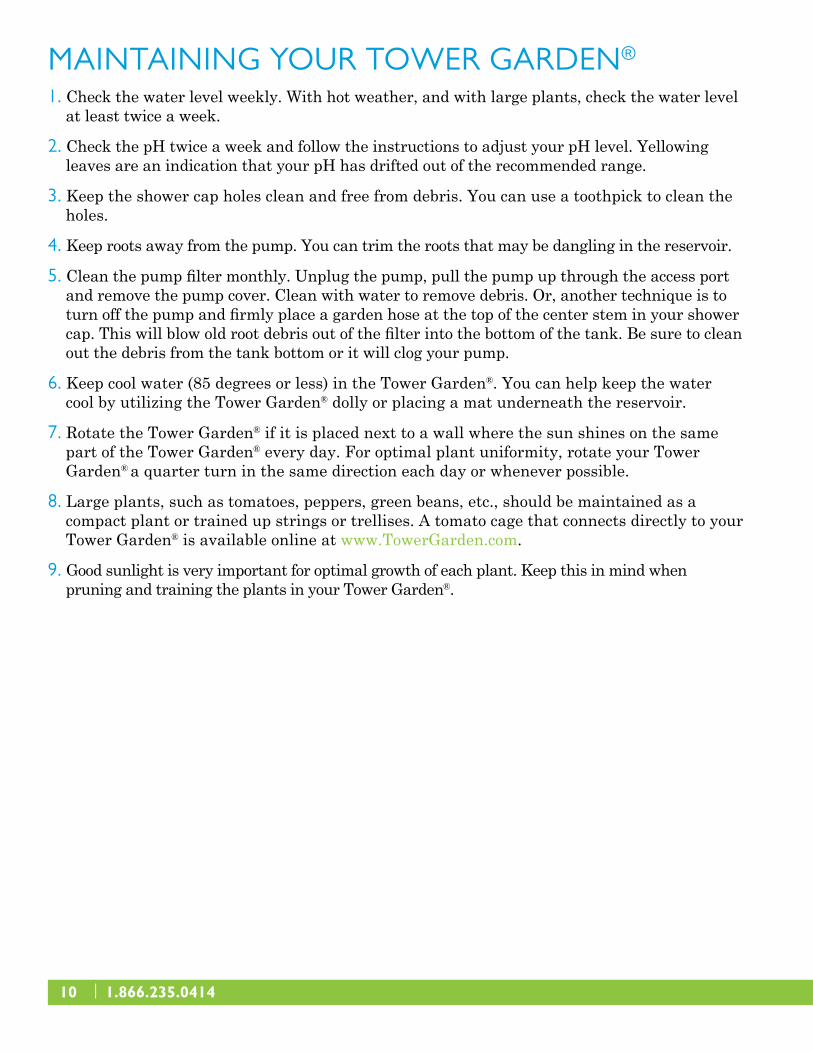
5. Locate the two 37-inch stainless steel rods. Remove end wing nut and washer from end containing 2 of each. (Fig. 3)
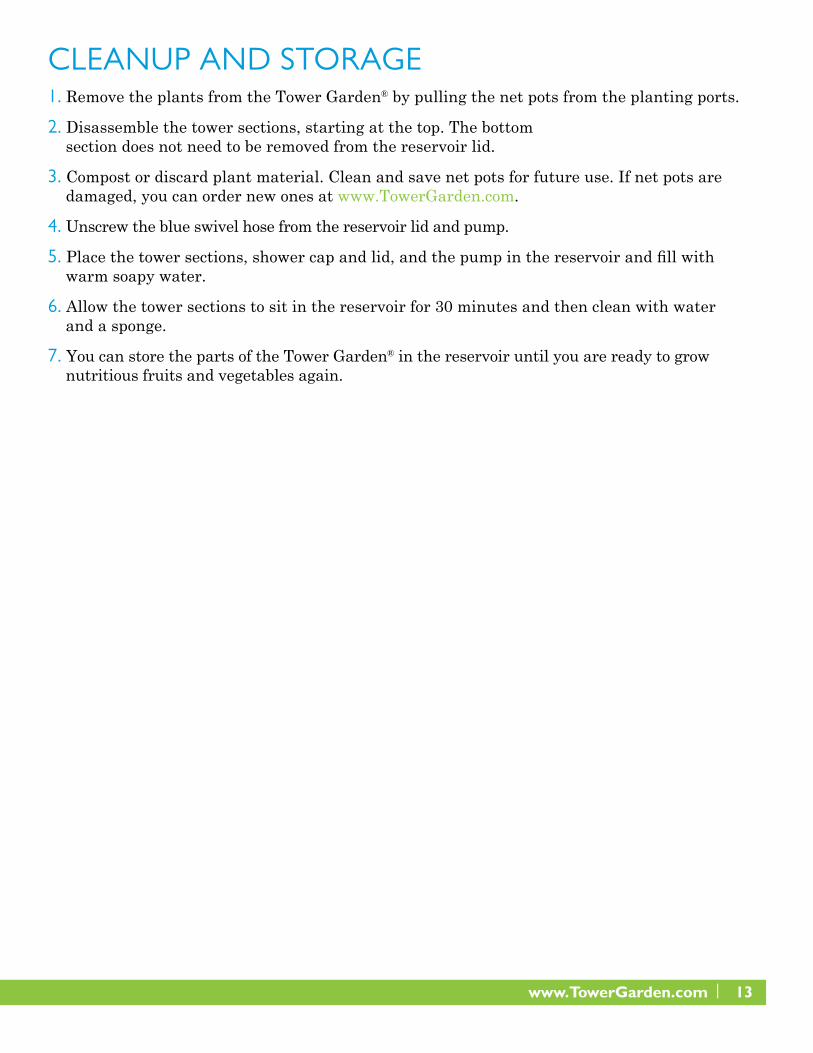
6. Locate a pair of holes marked “A” inside the first tower section. Insert the end of one rod into one of the holes marked “A” inside the section that is connected to the reservoir lid. (Fig. 4)
7. Reinstall a washer, then a wing nut, onto the rod and hand tighten. Turn the two wing nuts (one above and one below) toward each other. When completed there should be about ¼” of thread showing beyond the wing nut. Repeat steps 5-7 for the second rod, installing it in hole “A”, opposite the first rod. Once the second rod is installed, seat the reservoir lid with attached rods on the nutrient reservoir. (Fig. 5)
Fig. 4
Fig. 5
Fig.1
Fig.2
Fig. 3

6 | 1.866.235.0414
8. Remove wing nut and washer from top end of the rods. Choose any tower section to become your second section, and locate a pair of holes marked “B” inside the section.
9. Thread the rods through these two holes. Slide the tower section down the rods to first section. (Fig. 6) Push down firmly on center stem to properly seat with the first tower section.
10. Continue stacking tower sections until all have been installed. (Fig. 7) Firmly seat each section by pushing on the center stem before proceeding to the next section. Alternate between holes “A” and “B” as you continue to stack each section. Section 3 utilizes holes marked “A” Section 4 utilizes holes marked “B” Section 5 utilizes holes marked “A”
11. Once all of your tower sections are in place, install the shower cap. Push down firmly on the center stem to set with top tower section. (Fig. 8)
12. Reinstall the washers and wing nuts. HAND TIGHTEN ONLY. (Fig. 9)
13. Fit a net pot into each planting port with the large lip of the net pot resting on the outside rim of each planting port. With your fingers, firmly push down on the bottom of each net pot until the small lip snaps into place. (Fig. 10) NOTE: If the net pot is not pushed all the way in, the new seedling will not get watered.
14. Once your reservoir is filled with Tower Tonic and cold water, the access port lid (Fig. 11) and shower cap lid can both be firmly pushed into place. (See page 10 for instructions on filling the reservoir and adding nutrients.) NOTE: This step prevents algae and debris from contaminating the reservoir.
Fig. 8
Fig. 9
Fig. 10
Fig. 11
Fig. 6
Fig. 7

www.TowerGarden.com | 7
STARTING YOUR SEEDS1. Using the seed starter tray provided, thoroughly soak the rock wool starter cubes for 30
minutes. Remember that each variety of seed requires a different amount of seeds per hole.• Gourmet Lettuce: 6 - 12 seeds • Herbs: 6 seeds • Vegetables with larger seeds (tomatoes, cucumbers, peppers, beans): 1 - 2 seeds
2. Once you have placed your seeds, lightly fill each seed hole with the dry, coarse-grade vermiculite included. For smaller seeds, like lettuce, only fill the hole half full with vermiculite. Gently sprinkle a little water over each hole to wet the vermiculite and add a little water in the bottom of the container. If possible, use filtered water without chlorine. DO NOT CLOSE THE LID.
3. If it’s warm, place your seeding tray outside in a semi-shaded area. If it’s cool, place your seeding tray inside by a sunny window. Be sure there is about ¼” of fresh water in the bottom of the tray. After the seeds have sprouted through the vermiculite, IMMEDIATELY move them to a full sun area outside once all danger of frost has passed. Place those seeds that have not yet sprouted into a separate tray.
4. After 1–3 weeks, you should have healthy seedlings ready for transplanting in your Tower Garden®. Place one seedling cube inside each net pot on the Tower Garden®, gently pressing the seedling cube in until it touches the base of the net pot. WARNING: If the rock wool cube is not touching the base of the net pot, the seedlings will not get watered.
5. If you don’t have time to start your own crops, it’s possible to use seedlings purchased from a local garden center. This is also a great option for plants that take longer to germinate. Really, it’s not cheating. Visit the Resource Center at www.TowerGarden.com for step-by-step instructions on preparing seedlings to grow in your Tower Garden®.
IN A HURRY?
Seeds that germinate in 7 - 10 days: Lettuces, Beans, Squash, Cucumbers and Basil.

8 | 1.866.235.0414
FILLING YOUR RESERVOIR AND ADDING NUTRIENTS1. Your Tower Garden® will hold approximately 20 gallons when filled to within 3 inches of the
top lid. Use a hose to fill the reservoir with cool water. Do not overfill the reservoir. NEVER use softened water, heavily chlorinated water, or very hard water, as it may damage your plants. NOTE: Chlorine in water can be eliminated by filling a bucket with water and leaving it out in full sun for 48 hours.
2. Add the correct amount of Tower Tonic Mineral Blend to the reservoir. Follow the instructions listed on the labels. A Tower Garden® with all new plants requires a half strength of Tower Tonic (200 ml each of Tower Tonic A and Tower Tonic B).
3. Use a spoon or other utensil to stir in the nutrients thoroughly. Do not use your hands, as the solution may be slightly acidic or alkaline and can irritate the skin.
4. Use the pH tester kit to test the pH of the solution in the nutrient reservoir. The optimal pH is 5.5 to 6.5. If an adjustment is necessary, add one teaspoon / 5 mL of the pH buffering solution (included) to either raise (pH+Base) or lower (pH-Acid) the pH. Follow all safety instructions on the pH bottles. Avoid contact with the skin. Repeat this process until you reach the desired pH level.
5. Plug in the pump. Check that water is flowing out of the top of the Tower Garden® before putting the lid on the shower cap.
www.TowerGarden.com | 9
6. Your pump comes with an adjustable flow rate dial. (Fig. 1) Turning the dial counter-clockwise opens the flow rate to maximum, and turning the dial clockwise reduces the flow rate to minimum. Set your flow rate so that the nutrient solution does not touch the shower cap lid to prevent leakage.
7. A timer is included with your Tower Garden® which functions best if the watering is on a cycle, rather than a continuous flow. (Fig. 2) We recommend 15 minutes on and 15 minutes off. Cooler seasons throughout the year may allow for longer durations without water (15 minutes on and 30 minutes off). Follow the instructions found on the back of the timer.
8. Place the access port lid on the reservoir lid.
9. Your Tower Garden® is now operational and ready to grow!
Fig. 1
Fig. 2
10 | 1.866.235.0414
MAINTAINING YOUR TOWER GARDEN®
1. Check the water level weekly. With hot weather, and with large plants, check the water level at least twice a week.
2. Check the pH twice a week and follow the instructions to adjust your pH level. Yellowing leaves are an indication that your pH has drifted out of the recommended range.
3. Keep the shower cap holes clean and free from debris. You can use a toothpick to clean the holes.
4. Keep roots away from the pump. You can trim the roots that may be dangling in the reservoir.
5. Clean the pump filter monthly. Unplug the pump, pull the pump up through the access port and remove the pump cover. Clean with water to remove debris. Or, another technique is to turn off the pump and firmly place a garden hose at the top of the center stem in your shower cap. This will blow old root debris out of the filter into the bottom of the tank. Be sure to clean out the debris from the tank bottom or it will clog your pump.
6. Keep cool water (85 degrees or less) in the Tower Garden®. You can help keep the water cool by utilizing the Tower Garden® dolly or placing a mat underneath the reservoir.
7. Rotate the Tower Garden® if it is placed next to a wall where the sun shines on the same part of the Tower Garden® every day. For optimal plant uniformity, rotate your Tower Garden® a quarter turn in the same direction each day or whenever possible.
8. Large plants, such as tomatoes, peppers, green beans, etc., should be maintained as a compact plant or trained up strings or trellises. A tomato cage that connects directly to your Tower Garden® is available online at www.TowerGarden.com.
9. Good sunlight is very important for optimal growth of each plant. Keep this in mind when pruning and training the plants in your Tower Garden®.

www.TowerGarden.com | 11
ADDING WATER TO YOUR TOWER GARDEN®
1. Keep enough nutrient solution in your reservoir so that the submersible pump stays completely submerged.
2. During cool months, add nutrients to the water every time you fill your reservoir tank. You can mix water and the Tower Tonic in a five gallon bucket prior to adding it to the reservoir (100ml each of Tower Tonic A and Tower Tonic B for each five gallons of water). During hot months, add nutrients every other time you fill your reservoir tank (or half strength each time). Repeat the process if more nutrient solution is required.
3. Depending on the outside temperature and crop types, a full reservoir should last 2-3 weeks. During the hot months, and after your plants become large, your plants will use nutrients and water much faster. Do not let the water down more than half way.

12 | 1.866.235.0414
DRAINING AND REFILLING THE RESERVOIRDrain the reservoir and refill with fresh water and Tower Tonic Mineral Blend between fresh plantings.
1. Unplug the pump.
2. Insert the drain pipe on the tip of the shower cap nozzle. (Fig. 3)
3. Make sure the drain pipe is facing away from any electrical plugs, and pointing into a container.
4. Plug in the pump.
5. You can use the drained nutrient solution to water landscape plants around your yard.
6. Repeat the process of filling the reservoir and adding the nutrients.
Fig. 3
www.TowerGarden.com | 13
CLEANUP AND STORAGE1. Remove the plants from the Tower Garden® by pulling the net pots from the planting ports.
2. Disassemble the tower sections, starting at the top. The bottom section does not need to be removed from the reservoir lid.
3. Compost or discard plant material. Clean and save net pots for future use. If net pots are damaged, you can order new ones at www.TowerGarden.com.
4. Unscrew the blue swivel hose from the reservoir lid and pump.
5. Place the tower sections, shower cap and lid, and the pump in the reservoir and fill with warm soapy water.
6. Allow the tower sections to sit in the reservoir for 30 minutes and then clean with water and a sponge.
7. You can store the parts of the Tower Garden® in the reservoir until you are ready to grow nutritious fruits and vegetables again.
14 | 1.866.235.0414
TROUBLESHOOTINGLow or No Water in Shower Cap• Make sure pump is plugged in.• Make sure the outlet has not tripped the GFI or indoor breaker switch.• Check for a clogged filter on the pump. Clean filter on pump.• Check for a kink in the blue swivel hose.• Make sure blue swivel hose is firmly connected to the reservoir lid.• Unplug and replug the pump from the electrical outlet. Magnetic pumps sometimes need to be
restarted after long periods of continuous operation.
Algae Buildup in the Reservoir and Shower Cap• Light is getting into the system. Make sure all lids are secure and tight.
Water Leaks from around Net Pot• Tower Garden® is not level.• With seedlings and small plants, rotate the net pot in either direction to dislodge any object
that may be causing the leak.
Shower Cap is Running Over• Shower cap holes are plugged up – use a toothpick to clean the holes.
Plants are Wilting in Full Sun• During hot periods, plants can use a lot of water and the mineral nutrients in the reservoir
can sometimes become too concentrated – drain the reservoir and add nutrient solution as recommended.
• Watering hole is plugged over the net pot. Unstack the grow pots and check for debris in the watering holes in the bottom of the pots.
Leaves Look Yellow• Make sure the pH is between 5.5 and 6.5. High pH will cause leaves to turn yellow. • Nutrients have not been added to reservoir. Add nutrients
as recommended.
For further information, visit the Resource Center at www.TowerGarden.com.

www.TowerGarden.com | 15
At TowerGarden.com, you can order replacement supplies to keep your garden growing. You can also place an order for Tower Garden® Accessories that will enhance your growing experience.
ACCESSORIES AND SUPPLIES
Tower Garden® Dolly - $69.95Tower Garden® makes having an urban garden, rooftop garden, or patio garden easier. Wherever you choose to put it, these sturdy wheels allow easy moving of your vertical garden. We recommend placing a Tower Garden® dolly, doormat or similar product under the reservoir if you are placing the Tower Garden® on a deck or patio. This will reduce the heat transferred into the reservoir from the deck or patio during hot weather.
Tower Garden® Extension Kit - $69.95Increase your Tower Garden’s capacity to grow tomatoes, lettuce, vegetables, and more. This extension kit includes 2 Tower sections for 8 additional planting spaces in your vertical garden. The kit includes 2 tower sections, 8 seed starter plugs, and 2 extension rods.
Tomato Cage - $59.95Tower Garden® makes growing tomatoes easier. It uses aeroponics to produce nutritious, great-tasting tomatoes without soil and in less time than traditional gardening. If you plan to grow tomatoes, squash, or other large vegetable crops in your Tower Garden®, this cage will give them needed support.

16 | 1.866.235.0414
ONE YEAR LIMITED WARRANTYThe Juice Plus+® Company, LLC warrants that the Tower Garden® by Juice Plus+® will be free from defects in materials or workmanship for a period of One Year from the date of purchase by the original retail customer. Within the warranty period, The Juice Plus+® Company will, at its sole option, repair or replace any components that fail in normal use and, which upon inspection if requested by The Juice Plus+® Company, show to be defective in materials or workmanship. Such repairs or replacements will be made at no charge to the customer and The Juice Plus+® Company will arrange for the requested return of any defective components free of charge. The Juice Plus+® Company will also arrange delivery of the repaired or replacement component free of charge. HOW TO OBTAIN WARRANTY SERVICE:To obtain warranty service, call Tower Garden® Customer Care within the warranty period at 1-866-235-0414 for instructions and a Warranty Service Authorization number (WSA). WARRANTY LIMITATIONS:This limited warranty does not apply to: (i) damage caused by accident, misuse, abuse, alteration, improper assembly or installation, negligence in use, or acts of nature or other external causes; (ii) components considered to be consumable items; (iii) normal wear and tear; or (iv) products purchased for commercial or industrial use. THIS LIMITED WARRANTY IS EXCLUSIVE AND IN LIEU OF ALL OTHER WARRANTIES, EXPRESS, IMPLIED, OR STATUTORY, INCLUDING BUT NOT LIMITED TO ANY WARRANTY OF MERCHANTABILITY OR FITNESS FOR A PARTICULAR PURPOSE OR USE. NSA’S SOLE LIABILITY, AND THE SOLE REMEDY, FOR BREACH OF THIS WARRANTY IS LIMITED TO NSA’S REPAIR OR REPLACEMENT OF ANY DEFECTIVE COMPONENT (AT THE JUICE PLUS+® COMPANY'S SOLE OPTION). THE REPRESENTATIVES, EMPLOYEES AND DISTRIBUTORS OF THE JUICE PLUS+® COMPANY ARE NOT AUTHORIZED TO MAKE MODIFICATIONS TO THIS LIMITED WARRANTY OR MAKE ADDITIONAL WARRANTIES BINDING ON THE JUICE PLUS+® COMPANY. ACCORDINGLY, ADDITIONAL STATEMENTS BY ANY SUCH PERSONS, WHETHER ORAL OR WRITTEN, DO NOT CONSTITUTE WARRANTIES BY THE JUICE PLUS+® COMPANY AND SHOULD NOT BE RELIED UPON. THE JUICE PLUS+® COMPANY DOES NOT WARRANT THAT THE PRODUCT WILL MEET YOUR NEEDS OR EXPECTATIONS. THIS LIMITED WARRANTY IS NOT VALID UNLESS THE PRODUCT IS PURCHASED FROM AN AUTHORIZED TOWER GARDEN® BY JUICE PLUS+® DISTRIBUTOR. THIS LIMITED WARRANTY GIVES YOU SPECIFIC LEGAL RIGHTS, AND YOU MAY ALSO HAVE ADDITIONAL RIGHTS, WHICH MAY VARY FROM JURISDICTION TO JURISDICTION. SOME JURISDICTIONS DO NOT ALLOW SUCH WARRANTY LIMITATIONS, SO THE ABOVE LIMITATIONS MAY NOT APPLY.IN NO EVENT SHALL THE JUICE PLUS+® COMPANY BE LIABLE FOR ANY INCIDENTAL, SPECIAL, INDIRECT OR CONSEQUENTIAL DAMAGES RESULTING FROM A DEFECTIVE COMPONENT OR THE MISUSE OF THE PRODUCT. SOME JURISDICTIONS DO NOT ALLOW THE EXCLUSION OF INCIDENTAL OR CONSEQUENTIAL DAMAGES, SO THE ABOVE EXCLUSION MAY NOT APPLY.

www.TowerGarden.com | 17
INDEXA
Access Port Lid 3, 6Adding Nutrients 1, 8–9, 11,
14Adding Water 10Algae 6, 14Assembly Instructions 5–7
B
Beans 7
C
Chlorine in Water 8Cleanup and Storage 13Climate 4, 7, 10, 11, 14Cucumbers 7
DDisassembly of your Tower
Garden® 13Draining and Refilling
the Reservoir 12Drain Pipe 3, 12
F
Features 3Filling the Reservoir and
Adding Nutrients 8–9Fresh Water 12
G
Gloves 1Gourmet Lettuce 7Green Beans 10
H
Herbs 7Hose 3, 13, 14
I
Illustration 3
L
Leaks 14Lettuce 7Location of Your
Tower Garden® 4
MMaintaining Your
Tower Garden® 10
N
Net Pots 3, 6, 7, 13, 14Nutrient Reservoir 3, 5, 8–9,
12Nutrients 11, 14Nutrients (Tower Tonic A
and B) 1, 8–9
P
Parts 3Peppers 7, 10pH 3, 8, 10, 14pH+ and pH- 8, 10pH+Base and pH-Acid 1pH Tester Kit 8Placement of your
Tower Garden® 4Pots. See Net PotsPump 3, 5, 9, 10, 11, 12, 13, 14
R
Refilling the Reservoir 12Reservoir 3, 5, 6, 8–9, 11, 12,
13, 14Reservoir Lid 3, 5, 10, 13, 14Rods 3, 5Roots 10Rubber Gloves 1
S
Safety Information 1Seedlings 7, 14Seeds 3, 7Seed Starter Instructions 7Seed Starter Kit 3Seed Starter Tray 7Shower Cap 3, 6, 9, 10, 13Shower Cap Lid 3, 6, 9, 13Stainless Steel Rods 3, 5Storage 13Submersible Pump 3, 5, 9, 10,
11, 12, 13, 14Sun 4, 10, 14Swivel Hose 3, 13, 14
T
Temperature 4, 7, 11, 14Timer 3, 9Tomato Cage 10, 15Tomatoes 7, 10Tower Sections 3, 5, 6, 13Tower Tonic A and B 1, 3, 6,Troubleshooting 14
W
Warranty 16Water 1, 4, 5, 6, 7, 8, 9, 10, 11,
12, 13Water Leaks 14Water Level 10Water Temperature 10

Revised February 2015