aimetiscdn.aimetis.com/public/library/kiosk_install_setup_usage_guide.pdf · the install process...
TRANSCRIPT

1 Copyright © 2014 Aimetis Corp.
Aimetis KIOSK INSTALLATION, SETUP AND USAGE
Last Updated: 6/19/2014
Product Versions: 1.0

2 Copyright © 2014 Aimetis Corp.
Aimetis Kiosk Aimetis Kiosk ensures users can access only the programs you want them to access. By default, Kiosk is shipped with settings to enable access to Symphony Client.
Installation 1. Download Aimetis Kiosk from the Aimetis Website and run the Setup program. The
Aimetis Kiosk Setup Wizard starts.
2. Click Next. The Select Folder Installation screen opens.

3 Copyright © 2014 Aimetis Corp.
3. Leave the default installation path (displayed in the Folder field) so that Aimetis Kiosk can automatically find Symphony Client (ae.exe). The default configured path for Symphony Clients works ONLY if Symphony Client and Aimetis Kiosk were installed to their default paths.
4. Click Next. The install process begins.
4 Copyright © 2014 Aimetis Corp.
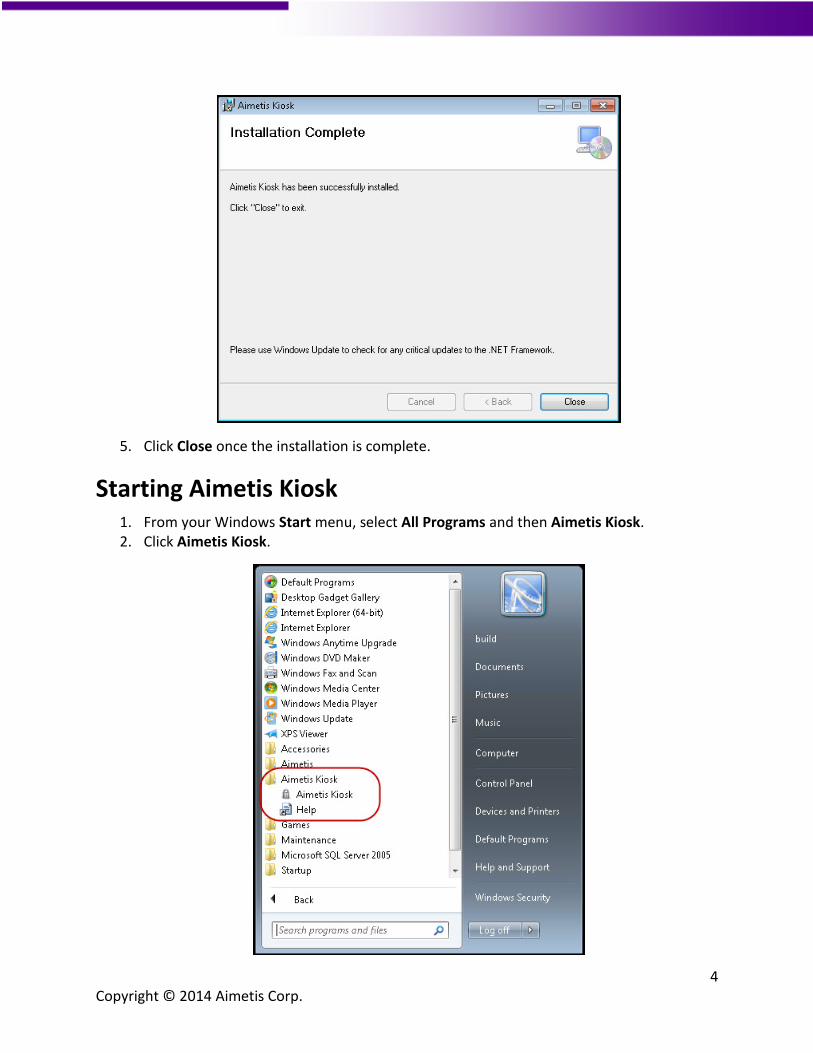
5. Click Close once the installation is complete.
Starting Aimetis Kiosk 1. From your Windows Start menu, select All Programs and then Aimetis Kiosk. 2. Click Aimetis Kiosk.

5 Copyright © 2014 Aimetis Corp.
The Settings and Symphony Client icon/menu options appear in the top left corner of the screen.
Note: The default configured path for Symphony Clients works ONLY if Symphony Client and Aimetis Kiosk were installed to their default paths. You can change the default path for Symphony Client in the Launcher.exe.config file. See How to change the default path for Symphony Client.
How to Enter Kiosk Mode 1. Click Settings. 2. The first time, the License – Aimetis Kiosk dialog box opens.
3. Click on the link to receive a license key (from the Aimetis Xnet) and then enter it the License Key field and click OK.
4. The first time, you will be asked for a passphrase that will be needed later to unlock the system.

6 Copyright © 2014 Aimetis Corp.
5. Enter the pass phrase and click OK. The Aimetis Kiosk settings dialog opens.
6. Click Enter Kiosk Mode. You will be asked to restart your computer.
7. When the computer starts again, you will be in Kiosk Mode, that is, the system will be locked and the following will apply:
Windows shell (explorer.exe) will be replaced with Launcher
Windows Task Manager will be disabled
CTRL-ALT-DEL privileges will be removed
You can click on any program in the Kiosk program launcher bar to run it.
You can right-click on any program to access further options: Run, Run as administrator, Terminate running processes, and Restart processes
You can activate the launcher bar by pressing the Windows Key. If this does not work, you can press ALT-TAB to cycle through all running programs (including Kiosk program launcher).

7 Copyright © 2014 Aimetis Corp.
How to Exit Kiosk Mode 1. Click Settings. The Enter Passphrase – Aimetis Kiosk dialog box opens. 2. Enter the phrase you saved to access Kiosk Mode and click OK. The Aimetis Kiosk
settings dialog box opens. 3. Click Exit Kiosk Mode. You will be asked to restart your computer.
4. All privileges will be restored.

8 Copyright © 2014 Aimetis Corp.
Setup Options You do not have to be in Kiosk Mode to change settings. You can change setup options directly or by clicking the Settings button in Aimetis Kiosk.
You can edit settings in the following files:
%programfiles%\Aimetis\Aimetis Kiosk\LockDesktop.exe.config
%programfiles%\Aimetis\Aimetis Kiosk\Launcher.exe.config
To change settings in the Launcher.exe.config file
1. From your Windows Start menu, select All Programs and then Aimetis Kiosk. 2. Click Aimetis Kiosk. The Settings and Symphony Client icon/menu options appear in the top
left corner of the screen. 3. Click Settings. The Enter Passphrase – Aimetis Kiosk dialog box opens. 4. Enter the phrase. The Aimetis Kiosk settings dialog box opens. 5. Click Setup Kiosk. The Launcher.exe.config file opens in Notepad. (You can also edit this file
directly in Windows: %programfiles%\Aimetis\Aimetis Kiosk\Launcher.exe.config)

9 Copyright © 2014 Aimetis Corp.
How to limit the programs available to the user
The user will not have access to the standard Windows shell while the system is locked. Ensure that all the programs you want are available to the user who will be working in the locked environment.
You change settings for which programs to launch in the Launcher.exe.config file.
Example
<setting name="Programs" serializeAs="String">
<value>
..\Symphony Client\_bin\ae.exe, Name=Symphony Client,Icon=aimetis32.ico
..\Symphony\_bin\ae.exe, Name=Symphony Client,Icon=aimetis32.ico
f:\branches\trunk\aira\_bin\ae.exe, Name=Symphony ClientDev,Icon=aimetis32.ico
</value>
</setting>
One line per program
Format of line is <Path to executable>[,<Option>=<Value>]...
Valid options are:
Name=<Text to display on button and in tooltip> Defaults to exe name.
Icon=<Path to icon> Defaults to icon found in executable.
DisableAction=<Restart|Terminate|RunAsAdministrator|Run>
DefaultAction=<RunAsAdministrator|Run> Defaults to Run.
RunAtStartup=<true|false> Runs the program at startup using the DefaultAction. Defaults to false.

10 Copyright © 2014 Aimetis Corp.
How to change the default path for Symphony Client
The default configured path for Symphony Clients works ONLY if Symphony Client and Aimetis
Kiosk were installed to their default paths.
You can change the default path for Symphony Client in the Launcher.exe.config file.
Example
<setting name="Programs" serializeAs="String">
<value>
..\Symphony Client\_bin\ae.exe, Name=Symphony Client,Icon=aimetis32.ico
..\Symphony\_bin\ae.exe, Name=Symphony Client,Icon=aimetis32.ico
f:\branches\trunk\aira\_bin\ae.exe, Name=Symphony ClientDev,Icon=aimetis32.ico
</value>
</setting>

11 Copyright © 2014 Aimetis Corp.
How to position the Aimetis Kiosk program launch bar on your screen
You specify the X,Y screen offset in pixels in the Launcher.exe.config file.
Example
<setting name="WindowLocation" serializeAs="String">
<value>-150, 0</value>
</setting>
If X,Y are positive, the position is from Left, Top of the primary Windows monitor.
If X,Y are negative, the position is from Right, Bottom of primary Windows monitor.
if X is negative it specfies a blank space.
How to show/hide text on the Aimetis Kiosk program launcher buttons
You specify True or False in the Launcher.exe.config file.
Example
<setting name="ShowText" serializeAs="String">
<value>True</value>
</setting>
Value= <true|false> Shows or hides the text beside the icons in the Aimetis Kiosk program launcher buttons

12 Copyright © 2014 Aimetis Corp.
How to show/hide icons on the Aimetis Kiosk program launcher buttons
You specify True or False in the Launcher.exe.config file.
Example
<setting name="ShowIcons" serializeAs="String">
<value>True</value>
</setting>
Value= <true|false> Shows or hides the icon beside the text in the Aimetis Kiosk program launcher buttons
How to change the language displayed in the user interface (English, German, French)
In the Launcher.exe.config file.
Example
<setting name="Culture" serializeAs="String">
<value>de</value>
</setting>
Value= <de|fr|en>
If you leave this setting blank, then the operating system's language is used
Set the operating system language by going to the language/region area of Control Panel in Windows. If your language is missing, you may be able to download a language pack from Microsoft.
If you override the language with this setting, then you will also need to make the same change in %programfiles%\Aimetis\Aimetis Kiosk\LockDesktop.exe.config.
If you override this setting, some operating system strings (for example, the Yes/No at the bottom of some dialogs) will not have the overridden translation.

13 Copyright © 2014 Aimetis Corp.
How to set up keys that will bring the Aimetis Kiosk program launcher window to the front
In the Launcher.exe.config file.
Note: Alt-Tab allows you to cycle between running programs.
Example
<setting name="BringToFrontKeys" serializeAs="String">
<value>91,92</value>
</setting>
Value= <#,#,…> A comma separated list of keys
A list of valid keys:
3 The CANCEL key. 8 The BACKSPACE key.
9 The TAB key. 10 The LINEFEED key.
12 The CLEAR key. 13 The ENTER key.
13 The RETURN key. 16 The SHIFT key.
17 The CTRL key. 18 The ALT key.
19 The PAUSE key. 20 The CAPS LOCK key.
20 The CAPS LOCK key. 21 The IME Kana mode key.
21 The IME Hanguel mode key. 21 The IME Hangul mode key.
23 The IME Junja mode key. 24 The IME final mode key.
25 The IME Kanji mode key. 25 The IME Hanja mode key.
27 The ESC key. 28 The IME convert key.
29 The IME nonconvert key. 30 The IME accept key.
31 The IME mode change key. 32 The SPACEBAR key.
33 The PAGE UP key. 33 The PAGE UP key.
34 The PAGE DOWN key. 34 The PAGE DOWN key.
35 The END key. 36 The HOME key.
37 The LEFT ARROW key. 38 The UP ARROW key.
39 The RIGHT ARROW key. 40 The DOWN ARROW key.
41 The SELECT key. 42 The PRINT key.
43 The EXECUTE key. 44 The PRINT SCREEN key.
44 The PRINT SCREEN key. 45 The INS key.
46 The DEL key. 47 The HELP key.
48 The 0 key. 49 The 1 key.
50 The 2 key. 51 The 3 key.
52 The 4 key. 53 The 5 key.
54 The 6 key. 55 The 7 key.

14 Copyright © 2014 Aimetis Corp.
56 The 8 key. 57 The 9 key.
65 The A key. 66 The B key.
67 The C key. 68 The D key.
69 The E key. 70 The F key.
71 The G key. 72 The H key.
73 The I key. 74 The J key.
75 The K key. 76 The L key.
77 The M key. 78 The N key.
79 The O key. 80 The P key.
81 The Q key. 82 The R key.
83 The S key. 84 The T key.
85 The U key. 86 The V key.
87 The W key. 88 The X key.
89 The Y key. 90 The Z key.
91 The left Windows logo key. 92 The right Windows logo key.
93 The application key. 95 The computer sleep key.
96 The 0 key on the numeric keypad. 97 The 1 key on the numeric keypad.
98 The 2 key on the numeric keypad. 99 The 3 key on the numeric keypad.
100 The 4 key on the numeric keypad. 101 The 5 key on the numeric keypad.
102 The 6 key on the numeric keypad. 103 The 7 key on the numeric keypad.
104 The 8 key on the numeric keypad. 105 The 9 key on the numeric keypad.
106 The multiply key. 107 The add key.
108 The separator key. 109 The subtract key.
110 The decimal key. 111 The divide key.
112 The F1 key. 113 The F2 key.
114 The F3 key. 115 The F4 key.
116 The F5 key. 117 The F6 key.
118 The F7 key. 119 The F8 key.
120 The F9 key. 121 The F10 key.
122 The F11 key. 123 The F12 key.
124 The F13 key. 125 The F14 key.
126 The F15 key. 127 The F16 key.
128 The F17 key. 129 The F18 key.
130 The F19 key. 131 The F20 key.
132 The F21 key. 133 The F22 key.
134 The F23 key. 135 The F24 key.
144 The NUM LOCK key. 145 The SCROLL LOCK key.
160 The left SHIFT key. 161 The right SHIFT key.
162 The left CTRL key. 163 The right CTRL key.
164 The left ALT key. 165 The right ALT key.
166 The browser back key. 167 The browser forward key.
168 The browser refresh key. 169 The browser stop key.

15 Copyright © 2014 Aimetis Corp.
170 The browser search key. 171 The browser favorites key.
172 The browser home key. 173 The volume mute key.
174 The volume down key. 175 The volume up key.
176 The media next track key. 177 The media previous track key.
178 The media Stop key. 179 The media play pause key.
180 The launch mail key. 181 The select media key.
182 The start application one key. 183 The start application two key.
186 The OEM 1 key. 186 The OEM Semicolon key on a US keyboard.
187 The OEM plus key on any keyboard. 188 The OEM comma key.
189 The OEM minus key. 190 The OEM period key.
191 The OEM question mark key. 191 The OEM 2 key.
192 The OEM tilde key on a US keyboard. 192 The OEM 3 key.
219 The OEM 4 key. 219 The OEM open bracket key on a US keyboard.
220 The OEM pipe key on a US keyboard. 220 The OEM 5 key.
221 The OEM 6 key. 221 The OEM close bracket key on a US keyboard.
222 The OEM 7 key. 223 The OEM 8 key.
226 The OEM 102 key. 229 The PROCESS KEY key.
246 The ATTN key. 247 The CRSEL key.
248 The EXSEL key. 249 The ERASE EOF key.
250 The PLAY key. 251 The ZOOM key.
253 The PA1 key. 254 The CLEAR key.

16 Copyright © 2014 Aimetis Corp.
How to hide the Settings button on the Aimetis Kiosk program launcher
In the Launcher.exe.config file.
CAUTION: This option is NOT recommended. You will not be able to show the Settings button again to Exit Kiosk Mode once it is hidden.
Example
<setting name="ShowSetup" serializeAs="String">
<value>True</value>
</setting>
Value= <true|false>
How to set up the system so that it automatically logs in without user input
See http://channel9.msdn.com/Blogs/coolstuff/Tip-Auto-Login-Your-Windows-7-User-Account
Support Aimetis Kiosk is supported in Windows XP and Windows 7 with the latest service packs. Aimetis Kiosk must be run as an Administrator. For further support, see http://aimetis.com/support/

17 Copyright © 2014 Aimetis Corp.
Disclaimers and Legal Information Copyright © 2014 Aimetis Inc. All rights reserved.
This material is for informational purposes only. AIMETIS MAKES NO WARRANTIES, EXPRESS, IMPLIED OR STATUTORY, AS TO THE INFORMATION IN THIS DOCUMENT.
Complying with all applicable copyright laws is the responsibility of the user. Without limiting the rights under copyright, no part of this document may be reproduced, stored in or introduced into a retrieval system, or transmitted in any form or by any means (electronic, mechanical, photocopying, recording, or otherwise), or for any purpose, without the express written permission of Aimetis Corp.
Aimetis may have patents, patent applications, trademarks, copyrights, or other intellectual property rights covering subject matter in this document. Except as expressly provided in any written license agreement from Aimetis, the furnishing of this document does not give you any license to these patents, trademarks, copyrights, or other intellectual property.
Aimetis and Aimetis Symphony are either registered trademarks or trademarks of Aimetis Corp. in the United States and/or other countries.