installation and configuration - vmware · pdf fileinstalling the proxy agent for hyper-v or...
TRANSCRIPT

Installation and ConfigurationvCloud Automation Center 6.1
This document supports the version of each product listed andsupports all subsequent versions until the document isreplaced by a new edition. To check for more recent editionsof this document, see http://www.vmware.com/support/pubs.
EN-001442-02

Installation and Configuration
2 VMware, Inc.
You can find the most up-to-date technical documentation on the VMware Web site at:
http://www.vmware.com/support/
The VMware Web site also provides the latest product updates.
If you have comments about this documentation, submit your feedback to:
Copyright © 2008–2014 VMware, Inc. All rights reserved. Copyright and trademark information.
VMware, Inc.3401 Hillview Ave.Palo Alto, CA 94304www.vmware.com

Contents
vCloud Automation Center Installation and Configuration 5
Updated Information 7
1 vCloud Automation Center Installation Overview 9
vCloud Automation Center Installation Components 9Choosing Your Deployment Path 12
2 Preparing for Installation 17
DNS and Host Name Resolution 17Hardware and Virtual Machine Requirements 17Browser Considerations 18PostgreSQL Database Requirements 18Windows Server Requirements 18Port Requirements 21Users and Credentials Required for Installation 23Security 25Time Synchronization 26
3 Minimal Deployment 27
Minimal Deployment Checklist 27Deploy and Configure the Identity Appliance 28Deploy and Configure the vCloud Automation Center Appliance 32Installing IaaS Components 36
4 Distributed Deployment 43
Distributed Deployment Checklist 43Distributed Installation Components 44Certificate Trust Requirements in a Distributed Deployment 45Installation Worksheets 46Deploy Appliances for vCloud Automation Center 49Configuring Your Load Balancer 51Configuring Appliances for vCloud Automation Center 51Install the IaaS Components in a Distributed Configuration 65
5 Installing Agents 85
Set the PowerShell Execution Policy to RemoteSigned 86Choosing the Agent Installation Scenario 86Agent Installation Location and Requirements 87Installing and Configuring the Proxy Agent for vSphere 87Installing the Proxy Agent for Hyper-V or XenServer 91
VMware, Inc. 3

Installing the VDI Agent for XenDesktop 94Installing the EPI Agent for Citrix 97Installing the EPI Agent for Visual Basic Scripting 99Installing the WMI Agent for Remote WMI Requests 102
6 Post-Installation Tasks 105
Configure the Identity Stores for the Default Tenant 105Appoint Administrators 107Provide the Infrastructure License 108Configuring Windows Service to Access the IaaS Database 108
7 Configuring Additional Tenants 111
Tenancy Overview 111Create and Configure a Tenant 115
8 Updating Certificates 119
Extracting Certificates and Private Keys 120Updating the Identity Appliance Certificate 120Updating the vCloud Automation Center Appliance Certificate 123Updating the IaaS Certificate 126Update the Certificate of the Identity Appliance Management Site 128Update the Certificate of the vCloud Automation Center Appliance Management Site 128
9 Troubleshooting 131
Default Log Locations 131Create a Support Bundle 132Installers Fail to Download 133Failed to Install Model Manager Data and Web Components 133Save Settings Warning Appears During IaaS Installation 134Rolling Back a Failed Installation 135Server Times Are Not Synchronized 136Encryption.key File has Incorrect Permissions 136Log in to the vCloud Automation Center Console Fails 137Error Communicating to the Remote Server 138Blank Pages May Appear When Using Internet Explorer 9 or 10 on Windows 7 138Cannot Establish Trust Relationship for the SSL/TLS Secure Channel 139Cannot Log in to a Tenant or Tenant Identity Stores Disappear 139
Index 141
Installation and Configuration
4 VMware, Inc.

vCloud Automation Center Installation andConfiguration
vCloud Automation Center Installation and Configuration explains how to install and configureVMware vCloud Automation Center.
NOTE Not all features and capabilities of vCloud Automation Center are available in all editions. For acomparison of feature sets in each edition, see https://www.vmware.com/products/vcloud-automation-center/.
Intended AudienceThis information is intended for experienced Windows or Linux system administrators who are familiarwith virtual machine technology and data center operations.
vCloud Suite Licensing and IntegrationYou can license vCloud Automation Center 6.1 individually or as part of vCloud Suite 5.8. You shouldconsider the licensing and integration options that are available to you.
Some vCloud Suite components are available as standalone products that are licensed on a per-virtualmachine basis. When the products are part of vCloud Suite, they are licensed on a per-CPU basis. You canrun an unlimited number of virtual machines on CPUs that are licensed with vCloud Suite. For moreinformation, see vCloud Suite Architecture Overview and Use Cases.
VMware Technical Publications GlossaryVMware Technical Publications provides a glossary of terms that might be unfamiliar to you. For definitionsof terms as they are used in VMware technical documentation, go to http://www.vmware.com/support/pubs.
VMware, Inc. 5

Installation and Configuration
6 VMware, Inc.

Updated Information
This Installation and Configuration guide for vCloud Automation Center is updated with each release of theproduct or when necessary.
This table provides the update history of the Installation and Configuration guide.
Revision Description
EN-001442-02 n Includes updated information on how to specify the Model Manager. IP addresses are not accepted.n Includes updated information on how to specify an Identity Server that is on a non-default port.
EN-001442-01 n New steps are added to the section “Update the IaaS Servers with the Certificate for the Single Sign-On Server,” on page 122
EN-001442-00 Initial release.
VMware, Inc. 7

Installation and Configuration
8 VMware, Inc.

vCloud Automation CenterInstallation Overview 1
vCloud Automation Center can be deployed in a variety of configurations. To ensure a successfuldeployment understand the deployment and configuration options, and the sequence of tasks required.
After installation, system administrators can customize the installation environment and configure one ormore tenants, which sets up access to self-service provisioning and life-cycle management of cloud services.
By using the secure portal Web interface, administrators, developers, or business users can request ITservices and manage specific cloud and IT resources based on their roles and privileges. Users can requestinfrastructure, applications, desktops, and IT service through a common service catalog.
This chapter includes the following topics:
n “vCloud Automation Center Installation Components,” on page 9
n “Choosing Your Deployment Path,” on page 12
vCloud Automation Center Installation ComponentsA vCloud Automation Center installation includes installing and configuring single sign-on (SSO)capabilities, the user interface portal, and Infrastructure as a Service (IaaS) components.
You can use the Identity Appliance SSO provided with vCloud Automation Center or some versions of theSSO provided with vSphere. For information about supported versions, see vCloud Automation CenterSupport Matrix.
n VMware Identity Appliance on page 10Identity Appliance is a preconfigured virtual appliance that provides single sign-on (SSO) capabilitiesfor the vCloud Automation Center environment.
n VMware vCloud Automation Center Appliance on page 10The vCloud Automation Center Appliance is a preconfigured virtual appliance that deploys thevCloud Automation Center server. The vCloud Automation Center is delivered as an openvirtualization format (OVF) template. The system administrator deploys the virtual appliance to theexisting virtualized infrastructure.
n VMware Infrastructure as a Service on page 10Infrastructure as a Service (IaaS) enables the rapid modeling and provisioning of servers and desktopsacross virtual and physical, private and public, or hybrid cloud infrastructures.
VMware, Inc. 9

VMware Identity ApplianceIdentity Appliance is a preconfigured virtual appliance that provides single sign-on (SSO) capabilities forthe vCloud Automation Center environment.
You can use the Identity Appliance SSO provided with vCloud Automation Center or some versions of theSSO provided with vSphere. For information about supported versions, see vCloud Automation CenterSupport Matrix.
The Identity Appliance is delivered as an open virtualization format (OVF) template. The systemadministrator deploys the virtual appliance to the existing virtualization infrastructure.
SSO is an authentication broker and security token exchange that interacts with the enterprise identity store,Active Directory or OpenLDAP, to authenticate users. A system administrator configures SSO settings toprovide access to the Identity Appliance console.
VMware vCloud Automation Center ApplianceThe vCloud Automation Center Appliance is a preconfigured virtual appliance that deploys thevCloud Automation Center server. The vCloud Automation Center is delivered as an open virtualizationformat (OVF) template. The system administrator deploys the virtual appliance to the existing virtualizedinfrastructure.
The server includes the vCloud Automation Center Appliance console, which provides a single portal forself-service provisioning and management of cloud services, authoring, administration, and governance.
VMware Infrastructure as a ServiceInfrastructure as a Service (IaaS) enables the rapid modeling and provisioning of servers and desktopsacross virtual and physical, private and public, or hybrid cloud infrastructures.
The system administrator installs IaaS components on a Windows machine, virtual or physical. IaaScapabilities are then available from the Infrastructure tab on the user interface console. IaaS has severalcomponents that you can install in a custom configuration to meet the needs of your organization.
IaaS WebsiteThe IaaS Website component provides the infrastructure administration and service authoring capabilitiesto the vCloud Automation Center console. The Website component communicates with the Model Manager,which provides it with updates from the Distributed Execution Manager (DEM), proxy agents, anddatabase.
Model ManagervCloud Automation Center models facilitate integration with external systems and databases. Theyimplement business logic that a Distributed Execution Manager (DEM) uses.
The Model Manager provides services and utilities for persisting, versioning, securing, and distributingmodel elements. It communicates with the database, the DEMs, and the console Web site.
vCloud Automation Center Manager ServiceThe Manager Service coordinates communication between DEMS, agents, and the database. The ManagerService communicates with the console Web site through the Model Manager. This service requiresadministrative privileges to run.
Installation and Configuration
10 VMware, Inc.

IaaS DatabaseThe IaaS component of vCloud Automation Center uses a Microsoft SQL Server database to maintaininformation about the machines it manages and its own elements and policies. Typically, a systemadministrator creates the database during installation.
Distributed Execution ManagersA Distributed Execution Manager (DEM) runs the business logic of custom models, interacting with thedatabase and with external databases and systems as required. DEMs also manage cloud and physicalmachines.
Each DEM instance acts in either a Worker role or in an Orchestrator role. The Worker role is responsible forrunning workflows. The Orchestrator role is responsible for monitoring DEM Worker instances,preprocessing workflows to run, and scheduling workflows.
The DEM Orchestrator performs these tasks.
n Monitors the status of DEM Workers and ensures that if a Worker instance stops or loses its connectionto the Model Manager, its workflows are put back in the queue for another DEM Worker to pick up.
n Manages scheduled workflows by creating new workflow instances at the scheduled time.
n Ensures that only one instance of a particular scheduled workflow is running at a given time.
n Preprocesses workflows before they are run, including checking preconditions for workflows, used inthe implementation of the RunOneOnly feature, and creating the workflow execution history.
One DEM Orchestrator instance is designated as the active Orchestrator that performs these tasks. Becausethe DEM Orchestrator is essential to run workflows, install at least one additional Orchestrator instance on aseparate machine for redundancy. The additional DEM Orchestrator monitors the status of the activeOrchestrator so that it can take over if the active Orchestrator goes offline.
vCloud Automation Center AgentsvCloud Automation Center uses agents to integrate with external systems. You can install the vSphere agentas part of a minimal installation. You can install additional agents as needed.
Virtualization Proxy Agents
The virtual machines that vCloud Automation Center manages are created on virtualization hosts.vCloud Automation Center uses virtualization proxy agents to send commands to and collect data fromvSphere ESX Server, XenServer, and Hyper-V virtualization hosts and the virtual machines provisioned onthem. A proxy agent has the following characteristics.
n Typically requires administrator-level access to the virtualization platform it manages
n Communicates with the Manager Service
n Is installed separately with its own configuration file
Integration Agents
Virtual desktop integration (VDI) PowerShell agents allow vCloud Automation Center to integrate withexternal virtual desktop systems. Currently, virtual machines that vCloud Automation Center provisionscan be registered with XenDesktop on a Citrix Desktop Delivery Controller (DDC) and their owners canaccess the XenDesktop Web Interface from vCloud Automation Center.
Chapter 1 vCloud Automation Center Installation Overview
VMware, Inc. 11

External provisioning integration (EPI) PowerShell agents allow vCloud Automation Center to integrateexternal systems into the machine provisioning process. For example, integration with Citrix ProvisioningServer enables provisioning of machines by on-demand disk streaming, and an EPI agent allows you to runVisual Basic scripts as extra steps during the provisioning process.
VDI and EPI agents require administrator-level access to the external systems with which they interact.
Windows Management Instrumentation Agent
The vCloud Automation Center Windows Management Instrumentation (WMI) agent enhances your abilityto monitor and control system information and allows you to manage remote servers from a centrallocation. It enables the collection of data from Windows machines that vCloud Automation Center manages.
Choosing Your Deployment PathYou can upgrade from an earlier vCloud Automation Center 6.x version, migrate fromvCloud Automation Center version 5.2.1 or 5.2.2, or install vCloud Automation Center for the first time.
Table 1‑1. Choosing Your Deployment Path
Installation Type More Information
Upgrade an existing vCloud Automation Center 6.0.1 tovCloud Automation Center 6.1.
“Upgrading vCloud Automation Center,”on page 12
Upgrade an existing vCloud Automation Center 6.0 tovCloud Automation Center 6.1.
“Upgrading vCloud Automation Center,”on page 12
Migrate data from vCloud Automation Center 5.2.1 or 5.2.2 tovCloud Automation Center 6.1.
“Migrating vCloud Automation Center,” onpage 13
Install vCloud Automation Center for the first time in a standalone,minimal deployment.Minimal deployments are typically used in a development environmentor as a proof of concept. You deploy a single instance of each virtualappliance and install all IaaS components on a single machine. You caninstall the databases on the same machine or on a dedicated SQL Servermachine.
“Minimal Deployment Overview,” onpage 13
Install vCloud Automation Center for the first time in a distributeddeployment.You distribute components across multiple servers to provide failovercapability and redundancy. A distributed deployment allows you todesign the topology best suited to your organization's needs.
“Distributed Deployment Overview,” onpage 14For information about scalability and highavailability, see VMware vCloud AutomationCenter Reference Architecture, available as atechnical paper from http://www.vmware.com/resources/techresources/.
Upgrading vCloud Automation CenterYou can upgrade from an earlier vCloud Automation Center 6.x version.
Table 1‑2. Supported Upgrade Paths to vCloud Automation Center 6.1
From Actions Reference
Version 6.0 1 Upgrade tovCloud Automation Center 6.0.1.
2 Upgrade tovCloud Automation Center 6.1.
1 Upgrading vCloud AutomationCenter 6.0 to 6.0.1
2 Upgrading to vCloudAutomation Center 6.1
Version 6.0.1 Upgrade to vCloud Automation Center6.1.
Upgrading to vCloud AutomationCenter 6.1
Installation and Configuration
12 VMware, Inc.

Migrating vCloud Automation CenterYou can migrate your data from vCloud Automation Center 5.2.1 or 5.2.2 to vCloud Automation Center 6.1.
The following high-level overview shows the steps required to migrate to vCloud Automation Center 6.1.
1 Read Migrating to vCloud Automation Center 6.1 for important information about processes andprerequisites.
2 Verify that the Identity Appliance and Windows IaaS servers belong to the same domain as the sourcevCloud Automation Center system servers or to a domain with identical domain trusts to the sourcesystem servers.
3 Install vCloud Automation Center 6.1. Depending on your deployment type, see Chapter 3, “MinimalDeployment,” on page 27 or Chapter 4, “Distributed Deployment,” on page 43. As you install, notethe following configurations required for migration:
n Join your Identity Appliance to your Native Active Directory domain. See “Configure the IdentityAppliance,” on page 52.
n Verify that the names of Distributed Execution Orchestrators and Distributed Execution Workersfor vCloud Automation Center 6.1 exactly match the names you used in yourvCloud Automation Center 5.2.1 or 5.2.2 deployment. See “Install the Distributed ExecutionManagers,” on page 81.
n Verify that agent and proxy agent names for vCloud Automation Center 6.1 exactly match thenames you used in your vCloud Automation Center 5.2.1 or 5.2.2 deployment. See Chapter 5,“Installing Agents,” on page 85.
n Configure the default tenant ID store for Native Active Directory. See “Configure a Native ActiveDirectory Identity Store,” on page 105.
n You must appoint one or more users to the administrative roles. Groups are not supported formigration. See “Appoint Administrators,” on page 107.
4 Migrate your vCloud Automation Center 5.2.1 or 5.2.2 deployment to vCloud Automation Center 6.1using the migration tool. See Migrating to vCloud Automation Center 6.1.
Minimal Deployment OverviewTo complete a minimal deployment, the system administrator installs the Identity Appliance, the vCloudAutomation Center Appliance, and Infrastructure as a Service (IaaS).
n Identity Appliance, which supports single sign-on capabilities. It is installed as a virtual appliance.
n vCloud Automation Center Appliance, which includes the Web console interface. It is installed as avirtual appliance. By default, the PostgreSQL database installed on this machine is used.
Chapter 1 vCloud Automation Center Installation Overview
VMware, Inc. 13

n Infrastructure as a Service (IaaS), which is installed on a Windows Server machine.
The IaaS database can be installed on the same machine as IaaS or on its own server.
vCloud AutomationCenter Virtual
Appliance
Infrastructureas a servicecomponents
Identity (SSO)Virtual Appliance
Provides userinterface console
Single Sign-incapability
Provides IaaSservices
Download anddeploy appliancefrom .ova or .ovf
Browser basedinstall from vCloudAutomation Center
appliance
Download anddeploy appliancefrom .ova or .ovf
Distributed Deployment OverviewThe system administrator can deploy and install multiple instances of the vCloud Automation CenterAppliance and individual IaaS components for scale, redundancy, high availability, and disaster recovery.
In this sample architecture, the IaaS components are distributed over multiple machines. This sampleinstallation describes one possible deployment. Load balancers distribute the workload across the servers. Inpractice, the system administrator chooses a distribution architecture that is compatible with the companyenvironment and goals.
For information about scalability and high availability, see VMware vCloud Automation Center ReferenceArchitecture, available as a technical paper from http://www.vmware.com/resources/techresources/.
Load balancers distribute the workload across the computing environment. System administrators configureload balancers outside of the vCloud Automation Center framework.
Installation and Configuration
14 VMware, Inc.

Figure 1‑1. Distributed Deployment Architecture
Users
VMware Single Sign-On
AppliancePostgresSQL
Databases
Infrastructure as a Service (IaaS)
IaaS Web Load Balancer
Agent 1
Agent2, 3, ...
DEMworker 1
DEM2, 3, ...
SQLDatabaseCluster
IaaS Manager Service Load Balancer
ManagerService 1 (active)
and DEMOrchestrator 1
ManagerService 2, 3, ...(passive backup
instance)
WebsiteComponent 1
Model ManagerData (only one
instance allowed)
WebsiteComponent 2, 3, ...
vCloud AutomationCenter
Appliance 1
1
2
3
4
5
6
7
8 9
13
11 12
10
vCloud AutomationCenter
Appliance 2, 3, ...
vCloud Automation Center Appliance Load Balancer
The Distributed Deployment Components table describes each component and presents requirements andoptions for using each component.
Chapter 1 vCloud Automation Center Installation Overview
VMware, Inc. 15

Table 1‑3. Distributed Deployment Components
DiagramNumber Description Requirements and Options
1 vCloud AutomationCenter Appliance LoadBalancer
Only necessary if you are deploying more than one vCloud Automation CenterAppliance.IMPORTANT Disable all nodes under the load balancer except for the node youare configuring. For example, if you have three nodes, disable nodes 1 and 2when you configure node 3.
2 Single Sign-On ServerAppliance
One instance of a single sign-on server is required. You can use the vCloudAutomation Center Appliance, which is a product component, or some versionsof vSphere SSO, which might be preferable for high-availability deployments.Consult the vCloud Automation Center Support Matrix for information aboutsupported versions.
3 vCloud AutomationCenter Appliance 1
One instance required. Multiple instances can be used to support highavailability and failover recovery. Multiple instances must be deployed withvSphere High Availability.
4 vCloud AutomationCenter Appliance 2, 3,and so on
Deploy multiple instances under the vCloud Automation Center ApplianceLoad Balancer.
5 PostgreSQL Database orDatabase Cluster
Standalone PostgreSQL database or cluster. An instance is created on everyvCloud Automation Center Appliance when the appliance is deployed. Whenyou use a standalone PostgreSQL, embedded PostgreSQL processes should bedisabled on any other vCloud Automation Center ApplianceIf you choose to cluster databases to support high availability and failover youmust do so through your high availability solution provider.
6 IaaS Web Load Balancer Only necessary if you are installing more than one Website Component. InstallWebsite Component 1 and Model Manager Data on one machine under thisload balancer.
7 SQL Database Cluster Install one instance during IaaS installation. Database administrator handlesredundancy outside of IaaS context. See “Choosing an IaaS Database Scenario,”on page 67.
8 Website Component 1and Model ManagerData
Required. Install together on one machine under the IaaS Web load balancer.Only one instance of Model Manager Data is allowed. See “Install the PrimaryIaaS Website Component with Model Manager Data,” on page 71
9 Website Component 2, 3,and so on
Optional. Install multiple instances under the IaaS Web load balancer for highavailability and failover recovery.
10 IaaS Manager ServiceLoad Balancer
Install the first instance of the Manager Service and the first instance of the DEMOrchestrator together on one machine under this load balancer. See “Install thePrimary Manager Service,” on page 77 and “Install the Distributed ExecutionManagers,” on page 81.
11 Manager Service 1 andDEM Orchestrator 1
Install the first instance of the Manager Service and the first instance of the DEMOrchestrator together on one machine under the IaaS Manager Service loadbalancer. The first Manager Service instance is active. Only one can be active atany given time. See “Install the Primary Manager Service,” on page 77 and “Install the Distributed Execution Managers,” on page 81.
12 Manager Service 2, 3,and so on
Passive instances for backup only. If the Active Manager Service fails, start theservice on the passive node.
13 Agents and DEMs Install the first DEM Orchestrator on the active Manager Service machine.Install Agents, DEM Orchestrators, and DEM Workers together or on separatemachines. See Chapter 5, “Installing Agents,” on page 85 and “Install theDistributed Execution Managers,” on page 81.
Installation and Configuration
16 VMware, Inc.

Preparing for Installation 2System Administrators install vCloud Automation Center into their existing virtualization environments.Before the installation begins, there are a number of preliminary steps that must be completed to prepare thedeployment environment.
This chapter includes the following topics:
n “DNS and Host Name Resolution,” on page 17
n “Hardware and Virtual Machine Requirements,” on page 17
n “Browser Considerations,” on page 18
n “PostgreSQL Database Requirements,” on page 18
n “Windows Server Requirements,” on page 18
n “Port Requirements,” on page 21
n “Users and Credentials Required for Installation,” on page 23
n “Security,” on page 25
n “Time Synchronization,” on page 26
DNS and Host Name ResolutionvCloud Automation Center requires the system administrator to identify hosts using their fully qualifieddomain names (FQDN). For example, the FQDN for an Identity Appliance might be sso-1-01a.corpn.local.Domain Name System (DNS) must be configured to resolve host names in your environment. Systemadministrators can use the method of their choice.
NOTE vCloud Automation Center does not allow navigation to hosts that contain the underscore (_)character in the host name.
Hardware and Virtual Machine RequirementsInstallation requires minimum system resources to install virtual appliances and minimum hardwarerequirements to install IaaS components on the Windows Server.
For operating system and high-level environment requirements, including information about supportedbrowsers and operating systems, see the vCloud Automation Center Support Matrix.
The Hardware Requirements table shows the minimum configuration requirements for deployment of thevirtual appliances and installation of IaaS components. The appliances are preconfigured virtual machinesthat you add to your vCenter Server or ESXi inventory. The IaaS components are installed on a physical orvirtual Windows 2008 R2 SP1 or 2012 servers.
VMware, Inc. 17

Table 2‑1. Hardware Requirements
Identity AppliancevCloud Automation CenterAppliance IaaS Components (Windows Server)
1 CPU2 GB memory2 GB disk storage
2 CPUs8 GB memory30 GB disk storage
2 CPUs8 GB memory30 GB disk storage
Browser ConsiderationsKeep in mind vCloud Automation Center requirements when choosing a browser to use withvCloud Automation Center.
n vCloud Automation Center does not support Compatibility View mode for Internet Explorer 9 or 10 onWindows 7 platforms. If you are unable to log in to the appliance management consoles or you receivean error on the SSO tab when using Internet Explorer 9 or 10, use the Developer Tools to set thebrowser mode to Internet Explorer 7.
n Multiple browser windows and tabs are not supported. vCloud Automation Center supports onesession per user.
For operating system and high-level environment requirements, including information about supportedbrowsers and operating systems, see the vCloud Automation Center Support Matrix.
PostgreSQL Database RequirementsvCloud Automation Center appliances store data in a PostgreSQL database.
During deployment of the virtual appliances, the PostgreSQL database is created automatically on the firstvCloud Automation Center Appliance. A system administrator can install the database on a separate serveror on multiple servers to create a high-availability environment.
Consult the vCloud Automation Center Support Matrix on the VMware Web site for information aboutsupported versions of PostgreSQL.
Windows Server RequirementsThe virtual or physical Windows machine that hosts the IaaS components must meet configurationrequirements for the IaaS database, the IaaS server components, the IaaS Manager Service, and DistributedExecution Managers.
IaaS Database Server RequirementsYour environment must meet these general requirements that support the installation of the IaaS Database(SQL Server).
n TCP/IP protocol enabled for MS SQL Server
n Microsoft Distributed Transaction Coordinator Service (MS DTC) enabled on all SQL nodes in thesystem
n No firewalls between Database Server and the Web server or IaaS Server, or ports opened as describedin “Port Requirements,” on page 21.
n If using SQL Server Express, the SQL Server Browser service must be running.
n For 6.0.x installations, the database name cannot contain a space. For 6.1 and later installations, the useof spaces in names is supported.
Installation and Configuration
18 VMware, Inc.

IaaS (Windows Server) RequirementsYour environment must meet software and configuration prerequisites that support installation of the IaaSserver components.
Table 2‑2. IaaS Requirements
Area Requirements
Server Configuration The following components must be installed on the host before installingIaaS:n Microsoft .NET Framework 4.5.1n Microsoft PowerShell 2.0 (included with Windows Server 2008 R2 SP1
and later) or Microsoft PowerShell 3.0 on Windows Server 2012n Microsoft Internet Information Services 7.5 (see Table 2-3)n Java
Database Requirements Microsoft SQL ServerThe database can reside on the IaaS (Windows) server host or on a remotehost.
Java Requirements n A 64-bit version of Java 1.7 or later. 32-bit is not supported.n The JAVA_HOME environment variable must be set to the Java
installation folder.n The %JAVA_HOME%\bin\java.exe path must be present.
Table 2‑3. Required Configuration for Microsoft Internet Information Services
IIS Component Setting
Internet Information Services (IIS)modules installed
n WindowsAuthenticationn StaticContentn DefaultDocumentn ASPNET 4.5n ISAPIExtensionsn ISAPIFilter
IIS Authentication settings n Windows Authentication enabledn AnonymousAuthentication disabledn Negotiate Provider enabledn NTLM Provider enabledn Windows Authentication Kernel Mode enabledn Windows Authentication Extended Protection disabledn For certificates using SHA512, TLS1.2 disabled on Windows 2012
machines
IIS Windows Process Activation Serviceroles
n ConfigurationApin NetEnvironmentn ProcessModeln WcfActivation (Windows 2008 only)n HttpActivationn NonHttpActivation
IaaS Manager ServiceYour environment must meet some general requirements that support the installation of the IaaS ManagerService.
n .NET Framework 4.5.1 is installed.
Chapter 2 Preparing for Installation
VMware, Inc. 19

n Microsoft PowerShell 2.0, included with Windows Server 2008 R2 SP1 and later, or MicrosoftPowerShell 3.0, Windows Server 2012, is installed.
n SecondaryLogOnService is running.
n No firewalls can exist between DEM host and Windows Server, nor can ports be opened as described in “Port Requirements,” on page 21.
n IIS is installed and configured.
Distributed Execution Manager RequirementsYour environment must meet some general requirements that support the installation of DistributedExecution Managers (DEMs).
n .NET Framework 4.5.1
n Microsoft PowerShell 2.0 (included with Windows Server 2008 R2 SP1 and later) or MicrosoftPowerShell 3.0 on Windows Server 2012 SecondaryLogOnService running
n No firewalls between DEM host and the Windows server, or ports opened as described in “PortRequirements,” on page 21.
DEM Worker instances might have additional requirements depending on the provisioning resources thatthey interact with.
Amazon Web Services EC2 RequirementsThe IaaS Windows server communicates with and collects data from an Amazon EC2 account.
When you use Amazon Web Services for provisioning, DEM workers must meet these configurationrequirements.
n Hosts on which DEMs are installed must have access to the Internet.
If there is a firewall, HTTPS traffic must be allowed to and from aws.amazon.com, as well as the URLsrepresenting all the EC2 regions your AWS accounts have access to, for example ec2.us-east-1.amazonaws.com for the US East region. Each URL resolves to a range of IP addresses, so you mayneed to use a tool, such as the one available from the Network Solutions Web site, to list and configurethese IP addresses.
n Internet access from the DEM host is through a proxy server, the DEM service must be running undercredentials that can authenticate to the proxy server.
Red Hat Enterprise Virtualization KVM (RHEV) RequirementsYour environment must meet these Red Hat Enterprise requirements to support installation of DistributedExecution Managers (DEMs).
n Each KVM (RHEV) environment must be joined to the domain containing the IaaS server.
n The credentials used to manage the endpoint representing a KVM (RHEV) environment must haveAdministrator privileges on the RHEV environment. These credentials must also have sufficientprivileges to create objects on the hosts within the environment.
SCVMM RequirementsAny DEM worker used to manage virtual machines through SCVMM must be installed on a host on whichthe SCVMM console is already installed.
In addition, the following requirements must be met:
n The DEM must have access to the SCVMM PowerShell module installed with the console.
Installation and Configuration
20 VMware, Inc.

n The MS PowerShell Execution Policy must be set to RemoteSigned or Unrestricted.
For information on PowerShell Execution Policy issue one of the following commands at Power-Shellcommand prompt:
help about_signing
help Set-ExecutionPolicy
n If all DEM Workers within the instance are not on compute resources meeting these requirements, Skillsmust be used to direct all SCVMM-related workflows to those that are.
The following additional requirements apply to SCVMM.
n You must install the SCVMM console before vCloud Automation Center you install DEM workers thatconsume SCVMM work items.
If you install the DEM worker before the SCVMM console, you see log errors similar to the following:
Workflow 'ScvmmEndpointDataCollection' failed with the following
exception: The term 'Get-VMMServer' is not recognized as the name
of a cmdlet, function, script file, or operable program. Check the
spelling of the name, or if a path was included, verify that the
path is correct and try again.
To address this, verify that the SCVMM console is installed and restart the DEM worker service.
n Each SCVMM instance must be joined to the domain containing the server.
n The credentials used to manage the endpoint representing an SCVMM instance must haveadministrator privileges on the SCVMM server. These credentials must also have administratorprivileges on the Hyper-V servers within the instance.
n Hyper-V servers within an SCVMM instance to be managed must be Windows 2008 R2 SP1 Serverswith Hyper-V installed. The processor must be equipped with the necessary virtualizationextensions .NET Framework 4.5.1 must be installed and Windows Management Instrumentation (WMI)must be enabled.
n To provision machines on an SCVMM compute resource, a user must be added in at least one securityrole within the SCVMM instance.
Port RequirementsvCloud Automation Center uses designated ports for communication and data access.
Although vCloud Automation Center uses only port 443 for communication, there might be other portsopen on the system. Because open, unsecure ports can be sources of security vulnerabilities, review all openports on your system and ensure that only the ports that are required by your business applications areopen.
Identity ApplianceThe following ports are used by the Identity Appliance.
Table 2‑4. Incoming Ports for the Identity Appliance
Port Protocol Comments
22 TCP Optional. SSH.
5480 TCP Access to virtual appliance Web management interface
7444 TCP SSO service over HTTPS
Chapter 2 Preparing for Installation
VMware, Inc. 21

Table 2‑5. Outgoing Ports for the Identity Appliance
Port Protocol Comments
53 TCP, UDP DNS
67, 68, 546, 547 TCP, UDP DHCP
80 TCP Optional. For fetching software updates. Updates can be downloadedseparately and applied.
123 TCP, UDP Optional. For connecting directly to NTP instead of using host time.
389, 636 TCP, UDP OpenLDAP and Active Directory
vCloud Automation Center ApplianceThe following ports are used by the vCloud Automation Center Appliance.
Table 2‑6. Incoming Ports for the vCloud Automation Center Appliance
Port Protocol Comments
22 TCP Optional. SSH.
80 TCP Optional. Redirects to 443.
111 TCP, UDP RPC
443 TCP Access to the vCloud Automation Center console and API calls.
5480 TCP Access to virtual appliance Web management interface
5488, 5489 TCP Internal. Used by vCloud Automation Center Appliance for updates.
5672 TCP RabbittMQ messaging
8230, 8280, 8281 TCP Internal vCenter Orchestrator instance
Table 2‑7. Outgoing Ports for the vCloud Automation Center Appliance
Port Protocol Comments
25, 587 TCP, UDP SMTP for sending outbound notification emails
53 TCP, UDP DNS
67, 68, 546, 547 TCP, UDP DHCP
80 TCP Optional. For fetching software updates. Updates can be downloadedseparately and applied.
110, 995 TCP, UDP POP for receiving inbound notification emails
143, 993 TCP, UDP IMAP for receiving inbound notification emails
123 TCP, UDP Optional. For connecting directly to NTP instead of using host time.
443 TCP IaaS Manager Service over HTTPS
5433 TCP, UDP Optional. For communicating with an standalone PostgreSQL database.
7444 TCP Communication with SSO service over HTTPS
8281 TCP Optional. For communicating with an external vCenter Orchestrator instance .
Other ports may be required by specific vCenter Orchestrator plugins that communicate with externalsystems. For more information, see the documentation for the vCenter Orchestrator plugin.
Installation and Configuration
22 VMware, Inc.

Infrastructure as a ServiceThe ports in the tables Incoming Ports for Infrastructure as a Service Components and Outgoing Ports forInfrastructure as a Service must be available for use by the IaaS Windows Server.
Table 2‑8. Incoming Ports for Infrastructure as a Service Components
Component Port Protocol Comments
SQL Server instance 1433 TCP MSSQL
Manager Service 443* TCP Communication with IaaS components and vCloudAutomation Center Appliance over HTTPS
* Any virtualization hosts managed by proxy agents must also have TCP port 443 open for incoming traffic.
Table 2‑9. Outgoing Ports for Infrastructure as a Service Components
Component Port Protocol Comments
All 53 TCP, UDP DNS
All 67, 68, 546,547
TCP, UDP DHCP
All 123 TCP, UDP Optional. NTP.
Manager Service 443 TCP Communication with vCloud Automation CenterAppliance over HTTPS
Website 443 TCP Communication with Manager Service over HTTPS
Distributed ExecutionManagers
443 TCP Communication with Manager Service over HTTPS
Proxy agents 443 TCP Communication with Manager Service and virtualizationhosts over HTTPS
Guest agent 443 TCP Communication with Manager Service over HTTPS
Manager Service, Website 1433 TCP MSSQL
In addition to verifying that the ports listed in the previous tables are free for use, you must enableMicrosoft Distributed Transaction Coordinator Service (MS DTC) communication between all servers in thedeployment. The Prerequisite Checker validates whether MS DTC is running and that the required ports areopen.
VMware Remote Console ConnectionsTable 2‑10. Outgoing Ports for Connecting through VMRC
Remotely Connect To Port Protocol Comments
vSphere or vCloud Director 443 TCP
Users and Credentials Required for InstallationYou must verify that you have the roles and credentials to install vCloud Automation Center components.
vCenter Service AccountIf you plan to use a vSphere endpoint, you need a domain or local account that has the appropriate level ofaccess configured in vCenter.
Chapter 2 Preparing for Installation
VMware, Inc. 23

Virtual Appliance InstallationTo deploy the Identity Appliance and the vCloud Automation Center Appliance, you must haveadministrator privileges on the deployment platform (for example, vSphere administrator credentials).
During the deployment process, you specify the passwords for the virtual appliance administrator accountsand the system administrator account. These accounts provide access to the Identity Appliance and vCloudAutomation Center Appliance management consoles where you configure and administer the virtualappliances.
IaaS InstallationBefore installing IaaS components, add the user under which you plan to execute the IaaS installationprograms to the Administrator group on the installation host.
IaaS Database CredentialsYou can create the database using the installation wizard or create it manually by running the providedscripts. If you use the complete install option to create a minimal installation, you must create the databaseusing the installer.
When you use the IaaS installer to create or populate the IaaS database the following requirements apply:
n If you use the installer to create the database and select Use Windows Authentication, the credentialsunder which you executed the installer must have the sysadmin role in SQL Server to create and alterthe size of the database.
n If you use the installer to create the database and do not select Use Windows Authentication, you mustprovide SQL credentials with the sysadmin role. If you do not use Windows authentication, thecredentials you provide are used only for database creation (not for run-time access after initialcreation).
n If you use the installer to populate a pre-created database, the user credentials you provide (either thecurrent Windows user or the specified SQL user) needs only dbo privileges for the IaaS database.
IaaS Service User CredentialsIaaS installs several Windows services that share a single service user.
The following requirements apply to the service user for IaaS services:
n The user must be a domain user.
n The user must have local Administrator privileges on all hosts on which the Manager Service or Website component is installed.
n The user must have dbo privileges for the IaaS database. If you use the installer to create the database,ensure that the service user login is added to SQL Server prior to running the installer. The installergrants the service user dbo privileges after creating the database
n The account under which the installer is running should have the sysadmin role enabled underMSSQL.
Model Manager Server SpecificationsAlways specify the Model Manager server name by using a fully qualified domain name (FQDN). Do notuse an IP address to specify the server.
Installation and Configuration
24 VMware, Inc.

SecurityvCloud Automation Center uses SSL to ensure secure communication among components. Passphrases areused for secure database storage.
For more information see “Certificate Trust Requirements in a Distributed Deployment,” on page 45 and Chapter 8, “Updating Certificates,” on page 119.
CertificatesvCloud Automation Center uses SSL certificates for secure communication among IaaS components, theIdentity Appliance, and instances of the vCloud Automation Center Appliance. The appliances and theWindows installation machines exchange these certificates to establish a trusted connection. You can obtaincertificates from an internal or external certificate authority, or generate self-signed certificates during thedeployment process for each component.
You can update or replace certificates after deployment. For example, you may choose to use self-signedcertificates during deployment, but then obtain certificates from a trusted authority before going live withyour vCloud Automation Center implementation.
Table 2‑11. Certificate Implementations
ComponentMinimal Deployment (nonproduction) Distributed Deployment (production ready)
VirtualAppliances
Generate a self-signed certificateduring appliance configuration.
For each appliance cluster, obtain a multi-use certificate, suchas a Subject Alternative Name (SAN) certificate, from aninternal or external certificate authority. Wildcard certificatesare also supported.
IaaS Components During installation, accept thegenerated self-signed certificates orselect certificate suppression.
Obtain a multi-use certificate, such as a Subject AlternativeName (SAN) certificate, from an internal or external certificateauthority that your Web client trusts. Install the same multi-use certificate on each IaaS installation machine.
NOTE If you do not have sufficient permissions to install IIS domain certificates, your Web browserprompts you with security exceptions when you open vCloud Automation Center. Follow the instructionsfor your browser to permanently trust each self-signed certificate.
Security PassphrasevCloud Automation Center uses security passphrases for database security. A passphrase is a series ofwords used to create a phrase that generates the encryption key that protects data while at rest in thedatabase.
Use the same passphrase for all components in a distributed environment.
Follow these guidelines when creating a security passphrase for the first time.
n Use the same passphrase across the entire installation to ensure that each component has the sameencryption key.
n Use a phrase that is greater than eight characters long.
n Include uppercase, lowercase and numeric characters, and symbols.
n Memorize the passphrase or keep it in a safe place. The passphrase is required to restore databaseinformation in the event of a system failure. Without the passphrase, you cannot restore successfully.
Chapter 2 Preparing for Installation
VMware, Inc. 25

Third-Party SoftwareSome components of vCloud Automation Center depend on third-party software, including MicrosoftWindows and SQL Server. To guard against security vulnerabilities in third-party products, ensure thatyour software is up-to-date with the latest patches from the vendor.
Time SynchronizationA system administrator must set up accurate timekeeping as part of the vCloud Automation Centerinstallation.
Installation fails if time synchronization is set up incorrectly.
Timekeeping must be consistent and synchronized across the Identity Appliance, vCloud AutomationCenter Appliance, and Windows servers. By using the same timekeeping method for each component, youcan ensure this consistency.
For virtual machines, you can use the following methods:
n Configuration by using Network Time Protocol (directly)
n Configuration by using Network Time Protocol through ESXi with VMware Tools. You must have NTPset up on the ESXi.
For Windows servers, consult Timekeeping best practices for Windows, including NTP.
Installation and Configuration
26 VMware, Inc.

Minimal Deployment 3You can install a standalone, minimal deployment for use in a development environment or as a proof ofconcept. Minimal deployments are not suitable for a production environment.
This chapter includes the following topics:
n “Minimal Deployment Checklist,” on page 27
n “Deploy and Configure the Identity Appliance,” on page 28
n “Deploy and Configure the vCloud Automation Center Appliance,” on page 32
n “Installing IaaS Components,” on page 36
Minimal Deployment ChecklistA system administrator can deploy a complete vCloud Automation Center in a minimal configuration.Minimal deployments are typically used in a development environment or as a proof of concept and requirefewer steps to install.
The Minimal Deployment Checklist provides a high-level overview of the sequence of tasks you mustperform to complete a minimal installation.
Print out a copy of the checklist and use it to track your work as you complete the installation. Complete thetasks in the order in which they are given.
Table 3‑1. Minimal Deployment Checklist
Task Details
Plan and prepare the installation environment andverify that all installation prerequisites are met.
Chapter 2, “Preparing for Installation,” on page 17
Set up your Identity Appliance “Deploy and Configure the Identity Appliance,” onpage 28
Set up your vCloud Automation Center Appliance “Deploy and Configure the vCloud AutomationCenter Appliance,” on page 32
Install IaaS components on a single Windows server. “Installing IaaS Components,” on page 36
Install additional agents, if required. Chapter 5, “Installing Agents,” on page 85
Perform post-installation tasks such as configuring thedefault tenant and entering the IaaS license
Chapter 6, “Post-Installation Tasks,” on page 105
If needed, configure additional tenants to representbusiness units in an enterprise or companies thatsubscribe to cloud services from a service provider.
Chapter 7, “Configuring Additional Tenants,” onpage 111
VMware, Inc. 27

Deploy and Configure the Identity ApplianceDownload and configure the Identity Appliance to provide Single Sign-On (SSO) capability for thevCloud Automation Center environment.
You can use the Identity Appliance SSO provided with vCloud Automation Center or some versions of theSSO provided with vSphere. For information about supported versions, see vCloud Automation CenterSupport Matrix.
1 Deploy the Identity Appliance on page 28The Identity Appliance is a preconfigured virtual appliance that provides single sign-on capabilities.You download the Identity Appliance and deploy it into vCenter Server or ESX/ESXi inventory.
2 Enable Time Synchronization on the Identity Appliance on page 29You must synchronize the clocks on the Identity Appliance server, the vCloud Automation Centerserver, and Windows servers to ensure a successful installation.
3 Configure the Identity Appliance on page 30The Identity Appliance provides Single-Sign On (SSO) capability for vCloud Automation Center users.SSO is an authentication broker and security token exchange that interacts with the enterprise identitystore (Active Directory or OpenLDAP) to authenticate users. A system administrator configures SSOsettings to provide access to the vCloud Automation Center.
Deploy the Identity ApplianceThe Identity Appliance is a preconfigured virtual appliance that provides single sign-on capabilities. Youdownload the Identity Appliance and deploy it into vCenter Server or ESX/ESXi inventory.
Exact steps for this procedure vary depending on whether you use the native or Web vSphere client. Also,specific steps can vary depending on the your data center configuration.
Prerequisites
n Download the Identity Appliance from the VMware Web site.
n Log in to the vSphere client as a user with system administrator privileges.
Procedure
1 In the vSphere client, select File > Deploy OVF Template.
2 Browse to the Identity Appliance file with the .ova or .ovf extension and click Open.
3 Click Next.
4 Click Next on the OVF Template Details page.
5 Accept the license agreement and click Next.
6 Type a unique virtual appliance name according to the IT naming convention of your organization inthe Name text box, select the datacenter and location to which you want to deploy the virtual appliance,and click Next.
7 Follow the prompts until the Disk Format page appears.
8 Verify on the Disk Format page that enough space exists to deploy the virtual appliance and click Next.
9 Follow the prompts to the Properties page.
The options that appear depend on your vSphere configuration.
Installation and Configuration
28 VMware, Inc.

10 Configure the values on the Properties page.
a Type the root password to use when you log in to the virtual appliance console in the Enterpassword and Confirm password text boxes.
b Type the fully qualified domain name of the virtual machine in the Hostname text box, even if youare using DHCP.
c Configure the networking properties.
d Choose whether SSH is enabled for the server.
11 Click Next.
12 If the Power on after deployment option is available on the Ready to Complete page, select it and clickFinish.
13 Restart the machine.
14 Verify that the fully qualified domain name can be resolved against the IP address of the IdentityAppliance by opening a command prompt and pinging the FQDN.
Enable Time Synchronization on the Identity ApplianceYou must synchronize the clocks on the Identity Appliance server, the vCloud Automation Center server,and Windows servers to ensure a successful installation.
If you see certificate warnings during this procedure, continue past them.
Prerequisites
“Deploy the Identity Appliance,” on page 28.
Procedure
1 Navigate to the Identity Appliance management console by using its fully qualified domain name,https://identity-hostname.domain.name:5480/.
2 Log in by using the user name root and the password you specified when you deployed the IdentityAppliance.
3 Select Admin > Time Settings.
4 Select an option from the Time Sync Mode menu.
Option Action
Network Time Protocol Select Use Time Server from the Time Sync Mode menu. For each timeserver that you are using, type the IP address or the host name in the TimeServer text box.
VMware Tools Select Use Host Time from the Time Sync Mode menu. You mustconfigure the connections to Network Time Protocol servers before youcan use VMware Tools.
5 Click Save Settings.
6 Click Refresh.
7 Verify that the value in Current Time is correct.
You can change the time zone as required from the Time Zone Setting page on the System tab.
Chapter 3 Minimal Deployment
VMware, Inc. 29

Configure the Identity ApplianceThe Identity Appliance provides Single-Sign On (SSO) capability for vCloud Automation Center users. SSOis an authentication broker and security token exchange that interacts with the enterprise identity store(Active Directory or OpenLDAP) to authenticate users. A system administrator configures SSO settings toprovide access to the vCloud Automation Center.
MIGRATION NOTE If you plan to use the vCloud Automation Center migration tool, you must specify aNative Active Directory when you configure the appliance.
Native Active Directories have the following characteristics:
n Use Kerberos to authenticate
n Do not require a search base, making it easier to find the correct Active Directory store
n Can be used only with the default tenant
You must also specify an identity store when you configure tenants, even if you specify Native ActiveDirectory settings here. See “Configure the Identity Stores for the Default Tenant,” on page 105.
Prerequisites
“Enable Time Synchronization on the Identity Appliance,” on page 29.
Procedure
1 Navigate to the Identity Appliance management console by using its fully qualified domain name,https://identity-hostname.domain.name:5480/.
2 Continue past the certificate warning.
3 Log in with the user name root and the password you specified when the appliance was deployed.
4 Click the SSO tab.
The red text is a prompt, not an error message.
5 Type the password to assign to the system administrator in the Admin Password and Repeat passwordtext boxes.
The System Domain text field has the value vsphere.local, which is the local default domain for theIdentity Appliance. The default tenant is created with this name and the system administrator [email protected]. Record the user name and password in a secure place for later use.
6 Click Apply.
It can take several minutes for the success message to appear. Do not interrupt the process.
7 When the success message appears, click the Host Settings tab.
8 Verify that the SSO Hostname does not include the SSO port, :7444.
9 (Optional) You can import a certificate or generate a self-signed certificate for the Identity Appliance. Aself-signed certificate is also created for you when you deploy the Identity Appliance. Click SSL
Installation and Configuration
30 VMware, Inc.

10 Select the certificate type from the Choose Action menu. If you are using a PEM encoded certificate, forexample for a distributed environment, select Import PEM encoded certificate.
Certificates that you import must be trusted and must also be applicable to all instances of vCloudAutomation Center Appliance and any load balancer by using Subject Alternative Name (SAN)certificates.
Option Action
Import a certificate a Copy the certificate values from BEGIN PRIVATE KEY to ENDPRIVATE KEY, including the header and footer, and paste them in theRSA Private Key text box.
b Copy the certificate values from BEGIN CERTIFICATE to ENDCERTIFICATE, including the header and footer, and paste them in theCertificate Chain text box.
c (Optional) If your certificate has one, copy the pass phrase thatencrypts the private key of the certificate that you are importing, andpaste it in the Pass Phrase text box.
Generate a self-signed certificate a Type a common name for the certificate in the Common Name textbox. You can use the fully qualified domain name of the virtualappliance (hostname.domain.name) or a wild card, such as*.mycompany.com. If you use a load balancer, you need to specify theFQDN of the load balancer or a wildcard that matches the name of theload balancer. Do not accept a default value if one is shown, unless itmatches the host name of the virtual appliance.
b Type your organization name, such as your company name, in theOrganization text box.
c Type your organizational unit, such as your department name orlocation, in the Organizational Unit text box.
d Type a two-letter ISO 3166 country code, such as US, in the Countrytext box.
11 Click Apply Settings.
After a few minutes the certificate details appear on the page.
12 Join the Identity Appliance to your Native Active Directory domain.
For migration, you must configure Native Active Directory. If you are not migrating, Native ActiveDirectory is optional.
a Click the Active Directory tab.
b Type the domain name of the Active Directory in Domain Name.
c Enter the credentials for the domain administrator in the Domain User and Password text boxes.
d Click Join AD Domain.
13 Click the Admin tab.
14 Verify that the SSH settings are correct.
When SSH service enabled is selected, SSH is enabled for all but the root user. Select or uncheckAdministrator SSH login enabled to enable or disable SSH login for the root user.
The SSO host is initialized. If Identity Appliance does not function correctly after configuration, redeployand reconfigure the appliance. Do not make changes to the existing appliance.
Chapter 3 Minimal Deployment
VMware, Inc. 31

Deploy and Configure the vCloud Automation Center ApplianceThe vCloud Automation Center Appliance is a preconfigured virtual appliance that deploys the vCloudAutomation Center Appliance server and Web console (the user portal). It is delivered as an openvirtualization format (OVF) template. The system administrator downloads the appliance and deploys itinto the vCenter Server or ESX/ESXi inventory.
1 Deploy the vCloud Automation Center Appliance on page 32To deploy the vCloud Automation Center Appliance, a system administrator must log in to thevSphere client and select deployment settings.
2 Enable Time Synchronization on the vCloud Automation Center Appliance on page 33Clocks on the Identity Appliance server, vCloud Automation Center server, and Windows serversmust be synchronized to ensure a successful installation.
3 Configure the vCloud Automation Center Appliance on page 33To prepare the vCloud Automation Center Appliance for use, a system administrator configures thehost settings, generates an SSL certificate, and provides SSO connection information.
Deploy the vCloud Automation Center ApplianceTo deploy the vCloud Automation Center Appliance, a system administrator must log in to the vSphereclient and select deployment settings.
Prerequisites
n Download the vCloud Automation Center Appliance from the VMware Web site.
n Log in to the vSphere client as a user with system administrator privileges.
Procedure
1 Select File > Deploy OVF Template from the vSphere client.
2 Browse to the vCloud Automation Center Appliance file you downloaded and click Open.
3 Click Next.
4 Click Next on the OVF Template Details page.
5 Accept the license agreement and click Next.
6 Type a unique virtual appliance name according to the IT naming convention of your organization inthe Name text box, select the datacenter and location to which you want to deploy the virtual appliance,and click Next.
7 Follow the prompts until the Disk Format page appears.
8 Verify on the Disk Format page that enough space exists to deploy the virtual appliance and click Next.
9 Follow the prompts to the Properties page.
The options that appear depend on your vSphere configuration.
10 Configure the values on the Properties page.
a Type the root password to use when you log in to the virtual appliance console in the Enterpassword and Confirm password text boxes.
b Type the fully qualified domain name of the virtual machine in the Hostname text box, even if youare using DHCP.
Installation and Configuration
32 VMware, Inc.

c Configure the networking properties.
d Choose whether SSH is enabled for the server.
11 Click Next.
12 If the Power on after deployment option is available on the Ready to Complete page, select it and clickFinish.
13 Restart the machine.
14 Open a command prompt and ping the FQDN to verify that the fully qualified domain name can beresolved against the IP address of vCloud Automation Center Appliance.
Enable Time Synchronization on the vCloud Automation Center ApplianceClocks on the Identity Appliance server, vCloud Automation Center server, and Windows servers must besynchronized to ensure a successful installation.
If you see certificate warnings during this process, continue past them to finish the installation.
Prerequisites
“Deploy the vCloud Automation Center Appliance,” on page 32.
Procedure
1 Navigate to the vCloud Automation Center Appliance management console by using its fully qualifieddomain name, https://vcac-va-hostname.domain.name:5480/.
2 Log in with the user name root and the password you specified when the appliance was deployed.
3 Select Admin > Time Settings.
4 Select an option from the Time Sync Mode menu.
Option Action
Network Time Protocol Select Use Time Server from the Time Sync Mode menu. For each timeserver that you are using, type the IP address or the host name in the TimeServer text box.
VMware Tools Select Use Host Time from the Time Sync Mode menu. You mustconfigure the connections to Network Time Protocol servers before youcan use VMware Tools.
5 Click Save Settings.
6 Verify that the value in Current Time is correct.
You can change the time zone as required from the Time Zone Setting page on the System tab.
7 (Optional) Click Time Zone from the System tab and select a system time zone from the menu choices.
The default is Etc/UTC.
8 Click Save Settings.
Configure the vCloud Automation Center ApplianceTo prepare the vCloud Automation Center Appliance for use, a system administrator configures the hostsettings, generates an SSL certificate, and provides SSO connection information.
Prerequisites
“Enable Time Synchronization on the vCloud Automation Center Appliance,” on page 33.
Chapter 3 Minimal Deployment
VMware, Inc. 33

Procedure
1 Navigate to the vCloud Automation Center Appliance management console by using its fully qualifieddomain name, https://vcac-va-hostname.domain.name:5480/.
2 Continue past the certificate warning.
3 Log in with user name root and the password you specified when you deployed vCloud AutomationCenter Appliance.
4 Select vCAC Settings > Host Settings and click Resolve Host Name to view the name of the currentlyspecified host.
5 (Optional) If you want to change the host name, enter the fully qualified domain name, vcac-hostname.domain.name, of the vCloud Automation Center Appliance. If you are using a load balancer,enter the fully qualified domain name for the load balancer server.
6 Click Save Settings.
7 Click SSL.
8 Select the certificate type from the Choose Action menu. If you are using a PEM encoded certificate, forexample for a distributed environment, select Import PEM encoded certificate.
Certificates that you import must be trusted and must also be applicable to all instances of vCloudAutomation Center Appliance and any load balancer by using Subject Alternative Name (SAN)certificates.
Option Action
Import a certificate a Copy the certificate values from BEGIN PRIVATE KEY to ENDPRIVATE KEY, including the header and footer, and paste them in theRSA Private Key text box.
b Copy the certificate values from BEGIN CERTIFICATE to ENDCERTIFICATE, including the header and footer, and paste them in theCertificate Chain text box.
c (Optional) If your certificate has one, copy the pass phrase thatencrypts the private key of the certificate that you are importing, andpaste it in the Pass Phrase text box.
Generate a self-signed certificate a Type a common name for the certificate in the Common Name textbox. You can use the fully qualified domain name of the virtualappliance (hostname.domain.name) or a wild card, such as*.mycompany.com. If you use a load balancer, you need to specify theFQDN of the load balancer or a wildcard that matches the name of theload balancer. Do not accept a default value if one is shown, unless itmatches the host name of the virtual appliance.
b Type your organization name, such as your company name, in theOrganization text box.
c Type your organizational unit, such as your department name orlocation, in the Organizational Unit text box.
d Type a two-letter ISO 3166 country code, such as US, in the Countrytext box.
9 Click Replace Certificate, even if you are generating a new certificate.
After a few minutes the certificate details appear on the page. If you are using a load balancer, thecertificate is for the load balancer.
Installation and Configuration
34 VMware, Inc.

10 Configure the SSO settings that the vCloud Automation Center Appliance uses to interact with theIdentity Appliance. These settings must match the settings you entered when configuring the IdentityAppliance.
a Click SSO.
b Type the fully qualified domain name of the Identity Appliance, identity-va-hostname.domain.namein the SSO Host text box. Do not use an https:// prefix.
For example, vcac-sso.mycompany.com.
c The default port number, 7444, is displayed in the SSO Port text box. Edit this value if you areusing a non-default port.
d Do not modify the default tenant name, vsphere.local, in the SSO Default Tenant text box.
e Type the default administrator name [email protected] in the SSO Admin User textbox.
f Type the SSO administrator password in the SSO Admin Password text box. The password mustmatch the password you specified in the SSO settings for the Identity Appliance.
g Click Save Settings.
After a few minutes, a success message appears and SSO Status is updated to Connected.
h (Optional) If the spinner does not stop within a few minutes, exit the appliance, close the browser,and log in again.
11 If you plan to deploy your PostgreSQL database on a standalone host, specify the database information.
a Click Database.
b Specify the host, port, database name (the default is vcac), and the database authenticationinformation for the PostgreSQL database.
c Click Save Settings.
12 If you see the message Error restarting VCAC server after you click Save Settings, ignore the messageand continue with the next step.
13 Click Messaging. The configuration settings and status of messaging for your appliance is displayed.Do not change these settings.
14 Click Services.
The following services must be running before you can log in to the console. Depending on your siteconfiguration, this can take about 10 minutes.
n authorization
n authentication
n eventlog-service
n shell-ui-app
n branding-service
n plugin-service
NOTE You can log in to the appliance and run tail -f /var/log/vcac/catalina.out to monitor startupof the services.
Chapter 3 Minimal Deployment
VMware, Inc. 35

15 Configure the license to enable the Infrastructure tab on the vCloud Automation Center console.
a Click vCAC Settings > Licensing.
b Click Licensing.
c Type a valid vCloud Automation Center license key that you downloaded when you downloadedthe installation files, and click Submit Key.
NOTE If you experience a connection error, you might have a problem with the load balancer. Checknetwork connectivity to the load balancer.
16 Confirm that you can log in to the vCloud Automation Center console.
a Open a browser and navigate to https://vcac-hostname.domain.name/vcac.
b Accept the vCloud Automation Center certificate.
c Accept the SSO certificate.
d Log in with [email protected] and the password you specified when you configuredSSO.
The console opens to the Tenants page on the Administration tab. A single tenant namedvsphere.local appears in the list.
You have finished the deployment and configuration of your vCloud Automation Center Appliance. If theappliance does not function correctly after configuration, redeploy and reconfigure the appliance. Do notmake changes to the existing appliance.
What to do next
“Install the Infrastructure Components,” on page 37
Installing IaaS ComponentsThe administrator installs a complete set of infrastructure (IaaS) components on a Windows machine(physical or virtual). Administrator rights are required to perform these tasks.
A minimal installation installs all of the components on the same Windows server, except for the SQLdatabase, which you can install on a separate server.
Enable Time Synchronization on the Windows ServerClocks on the Identity Appliance server, vCloud Automation Center server, and Windows servers must besynchronized to ensure a successful installation.
The following steps describe how to enable time synchronization with the ESX/ESXi host by using VMwaretools. If you are installing the IaaS components on a physical host or do not want to use VMware tools fortime synchronization, ensure that the server time is accurate by using your preferred method.
Procedure
1 Open a command prompt on the Windows installation machine.
2 Type the following command to navigate to the VMware Tools directory.
cd C:\Program Files\VMware\VMware Tools
3 Type the command to display the timesync status.
VMwareToolboxCmd.exe timesync status
Installation and Configuration
36 VMware, Inc.

4 If timesync is disabled, type the following command to enable it.
VMwareToolboxCmd.exe timesync enable
IaaS CertificatesvCloud Automation Center IaaS components use certificates and SSL to secure communications betweencomponents.
In a minimal installation for proof-of-concept purposes, you can use self-signed certificates.
In a distributed environment, it is a best practice to obtain a domain certificate from a trusted certificateauthority.
IMPORTANT You must disable TLS1.2 for certificates using SHA512 on Windows 2012 machines. For moreinformation about disabling TLS1.2, consult the Microsoft Knowledge Base article at http://support.microsoft.com/kb/245030.
If you are performing a distributed installation, follow these steps to prepare the IaaS certificate.
1 Get a certificate from a trusted certificate authority.
2 To ensure that the certificate authority and that the root certificate is trusted, place the root certificatefrom the certificate authority into the Trusted Root using the Windows certificate plug-in.
3 Add the certificate to IIS.
4 Restart the IIS machine.
5 Start the IaaS installer.
Install the Infrastructure ComponentsThe system administrator logs into the Windows machine and follows the installation wizard to install theinfrastructure components (IaaS) on the Windows virtual or physical machine.
Prerequisites
n Verify that your installation machine meets the requirements described in “IaaS (Windows Server)Requirements,” on page 19.
n “Enable Time Synchronization on the Windows Server,” on page 36.
n Verify that you have deployed and fully configured the vCloud Automation Center Appliance, and thatthe necessary services are running (plugin-service, catalog-service, iaas-proxy-provider).
Procedure
1 Download the IaaS Installer on page 38A system administrator downloads the installer to a Windows 2008 or Windows 2012 physical orvirtual machine.
2 Select the Installation Type on page 38The system administrator runs the installer wizard from the Windows 2008 or 2012 installationmachine.
3 Check Prerequisites on page 39The Prerequisite Checker verifies that your machine meets IaaS installation requirements.
4 Specify Server and Account Settings on page 39The system administrator specifies server and account settings for the Windows installation serverand selects a SQL database server instance and authentication method.
Chapter 3 Minimal Deployment
VMware, Inc. 37

5 Specify Managers and Agents on page 40The minimum installation installs the required Distributed Execution Managers and the defaultvSphere proxy agent. The system administrator can install additional proxy agents (XenServer, orHyper-V, for example) after installation.
6 Register the IaaS Components on page 40The system administrator installs the IaaS certificate and registers the IaaS components with the SSO.
7 Finish the Installation on page 41The system administrator finishes the IaaS installation.
Download the IaaS InstallerA system administrator downloads the installer to a Windows 2008 or Windows 2012 physical or virtualmachine.
If you see certificate warnings during this procedure, continue past them.
Prerequisites
n Microsoft .NET Framework 4.5.1 must be installed on the IaaS installation machine. You can downloadthe .NET installer from the installer Web page.
n If you are using Internet Explorer for the download, verify that Enhanced Security Configuration is notenabled. See res://iesetup.dll/SoftAdmin.htm.
n Log in to the Windows server as a local administrator.
Procedure
1 Open a Web browser.
2 Enter the URL for the Windows IaaS installer download page.
For example, https://vcac-va-hostname.domain.name:5480/installer, where vcac-va-hostname.domain.name is the name of the vCloud Automation Center Appliance host.
3 Click IaaS Installer.
4 When prompted, save the installer file to the desktop. The file name is of the form setup__vcac-va-hostname.domain.name@5480.
Do not change the file name. It is used to connect the installation to the vCloud Automation CenterAppliance.
Select the Installation TypeThe system administrator runs the installer wizard from the Windows 2008 or 2012 installation machine.
Prerequisites
“Download the IaaS Installer,” on page 67.
Procedure
1 Right-click the [email protected] setup file that you downloaded andselect Run as administrator.
2 Click Next.
3 Accept the license agreement and click Next.
Installation and Configuration
38 VMware, Inc.

4 Type the administrator credentials for the vCloud Automation Center Appliance on the Log In pageand click Next.
The user name is root and the password is the password that you specified when you deployed thevCloud Automation Center Appliance.
5 Click Next.
6 Select Complete Install on the Installation Type page if you are creating a minimal deployment andclick Next.
Check PrerequisitesThe Prerequisite Checker verifies that your machine meets IaaS installation requirements.
Prerequisites
“Select the Installation Type,” on page 38.
Procedure
1 Complete the Prerequisite Check.
Option Description
No errors Click Next.
Noncritical errors Click Bypass.
Critical errors Bypassing critical errors causes the installation to fail. If warnings appear,select the warning in the left pane and follow the instructions on the right.Address all critical errors and click Check Again to verify.
2 Click Next.
The machine meets installation requirements.
Specify Server and Account SettingsThe system administrator specifies server and account settings for the Windows installation server andselects a SQL database server instance and authentication method.
Prerequisites
“Check Prerequisites,” on page 39.
Procedure
1 On the Server and Account Settings page, specify the user name and password for a user with SQLadministrative privileges or a local administrator.
2 Type a phrase in the Passphrase text box.
The passphrase is a series of words that generates the encryption key used to secure database data.
3 In the Microsoft SQL Server Database Installation Information panel, accept the default server to installthe database instance on the same server with the IaaS components, or type a different server name ifthe database is on another machine.
If you specify a different server, you must supply the server name and port number, using the formservername,portnumber.
4 Accept the default in the Database Name text box.
Chapter 3 Minimal Deployment
VMware, Inc. 39

5 Select the authentication method.
u Select Use Windows authentication if you want to create the database using the Windowscredentials of the current user.
u Deselect Use Windows authentication if you want to create the database using SQLauthentication. Type the User name and Password of the SQL Server user with administratorcredentials on the SQL server instance.
6 Click Next.
Specify Managers and AgentsThe minimum installation installs the required Distributed Execution Managers and the default vSphereproxy agent. The system administrator can install additional proxy agents (XenServer, or Hyper-V, forexample) after installation.
Prerequisites
“Specify Server and Account Settings,” on page 39.
Procedure
1 On the Distributed Execution Managers And Proxy vSphere Agent page, accept the defaults.
2 (Optional) Install a vSphere agent to enable provisioning with vSphere.
a Select Install and configure vSphere agent.
b Accept the default agent and endpoint, or type a name.
Make a note of the Endpoint name value. This information is used when you configure the vSphereendpoint in the vCloud Automation Center console.
3 Click Next.
Register the IaaS ComponentsThe system administrator installs the IaaS certificate and registers the IaaS components with the SSO.
Prerequisites
“Specify Managers and Agents,” on page 40.
Procedure
1 Accept the default Server value, which is populated with the fully qualified domain name of thevCloud Automation Center Appliance server from which you downloaded the installer. Verify that afully qualified domain name is used to identify the server and not an IP address.
2 Click Load to populate the value of SSO Default Tenant (vsphere.local).
3 Click Download to retrieve the certificate from the vCloud Automation Center Appliance.
You can click View Certificate to view the certificate details.
4 Select Accept Certificate to install the SSO certificate.
5 In the SSO Administrator panel, type [email protected] in the User name text box and thepassword you defined for this user when you configured SSO in Password and Confirm password.
6 Accept the default in IaaS Server, which contains the host name of the Windows machine where youare installing.
7 Click Next.
Installation and Configuration
40 VMware, Inc.

Finish the InstallationThe system administrator finishes the IaaS installation.
Prerequisites
n “Register the IaaS Components,” on page 40.
n Verify that machine on which you are installing is connected to the network and is able to connect tothe vCloud Automation Center Appliance from which you download the IaaS installer.
Procedure
1 Review the information on the Ready to Install page and click Install.
The installation starts. Depending on your network configuration, installation can take between fiveminutes and one hour.
2 When the success message appears, leave the Guide me through initial configuration check boxselected and click Next, and Finish.
3 Close the Configure the System message box.
The installation is now finished.
What to do next
“Verify IaaS Services,” on page 84.
Chapter 3 Minimal Deployment
VMware, Inc. 41

Installation and Configuration
42 VMware, Inc.
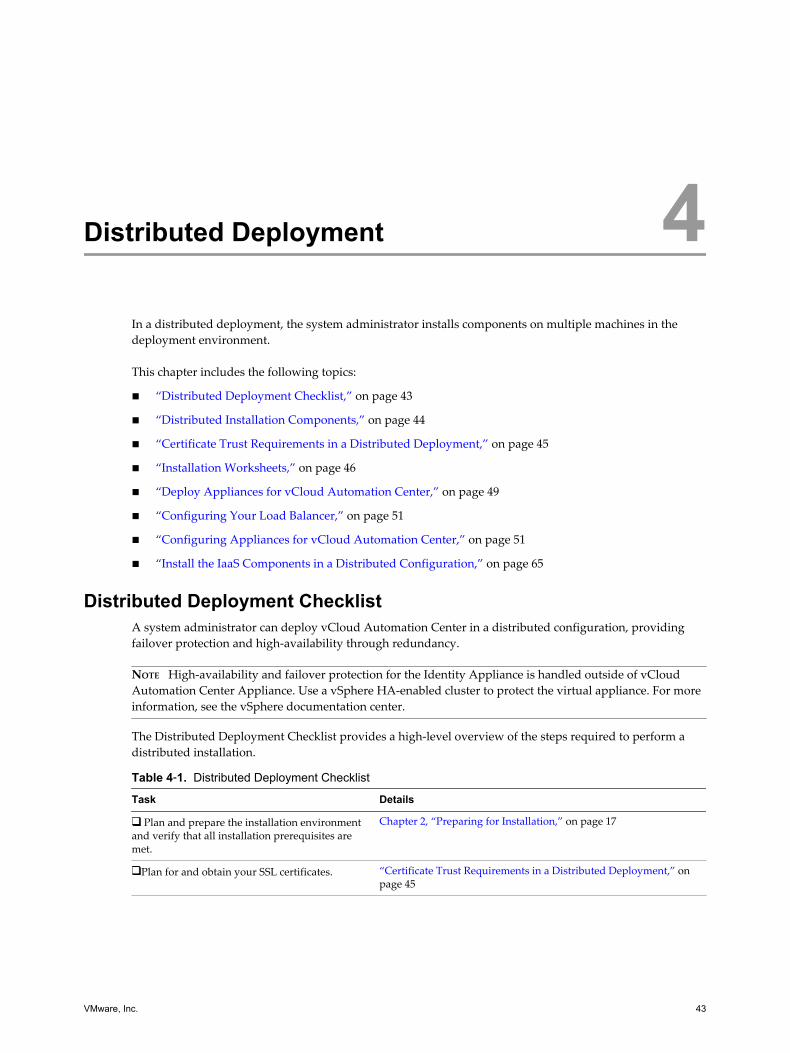
Distributed Deployment 4In a distributed deployment, the system administrator installs components on multiple machines in thedeployment environment.
This chapter includes the following topics:
n “Distributed Deployment Checklist,” on page 43
n “Distributed Installation Components,” on page 44
n “Certificate Trust Requirements in a Distributed Deployment,” on page 45
n “Installation Worksheets,” on page 46
n “Deploy Appliances for vCloud Automation Center,” on page 49
n “Configuring Your Load Balancer,” on page 51
n “Configuring Appliances for vCloud Automation Center,” on page 51
n “Install the IaaS Components in a Distributed Configuration,” on page 65
Distributed Deployment ChecklistA system administrator can deploy vCloud Automation Center in a distributed configuration, providingfailover protection and high-availability through redundancy.
NOTE High-availability and failover protection for the Identity Appliance is handled outside of vCloudAutomation Center Appliance. Use a vSphere HA-enabled cluster to protect the virtual appliance. For moreinformation, see the vSphere documentation center.
The Distributed Deployment Checklist provides a high-level overview of the steps required to perform adistributed installation.
Table 4‑1. Distributed Deployment Checklist
Task Details
Plan and prepare the installation environmentand verify that all installation prerequisites aremet.
Chapter 2, “Preparing for Installation,” on page 17
Plan for and obtain your SSL certificates. “Certificate Trust Requirements in a Distributed Deployment,” onpage 45
VMware, Inc. 43

Table 4‑1. Distributed Deployment Checklist (Continued)
Task Details
Deploy the Identity Appliance, the leadvCloud Automation Center Appliance server, thevCloud Automation Center Appliance to use as astandalone PostgreSQL database, and anyadditional appliances you require forredundancy and high availability.
“Deploy Appliances for vCloud Automation Center,” on page 49
Configure your load balancer to handlevCloud Automation Center appliance traffic.
“Configuring Your Load Balancer,” on page 51
Configure the Identity Appliance, thestandalone PostgreSQL database, the leadvCloud Automation Center Appliance server,and any additional appliances you deployed forredundancy and high availability.
“Configuring Appliances for vCloud Automation Center,” onpage 51
Configure your load balancer to handle thevCloud Automation Center IaaS componenttraffic and install vCloud Automation CenterIaaS components.
“Install the IaaS Components in a Distributed Configuration,” onpage 65
If required, install agents to integrate withexternal systems.
Chapter 5, “Installing Agents,” on page 85
Configure the default tenant and provide theIaaS license.
Chapter 6, “Post-Installation Tasks,” on page 105
Distributed Installation ComponentsIn a distributed installation, the system administrator can deploy multiple instances of the appliances andinstall IaaS components over multiple machines in the deployment environment.
Table 4‑2. Virtual Appliances and PostgreSQL Database
Component Description
Single Sign-On Server Identity Appliance, a preconfigured virtual appliance thatprovides Single Sign-On capabilities.Alternatively, you can use some versions of the SSOprovided with vSphere. For information on supportedversions, see vCloud Automation Center Support Matrix.
vCloud Automation Center Appliance A preconfigured virtual appliance that deploys thevCloud Automation Center server. The server includes thevCloud Automation Center console, which provides asingle portal for self-service provisioning and managementof cloud services, as well as authoring and administration.
PostgreSQL Database Stores information required by the virtual appliances. Thedatabase is embedded on every vCloud Automation CenterAppliance and you can configure appliances for use asPostgreSQL databases.
You can select the individual IaaS components you want to install and specify the installation location.
Installation and Configuration
44 VMware, Inc.

Table 4‑3. IaaS Components
Component Description
Website Provides the infrastructure administration and serviceauthoring capabilities to the vCloud Automation Centerconsole. The Website component communicates with theModel Manager, which provides it with updates from theDistributed Execution Manager (DEM), proxy agents anddatabase.
Manager Service The Manager Service coordinates communication betweenagents, the database, Active Directory (or OpenLDAP), andSMTP. The Manager Service communicates with theconsole Web site through the Model Manager. This servicerequires administrative privileges to run.
Model Manager The Model Manager communicates with the database, theDEMs, and the portal website. The Model Manager isdivided into two separately installable components — theModel Manager Web service and the Model Manager datacomponent.
Distributed Execution Managers (Orchestrator andWorker)
A Distributed Execution Manager (DEM) executes thebusiness logic of custom models, interacting with the IaaSdatabase and external databases. DEMs also manage cloudand physical machines.
Agents Virtualization, integration, and WMI agents thatcommunicate with infrastructure resources.
Certificate Trust Requirements in a Distributed DeploymentFor secure communication, vCloud Automation Center Appliance relies on certificates to create the trustedrelationships between components.
The specific implementation of the certificates required to achieve this trust depends on your environment.
To provide high availability and failover support, you might deploy load balanced clusters of components.In this case, you obtain a multi-use certificate that includes each component in the cluster, and then copythat multi-use certificate to each component in the cluster. You can use Subject Alternative Name (SAN)certificates, chain certificates, wildcard certificates, or any other method of multi-use certificationappropriate for your environment as long as you satisfy the trust requirements. Depending on your loadbalancer configuration, you may need to certify the load balancer as part of the multi-use certificate for thecluster.
For example, if you have a load balancer configuration that requires a certificate on the load balancer as wellas its components, you might obtain a SAN certificate to certify web-load-balancer.eng.mycompany.com,web-component-1.eng.mycompany.com, and web-component-2.eng.mycompany.com. You would copy thatsingle multi-use certificate to the load balancer and each of the appliances and then register the certificate onthe Web component machines.
The Trust Requirements diagram illustrates the required trust relationships among clusters and assumesyou have configured trust as necessary between the load balancer and the nodes underneath it.
Chapter 4 Distributed Deployment
VMware, Inc. 45

Figure 4‑1. Trust Requirements
Load Balancer 1
Database connections do notrequire certificates
PostgresDatabase
vCACAppliance 1
vCACAppliance 2
vCAC Appliance Cluster
Load Balancer 2
WebComponent 1
WebComponent 2
Web Component Cluster
Load Balancer 3
ManagerService
Component 1
ManagerService
Component 2
Manager Service Component Cluster
SQL IaaSDatabase
SSO
DEMs
Agent/guest
The Certificate Importation and Registration table summarizes the registration requirements for variousimported certificates.
Table 4‑4. Certificate Importation and Registration
Import Register
SSO vCloud Automation Center Appliance cluster
vCloud Automation Center Appliance cluster Web components cluster
Web components cluster n vCloud Automation Center Appliance clustern Manager Service components clustern DEM Orchestrators and DEM Worker components
Manager Service components cluster n DEM Orchestrators and DEM Worker componentsn Agents and Proxy Agents
Installation WorksheetsYou can use these worksheets to record important information for reference during the installation process.
One copy of each worksheet is given here. Create additional copies as you need them. Settings are casesensitive.
Installation and Configuration
46 VMware, Inc.

Table 4‑5. PostgreSQL Database Information
Variable Value Example
Host Name (FQDN) vcac-database-va.mycompany.com
IP 192.168.1.111
Database name vcac (default) vcac
Database username vcac (default) vcac
Database password vcac (default) vcac
Appliance username [email protected] (default) [email protected]
Appliance password vmware
Table 4‑6. Identity Appliance Information
Variable Value Example
Host Name (FQDN) vcac-sso.mycompany.com
SSO service over HTTPS IncomingPort
7444 (do not change) 7444
IP 192.168.1.104
Username [email protected] (default) [email protected]
Password vmware
Table 4‑7. Leading cluster vCloud Automation Center Appliance Information
Variable Value Example
Host Name (FQDN) vcac-va.mycompany.com
SSO service over HTTPS OutgoingPort (default)
7444 (do not change) 7444
IP 192.168.1.105
Username [email protected] (default) [email protected]
Password vmware
Table 4‑8. Additional vCloud Automation Center Appliance Information
Variable Value Example
Host Name (FQDN) vcac-va2.mycompany.com
SSO service over HTTPS OutgoingPort (default)
7444 (do not change) 7444
IP 192.168.1.110
Username [email protected] (default) [email protected]
Password vmware
Table 4‑9. IaaS Database Passphrase
Variable Value Example
Passphrase (reused in IaaS Installer,Upgrade, and Migration)
myPassphrase
Chapter 4 Distributed Deployment
VMware, Inc. 47

Table 4‑10. IaaS Website
Variable Value Example
Host Name (FQDN) iaas-web.mycompany.com
SSO service over HTTPS OutgoingPort (default)
IP 192.168.1.106
Username
Password
Table 4‑11. IaaS Model Manager Data
Variable Value Example
Host Name (FQDN) iaas-model-man.mycompany.com
SSO service over HTTPS OutgoingPort (default)
IP 192.168.1.107
Username
Password
Table 4‑12. IaaS Model Service
Variable Value Example
Host Name (FQDN) iaas-model-service.mycompany.com
SSO service over HTTPS OutgoingPort (default)
IP 192.168.1.108
Username
Password
Table 4‑13. Distributed Execution Managers
Unique Name Orchestrator/Worker
ex. myuniqueorchestratorname Orchestrator:Worker:
Orchestrator:Worker:
Orchestrator:Worker:
Orchestrator:Worker:
Installation and Configuration
48 VMware, Inc.

Deploy Appliances for vCloud Automation CenterDownload and deploy all appliances for vCloud Automation Center.
Procedure
1 Deploy the Identity Appliance on page 49The Identity Appliance is a preconfigured virtual appliance that provides single sign-on capabilities. Itis delivered as an open virtualization format (OVF) template. The system administrator downloads theIdentity Appliance and deploys it into vCenter Server or ESX/ESXi inventory.
2 Deploy the vCloud Automation Center Appliance on page 50To deploy the vCloud Automation Center Appliance, a system administrator must log in to thevSphere client and select deployment settings.
What to do next
If you plan to use a load balancer in your environment, install and configure the load balancer forvCloud Automation Center traffic. See “Configuring Your Load Balancer,” on page 51.
Deploy the Identity ApplianceThe Identity Appliance is a preconfigured virtual appliance that provides single sign-on capabilities. It isdelivered as an open virtualization format (OVF) template. The system administrator downloads theIdentity Appliance and deploys it into vCenter Server or ESX/ESXi inventory.
Prerequisites
n Verify that the Identity Appliance was downloaded from the VMware Web site.
n Log in to the vSphere client as a user with system administrator privileges.
Procedure
1 In the vSphere client, select File > Deploy OVF Template.
2 Browse to the Identity Appliance file with the .ova or .ovf extension and click Open.
3 Click Next.
4 Click Next on the OVF Template Details page.
5 Accept the license agreement and click Next.
6 Type a unique virtual appliance name according to the IT naming convention of your organization inthe Name text box, select the datacenter and location to which you want to deploy the virtual appliance,and click Next.
7 Follow the prompts until the Disk Format page appears.
8 Verify on the Disk Format page that enough space exists to deploy the virtual appliance and click Next.
9 Follow the prompts to the Properties page.
The options that appear depend on your vSphere configuration.
10 Configure the values on the Properties page.
a Type the root password to use when you log in to the virtual appliance console in the Enterpassword and Confirm password text boxes.
b Type the fully qualified domain name of the virtual machine in the Hostname text box, even if youare using DHCP.
Chapter 4 Distributed Deployment
VMware, Inc. 49

c Configure the networking properties.
d Choose whether SSH is enabled for the server.
11 Click Next.
12 If the Power on after deployment option is available on the Ready to Complete page, select it and clickFinish.
13 Restart the machine.
If the deployment is successful, the fully qualified domain name can be resolved against the IP address ofthe Identity Appliance by opening a command prompt and pinging the FQDN.
Deploy the vCloud Automation Center ApplianceTo deploy the vCloud Automation Center Appliance, a system administrator must log in to the vSphereclient and select deployment settings.
Prerequisites
n Download the vCloud Automation Center Appliance from the VMware Web site.
n Log in to the vSphere client as a user with system administrator privileges.
Procedure
1 Select File > Deploy OVF Template from the vSphere client.
2 Browse to the vCloud Automation Center Appliance file you downloaded and click Open.
3 Click Next.
4 Click Next on the OVF Template Details page.
5 Accept the license agreement and click Next.
6 Type a unique virtual appliance name according to the IT naming convention of your organization inthe Name text box, select the datacenter and location to which you want to deploy the virtual appliance,and click Next.
7 Follow the prompts until the Disk Format page appears.
8 Verify on the Disk Format page that enough space exists to deploy the virtual appliance and click Next.
9 Follow the prompts to the Properties page.
The options that appear depend on your vSphere configuration.
10 Configure the values on the Properties page.
a Type the root password to use when you log in to the virtual appliance console in the Enterpassword and Confirm password text boxes.
b Type the fully qualified domain name of the virtual machine in the Hostname text box, even if youare using DHCP.
c Configure the networking properties.
d Choose whether SSH is enabled for the server.
11 Click Next.
12 If the Power on after deployment option is available on the Ready to Complete page, select it and clickFinish.
13 Restart the machine.
Installation and Configuration
50 VMware, Inc.

To verify that you successfully deployed the appliance, open a command prompt and ping the FQDN of thevCloud Automation Center Appliance.
What to do next
Repeat this procedure to deploy additional instances of the vCloud Automation Center Appliance forredundancy in a high-availability environment or to use as a dedicated PostgreSQL database.
Configuring Your Load BalancerAfter you deploy the appliances for vCloud Automation Center, you can set up a load balancer to distributetraffic among multiple instances of the vCloud Automation Center Appliance.
The following list presents an overview of the general steps required to configure a load balancer forvCloud Automation Center traffic:
1 Install your load balancer.
2 Enable session affinity, also known as sticky sessions.
3 Import a certificate to your load balancer. For information about trust relationships and certificates, see “Certificate Trust Requirements in a Distributed Deployment,” on page 45. For information aboutextracting certificates, see “Extracting Certificates and Private Keys,” on page 120
4 Configure the load balancer for vCloud Automation Center Appliance traffic.
5 Configure the load balancer to forward port 5480.
6 Configure the appliances for vCloud Automation Center. See “Configuring Appliances for vCloudAutomation Center,” on page 51.
For information about scalability and high availability, see VMware vCloud Automation Center ReferenceArchitecture, available as a technical paper from http://www.vmware.com/resources/techresources/.
Configuring Appliances for vCloud Automation CenterAfter deploying your appliances and configuring load balancing, you configure the appliances forvCloud Automation Center.
Configure the Identity ApplianceConfigure the Identity Appliance to provide Single Sign-On (SSO) capability for the vCloud AutomationCenter Appliance environment.
You can use the Identity Appliance SSO provided with vCloud Automation Center or some versions of theSSO provided with vSphere. For information about supported versions, see vCloud Automation CenterSupport Matrix.
1 Enable Time Synchronization on the Identity Appliance on page 52Clocks on the Identity Appliance server, the vCloud Automation Center server, and Windows serversmust be synchronized to ensure a successful installation.
2 Configure the Identity Appliance on page 52The Identity Appliance provides Single-Sign On (SSO) capability for vCloud Automation Center users.SSO is an authentication broker and security token exchange that interacts with the enterprise identitystore (Active Directory or OpenLDAP) to authenticate users. A system administrator configures SSOsettings to provide access to the vCloud Automation Center Appliance.
Chapter 4 Distributed Deployment
VMware, Inc. 51

Enable Time Synchronization on the Identity ApplianceClocks on the Identity Appliance server, the vCloud Automation Center server, and Windows servers mustbe synchronized to ensure a successful installation.
If you see certificate warnings during this procedure, continue past them.
Prerequisites
“Deploy the Identity Appliance,” on page 49.
Procedure
1 Navigate to the Identity Appliance management console by using its fully qualified domain name,https://identity-hostname.domain.name:5480/.
2 Log in by using the user name root and the password you specified when you deployed the IdentityAppliance.
3 Select Admin > Time Settings.
4 Select an option from the Time Sync Mode menu.
Option Action
Network Time Protocol Select Use Time Server from the Time Sync Mode menu. For each timeserver that you are using, type the IP address or the host name in the TimeServer text box.
VMware Tools Select Use Host Time from the Time Sync Mode menu. You mustconfigure the connections to Network Time Protocol servers before youcan use VMware Tools.
5 Click Save Settings.
6 Verify that the value in Current Time is correct.
You can change the time zone as required from the Time Zone Setting page on the System tab.
Configure the Identity ApplianceThe Identity Appliance provides Single-Sign On (SSO) capability for vCloud Automation Center users. SSOis an authentication broker and security token exchange that interacts with the enterprise identity store(Active Directory or OpenLDAP) to authenticate users. A system administrator configures SSO settings toprovide access to the vCloud Automation Center Appliance.
MIGRATION NOTE If you plan to use the vCloud Automation Center migration tool, you must specify aNative Active Directory when you configure the appliance.
Native Active Directories have the following characteristics:
n Use Kerberos to authenticate
n Do not require a search base, making it easier to find the correct Active Directory store
n Can be used only with the default tenant
You must also specify an identity store when you configure tenants, even if you specify Native ActiveDirectory settings here. See “Configure the Identity Stores for the Default Tenant,” on page 105.
Prerequisites
“Enable Time Synchronization on the Identity Appliance,” on page 52.
Installation and Configuration
52 VMware, Inc.

Procedure
1 Navigate to the Identity Appliance management console by using its fully qualified domain name,https://identity-hostname.domain.name:5480/.
2 Continue past the certificate warning.
3 Log in with the user name root and the password you specified when the appliance was deployed.
4 Click the SSO tab.
The red text is a prompt, not an error message.
5 Type the password to assign to the system administrator in the Admin Password and Repeat passwordtext boxes.
The System Domain text field has the value vsphere.local, which is the local default domain for theIdentity Appliance. The default tenant is created with this name and the system administrator [email protected]. Record the user name and password in a secure place for later use.
6 Click Apply.
It can take several minutes for the success message to appear. Do not interrupt the process.
7 When the success message appears, click the Host Settings tab.
8 Verify that the SSO Hostname does not include the SSO port, :7444.
9 (Optional) Click SSL.
You can import a certificate or generate a self-signed certificate for the Identity Appliance. A self-signedcertificate is also created for you when you deploy the Identity Appliance.
10 Click SSL.
11 Select the certificate type from the Choose Action menu. If you are using a PEM encoded certificate, forexample for a distributed environment, select Import PEM encoded certificate.
Certificates that you import must be trusted and must also be applicable to all instances of vCloudAutomation Center Appliance and any load balancer by using Subject Alternative Name (SAN)certificates.
Option Action
Import a certificate a Copy the certificate values from BEGIN PRIVATE KEY to ENDPRIVATE KEY, including the header and footer, and paste them in theRSA Private Key text box.
b Copy the certificate values from BEGIN CERTIFICATE to ENDCERTIFICATE, including the header and footer, and paste them in theCertificate Chain text box.
c (Optional) If your certificate has one, copy the pass phrase thatencrypts the private key of the certificate that you are importing, andpaste it in the Pass Phrase text box.
Generate a self-signed certificate a Type a common name for the certificate in the Common Name textbox. You can use the fully qualified domain name of the virtualappliance (hostname.domain.name) or a wild card, such as*.mycompany.com. If you use a load balancer, you need to specify theFQDN of the load balancer or a wildcard that matches the name of theload balancer. Do not accept a default value if one is shown, unless itmatches the host name of the virtual appliance.
b Type your organization name, such as your company name, in theOrganization text box.
c Type your organizational unit, such as your department name orlocation, in the Organizational Unit text box.
d Type a two-letter ISO 3166 country code, such as US, in the Countrytext box.
Chapter 4 Distributed Deployment
VMware, Inc. 53

12 Click Apply Settings.
After a few minutes the certificate details appear on the page.
13 Join the Identity Appliance to your Native Active Directory domain.
For migration, you must configure Native Active Directory. If you are not migrating, Native ActiveDirectory is optional.
a Click the Active Directory tab.
b Type the domain name of the Active Directory in Domain Name.
c Enter the credentials for the domain administrator in the Domain User and Password text boxes.
d Click Join AD Domain.
14 Click the Admin tab.
15 Verify that the SSH settings are correct.
When SSH service enabled is selected, SSH is enabled for all but the root user. Select or uncheckAdministrator SSH login enabled to enable or disable SSH login for the root user.
The SSO host is initialized. If Identity Appliance does not function correctly after configuration, redeployand reconfigure the appliance. Do not make changes to the existing appliance.
Configure a Standalone PostgreSQL DatabaseYou can configure a vCloud Automation Center Appliance as a dedicated PostgreSQL database by disablingall unused services on the appliance.
The vCloud Automation Center Appliance installs with an embedded PostgreSQL database. In a minimalinstallation, you can use the database in its embedded form. However in a distributed installation wherehigh availability and redundancy are important, you typically configure a separate vCloud AutomationCenter Appliance to act as a standalone PostgreSQL database.
NOTE Using the embedded vCenter Orchestrator instance is not supported with a standalone PostgreSQLdatabase. If you configure a standalone database, you must also configure vCloud Automation Center to usean external vCenter Orchestrator server. For information about configuring an externalvCenter Orchestrator server, see Advanced Service Designer Configuration.
Prerequisites
Deploy an additional vCloud Automation Center Appliance to use as a dedicated PostgreSQL database. See “Deploy the vCloud Automation Center Appliance,” on page 50.
Procedure
1 Enable Time Synchronization for the vCloud Automation Center PostgreSQL Database on page 55Clocks on the Identity Appliance server, vCloud Automation Center server, PostgreSQL databaseserver, and Windows servers must be synchronized to ensure a successful installation.
2 Configure a vCloud Automation Center Appliance as a Standalone PostgreSQL Database on page 55To use a vCloud Automation Center Appliance as a dedicated PostgreSQL database, disable allservices on the appliance that are not used by the embedded PostgreSQL database.
3 Set a Password for the PostgreSQL Database on page 56After you configure the vCloud Automation Center Appliance for use as a dedicated PostgreSQLdatabase, you change the password for the database owner.
Installation and Configuration
54 VMware, Inc.

What to do next
Configure your leading cluster vCloud Automation Center Appliance and set it to use your standalonePostgreSQL Database. See “Configure the Primary vCloud Automation Center Appliance,” on page 57.
Enable Time Synchronization for the vCloud Automation Center PostgreSQLDatabaseClocks on the Identity Appliance server, vCloud Automation Center server, PostgreSQL database server,and Windows servers must be synchronized to ensure a successful installation.
If you see certificate warnings during this process, continue past them to finish the installation.
Prerequisites
Deploy an additional vCloud Automation Center Appliance to use as a dedicated PostgreSQL database. See “Deploy the vCloud Automation Center Appliance,” on page 50.
Procedure
1 Navigate to the vCloud Automation Center Appliance management console by using its fully qualifieddomain name, https://vcac-va-hostname.domain.name:5480/.
2 Log in with the user name root and the password you specified when the appliance was deployed.
3 Select Admin > Time Settings.
4 Select an option from the Time Sync Mode menu.
Option Action
Network Time Protocol Select Use Time Server from the Time Sync Mode menu. For each timeserver that you are using, type the IP address or the host name in the TimeServer text box.
VMware Tools Select Use Host Time from the Time Sync Mode menu. You mustconfigure the connections to Network Time Protocol servers before youcan use VMware Tools.
5 Click Save Settings.
6 Verify that the value in Current Time is correct.
You can change the time zone as required from the Time Zone Setting page on the System tab.
Configure a vCloud Automation Center Appliance as a Standalone PostgreSQLDatabaseTo use a vCloud Automation Center Appliance as a dedicated PostgreSQL database, disable all services onthe appliance that are not used by the embedded PostgreSQL database.
Prerequisites
“Enable Time Synchronization for the vCloud Automation Center PostgreSQL Database,” on page 55.
Procedure
1 Log in to the vCloud Automation Center Appliance by using SSH.
2 Run the chkconfig command to see a list of services and their status.
3 Disable the following services.
n vcac-server
n vco-configuration
Chapter 4 Distributed Deployment
VMware, Inc. 55

n vco-server
For example, to stop and disable the vcac-server service type the following commands at a commandprompt.
service vcac-server stop
chkconfig vcac-server off
4 Verify that the vpostgres service is running.
5 Configure the appliance to listen to any address on the network.
sed -i -re
's/^#(listen_addresses=.\*.)/\1/' /var/vmware/vpostgres/current/pgdata/postgresql.conf
6 Increase MAX_CONNECTIONS to 400.
sed -i -re 's/^(max_connections *= *)([0-9]+)(.*)/\1
400 \3/' /var/vmware/vpostgres/current/pgdata/postgresql.conf
7 (Optional) Open the postgresql.conf file to verify your changes.
8 Restart the vpostgres service.
/etc/init.d/vpostgres restart
What to do next
“Set a Password for the PostgreSQL Database,” on page 56.
Set a Password for the PostgreSQL DatabaseAfter you configure the vCloud Automation Center Appliance for use as a dedicated PostgreSQL database,you change the password for the database owner.
Prerequisites
“Configure a vCloud Automation Center Appliance as a Standalone PostgreSQL Database,” on page 55.
Procedure
1 Log in to the PostgreSQL server with administrator-level privileges.
2 From a command prompt, change the user account to postgres.
su postgres
3 Open an SQLshell (psql) session.
4 Navigate to /opt/vmware/vpostgres/9.2/bin/psql.
5 Run the following command to update the password for the database user.
ALTER USER vcac ENCRYPTED PASSWORD 'mypassword';
In this example, the database owner is a user named vcac and the password is set to mypassword.Replace these values with the values that are appropriate to your environment.
6 Log out of the PostgreSQL server.
\q
What to do next
Configure the lead vCloud Automation Center Appliance for your cluster and set it to use your standalonePostgreSQL Database. See “Configure the Primary vCloud Automation Center Appliance,” on page 57.
Installation and Configuration
56 VMware, Inc.

Configure the Primary vCloud Automation Center ApplianceThe vCloud Automation Center Appliance is a preconfigured virtual appliance that deploys thevCloud Automation Center server and Web console (the user portal). It is delivered as an openvirtualization format (OVF) template. The system administrator downloads the appliance and deploys itinto the vCenter Server or ESX/ESXi inventory.
The certificate you configure for the primary instance of the appliance is copied to the load balancer andadditional appliance instances in subsequent procedures.
Prerequisites
n “Deploy Appliances for vCloud Automation Center,” on page 49.
n Get a domain certificate for the vCloud Automation Center Appliance. See “Certificates,” on page 25.
n “Set a Password for the PostgreSQL Database,” on page 56.
n “Configure the Identity Appliance,” on page 51.
Procedure
1 Enable Time Synchronization on the vCloud Automation Center Appliance on page 57Clocks on the Identity Appliance server, vCloud Automation Center server, and Windows serversmust be synchronized to ensure a successful installation.
2 Configure the vCloud Automation Center Appliance to Use a Standalone PostgreSQL Database onpage 58By default, the vCloud Automation Center Appliance is configured to use an embedded PostgreSQLdatabase. For high availability and large-scale deployments, a standalone database is required.
3 Configure the vCloud Automation Center Appliance on page 59To prepare the vCloud Automation Center Appliance for use, a system administrator configures thehost settings, generates an SSL certificate, and provides SSO connection information.
Enable Time Synchronization on the vCloud Automation Center ApplianceClocks on the Identity Appliance server, vCloud Automation Center server, and Windows servers must besynchronized to ensure a successful installation.
If you see certificate warnings during this process, continue past them to finish the installation.
Procedure
1 Navigate to the vCloud Automation Center Appliance management console by using its fully qualifieddomain name, https://vcac-va-hostname.domain.name:5480/.
2 Log in with the user name root and the password you specified when the appliance was deployed.
3 Select Admin > Time Settings.
4 Select an option from the Time Sync Mode menu.
Option Action
Network Time Protocol Select Use Time Server from the Time Sync Mode menu. For each timeserver that you are using, type the IP address or the host name in the TimeServer text box.
VMware Tools Select Use Host Time from the Time Sync Mode menu. You mustconfigure the connections to Network Time Protocol servers before youcan use VMware Tools.
Chapter 4 Distributed Deployment
VMware, Inc. 57

5 Click Save Settings.
6 Verify that the value in Current Time is correct.
You can change the time zone as required from the Time Zone Setting page on the System tab.
Configure the vCloud Automation Center Appliance to Use a StandalonePostgreSQL DatabaseBy default, the vCloud Automation Center Appliance is configured to use an embedded PostgreSQLdatabase. For high availability and large-scale deployments, a standalone database is required.
Prerequisites
n “Configure a Standalone PostgreSQL Database,” on page 54.
n “Enable Time Synchronization on the vCloud Automation Center Appliance,” on page 57.
Procedure
1 Navigate to the vCloud Automation Center Appliance management console by using its fully qualifieddomain name, https://vcac-va-hostname.domain.name:5480/.
2 Navigate to vCAC Settings > Database.
3 Specify the information for the standalone database.
a Enter the fully qualified domain name of the database host in the Host text box.
b Enter the port name of the database host in the Port text box.
c Enter the database name in the Database text box.
d Enter the user name of the database owner in the User text box.
e Enter the password for the database owner in the Password text box.
4 Click Save Settings.
NOTE The message Error restarting VCAC server appears. This warning is safe to ignore, because thevCloud Automation Center server has not been started yet.
The virtual appliance creates the necessary tables in the database if they do not already exist. If anotherdatabase had previously been used, the new database is used after the vCloud Automation Centerserver restarts. No data is migrated from the previous database to the new database.
5 Disable the unused services on the vCloud Automation Center Appliance.
a Log in to the vCloud Automation Center Appliance by using SSH.
b Stop the database service.
service vpostgres stop
chkconfig vpostgres off
c Stop the embedded vCenter Orchestrator service.
service vco-server stop
chkconfig vco-server off
d Log out of the vCloud Automation Center Appliance.
Installation and Configuration
58 VMware, Inc.

Configure the vCloud Automation Center ApplianceTo prepare the vCloud Automation Center Appliance for use, a system administrator configures the hostsettings, generates an SSL certificate, and provides SSO connection information.
Prerequisites
“Configure the vCloud Automation Center Appliance to Use a Standalone PostgreSQL Database,” onpage 58.
Procedure
1 Navigate to the vCloud Automation Center Appliance management console by using its fully qualifieddomain name, https://vcac-va-hostname.domain.name:5480/.
2 Continue past the certificate warning.
3 Log in with user name root and the password you specified when you deployed vCloud AutomationCenter Appliance.
4 Select vCAC Settings > Host Settings and click Resolve Host Name to view the name of the currentlyspecified host.
5 (Optional) If you want to change the host name, enter the fully qualified domain name, vcac-hostname.domain.name, of the vCloud Automation Center Appliance. If you are using a load balancer,enter the fully qualified domain name for the load balancer server.
6 Click Save Settings.
7 Click SSL.
8 Select the certificate type from the Choose Action menu. If you are using a PEM encoded certificate, forexample for a distributed environment, select Import PEM encoded certificate.
Certificates that you import must be trusted and must also be applicable to all instances of vCloudAutomation Center Appliance and any load balancer by using Subject Alternative Name (SAN)certificates.
Option Action
Import a certificate a Copy the certificate values from BEGIN PRIVATE KEY to ENDPRIVATE KEY, including the header and footer, and paste them in theRSA Private Key text box.
b Copy the certificate values from BEGIN CERTIFICATE to ENDCERTIFICATE, including the header and footer, and paste them in theCertificate Chain text box.
c (Optional) If your certificate has one, copy the pass phrase thatencrypts the private key of the certificate that you are importing, andpaste it in the Pass Phrase text box.
Generate a self-signed certificate a Type a common name for the certificate in the Common Name textbox. You can use the fully qualified domain name of the virtualappliance (hostname.domain.name) or a wild card, such as*.mycompany.com. If you use a load balancer, you need to specify theFQDN of the load balancer or a wildcard that matches the name of theload balancer. Do not accept a default value if one is shown, unless itmatches the host name of the virtual appliance.
b Type your organization name, such as your company name, in theOrganization text box.
c Type your organizational unit, such as your department name orlocation, in the Organizational Unit text box.
d Type a two-letter ISO 3166 country code, such as US, in the Countrytext box.
Chapter 4 Distributed Deployment
VMware, Inc. 59

9 Click Replace Certificate, even if you are generating a new certificate.
After a few minutes the certificate details appear on the page. If you are using a load balancer, thecertificate is for the load balancer.
10 Configure the SSO settings that the vCloud Automation Center Appliance uses to interact with theIdentity Appliance. These settings must match the settings you entered when configuring the IdentityAppliance.
a Click SSO.
b Type the fully qualified domain name of the Identity Appliance, identity-va-hostname.domain.namein the SSO Host text box. Do not use an https:// prefix.
For example, vcac-sso.mycompany.com.
c The default port number, 7444, is displayed in the SSO Port text box. Edit this value if you areusing a non-default port.
d Do not modify the default tenant name, vsphere.local, in the SSO Default Tenant text box.
e Type the default administrator name [email protected] in the SSO Admin User textbox.
f Type the SSO administrator password in the SSO Admin Password text box. The password mustmatch the password you specified in the SSO settings for the Identity Appliance.
g Click Save Settings.
After a few minutes, a success message appears and SSO Status is updated to Connected.
h (Optional) If the spinner does not stop within a few minutes, exit the appliance, close the browser,and log in again.
11 Continue past the certificate warning.
12 Log in with user name root and the password you specified when you deployed vCloud AutomationCenter Appliance.
13 Select vCAC Settings > Host Settings and click Resolve Host Name to view the name of the currentlyspecified host.
14 (Optional) If you want to change the host name, enter the fully qualified domain name, vcac-hostname.domain.name, of the vCloud Automation Center Appliance. If you are using a load balancer,enter the fully qualified domain name for the load balancer server.
15 Click Save Settings.
Installation and Configuration
60 VMware, Inc.

16 Select the certificate type from the Choose Action menu. If you are using a PEM encoded certificate, forexample for a distributed environment, select Import PEM encoded certificate.
Certificates that you import must be trusted and must also be applicable to all instances of vCloudAutomation Center Appliance and any load balancer by using Subject Alternative Name (SAN)certificates.
Option Action
Import a certificate a Copy the certificate values from BEGIN PRIVATE KEY to ENDPRIVATE KEY, including the header and footer, and paste them in theRSA Private Key text box.
b Copy the certificate values from BEGIN CERTIFICATE to ENDCERTIFICATE, including the header and footer, and paste them in theCertificate Chain text box.
c (Optional) If your certificate has one, copy the pass phrase thatencrypts the private key of the certificate that you are importing, andpaste it in the Pass Phrase text box.
Generate a self-signed certificate a Type a common name for the certificate in the Common Name textbox. You can use the fully qualified domain name of the virtualappliance (hostname.domain.name) or a wild card, such as*.mycompany.com. If you use a load balancer, you need to specify theFQDN of the load balancer or a wildcard that matches the name of theload balancer. Do not accept a default value if one is shown, unless itmatches the host name of the virtual appliance.
b Type your organization name, such as your company name, in theOrganization text box.
c Type your organizational unit, such as your department name orlocation, in the Organizational Unit text box.
d Type a two-letter ISO 3166 country code, such as US, in the Countrytext box.
17 Click Replace Certificate, even if you are generating a new certificate.
After a few minutes the certificate details appear on the page. If you are using a load balancer, thecertificate is for the load balancer.
18 Configure the SSO settings that the vCloud Automation Center Appliance uses to interact with theIdentity Appliance. These settings must match the settings you entered when configuring the IdentityAppliance.
a Click SSO.
b Type the fully qualified domain name of the Identity Appliance, identity-va-hostname.domain.namein the SSO Host text box. Do not use an https:// prefix.
For example, vcac-sso.mycompany.com.
c The default port number, 7444, is displayed in the SSO Port text box. Edit this value if you areusing a non-default port.
d Do not modify the default tenant name, vsphere.local, in the SSO Default Tenant text box.
e Type the default administrator name [email protected] in the SSO Admin User textbox.
f Type the SSO administrator password in the SSO Admin Password text box. The password mustmatch the password you specified in the SSO settings for the Identity Appliance.
g Click Save Settings.
After a few minutes, a success message appears and SSO Status is updated to Connected.
h (Optional) If the spinner does not stop within a few minutes, exit the appliance, close the browser,and log in again.
Chapter 4 Distributed Deployment
VMware, Inc. 61

19 Click Messaging. The configuration settings and status of messaging for your appliance is displayed.Do not change these settings.
20 Click Services.
The following services must be running before you can install a license or log in to the console. Theyusually start in about 10 minutes.n advanced-designer-service
n approval-service
n branding-service
n catalog-service
n component-registry
n content-management
n eventlog-service
n files-service
n iaas-proxy-provider
n licensing-service
n management-service
n notification-service
n plugin-service
n portal-service
n shell-ui-app
n sts-service
n workitem-service
NOTE You can also log in to the appliance and run tail -f /var/log/vcac/catalina.out to monitorservice startup.
21 Configure the license to enable the Infrastructure tab on the vCloud Automation Center console.
a Click vCAC Settings > Licensing.
b Click Licensing.
c Type a valid vCloud Automation Center license key that you downloaded when you downloadedthe installation files, and click Submit Key.
NOTE If you experience a connection error, you might have a problem with the load balancer. Checknetwork connectivity to the load balancer.
22 Confirm that you can log in to the vCloud Automation Center console.
a Open a browser and navigate to https://vcac-hostname.domain.name/vcac.
b Accept the vCloud Automation Center certificate.
c Accept the SSO certificate.
d Log in with [email protected] and the password you specified when you configuredSSO.
The console opens to the Tenants page on the Administration tab. A single tenant namedvsphere.local appears in the list.
Installation and Configuration
62 VMware, Inc.

Configuring Additional Instances of vCloud Automation Center ApplianceThe system administrator can deploy multiple instances of the vCloud Automation Center Appliance toensure redundancy in a high-availability environment.
For each vCloud Automation Center Appliance, you must enable time synchronization and add theappliance to a cluster. Configuration information based on settings for the initial (primary) vCloudAutomation Center Appliance is added automatically when you add the appliance to the cluster.
Enable Time Synchronization on the vCloud Automation Center ApplianceClocks on the Identity Appliance server, vCloud Automation Center server, and Windows servers must besynchronized to ensure a successful installation.
If you see certificate warnings during this process, continue past them to finish the installation.
Prerequisites
“Configure the Primary vCloud Automation Center Appliance,” on page 57.
Procedure
1 Navigate to the vCloud Automation Center Appliance management console by using its fully qualifieddomain name, https://vcac-va-hostname.domain.name:5480/.
2 Log in with the user name root and the password you specified when the appliance was deployed.
3 Select Admin > Time Settings.
4 Select an option from the Time Sync Mode menu.
Option Action
Network Time Protocol Select Use Time Server from the Time Sync Mode menu. For each timeserver that you are using, type the IP address or the host name in the TimeServer text box.
VMware Tools Select Use Host Time from the Time Sync Mode menu. You mustconfigure the connections to Network Time Protocol servers before youcan use VMware Tools.
5 Click Save Settings.
6 Verify that the value in Current Time is correct.
You can change the time zone as required from the Time Zone Setting page on the System tab.
Join a vCloud Automation Center Appliance to a ClusterDistributed installations support the use of more than one vCloud Automation Center Appliance. Each ofthese appliances must belong to a cluster.
You join a vCloud Automation Center Appliance to a cluster from the management console. The joinoperation copies appliance configuration information for the cluster to the appliance you are adding to thecluster, including certificate, SSO, licensing, database, and messaging information.
Prerequisites
n “Configure the Primary vCloud Automation Center Appliance,” on page 57.
n If your site is using a load balancer, verify that it is configured for use with your vCloud AutomationCenter Appliance. See “Configuring Your Load Balancer,” on page 51.
Chapter 4 Distributed Deployment
VMware, Inc. 63

n “Enable Time Synchronization on the vCloud Automation Center Appliance,” on page 63. Timesynchronization must be enabled for each appliance.
Procedure
1 Navigate to the vCloud Automation Center Appliance management console by using its fully qualifieddomain name, https://vcac-va-hostname.domain.name:5480/.
2 Continue past any certificate warnings.
3 Log in with user name root and the password you specified when deploying the vCloud AutomationCenter Appliance.
4 Select vCAC Settings > HA.
5 Enter the FQDN of a previously configured vCloud Automation Center Appliance in the Leadingcluster node text box.
You can use the FQDN of the primary vCloud Automation Center Appliance, or any vCloudAutomation Center Appliance that is already joined to the cluster.
6 Type the root password in the Password text box.
7 Click Join Cluster.
8 Continue past any certificate warnings.
Services for the cluster are restarted.
9 Verify that services are running.
a Click the Services tab.
b Click the Refresh tab to monitor the progress of service start up.
You should see a list of about twenty-one registered services.
Disable Unused ServicesIf you are using an external PostgreSQL database, a system administrator can disable the database (which isdeployed with every appliance) and embedded vCenter Orchestrator services. These services are not used ina distributed deployment so they should be disabled so as not to consume unnecessary resources.
Prerequisites
“Join a vCloud Automation Center Appliance to a Cluster,” on page 63
Procedure
1 Log in to the vCloud Automation Center Appliance by using SSH.
2 Stop the database service.
service vpostgres stop
chkconfig vpostgres off
3 Stop the embedded vCenter Orchestrator service.
service vco-server stop
chkconfig vco-server off
4 Log out of the vCloud Automation Center Appliance.
Installation and Configuration
64 VMware, Inc.

Validate the Distributed DeploymentAfter deploying additional instances of the vCloud Automation Center Appliance, you should validate thatyou can access the clustered appliances.
Procedure
1 In the load balancer management interface or configuration file, temporarily disable all nodes exceptthe node that you are testing.
2 Confirm that you can log in to the vCloud Automation Center console by navigating to https://vcac-hostname.domain.name/vcac, where vcac-hostname.domain.name is the address of the load balancer.
3 After you have verified that the new vCloud Automation Center Appliance is accessible by using theload balancer, re-enable the other nodes.
Install the IaaS Components in a Distributed ConfigurationThe system administrator installs the IaaS components after the appliances are deployed and fullyconfigured. The IaaS components provide access to vCloud Automation Center Infrastructure features.
Prerequisites
n “Configure the Identity Appliance,” on page 51.
n “Configure the Primary vCloud Automation Center Appliance,” on page 57.
n If your site includes multiple instances of vCloud Automation Center Appliance, “Join a vCloudAutomation Center Appliance to a Cluster,” on page 63.
n Verify that your installation servers meet the requirements described in “IaaS (Windows Server)Requirements,” on page 19.
n Verify that you imported a certificate to IIS and that the certificate root or the certificate authority is inthe trusted root on the installation machine.
n If you are using components in your environment, verify that your load balancer meets theconfiguration requirements.
n You must disable the Microsoft loopback check on the installation machine if you are using a loadbalancer.
See this Microsoft KB article for information about how to disable the loopback check feature. http://support.microsoft.com/KB/926642/EN-US. If you follow the first method described in this article,and use multiple load balancers or load balance layers, be sure to specify the host name for each loadbalancer or layer. The installation fails otherwise.
Procedure
1 IaaS Certificates on page 66vCloud Automation Center IaaS components use certificates and SSL to secure communicationsbetween components.
2 Download the IaaS Installer on page 67A system administrator downloads the installer from the vCloud Automation Center Appliance andruns the installation wizard.
3 Choosing an IaaS Database Scenario on page 67IaaS uses a Microsoft SQL Server database to maintain information about the machines it manages andits own elements and policies.
Chapter 4 Distributed Deployment
VMware, Inc. 65

4 Install the Primary IaaS Website Component with Model Manager Data on page 71The system administrator installs the Website component to provide access to infrastructurecapabilities in the vCloud Automation Center web console. You can install one or many instances ofthe Website component, but you must configure Model Manager Data on the machine that hosts thefirst Website component. You install Model Manager Data only once.
5 Install Additional IaaS Website Components on page 75The Model Manager Website component provides access to infrastructure capabilities in thevCloud Automation Center web console. The system administrator can install one or many instancesof the Website component.
6 Install the Primary Manager Service on page 77The Manager Service component coordinates communication between agents and proxy agents, thedatabase, and SMTP. A minimum of one instance of the Manager Service component must beinstalled. You can install one primary instance and one backup instance of the Manager Servicecomponent to provide redundancy in a high-availability deployment.
7 Install an Additional Manager Service Component on page 79You can install a passive backup instance of the Manager Service component that you can startmanually to provide redundancy in a high-availability deployment.
8 Installing Distributed Execution Managers on page 81You install the Distributed Execution Manager as one of two roles: DEM Orchestrator or DEM Worker.You must install at least one DEM instance for each role, and you can install additional DEM instancesto support failover and high-availability.
9 Verify IaaS Services on page 84After installation, the system administrator verifies that the IaaS services are running. If the servicesare running, the installation is a success.
What to do next
Install a DEM Orchestrator and at least one DEM Worker instance. See “Installing Distributed ExecutionManagers,” on page 81.
IaaS CertificatesvCloud Automation Center IaaS components use certificates and SSL to secure communications betweencomponents.
In a minimal installation for proof-of-concept purposes, you can use self-signed certificates.
In a distributed environment, VMware recommends that you obtain a domain certificate from a trustedcertificate authority.
If you are performing a distributed installation, follow these steps to prepare the IaaS certificate.
1 Get a certificate from a trusted certificate authority.
2 To ensure that the certificate authority and that the root certificate is trusted, place the root certificatefrom the certificate authority into the Trusted Root using the Windows certificate plug-in.
3 Add the certificate to IIS.
4 Restart the IIS machine.
5 Start the IaaS installer.
Installation and Configuration
66 VMware, Inc.

Download the IaaS InstallerA system administrator downloads the installer from the vCloud Automation Center Appliance and runsthe installation wizard.
If you see certificate warnings during this process, continue past them to finish the installation.
See “Certificates,” on page 25 to help you select a certificate.
Prerequisites
n “Configure the Identity Appliance,” on page 51.
n “Configure the Primary vCloud Automation Center Appliance,” on page 57 and, optionally, “Join avCloud Automation Center Appliance to a Cluster,” on page 63.
n Verify that your installation servers meet the requirements described in “IaaS (Windows Server)Requirements,” on page 19.
n Verify that you imported a certificate to IIS and that the certificate root or the certificate authority is inthe trusted root on the installation machine.
n If you are using components in your environment, verify that your load balancer meets theconfiguration requirements.
Procedure
1 (Optional) Activate HTTP if you are installing on a Windows 2012 machine.
a Select Features > Add Features from Server Manager.
b Expand WCF Services under .NET Framework 4.5.1 Features.
c Select HTTP Activation.
2 Open a browser. Navigate to a load balancer or to the primary vCloud Automation Center Appliance.
For a load balancer, use the FQDN. The load balancer must be configured for port 5480. Disable thisport after installation.
For the primary vCloud Automation Center Appliance, use an address of the form https://vcac-va-hostname.domain.name.
3 Click vCloud Automation Center Installer IaaS installation page.
4 Click IaaS Installer.
5 When prompted, save the installer file ([email protected]) to the desktop.
Do not change the file name. It is used to connect the installation to the vCloud Automation CenterAppliance.
6 Copy the installer file to each machine on which you are installing components.
What to do next
Install an IaaS database, see “Choosing an IaaS Database Scenario,” on page 67.
Choosing an IaaS Database ScenarioIaaS uses a Microsoft SQL Server database to maintain information about the machines it manages and itsown elements and policies.
Depending on your preferences and privileges, there are several procedures to choose from to create theIaaS database.
Chapter 4 Distributed Deployment
VMware, Inc. 67

Table 4‑14. Choosing an IaaS Database Scenario
Scenario Procedure
Create the IaaS database manually using the provideddatabase scripts. This option enables a databaseadministrator to review the changes carefully beforecreating the database.
“Create the IaaS Database Manually,” on page 68.
Prepare an empty database and use the installer topopulate the database schema. This option enables theinstaller to use a database user with dbo privileges topopulate the database, instead of requiring sysadminprivileges.
“Prepare an Empty Database,” on page 69.
Use the installer to create the database. This is the simplestoption but requires the use of sysadmin privileges in theinstaller.
“Create the IaaS Database Using the Installation Wizard,”on page 70.
Create the IaaS Database ManuallyThe system administrator can create the database manually using VMware-provided scripts.
Prerequisites
n .NET 4.5.1 must be installed on the SQL Server host.
n Use Windows Authentication, rather than SQL Authentication, to connect to the database.
n Verify the database installation prerequisites. See “IaaS Database Server Requirements,” on page 18.
n Download the IaaS database installer scripts from the vCloud Automation Center Appliance bynavigating to https://vcac-va-hostname.domain.name:5480/installer/.
Procedure
1 Navigate to the Database subdirectory in the directory where you extracted the installation zip archive.
2 Extract the DBInstall.zip archive to a local directory.
3 Log in to the Windows database host with sufficient rights to create and drop databases sysadminprivileges in the SQL Server instance.
4 Review the database deployment scripts as needed. In particular, review the settings in the DBSettingssection of CreateDatabase.sql and edit them if necessary.
The settings in the script are the recommended settings. Only ALLOW_SNAPSHOT_ISOLATION ON andREAD_COMMITTED_SNAPSHOT ON are required.
5 Execute the following command with the arguments described in the table.
BuildDB.bat /p:DBServer=db_server;
DBName=db_name;DBDir=db_dir;
LogDir=[log_dir];ServiceUser=service_user;
ReportLogin=web_user
Table 4‑15. Database Values
Variable Value
DBServer Specifies the SQL Server instance in the formatdbhostname[,port number]\SQL instance. Specify a portnumber only if you are using a non-default port. TheMicrosoft SQL default port number is 1433. The default valuefor DBserver is localhost.
DBName Name of the database. The default value is vcac..
Installation and Configuration
68 VMware, Inc.

Table 4‑15. Database Values (Continued)
Variable Value
DBDir Path to the data directory for the database, excluding thefinal slash.
LogDir Path to the log directory for the database, excluding the finalslash.
Service User User name under which the Manager Service runs.
ReportLogin User name under which the Web services run.
The database is created.
What to do next
“Install the IaaS Components in a Distributed Configuration,” on page 65.
Prepare an Empty DatabaseA system administrator can install the IaaS schema on an empty database. This installation method providesmaximum control over database security.
Prerequisites
n Verify the database installation prerequisites. See “IaaS Database Server Requirements,” on page 18.
n Download the IaaS database installer scripts from the vCloud Automation Center Appliance bynavigating to https://vcac-va-hostname.domain.name:5480/installer/.
Procedure
1 Navigate to the Database directory within the directory where you extracted the installation zip archive.
2 Extract the DBInstall.zip archive to a local directory.
3 Log in to the Windows database host with sysadmin privileges within the SQL Server instance.
4 Edit CreateDatabase.sql and replace all instances of the variables in the table with the correct valuesfor your environment.
Table 4‑16. Database Values
Variable Value
$(DBName) Name of the database, such as vCAC.
$(DBDir) Path to the data directory for the database, excluding thefinal slash.
$(LogDir) Path to the log directory for the database, excluding the finalslash.
5 Review the settings in the DB Settings section of CreateDatabase.sql and edit them if needed.
The settings in the script are the recommended settings for the IaaS database. OnlyALLOW_SNAPSHOT_ISOLATION ON and READ_COMMITTED_SNAPSHOT ON are required.
6 Open SQL Server Management Studio.
7 Click New Query.
An SQL Query window opens.
8 On the Query menu, ensure that SQLCMD Mode is selected.
9 Paste the entire modified contents of CreateDatabase.sql into the query pane.
Chapter 4 Distributed Deployment
VMware, Inc. 69

10 Click Execute.
The script runs and creates the database.
What to do next
“Install the IaaS Components in a Distributed Configuration,” on page 65.
Create the IaaS Database Using the Installation WizardvCloud Automation Center uses a Microsoft SQL Server database to maintain information about themachines it manages and its own elements and policies.
The following steps describe how to create the IaaS database using the installer or populate an existingempty database. It is also possible to create the database manually. See “Create the IaaS DatabaseManually,” on page 68.
Prerequisites
n If you are creating the database with Windows authentication, instead of SQL authentication, verifythat the user who runs the installer has sysadmin rights on the SQL server.
n “Download the IaaS Installer,” on page 67.
Procedure
1 Right-click the [email protected] setup file that you downloaded andselect Run as administrator.
2 Click Next.
3 Accept the license agreement and click Next.
4 Type the administrator credentials for the vCloud Automation Center Appliance on the Log In pageand click Next.
The user name is root and the password is the password that you specified when you deployed thevCloud Automation Center Appliance.
5 Click Next.
6 Select Custom Install on the Installation Type page.
7 Select IaaS Server on the Installation Type page.
8 Accept the root install location or click Change and select an installation path.
9 Click Next.
10 On the IaaS Server Custom Install page, select Database.
11 In the Database Instance text box, specify the database instance or click Scan and select from the list ofinstances. If the database instance is on a non-default port, include the port number in instancespecification by using the form dbhost,SQL_port_number\SQLinstance. The Microsoft SQL default portnumber is 1443.
12 Choose your database installation type from the Database Name panel.
n Select Use existing empty database to create the schema in an existing database.
n Type a new database name or type the default name vcac to create a database.
13 Deselect Use default data and log directories to specify alternative locations or leave it selected to usethe default directories (recommended).
Installation and Configuration
70 VMware, Inc.

14 Select an authentication method for installing the database from the Authentication list.
n To use the credentials under which you are running the installer to create the database, select UserWindows identity... .
n To use specify SQL authentication, deselect Use Windows identity.... Type SQL credentials in theuser and password text boxes.
By default, the Windows service user account is used during runtime access to the database, and musthave access to the SQL Server instance. The credentials used to access the database at runtime can beconfigured to use SQL credentials.
15 Click Next.
16 Complete the Prerequisite Check.
Option Description
No errors Click Next.
Noncritical errors Click Bypass.
Critical errors Bypassing critical errors causes the installation to fail. If warnings appear,select the warning in the left pane and follow the instructions on the right.Address all critical errors and click Check Again to verify.
17 Click Install.
18 When the success message appears, deselect Guide me through initial configuration and click Next.
19 Click Finish.
The database is ready for use.
Install the Primary IaaS Website Component with Model Manager DataThe system administrator installs the Website component to provide access to infrastructure capabilities inthe vCloud Automation Center web console. You can install one or many instances of the Websitecomponent, but you must configure Model Manager Data on the machine that hosts the first Websitecomponent. You install Model Manager Data only once.
Prerequisites
n Install the IaaS Database, see “Choosing an IaaS Database Scenario,” on page 67.
n If you previously installed other components in this environment, verify that you know the passphrasethat was created. See “Security Passphrase,” on page 25.
n If you are using components in your environment, verify that your load balancer meets theconfiguration requirements.
n You must disable the Microsoft loopback check on the installation machine if you are using a loadbalancer. If you use multiple load balancers or load balance layers, specify the path for each host name.The installation fails otherwise.
See this Microsoft KB article for information on how to disable the loopback check feature. http://support.microsoft.com/KB/926642/EN-US.
Procedure
1 Install the Primary IaaS Website Component on page 72The system administrator installs the Model Manager Website component to provide access toinfrastructure capabilities in the vCloud Automation Center Web console.
Chapter 4 Distributed Deployment
VMware, Inc. 71

2 Configure Model Manager Data on page 73You install the Model Manager component on the same machine that hosts the first Websitecomponent. You can only install Model Manager Data once.
You can install additional Website components or install the Manager Service. See “Install Additional IaaSWebsite Components,” on page 75 or “Install the Primary Manager Service,” on page 77.
Install the Primary IaaS Website ComponentThe system administrator installs the Model Manager Website component to provide access toinfrastructure capabilities in the vCloud Automation Center Web console.
Prerequisites
n “Create the IaaS Database Using the Installation Wizard,” on page 70.
n Verify that your environment meets the requirements described in “IaaS (Windows Server)Requirements,” on page 19.
n If you previously installed other components in this environment, verify that you know the passphrasethat was created. See “Security Passphrase,” on page 25.
n If you are using components in your environment, verify that your load balancer meets theconfiguration requirements.
n You must disable the Microsoft loopback check on the installation machine if you are using a loadbalancer.
See this Microsoft KB article for information about how to disable the loopback check feature. http://support.microsoft.com/KB/926642/EN-US. If you follow the first method described in this article,and use multiple load balancers or load balance layers, be sure to specify the host name for each loadbalancer or layer. The installation fails otherwise.
Procedure
1 Right-click the [email protected] setup file that you downloaded andselect Run as administrator.
2 Click Next.
3 Accept the license agreement and click Next.
4 Type the administrator credentials for the vCloud Automation Center Appliance on the Log In pageand click Next.
The user name is root and the password is the password that you specified when you deployed thevCloud Automation Center Appliance.
5 Click Next.
6 Select Custom Install on the Installation Type page.
7 Select IaaS Server on the Installation Type page.
8 Accept the root install location or click Change and select an installation path.
9 Click Next.
10 Select Website and ModelManagerData on the IaaS Server Custom Install page.
11 Select a Web site from available Web sites or accept the default Web site on the Administration &Model Manager Web Site tab.
12 Type an available port number in the Port number text box, or accept the default port 443.
Installation and Configuration
72 VMware, Inc.

13 Click Test Binding to confirm that the port number is available for use.
14 Select the certificate for this component.
a If you imported a certificate after you began the installation, click Refresh to update the list.
b Select the certificate to use from Available certificates.
c If you imported a certificate that does not have a friendly name and it does not appear in the list,deselect Display certificates using friendly names and click Refresh.
If you are installing in an environment that does not use load balancers, you can select Generate a Self-Signed Certificate instead of selecting a certificate. If you are installing additional Web site componentsbehind a load balancer, do not generate self-signed certificates. Import the certificate from the main IaaSWeb server to ensure that you use the same certificate on all servers behind the load balancer.
15 (Optional) Click View selected certificate, view the certificate, and click OK to close the informationwindow.
16 (Optional) Select Suppress certificate mismatch to suppress certificate errors. The installation ignorescertificate name mismatch errors as well as any remote certificate-revocation list match errors.
This is a less secure option.
Configure Model Manager DataYou install the Model Manager component on the same machine that hosts the first Website component.You can only install Model Manager Data once.
Prerequisites
“Install the Primary IaaS Website Component,” on page 72.
Procedure
1 Click the Model Manager Data tab.
2 Type the server information in the Server text box.
Option Description
If you are using a load balancer Type the fully qualified domain name of the load balancer for the vCloudAutomation Center Appliance. For example,vcac-load-balancer.eng.mycompany.com. IP addresses are notrecognized.
With no load balancer Type the fully qualified domain name of the vCloud Automation CenterAppliance. For example, vcac.eng.mycompany.com. IP addresses are notrecognized.
3 Click Load to display the SSO Default Tenant.
The vsphere.local default tenant is created automatically when you configure single sign-on. Do notmodify it.
4 Click Download to import the certificate from the virtual appliance.
It might take several minutes to download the certificate.
5 (Optional) Click View selected certificate, view the certificate, and click OK to close the informationwindow.
6 Click Accept Certificate.
7 Type [email protected] in the User name text box and the password you created when youconfigured the SSO in the Password and Confirm text boxes.
Chapter 4 Distributed Deployment
VMware, Inc. 73

8 (Optional) Click Test to verify the credentials.
9 Type IaaS server information in the IaaS Server text box.
Option Description
If you are using a load balancer Type the fully qualified domain name of the load balancer for the IaaSWebsite Server. For example,IaaS-load-balancer.eng.mycompany.com. IP addresses are notrecognized.
With no load balancer Type the fully qualified domain name of the IaaS Website Server. Forexample, IaaS.eng.mycompany.com. IP addresses are not recognized.
10 Click Test to verify the server connection.
11 Click Next.
12 Complete the Prerequisite Check.
Option Description
No errors Click Next.
Noncritical errors Click Bypass.
Critical errors Bypassing critical errors causes the installation to fail. If warnings appear,select the warning in the left pane and follow the instructions on the right.Address all critical errors and click Check Again to verify.
13 Type the user name and password of the service account user who has administrative privileges on the
current installation server in the Server Installation Information text boxes on the Server and AccountSettings page.
14 Provide the passphrase used to generate the encryption key that protects the database.
Option Description
If you have already installedcomponents in this environment
Type the passphrase you created previously in the Passphrase andConfirm text boxes.
If this is the first installation Type a passphrase in the Passphrase and Confirm text boxes. You mustuse this passphrase every time you install a new component.
Keep this passphrase in a secure place for later use.
15 Specify the IaaS database server, database name, and authentication method for the database server inthe Microsoft SQL Database Installation Information text box.
This is the IaaS database server, name, and authentication information that you created previously.
16 Click Next.
17 Click Install.
18 When the installation finishes, deselect Guide me through the initial configuration and click Next.
What to do next
You can install additional Website components or install the Manager Service. See “Install Additional IaaSWebsite Components,” on page 75 or “Install the Primary Manager Service,” on page 77.
Installation and Configuration
74 VMware, Inc.

Install Additional IaaS Website ComponentsThe Model Manager Website component provides access to infrastructure capabilities in thevCloud Automation Center web console. The system administrator can install one or many instances of theWebsite component.
Prerequisites
n “Install the Primary IaaS Website Component with Model Manager Data,” on page 71.
n Verify that your environment meets the requirements described in “IaaS (Windows Server)Requirements,” on page 19.
n If you previously installed other components in this environment, verify that you know the passphrasethat was created. See “Security Passphrase,” on page 25.
n If you are using components in your environment, verify that your load balancer meets theconfiguration requirements.
n You must disable the Microsoft loopback check on the installation machine if you are using a loadbalancer.
See this Microsoft KB article for information about how to disable the loopback check feature. http://support.microsoft.com/KB/926642/EN-US. If you follow the first method described in this article,and use multiple load balancers or load balance layers, be sure to specify the host name for each loadbalancer or layer. The installation fails otherwise.
Procedure
1 Right-click the [email protected] setup file that you downloaded andselect Run as administrator.
2 Click Next.
3 Accept the license agreement and click Next.
4 Type the administrator credentials for the vCloud Automation Center Appliance on the Log In pageand click Next.
The user name is root and the password is the password that you specified when you deployed thevCloud Automation Center Appliance.
5 Click Next.
6 Select Custom Install on the Installation Type page.
7 Select IaaS Server on the Installation Type page.
8 Accept the root install location or click Change and select an installation path.
9 Click Next.
10 Select Website on the IaaS Server Custom Install page.
11 Select a Web site from available Web sites or accept the default Web site on the Administration &Model Manager Web Site tab.
12 Type an available port number in the Port number text box, or accept the default port 443.
13 Click Test Binding to confirm that the port number is available for use.
Chapter 4 Distributed Deployment
VMware, Inc. 75
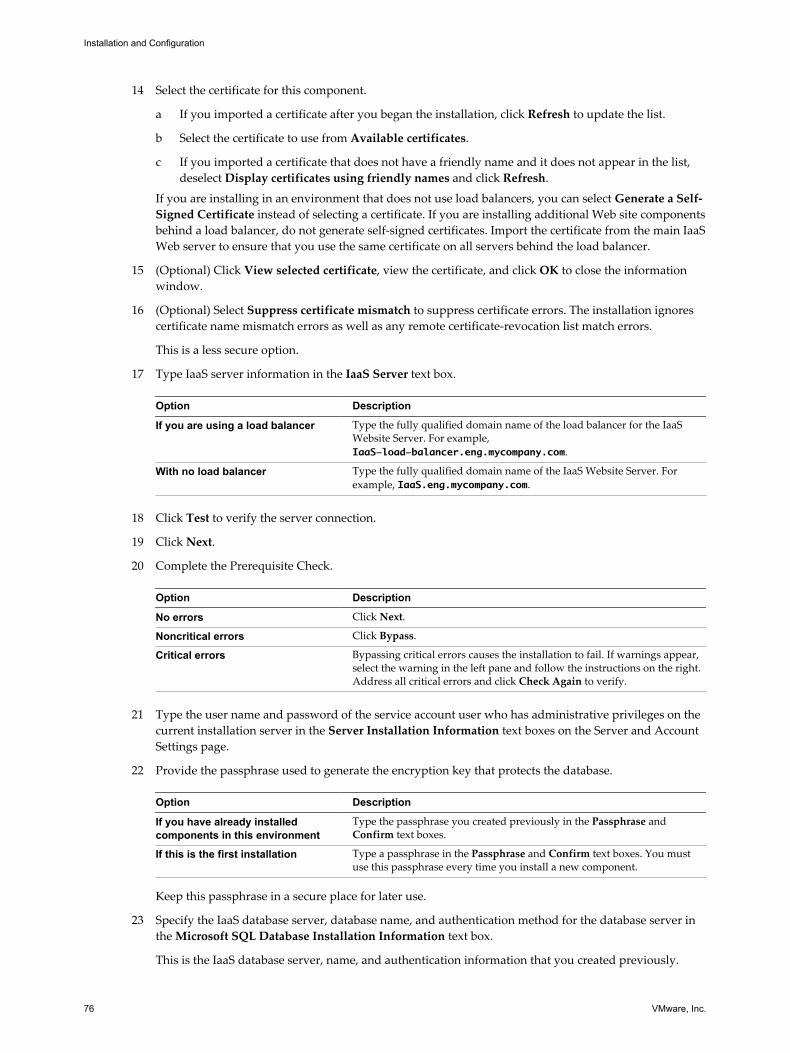
14 Select the certificate for this component.
a If you imported a certificate after you began the installation, click Refresh to update the list.
b Select the certificate to use from Available certificates.
c If you imported a certificate that does not have a friendly name and it does not appear in the list,deselect Display certificates using friendly names and click Refresh.
If you are installing in an environment that does not use load balancers, you can select Generate a Self-Signed Certificate instead of selecting a certificate. If you are installing additional Web site componentsbehind a load balancer, do not generate self-signed certificates. Import the certificate from the main IaaSWeb server to ensure that you use the same certificate on all servers behind the load balancer.
15 (Optional) Click View selected certificate, view the certificate, and click OK to close the informationwindow.
16 (Optional) Select Suppress certificate mismatch to suppress certificate errors. The installation ignorescertificate name mismatch errors as well as any remote certificate-revocation list match errors.
This is a less secure option.
17 Type IaaS server information in the IaaS Server text box.
Option Description
If you are using a load balancer Type the fully qualified domain name of the load balancer for the IaaSWebsite Server. For example,IaaS-load-balancer.eng.mycompany.com.
With no load balancer Type the fully qualified domain name of the IaaS Website Server. Forexample, IaaS.eng.mycompany.com.
18 Click Test to verify the server connection.
19 Click Next.
20 Complete the Prerequisite Check.
Option Description
No errors Click Next.
Noncritical errors Click Bypass.
Critical errors Bypassing critical errors causes the installation to fail. If warnings appear,select the warning in the left pane and follow the instructions on the right.Address all critical errors and click Check Again to verify.
21 Type the user name and password of the service account user who has administrative privileges on the
current installation server in the Server Installation Information text boxes on the Server and AccountSettings page.
22 Provide the passphrase used to generate the encryption key that protects the database.
Option Description
If you have already installedcomponents in this environment
Type the passphrase you created previously in the Passphrase andConfirm text boxes.
If this is the first installation Type a passphrase in the Passphrase and Confirm text boxes. You mustuse this passphrase every time you install a new component.
Keep this passphrase in a secure place for later use.
23 Specify the IaaS database server, database name, and authentication method for the database server inthe Microsoft SQL Database Installation Information text box.
This is the IaaS database server, name, and authentication information that you created previously.
Installation and Configuration
76 VMware, Inc.

24 Click Next.
25 Click Install.
26 When the installation finishes, deselect Guide me through the initial configuration and click Next.
What to do next
“Install the Primary Manager Service,” on page 77.
Install the Primary Manager ServiceThe Manager Service component coordinates communication between agents and proxy agents, thedatabase, and SMTP. A minimum of one instance of the Manager Service component must be installed. Youcan install one primary instance and one backup instance of the Manager Service component to provideredundancy in a high-availability deployment.
Prerequisites
n If you previously installed other components in this environment, verify that you know the passphrasethat was created. See “Security Passphrase,” on page 25.
n (Optional) If you want to install the Manager Service in a Web site other than the default Web site, firstcreate a Web site in Internet Information Services.
n .NET Framework 4.5.1 is installed.
n Verify that you have a certificate from a certificate authority imported into IIS and that the rootcertificate or certificate authority is trusted. All components under the load balancer must have thesame certificate.
n Verify that the Web site load balancer is configured.
n “Install the Primary IaaS Website Component with Model Manager Data,” on page 71.
Procedure
1 Right-click the [email protected] setup file that you downloaded andselect Run as administrator.
2 Accept the license agreement and click Next.
3 Type the administrator credentials for the vCloud Automation Center Appliance on the Log In pageand click Next.
The user name is root and the password is the password that you specified when you deployed thevCloud Automation Center Appliance.
4 Click Next.
5 Select Custom Install on the Installation Type page.
6 Select IaaS Server on the Installation Type page.
7 Accept the root install location or click Change and select an installation path.
8 Click Next.
9 Select Manager Service on the IaaS Server Custom Install page.
Chapter 4 Distributed Deployment
VMware, Inc. 77

10 Type IaaS server information in the IaaS Server text box.
Option Description
If you are using a load balancer Type the fully qualified domain name of the load balancer for the IaaSWebsite Server. For example,IaaS-load-balancer.eng.mycompany.com.
With no load balancer Type the fully qualified domain name of the IaaS Website Server. Forexample, IaaS.eng.mycompany.com.
11 Select Active node with startup type set to automatic.
12 Select a Web site from available Web sites or accept the default Web site on the Administration &Model Manager Web Site tab.
13 Type an available port number in the Port number text box, or accept the default port 443.
14 Click Test Binding to confirm that the port number is available for use.
15 Select the certificate for this component.
a If you imported a certificate after you began the installation, click Refresh to update the list.
b Select the certificate to use from Available certificates.
c If you imported a certificate that does not have a friendly name and it does not appear in the list,deselect Display certificates using friendly names and click Refresh.
If you are installing in an environment that does not use load balancers, you can select Generate a Self-Signed Certificate instead of selecting a certificate. If you are installing additional Web site componentsbehind a load balancer, do not generate self-signed certificates. Import the certificate from the main IaaSWeb server to ensure that you use the same certificate on all servers behind the load balancer.
16 (Optional) Click View selected certificate, view the certificate, and click OK to close the informationwindow.
17 Click Next.
18 Check the prerequisites and click Next.
19 Type the user name and password of the service account user who has administrative privileges on thecurrent installation server in the Server Installation Information text boxes on the Server and AccountSettings page.
20 Provide the passphrase used to generate the encryption key that protects the database.
Option Description
If you have already installedcomponents in this environment
Type the passphrase you created previously in the Passphrase andConfirm text boxes.
If this is the first installation Type a passphrase in the Passphrase and Confirm text boxes. You mustuse this passphrase every time you install a new component.
Keep this passphrase in a secure place for later use.
21 Specify the IaaS database server, database name, and authentication method for the database server inthe Microsoft SQL Database Installation Information text box.
This is the IaaS database server, name, and authentication information that you created previously.
22 Click Next.
23 Click Install.
24 When the installation finishes, deselect Guide me through the initial configuration and click Next.
25 Click Finish.
Installation and Configuration
78 VMware, Inc.

What to do next
To ensure that the Manager Service you installed is the active primary instance, verify that thevCloud Automation Center Service is running.
Optionally, you can install an additional instance of the Manager Service component as a passive backupthat you can start manually if the primary instance fails. See “Install an Additional Manager ServiceComponent,” on page 79.
Install an Additional Manager Service ComponentYou can install a passive backup instance of the Manager Service component that you can start manually toprovide redundancy in a high-availability deployment.
Prerequisites
n If you previously installed other components in this environment, verify that you know the passphrasethat was created. See “Security Passphrase,” on page 25.
n (Optional) If you want to install the Manager Service in a Web site other than the default Web site, firstcreate a Web site in Internet Information Services.
n .NET Framework 4.5.1 is installed.
n Verify that you have a certificate from a certificate authority imported into IIS and that the rootcertificate or certificate authority is trusted. All components under the load balancer must have thesame certificate.
n Verify that the Website load balancer is configured.
n “Install the Primary IaaS Website Component with Model Manager Data,” on page 71.
Procedure
1 Right-click the [email protected] setup file that you downloaded andselect Run as administrator.
2 Click Next.
3 Accept the license agreement and click Next.
4 Type the administrator credentials for the vCloud Automation Center Appliance on the Log In pageand click Next.
The user name is root and the password is the password that you specified when you deployed thevCloud Automation Center Appliance.
5 Click Next.
6 Select Custom Install on the Installation Type page.
7 Select IaaS Server on the Installation Type page.
8 Accept the root install location or click Change and select an installation path.
9 Click Next.
10 Select Manager Service on the IaaS Server Custom Install page.
Chapter 4 Distributed Deployment
VMware, Inc. 79

11 Type IaaS server information in the IaaS Server text box.
Option Description
If you are using a load balancer Type the fully qualified domain name of the load balancer for the IaaSWebsite Server. For example,IaaS-load-balancer.eng.mycompany.com.
With no load balancer Type the fully qualified domain name of the IaaS Website Server. Forexample, IaaS.eng.mycompany.com.
12 Select Disaster recovery cold standby node.
13 Select a Web site from available Web sites or accept the default Web site on the Administration &Model Manager Web Site tab.
14 Type an available port number in the Port number text box, or accept the default port 443.
15 Click Test Binding to confirm that the port number is available for use.
16 Select the certificate for this component.
a If you imported a certificate after you began the installation, click Refresh to update the list.
b Select the certificate to use from Available certificates.
c If you imported a certificate that does not have a friendly name and it does not appear in the list,deselect Display certificates using friendly names and click Refresh.
If you are installing in an environment that does not use load balancers, you can select Generate a Self-Signed Certificate instead of selecting a certificate. If you are installing additional Web site componentsbehind a load balancer, do not generate self-signed certificates. Import the certificate from the main IaaSWeb server to ensure that you use the same certificate on all servers behind the load balancer.
17 (Optional) Click View selected certificate, view the certificate, and click OK to close the informationwindow.
18 Click Next.
19 Check the prerequisites and click Next.
20 Type the user name and password of the service account user who has administrative privileges on thecurrent installation server in the Server Installation Information text boxes on the Server and AccountSettings page.
21 Provide the passphrase used to generate the encryption key that protects the database.
Option Description
If you have already installedcomponents in this environment
Type the passphrase you created previously in the Passphrase andConfirm text boxes.
If this is the first installation Type a passphrase in the Passphrase and Confirm text boxes. You mustuse this passphrase every time you install a new component.
Keep this passphrase in a secure place for later use.
22 Specify the IaaS database server, database name, and authentication method for the database server inthe Microsoft SQL Database Installation Information text box.
This is the IaaS database server, name, and authentication information that you created previously.
23 Click Next.
24 Click Install.
25 When the installation finishes, deselect Guide me through the initial configuration and click Next.
26 Click Finish.
Installation and Configuration
80 VMware, Inc.

What to do next
To ensure that the Manager Service you installed is a passive backup instance, verify that thevCloud Automation Center Service is not running.
Installing Distributed Execution ManagersYou install the Distributed Execution Manager as one of two roles: DEM Orchestrator or DEM Worker. Youmust install at least one DEM instance for each role, and you can install additional DEM instances tosupport failover and high-availability.
The system administrator must choose installation machines that meet predefined system requirements. TheDEM Orchestrator and the Worker can reside on the same machine.
As you plan to install Distributed Execution Managers, keep in mind the following considerations:
n Only one DEM Orchestrator instance is active at any time. Typically, you install one active and onepassive DEM Orchestrator on each Manager Service machine.
n Install the Orchestrator on a machine with strong network connectivity to the Model Manager host.
n Install a second DEM Orchestrator on a different machine for failover.
n Typically, you install DEM Workers on the IaaS Manager Service server or on a separate server. Theserver must have network connectivity to the Model Manager host.
n You can install additional DEM instances for redundancy and scalability, including multiple instanceson the same machine.
There are specific requirements for the DEM installation that depend on the endpoints you use. See “Distributed Execution Manager Requirements,” on page 20.
Install the Distributed Execution ManagersA system administrator installs at least one DEM Worker and one DEM Orchestrator. The installationprocedure is the same for both roles.
Typically, you install one active and one passive DEM Orchestrator on each Manager Service machine. Youcan install DEM Orchestrators and DEM Workers on the same machine.
Prerequisites
“Download the IaaS Installer,” on page 67.
Procedure
1 Right-click the [email protected] setup file that you downloaded andselect Run as administrator.
2 Click Next.
3 Accept the license agreement and click Next.
4 Type the administrator credentials for the vCloud Automation Center Appliance on the Log In pageand click Next.
The user name is root and the password is the password that you specified when you deployed thevCloud Automation Center Appliance.
5 Click Next.
6 Select Custom Install on the Installation Type page.
7 Select Distributed Execution Managers.
8 Accept the root install location or click Change and select an installation path.
Chapter 4 Distributed Deployment
VMware, Inc. 81

9 Click Next.
10 Check prerequisites and click Next.
11 Enter the log in credentials for the administrator account that is performing the installation.
12 Click Next.
13 Select the installation type from the DEM role drop-down menu.
Option Description
Worker The Worker executes workflows.
Orchestrator The Orchestrator oversees DEM worker activities, including schedulingand preprocessing workflows, and monitors DEM worker online status.
14 Enter a unique name that identifies this DEM in the DEM name text box.
If you plan to use the migration tool, this name must exactly match the name you used in yourvCloud Automation Center 5.2.1 or 5.2.2 installation. The name cannot include spaces and cannotexceed 128 characters.
15 (Optional) Enter a description of this instance in DEM description.
16 Enter the host names and ports in the Manager Service Host name and Model Manager Web ServiceHost name text boxes.
Option Description
If you are using a load balancer Type the fully qualified domain names of the load balancers for theManager Service and Model Manager Web Service. For example,manager-load-balancer.eng.mycompany.com:443 andweb-load-balancer.eng.mycompany.com:443.
With no load balancer Type the fully qualified domain names of the Manager Service and ModelManager Web Service. For example,manager-service.eng.mycompany.com:443 andmodel-manager.eng.mycompany.com:443.
17 (Optional) Click Test to test the connections to the Manager Service and Model Manager Web Service.
18 Click Add.
19 Click Next.
20 Click Install.
21 When the installation finishes, deselect Guide me through the initial configuration and click Next.
22 Click Finish.
What to do next
Repeat this procedure to install additional DEM instances for redundancy and scalability.
Configure the DEM to Connect to SCVMM on a Nonstandard Installation PathBy default, the DEM Worker configuration file (DynamicOps.DEM.exe.config) points to the standardinstallation path of Microsoft's System Center Virtual Machine Manager (SCVMM) console:{ProgramFiles}\Microsoft System Center 2012\Virtual Machine Manager\bin. The system administratormust change the path if it is installed in another location.
This procedure is required only when you have SCVMM endpoints and agents.
Installation and Configuration
82 VMware, Inc.

Prerequisites
n If the SCVMM Console has been installed in another location, the configuration file of the DEM Worker(located in Program Files (x86)VMware\vCAC\Distributed Execution Manager\<InstanceName>\DynamicOps.DEM.exe.config must be updated to change the default path in theassemblyLoadConfiguration section to point to the new folder.
<assemblyLoadConfiguration>
<assemblies>
<!-- List of required assemblies for Scvmm -->
<add name="Errors" path="{ProgramFiles}\Microsoft System Center 2012\Virtual
Machine Manager\bin" />
[...]
</assemblies>
</assemblyLoadConfiguration>
Procedure
1 Stop the DEM Worker.
2 Determine the installation path.
3 Update the DynamicOps.DEM.exe.config file.
4 Restart the DEM Worker.
The default DEM Worker path is updated to the new folder.
Perform Virtual Provisioning on SCVMMWhen setting up a virtual machine template in SCVMM, a system administrator can add a Guest OS Profiledirectly to a Windows template by using SCVMM Console.
Prerequisites
Some restrictions apply to SCVMM template and hardware profile names. Specifically, these names cannotstart with the following words.
n TemporaryTemplate
n Temporary Template
n TemporaryProfile
n Temporary Profile
n Profile
Because of naming conventions that SCVMM and VMware use for temporary templates and hardwareprofiles, these words are ignored during data collection. A compute resource running under SCVMM canhave multiple paths in the placement section that are collected and assigned in a reservation. On a Hyper-Vcluster under SCVMM management, data collection is for Shared Volumes only, work loads can beprovisioned on a shared resource of a cluster only.
When running data collection on Standalone hosts for storage used in the reservation,vCloud Automation Center collects the default virtual machine path. This can be configured throughSCVMM Console under the Placement section.
Procedure
1 View the SCVMM Console.
2 Right-click the Hyper-V cluster to select properties.
3 Browse to the Shared Volumes section to view the storage properties.
Chapter 4 Distributed Deployment
VMware, Inc. 83

4 To configure the SCVMM for data collection on standalone hosts:
a View the SCMVV Console.
b Right-click the Hyper-V standalone host to select properties.
c Browse to the Placement section to view the storage properties.
Verify IaaS ServicesAfter installation, the system administrator verifies that the IaaS services are running. If the services arerunning, the installation is a success.
Procedure
1 From the Windows desktop of the IaaS machine, select Administrative Tools > Services.
2 Locate the following services and verify that their status is Started.
n VMware DEM – Orchestrator – DEO
n VMware DEM – Worker – DEM
n VMware vCloud Automation Center Agent Agent name
n VMware vCloud Automation Center Service
3 Close the Services window.
What to do next
“Provide the Infrastructure License,” on page 108.
Installation and Configuration
84 VMware, Inc.

Installing Agents 5vCloud Automation Center uses agents to integrate with external systems. A system administrator canselect agents to install to communicate with other virtualization platforms.
vCloud Automation Center uses the following types of agents to manage external systems:
n Hypervisor proxy agents (vSphere, Citrix Xen Servers and Microsoft Hyper-V servers)
n External provisioning infrastructure (EPI) integration agents
n Virtual Desktop Infrastructure (VDI) agents
n Windows Management Instrumentation (WMI) agents
For high-availability, you can install multiple agents for a single endpoint. Install each redundant agent on aseparate server, but name and configure them identically. Redundant agents provide some fault tolerance,but do not provide failover. For example, if you install two vSphere agents, one on server A and one onserver B, and server A becomes unavailable, the agent installed on server B continues to process work items.However, the server B agent cannot finish processing a work item that the server A agent had alreadystarted.
You have the option to install a vSphere agent as part of your minimal installation, but after the installationyou can also add other agents, including an additional vSphere agent. In a distributed deployment, youinstall all your agents after you complete the base distributed installation. The agents you install depend onthe resources in your infrastructure.
For information about using vSphere agents, see “vSphere Agent Requirements,” on page 87.
This chapter includes the following topics:
n “Set the PowerShell Execution Policy to RemoteSigned,” on page 86
n “Choosing the Agent Installation Scenario,” on page 86
n “Agent Installation Location and Requirements,” on page 87
n “Installing and Configuring the Proxy Agent for vSphere,” on page 87
n “Installing the Proxy Agent for Hyper-V or XenServer,” on page 91
n “Installing the VDI Agent for XenDesktop,” on page 94
n “Installing the EPI Agent for Citrix,” on page 97
n “Installing the EPI Agent for Visual Basic Scripting,” on page 99
n “Installing the WMI Agent for Remote WMI Requests,” on page 102
VMware, Inc. 85

Set the PowerShell Execution Policy to RemoteSignedYou must set the PowerShell Execution Policy from Restricted to RemoteSigned or Unrestricted to allowlocal PowerShell scripts to be run.
Prerequisites
n Log in as a Windows administrator.
n Verify that Microsoft PowerShell is installed on the installation host before agent installation. Theversion required depends on the operating system of the installation host. See Microsoft Help andSupport.
n For more information about PowerShell Execution Policy, run help about_signing or help Set-ExecutionPolicy at the PowerShell command prompt.
Procedure
1 Select Start > All Programs > Windows PowerShell version > Windows PowerShell.
2 For Remote Signed, run Set-ExecutionPolicy RemoteSigned.
3 For Unrestricted, run Set-ExecutionPolicy Unrestricted.
4 Verify that the command did not produce any errors.
5 Type Exit at the PowerShell command prompt.
Choosing the Agent Installation ScenarioThe agents that you need to install depend on the external systems with which you plan to integrate.
Table 5‑1. Choosing an Agent Scenario
Integration Scenario Agent Requirements and Procedures
Provision cloud machines by integrating with a cloudenvironment such as Amazon Web Services orRed Hat Enterprise Linux OpenStack Platform.
You do not need to install an agent.
Provision physical machines by integrating with a physicalenvironment such as Dell iDRAC or Cisco UCS Manager.
You do not need to install an agent.
Provision virtual machines by integrating with a vSphereenvironment.
“Installing and Configuring the Proxy Agent for vSphere,”on page 87
Provision virtual machines by integrating with aMicrosoft Hyper-V Server environment.
“Installing the Proxy Agent for Hyper-V or XenServer,” onpage 91
Provision virtual machines by integrating with a XenServerenvironment.
n “Installing the Proxy Agent for Hyper-V orXenServer,” on page 91
n “Installing the EPI Agent for Citrix,” on page 97
Provision virtual machines by integrating with aXenDesktop environment.
n “Installing the VDI Agent for XenDesktop,” onpage 94
n “Installing the EPI Agent for Citrix,” on page 97
Run Visual Basic scripts as additional steps in theprovisioning process before or after provisioning amachine, or when deprovisioning.
“Installing the EPI Agent for Visual Basic Scripting,” onpage 99
Collect data from the provisioned Windows machines, forexample the Active Directory status of the owner of amachine.
“Installing the WMI Agent for Remote WMI Requests,” onpage 102
Provision virtual machines by integrating with any othersupported virtual platform.
You do not need to install an agent.
Installation and Configuration
86 VMware, Inc.

Agent Installation Location and RequirementsA system administrator typically installs the agents on the vCloud Automation Center server that hosts theactive Manager Service component.
If an agent is installed on another host, the network configuration must allow communication between theagent and Manager Services installation machine.
Each agent is installed under a unique name in its own directory, Agents\agentname, under thevCloud Automation Center installation directory (typically Program Files(x86)\VMware\vCAC), with itsconfiguration stored in the file VRMAgent.exe.config in that directory.
Installing and Configuring the Proxy Agent for vSphereA system administrator installs proxy agents to communicate with vSphere server instances. The agentsdiscover available work, retrieve host information, and report completed work items and other host statuschanges.
vSphere Agent RequirementsCredentials under which the agent service runs must have administrative access to the installation host.Multiple vSphere agents must meet vCloud Automation Center configuration requirements.
CredentialsWhen creating an endpoint representing the vCenter Server instance to be managed by a vSphere agent, theagent can use the credentials that the service is running under to interact with the vCenter Server or specifyseparate endpoint credentials.
This table shows the detailed permissions the vSphere endpoint credentials must have to manage avCenter Server instance.
Table 5‑2. Permissions Required for vSphere Agent to Manage vCenter Server Instance
Attribute Value Permission
Global Manage Custom Attributes
Set Custom Attribute
Folder Create Folder
Delete Folder
Datastore Allocate Space
Browse Datastore
Virtual Machine Inventory Create from existing
Create New
Move
Remove
Interaction Power On
Power Off
Suspend
Reset
Device Connection
Configure CD Media
Chapter 5 Installing Agents
VMware, Inc. 87

Table 5‑2. Permissions Required for vSphere Agent to Manage vCenter Server Instance (Continued)
Attribute Value Permission
Tools Install
Console Interaction
Configuration Rename
Add Existing Disk
Add New Disk
Remove Disk
Change CPU Count
Memory
Add or Remove Device
Settings
Change Resource
Advanced
Swapfile Placement
Modify Device Settings
Disk Change Tracking
Set Annotation (5.0 and 5.1 only)
Provisioning Customize
Clone Template
Clone Virtual Machine
Deploy Template
Read Customization Specs
State Create Snapshot
Remove Snapshot
Revert to Snapshot
Resource Assign VM to Res Pool
Migrate Powered Off Virtual Machine
Migrate Powered On Virtual Machine
Permissions Modify Permission
Network Assign Network
Disable or reconfigure any third-party software that might change the power state of virtual machinesoutside of vCloud Automation Center. Such changes can interfere with the management of the machine lifecycle by vCloud Automation Center.
Supported ConfigurationsYou can configure your deployment to use vSphere agents for concurrency. The supported configuration islimited to two vSphere agents installed with the same name on two different machines, each pointing at thesame center1329961.
Installation and Configuration
88 VMware, Inc.

Install the vSphere AgentThe vSphere agent manages vCenter Server instances. An administrator typically installs the agent on thesame machine that hosts the Manager Service component.
The endpoint name you configure in vCloud Automation Center must match the endpoint name providedto the vSphere proxy agent during installation. Otherwise, data collection fails.
Prerequisites
n The IaaS components, including the Manager Service and Website, are installed.
n Verify that you have completed all the “vSphere Agent Requirements,” on page 87.
n If you already created a vSphere endpoint for use with this agent, make a note of the endpoint name.
n “Download the IaaS Installer,” on page 67.
Procedure
1 Right-click the [email protected] setup file that you downloaded andselect Run as administrator.
2 Click Next.
3 Accept the license agreement and click Next.
4 Type the administrator credentials for the vCloud Automation Center Appliance on the Log In pageand click Next.
The user name is root and the password is the password that you specified when you deployed thevCloud Automation Center Appliance.
5 Click Next.
6 Select Custom Install on the Installation Type page.
7 Select Proxy Agents on the Installation Type page.
8 Accept the root install location or click Change and select an installation path.
9 Click Next.
10 Enter the user name and password for the Windows services user with sysadmin privileges on theinstallation machine.
11 Click Next.
12 Select vSphere from the Agent type list.
13 Enter an identifier for this agent in the Agent name text box.
Option Description
If you plan to use the migration tool The agent name must exactly match the name you used in your sourcevCloud Automation Center instance.
Redundant agent install Install redundant agents on different servers, but name and configurethem identically to provide high-availability.
Single agent install Select a unique identifier for this agent. Maintain a record of the name, credentials, and platform instance for each agent. You might need thisinformation to configure endpoints, or to add hosts in the future. Agent names can only be duplicatedfor redundant agents that you configure identically.
Chapter 5 Installing Agents
VMware, Inc. 89

14 Enter the fully qualified domain name and port number of the machine where you installed theManager Service component.
For example, manager_service.mycompany.com:443.
The default port is 443.
15 Enter the fully qualified domain name and the port number of the machine where you installed theManager Website component.
For example, website_component.mycompany.com:443.
The default port is 443.
16 Click Test to verify connectivity to each host.
17 Type the name of the endpoint.
The endpoint name that you provide here must match exactly the endpoint name configured invCloud Automation Center. Otherwise, data collection fails.
18 Click Add.
19 Click Next.
20 Click Install to begin the installation.
After several minutes a success message appears.
21 Click Next.
22 Click Finish.
What to do next
For high-availability, you can install and configure a redundant agent for your endpoint. Install eachredundant agent on a separate server, but name and configure the agents identically.
“Configure the vSphere Agent,” on page 90.
Configure the vSphere AgentYou can use the proxy agent utility to modify the initial configurations that are encrypted in the agentconfiguration file, or to change the machine deletion policy for virtualization platforms.
Prerequisites
Log in as a system administrator to the machine where you installed the agent.
Procedure
1 Open a Windows command console as an administrator.
2 Go to the agents installation directory.
For example, cd Program Files (x86)\VMware\vCAC\CD Agents\agent_name.
3 (Optional) Enter DynamicOps.Vrm.VRMencrypt.exe VRMAgent.exe.config get to view the currentconfiguration settings.
The following is an example of the output of the command:
managementEndpointName: VCendpoint
doDeletes: True
Installation and Configuration
90 VMware, Inc.

4 (Optional) Enter the set managementEndpointName command to change the name of the genericendpoint you configured at installation.
For example, Dynamic0ps.Vrm.VRMencrypt.exe VRMAgent.exe.config set managementEndpointName MyEndpoint.
You change this property to rename the generic endpoint within vCloud Automation Center instead ofchanging endpoints.
5 (Optional) Enter the set doDeletes command to configure the virtual machine deletion policy.
For example, Dynamic0ps.Vrm.VRMencrypt.exe VRMAgent.exe.config set doDeletes false.
Option Description
true (Default) Delete virtual machines destroyed in vCloud Automation Centerfrom vCenter Server.
false Move virtual machines destroyed in vCloud Automation Center to theVRMDeleted directory in vCenter Server.
6 Navigate to Start > Administrative Tools > Services and restart the vCloud Automation Center Agent –
agentname service.
What to do next
For high-availability, you can install and configure a redundant agent for your endpoint. Install eachredundant agent on a separate server, but name and configure the agents identically.
Installing the Proxy Agent for Hyper-V or XenServerA system administrator installs proxy agents to communicate with Hyper-V and XenServer server instances.The agents discover available work, retrieve host information, and report completed work items and otherhost status changes.
Hyper-V and XenServer RequirementsHyper-V Hypervisor proxy agents require system administrator credentials for installation.
The credentials under which to run the agent service must have administrative access to the installationhost.
Administrator-level credentials are required for all XenServer or Hyper-V instances on the hosts to bemanaged by the agent.
If you are using Xen pools, all nodes within the Xen pool must be identified by their fully qualified domainnames.
NOTE By default, Hyper-V is not configured for remote management. A vCloud Automation CenterHyper-V proxy agent cannot communicate with a Hyper-V server unless remote management has beenenabled.
See the Microsoft Windows Server documentation for information about how to configure Hyper-V forremote management.
Chapter 5 Installing Agents
VMware, Inc. 91

Install the Hyper-V or XenServer AgentThe Hyper-V agent manages Hyper-V server instances. The XenServer agent manages XenServer serverinstances.
Prerequisites
n The IaaS components, including the Manager Service and Website, are installed.
n “Download the IaaS Installer,” on page 67.
n Verify that Hyper-V Hypervisor proxy agents have system administrator credentials.
n Verify that the credentials under which to run the agent service have administrative access to theinstallation host.
n Verify that all XenServer or Hyper-V instances on the hosts to be managed by the agent haveadministrator-level credentials.
n If you are using Xen pools, note that all nodes within the Xen pool must be identified by their fullyqualified domain names.
vCloud Automation Center cannot communicate with or manage any node that is not identified by itsfully qualified domain name within the Xen pool.
n Configure Hyper-V for remote management to enable Hyper-V server communication withvCloud Automation Center Hyper-V proxy agents.
See the Microsoft Windows Server documentation for information about how to configure Hyper-V forremote management.
Procedure
1 Right-click the [email protected] setup file that you downloaded andselect Run as administrator.
2 Click Next.
3 Accept the license agreement and click Next.
4 Type the administrator credentials for the vCloud Automation Center Appliance on the Log In pageand click Next.
The user name is root and the password is the password that you specified when you deployed thevCloud Automation Center Appliance.
5 Click Next.
6 Select Custom Install on the Installation Type page.
7 Select Proxy Agents on the Installation Type page.
8 Accept the root install location or click Change and select an installation path.
9 Click Next.
10 Enter the user name and password for the Windows services user with sysadmin privileges on theinstallation machine.
11 Click Next.
12 Select the agent from the Agent type list.
n Xen
n Hyper-V
Installation and Configuration
92 VMware, Inc.

13 Enter an identifier for this agent in the Agent name text box.
Option Description
If you plan to use the migration tool The agent name must exactly match the name you used in your sourcevCloud Automation Center instance.
Redundant agent install Install redundant agents on different servers, but name and configurethem identically to provide high-availability.
Single agent install Select a unique identifier for this agent. Maintain a record of the name, credentials, and platform instance for each agent. You might need thisinformation to configure endpoints, or to add hosts in the future. Agent names can only be duplicatedfor redundant agents that you configure identically.
14 Communicate the Agent name to the IaaS administrator who configures endpoints.
To enable access and data collection, the endpoint must be linked to the agent that was configured forit.
15 Enter the fully qualified domain name and port number of the machine where you installed theManager Service component.
For example, manager_service.mycompany.com:443.
The default port is 443.
16 Enter the fully qualified domain name and the port number of the machine where you installed theManager Website component.
For example, website_component.mycompany.com:443.
The default port is 443.
17 Click Test to verify connectivity to each host.
18 Enter the credentials of a user with administrative-level permissions on the managed server instance.
19 Click Add.
20 Click Next.
21 Click Install to begin the installation.
After several minutes a success message appears.
22 Click Next.
23 Click Finish.
What to do next
For high-availability, you can install and configure a redundant agent for your endpoint. Install eachredundant agent on a separate server, but name and configure the agents identically.
“Configure the Hyper-V or XenServer Agent,” on page 93.
Configure the Hyper-V or XenServer AgentA system administrator can modify proxy agent configuration settings, such as the deletion policy forvirtualization platforms. You can use the proxy agent utility to modify the initial configurations that areencrypted in the agent configuration file.
Prerequisites
Log in as a system administrator to the machine where you installed the agent.
Chapter 5 Installing Agents
VMware, Inc. 93

Procedure
1 Change to the agents installation directory, where agent_name is the directory containing the proxyagent, which is also the name under which the agent is installed.
cd Program Files (x86)\VMware\vCAC Agents\agent_name
2 View the current configuration settings.
Enter DynamicOps.Vrm.VRMencrypt.exe VRMAgent.exe.config get
The following is an example of the output of the command:
Username: XSadmin
3 Enter the set command to change a property, where property is one of the options shown in the table.
Dynamic0ps.Vrm.VRMencrypt.exe VRMAgent.exe.config set property value
If you omit value, the utility prompts you for a new value.
Property Description
username The username representing administrator-level credentials for the XenServer or Hyper-V server theagent communicates with.
password The password for the administrator-level username.
4 Click Start > Administrative Tools > Services and restart the vCloud Automation Center Agent –agentname service.
Example: Change Administrator-Level CredentialsEnter the following command to change the administrator-level credentials for the virtualization platformspecified during the agent installation.
Dynamic0ps.Vrm.VRMencrypt.exe VRMAgent.exe.config set username jsmith
Dynamic0ps.Vrm.VRMencrypt.exe VRMAgent.exe.config set password
What to do next
For high-availability, you can install and configure a redundant agent for your endpoint. Install eachredundant agent on a separate server, but name and configure the agents identically.
Installing the VDI Agent for XenDesktopvCloud Automation Center uses Virtual Desktop Integration (VDI) PowerShell agents to register theXenDesktop machines it provisions with external desktop management systems.
The VDI integration agent provides the owners of registered machines with a direct connection to theXenDesktop Web Interface. You can install a VDI agent as a dedicated agent to interact with a singleDesktop Delivery Controller (DDC) or as a general agent that can interact with multiple DDCs.
Installation and Configuration
94 VMware, Inc.

XenDesktop RequirementsA system administrator installs a Virtual Desktop Infrastructure (VDI) agent to integrate XenDesktopservers into vCloud Automation Center.
You can install a general VDI agent to interact with multiple servers. If you are installing one dedicatedagent per server for load balancing or authorization reasons, you must provide the name of the XenDesktopDDC server when installing the agent. A dedicated agent can handle only registration requests directed tothe server specified in its configuration.
Consult the vCloud Automation Center Support Matrix on the VMware Web site for information aboutsupported versions of XenDesktop for XenDesktop DDC servers.
Installation Host and CredentialsThe credentials under which the agent runs must have administrative access to all XenDesktop DDC serverswith which it interacts.
XenDesktop RequirementsThe name given to the XenServer Host on your XenDesktop server must match the UUID of the Xen Pool inXenCenter. See “Set the XenServer Host Name,” on page 95 for more information.
Each XenDesktop DDC server with which you intend to register machines must be configured in thefollowing way:
n The group/catalog type must be set to Existing for use with vCloud Automation Center.
n The name of a vCenter Server host on a DDC server must match the name of thevCenter Server instanceas entered in the vCloud Automation Center vSphere endpoint, without the domain. The endpointmust be configured with a fully qualified domain name (FQDN), and not with an IP address. Forexample, if the address in the endpoint is https://virtual-center27.domain/sdk, the name of the host onthe DDC server must be set to virtual-center27.
If your vCloud Automation Center vSphere endpoint has been configured with an IP address, you mustchange it to use an FQDN. See IaaS Configuration for more information about setting up endpoints.
XenDesktop Agent Host requirementsCitrix XenDesktop SDK must be installed. The SDK for XenDesktop is included on the XenDesktopinstallation disc.
Verify that Microsoft PowerShell is installed on the installation host before agent installation. The versionrequired depends on the operating system of the installation host. See Microsoft Help and Support.
MS PowerShell Execution Policy is set to RemoteSigned or Unrestricted. See “Set the PowerShell ExecutionPolicy to RemoteSigned,” on page 86.
For more information about PowerShell Execution Policy, run help about_signing or help Set-ExecutionPolicy at the PowerShell command prompt.
Set the XenServer Host NameIn XenDesktop, the name given to the XenServer Host on your XenDesktop server must match the UUID ofthe Xen Pool in XenCenter. If no XenPool is configured, the name must match the UUID of the XenServeritself.
Procedure
1 In Citrix XenCenter, select your XenPool or standalone XenServer and click the General tab. Record theUUID.
Chapter 5 Installing Agents
VMware, Inc. 95

2 When you add your XenServer Pool or standalone host to XenDesktop, type the UUID that wasrecorded in the previous step as the Connection name.
Install the XenDesktop AgentVirtual desktop integration (VDI) PowerShell agents integrate with external virtual desktop system, such asXenDesktop and Citrix. Use a VDI PowerShell agent to manage the XenDesktop machine.
Prerequisites
n The IaaS components, including the Manager Service and Website, are installed.
n Verify that you have satisfied all the “XenDesktop Requirements,” on page 95.
n “Download the IaaS Installer,” on page 67.
Procedure
1 Right-click the [email protected] setup file that you downloaded andselect Run as administrator.
2 Click Next.
3 Accept the license agreement and click Next.
4 Type the administrator credentials for the vCloud Automation Center Appliance on the Log In pageand click Next.
The user name is root and the password is the password that you specified when you deployed thevCloud Automation Center Appliance.
5 Click Next.
6 Select Custom Install on the Installation Type page.
7 Select Proxy Agents on the Installation Type page.
8 Accept the root install location or click Change and select an installation path.
9 Click Next.
10 Enter the user name and password for the Windows services user with sysadmin privileges on theinstallation machine.
11 Click Next.
12 Select Vdi Power Shell from the Agent type list.
13 Enter an identifier for this agent in the Agent name text box.
Option Description
If you plan to use the migration tool The agent name must exactly match the name you used in your sourcevCloud Automation Center instance.
Redundant agent install Install redundant agents on different servers, but name and configurethem identically to provide high-availability.
Single agent install Select a unique identifier for this agent. Maintain a record of the name, credentials, and platform instance for each agent. You might need thisinformation to configure endpoints, or to add hosts in the future. Agent names can only be duplicatedfor redundant agents that you configure identically.
Installation and Configuration
96 VMware, Inc.

14 Enter the fully qualified domain name and port number of the machine where you installed theManager Service component.
For example, manager_service.mycompany.com:443.
The default port is 443.
15 Enter the fully qualified domain name and the port number of the machine where you installed theManager Website component.
For example, website_component.mycompany.com:443.
The default port is 443.
16 Click Test to verify connectivity to each host.
17 Select the VDI version.
18 Enter the fully qualified domain name of the managed server in the VDI Server text box.
19 Click Add.
20 Click Next.
21 Click Install to begin the installation.
After several minutes a success message appears.
22 Click Next.
23 Click Finish.
What to do next
For high-availability, you can install and configure a redundant agent for your endpoint. Install eachredundant agent on a separate server, but name and configure the agents identically.
Installing the EPI Agent for CitrixExternal provisioning Integration (EPI) PowerShell agents integrate Citrix external machines into theprovisioning process. The EPI agent provides on-demand streaming of the Citrix disk images from whichthe machines boot and run.
The dedicated EPI agent interacts with a single external provisioning server. You must install one EPI agentfor each Citrix provisioning server instance.
Citrix Provisioning Server RequirementsA system administrator uses External Provisioning Infrastructure (EPI) agents to integrate Citrixprovisioning servers and to enable the use of Visual Basic scripts in the provisioning process.
Installation Location and CredentialsInstall the agent on the PVS host for Citrix Provisioning Services instances. Verify that the installation hostmeets “Citrix Agent Host Requirements,” on page 98 before you install the agent.
Although an EPI agent can generally interact with multiple servers, Citrix Provisioning Server requires adedicated EPI agent. You must install one EPI agent for each Citrix Provisioning Server instance, providingthe name of the server hosting it. The credentials under which the agent runs must have administrativeaccess to the Citrix Provisioning Server instance.
Consult the vCloud Automation Center Support Matrix for information about supported versions of Citrix PVS.
Chapter 5 Installing Agents
VMware, Inc. 97

Citrix Agent Host RequirementsPowerShell and Citrix Provisioning Services SDK must be installed on the installation host prior to agentinstallation. Consult the vCloud Automation Center Support Matrix on the VMware Web site for details.
Verify that Microsoft PowerShell is installed on the installation host before agent installation. The versionrequired depends on the operating system of the installation host. See Microsoft Help and Support.
You must also ensure that the PowerShell Snap-In is installed. For more information, see the CitrixProvisioning Services PowerShell Programmer's Guide on the Citrix Web site.
MS PowerShell Execution Policy is set to RemoteSigned or Unrestricted. See “Set the PowerShell ExecutionPolicy to RemoteSigned,” on page 86.
For more information about PowerShell Execution Policy, run help about_signing or help Set-ExecutionPolicy at the PowerShell command prompt.
Install the Citrix AgentExternal provisioning integration (EPI) PowerShell agents integrate external systems into the machineprovisioning process. Use the EPI PowerShell agent to integrate with Citrix provisioning server to enableprovisioning of machines by on-demand disk streaming.
Prerequisites
n The IaaS components, including the Manager Service and Website, are installed.
n Verify that you have satisfied all the “Citrix Provisioning Server Requirements,” on page 97.
n “Download the IaaS Installer,” on page 67.
Procedure
1 Right-click the [email protected] setup file that you downloaded andselect Run as administrator.
2 Click Next.
3 Accept the license agreement and click Next.
4 Type the administrator credentials for the vCloud Automation Center Appliance on the Log In pageand click Next.
The user name is root and the password is the password that you specified when you deployed thevCloud Automation Center Appliance.
5 Click Next.
6 Select Custom Install on the Installation Type page.
7 Select Proxy Agents on the Installation Type page.
8 Accept the root install location or click Change and select an installation path.
9 Click Next.
10 Enter the user name and password for the Windows services user with sysadmin privileges on theinstallation machine.
11 Click Next.
12 Select EPI Power Shell from the Agent type list.
Installation and Configuration
98 VMware, Inc.

13 Enter an identifier for this agent in the Agent name text box.
Option Description
If you plan to use the migration tool The agent name must exactly match the name you used in your sourcevCloud Automation Center instance.
Redundant agent install Install redundant agents on different servers, but name and configurethem identically to provide high-availability.
Single agent install Select a unique identifier for this agent. Maintain a record of the name, credentials, and platform instance for each agent. You might need thisinformation to configure endpoints, or to add hosts in the future. Agent names can only be duplicatedfor redundant agents that you configure identically.
14 Enter the fully qualified domain name and port number of the machine where you installed theManager Service component.
For example, manager_service.mycompany.com:443.
The default port is 443.
15 Enter the fully qualified domain name and the port number of the machine where you installed theManager Website component.
For example, website_component.mycompany.com:443.
The default port is 443.
16 Click Test to verify connectivity to each host.
17 Select the EPI type.
18 Enter the fully qualified domain name of the managed server in the EPI Server text box.
19 Click Add.
20 Click Next.
21 Click Install to begin the installation.
After several minutes a success message appears.
22 Click Next.
23 Click Finish.
What to do next
For high-availability, you can install and configure a redundant agent for your endpoint. Install eachredundant agent on a separate server, but name and configure the agents identically.
Installing the EPI Agent for Visual Basic ScriptingA system administrator can specify Visual Basic scripts as additional steps in the provisioning processbefore or after provisioning a machine, or when deprovisioning a machine. You must install an ExternalProvisioning Integration (EPI) PowerShell before you can run Visual Basic scripts.
Visual Basic scripts are specified in the blueprint from which machines are provisioned. Such scripts haveaccess to all of the custom properties associated with the machine and can update their values. The next stepin the workflow then has access to these new values.
For example, you could use a script to generate certificates or security tokens before provisioning and usethem in machine provisioning.
Chapter 5 Installing Agents
VMware, Inc. 99

To enable scripts in provisioning, you must install a specific type of EPI agent and place the scripts youwant to use on the system on which the agent is installed.
When executing a script, the EPI agent passes all machine custom properties as arguments to the script. Toreturn updated property values, you must place these properties in a dictionary and call avCloud Automation Center function. A sample script is included in the scripts subdirectory of the EPI agentinstallation directory. This script contains a header to load all arguments into a dictionary, a body in whichyou can include your function(s), and a footer to return updated custom properties values.
NOTE You can install multiple EPI/VBScripts agents on multiple servers and provision using a specificagent and the Visual Basic scripts on that agent’s host. If you need to do this, contact VMware customersupport.
Visual Basic Scripting RequirementsA system administrator installs External Provisioning Infrastructure (EPI) agents to enable the use of VisualBasic scripts in the provisioning process.
The following table describes the requirements that apply to installing an EPI agent to enable the use ofVisual Basic scripts in the provisioning process.
Table 5‑3. EPI Agents for Visual Scripting
Requirement Description
Credentials Credentials under which the agent will run must have administrative access tothe installation host.
Microsoft PowerShell Microsoft PowerShell must be installed on the installation host prior to agentinstallation: The version required depends on the operating system of theinstallation host and might have been installed with that operating system. Visithttp://support.microsoft.com for more information.
MS PowerShell Execution Policy MS PowerShell Execution Policy must be set to RemoteSigned or Unrestricted.For information on PowerShell Execution Policy issue one of the followingcommands at Power-Shell command prompt:
help about_signinghelp Set-ExecutionPolicy
Install the Agent for Visual Basic ScriptingExternal provisioning integration (EPI) PowerShell agents allow integrate external systems into the machineprovisioning process. Use an EPI agent to run Visual Basic Scripts as extra steps during the provisioningprocess.
Prerequisites
n The IaaS components, including the Manager Service and Website, are installed.
n Verify that you have satisfied all the “Visual Basic Scripting Requirements,” on page 100.
n “Download the IaaS Installer,” on page 67.
Procedure
1 Right-click the [email protected] setup file that you downloaded andselect Run as administrator.
2 Click Next.
3 Accept the license agreement and click Next.
Installation and Configuration
100 VMware, Inc.

4 Type the administrator credentials for the vCloud Automation Center Appliance on the Log In pageand click Next.
The user name is root and the password is the password that you specified when you deployed thevCloud Automation Center Appliance.
5 Click Next.
6 Select Custom Install on the Installation Type page.
7 Select Proxy Agents on the Installation Type page.
8 Accept the root install location or click Change and select an installation path.
9 Click Next.
10 Enter the user name and password for the Windows services user with sysadmin privileges on theinstallation machine.
11 Click Next.
12 Select EPI Power Shell from the Agent type list.
13 Enter an identifier for this agent in the Agent name text box.
Option Description
If you plan to use the migration tool The agent name must exactly match the name you used in your sourcevCloud Automation Center instance.
Redundant agent install Install redundant agents on different servers, but name and configurethem identically to provide high-availability.
Single agent install Select a unique identifier for this agent. Maintain a record of the name, credentials, and platform instance for each agent. You might need thisinformation to configure endpoints, or to add hosts in the future. Agent names can only be duplicatedfor redundant agents that you configure identically.
14 Enter the fully qualified domain name and port number of the machine where you installed theManager Service component.
For example, manager_service.mycompany.com:443.
The default port is 443.
15 Enter the fully qualified domain name and the port number of the machine where you installed theManager Website component.
For example, website_component.mycompany.com:443.
The default port is 443.
16 Click Test to verify connectivity to each host.
17 Select the EPI type.
18 Enter the fully qualified domain name of the managed server in the EPI Server text box.
19 Click Add.
20 Click Next.
21 Click Install to begin the installation.
After several minutes a success message appears.
22 Click Next.
23 Click Finish.
Chapter 5 Installing Agents
VMware, Inc. 101

Installing the WMI Agent for Remote WMI RequestsA system administrator enables the Windows Management Instrumentation (WMI) protocol and installs theWMI agent on all managed Windows machines to enable management of data and operations. The agent isrequired to collect data from Windows machines, such as the Active Directory status of the owner of amachine.
Enable Remote WMI Requests on Windows MachinesTo use WMI agents, remote WMI requests must be enabled on the managed Windows servers.
Procedure
1 In each domain that contains provisioned and managed Windows virtual machines, create an ActiveDirectory group and add to it the service credentials of the WMI agents that execute remote WMIrequests on the provisioned machines.
2 Enable remote WMI requests for the Active Directory groups containing the agent credentials on eachWindows machine provisioned.
Install the WMI AgentThe Windows Management Instrumentation (WMI) agent enables data collection from Windows managedmachines.
Prerequisites
n The IaaS components, including the Manager Service and Website, are installed.
n Verify that you have satisfied all the requirements, see “Enable Remote WMI Requests on WindowsMachines,” on page 102.
n “Download the IaaS Installer,” on page 67.
Procedure
1 Right-click the [email protected] setup file that you downloaded andselect Run as administrator.
2 Click Next.
3 Accept the license agreement and click Next.
4 Type the administrator credentials for the vCloud Automation Center Appliance on the Log In pageand click Next.
The user name is root and the password is the password that you specified when you deployed thevCloud Automation Center Appliance.
5 Click Next.
6 Select Custom Install on the Installation Type page.
7 Select Proxy Agents on the Installation Type page.
8 Accept the root install location or click Change and select an installation path.
9 Click Next.
10 Enter the user name and password for the Windows services user with sysadmin privileges on theinstallation machine.
Installation and Configuration
102 VMware, Inc.

11 Click Next.
12 Select WMI from the Agent type list.
13 Enter an identifier for this agent in the Agent name text box.
Option Description
If you plan to use the migration tool The agent name must exactly match the name you used in your sourcevCloud Automation Center instance.
Redundant agent install Install redundant agents on different servers, but name and configurethem identically to provide high-availability.
Single agent install Select a unique identifier for this agent. Maintain a record of the name, credentials, and platform instance for each agent. You might need thisinformation to configure endpoints, or to add hosts in the future. Agent names can only be duplicatedfor redundant agents that you configure identically.
14 Enter the fully qualified domain name and port number of the machine where you installed theManager Service component.
For example, manager_service.mycompany.com:443.
The default port is 443.
15 Enter the fully qualified domain name and the port number of the machine where you installed theManager Website component.
For example, website_component.mycompany.com:443.
The default port is 443.
16 Click Test to verify connectivity to each host.
17 Click Add.
18 Click Next.
19 Click Install to begin the installation.
After several minutes a success message appears.
20 Click Next.
21 Click Finish.
Chapter 5 Installing Agents
VMware, Inc. 103

Installation and Configuration
104 VMware, Inc.

Post-Installation Tasks 6You must add an identity store to the default tenant and appoint administrators. You can also customize theinstallation environment by changing the authentication method used to communicate with the SQLdatabase during run-time.
This chapter includes the following topics:
n “Configure the Identity Stores for the Default Tenant,” on page 105
n “Appoint Administrators,” on page 107
n “Provide the Infrastructure License,” on page 108
n “Configuring Windows Service to Access the IaaS Database,” on page 108
Configure the Identity Stores for the Default TenantEach tenant requires at least one identity store. Identity stores can be OpenLDAP or Active Directory. ActiveDirectory in native mode is supported for the default tenant only.
The default tenant is automatically created when you configure single sign-on. You cannot edit any of thetenant details.
n Configure a Native Active Directory Identity Store on page 105You can configure the default tenant identity store for Native Active Directory if you joined theIdentity Appliance to your Active Directory domain.
n Configure an OpenLDAP or Active Directory Identity Store on page 106You can configure identity stores for OpenLDAP or Active Directory in mixed mode without joiningyour Active Directory domain to the Identity Appliance.
Configure a Native Active Directory Identity StoreYou can configure the default tenant identity store for Native Active Directory if you joined the IdentityAppliance to your Active Directory domain.
You can configure an Active Directory in native mode for the default tenant only.
MIGRATION NOTE For migration, you must configure your identity store to use Native Active Directory.Migration is supported only to the default tenant, vsphere.local, in the target system and only if the defaulttenant is configured for Native Active Directory.
Prerequisites
n Log in to the vCloud Automation Center console as a system administrator.
VMware, Inc. 105

n Verify that your Identity Appliance is joined to your Native Active Directory domain. See “Configurethe Identity Appliance,” on page 52.
Procedure
1 Select Administration > Tenants.
2 Click the name of the default tenant, vsphere.local.
3 Click the Identity Stores tab.
4 Click the Add icon ( ).
5 Select Native Active Directory from the Type drop-down menu.
6 Type the domain for the identity store in the Domain text box.
7 Click Add.
8 (Optional) Repeat this procedure to configure additional identity stores.
For migration, only one identity store is supported.
9 Click Update.
Your new identity store is saved and associated with the tenant. You are directed to the Administrators tabfor the next step in the process.
What to do next
“Appoint Administrators,” on page 107.
Configure an OpenLDAP or Active Directory Identity StoreYou can configure identity stores for OpenLDAP or Active Directory in mixed mode without joining yourActive Directory domain to the Identity Appliance.
Prerequisites
n Install vCloud Automation Center 6.1, including IaaS components. Depending on your deploymenttype, see Chapter 3, “Minimal Deployment,” on page 27 or Chapter 4, “Distributed Deployment,” onpage 43.
n Log in to the vCloud Automation Center console as a system administrator.
Procedure
1 Select Administration > Tenants.
2 Click the name of the default tenant, vsphere.local.
3 Click the Identity Stores tab.
4 Click the Add icon ( ).
5 Enter a name in the Name text box.
6 Select OpenLDAP or Active Directory from the Type drop-down menu.
7 Type the URL for the identity store in the URL text box.
For example, ldap://ldap.mycompany.com:389 .
8 Type the domain for the identity store in the Domain text box.
Installation and Configuration
106 VMware, Inc.

9 (Optional) Type the domain alias in the Domain Alias text box.
The alias allows users to log in by using userid@domain-alias rather than userid@identity-store-domain as auser name.
10 Type the Distinguished Name for the login user in the Login User DN text box.
Use the display format of the user name, which can include spaces and is not required to be identical tothe user ID.
For example, cn=Demo Admin,ou=demo,dc=dev,dc=mycompany,dc=com.
11 Type the password for the identity store login user in the Password text box.
12 Type the group search base Distinguished Name in the Group Search Base DN text box.
For example, ou=demo,dc=dev,dc=mycompany,dc=com.
13 (Optional) Type the user search base Distinguished Name in the User Search Base DN text box.
For example, ou=demo,dc=dev,dc=mycompany,dc=com.
14 Click Test Connection.
15 Click Add.
16 (Optional) Repeat this procedure to configure additional identity stores.
17 Click Next.
18 Click Update.
What to do next
“Appoint Administrators,” on page 107.
Appoint AdministratorsYou can appoint one or more tenant administrators and IaaS administrators from the identity stores youconfigured for a tenant.
Tenant administrators are responsible for configuring tenant-specific branding, as well as managing identitystores, users, groups, entitlements, and shared blueprints within the context of their tenant. IaaSAdministrators are responsible for configuring infrastructure source endpoints in IaaS, appointing fabricadministrators, and monitoring IaaS logs.
MIGRATION NOTE For migration, you must select one or more single users to appoint as your administrators.The individual administrator name must have access to the default tenant, vsphere.local. Groupadministrator names are not supported.
Prerequisites
n Log in to the vCloud Automation Center console as a system administrator.
n “Configure the Identity Stores for the Default Tenant,” on page 105.
Procedure
1 Select Administration > Tenants.
2 Click the name of the default tenant, vsphere.local.
3 Click the Administrators tab.
4 Type the name of a user or group in the Tenant Administrators search box and press Enter.
Repeat this step to appoint additional tenant administrators.
Chapter 6 Post-Installation Tasks
VMware, Inc. 107

5 Type the name of a user or group in the Infrastructure Administrators search box and press Enter.
Repeat this step to appoint additional IaaS administrators.
6 Verify that the user or group names you chose appear in Tenant Administrators and InfrastructureAdministrators lists.
7 Click Update.
For migration, make note of the tenant administrator you appointed. You must supply the tenantadministrator credentials to the pre-migration tool when you are prompted for the default tenantadministrator credentials.
What to do next
“Provide the Infrastructure License,” on page 108.
Provide the Infrastructure LicenseAfter installation, the IaaS administrator logs into the vCloud Automation Center console and provides alicense for the Infrastructure components.
Prerequisites
“Appoint Administrators,” on page 107.
Procedure
1 Navigate to the vCloud Automation Center Appliance console by using its fully qualified domainname, https://vcac-hostname.domain.name/vcac/.
2 Accept the certificate, if you are prompted.
3 Log in to the vCloud Automation Center console as IaaS admin.
4 Click the Infrastructure tab.
5 Navigate to Administration > Licensing.
6 Click Add License.
7 Type the VMware license code in the License key text box.
8 Click OK.
What to do next
Configure additional tenants. See Chapter 7, “Configuring Additional Tenants,” on page 111.
Configuring Windows Service to Access the IaaS DatabaseA system administrator can change the authentication method used to access the SQL database during runtime (after the installation is complete). By default, the Windows identity of the currently logged on accountis used to connect to the database after it is installed.
Installation and Configuration
108 VMware, Inc.

Enable IaaS Database Access from the Service UserIf the SQL database is installed on a separate host from the Manager Service, database access from theManager Service must be enabled. If the user name under which the Manager Service will run is the ownerof the database, no action is required. If the user is not the owner of the database, the system administratormust grant access.
Prerequisites
n “Choosing an IaaS Database Scenario,” on page 67.
n Verify that the user name under which the Manager Service will run is not the owner of the database.
Procedure
1 Navigate to the Database subdirectory within the directory where you extracted the installation ziparchive.
2 Extract the DBInstall.zip archive to a local directory.
3 Log in to the database host as a user with the sysadmin role in the SQL Server instance.
4 Edit VMPSOpsUser.sql and replace all instances of $(Service User) with user (from Step 3) under whichthe Manager Service will run.
Do not replace ServiceUser in the line ending with WHERE name = N'ServiceUser').
5 Open SQL Server Management Studio.
6 Select the database (vCAC by default) in Databases in the left-hand pane.
7 Click New Query.
The SQL Query window opens in the right-hand pane.
8 Paste the modified contents of VMPSOpsUser.sql into the query window.
9 Click Execute.
Database access is enabled from the Manager Service.
Configure the Windows Services Account to Use SQL AuthenticationBy default, the Windows services account accesses the database during run-time, even if you created thedatabase using SQL authentication. A system administrator can change the run-time authentication methodfrom Windows, to SQL, when the database is on an untrusted domain, for example.
Prerequisites
“Choosing an IaaS Database Scenario,” on page 67.
Procedure
1 Log in to the Manager Service host as a local user with administrator privileges.
2 Stop the vCloud Automation Center service.
3 Navigate to the Server directory.
C:\Program Files (x86) \VMware\vCAC\Server\
4 Open the ManagerService.exe.config file in a text editor.
5 In the connectionStrings section and the serviceConfiguration serviceURIsection, replaceIntegrated Security=True with User Id=DATABASE_USER;Password=DATABASE_PASSWORD.
Chapter 6 Post-Installation Tasks
VMware, Inc. 109

6 Save and close the file.
7 Navigate to C:\Program Files (x86)\VMware\vCAC\Server\Model Manager Web\.
8 Open the Web.config file in a text editor.
9 Locate the repository server section.
<repository server="localhost" database="vCAC" store="https://vcac.example.com/" />
10 Add the database user command.
user=DATABASE_USER password=DATABASE_PASSWORD. For example:
<repository server="localhost" database="vCAC" user="sqlUser" password="sqlPassword"
store="https://vcac.example.com/" />
11 Save and close the file.
12 Start the vCloud Automation Center Service.
SQL server authentication is now in use at run-time.
What to do next
Restart Internet Information Service.
Installation and Configuration
110 VMware, Inc.

Configuring Additional Tenants 7You create the default tenant when you install vCloud Automation Center, but you can create additionaltenants to represent business units in an enterprise or companies that subscribe to cloud services from aservice provider.
This chapter includes the following topics:
n “Tenancy Overview,” on page 111
n “Create and Configure a Tenant,” on page 115
Tenancy OverviewA tenant is an organizational unit in a vCloud Automation Center deployment. A tenant can represent abusiness unit in an enterprise or a company that subscribes to cloud services from a service provider.
Each tenant has its own dedicated configuration. Some system-level configuration is shared across tenants.
Table 7‑1. Tenant Configuration
Configuration Area Description
Login URL Each tenant has a unique URL to the vCloud Automation Center console.n The default tenant URL is in the following format: https://hostname/vcacn The URL for additional tenants is in the following format:
https://hostname/vcac/org/tenantURL
Identity stores Each tenant requires access to one or more directory services, such asOpenLDAP or Microsoft Active Directory servers, that are configured toauthenticate users. You can use the same directory service for more than onetenant, but you must configure it separately for each tenant.
Branding A tenant administrator can configure the branding of thevCloud Automation Center console including the logo, background color, andinformation in the header and footer. System administrators control the defaultbranding for all tenants.
Notification providers System administrators can configure global email servers that process emailnotifications. Tenant administrators can override the system default servers, oradd their own servers if no global servers are specified.
Business policies Administrators in each tenant can configure business policies such as approvalworkflows and entitlements. Business policies are always specific to a tenant.
VMware, Inc. 111

Table 7‑1. Tenant Configuration (Continued)
Configuration Area Description
Service catalog offerings Service architects can create and publish catalog items to the service catalog andassign them to service categories. Services and catalog items are always specificto a tenant.
Infrastructure resources The underlying infrastructure fabric resources, for example, vCenter servers,Amazon AWS accounts, or Cisco UCS pools, are shared among all tenants. Foreach infrastructure source that vCloud Automation Center manages, a portionof its compute resources can be reserved for users in a specific tenant to use.
About the Default TenantWhen the system administrator configures single sign-on during the installation ofvCloud Automation Center, a default tenant is created with the built-in system administrator account to login to the vCloud Automation Center console. The system administrator can then configure the defaulttenant and create additional tenants.
The default tenant supports all of the functions described in Tenant Configuration. In the default tenant, thesystem administrator can also manage system-wide configuration, including global system defaults forbranding and notifications, and monitor system logs.
The default tenant is the only tenant that supports native Active Directory authentication. All other tenantsmust use Active Directory over OpenLDAP.
User and Group ManagementAll user authentication is handled through single sign-on. Each tenant has one or more identity stores, suchas Active Directory servers, that provide authentication.
The system administrator performs the initial configuration of single sign-on and basic tenant setup,including designating at least one identity store and a tenant administrator for each tenant. Thereafter, atenant administrator can configure additional identity stores and assign roles to users or groups from theidentity stores.
Tenant administrators can also create custom groups within their own tenant and add users and groupsdefined in the identity store to custom groups. Custom groups, like identity store groups and users, can beassigned roles or designated as the approvers in an approval policy.
Tenant administrators can also create business groups within their tenant. A business group is a set of users,often corresponding to a line of business, department or other organizational unit, that can be associatedwith a set of catalog services and infrastructure resources. Users, identity store groups, and custom groupscan be added to business groups.
Comparison of Single-Tenant and Multitenant DeploymentsvCloud Automation Center supports deployments with either a single tenant or multiple tenants. Theconfiguration can vary depending on how many tenants are in your deployment.
System-wide configuration is always performed in the default tenant and can apply to one or more tenants.For example, system-wide configuration might specify defaults for branding and notification providers.
Infrastructure configuration, including the infrastructure sources that are available for provisioning, can beconfigured in any tenant and is shared among all tenants. The infrastructure resources, such as cloud orvirtual compute resources or physical machines, can be divided into fabric groups managed by fabricadministrators. The resources in each fabric group can be allocated to business groups in each tenant byusing reservations.
Installation and Configuration
112 VMware, Inc.

Single-Tenant DeploymentIn a single-tenant deployment, all configuration can occur in the default tenant. Tenant administrators canmanage users and groups, configure tenant-specific branding, notifications, business policies, and catalogofferings.
All users log in to the vCloud Automation Center console at the same URL, but the features available tothem are determined by their roles.
Figure 7‑1. Single-Tenant Example
Tenantadmin
Businessgroup mgr
BusinessGroup
Businessgoup mgr
BusinessGroup
http://vcac.mycompany.com/shell-ui-app/
Default Tenant(System and
infrastructure config)
Systemadmin
IaaSadmin
Infrastructure Fabric
Hypervisors Publicclouds
Physicalservers
Default Tenant
• User management• Tenant branding• Tenant notification providers• Approval policies• Catalog management
• Tenant creation• System branding• System notification poviders• Event logs
Fabricadmin Fabric
Group
Reservation Reservation
Fabricadmin Fabric
Group
Reservation Reservation
Fabricadmin Fabric
Group
Reservation Reservation
http://vcac.mycompany.com/shell-ui-app/
(Tenant config)
NOTE In a single-tenant scenario, it is common for the system administrator and tenant administrator rolesto be assigned to the same person, but two distinct accounts exist. The system administrator account isalways [email protected]. The tenant administrator must be a user in one of the tenant identitystores, such as [email protected].
Multitenant DeploymentIn a multitenant environment, the system administrator creates tenants for each organization that uses thesame vCloud Automation Center instance. Tenant users log in to the vCloud Automation Center console ata URL specific to their tenant. Tenant-level configuration is segregated from other tenants and from thedefault tenant. Users with system-wide roles can view and manage configuration across multiple tenants.
There are two main scenarios for configuring a multi-tenant deployment.
Chapter 7 Configuring Additional Tenants
VMware, Inc. 113

Table 7‑2. Multitenant Deployment Examples
Example Description
Manage infrastructure configurationonly in the default tenant
In this example, all infrastructure is centrally managed by IaaS administratorsand fabric administrators in the default tenant. The shared infrastructureresources are assigned to the users in each tenant by using reservations.
Manage infrastructure configuration ineach tenant
In this scenario, each tenant manages its own infrastructure and has its ownIaaS administrators and fabric administrators. Each tenant can provide its owninfrastructure sources or can share a common infrastructure. Fabricadministrators manage reservations only for the users in their own tenant.
The following diagram shows a multitenant deployment with centrally managed infrastructure. The IaaSadministrator in the default tenant configures all infrastructure sources that are available for all tenants. TheIaaS administrator can organize the infrastructure into fabric groups according to type and intendedpurpose. For example, a fabric group might contain all virtual resources, or all Tier One resources. Thefabric administrator for each group can allocate resources from their fabric groups. Although the fabricadministrators exist only in the default tenant, they can assign resources to business groups in any tenant.
NOTE Some infrastructure tasks, such as importing virtual machines, can only be performed by a user withboth the fabric administrator and business group manager roles. These tasks might not be available in amultitenant deployment with centrally managed infrastructure.
Figure 7‑2. Multitenant Example with Infrastructure Configuration Only in Default Tenant
Tenantadmin
Tenant A
Businessgroup mgr
BusinessGroup
Businessgroup mgr
BusinessGroup
http://vcac.mycompany.com/shell-ui-app/org/tenanta/
Tenantadmin
Tenant B
Businessgroup mgr
BusinessGroup
Businessgroup mgr
BusinessGroup
http://vcac.mycompany.com/shell-ui-app/org/tenantb/
Tenantadmin
Tenant C
Businessgroup mgr
BusinessGroup
Businessgroup mgr
BusinessGroup
http://vcac.mycompany.com/shell-ui-app/org/tenantc/
DefaultTenant
(System andinfrastructure config)
Systemadmin
Fabricadmin
IaaSadmin
Fabric Group
Reservation Reservation
Fabricadmin Fabric Group
Resv ResvResv
Fabricadmin Fabric Group
Resv ResvResv
Infrastructure Fabric
Hypervisors Publicclouds
Physicalservers
http://vcac.mycompany.com/shell-ui-app/
The following diagram shows a multitenant deployment where each tenant manages their owninfrastructure. The system administrator is the only user who logs in to the default tenant to managesystem-wide configuration and create tenants.
Installation and Configuration
114 VMware, Inc.

Each tenant has an IaaS administrator, who can create fabric groups and appoint fabric administrators withtheir respective tenants. Although fabric administrators can create reservations for business groups in anytenant, in this example they typically create and manage reservations in their own tenants. If the sameidentity store is configured in multiple tenants, the same users can be designated as IaaS administrators orfabric administrators in each tenant.
Figure 7‑3. Multitenant Example with Infrastructure Configuration in Each Tenant
IaaSadmin
IaaSadmin
Tenantadmin
Tenant A
http://vcac.mycompany.com/shell-ui-app/org/tenanta/
Tenantadmin
Tenant B
Businessgroup mgr
BusinessGroup
Businessgroup mgr
BusinessGroup
http://vcac.mycompany.com/shell-ui-app/org/tenantb/
Tenantadmin
Tenant C
Businessgroup mgr
BusinessGroup
Businessgroup mgr
BusinessGroup
http://vcac.mycompany.com/shell-ui-app/org/tenantc/
DefaultTenant
(System config)
Hypervisors Publicclouds
Physicalservers
IaaSadmin
Fabric
Fabricadmin Fabric Group
Businessgroup mgr
BusinessGroup
Businessgroup mgr
BusinessGroup
Reservation Reservation
Fabricadmin Fabric Group
Fabricadmin Fabric Group
Reservation Reservation Reservation Reservation
http:/vcac.mycompany.com/
shell-ui-app/
Systemadmin
Infrastructure
Create and Configure a TenantSystem administrators create tenants and specify basic configuration such as name, login URL, identitystores, and administrators.
Prerequisites
Log in to the vCloud Automation Center console as a system administrator.
Procedure
1 Specify Tenant Information on page 116The first step to configuring a tenant is to add the new tenant to vCloud Automation Center and createthe tenant-specific access URL.
2 Configure Identity Stores on page 116Each tenant must be associated with at least one identity store. Identity stores can be OpenLDAP orActive Directory. Use of Native Active Directory is also supported for the default tenant.
3 Appoint Administrators on page 117You can appoint one or more tenant administrators and IaaS administrators from the identity storesyou configured for a tenant.
Chapter 7 Configuring Additional Tenants
VMware, Inc. 115

Specify Tenant InformationThe first step to configuring a tenant is to add the new tenant to vCloud Automation Center and create thetenant-specific access URL.
Prerequisites
Log in to the vCloud Automation Center console as a system administrator.
Procedure
1 Select Administration > Tenants.
2 Click the Add icon ( ).
3 Enter a name in the Name text box.
4 (Optional) Enter a description in the Description text box.
5 Type a unique identifier for the tenant in the URL Name text box.
This URL token is used to create tenant-specific URLs to access vCloud Automation Center.
6 (Optional) Type an email address in the Contact Email text box.
7 Click Submit and Next.
Your new tenant is saved and you are automatically directed to the Identity Stores tab for the next step inthe process.
Configure Identity StoresEach tenant must be associated with at least one identity store. Identity stores can be OpenLDAP or ActiveDirectory. Use of Native Active Directory is also supported for the default tenant.
Prerequisites
“Specify Tenant Information,” on page 116.
Procedure
1 Click the Add icon ( ).
2 Enter a name in the Name text box.
3 Select the type of identity store from the Type drop-down menu.
4 Type the URL for the identity store in the URL text box.
For example, ldap://ldap.mycompany.com:389 .
5 Type the domain for the identity store in the Domain text box.
6 (Optional) Type the domain alias in the Domain Alias text box.
The alias allows users to log in by using userid@domain-alias rather than userid@identity-store-domain as auser name.
7 Type the Distinguished Name for the login user in the Login User DN text box.
Use the display format of the user name, which can include spaces and is not required to be identical tothe user ID.
For example, cn=Demo Admin,ou=demo,dc=dev,dc=mycompany,dc=com.
Installation and Configuration
116 VMware, Inc.

8 Type the password for the identity store login user in the Password text box.
9 Type the group search base Distinguished Name in the Group Search Base DN text box.
For example, ou=demo,dc=dev,dc=mycompany,dc=com.
10 (Optional) Type the user search base Distinguished Name in the User Search Base DN text box.
For example, ou=demo,dc=dev,dc=mycompany,dc=com.
11 Click Test Connection.
Check that the connection is working.
12 Click Add.
13 (Optional) Repeat Step 1 to Step 12 to configure additional identity stores.
14 Click Next.
Your new identity store is saved and associated with the tenant. You are directed to the Administrators tabfor the next step in the process.
Appoint AdministratorsYou can appoint one or more tenant administrators and IaaS administrators from the identity stores youconfigured for a tenant.
Tenant administrators are responsible for configuring tenant-specific branding, as well as managing identitystores, users, groups, entitlements, and shared blueprints within the context of their tenant. IaaSAdministrators are responsible for configuring infrastructure source endpoints in IaaS, appointing fabricadministrators, and monitoring IaaS logs.
Prerequisites
n “Configure Identity Stores,” on page 116.
n Before you appoint IaaS administrators, you must install IaaS. For more information about installation,see Installation and Configuration.
Procedure
1 Type the name of a user or group in the Tenant Administrators search box and press Enter.
Repeat this step to appoint additional tenant administrators.
2 Type the name of a user or group in the Infrastructure Administrators search box and press Enter.
Repeat this step to appoint additional IaaS administrators.
3 Click Update.
Chapter 7 Configuring Additional Tenants
VMware, Inc. 117

Installation and Configuration
118 VMware, Inc.

Updating Certificates 8A system administrator can update certificates for the Identity Appliance, the vCloud Automation CenterAppliance, and IaaS components. Typically, an update is performed when switching from self-signedcertificates to certificates provided by a certificate authority chosen by the system administrator.
When you update a certificate for a vCloud Automation Center component, components that have adependency on this certificate are affected. You must register the new certificate with these components toensure certificate trust.
You must update all components of the same type in a distributed system. For example, if you update acertificate for one vCloud Automation Center Appliance in a distributed environment, you must update allinstances of vCloud Automation Center Appliance for that installation.
Certificates for the Identity Appliance management site and vCloud Automation Center Appliancemanagement site do not have registration requirements.
Update components in the following order:
1 Identity Appliance
2 vCloud Automation Center Appliance
3 IaaS components
With one exception, changes to later components do not affect earlier ones. For example, if you import anew certificate to a vCloud Automation Center Appliance, you must register this change with the IaaSserver, but not with the Identity Appliance. The exception is that an updated certificate for IaaS componentsmust be registered with vCloud Automation Center Appliance.
The following table shows registration requirements when you update a certificate.
Table 8‑1. Registration Requirements
Updated CertificateRegister new certificatewith Identity Appliance
Register new certificatewith vCloud AutomationCenter Appliance
Register new certificatewith IaaS
Identity Appliance Not applicable Yes Done automatically
vCloud Automation CenterAppliance
No Not applicable Yes
IaaS No Yes Not applicable
NOTE If your certificate uses a passphrase for encryption and you do not enter it when you replace yourcertificate on the virtual appliance, the Unable to load private key message appears. Verify that you havesupplied the correct passphrase.
VMware, Inc. 119

Updating Certificates When a Host Name is ChangedWhen a vCloud Automation Center Appliance host name is changed, you must update the IdentityAppliance with the vCloud Automation Center Appliance certificate. For more information, see “Update theIdentity Appliance with the vCloud Automation Center Appliance Certificate,” on page 124.
This chapter includes the following topics:
n “Extracting Certificates and Private Keys,” on page 120
n “Updating the Identity Appliance Certificate,” on page 120
n “Updating the vCloud Automation Center Appliance Certificate,” on page 123
n “Updating the IaaS Certificate,” on page 126
n “Update the Certificate of the Identity Appliance Management Site,” on page 128
n “Update the Certificate of the vCloud Automation Center Appliance Management Site,” on page 128
Extracting Certificates and Private KeysCertificates that you use with the virtual appliances must be in the PEM file format.
The examples in the following table use Gnu openssl commands to extract the certificate information youneed to configure the virtual appliances.
Table 8‑2. Sample Certificate Values and Commands (openssl)
Certificate AuthorityProvides Command Virtual Appliance Entries
RSA Private Key openssl pkcs12 -in path _to_.pfxcertificate_file -nocerts -out key.pem
RSA Private Key
PEM File openssl pkcs12 -in path _to_.pfxcertificate_file -clcerts -nokeys -outcert.pem
Certificate Chain
(Optional) Pass Phrase n/a Pass Phrase
Updating the Identity Appliance CertificateThe system administrator can replace a self-signed certificate with another self-signed certificate or adomain certificate after the installation is complete.
1 Replace a Certificate in the Identity Appliance on page 121The system administrator can replace a self-signed certificate with one from a certificate authority. Thesame certificate can be used on multiple machines.
2 Update the vCloud Automation Center Appliance with the Identity Appliance Certificate on page 122After the Identity Appliance certificate is updated, the system administrator updates the vCloudAutomation Center Appliance with the new certificate information. This process reestablishes trustedcommunications between the virtual appliances.
3 Update the IaaS Servers with the Certificate for the Single Sign-On Server on page 122After the certificate for the single sign-on server is updated, the system administrator updates the IaaScomponent registry on all IaaS component machines with the new virtual appliance certificateinformation. This process reestablishes trusted communications between the virtual appliance andIaaS components.
Installation and Configuration
120 VMware, Inc.

Replace a Certificate in the Identity ApplianceThe system administrator can replace a self-signed certificate with one from a certificate authority. The samecertificate can be used on multiple machines.
The labels for the private key and certificate chain headers and footers depend on the certificate authority inuse. Information here is based on headers and footers for a certificate generated by openssl.
Procedure
1 Navigate to the Identity Appliance management console by using its fully qualified domain name,https://identity-hostname.domain.name:5480/.
2 Log in with user name root and the password you specified when deploying the Identity Appliance.
3 Click the SSO tab.
4 Click SSL.
5 Select the certificate type from the Choose Action menu. If you are using a PEM encoded certificate, forexample for a distributed environment, select Import PEM encoded certificate.
Certificates that you import must be trusted and must also be applicable to all instances of vCloudAutomation Center Appliance and any load balancer by using Subject Alternative Name (SAN)certificates.
Option Action
Import a certificate a Copy the certificate values from BEGIN PRIVATE KEY to ENDPRIVATE KEY, including the header and footer, and paste them in theRSA Private Key text box.
b Copy the certificate values from BEGIN CERTIFICATE to ENDCERTIFICATE, including the header and footer, and paste them in theCertificate Chain text box.
c (Optional) If your certificate has one, copy the pass phrase thatencrypts the private key of the certificate that you are importing, andpaste it in the Pass Phrase text box.
Generate a self-signed certificate a Type a common name for the certificate in the Common Name textbox. You can use the fully qualified domain name of the virtualappliance (hostname.domain.name) or a wild card, such as*.mycompany.com. If you use a load balancer, you need to specify theFQDN of the load balancer or a wildcard that matches the name of theload balancer. Do not accept a default value if one is shown, unless itmatches the host name of the virtual appliance.
b Type your organization name, such as your company name, in theOrganization text box.
c Type your organizational unit, such as your department name orlocation, in the Organizational Unit text box.
d Type a two-letter ISO 3166 country code, such as US, in the Countrytext box.
6 Click Replace Certificate, even if you are generating a new certificate.
After a few minutes the certificate details appear on the page. If you are using a load balancer, thecertificate is for the load balancer.
The certificate is updated.
Chapter 8 Updating Certificates
VMware, Inc. 121

Update the vCloud Automation Center Appliance with the Identity ApplianceCertificate
After the Identity Appliance certificate is updated, the system administrator updates the vCloudAutomation Center Appliance with the new certificate information. This process reestablishes trustedcommunications between the virtual appliances.
Use the import-certificate command to import the SSL certificate from the Identity Appliance into the SSLkeystore used by the vCloud Automation Center Appliance. The alias value specifies the alias under whichthe imported certificate is stored in the keystore, and url is the address of the SSL endpoint.
Prerequisites
“Replace a Certificate in the Identity Appliance,” on page 121.
Procedure
1 Start Putty or another Unix SSL remote login tool.
2 Log in to the vCloud Automation Center Appliance with user name root and the password youspecified when deploying the appliance.
3 Execute the import-certificate command:
/usr/sbin/vcac-config import-certificate --alias websso --url https://identity-
hostname.domain.name:7444
For example:
/usr/sbin/vcac-config import-certificate --alias websso --url https://identity-
vm76-115.eng.mycompany.com:7444
4 Restart the vCloud Automation Center Appliance.
5 Navigate to the vCloud Automation Center Appliance management console by using its fully qualifieddomain name, https://vcac-va-hostname.domain.name:5480/.
6 Select System > Reboot.
7 Click Services. The following services must be running to log in to the console. They usually start inabout 10 minutes.
n authorization
n authentication
n eventlog-service
n shell-ui-app
n branding-service
n plugin-service
The certificate is updated on the vCloud Automation Center Appliance.
Update the IaaS Servers with the Certificate for the Single Sign-On ServerAfter the certificate for the single sign-on server is updated, the system administrator updates the IaaScomponent registry on all IaaS component machines with the new virtual appliance certificate information.This process reestablishes trusted communications between the virtual appliance and IaaS components.
Run this procedure once from the Model Manager Data machine to update the database. All IaaS servers areupdated from the database.
Installation and Configuration
122 VMware, Inc.

A single sign-on server can be the Identity Appliance or a supported version of the vSphere SSO.
Procedure
1 Open a command prompt as an administrator on the Model Manager Data machine.
2 Type the following commands to download the root certificates from the single sign-on server into thelocal operating system trusted certificate store. Pkcs7CertPath represents the path to SSO root certificate.
n Vcac-Config.exe DownloadRootCertificates --Pkcs7CertPath "C:\Program Files
(x86)\VMware\vCAC\Web API\SSO.p7b" -v
n Vcac-Config.exe DownloadRootCertificates --Pkcs7CertPath "C:\Program Files
(x86)\VMware\vCAC\Server\Website\SSO.p7b" -v
3 Type iisreset to reset IIS.
Updating the vCloud Automation Center Appliance CertificateThe system administrator can replace a self-signed certificate with another self-signed certificate or adomain certificate. You can use Subject Alternative Name (SAN) certificates, wildcard certificates, or anyother method of multi-use certification appropriate for your environment as long as you satisfy the trustrequirements.
1 Replace a Certificate in the vCloud Automation Center Appliance on page 123The system administrator can replace a self-signed certificate with a trusted one from a certificateauthority. You can use Subject Alternative Name (SAN) certificates, wildcard certificates, or any othermethod of multi-use certification appropriate for your environment as long as you satisfy the trustrequirements.
2 (Optional) Update the Identity Appliance with the vCloud Automation Center Appliance Certificateon page 124When the host name for a vCloud Automation Center Appliance is changed, the system administratormust re-enter Identity Appliance SSO settings.
3 Update the IaaS Servers with the vCloud Automation Center Appliance Certificate on page 125After the virtual appliance certificates are updated, the system administrator updates the IaaS serverrunning the Model Manager Data component registry to reestablish trusted communications betweenthe virtual appliances and IaaS components.
Replace a Certificate in the vCloud Automation Center ApplianceThe system administrator can replace a self-signed certificate with a trusted one from a certificate authority.You can use Subject Alternative Name (SAN) certificates, wildcard certificates, or any other method ofmulti-use certification appropriate for your environment as long as you satisfy the trust requirements.
Procedure
1 Navigate to the vCloud Automation Center Appliance management console by using its fully qualifieddomain name, https://vcac-va-hostname.domain.name:5480/.
2 Log in with user name root and the password you specified when deploying the Identity Appliance.
3 Navigate to vCAC Settings > SSL.
4 Click SSL.
Chapter 8 Updating Certificates
VMware, Inc. 123

5 Select the certificate type from the Choose Action menu. If you are using a PEM encoded certificate, forexample for a distributed environment, select Import PEM encoded certificate.
Certificates that you import must be trusted and must also be applicable to all instances of vCloudAutomation Center Appliance and any load balancer by using Subject Alternative Name (SAN)certificates.
Option Action
Import a certificate a Copy the certificate values from BEGIN PRIVATE KEY to ENDPRIVATE KEY, including the header and footer, and paste them in theRSA Private Key text box.
b Copy the certificate values from BEGIN CERTIFICATE to ENDCERTIFICATE, including the header and footer, and paste them in theCertificate Chain text box.
c (Optional) If your certificate has one, copy the pass phrase thatencrypts the private key of the certificate that you are importing, andpaste it in the Pass Phrase text box.
Generate a self-signed certificate a Type a common name for the certificate in the Common Name textbox. You can use the fully qualified domain name of the virtualappliance (hostname.domain.name) or a wild card, such as*.mycompany.com. If you use a load balancer, you need to specify theFQDN of the load balancer or a wildcard that matches the name of theload balancer. Do not accept a default value if one is shown, unless itmatches the host name of the virtual appliance.
b Type your organization name, such as your company name, in theOrganization text box.
c Type your organizational unit, such as your department name orlocation, in the Organizational Unit text box.
d Type a two-letter ISO 3166 country code, such as US, in the Countrytext box.
6 Click Replace Certificate.
After a few minutes, the certificate details appear on the page.
The certificate is updated.
(Optional) Update the Identity Appliance with the vCloud Automation CenterAppliance Certificate
When the host name for a vCloud Automation Center Appliance is changed, the system administrator mustre-enter Identity Appliance SSO settings.
Prerequisites
“Replace a Certificate in the vCloud Automation Center Appliance,” on page 123.
Procedure
1 Navigate to the vCloud Automation Center Appliance management console by using its fully qualifieddomain name, https://vcac-va-hostname.domain.name:5480/.
2 Log in with user name root and the password you specified when deploying the Identity Appliance.
3 Go to vCAC Settings > SSO.
4 Verify that the fully qualified name and port for the Identity Appliance, identity-va-hostname.domain.name:7444, appears in the SSO Host and Port text box.
For example, vcac-sso.mycompany.com:7444.
The https:// prefix is not used.
Installation and Configuration
124 VMware, Inc.

5 Verify that the SSO default tenant is vsphere.local.
Do not change this name.
6 Type the default administrator name [email protected] in the SSO Admin User text box.
7 Type the SSO administrator password in the SSO Admin Password text box.
The password must match the password you specified in the SSO settings for the Identity Appliance.
8 Click Save Settings.
The Identity Appliance is updated with certificate information for the new vCloud Automation CenterAppliance host name.
Update the IaaS Servers with the vCloud Automation Center ApplianceCertificate
After the virtual appliance certificates are updated, the system administrator updates the IaaS serverrunning the Model Manager Data component registry to reestablish trusted communications between thevirtual appliances and IaaS components.
Execute the vcac-Config.exe command with the UpdateServerCertificates argument to update the IaaSdatabase with the certificate information.
Type the following command for a list of vcac-Config arguments.
vcac-Config.exe help
Prerequisites
“Update the Identity Appliance with the vCloud Automation Center Appliance Certificate,” on page 124.
Procedure
1 Open a command prompt as an administrator and navigate to the Cafe directory on the ModelManager Data installation machine.
C:\Program Files (x86)\VMware\vCAC\Server\Model Manager Data\Cafe
2 Type the following command to update the IaaS database with the certificate information in one step.Supply the IaaS database name (vcac, by default) and the fully qualified domain name of the databaseserver.
vcac-Config.exe UpdateServerCertificates -d vcac_database -s sql_database_server -v
For example:
vcac-Config.exe UpdateServerCertificates -d vCAC -s tr-w2008-13.eng.mycompany -v
NOTE The version of the command shown here, without the thumbprint argument, downloads thecertificate in one step.
3 (Optional) If you use self-signed certificates or certificates signed by a custom certificate authority (CA),verify that the Windows servers that host the Manager Service, DEMs, and IaaS Website trust the newcertificate.
4 (Optional) Add the virtual appliance certificate to the trusted store if it is not trusted and recheck thatWindows servers now trust the certificate.
5 Type iisreset to reset IIS.
Chapter 8 Updating Certificates
VMware, Inc. 125

Updating the IaaS CertificateThe system administrator can replace a self-signed certificate with another self-signed certificate or acertificate from a certificate authority after the installation is complete. Certificate updates are requiredwhen the certificate type changes or the certificate expires.
1 Update the Certificate in Internet Information Services on page 126The system administrator can replace a self-signed certificate with one from a certificate authority toensure security in a distributed deployment environment.
2 Update the vCloud Automation Center Appliance with the IaaS Certificate on page 127After certificates are updated on the IaaS servers, the system administrator updates the IaaScomponent registry to reestablish trusted communications between the virtual appliances and IaaScomponents. In a distributed environment, this process is repeated for each IaaS server where youupdated certificates.
Update the Certificate in Internet Information ServicesThe system administrator can replace a self-signed certificate with one from a certificate authority to ensuresecurity in a distributed deployment environment.
You can use a Subject Alternative Name (SAN) certificate on multiple machines. The certificate must beadded to the trusted root certificate store on the IIS machine. The IIS machine is the machine on which theComponent Website and Model Manager data are installed during the IaaS installation. This procedureadds the certificate to the trusted root in the certificate store.
Procedure
1 Get a certificate from a trusted certificate authority.
2 Open the Internet Information Services (IIS) Manager.
3 Double-click Server Certificates from Features View.
4 Click Import in the Actions pane.
a Type a file name in the Certificate file text box, or click the browse button (…), to navigate to thename of a file where the exported certificate is stored.
b Type a password in the Password text box if the certificate was exported with a password.
5 Click OK.
6 Click on the imported certificate and select View.
7 Verify that the certificate is trusted.
If the certificate is untrusted, you see the message, This CA root certificate is not trusted.
8 Update IIS bindings.
a Select the site that hosts the component Web site and model manager.
b Click Bindings in the Action pane.
c Click Edit on the https (443) in the Site Bindings dialog box.
d Change the SSL certificate to the newly imported one.
9 Restart IIS or open a command prompt window and type iisreset.
Installation and Configuration
126 VMware, Inc.

10 Open the vCloud Automation Center site with a browser.
The server address is of the form https://<IaaS_server_address>/vcac/ and is case sensitive. Whenyou open the site, you should see the message 401 Not authorized, which indicates that certificates areconfigured on the IaaS server.
Update the vCloud Automation Center Appliance with the IaaS CertificateAfter certificates are updated on the IaaS servers, the system administrator updates the IaaS componentregistry to reestablish trusted communications between the virtual appliances and IaaS components. In adistributed environment, this process is repeated for each IaaS server where you updated certificates.
As part of updating the IaaS certificate, you must re-register the certificate with thevCloud Automation Center. You can use the hostname or IP address of the IaaS machines in the followingcommands. If you are using a load balancer, supply the host name of the load balancer instead. Note thatURL paths are case-sensitive.
If you encounter errors, see the troubleshooting section of Installation and Configuration.
Prerequisites
“Update the Certificate in Internet Information Services,” on page 126.
Procedure
1 Navigate to the Cafe directory on the IaaS machine that has an updated certificate.
C:\Program Files (x86)\VMware\vCAC\Server\Model Manager Data\Cafe
2 Register the endpoint address for the UI using a command of this form:
Vcac-Config.exe RegisterEndpoint --EndpointAddress
https://<IaaS UI server hostname> or <lbhostname>/
<IaaS UI application path> --Endpoint ui -v
For example:Vcac-Config.exe RegisterEndpoint --EndpointAddress https://192.168.1.1/vcac/ --Endpoint ui -v
3 Register the endpoint address for the Model Manager Web server using a command of this form:
Vcac-Config.exe RegisterEndpoint --EndpointAddress
https://<Model Manager Web server hostname> or <lbhostname>/
<Model Manager Web application path> --Endpoint repo -v
For example:
Vcac-Config.exe RegisterEndpoint --EndpointAddress https://192.168.1.1/Repository --Endpoint
repo -v
4 Register the endpoint address for the WAPI server using a command of this form:
Vcac-Config.exe RegisterEndpoint --EndpointAddress
https://<IaaS WAPI server hostname> or <lbhostname>/
<IaaS WAPI application path>/ --Endpoint wapi -v
For example:
Vcac-Config.exe RegisterEndpoint --EndpointAddress https://192.168.1.1/WAPI --Endpoint wapi -
v
Chapter 8 Updating Certificates
VMware, Inc. 127
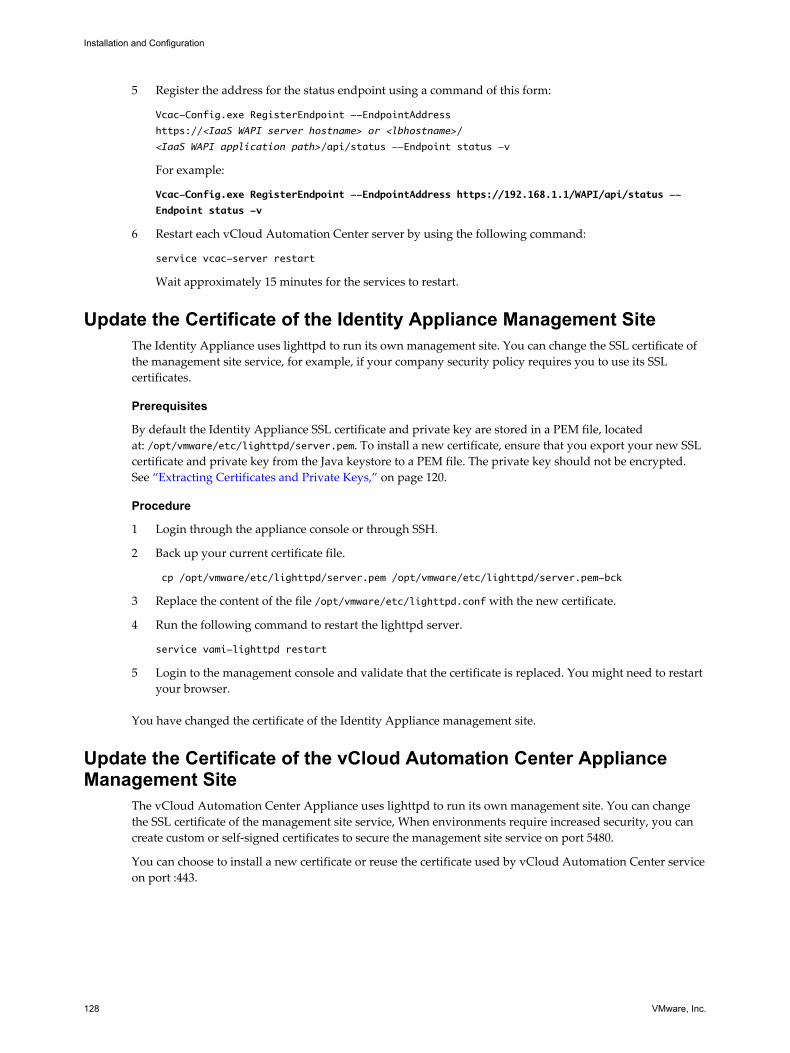
5 Register the address for the status endpoint using a command of this form:
Vcac-Config.exe RegisterEndpoint --EndpointAddress
https://<IaaS WAPI server hostname> or <lbhostname>/
<IaaS WAPI application path>/api/status --Endpoint status -v
For example:
Vcac-Config.exe RegisterEndpoint --EndpointAddress https://192.168.1.1/WAPI/api/status --
Endpoint status -v
6 Restart each vCloud Automation Center server by using the following command:
service vcac-server restart
Wait approximately 15 minutes for the services to restart.
Update the Certificate of the Identity Appliance Management SiteThe Identity Appliance uses lighttpd to run its own management site. You can change the SSL certificate ofthe management site service, for example, if your company security policy requires you to use its SSLcertificates.
Prerequisites
By default the Identity Appliance SSL certificate and private key are stored in a PEM file, locatedat: /opt/vmware/etc/lighttpd/server.pem. To install a new certificate, ensure that you export your new SSLcertificate and private key from the Java keystore to a PEM file. The private key should not be encrypted.See “Extracting Certificates and Private Keys,” on page 120.
Procedure
1 Login through the appliance console or through SSH.
2 Back up your current certificate file.
cp /opt/vmware/etc/lighttpd/server.pem /opt/vmware/etc/lighttpd/server.pem-bck
3 Replace the content of the file /opt/vmware/etc/lighttpd.conf with the new certificate.
4 Run the following command to restart the lighttpd server.
service vami-lighttpd restart
5 Login to the management console and validate that the certificate is replaced. You might need to restartyour browser.
You have changed the certificate of the Identity Appliance management site.
Update the Certificate of the vCloud Automation Center ApplianceManagement Site
The vCloud Automation Center Appliance uses lighttpd to run its own management site. You can changethe SSL certificate of the management site service, When environments require increased security, you cancreate custom or self-signed certificates to secure the management site service on port 5480.
You can choose to install a new certificate or reuse the certificate used by vCloud Automation Center serviceon port :443.
Installation and Configuration
128 VMware, Inc.

Prerequisites
n By default the vCloud Automation Center Appliance SSL certificate and private key are stored in aPEM file, which is located at: /opt/vmware/etc/lighttpd/server.pem. To install a new certificate, ensurethat you export your new SSL certificate and private key from the Java keystore to a PEM file. See “Extracting Certificates and Private Keys,” on page 120.
Procedure
1 Login through the appliance console or through SSH.
2 Back up your current certificate file.
cp /opt/vmware/etc/lighttpd/server.pem /opt/vmware/etc/lighttpd/server.pem-bck
3 Replace the content of the file /opt/vmware/etc/lighttpd.conf with the new certificate.
4 Run the following command to restart the lighttpd server.
service vami-lighttpd restart
5 Login to the management console and validate that the certificate is replaced. You might need to restartyour browser.
You have changed the certificate of the vCloud Automation Center Appliance management site.
Chapter 8 Updating Certificates
VMware, Inc. 129

Installation and Configuration
130 VMware, Inc.

Troubleshooting 9vCloud Automation Center troubleshooting provides procedures for resolving issues you might encounterwhen installing or configuring vCloud Automation Center.
This chapter includes the following topics:
n “Default Log Locations,” on page 131
n “Create a Support Bundle,” on page 132
n “Installers Fail to Download,” on page 133
n “Failed to Install Model Manager Data and Web Components,” on page 133
n “Save Settings Warning Appears During IaaS Installation,” on page 134
n “Rolling Back a Failed Installation,” on page 135
n “Server Times Are Not Synchronized,” on page 136
n “Encryption.key File has Incorrect Permissions,” on page 136
n “Log in to the vCloud Automation Center Console Fails,” on page 137
n “Error Communicating to the Remote Server,” on page 138
n “Blank Pages May Appear When Using Internet Explorer 9 or 10 on Windows 7,” on page 138
n “Cannot Establish Trust Relationship for the SSL/TLS Secure Channel,” on page 139
n “Cannot Log in to a Tenant or Tenant Identity Stores Disappear,” on page 139
Default Log LocationsConsult system and product log files for information on a failed installation.
The file paths shown are the default paths. If you installed IaaS in another directory, navigate to yourcustom installation directory instead.
Windows Logs
Log Location
Windows Event Viewer logs Start > Control Panel > Administrative Tools > Event Viewer
VMware, Inc. 131

Installation Logs
Log Default Location
Installation Logs %TEMP%\vCAC
C:\Program Files (x86)\VMware\vCAC\Server\ConfigTool\Log
WAPI Installation Logs C:\Program Files (x86)\VMware\vCAC\Web API\ConfigTool\LogfilenameWapiConfiguration-<XXX>
IaaS Logs
Log Default Location
Website Logs C:\Program Files (x86)\VMware\vCAC\Server\Website\Logs
Repository Log C:\Program Files (x86)\VMware\vCAC\Server\Model Manager Web\Logs
Manager Service Logs C:\Program Files (x86)\VMware\vCAC\Server\Logs
Orchestrator Logs C:\Program Files (x86)\VMware\vCAC\Distributed Execution Manager\DEO\Logs
Agent Logs C:\Program Files (x86)\VMware\vCAC\Agents\agent_name\logs
Identity ApplianceYou can generate a complete log file by creating a support bundle. See “Create a Support Bundle,” onpage 132.
vCloud Automation Center Framework Logs
Log Default location
Framework Logs /var/log/vmware
Create a Support BundleA root user can create a support bundle in the vCloud Automation Center Appliance management consoleor for IaaS components. These bundles can help VMware support staff to identify causes of issues you mightencounter.
For information about creating a support bundle for IaaS component see the VMware Knowledge Basearticle Collecting VMware vCloud Automation Center logs using the vCAC log collection utility (2078179) .
Use the following procedure to create a support bundle for a vCloud Automation Center Appliance
Procedure
1 Navigate to the vCloud Automation Center Appliance management console by using its fully qualifieddomain name, https://vcac-va-hostname.domain.name:5480/.
2 Log in and navigate to vCAC Settings > Logs.
3 Click Create support bundle.
4 Click Download and save the file on your system.
You can use the support bundle to troubleshoot issues on your own or to send to your VMware supportrepresentative.
Installation and Configuration
132 VMware, Inc.

Installers Fail to DownloadInstallers fail to download from the vCloud Automation Center Appliance.
Problem
Installers do not download when running setup__vcac-va-hostname.domain.name.exe.
Cause
n Network connectivity issues when connecting to the vCloud Automation Center Appliance machine.
n Not able to connect to the vCloud Automation Center Appliance machine because the machine cannotbe reached or it cannot respond before the connection times out.
Solution
1 Verify that you can connect to the vCloud Automation Center Appliance by typing the following URLin a Web browser.
https://vcac-va-hostname.domain.name
2 Check the other vCloud Automation Center Appliance troubleshooting topics.
3 Download the setup file and reconnect to the vCloud Automation Center Appliance.
Failed to Install Model Manager Data and Web ComponentsYour installation can fail if the IaaS installer is unable to save the Model Manager Data component and Webcomponent.
Problem
Your installation fails with the following message: The IaaS installer failed to save the Model Manager Dataand Web components.
Cause
The failure has several potential causes.
n Connectivity issues to the vCloud Automation Center Appliance or the Identity Appliance orconnectivity issues between the appliances. A connection attempt fails because there was no responseor the connection could not be made.
n Trusted certificate issues in IaaS when using a distributed configuration.
n Trusted certificate issues between the vCloud Automation Center Appliance and the IdentityAppliance.
n A certificate name mismatch in a distributed configuration.
n The certificate may be invalid or an error on the certificate chain might exist.
n The Repository Service fails to start.
n Loopback problem or incorrect configuration of the load balancer in a distributed environment.
Solution
n Connectivity
Check that you can connect to the vCloud Automation Center Appliance by typing the following URLin a Web browser: https//vcac-va-hostname.domain.name.
Chapter 9 Troubleshooting
VMware, Inc. 133

n Trusted certificate Issues
n In IaaS, open Microsoft Management Console with the command mmc.exe and check that thecertificate used in the installation has been added to the Trusted Root Certificate Store in themachine.
n From a browser check https://<ip-web>/repository/data/MetaModel.svc and verify that no certificateerrors appear in your browser.
n Certificate Name Mismatch
This error can occur when the certificate is issued to a particular name and a different name or IPaddress is used. You can suppress the certificate name mismatch error during installation by selectingSuppress certificate mismatch.
You can also use the Suppress certificate mismatch option to ignore remote certificate revocation listmatch errors.
n Invalid Certificate
Open Microsoft Management Console with the command mmc.exe. Check that the certificate is notexpired and that the status is correct. Do this for all certificates in the certificate chain. You might haveto import other certificates in the chain into the Trusted Root Certificate Store when using a Certificatehierarchy.
n Repository Service
Use the following actions to check the status of the repository service.
n From a browser, check the status of the MetaModel service at https://<ip-web>/repository/data/MetaModel.svc.
n Check the Repository.log for errors.
n Reset IIS (iisreset) if you have problems with the applications hosted on the Web site (Repository,vCAC or WAPI).
n Check the Web site logs in %SystemDrive%\inetpub\logs\LogFiles for additional logginginformation.
n Verify that Prerequisite Checker passed when checking the requirements.
n On Windows 2012, check that WCF Services under .NET Framework 4.5.1 is installed and thatHTTP activation is installed.
n Loopback check
You must disable the Microsoft loopback check on the Model Manager machine to install the ModelManager Data Component in a load balanced environment.
See the following Microsoft KB article for information on how to disable the loopback check feature: http://support.microsoft.com/KB/926642/EN-US. If you follow the first method described in this article,and use multiple load balancers or load balance layers, be sure to specify each host name when youdisable loopback check. The installation fails, otherwise.
Save Settings Warning Appears During IaaS InstallationMessage appears during IaaS Installation. Warning: Could not save settings to the virtual applianceduring IaaS installation.
Problem
An inaccurate error message indicating that user settings have not been saved appears during IaaSinstallation.
Installation and Configuration
134 VMware, Inc.

Cause
Communication or network problems can cause this message to appear erroneously.
Solution
Ignore the error message and proceed with the installation. This message should not cause the setup to fail.
Rolling Back a Failed InstallationWhen an installation fails and rolls back, the system administrator must verify that all required files havebeen uninstalled before starting another installation. Some files must be uninstalled manually.
Roll Back a Minimal InstallationA system administrator must manually remove some files and revert the database to completely uninstall afailed IaaS installation.
Procedure
1 If the following components are present, uninstall them with the Windows uninstaller.
n vCloud Automation Center Agents
n vCloud Automation Center DEM-Worker
n vCloud Automation Center DEM-Orchestrator
n vCloud Automation Center Server
n vCloud Automation Center WAPI
NOTE If you see the following message, restart the machine and then follow the steps in this procedure:Error opening installation log file. Verify that the specified log file location exists and
it is writable
2 Revert your database to the state it was in before the installation was started. The method you usedepends on the original database installation mode.
3 In IIS (Internet Information Services Manager) select Default Web Site (or your custom site) and clickBindings. Remove the https binding (defaults to 443).
4 Check that the Applications Repository, vCAC and WAPI have been deleted and that the applicationpools RepositoryAppPool, vCACAppPool, WapiAppPool have also been deleted.
The installation is completely removed.
Roll Back a Distributed InstallationA system administrator must manually remove some files and revert the database to completely uninstall afailed IaaS installation.
Procedure
1 If the following components are present, uninstall them with the Windows uninstaller.
n vCloud Automation Center Server
Chapter 9 Troubleshooting
VMware, Inc. 135

n vCloud Automation Center WAPI
NOTE If you see the following message, restart the machine and then follow this procedure: Erroropening installation log file. Verify that the specified log file location exists and it is
writable.
2 Revert your database to the state it was in before the installation was started. The method you usedepends on the original database installation mode.
3 In IIS (Internet Information Services Manager) select the Default Web Site (or your custom site) andclick Bindings. Remove the https binding (defaults to 443).
4 Check that the Applications Repository, vCAC and WAPI have been deleted and that the applicationpools RepositoryAppPool, vCACAppPool, WapiAppPool have also been deleted.
Table 9‑1. Roll Back Failure Points
Failure Point Action
Installing Manager Service If present, uninstall vCloud Automation Center Server.
Installing DEM-Orchestrator If present, uninstall vCloud Automation Center DEM Orchestrator .
Installing DEM-Worker If present, uninstall VMware vCloud Automation Center DEM-Worker.
Installing an Agent If present, uninstall vCloud Automation Center Agents.
Server Times Are Not SynchronizedAn installation might not succeed when IaaS time servers are not synchronized with the vCloudAutomation Center Appliance and the Identity Appliance.
Problem
You cannot log in after installation, or the installation fails while it is completing.
Cause
Time servers on all servers might not be synchronized.
Solution
For each server (Identity Appliance, vCloud Automation Center Appliance, and all Windows servers wherethe IaaS components will be installed), enable time synchronization as described in the following topics:
n “Enable Time Synchronization on the Identity Appliance,” on page 29
n “Enable Time Synchronization on the vCloud Automation Center Appliance,” on page 33
n “Enable Time Synchronization on the Windows Server,” on page 36
For an overview of timekeeping for vCloud Automation Center, see “Time Synchronization,” on page 26.
Encryption.key File has Incorrect PermissionsA system error can result when incorrect permissions are assigned to the Encryption.key file for a virtualappliance.
Problem
You log in to vCloud Automation Center Appliance and the Tenants page is displayed. After the page hasbegun loading, you see the message System Error.
Installation and Configuration
136 VMware, Inc.

Cause
The Encryption.key file has incorrect permissions or the group or owner user level is incorrectly assigned.
Solution
Prerequisites
Log in to the virtual appliance that displays the error.
NOTE If your virtual appliances are running under a load balancer, you must check each virtualappliance.
Procedure
1 View the log file /var/log/vcac/catalina.out and search for the message Cannot writeto /etc/vcac/Encryption.key.
2 Go to the /etc/vcac/ directory and check the permissions and ownership for the Encryption.keyfile. You should see a line similar to the following one:
-rw------- 1 vcac vcac 48 Dec 4 06:48 encryption.key
Read and write permission is required and the owner and group for the file must be vcac.
3 If the output you see is different, change the permissions or ownership of the file as needed.
What to do next
Log in to the Tenant page to verify that you can log in without error.
Log in to the vCloud Automation Center Console FailsYour installation appears to have completed successfully, but you cannot log in to the console.
Problem
You cannot log in to the vCloud Automation Center console at https://vcac-va-hostname/vcac.
Cause
Multiple conditions can prevent you from logging in to vCloud Automation Center console.
Solution
1 Navigate to the Identity Appliance management console by using its fully qualified domain name,https://identity-hostname.domain.name:5480/.
2 Log in and select System > Reboot to reboot the appliance.
3 Navigate to the vCloud Automation Center Appliance management console by using its fully qualifieddomain name, https://vcac-va-hostname.domain.name:5480/.
4 Log in and select System > Reboot to reboot the appliance.
You can also check the status of the services under the SSO tab in the vCloud Automation Centerconsole or log in to the appliance and run tail -f /var/vcac/log/catalina.out.
Chapter 9 Troubleshooting
VMware, Inc. 137

Error Communicating to the Remote ServerAn error message indicating a communication problem between the vCloud Automation Center Applianceand the Identity Appliance appears when a problem exists in Common Name.
Problem
Error Communicating to the Remote Server error message appears when you configure the SSO from thevCloud Automation Center Appliance management console, even when the configuration is correct and thevirtual appliances are communicating successfully.
Cause
The Common Name or the alternative names in the Identity SSL certificate do not match the hostname inthe SSO URL you entered in the vCloud Automation Center Appliance.
Solution
1 In the Identity Appliance management console, replace the SSL certificate, making sure you enter ascommon name exactly the same FQDN (no protocol or port included) as it is accessed from vCloudAutomation Center Appliance.
2 Navigate to the Identity Appliance management console by using its fully qualified domain name,https://identity-hostname.domain.name:5480/.
3 Replace the SSL certificate and type the fully qualified domain name of the SSO host (as it is accessedfrom the vCloud Automation Center Appliance) in the Common Name text box.
Do not include the https:// prefix or the port number.
Blank Pages May Appear When Using Internet Explorer 9 or 10 onWindows 7
When you use Internet Explorer 9 or 10 on Windows 7 and compatibility mode is enabled, some pagesappear to have no content.
Problem
When using Internet Explorer 9 or 10 on Windows 7, the following pages have no content:
n Infrastructure
n Default Tenant Folder on the Orchestrator page
n Server Configuration on the Orchestrator page
Cause
The problem could be related to compatibility mode being enabled. You can disable compatibility mode forInternet Explorer with the following steps.
Solution
Prerequisites
Ensure that the menu bar is displayed. If you are using Internet Explorer 9 or 10, press Alt to displaythe Menu bar (or right-click the Address bar and then select Menu bar).
Procedure
1 Select Tools > Compatibility View settings.
2 Deselect Display intranet sites in Compatibility View.
Installation and Configuration
138 VMware, Inc.

3 Click Close.
Cannot Establish Trust Relationship for the SSL/TLS Secure ChannelYou might receive the message "Cannot establish trust relationship for the SSL/TLS secure channel whenupgrading security certificates for vCloud Automation Center."
Problem
If a certificate issue occurs with vcac-config.exe when upgrading a security certificate, you might see thefollowing message:
The underlying connection was closed: Could not establish trust relationship
for the SSL/TLS secure channel
You can find more information about the cause of the issue by using the following procedure.
Solution
1 Open the vcac-config.exe.config file and locate the repository address : <addkey="repositoryAddress" value=" https://[IaaS address]:443/repository/" />
2 Browse to the address with Internet Explorer.
3 Continue through any error messages about certificate trust issues.
4 Obtain a security report from Internet Explorer and use it to troubleshoot why this certificate is nottrusted.
If problems persist, repeat the procedure by browsing with the address that needs to be registered, theEndpoint address that you used to register with vcac-config.exe.
Cannot Log in to a Tenant or Tenant Identity Stores DisappearNinety days after deployment, you cannot log into a tenant or the identity store for a tenant disappears.
Problem
n When you log in to a tenant, you see a blank page displayed with a Submit button in the upper left-hand corner.
n You receive a System Exception error when accessing the tenant ID store configuration page.
n The ID store configuration disappears.
n You cannot log in to a tenant by using an LDAP account.
n The catalina.out log located in /var/log/vmware/vcac/ shows an error similar to the following:
12:40:49,190 [tomcat-http--34] [authentication] INFO
com.vmware.vim.sso.client.impl.SecurityTokenServiceImpl
$RequestResponseProcessor.handleFaultCondition:922 - Failed trying to retrieve token:
ns0:RequestFailed: Error occurred looking for solution user :: Insufficient access YYYY-03-18
12:40:49,201 [tomcat-http--34] [authentication] ERROR
com.vmware.vcac.platform.service.rest.resolver.ApplicationExceptionHandler.handleUnexpectedEx
ception:820 - Failed trying to retrieve token: ns0:RequestFailed: Error occurred looking for
solution user :: Insufficient access com.vmware.vim.sso.client.exception.InternalError:
Failed trying to retrieve token: ns0:RequestFailed: Error occurred looking for solution
user :: Insufficient access
n The Identity Appliance messages log located in /var/log/ shows an error message similar to thefollowing:
Chapter 9 Troubleshooting
VMware, Inc. 139

T16:50:18-05:00 lsassd[2913]: GSSAPI Error: The referenced context has expired (Unknown
error) T08:34:41-06:00 vmdird: t@139870073485056: Lockout policy check - password expired.
(cn=tenantadmin,cn=users,dc=tenant) T11:58:03-06:00 lsassd[2943]: GSSAPI Error: The
referenced context has expired (Unknown error)....
Account "cn=tenantadmin,cn=users,dc=qic" password expired and caused login/bind from IDM to
fail. YYYY-03-18T11:38:46-06:00 denqca3vcacid01 vmdird: t@140689332778752: LoginBlocked DN
(cn=tenantadmin,cn=users,dc=tenant), error (9239)(Account access blocked)
Cause
The SSO internal tenant administrator password expires after 90 days by default. This issue is internal tovCloud Automation Center and does not affect external identity stores such as OpenLDAP or ActiveDirectory.
It is a known issue that the vCloud Automation Center user interface does not provide notification that thetenant administrator password is expiring. The workaround for this issue is to disable password expirationfor the tenant administrator account.
For step-by-step instructions to solve this issue, see the VMware knowledge base article at http://kb.vmware.com/kb/2075011.
Installation and Configuration
140 VMware, Inc.

Index
Aaccount settings, specifying 39agents
choosing the installation scenario 86configuring Hyper-V 93configuring XenServer 93configuring vSphere agents 90enabling remote WMI requests 102EPI Powershell 11Hyper-V 91, 92installation location and requirements 87installing 85installing WMI 102installing XenDesktop 96installing Citrix agents 98installing EPI agent for Citrix 97installing for Visual Basic scripting 100installing the EPI agent for VB scripting 99installing vSphere agents 89integration agents 11VDI PowerShell 11Visual Basic scriptiong requirements 100WMI agents 11XenServer 91, 92
appliances, configuring additional 63
Ccertificate name mismatch 133certificates
component registry 122, 125, 127IaaS certificate 126trust relationships 45updating 119updating Appliance certificate after renaming a
vCloud Automation Center Appliancehost 124
updating the Identity Appliance certificate 121,122
updating the vCloud Automation CenterAppliance certificate 123
updating the vCloud Automation CenterIdentity appliance 120
change the management site SSLcertificate 128
Citrix, installing the EPI agent 97Citrix agents, installing 98
clusters;joing 63component registry, updating 122, 125, 127configuring tenants 111
Ddatabase
configuring standalone PostgreSQL 55configuring standalone PostreSQL 54creating by using the wizard 70preparing IaaS database 67
DEMabout installing 81installing 81
DEM Worker, connecting to SCVMM 82dems
Amazon Web Services EC2 requirements 20Red Hat requirements 20SCVMM requirements 20
deployment scenariodistributed deployment 43minimal deployment 27minimal installation 12
deployment pathchoosing 12distributed installation 12
distributed deploymentinstallation overview 14validating 65
Distributed Execution Managers, See also DEMdistributed installation, overview 43Distributed Execution Manager, See DEM
EEncryption.key file, setting permissions 136EPI agents, installing for Visual Basic
scripting 99, 100
HHyper-V
agent 91proxy agent 91requirements 91
Hyper-V agents, installing 92hypervisor, requirements 91
IIaaS
agents 11
VMware, Inc. 141

download installer 67updating the certificate 126
IaaS administrators, appointing 107, 117IaaS components
installing 36installing in a distributed configuration 65registering 40
IaaS components,definitions 44IaaS installer, downloading 38IaaS services, verifying 84IaaS database
configuring Windows service for access 108configuring Windows services account to use
SQL authentication 109creating the database manually 68creating the database using the wizard 70specifying the SQL database 39
IaaS database access, enabling from serviceuser 109
IaaS distributed installation 44IaaS Manager Service, requirements 19Identity Appliance
configuring 30, 52deploy in a distributed environment 51enabling time sync 29, 52
identity stores, configuring tenant 105, 106, 116Identity stores, troubleshooting 139Identity Appliance certificate, updating 121, 122Identity Appliance management
site;certificates 128identity virtual appliance, deploying 28, 49infrastructure components, installing 37installation
certificates 119completing 41configuring 131configuring tenants 111distributed deployment overview 14DNS and host name resolution 17minimal deployment overview 13minimal installation overview 27overview 9specifying agents 40specifying managers 40troubleshooting 131vCloud Automation Center Appliance 32, 57
installation componentschecking prerequisites 39choosing a deployment path 12SSO 9VMware Identity Appliance 10VMware Infrastructure as a Service (IaaS) 10VMware vCloud Automation Center
Appliance 10
installation preparation, time synchronization 26installation requirements
credentials 23deployment environments 17IaaS requirements 19operating system 17port requirements 21security 25users 23virtual machine 17Windows server 18XenDesktop 95
installation failure, servers out of sync 136installation requirements, hardware 17installation type
logging in 38selecting 38
installingbrowser considerations 18configuring vCloud Automation Center
Appliances 51deploying vCloud Automation Center
Appliances 49download IaaS installer 67worksheet 46
LLicense, IaaS 108Log in, failure 137login failure, servers out of sync 136logs, locations 131Logs
IaaS 131troubleshooting 131
loopback check, disabling 133
MManager service, definition 44Manager Service
installing 77, 79requirements 19
migratinginstalling and configuring the target system 13supported migration paths 13
minimal deployment, installation overview 13Minimal installation, uninstalling 135Model Manager
definition 44editable business logic 10execution policies 10secure multi-tenancy 10troubleshooting install failures 133unified data model 10
Model Manager data, installing 71–73, 75
Installation and Configuration
142 VMware, Inc.

PPEM files, command for extracting 120post-installation tasks
configuring Windows service to access IaaSdatabase 108
updating certificates 119PostgreSQL database
configuring standalone 55requirements 18, 44set a password 56
PostgreSQL, configuring external database 58PostreSQL database, configuring standalone 54PowerShell, setting to RemoteSigned 86prerequisites
browser considerations 18checking 39
provisioning server 97proxy agents, installing and configuring for
vSphere 87
Rremote servers, troubleshooting communication
errors 138requirements 97RSA private keys, command for extracting 120
Sscenarios, choosing the agent installation 86security
certificates 25IaaS certificates 37, 66passphrase 25third-party software 26trust relationships 45
server settings, specifying 39Server requirements
IaaS database 18IaaS or Windows server 19
SSL certificates, extracting 120SSO, configuring the Identity Appliance 30, 52support bundle, creating 132System error message 136
Ttenancy
default tenant 111overview 111single-tenant vs. multi-tenant 112
tenant administrators, appointing 107, 117tenants
appointing administrators 107, 117configuring 111, 115configuring identity store 105, 106, 116configuring default tenant 105configuring identity stores 116creating 115, 116
group management 112troubleshooting ID stores 139troubleshooting login 139user management 112
time sync, enabling on Windows machine 36troubleshooting
blank pages appearing 138log locations 131server times out of sync 136
trusted certificate issues 133
UUninstall, failled installation 135updated information 7upgrading, supported upgrade paths 12user and groups, overview 112
VvCloud Automation Center Appliance
configuring 33, 59deploying 32, 50
vCloud Suite, licensing 5vCloud Automation Center Appliance certificate
updating 123updating after renaming a host 124
vCloud Automation Center Applianceclusters;joining 63
VDI agent for XenDesktop, installing 94virtualization proxy agents 11Visual Basic, scripting requirements 100Visual Basic scripting
installing EPI agents 100installing the EPI agent 99
VMware IaaSdistributed execution manager 11manager service 10
Vmware IaaS, database 11VMware IaaS, IaaS web site 10VMware IaaS, Model Manager 10vSphere agents
configuring 90installing 89
vSphere agentrequired permissions 87supported configuration for concurrency 87
vSphere proxy agents, installing andconfiguring 87
Wwebsite component, installing 71–73, 75Windows services account, configuring to use
SQL authentication 109WMI agents
enabling remote requests 102installing 102
Index
VMware, Inc. 143

XXenDesktop
installation requirements 95installing agent 96installing VDI agent 94
XenServeragent 91proxy agent 91
XenServer agents, installing 92XenServer Host name, setting 95
Installation and Configuration
144 VMware, Inc.