installation and configuration guide - pacs support · formation flow enginetm; gold mine data...
TRANSCRIPT
Installation andConfiguration Guide
for Windows NT
Informix Red Brick Decision Server
Version 6.0November 1999Part No. 000-6369

ii Installation and Config
Published by Informix Press Informix Corporation4100 Bohannon DriveMenlo Park, CA 94025-1032
© 1999 Informix Corporation. All rights reserved. The following are trademarks of Informix Corporationor its affiliates, one or more of which may be registered in the United States or other jurisdictions:
Answers OnLineTM; C-ISAM; Client SDKTM; DataBlade; Data DirectorTM; Decision FrontierTM;Dynamic Scalable ArchitectureTM; Dynamic ServerTM; Dynamic ServerTM, Developer EditionTM;Dynamic ServerTM with Advanced Decision Support OptionTM; Dynamic ServerTM with ExtendedParallel OptionTM; Dynamic ServerTM with MetaCube; Dynamic ServerTM with Universal Data OptionTM;Dynamic ServerTM with Web Integration OptionTM; Dynamic ServerTM, Workgroup EditionTM;Dynamic Virtual MachineTM; Enterprise Decision ServerTM; FormationTM; Formation ArchitectTM;Formation Flow EngineTM; Gold Mine Data Access; IIF.2000TM; i.ReachTM; i.SellTM; Illustra; Informix;Informix 4GL; Informix InquireSM; Informix Internet Foundation.2000TM; InformixLink;Informix Red Brick Decision ServerTM; Informix Session ProxyTM; Informix VistaTM; InfoShelfTM;InterforumTM; I-SpyTM; MediazationTM; MetaCube; NewEraTM; ON-BarTM; OnLine Dynamic ServerTM;OnLine/Secure Dynamic ServerTM; OpenCase; OrcaTM; PaVERTM; Red Brick and Design;Red Brick Data MineTM; Red Brick Mine BuilderTM; Red Brick DecisionscapeTM; Red Brick ReadyTM;Red Brick Systems; Regency Support; Rely on Red BrickSM; RISQL; Solution DesignSM; STARindexTM;STARjoinTM; SuperView; TARGETindexTM; TARGETjoinTM; The Data Warehouse Company;The one with the smartest data wins.TM; The world is being digitized. We’re indexing it.SM;Universal Data Warehouse BlueprintTM; Universal Database ComponentsTM; Universal Web ConnectTM;ViewPoint; VisionaryTM; Web Integration SuiteTM. The Informix logo is registered with the United StatesPatent and Trademark Office. The DataBlade logo is registered with the United States Patent andTrademark Office.
Documentation Team: Twila Booth, Laura Kremers, Jerry Tattershall
GOVERNMENT LICENSE RIGHTS
Software and documentation acquired by or for the US Government are provided with rights as follows:(1) if for civilian agency use, with rights as restricted by vendor’s standard license, as prescribed in FAR 12.212;(2) if for Dept. of Defense use, with rights as restricted by vendor’s standard license, unless superseded by anegotiated vendor license, as prescribed in DFARS 227.7202. Any whole or partial reproduction of software ordocumentation marked with this legend must reproduce this legend.
uration Guide for Windows NT

Table of Contents
Table ofContents
IntroductionIn This Introduction . . . . . . . . . . . . . . . . . 3About This Guide . . . . . . . . . . . . . . . . . . 3
Types of Users . . . . . . . . . . . . . . . . . . 3Software Dependencies . . . . . . . . . . . . . . . 4
New Features . . . . . . . . . . . . . . . . . . . . 4Documentation Conventions . . . . . . . . . . . . . . 5
Syntax Notation . . . . . . . . . . . . . . . . . 5Syntax Diagrams . . . . . . . . . . . . . . . . . 6Keywords and Punctuation . . . . . . . . . . . . . 8Identifiers and Names . . . . . . . . . . . . . . . 9Icon Conventions . . . . . . . . . . . . . . . . . 9
Customer Support . . . . . . . . . . . . . . . . . . 10New Cases . . . . . . . . . . . . . . . . . . . 10Existing Cases . . . . . . . . . . . . . . . . . . 11Troubleshooting Tips . . . . . . . . . . . . . . . . 11
Related Documentation . . . . . . . . . . . . . . . . 12Additional Documentation . . . . . . . . . . . . . . . 15
Online Manuals . . . . . . . . . . . . . . . . . 15Printed Manuals . . . . . . . . . . . . . . . . . 15
Informix Welcomes Your Comments . . . . . . . . . . . . 16
iv Install
Chapter 1 Preparing for an InstallationIn This Chapter . . . . . . . . . . . . . . . . . . . 1-3Preview of Preparation Tasks . . . . . . . . . . . . . . 1-3
Designed for Microsoft BackOffice . . . . . . . . . . . 1-4Verifying Operating-System Version and Disk Space . . . . . . 1-4
Disk Space . . . . . . . . . . . . . . . . . . . 1-5Configuring Operating-System Parameters . . . . . . . . . 1-6
Virtual Memory . . . . . . . . . . . . . . . . . 1-6Tasking . . . . . . . . . . . . . . . . . . . . 1-6
Remove Existing Client Connector Pack . . . . . . . . . . 1-6Determining the Locale . . . . . . . . . . . . . . . . 1-7
Locale Components . . . . . . . . . . . . . . . . 1-7Defining the Locale . . . . . . . . . . . . . . . . 1-8
Selecting a Logical Name for the Service . . . . . . . . . . 1-9Determining the Port Numbers for TCP/IP . . . . . . . . . 1-10Creating the redbrick Account . . . . . . . . . . . . . 1-10Providing License Keys . . . . . . . . . . . . . . . . 1-12The Installation Procedure . . . . . . . . . . . . . . . 1-12Checklist of Preparation Steps . . . . . . . . . . . . . . 1-13
Chapter 2 Installing Red Brick Decision ServerIn This Chapter . . . . . . . . . . . . . . . . . . . 2-3Before You Begin . . . . . . . . . . . . . . . . . . 2-4Preview of Installation Tasks . . . . . . . . . . . . . . 2-4
Unattended Installation . . . . . . . . . . . . . . 2-4Installing in a Non-Networked Environment . . . . . . . 2-5
Running the Setup Program . . . . . . . . . . . . . . 2-5Accepting the License Agreement . . . . . . . . . . . 2-6Stopping the Installation . . . . . . . . . . . . . . 2-6Providing User Information . . . . . . . . . . . . . 2-6Specifying the Installation Type and a Directory . . . . . . 2-7Specifying Custom Installation Options . . . . . . . . . 2-8Specifying the Locale . . . . . . . . . . . . . . . 2-9Specifying the Program Folder . . . . . . . . . . . . 2-11Providing Security Information . . . . . . . . . . . . 2-11Providing Server Information . . . . . . . . . . . . 2-12Providing TCP/IP Information . . . . . . . . . . . . 2-13Verifying Your Settings and Installing Files . . . . . . . . 2-14Finishing the First Phase of Installation . . . . . . . . . 2-14
ation and Configuration Guide for Windows NT

Enabling Red Brick Decision Server . . . . . . . . . . . 2-15Product Licenses for Red Brick Decision Server . . . . . . 2-15Product Licenses for Red Brick Decision Server for Workgroups 2-16Product Licenses for Web Connections . . . . . . . . . 2-16Product Licenses for Options . . . . . . . . . . . . 2-17Entering License Keys . . . . . . . . . . . . . . 2-17Enabling Informix Red Brick Products . . . . . . . . . 2-17Finishing Setup . . . . . . . . . . . . . . . . . 2-18Specifying Username for Concurrent Web Connections Option 2-18Verifying Your Installation . . . . . . . . . . . . . 2-19
Installing in a Non-Networked Environment . . . . . . . . 2-19Without a Network Card . . . . . . . . . . . . . 2-19With a Network Card. . . . . . . . . . . . . . . 2-20
Performing an Unattended Installation . . . . . . . . . . 2-21The redbrick.ini File . . . . . . . . . . . . . . . 2-21[SETUP] Section . . . . . . . . . . . . . . . . 2-22[INSTALL] Section. . . . . . . . . . . . . . . . 2-23[ENABLE] Section . . . . . . . . . . . . . . . . 2-24
Checklist of Installation Tasks . . . . . . . . . . . . . 2-26
Chapter 3 Installing a New ReleaseIn This Chapter . . . . . . . . . . . . . . . . . . 3-3Running Two Releases of Red Brick Decision Server . . . . . 3-5Preview of Installation Tasks . . . . . . . . . . . . . 3-6
Unattended Installation . . . . . . . . . . . . . . 3-6Installing Red Brick Decision Server . . . . . . . . . . . 3-7Redirecting Client Applications for Test Purposes . . . . . . 3-7Migrating Databases to the New Release . . . . . . . . . 3-8Upgrading Databases . . . . . . . . . . . . . . . . 3-8
Upgrade Messages. . . . . . . . . . . . . . . . 3-9Migrating Users to the New Release . . . . . . . . . . . 3-10Replacing an Existing Installation with the New Release . . . . 3-11
Shutting Down the Service . . . . . . . . . . . . . 3-11Installing the New Release . . . . . . . . . . . . . 3-12Upgrading Existing Databases . . . . . . . . . . . 3-12Announcing the New Release . . . . . . . . . . . . 3-12
Checklist of Installation Tasks . . . . . . . . . . . . . 3-13
Table of Contents v

vi Install
Chapter 4 Administering Redbrick Decision ServerIn This Chapter . . . . . . . . . . . . . . . . . . . 4-3Configuring the Services for Automatic Startup . . . . . . . 4-3Removing Red Brick Decision Server . . . . . . . . . . . 4-4
Appendix A Red Brick Decision Server Directories and Files
Appendix B Recommended Locale Specifications
Index
ation and Configuration Guide for Windows NT

Introduction
Introduction
In This Introduction . . . . . . . . . . . . . . . . . . 3
About This Guide . . . . . . . . . . . . . . . . . . . 3Types of Users . . . . . . . . . . . . . . . . . . . 3Software Dependencies . . . . . . . . . . . . . . . . 4
New Features . . . . . . . . . . . . . . . . . . . . . 4
Documentation Conventions . . . . . . . . . . . . . . . 5Syntax Notation . . . . . . . . . . . . . . . . . . 5Syntax Diagrams . . . . . . . . . . . . . . . . . . 6Keywords and Punctuation . . . . . . . . . . . . . . 8Identifiers and Names . . . . . . . . . . . . . . . . 9Icon Conventions . . . . . . . . . . . . . . . . . . 9
Customer Support . . . . . . . . . . . . . . . . . . . 10New Cases . . . . . . . . . . . . . . . . . . . . 10Existing Cases . . . . . . . . . . . . . . . . . . . 11Troubleshooting Tips . . . . . . . . . . . . . . . . . 11
Related Documentation . . . . . . . . . . . . . . . . . 12
Additional Documentation . . . . . . . . . . . . . . . . 15Online Manuals . . . . . . . . . . . . . . . . . . 15Printed Manuals . . . . . . . . . . . . . . . . . . 15
Informix Welcomes Your Comments . . . . . . . . . . . . . 16

2 Installa
tion and Configuration Guide for Windows NT
In This IntroductionThis Introduction provides an overview of the information in this documentand describes the conventions it uses.
About This GuideThis guide describes how to install Informix Red Brick Decision Server andconfigure it for use on a Windows NT workstation.
Types of UsersThis guide is written for the following users:
■ Database administrators
■ Database-application programmers
■ Database developers
This guide assumes that you have the following background:
■ A working knowledge of your computer, your operating system,and the utilities that your operating system provides
■ Some experience working with relational databases or exposure todatabase concepts
■ Some experience with computer programming
■ Some experience with database server administration, operating-system administration, or network administration
Introduction 3

Software Dependencies
Software DependenciesThis guide assumes that you are using Informix Red Brick Decision Server,Version 6.0, as your database server.
Red Brick Decision Server includes the Aroma database, which contains salesdata about a fictitious coffee and tea company. The database tracks dailyretail sales in stores owned by the Aroma Coffee and Tea Company. Thedimensional model for this database consists of a fact table and itsdimensions.
For information about how to create and populate the demonstrationdatabase, see the Administrator’s Guide. For a description of the database andits contents, see the SQL Self-Study Guide.
The scripts that you use to install the demonstration database reside in theredbrick_dir\sample_input directory, where redbrick_dir is the Red BrickDecision Server directory on your system.
New FeaturesThe following section describes new database server features relevant to thisdocument. For a comprehensive list of new features, see the release notes.
■ Informix Red Brick JDBC Driver, which allows Java programs toaccess database management systems
■ Parallel versioned load
4 Installation and Configuration Guide for Windows NT

Documentation Conventions
Documentation ConventionsInformix Red Brick documentation uses the following notation and syntaxconventions:
■ Computer input and output, including commands, code, andexamples, appear in LetterGothic.
■ Information that you enter or that is being emphasized in an exampleappears in Courier bold to help you distinguish it from other text.
■ Filenames, system-level commands, and variables appear in italic orCourier italic , depending on the context.
■ Document titles always appear in Palatino italic.
■ Names of database tables and columns are capitalized (Sales table,Dollars column). Names of system tables and columns are in alluppercase (RBW_INDEXES table, TNAME column).
Syntax NotationThis guide uses the following conventions to describe the syntax ofoperating-system commands.
Command Element Example Convention
Values andparameters
table_name Items that you replace with an appropriatename, value, or expression are in italic typestyle.
Optional items [ ] Optional items are enclosed by squarebrackets. Do not type the brackets.
Choices ONE |TWO Choices are separated by vertical lines; chooseone if desired.
Required choices {ONE|TWO} Required choices are enclosed in braces;choose one. Do not type the braces.
(1 of 2)
Introduction 5

Syntax Diagrams
Syntax DiagramsThis guide uses diagrams built with the following components to describethe syntax for statements and all commands other than system-levelcommands.
Default values ONE|TWO Default values are underlined, except ingraphics where they are in bold type style.
Repeating items name, … Items that can be repeated are followed by acomma and an ellipsis. Separate the itemswith commas.
Languageelements
( ) , ; . Parentheses, commas, semicolons, andperiods are language elements. Use themexactly as shown.
Component Meaning
Statement begins.
Statement syntax continues on next line. Syntaxelements other than complete statements end withthis symbol.
Statement continues from previous line. Syntaxelements other than complete statements beginwith this symbol.
Statement ends.
Required item in statement.
Optional item.
(1 of 2)
Command Element Example Convention
(2 of 2)
SELECT
DISTINCT
6 Installation and Configuration Guide for Windows NT

Syntax Diagrams
The preceding syntax elements are combined to form a diagram as follows.
Required item with choice. One and only one itemmust be present.
Optional item with choice. If a default value exists,it is printed in bold.
Optional items. Several items are allowed; acomma must precede each repetition.
Component Meaning
(2 of 2)
DBA TO
SELECT ONCONNECT TO
ASCDESC
,
ASCDESC
REORG table_name
INDEX
,
( )index_name
RECALCULATE RANGES OPTIMIZE ON
;
OFF
Introduction 7

Keywords and Punctuation
Complex syntax diagrams such as the one for the following statement arerepeated as point-of-reference aids for the detailed diagrams of their compo-nents. Point-of-reference diagrams are indicated by their shadowed corners,gray lines, and reduced size.
The point-of-reference diagram is then followed by an expanded diagram ofthe shaded portion—in this case, the INPUT_CLAUSE.
Keywords and PunctuationKeywords are words reserved for statements and all commands exceptsystem-level commands. When a keyword appears in a syntax diagram, it isshown in uppercase characters. You can write a keyword in uppercase orlowercase characters, but you must spell the keyword exactly as it appears inthe syntax diagram.
Any punctuation that occurs in a syntax diagram must also be included inyour statements and commands exactly as shown in the diagram.
segment_clause
LOAD
DATA
INPUT_CLAUSE
DISCARD_CLAUSE
TABLE_CLAUSE ;criteria_clauseoptimize_clause comment_clause
FORMAT_CLAUSE
)( 'FILENAME '
INPUTFILE
INDDN
START RECORD START_ROWSTART_ROW STOP RECORD stop_row
TAPE DEVICE 'DEVICE_NAME '
filename
8 Installation and Configuration Guide for Windows NT

Identifiers and Names
Identifiers and NamesVariables serve as placeholders for identifiers and names in the syntaxdiagrams and examples. You can replace a variable with an arbitrary name,identifier, or literal, depending on the context. Variables are also used torepresent complex syntax elements that are expanded in additional syntaxdiagrams. When a variable appears in a syntax diagram, an example, or text,it is shown in lowercase italic.
The following syntax diagram uses variables to illustrate the general form ofa simple SELECT statement.
When you write a SELECT statement of this form, you replace the variablescolumn_name and table_name with the name of a specific column and table.
Icon ConventionsThroughout the documentation, you will find text that is identified bycomment icons. Comment icons identify three types of information, as thefollowing table describes. This information always appears in italics.
SELECT column_name FROM table_name
Icon Label Description
Warning: Identifies paragraphs that contain vital instructions,cautions, or critical information
Important: Identifies paragraphs that contain significantinformation about the feature or operation that isbeing described
Tip: Identifies paragraphs that offer additional details orshortcuts for the functionality that is being described
Introduction 9

Customer Support
Customer SupportPlease review the following information before contacting InformixCustomer Support.
If you have technical questions about Informix Red Brick Decision Server butcannot find the answer in the appropriate document, contact InformixCustomer Support as follows:
For nontechnical questions about Red Brick Decision Server, contactInformix Customer Support as follows:
New CasesTo log a new case, you must provide the following information:
■ Red Brick Decision Server version
■ Platform and operating-system version
■ Error messages returned by Red Brick Decision Server or theoperating system
■ Concise description of the problem, including any commands oroperations performed before you received the error message
■ List of Red Brick Decision Server or operating-system configurationchanges made before you received the error message
Telephone 1-800-274-8184 or 1-913-492-2086(7 A.M. to 7 P.M. CST, Monday through Friday)
Internet access http://www.informix.com/techinfo
Telephone 1-800-274-8184(7 A.M. to 7 P.M. CST, Monday through Friday)
Internet access http://www.informix.com/services
10 Installation and Configuration Guide for Windows NT

Existing Cases
For problems concerning client-server connectivity, you must provide thefollowing additional information:
■ Name and version of the client tool that you are using
■ Version of Informix Red Brick ODBC Driver or Informix Red BrickJDBC Driver that you are using, if applicable
■ Name and version of client network or TCP/IP stack in use
■ Error messages returned by the client application
■ Server and client locale specifications
Existing CasesThe support engineer who logs your case or first contacts you will alwaysgive you a case number. This number is used to keep track of all the activitiesperformed during the resolution of each problem. To inquire about the statusof an existing case, you must provide your case number.
Troubleshooting TipsYou can often reduce the time it takes to close your case by providing thesmallest possible reproducible example of your problem. The more you canisolate the cause of the problem, the more quickly the support engineer canhelp you resolve it:
■ For SQL query problems, try to remove columns or functions or torestate WHERE, ORDER BY, or GROUP BY clauses until you can isolatethe part of the statement causing the problem.
■ For Table Management Utility load problems, verify the data typemapping between the source file and the target table to ensurecompatibility. Try to load a small test set of data to determinewhether the problem concerns volume or data format.
■ For connectivity problems, issue the ping command from the client tothe host to verify that the network is up and running. If possible, tryanother client tool to see if the same problem arises.
Introduction 11

Related Documentation
Related DocumentationThe standard documentation set for Red Brick Decision Server includes thefollowing documents.
Document Description
Administrator’s Guide Describes warehouse architecture, supportedschemas, and other concepts relevant to databases.Procedural information for designing and imple-menting a database, maintaining a database, andtuning a database for performance. Includes adescription of the system tables and the configu-ration file.
Installation and ConfigurationGuide
Provides installation and configuration infor-mation, as well as platform-specific material, aboutRed Brick Decision Server and related products.Customized for either UNIX or Windows NT.
Messages and Codes ReferenceGuide
Contains a complete listing of all informational,warning, and error messages generated by InformixRed Brick Decision Server products, includingprobable causes and recommended responses. Alsoincludes event log messages that are written to thelog files.
The release notes Contains information pertinent to the currentrelease that was unavailable when the documentswere printed.
RISQL Entry Tool and RISQLReporter User’s Guide
Is a complete guide to the RISQL Entry Tool, acommand-line tool used to enter SQL statements,and the RISQL Reporter, an enhanced version of theRISQL Entry Tool with report-formattingcapabilities.
(1 of 2)
12 Installation and Configuration Guide for Windows NT

Related Documentation
In addition to the standard documentation set, the following documents areincluded for specific sites.
SQL Reference Guide Is a complete language reference for the InformixRed Brick SQL implementation and RISQL exten-sions for warehouse databases.
SQL Self-Study Guide Provides an example-based review of SQL andintroduction to the RISQL extensions, the macrofacility, and Aroma, the sample database.
Table Management UtilityReference Guide
Describes the Table Management Utility, includingall activities related to loading and maintainingdata. Also includes information about data repli-cation and the rb_cm copy management utility.
Document Description
Client Connector PackInstallation Guide
Includes procedures for installing and configuringthe Informix Red Brick ODBC Driver, the RISQLEntry Tool, and the RISQL Reporter on clientsystems. Included for sites that purchase the ClientConnector Pack.
SQL-BackTrack User’sGuide
Is a complete guide to SQL-BackTrack, a command-line interface for backing up and recoveringwarehouse databases. Includes procedures fordefining backup configuration files, performingonline and checkpoint backups, and recovering thedatabase to a consistent state.
(1 of 2)
Document Description
(2 of 2)
Introduction 13
Related Documentation
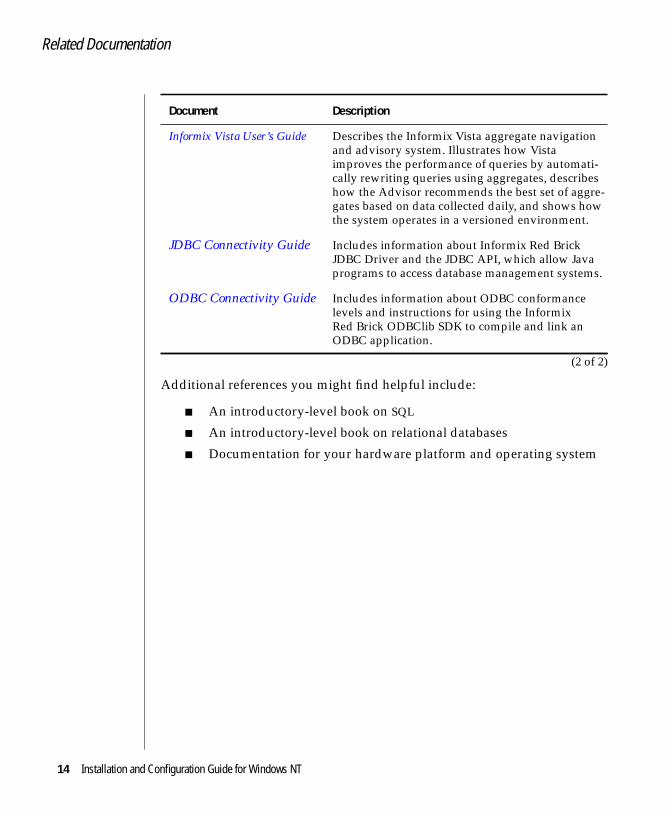
Additional references you might find helpful include:
■ An introductory-level book on SQL
■ An introductory-level book on relational databases
■ Documentation for your hardware platform and operating system
Informix Vista User’s Guide Describes the Informix Vista aggregate navigationand advisory system. Illustrates how Vistaimproves the performance of queries by automati-cally rewriting queries using aggregates, describeshow the Advisor recommends the best set of aggre-gates based on data collected daily, and shows howthe system operates in a versioned environment.
JDBC Connectivity Guide Includes information about Informix Red BrickJDBC Driver and the JDBC API, which allow Javaprograms to access database management systems.
ODBC Connectivity Guide Includes information about ODBC conformancelevels and instructions for using the InformixRed Brick ODBClib SDK to compile and link anODBC application.
Document Description
(2 of 2)
14 Installation and Configuration Guide for Windows NT

Additional Documentation
Additional DocumentationFor additional information, you might want to refer to the followingdocuments, which are available as online and printed manuals.
Online ManualsAn Answers OnLine CD that contains Informix manuals in electronic formatis provided with your Informix products. You can install the documentationor access it directly from the CD. For information about how to install, read,and print online manuals, see the installation insert that accompaniesAnswers OnLine.
Printed ManualsTo order printed manuals, call 1-800-331-1763 or send email [email protected]. Please provide the following information whenyou place your order:
■ The documentation that you need
■ The quantity that you need
■ Your name, address, and phone number
Introduction 15

Informix Welcomes Your Comments
Informix Welcomes Your CommentsLet us know what you like or dislike about our manuals. To help us withfuture versions of our manuals, we want to know about any corrections orclarifications that you would find useful. Include the following information:
■ The name and version of the manual that you are using
■ Any comments that you have about the manual
■ Your name, address, and phone number
Write to us at the following address:
Informix Software, Inc.SCT Technical Publications Department4100 Bohannon DriveMenlo Park, CA 94025
If you prefer to send electronic mail, our address is:
The doc alias is reserved exclusively for reporting errors and omissions in ourdocumentation.
We appreciate your suggestions.
16 Installation and Configuration Guide for Windows NT

1Chapter
Preparing for an Installation
In This Chapter . . . . . . . . . . . . . . . . . . . . 1-3
Preview of Preparation Tasks . . . . . . . . . . . . . . . 1-3Designed for Microsoft BackOffice . . . . . . . . . . . . 1-4
Verifying Operating-System Version and Disk Space . . . . . . . 1-4Disk Space . . . . . . . . . . . . . . . . . . . . 1-5
Configuring Operating-System Parameters . . . . . . . . . . 1-6Virtual Memory . . . . . . . . . . . . . . . . . . 1-6Tasking . . . . . . . . . . . . . . . . . . . . . 1-6
Removing Existing Client Connector Pack . . . . . . . . . . . 1-6
Determining the Locale . . . . . . . . . . . . . . . . . 1-7Locale Components . . . . . . . . . . . . . . . . . 1-7
Language . . . . . . . . . . . . . . . . . . . 1-7Territory . . . . . . . . . . . . . . . . . . . . 1-7Code Page . . . . . . . . . . . . . . . . . . . 1-8Collation Sequence . . . . . . . . . . . . . . . . 1-8
Defining the Locale . . . . . . . . . . . . . . . . . 1-8
Selecting a Logical Name for the Service . . . . . . . . . . . 1-9
Determining the Port Numbers for TCP/IP . . . . . . . . . . 1-10
Creating the redbrick Account . . . . . . . . . . . . . . . 1-10
Providing License Keys . . . . . . . . . . . . . . . . . 1-12
The Installation Procedure . . . . . . . . . . . . . . . . 1-12
Checklist of Preparation Steps . . . . . . . . . . . . . . . 1-13

1-2 Insta
llation and Configuration Guide for Windows NT
In This ChapterThis chapter will help you gather information and set up your environmentin preparation for installing Red Brick Decision Server or Red Brick DecisionServer for Workgroups. After you have worked through this chapter, youwill be ready to respond to the prompts from the Setup program.
You should complete the preparation steps discussed here before beginningthe procedure in Chapter 2, “Installing Red Brick Decision Server.”
Important: Read the release notes that accompany the software before you begin thepreparation tasks.
The procedures in this chapter apply to both Red Brick Decision Server andRed Brick Decision Server for Workgroups unless otherwise stated.
Preview of Preparation TasksBefore you install Red Brick Decision Server or Red Brick Decision Server forWorkgroups, you need to complete the following tasks:
■ Verify that the Windows NT version and available disk space meetRed Brick Decision Server requirements.
■ Configure operating-system parameters.
■ Remove Client Connector Pack if it exists.
■ Specify a locale for the installation.
■ Select a logical name for Red Brick Decision Server.
■ Determine network information for the Red Brick Decision Server.
■ Create the redbrick account for database administration and assignthe necessary group membership and privileges.
Preparing for an Installation 1-3

Designed for Microsoft BackOffice
Some steps in this chapter require administrator privileges and are typicallyperformed by the Windows NT administrator. If the Windows NT adminis-trator is not also the database administrator, administration activities must becarefully coordinated to ensure the success of the installation.
Designed for Microsoft BackOfficeRed Brick Decision Server for Windows NT is designed with SystemsManagement Server support for Microsoft BackOffice. Red Brick DecisionServer includes the following features to conform with Microsoft BackOfficerequirements:
■ Runs as a Windows NT service
■ Supports the WinSock 2.0 network protocol stack
■ Supports the Windows NT unified logon
■ Supports an unattended installation using Systems ManagementServer
Verifying Operating-System Version and Disk SpaceTo install and run Red Brick Decision Server on the Windows NT system, youmust be running Windows NT Version 4.0 or later software and meet thefollowing system hardware and memory requirements:
■ Windows NT Service Pack 1, 3, or 4. Do not use Red Brick DecisionServer with Service Pack 2.
■ An Intel 486DX2 processor (Pentium preferred) or an Intel processorof greater speed, an equivalent processor, or a Digital Alphaprocessor.
1-4 Installation and Configuration Guide for Windows NT

Disk Space
■ A minimum of 64 megabytes of RAM with an additional 1.5megabytes for each additional concurrent user is recommended.
■ A minimum of 45 megabytes of free disk space on the workstationwhere Red Brick Decision Server will be installed. Red BrickDecision Server is supported only on NTFS file systems; it is notsupported on FAT file systems.
You also need sufficient disk space to store and manage the databases youcreate in addition to the space required for Red Brick Decision Server. Forinformation about how to estimate the disk space required for your database,refer to the Administrator’s Guide.
Disk SpaceDetermine how much disk space is available on the workstation where youwant to install the Red Brick Decision Server. Use a disk with enough freespace to provide sufficient storage for Red Brick Decision Server, otheroptional Red Brick products, and the sample database.
To determine the disk space on the workstation
1. Click the Windows Start button.
2. Select Windows Explorer.
3. Click the name of the drive where you intend to install Red BrickDecision Server.
Explorer returns a popup menu.
4. Choose Properties from this popup menu.
Explorer returns a panel that displays the total amount of space onthe selected drive, the amount of used space, and the amount ofavailable space.
Preparing for an Installation 1-5

Configuring Operating-System Parameters
Configuring Operating-System ParametersRed Brick Decision Server is a high-performance server designed to supportthe needs of tens or hundreds of users in a distributed client/serverenvironment. To provide sufficient resources for this large number of clientusers, selected operating-system configuration parameters might requiremodification.
Virtual MemoryVirtual Memory should be set equal to or greater than the RecommendedSize. In the Control Panel, select System and then select the Performance tabto display Virtual Memory information for the workstation.
TaskingTasking should be set to Foreground and Background Applications EquallyResponsive. In the Control Panel, select System and then select the Perfor-mance tab. In the Application Performance section, move the Boost slider toNone to give equal boost to the foreground and background applications.
Removing Existing Client Connector PackIf your machine already has the Client Connector Pack installed, uninstall itusing the Uninstall utility before installing Red Brick Decision Server.
The Uninstall program might not remove all the previously installed files (forexample, the rbw.config file). Manually delete the RedBrick\Client 16 orRedBrick\Client32 folder and its contents from your system before youinstall Red Brick Decision Server.
1-6 Installation and Configuration Guide for Windows NT

Determining the Locale
Determining the LocaleDuring the installation process, you will be asked to specify a locale. A localeis the unique combination of a language and a location. The locale youspecify will apply to all databases created for this installation.
For more information about locale specifications, refer to Appendix B,“Recommended Locale Specifications.”
Locale ComponentsA locale consists of the following four components:
■ Language
■ Territory
■ Code page
■ Collation sequence
Each component is described briefly in the following sections. The Adminis-trator’s Guide describes these components in more detail.
Language
The language component (in conjunction with the territory) controls whichtranslation is used. In general, text strings are accepted and displayed in theuser’s chosen language. These strings include information and warningmessages, object names, month and day names, and character data returnedin query results. However, the fixed elements of a programming language,such as the keywords used in SQL commands, are not translated.
Territory
The territory component controls country-dependent information such ascurrency symbols, numeric and monetary formatting rules, and date andtime formats. For example, although English is used in both the United Statesand the United Kingdom, and Spanish is used in both Spain and Mexico, theuse of these languages differs according to location. (Sometimes, a singleterritory applies to more than one country in a region.)
Preparing for an Installation 1-7

Defining the Locale
Code Page
The code page component specifies the character encoding used to formatand display information. For more information on specific code pages, seeAppendix B, “Recommended Locale Specifications.”
Collation Sequence
The sort component of the locale, or collation sequence, defines the rules usedto compare character strings and arrange them in the correct order. The twomain types of character comparisons are binary and linguistic.
Defining the LocaleDuring the installation of the Red Brick Decision Server software, a localespecification is requested for the server. The locale supplied during instal-lation is stored as the NLS_LOCALE LOCALE parameter in the rbw.config file.If no locale is supplied, the default value of this parameter is used:
English_UnitedStates.US-ASCII@Binary
This locale specification applies to the whole Red Brick Decision Serverinstallation, regardless of the number of databases that will be created forthat installation. (An installation is defined by the contents of the rbw.configfile found in the directory referenced by the RB_CONFIG environmentvariable.)
1-8 Installation and Configuration Guide for Windows NT

Selecting a Logical Name for the Service
If you want to specify a locale that is different from the default locale specifi-cation, you must define each of its four components—language, territory,code page, and collation sequence. Refer to Appendix B, “RecommendedLocale Specifications,” for a list of locale specifications that Red BrickDecision Server supports. Record your locale specification below for futurereference.
Selecting a Logical Name for the ServiceThe default logical name for the Red Brick Decision Server is the literal nameRB_HOST. This installation program inserts this logical name in theWindows NT Registry. To use a different logical name, record it in thefollowing table for future reference.
Language:
Territory:
Code page:
Collation sequence:
Logical name of warehouse service:(RB_HOST by default)
Preparing for an Installation 1-9

Determining the Port Numbers for TCP/IP
Determining the Port Numbers for TCP/IPThe installation process asks you to supply a TCP/IP port number. The RedBrick service uses this port and the next consecutively numbered port for itsnetwork connection. For example, if you specify port 5050, then the serviceuses 5050 and 5051.
The default port for TCP/IP is 5050. Use this port if it is not already in use;otherwise, use a number between 2048 and 65535 that is not in use. Becausenumbers between 1024 and 2048 are commonly used for standard systemports, Red Brick Decision Server installation and configuration utilities donot accept values below 2048. Use a number above 4097 to minimize thechance of conflict.
If you plan to run two versions of Red Brick Decision Server simultaneously,you must specify a different port number for each one.
Record the port in the following table for future reference.
Creating the redbrick AccountBefore you install Red Brick Decision Server on a Windows NT system, youmust first create a user account that:
■ Belongs to the Administrators or Domain Administrators Group(Windows NT Workstation or Windows NT Server, respectively).
■ Has the privilege to Log on as a service.
■ Has the privilege to Act as part of the operating system.
The default name for this account is redbrick, but you can use any name.Informix reference guides uniformly refer to this account as redbrick.
Red Brick Warehouse Service port:
1-10 Installation and Configuration Guide for Windows NT

Creating the redbrick Account
If the redbrick user is defined on both the local system and on the networkdomain, the installation process logs on to the network domain as a serviceusing the redbrick user defined on the network domain. Consequently, youmust enter the password for the network redbrick user during the installationprocess instead of the password for the local redbrick user.
If you want to use the redbrick user account defined on the local system toinstall the Red Brick Decision Server, make sure that there is no redbrick userpresent in the network domain.
To grant redbrick membership in the Administrators Group
1. Start the User Manager or User Manager for Domains.
2. Select the redbrick user name.
3. Click User and then select Properties from the drop-down menu.
Windows returns the User Properties window.
4. Click Groups from the window.
5. Select Administrators from the list box and click Add.
The redbrick user is now a member of the Administrators group.
To grant the required privileges to redbrick
1. Click Policies and then select User Rights from the drop-downmenu.
Windows returns the User Rights Policy window.
2. Check the Show User Advanced Rights box.
Windows lists Advanced Rights in the down-arrow box.
3. Add the privilege to Log on as a service.
4. Add the privilege to Act as part of the operating system.
5. Click OK.
6. Exit the User Manager.
For detailed information on how to administer Windows NT, refer to theMicrosoft document set.
Preparing for an Installation 1-11

Providing License Keys
Providing License KeysRed Brick Decision Server requires that you provide a valid license key beforeyou start the Red Brick Decision Server service. In addition, if you havepurchased optional products, you must enable these products with licensekeys before you use them.
The interactive Setup program provides an interface for entering license keysdirectly into the Red Brick Decision Server configuration file. This procedureis described in Chapter 2. Your license key for a licensed option is providedon a one-page document that is delivered with Red Brick Decision Serverwhen an optional product is purchased.
The Installation ProcedureAfter completing the preparation tasks in this chapter, you are ready to beginthe installation procedure.
■ Use the procedure in Chapter 2, “Installing Red Brick DecisionServer,” to install Red Brick Decision Server for the first time.
■ Use the procedure in Chapter 3, “Installing a New Release,” to installa new version of Red Brick Decision Server.
1-12 Installation and Configuration Guide for Windows NT

Checklist of Preparation Steps
Checklist of Preparation StepsThe following steps summarize how to prepare your computer for the instal-lation of Red Brick Decision Server.
To prepare your computer for installation of Red Brick Decision Server
1. Verify that the Windows NT 4.0 you are running has Service Pack 1,3, or 4.
2. Verify that you have sufficient disk space to install and run thesoftware.
3. Set up your environment by configuring the operating-systemparameters discussed in “Configuring Operating-System Param-eters” on page 1-6.
4. Choose a locale for the installation.
5. Select a logical name for the service (default is RB_HOST).
6. Determine the TCP/IP ports numbers to use.
7. Create the redbrick user account, assign it membership in the Admin-istrators group, and assign it the privileges to Log on as a service and toAct as part of the operating system.
8. Have your license keys ready; one for each product or option youpurchased is provided in a separate document delivered with RedBrick Decision Server.
9. Go to Chapter 2, “Installing Red Brick Decision Server” or Chapter 3,“Installing a New Release” for installation instructions.
Preparing for an Installation 1-13


2Chapter
Installing Red Brick DecisionServer
In This Chapter . . . . . . . . . . . . . . . . . . . . 2-3
Before You Begin . . . . . . . . . . . . . . . . . . . 2-4
Preview of Installation Tasks . . . . . . . . . . . . . . . 2-4Unattended Installation . . . . . . . . . . . . . . . . 2-4Installing in a Non-Networked Environment . . . . . . . . 2-5
Running the Setup Program. . . . . . . . . . . . . . . . 2-5Accepting the License Agreement . . . . . . . . . . . . 2-6Stopping the Installation . . . . . . . . . . . . . . . 2-6Providing User Information . . . . . . . . . . . . . . 2-6Specifying the Installation Type and a Directory . . . . . . . 2-7Specifying Custom Installation Options . . . . . . . . . . 2-8Specifying the Locale . . . . . . . . . . . . . . . . . 2-9Specifying the Program Folder . . . . . . . . . . . . . 2-11Providing Security Information . . . . . . . . . . . . . 2-11Providing Server Information . . . . . . . . . . . . . . 2-12Providing TCP/IP Information . . . . . . . . . . . . . 2-13Verifying Your Settings and Installing Files . . . . . . . . . 2-14Finishing the First Phase of Installation . . . . . . . . . . 2-14

2-2 Insta
Enabling Red Brick Decision Server . . . . . . . . . . . . . 2-15Product Licenses for Red Brick Decision Server . . . . . . . . 2-15Product Licenses for Red Brick Decision Server for Workgroups . . 2-16Product Licenses for Web Connections . . . . . . . . . . . 2-16Product Licenses for Options . . . . . . . . . . . . . . 2-17Entering License Keys . . . . . . . . . . . . . . . . 2-17Enabling Informix Red Brick Products . . . . . . . . . . . 2-17Finishing Setup . . . . . . . . . . . . . . . . . . . 2-18Specifying Username for Concurrent Web Connections Option . . 2-18Verifying Your Installation . . . . . . . . . . . . . . . 2-19
Installing in a Non-Networked Environment . . . . . . . . . . 2-19Without a Network Card . . . . . . . . . . . . . . . 2-19With a Network Card . . . . . . . . . . . . . . . . . 2-20
Performing an Unattended Installation . . . . . . . . . . . . 2-21The redbrick.ini File . . . . . . . . . . . . . . . . . 2-21[SETUP] Section . . . . . . . . . . . . . . . . . . 2-22[INSTALL] Section . . . . . . . . . . . . . . . . . . 2-23[ENABLE] Section . . . . . . . . . . . . . . . . . . 2-24
Checklist of Installation Tasks . . . . . . . . . . . . . . . 2-26
llation and Configuration Guide for Windows NT
In This ChapterThis chapter explains how to install Red Brick Decision Server or Red BrickDecision Server for Workgroups for the first time. The procedures in thischapter apply to both products, unless otherwise stated. The installationprocedure installs the software, a sample database named Aroma, a utilitydirectory named util, and all optional Red Brick Decision Server products. Aspart of the installation procedure, you also have to license Red Brick DecisionServer and any optional products you purchased.
The installation procedure uses a Windows NT Setup program, whichdisplays a menu of installation options. You can install a full-feature releaseof Red Brick Decision Server or enable optional products with a license key.For more information about installing an update release, refer to the releasenotes distributed with your update release media and Chapter 3, “Installinga New Release.”
The installation of Red Brick Decision Server is typically done by the systemadministrator or database administrator. You must have Administrator privi-leges or be logged in as the redbrick user to complete the installation steps andto start Red Brick Decision Server. For more information about the redbrickuser, refer to “Providing Security Information” on page 2-11.
Installing Red Brick Decision Server 2-3

Before You Begin
Before You BeginRead the release notes delivered with the software and complete the prein-stallation tasks described in Chapter 1, “Preparing for an Installation.”
The following conditions will prevent you from installing the software:
■ Incorrect user privileges
■ Insufficient disk space
■ Media failure (damaged CD-ROM)
If you see an error message during installation, make sure you have sufficientdisk space for the Red Brick Decision Server software. For more informationabout system requirements, refer to “Verifying Operating-System Versionand Disk Space” on page 1-4.
If you are still unable to install Red Brick Decision Server and the sampledatabase, or if the CD-ROM is damaged, contact Informix Customer Supportas described in “Customer Support” on page 10.
Preview of Installation TasksTo install a first-time Red Brick Decision Server, you will perform thefollowing tasks:
■ Log on as the redbrick user or Administrator.
■ Run the Setup program, responding to the prompts as required.
■ Enable Red Brick Decision Server with a valid license key.
■ Enable additional products or options with valid license keys, ifapplicable.
Unattended InstallationIf you are using Microsoft Systems Management Server (SMS), you canperform an unattended installation of the Red Brick Decision Serversoftware. Refer to “Performing an Unattended Installation” on page 2-21 forinstructions on how to perform this installation.
2-4 Installation and Configuration Guide for Windows NT

Installing in a Non-Networked Environment
Installing in a Non-Networked EnvironmentIf you are not connected to the network or if you do not have a network cardinstalled, refer to “Installing in a Non-Networked Environment” onpage 2-19.
Running the Setup ProgramYou use a Windows NT Setup program to install Red Brick Decision Server.Setup contains a menu interface that calls the necessary files during theinstallation. You run the same program to install both Red Brick DecisionServer and Red Brick Decision Server for Workgroups. You must be theredbrick user or the Administrator to run the program.
To start the installation process:
1. Log on as redbrick or the Windows NT Administrator.
2. Load the CD-ROM.
3. Click the Windows NT Start button and select Run.
Windows NT returns a dialog panel that contains a text box.
4. Enter one of the following in the text box:
■ <drive>:\i386\disk1\setup for an Intel computer
■ <drive>:\alpha\disk1\setup for a Digital Alpha computer
where drive is the letter that maps to your CD-ROM drive.
5. Click OK.
Setup displays a message that informs you that the installer is beingprepared and then returns the Welcome window.
6. Click Next to continue the installation.
Setup displays three choices on the Select Components window:
■ Install Red Brick Products
■ Enable Red Brick Products
■ Verify Red Brick Products
7. Choose Install Red Brick Products and click Next.
Installing Red Brick Decision Server 2-5

Accepting the License Agreement
Accepting the License AgreementThe Setup program displays the license agreement. Read the agreementcarefully before you proceed. If you accept the terms of the agreement, clickYes to continue the installation. If you do not accept the terms, click No andthe installation will terminate.
From this point on, the Setup program prompts you for information. Later inthe installation process, you are asked to verify that the information you haveprovided is correct.
When a default value exists for an installation parameter, that value appearsin the appropriate field. To use a default value, leave the value of the field asit is. To use another value, type the new value in the field.
Stopping the InstallationYou can stop the installation from any Setup window by clicking Cancel.
The Exit Setup window is displayed:
Setup is not complete. If you quit the Setup program now, theprogram will not be installed.
You may run the Setup program at a later time to complete theinstallation.
To continue installing the program, click Resume. To quit theSetup program, click Exit Setup.
Providing User InformationThe Setup program displays the User Information window and asks you toprovide your name and your company name.
Type your name in the Name field and your company name in the Companyfield, and then click Next.
2-6 Installation and Configuration Guide for Windows NT

Specifying the Installation Type and a Directory
Specifying the Installation Type and a DirectoryThe Setup program displays the Setup Type window and asks you to specifythe type of installation you want to perform, as follows:
■ Typical installs all Red Brick Decision Server executable files and thesample database.
The installation verification procedure requires the sample database,which is also used by examples in the Red Brick Decision Serverreference guides. Most sites should install the sample database. Thedatabase and its supporting data and scripts require roughly 16megabytes of disk space and can be removed later when no longerneeded.
■ Compact installs only the Red Brick Decision Server executable files.
■ Custom allows you to choose the options you want (recommendedfor experienced users only).
You can rerun the Setup program later and add additional components, suchas the Administration Database, as separate tasks, provided the Red BrickDecision Server files are already installed.
Click the appropriate box to select the installation type.
The Setup Type window also asks you to specify the directory into which youwant Red Brick Decision Server installed. The default directory isc:\RedBrick\RBW. (In this guid e, the default directory is called the redbrickdirectory, or redbrick_dir.) If you want to specify another directory, click theBrowse button and choose the directory, then click OK to go back to the SetupType window.
Important: If you are installing a new release of Red Brick Decision Server, youshould choose another directory name, such as c:\RedBrick\RB_600.
Click Next to go to the next installation window. If you select the Typical orCompact installation, refer to “Specifying the Locale” on page 2-9. If youselect the Custom installation option, see the next section.
Installing Red Brick Decision Server 2-7

Specifying Custom Installation Options
Specifying Custom Installation OptionsIf you selected the Custom installation option in the Setup Type window andclicked Next, the Select Components window is displayed. Select the compo-nents you want to install from the following list:
■ Program Files
■ Sample Database (Aroma)
■ Administration Database
The window shows the amount of disk space each component requires.
To select a component to install, click to the left of its name. A check markappears next to each selected component. To deselect a component, click itscheck mark. You can see the total amount of space your choices will require,and the disk space that remains on the current drive at the bottom of thewindow.
To view the space that remains on any other drives connected to yourworkstation, click the Disk Space button and select the drive from the drop-down list.
Click Next to go to the next installation window.
2-8 Installation and Configuration Guide for Windows NT

Specifying the Locale
Specifying the LocaleThe Locale Language Specification dialog box is displayed, as Figure 2-1shows.
1. Select the language and click Next.
The language component of the locale specification controls whichtranslation is used to display information and warning messages,object names, month and day names, and character data returned inquery results.
Figure 2-1Specify Locale
Installing Red Brick Decision Server 2-9

Specifying the Locale
The Locale Components Specification dialog box is displayed, asFigure 2-2 shows.
The default values that appear in the Locale Components Specifi-cation dialog box differ depending on which language you selected.For example, if you selected English, the default values are territory:UnitedStates; code page: US-ASCII; and sort order: Binary.
2. Choose a territory, code page, and sort order and click Next.
For a detailed description of locale specifications, refer to the Admin-istrator’s Guide.
Figure 2-2Specify
Components
2-10 Installation and Configuration Guide for Windows NT

Specifying the Program Folder
Specifying the Program FolderThe Setup program displays the Select Program Folder window and asks youto specify the Program Folder to contain Red Brick Decision Server. Thisname appears on the title bar of the Program Group in the Windows NTProgram Manager.
The default folder is Red Brick Warehouse. To specify a different programfolder, select one from the list of existing folders or type a new name.
Click Next to go to the next installation window.
Providing Security InformationSetup displays the Security Information window, as Figure 2-3 shows.
Figure 2-3Specify Security
Information
Installing Red Brick Decision Server 2-11

Providing Server Information
You should have created a redbrick account prior to starting the installation,as described in “Creating the redbrick Account” on page 1-10. If you createdthis account, choose the REDBRICK account and type the password andpassword confirmation in the appropriate fields.
If you did not create the redbrick account, choose SYSTEM Local Account.
Providing Server InformationWhen you click Next, Setup displays the Server Information window, asFigure 2-4 shows:
Figure 2-4Specify Server
2-12 Installation and Configuration Guide for Windows NT

Providing TCP/IP Information
The program asks you to provide a logical name for your server and tospecify the maximum number of users:
■ Enter the logical name you recorded earlier (page 1-9) in the uppertext box or accept the default logical name (RB_HOST).
■ Enter the maximum number of servers (one server per concurrentuser) allowed by your license in the lower text box or accept thedefault value (5). This value must also include the purchasednumber of web connections.
If you plan to run two releases of Red Brick Decision Server simultaneously,specify a host name that differs from any that already exists on you computer.
Click Next to go to the next installation window.
Providing TCP/IP InformationThe installation program prompts you for a port number that Red BrickDecision Server can use for TCP/IP communications. The Decision Serveractually uses two ports: the one you specify and the next consecutive port.Enter the port number you recorded earlier (“Determining the Port Numbersfor TCP/IP” on page 1-10) or accept the default (5050).
Informix recommends that you use the default ports (5050 and 5051).
If you are installing a new release of Red Brick Decision Server and youintend to run the current release in addition to a previous release (say for thepurpose of testing), you must use a set of consecutive port numbers differentfrom those used by any existing installations.
If you type a port number that is not within the allowed range, Setup displaysthis message:
Invalid port number provided. Please reenter.
Important: If you provide a port number that is already in use, the installation willproceed, but verification will fail. If this happens, rerun the Setup program with adifferent port number.
Click Next to go to the next installation window.
Installing Red Brick Decision Server 2-13
Verifying Your Settings and Installing Files
Verifying Your Settings and Installing FilesThe Setup program displays the Start Copying Files window. All the choicesyou made on the previous Setup windows are displayed.
To change your choices, click Back until you reach the window that containsthe information you want to change. After you make all your changes, returnto the Start Copying Files window. The list reflects your changes.
Click Next to continue the installation.
Finishing the First Phase of InstallationAfter you complete the user-input phase of the installation process, the Setupprogram returns a window that lists all the information you supplied. Beforeyou click OK, verify that each option displayed in this window correspondswith the entry you made during your preparation for the installation. Thiscan save considerable time and effort. Verify that the following are correct:
■ Target directory for the Red Brick Decision Server software
■ Locale
■ Name of the program folder
■ Security information
■ Host information
❑ Server name
❑ Maximum users
❑ Computer name
■ Network information
❑ Network protocol
❑ TCP/IP port number
Setup uses this information to create and configure files for the Red BrickDecision Server. For a description of these files, refer to Appendix A, “RedBrick Decision Server Directories and Files.” Setup also places a Red BrickSetup icon in your Red Brick Warehouse Program Group.
2-14 Installation and Configuration Guide for Windows NT

Enabling Red Brick Decision Server
If the information is correct, click Next. Setup now copies the specified infor-mation from the CD-ROM to your computer. After Setup completes this task,it returns the Install Information window. You must now enable Red BrickDecision Server with a license key and verify the installation. Click Next tobegin this process.
Enabling Red Brick Decision ServerBefore you can use Red Brick Decision Server, you must provide a licensekey. You can enable Red Brick Decision Server and any optional products thatyou purchased. Select Enable Red Brick Products from the Select Compo-nents window and then click Next.
The following choices appear:
■ Enable Red Brick Decision Server
■ Enable Red Brick Decision Server for Workgroups
Select the appropriate choice and then click Next. Depending on your choice,you will see one of two different menus of products and options. In the list ofchoices, check the boxes for all products that you purchased and then clickNext.
Product Licenses for Red Brick Decision ServerProduct licenses for Red Brick Decision Server include the following:
■ RED_BRICK_WAREHOUSE
■ RED_BRICK_WAREHOUSE_10
■ RED_BRICK_WAREHOUSE_25
■ RED_BRICK_WAREHOUSE_50
■ RED_BRICK_WAREHOUSE_75
■ RED_BRICK_WAREHOUSE_100
■ RED_BRICK_WAREHOUSE_150
■ RED_BRICK_WAREHOUSE_200
■ More than 200
Installing Red Brick Decision Server 2-15

Product Licenses for Red Brick Decision Server for Workgroups
Product Licenses for Red Brick Decision Server forWorkgroupsProduct licenses for Red Brick Decision Server for Workgroups include thefollowing:
■ RED_BRICK_WAREHOUSE_FOR_WORKGROUPS_5
■ RED_BRICK_WAREHOUSE_FOR_WORKGROUPS_10
■ RED_BRICK_WAREHOUSE_FOR_WORKGROUPS_20
■ RED_BRICK_WAREHOUSE_FOR_WORKGROUPS_30
Product Licenses for Web ConnectionsProduct licenses for Web Connections include the following:
■ WEB_CONNECTIONS_5
■ WEB_CONNECTIONS_10
■ WEB_CONNECTIONS_20
■ WEB_CONNECTIONS_30
■ WEB_CONNECTIONS_50
■ WEB_CONNECTIONS_70
■ WEB_CONNECTIONS_100
■ More than one hundred Web connections
After you enter the license key, you must also set the configuration parameter(OPTION WEB_USER_NAME <WebUser>) in the rbw.config file. WebUser mustbe a valid database username in any database that is accessed through a webconnection.
Important: Only one user can be designated as the WebUser, and this user must bedefined as a database user in each database that is accessed through the Webconnection.
2-16 Installation and Configuration Guide for Windows NT

Product Licenses for Options
Product Licenses for OptionsProduct licenses for options include the following:
■ BACKUP_RESTORE
■ AUTO_AGGREGATE
■ RED_BRICK_VISTA
■ RED_BRICK_DATA_MINE
■ PTMU_OPTION
Entering License KeysAfter you select the products to license, Setup displays a sequence of LicenseInformation windows. Each window prompts you for the license keyrequired to enable a specific product or option.
Tip: You can enable additional products and options at any time by running theSetup program again.
Enter your license key (a string of characters, numbers, or both), as printedon the one-page document delivered with the software. Each product listedin the menu has a separate license key document. You must enter the keyexactly as it appears in the document.
If you enter the license key incorrectly, Setup returns the following message:
Invalid license key provided. Please reenter.
Re-enter the license key and click Next.
Enabling Informix Red Brick ProductsThe Setup program displays an Information window that lists whichproducts you enabled. If any products you purchased are not enabled, clickBack, and Setup returns the Select Components window. You can now enablethe products or options by entering their license keys.
When all the products are enabled, click Next on the Information window tocomplete the setup.
Installing Red Brick Decision Server 2-17

Finishing Setup
Important: One of the RED_BRICK_WAREHOUSE options must be enabled, orverification of the installation will fail.
Setup starts the Windows NT service for Red Brick Decision Server, loads thesample database, and creates the administration database (provided youchose to install these components). This process takes a few moments; statusboxes appear to indicate progress.
Finishing SetupSetup displays the Setup Complete window with the following messages:
Setup has successfully enabled the options you requested andverified the installation.
Please view the contents of the release notes file beforeusing Red Brick Warehouse.
To review the release notes now, click Finish. Setup displays the release notesfile in Notepad. To review them later, uncheck the checkbox and then clickFinish. The release notes file icon is located in the Red Brick WarehouseProgram Group in your Program Manager.
If the verification process is not successful, Setup displays this message:
Setup has successfully enabled the options you requested,however verification did NOT succeed.
Please review the contents of the verification log file(c:\redbrick_dir\VERIFY\VERIFY.LOG) to diagnose the problem.
Specifying Username for Concurrent Web ConnectionsOptionTo use the Concurrent Web Connections Option, you must supply a databaseusername in the rbw.config file. Open the rbw.config file with a text processorand specify a valid database username for the WEB_USER_NAME configu-ration option. This username must be created in the database that is accessedby web users. All privileges and authorizations granted to this username areinherited by all users who connect with this database over the web.
2-18 Installation and Configuration Guide for Windows NT

Verifying Your Installation
Verifying Your InstallationThe Setup program automatically verifies your installation during theprocess of enabling the products you purchased. However, if you want toperform verification at another time, you run Setup and select Verify RedBrick Products from the Select Components window.
Installing in a Non-Networked EnvironmentThe procedure for installing Red Brick Decision Server assumes you areoperating in a networked environment. Consider the following twoadditional configurations:
■ You do not have a network card installed.
■ You have a network card installed but are disconnected from thenetwork.
Without a Network CardIf you are using Red Brick Decision Server on Windows NT in a non-networked environment and you do not have a network card installed, youmust perform the following sequence of steps.
To install Red Brick Decision Server without a network card
1. Install Remote Access Service (RAS).
When configuring RAS, you can choose any COM port (for example,COM1 or COM2) and any modem driver, even if you do not have amodem installed.
2. Install the TCP/IP software if it is not already installed.
3. Configure TCP/IP (Control Panel➞Network) to use any IP address,such as 127.0.0.1, and to bind TCP/IP to RAS. The binding is doneautomatically by default.
Installing Red Brick Decision Server 2-19
With a Network Card
4. From an MS-DOS prompt, use the ping command to test that thenetwork software can communicate with the computer you areworking on, as in the following example:
c:\> ping <computer_name>
computer_name is the name or IP address of the computer on whichyou are working.
5. Install Red Brick Decision Server.
With a Network CardIf you are using Red Brick Decision Server on Windows NT in a non-networked environment but you have a network card installed, you mustperform the following steps.
To install Red Brick Decision Server with a network card
1. Install the network adapter software if it is not already installed(Control Panel➞Network).
2. Install the TCP/IP software if it is not already installed.
3. Configure TCP/IP (Control Panel➞Network) to use any IP address,such as 127.0.0.1, and to bind TCP/IP to RAS. The binding is doneautomatically by default.
4. From an MS-DOS prompt, use the ping command to test that thenetwork software can communicate with the computer you areworking on, as in the following example:
c:\> ping <computer_name>
computer_name is the name or IP address of the computer on whichyou are working.
5. Install Red Brick Red Brick Decision Server.
2-20 Installation and Configuration Guide for Windows NT

Performing an Unattended Installation
Performing an Unattended InstallationIf you are using Microsoft SMS, you can perform an unattended installation.This procedure installs Red Brick Decision Server with default values for allthe required parameters, or you can override the default values by settingvalues in a file called redbrick.ini. The redbrick.ini file, which is located in eitherthe i386 directory or the alpha directory on your CD-ROM along with aREADME file describing its use, is used only for unattended installation.
To initiate an unattended installation, use one of the following commands.For descriptions of each of the installation types, refer to “Specifying theInstallation Type and a Directory” on page 2-7. For more information aboutSMS, refer to the SMS Administration Guide published by Microsoft.
The redbrick.ini FileDuring the unattended installation process, the Setup program reads theredbrick.ini file to determine the values specified for each of the installationparameters. If no values are specified in the redbrick.ini file, Setup uses thedefault values.
Command Function
TYPICAL Performs the Typical installation
CUSTOM Performs the Custom installation
COMPACT Performs the Compact installation
DEINSTALL Removes the Red Brick Decision Server software
Installing Red Brick Decision Server 2-21
[SETUP] Section
The following tables show the parameters and default values contained inthe redbrick.ini file. To change a parameter to a non-default value, remove thecomment character (;) from the line in the file and add the new valuefollowing the equal sign (=).
For a complete description of each installation parameter, refer to “ProvidingUser Information” on page 2-6.
Important: You must enter the correct license keys for each Red Brick DecisionServer option you specify before you begin an unattended installation or the processwill fail.
[SETUP] SectionThe following parameters are specified in the [SETUP] section of theredbrick.ini file.
Installation Parameter Default Value Possible Values
VERSION= 6.0.x Version number
OPTION= INSTALL INSTALL | ENABLE | UPGRADE
2-22 Installation and Configuration Guide for Windows NT

[INSTALL] Section
[INSTALL] SectionThe following parameters are set in the [INSTALL] section of the redbrick.inifile.
Installation Parameter Default Value Possible Values
LICENSE= YES NO | YES
USERNAME= “Name” Username
COMPANYNAME= “Company” Company name
LOCATION= c:\RBW60 Path to location where Red BrickDecision Server software will beinstalled.
TYPE= TYPICAL Installation type:TYPICAL | COMPACT | CUSTOM
PROGRAMFOLDER= Red BrickDecision Server
Name of the program folder that willcontain Red Brick Decision Server.
ACCOUNT= SYSTEM REDBRICK | SYSTEM
DOMAIN= ““ <text clear string>(Only required when REDBRICKaccount is used.)
PASSWORD= ““ <text clear string>(Only required when REDBRICKaccount is used.)
HOST= RB_HOST string
MAXUSERS= 50 number
PORT= 5050 Port number
Installing Red Brick Decision Server 2-23

[ENABLE] Section
[ENABLE] SectionThe following parameters are set in the [ENABLE] section of the redbrick.inifile.
Installation Parameter Default Value Possible Values
EDITION= NT WORKGROUPS | NT
Red Brick Decision Server for Windows NT License Keys—One license key must beset if NT is specified in EDITION.
RED_BRICK_WAREHOUSE= ““ (License key must bespecified for the optionlicensed.)RED_BRICK_WAREHOUSE_10= ““
RED_BRICK_WAREHOUSE_25= ““
RED_BRICK_WAREHOUSE_50= ““
RED_BRICK_WAREHOUSE_75= ““
RED_BRICK_WAREHOUSE_100= ““
RED_BRICK_WAREHOUSE_150= ““
RED_BRICK_WAREHOUSE_200= ““
RED_BRICK_WAREHOUSE_250= ““
RED_BRICK_WAREHOUSE_500= ““
(1 of 2)
(1 of 2)
2-24 Installation and Configuration Guide for Windows NT

[ENABLE] Section
Informix Red Brick Decision Server Concurrent Web Connections Option LicenseKey—One license key must be set if option was purchased.
WEB_CONNECTIONS_5= ““ (License key must bespecified for the optionlicensed.)WEB_CONNECTIONS_10= ““
WEB_CONNECTIONS_20= ““
WEB_CONNECTIONS_30= ““
WEB_CONNECTIONS_50= ““
WEB_CONNECTIONS_70= ““
WEB_CONNECTIONS_100= ““
More than one hundred webconnections=
““
Red Brick Decision Server for Workgroups License Keys—One license key must beset if WORKGROUPS is specified in EDITION.
RED_BRICK_WAREHOUSE_FOR_WORKGROUPS_5=
““ (License key must bespecified for the optionlicensed.)
RED_BRICK_WAREHOUSE_FOR_WORKGROUPS_10=
““
RED_BRICK_WAREHOUSE_FOR_WORKGROUPS_20=
““
RED_BRICK_WAREHOUSE_FOR_WORKGROUPS_30=
““
Red Brick Decision Server Options License Keys—Must be set for each optionpurchased.
BACKUP_RESTORE= ““ (License keys must be setfor purchased options.)
AUTO_AGGREGATE= ““
RED_BRICK_VISTA= ““
(2 of 2)
Installation Parameter Default Value Possible Values
(2 of 2)
Installing Red Brick Decision Server 2-25

Checklist of Installation Tasks
Checklist of Installation Tasks1. Log on as the redbrick user or Administrator and run the Setup
program.
2. Select Install Red Brick Products and answer the questions on theinstallation windows, using the Next and Back buttons fornavigation.
3. Select Enable Red Brick Products. Enter license keys to enable all ofthe products you have purchased.
4. Click Finish to complete the installation and verification process andview the release notes file.
5. If you purchased the Concurrent Web Connection Option, thenspecify a valid database username for the WEB_USER_NAME config-uration option.
2-26 Installation and Configuration Guide for Windows NT

3Chapter
Installing a New Release
In This Chapter . . . . . . . . . . . . . . . . . . . . 3-3
Running Two Releases of Red Brick Decision Server . . . . . . . 3-5
Preview of Installation Tasks . . . . . . . . . . . . . . . 3-6Unattended Installation . . . . . . . . . . . . . . . . 3-6
Installing Red Brick Decision Server . . . . . . . . . . . . . 3-7
Redirecting Client Applications for Test Purposes . . . . . . . . 3-7
Migrating Databases to the New Release . . . . . . . . . . . 3-8
Upgrading Databases . . . . . . . . . . . . . . . . . . 3-8Upgrade Messages . . . . . . . . . . . . . . . . . 3-9
Migrating Users to the New Release . . . . . . . . . . . . . 3-10
Replacing an Existing Installation with the New Release . . . . . . 3-11Shutting Down the Service . . . . . . . . . . . . . . . 3-11Installing the New Release . . . . . . . . . . . . . . . 3-12Upgrading Existing Databases . . . . . . . . . . . . . 3-12Announcing the New Release . . . . . . . . . . . . . . 3-12
Checklist of Installation Tasks . . . . . . . . . . . . . . . 3-13

3-2 Insta
llation and Configuration Guide for Windows NT
In This ChapterThis chapter is for existing Informix customers who want to install a newfeature or maintenance release of Red Brick Decision Server or Red BrickDecision Server for Workgroups. The procedures in this chapter apply toboth products, unless otherwise stated.
The installation procedure installs the Red Brick Decision Server software,including the sample database named Aroma, the utility directory namedutil, and all optional products. It also includes a licensing mechanism thatyou use to enable the software and any optional products you havepurchased.
You can use the following two methods to install Red Brick Decision Serverover an existing installation:
■ You can keep the existing release of Red Brick Decision Serverrunning at your site and install the new release in a separatedirectory and with separate runtime configuration settings for testpurposes. For a description of this method, see “Running TwoReleases of Red Brick Decision Server” on page 3-5.
■ You can replace the existing release with the new release. For adescription of this method, see “Replacing an Existing Installationwith the New Release” on page 3-11.
To decide which method to use, consider the level of change in the release,the system resources, and the production status of the implementation atyour site.
Installing a New Release 3-3

For example, suppose the new release represents a major change from yourexisting Red Brick Decision Server software, you have room on your systemto run two concurrent copies of Red Brick Decision Server and store twodatabases, and your existing Red Brick Decision Server is in full-productionmode. To overwrite your existing system is unwise. Instead, you need toinstall the new release in a separate directory, test it to see how the changesaffect your Red Brick Decision Server implementation, and then upgradeproduction databases later.
On the other hand, if the new release is a maintenance release that containsfew significant changes from the release running in your productionenvironment, you might choose to skip the test step and overwrite theexisting release immediately.
Depending on the level of change between your installed release and the newrelease, you might have to upgrade existing databases with the TableManagement Utility before the new Red Brick Decision Server can accessthem. This operation is described in “Upgrading Databases” on page 3-8.
For more information about the level of change in this release and whetheryou need to upgrade your existing databases, refer to the release notesdistributed with the new release of Red Brick Decision Server.
Warning: Earlier releases of the software cannot access an upgraded system.Therefore, Informix recommends that for test purposes you use newly loaded data orcopies of your existing databases.
3-4 Installation and Configuration Guide for Windows NT

Running Two Releases of Red Brick Decision Server
Running Two Releases of Red Brick Decision ServerThe procedure for installing a new release and simultaneously running twoversions of Red Brick Decision Server is similar to the first-time installationprocedure except for directory name and location and a few configurationparameters.
You need not shut down any existing Red Brick Decision Server services toperform this installation. Full production use of the existing release cancontinue.
The installation procedure for Red Brick Decision Server uses a Windows NTSetup program, which displays a menu of installation options. These optionslet you perform any of the following installations:
■ Install a full-feature or maintenance release of Red Brick DecisionServer
■ Install a partial update, or patch, release
■ Enable an additional Red Brick Decision Server product with alicense key
For more information about installing an update release, refer to the releasenotes distributed with the update release.
Red Brick Decision Server installation is typically done by the system ordatabase administrator. You must have Administrator privileges or belogged in as the redbrick user to complete the steps in the installationprocedure and to start the Windows NT service for the Red Brick DecisionServer.
As long as you do not overwrite the existing release with the new release, youcan install a new release of Red Brick Decision Server while users areaccessing the existing release.
Installing a New Release 3-5

Preview of Installation Tasks
Preview of Installation TasksYou can install Red Brick Decision Server in a few simple steps.
To install Red Brick Decision Server
1. Log on as the redbrick user or Administrator.
2. Run the Setup program, responding to the prompts as required.
3. Enable Red Brick Decision Server with a valid license key.
4. Enable additional products or options with valid license keys.
5. Verify your installation.
6. Redirect client-application systems to the new release for testing.
7. Upgrade your test databases.
8. Fully test all the new features of Red Brick Decision Server beforeyou migrate production databases to the new release.
9. Upgrade production databases to the new release.
10. Migrate users to the new release.
Warning: Database backups created with Red Brick Decision Server for the existingrelease might not be compatible with the new release you are installing. (For detailsor whether a new release requires an UPGRADE operation, refer to the release notes.)If you might need access to backups, do not remove your existing Red Brick DecisionServer software from your system.
Unattended InstallationIf you are using Microsoft SMS, you can perform an unattended installationof the Red Brick Decision Server software. For instructions on how toperform this installation, see “Performing an Unattended Installation” onpage 2-21.
3-6 Installation and Configuration Guide for Windows NT

Installing Red Brick Decision Server
Installing Red Brick Decision ServerWhen you install a new version of Red Brick Decision Server in addition toyour existing installation, you must select an installation directory that isdifferent from the existing installation directory. For example, if your existinginstallation is in redbrick_dir, then you might install your new installation in adirectory named new_redbrick_dir. The procedure for installing Red BrickDecision Server is described in Chapter 2, “Installing Red Brick DecisionServer.”
You must also select a Red Brick Decision Server logical name that is differentfrom the logical name you used for your existing installation. For example, ifyour existing Red Brick Decision Server logical name is RB_517, you mightchoose RB_600 as the logical name for the new installation.
Follow the instructions in Chapter 2, in “Running the Setup Program” onpage 2-5 and then continue with the instructions in “Redirecting ClientApplications for Test Purposes” on page 3-7.
Redirecting Client Applications for Test PurposesRedirect the client-application systems that you want to use for testing thenew release by specifying the TCP/IP ports you chose during the installation(for example, 6060 and 6161). You can do this by adding a new Data SourceName (DSN) that points to the new port, or by modifying an existing DSN thatpoints to the new port.
You now have two independent Red Brick Decision Server services running.
Important: To use a mixed-version host properly via the Windows NT shell, youmust explicitly specify both the pathname of the RISQL binary (such asc:\rbw60\bin\risql) and the name of the service to use (such as c:\rbw60\bin\risql-h RBW_601); otherwise, the more previous RISQL binary and service such asc:\rbw\bin\risql -h RBW_517 will be run.
To use existing databases to test a new release, you must upgrade them to thenew release as described in the following sections.
Installing a New Release 3-7

Migrating Databases to the New Release
Migrating Databases to the New ReleaseAfter you test the new release of Red Brick Decision Server and becomefamiliar with its new features and changes from previous releases, migrateyour production databases to the new release in any of the following threeways:
■ Use the UPGRADE command provided with the new release toupgrade existing databases.
■ Run a TMU UNLOAD operation with the existing release of the TMU,re-create all tables and other database objects in the new server, andreload (LOAD) with the new TMU.
■ Run a TMU LOAD DATA operation with the data input files for theexisting database using the new release.
Only the UPGRADE procedure is described in this guide. For informationabout unloading and reloading data or loading from original data input files,refer to the Table Management Utility Reference Guide.
Important: Databases created under previous releases are not always compatiblewith new releases. For example, if you need to access a database backup that wascreated with a previous release of Red Brick Decision Server, you might need accessto a compatible server release. To check compatibility between releases, refer to therelease notes for the new release.
Upgrading DatabasesTo upgrade an individual database, run the TMU with a control file thatspecifies an UPGRADE operation.
Tip: Upgrades are not required for all new releases; check the current release notesfor compatibility issues.
The upgrade operation creates backup copies of certain files for yourdatabase (such as the RB_DEFAULT_IDX file), which you can delete when youare satisfied that the upgrade process was successful. Which files are backedup varies from upgrade to upgrade.
3-8 Installation and Configuration Guide for Windows NT
Upgrade Messages
To upgrade each database
1. Create a TMU control file that contains an UPGRADE operation asspecified in the Table Management Utility Guide or the release notes forthe version you are installing.
2. Invoke the TMU, using a command of the form:c:\> rb_tmu -d db_name control_file dba_usernamedba_password
where:
Depending on the releases involved in a given upgrade, you might have toperform a REORG operation on your databases after the upgrade. To find outwhether this operation is necessary, refer to the current release notes.
For more information about TMU syntax, refer to the Table Management UtilityReference Guide.
Upgrade MessagesIf a database referenced by a logical database name in the rbw.config file or adatabase named with the RISQL Entry Tool or RISQL Reporter -d startupoption does not point to a valid database, the TMU issues a message such asthe following message.
db_name The database to upgrade. This name is the logical databasename, as defined in the new_redbrick_dir\rbw.config file. Ifyou do not use the -d option, the TMU uses the logicaldatabase name specified by the RB_PATH environmentvariable.
control_file Name of file that contains the UPGRADE operation.
dba_username,dba_password
Username and password for the user with DBA authori-zation for the database to be upgraded.
** FATAL ** (519) Directory 'c:\db\sales' does not contain avalid Red Brick Warehouse database. Missing 'c:\db\sales\RB_DEFAULT_LOCKS'.
Installing a New Release 3-9

Migrating Users to the New Release
If the database is already a valid Version 6.0 database, the TMU issues amessage such as the following message.
After the database has been successfully upgraded, the TMU issues a messagesuch as the following message.
Migrating Users to the New ReleaseTo migrate users to the new release, follow these steps:
1. Back up your existing production databases.
2. Run the UPGRADE script, as described in previous sections, to makedatabases compatible with the new release.
3. If necessary, perform a REORG operation to ensure referentialintegrity and optimal performance. To find out whether you need toperform a REORG operation, refer to the release notes for the currentrelease.
4. Redefine users’ existing environment variables to point to thedirectory that contains the new release software(new_redbrick_dir\bin).
The production version of the new Red Brick Decision Server release is nowready for use.
** ERROR ** (558) UPGRADE command does not need to be run on databasec:\db\sales.
** INFORMATION ** (559) UPGRADE of Red Brick Warehouse database c:\db\salessuccessful.
3-10 Installation and Configuration Guide for Windows NT

Replacing an Existing Installation with the New Release
Replacing an Existing Installation withthe New ReleaseIf the new release you are installing is a maintenance release that contains fewsubstantial changes from the release running in your productionenvironment, you can install the new release directly in the redbrick directoryrather than set up a test directory. To install the new release in a directory thatalready contains a release of Red Brick Decision Server, perform thefollowing tasks:
■ Shut down the Windows NT service for Red Brick Decision Server.
■ Install, enable, and verify the new software.
■ Upgrade existing databases, if necessary.
■ Announce to user groups that the new release is available.
The following sections describe how to perform these tasks.
Important: You must perform all steps in the procedure as the redbrick user. Beforeyou install the new software, schedule a shutdown and warn all users that databaseswill not be accessible during the shutdown period.
Shutting Down the ServiceYou can shut down the service in three steps.
To shut down the service
1. Log in as the redbrick user.
2. Open the Control Panel in the Windows NT Program Manager andclick Services.
3. In the Services screen, select RedBrickService <HOST_NAME> andthen click the Stop button to stop the service.
Installing a New Release 3-11

Installing the New Release
Installing the New ReleaseFollow the instructions in Chapter 2, “Installing Red Brick Decision Server,”to install the new release in your standard redbrick directory.
Important: Informix recommends backing up the existing release at this time in caseyou need access to backup copies of databases that were created with the earlier releaseof Red Brick Decision Server. Eventually, you can remove these Red Brick DecisionServer backup files from your system.
During installation, Setup automatically saves your existing rbw.config fileunder the name rbw.config.org and installs the new rbw.config file in its place.If you need to use parameter values from your old rbw.config file, you mustmanually copy them from rbw.config.org to the new rbw.config.
Enable each optional Informix Red Brick product you purchased with a validlicense key at this time.
Upgrading Existing DatabasesUpgrade existing databases, as described in “Migrating Databases to theNew Release” on page 3-8.
Announcing the New ReleaseFinally, describe any changes and improvements this release offers to the usercommunity at your site.
3-12 Installation and Configuration Guide for Windows NT

Checklist of Installation Tasks
Checklist of Installation TasksThe following checklist summarizes how you can run two releases of RedBrick Decision Server concurrently.
To run two releases of Red Brick Decision Server concurrently
1. Install and verify Red Brick Decision Server, following the instruc-tions in Chapter 2.
2. Redirect client applications to the new release for testing purposes.
3. Migrate your databases to the new release by performing anupgrade. Check the release notes for upgrade requirements.
4. Migrate users to the new release.
The following checklist summarizes how you can replace an existing releaseof Red Brick Decision Server with a new release.
To replace an existing release of Red Brick Decision Server with the new release
1. Stop the Windows NT service for Red Brick Decision Server.
2. Install the new release, following the instructions in Chapter 2,“Installing Red Brick Decision Server.”
3. Upgrade existing databases, if necessary; check the release notes fordetails.
4. Announce the availability of the new release to users.
Installing a New Release 3-13


4Chapter
Administering RedbrickDecision Server
In This Chapter . . . . . . . . . . . . . . . . . . . . 4-3
Configuring the Services for Automatic Startup . . . . . . . . . 4-3
Removing Red Brick Decision Server . . . . . . . . . . . . 4-4

4-2 Insta
llation and Configuration Guide for Windows NT
In This ChapterThis chapter contains administration information for Red Brick DecisionServer, much of which is specific to hardware platforms running theWindows NT operating system.
Configuring the Services for Automatic StartupTo configure the Windows NT services for Red Brick Decision Server and theCopy Management Utility (rb_cm) to start up automatically whenever theoperating system boots, open the Control Panel in the Windows NT ProgramManager and click Services.
In the Services screen, select RedBrickService<HOST_NAME> (Service forRed Brick Decision Server) and RedBrickService-CopyManagement(Service for Copy Management) and then click Startup. The Service screenappears. Under Startup, select Automatic. When you restart your computer,the services start automatically.
Administering Redbrick Decision Server 4-3

Removing Red Brick Decision Server
Removing Red Brick Decision ServerTo remove Red Brick Decision Server, you must first stop the Service, becausethe Uninstaller cannot remove any files that are currently in use.
To stop the Red Brick Decision Server Service and remove the Red Brick DecisionServer software
1. Log in as the redbrick user.
2. Open the Control Panel in the Windows NT Program Manager andclick Services.
3. In the Services screen, select Red Brick Service <HOST_NAME> andthen click Stop to stop the service.
4. Click the Uninstaller icon in the Red Brick Decision Server programgroup.
The Uninstaller deletes any files that were copied to the new_redbrickdirectory during installation. It also removes most of the Registry settingsspecified by the Setup program.
Important: The Uninstaller does not delete any log files or files added to the directoryduring the Enable and Verify portions of installation, nor does it delete files youadded after the initial files were copied to the directory. To remove these files, deletethe entire new_redbrick directory.
4-4 Installation and Configuration Guide for Windows NT
AAppendix
Red Brick DecisionServer Directoriesand Files
This appendix describes a typical directory structure, built usingthe standard configuration provided by the Red Brick DecisionServer installation procedure. Throughout the Red BrickSystems documentation, the Red Brick Decision Server directoryis referred to as the redbrick directory or redbrick_dir.
Directories and Files
The following illustration represents the directory hierarchy. A briefdescription of each significant file follows the illustration.
__ DBA_SCRIPTS__ READACCT__ README.TXT__ SERVICE
rbenusa.mbrbjajpn.mbrcenusa.mbrcjajpn.mbrlenusa.mb
__ SAMPLE_INPUT
__ UTIL
__ VERIFY
aroma.rbwrcaroma.tmuaroma_create.risqlaroma_class.txtaroma_deal.txtaroma_line_items.txtaroma_market.txtaroma_orders.txtaroma_period.txtaroma_product.txt
aroma_promo.txtaroma_sales.txtaroma_store.txtaroma_supplier.txt
__ readme.txt
AromaSampleDataDirectory
redbrickDirectory
cmclient.execmservice.execmsetup.exedbcreate.exelogdview.exerb_cm.exerb_ptmu.exerb_tmu.exerb_translaterbclean.batrbshow.exerbw.exerbwping.cntrbwping.exe
rbwping.hlprbwservice.exerisql.exerisqlrpt.exe
Additional filesfor DEC Alpha:dmcgtb32.dlldmcgth32.dlldmrb32.dll
__ ADMIN_DB__ AROMA_DB__ BIN
__ rbw.config__ rbwapid.log
__ HELP__ INSTALL__ LOCALE__ LOGS__ MESSAGES
concdump.exedbsize.exeixvalid.exerbwtest.exeReadme.txtrisqltty.exeshowlocks.exetblchk.exe
A-2 Installation and Configuration Guide for Windows N
T
Directories and Files
The following table describes the directories and files in the redbrick directory.In the Name column, directories are marked with a backslash (\) character.
Name Description
BIN\ Directory for decision server binary files and scripts.
cmclient.exe Copy Management client program
cmservice.exe Copy Management Service
cmsetup.exe Copy Management network setup program
dbcreate.exe Database creation/deletion utility
dmcgtb32.dll Library for Red Brick Data Mine
dmcgth32.dll Library for Red Brick Data Mine
dmrb32.dll Library for Red Brick Data Mine
logdview.exe Log file viewer
rb_cm.exe Binary file for the Copy Management utility
rb_ptmu.exe Binary file for the Parallel Table Management Utility
rb_tmu.exe Binary file for the Table Management Utility
rb_translate Translation-support file
rbclean.bat Sample batch file to clean index build and spill area
rbwping.exe RBPing program
rbwping.hlp RBPing online help
rbshow.exe Binary file for the Red Brick Show utility
rbw.exe Red Brick Decision Server Service
rbwservice.exe Red Brick Decision Server Service administration utility
risql.exe Binary file for the RISQL Entry Tool
risqlrpt.exe Optional binary file for the RISQL Reporter
(1 of 3)
Red Brick Decision Server Directories and Files A-3

Directories and Files
MESSAGES\ Directory containing the messages file for the language ofchoice (for example, English) and a corresponding log file.
rbwconnect.boot Script that configures the operating-system startup files so RedBrick Warehouse Connect starts automatically when thesystem reboots
rbwconnect.log Red Brick Warehouse Connect log file
rbwconnect.show Script that lists the active Red Brick Warehouse Connectprocess
rbwconnect.start Script that starts the Red Brick Warehouse Connect process
rbwconnect.stop Script that stops the Red Brick Warehouse Connect process
rbwconnect.verify Program used to verify the Red Brick Warehouse Connectinstallation
LOCALE\ Directory of files containing product error messages in thelanguage and character sets specified by their parent direc-tories. These files enable errors to be reported in a specificlanguage and character set.
rbw.config Text file containing configuration parameters
rbwapid.log File where log entries are written; an _old extension indicatesthe previous log file
SAMPLE_INPUT Directory that contains files used to create Aroma, the sampledatabase. File contents are indicated by their extensions asfollows:
■ .tmu—Control statements for the Table Management Utility;for example, LOAD DATA
■ .risql—SQL and RISQL commands; for example,CREATE TABLE
■ .txt—Data input for the tables
AROMA_DB\ Sample database built by the rbw.verify program that resultsfrom the sample_input files
ADMIN_DB\ Administration database built by the installation script
Name Description
(2 of 3)
A-4 Installation and Configuration Guide for Windows NT

Directories and Files
INSTALL\ Directory that contains installation log files
LOGS\ Default directory that contains log files created by the logthread (rbwlogd)
UTIL\ Directory that contains collection of miscellaneous tools andutilities for use with Red Brick Decision Server. For infor-mation on contents and use, refer to the README file in thisdirectory.
VERIFY\ Directory that contains verification scripts and the verify.log file
Name Description
(3 of 3)
Red Brick Decision Server Directories and Files A-5


BAppendix
Recommended LocaleSpecifications
This appendix identifies the languages, territories, code pages,and collation sequences supported by the Red Brick DecisionServer products. The following table lists the logical combina-tions of these locale components; however, any combination canbe used in a locale specification.
LocalesThe values shown in boldface in the following table are thedefault values for the corresponding language when an incom-plete locale is specified. For example, the default code page forGerman is Latin1.
For more information on locales, see the Administrator’s Guide.

Locales
Language Territory Code Page (Character Set) Sort
English UnitedStatesAustraliaCanadaSouth AfricaUnitedKingdom
US-ASCIILatin1MS1252UTF-8IBM037IBM285
BinaryDefault
German GermanyAustriaGerman-Switzerland
Latin1MS1252ISO-8859-9UTF-8IBM273
DefaultBinary
French FranceFrench-BelgiumFrench-CanadaFrench-Switzerland
Latin1MS1252ISO-8859-9UTF-8IBM297
DefaultBinary
Spanish SpainArgentinaChileMexico
Latin1MS1252ISO-8859-9UTF-8
SpanishTraditionalSpanishBinary
Italian ItalyItalian-Switzerland
Latin1MS1252ISO-8859-9UTF-8IBM280
DefaultBinary
Portuguese PortugalBrazil
Latin1MS1252ISO-8859-9UTF-8IBM037
DefaultBinary
Norwegian Norway Latin1MS1252ISO-8859-9UTF-8
DanishBinary
(1 of 5)
B-2 Installation and Configuration Guide for Windows NT

Locales
Swedish Sweden Latin1MS1252ISO-8859-9UTF-8
SwedishBinary
Danish Denmark Latin1MS1252ISO-8859-9UTF-8
DanishBinary
Finnish Finland Latin1MS1252ISO-8859-9UTF-8
FinnishBinary
Japanese Japan JapanEUCMS932UTF-8IBM930
Binary
CanadianFrench French-Canada Latin1MS1252ISO-8859-9UTF-8IBM297
DefaultBinary
TraditionalChinese Taiwan EUC-TWMS950UTF-8IBM937
Binary
SimplifiedChinese China MS936UTF-8IBM935
Binary
Albanian Albania ISO-8859-2MS1250Latin1MS1252ISO-8859-9UTF-8
DefaultBinary
Language Territory Code Page (Character Set) Sort
(2 of 5)
Recommended Locale Specifications B-3

Locales
Arabic SaudiArabia ISO-8859-6MS1256UTF-8
DefaultBinary
Bulgarian Bulgaria ISO-8859-5MS1251UTF-8
DefaultBinary
Byelorussian Belarus ISO-8859-5MS1251UTF-8
DefaultBinary
Catalan Catalonia Latin1MS1252ISO-8859-9UTF-8
DefaultBinary
Croatian Croatia ISO-8859-2MS1250UTF-8
CroatianBinary
Czech CzechRepublic ISO-8859-2MS1250UTF-8
CzechBinary
Dutch NetherlandsDutch-Belgium
Latin1MS1252ISO-8859-9UTF-8IBM037
DefaultBinary
Estonian Estonia ISO-8859-4ISO-8859-10MS1257UTF-8
EstonianBinary
Farsi Iran ISO-8859-6UTF-8
DefaultBinary
Greek Greece ISO-8859-7MS1253UTF-8
DefaultBinary
Language Territory Code Page (Character Set) Sort
(3 of 5)
B-4 Installation and Configuration Guide for Windows NT
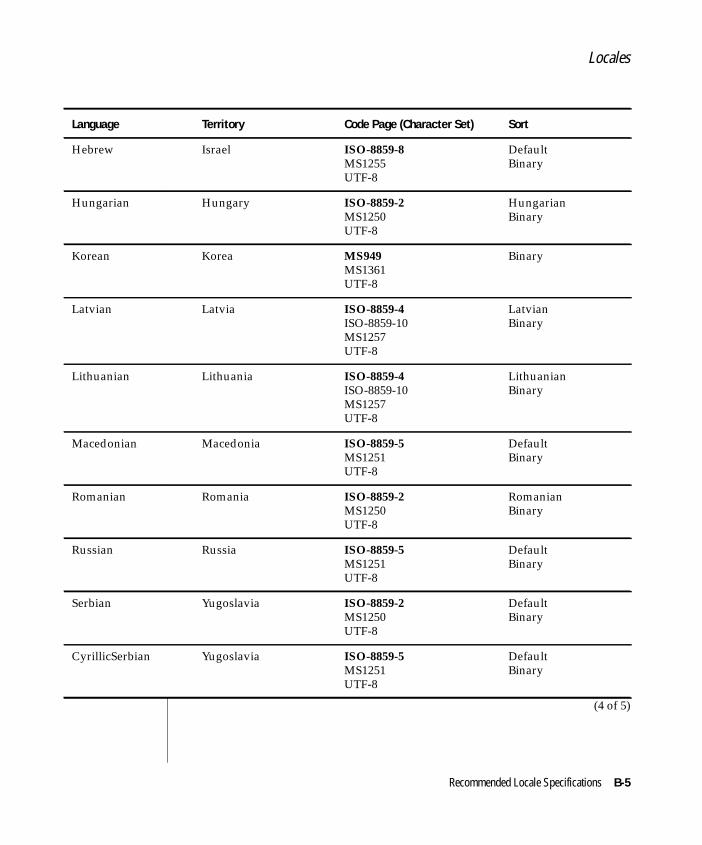
Locales
Hebrew Israel ISO-8859-8MS1255UTF-8
DefaultBinary
Hungarian Hungary ISO-8859-2MS1250UTF-8
HungarianBinary
Korean Korea MS949MS1361UTF-8
Binary
Latvian Latvia ISO-8859-4ISO-8859-10MS1257UTF-8
LatvianBinary
Lithuanian Lithuania ISO-8859-4ISO-8859-10MS1257UTF-8
LithuanianBinary
Macedonian Macedonia ISO-8859-5MS1251UTF-8
DefaultBinary
Romanian Romania ISO-8859-2MS1250UTF-8
RomanianBinary
Russian Russia ISO-8859-5MS1251UTF-8
DefaultBinary
Serbian Yugoslavia ISO-8859-2MS1250UTF-8
DefaultBinary
CyrillicSerbian Yugoslavia ISO-8859-5MS1251UTF-8
DefaultBinary
Language Territory Code Page (Character Set) Sort
(4 of 5)
Recommended Locale Specifications B-5

Locales
Slovak Slovakia ISO-8859-2MS1250UTF-8
SlovakBinary
Slovenian Slovenia ISO-8859-2MS1250UTF-8
SlovenianBinary
Thai Thailand MS874UTF-8
ThaiBinary
Turkish Turkey ISO-8859-9ISO-8859-3MS1254UTF-8
TurkishBinary
Ukrainian Ukraine ISO-8859-5MS1251UTF-8
UkrainianBinary
Vietnamese VietNam MS1258UTF-8
VietnameseBinary
Language Territory Code Page (Character Set) Sort
(5 of 5)
B-6 Installation and Configuration Guide for Windows NT
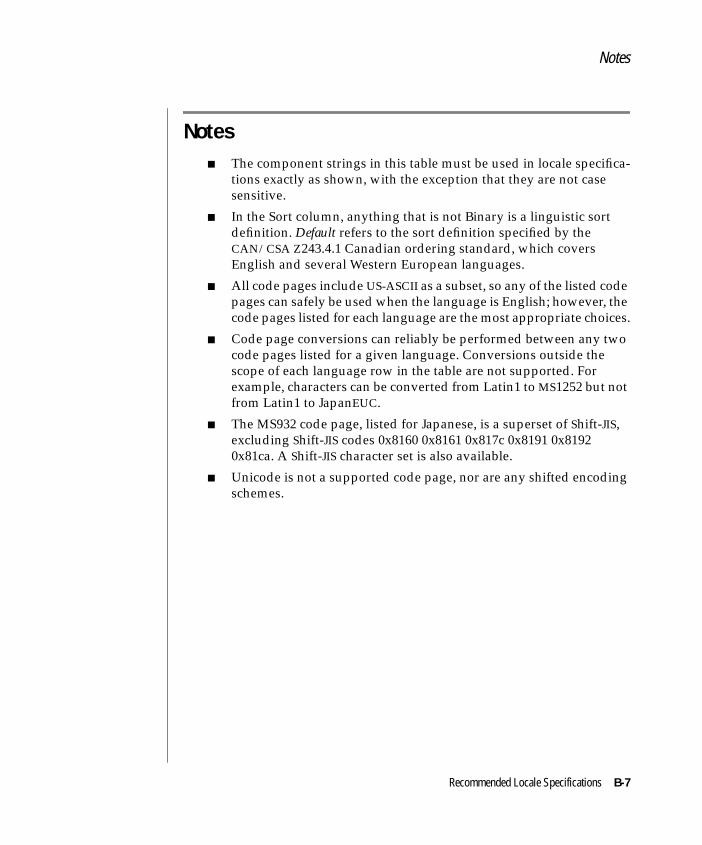
Notes
Notes■ The component strings in this table must be used in locale specifica-
tions exactly as shown, with the exception that they are not casesensitive.
■ In the Sort column, anything that is not Binary is a linguistic sortdefinition. Default refers to the sort definition specified by theCAN/CSA Z243.4.1 Canadian ordering standard, which coversEnglish and several Western European languages.
■ All code pages include US-ASCII as a subset, so any of the listed codepages can safely be used when the language is English; however, thecode pages listed for each language are the most appropriate choices.
■ Code page conversions can reliably be performed between any twocode pages listed for a given language. Conversions outside thescope of each language row in the table are not supported. Forexample, characters can be converted from Latin1 to MS1252 but notfrom Latin1 to JapanEUC.
■ The MS932 code page, listed for Japanese, is a superset of Shift-JIS,excluding Shift-JIS codes 0x8160 0x8161 0x817c 0x8191 0x81920x81ca. A Shift-JIS character set is also available.
■ Unicode is not a supported code page, nor are any shifted encodingschemes.
Recommended Locale Specifications B-7

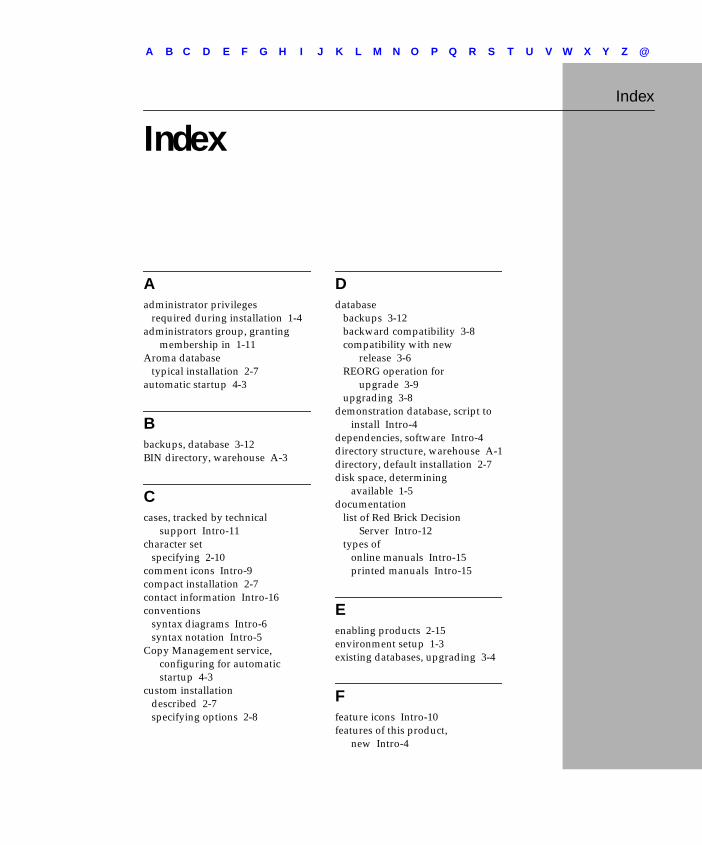
@
Index
O QCA B D E F G H I J K L M N P R S T U V W X Y Z
Index
Aadministrator privileges
required during installation 1-4administrators group, granting
membership in 1-11Aroma database
typical installation 2-7automatic startup 4-3
Bbackups, database 3-12BIN directory, warehouse A-3
Ccases, tracked by technical
support Intro-11character set
specifying 2-10comment icons Intro-9compact installation 2-7contact information Intro-16conventions
syntax diagrams Intro-6syntax notation Intro-5
Copy Management service,configuring for automaticstartup 4-3
custom installationdescribed 2-7specifying options 2-8
Ddatabase
backups 3-12backward compatibility 3-8compatibility with new
release 3-6REORG operation for
upgrade 3-9upgrading 3-8
demonstration database, script toinstall Intro-4
dependencies, software Intro-4directory structure, warehouse A-1directory, default installation 2-7disk space, determining
available 1-5documentation
list of Red Brick DecisionServer Intro-12
types ofonline manuals Intro-15printed manuals Intro-15
Eenabling products 2-15environment setup 1-3existing databases, upgrading 3-4
Ffeature icons Intro-10features of this product,
new Intro-4
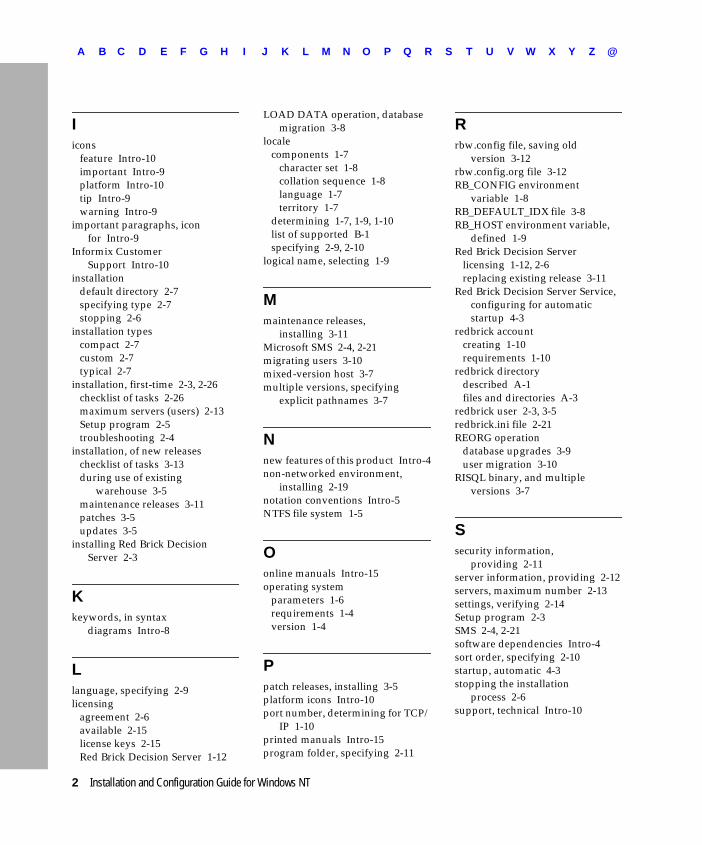
O QCA B D E F G H I J K L M N P R S T U V W X Y Z @
Iicons
feature Intro-10important Intro-9platform Intro-10tip Intro-9warning Intro-9
important paragraphs, iconfor Intro-9
Informix CustomerSupport Intro-10
installationdefault directory 2-7specifying type 2-7stopping 2-6
installation typescompact 2-7custom 2-7typical 2-7
installation, first-time 2-3, 2-26checklist of tasks 2-26maximum servers (users) 2-13Setup program 2-5troubleshooting 2-4
installation, of new releaseschecklist of tasks 3-13during use of existing
warehouse 3-5maintenance releases 3-11patches 3-5updates 3-5
installing Red Brick DecisionServer 2-3
Kkeywords, in syntax
diagrams Intro-8
Llanguage, specifying 2-9licensing
agreement 2-6available 2-15license keys 2-15Red Brick Decision Server 1-12
LOAD DATA operation, databasemigration 3-8
localecomponents 1-7
character set 1-8collation sequence 1-8language 1-7territory 1-7
determining 1-7, 1-9, 1-10list of supported B-1specifying 2-9, 2-10
logical name, selecting 1-9
Mmaintenance releases,
installing 3-11Microsoft SMS 2-4, 2-21migrating users 3-10mixed-version host 3-7multiple versions, specifying
explicit pathnames 3-7
Nnew features of this product Intro-4non-networked environment,
installing 2-19notation conventions Intro-5NTFS file system 1-5
Oonline manuals Intro-15operating system
parameters 1-6requirements 1-4version 1-4
Ppatch releases, installing 3-5platform icons Intro-10port number, determining for TCP/
IP 1-10printed manuals Intro-15program folder, specifying 2-11
Rrbw.config file, saving old
version 3-12rbw.config.org file 3-12RB_CONFIG environment
variable 1-8RB_DEFAULT_IDX file 3-8RB_HOST environment variable,
defined 1-9Red Brick Decision Server
licensing 1-12, 2-6replacing existing release 3-11
Red Brick Decision Server Service,configuring for automaticstartup 4-3
redbrick accountcreating 1-10requirements 1-10
redbrick directorydescribed A-1files and directories A-3
redbrick user 2-3, 3-5redbrick.ini file 2-21REORG operation
database upgrades 3-9user migration 3-10
RISQL binary, and multipleversions 3-7
Ssecurity information,
providing 2-11server information, providing 2-12servers, maximum number 2-13settings, verifying 2-14Setup program 2-3SMS 2-4, 2-21software dependencies Intro-4sort order, specifying 2-10startup, automatic 4-3stopping the installation
process 2-6support, technical Intro-10
2 Installation and Configuration Guide for Windows NT

O QCA B D E F G H I J K L M N P R S T U V W X Y Z @
syntax diagramsconventions for Intro-6keywords in Intro-8variables in Intro-9
syntax notation Intro-5SYSTEM Local Account 2-12system requirements 1-4
database Intro-4software Intro-4
Ttasking 1-6TCP/IP, determining port
number 1-10technical support Intro-10territory, specifying 2-10tip icons Intro-9troubleshooting general
problems Intro-11typical installation 2-7
Uunattended installation 2-21uninstalling Red Brick Decision
Server files 4-4UNLOAD operations, database
migration 3-8update releases, installing 3-5UPGRADE statements 3-8user information, providing 2-6users, maximum number of 2-13users, migrating to new
release 3-10users, types of Intro-3
Vvariables in syntax
diagrams Intro-9verification
failure 2-18separate from enabling 2-19settings 2-14
verifying settings 2-14verify.log file 2-18version, operating system 1-4virtual memory 1-6
Wwarehouse
directory structure A-1directory, specifying 2-7logical name, selecting 1-9
warning icons Intro-9Windows NT Setup program 2-3
Index 3
