installation guide overview - franklin fueling systems · vacuum test ... this guide is meant as an...
TRANSCRIPT

Franklin Fueling Systems • 3760 Marsh Rd. • Madison, WI 53718 USA
Tel: +1 608 838 8786 • 800 225 9787 • Fax: +1 608 838 6433 • www.franklinfueling.com
Double Wall Fiberglass SumpsInstallation Guide Overview
ii
Copyright ©2007 by Franklin Fueling Systems (FFS). No part of this publication may be reproduced in any form without the prior written consent of FFS. All rights reserved.
NoticeFranklin Fueling Systems (FFS) strives to produce the finest manual possible and to ensure that the information that it contains is complete and accurate. However, FFS reserves the rights to change this document and specifications at any time without notice. FFS makes no expressed or implied warranty with regard to the contents of this manual. FFS assumes no liability for errors, omissions or for any damages, direct or consequential, that may result from the use of this document or the equipment that it describes.
Inspection of MaterialsVisually inspect all components for defects or damage prior to installation. If any defect or damage is found, do not use the product and contact Franklin Fueling Systems for further assistance.
Warranty InformationPlease refer to the FFS Fuel Management Systems & Product Warranty Policy for all warranty information.
Contacting Franklin Fueling Systems (FFS)Please feel free to contact us by mail at:
Franklin Fueling Systems3760 Marsh Rd.
Madison, WI 53718 USA
Or contact us by phone, fax or e-mail:Tel: +1 800 225 9787 E-mail: [email protected]: +1 608 838 6433 [email protected]
Office and Sales Hours: 8 a.m. to 5 p.m. CST - Monday through FridayTechnical Support Hours: 7 a.m. to 7 p.m. CST - Monday through Friday
Please visit our website at www.franklinfueling.com
ContentsNotice.................................................................................................................................. ii
Introduction ........................................................................................................................1Safety ........................................................................................................................................1Tools Required for Installation ..................................................................................................1Inspect the Double Wall Sump Upon Delivery ..........................................................................1
Preparation.........................................................................................................................2Preparing the DW Octagon Sump Bottom and Tank Collar ...................................................... 2Surface Preparation ..................................................................................................................2
Applying Putty to Sump Joints ........................................................................................3
Mixtures and Cure Times for Resin and Catalyst ...........................................................4
Applying Resin and Mat to Sumps ..................................................................................5
Cutting Sump Riser to Length ..........................................................................................6
Gel Coat Application .........................................................................................................7Tools .........................................................................................................................................7Safety Considerations ...............................................................................................................7Mixing .......................................................................................................................................7Application ................................................................................................................................7
Finishing .............................................................................................................................8Vacuum Test .............................................................................................................................8Storage Limitations of Catalyst, Resin and Mat ........................................................................8
1
IntroductionThis guide is meant as an installation overview for double wall underground fiberglass sumps and should be used in conjunction with the appropriate part-specific installation instructions. For complete installation and safety information, refer to the installation documentation for the equipment described in this guide and any other related equipment. To ensure your system integrity and safety, it is essential that you follow all applicable installation instructions and the federal, state, and local codes that supersede them.
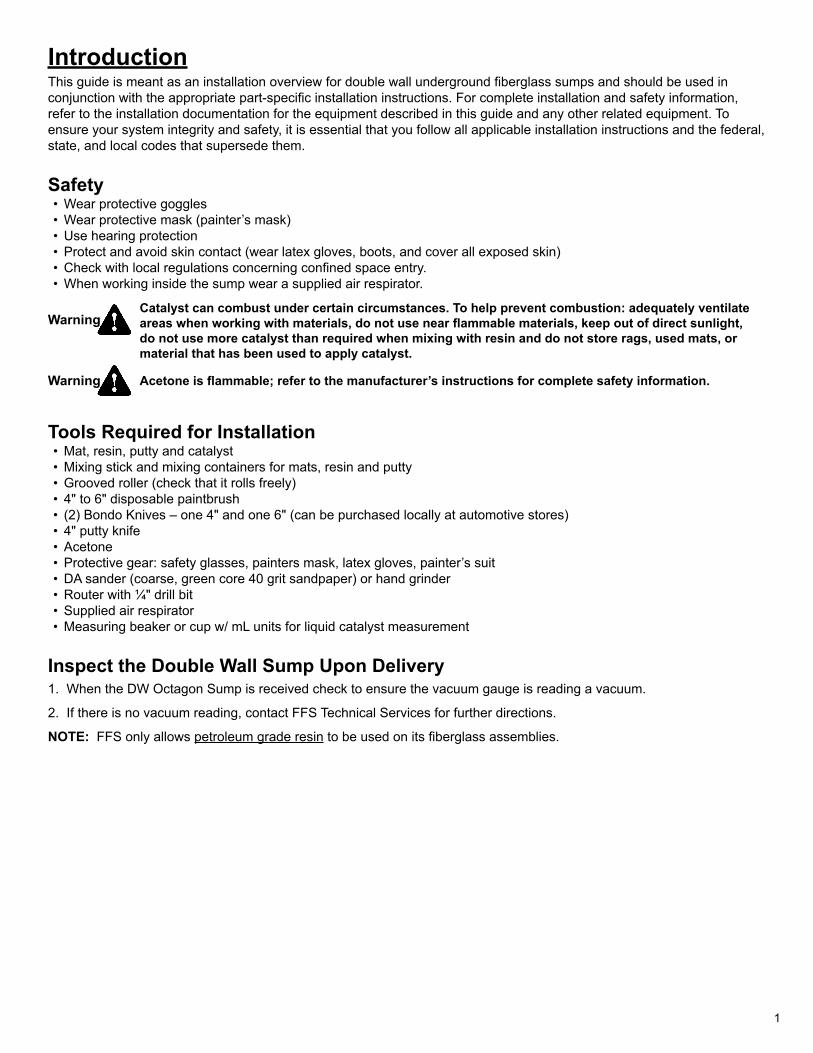
SafetyWear protective goggles• Wear protective mask (painter’s mask)• Use hearing protection• Protect and avoid skin contact (wear latex gloves, boots, and cover all exposed skin)• Check with local regulations concerning confined space entry.• When working inside the sump wear a supplied air respirator.•
WarningCatalyst can combust under certain circumstances. To help prevent combustion: adequately ventilate areas when working with materials, do not use near flammable materials, keep out of direct sunlight, do not use more catalyst than required when mixing with resin and do not store rags, used mats, or material that has been used to apply catalyst.
Warning Acetone is flammable; refer to the manufacturer’s instructions for complete safety information.
Tools Required for InstallationMat, resin, putty and catalyst• Mixing stick and mixing containers for mats, resin and putty• Grooved roller (check that it rolls freely)• 4" to 6" disposable paintbrush• (2) Bondo Knives – one 4" and one 6" (can be purchased locally at automotive stores)• 4" putty knife• Acetone• Protective gear: safety glasses, painters mask, latex gloves, painter’s suit• DA sander (coarse, green core 40 grit sandpaper) or hand grinder• Router with ¼" drill bit• Supplied air respirator• Measuring beaker or cup w/ mL units for liquid catalyst measurement•
Inspect the Double Wall Sump Upon DeliveryWhen the DW Octagon Sump is received check to ensure the vacuum gauge is reading a vacuum.1.
If there is no vacuum reading, contact FFS Technical Services for further directions.2.
NOTE: FFS only allows petroleum grade resin to be used on its fiberglass assemblies.

2
PreparationPreparing the DW Octagon Sump Bottom and Tank Collar
The DW Octagon sump has a bottom ring installed to provide support for 1. shipping.
This ring must be removed before installing the DW Octagon sump to the 2. tank collar.
Use a diamond blade to make an accurate and straight cut (see Figure 1).3.
DO NOT use the bottom ring as a guideline to cut. The bottom ring is not 4. straight or flat and WILL NOT ensure a straight cut. Trim 1" to 3" from the bottom of the sump.
Dry fit all components at this time.5. Ensure you have the flat sides aligned on the tank collar for your piping • entries.Sump alignment is critical.•
Figure 1 - Removing Bottom Ring
Figure 2 - Acetone Discoloring Sanded Surfaces
Exterior Surface Preparation: 1. Degrease with Acetone. Only degrease areas that will be abraded as
described below.
2. Sand the outside layer of the fiberglass pieces that are to be fiberglassed together. Only prepare four inch tall segments of components being adhered together. Do not sand past the areas that will be covered with mat.
3. The fiberglass sump should be sanded using a DA sander with 120-grit sandpaper. If sanding by hand, use an abrasive medium to make a rough surface for the fiberglass to bond to.
4. Remove dust created by the abrasion process with a tack rag.
5. Clean abraded areas with acetone because this will help the mat adhere to the abraded areas of the components that are being fiberglassed together ( see Figure 2)
Interior Surface Preparation:1. Degrease with Acetone. Only degrease areas that will be abraded as
described below.
2. Using 120 grit sandpaper sand the gel coat finish until the shine is removed. This will be adequate for the mat to adhere to the inside sump wall. Do not sand past the areas that will be covered with mat. Before installing the sump base to the DW fiberglass tank collar, the collar must be sanded on both the inside and outside too.
3. Remove dust created by the abrasion process with a tack rag
4. Clean abraded areas with acetone because this will help the mat adhere to the abraded areas of the components that are being fiberglassed together ( see Figure 2).
NOTE: Do NOT use marine grade resin. Only use petroleum grade resin.
3
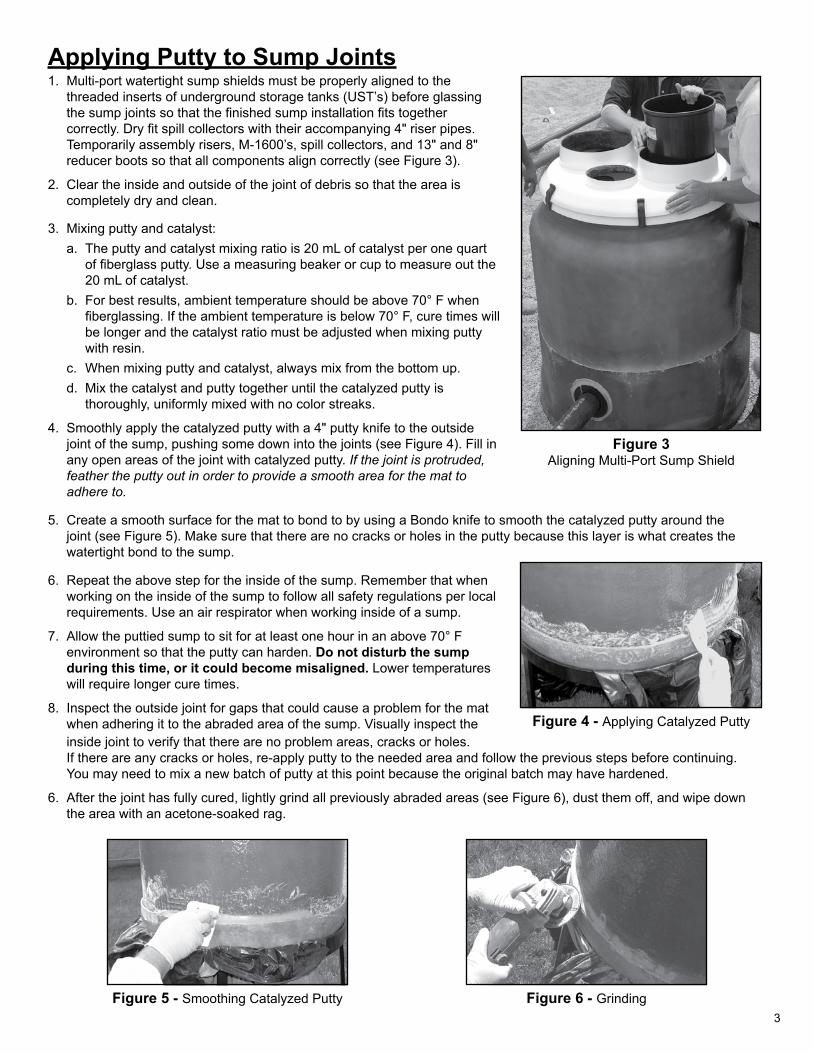
Applying Putty to Sump JointsMulti-port watertight sump shields must be properly aligned to the 1. threaded inserts of underground storage tanks (UST’s) before glassing the sump joints so that the finished sump installation fits together correctly. Dry fit spill collectors with their accompanying 4" riser pipes. Temporarily assembly risers, M-1600’s, spill collectors, and 13" and 8" reducer boots so that all components align correctly (see Figure 3).
Clear the inside and outside of the joint of debris so that the area is 2. completely dry and clean.
Mixing putty and catalyst:3. The putty and catalyst mixing ratio is 20 mL of catalyst per one quart a. of fiberglass putty. Use a measuring beaker or cup to measure out the 20 mL of catalyst.For best results, ambient temperature should be above 70° F when b. fiberglassing. If the ambient temperature is below 70° F, cure times will be longer and the catalyst ratio must be adjusted when mixing putty with resin.When mixing putty and catalyst, always mix from the bottom up.c. Mix the catalyst and putty together until the catalyzed putty is d. thoroughly, uniformly mixed with no color streaks.
Smoothly apply the catalyzed putty with a 4" putty knife to the outside 4. joint of the sump, pushing some down into the joints (see Figure 4). Fill in any open areas of the joint with catalyzed putty. If the joint is protruded, feather the putty out in order to provide a smooth area for the mat to adhere to.
Figure 3Aligning Multi-Port Sump Shield
Create a smooth surface for the mat to bond to by using a Bondo knife to smooth the catalyzed putty around the 5. joint (see Figure 5). Make sure that there are no cracks or holes in the putty because this layer is what creates the watertight bond to the sump.
Repeat the above step for the inside of the sump. Remember that when 6. working on the inside of the sump to follow all safety regulations per local requirements. Use an air respirator when working inside of a sump.
Allow the puttied sump to sit for at least one hour in an above 70° F 7. environment so that the putty can harden. Do not disturb the sump during this time, or it could become misaligned. Lower temperatures will require longer cure times.
Inspect the outside joint for gaps that could cause a problem for the mat 8. when adhering it to the abraded area of the sump. Visually inspect the Figure 4 - Applying Catalyzed Puttyinside joint to verify that there are no problem areas, cracks or holes. If there are any cracks or holes, re-apply putty to the needed area and follow the previous steps before continuing. You may need to mix a new batch of putty at this point because the original batch may have hardened.
After the joint has fully cured, lightly grind all previously abraded areas (see Figure 6), dust them off, and wipe down 6. the area with an acetone-soaked rag.
Figure 5 - Smoothing Catalyzed Putty
Figure 6 - Grinding

4
Mixtures and Cure Times for Resin and CatalystImportant Things to Know
Resin hardens quickly, so have all setup items prepared • ahead of time. Spending extra time on setup items prior to mixing the resin will help ensure that you have enough time later to work with the resin before it hardens.Before mixing resin, check that your roller works properly.•
For best results, ambient temperature should be above • 70° F. If the ambient temperature is below 70° F, curing time will be extended (refer to the time chart for approximate cure times).
Resin/Catalyst Mixtures
ResinCatalyst in cool or
overcast conditions:2% per weight
Catalyst in standard conditions:
1.5% per weight
Catalyst in hot or sunny conditions:
1% per weight16 fl. oz. (1 pt.) 9 mL 7 mL 5 mL
32 fl. oz. (1 qt.) 19 mL 14 mL 9 mL
Cut several dozen pieces of fiberglass mats to lengths of 24". These mats will 1. be used in the next section, but it’s important to do this before mixing the resin to give yourself more time to work with the resin before it hardens.
Mix one pint of catalyzed resin at a time, starting with a small amount so that 2. the mixture does not cure before applying it to the sump. As you become more familiar with the fiberglass application, you may increase the amount to one quart.
Cure TimesAmbient
TemperatureMinimum Set-up
Time35 F 20 Hours40 F 14 Hours50 F 8 Hours60 F 5 Hours70 F 3 Hours80 F 2 Hours90 F 1 Hour100 F ½ Hour
Cure times given are for reference purposes only, exact times may vary.
Note: Do not use less than 1% per weight of catalyst per mixture, or the resin will not fully bond to the surface of the sump and mat.

5
Applying Resin and Mat to SumpsWhen applying mats to a sump, use three layers of fiberglass mat strips (the ones you cut in Step 1 in the Mixtures and Cure Times for Resin and Catalyst section) for each joint of the sumps being fiberglassed. Apply one layer of mat at a time, centering the mats on the joint being fiberglassed.
Note: Do not store mats in humid or wet environments. If a mat comes in contact with liquids or humidity, it will begin to release the chemicals that allow it to adhere to the fiberglass sump. A wet or damp mat will not adhere to a sump and should be disposed of immediately.
Apply catalyzed resin generously to the puttied sump joint using a 1. disposable paintbrush that is 4" or 6" wide. Wet out (apply a large amount of catalyzed resin to) the area on the components being fiberglassed more than large enough for the 24" piece of mat to lay on (see Figure 7).
Apply a fiberglass mat to the area you wetted out in Step 1 and 2. saturate this layer of mat with catalyzed resin (see Figures 8 and 9).
Using a 4-6" grooved roller, roll over the layer of fiberglass mat and 3. remove any air bubbles. Make sure that air bubbles are not present in this layer because this layer is the foundation for the next layer. White areas in a mat indicate the presence of air pockets.
Roll over the mat horizontally and vertically with the roller as many 4. times as needed to eliminate air bubbles (see Figure 10).
Repeat Steps 1 through 4 all of the way around the sump, 5. overlapping each mat with the one previously applied (see Figure 11). Three layers of mat need to be applied to each sump joint on both the inside and outside.
Note: Resin will soak through the first layer, so don’t apply as much resin to the second and third layers as on the first.
Note: Clean the roller with acetone periodically so that it keeps rolling freely.
Finalize the mat install by spreading some extra resin across the mat. 6. Again, remove any air pockets that may be caught in the resin.
Please refer to the Cure Times chart in the Mixtures and Cure Times 7. for Resin and Catalyst chapter for approximate cure times. While you wait for mats to cure, work on other sumps.
Figure 7 - Wetting Out
Figure 8 - Applying Mat
Figure 9 - Saturating with Resin
Figure 10 - Removing Air Bubbles Figure 11 - Applying 2nd Layer

6
Cutting Sump Riser to LengthMeasure from the sump base to finish grade to 1. determine the correct height for the sump riser.
Mark the sump for cutting.2.
Note: Cutting the sump bottom not only creates the cor-rect riser height but also allows the sump riser and sump base to communicate.
Using a diamond blade to ensure an accurate and 3. straight cut, cut the bottom of the sump riser off in order to create a communication channel.
Dry fit all components together to ensure that the 4. proper height has been achieved.
Figure 12 - Marking the Sump for Cutting
Follow all of the instructions in the Surface Preparation section (located in the Preparation chapter), then continue on 5. to Step 6.
Before installing the sump riser to the sump bottom, use a ¼" router to drill a complete opening in the top 6. communication channel of the sump base. The sump riser will already have a communication channel from Step 3.
Caution Do not drill holes into the sidewalls of the sump because that could compromise system integrity.
Verify that the alignment is correct and sized properly.7.
Return to the 8. Applying Putty to Sump Joints and Applying Resin and Mat to Sumps chapters and, respectively, follow the instructions there for applying putty and fiberglassing the inside and outside seams of these two components.
7
Gel Coat ApplicationTools
NIOSH approved respirator• Disposable paint brush or roller• Disposable bucket for mixing• Mixing sticks• Gel Coat LHM-2900 Low Hap White HydroShield Lite NPG/ISO Marine Gel Coat (available from HK Research). Check • this link for local distributor information: www.hkresearch.com/distributor_list.php.Catalyst• Tacky rags• Acetone to clean and prepare surface•
Safety ConsiderationsThe white gel coat contain styrene monomer, which is a flammable liquid. Keep away from sparks, heat and open • flame.Styrene vapors are heavier than air. Use adequate ventilation or suction fans to remove vapors.• Both the polyester gel coat and the catalyst may cause burns to eyes and skin. Do not get in the eyes! • Avoid breathing vapors! Gel coat applicators should wear a NIOSH approved respirator effective for vapors, spray mist • and dust. In case of accidental contact, remove the contaminated clothing and wash affected skin areas with soap and copious quantities of water. Contact a physician if persistent skin irritation occurs. For eyes, immediately flush with plenty of water for at least 15 minutes; call a physician immediately. Wash contaminated clothing before reusing.
Note: Do not mix material continuously or its thixotropic properties may be lost. If the gel coat is inadvertently over-mixed, hold material for four hours without agitation before application.
MixingIt is suggested that the catalyst concentration used in the application of the “LHM” series NPG-ISO White Gel Coats not • exceed 3.0% or fall below 1.5% to retain maximum properties.The recommended range for the catalyst concentration within the applied film is 1.8 to 2.2% at 77° F.• Recommended catalysts are NORAC MEKP-9, Superox 46-702 and Cadox L-50a. Call HK’s Lab for other • recommendations.
ApplicationUse sandpaper to rough up the surface and remove the shiny surface of the existing gel coat layer. 1.
Use a tacky rag to remove dust on the surface to be gel coated.2.
Clean area with acetone and let dry.3.
After mixing resin and catalyst, apply it using a disposable brush or roller. Coat the area thoroughly and allow the gel 4. coat to set. The time required for the gel coat to set is dependent upon the temperature and the percent of catalyst mixed into resin.
Inspect the area for full coverage. Paint on additional coats to ensure full coverage.5.

8
FinishingAfter fiberglass has cured sand lightly with air-sander or roughly with coarse 40 – 60 grit sandpaper.1.
Knock down all excess fiberglass material and dust the sump clean2.
Mix a new batch of resin and apply to outside of the sump again as a final coat. Use the aluminum roller to eliminate 3. any air bubbles. Allow to cure (Refer to the time chart for approximate curing time).
Vacuum TestIt is recommended to perform a vacuum test on the double wall sump after fiberglassing is complete.1.
Note: Do not perform this test if pipe entry boots have been installed.
DO NOT conduct a vacuum test in direct sunlight or if the temperature is fluctuating. Temperature will affect the 2. vacuum.
Close the needle valve attached to the vacuum gauge, and remove the vacuum gauge.3.
Connect the vacuum pump onto the closed needle valve.4.
Open the needle valve and draw a 15" Hg vacuum.5.
Close the needle valve and re-install the vacuum gauge.6.
Open the Needle valve and observe the vacuum gauge.7.
We should see 15" Hg. Observe the gauge for 30 minutes. There should not be a drop in vacuum. 8.
Storage Limitations of Catalyst, Resin and Mat3 months after manufacture at 73 degrees or below, factory sealed container• Out of direct sunlight • Do not store rags, used mat, or material that may have been used to apply catalyst. Catalyst will combust! Please take • great care in storing material that has been used in the resin applying process. Do not store mat in a humid or wet environment. If mat comes in contact with humidity or liquid it will begin to release • the chemicals that allow it to adhere to the fiberglass sump. Wet or damp mat will not adhere to the sump. This mat should be disposed of and not used.


©2008 FFS 602019027 Rev. 2