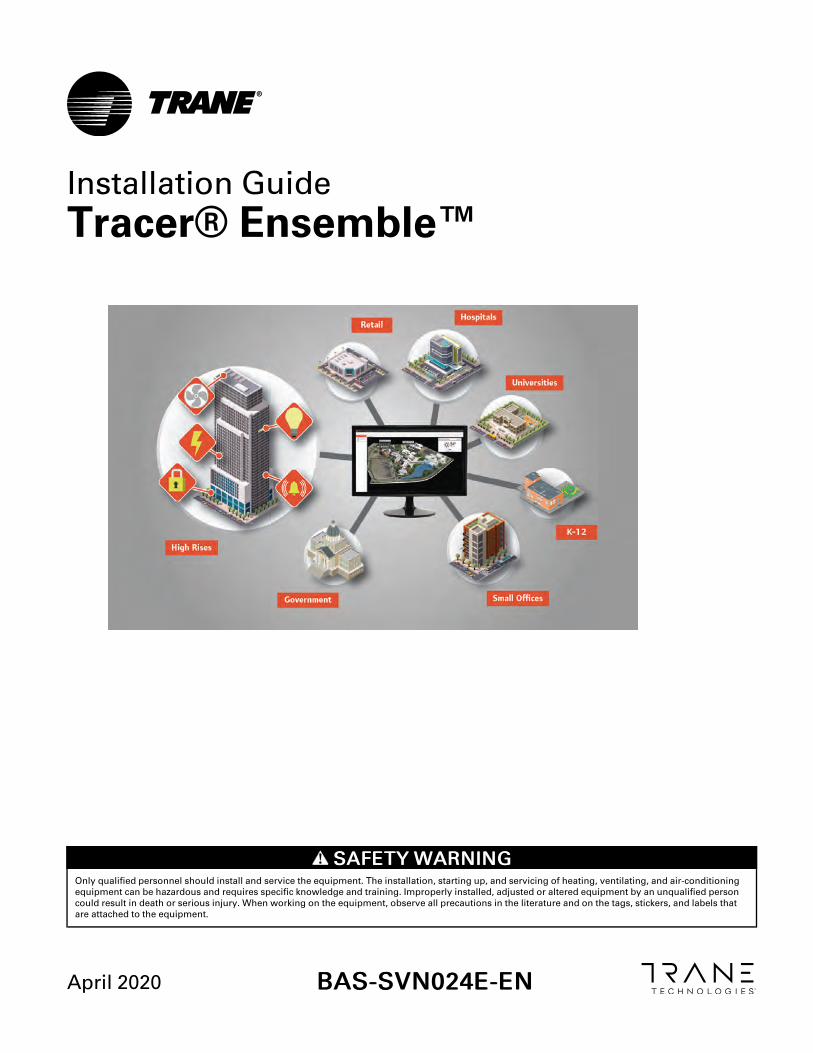
installation guide tracer®ensemble™
TRANSCRIPT
SSAAFFEETTYY WWAARRNNIINNGGOnly qualified personnel should install and service the equipment. The installation, starting up, and servicing of heating, ventilating, and air-conditioningequipment can be hazardous and requires specific knowledge and training. Improperly installed, adjusted or altered equipment by an unqualified personcould result in death or serious injury. When working on the equipment, observe all precautions in the literature and on the tags, stickers, and labels thatare attached to the equipment.
April 2020 BBAASS--SSVVNN002244EE--EENN
Installation GuideTracer® Ensemble™

©2020 Trane BAS-SVN024E-EN
IntroductionRead this manual thoroughly before operating orservicing this unit.
Warnings, Cautions, and NoticesSafety advisories appear throughout this manual asrequired. Your personal safety and the properoperation of this machine depend upon the strictobservance of these precautions.
The three types of advisories are defined as follows:
WARNINGIndicates a potentially hazardous situationwhich, if not avoided, could result in death orserious injury.
CAUTIONIndicates a potentially hazardous situationwhich, if not avoided, could result in minor ormoderate injury. It could also be used to alertagainst unsafe practices.
NOTICEIndicates a situation that could result inequipment or property-damage onlyaccidents.
Important Environmental ConcernsScientific research has shown that certain man-madechemicals can affect the earth’s naturally occurringstratospheric ozone layer when released to theatmosphere. In particular, several of the identifiedchemicals that may affect the ozone layer arerefrigerants that contain Chlorine, Fluorine and Carbon(CFCs) and those containing Hydrogen, Chlorine,Fluorine and Carbon (HCFCs). Not all refrigerantscontaining these compounds have the same potentialimpact to the environment. Trane advocates theresponsible handling of all refrigerants-includingindustry replacements for CFCs and HCFCs such assaturated or unsaturated HFCs and HCFCs.
Important Responsible RefrigerantPracticesTrane believes that responsible refrigerant practicesare important to the environment, our customers, andthe air conditioning industry. All technicians whohandle refrigerants must be certified according to localrules. For the USA, the Federal Clean Air Act (Section608) sets forth the requirements for handling,reclaiming, recovering and recycling of certainrefrigerants and the equipment that is used in theseservice procedures. In addition, some states ormunicipalities may have additional requirements thatmust also be adhered to for responsible managementof refrigerants. Know the applicable laws and followthem.
WWAARRNNIINNGGPPrrooppeerr FFiieelldd WWiirriinngg aanndd GGrroouunnddiinnggRReeqquuiirreedd!!FFaaiilluurree ttoo ffoollllooww ccooddee ccoouulldd rreessuulltt iinn ddeeaatthh oorrsseerriioouuss iinnjjuurryy..AAllll ffiieelldd wwiirriinngg MMUUSSTT bbee ppeerrffoorrmmeedd bbyy qquuaalliiffiieeddppeerrssoonnnneell.. IImmpprrooppeerrllyy iinnssttaalllleedd aanndd ggrroouunnddeeddffiieelldd wwiirriinngg ppoosseess FFIIRREE aanndd EELLEECCTTRROOCCUUTTIIOONNhhaazzaarrddss.. TToo aavvooiidd tthheessee hhaazzaarrddss,, yyoouu MMUUSSTT ffoolllloowwrreeqquuiirreemmeennttss ffoorr ffiieelldd wwiirriinngg iinnssttaallllaattiioonn aannddggrroouunnddiinngg aass ddeessccrriibbeedd iinn NNEECC aanndd yyoouurr llooccaall//ssttaattee//nnaattiioonnaall eelleeccttrriiccaall ccooddeess..
WWAARRNNIINNGGPPeerrssoonnaall PPrrootteeccttiivvee EEqquuiippmmeenntt ((PPPPEE))RReeqquuiirreedd!!FFaaiilluurree ttoo wweeaarr pprrooppeerr PPPPEE ffoorr tthhee jjoobb bbeeiinngguunnddeerrttaakkeenn ccoouulldd rreessuulltt iinn ddeeaatthh oorr sseerriioouuss iinnjjuurryy..TTeecchhnniicciiaannss,, iinn oorrddeerr ttoo pprrootteecctt tthheemmsseellvveess ffrroommppootteennttiiaall eelleeccttrriiccaall,, mmeecchhaanniiccaall,, aanndd cchheemmiiccaallhhaazzaarrddss,, MMUUSSTT ffoollllooww pprreeccaauuttiioonnss iinn tthhiiss mmaannuuaallaanndd oonn tthhee ttaaggss,, ssttiicckkeerrss,, aanndd llaabbeellss,, aass wweellll aass tthheeiinnssttrruuccttiioonnss bbeellooww::
•• BBeeffoorree iinnssttaalllliinngg//sseerrvviicciinngg tthhiiss uunniitt,,tteecchhnniicciiaannss MMUUSSTT ppuutt oonn aallll PPPPEE rreeqquuiirreedd ffoorrtthhee wwoorrkk bbeeiinngg uunnddeerrttaakkeenn ((EExxaammpplleess;; ccuuttrreessiissttaanntt gglloovveess//sslleeeevveess,, bbuuttyyll gglloovveess,, ssaaffeettyyggllaasssseess,, hhaarrdd hhaatt//bbuummpp ccaapp,, ffaallll pprrootteeccttiioonn,,eelleeccttrriiccaall PPPPEE aanndd aarrcc ffllaasshh ccllootthhiinngg))..AALLWWAAYYSS rreeffeerr ttoo aapppprroopprriiaattee SSaaffeettyy DDaattaaSShheeeettss ((SSDDSS)) aanndd OOSSHHAA gguuiiddeelliinneess ffoorrpprrooppeerr PPPPEE..
•• WWhheenn wwoorrkkiinngg wwiitthh oorr aarroouunndd hhaazzaarrddoouusscchheemmiiccaallss,, AALLWWAAYYSS rreeffeerr ttoo tthhee aapppprroopprriiaatteeSSDDSS aanndd OOSSHHAA//GGHHSS ((GGlloobbaall HHaarrmmoonniizzeeddSSyysstteemm ooff CCllaassssiiffiiccaattiioonn aanndd LLaabbeelllliinngg ooffCChheemmiiccaallss)) gguuiiddeelliinneess ffoorr iinnffoorrmmaattiioonn oonnaalllloowwaabbllee ppeerrssoonnaall eexxppoossuurree lleevveellss,, pprrooppeerrrreessppiirraattoorryy pprrootteeccttiioonn aanndd hhaannddlliinnggiinnssttrruuccttiioonnss..
•• IIff tthheerree iiss aa rriisskk ooff eenneerrggiizzeedd eelleeccttrriiccaallccoonnttaacctt,, aarrcc,, oorr ffllaasshh,, tteecchhnniicciiaannss MMUUSSTT ppuuttoonn aallll PPPPEE iinn aaccccoorrddaannccee wwiitthh OOSSHHAA,, NNFFPPAA7700EE,, oorr ootthheerr ccoouunnttrryy--ssppeecciiffiicc rreeqquuiirreemmeennttssffoorr aarrcc ffllaasshh pprrootteeccttiioonn,, PPRRIIOORR ttoo sseerrvviicciinnggtthhee uunniitt.. NNEEVVEERR PPEERRFFOORRMM AANNYY SSWWIITTCCHHIINNGG,,DDIISSCCOONNNNEECCTTIINNGG,, OORR VVOOLLTTAAGGEE TTEESSTTIINNGGWWIITTHHOOUUTT PPRROOPPEERR EELLEECCTTRRIICCAALL PPPPEE AANNDDAARRCC FFLLAASSHH CCLLOOTTHHIINNGG.. EENNSSUURREEEELLEECCTTRRIICCAALL MMEETTEERRSS AANNDD EEQQUUIIPPMMEENNTT AARREEPPRROOPPEERRLLYY RRAATTEEDD FFOORR IINNTTEENNDDEEDDVVOOLLTTAAGGEE..
BAS-SVN024E-EN 3
WWAARRNNIINNGGFFoollllooww EEHHSS PPoolliicciieess!!FFaaiilluurree ttoo ffoollllooww iinnssttrruuccttiioonnss bbeellooww ccoouulldd rreessuulltt iinnddeeaatthh oorr sseerriioouuss iinnjjuurryy..
•• AAllll TTrraannee ppeerrssoonnnneell mmuusstt ffoollllooww tthheeccoommppaannyy’’ss EEnnvviirroonnmmeennttaall,, HHeeaalltthh aanndd SSaaffeettyy((EEHHSS)) ppoolliicciieess wwhheenn ppeerrffoorrmmiinngg wwoorrkk ssuucchh aasshhoott wwoorrkk,, eelleeccttrriiccaall,, ffaallll pprrootteeccttiioonn,, lloocckkoouutt//ttaaggoouutt,, rreeffrriiggeerraanntt hhaannddlliinngg,, eettcc.. WWhheerree llooccaallrreegguullaattiioonnss aarree mmoorree ssttrriinnggeenntt tthhaann tthheesseeppoolliicciieess,, tthhoossee rreegguullaattiioonnss ssuuppeerrsseeddee tthheesseeppoolliicciieess..
•• NNoonn--TTrraannee ppeerrssoonnnneell sshhoouulldd aallwwaayyss ffoolllloowwllooccaall rreegguullaattiioonnss..
CopyrightThis document and the information in it are theproperty of Trane, and may not be used or reproducedin whole or in part without written permission. Tranereserves the right to revise this publication at any time,and to make changes to its content without obligationto notify any person of such revision or change.
TrademarksAll trademarks referenced in this document are thetrademarks of their respective owners.
Factory TrainingFactory training is available through Trane University™to help you learn more about the operation andmaintenance of your equipment. To learn aboutavailable training opportunities contact TraneUniversity™.
Online: www.trane.com/traneuniversity
Phone: 855-803-3563
Email: [email protected]
Revision HistoryBAS-SVN024C-EN has been updated with the followingchanges:
• HTTPS and SSL Secure Communication (newsection)
IInnttrroodduuccttiioonn

4 BAS-SVN024E-EN
System Requirements andSpecifications . . . . . . . . . . . . . . . . . . . . . . . . . . . . . . 5
SQL Database Size. . . . . . . . . . . . . . . . . . . . . . . . 6
Configure Microsoft Windows Server . . . . . . 7Initial System Configuration . . . . . . . . . . . . . . . 7
Information Needed. . . . . . . . . . . . . . . . . . . 7
Network and Regional Settings . . . . . . . . . . . . 7
Roles and Services. . . . . . . . . . . . . . . . . . . . . . . . 7Windows Server 2012 ServerRoles . . . . . . . . . . . . . . . . . . . . . . . . . . . . . . . . 7.Net Framework. . . . . . . . . . . . . . . . . . . . . . . 8
Installation and Configuration on non-Latin Based Servers. . . . . . . . . . . . . . . . . . . . . . . 8
Tracer Ensemble Installation . . . . . . . . . . . 8
Install and Configure SQL Server. . . . . . . . . . . 8
Database Setup . . . . . . . . . . . . . . . . . . . . . . . . . . 8Create the Database . . . . . . . . . . . . . . . . . . . 9Create the Database Structure. . . . . . . . . . 9
Manually Upgrading the TracerEnsemble Database. . . . . . . . . . . . . . . . . . . . . . . 9
Install Tracer Ensemble Application . . . . . . . 11
Tracer Ensemble First Login . . . . . . . . . . . . . . . 14
Licensing . . . . . . . . . . . . . . . . . . . . . . . . . . . . . . . . . . 15
Updating Tracer Ensemble . . . . . . . . . . . . . . . . 16
Advanced Configurations andFunctions. . . . . . . . . . . . . . . . . . . . . . . . . . . . . . . . . . 19
Windows Services . . . . . . . . . . . . . . . . . . . . . . . 19
HTTPS and SSL – SecureCommunications Configuration. . . . . . . . . . . 19
Appendix A: Virtual MachineRequirements . . . . . . . . . . . . . . . . . . . . . . . . . . . . . 20
HyperV Configuration . . . . . . . . . . . . . . . . . . . . 20
VMware ESX(i) . . . . . . . . . . . . . . . . . . . . . . . . . . 20
Appendix B: Advanced SQLConfiguration. . . . . . . . . . . . . . . . . . . . . . . . . . . . . . 21
Appendix C: Backup and Restore . . . . . . . . . . 22Backup . . . . . . . . . . . . . . . . . . . . . . . . . . . . . . . . . 22
Restore . . . . . . . . . . . . . . . . . . . . . . . . . . . . . . . . . 22
Appendix D: Direct Link with TracerSC . . . . . . . . . . . . . . . . . . . . . . . . . . . . . . . . . . . . . . . . . 23
Configuring Tracer SC for DirectLink . . . . . . . . . . . . . . . . . . . . . . . . . . . . . . . . . . . . 23
Configuring Tracer Ensemble for DirectLink . . . . . . . . . . . . . . . . . . . . . . . . . . . . . . . . . . . . 23
User Access to Direct Links . . . . . . . . . . . . . . . 24
Table of Contents

BAS-SVN024E-EN 5
System Requirements and SpecificationsServer Requirements
Operating System: Microsoft Windows Server 2012, 2012 R2, and 2016
.Net V4.72
Database: Microsoft SQL Server 2012, 2014, 2016, and 2017
Network Interface: TCP/IP Interface
Minimum Requirements: Configuration Server Type Processor Memory Hard Drive
Application server Virtual(a) 2 vCPU(a) 4 GB NAS/SAN
Application server Tower orrack-mount
3.0 GHz -Dual Core 4 GB 73 GB Min
Application serverand database
server
Tower orrack-mount
3.0 GHz -Quad Core 8 GB
BACnet Network RequirementsArchitecture: TCP/IP
Utilization: Low (see IT Fact Sheet BAS-SLB014-EN)
Protocols: BACnet (ASHRAE Std 135-2004)
http (port 80)
User Interface Network Requirements
Tracer EnsembleWeb UI:
http (port 80)
https (port 443)(b)
Server: Remote Desktop Connection(c) (RDP) port 3389
VPN recommended
Utilization: Load dependent on number of users and web page customizations
(a) Virtual Server needs to be configured to allow the Processor Serial Number (Processor ID) to be persisted. This is used by Tracer Ensemble for licensingpurposes.
(b) Https requires additional configuration and installation of certificate.(c) Remote desktop connection is recommended for support; additional configuration is needed for RDP and VPN.

6 BAS-SVN024E-EN
SQL Database SizeThe size of the SQL database Tracer Ensemble uses willdepend directly upon on:
• How much equipment is being monitored.
• The number of points on each piece of equipment.
• The frequency of data logs being captured.
• The length of time data logs are kept.The following tables approximates the size of theTracer Ensemble SQL database to grow given 200, 500,and 1000 pieces of equipment over 1 and 3 years.
200 Equipment5 points each
1 Year of Data 3 Years of Data
15 min 3.51 GB 10.53 GB
10 min 5.27 GB 15.8 GB
5 min 10.5 GB 31.6 GB
500 Equipment5 points each
1 Year of Data 3 Years of Data
15 min 8.78 GB 26.3 GB
10 min 13.2 GB 39.5 GB
5 min 26.33 GB 79.0 GB
1000Equipment5 points each
1 Year of Data 3 Years of Data
15 min 17.56 GB 52.67 GB
10 min 26.33 GB 79 GB
5 min 52.67 GB 158 GB
SSyysstteemm RReeqquuiirreemmeennttss aanndd SSppeecciiffiiccaattiioonnss

BAS-SVN024E-EN 7
Configure Microsoft Windows ServerIImmppoorrttaanntt:: Beginning with Tracer Ensemble 5.1, the
application will automatically configurethese roles and settings during theinstallation process. Follow theseinstructions if installing an older version ofTracer Ensemble or to verify a setting.
Initial System ConfigurationThis subsection provides steps for setting up a newserver running Window Server 2008 on which you planto run Tracer Ensemble software with a local SQLdatabase. The instructions assume that the serveroperating system is a fresh out-of-box installation andis being powered up for the first time. Skip any stepsthat have already been completed for this server.
Information NeededIImmppoorrttaanntt:: Your Windows Server Operating System
must not be configured as a domaincontroller. Applying the domain controllerrole prevents installing Tracer Ensemble onthat server.
Before you begin the configuration, get answers to thefollowing questions from your IT organization:
• What IP address, Subnet mask, and Defaultgateway will the server use?
• What is the network name and workgroup ordomain name (if applicable) of the server?
Network and Regional SettingsTo configure the server:
1. Power up the server with all of the peripheralsconnected.
2. Set the new Administrator password and record itin a safe location. The Initial Configuration Taskswindow appears.
3. Click SSeett ttiimmee zzoonnee, and then complete the timezone and date and time settings according to yourregion.
4. Click OOKK. You will return to the Initial ConfigurationTasks window.
5. Click CCoonnffiigguurree nneettwwoorrkkiinngg, and then completethe following steps:
a. Double-click LLooccaall AArreeaa CCoonnnneeccttiioonn.
b. In the Local Area Connection Status window,click PPrrooppeerrttiieess.
c. On the Networking tab, double-click IInntteerrnneettPPrroottooccooll VVeerrssiioonn 44 ((TTCCPP//IIPPvv44)).
d. In the Internet Protocol Version 4 (TCP/IPv4)Properties window, select UUssee tthhee ffoolllloowwiinngg IIPPaaddddrreessss, and then type in each of the three
addresses provided by the IT organization. Ifyou do not know the correct IP Address, you cantemporarily use 172.16.1.82 or any other privateaddress.
e. Click OOKK. You will return to the Local AreaConnection properties.
6. Click OOKK. You will return to the Initial ConfigurationTasks window.
7. Click PPrroovviiddee ccoommppuutteerr nnaammee aanndd ddoommaaiinn. TheComputer Name tab on the System Propertieswindow appears.
8. Optionally, type a description in the CCoommppuutteerrddeessccrriippttiioonn ffiieelldd.
9. Click CChhaannggee. The Computer Name/DomainChanges window appears.
10. Replace the text in the Computer name with thecomputer name provided by the IT organization.
11. Click OOKK, and then reboot the server. Upon reboot,you return to the Initial Configuration Taskswindow.
12. Click PPrroovviiddee ccoommppuutteerr nnaammee aanndd ddoommaaiinn. TheComputer Name tab on the System Propertieswindow appears.
13. Click CChhaannggee. The Computer Name/DomainChanges window appears.
14. Select DDoommaaiinn or WWoorrkkggrroouupp with the informationprovided by the IT organization.
15. Click OOKK, and then reboot the server. Upon reboot,you return to the Initial Configuration Taskswindow.
16. Click CClloossee.
Roles and ServicesTracer Ensemble requires features of the serveroperating system to be installed to operate correctly.Each server version is slightly different in the setup andconfiguration of these features. The summary of thesefeatures are:
Windows Server 2012 Server Roles
Application Server Role Services:• .Net 4.72
• .Web Server (IIS) Support
8 BAS-SVN024E-EN
Web Server (IIS) Role Services:
Common HTTP Features Application Development
• Default Document
• Directory Browsing
• HTTP Errors
• Static Content
• Health and Diagnostics
• HTTP Logging
• Logging Tools
• Request Monitor
• Performance (all)
• Security
• Request Filtering
• Performance
• Static ContentCompression
• .Net 4.72
• ISAPI Extensions
• ISAPI Filters
• Management Tools
• IIS Management Console
• IIS Management Scripts andTools
• IIS ManagementCompatibility (all)
.Net FrameworkTracer Ensemble 5.7 requires .Net 4.7.2 to be installedon the server and will do this automatically during theinstallation process. If the server does not have anInternet connection, .Net will need to be downloadedmanually and installed manually separately.
Installation and Configuration onnon-Latin Based ServersThis section covers known issues with installation andconfiguration on a non-Latin based server, including,but not limited to: Chinese, Japanese, Korean andother complex script languages.
Tracer Ensemble InstallationInstalling Tracer Ensemble on a non-Latin based serverrequires special handling of the current SQL scripts
that are used for database creation and updates:
1. Create the database in Latin-based script language.
2. Change the language for non-Unicode programscomplex script display language to English.
3. Run the appropriate SQL scripts that are needed.
4. Revert the language for non-Unicode programsfrom English to the complex script display languageof choice.
5. Install the Tracer Ensemble application.
Install and Configure SQL ServerSee Microsoft Developers Network (MSDN) article143219 for complete installation instructions andconfiguration.
Database SetupThese procedures must be performed before youinstall Tracer Ensemble. Before you begin, verify thefollowing:
• You have a supported version of Microsoft SQLServer installed on your system.
• You have a Tracer Ensemble installation media.
• You are not performing an upgrade of TracerEnsemble. These instructions apply only to a newdatabase.
NNoottee:: These procedures and the screen captures usedare based on Windows Server 2008 operatingsystem and SQL Express 2008 database. Theremay be slight, undocumented differencesbetween your installation and the installationshown if you are using a different database oroperating system. See Appendix B: AdvancedSQL Configuration for further details onadvanced configuration.
CCoonnffiigguurree MMiiccrroossoofftt WWiinnddoowwss SSeerrvveerr
BAS-SVN024E-EN 9
Create the DatabaseTo create the database:
1. Click Start | All Programs | Microsoft SQL Server200X, | MMiiccrroossoofftt SSQQLL MMaannaaggeemmeenntt SSttuuddiioo.
2. In the CCoonnnneecctt ttoo SSeerrvveerr window, complete thefollowing tasks.
a. In the Server type field, select DDaattaabbaasseeEEnnggiinnee.
b. In the Server name field, select the name of thedatabase server (typically the name of theserver you are using).
c. In the Authentication field, select WWiinnddoowwssAAuutthheennttiiccaattiioonn.
d. Click CCoonnnneecctt.
3. Under Object Explorer, right-click Databases andselect NNeeww DDaattaabbaassee.
4. In the New Database window, complete thefollowing tasks:
a. In the Database name field, enterTTrraacceerrEEnnsseemmbbllee.
NNoottee:: You can choose any name you like for thedatabase, but this procedure and thescreen captures in this document will useTTrraacceerrEEnnsseemmbbllee as the database name.If you choose a different name, substituteyour database name where appropriate.
b. Click OOKK (not Add, which would begin to createanother new database).
5. Navigate to the newly created database to verifythat it has been added.
Upon completion of these steps, the database shell iscreated, but its structure and Tracer Ensemble initialvalues are not yet in place.
Create the Database StructureThe database structure is provided on the installationdisk. Complete the following procedure to apply thestructure to your database:
1. Select File | Open | FFiillee......
2. Locate and open the TTrraacceerrEEnnsseemmbbllee..ddbb..ccrreeaattee..ssqqll file in the DDBBSSccrriippttss directory at the top level ofthe Tracer Ensemble installation media. (Reconnectto the database engine, if prompted, to proceed.)
3. Select the TTrraacceerrEEnnsseemmbbllee database.
4. On the Query menu, click EExxeeccuuttee.
5. In the Object Explorer sidebar, expand theTracerEnsemble database, and then expandTTaabblleess. There should be a list of tables starting withdbo.
Populate the Database with Initial ValuesThe initial values for the Tracer Ensemble database are
provided on the installation disk. Complete thefollowing procedure to apply the initial values to yourdatabase:
1. On the File menu, select Open | FFiillee......
2. Locate and open the TTrraacceerrEEnnsseemmbbllee..iinniittiiaall..ddaattaa..ssqqll file in the DDBBSSccrriippttss ddiirreeccttoorryy at the top levelof the Tracer Ensemble installation media.(Reconnect to the database engine, if prompted, toproceed.)
3. Select the TTrraacceerr EEnnsseemmbbllee database.
NNoottee:: Step 3 is easy to miss. Be sure that the newlycreated database appears in the pull-downmenu.
4. On the Query menu, click EExxeeccuuttee.
5. In the Object Explorer sidebar, expand the TracerESdatabase, and then expand TTaabblleess. There shouldbe a list of tables starting with dbo.
6. After executing the two database scripts, thedatabase tables should appear as in Figure 22. Toperform this check:
a. Expand TTaabblleess.
b. Right-click LLOOVV__TTiimmeeZZoonnee table, and thenselect SSeelleecctt TToopp 11000000 RRoowwss. You will see timezone data in the lower right quadrant of thewindow as in. If the scripts were not executedproperly, the table will either not be available orwill not contain any data.
If the table is not available or does not contain anydata, go back and re-execute the scripts.
Manually Upgrading the TracerEnsemble Database1. Determine the current version of Tracer Ensemble.
In Tracer Ensemble navigate to Actions andSettings | System | SSyysstteemm SSttaattuuss. The build willbe represented as X.X.XXX. This is required toupdate the database manually.
2. Open SQL Server Management Studio.
3. Log in with the appropriate user account.
4. Within the Object Explorer, expand DDaattaabbaasseess andlocate the database that is currently being used byTracer Ensemble. This can be determined by theTracer Ensemble Smart Client.
5. Within the Tracer Ensemble installation media,open the DDBBSSccrriippttss folder.
6. Using the current version of Tracer Ensemblelocated in the first step:
a. Locate the Upgrade.X.X.XXXto.Y.Y.YYY.sql orUpgrade.X.X.XXXto.Y.Y.Current.sql script,where XX..XX..XXXXXX is the current version. YY..YY..indicates the next available version. Double clickon this to open the script in SQL ServerManagement Studio.
CCoonnffiigguurree MMiiccrroossoofftt WWiinnddoowwss SSeerrvveerr
10 BAS-SVN024E-EN
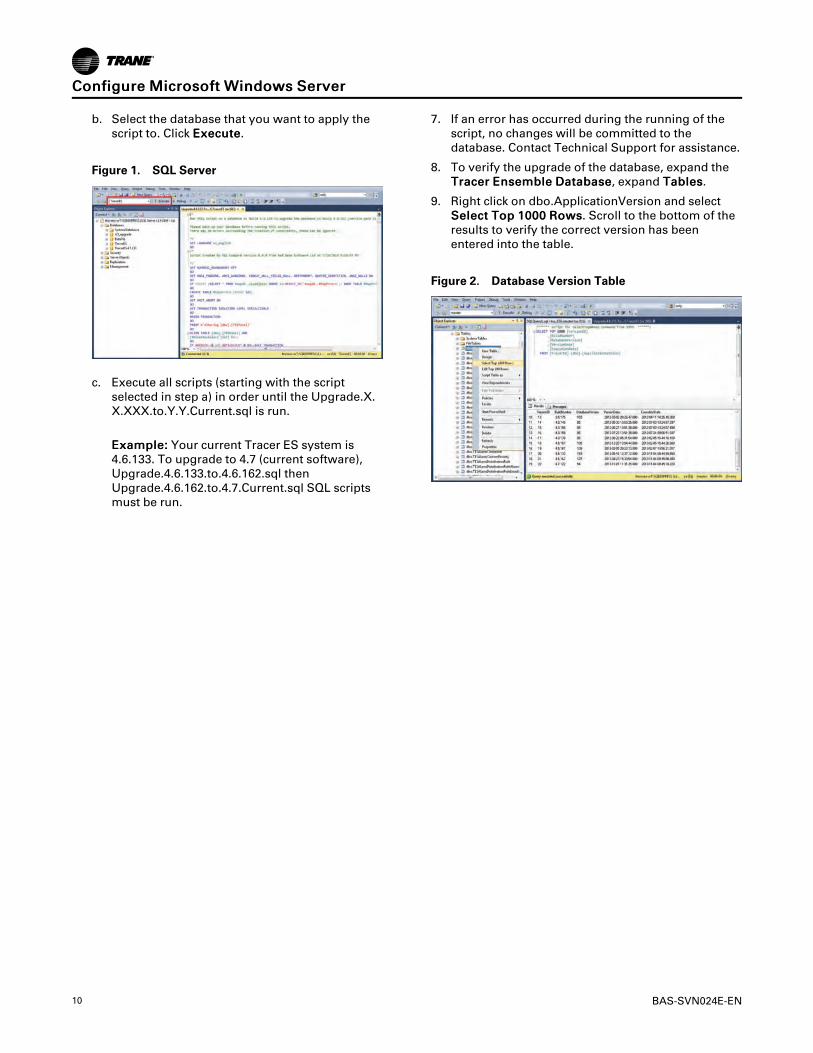
b. Select the database that you want to apply thescript to. Click EExxeeccuuttee.
Figure 1. SQL Server
c. Execute all scripts (starting with the scriptselected in step a) in order until the Upgrade.X.X.XXX.to.Y.Y.Current.sql is run.
EExxaammppllee:: Your current Tracer ES system is4.6.133. To upgrade to 4.7 (current software),Upgrade.4.6.133.to.4.6.162.sql thenUpgrade.4.6.162.to.4.7.Current.sql SQL scriptsmust be run.
7. If an error has occurred during the running of thescript, no changes will be committed to thedatabase. Contact Technical Support for assistance.
8. To verify the upgrade of the database, expand theTTrraacceerr EEnnsseemmbbllee DDaattaabbaassee, expand TTaabblleess.
9. Right click on dbo.ApplicationVersion and selectSSeelleecctt TToopp 11000000 RRoowwss. Scroll to the bottom of theresults to verify the correct version has beenentered into the table.
Figure 2. Database Version Table
CCoonnffiigguurree MMiiccrroossoofftt WWiinnddoowwss SSeerrvveerr

BAS-SVN024E-EN 11
Install Tracer Ensemble Application
1. Load the Tracer Ensemble installation media andwait for the Autorun program. If Autorun does notbeing automatically, browse to MMyy CCoommppuutteerr, rightclick on the disk drive, and select AAuuttooPPllaayy..
2. The installer will determine if the correct .NetFramework is installed. If the correct version is notinstalled, the Tracer Ensemble installer willdownload and initiate the .Net Framework installer.
NNoottee:: If Internet access is not available to the server,a manual download and installation of .NetFramework is required. Tracer Ensemble 4.7+will not install if the correct framework is notin place.
a. When prompted, install the .Net Frameworkversion.
Figure 3. Tracer Ensemble Installer .Net Update
b. Upon installation of the .Net Framework, theTracer Ensemble installer will proceed withinstallation.
Figure 4. Configuring Roles and Features
3. On the welcome screen, click NNeexxtt.
Figure 5. Welcome
4. On the Installation Type screen, select your desiredmethod for installing Tracer Ensemble:
• Select IInnssttaallll TTrraacceerr EEnnsseemmbbllee aanndd ccrreeaatteeddaattaabbaassee if the SQL Server resides on the same
server or SQL Server administrative credentialsare available. With this option, the installationprogram will create the database and installTracer Ensemble.
• Select IInnssttaallll TTrraacceerr EEnnsseemmbbllee oonnllyy if the SQLServer is managed by a DatabaseAdministrator, or administrative credentials arenot known. With this option the installationprogram will only install Tracer Ensemble;database creation and script execution have tobe done manually.
Figure 6. Installation Type
5. On the Custom Setup screen, select the languagesyou want to install, and then click NNeexxtt.
Figure 7. Language Setting
6. On the Customer Information screen, complete thefields according to your preferences, and then clickNNeexxtt.
• UUsseerr NNaammee is usually the name of the customerwho owns or administers the software.
• OOrrggaanniizzaattiioonn is usually the company, agency,or other organization that owns the softwareand the building network.
Figure 8. Customer Information
7. On the Destination Folder screen, accept the defaultdestination folder (recommended) or select adifferent folder by clicking CChhaannggee and specifying adifferent folder. Then click NNeexxtt..
Figure 9. Destination Folder
8. On the Network Settings screen, select a networkconnection, specify the BACnet Device Instance,and then click NNeexxtt. Here is some additionalinformation:
• The network connection is identified by itsconnection name, IP address, and the name ofthe network interface adapter installed.
• The BBAACCnneett DDeevviiccee IInnssttaannccee is a uniquenumber that the BACnet network uses forrouting alarms from Tracer Summit to TracerEnsemble. Device instance 125 is the defaultand should be used unless already used.

12 BAS-SVN024E-EN
Figure 10. Network Settings
9. On the Database Settings screen, complete thefields according to the TracerES database and clickNNeexxtt.
• If IInnssttaallll TTrraacceerr EEnnsseemmbbllee aanndd ccrreeaatteeddaattaabbaassee has been selected:
– DDaattaabbaassee SSeerrvveerr is the server name of theSQL server computer. If you are not sure ofthe name, open the SQL ServerManagement Studio. The server name isshown on the Connect to Server window. Ifthe SQL Server Management Studio isalready running the server name is at the toplevel of the navigation tree, and on the titleof the database when selected. The databaseserver name may also contain the SQLinstance name if the default instance is notused.
– DDaattaabbaassee NNaammee will be the name of thedatabase to be created, TracerES should beused unless otherwise noted by DatabaseAdministrator or customer request.
• If IInnssttaallll TTrraacceerr EEnnsseemmbbllee has been selected:
– DDaattaabbaassee SSeerrvveerr is the server name of theSQL server computer. If you are not sure ofthe name, open the SQL ServerManagement Studio. The server name isshown on the Connect to Server window. Ifthe SQL Server Management Studio isalready running the server name is at the toplevel of the navigation tree, and on the titleof the database when selected.
– DDaattaabbaassee NNaammee is the name of the TracerEnsemble database. It should be TracerESunless the database creator chose a differentname during the setup.
• AAuutthheennttiiccaattee ccoonnnneeccttiioonn
– Select WWiinnddoowwss aauutthheennttiiccaattiioonn...... to useyour Windows login credentials to
authenticate your access to the TracerEnsemble database. Choose this option ifyou are typically able to make changes tothe database structure without needing tologin using a different administratoraccount.
If IInnssttaallll TTrraacceerr EEnnsseemmbbllee aanndd ccrreeaatteeddaattaabbaassee was selected, the installationprogram will construct the databaseusing the Windows credentials. TheTracer Ensemble system will access thedatabase using the following SQLusername and password:
Username: tranedbuser
Password: tes!2345
If IInnssttaallll TTrraacceerr EEnnsseemmbbllee was selected,the Tracer Ensemble system will accessthe database using the Windowscredentials of the current user.
– Select SSeerrvveerr aauutthheennttiiccaattiioonn......, and thenspecify the LLooggiinn IIDD and PPaasssswwoorrdd to beused to log in to the database. Choose thisoption if you know that you need to use adifferent administrator account to and makechanges to the database.
If ccrreeaattee ddaattaabbaassee was selected, theentered SQL user is required to haveeither DbOwner or SysAdmin role for theinstallation to execute successfully. Theinstallation program will construct thedatabase with the specified SQL usercredentials. Tracer Ensemble will accessthe database using the following SQLusername and password:
Username: tranedbuser
Password: tes!2345
If IInnssttaallll TTrraacceerr EEnnsseemmbbllee was selected,the Tracer Ensemble system will accessthe database using the specified SQLcredentials.
Figure 11. Database Settings
10. On the E-mail Settings screen, complete the fieldsaccording to your e-mail system and click NNeexxtt.
• If you do not want to use e-mail notificationfrom Tracer Ensemble, clear EEnnaabbllee EE--mmaaiillsseerrvviicceess. The rest of the screen can be ignored.
• If you do want to use e-mail notification, selectEEnnaabbllee EE--mmaaiill sseerrvviicceess and complete the restof the screen with information about the e-mailaccount you will use. These settings are thesame as you would find in setting up any locale-mail client. The e-mail service provider,whether internal or external, must have createdthe account and should be able to provide the
IInnssttaallll TTrraacceerr EEnnsseemmbbllee AApppplliiccaattiioonn

BAS-SVN024E-EN 13
necessary information.
Figure 12. E-mail Settings
11. On the Ready to Install screen, select or clear anoption as desired, and then click NNeexxtt.
• Select SSttaarrtt AApppplliiccaattiioonn SSeerrvveerr wwhheennccoommpplleettee if you would like to run the TracerEnsemble server as soon as installation iscomplete.
• Clear SSttaarrtt AApppplliiccaattiioonn SSeerrvveerr wwhheennccoommpplleettee if you prefer to start the servermanually after installation.
Figure 13. Ready to Install
12. Wait for the installation to complete.
13. When the InstallShield Wizard Completed screenappears, click FFiinniisshh.
IInnssttaallll TTrraacceerr EEnnsseemmbbllee AApppplliiccaattiioonn
14 BAS-SVN024E-EN
Tracer Ensemble First Login
You can use the built-in administrative account to login to Tracer Ensemble for the first time. This will permityou to confirm that the server is running as expected.
To log in to Tracer Ensemble:
1. Open one of the following web browsers:
• Microsoft Internet Explorer
• Mozilla Firefox
• Apple Safari
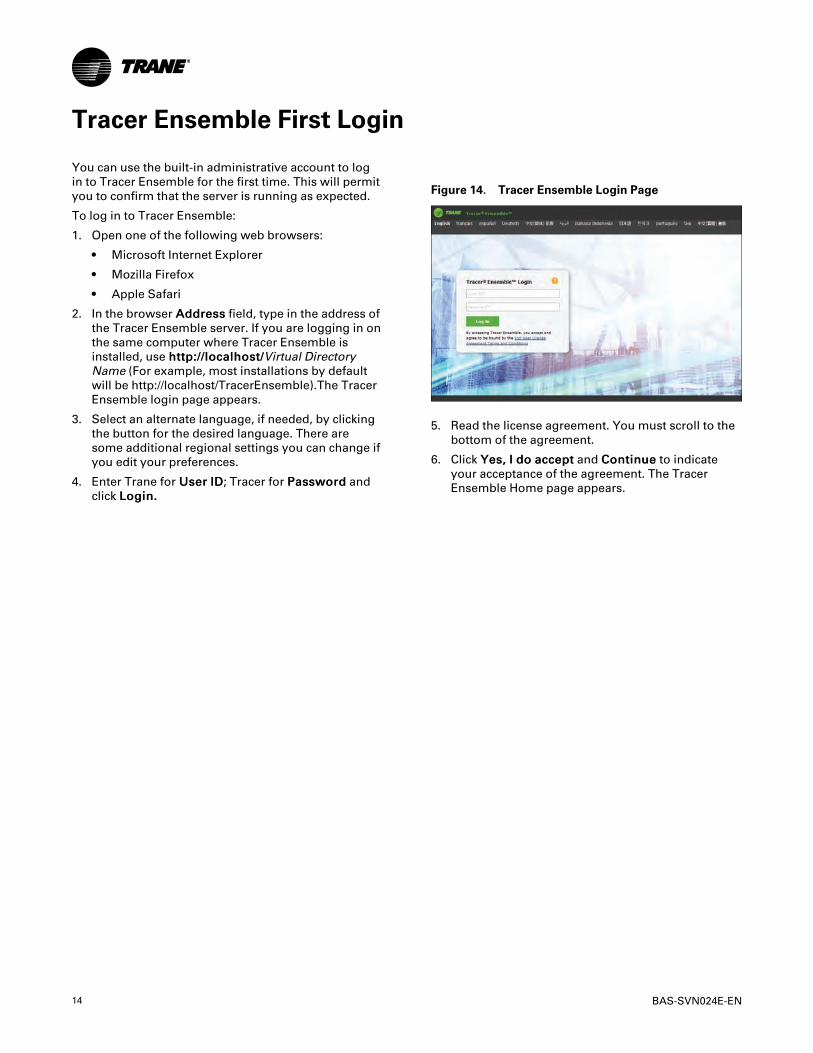
2. In the browser AAddddrreessss field, type in the address ofthe Tracer Ensemble server. If you are logging in onthe same computer where Tracer Ensemble isinstalled, use hhttttpp::////llooccaallhhoosstt//Virtual DirectoryName (For example, most installations by defaultwill be http://localhost/TracerEnsemble).The TracerEnsemble login page appears.
3. Select an alternate language, if needed, by clickingthe button for the desired language. There aresome additional regional settings you can change ifyou edit your preferences.
4. Enter Trane for UUsseerr IIDD; Tracer for PPaasssswwoorrdd andclick LLooggiinn..
Figure 14. Tracer Ensemble Login Page
5. Read the license agreement. You must scroll to thebottom of the agreement.
6. Click YYeess,, II ddoo aacccceepptt and CCoonnttiinnuuee to indicateyour acceptance of the agreement. The TracerEnsemble Home page appears.

BAS-SVN024E-EN 15
Licensing
1. Select Actions and Settings | TTrraacceerr EEnnsseemmbblleeLLiicceennssiinngg.
2. Enter the SSooffttwwaarree SSeerriiaall NNuummbbeerr.
Figure 15. Enter Software Serial Number
3. Click GGeenneerraattee SSeerrvveerr IIDD.
Figure 16. Generate Server ID
4. Click CCooppyy ttoo CClliippbbooaarrdd to copy the Server ID toyour clipboard.
5. Click GGoo TToo WWeebbssiittee to create a license file.
6. Once you have created a license file, click BBrroowwsseeand select the license file.
7. Click UUppllooaadd LLiicceennssee FFiillee.
Figure 17. Upload License File

16 BAS-SVN024E-EN
Updating Tracer Ensemble
Complete this procedure if you are installing TracerEnsemble software on a system that already has TracerES V2.5 or higher installed. If Tracer ES is older thanV2.5, it must be upgraded to V2.5 before upgrading tothe current version. The installation program willautomatically make changes to a previous version ofthe Tracer Ensemble database to make it compatiblewith the latest version of the software
NNoottee:: Tracer ES v4.6+ uses a new license file formatwhich requires a valid Software MaintenancePlan (SMP) license in order to upgrade. A validlicense file is required before Tracer Ensembleinstaller will perform the upgrade.
To upgrade Tracer Ensemble:
1. Copy the Tracer Ensemble installation media to adefined location on the workstation.
2. The installer will determine if the correct .NetFramework is installed. If the correct version is notinstalled, the Tracer Ensemble installer willdownload and initiate the .Net Framework installer.
NNoottee:: If Internet access is not available to the server,a manual download and installation of .NetFramework is required. Tracer ES 4.7+ willnot install if the correct framework is not inplace.
a. When prompted, install the .Net Framework.
b. Upon installation of the .Net Framework, theTracer Ensemble installer will proceed withinstallation.
Figure 18. Configuring Roles and Features
3. On the welcome screen, click NNeexxtt.
Figure 19. Welcome
4. The installer will analyze the existing TracerEnsemble version and license.
Figure 20. Tracer Ensemble License
UUppggrraaddiinngg ffrroomm TTrraacceerr EESS vv44..55 oorr bbeellooww
a. The installer will determine that the currentlicense is incompatible with Tracer ES v4.6+ andwill create a new license request file and savedit the desktop. The installer will not install TracerES 4.6+ until a valid license is obtained.
b. Using the newly created license request file andthe Tracer Licensing page, update the existinglicense with the new Server ID using the ChangeHardware path on the licensing server.
c. Using the Tracer Licensing page, update thelicense with an appropriate SoftwareMaintenance Plan.
d. Save the update license.
BAS-SVN024E-EN 17
e. Re-run the installer if cancelled.
f. When prompted, upload the new license file.
UUppggrraaddiinngg ffrroomm TTrraacceerr EESS 44..66++
a. The installer will determine if the current licensehas a valid SMP.
• If a valid plan is detected the installerproceed to Step 6.
• If an invalid SMP is detected a new licenserequest file and saved it the desktop. Theinstaller will not install Tracer ES 4.6+ until alicense with a valid SMP is detected.
b. Using the Tracer Licensing page, update thelicense with an appropriate SoftwareMaintenance Plan.
c. Save the update license.
d. Re-run the installer if cancelled.
e. When prompted, upload the new license file.
5. On the Database upgrade screen, verify thefollowing:
• Database server name
• Database name. This is typically TTrraacceerrEEnnsseemmbbllee, but may vary.
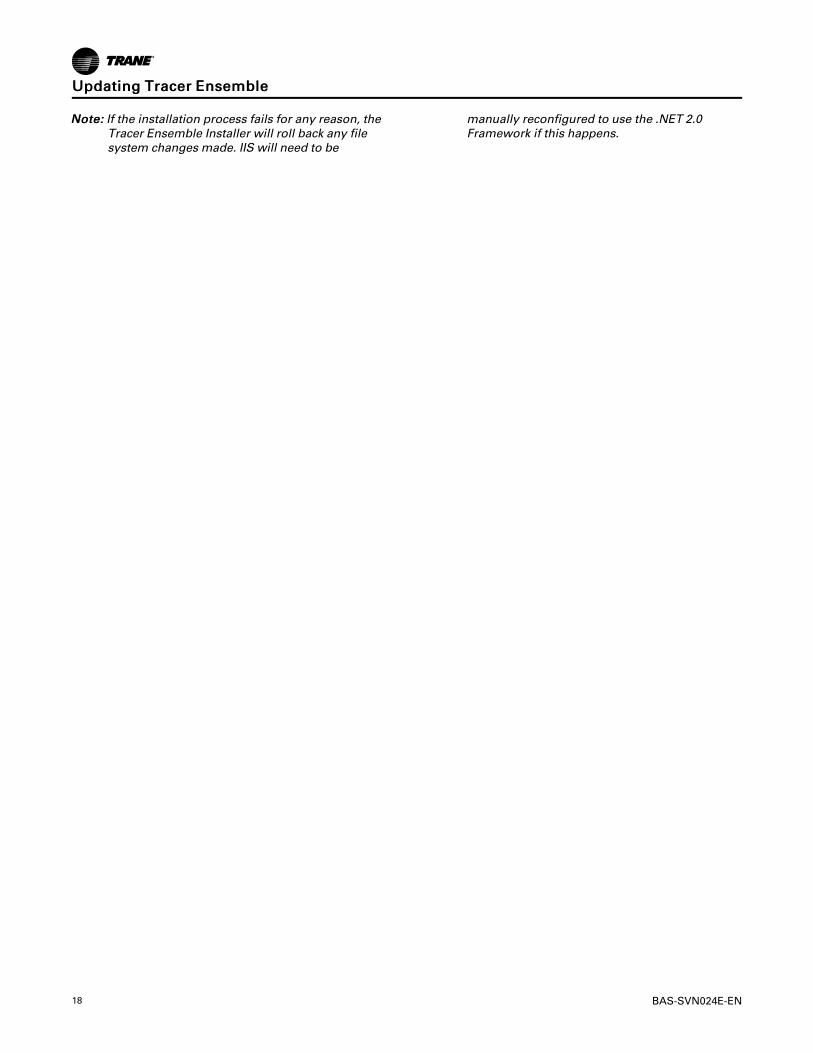
6. Select the method for upgrading the database:
• Select DDoo nnoott uuppggrraaddee tthhee ddaattaabbaassee if you areupdating the database manually. This option istypically used if the database is managed by anSQL DBA or another user.
• Select UUppggrraaddee tthhee ddaattaabbaassee if you want theinstallation program to automatically update thedatabase to the current version.
Figure 21. Database Upgrade
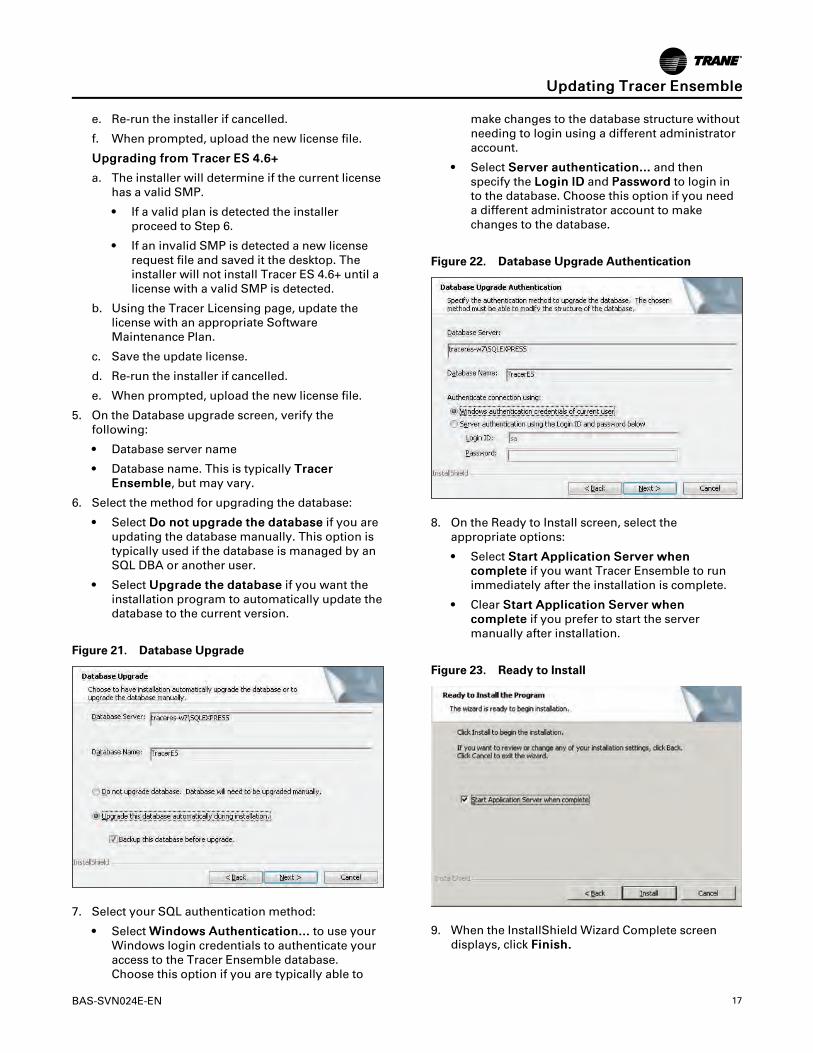
7. Select your SQL authentication method:
• Select WWiinnddoowwss AAuutthheennttiiccaattiioonn...... to use yourWindows login credentials to authenticate youraccess to the Tracer Ensemble database.Choose this option if you are typically able to
make changes to the database structure withoutneeding to login using a different administratoraccount.
• Select SSeerrvveerr aauutthheennttiiccaattiioonn...... and thenspecify the LLooggiinn IIDD and PPaasssswwoorrdd to login into the database. Choose this option if you needa different administrator account to makechanges to the database.
Figure 22. Database Upgrade Authentication
8. On the Ready to Install screen, select theappropriate options:
• Select SSttaarrtt AApppplliiccaattiioonn SSeerrvveerr wwhheennccoommpplleettee if you want Tracer Ensemble to runimmediately after the installation is complete.
• Clear SSttaarrtt AApppplliiccaattiioonn SSeerrvveerr wwhheennccoommpplleettee if you prefer to start the servermanually after installation.
Figure 23. Ready to Install
9. When the InstallShield Wizard Complete screendisplays, click FFiinniisshh..
UUppddaattiinngg TTrraacceerr EEnnsseemmbbllee
18 BAS-SVN024E-EN
NNoottee:: If the installation process fails for any reason, theTracer Ensemble Installer will roll back any filesystem changes made. IIS will need to be
manually reconfigured to use the .NET 2.0Framework if this happens.
UUppddaattiinngg TTrraacceerr EEnnsseemmbbllee
BAS-SVN024E-EN 19
Advanced Configurations and FunctionsWindows ServicesWindows provides functionality to start and stopservices that are running on the server. TracerEnsemble runs as a services and can be started,stopped, or restarted.
To start or stop the service:
1. Click SSttaarrtt, and then click CCoonnttrrooll PPaanneell.
2. Double-click AAddmmiinniissttrraattiivvee TToooollss.
3. Double-click SSeerrvviicceess.
4. Select TTrraannee TTrraacceerrEESS AApppplliiccaattiioonn SSeerrvveerrservice.
5. Look in the Status column to determine whether ornot the service is running.
• Started means the service is running.
• Stopped means the service is not running.
6. Choose an action:
• To start the service, on the AAccttiioonn menu, clickSSttaarrtt.
• To stop the service, on the AAccttiioonn menu, clickSSttoopp.
• The service may require several minutes to startor stop completely.
HTTPS and SSL – SecureCommunications ConfigurationThe following procedure is necessary only if yourequire secure communications on the TracerEnsemble website, specifically HTTPS. If you do notrequire secure communications, you should use thestandard HTTP connection established by theinstallation program and IIS configuration on theMicrosoft Server.
The following steps are involved when configuringHTTPS on the Microsoft Windows Sever:
1. Obtain a certificate.
Before proceeding, you must obtain a servercertificate. There are two parts to this step. Youmust generate a certificate request, then obtain theactual certificate. Generating a certificate request isnot a part of Tracer Ensemble, but rather a part ofthe Microsoft Server that Tracer Ensemble isinstalled on. The certificate request generation willdiffer slightly depending on the Microsoft WindowsServer Platform on which you are installing it.
There are many certificate vendors and videos to
aid customers through this process:
• https://www.youtube.com/watch?v=OIx5kg0YK7U
• https://www.godaddy.com/help/ssl-certificates-1000006
• https://www.digicert.com/csr-creation.htm
After you have the Certificate Request, there aremultiple ways to obtain a certificate. One method isto obtain a trusted certificate through a trustedcertificate vendor.
Examples of Trusted Certificate Vendors are:
• www.verisign.com
• www.godaddy.com
You can also create a self-signed certificate;however, the process for this will depend on theMicrosoft Windows Server Operating SystemPlatform you are using and what version of IIS isrunning.
Microsoft Corporation provides documentation onhow to do this for each version:
• https://support.microsoft.com/en-us/help/228991
• https://msdn.microsoft.com/en-us/library/ff699202.aspx
2. Install the certificate.
The installation method will vary depending onyour web server and the type of certificate youpurchase. Specific installation instructions,resources, and support are typically offered by yourcertificate provider or your web host.
Below are links to Trusted Certificate Vendorsinstructions on installing their certificates:
• https://www.godaddy.com/help/ssl-certificates-1000006
• https://www.wikihow.com/Install-an-SSL-Certificate
3. Disable/redirect HTTP.
After HTTPS is enabled on the Microsoft WindowsServer Platform hosting Tracer Ensemble, it ispossible to disable/redirect HTTP traffic through theMicrosoft Windows Server Platform.
Below is a Microsoft link with instructions on thisprocess for multiple Microsoft Server Platforms:
• https://docs.microsoft.com/en-us/iis/configuration/system.webServer/httpRedirect/
20 BAS-SVN024E-EN
Appendix A: Virtual Machine RequirementsFor Tracer Ensemble to be licensed correctly, theprocessor signature must be persisted within theserver. This is CPUID EAX=1 instruction set.
HyperV ConfigurationHyperV Virtual server must be configured withProcessor Compatibility mode enabled. This obscuresthe CPUID instruction set allowing Tracer Ensemble
licensing to remain operational upon migration orrestart.
VMware ESX(i)VMWare virtual machines must have the CPUID leavesconfigured to persist the EAX within the virtualmachine configuration file.

BAS-SVN024E-EN 21
Appendix B: Advanced SQL Configuration
If it is determined that the SQL server is consumingmost or all of the memory of the server that SQL andTracer Ensemble is installed on, follow these steps tolimit the amount of memory that the SQL Server canuse.
1. Open SQL Management Studio, right click on theSQL Server, and select PPrrooppeerrttiieess.
Figure 24. Select SQL Server Properties
2. Select MMeemmoorryy and set the Maximum servermemory to XXXX MB to limit the SQL servermemory consumption to your specified limit.
NNoottee:: Determining what to limit the SQL Serversmemory consumption will need to be doneon an installation by installation basis.
Figure 25. SQL Server Properties
3. Click OOKK.
4. Restart SQL for the changes to take affect.
5. Restart Tracer Ensemble to reinitialize theconnection to the SQL database.
22 BAS-SVN024E-EN
Appendix C: Backup and RestoreBackupA disaster recovery solution for Tracer Ensemblesystems server should be identified and executed on acustomer agreed upon basis. Typically either anautomated or manual backup of Tracer Ensemble filesand database is required to accomplish this. There arenumerous software solutions available at all costpoints to accomplish an automated backup solution.Talk with an industry professional to select the bestsolution for your application.
The following files and databases are critical to TracerEnsemble and need to be backed up:
SQL Database
• Tracer Ensemble database
• Master database (used in extreme disaster recoverycircumstances)
Tracer Ensemble files
• <drive path>/Trane/TracerES/Server/bin/trane.OWS.server.exe.config
• <drive path>/Trane/TracerES/Server/metadata/administration/license/lic.dat
• <drive path>/Trane/TracerES/UI/Web.config
• <drive path>/Trane/TracerES/UI/CustomApplications
• <drive path>/Trane/TracerES/UI/Graphics
RestoreThe backup files identified above are required torestore a Tracer Ensemble system to the previous state.Examples of when you need to restore TracerEnsemble include when the operating system (OS) foryour Tracer Ensemble server has been reinstalled,when the Tracer Ensemble server is moved to newhardware, or a Virtual Machine is created for TracerEnsemble. The process to restore Tracer Ensemble isthe same for each situation.
To restore Tracer Ensemble:
1. Using SQL management studio restore the TracerEnsemble database.
2. Identify the Tracer Ensemble version to install onthe new server.
a. After the Tracer Ensemble database has beenrestored, expand the database folder, TracerEnsemble database and tables.
b. Locate the dbo.ApplicationVersion table, right
click, and select top 1000 rows.
c. Note the application version (last row is thecurrent version of software from backup).
3. Install the Tracer Ensemble version identified instep 2 for proper restore.
a. Select Install Tracer Ensemble only.
b. Populate the database information with therestored Tracer Ensemble database name anduser credentials of the SQL server.
c. Do not start Application Server after installationis complete.
NNoottee:: If an upgrade is desired at this time werecommend restoring the Tracer Ensemblesystem, verify operation and then proceedwith a software upgrade.
4. Copy the following files to the Tracer Ensembleinstallation location:
• <drive path>/Trane/TracerES/Server/bin/trane.OWS.server.exe.config
• <drive path>/Trane/TracerES/UI/Web.config
• <drive path>/Trane/TracerES/UI/CustomApplications
• <drive path>/Trane/TracerES /UI/Graphics
5. Start Tracer Ensemble.
6. Log in o Tracer Ensemble. Navigate to Actions andSettings | TTrraacceerr EEnnsseemmbbllee LLiicceennssiinngg.
7. Click RReeggiisstteerr SSiittee LLiicceennssee.
8. All information should be populated. Licensinginformation cannot be changed during this process.If it is not populated, populate the required fieldsand click NNeexxtt.
9. Download a new license request file to update theServer ID within the Trane licensing system.
10. See Updating Tracer Ensemble for updating licenseserver ID.
11. Download new license from Trane licensingsystem. Upload new license to Tracer Ensemble.
12. Navigate to Actions and Settings | TTrraacceerrEEnnsseemmbbllee LLiicceennssiinngg.
13. Click VViieeww PPaanneell LLiicceennssiinngg. Activate panels thatwere deactivated during the restore process.
14. Verify communications is restored to systempanels.
15. Verify operation of Tracer Ensemble system.

BAS-SVN024E-EN 23
Appendix D: Direct Link with Tracer SCDirect link allows Tracer Ensemble users to access theTracer SC user interface from links within TracerEnsemble without requiring an additional log on toTracer SC. These links are created and displayed forbuildings with Tracer SC V3.1+. Both Tracer Ensembleand Tracer SC must be configured for direct link access.
Direct Link Requires:
• Tracer ES V3.5+
• •Tracer SC V3.5+ (high performance user interface)
Single Sign On for Direct Link Requires:
• •Tracer ES V4.0+
• •Tracer SC V3.5+ (high performance user interface)
Configuring Tracer SC for DirectLink1. Log in to the Tracer SC user interface via the Tracer
SC application or Tracer Ensemble direct link.
Figure 26. Tracer SC Login Page
Figure 27. Access Tracer SC via Tracer EnsembleDirect LInk
2. Click on TToooollss.
3. Double click on TTrraacceerr EEnnsseemmbbllee IIPP AAddddrreessss.
Figure 28. Tracer Ensemble IP Address
4. Enter the IP address of the Tracer Ensemble server.
Figure 29. Tracer Ensemble Server IP Address
5. Click SSaavvee.
NNoottee:: This process must be repeated for every TracerSC that you want to access from Tracer ES forsingle sign on to work. This is not required fordirect links from Tracer Ensemble to functionproperly, but users will need to log on to TracerSC when accessing it from Tracer Ensemble ifnot set up correctly.
Configuring Tracer Ensemble forDirect Link1. In Tracer Ensemble, click the AAccttiioonnss aanndd SSeettttiinnggss
icon.
2. Click UUsseerr PPrrooffiilleess.
3. Click the appropriate user name.
4. Click EEddiitt PPrrooffiillee.
5. In the SSCC UUsseerr IIDD field, enter the Tracer SC username.
24 BAS-SVN024E-EN
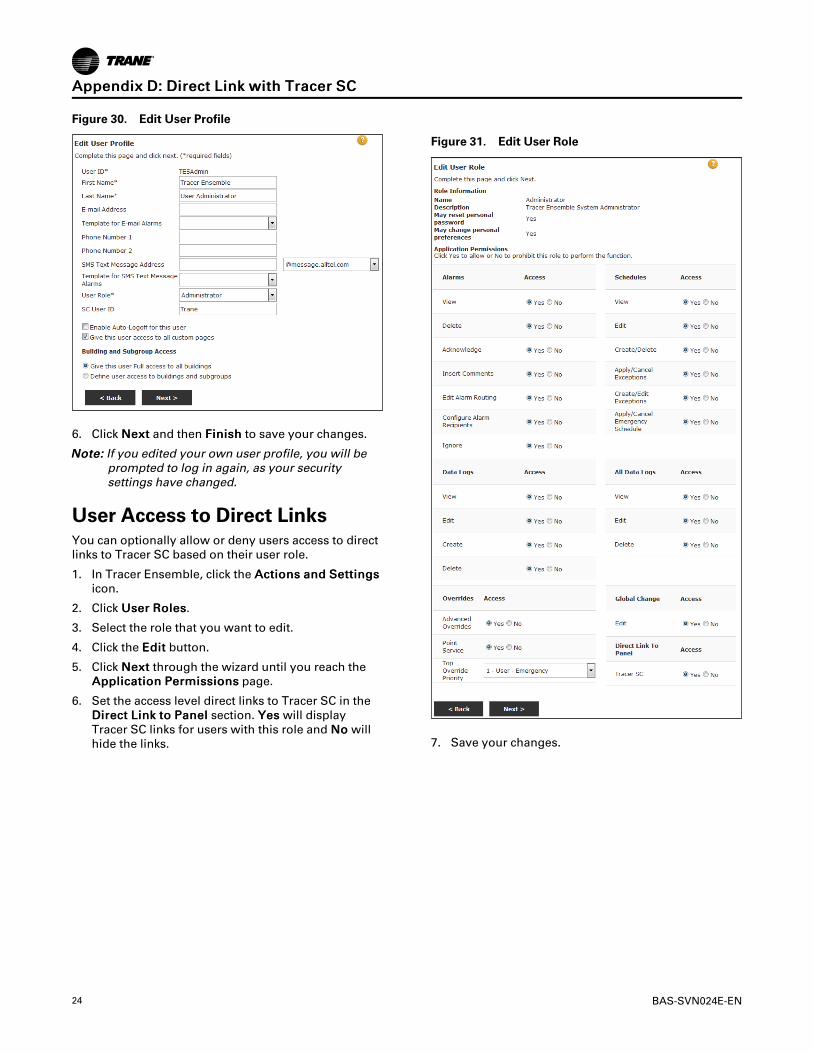
Figure 30. Edit User Profile
6. Click NNeexxtt and then FFiinniisshh to save your changes.
NNoottee:: If you edited your own user profile, you will beprompted to log in again, as your securitysettings have changed.
User Access to Direct LinksYou can optionally allow or deny users access to directlinks to Tracer SC based on their user role.
1. In Tracer Ensemble, click the AAccttiioonnss aanndd SSeettttiinnggssicon.
2. Click UUsseerr RRoolleess.
3. Select the role that you want to edit.
4. Click the EEddiitt button.
5. Click NNeexxtt through the wizard until you reach theAApppplliiccaattiioonn PPeerrmmiissssiioonnss page.
6. Set the access level direct links to Tracer SC in theDDiirreecctt LLiinnkk ttoo PPaanneell section. YYeess will displayTracer SC links for users with this role and NNoo willhide the links.
Figure 31. Edit User Role
7. Save your changes.
AAppppeennddiixx DD:: DDiirreecctt LLiinnkk wwiitthh TTrraacceerr SSCC

BAS-SVN024E-EN 25
NNootteess

26 BAS-SVN024E-EN
NNootteess

BAS-SVN024E-EN 27
NNootteess

Trane - by Trane Technologies (NYSE: TT), a global innovator - creates comfortable, energy efficientindoor environments for commercial and residential applications. For more information, please visittrane.com or tranetechnologies.com.
Trane has a policy of continuous product and product data improvements and reserves the right to change design and specifications withoutnotice. We are committed to using environmentally conscious print practices.
BAS-SVN024E-EN 29 Apr 2020
Supersedes BAS-SVN024D-EN (March 2019) ©2020 Trane