installing and setup mysql-kit - thecus
TRANSCRIPT
1
Installing and Setup MySQL-kitOn Thecus® OS6
2013/10
2
� OverviewFirst make sure that your ThecusOS 6 is up-to-date.
•InstallingMySQL-kit
•AccessingphpMyAdmin
•Changingyourpassword
•Piczza’sdatabase
Program DetailsMySQL•Server: Localhost via UNIX socket•Server version: 5.5.14•Protocol version: 10
WebServer•Apache/2.2.21 (Fedora)•MySQL client version: 5.5.14•PHP extension: mysqli
phpMyAdmin•Version information: 3.4.5, latest stable version: 4.0.8
3
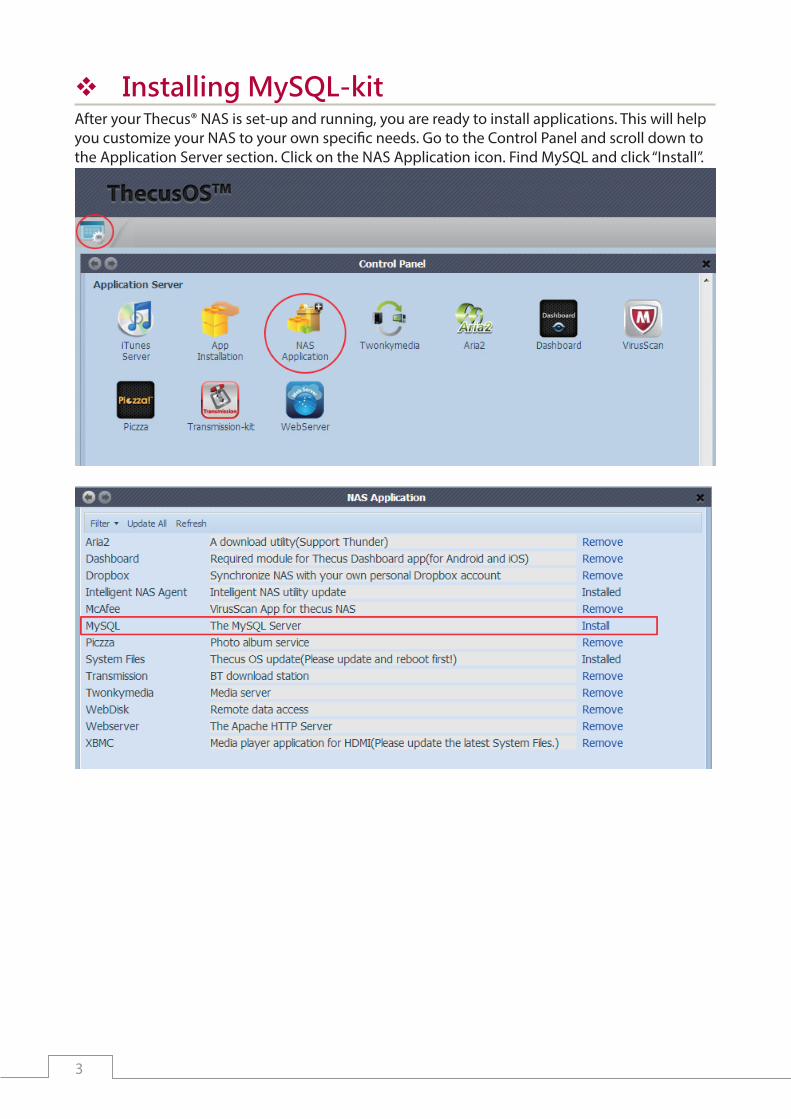
� Installing MySQL-kitAfter your Thecus® NAS is set-up and running, you are ready to install applications. This will help you customize your NAS to your own specific needs. Go to the Control Panel and scroll down to the Application Server section. Click on the NAS Application icon. Find MySQL and click “Install”.
4
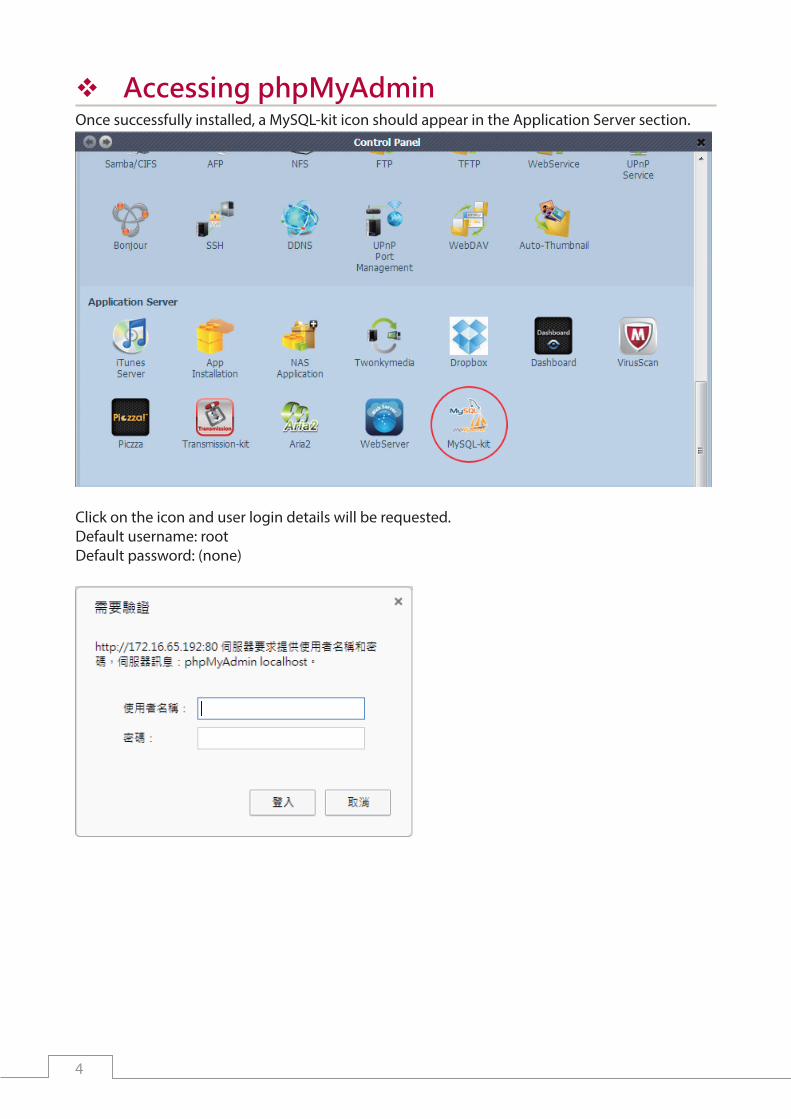
� Accessing phpMyAdminOnce successfully installed, a MySQL-kit icon should appear in the Application Server section.
Click on the icon and user login details will be requested.Default username: rootDefault password: (none)

5
� Changing your passwordAfter logging in, you will see the phpMyAdmin homepage. There will be a message at the bottom of the page that suggests you change your password.
Select “mysql” in the left column, and click on “user” which is at the bottom of the list. Click “Edit” in the “Host: localhost” line.
6
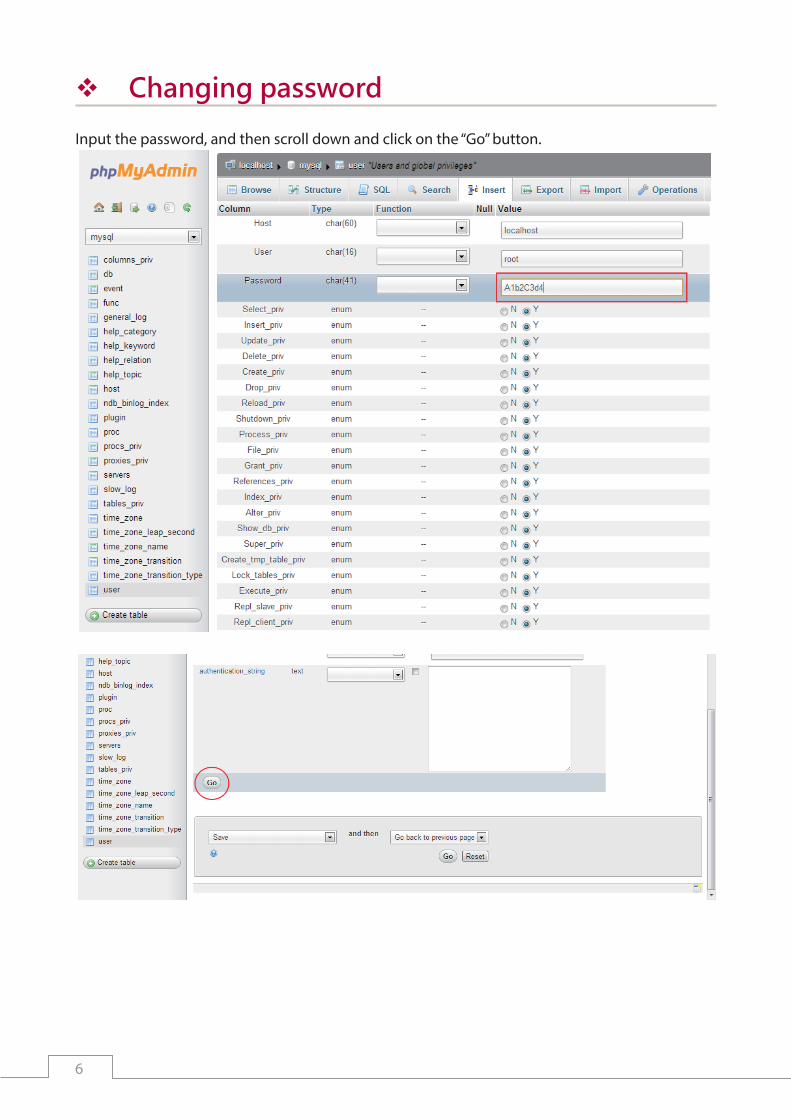
� Changing password
Input the password, and then scroll down and click on the “Go” button.
7
� Piczza’s databaseYou may notice that Piczza’s database is also listed. If you remove “MySQL-kit”, Piczza’s database will not be deleted from your NAS, so don’t worry.