installing oracle web services manager 1. install j2ee...
TRANSCRIPT

Installing Oracle Web Services Manager
get the installer for soa suite, ex. soa_linux_x86_101310_disk1.cpioget the installer for wsm, ex soa_linux_x86_ws_mgr_101310.cpio
1. Install J2EE server, from SOA suite installation$cpio -idv < soa_linux_x86_101310_disk1.cpio
$./runInstaller(if there are some prerequisites failing, use option -ignoreSysPrereqs)
-set installation directory-choose advanced install
Figure 1: first step installing j2ee server
Figure 2: selecting only j2ee server, to minimize footprint. This is just to hold WSM base components.

Figure 3: Choose automatic port configuration for simplicity. if manual control of ports are needed, create a staticports.ini file.
Figure 4: Set appropriate Application Server instance name, and OC4J instance name
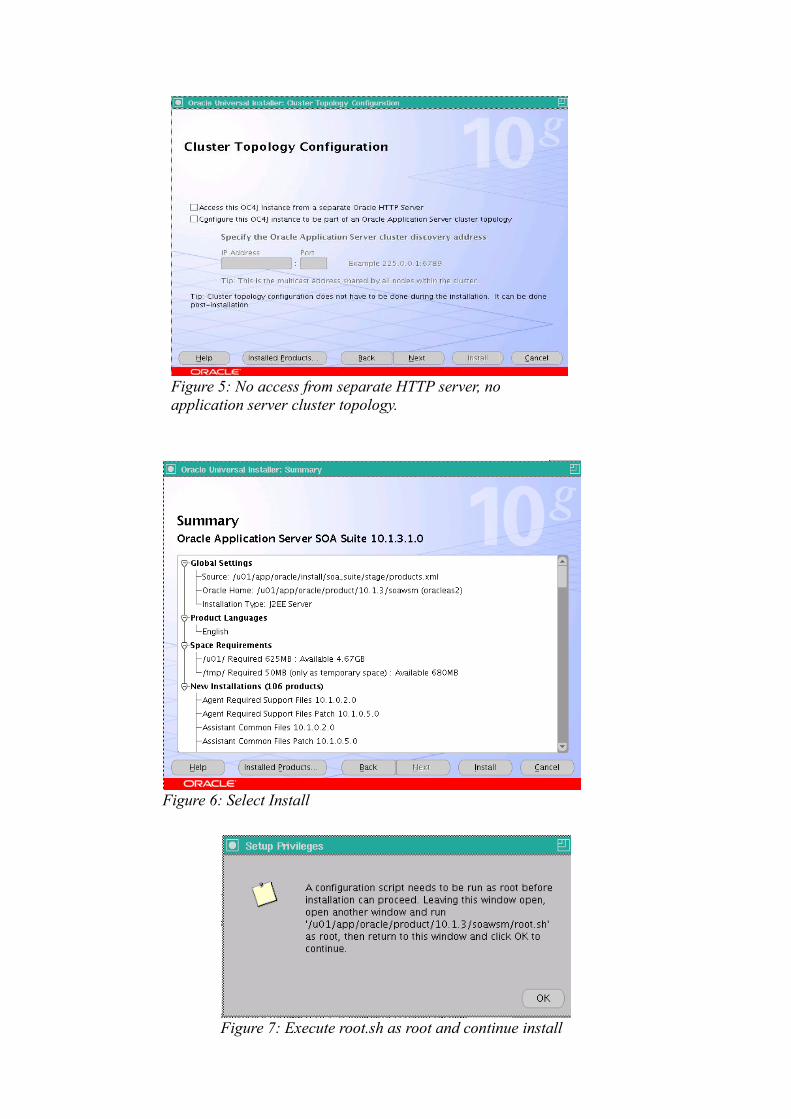
Figure 5: No access from separate HTTP server, no application server cluster topology.
Figure 7: Execute root.sh as root and continue install
Figure 6: Select Install
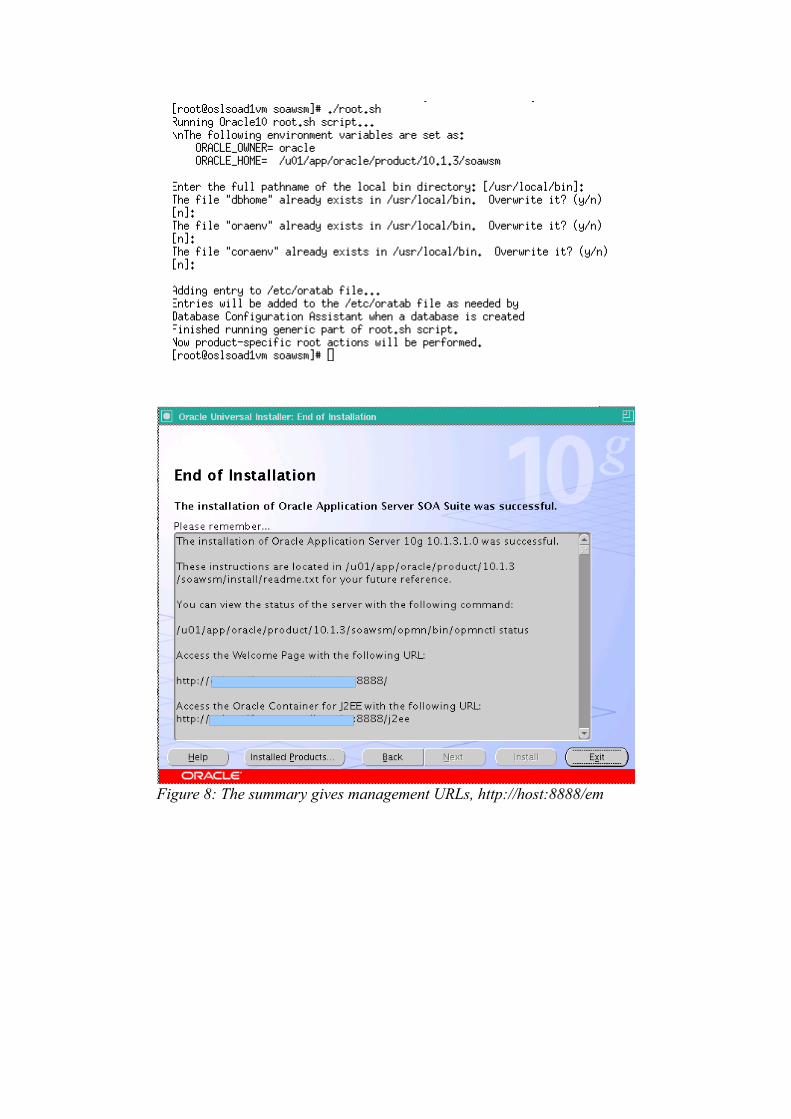
Figure 8: The summary gives management URLs, http://host:8888/em
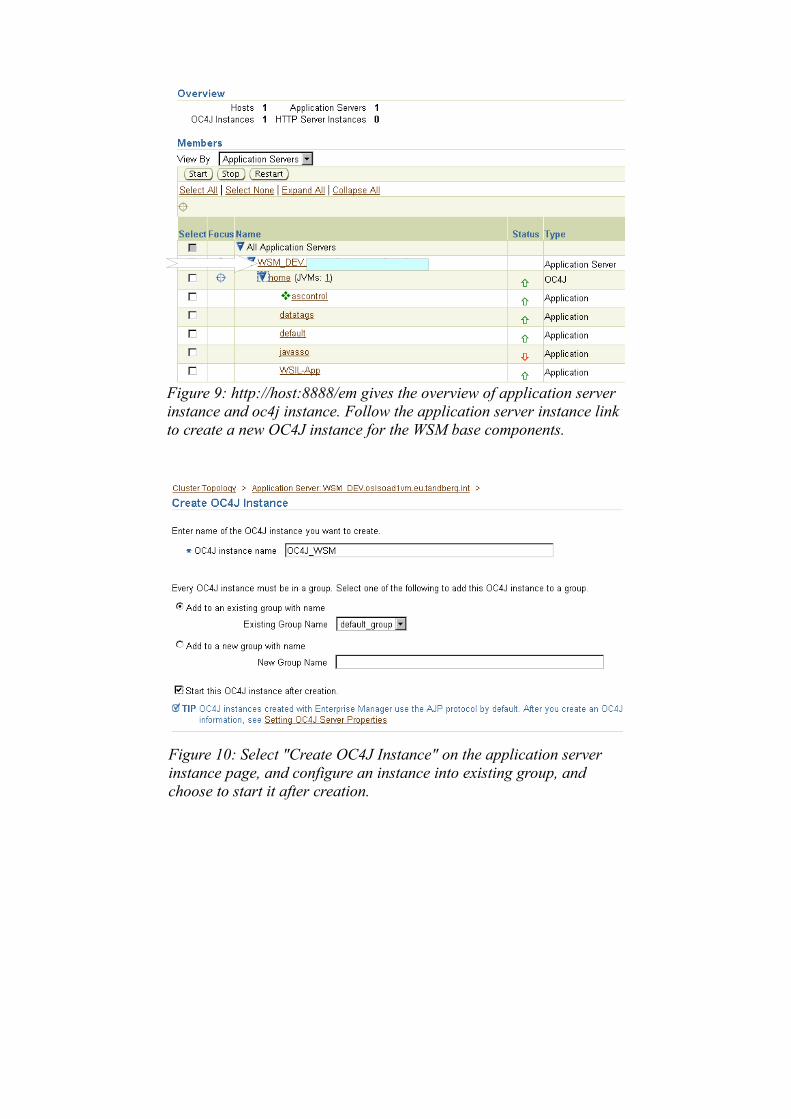
Figure 9: http://host:8888/em gives the overview of application server instance and oc4j instance. Follow the application server instance link to create a new OC4J instance for the WSM base components.
Figure 10: Select "Create OC4J Instance" on the application server instance page, and configure an instance into existing group, and choose to start it after creation.
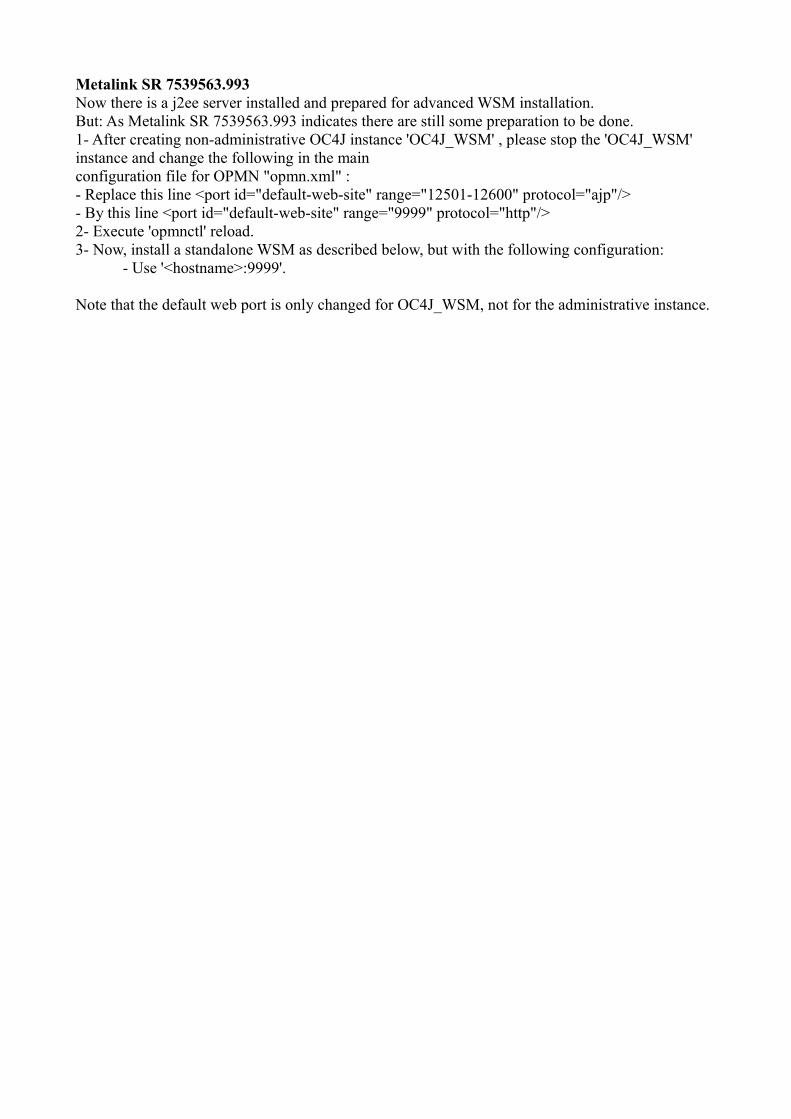
Metalink SR 7539563.993Now there is a j2ee server installed and prepared for advanced WSM installation.But: As Metalink SR 7539563.993 indicates there are still some preparation to be done.1- After creating non-administrative OC4J instance 'OC4J_WSM' , please stop the 'OC4J_WSM' instance and change the following in the main configuration file for OPMN "opmn.xml" :- Replace this line <port id="default-web-site" range="12501-12600" protocol="ajp"/>- By this line <port id="default-web-site" range="9999" protocol="http"/>2- Execute 'opmnctl' reload.3- Now, install a standalone WSM as described below, but with the following configuration:
- Use '<hostname>:9999'.
Note that the default web port is only changed for OC4J_WSM, not for the administrative instance.

2. Prepare WSM database
Before beginning the install it is necessary to prepare the orawsm database. A orawsm database schema can be created from the database scripts in soa suite install. install/soa_schemas/irca.Using irca the ORAWSM schema will be named ORAWSM. You should modify the name of schema, to avoid interference with SOA suite installation
-- as database system user;drop user &orawsm_user cascade;create user &orawsm_user identified by &orawsm_password;grant connect,resource to &orawsm_user;
-- as this newly created database user; irca/sql/owsm/loaddata.sql
3. Install WSM to the existing J2EE server
$ cpio -idv < soa_linux_x86_ws_mgr_101310.cpio$.cd owsm_101310/OWSM$./runInstaller
Note that there is a defect causing WSM installed into a non-administrative OC4J-container to not have a working ccore component, see SR 7539563.993. The workaround is given in this installation guide as well.
Figure 11: Selecting existing oracle_home for installation is the same as switching to advanced WSM installation mode. Note that a different database user than orawsm is set, to avoid a later soa suite install overwriting this schema.
use port 9999seeSR:7539563.993
host:9999
sid
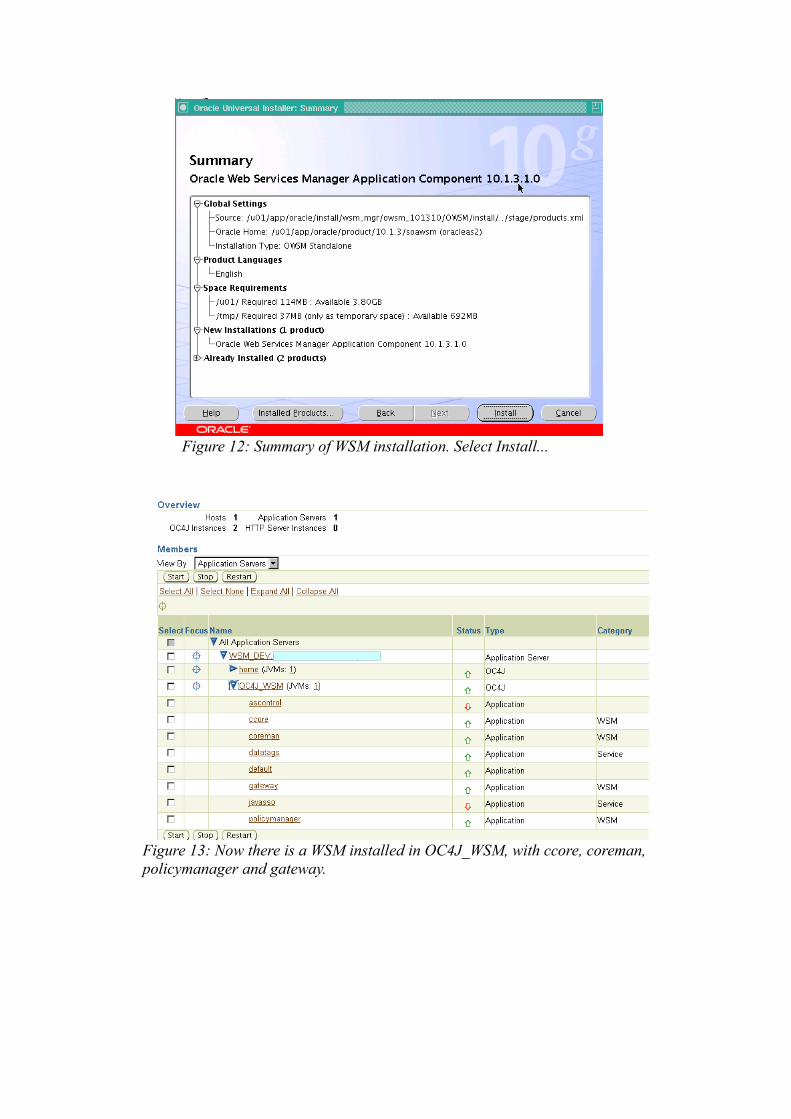
Figure 12: Summary of WSM installation. Select Install...
Figure 13: Now there is a WSM installed in OC4J_WSM, with ccore, coreman, policymanager and gateway.
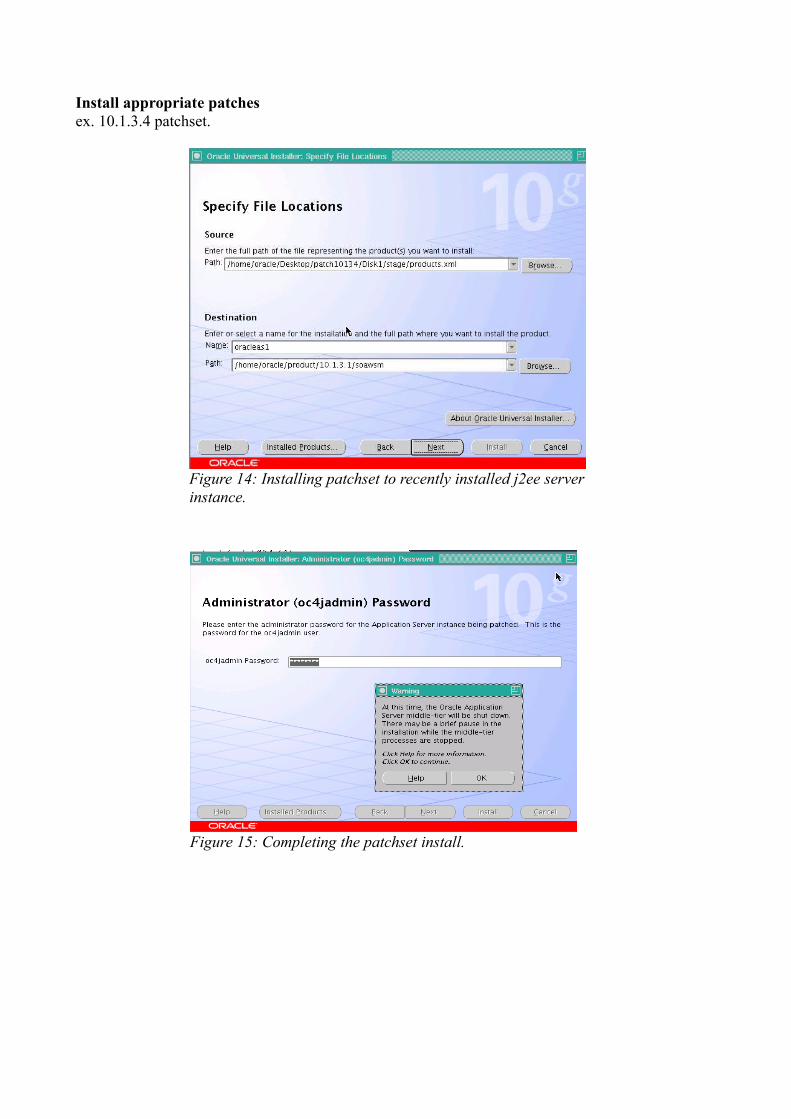
Install appropriate patches ex. 10.1.3.4 patchset.
Figure 14: Installing patchset to recently installed j2ee server instance.
Figure 15: Completing the patchset install.
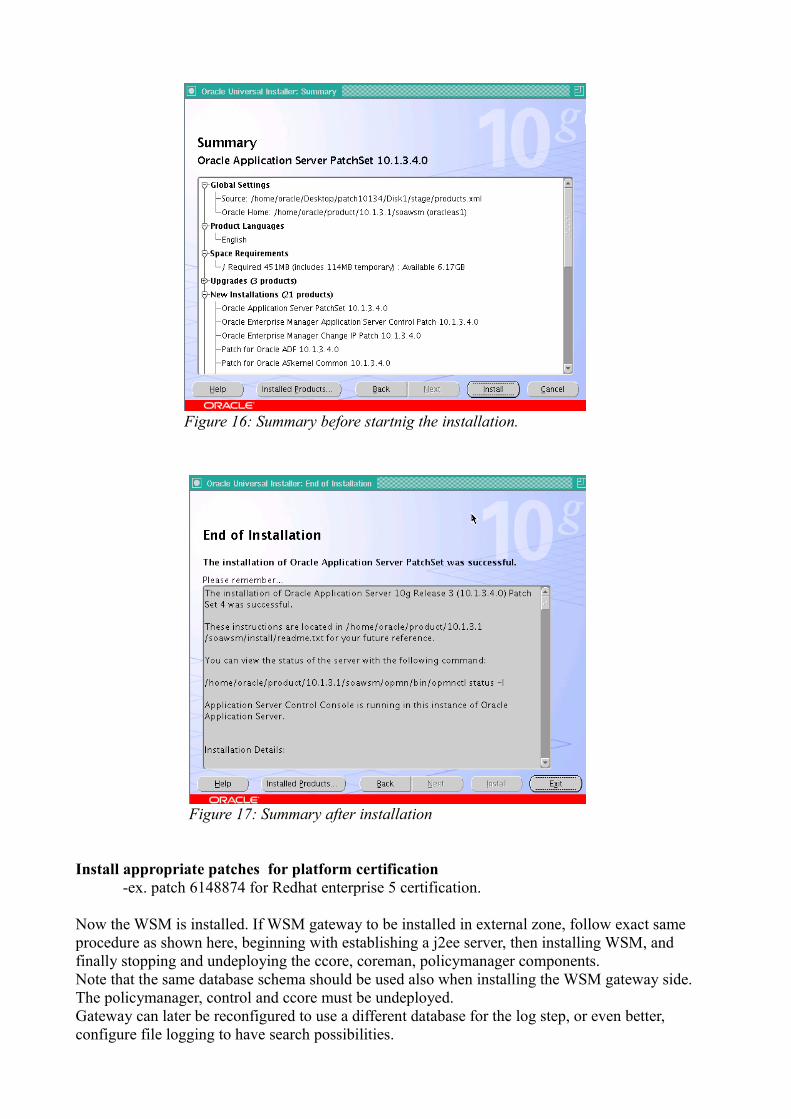
Install appropriate patches for platform certification-ex. patch 6148874 for Redhat enterprise 5 certification.
Now the WSM is installed. If WSM gateway to be installed in external zone, follow exact same procedure as shown here, beginning with establishing a j2ee server, then installing WSM, and finally stopping and undeploying the ccore, coreman, policymanager components.Note that the same database schema should be used also when installing the WSM gateway side. The policymanager, control and ccore must be undeployed.Gateway can later be reconfigured to use a different database for the log step, or even better, configure file logging to have search possibilities.
Figure 16: Summary before startnig the installation.
Figure 17: Summary after installation
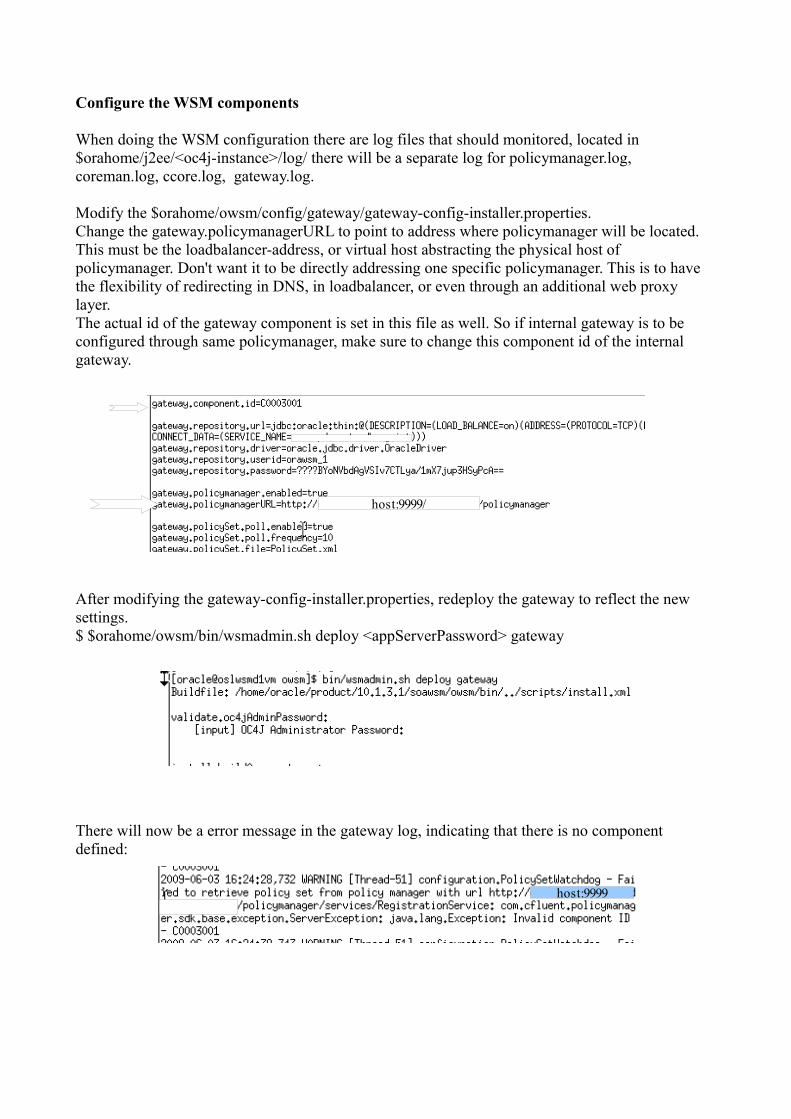
Configure the WSM components
When doing the WSM configuration there are log files that should monitored, located in $orahome/j2ee/<oc4j-instance>/log/ there will be a separate log for policymanager.log, coreman.log, ccore.log, gateway.log.
Modify the $orahome/owsm/config/gateway/gateway-config-installer.properties.Change the gateway.policymanagerURL to point to address where policymanager will be located. This must be the loadbalancer-address, or virtual host abstracting the physical host of policymanager. Don't want it to be directly addressing one specific policymanager. This is to have the flexibility of redirecting in DNS, in loadbalancer, or even through an additional web proxy layer.The actual id of the gateway component is set in this file as well. So if internal gateway is to be configured through same policymanager, make sure to change this component id of the internal gateway.
After modifying the gateway-config-installer.properties, redeploy the gateway to reflect the new settings.$ $orahome/owsm/bin/wsmadmin.sh deploy <appServerPassword> gateway
There will now be a error message in the gateway log, indicating that there is no component defined:
host:9999/
host:9999
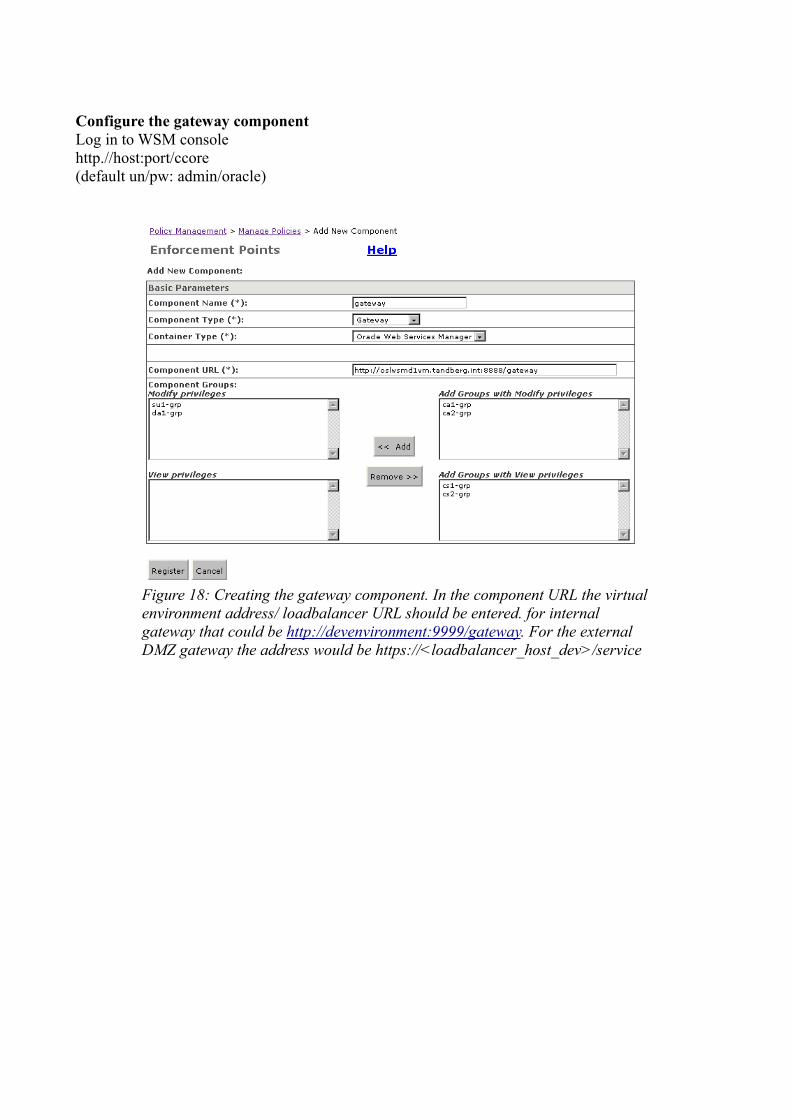
Configure the gateway componentLog in to WSM console http.//host:port/ccore(default un/pw: admin/oracle)
Figure 18: Creating the gateway component. In the component URL the virtual environment address/ loadbalancer URL should be entered. for internal gateway that could be http://devenvironment:9999/gateway. For the external DMZ gateway the address would be https://<loadbalancer_host_dev>/service

Add a service to the gatewayadding a service to the gateway. First select “Register Services” in the “Policy Management” menu, then follow the “Services” link.
Figure 20: How to find the service management console
Figure 19: modify the cfluent.monitor.rmi.host and the cfluent.monitor.soap.endpoint to point to the monitor server, via loadbalancer. cfluent.monitor.type can be rmi or soap, which is the reason there are two different parameters for monitor address.
2
1
devenvironment
devenvironment
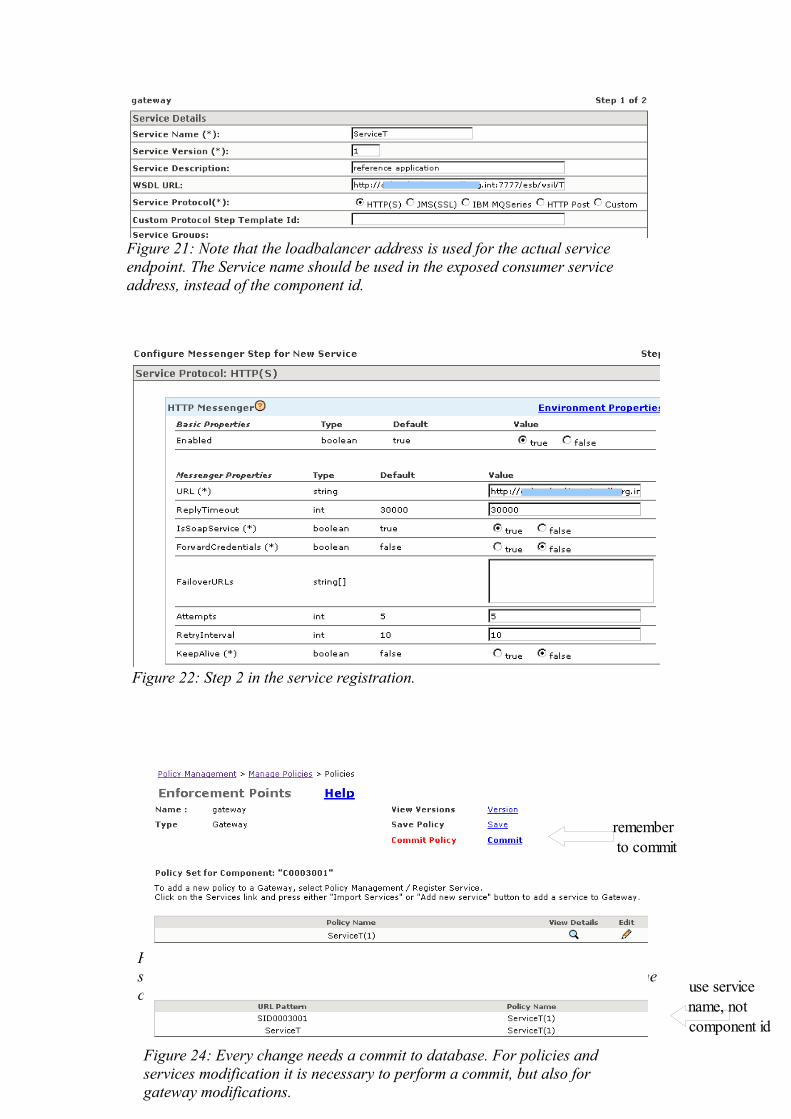
Figure 21: Note that the loadbalancer address is used for the actual service endpoint. The Service name should be used in the exposed consumer service address, instead of the component id.
Figure 22: Step 2 in the service registration.
Figure 23: Details of the service. Note that the Service URL used by consumers should be: http://oslwsmd1vm.tandberg.int:8888/gateway/ServiceT, replacing the component id with the more logical service name. use service
name, not component id
Figure 24: Every change needs a commit to database. For policies and services modification it is necessary to perform a commit, but also for gateway modifications.
remember to commit

References
http://ws-security.blogspot.com/2007/12/how-to-1013-owsm-setup-gateway-with.htmlhttp://download.oracle.com/docs/cd/E10291_01/doc.1013/e10298/depovrvw.htm
Figure 25: Example of consumer invoking the newly defined service.