installing qt creator - unisaosprey.unisa.ac.za/download/disk/disk...
TRANSCRIPT

Installing Qt Creator
Firstly download the .exe file (from DISK2017) on to your hard disk. Once the .exe is saved on the hard disk, double click the file qt-opensource-windows-x86-mingw482_opengl-5.3.0.exe. During installation, you will be given a number of options. We recommend that you accept all the defaults.
1. Using the software
To help you get started, we present a short guide to your first "Hello Qt" program.
Step 1. Starting Qt Creator
Double-click the Qt Creator shortcut on your desktop.
The following dialog will be displayed:
Step 2. Creating a project
Click on the New Project button. The following dialog will be displayed:

Select Other Project and then Empty Qt Project from the list of options and click on Choose.... The following dialog will be displayed:
Type Hello as the project name and change the location to your choice (e.g. C:\unisa\cos2614) and click on Next. The following dialog will be displayed:
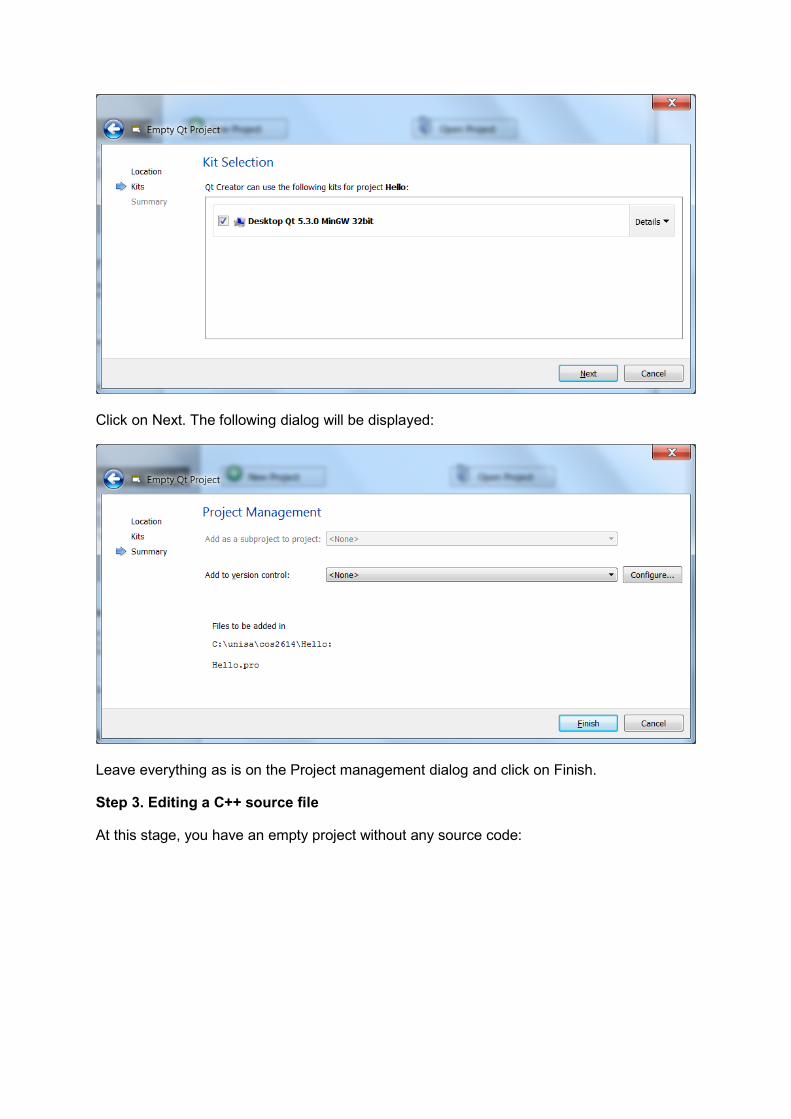
Click on Next. The following dialog will be displayed:
Leave everything as is on the Project management dialog and click on Finish.
Step 3. Editing a C++ source file
At this stage, you have an empty project without any source code:
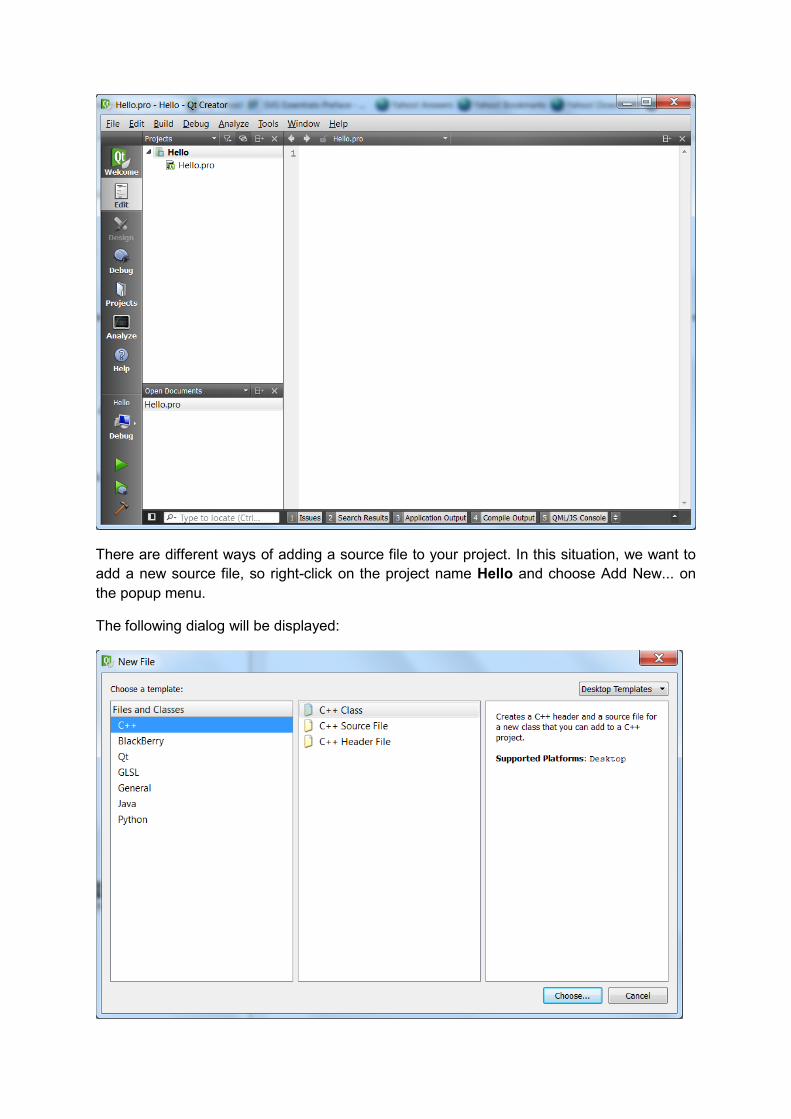
There are different ways of adding a source file to your project. In this situation, we want to add a new source file, so right-click on the project name Hello and choose Add New... on the popup menu.
The following dialog will be displayed:
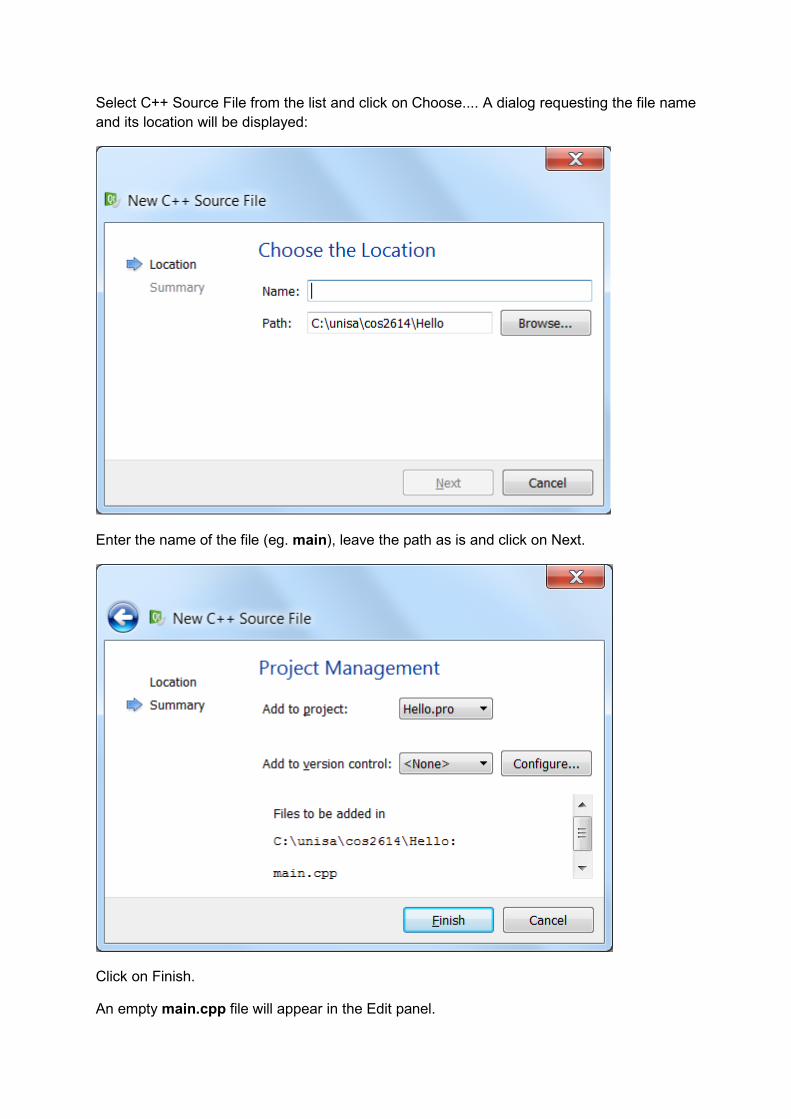
Select C++ Source File from the list and click on Choose.... A dialog requesting the file name and its location will be displayed:
Enter the name of the file (eg. main), leave the path as is and click on Next.
Click on Finish.
An empty main.cpp file will appear in the Edit panel.
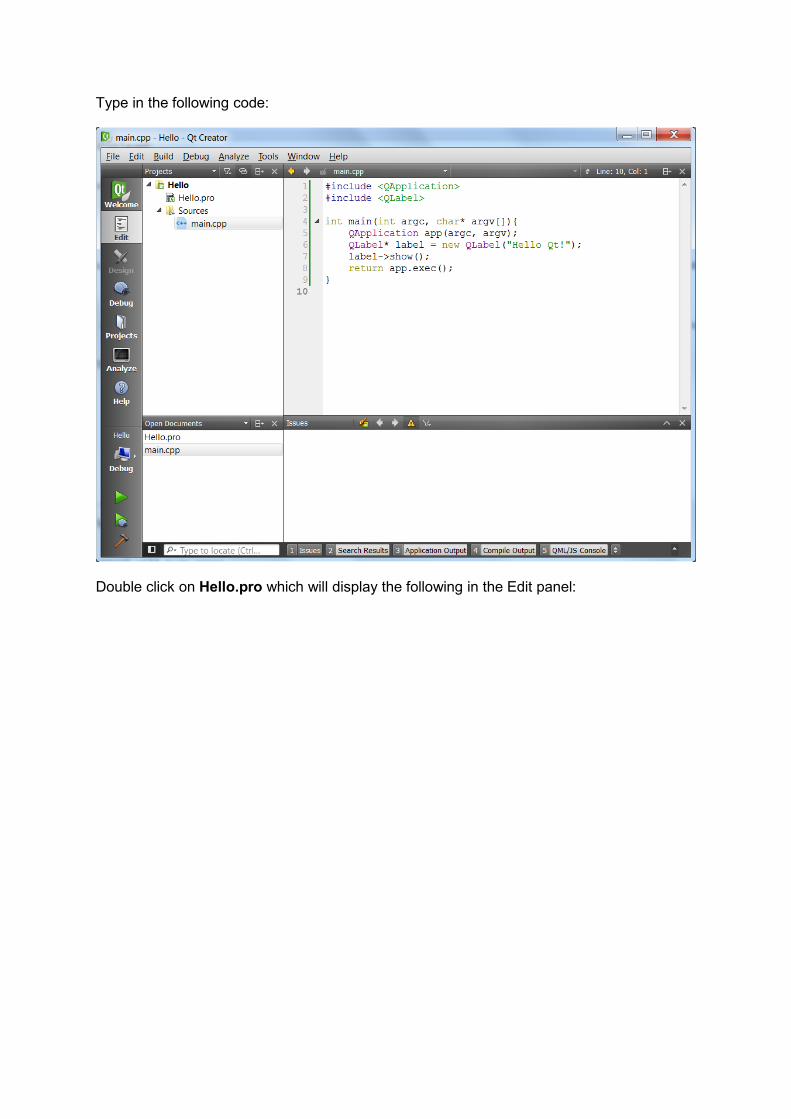
Type in the following code:
Double click on Hello.pro which will display the following in the Edit panel:
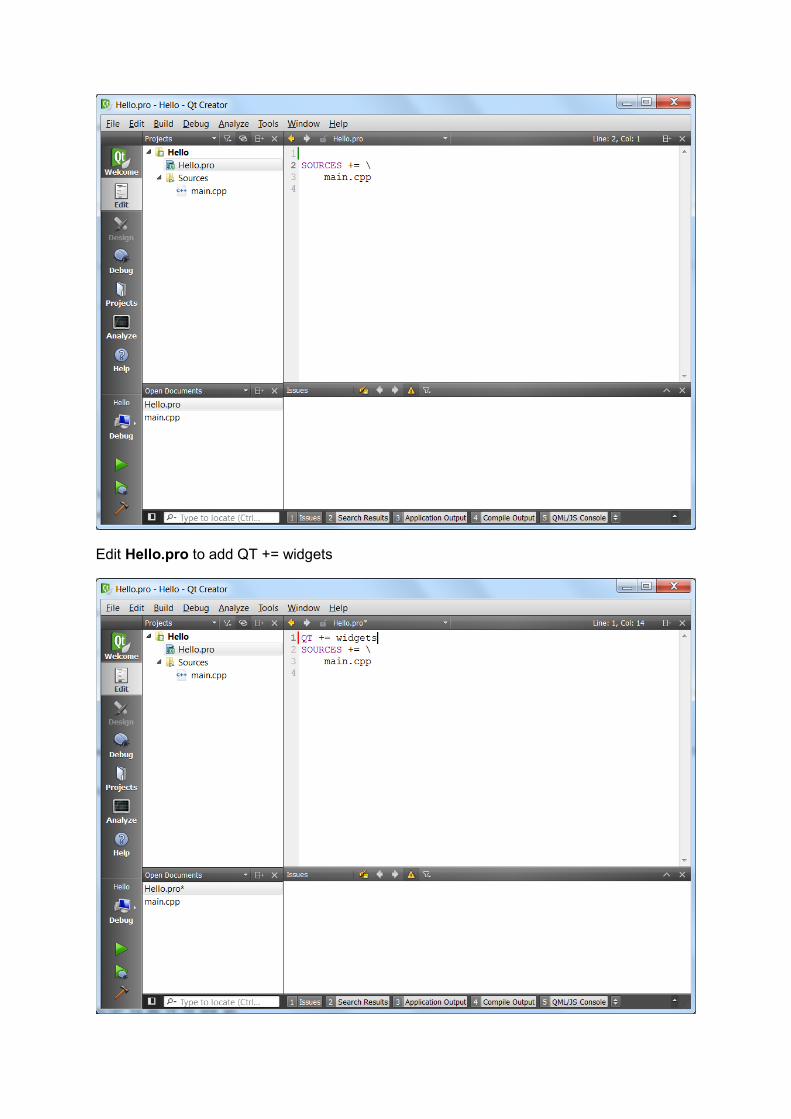
Edit Hello.pro to add QT += widgets

Select File and Save All to save all the changes you have made.
Step 4. Building and running the program
It is possible to build and run a program separately, but it's easier to do it in one go.
Click on the Run button (the button with a green triangle in the bottom left-hand corner - circled in red here).
If the build is successful, a small window should appear somewhere on the screen displaying the message Hello Qt!. You can resize the window.
If the build was unsuccessful, make sure you have entered the program correctly and re-run the project.
When you have finished admiring your first Qt program, close the little window.
2. More on Qt Creator
Please refer to TL 102 (available on myUnisa under Additional Resources).