installing windows xp - suffield academyweb.suffieldacademy.org/.../windows_xp_install.pdf · with...
TRANSCRIPT
Installing Windows XP
Jason Healy, Director of Networks and Systems
Last Updated Mar 18, 2008

2

Contents
1 Installing Windows XP 5
1.1 Introduction . . . . . . . . . . . . . . . . . . . . . . . . . . . . . . 5
1.2 Installation . . . . . . . . . . . . . . . . . . . . . . . . . . . . . . 5
1.2.1 Before You Start . . . . . . . . . . . . . . . . . . . . . . . 5
1.2.2 BIOS Settings . . . . . . . . . . . . . . . . . . . . . . . . 6
1.2.3 Booting . . . . . . . . . . . . . . . . . . . . . . . . . . . . 6
1.2.4 Partitioning . . . . . . . . . . . . . . . . . . . . . . . . . . 7
1.2.5 Initializing the Disk . . . . . . . . . . . . . . . . . . . . . 9
1.2.6 Waiting for Installation . . . . . . . . . . . . . . . . . . . 11
1.2.7 Regional and Language Options . . . . . . . . . . . . . . 13
1.2.8 Personalize Your Software . . . . . . . . . . . . . . . . . . 14
1.2.9 Product Activation Key . . . . . . . . . . . . . . . . . . . 15
1.2.10 Computer Name and Administrator Password . . . . . . . 15
1.2.11 Date and Time Settings . . . . . . . . . . . . . . . . . . . 16
1.2.12 Networking Settings . . . . . . . . . . . . . . . . . . . . . 16
1.2.13 Workgroup or Computer Domain . . . . . . . . . . . . . . 17
1.2.14 Finishing Initialization . . . . . . . . . . . . . . . . . . . . 18
1.2.15 Network Identification Wizard . . . . . . . . . . . . . . . 18
1.2.16 Logging In . . . . . . . . . . . . . . . . . . . . . . . . . . 20
1.3 Setting Up the OS . . . . . . . . . . . . . . . . . . . . . . . . . . 21
3
1.3.1 Eject the Installation CD . . . . . . . . . . . . . . . . . . 21
1.3.2 Display Settings . . . . . . . . . . . . . . . . . . . . . . . 21
1.3.3 Control Panel Settings . . . . . . . . . . . . . . . . . . . . 23
1.3.4 Install Pending Updates . . . . . . . . . . . . . . . . . . . 28
1.4 Installing Standard Applications . . . . . . . . . . . . . . . . . . 29
1.4.1 Connecting to the Fileserver . . . . . . . . . . . . . . . . . 29
1.4.2 First Class . . . . . . . . . . . . . . . . . . . . . . . . . . 31
1.4.3 Mozilla Firefox . . . . . . . . . . . . . . . . . . . . . . . . 32
1.4.4 Mozilla Sunbird . . . . . . . . . . . . . . . . . . . . . . . . 34
1.4.5 Microsoft Office 2003 . . . . . . . . . . . . . . . . . . . . . 35
1.4.6 FileMaker 6 . . . . . . . . . . . . . . . . . . . . . . . . . . 35
1.4.7 Acrobat Reader 7 . . . . . . . . . . . . . . . . . . . . . . . 35
1.4.8 Ultr@VNC Server . . . . . . . . . . . . . . . . . . . . . . 35
1.4.9 Sophos Anti-Virus . . . . . . . . . . . . . . . . . . . . . . 37
1.4.10 Printing . . . . . . . . . . . . . . . . . . . . . . . . . . . . 37
1.4.11 Macromedia Studio 8 (optional) . . . . . . . . . . . . . . 37
4
Chapter 1
Installing Windows XP
Last updated 2008/03/18
1.1 Introduction
Suffield Academy has standardized on Windows XP Professional edition for usewith all Windows-based workstations on the campus network.
This document describes how to install and configure Windows XP Professionalwith Service Pack 2 (the latest version, as of this writing). Later sections of thedocument also discuss installing the standard set of software used at SuffieldAcademy.
This document assumes a general familiarity with Windows concepts (such asthe running installers, and using the Start Menu and System Tray). However, itassumes no system administration knowledge, so even first-time installers shouldhave no trouble following the instructions.
1.2 Installation
1.2.1 Before You Start
These instructions assume installation onto a PC that has nothing of value onit. Following these instructions will erase everything that is currentlyinstalled on the PC. Do not perform the installation until you are sure ev-erything of value has been backed up on the machine.
5
To complete the installation, you must have a keyboard, mouse, monitor, andnetwork connection. The network should be connected during the entire instal-lation.
You’ll need to be a domain administrator to correctly join the machine to thenetwork. If you do not have these priviledges, you will be able to install Win-dows, but you cannot join the machine to the network properly. Complete theinstallation and contact the Network Administrator for further assistance.
1.2.2 BIOS Settings
To install Windows XP, we must boot the PC off of the built-in CD-ROM drive.You should first try booting the machine with the installation CD in the drive.If the PC fails to boot off of the CD, you may need to modify the BIOS settings.
The BIOS settings can only be accessed immediately after the computer hasbeen turned on. Usually, the computer prints a message telling you how toenter the BIOS setup utility. Often, this is done by pressing a special key: F1,F2, F12, and delete are common keys for this feature.
Once inside the BIOS setup, check for a setting related to boot order. Ensurethat the computer is set to boot off CD-ROM first, and then off the internalhard drive.
Save your settings and follow the instructions below for booting the machine offof CD.
1.2.3 Booting
Put the Windows XP Professional CD into the CD-ROM drive and start up thecomputer.
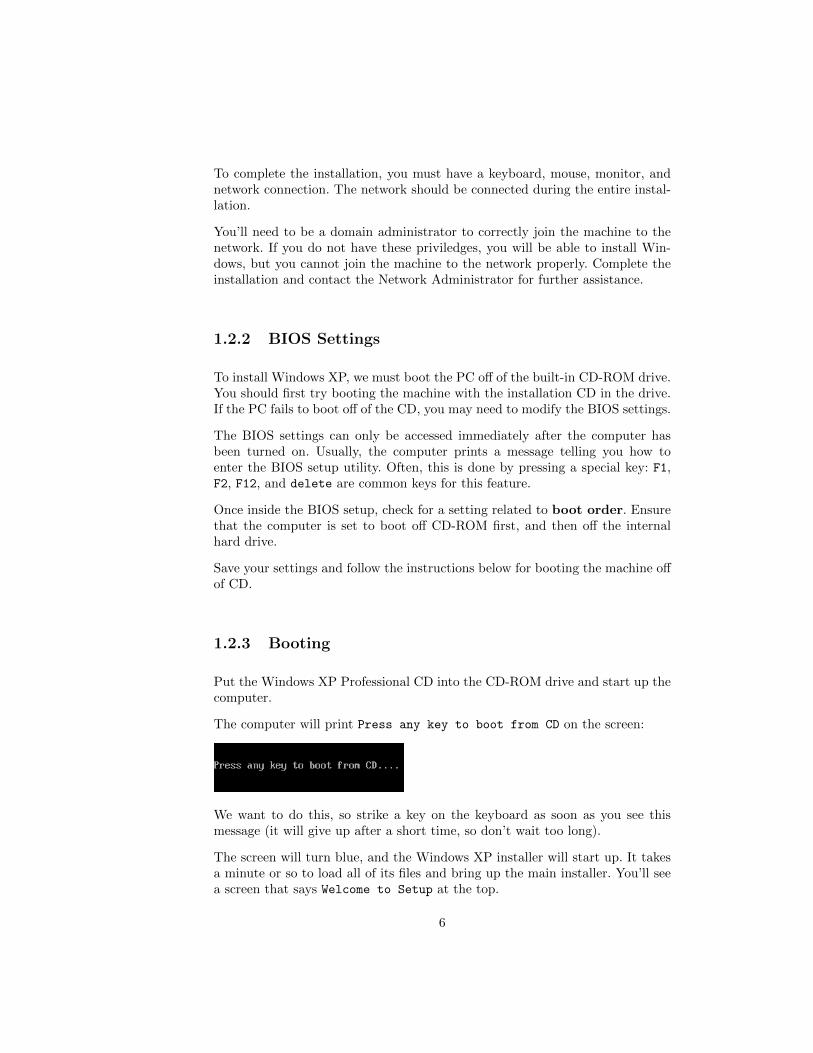
The computer will print Press any key to boot from CD on the screen:
We want to do this, so strike a key on the keyboard as soon as you see thismessage (it will give up after a short time, so don’t wait too long).
The screen will turn blue, and the Windows XP installer will start up. It takesa minute or so to load all of its files and bring up the main installer. You’ll seea screen that says Welcome to Setup at the top.
6

Hit enter to continue to the next screen.
You’ll be presented with a License Agreement. Sign your life away and press F8.
1.2.4 Partitioning
The setup program searches your hard drive for exising data. Because we’vebacked everything up on this computer (you did back everything up, right?),we’re just going to erase the drive and start from scratch.
You’ll see a listing of partitions on your computer. If all you see is the lineUnpartitioned space, with no drive letters (such as C:), you may skip to thenext step.
Otherwise, for each partition listed, you must highlight it and delete it. Use thearrow keys to highlight a drive letter (e.g., C:, D:, and so on):
7
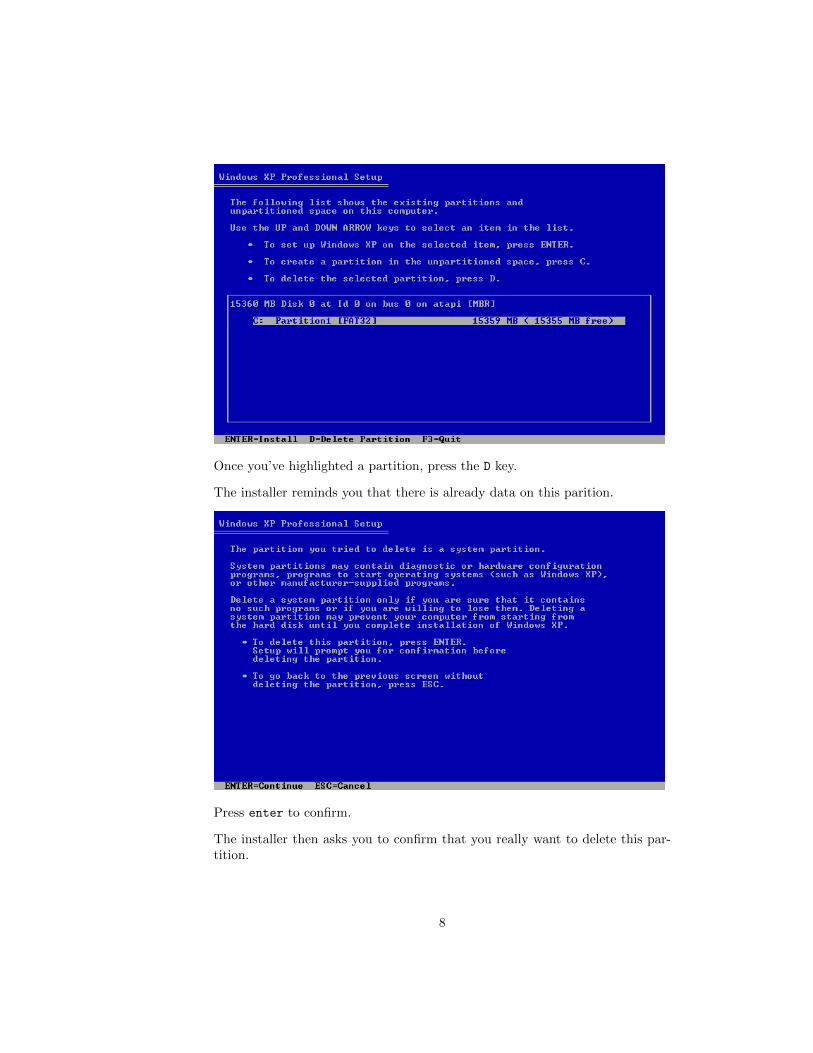
Once you’ve highlighted a partition, press the D key.
The installer reminds you that there is already data on this parition.
Press enter to confirm.
The installer then asks you to confirm that you really want to delete this par-tition.
8
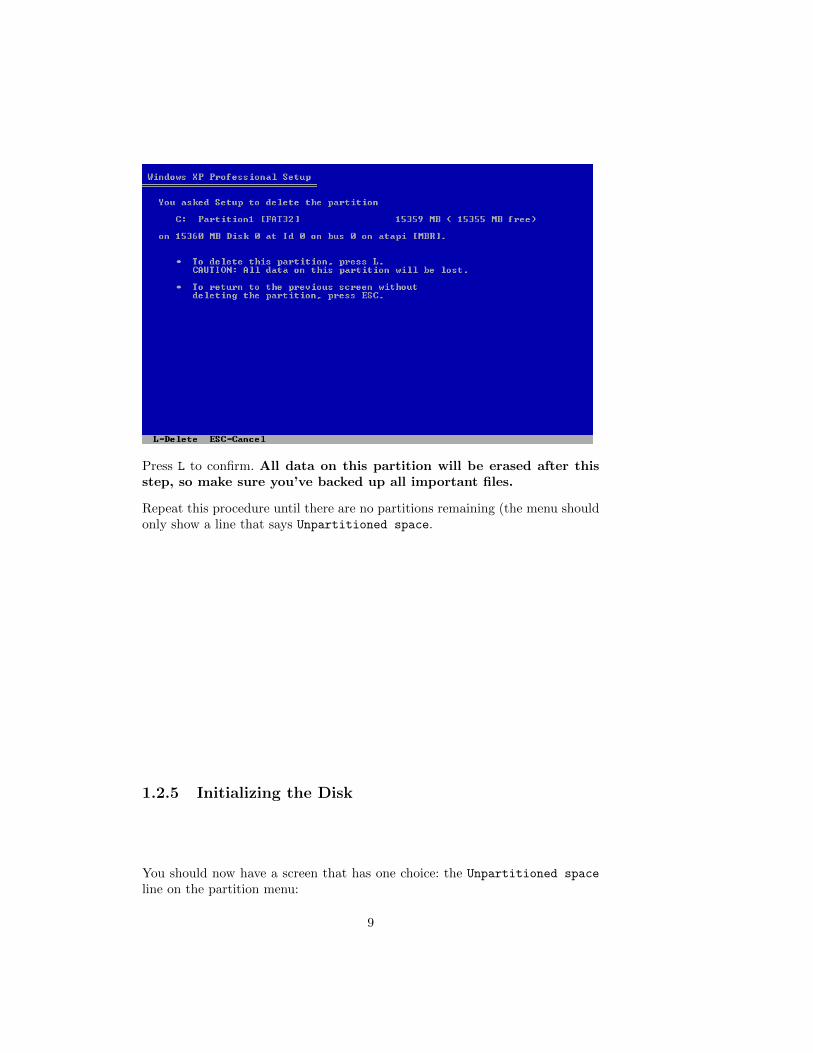
Press L to confirm. All data on this partition will be erased after thisstep, so make sure you’ve backed up all important files.
Repeat this procedure until there are no partitions remaining (the menu shouldonly show a line that says Unpartitioned space.
1.2.5 Initializing the Disk
You should now have a screen that has one choice: the Unpartitioned space
line on the partition menu:
9
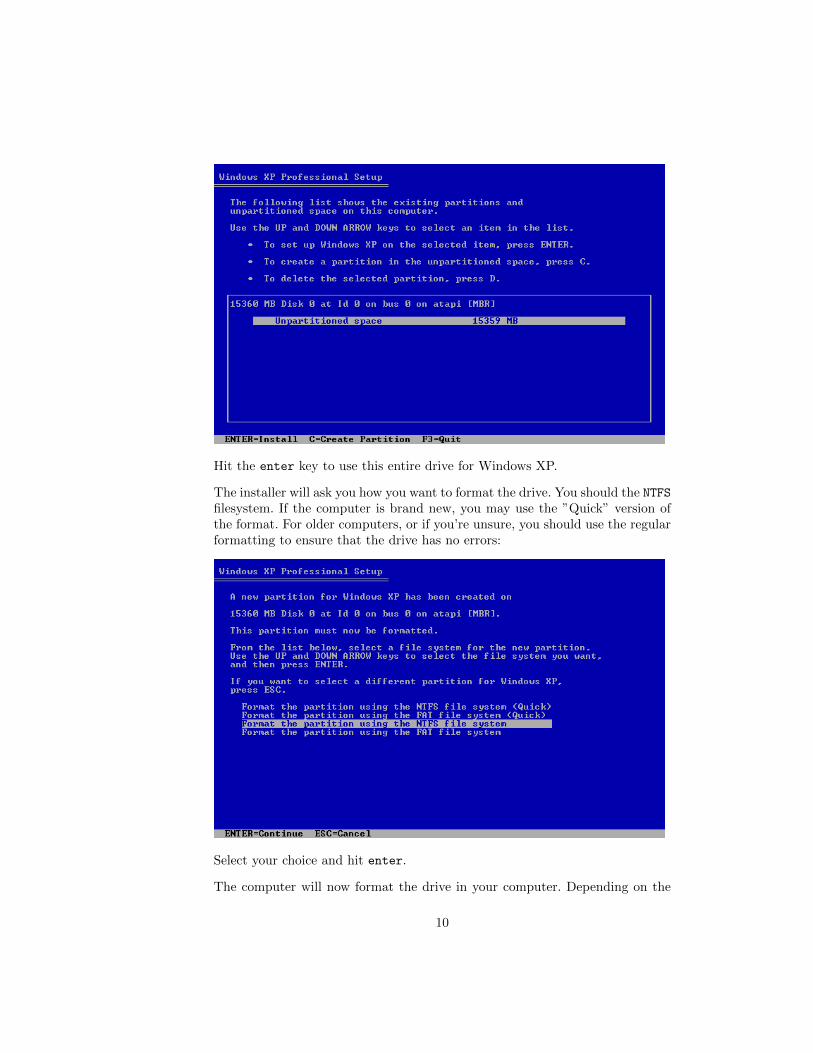
Hit the enter key to use this entire drive for Windows XP.
The installer will ask you how you want to format the drive. You should the NTFSfilesystem. If the computer is brand new, you may use the ”Quick” version ofthe format. For older computers, or if you’re unsure, you should use the regularformatting to ensure that the drive has no errors:
Select your choice and hit enter.
The computer will now format the drive in your computer. Depending on the
10
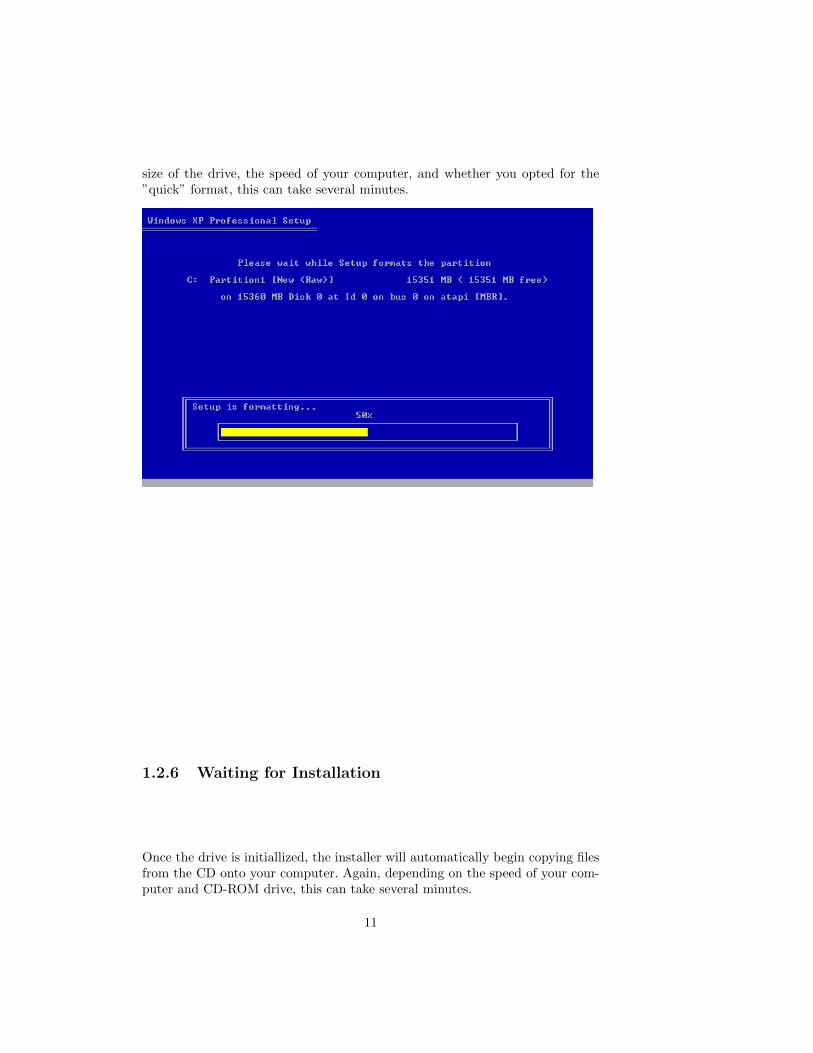
size of the drive, the speed of your computer, and whether you opted for the”quick” format, this can take several minutes.
1.2.6 Waiting for Installation
Once the drive is initiallized, the installer will automatically begin copying filesfrom the CD onto your computer. Again, depending on the speed of your com-puter and CD-ROM drive, this can take several minutes.
11
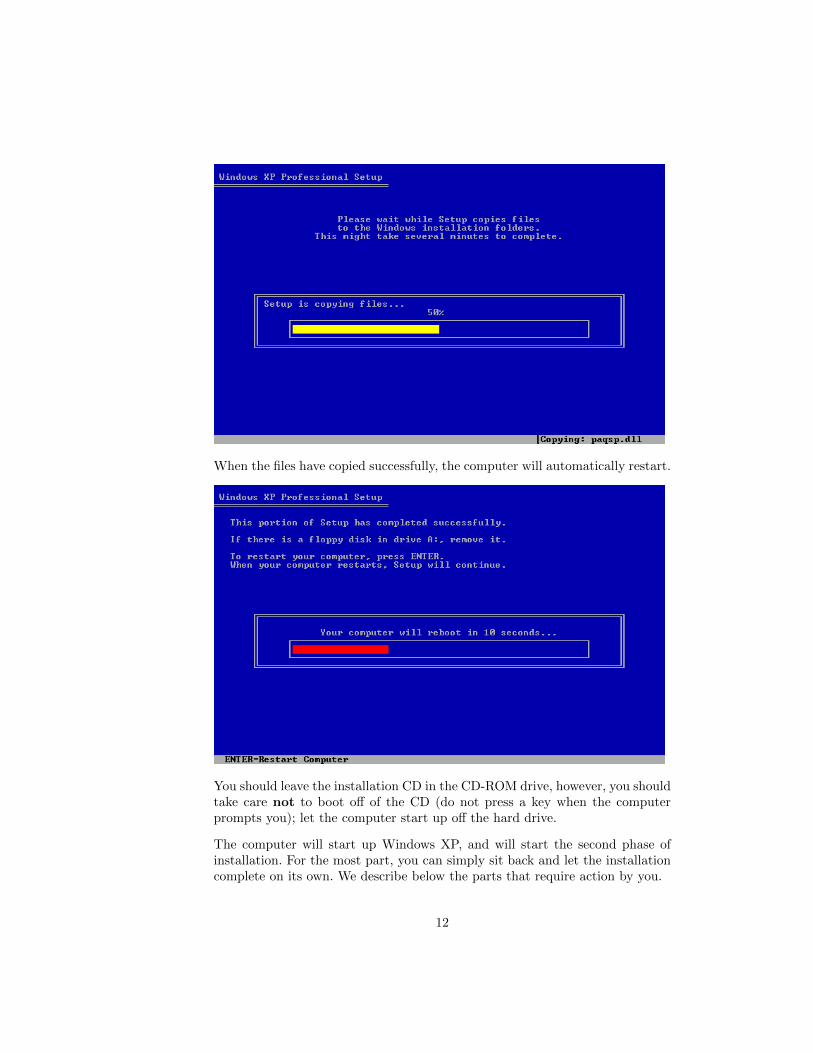
When the files have copied successfully, the computer will automatically restart.
You should leave the installation CD in the CD-ROM drive, however, you shouldtake care not to boot off of the CD (do not press a key when the computerprompts you); let the computer start up off the hard drive.
The computer will start up Windows XP, and will start the second phase ofinstallation. For the most part, you can simply sit back and let the installationcomplete on its own. We describe below the parts that require action by you.
12
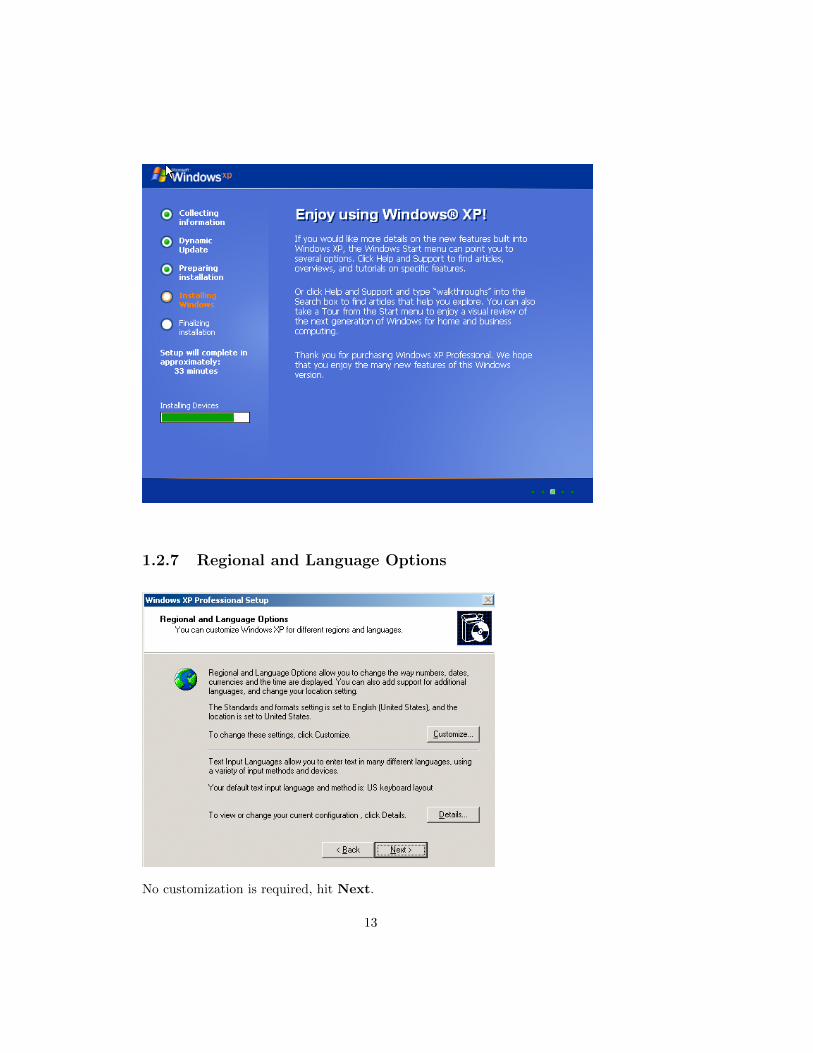
1.2.7 Regional and Language Options
No customization is required, hit Next.
13
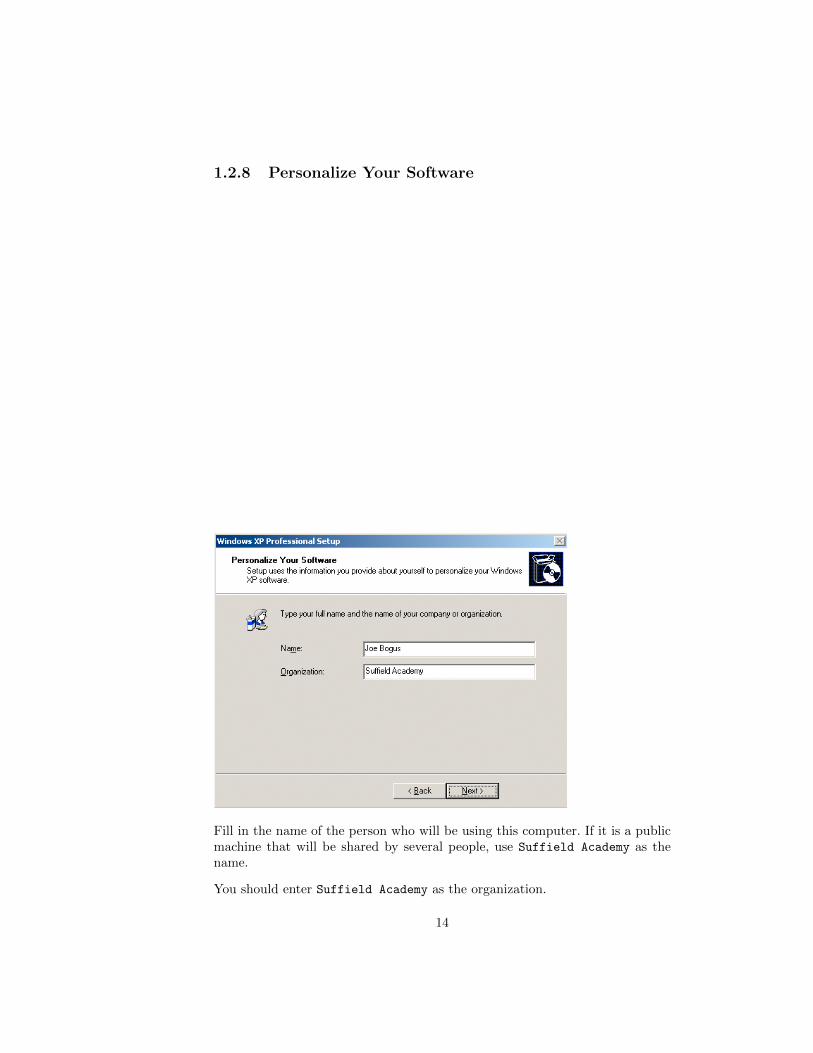
1.2.8 Personalize Your Software
Fill in the name of the person who will be using this computer. If it is a publicmachine that will be shared by several people, use Suffield Academy as thename.
You should enter Suffield Academy as the organization.
14
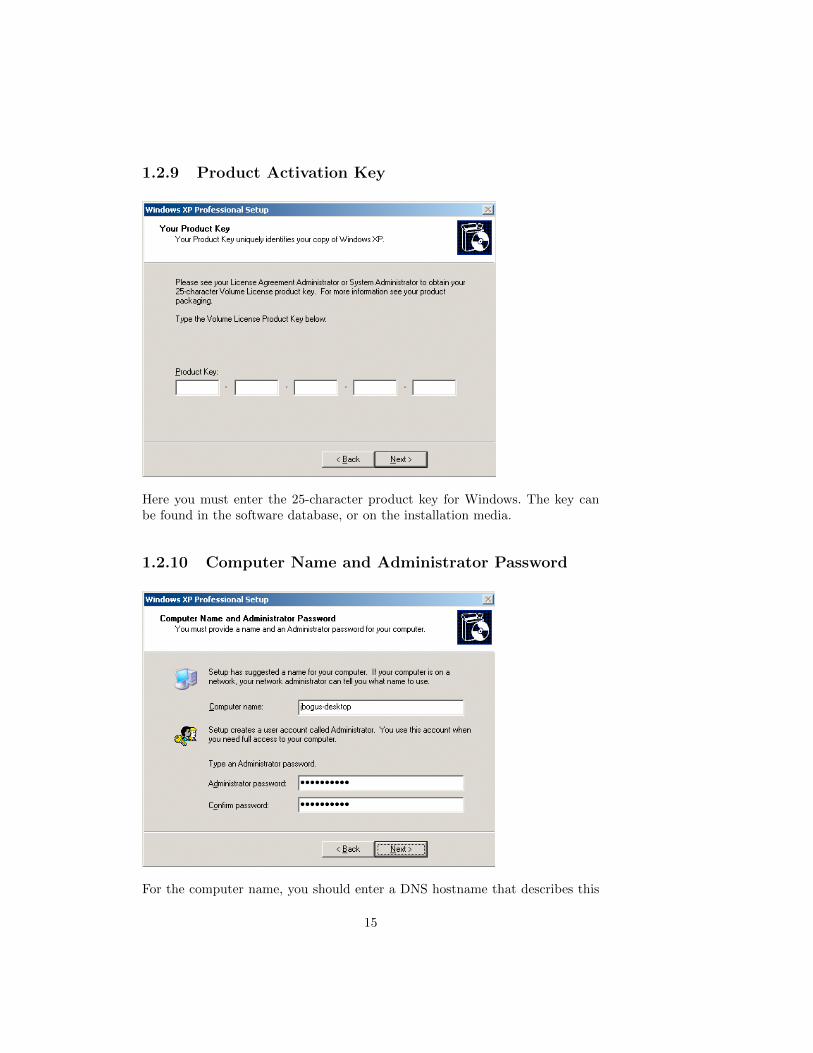
1.2.9 Product Activation Key
Here you must enter the 25-character product key for Windows. The key canbe found in the software database, or on the installation media.
1.2.10 Computer Name and Administrator Password
For the computer name, you should enter a DNS hostname that describes this
15
machine. For machines used by a single person, we use the <username>-desktopformat (e.g., jbogus-desktop). For shared machines, use a name that describesthe machine (e.g., bookstore or art-lab-1).
Do not use spaces, underscores, or other punctuation in the name. Only usenumbers, leters, and dashes for the name.
The installer may force you to shorten the name of the machine. That’s fine;just make note of the new shortened name.
For the Administrator password, use one of the standard system passwords forthe department or lab where the computer is being installed. Consult with theNetwork Administrator if you do not know which password to use.
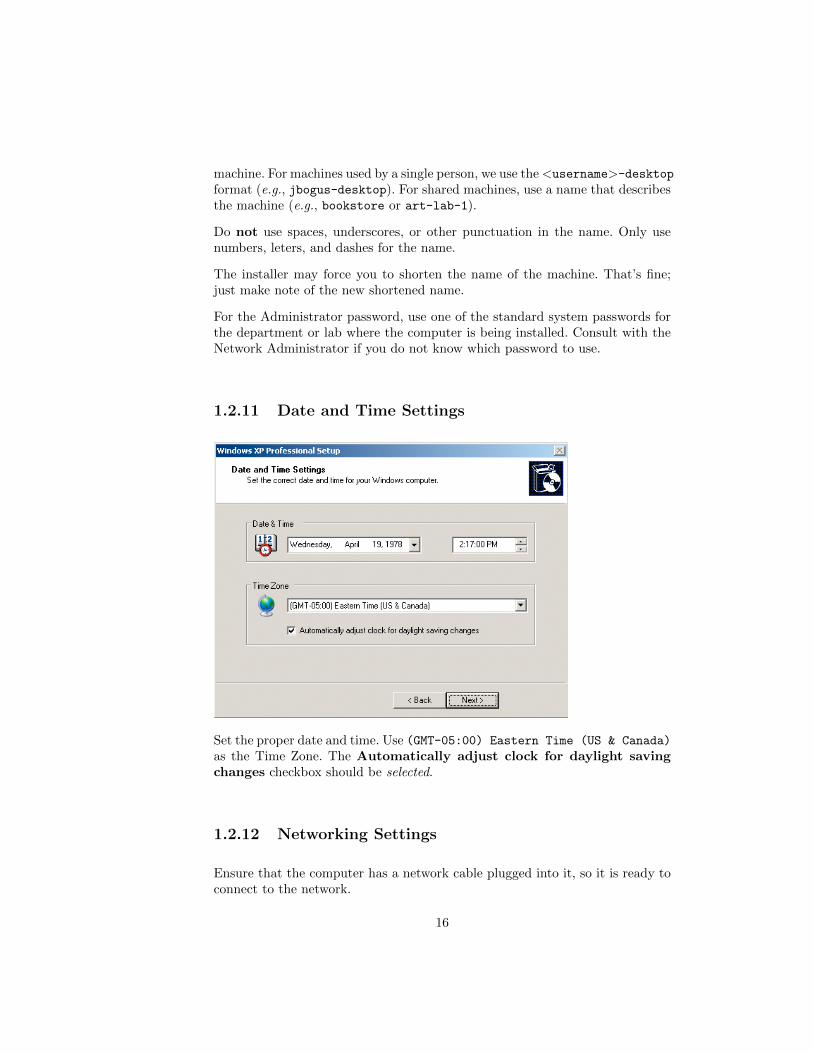
1.2.11 Date and Time Settings
Set the proper date and time. Use (GMT-05:00) Eastern Time (US & Canada)
as the Time Zone. The Automatically adjust clock for daylight savingchanges checkbox should be selected.
1.2.12 Networking Settings
Ensure that the computer has a network cable plugged into it, so it is ready toconnect to the network.
16
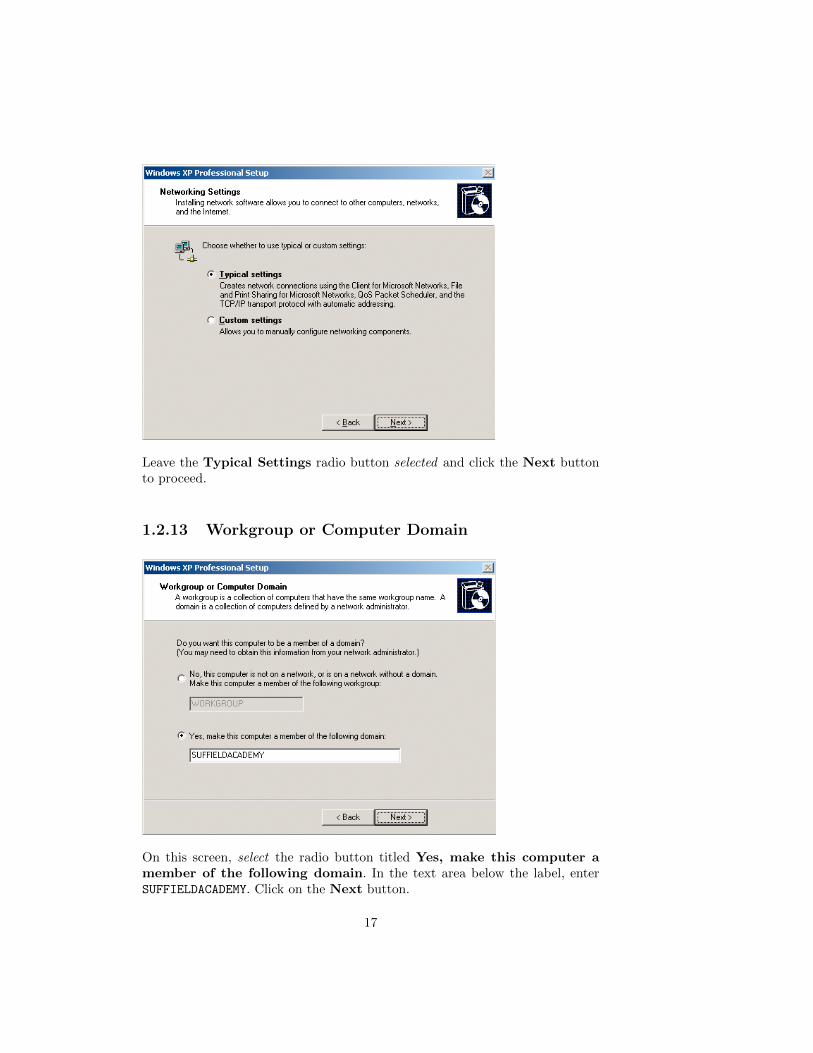
Leave the Typical Settings radio button selected and click the Next buttonto proceed.
1.2.13 Workgroup or Computer Domain
On this screen, select the radio button titled Yes, make this computer amember of the following domain. In the text area below the label, enterSUFFIELDACADEMY. Click on the Next button.
17
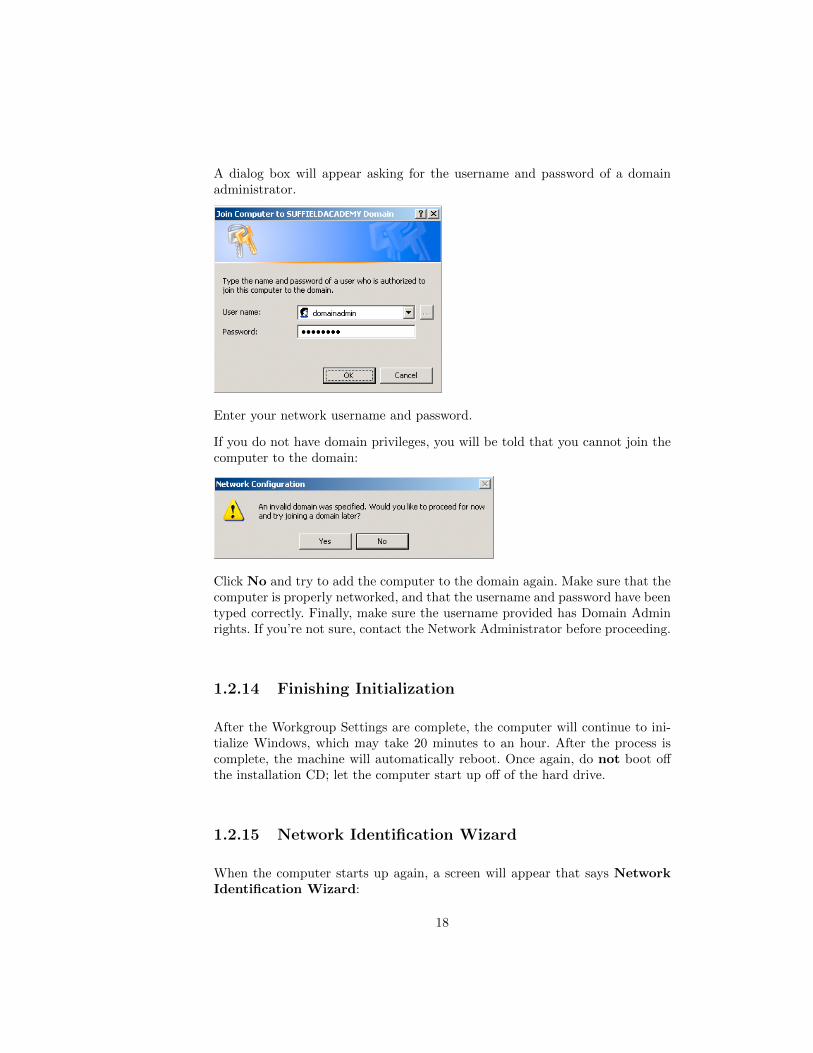
A dialog box will appear asking for the username and password of a domainadministrator.
Enter your network username and password.
If you do not have domain privileges, you will be told that you cannot join thecomputer to the domain:
Click No and try to add the computer to the domain again. Make sure that thecomputer is properly networked, and that the username and password have beentyped correctly. Finally, make sure the username provided has Domain Adminrights. If you’re not sure, contact the Network Administrator before proceeding.
1.2.14 Finishing Initialization
After the Workgroup Settings are complete, the computer will continue to ini-tialize Windows, which may take 20 minutes to an hour. After the process iscomplete, the machine will automatically reboot. Once again, do not boot offthe installation CD; let the computer start up off of the hard drive.
1.2.15 Network Identification Wizard
When the computer starts up again, a screen will appear that says NetworkIdentification Wizard:
18
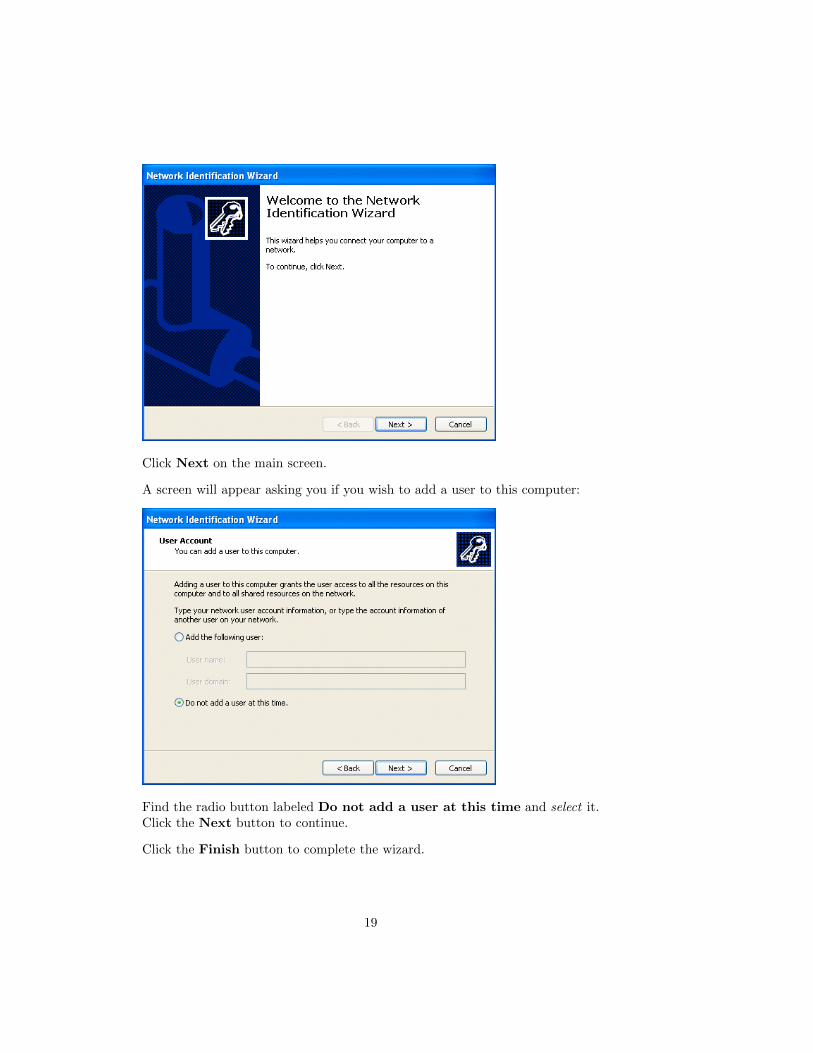
Click Next on the main screen.
A screen will appear asking you if you wish to add a user to this computer:
Find the radio button labeled Do not add a user at this time and select it.Click the Next button to continue.
Click the Finish button to complete the wizard.
19
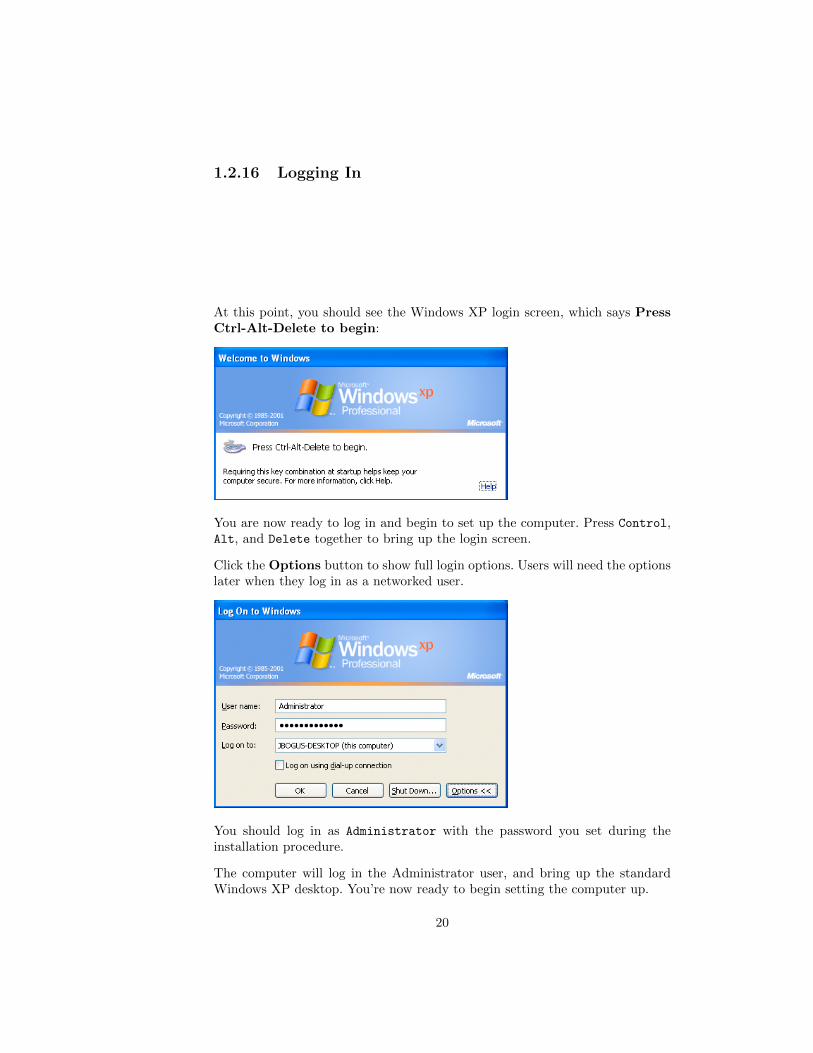
1.2.16 Logging In
At this point, you should see the Windows XP login screen, which says PressCtrl-Alt-Delete to begin:
You are now ready to log in and begin to set up the computer. Press Control,Alt, and Delete together to bring up the login screen.
Click the Options button to show full login options. Users will need the optionslater when they log in as a networked user.
You should log in as Administrator with the password you set during theinstallation procedure.
The computer will log in the Administrator user, and bring up the standardWindows XP desktop. You’re now ready to begin setting the computer up.
20

1.3 Setting Up the OS
At this point, your installation of Windows XP is complete. You should belogged into the machine as a local Administrator. Windows takes you throughseveral final customization steps, and we perform a few tweaks to the settingsso the computer is ready to use.
1.3.1 Eject the Installation CD
We’re done with the installation CD, so you may eject it from the computer.
1.3.2 Display Settings
Automatic Settings
Windows may pop up an alert telling you that your display settings are set toa very low level:
Dismiss the alert; we’ll change the settings in the next step.
If you do not get the alert, just move on to the next step.
Adjusting the Settings
Right-click on the desktop, and select Properties from the menu that appears.
The Display Properties window should appear.
21
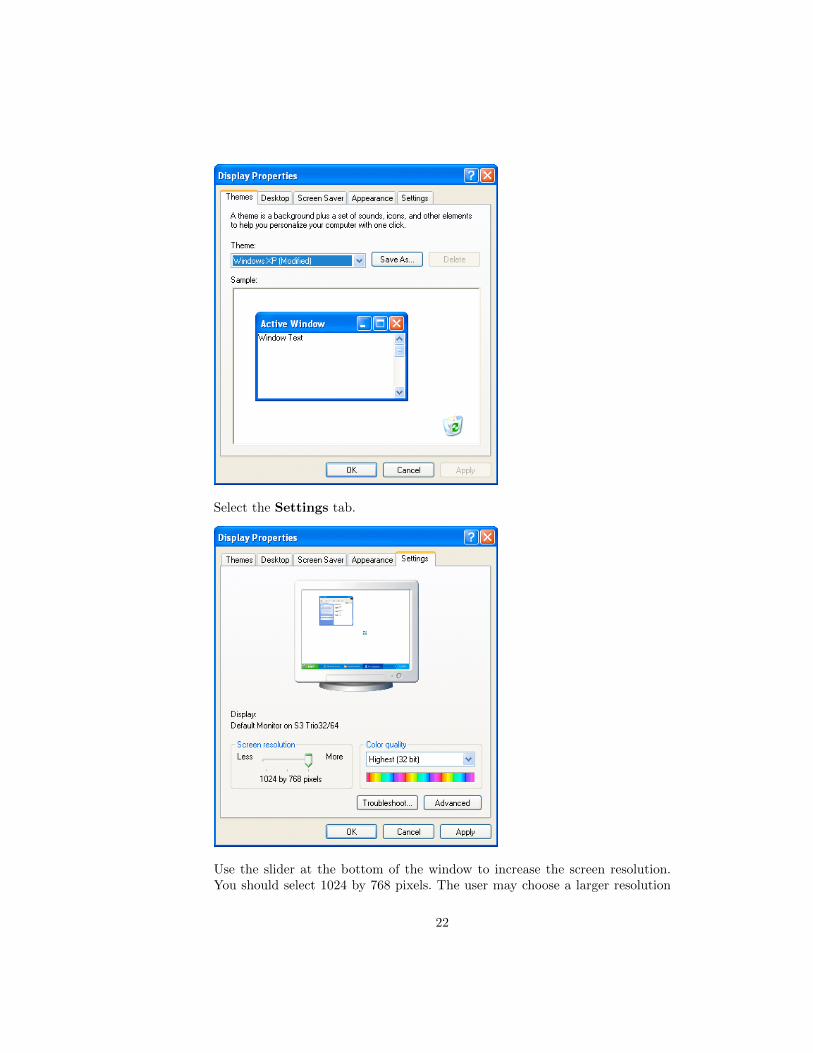
Select the Settings tab.
Use the slider at the bottom of the window to increase the screen resolution.You should select 1024 by 768 pixels. The user may choose a larger resolution
22
at a later time, if they wish. Under the Color quality menu, select Highest(32 bit).
Click the Apply button. Confirm that the new settings work on the monitor.Click the OK button.
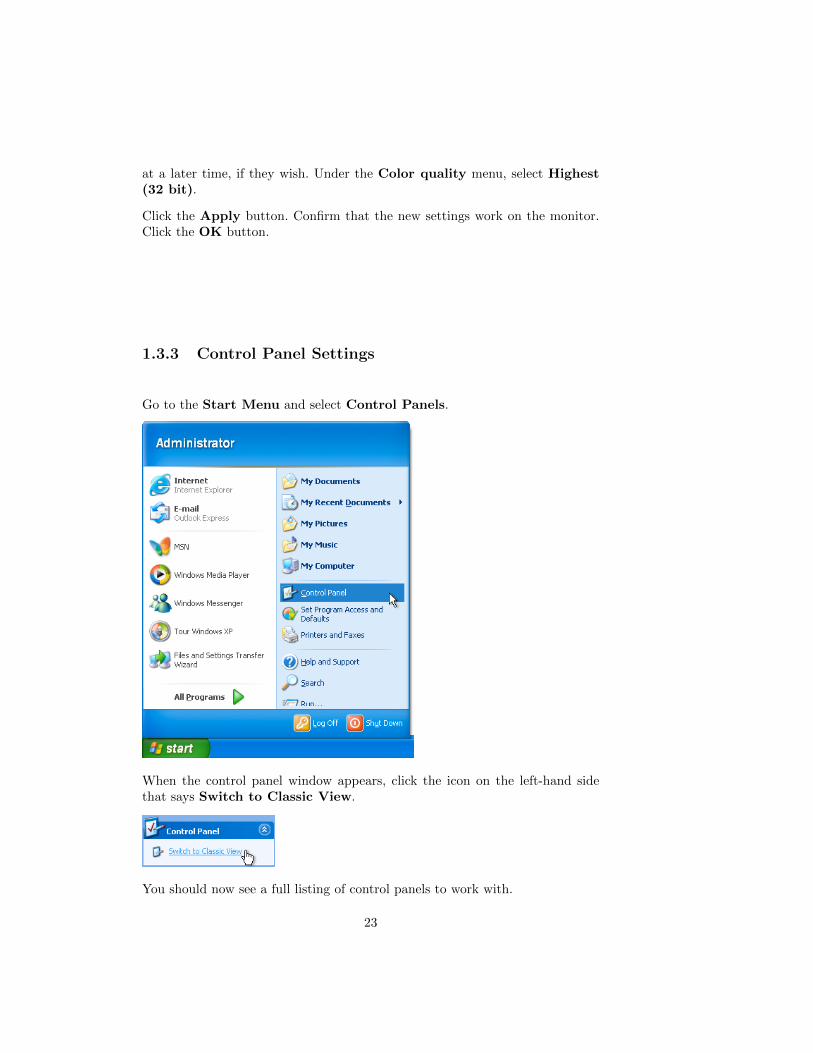
1.3.3 Control Panel Settings
Go to the Start Menu and select Control Panels.
When the control panel window appears, click the icon on the left-hand sidethat says Switch to Classic View.
You should now see a full listing of control panels to work with.
23
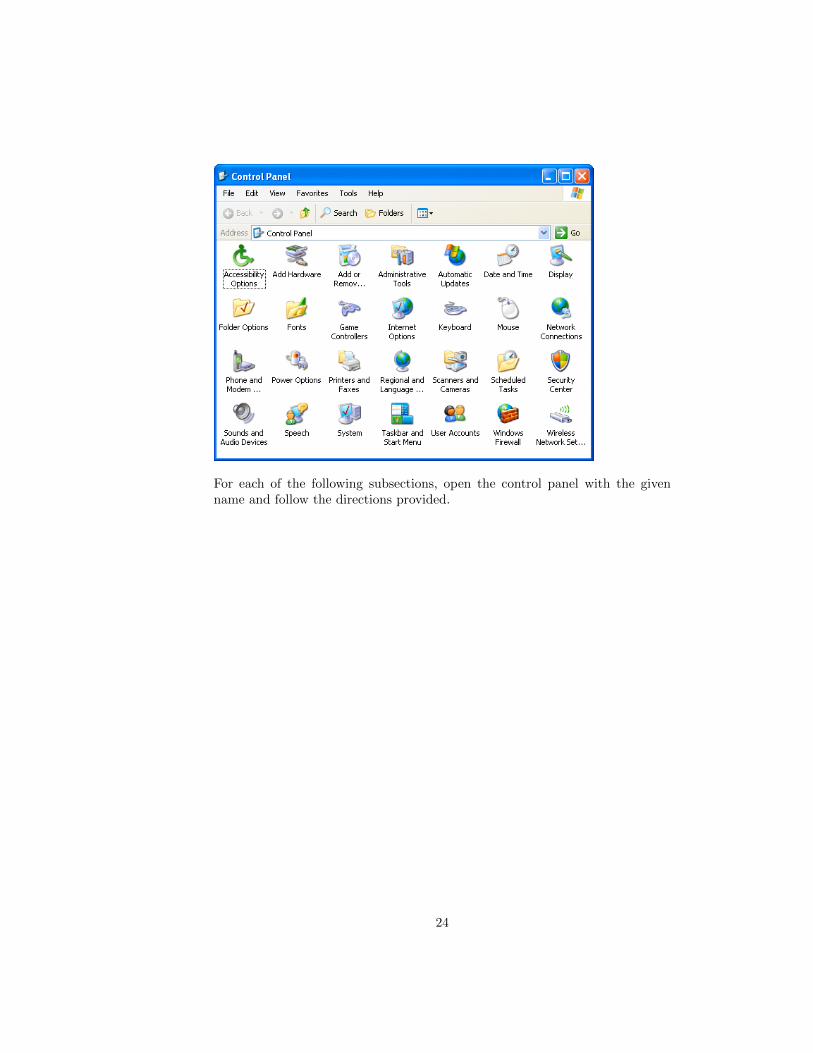
For each of the following subsections, open the control panel with the givenname and follow the directions provided.
24
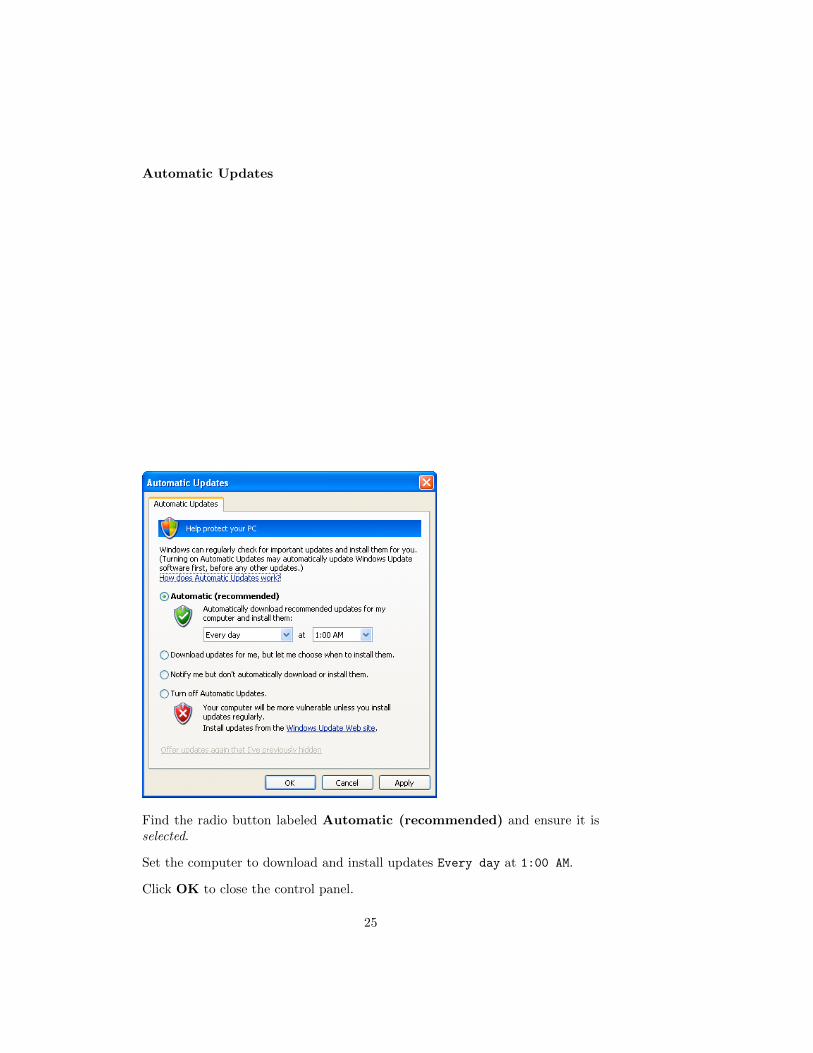
Automatic Updates
Find the radio button labeled Automatic (recommended) and ensure it isselected.
Set the computer to download and install updates Every day at 1:00 AM.
Click OK to close the control panel.
25

Power Options
From the Power schemes menu, select Always On.
Click OK to close the control panel.
26
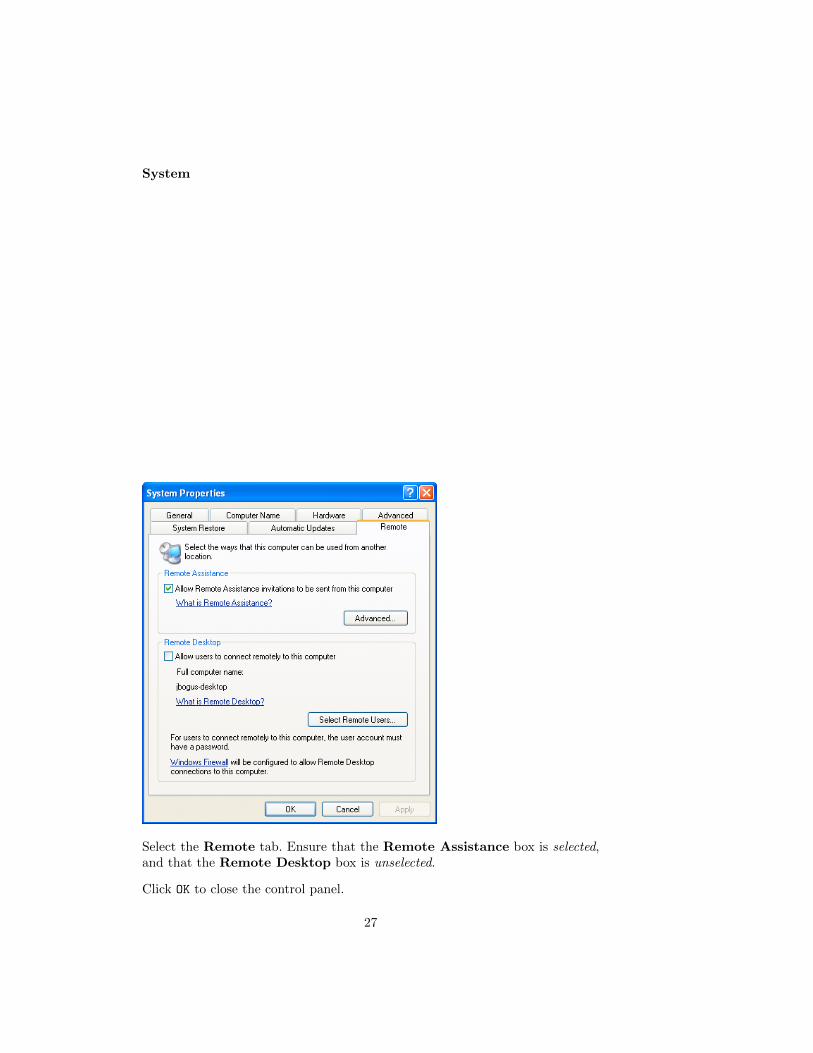
System
Select the Remote tab. Ensure that the Remote Assistance box is selected,and that the Remote Desktop box is unselected.
Click OK to close the control panel.
27
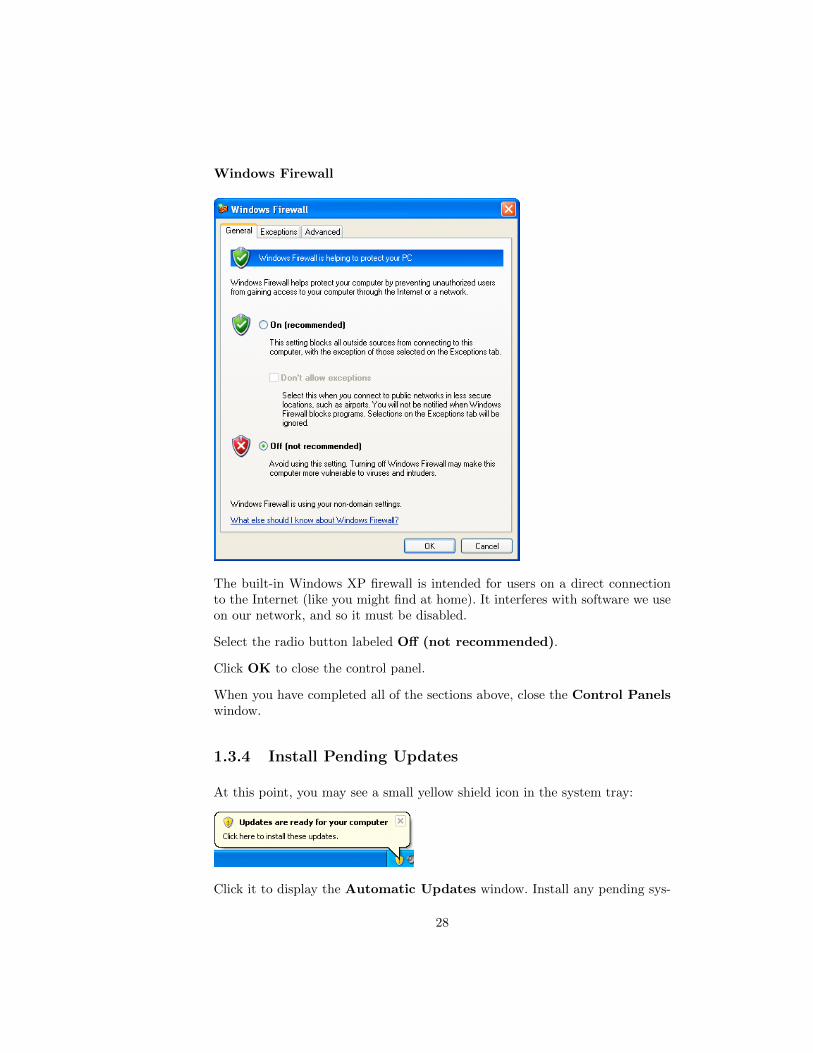
Windows Firewall
The built-in Windows XP firewall is intended for users on a direct connectionto the Internet (like you might find at home). It interferes with software we useon our network, and so it must be disabled.
Select the radio button labeled Off (not recommended).
Click OK to close the control panel.
When you have completed all of the sections above, close the Control Panelswindow.
1.3.4 Install Pending Updates
At this point, you may see a small yellow shield icon in the system tray:
Click it to display the Automatic Updates window. Install any pending sys-
28
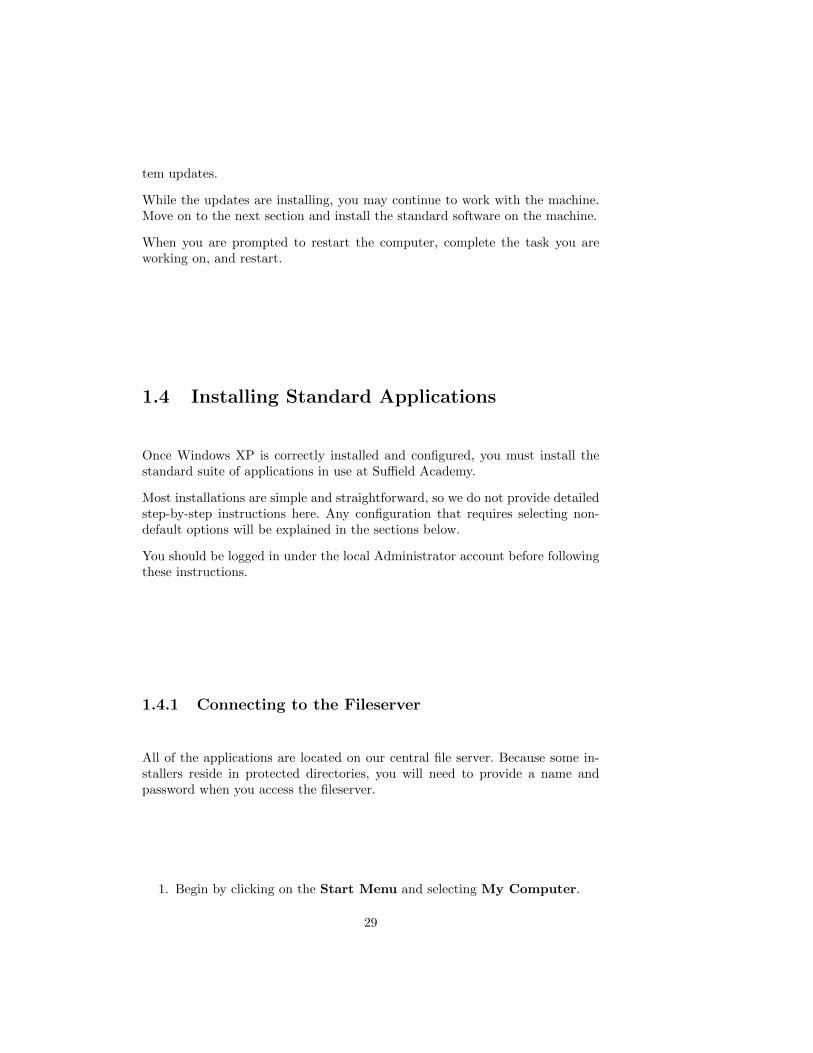
tem updates.
While the updates are installing, you may continue to work with the machine.Move on to the next section and install the standard software on the machine.
When you are prompted to restart the computer, complete the task you areworking on, and restart.
1.4 Installing Standard Applications
Once Windows XP is correctly installed and configured, you must install thestandard suite of applications in use at Suffield Academy.
Most installations are simple and straightforward, so we do not provide detailedstep-by-step instructions here. Any configuration that requires selecting non-default options will be explained in the sections below.
You should be logged in under the local Administrator account before followingthese instructions.
1.4.1 Connecting to the Fileserver
All of the applications are located on our central file server. Because some in-stallers reside in protected directories, you will need to provide a name andpassword when you access the fileserver.
1. Begin by clicking on the Start Menu and selecting My Computer.
29
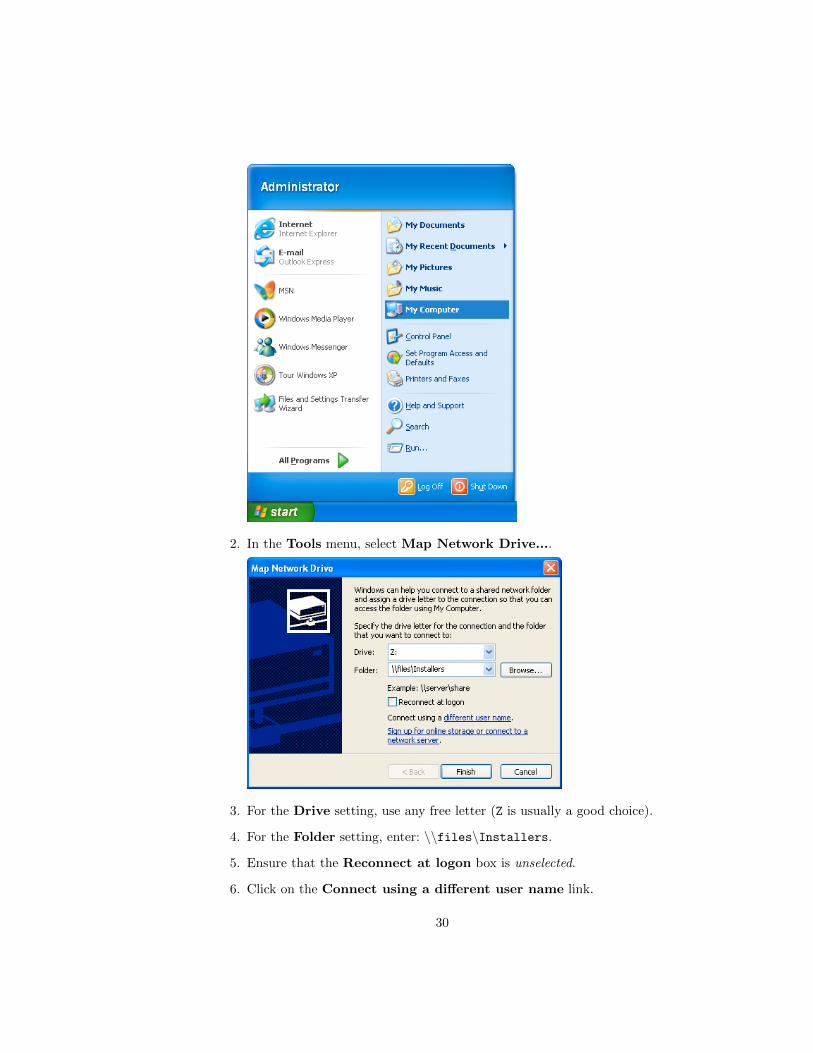
2. In the Tools menu, select Map Network Drive....
3. For the Drive setting, use any free letter (Z is usually a good choice).
4. For the Folder setting, enter: \\files\Installers.
5. Ensure that the Reconnect at logon box is unselected.
6. Click on the Connect using a different user name link.
30
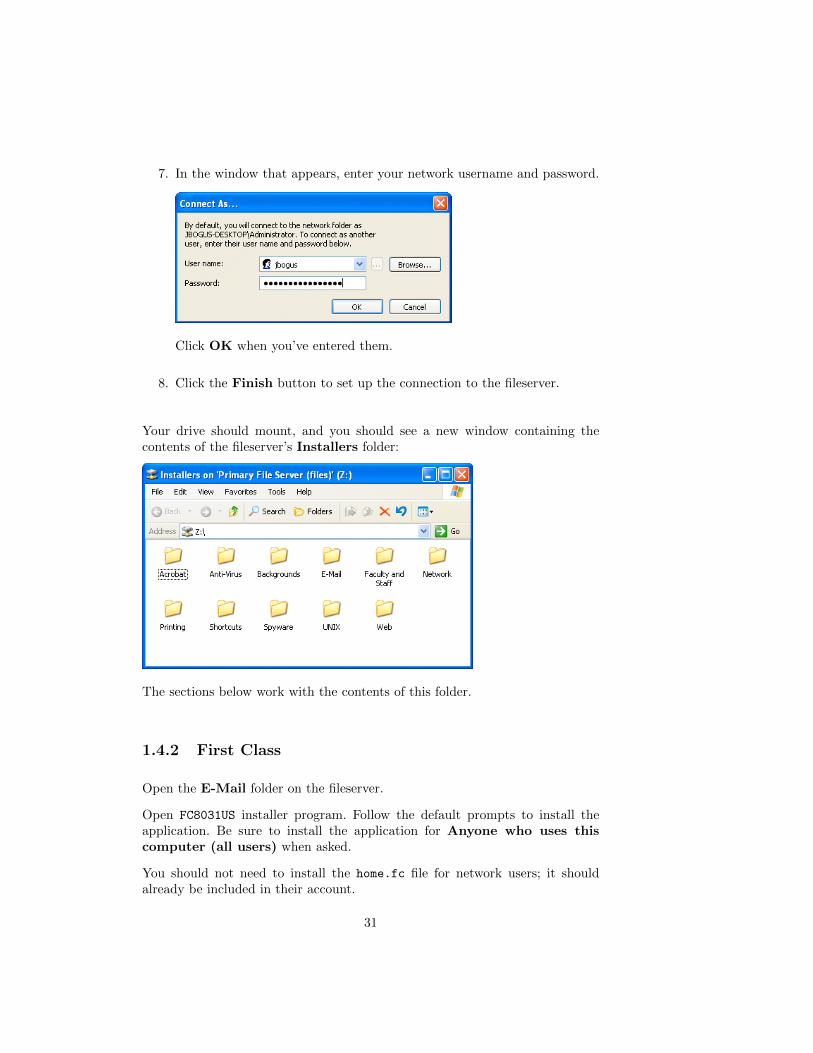
7. In the window that appears, enter your network username and password.
Click OK when you’ve entered them.
8. Click the Finish button to set up the connection to the fileserver.
Your drive should mount, and you should see a new window containing thecontents of the fileserver’s Installers folder:
The sections below work with the contents of this folder.
1.4.2 First Class
Open the E-Mail folder on the fileserver.
Open FC8031US installer program. Follow the default prompts to install theapplication. Be sure to install the application for Anyone who uses thiscomputer (all users) when asked.
You should not need to install the home.fc file for network users; it shouldalready be included in their account.
31
Default Mail Program
We must register FirstClass as the default mail reading application on the com-puter.
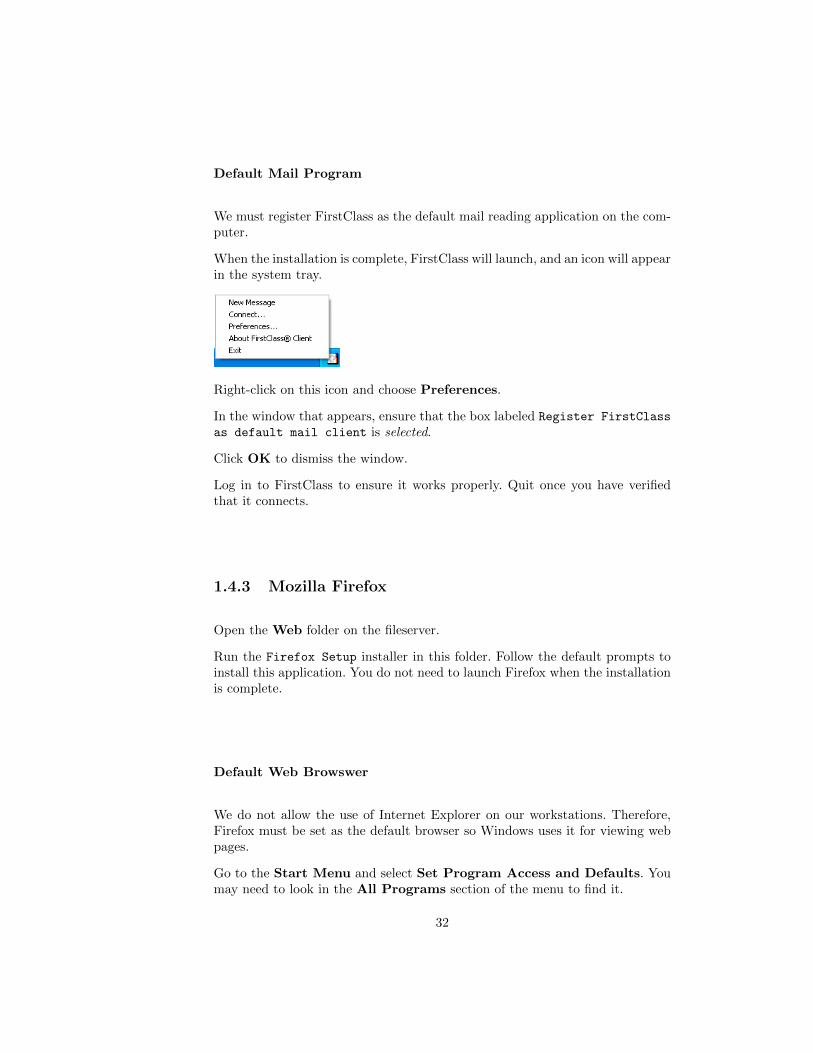
When the installation is complete, FirstClass will launch, and an icon will appearin the system tray.
Right-click on this icon and choose Preferences.
In the window that appears, ensure that the box labeled Register FirstClass
as default mail client is selected.
Click OK to dismiss the window.
Log in to FirstClass to ensure it works properly. Quit once you have verifiedthat it connects.
1.4.3 Mozilla Firefox
Open the Web folder on the fileserver.
Run the Firefox Setup installer in this folder. Follow the default prompts toinstall this application. You do not need to launch Firefox when the installationis complete.
Default Web Browswer
We do not allow the use of Internet Explorer on our workstations. Therefore,Firefox must be set as the default browser so Windows uses it for viewing webpages.
Go to the Start Menu and select Set Program Access and Defaults. Youmay need to look in the All Programs section of the menu to find it.
32
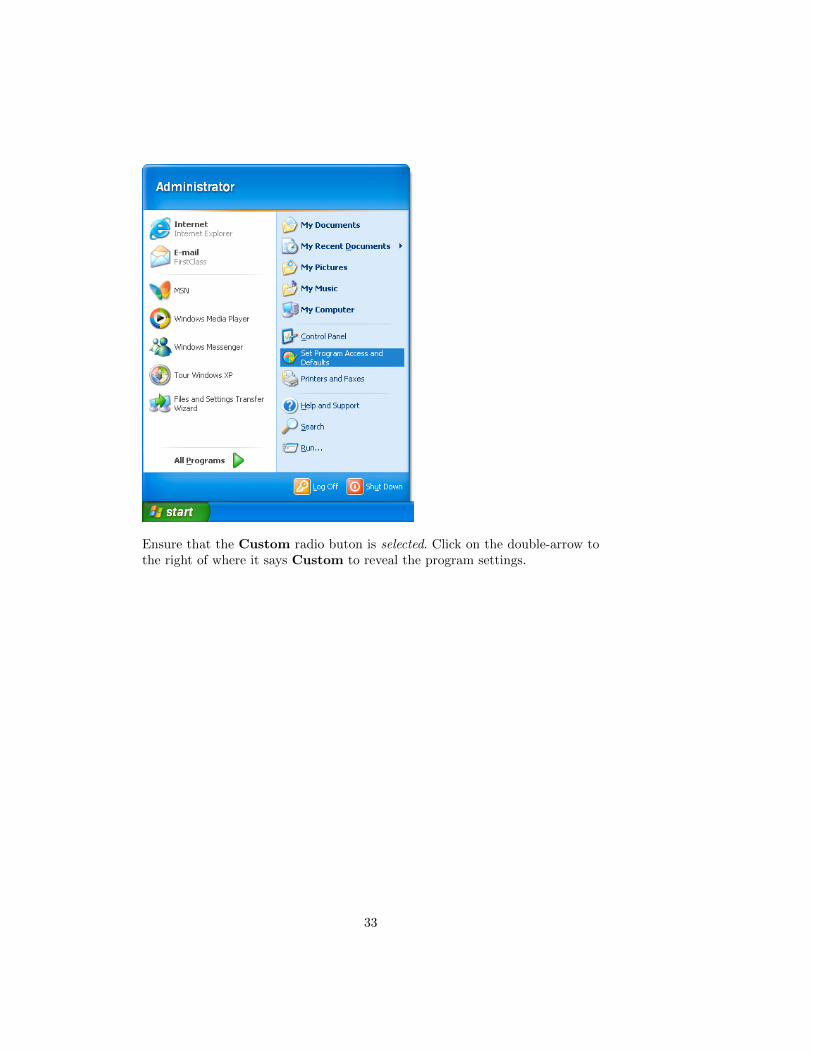
Ensure that the Custom radio buton is selected. Click on the double-arrow tothe right of where it says Custom to reveal the program settings.
33
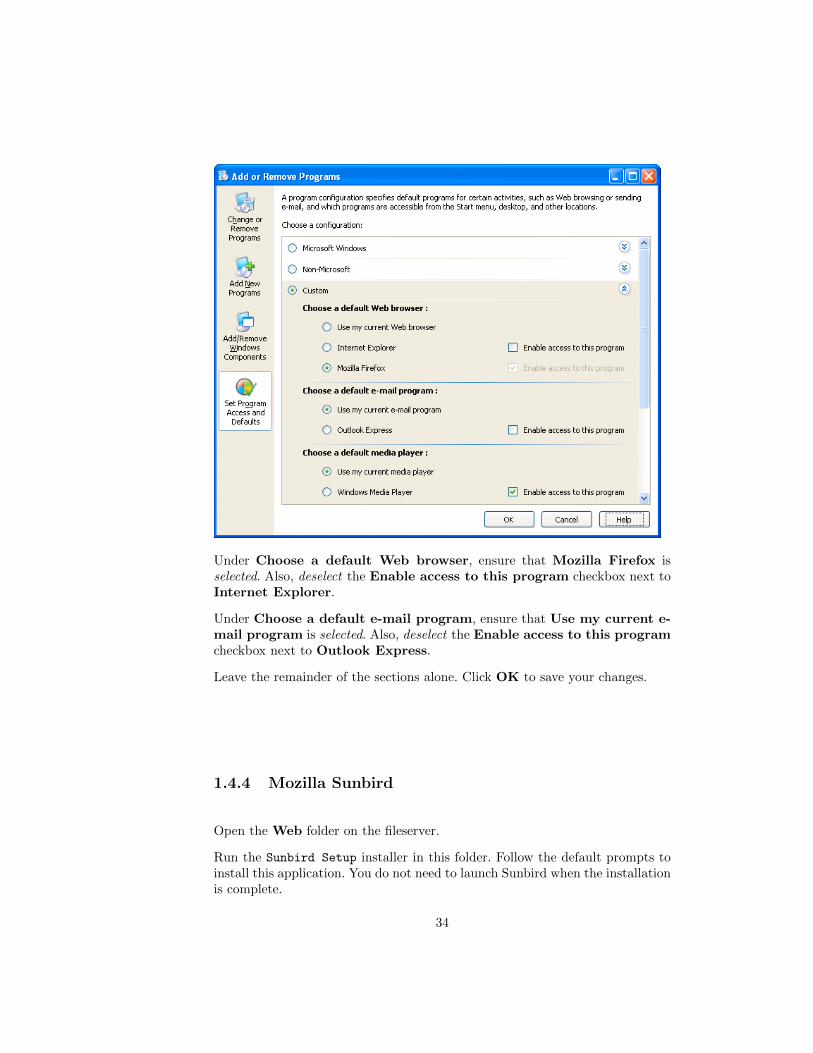
Under Choose a default Web browser, ensure that Mozilla Firefox isselected. Also, deselect the Enable access to this program checkbox next toInternet Explorer.
Under Choose a default e-mail program, ensure that Use my current e-mail program is selected. Also, deselect the Enable access to this programcheckbox next to Outlook Express.
Leave the remainder of the sections alone. Click OK to save your changes.
1.4.4 Mozilla Sunbird
Open the Web folder on the fileserver.
Run the Sunbird Setup installer in this folder. Follow the default prompts toinstall this application. You do not need to launch Sunbird when the installationis complete.
34
1.4.5 Microsoft Office 2003
Open the Faculty and Staff folder on the fileserver, then open the Office folderinside of that. Finally, open the Office Professional 2003 folder (the rest ofthe folder name is the serial number for the software).
Inside this folder are several subfolders containing both the initial installer andservice pack updates to the software.
There should be shortcuts to the various installers in this folder. Simply run theinstallers in the listed order (e.g., ”Step 1”, ”Step 2”, ”Step 3”).
If ask for an installation type, opt for a Complete Install. If an activiationkey is requested, it can be found embedded in the name of the folder thatcontains the installer program.
1.4.6 FileMaker 6
Open the Faculty and Staff folder on the fileserver, then open the Filemakerfolder inside of that. Finally, open the FMPro6 folder (the rest of the foldername is the serial number for the software).
Find the program called Setup and run it. The activation key for the softareis embedded in the name of the folder that contains the installer program.Follow the default prompts to install the applications. You may safely ignorethe registration of the product (choose Online and close the browser).
Once Filemaker is installed, the SMTPit extension must be installed. Moveback to the Filemaker folder on the server. Find the file called SMTPit, and copyit to the C:\Program Files\FileMaker\FileMaker Pro 6\System\ directory.
1.4.7 Acrobat Reader 7
Open the Acrobat folder on the fileserver.
Run the installer inside the folder. Follow the default prompts to install thisapplication.
1.4.8 Ultr@VNC Server
Open the Network folder on the fileserver.
Find and run the Ultr@VNC installer. Click through the License Agreement,Information, and Select Destination Location pages.
35
On the Select Components page, accept the default component list.
Accept the defaults for the Select Start Menu Folder page.
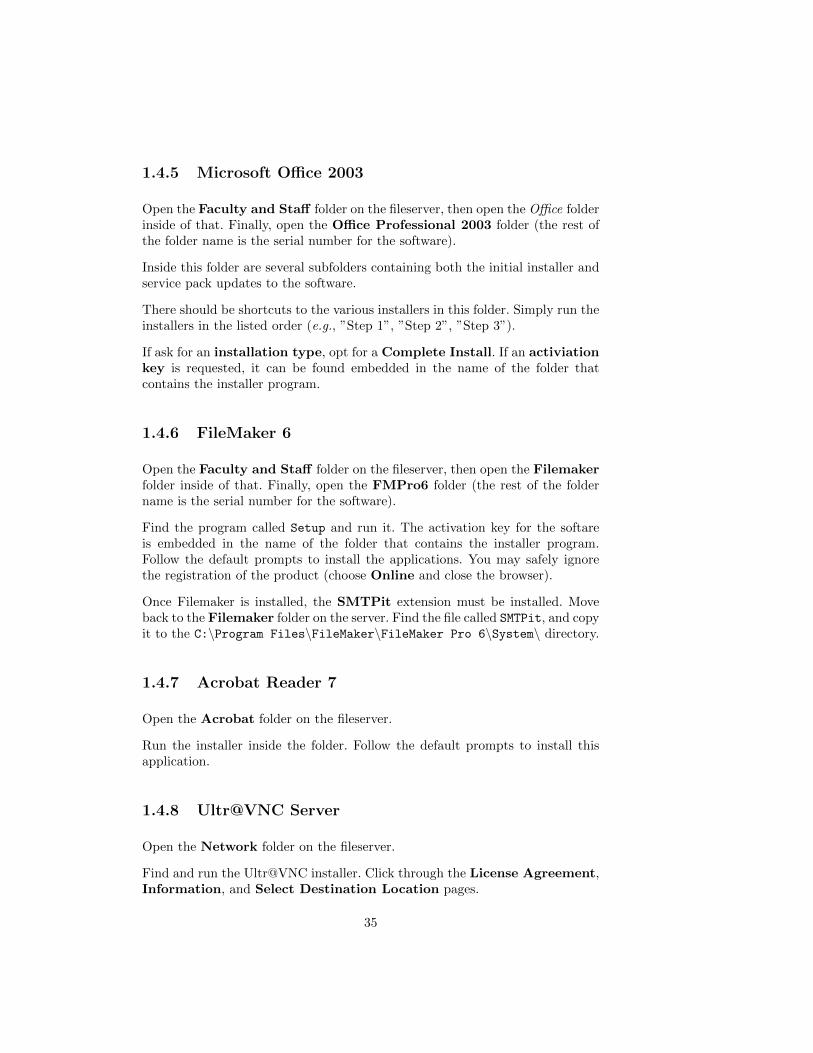
On the Select Additional Tasks page, do the following:
select the Register Ultr@VNC Server as a system service and Start orrestart Ultr@VNC service checkboxes. Deselect the Create a Ultr@VNCViewer desktop icon and Create a Ultr@VNC Server desktop iconcheckboxes. Leave the other checkboxes alone.
Complete the installation procedure. The installer opens a web browser to theUltr@VNC web page, which you may close immediately. Additionally, if youreceive an error message about a shell command that can’t run, you may simplydismiss it.
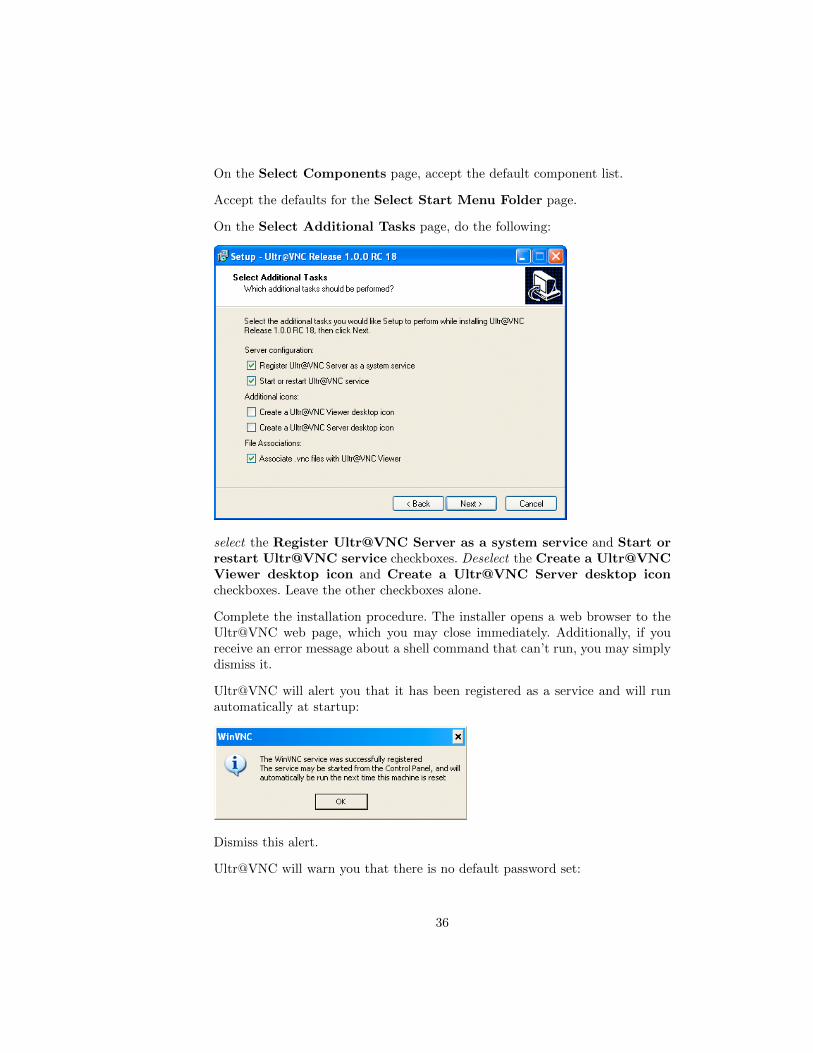
Ultr@VNC will alert you that it has been registered as a service and will runautomatically at startup:
Dismiss this alert.
Ultr@VNC will warn you that there is no default password set:
36
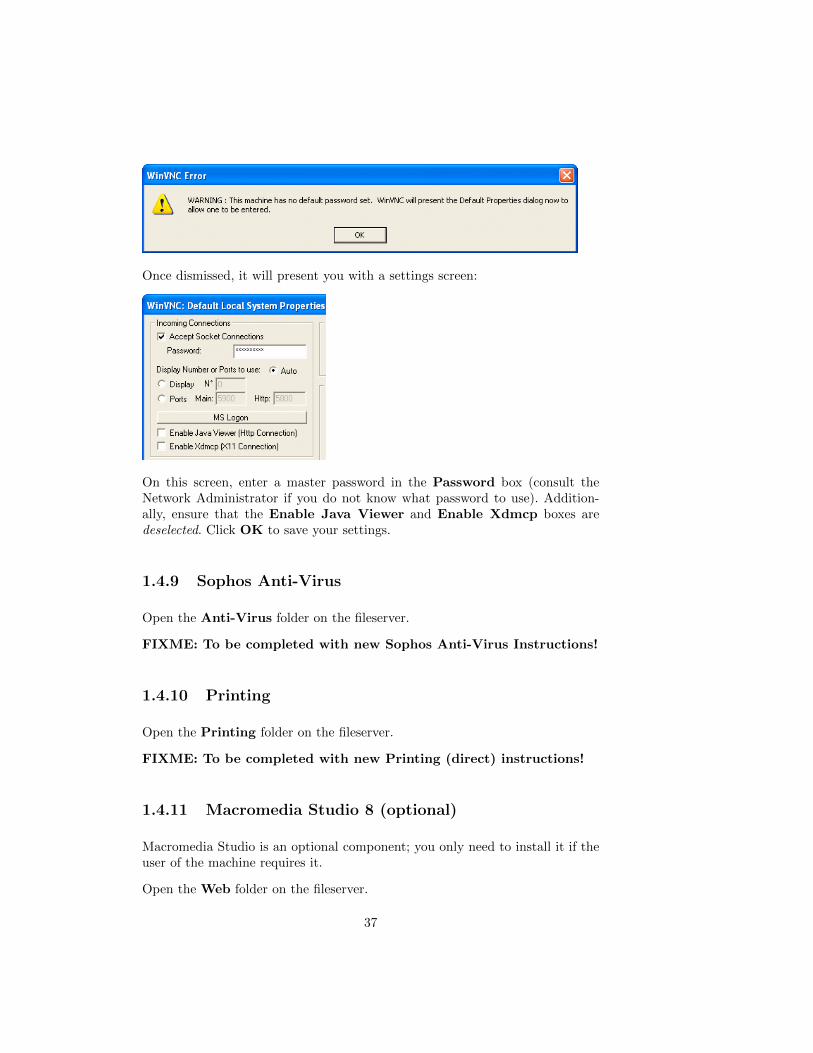
Once dismissed, it will present you with a settings screen:
On this screen, enter a master password in the Password box (consult theNetwork Administrator if you do not know what password to use). Addition-ally, ensure that the Enable Java Viewer and Enable Xdmcp boxes aredeselected. Click OK to save your settings.
1.4.9 Sophos Anti-Virus
Open the Anti-Virus folder on the fileserver.
FIXME: To be completed with new Sophos Anti-Virus Instructions!
1.4.10 Printing
Open the Printing folder on the fileserver.
FIXME: To be completed with new Printing (direct) instructions!
1.4.11 Macromedia Studio 8 (optional)
Macromedia Studio is an optional component; you only need to install it if theuser of the machine requires it.
Open the Web folder on the fileserver.
37

Open the Macromedia Studio 8 folder.
Run the Install Studio 8 installer, and perform a default install of the appli-cation. The serial number for the product is contained in the name of the folderyou are in, or you can find it in the software database.
38