instructions for high altitude conversion · 2015-03-09 · instructions for high altitude...
TRANSCRIPT

6302 9763 – 02/2004 US/CA For the contractor
Please read these instructions carefully
Instructions for High Altitude Conversion
Sealed Combustion Gas Boiler Logano GA244
Required Sealevel Input Rates 0–2000 ft
GA244-37156 MBtu/hr
GA244-44182 MBtu/hr
GA244-53220 MBtu/hr
GA244-62259 MBtu/hr
Warning!
This conversion kit shall be installed by a qualified service agency in accordance with the manufacturer's instructions and all applicable codes and requirements of the authority having jurisdiction and in accordance with the requirements of the CAN/CSA B149.1 or CAN/CSA B149.2 installation codes.
Warning!
Please observe the instructions regarding conversion from natural gas to propane.
This kit and instructions are for converting the GA244 model Boilers to high altitude operation.
Notice! Save these instructions for later use.
Instructions for High Altitude Conversion
1 Safety Considerations
Please observe the following safety instructions.
1.1 Application purpose
This kit and instructions are for high altitude converting the GA244 model boiler over 2000 ft.
1.2 Guideline of notices
Two levels of danger are identified by the following warning labels:
1.3 Observe the following symbols
2 Parts List for High Altitude Conversion
This kit contains the following parts:
– Main orifices and gaskets.
– Conversion data plate to be filled out and affixed to the appliance.
– Conversion instructions.
– Technical documents.
WARNING!
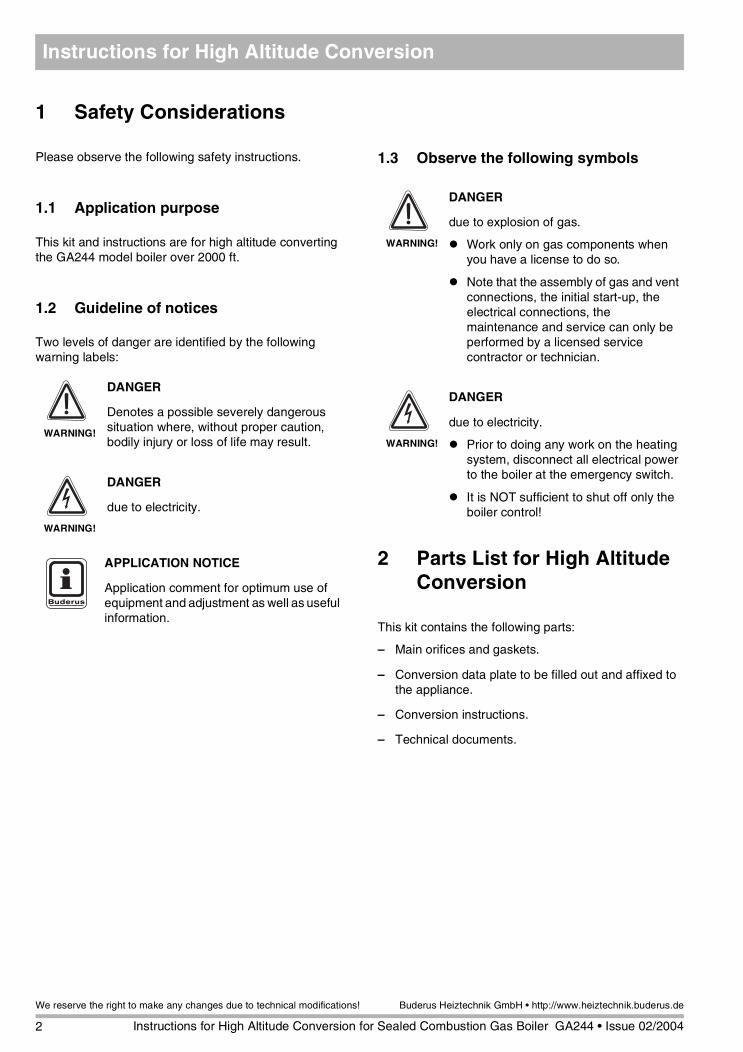
DANGER
Denotes a possible severely dangerous situation where, without proper caution, bodily injury or loss of life may result.
WARNING!
DANGER
due to electricity.
APPLICATION NOTICE
Application comment for optimum use of equipment and adjustment as well as useful information.
WARNING!
DANGER
due to explosion of gas.
Work only on gas components when you have a license to do so.
Note that the assembly of gas and vent connections, the initial start-up, the electrical connections, the maintenance and service can only be performed by a licensed service contractor or technician.
WARNING!
DANGER
due to electricity.
Prior to doing any work on the heating system, disconnect all electrical power to the boiler at the emergency switch.
It is NOT sufficient to shut off only the boiler control!
2
We reserve the right to make any changes due to technical modifications!
Instructions for High Altitude Conversion for Sealed Combustion Gas Boiler GA244 • Issue 02/2004
Buderus Heiztechnik GmbH • http://www.heiztechnik.buderus.de
Instructions for High Altitude Conversion
3 High Altitude Conversion over 2000 feet
For your safety, read these instructions before converting the boiler.
To convert the boiler for use at high altitude, the following instructions shall be adhered to:
The boiler shall be converted prior to installation.
1. If the boiler has been in operation, shut off the main gas shut-off valve. If the boiler has not been placed into service, go to step 3.
2. Turn off all electric power to the appliance and set the thermostat to its lowest setting.
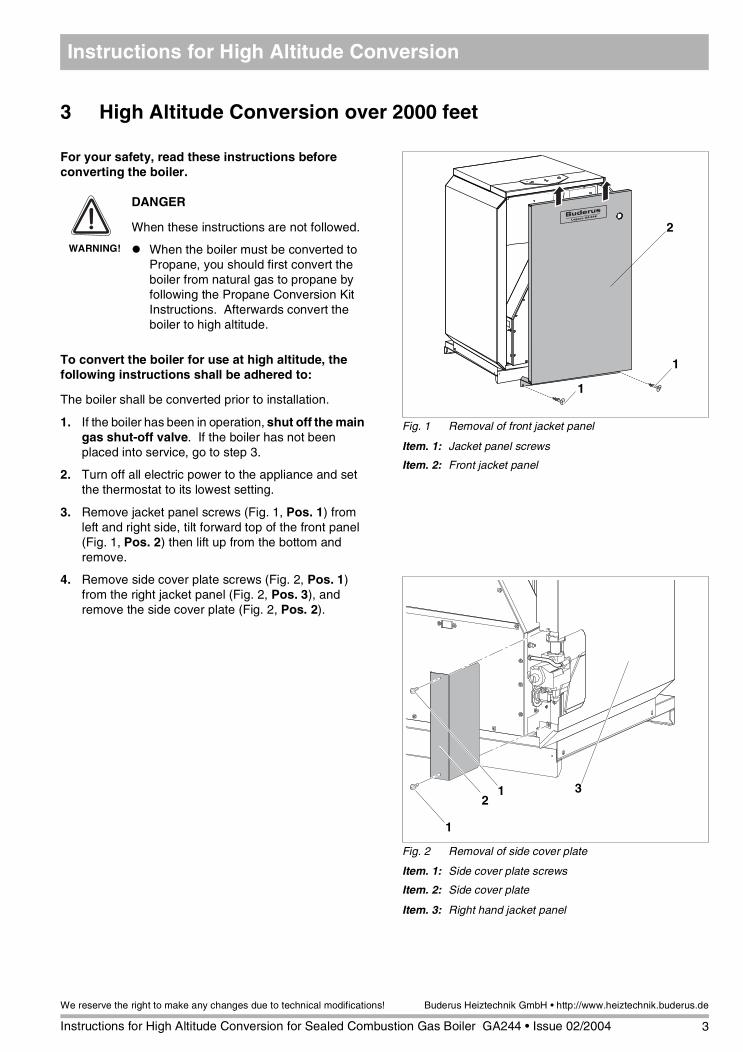
3. Remove jacket panel screws (Fig. 1, Pos. 1) from left and right side, tilt forward top of the front panel (Fig. 1, Pos. 2) then lift up from the bottom and remove.
4. Remove side cover plate screws (Fig. 2, Pos. 1) from the right jacket panel (Fig. 2, Pos. 3), and remove the side cover plate (Fig. 2, Pos. 2).
Fig. 1 Removal of front jacket panel
Item. 1: Jacket panel screws
Item. 2: Front jacket panel
1
2
1
WARNING!
DANGER
When these instructions are not followed.
When the boiler must be converted to Propane, you should first convert the boiler from natural gas to propane by following the Propane Conversion Kit Instructions. Afterwards convert the boiler to high altitude.
Fig. 2 Removal of side cover plate
Item. 1: Side cover plate screws
Item. 2: Side cover plate
Item. 3: Right hand jacket panel
1
12
3
3
We reserve the right to make any changes due to technical modifications!
Instructions for High Altitude Conversion for Sealed Combustion Gas Boiler GA244 • Issue 02/2004
Buderus Heiztechnik GmbH • http://www.heiztechnik.buderus.de

Instructions for High Altitude Conversion
5. Turn the gas control valve knob (Fig. 3, Pos. 1) clockwise to the “OFF“ position. Do not use excessive force.
Change out main orifices
6. Remove the burner tray cover plate screws (Fig. 4, Pos. 1) from the cover plate (Fig. 4, Pos. 2) and remove this cover plate (Fig. 4, Pos. 2).
Fig. 3 Gas control valve
Item. 1: Gas control valve knob (set to “ON“)
1
WARNING!
DANGER
For explosion due to gas.
Wait five (5) minutes to clear out any gas. Then smell for gas, including near the floor. If you smell gas, STOP! Follow "B" instructions in the safety information printed on page 7. If you do not smell gas, go to the next step.
NOTICE
For the conversion to high altitude, you only need to change out the main orifices and not the pilot orifice.
DANGER!
DANGER
due to incorrect wiring.
Label all wires prior to disconnecting when servicing controls.
Fig. 4 Gas burner
Item. 1: Burner tray cover plate screws
Item. 2: Burner cover plate
2
1
4
We reserve the right to make any changes due to technical modifications!
Instructions for High Altitude Conversion for Sealed Combustion Gas Boiler GA244 • Issue 02/2004
Buderus Heiztechnik GmbH • http://www.heiztechnik.buderus.de

Instructions for High Altitude Conversion
7. Install the new orifices (Fig. 5, Pos. 1) and washers (Fig. 5, Pos. 2) supplied with the kit. Ensure orifices are the proper size for your boiler application per Table. 1 and Table. 2.
8. Install the burner tray cover plate on the burner tray assembly in reverse order of removal. Ensure the nuts are tightened firmly.
9. Fill out the required information on the conversion plate and affix the plate to the outside of the boiler jacket as close as possible to the existing rating label.
Testing for Leaks
10. If the boiler has not been placed in operation, follow the installation instructions in GA244 Installation, Operation and Maintenance Manual supplied with the boiler. If the boiler has been in operation, then open the main gas shut-off valve. Test the gas piping on the input side of the gas control (Fig. 6) for leaks by applying a soap and water solution. If no leaks are found, go to step 12. If any leaks are found, shut off the main gas shut-off valve.
11. Repair leaks and repeat step 10.
Fig. 5 Installation fo main orifices
Item. 1: Main orifice
Item. 2: Washer (copper)
1
2Orifice Sizes for Natural Gas Firing at High Altitude in Feet
Model
GA244-37
GA244-44
GA244-53
GA244-62
Table. 1 Orifice sizes for Natural gas
Orifice Sizes for Propane Conversionat High Altitude in Feet
Model
GA244-37
GA244-44
GA244-53
GA244-62
Table. 2 Orifice sizes for Propane
0–8500 8501–12000
3.00 2.95
3.25 3.20
3.20 3.15
3.15 3.10
0–8500
1.95
2.15
2.10
2.20
8501–12000
1.90
2.10
2.05
2.15
5
We reserve the right to make any changes due to technical modifications!
Instructions for High Altitude Conversion for Sealed Combustion Gas Boiler GA244 • Issue 02/2004
Buderus Heiztechnik GmbH • http://www.heiztechnik.buderus.de

Instructions for High Altitude Conversion
12. Shut off the main gas supply shut-off valve. Remove the line pressure tapping plug (Fig. 6, Pos. 2) from the gas control. Install a test fitting and hook up a manometer to measure the supply pressure.
13. Remove the manifold pressure tapping plug (Fig. 6, Pos. 3) from the gas control. Install a test fitting and hook up a manometer to measure the manifold pressure.
14. Open the main gas piping shut-off valve and measure the supply pressure of the boiler. The supply pressure must be between 4.7 and 10.5 inches of water column for Natural gas or 11 and 13 inches water column for Propane. If the pressure is not between 4.7 and 10.5 inches water column for Natural gas (or 11 and 13 inches water column for Propane), when boiler is running, call your service technician or gas supplier.
15. Follow the lighting instructions on the next page.
Fig. 6 Gas control valve
Item. 1: Gas control knob (set to “ON“)
Item. 2: Supply pressure test port
Item. 3: Manifold pressure test port
3
2
1
6
We reserve the right to make any changes due to technical modifications!
Instructions for High Altitude Conversion for Sealed Combustion Gas Boiler GA244 • Issue 02/2004
Buderus Heiztechnik GmbH • http://www.heiztechnik.buderus.de

High Altitude Conversion over 2000 feet 3
3.1 Lighting Instructions
For your safety, read belore lighting. A) This appliance is equipped with an ignition device which automatically lights the pilot. Do not try to light the pilot by hand.
B) Check for smell of gas around the appliance area. Be sure to smell next to the floor because some gas is heavier than air and will settle on the floor.
C) Use only your hand to turn the gas control knob. Never use tools. If the knob will not turn by hand, don't try to repair it, call a qualified service technician. Force or attempted repair may result in a fire or explosion.
D) Do not use this appliance if any part has been under water. Immediately call a qualified service technician to inspect the appliance and to replace any part of the control system and any gas control which has been under water.
WARNING!
DANGER
due to incorrect service and maintenance.
If you do not follow these instructions exactly, a fire or explosion may result causing property damage, personal in-jury or loss of life.
Follow these operating instructions.
WARNING!
DANGER !
What to do if you smell gas:
No open fire! Do not smoke!
Avoid formation of sparks! Do not touch any electric switch, phone, electric plug or bell!
Shut off main gas supply.
Open windows and doors!
Notify all occupants!
Leave the building!
Immediately call your gas supplier, heating contractor or fire department from a phone outside the building!!
7
We reserve the right to make any changes due to technical modifications!
Instructions for High Altitude Conversion for Sealed Combustion Gas Boiler GA244 • Issue 02/2004
Buderus Heiztechnik GmbH • http://www.heiztechnik.buderus.de

Instructions for High Altitude Conversion
4 Operating Instructions
STOP! Read the safety precautions on page 7 of this manual.
1. Wait five (5) minutes to clear out any gas. Then smell for gas, including near the floor. If you smell gas, STOP! Follow "B" in the safety information on page 7. If you do not smell gas, go to the next step.
2. Locate the pilot assembly by looking through the access viewing port (Fig. 7, Pos. 1) on the burner front plate.
3. Turn the gas control knob (Fig. 8, Pos. 1) counterclockwise to “ON“.
4. Turn on the electrical power to the application.
5. Set the thermostat to the desired setting to activate the boiler (Thermostat should be at least 10 °F above the desired room tmeprature).
6. The ignition control should initiate sparking at the pilot. The pilot should light and then the main burners should light. If the main burners do not light, shut off the main gas piping shutoff valve. Shut off all electric power to the appliance and call your service technician or gas supplier.
7. If the main burners light, then the gas fittings, union and orifices must be tested for leaks with a soap and water solution. If no leaks are found then go to step 9. If any leaks are found, turn off gas control knob (Fig. 8, Pos. 1) clockwise to “OFF“. Turn off all electric power to the appliance, set the thermostat to lowest setting.
8. Repair leaks. Repeat steps 1 through 7.
9. Check the supply pressure while the boiler is running. Pressure must be between 4.7 and 10.5 inches water column for Natural gas or 11 and 13 inches water column for Propane gas. Record supply pressure on the boiler start-up procedure.
Fig. 7 Front view
Item. 1: Viewing port
1
Fig. 8 Gas control valve
Item. 1: Gas control knob (set to “ON“)
Item. 2: Test port for gas supply measurements
Item. 3: Test port for manifold pressure measurement
Item. 4: Protective screw for pilot pressure adjustment
Item. 5: Protective screw for manifold pressure adjustment
1
2
34
5
8
We reserve the right to make any changes due to technical modifications!
Instructions for High Altitude Conversion for Sealed Combustion Gas Boiler GA244 • Issue 02/2004
Buderus Heiztechnik GmbH • http://www.heiztechnik.buderus.de

Instructions for High Altitude Conversion
10. Check manifold pressure. Set the manifold pressure according to the values in Table 3. To adjust the manifold pressure (Fig. 8, Pos. 5) remove the capscrew from the gas control. Turn the pressure regulating adjusting screw clockwise to increase, or counterclockwise to decrease the manifold pressure. This adjustment must be made while the boiler is in operation.
11. After adjustment, record pressure in the start-up procedure, and install the capscrew on the gas control (Fig. 8, Pos. 5).
12. Observe the pilot flame (Fig. 9, Pos. 2) through viewing port (Fig. 7, Pos. 1) in the burner cover plate. The flame should envelop the flame sensor ½ - 1-½ inch, see (Fig. 9, Pos. 1). If the pilot flame is satisfactory then go to step 13. If the pilot flame is too small or too large, adjust the pilot using pilot adjustment. Turn the inner adjustment screw (Fig. 8, Pos. 4) clockwise to decrease, or counterclockwise to increase the pilot flame. After adjustment, replace the cover screw and tighten firmly (Fig. 8, Pos. 4).
13. Observe the main burner flame (Fig. 10, Pos. 1) through the viewing port (Fig. 7, Pos. 1) in the burner cover plate. The flame should have a smooth, firm contour and must be mostly blue in color. If the main flame is satisfactory, go to step 14. If the main burner flame is lazy, yellow, or lifting off the burners, turn the gas control knob (Fig. 8, Pos. 1) clockwise to “OFF“. Shut off the main gas piping shutoff valve. Disconnect all electric power to the appliance and call your service technician or gas supplier.
14. The ignition safety shut-off must be tested. Test the safety shut-off by shutting off the main gas piping shut-off valve.The main burner and pilot flame (Fig. 9, Pos. 2) will extinguish. Within six (6) seconds the gas control main gas solenoid should close and make an audible sound. The ignition will spark.After 90 seconds, the module should go into lock out mode and the spark should stop. Disconnect the electric power to the appliance. Open the main gas shutoff valve. Turn on the electric power to the unit. A normal operating sequence should occur. If the gas control functions satisfactorily then go to step 15. If the gas control does not function satisfactorily, immediately turn the gas control knob (Fig. 11, Pos. 1) clockwise to "OFF".
GA244Natural gas[inch W.C.]
Propane[inch W.C.]
37 3.77 8.03
44 3.65 7.63
53 3.73 8.11
62 3.77 6.15Table. 3 Required manifold pressure
Fig. 9 Proper pilot flame
Item. 1: 1/2“ to1 1/2“
Item. 2: Flame
1 2
Fig. 10 Main burner
Item. 1: Main burner flame
1
9
We reserve the right to make any changes due to technical modifications!
Instructions for High Altitude Conversion for Sealed Combustion Gas Boiler GA244 • Issue 02/2004
Buderus Heiztechnik GmbH • http://www.heiztechnik.buderus.de

Instructions for High Altitude Conversion
Shut off the main gas piping shut-off valve. Disconnect all electric power to the appliance and call your service technician or gas supplier.
15. Turn the gas control knob (Fig. 11, Pos. 1) clockwise to “OFF“.
16. Shut the main gas piping shut-off valve.
17. Turn off electric power to the appliance, and set the thermostat to the lowest setting.
18. Remove the pressure test fittings from the gas supply and manifold pressure tabs in the gas control and replace the plugs.
19. Repeat steps 1 to 6, and 13 to place the appliance back in operation. Check the plugs in the gas control with a soap and water solution. If no leaks are found go to step 21. If any leaks are found, shut off the main gas piping shutoff valve and turn off all electric power to the appliance and turn the gas control knob (Fig. 11, Pos. 1) clockwise to "OFF“.
20. Repair leaks. Open the main gas shut-off valve and repeat step 19.
21. Wash off the soap and water solution used to test for leaks to ensure no corrosive effects from the soap.
22. Check the high limit aquastat operation to ensure that it shuts off the boiler when the boiler water temperature reaches the setpoint of the aquastat. Record on start-up procedure form.
23. Replace the front boiler jacket panel.
Fig. 11 Gas control valve
Item. 1: Gas control knob
1
10
We reserve the right to make any changes due to technical modifications!
Instructions for High Altitude Conversion for Sealed Combustion Gas Boiler GA244 • Issue 02/2004
Buderus Heiztechnik GmbH • http://www.heiztechnik.buderus.de

Notice
11
We reserve the right to make any changes due to technical modifications!
Instructions for High Altitude Conversion for Sealed Combustion Gas Boiler GA244 • Issue 04/2004
Buderus Heiztechnik GmbH • http://www.heiztechnik.buderus.de
Buderus Hydronic Systems 50 Wentworth Avenue
Londonderry, NH 03053 Tel: 603-552-1100 • Fax: 603-421-2719
www.buderus.net
Buderus Hydronic Systems, reserves the right to make changes without notice due to continuing engineering and technological advances
Contractor: