instructor development: training the adult · pdf fileinstructor development: training the...
TRANSCRIPT
1
Instructor Development: Training the Adult Learner
October 2013
NATIONAL SKI PATROL SYSTEM 133 South Van Gordon Street, Suite 100
Lakewood, Colorado 80228 303-988-1111 www.nsp.org

2
Table of Contents Introduction 3
Chapter 1. Overview of Instructional Responsibilities 6
Chapter 2. How Adults Learn 9
Chapter 3. Human Relations and Communications 17
Chapter 4. Instructional Management 25
Chapter 5. Lesson Planning 32
Chapter 6. Lesson Contentand Instructional Resources 43
Chapter 7. Instructional Methods 48
Chapter 8. Monitoring and Evaluation 56
Chapter 9. Course Summary and Instructor Mentoring 63
Chapter 10. Administrative Procedures 67
Appendices 69
Appendix A. Glossary 69
Appendix B. NSP Instructor Job Description 73
Appendix C. Effective Questioning Skills 75
Appendix D. Effective Teaching Techniques 77
Appendix E. Use Of PowerPoint and Other Visual Aids 85
Appendix F. Sample Lesson Guides From NSP Education Programs 89
Appendix G. Classifying Learning 100
Appendix H. Administrative Forms 108
Appendix I. Quality Management System 109

3
Introduction More than 25,000 National Ski Patrol (NSP) members participate in ongoing education programs. These programs serve members acquiring new knowledge and skills in addition to those taking continuing education. The strength of the NSP system resides in its ability to provide continually updated, consistent training to the membership. A main part of training is the instructors who provide it. The first step in becoming an NSP instructor is the Instructor Development Course. However, the National Ski Patrol is, by definition, a dynamic, member-driven organization. Members are expected to complete extensive initial training and maintain high skill levels through participation in continuing education programs. Increasingly, members are saying that they have less time but are expected to do more. Changes in the NSP Instructor Development Program are a direct result of listening to the membership. The new program requires initial Instructor Development education, followed by practical experience teaching NSP programs while being mentored by more experienced instructors. This manual is meant to guide the initial Instructor Development training and is to be used as a frequent reference by both students taking the course and all instructors who are planning, teaching, and administering their classes and courses in every NSP discipline. NSP Instructor Development Program Nothing is more important to the success of NSP's education programs than the cadre of hard-working, well-trained instructors who deliver those programs. All NSP programs utilize peer instructors; in other words, our fellow members teach us. Our volunteer instructors are engineers, lawyers, doctors, homemakers, teachers, farmers, nurses, secretaries and construction workers, among others. While these dedicated individuals are the lifeblood of NSP's program delivery, few have had formal training in educational theory and teaching methods. To support these instructors, NSP's goal is to provide high-quality educational materials, well-organized lesson outlines, and relevant training in how to teach. The NSP Instructor Development Program consists of several components that provide training in course management as well as instruction skills that instructors of any organization will find useful. The Instructor Development Course focuses on the basics of good instruction, and this generic information is applicable for all potential instructors regardless of the instructional content they wish to teach. The course is designed to be delivered through a traditional face-to-face instructional format or as a hybrid course (referred to as a “Hybrid E-course”) consisting of a self-paced, multimedia, web-based portion and a hands-on, face-to-face portion. The traditional course usually last about eight hours. The E-course permits students, including those who are experienced instructors in other contexts, to complete much of the coursework at their own pace. Table 1.1 shows the steps in becoming an instructor. This reference tool, the

4
Instructor Development: Training the Adult Learner manual, supports both formats of the course. There are many resources available to you on the NSP website once you log in to your personal page (www.nsp.org); however, you should be aware that instructor resources are only available to certified NSP instructors. Until you become certified, your instructor of record will provide needed information to you (such as forms used in course administration). Table 1.1 – Steps in Becoming an Instructor
Hybrid E-Course: Patroller completes self-directed electronic portion of course and passes exam; Patroller presents certificate of completion to ID instructor; Patroller successfully demonstrates teaching skills
Patroller wishes to become an instructor in a specific discipline
Patroller contacts ID instructor who has registered or will register an ID course with NSP; Patroller enrolls in that course
Traditional Course: Patroller attends course; Patroller passes exam (optional), completes teaching skill demonstration successfully
NSP and Division Specialty supervisor notified; mentor assigned; mentoring process is completed by patroller and mentor; appropriate forms submitted to NSP; Patroller is certified as instructor by NSP.

5
Upon completing the instructor course, students will take the knowledge they have acquired and begin the NSP Instructor Mentoring Program. Here the instructor trainee will be paired with an experienced instructor in a chosen discipline. During this process, instructional skills – as well as the skills needed for the specific discipline – will be refined. ThisInstructor Developmentmanual can continue to serve as a reference while potential instructors move through the mentoring stage. All instructors must keep their teaching skills sharp by pursuing continuing education opportunities such as seminars and clinics whenever possible, at least once in every three years of teaching. People don't become instructors merely because they have completed one or two days of training for the role. Instructors must be developed and nurtured through mentoring, observation, feedback, ample opportunities to practice, and continuing education. This manual serves as a reference tool for all instructors throughout their instructing career.

6
CHAPTER 1. Overview of Instructor Development Course "There is no more noble occupation in the world than to assist another human being – to help someone succeed."– Alan Loy McGinnis Concluding Objectives + Describe the purpose of the Instructor Development Program. + List the content included in the Instructor Development Course. Purpose of the Instructor Development Program All students demand and deserve quality training, regardless of the topic. The National Ski Patrol's Instructor Development Course and this accompanying Instructor Development: Training the Adult Learner manual are designed to introduce people to the core tenets of teaching and coaching so they can become effective, dynamic instructors. Whereas a strong grasp of a particular topic is essential, there is more to teaching than subject-matter expertise. Instructors must also understand how people learn, and they must be able to apply common teaching strategies to ensure understanding and retention. In addition, they must be able to build credibility and inspire confidence in their teaching abilities. They accomplish these objectives by imparting knowledge in a manner that is as engaging as it is factual. The art of instruction hinges on this subtle, dynamic interplay between the teacher, the students andthe course content. These concepts are the foundation of NSP Instructor Development training. Applicable whether applied to NSP courses or those of another organization altogether, the following insights on adult learners, human relations, communications, tools and methods of teaching, and guidelinesfor lesson planning are key to successful teaching and learning experiences. After completing the Instructor Development Course, instructor trainees may obtain teaching credentials in a specific NSP discipline through the organization’s Instructor Mentoring Program. Mentoring and certification are available for Outdoor Emergency Care (OEC); Outdoor Emergency Transportation (OET – formerly called Ski and Toboggan); Avalanche; Mountain Travel and Rescue (MTR); and Instructor Development itself. Appendix B (NSP Instructor Job Description) identifies many of the requirements for becoming a certified NSP instructor, and for maintaining that certification. Overview of Course Content Teaching looks deceptively easy to those who have never taught. Often, they underestimate or do not recognize the quantity and variety of thetasks required to successfully lead a class. A
7
typical perception of teaching is that of a knowledgeable instructor dispensing information through lecture to receptive and bright learners; however, this picture fails to incorporate the planning, human relations, class organization, motivational tactics, and instructional skills that go into quality instruction. Effective instructors rarely rely on lecture as their only – or even primary – teaching method. Consequently, utilizing additional creative training techniques must be a major part of an instructor's task to convey information so that the learners will participate, understand and remember. Organization and planning are major parts of an effective class. Many times, instruction tends to focus merely on delivery, but a well-planned class will challenge students to be engaged and to take an active role in acquiring skill. This manual describes effective instructional strategies that support the Instructor Development Course. As indicated above, the material is designed to be completed in a traditional classroom setting or in a Hybrid E-course. Here is a brief description of each chapter contained in this text:
• Chapter 1. Overview of Instructional Responsibilitiesprovides an introduction to the Instructor Development Program and a summary of the course objectives and expectations.
• Chapter 2. How Adults Learn outlines common characteristics of adult learners, the principles of adult learning, and how to motivate adults with different learning preferences.
• Chapter 3. Human Relations and Communications examines human relations and communication skills relevant to teaching, with an emphasis on how to provide effective feedback.
• Chapter 4. Instructional Management covers the logistics of teaching, including course preparation, quality management and safety considerations.
• Chapter 5. Lesson Planning illustrates how to incorporate the concepts from the other chapters into the "six-pack" lesson plan format. This is the art of teaching – the individual instructor's creativity and decision-making abilitiesregarding how to use the components of effective instruction in a lesson.
• Chapter 6. Lesson Contentand Instructional Resources discusses lesson guides used to convey the subject matter. This section also discusses NSP instructor resources as well as the importance of organizing curriculum.
• Chapter 7. Instructional Methodshighlights common instructional strategies used in content delivery, such as lecture, demonstration and scenarios.
• Chapter 8. Monitoring and Evaluationcompletes the discussion or instructional methods with suggestions for monitoring and evaluating student progress.

8
• Chapter 9. Course Summary and Instructor Mentoringprovides a short review of the material presented in the Instructor Development Course and introduces the Instructor Mentoring Program, which is the next step to be pursued by instructor trainees.
• Chapter 10. Administrative Procedures reviews the administrative steps and forms that are required for instructors to be and stay certified.
A glossary (Appendix A) and eight other appendices containing definitions of terms and additional reference material are provided at the end of' this text. To the Point The Instructor Development Course presents a basic background of instructional skills and approaches. All instructors should have common definitions for key terminology, understand and be able to use a basic lesson plan, and demonstrate effective instructional skills. The Instructor Development Course serves as the beginning point in each instructor's ongoing search to locate useful teaching ideas, build positive communication skillsand motivate students. Since the inception of the Instructor Development Program in 1989, the NSP has continued to review and enhance the course content and delivery to keep current with the latest in technology and teaching methodologies.
9
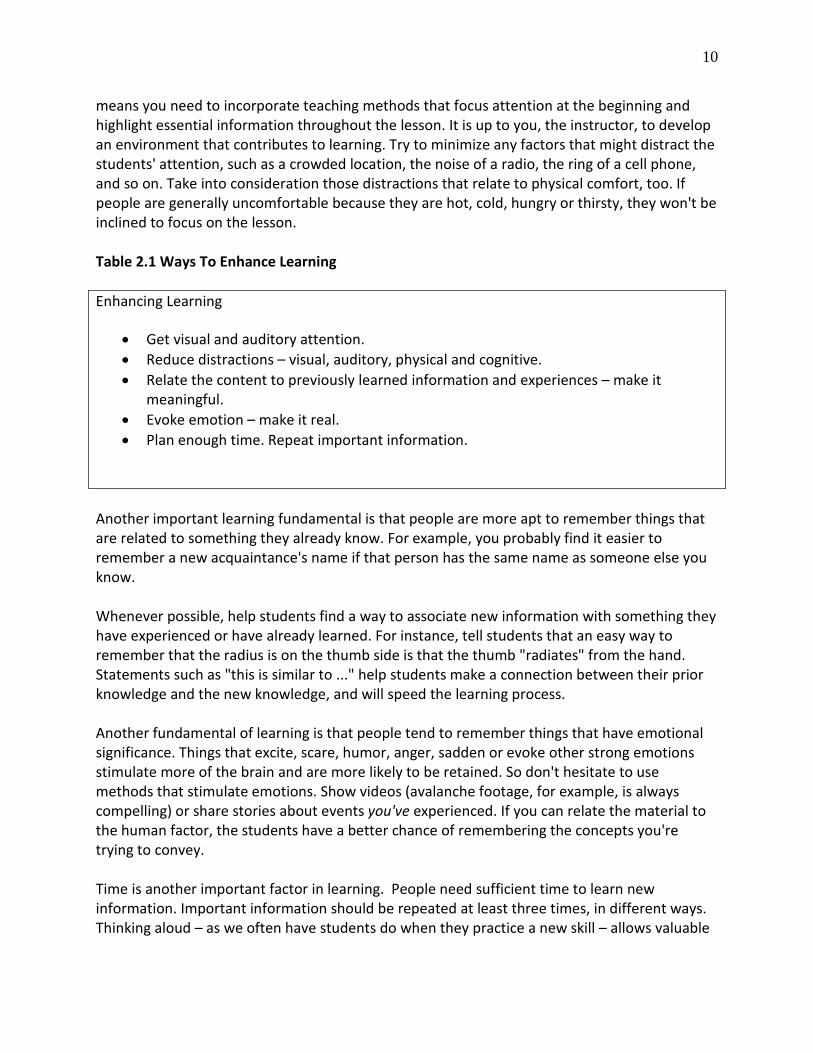
CHAPTER 2. How Adults Learn "Learning is finding out what you already know. Doing isdemonstrating that you know it. Teaching is reminding others that they know just as well as you. You are all learners, doers, teachers.” – Richard Bach Concluding Objectives + Summarize the characteristics of adult learners. + List learning styles and discuss how these affect teaching. Adult Learners So you’re planning to teach a group of students a specific skill. You think the subject is very important, and you want to do a good job. However, before you go any further in your lesson planning, you need to understand that teaching adult students is different than teaching children. Adults require different teaching strategies to help them learn, understand and commit concepts to memory. First, let us define “learning.” Learning is the process that results in lasting behavioral changes in a student. There is no typical student for whom you can design presentations and materials. One of the great things about the outdoor recreation industry is that it brings together so many people from different backgrounds to work toward common goals. Think about all the people with whom you work or patrol and the characteristics that distinguish one person from another. Gender, age, experience and culture are only a few or the qualities that make each of us unique, unlike anyone else. This diversity means that you can never be completely sure how a group of adults will respond to new learning situations. That said, educators have amassed a lot of helpful theories on learning fundamentals, adult learning characteristics, learning styles and personal assessment methods. This information –along with your own insights – will help you gauge and address the various learning behaviors of those you teach. Appendix G – Classifying Learning, provides some education theory that is linked to the NSP teaching format (discussed in Chapters 6, 7, 8 and 9 below). Learning Fundamentals People take in and retain information differently, but certain fundamentals of learning pertain to everyone. As an instructor, you need to have a clear understanding of these learning fundamentals so you can apply them for maximum effect when teaching (see Table 2.1). One of the most basic fundamentals of learning is that if you don't have the learners' undivided attention, they won't hear or retain much of anything you have to say or demonstrate. That
10
means you need to incorporate teaching methods that focus attention at the beginning and highlight essential information throughout the lesson. It is up to you, the instructor, to develop an environment that contributes to learning. Try to minimize any factors that might distract the students' attention, such as a crowded location, the noise of a radio, the ring of a cell phone, and so on. Take into consideration those distractions that relate to physical comfort, too. If people are generally uncomfortable because they are hot, cold, hungry or thirsty, they won't be inclined to focus on the lesson. Table 2.1 Ways To Enhance Learning Enhancing Learning
• Get visual and auditory attention. • Reduce distractions – visual, auditory, physical and cognitive. • Relate the content to previously learned information and experiences – make it
meaningful. • Evoke emotion – make it real. • Plan enough time. Repeat important information.
Another important learning fundamental is that people are more apt to remember things that are related to something they already know. For example, you probably find it easier to remember a new acquaintance's name if that person has the same name as someone else you know. Whenever possible, help students find a way to associate new information with something they have experienced or have already learned. For instance, tell students that an easy way to remember that the radius is on the thumb side is that the thumb "radiates" from the hand. Statements such as "this is similar to ..." help students make a connection between their prior knowledge and the new knowledge, and will speed the learning process. Another fundamental of learning is that people tend to remember things that have emotional significance. Things that excite, scare, humor, anger, sadden or evoke other strong emotions stimulate more of the brain and are more likely to be retained. So don't hesitate to use methods that stimulate emotions. Show videos (avalanche footage, for example, is always compelling) or share stories about events you've experienced. If you can relate the material to the human factor, the students have a better chance of remembering the concepts you're trying to convey. Time is another important factor in learning. People need sufficient time to learn new information. Important information should be repeated at least three times, in different ways. Thinking aloud – as we often have students do when they practice a new skill – allows valuable
11
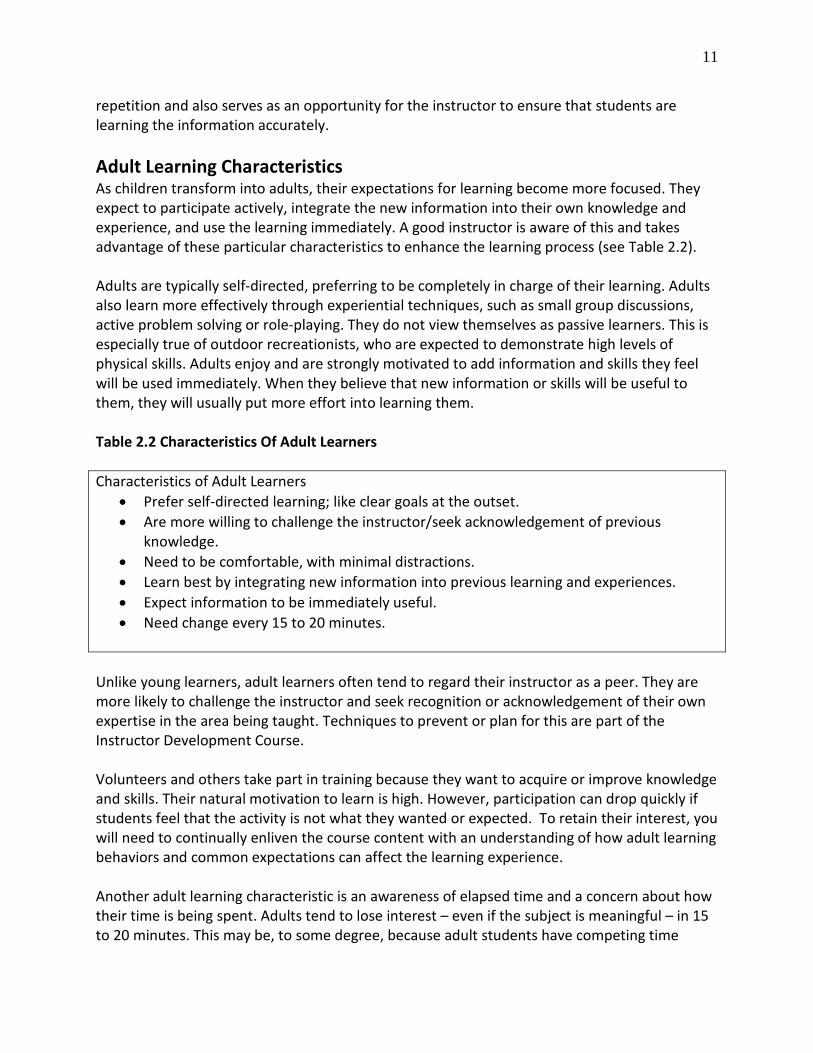
repetition and also serves as an opportunity for the instructor to ensure that students are learning the information accurately. Adult Learning Characteristics As children transform into adults, their expectations for learning become more focused. They expect to participate actively, integrate the new information into their own knowledge and experience, and use the learning immediately. A good instructor is aware of this and takes advantage of these particular characteristics to enhance the learning process (see Table 2.2). Adults are typically self-directed, preferring to be completely in charge of their learning. Adults also learn more effectively through experiential techniques, such as small group discussions, active problem solving or role-playing. They do not view themselves as passive learners. This is especially true of outdoor recreationists, who are expected to demonstrate high levels of physical skills. Adults enjoy and are strongly motivated to add information and skills they feel will be used immediately. When they believe that new information or skills will be useful to them, they will usually put more effort into learning them. Table 2.2 Characteristics Of Adult Learners Characteristics of Adult Learners
• Prefer self-directed learning; like clear goals at the outset. • Are more willing to challenge the instructor/seek acknowledgement of previous
knowledge. • Need to be comfortable, with minimal distractions. • Learn best by integrating new information into previous learning and experiences. • Expect information to be immediately useful. • Need change every 15 to 20 minutes.
Unlike young learners, adult learners often tend to regard their instructor as a peer. They are more likely to challenge the instructor and seek recognition or acknowledgement of their own expertise in the area being taught. Techniques to prevent or plan for this are part of the Instructor Development Course. Volunteers and others take part in training because they want to acquire or improve knowledge and skills. Their natural motivation to learn is high. However, participation can drop quickly if students feel that the activity is not what they wanted or expected. To retain their interest, you will need to continually enliven the course content with an understanding of how adult learning behaviors and common expectations can affect the learning experience. Another adult learning characteristic is an awareness of elapsed time and a concern about how their time is being spent. Adults tend to lose interest – even if the subject is meaningful – in 15 to 20 minutes. This may be, to some degree, because adult students have competing time
12
demands. To keep the students' minds off the clock and on the subject matter,you will need to vary your teaching methods and activities. Learning Styles One important aspect of effectively providing instruction is to recognize that individuals learn in different ways. As adults learn, they focus on information that they see, hear and respond to emotionally and physically. Each adult has a preferred way of learning and communicating, and he or she relies more on one of these three senses than the other two. These three learning styles are commonly described as visual (what we see), auditory (what we hear), and kinesthetic (touch and emotion, or what we feel). A variety of instruments are available to today's educators that can be utilized to assess a student's preferred learning style. In training situations, clear and effective communication is essential for learning. At times, even though the students and instructors are using the same language, some students do not gain the desired knowledge or skills. This generally occurs because the instructor fails to impart information in a manner that sufficiently complements the students' primary learning style. Consequently, when presenting material to students, you – the instructor – must always be cognizant of the three primary learning styles and make every reasonable attempt to bridge those differences. Learning is closely connected to perceptions: thinking, talking, and doing. What we sayis the result of our present thinking; what we think is the result of our present perceptions. Perceptions of information are gathered mainly by three senses, which reflect the three primary learning styles. This information is then coded into our memory by pictures, sounds and feelings/sensations that were present when the experience first happened. As adults are learning, they store and recall this information as visual, auditory and kinesthetic representations. Most people tend to trust one of these perceptions and representation processes more than the others. This preference represents an individual's predominant learning style. Each learning style can be categorized by two types of behaviors: 1. A preferred method for receiving information. 2. Verbal expressions used to describe communications. Visual Adults who respond primarily to visual information tend to see those things around them rather than hear or feel the situation. Adults who are visual reveal themselves by using expressions such as "I see," "Do you see what I mean?" and "I get the picture!" Also, they tend to make diagrams or use models frequently. Auditory

13
Adults who prefer hearing sounds or words can be described as auditory-oriented individuals. Auditory learners may say, "I hear what you are saying," "I want you to listen carefully," or "That sounds good to me." Kinesthetic Adults who respond primarily to feeling or hands-on exercises are more aware of tactile sensations and visceral emotions. They are likely to process and represent their thoughts kinesthetically and say things like, “This feels really good/bad,” “I need to get a grip on this,” or “This feels right to me.” When you recognize a learning preference, you will need to find ways to engage that learner. For example, you could provide a verbal description of patient assessment, and the auditory learner would easily tune into that approach. However, you have more than one student, obviously, and if you were to use this training method only, you would quickly lose the attention of the remaining visual and kinesthetic learners in the group. The people in these other two categories respond best to seeing a picture and feeling and touching their way through the material, respectively. For this reason, it's best to present material using a combination approach. Have students watch a video that articulates each step in a sequence as it occurs (visual and auditory), then conduct a demonstration of the assessment on each student (visual, auditoryand kinesthetic). This incorporates all three sensory-perception systems and therefore should address the learning preferences of each person in the class. Although it is important to consider all types of learners, some instructors go overboard and try to allow for each variable for each student, for each lesson. If you tried to target different learning styles with too many methods and strategies, you would probably lose the point of the lesson. It is important to remember that the totality of a lesson presentation should reflect the different learning styles, but that every single activity may not. It is also important to acknowledge your own teaching style and understand how this style affects your instruction. As with the students, you will most likely be more comfortable with a particular style of instruction and have different beliefs about how learning takes place. Regardless of their preferred learning style, individuals learn more when instruction is directed at two or more senses. If students only read, or only hear, or only see, the impact is minimized. To ensure that students grasp the meaning of a certain concept, you will need to provide opportunities for the group to read about it, hear about it, and see how it works (e.g. you describe what is being done while the student performs the activity). The student – and anyone else in the class who might be observing the individual – will benefit from exercises that involve all the senses.

14
The following statistics provide important clues to how people learn. Studies show that people tend to retain:
• 10 percent of what they read. • 20 percent of what they hear. • 30 percent of what they see. • 50 percent of what they hear and do. • 70 percent of what they say; and • 90 percent of what they say and do.1
Combinations of visual, auditory and kinesthetic approaches clearly improve students’ learning and memory. By recognizing the ways in which adults learn, instructors can plan and lead more interesting, effective classes. Adult Learning Disabilities As an instructor, you are likely to find that some adult learners display learning disabilities that prevent them from either learning or demonstrating their knowledge in more traditional activities. These characteristics can range from physical disabilities to those that interfere with how they process and learn information. Disabilities are not an indicator of low intelligence, as a physical disability may be completely unrelated to cognitive function. Oftentimes these individuals merely require certain adaptations in order to be successful. Although many adults may know how to adapt their learning environment to their own disabilities, others are often hesitant to ask for modifications or may not even realize that they have a problem processing information. Many adults with learning disabilities have had less-than-positive experiences in school and may be wary of actively participating in class. As the instructor, you will need to be sensitive to their self-consciousness and avoid making any comments in front of other students or involving them in activities that may highlight their disability. Some of the more common learning disabilities include the following:
• Difficulty reading. The student may inadvertently reverse letters, skip words or even struggle to read lines in the proper sequence.
• Difficulty comprehending written material. The student may have trouble understanding or remembering what he or she read.
• Difficulty writing. The student may understand the information but is not able to put his or her ideas into written form. The student may have difficulty with written activities such as completing the exercises in Outdoor Emergency Care, taking written tests or preparing written lesson plans.
• Short attention span. The student may struggle to maintain focus, particularly if he or she is tired, bored or stressed. To keep such easily distracted students focused and on
1 Pike, Robert W. Creative Training Techniques Handbook. Minnesota: Lakewood Books, 1989, page 61.

15
task, try to minimize stimuli such as classroom noise and unnecessary activity. Another rule of thumb is to avoid using graphics and overheads that are too busy to convey the main point efficiently.
If you sense that a student is having trouble reading or understanding the material for the course, or in taking a written test, you may wish to privately discuss this with the individual. It is helpful to keep in mind that most accommodations, which can be viewed as extensions of good teaching practices, will benefit all the students. Here are some additional considerations that may hinder the learning process:
• Test anxiety. The student may know the information but have the tendency to "freeze up" when tested or evaluated. This may occur during a skill demonstration as well as a written test. Reassure such students that they know the material and just need to relax and rely on their knowledge.
• Language barriers. The process of learning a new language is challenging at best. A student who speaks English as a second language may need additional assistance with vocabulary and reading. It is important to be discreet when asking if such students need help. Be sure to check for understanding continually.
• Physical limitations. Poor hearing and/or poor eyesight may impede a student's ability to take in information fully. Also, artificial limbs, previous injuries, and/or being in a wheelchair may limit the person's level of participation in certain activities. Encourage those individuals with hearing and eyesight limitations to be in the front of the group, and remember to check for understanding throughout the lesson. For those students with limited mobility, you may need to structure unconventional creative learning activities that reinforce important concepts without requiring excessive movement.
If you notice that a student is making the effort to learn but continues to struggle to comprehend the information, take that person aside and ask if there is anything you can do to help him or her learn. If that student identifies a disability, you will have some idea how to adapt the learning environment accordingly. If the student doesn't identify any problem, you might ask some questions such as, "You seem to be struggling a bit to keep up with the reading, Tom. Is reading just not your thing?" Approaching the subject in a casual manner along these lines may make the student feel more comfortable about revealing learning challenges. You can then come up with a plan for modifying the instructional environment or learning activities. For a student like Tom, your plan might entail providing him with bullet points that represent the most important concepts in the reading material. You could also merely talk with Tom about the concepts before he does his reading assignment. That way he will have a head start, i.e. familiarity with the material before he reads about it. Additional techniques for handling these situations are presented in the Instructor Development Course.

16
To the Point The fundamentals of learning are simple but effective principles to guide the ways in which you present and receive information. Your understanding of these principles along with your ability to recognize and respond to your students' learning characteristics will have an enormous influence on the outcome of the lesson experience. It is important to realize that adult learners present different challenges than do adolescents and children. Whereas children require much one-on-one attention and guidance, adults usually prefer self-directed learning and need to integrate new information with previous knowledge, skills, and experiences. Adults also expect the information to be immediately useful. They tend to respond more to first impressions and arc more willing than adolescents or children to challenge the instructor or seek recognition. Whereas they may be keenly aware of passing time, they may be more inclined to spend that time in the pursuit or knowledge and skills. Remember the importance of retaining the students' attention, and do whatever is necessary to reduce distractions. Make instruction “real" by invoking an emotional response and relating it to previously learned information. At the same time, be sensitive to the fact that some adults willexhibit various learning disabilities. Learn to recognize these signs and make the necessary adaptations to the content and methodology of instruction to address the situation.

17
CHAPTER 3. Human Relations and Communications "Communication does not begin with being understood, but with understanding others." – W. Steven Brown Concluding Objectives + Explain the human relations qualities necessary for effective instruction. + Identify and explain effective listening skills. + Identify types of nonverbal behavior and the messages they convey. + Understand and identify the principles of effective feedback techniques. Human Relations Teaching requires constant interaction between the instructor and the learners. Without an ability to relate well to people, an instructor's subject matter expertise is useless. Imparting information in a way that engages students requires good human relations and communication skills. Instructors of the best training programs expend much effort to create a positive learning environment and accommodate different adult learning styles. Think back to those instructors with whom you have connected over the years. What personal qualities made them special and memorable? Were these instructors confident in their knowledge and skill? Did they display a sense of humor? Did they generate enthusiasm about their subject matter? Your favorite instructors probably demonstrated good human relations by making you and the other students feel valued and important. Here are some ways you can cultivate the same characteristics in your own teaching style:
• Encourage learners to share in decision-making that relates to learning. They are likely to be much more supportive of activities or decisions in which they have participated.
• Be knowledgeable and skilled in the subject matter. Learners are more likely to respect your authority and take you seriously if you demonstrate expertise in the material. Conversely, an unprepared instructor will quickly lose the confidence and attention of learners.
• Be fair and consistent when dealing with students. Favoritism or prejudice of any kind has no place in the classroom.
• Freely express warmth, friendliness, acceptance and empathy. Students tend to have positive learning experiences when they can relate in a personal way to the instructor.
• Be dynamic, spontaneous, enthusiastic, open and positive. Be willing to admit when you do not have all the answers, but be sure to indicate that you will get the required information. Then, follow up and communicate that information to the students.
18
• Maintain a sense of humor. This can be an excellent way to build a positive relationship with the students and defuse any uncomfortable moments in class.
• Be an example of what you teach and what you advocate; in other words, "Practice what you preach" and “Walk the talk." Not only do you need to describe concepts, but you must also be able to demonstrate them to reinforce the effectiveness or the lesson and build your credibility as an instructor.
• Use a variety of teaching methods. Remember that adults learn in different ways and exhibit different learning styles (see Chapter 2 – How Adults Learn). Make sure your teaching approach incorporates methods for assessing visual, auditory and kinesthetic learning styles.
Communication Skills Good communication skills are critical to effective instruction and encompass many different behaviors. The Instructor Development Course focuses on three components of effective teaching: listening skills, interpreting nonverbal communications and providing constructive feedback. Always remember that communication is a two-way street! Appendix C – Effective Questioning Skills, and Appendix D – Effective Teaching Techniques, will give you additional information that can develop and improve your teaching. Listening Skills Although many of us like to believe we are skilled communicators, we are often better at sending information than receiving it. There is much truth in the expression "communication is a two-way street.” Communication consists of the ability not only to give messages but also to take them in, and this requires listening skills – a willingness to focus on what the student is saying. Only then can you decide how, when and what information to impart based on the student's verbal cues. Here are some ways to build effective listening skills:
• Concentrate on listening. Give undivided attention to the student and focus on what is being said. Maintain eye contact with the person who is speaking.
• Build pauses or activities into your class and invite learners to participate. These will provide the opportunity for students to solidify learning and provide feedback.
• Avoid interrupting. By allowing students to finish what they have to say, you are demonstrating that you value their contributions to the class.
• Respect every student's right to share his or her views. • Ask questions when you don't understand what the student is saying (and encourage
everyone in the class to do this when they don't understand you). Paraphrase the message back to the student if necessary, and begin with "Let me repeat what I think you are saying ... " in order to verify understanding.
• Search for the total meaning of the message rather than the details. Don't let superfluous information distract you from the main message.
• Pay attention to nonverbal messages; actions and expressions may convey more meaning than the spoken word.

19
Nonverbal Communication Communication consists of two parts: content, which is usually expressed verbally, and emotion, which is usually expressed nonverbally. (Verbal communication skills are discussed in subsequent chapters on lesson planning and presentation). If you've ever tried to talk with someone who didn't speak your language, you can understand the importance of nonverbal communication. Facial expression, tone of voice, physical gestures and body posture all dramatically affect the verbal messages we send (see Table 3.1). Typically, the same words take on completely different meanings, depending on the nonverbal component of the message. Nonverbal messages can communicate up to 70 percent of the meaning. Consequently, be sure to pay close attention to your own nonverbal messages and those of your students. These communications can have important implications in how you deal with certain individuals in your class. Table 3.1 Examples of Nonverbal Signals Nonverbal Signals
• Do students roll their eyes as if they're bored or confused when you give them directions on how to complete a task – or do they look interested and focused?
• Do they avoid eye contact, as if they've "checked out" – or do they look at you and listen to you while you talk?
• Are they slumped back in their seats, as if they're fighting sleep – or are they sitting forward, with an attentive expression, as if eager to learn?
• Are they fiddling with papers when you're talking, as if they're distracted or not listening – or are they looking at you or taking notes on what you're saying?
• Do they have a quizzical, confused look on their faces when you present a certain procedure – or does their expression convey understanding?
Nonverbal communication can be divided into several categories. Look for these behaviors – in your own communication as well as that of your students – and be aware of the signals that are being sent:
• Body language – This includes movement of the hands, head, feet and entire body. A tilt of the head, clenched fists, or a shift of the eyes can communicate a great deal. For example, a tilt of the head may indicate curiosity or irritation; clenched fists or a tight jaw may indicate anger or discomfort; and a shift of the eyes may indicate embarrassment or even insincerity.
• Physical characteristics – This includes physique, height, weight, hygiene, etc. Your physical condition, for example, conveys the value you place on fitness. And, although you shouldn't make assumptions about people, your students' physical characteristics provide important clues about which learning activities might be appropriate for them.
20
• Appropriate touching behavior – This includes a pat on the back, shaking hands, or putting an arm around someone's shoulders. Be aware that while some people may be comfortable with this level of appropriate physical contact, others may find any physical contact whatsoever inappropriate.
• Voice characteristics– This includes voice quality: pitch, rhythm, resonance and inflections. It often is not what we say but how we say it that conveys the real message. The comment, "That was a great run, Bill!" can be said enthusiastically, with looks of approval and voice inflections that indicate sincerity. Or it can be spoken sarcastically, with a slight smirk, suggesting just the opposite.
• Body position – This refers to the personal space between the instructor and the students, and the position of your body in relation to theirs. The "cold shoulder" is an example of expressing through body language that you don't want to talk to someone (or vice versa).
The manner in which we communicate nonverbal messages is closely tied to our cultural as well as our personal experiences. Remember that members of other cultures may interpret nonverbal communication differently. Also be aware of the consistency (or lack thereof) between your verbal and nonverbal messages. You may be imparting one meaning with your words but anothermeaning entirely with your body language. That said, it's important to recognize mixed messages that others may give when they communicate. They may just need reassurance that it's okay to be honest and open with their feedback. Being able to read your students' nonverbal messages is an essential part of being an instructor. By constantly scanning the audience for nonverbal signals, you can obtain immediate information about how the students are receiving the information and take action accordingly. Learn to interpret these nonverbal messages and think about how you can adjust your teaching style on the spot to avoid barriers to learning. Sometimes a person's learning style is the cause of confusion or ambivalence; other times it's merely a case of boredom. Constructive Feedback The ways in which you convey feedback can either make the student receptive to the input or defensive about it. Many new instructors feel as if they must detect every mistake – and point it out to students in a machine gun-like fashion – but this is counterproductive.Imagine a ski instructor yelling at you, "You're leaning back! You're going too fast! You forgot your pole plant!" and so on. How would you feel? It's important to detect problems in a student’s performance, but giving the person a barrage of feedback is degrading and overwhelming, particularly when it is delivered without any corrective actions or suggestions for improvement. An important rule of thumb is that feedback should never be entirely negative. You can always find something positive to point out about a student's performance. Single out the most important skill to work on so the student won't become inundated with information. For example: "You were in much better control during that run. Now this time try
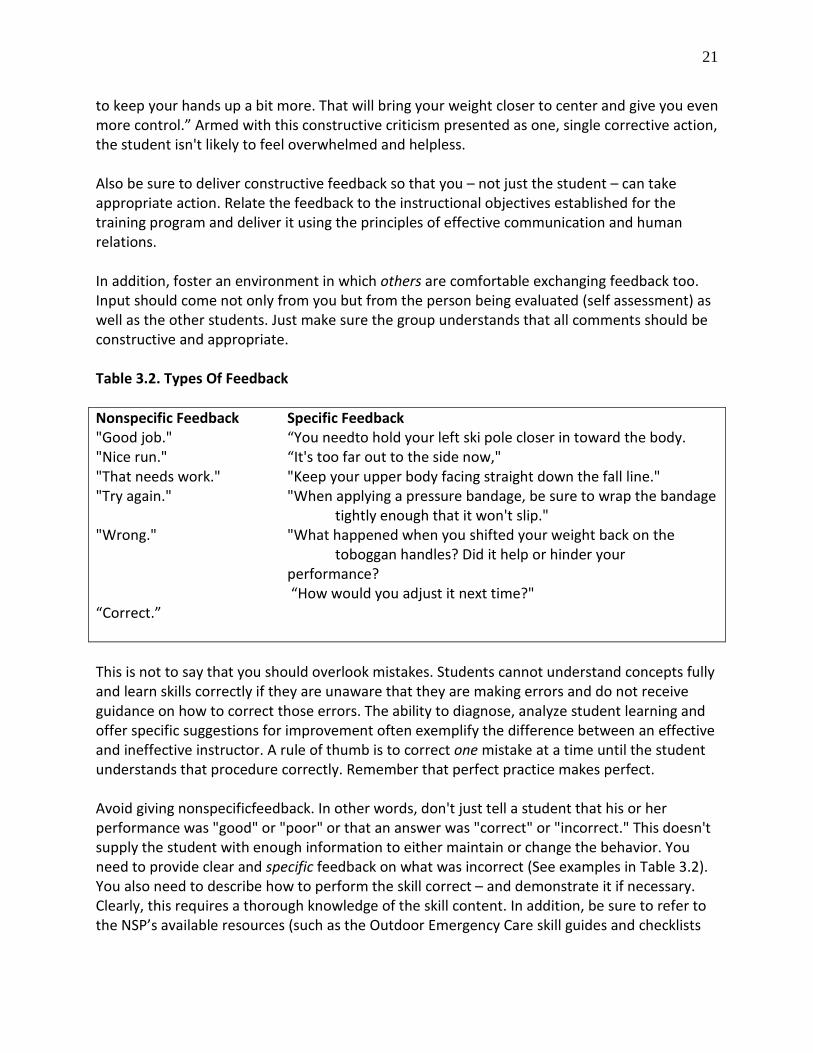
21
to keep your hands up a bit more. That will bring your weight closer to center and give you even more control.” Armed with this constructive criticism presented as one, single corrective action, the student isn't likely to feel overwhelmed and helpless. Also be sure to deliver constructive feedback so that you – not just the student – can take appropriate action. Relate the feedback to the instructional objectives established for the training program and deliver it using the principles of effective communication and human relations. In addition, foster an environment in which others are comfortable exchanging feedback too. Input should come not only from you but from the person being evaluated (self assessment) as well as the other students. Just make sure the group understands that all comments should be constructive and appropriate. Table 3.2. Types Of Feedback Nonspecific Feedback Specific Feedback "Good job." “You needto hold your left ski pole closer in toward the body. "Nice run." “It's too far out to the side now," "That needs work." "Keep your upper body facing straight down the fall line." "Try again." "When applying a pressure bandage, be sure to wrap the bandage
tightly enough that it won't slip." "Wrong." "What happened when you shifted your weight back on the
toboggan handles? Did it help or hinder your performance? “How would you adjust it next time?"
“Correct.” This is not to say that you should overlook mistakes. Students cannot understand concepts fully and learn skills correctly if they are unaware that they are making errors and do not receive guidance on how to correct those errors. The ability to diagnose, analyze student learning and offer specific suggestions for improvement often exemplify the difference between an effective and ineffective instructor. A rule of thumb is to correct one mistake at a time until the student understands that procedure correctly. Remember that perfect practice makes perfect. Avoid giving nonspecificfeedback. In other words, don't just tell a student that his or her performance was "good" or "poor" or that an answer was "correct" or "incorrect." This doesn't supply the student with enough information to either maintain or change the behavior. You need to provide clear and specific feedback on what was incorrect (See examples in Table 3.2). You also need to describe how to perform the skill correct – and demonstrate it if necessary. Clearly, this requires a thorough knowledge of the skill content. In addition, be sure to refer to the NSP’s available resources (such as the Outdoor Emergency Care skill guides and checklists

22
for effective toboggan-handling movements) when evaluating student performance and providing feedback. Focus on facts,not opinions. Avoid evaluative language (words such as "good" and "bad"), which tends to make learners feel overly cautious and even defensive. Focus on and evaluate the learner's behavior;it is important not to become personal when correcting mistakes. Students trust and respect instructors who deal with their learning skills and don't inject value judgments into their feedback. Rather than say, "You did a poor job in bandaging that knee," opt for a more positive spin such as, "That bandage would work very well over a wound on a long bone such as a forearm. Can you see any difficulty with using it overa joint such as a knee?" Try to maintain a positive attitude whether you are dealing with successes or mistakes. Point out that mistakes are an inevitable part of learning and that you need to reinforce desired behaviors for more effective learning. When your students' performance is incorrect, give them credit for what they didknow, and then supply specific instructions to correct the error. Develop a talent for catching learners in the act of doing something right, and be quick to praise and encourage. Also, realize that a positive approach does not mean that every message should be full of meaningless praise. People can sense when a compliment is insincere (see Tables 3.3 and 3.4). Sustaining Feedback Sustained, ongoing feedback is one of the most efficient ways to help students learn. Resist the urge to merely point out an incorrect answer and then immediately provide the correct answer – or ask another student for the correct answer. Instead, try to provide helpful information and hints so the person can resolve the problem independently. The student will learn much more than if he or she had simply been given the solution. Be sure to give the person a chance to respond or change something in his or her performance (four to six seconds should suffice) before stepping in with additional guidance. Coaching Feedback Coaching most often refers to providing feedback to students practicing a skill or in a role-play situation. You may coach the students as they perform a skill or wait to provide an analysis at the end of the task. When possible, guide the learner through a self-analysis of a successful performance or of errors that may have occurred. Correct mistakes by providing specific information and suggestions. When coaching, your ability to see and retain a mental picture of a toboggan run, skiing run, or behavior during a scenario is essential to giving positive and constructive feedback. A photographic eye will help you remember your students' performance so you can analyze, make corrections, and provide positive and specific suggestions for improvement. Instructors attain this unique skill through practice and experience.

23
The ability to provide specific, constructive feedback is a critical aspect of promoting learning. This practice helps students identify what they do know and also how to improve skills in other areas. To the Point Students focus on learning – as they should – which means that they may not always realize how much planning and effort that you, the instructor, have put into developing und conducting the lesson itself. Considerable forethought and preparation are the very foundation of effective, successful lessons. Also important is an understanding of the role that human relations and communication skills have in the teaching/learning process. The more you know about these areas, the more successful you will be when you teach, coach and mentor others. Teacher-student relations have come a long way over the years. Today's instructors must be flexible. Try to avoid the use of dated teaching methods whenever possible. Above all, avoid relying solely on a prepared text, standing in front of a lectern intoning dry facts and instructions, and not involving students as active participants in the learning process. Students today both demand and deserve more. Use listening skills to help you understand and respond to the needs and interests of your students. To create a comfortable learning environment, remember to be sensitive to the various verbal and nonverbal messages you convey as well as those you receive. Finally, be sure to provide constructive feedback to ensure that the learning experience is both productive and enjoyable for each and every student. Table 3.3 Ways To Provide Effective Feedback Effective Feedback
• Have students perform a measurable or observable behavior that matches the lesson’s objectives.
o Ask a question of students in order to measure their grasp of the content. o Engage students in an activity that will indicate their understanding of the
current lesson or topic. • Provide immediate feedback. • Correct one error at a time. Don't overload the learner with too much feedback. • Give specific feedback.
o Determine the cause of the error. o Provide precise information for improvement.
• Use a positive approach. o Identify the skills that are performed correctly. o Acknowledge the information that the students have acquired. o Recognize students' improvement since their previous evaluations.

24
• Sustain the students' involvement in the learning process. • Check for understanding.
o Have the student paraphrase the concept. o Have the student repeat the steps.
Table 3.4 Feedback Strategies Situation
• Skill attainment • Skill practice sessions • Interactive activities
Strategies • Coach during practice of skill. • Coach after skill is completed. • Allow for self-diagnosis. • Develop a photographic eye. • Pick one skill – do not overload the
learner. • Give specific information. • Give justifications.
25
CHAPTER 4. Instructional Management "Quality is never an accident; it is always the result of high intention, sincere effort, intelligent direction, and skillful execution; it represents the wise choice of many alternatives." – Will A. Foster Concluding Objectives + Explain the importance and list specific examples of instructional management tasks as they relate to organization, quality management and safety considerations. + Understand the difference between a standard of training and a local protocol. Organization Even the most knowledgeable and engaging instructors will be hard-pressed to lead effective classes if they haven't put considerable time and effort into planning the course content and addressing the myriad of logistical considerations involved. Long before the course date arrives, you need to finalize your lesson plan and work through all basic considerations including refreshments, restroom access, adequate heat and light, and how to reduce distractions such as excess noise and crowds. Students may take many of these creature comforts for granted, but they willnotice if basic necessities are lacking. Safety considerations are also paramount in the planning stages. Many risks are inherent in snow sports and other outdoor activities, and the lesson plan needs to incorporate steps to minimize any unnecessary exposure to these factors. Course Preparation To ensure that the class runs smoothly and all objectives are met, you will need to do a considerable amount of long-range planning in order to work out all aspects of the course beforehand. In-depth details of course organization are included as part of the mentoring process for specific disciplines, but here are the main considerations: Scheduling
• Establish the course dates. • Coordinate dates with patrol, section, region or division. • Register course with NSP online, and order materials and course Certificates of
Achievement (See Appendix H for links). • Arrange for facilities/sites that match planned activities. • Coordinate with local recreation area management to meet specific local training needs. • Arrange for equipment. • Determine class size and instructor needs.

26
Notification
• Reach potential students through patrol, section, region, division. • Contact instructors and evaluators. • Notify newsletter editor. • Contact national office. • List course on websites: division/region/patrol.
Registration
• Register students and collect fees. • Have all students and instructors sign release forms. • Prepare attendance sheets. • Deposit fees/funds according to local and national procedures.
Course Outline (Syllabus)
• Outline instructional content. • Provide contact information. • Distribute to students prior to first class.
Lesson Preparation In addition to preparing the overall course, you will also need to plan each lesson within the course. Using a wide range of instructional materials and training aids will help you increase your chances of presenting effective lessons. Large amounts of instructional materials are available from NSP for various disciplines, including instructor’s manuals and lesson guides. These materials should serve as a base for preparing for your class. However, you should also take time to familiarize yourself with student materials, which may require rereading text(s) and study books, previewing videos, etc. Also be sure that you know how to operate any audiovisual equipment that will be used, including overhead projectors, VCRs, PowerPoint software, digital projectors and slide projectors. Many courses require the instructor to demonstrate the proper use of equipment, so make sure you are well versed in the manufacturer's instructions of all equipment that will be on hand. For example, Outdoor Emergency Care instructors must be able to use oxygen equipment, various types of splints, and blood pressure cuffs. Toboggan instructors must be experienced in handling various types of toboggans. Avalanche instructors must be able to demonstrate the use of different transceivers, snow analysis equipment, and probes. Courses offered by other outdoor recreation information providers have similar specific requirements, such as how to properly guide a kayak in a whitewater gorge. In addition to learning about the equipment itself, don't forget to have a contingency plan in case the weather becomes a factor. In summary, here are important considerations to keep in mind when preparing a lesson:
• Know your content. • Use the lesson guides and materials available from NSP to develop your lesson plan.
27
• Preview videos and other training tools. • Practice with materials and equipment. • Be familiar with classroom and outdoor facilities. • Have a backup plan if weather becomes a factor.
On-Site Preparation Instructional organization is a process that continues during teaching. Skilled instructors will fine-tune the physical setting and equipment necessary to maximize learning and ensure a safe environment. It is essential to take time before each class to make sure things are set up correctly. To ensure that the instructional area meets the lesson requirements, here are some guidelines to help you prepare the setting:
• Set up the teaching area to match the planned activity. • Make sure the students:
o can see and hear you. o can be seen and heard by you. o haveenough space for themselves and their personal gear. o have enough space to move about comfortably. o have enough space to practice skills presented, as appropriate. o have access to restroom facilities. o have audible pagers and cell phones turned off.
• Check to make sure all equipment and teaching aids are available on-site and are functional.
• Provide enough equipment, e.g., toboggans, splints, probes, so that all learners will have the opportunity to practice the specific skills taught in the lesson.
Address environmental considerations The following environmental considerations are inherent in snow sports and other outdoor recreational activities and require special attention:
• Identify proper clothing and appropriate equipment for the activities and notify students in advance of what will be required.
• If teaching outdoors, make sure the class faces away from the wind and sun; seek sheltered/protected areas when stopping to talk.
• Be aware of the physical comfort and safety of the students at all times. • If using "patients," do your best to ensure their comfort and safety.
Don't forget the follow-up tasks. An instructor’s responsibility does not end with the conclusion of the lesson. Before the students leave, they should be asked to complete an evaluation of the course and the day's activities. This can then be summarized to gauge the effectiveness of the program and guide the planning for subsequent courses.

28
You will also need to complete the following activities: • Clean up the instructional area. • Return all equipment, materials and keys, as required. • Complete, copy, and submit course records to region/division/national office, as
appropriate (see Appendix H for links). • File course schedules, materials, and lesson plans. • Complete and distribute course Certificates of Achievement. • Send thank-you letters to the organization and staff that hosted the program as well as
to the instructors and the participants. Quality Management Developing well-prepared and talented teachers is essential, but it is only part of the equation when it comes to educational endeavors. Quality management of the entire process is the other component that helps ensure success. For the purposes of this discussion, the term "quality management" refers to how an education program is administered, reviewed and continually improved to meet the needs of the sponsoring organization and the student participants. An effective quality management program incorporates three areas:
• Developing quality instruction – the knowledge and skill base of the instructor as an outdoor recreational teacher, who is accountable for providing the highest quality course delivery.
• Developing quality students – the knowledge and skill base of the course participants. • Maintaining quality program integrity – the value and validity of the education program
as a whole. The NSP Quality Management System is described in Appendix I. Managing students' performance comes from creative lesson planning, evaluating their actions and responses, and following the appropriate lesson guides to cover all the material. Two terms are particularly important in the context of quality management. "Quality instruction" refers to the process of sticking to the standard of training by teaching the essential content from each lesson guide and meeting all the concluding objectives. "Accountability" refers to the process of keeping thorough and complete records on each and every student – maintaining and documenting the completion of objectives and skill performance – to verify a certain standard of training. The administration of a quality management program requires an investment of time. Various NSP education programs address discipline-specific quality management issues during mentoring. Other outdoor recreation organizations may provide similar follow-up training. Safety Considerations
29
Students safety must be a major consideration in course planning and class management. As the instructor, you can never guarantee that every risk will be eliminated. That said, you must recognize that students place their trust in you to help ensure their personal safety, and you must make every reasonable effort to anticipate and avoid hazardous situations. The following sections contain important ideas that pertain to this topic. Safety Checklist
• Make sure students are applying emergency care devices appropriately. • Have students use correct lifting techniques as necessary. • Use only terrain that is appropriate for the students' skill level. • Provide appropriate and accurate directions for the use of training aids and other
equipment. • Use sites that are safe for practice and evaluation; keep students, instructional staff and
"patients" in these areas at all times. Avoid dangerous locations such as the middle of a crowded ski run/intersection; below a depression or break where the class cannot be seen from above; under a ski lift; and on or below an avalanche path.
• Assure that each student and each instructor has signed a release form (See Appendix H for links).
Standards of Training vs. Local Protocols It is important for you to recognize the basis for the material to be taught and to ensure that the lesson content is consistent with the specific standards of the organization that provides the training material. This is true of other organizations as well as the National Ski Patrol. When running a discipline-specific NSP course, all course objectives must be met. It is equally important notto teach beyond the level of NSP prepared material. For example, physical manipulation tests to assess individual knee ligaments are not taught in the NSP's Outdoor Emergency Care curriculum and should not be taught in the OEC course or performed by OEC-trained technicians in the aid room. This is important to minimize the risk of further injury. If athletic trainers, therapists or doctors who are also OEC certified choose to perform this type of activity, they are accepting personal liability for their actions. You also need to be aware of the differences between the NSP, other certifying organizations (e.g. American Heart Association, American Avalanche Association), and the requirements of the local ski or outdoor recreation area. The NSP provides course materials that represent a standard of training for each program. Local protocol is determined by local management. When teaching NSP courses, you must obtain and use NSP texts and program outlines. The lesson and study guides available from the NSP (often as downloads) will provide you with both the objectives to be met (including skill demonstrations) and suggestions about the lesson that is being taught (examples of lesson guides are found in Appendix F). As indicated above, the objectives set forth by NSP for the course must be met.You may reference another certifying organization's material and include specific ski area standards and procedures, but you will

30
need to identify this material as non-NSP approved content. Remember, the NSP may provide a standard of training, which may be procedural, but does not establish operational procedures for any specific task. All operational procedures are determined by the area management that implements/authorizes the procedure. The following lists represent samples of NSP-approved programs and items that involve local recreation area requirements. National NSP-approved programs
• Instructor Development/Mentoring • Avalanche (Rescue) • Mountain Travel and Rescue • Outdoor Emergency Care • Skills Development (Basic, Senior, Certified) • Outdoor Emergency Transportation (alpine, snowboard, nordic)
Local requirements may include, but are not limited to:
• AED/CPR • Avalanche (control and management) • Lift evacuation • Search and rescue • Snowmobile operations • Other local area requirements
Instructional Management and the Nontraditional Classroom To be an effective instructor you have to be a good communicator, not only before the lesson begins but between the lessons and after them. Keeping communication open with students will motivate them and help improve the overall program. In today's information age, there are numerous tools at an instructor's disposal to help in this endeavor. Modern technology has drastically reduced or eliminated many traditional barriers to participation in educational programs. Extensive travel distances, time poverty, cost, and job-related scheduling conflicts no longer need prohibit a person's ability to engage in learning activities. The growth of the Internet as an educational resource and communications media – along with the availability of electronic media – has increased general access to non-traditional educational formats. Consequently, there are now numerous instructional class delivery systems that can augment – or perhaps even replace – the conventional face-to-face classroom setting such as the Hybrid E-course for Instructor Development or other hybrid NSP courses. Technology will continue to simplify the management and delivery of instruction; however, regardless of the method utilized for course delivery, effective learning will always be the result of a competent instructor's preparation and planning. As the instructor, it is your responsibility to keep pace with changing technology – and to make the most of it to enhance the teaching

31
and learning process. The NSP website (www. nsp.org) has links to new information as well as the NSP Instructor’s web pages (www.nsp.org and click on Instructor Resources), which you can access from your personal NSP webpage by logging on to the site. The NSP national office is another good source of information. Other organizations that serve the outdoor recreation community may provide similar services. Before the Lesson One of the most important ways to ensure the success of any course -- whether an NSP course or that of a similar organization – is to advertise it. This starts by registering the course with the staff at the national organization's office. Each NSP instructor should register his or her course on-line. (See Appendix H for links). All NSP members have access to the member's login area of www.nsp.org. Once logged in, you can look up all the courses registered in your area. Contact information is also provided for the instructor of record. In addition, most divisions and some regions have their own website, on which the student can register for courses. This not only helps local students register for the course, but also makes it easy to attend a class not being offered in the student's immediate geographic area. During the Course or Lesson Using technology effectively takes practice and instructors should always familiarize themselves with the service before trying to put it to use. After the Course or Lesson Completing and submitting the necessary paperwork in a timely manner should be a high priority. Students look to their instructors for mentoring and guidance; consequently, you need to keep up to date on program content and policies. Being an instructor entails more than fulfilling a teaching function at a course; it involves accepting certain additional responsibilities that may be expected of you once the course or lesson is completed. To the Point Instructional Management is a core part of the teaching and learning process. Without adequate planning, preparation and follow-up, the act of delivering instructional content to students will not be nearly as effective as it could and should be. Instructors must consider and resolve any issues that pertain to course organization, quality management, safety considerations and standards of training vs. local protocols. In addition, they must make the best use of modern technology to provide nontraditional educational opportunities that supplement face-to-face classroom experience and communication. Remember to take time to review all available materials and consult with the appropriate instructor trainers and mentors with whom you are working – a process that must occur long before the course is held. The NSP provides additional information regarding training, safety, risk management and quality management. Other organizations that participate in outdoor

32
recreation activities offer similar materials. The information is there, and you are responsible for seeking itout.

33
CHAPTER 5. Lesson Planning "I hated every minute of the training, but I said, 'Don't quit. Suffer now and live the rest of your life as a champion. '" – Muhammad Ali Concluding Objectives + Identify and explain the importance of lesson planning. + Develop a lesson plan using the six-pack format. Lesson Planning: An Overview The lesson plan(s) you create will set out what you are going to teach and how you are going to teach it. In some cases you may even want to prepare a more detailed lesson outline. It's important to develop complete lesson plans that best fit the needs of your students, the teaching environment and your own teaching style. Lesson guides and other tools that provide instructional resources are available from the NSP in instructors’ manuals, from the NSP website, and elsewhere (discussed in more detail in Chapter 6). However, these lesson guides, by themselves, are not lesson plans, as they lack the instructor’s intended methods, evaluation activities and materials. Lesson plans are an instructor's most essential tool, and that is why you should spend considerable time developing them. They must contain enough information to trigger your memory about what is to be taught and the methods to be used. That said, planning and teaching utilize different skills. Having a polished, written lesson plan increases the probability of a well-taught lesson but provides no guarantee. Teaching is much more complex than planning, and requires constant and instant decision-making. The only way to gain effective and polished teaching skills is to teach. This chapter presents a six-part lesson format to provide structure to lesson plan development, termed the “six-pack method.” Most instructors write out complete “six-pack” lesson plans until the format becomes instinctive; even professional educators write detailed plans whenever they need to think through a new or difficult lesson. Initially this process is time-consuming, but you will find that it is well worth the effort involved. The six steps that compose the “six-pack” lesson can be grouped into three sections for any lesson: the beginning, the middle, and the ending as detailed below. There is nothing magical about this lesson plan; in fact, it is similar to many teaching or speaking formats. However, instructors of skills-based content must devise methods that actively engage students. They must prepare models and visual aids, organize practice sessions, devise discussion questions, and evaluate student progress. The six-pack lesson model provides a workable teaching format

34
to organize activities and methods as well as suggesting things that an instructor trainee will be expected to perform before he or she completes this course (see Table 5.1). Six-Pack Planning: The Beginning A “set” is an attention-getter and should link to the topics to be covered. Concluding objectives drive the lesson-planning process and are located in the lesson guide section of the instructor's manual for each discipline. You need to be sure that you understand the concepts and skills that are required for each objective. Outlines of the essential content for each lesson guide are also provided in each instructor's manual; however, you may prefer to prepare your own topical outline. Just remember that a topical outline by itself is not a complete lesson plan. As part of the planning process, review the lesson guide materials to refresh your content knowledge and also to become familiar with the student materials. Rereading chapters, viewing videos and reviewing workbook pages will help familiarize you with the lesson content and select important sub-objectives. Table 5.1 The Six Pack (with examples from the ID course) The Beginning Purpose: To get students' attention and focus them on the lesson. Step 1: Set Step 2: Concluding Objectives ID Course Concluding Objectives The instructor trainee will:
• apply the knowledge of adult learners by designing and discussing a set for the beginning of an assigned lesson.
• select a method for stating the concluding objectives. The Heart of the Lesson Purpose: To give students information and provide practice. This is the heart of the teaching process. Step 3: Content Delivery Step 4: Learning Activities ID Course Concluding Objectives The instructor trainee will:
• select instructional methods appropriate for the content, the students, and the environment.
• present a six-pack lesson. • explain the role of guided and independent practice during the learning process.

35
Table 5.1 (ct.) The Ending Purpose: To bring all the ideas and new skills together so students can make connections, and to determine if students have the skills or will need more instruction/practice. Step 5: Student Summary Step 6: Monitoring and Evaluation ID Course Concluding Objectives The instructor trainee will:
• explain the steps in providing a student summary to the lesson. • explain the summary's importance to learning. • understand and utilize the concepts of monitoring and evaluation presented in Chapter
8. Step One: The Set Effective lessons are those that engage students from the very beginning. The instructor's first words or actions can have significant impact on adult motivation. People walk into a classroom with all sorts of ideas crowding their brains. (“Will the kids see my note about dinner?" "I have to get that memo written before tomorrow." "I wouldn’t be so rushed if I'd remembered to put gas in the car.") The purpose of the set is to help the student overcome these competing thoughts at the beginning of the lesson (see Table 5.2). A set is an introduction that helps the learner focus on the lesson and prepare mentally for new material. It is a motivational instructional tool and should invite students to actively participate in the learning process. In addition to serving as an introduction to a lesson, a set can also introduce a new step within a lesson. An effective set uses the characteristics of adult learners to build motivation. Students become interested in a lesson that clearly relates the new topic to their past experiences or points out its immediate usefulness. This linking to previously learned material also increases the efficiency of learning. The instructional methods you choose for a set should be ones that actively involve the students. Effective sets cause learners to do something, such as recall a personal experience, take a short quiz, view a skit and make comments or handle an object. The set should not be the major activity of the lesson, but a “teaser” to jump-start the learner’s mind into the lesson. Many sets last five to 10 minutes but they may be shorter. A set needs to clearly relate to the concluding objectives(s) for the lesson. Decide how you can relate to the student’s previous experiences. Here are some questions to consider in the planning process:
• What do the students already know about this subject?

36
• What related experiences could they have had in their family, communities, careers or recreational pursuits?
• Is there an analogy I can draw to any of these experiences? Once you've established this link to the past, you can select a method to actively involve the students. Here are some questions to consider when determining your approach:
• Can I ask a question that will engage and focus the learner? • What instructional method will be effective? • Can I demonstrate something or have a model? • Can I design a short hands-on activity?
Finally, design a transition to the lesson by asking yourself the following:
• How do I relate the new learning to past experiences? • How will it immediately be useful to the students?
Table 5.2 The Beginning – The Set Purpose
• Focuses attention. • Motivates students. • Makes learning more concrete and
personal. • Provides a mental reference point.
Characteristics • Hooks into the students’ previous
learning and experiences. • Involves the students. • Provides a transition to the new
material. • Is completed in a short time (10
minutes or less). • Is used at the beginning of a lesson,
at the beginning of a new section within a lesson, and at the end of a lesson to bridge to the next lesson.
Table 5.3 The Beginning – Concluding Objective Let students know the objective:
• Restate the objective in student-friendly terms and provide examples. • Print the objective on the white board, chalkboard or flipchart and explain. • Prepare the objective as a PowerPoint slide or transparency and explain. • Place the objective at the top of a handout and explain.
Note: Objectives in written formats should be explained/elaborated. Don't assume students will see and understand objectives written in 10-inch letters on the board. As part of the beginning of the lesson, let the learners know what to expect from the lesson. Having expectations set early in the lesson helps to raise the students’ interest, focus their
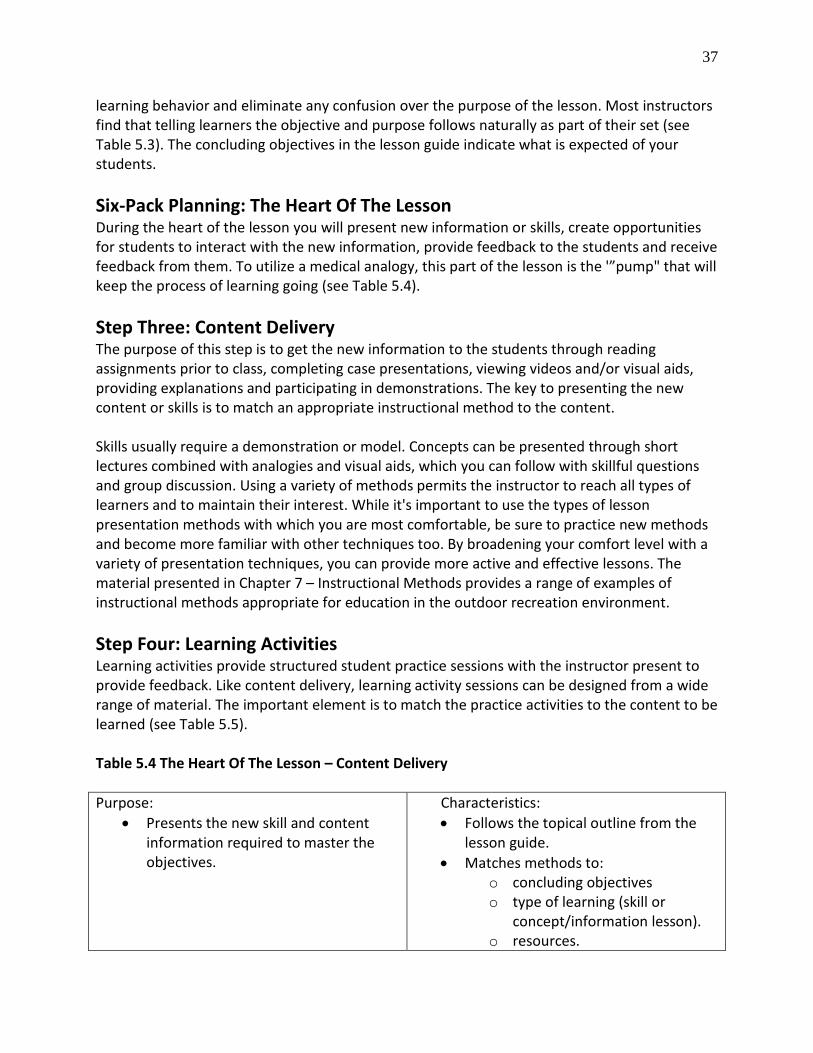
37
learning behavior and eliminate any confusion over the purpose of the lesson. Most instructors find that telling learners the objective and purpose follows naturally as part of their set (see Table 5.3). The concluding objectives in the lesson guide indicate what is expected of your students. Six-Pack Planning: The Heart Of The Lesson During the heart of the lesson you will present new information or skills, create opportunities for students to interact with the new information, provide feedback to the students and receive feedback from them. To utilize a medical analogy, this part of the lesson is the '”pump" that will keep the process of learning going (see Table 5.4). Step Three: Content Delivery The purpose of this step is to get the new information to the students through reading assignments prior to class, completing case presentations, viewing videos and/or visual aids, providing explanations and participating in demonstrations. The key to presenting the new content or skills is to match an appropriate instructional method to the content. Skills usually require a demonstration or model. Concepts can be presented through short lectures combined with analogies and visual aids, which you can follow with skillful questions and group discussion. Using a variety of methods permits the instructor to reach all types of learners and to maintain their interest. While it's important to use the types of lesson presentation methods with which you are most comfortable, be sure to practice new methods and become more familiar with other techniques too. By broadening your comfort level with a variety of presentation techniques, you can provide more active and effective lessons. The material presented in Chapter 7 – Instructional Methods provides a range of examples of instructional methods appropriate for education in the outdoor recreation environment. Step Four: Learning Activities Learning activities provide structured student practice sessions with the instructor present to provide feedback. Like content delivery, learning activity sessions can be designed from a wide range of material. The important element is to match the practice activities to the content to be learned (see Table 5.5). Table 5.4 The Heart Of The Lesson – Content Delivery Purpose:
• Presents the new skill and content information required to master the objectives.
Characteristics: • Follows the topical outline from the
lesson guide. • Matches methods to:
o concluding objectives o type of learning (skill or
concept/information lesson). o resources.
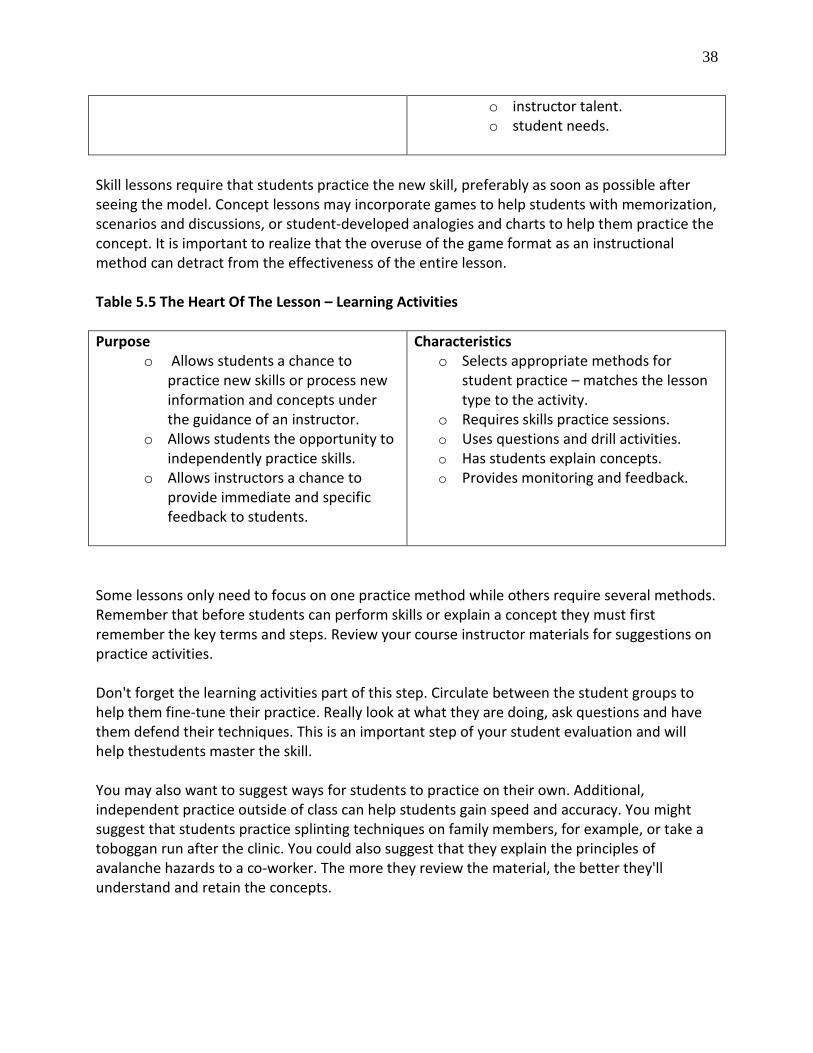
38
o instructor talent. o student needs.
Skill lessons require that students practice the new skill, preferably as soon as possible after seeing the model. Concept lessons may incorporate games to help students with memorization, scenarios and discussions, or student-developed analogies and charts to help them practice the concept. It is important to realize that the overuse of the game format as an instructional method can detract from the effectiveness of the entire lesson. Table 5.5 The Heart Of The Lesson – Learning Activities Purpose
o Allows students a chance to practice new skills or process new information and concepts under the guidance of an instructor.
o Allows students the opportunity to independently practice skills.
o Allows instructors a chance to provide immediate and specific feedback to students.
Characteristics o Selects appropriate methods for
student practice – matches the lesson type to the activity.
o Requires skills practice sessions. o Uses questions and drill activities. o Has students explain concepts. o Provides monitoring and feedback.
Some lessons only need to focus on one practice method while others require several methods. Remember that before students can perform skills or explain a concept they must first remember the key terms and steps. Review your course instructor materials for suggestions on practice activities. Don't forget the learning activities part of this step. Circulate between the student groups to help them fine-tune their practice. Really look at what they are doing, ask questions and have them defend their techniques. This is an important step of your student evaluation and will help thestudents master the skill. You may also want to suggest ways for students to practice on their own. Additional, independent practice outside of class can help students gain speed and accuracy. You might suggest that students practice splinting techniques on family members, for example, or take a toboggan run after the clinic. You could also suggest that they explain the principles of avalanche hazards to a co-worker. The more they review the material, the better they'll understand and retain the concepts.
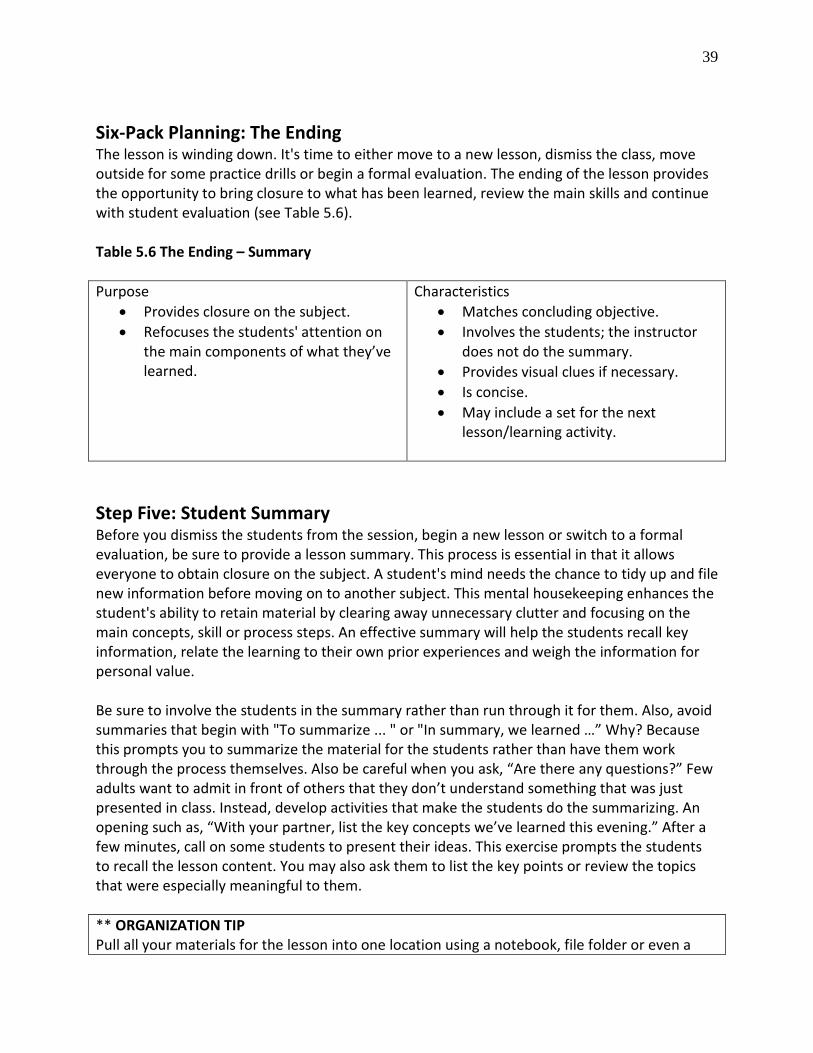
39
Six-Pack Planning: The Ending The lesson is winding down. It's time to either move to a new lesson, dismiss the class, move outside for some practice drills or begin a formal evaluation. The ending of the lesson provides the opportunity to bring closure to what has been learned, review the main skills and continue with student evaluation (see Table 5.6). Table 5.6 The Ending – Summary Purpose
• Provides closure on the subject. • Refocuses the students' attention on
the main components of what they’ve learned.
Characteristics • Matches concluding objective. • Involves the students; the instructor
does not do the summary. • Provides visual clues if necessary. • Is concise. • May include a set for the next
lesson/learning activity.
Step Five: Student Summary Before you dismiss the students from the session, begin a new lesson or switch to a formal evaluation, be sure to provide a lesson summary. This process is essential in that it allows everyone to obtain closure on the subject. A student's mind needs the chance to tidy up and file new information before moving on to another subject. This mental housekeeping enhances the student's ability to retain material by clearing away unnecessary clutter and focusing on the main concepts, skill or process steps. An effective summary will help the students recall key information, relate the learning to their own prior experiences and weigh the information for personal value. Be sure to involve the students in the summary rather than run through it for them. Also, avoid summaries that begin with "To summarize ... " or "In summary, we learned …” Why? Because this prompts you to summarize the material for the students rather than have them work through the process themselves. Also be careful when you ask, “Are there any questions?” Few adults want to admit in front of others that they don’t understand something that was just presented in class. Instead, develop activities that make the students do the summarizing. An opening such as, “With your partner, list the key concepts we’ve learned this evening.” After a few minutes, call on some students to present their ideas. This exercise prompts the students to recall the lesson content. You may also ask them to list the key points or review the topics that were especially meaningful to them. ** ORGANIZATION TIP Pull all your materials for the lesson into one location using a notebook, file folder or even a
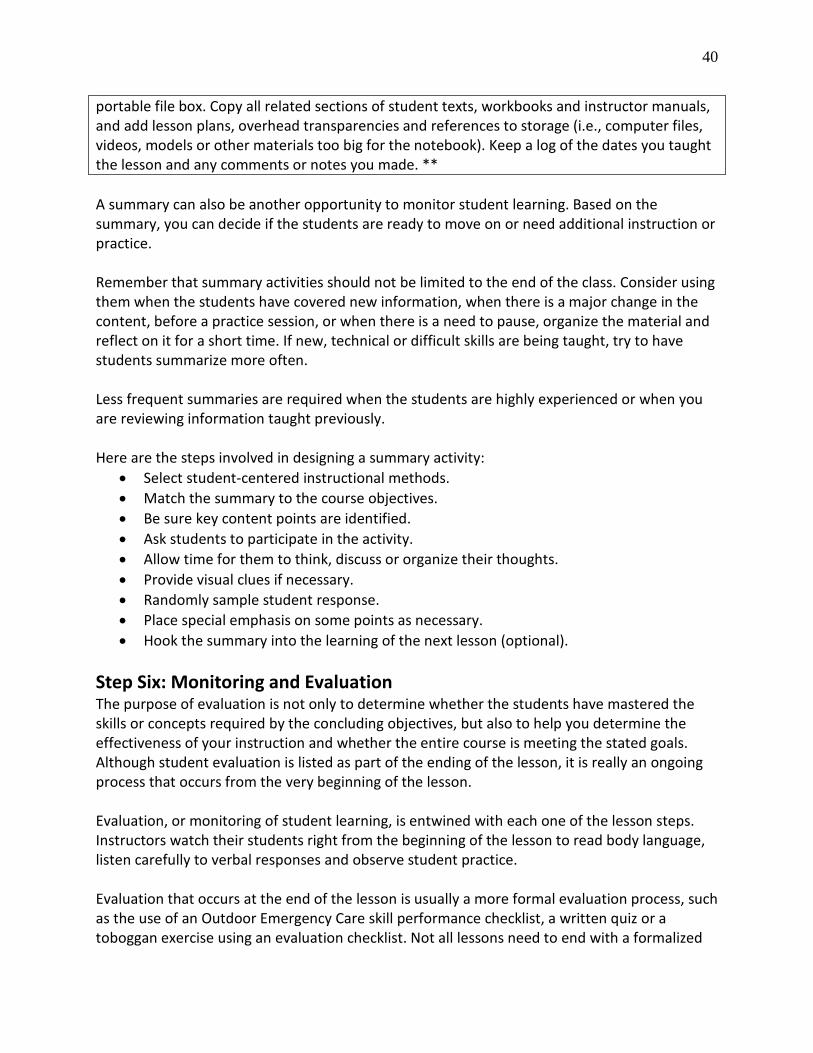
40
portable file box. Copy all related sections of student texts, workbooks and instructor manuals, and add lesson plans, overhead transparencies and references to storage (i.e., computer files, videos, models or other materials too big for the notebook). Keep a log of the dates you taught the lesson and any comments or notes you made. ** A summary can also be another opportunity to monitor student learning. Based on the summary, you can decide if the students are ready to move on or need additional instruction or practice. Remember that summary activities should not be limited to the end of the class. Consider using them when the students have covered new information, when there is a major change in the content, before a practice session, or when there is a need to pause, organize the material and reflect on it for a short time. If new, technical or difficult skills are being taught, try to have students summarize more often. Less frequent summaries are required when the students are highly experienced or when you are reviewing information taught previously. Here are the steps involved in designing a summary activity:
• Select student-centered instructional methods. • Match the summary to the course objectives. • Be sure key content points are identified. • Ask students to participate in the activity. • Allow time for them to think, discuss or organize their thoughts. • Provide visual clues if necessary. • Randomly sample student response. • Place special emphasis on some points as necessary. • Hook the summary into the learning of the next lesson (optional).
Step Six: Monitoring and Evaluation The purpose of evaluation is not only to determine whether the students have mastered the skills or concepts required by the concluding objectives, but also to help you determine the effectiveness of your instruction and whether the entire course is meeting the stated goals. Although student evaluation is listed as part of the ending of the lesson, it is really an ongoing process that occurs from the very beginning of the lesson. Evaluation, or monitoring of student learning, is entwined with each one of the lesson steps. Instructors watch their students right from the beginning of the lesson to read body language, listen carefully to verbal responses and observe student practice. Evaluation that occurs at the end of the lesson is usually a more formal evaluation process, such as the use of an Outdoor Emergency Care skill performance checklist, a written quiz or a toboggan exercise using an evaluation checklist. Not all lessons need to end with a formalized

41
evaluation process. Final evaluation or "high stakes" evaluations should be carefully planned for the end of a lesson, a major course segment, or the entire course. Also, they should be designed to give every student an equal opportunity to perform well. As needed, refer to the information presented in Chapter 8 – Monitoring and Evaluation. To the Point A lesson guide is just that: a guide for the development of a lesson. It is not an entire lesson plan. This course presents the six-pack lesson-planning format, which may be used to develop lessons appropriate for many outdoor recreation adult education courses (see Tables 5.7 and 5.8). Table 5.7 Developing A Six-Pack Lesson For A Physical Skill The Beginning: The Set Be enthusiastic in both actions and words when introducing a new skill. Speak clearly and use terminology the students can understand. Try to be brief. Involve learners in the introduction by building on their past experiences. The introduction should take less than three minutes. During the introduction, try to get the students' attention. Arrange the class so all can see and Hear, name the skill and give a reason for learning it. Keep explanations short, clear and concise. The Beginning: Concluding Objectives Give the students a clear statement of what they will be expected to perform, and explain its importance to them. The Heart: Content Delivery Explain the skill through demonstration. This usually works best if one instructor demonstrates the skill correctly while another instructor identifies the key elements of the successful performance. The Heart: Learning Activities Begin practicing the new skill immediately after the demonstration. Show the class how to practice the skill, and then arrange the students so that the greatest number possible can safely and effectively practice it.When a drill is used to practice the skill, be sure it is easy to understand, simple to do and that itemphasizes the skill to be learned. The Ending: Summary Allow the students time to verbalize what they gained from the lesson. Ask them to remember key points. Have them set a goal for their next practice session.
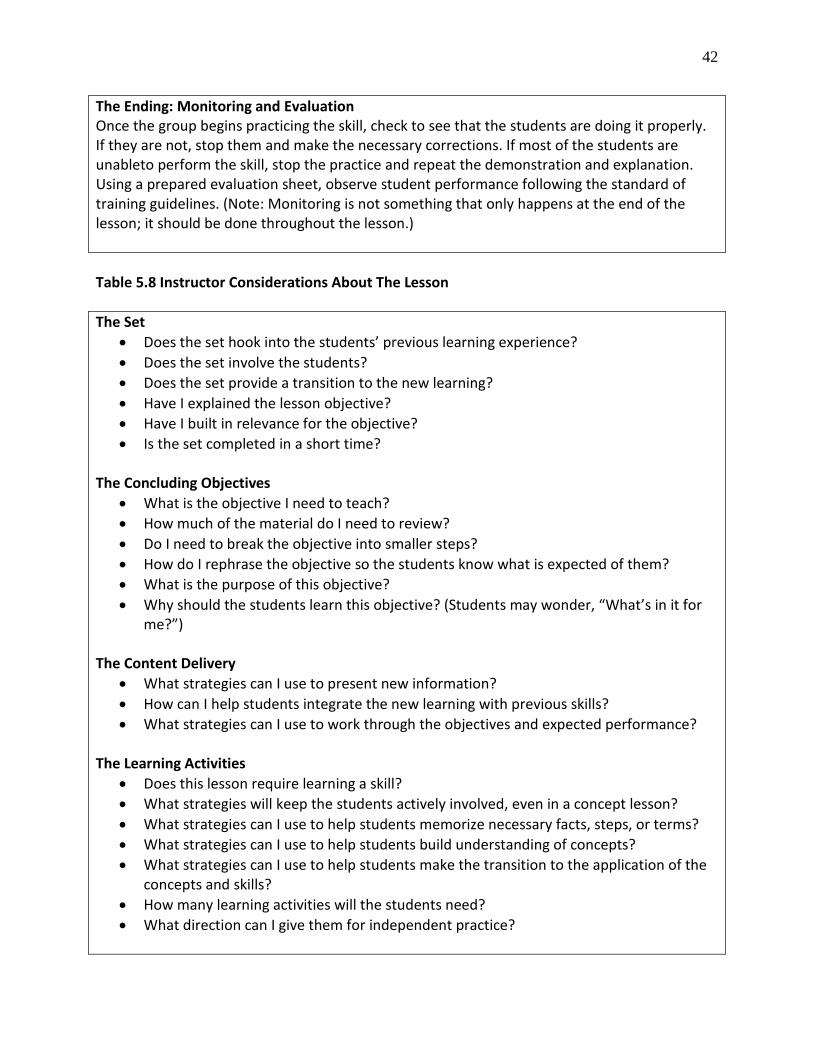
42
The Ending: Monitoring and Evaluation Once the group begins practicing the skill, check to see that the students are doing it properly. If they are not, stop them and make the necessary corrections. If most of the students are unableto perform the skill, stop the practice and repeat the demonstration and explanation. Using a prepared evaluation sheet, observe student performance following the standard of training guidelines. (Note: Monitoring is not something that only happens at the end of the lesson; it should be done throughout the lesson.) Table 5.8 Instructor Considerations About The Lesson The Set
• Does the set hook into the students’ previous learning experience? • Does the set involve the students? • Does the set provide a transition to the new learning? • Have I explained the lesson objective? • Have I built in relevance for the objective? • Is the set completed in a short time?
The Concluding Objectives
• What is the objective I need to teach? • How much of the material do I need to review? • Do I need to break the objective into smaller steps? • How do I rephrase the objective so the students know what is expected of them? • What is the purpose of this objective? • Why should the students learn this objective? (Students may wonder, “What’s in it for
me?”) The Content Delivery
• What strategies can I use to present new information? • How can I help students integrate the new learning with previous skills? • What strategies can I use to work through the objectives and expected performance?
The Learning Activities
• Does this lesson require learning a skill? • What strategies will keep the students actively involved, even in a concept lesson? • What strategies can I use to help students memorize necessary facts, steps, or terms? • What strategies can I use to help students build understanding of concepts? • What strategies can I use to help students make the transition to the application of the
concepts and skills? • How many learning activities will the students need? • What direction can I give them for independent practice?

43
The Student Summary • What key points need to be reviewed? • Is the timing appropriate to bring the entire objective to closure? • How do I build for transition to the next activity or lesson? • How can I relate this summary to a student activity?
The Evaluation
• How will I check to see whether students understand the lesson? • How will I know whether students have met the objective and mastered the skill? • Is this a “high stakes” evaluation? If so, how will I prepare the students and make the
evaluation fair? Considerable planning is required to that lessons can be presented effectively to students. Without such planning, instructors most likely will not meet the needs of their students, the requirements of the course or the goals of the organization that sponsors the program. When preparing for a class, remember that what works well for one audience may not work at all with another group. Course content may not vary from one session to the next, but the mix of people will change. Successful teaching depends not only upon your ability to plan lessons effectively, but also upon your ability to modify the content and design a course according to the overall strengths and weaknesses of each group of participants. It is important to be as flexible as possible, always having a backup exercise at your disposal if a planned activity does not fit the characteristics of the current group.

44
CHAPTER 6. Lesson Content and Instructional Resources "Time is the scarcest resource and unless it is managed nothing else can be managed." - Peter Drucker Concluding Objectives + Describe the differences between the whatand the how of teaching. + Identify the parts of a concluding objective and explain how an objective guides lesson planning. + Identify the parts of a lesson guide and list other instructional materials needed for planning a lesson. Lesson Planning Planning any six-pack lesson requires a balance between what is to be learned and how you will present the material to most actively engage the learners. You will have access to lesson guides, developed for each topic in a course, that give you reference material, the topics to be presented, and an outline that should help you prepare your lesson plan (Appendix F – Sample Lesson Guides, provides you with an idea of the lesson guides that will be available to you). These lesson guides are available online to certified instructors. The OEC lesson guides are available to instructors on the MyNSPKit website (www.mynspkit.com), while instructors’ manuals and lesson guides for other specialties can be found on the Instructor Resources page of the NSP website (accessed from the Member’s Page). You will also have access to skill performance requirements, called Critical Performance Indicators (CPIs) and suggested activities, either included in the lesson guides or accompanying them. The lesson guides describe whatmust be taught to maintain a quality standard of instruction, and they provide ideas for howthe material may be presented. The whatof a lesson is fixed; the how is negotiable, and is the result of the instructor planning process as well as the interaction and communication that takes place between the instructor and the participants. Lesson Guide Format Instructional materials are designed around lesson guides. These guides, while not a lesson plan, provide the essential objectives and topical outline necessary for you to plan lessons. Each lesson guide is a template – a consistent pattern for instructor planning. The lesson guide directs the planning of six-pack lessons; however, a lesson guide can prompt many six-pack lessons.

45
Lesson guides accomplish the following: 1. They describe whatmust be taught to maintain a quality standard of instruction, including concluding objectives and essential content. 2. They provide ideas for how the content may be presented – a reference for resources and materials. The content of each NSP course is determined by an education committee and is then approved by the NSP Board of Directors; other organizations that provide training have similar development and approval processes. Content delivery is based on the methods that the instructor chooses to present the desired information to students and the instructional outcomes that are required to ensure effective learning. A certain amount of flexibility existsin any lesson, and both you and the students may exercise that flexibility as long as the desired learning takes place and the objectives are met. The following are the general components of each lesson guide, though each specialty may have slightly different formats:
• Lesson (or chapter) number and title • Instructor and student resources • Concluding objectives • Essential content • Activities for problem solving
Lesson Guide Components The components of each lesson guide may vary among specialties, but, as indicated above, will include a lesson title, concluding objectives, instructor (and possibly student) resources, essential content and activities for problem solving, summary and evaluation. Samples of lesson guides for NSP education programs are provided in Appendix F. Lesson Title The lesson title should match the chapter heading of an accompanying text or the course outline of the education program. Recommended Instructor (and Student) Resources All the related resources, reference chapters and pages in accompanying textbooks are identified for instructor use with each course. Other references, training aids and audio/visual equipment are suggested, when applicable. The student resources include the manual, student workbooks and other resources, such as found in the student’s file on MyNSPKit on the web.
Concluding Objectives After you review the title of the lesson and the prerequisite skills required of the participants, you can begin organizing a six-pack lesson. Throughout this process, be sure to pay careful attention to the desired end results, which are the chapter’s concluding objective(s). These objectives describe what the students should know or be able to perform by the end of the
46
lesson. In other words, they describe a change in student knowledge or behavior resulting from instruction. Concluding objectives play two roles in instruction. First, they provide the essential structure around which you plan the lesson, and second, the students' awareness of concluding objectives helps set their expectations for the activity. The chapter objectives for each training program are outlined in the lesson guides for each course. As you read these objectives, consider the following questions:
• How do I ensure that students have mastered the objectives? • What content or skill is to be learned? Would it be helpful to break the objective into
sub-objectives? • Is there any unique condition or setting in which the desired behavior should be
demonstrated? All NSP objectives consist of two parts:
• The key verb indicates what is expected from the student (these key verbs are related to various levels of learning in education theory, as described in Appendix G – Classifying Learning).
• The content to be learned. The key verb helps you select student activities that match the content. Pay careful attention to the key verb. For example, if the concluding objective requires students to apply a concept to a situation, such as in a scenario, you will need to ensure that the students have a firm grasp of the factual information and an understanding of the major concepts and principles before you implement “applied” activities.
Objectives must be at the appropriate level of difficulty, essential and specific to the discipline, measurableand observable. It is important to consider the experience and understanding of the students when selecting methods to help them meet the objectives. Realistic expectations must be carefully defined and incorporated into the accomplishment of the concluding objectives. Objectives are behavioral, that is, they require students to demonstrate knowledge, skills or attitudes that are measurable and observable. Asking students to thinkabout something is non-behavioral. Asking them to writetheir thoughts on paper is observable – but only if you check it. Examples of concluding objectives: Instructor Development The learner will:
• Identify the three types of learners. • Describe ways to present material in order to reach all three types of learners and to
explain the effectiveness of using methods aimed at multiple type learners. • Explain the use of a key verb to specify appropriate activity.
Outdoor Emergency Care
47
Upon completion of this chapter (Chapter 25 – Cold Related Emergencies), the OEC technician will be able to:
• List and define the four mechanisms of heat loss. • List the signs and symptoms of cold exposure. • List the signs and symptoms of frostbite. • List and explain the two classifications of hypothermia. • List and explain the three categories of hypothermia related to severity. • Define afterdrop and explain how to prevent it. • Describe and demonstrate the assessment and emergency care of a patient with a cold
injury. • Describe and demonstrate the assessment and emergency care of a patient with
frostbite. • Describe and demonstrate the assessment and emergency care of an avalanche victim.
Alpine Toboggan Handling The learner will:
• Demonstrate how to operate the front of an unloaded toboggan while descending the fall line under a variety of terrain and snow conditions.
Essential Content The knowledge of subject matter is the base for the outline of essential content defined in every lesson guide. The essential content identifies what the instructor will need to cover on a specific topic. This curriculum outline establishes the required standard of training for each education discipline, as implemented by the instructor and measured through the quality assurance program. The essential content outline can be used to plan your lesson in detail. Activities For Problem Solving, Summary, And Evaluation Included in or accompanying the lesson guide are suggestions for various activities. This section will include much of the how of the lesson, including suggestions for activities to be used for guided practice, problem solving, summary and evaluation exercises. It is important to design activities that restate the objectives and actively involve the students. The evaluation portion of the lesson provides the opportunity for students to remember and link together the skills and ideas that have been learned. For example, the OEC activity section (apart from the lesson guide in MyNSPKit) suggests a scenario for students to complete. Lesson activities are suggested but may be used or modified at the instructor’s discretion. With the wealth of creativity among outdoor recreation instructors, many innovative lessons have been planned and a collection of activities and exercises can be found in each instructor manual, either under a separate tab or in the lesson guide section. Additionally, a variety of activities and resources may be obtained from the NSP Instructor's web page (at www.nsp.org) or the NSP instructor's publications. Other outdoor recreation organizations provide similar resources.

48
Instructor Tools In order to access a variety of presentations and activities, you can access the NSP website (at www.nsp.org); select the link to the instructor's website. You may develop lessons and presentation to add to that site. Additional Instructor Development Program Resources Electronic learning has become an essential educational tool in today's society. As an example, the Instructor Development Course is designed to be presented as a traditional face-to-face educational program or as an electronic web-based program (Hybrid E-course) that the student can pursue on an individual basis, combined with a hands-on, in-class demonstration of teaching skills. This student text is designed to be an integral part of both instructional formats. The National Ski Patrol constantly updates program information and resources. In addition to Ski Patrol Magazineand other bulletins, information is constantly added on the Internet. Visit the instructor's website for further information on instruction and for help putting your lesson plans together. The website www.mynspkit.comprovides lesson guides, activities, evaluations and other resources for OEC courses. Also available online are course listings. These can be accessed by logging into the member's area of the www.nsp.org website. The member services area provides access to the NSP online catalog, order status, the NSP Policies and Procedures manual, and the member forum. It also includes a feedback form. To the Point There are two essential components of lesson planning: 1) the content and 2) the manner in which you will present that content. As the instructor, you will receive a variety of materials for the course you are teaching, including lesson guides, course or lesson outlines, an instructor's manualand the student text. These materials will lend structure toyour lesson and help you focus activities on helping students meet the objectives. It is up to you, however, to make the most of these tools and torevise your strategies depending on the needs of the students. Make use of all the resources that are provided toyou as an instructor, and investigate other sources of information – not only on the subject matter but also on successful teaching strategies. These sources may include the association website, instructor newsletters andthe membership magazine. And don't forget to talk to other instructors too. You may find that some of your most successful teaching strategies are those that you learned from someone else. Share your ideas. Instructors are encouraged to continually create and share activities, exercises, and other instructional methods.

49
CHAPTER 7. Instructional Methods "To become successful you must be a person of action. Merely to 'know' is not sufficient. It is necessary both to know and do."– Napoleon Hill Concluding Objectives + Explain that methods include both instructor presentation and student practice. + Compare and contrast various instructional methods. Purpose of Instructional Methods Instructional methods are the process by which students learn. Regardless of the methods you select, you will need to use a process or a series of processes to accomplish the following:
• Introduce a lesson. • Provide students with relevant new material. • Encourage student interaction with the new material. • Help students integrate new material with previously learned material. • Have students practice. • Bring closure to a subject.
Rather than being discreet steps in the lesson, instructional methods are the means by which every part of a lesson is presented. It is important to think of a lesson as a continual flow of varied teaching methods that engage the students through the process of communication. As an instructor, you should be aware of learning styles and organize each lesson so that all students have the opportunity for maximum learning. Information Delivery One of the objectives of this course is to promote instructor decision-making and creativity as you develop activities that will reinforce the teaching/learning process. Within each lesson, you will use many instructional methods to accomplish each objective. Instructional methods offer great ideas for building and delivering powerful, active presentations and selecting student activities. You choose appropriate methods to provide the students with new information and generate practice sessions. When students receive new information, they need opportunities to demonstrate their new knowledge skills through practice. You will not necessarily need to use dramatic strategies when presenting information. In reality, many brief, subtle yet effective methods of teaching constitute quality instruction. Every time you ask a question of your students, use a visual aid, encourage a student to share a response with another student or give a reading assignment, you have used an instructional method that enables constructive input.

50
Types Of Instructional Methods A sampling of strategies is listed below; however, the variety of options is endless and limited only by your creativity. How you organize and present information will determine whether they are instructor-centered methods or student-centered methods.
• Lecture: A well-designed talk or presentation where no hands-on skills are involved. This method is especially suited to presentations before large groups. The presenter must be very proficient in oral skills to be effective. Because communication is one-way – from the instructor to the students – the effectiveness of learning is often difficult to assess.
• Demonstration: An instructor or other individual proficient with a skill performs it correctly in front of students. The skill must be one that is easily visible or the demonstration will not be effective.
• Model: A realistic prototype of an object or system. This gives the students the opportunity to relate their current knowledge to that presented in the model.
• Audio/visual aids: The use of PowerPoint presentations, videos, overheads, flip charts, films, slides, etc., to present information, or actual objects. This can help reinforce skill acquisition by visual learners as well as those with other primary learning styles. Remember that while most individuals have a primary learning style, they also tend to benefit from different instructional methods. Audio/visual aids must be properly prepared and presented or they will detract from the overall effectiveness of the lesson (See Appendix E).
• Reading: Students read or review printed matter. Reading assignments that should be completed prior to class must be effectively communicated to the students, or adequate class time must be allocated for reading material to be absorbed in class. Often, class time is not adequate for students to digest extensive written material.
• Scenarios: Students act out pre-assigned roles to a realistic situation. This can be very useful in many situations as it allows students to explore different solutions to the problems presented and to develop and practice skills. This method is not usually appropriate for use with large groups. Also, some individuals may not be comfortable acting out scenarios in front of others.
• Questioning and group discussion: Two-way question-and-answer sessions that increase a learner's interest and knowledge in a particular subject. Communication of this type (between students and the instructor) is a good way to probe ideas and brainstorm. This process is especially effective with smaller groups and allows students to actively participate in the learning process. However, as with the scenario method, not all individuals will be comfortable sharing their ideas before a group. In addition, you will need to be careful not to allow one or two individuals to dominate the process, which could keep others from participating.
• Skill stations: Students perform specific tasks as directed by the instructor. This is a good method to observe the correct application of skills. It requires that you carefully plan and communicate to the students the skills that are to be demonstrated.

51
• Role playing: Students spontaneously respond to a real-life situation. As with scenario-based methods, this can be very useful to allow students to try different solutions to resolve a situation. You must remember to involve all of the students as either active participants or observers with specific roles.
• Analogies: Students compare similar characteristics of two dissimilar objects or ideas. By associating new concepts with previous knowledge or experience, learners can simplify their understanding of complex topics. Analogies are useful in capturing students’ attention and helping them focus on a specific topic.
• Problem solving: Students seek solutions to a situation fixed within a framework that is set by the instructor. As with scenario and role-playing methodologies, it is important to involve all students in the activity.
• Video feedback: A student is videoed during a skill performance so that the instructor, the student and/or peers can provide assessment. Some students may become uncomfortable when they are "on camera," so allow them to practice before the assessment. When used as part of the Instructor Development Course, this method may also be useful in identifying any mannerisms an individual has that may be affecting the instructional process.
• Multimedia product: Students demonstrate their knowledge by putting the material into a media format, such as a video, slide show, or computer program. This is often useful as a follow-up project for a presentation at a later date, as it is frequently difficult to provide adequate class time to complete such a project.
• Skit: Students act out a play developed by the instructor or a student. This can be a productive activity for small groups of students. It is essential that you provide sufficient direction to ensure that the material is on topic and that all the students are actively involved.
• Categorization/sorting: Students sort or organize information into related groups. This can help with the process of relating material to the appropriate learning objectives. It can also help students relate new concepts to previously learned information.
• Games: The use of board, TV or card game formats to have students review information in an interactive way to demonstrate knowledge. Games must be carefully designed to ensure that they reinforce the appropriate lesson material. The overuse of this method can detract from the effectiveness of learning.
• Electronic media: The use of materials developed for student self-instruction, such as the Hybrid E-course. This provides the opportunity for students to receive instruction and overcome obstacles such as distance, travel time, scheduling conflicts and expenses. It may not be suited to all learners, however, as it does not provide the personal communication and interaction of a face-to-face class.
This is an open-ended list. Look for activity ideas in the NSP's instructor training materials and in those of other organizations, and use these suggestions to spark your own creativity. You should feel free to design and experiment with methods seen in other training environments. Keep expanding the training options so that the learners remain active. After all, learners who

52
are active understand and retain more than those who are subjected to a sedentary instruction format. When planning, it is important to remember the relevance of the learning styles discussed in Chapter 2: visual, auditory and kinesthetic. You should try to include material that engages all learning styles, but realize that certain parts of a lesson or an entire lesson may not incorporate all three styles. That is acceptable as long as the totality of the presentation touches on all three. Identifying Appropriate Teacher and Student Behavior Identifying instructor behavior and student behavior is an interwoven planning process. What methods you decide to use and how you direct the students to interact with those methods must match the essential content and ultimately satisfy the concluding objectives. Ask yourself the following questions to help you select the appropriate teaching methods:
• How many of these methods have I tried? • How many of these methods have I observed other instructors implement? • What methods have I been involved in as a student? • What are the best methods for practicing a skill? • What are the best methods for learning a concept? • What are the most effective methods to use with a small student group? • What works best with a group larger than 15 students? • What learning activities fit with the concluding objectives? • What learning activities fit the learning styles of my students? • Is this an efficient way to teach the content of the objective?
When selecting instructional methods, try to determine which learning styles (auditory, visual or kinesthetic) function best with each method. Some activities primarily address one style. For example, a lecture and/or group discussion may work well for auditory learners but will not enhance learning for visual and kinesthetic learners. Try to find ways to combine instructional methods so you can address multiple learning styles, such as enhancing verbal analogies with sketches or actual objects, using flip charts to help illustrate a mini lecture, or using motions to indicate relationships. Learning New Methods To learn/use a new method, first apply it to teaching a topic with which you are comfortable and test it on a small number of trusted friends. This will help you identify weak spots and problem areas as well as prompt you to develop ideas and logistics you may not have considered before. Be sure to evaluate the method in terms of the appropriate learning styles for adult learners. Once you've practiced the new method and feel comfortable using it, you can feel confident about adding it to your instructor "bag of tricks.”
53
Creating Learning Activities Activities should be designed around how the student practices or uses new information. Guided practice and independent practice define student behavior. Select one or more of these methods as a means of generating student activities. Students can write answers to questions, respond orally or demonstrate a skill. They can also create a skit, build a model, put together a video or play a game. These student activities can provide guided practice of the skill and serve as an opportunity to review and explain what is learned in class. Or, the activities can be part of a formal learning evaluation. Regardless, the method should generate student interaction with the new information. Students can either express their knowledge and understanding of the new information, or demonstrate the skills individually or as part of a group. Student Learning Activities and the Role of Practice Group activities engage the students in the learning process and make them working partners with the instructor. Many instructors tend only to rely on a few basic training methods. Because the purpose of any training program is to deliver results, it is natural to want to stick with proven techniques. Studies indicate, however, that by varying teaching methods and using highly participatory methods during a program, learner involvement will increase, as will the program's effectiveness. Make sure you continually refer back to (and incorporate) skills and concepts that were presented earlier in the course. Practice activities, one type of observable student behavior, should be part of every lesson. The instructional methods presented previously can also be applied to practice activities. Outdoor recreationists are familiar with a variety of practice methods that are presented in different instructional settings. In NSP programs, scenarios are frequently used to practice emergency care skills, incident command roles, and avalanche rescue. Drills have been devised for toboggan-handling skills, and mountain travel and rescue students go out into the field with a compass and a specific list of tasks to accomplish. Other outdoor recreation disciplines also provide similar lists of methods that are appropriate for instruction and student practice. Guided Practice Students should practice each new concept or skill under your direction. This guided practice reduces the chance that they will practice all or part of a skill incorrectly. In and of itself, your presence in the room or on the hill does not qualify as guided practice. Minimum criteria for guided practice include an observant instructor who provides immediate and specific feedback. NSP programs provide frequent occasions for guided practice, such as coaching toboggan handling, Outdoor Emergency Care skill stations, avalanche transceiver fieldwork, or small group tasks. Other organizations' programs provide similar opportunities, such as demonstrating swimming or SCUBA skills or having the opportunity to practice rolling a kayak in a pool beforeattempting the skill in the open water. Successful guided practice requires you to select an instructional method that generates observable student behavior, carefully check the behavior, and then supply appropriate specific

54
feedback. Responses such as "Good job!" or "That's wrong!" do not help students identify what was successful or what was incorrect about their skill performance. Specific skill-related responses are required. It is more effective for instructors to help students identify their strengths and weaknesses – and then select alternate approaches to solving the activity problem – than it is to provide a detailed critique. In addition, re-teaching an incorrectly learned skill is much more difficult than teaching a new skill. Just think of how hard it can be to correct a golf swing or “sitting back” in the bumps. Independent Practice Once students can demonstrate a skill, they can gain fluency, speed, or accuracy by practicing independently, which occurs away from the original instructional setting. When OEC students practice splinting on their family members or take a toboggan run after the conclusion of a clinic, or when SCUBA students explain the concept of buddy breathing to a co-worker, they are engaged in independent practice. This helps reinforce the learned skills so they may be performed more effectively and efficiently. Remember to be sure that independent practice is based on correct skills knowledge. Nontraditional Learning The growth of the Internet as an educational resource and communications media – along with the availability of videos, CDs, e-mail and instant messaging – all have helped increase student access to nontraditional educational formats. Consequently, there are now numerous available instructional class delivery systems that can augment or replace the typical classroom scenario. The traditional classroom setting in which an instructor works with a group of students has many benefits, including the opportunity for personal, face-to-face communication and on-site analysis of the effectiveness of learning. In today's world, with so many other activities competing for students' time and effort, electronic media offers an alternative that cannot be ignored. It is the responsibility of today's instructors to keep pace with this changing technology and effectively utilize it to enhance the teaching/learning process, whether it augments or replaces the conventional classroom learning environment. Without recognizing the applicability of this technology in today’s instructional methodology, the opportunity for some students to participate in educational programs may be greatly reduced. Instructional Modifications for Students with Learning Disabilities Lesson planning should include ways to accommodate any learning disabilities that may exist among students. The following list presents a number of ways that lessons may be adapted for this purpose. Many of these modifications can also be beneficial to students who do not have learning disabilities.
• Provide structure in your lessons. – Prepare written objectives and learning expectations.

55
– Make transitions between activities or lessons clear; end one section with a summary and start the next with a set.
• Provide assistance for students who have difficulty reading. – Encourage reading and study groups that can help struggling readers learn the material. – Ask students to explain or demonstrate a process rather than put it in written form. – Present information in visual forms when possible (such as videos, demonstrations, pictures, etc.). – Give students outline notes to assist with note taking.
• Provide alternative means to demonstrate learning. Avoid relying only on paper/pencil tests.
– Have students restate what they have just read. – Read tests out loud to students and have them give you oral answers. – Ask students to work in groups. – Reduce the number of assignments.
• Minimize distractions. – Have students sit in the front and in the "power center" of the room and make more frequent eye contact with them. They should avoid aisles windows, and the back of the room. – Reduce background noises and discourage 'side conversations during instruction.
– Emphasize successes and redirect problem areas. Focus on Self Image Some students may have negative feelings toward “school.” Students who exhibit learning disabilities often lack a positive self-image. Be sure that they focus on what they can do well and find ways to approach a difficult skill in a different manner. It is important that you work with such individuals to help them minimize these feelings. The following recommendations can assist in this process:
• Help students identify their assets. • Encourage students to constantly remind themselves of those assets. • Heighten the students' awareness of their ambitions and goals, both long and short-
term. • Help students develop a realistic plan of action for reaching their goals. • Encourage students to constantly assess their progress toward goals, including why or
why not the goals have been attained. • Congratulate and reward students for completing tasks or attaining goals; encourage
students to the same for themselves. • Praise good behavior, including learning behavior and social behavior. Positive
reinforcement has an important role in the learning process. • Use descriptive praise instead of making judgmental comments. • Never make comments that might be misconstrued as belittling or humiliating. Also
avoid comparing one student's progress to another student's progress.

56
• Provide students with clear and simple instructions about a task • Try to engage as many senses as possible. • Practice social skills with students. • Provide students with social or academic situations in which they will be successful. • Limit the number of decisions students have to make. • Discuss an individual student's problems in private.
To the Point Instructional methods are part of a large category of teaching and learning activities that generate instructor and student behaviors. It is important that you become proficient in utilizing a wide range of such methods and that you recognize the settings in which each one is most appropriate. Learning activities provide a method for the students to interact with other students as well as with you. They also enable students to practice new skills and behaviors, and broaden the knowledge they've acquired during the instructional process. Whether this occurs within a traditional classroom setting or through the utilization of today’s electronic media, the expectedoutcome is the same: to provide students with appropriate new skills and behaviors.

57
CHAPTER 8. Monitoring and Evaluation "I have yet to find the man, however exalted his station, who did not do better work and put forth greater effort under a spirit of approval than under a spirit of criticism." – Charles Schwab Concluding Objectives + Define the purpose and characteristics of monitoring students on an ongoing basis. + Define the purpose and characteristics of evaluating students at the conclusion of a course. + Distinguish between knowledge and performance evaluations. Measuring Learning An instructor's responsibility is not only to present information but also to determine whether students are learning the material. How do you know when students have mastered a skill, embraced a concept or internalized a process? How do you know that your teaching methods are effective? By learning how to monitor and evaluate student learning. General Considerations Whether monitoring or evaluating students, instructors need to establish realistic expectations about acceptable and unacceptable performance. This begins when you know the students, identify their capabilities and understand how best to evaluate them. Correctly estimating a student’s ability level is important; after all, not all students are alike or at the same skill level. A 61-year-old person is likely to have different abilities than a 16-year-old, and not every student will be ready for toboggan training on the same slope at the same time. One student may need a review of directions before beginning a scenario while another plunges in without a second thought. As an instructor, you will need to base your assessment of student performance on objective observations of their learning behaviors rather than on attitudes and feelings. This is more difficult than most of us would like to believe. For example, teaching a former student's child or sibling can challenge your ability to be objective with the person. Depending on your experience with the former student, you may be inclined to be either unreasonably harsh or willing to overlook errors in the student's performance. To make the teaching/learning process effective in this situation, it's important to be unbiased, and rely on judgment rather than impulse. Ongoing Monitoring As with taking a patient’s vital signs, the act of monitoring while teaching refers to continually checking the student’s learning progress. The information you gain from these "vitals" will help
58
you adjust your instruction on the spot. By frequently checking the student’s behavior you can determine to what extent learning activities are producing the desired results. Based on student responses, you can judge the appropriateness and effectiveness of the instruction, modify your approach and make decisions about further student learning needs. This type of learning assessment takes place often and at small, incremental steps throughout the lesson. An effective instructor builds into the lesson frequent opportunities for checking student understanding and skills. Observable student behaviors generated by student-centered instructional methods allow you to monitor learning. From the beginning of the lesson to the concluding summary, you should be looking for and checking student behavior. Throughout the lesson, you will need to take your students’ “vital signs,” that is, read their body language, evaluate their responses, analyze their performance in activities, and interpret their questions. Monitoring should check learning frequently. Prime opportunities to monitor students and adjust your instructional approach accordingly include the following:
• The Beginning – As students respond to the introduction (indicate previous knowledge). • The Heart – As students respond to questions, participate in activities and practice a
skill, etc. • The Ending – As students summarize what they've learned.
Ongoing monitoring eliminates the unpleasant and unnecessary surprise of discovering at the end of a lesson or unit that students don't understand the material. Frequent monitoring helps avoidgaps in learning the content. Based on information gleaned from monitoring, you have a responsibility and an opportunity to adjust the lesson. You may decide to move ahead, re-teach, provide additional practice or abandon the current learning activity. Be open to the fact that when most of the students are not grasping the content, something is probably lacking in the instructional process. Readjust the lesson and try again. Summary of Lesson Adjustments Move on when…
• everyone already knows the material being presented (the students can perform a summary activity and move on) or
• everyone has mastered the material (the student can move on). Re-teach when...
• the directions are not clear (requiring you to back up and clarify) • students are missing some information or steps (requiring you to back up and re-teach
immediately) or

59
• students are missing most of the information or steps (requiring you to re-teach during the next lesson)
When one or two students do not have a firm grasp of the material, you can remediate, i.e., work independently with those students after class so you don't take time from the class and therest of the students. Practice when…
• students have the skill or concept, but just need more practice Abandon ship before…
• damage is done to students' learning (in other words, retreat and end with a positive approach)
In this situation, you must diagnose the instructional/learning problems and re-teach the lesson using different instructional methods. These fresh methods may have to address other learning styles to promote successful learning. Overall, instructors need to constantly monitor the abilities of each student and then adjust expectations accordingly. Effective instructors set up students to be winners by always assessing what students have learned and by avoiding the "Gotcha!" game – that is, using trick questions, creating overly complex scenarios, or putting students on skiing or snowboarding terrain beyond their ability level. Monitoring a student who is learning is like assessing a fragile patient; you take vital signs often, observe the patterns and adjust the prescription based on the information learned. If you know that a student does not understand the current material, moving forward with the lesson plan is unacceptable. Concluding Evaluation Evaluations should be consistent, objective and fair. Consistency takes real effort. At some point, all instructors are inconsistent, even the best. The worst form of inconsistency evolves from prejudice or bias and may result in the instructor singling out an individual for harsh, unfair criticism. Inconsistency is human. The key is for you to recognize it in yourself and take steps to make it transparent to the class. To be objective in your assessment, you must have given your students well-defined lesson objectives. If you demonstrate the skill to the students, do so at the level you intend to assess. Fairness implies fair treatment in all phases of performance assessment. Many forms of assessment have fairness built-in. A written exam is usually inherently fair, especially if developed and tested by an outside source such as the NSP or American Heart Association. The

60
area where fairness can be most problematic is in skill assessments. Some trainers are so rigid in finding a below-standard performance that they miss the big picture. Fixating on one aspect of a student’s skill demonstration and ignoring the fact that, in the end, the student met the objective, is patently unfair, but happens all too often in skill assessment. That student may not have done an integral task the way we would do it, but, if in the end the objective was met, that’s what counts. Evaluation serves to answer one critical question: Has the student mastered the lesson content or skill? Each concluding objective should be considered a benchmark requiring evaluation, which must be based on an objective assessment of observable student behaviors. Evaluation must match instruction, and instruction must match the concluding objective. No one likes to be tested or judged on something he or she was never taught. Students need to know early in the course or program how their learning will be measured, what criteria will determine mastery and when they will be assessed. Be sure to give them samples of the written questions and evaluation scenarios, and tell them where to find skill performance checklists, e.g. at the end of the chapters of the Outdoor Emergency Care or other course/program materials. Also provide them copies of scoring/evaluating guides for toboggan, mountaineering, avalanche, or other outdoor recreation program skills, and explain how these guides will be used. Every evaluation should build on the need of adults to self-diagnose. Ask students to continue to self-evaluate against these provided evaluation skill lists. NSP instructors need to be familiar with evaluation materials developed by the NSP curriculum. These structured tools, based on observable behaviors, help make assessment consistent, reliable and informative. They also help students recognize their strengths and weaknesses. Instructor manuals provide examples of evaluation tools, including those such as the OEC skill performance guides and critical performance indicators (CPIs), test bank blueprints (which may be electronically provided from NSP), and toboggan and ski skills checklists. Other outdoor recreation program materials include similar information. Evaluation typically occurs at the end of a major piece of instruction: the end of a lesson, a related group of lessons or the course itself. Evaluation not only helps you recognize and assess student attainment but also helps you guide course and program planning.Table 8.l outlines the similarities and differences between ongoing monitoring and evaluation. Evaluation Types Instructors generally utilize two essential evaluation methods to help gauge student progress: knowledge-based content tests and performance-based evaluations. Knowledge-based content tests This type of evaluation is used to measure knowledge of information, such as patient signs and symptoms, types of avalanches, parts of a toboggan, a SCUBA assembly or similar material from

61
another outdoor recreation program. Content assessments generally are written examinations that measure either recall or recognition. Objective questions (true-false, multiple choice or matching) measure the student’s ability to recognize the correct answer. Subjective questions (essay, short answer or fill-in-the-blank) measure the students' ability to recall facts or information and present the answer in their own words. Consequently, subjective tests generally measure higher levels of thinking. Knowledge-based objective tests are generally the easiest to administer and score; however, they cannot measure complex reasoning or performance skills. Performance-based evaluations This type of evaluation requires the performance of a skill or task and must be conducted using scoring guides. The instructor observing the student performing the skill must check rote skills such as correctly setting up oxygen equipment, applying a sling or using an avalanche probe. Usually a simple checklist of steps can be utilized to assess whether the students have mastered the skill. Complex scenarios or skills at the application level require the development of performance tasks and their associated rating criteria. After the task has been designed, a criteria performance scale must be applied. This scale will include the skill step and an indicator of how well the skill was performed. The specific steps in designing this type of performance criteria go beyondthe scope of this Instructor Development Course. Performance-based evaluation requires considerable time to develop, administer and score. Accurately evaluating student performance often requires the use of multiple evaluators. For example, the NSP Senior Program and final OEC practical evaluation use trained evaluators each using identical evaluation forms. The evaluators attend clinics to ensure that their ratings are reliable and consistent. It is important to provide this same level of expertise and instructor training, no matter what outdoor recreation discipline may be involved. Consider keeping a student assessment portfolio. To accomplish this, simply prepare a folder for each student that will contain a history of the student's learning activities and performance, including instructor notes, skill performance guidelines, student self-evaluation, and important written test results, among other evaluative material. The portfolio can be used in conjunction with written and practical assessments to more accurately evaluate the progress of each student. Table 8.1 Ongoing Monitoring and Evaluation Ongoing Monitoring Purpose
Evaluation Purpose

62
• Check if students are mastering small, incremental steps toward the concluding objectives.
• Immediate information that aids short-term planning.
--Make immediate instructional decisions. --Adjust subsequent lesson(s). Characteristics
• Occurs frequently during instruction. • Quick "vitals" to check attainment of
small incremental steps. Steps
• Obtain an observable behavior. • Observe the behavior and check
carefully for accuracy. • Adjust instruction:
--Move ahead. --Re-teach. --Provide for additional practice. --Abandon ship.
• Determines if learning has occurred. Has the student behavior changed?
• Determines satisfactory knowledge and skill performance to complete the program (OEC technician, patroller, senior, etc.).
• Provides information for program feedback.
• Provide information for instructional feedback.
Characteristics
• Occurs at the end of a major section: --end of a lesson --end of a group of related lessons --end of a course
• Test major learning steps (concluding objectives).
• Tends to be a more formalized assessment process.
Evaluation Types
• Knowledge- or concept-based --Objective --Subjective
• Performance-based (subjective) --Rote skills --Application skills
Evaluation Design You may find it necessary to design your own evaluation instruments. This design process includes the following considerations:
• What (Content) – What concluding objective(s) are to be evaluated ? – How is this objective to be evaluated ? – What observable behaviors will be checked for learning/mastery?
• Why (The purpose of the evaluation) – Determine the student's knowledge. – Check skill ability. – Group students together for practice. – Refine and modify the program.
63
• When (During or at the conclusion of the lesson)
– When should the evaluation be conducted? – Where are the logical places to evaluate knowledge/skills?
• Who (Evaluators) – Who will perform the evaluation? – Can I involve students in self evaluation? – Can I involve students in peer evaluation? – Do I need to invite an outside source to the evaluation? – Would it be best to use multiple evaluators?
• How (Evaluation method) – What type of evaluation will I design?
* Knowledge-based evaluations make best use of paper/pencil-type evaluations. * Performance-based evaluations require the development of a task and observation/evaluation form.
– How will I use the scoring guide? Once you’ve answered these questions, you can prepare the evaluation tool to accurately assess student progress. To the Point As an instructor, you are not only responsible for preparing lessons and instructing students, but you are expected to evaluate whether the students have actually learned the appropriate knowledge and skills. It is important that you understand the capabilities of the students and refrain from inserting your own personal values into the evaluation process. Frequent monitoring of a student's learning progress can help you adjust your teaching strategies on the spot. In addition, concluding evaluations will help you determine whether the learner has mastered the appropriate lesson content, based on an objective assessment of observable behaviors. Evaluations must match the instruction, and the instruction must match the concluding objectives for the lesson. Knowledge-based objective tests are used to measure knowledge of information, and are typically utilized in written examinations. Performance-based tests require the performance of a skill. This performance is usually recorded on a skill checklist. Without appropriate and effective monitoring and evaluation, instructors cannot assess whether the students have learned the lesson content, the instruction has been effective and the goals and objectives of the course have been met.
64
CHAPTER 9. Course Summary, Lesson Presentation and Instructor Mentoring "There are risks and costs to a program of action. But they are far less than the long-range risks and costs of comfortable inaction.” – John F. Kennedy Concluding Objectives + Be able to review the purpose and content of the Instructor Development Course. + Present a six-pack lesson plan + Understand the role of the NSP Instructor Mentoring Program in the Instructor Development process. Instructor Resources The Instructor Development Course and this manual provide the materials required to begin developing competent instructors for the National Ski Patrol and other organizations that need to provide NSP-related adult education. Over its long history, the NSP has provided quality training programs to its membership. Other organizations teaching NSP courses (such as OEC) will now be able to have their own NSP-certified instructors through the Instructor Development Course. After completing this course, NSP instructors begin the process of teaching while working with seasoned instructors who mentor them as they gain experience. Other organizations may utilize these course materials to provide the same support and certification for their new instructors who will teach NSP-related courses and possibly other courses within these organizations’ training programs. Through this process, competent, experienced instructors will be developed to continue the organization's educational efforts. To those who have not taught, teaching may appear deceptively easy. Nothing could be further from the truth. It takes effective training, quality course materials and a strong commitment from those who teach. Preparing competent instructors to work with adults is an important task and crucial to the success of any organization that provides adult education programs. Course Summary The Instructor Development Course and this text are designed to help you develop effective instructional strategies. The skills of planning, decision making, lesson preparation, instructing, and evaluating the progress of students are crucial elements that you must master in order to be a successful instructor. Central to this overall process is the development of effective communication skills so you can successfully convey the course information as well as receive feedback regarding the success of your efforts and the students' learning.

65
Because adult learners exhibit different characteristics than do children and adolescents, this course is designed with considerable emphasis on how adults learn. In addition, an essential part of providing instruction is managing the content, the methods, and the actual process of teaching. This entails effectively utilizing lesson guides and developing lesson plans. The Instructor Development Course introduces the six-pack lesson plan, which may be adopted for many different kinds of activities, whether they are traditional classroom-based presentations or specific skill-based activities that take place in the outdoors. When planning courses, always take into account safety considerations, especially for those lessons that entail outdoor recreation skills. You will need to manage the process of instruction, and utilize a wide range of available materials and instructional techniques to transmit information to students. The Instructor Development Course contains useful information on how to evaluate student progress – a key indicator of the effectiveness of your instruction and whether you and the students are meeting the program goals. Another key aspect of the course is recordkeeping – that is, registering courses, maintaining student records, submitting course completion information and issuing certificates. Technology today is more relevant than ever in providing effective instruction. The growth of the Internet makes it possible to offer more than the traditional face-to-face classroom experience. Multimedia course offerings, such as the Instructor Development Hybrid E-course, will continue to expand the available opportunities and help remove traditional educational barriers, including travel time, distance and the competing time commitments of family and work-related responsibilities. Instructor Mentoring The Instructor Development Course provides an introduction to the art and science of teaching, but it does not delve into the specific curriculum content you will actually teach. That content focus begins with mentoring, in which new instructors are teamed with experienced instructors for individual training and guidance. This relationship fosters a positive learning experience for the new instructor, and provides support and examples of specific discipline-related instruction. The mentoring portion of the Instructor Development process involves the instructor trainee in real course situations and provides the opportunity to participate and develop experience, much like the guided practice portion of the six-pack method taught in this course. Mentoring begins when the patroller has completed this course and the appropriate forms have been submitted to division supervisors and NSP. Mentoring is not a new concept. The name itself dates back to Greek mythology, and the process was one of the first forms of teaching and learning utilized in the early days of mankind. Today, mentoring is successfully practiced in a variety of businesses and organizations as a way to optimize productivity and train staff as well as provide guidance for new instructors. Whatever the organization or setting, the goals are the same: to produce competent, self-assured people who can help the organization fulfill its educational function.
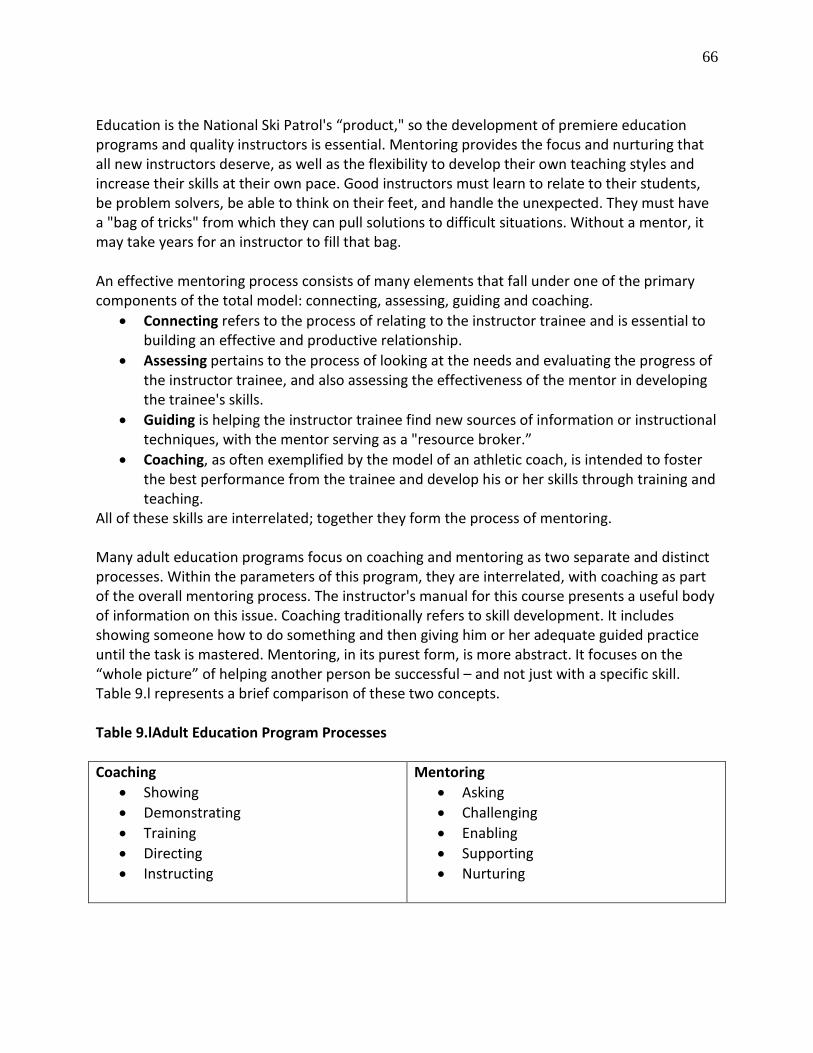
66
Education is the National Ski Patrol's “product," so the development of premiere education programs and quality instructors is essential. Mentoring provides the focus and nurturing that all new instructors deserve, as well as the flexibility to develop their own teaching styles and increase their skills at their own pace. Good instructors must learn to relate to their students, be problem solvers, be able to think on their feet, and handle the unexpected. They must have a "bag of tricks" from which they can pull solutions to difficult situations. Without a mentor, it may take years for an instructor to fill that bag. An effective mentoring process consists of many elements that fall under one of the primary components of the total model: connecting, assessing, guiding and coaching.
• Connecting refers to the process of relating to the instructor trainee and is essential to building an effective and productive relationship.
• Assessing pertains to the process of looking at the needs and evaluating the progress of the instructor trainee, and also assessing the effectiveness of the mentor in developing the trainee's skills.
• Guiding is helping the instructor trainee find new sources of information or instructional techniques, with the mentor serving as a "resource broker.”
• Coaching, as often exemplified by the model of an athletic coach, is intended to foster the best performance from the trainee and develop his or her skills through training and teaching.
All of these skills are interrelated; together they form the process of mentoring. Many adult education programs focus on coaching and mentoring as two separate and distinct processes. Within the parameters of this program, they are interrelated, with coaching as part of the overall mentoring process. The instructor's manual for this course presents a useful body of information on this issue. Coaching traditionally refers to skill development. It includes showing someone how to do something and then giving him or her adequate guided practice until the task is mastered. Mentoring, in its purest form, is more abstract. It focuses on the “whole picture” of helping another person be successful – and not just with a specific skill. Table 9.l represents a brief comparison of these two concepts. Table 9.lAdult Education Program Processes Coaching
• Showing • Demonstrating • Training • Directing • Instructing
Mentoring • Asking • Challenging • Enabling • Supporting • Nurturing

67
It is often quite difficult to separate or differentiate between these two skills, as they are often used simultaneously. There are times when a mentor must demonstrate a skill while helping the instructor trainee determine how to best relate that skill to a student. On other occasions the mentor may challenge and help the instructor modify an instructional method to improve the learning opportunity for students. The most important thing a mentor can learn from this differentiation of terms is that there is more to mentoring than just coaching. Coaching is a very important part of the entire mentoring process – as are the other listed items. Nonetheless, it is only a part. A number of steps are involved in the mentoring process, as can be seen in the NSP Instructor Mentoring Completion Form (find links to forms in Appendix H). The first step is the assignment of a mentor to the instructor trainee by a division supervisor (or his/her designated representative) in the discipline(s) in which the instructor trainee wishes to teach. The two individuals then meet and mutually prepare an outline of goals and expectations, a timeline, and they review the evaluative process. The instructor trainee will observe the mentor or other experienced instructors teach a number of lessons, and then the process will be reversed and the mentor and others will observe the instructor trainee. Pre- and post-observation conferences are held to review the effectiveness of the teaching-learning process. As this continues, the trainee’s understanding of the curriculum material and the skills of lesson planning, presenting effective instruction, and appropriate evaluation will be enhanced. Once the mentor and instructor trainee agree that their goals and objectives have been met, a final evaluation of the instructor trainee is completed by an instructor trainer in the appropriate discipline(s) and the paperwork is completed to certify the trainee as an instructor. Mentoring does not end with the final evaluation; it is an ongoing process. All instructors can benefit from continuing education, assistance from another instructor, and a periodic review of their skills. These are elements of a quality assurance program that maintains the value and effectiveness of the adult education program. To the Point Developing trained, skilled instructors is only part of the obligation of any organization that provides educational programs. Well-designed programs and materials must also be made available. Combining these elements result in a complete package that can be utilized to further the goals of any organization, whether it is the NSP or another outdoor recreation organization. The basics of adult education, as presented in this Instructor Development Course, can be utilized to fulfill the mission of any of these organizations and can be easily adapted for this purpose.

68
Chapter 10. Administrative Procedures “Nothing’s over until the paperwork is done”– Anonymous Concluding Objectives + Identify the forms and procedures necessary to become an instructor. + Identify the forms and procedures to be followed by certified NSP instructors. As a Student The process of becoming an NSP-certified instructor has been described in Chapter 1. However, the student must be aware of the necessary forms and procedures to assure his or her certification. Links to the forms may be found in Appendix H. General procedures have been identified in Appendix B and are detailed below. The procedure to become an instructor is as follows:
• Student enrolls in a registered NSP ID course (necessary for both the traditional course and Hybrid E-course)
• Student completes the ID course – Instructor Of Record (IOR) submits course completion form to NSP and to appropriate division specialty supervisor(s), or his or her designee.
• Student obtains Instructor Application (IA) form from IOR in class (or from the NSP website).
• Student completes first section of IA form and the recommendation block and forwards to division or region specialty supervisor or his or her designee (this can be done at the same time as the course completion form is submitted by the IOR). Student retains copy of the IA form (Note: if student is taking the ID course for senior credit only, he or she should fill out the IA form and the form should be sent to the ID division supervisor for retention in case the student later wishes to become an instructor).
• Mentor is assigned to student (usually under direction of the division specialty supervisor or his or her designee).
• Student completes his/her mentoring. • Mentor or specialty instructor trainer submits completed IA form, and completed
mentoring form to division and/or region specialty supervisor(s) or their designees, depending on division procedures. Student should retain a copy of the completed IA form.
• Division or region specialty supervisor(s) submit(s) completed IA form to NSP for certification of patroller as specialty instructor and returns a copy of the signed form to the student.

69
While many of the steps in the process are the responsibility of an instructor and instructor trainer or a specialty supervisor, the student should be aware that the ultimate responsibility is his or hers. The student should make sure that the steps in the process have been completed by contacting the appropriate instructor or supervisor. He or she should also retain a copy of the IA form in his/her records at each step in the process. As a Certified Instructor Each instructor has a responsibility to keep his or her records current. Instructors must record lesson and courses taught on the Instructor Activity Log (www.nsp.org and click the Education Tools button). This documentation provides a basis on which instructor recertification is made by NSP division program supervisor(s). In addition, the instructor will be able to verify his/her instruction activity over time. For those who are the Instructor of Record (IOR) for a course, he/she must register the course with NSP (again, on the Education Tools page of the NSP member website). A course number will be assigned for the course. Certificates of Achievement are issued to successful students by the IOR. Once the course is completed, the IOR must submit a Course Completion Record to NSP and to the division specialty supervisor. This submission should occur within no more than one week of completion of the course, if possible. Finally, in order to be recertified, each instructor in each discipline is required to:
• Teach at least one lesson every three years. • Complete continuing education in his/her discipline at least once every three years. • Be evaluated by an IT in his/her discipline at least once every three years.
The continuing education requirement may be fulfilled through an NSP-sponsored event or other approved non-NSP events (for example, an emergency medical training (EMT), or national avalanche course). The instructor should verify approval of any non-NSP activity with his/her division specialty supervisor. To the Point The steps to becoming a certified NSP instructor, and to being an NSP instructor, require attention to the administrative details, including completing and submitting the requisite forms. Being a good instructor means following appropriate procedures without unnecessary delays. There is nothing more frustrating to a student than to have completed a course (including this one) and not getting the appropriate credit for it. That being said, the student and instructor are themselves responsible for making sure these procedures have been completed.

70
Appendices Appendix A. Glossary The definitions provided in this glossary are intended to provide a working understanding of the terms used in this text. They are not precise, technical definitions. accountability Keeping thorough and complete records on each and every student, maintaining and documenting the completion of objectives and skill performance, and verifying a certain standard of training. adult learner An individual with unique experiences that influence his or her learning. art of instruction A lesson-planning format that requires individual instructor creativity and decision making relating the use of effective instruction strands to essential content. auditory learner A person who learns effectively through listening. beginning The first two steps of a six-pack lesson plan that include a set and restated concluding objectives. coaching One-on-one, intensive learning through demonstration and practice, characterized by immediate feedback and correction. ending The point in the lesson when it is time to summarize what learning has occurred and to assess if students have mastered it. feedback The skill of providing information (praise, constructive comments and guidance) as a result of a process. guided practice A situation provided wherein the students can practice a new concept or skill under the direct supervision of an instructor and receive immediate feedback.

71
heart The essential core to the lesson where content delivery and learning activities are woven together. “how” of teaching The instructional strategies and methods selected to generate the input of new information and the output of learning activities. independent practice A situation provided wherein the students can practice a new concept or skill to develop efficiency and form without the direct supervision of an instructor. instructional management Preparations and considerations taken into account by an instructor before conducting a lesson toensure a safe, educationally-focused and productive learning environment. instructional methods (strategies) The teaching and learning activities employed by an instructor to deliver a lesson and provide students the maximum learning environment. Instructor Development (ID) An NSP education program that builds a strong educational knowledge base of teaching skills forpotential instructors of NSP courses. Satisfactory completion of an Instructor Development Course is a prerequisite for NSP instructor certification. instructor of record (IOR) The instructor who registers an NSP course and who has the ultimate responsibility for instruction, management and administration of the course. instructor trainer (IT) A certified NSP instructor who is appointed by division supervisors and who has the responsibility for monitoring and evaluating NSP instructors and courses (Quality Management). kinesthetic learner A person who learns effectively through hands-on experiences. learning activities Planned practice that incites a student to action, either through guided practice or independent practice. Used appropriately, this practice can be an enjoyable and effective way to advance training objectives.

72
learning styles One or a combination of sensory abilities (visual, auditory or kinesthetic) used to learn and communicate. lesson guide A template used to provide a consistent pattern of the essential objectives and topical outline necessary for instructors to plan lessons. Lesson guides can be used to develop a variety of lesson plans. lesson plan The instructor's tool for organizing an effective instruction. It increases the probability of a well-taught lesson. The NSP template for lesson planning is called the "six pack." mentor A wise and trusted advisor, counselor and teacher who encourages and supports personal growth. mentoring A means of sharing knowledge and experience with instructor trainees so they may gain from the coaching, guidance and encouragement of their mentors. monitoring The continual checking of student progress during instruction, also referred to as ongoing monitoring. non-specific feedback Feedback that identifies whether a performance was "good" or "poor" or that an answer was correct or incorrect, but does not supply enough information to maintain or change the behavior. nontraditional learning Alternative instructional methods (e.g. the use of new technology), designed to overcome traditional barriers to learning, including time and distance, learning disabilities, weather, etc. nonverbal communication Unspoken body movement or physical behavior that delivers a message, i.e. a quizzical look, crossed arms, etc. objective questions Questions that measure the student's ability to recognize the correct answer, i.e.true-false, multiple choice, or matching. performance-based evaluation An evaluation requiring the performance of a skill or task.

73
quality instruction Adhering to the standard of training by teaching the essential content from each lesson guide andmeeting all the concluding objectives. quality management Describes how an education program is administered and continually improves to meet the needsof the organization and those it serves. risk management The process of analyzing exposure to risk and determining how to best handle such exposure. set A five- to l0-minute introduction to a lesson or a new step within a lesson. six-pack lesson plan A template with six steps to organize an effective lesson of instruction and student participation. specific feedback Clear information on what was incorrect (or correct) and how to perform correctly; a process to help students arrive at the correct answer. subject matter Comprises the "what" of teaching for any subject matter; vital for an instructor to have an in-depth understanding of the subject matter being discussed. subjective questions Questions that measure the student's ability to recall facts or information and present the answer in his or her own words, i.e. essay, short answer or fill-in-the-blank . summary A point in the lesson in which the learner has an opportunity for closure on the material that's just been presented; ideally, this is student-directed. visual learner A person who learns effectively by seeing the process or viewing pictures. “what” of teaching The subject matter and essential content for any topic.
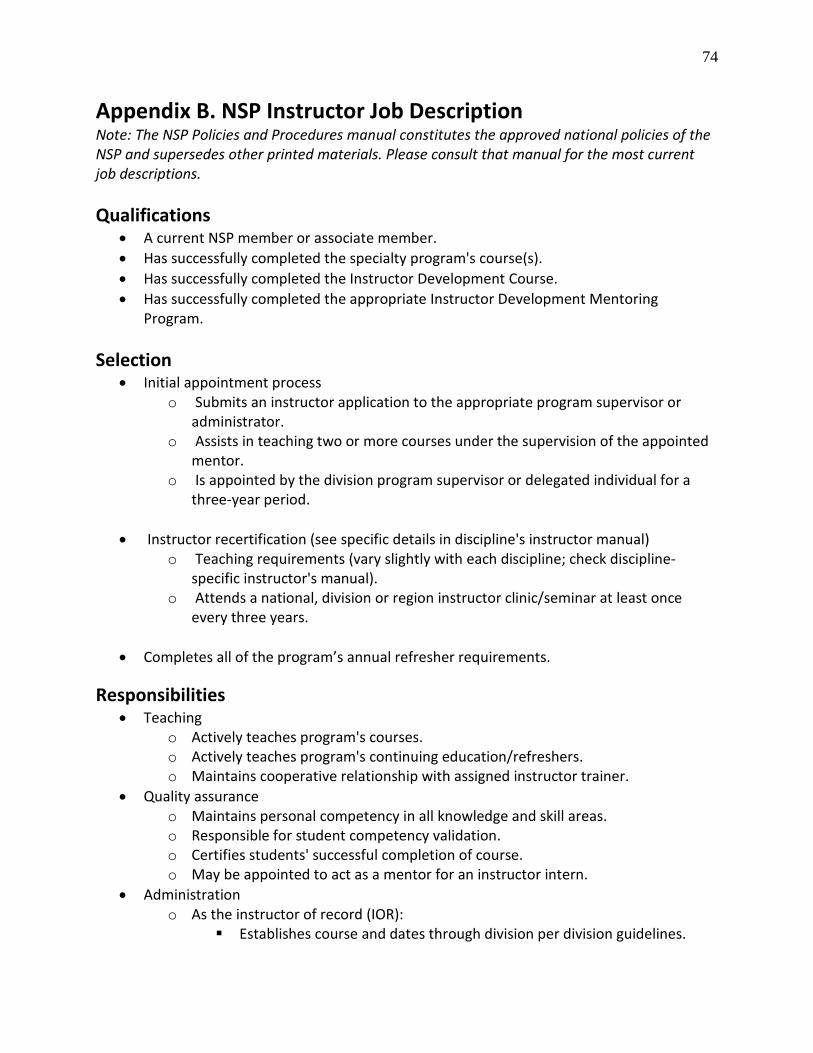
74
Appendix B. NSP Instructor Job Description Note: The NSP Policies and Procedures manual constitutes the approved national policies of the NSP and supersedes other printed materials. Please consult that manual for the most current job descriptions. Qualifications
• A current NSP member or associate member. • Has successfully completed the specialty program's course(s). • Has successfully completed the Instructor Development Course. • Has successfully completed the appropriate Instructor Development Mentoring
Program. Selection
• Initial appointment process o Submits an instructor application to the appropriate program supervisor or
administrator. o Assists in teaching two or more courses under the supervision of the appointed
mentor. o Is appointed by the division program supervisor or delegated individual for a
three-year period.
• Instructor recertification (see specific details in discipline's instructor manual) o Teaching requirements (vary slightly with each discipline; check discipline-
specific instructor's manual). o Attends a national, division or region instructor clinic/seminar at least once
every three years.
• Completes all of the program’s annual refresher requirements.
Responsibilities • Teaching
o Actively teaches program's courses. o Actively teaches program's continuing education/refreshers. o Maintains cooperative relationship with assigned instructor trainer.
• Quality assurance o Maintains personal competency in all knowledge and skill areas. o Responsible for student competency validation. o Certifies students' successful completion of course. o May be appointed to act as a mentor for an instructor intern.
• Administration o As the instructor of record (IOR):
Establishes course and dates through division per division guidelines.

75
Preregisters all courses withthe national office by logging on to his/her page on the NSP web site (www.nsp.org and clicking on the Education Tools button).
Orders required texts and material in timely manner. Organizes and plans courses. Facilitates the mentoring relationship with individual instructors and their
assigned trainees. Distributes education certificates to students who successfully complete
the course. Collates course and instructor evaluations and forwards them to the
division supervisor. Completes course records and mails them to the national office and the
division specialty supervisor within two weeks of coursecompletion. Maintains personal teaching and continuing education record.

76
Appendix C. Effective Questioning Skills Lower/Higher Order Questioning Skills
• Recall questions: List, describe, what, when, how, where
• Concept formation questions: Why, interpret, explain, discuss, evaluate, justify, compare
Pausing
• Ask a question. Wait three to five seconds, then call on a student (use a prompt, e.g. "Think carefully.").
• Pausing promotes an atmosphere more conducive to discussion. Students will learn to use the delay to organize their thoughts.
Redirecting
• Ask the same question of several different students. • Carefully phrase questions to allow for multiple answers. • Use nonverbal as well as verbal cues to involve more students.
Rephrasing
• Reword the same question to assist the student in developing a better understanding of the question.
Probing Techniques
• A series of questions asked of one student that are developed to move a student’s initial response toward a more acceptable answer. The instructor must have in mind a pre-determined acceptable criterion for the answer.
Prompting
• Ask additional questions that provide hints. Base each new question on the previous answer.
• This technique is useful for “I don’t know” answers, weak responses and partially incorrect responses.
Probing for Further Clarification This type of question encourages the student to provide additional information. Some useful questions to ask:
• “What else can you add?" • “Are there any other reasons?" • "Can you state that another way?" • "Can you tell me why you think you are right?"

77
Refocusing
• A high-level probing technique used to prompt the student to relate a completely acceptable answer to another topic. This technique is designed to help students develop new concepts and see new relationships.
Things to Avoid
• Repeating one's own questions. This tends to discourage students from listening because they soon learn that you will always repeat what you said. Do not clarify/repeat a question until the student's answer indicates that the question was unclear.
• Answering one's own questions. Doing so discourages the students from listening to anyone besides the teacher, who they regard as the sole source of information. They learn not to pay attention to each other.
• Repeating the student's answer. This tends to stop discussion by cutting off other students who might have responded to what the first student said. It is appropriate to summarize a student's answer when it may be time to move the discussion to a new topic or point.
78
Appendix D. Effective Teaching Techniques New School Tools: Six Effective Teaching Techniques By Ken Bergmann (reprinted from Ski Patrol Magazine, Fall 2000) Teaching and learning. They are often viewed as separate activities, but the two are so closely intertwined that education hinges upon their delicate interaction. In some instances, learning can essentially become synonymous with teaching. Here are six effective teaching methods that turn the rules of old-school class structure upside-down by introducing more student responsibility in the learning process, and gracing the teacher with the novel title of “learning facilitator." In this new role, the learning facilitator provides students with experiences that promote learning and introduces methods that help studentsteach themselves. There are multiple routes you can take to accomplish your new goal as learning facilitator, but the following instructional guidelines are particularly useful for conducting NSP classes. 1. Listening As an instructor, you can learn a lot about your students simply by listening to their comments, and paying attention to all of their remarks. As vital as it is to listen to their direct feedback, you should also pay close attention to their unselfconscious chatter. From side comments and occasional expressions of concern, such as "I hope I don't have to lead a femur scenario," you can become aware of a student’s readiness to learn as well as his or her weaknesses, hopes and fears. As a learning facilitator, you can use student comments as an important tool to evaluate the success of your exercises and the needs of your students. Gather feedback and listen to your students as an ongoing process throughout the day. After presenting the verbal part of a lesson, ask the students for direct feedback. Your job is to find out your students' interpretation of the information you provide. Did they truly comprehend what you told them? Before any training exercise, ask students to summarize the specific objectives you just presented them: “What are you going to focus on?" "What is your goal?" Have the students tell you what they learned from a previous exercise. What details did they pick up on? Don't ask for their opinion on the goal of the exercise, but rather seek feedback that is specific to the students' experience. This will give you insight into how each lesson was synthesized by the students. You may be surprised at what they notice. Elements of the exercise that you take for granted may be foreign to your class members. By noting your students' observations, a new training method may emerge. As a group, you and your class can work to develop this and test its benefits.

79
After completing a training exercise, ask each class member to name one technique he or she learned from it. You’re likely to get some very specific feedback. For instance, when leading a toboggan-handling exercise, you might get responses such as "I could really feel the importance of counter rotating," "I could feel how easy it was to guide the sled rather than force it," or maybe "I noticed the difference when I anticipated the terrain." Though these responses may not coincide with the specific goal you started with, they are extremely valuable. They reinforce what the student’s experience, allowing them to learn from each other. Most important, this feedback gives the instructor a clear idea of the students' skill levels by showing what skills the students had trouble with, had never encountered before or were already comfortable with. Apart from your students, there are other important sources of feedback; you can also gain much from listening to your fellow instructors. Every instructor, regardless of age or experience, has valuable insight to share. If you listen and integrate their ideas into your teaching, you can improve your classes with new techniques that will benefit everyone. 2. Focusing on One Element It's easy for an instructor to focus on a student’s weaknesses, but it takes an effective teacher to develop a strategy to help the student overcome those deficiencies. Listening to instructor and student feedback is crucial to developing the strategies that will best benefit the learner. As thelearning facilitator, it's essential to boil down all the information you receive to determine the one focus that the student most needs. While all suggestions may be useful individually, presenting too many at a time is counterproductive. If students are unable to separate comments pertinent to their improvement from unimportant ones, they will become frustrated. At this point, the students will start to concentrate on simpler objectives…such as when the lunch break begins. Many times when you correct a single skill, you may discover that a student simultaneously acquires multiple improvements. For example, if a candidate has problems side slipping while in the handles of the toboggan, you should have several options for addressing the issue, including such directives as “Lean forward,” “Rotate your upper body to the fall line,” “Adjust your hand position to facilitate rotating the body,” “Roll your ankles,”…the list goes on. After hearing the first two suggestions, the student would probably "shut down" and your attempt to present additional concepts might become an exercise in futility. If, on the other hand, you choose just one element of the skill for the student to focus on and ignore the other problems, the student will be able to concentrate on that single issue and conquer it. In the case of side slipping in the handles, the best solution may be to have the student focus on rolling the ankles and getting used to the kinetics of the skis' edges engaging and releasing. The maneuver does not address issues of upper body position, hand placement or lateral balance, but those issues are irrelevant until the candidate is able to release and engage edges

80
by rolling the ankles. On the second run, after the candidate has successfully conquered the element of edge control, you may choose to present one additional element to the learner. In this case, rotating the upper body may be the best experience for the student. If you choose your elements carefully, you may solve two or three problems at once. When the student concentrates on rotating the upper body down the fall line, the student's hands should automatically move to a perpendicular position. With the body in this position the knees should automatically flex as they counter rotate and simultaneously cause the skier to lean forward. By concentrating on one thing at a time, your student has mastered all of the skill elements, and can move on with confidence. "This is fun!" will now replace the "When's lunch?" attitude. This is a student who is primed for the next challenge. 3. Practice A tourist walks up to a guy in New York City and asks, “Hey buddy, how do I get to Carnegie Hall?” “Practice,” says the New Yorker. “Practice.” That famous joke is always good for a laugh, but there's also a lesson there. Practice is essential to learning. It's frustrating to watch a student make the same mistake over and over again. Usually, we address the problem by questioning the student and listening carefully to the responses to verify that he or she understands the concepts and individual elements of the skill. But what if the student verbalizes all of the skill's components correctly yet turns around and makes the error again? Do you abandon the lesson? Avert your eyes and move onto the next phase of the lesson? Storm off in a snit? Of course not. You stick with it, but you must somehow change your approach. If the student isn't "getting it,” then you aren't teaching it in a manner he or she can absorb. Encourage the student to break the concept down into its parts by practicing each element of the skill under your gentle guidance. Eventually, your student will pick up on theproblem. Make sure that you are supportive, focus on the positive aspects of the student's performance, and emphasize the correctly performed part of the skill to further his or her success. This low-pressure environment is the best learning atmosphere. Most NSP skills are kinetic, which means they comprise a series of linked movements that come together to form one action. The only surefire way to learn a kinetic activity is to practice it. Take the accomplished piano player, for example. The pianist's hands move at a velocity that we can barely see, much less comprehend. How does the piano player see the image of the note onthe sheet music and cognitively connect that symbol to the motion of using a finger to strike one of 88 possible keys? And how does the musician complete this process at such a high rate of speed? In truth, this is not how it actually happens. The piano player does not address each note individually. Instead, each series of notes triggers memories of familiar patterns the pianist has repeatedly practiced. Two distinct sections of the human brain are involved in this process. The cerebrum, or cognitive part of the brain, sees and interprets the notes on the sheet music. The pianist will

81
then practice this pattern repeatedly until it is memorized not as a gathering of individual notes, but as a group or pattern. Another, more primitive, section of the brain – the cerebellum – is a master at memorizing kinetic patterns. This section of the brain memorizes the group of notes and will execute it as a kinetic memory, rather than employ the cognitive process of seeing and interpreting individual musical notes. To get a sense of the individual functions of the cerebrum and cerebellum, try the following experiment: tie your shoes with your eyes closed. Your cerebellum just executed a kinetic pattern. Now try tying your shoes while you think about each step of the process (Put one lace over and then under the other lace, pull both laces tight, now take a bit of the lace, etc... ). If you're typical, you’ll feel like you are 3 years old and trying to learn to tie your shoes. You'll be slow and uncoordinated. Your cerebrum has been allowed to interrupt a pattern your cerebellum knows so well. Learning toboggan-handling or Outdoor Emergency Care (OEC) skills is no different. Practice helps students accustom their cerebellum to the individual movements of each new skill. It's important, however, to take note of one simple fact here. The cerebellum is stupid. Really stupid. It’s incapable of determining whether the pattern it is performing is correct or incorrect. Therefore, it's imperative that the student repeatedly performs the correct kinetic sequence each time. Otherwise, the cerebellum can absorb and retain incorrect patterns as the cerebrum supplies them. This is why some ski instructors take their advanced skiing classes onto beginner terrain to teach them new concepts. They’re attempting to create a learning environment that will guarantee the successful repetition of the skill’s movements. Once the cerebellum has memorized the new technique as an executable pattern, the instructor can then move the lesson to advanced terrain where students can practice their newly acquired skills under different circumstances. The cerebellum controls side slipping, slalom turns, and bump skiing techniques. Meanwhile, the cerebrum assesses the terrain and tells the cerebellum what learned patterns to execute. If you ski into a situation you have never encountered before, your cerebrum doesn't know what to do and you just may execute the "face plant pattern" the cerebellum knows so well. The more kinetic ski patterns your cerebellum absorbs, the less likely you will ski into a situation that you can't handle. If you allow plenty of guided practice time, then your students can firmly embed kinetic movements into their cerebellum's memory. 4. Encouragement It's very important for teachers to focus on the positive aspect of their pupil's performance. It's rare that learners will perform a new skill perfectly; those who do have already learned it. As mentioned, rather than point out weaknesses in student performance, the effective instructor helps the student overcome those weaknesses. One way to do this is to find the inherent

82
strengths in a student's technique. Let's say a student practicing a run as tail rope operator did it completely wrong. He was out of position, his rope-handling technique was a mess, and he ended the run with a significant amount of P-tex facing the clouds. If you witnessed just 10 yards of perfection within this tail roping disaster, then you should focus on those 10 yards. Have the student forget his mistakes – he knows he blew it – and instead help him remember the kinetic sensation of the properly performed part of the run. Make this the one element you focus on. You can facilitate this exercise by moving the practice to an easier slope, thus allowing the student to acquire the necessary kinetic patterns needed for successful tail roping. Over time, as the student gets the movement down, you can add factors to the exercise to further challenge him. By focusing on the positive, you can build your students' skill levels based on their strengths. This encouragement will foster a positive learning environment and the students will be motivated to learn more. 5. Success through Failure How many times have you witnessed a well-meaning instructor constantly interrupt an OEC scenario during a refresher? “Hold on, this method of tying the cravat is more effective." “Wait a sec, the patient's feet cannot hang over the end of the spineboard; you won't be able to successfully apply the Hare splint." Interrupting a student to give advice is a common method of teaching, yet it is not necessarily the most effective. The key is for the instructor to take a step back and allow the students the freedom to fail. Learning is defined as the gaining of knowledge through experience, and sentientbeings learn most effectively from failure. Any 4 year old with a burnt finger has learned all he or she needs to know about hot stoves. As instructors, it's important to save your comments and allow your students to fail. By letting your students complete an incorrect process, they will be able to learn firsthand what their errors were. You, as the instructor, can now assist the students in correcting their errors while commending their accomplishments. Students usually enter a lesson without previous experience. When you allow the students to complete exercises without interruptions, you provide an opportunity for the students to perform a skill in its entirety, thereby permitting them to gain valuable experience. For example, it’sinvaluable for an OEC student to experience the flow of the entire scenario from initial contact through delivery to Emergency Medical Services (EMS) personnel. When you encumber a student with a flood of new information midway through this exercise, it can be frustrating and counterproductive. If a student identifies a specific problem, he or she will remember to avoidcausing that problem or know how to remedy it in the future. In a training situation, a student who allows the "patient's" legs to hang over the end of the spineboard would soon find it difficult if not impossible to apply a Hare traction splint. Other students will witness the student's choices and decisions as well, and they will hopefully learn

83
and remember not to repeat their peer's missteps. By making mistakes and working through them, a student will learn to anticipate the consequences of his or her actions. The instructor has created the need for the student to gain new information by remaining silent. The student knows there is a problem and will want to solve it. He or she is now primed to absorb any information necessary to successfully complete the process of applying the spineboard, while being specifically aware of difficulties that may arise. Instructors strive for perfection in student performance, and reach it through a series of small steps. Students, on the other hand, strive for success and self-fulfillment. After working through various problems, it's exciting when a student experiences a breakthrough or learns something new. The accomplished teacher leaves room for error so that students can learn from mistakes and appreciate their accomplishments. 6. Challenge Frequently, you will encounter students who have excellent basic skills but are afraid of applying those skills to a more challenging situation. You, as the instructor, have observed the students run toboggans down steep slopes with extreme confidence in the fall line. These students are impressive skiers, yet they consistently avoid training in narrow chutes. You know these chutes are well within the skiers' ability level, but the students are unable to overcome the mental block of being forced to ski between the two imposing rocky outcroppings of a chute with a toboggan. To meet your students' needs, devise safe exercises that challenge them to take their performance to the next level. You know when your students have the skills to achieve the goal. Although you're well aware of your students' skills, they might not be. It's your job to create activities that help convince them they have the necessary skills. In the case of running a narrow chute with a toboggan, you might start on open terrain with an equivalent incline. Have your class run the toboggan within an area the same width as the chute. Mark this corridor with flagging or boughs. You may choose a groomed slope to provide your students with the opportunity to experiment with the toboggan in this safer environment. Let them try it without the chain brake so they can feel the effect of losing their braking power. Take some training tools like a rope-a-goat on the slope so the tail operator can experience what it would feel like to "save" the sled if the front operator were to run into difficulty. Build up their confidence. Once they understand how to deal with the possible dangers of running a toboggan down a steep, narrow chute, it is time to give them the option of challenging the chute. A good first step is to have an instructor run the toboggan so the students can witness how the techniques they practiced are applied to the actual situation. Note: For safety reasons, all NSP instructors must ensure that their students understand their right and responsibility to refuse to perform any activity. This means that a student who does

84
not want to attempt to run a toboggan down a steep, narrow chute is under no obligation to do so. As one instructor at a steep skiing camp put it, “We all have our days when we can ski anything and we have our days when loading the chair can be a challenge. Make sure you know what day it is for you." This instructor makes it clear that no one is obligated to try a run he or she is not comfortable with. In fact, all participants are assured that they will earn respect of their instructors and peers if they opt out of skiing a particularly challenging run. Conclusion A successful instructor gives students the room to learn from their mistakes. By listening to students' feedback on lessons, you can teach through encouragement and emphasize a focus on the positive. On the physical side, never underestimate the importance of practice in learning kinetic skills. Ultimately, you can take learning to a new level by guiding students into theactive role of mastering new skills and helping individuals teach themselves. Ken Bergmann is a member of the Sugar Bowl Ski Patrol in California's Lake Tahoe region. He is a professional educator and musician who presents educational seminars to schools throughout the state. • • • Brain Food for Thought The separate functions of the cerebrum and cerebellum are part of a fascinating learning process. You can experience these two parts of your brain in action by playing this simple game: Try patting your legs – one hand at a time – in this pattern without pausing between beats: R L R R L R L L (R = right hand and L = left hand). Do it very slowly with no errors. You will notice as you attempt this 10 times in a row that you will involuntarily start to speed up. This is your cerebellum attempting to take over the pattern from your cerebrum. You will also notice that you occasionally execute the pattern without thinking about your individual hands. This, too, is a function of your cerebellum attempting to take over the pattern from your cerebrum. You can feel the distinct difference between the cerebrum controlling each hand's motions and the cerebellum trying to execute the pattern. You are now becoming cognizant of the cerebrum and cerebellum's roles in your learning process. This process of becoming conscious of learning, i.e., the awareness of being aware, is called metacognition (a great term for cocktail parties). When students study new skills, their awarenessof kinetic patterns is heightened. This awareness can be analyzed as useful feedback. It is now the responsibility of the instructor to create a safe practice environment for their

85
classes where the students can improve their own kinetic patterns. At this point, students are learning by teaching themselves. This is the ultimate gift any teacher can provide for a learner. – Ken Bergmann
Appendix E. Use Of PowerPoint and Other Visual Aids
The following information was taken from Gary Chapman, LBJ School of Public Affairs (http://www.utexas.edu/lbj/21cp/syllabus/powerpoint_tips2.htm). These tips and the elaboration of them are aimed at PowerPoint presentations, but apply equally well to flip

86
charts, slides and other forms of visual aids. On the NSP website, www.NSP.org, you can find an NSP template in the downloads section of the Member Links tab and pre-prepared PowerPoint presentations and posters in the discipline-specific Instructor Resources tab.
Tips A slide is a guide for your presentation, not the presentation itself. Be sure your background and message contrast sufficiently to allow clear reading. Use only a few (less than six) lines per slide. Use fonts in excess of 30 point (40 is better). Use animation sparingly if at all.
Discussion Showing things to an audience during a speech is as old as public speaking. In nearly all cases, showing an audience a physical thing, an actual object, is the best way to engage an audience’s attention. But when this isn’t possible, presentation software like PowerPoint (or Apple’s Keynote software) allows the modern public speaker to show things to an audience on a large screen.
What has been turned upside-down over the past decade’s spread of PowerPoint, for most PowerPoint users, is that the “speech” is now mostly what’s on the screen, rather than what is spoken. In other words, the proper relation of the illustration tool to the speech has been reversed. In the opinion of many people, this has tragically damaged the art of public speaking. No one can imagine Abraham Lincoln nor Martin Luther King, Jr., needing PowerPoint. But today many people who give oral presentations cannot imagine doing so without PowerPoint.
In the interest of restoring some balance to the use of PowerPoint without rejecting its use altogether, here are some suggestions for how to use PowerPoint effectively.
Ten Thoughts About How to Use PowerPoint Effectively 1. PowerPoint, when displayed via a projector, is a useful tool for showing audiences things that enhance what the speaker is saying. It is a useful tool for illustrating the content of a speech, such as by showing photos, graphs, charts, maps, etc., or by highlighting certain text from a speech, such as quotations or major ideas. It should not be used as a slide-show outline of what the speaker is telling the audience.
2. Slides used in a presentation should be spare, in terms of how much information is on each slide, as well as how many slides are used. A rule of thumb is to put no more than eight lines of text on a slide, and with no more than eight to 10 words per line. In most cases, less is more, so four lines of text is probably better. Don’t display charts or graphs with a lot of information – if it’s useful for the audience to see such things, pass them out as handouts.
3. Unless you’re an experienced designer, don’t use the transition and animation “tricks” that are built into PowerPoint, such as bouncing or flying text. By now, most people roll their eyes when they see these things, and these tricks add nothing of value to a presentation.

87
4. Above all, use high-contrast color schemes so that whatever is on your slides is readable. Unless you are a talented graphic designer, use the templates that come with PowerPoint or Keynote, and keep it simple – high concept design in a slide presentation doesn’t help in most circumstances. If you use graphics or photos, try to use the highest quality you can find or afford – clip art and low-resolution graphics blown up on a screen usually detract from a presentation.
5. Rehearse your PowerPoint presentation and not just once. Don’t let PowerPoint get in the way of your oral presentation, and make sure you know how it works, what sequence the slides are in, how to get through it using someone else’s computer, etc. Make sure that you can deliver your presentation if PowerPoint is completely unavailable; in other words, make sure you can give your speech without your PowerPoint presentation.
6. Get used to using black slides. There are few speeches that need something displayed on the screen all the time. If you include a black slide in your presentation, your audience will refocus on you, rather than on the screen, and you can direct them back to the screen when you have something else to show them. Put a black screen at the end of your presentation, so that when you’re done, the PowerPoint presentation is finished and off the screen.
7. Concentrate on keeping the audience focused on you, not on the screen. You can do this by using slides sparingly, standing in front of the audience in a way that makes them look at you, and, if possible, going to the screen and using your hand or arm to point out things on a slide. If you expect to be using PowerPoint a lot, invest in a remote clicker that lets you get away from the computer and still drive your presentation. If you don’t have one of those, it’s better to ask someone to run the presentation than to be behind a screen and keyboard while you talk.
8. If you show something on a computer that requires moving the cursor around, flipping from one screen to another, or some other technique that requires interaction with the computer itself, remember that people in the audience will see things very differently on the projection screen than you see them on the computer screen. Keep motion on the screen to a minimum, unless you’re showing a movie or a video. It’s better to show a static screenshot of a web page embedded on a slide, than to call up the web page in a browser on a computer. If you want to point out something on a web page, go to the screen and point at it – don’t jiggle the cursor around what you want people to look at.
9. Don’t “cue” the audience that listening to your speech means getting through your PowerPoint presentation. If the audience sees that your PowerPoint presentation is the structure of your speech, they’ll start wondering how many slides are left. Slides should be used asynchronously within your speech, and only to highlight or illustrate things. Audiences are bored with oral presentations that go from one slide to the next until the end. Engage the audience, and use slides only when they are useful. 10. Learn how to give a good speech without PowerPoint. This takes practice, which means giving speeches without PowerPoint. Believe it or not, public speaking existed before PowerPoint, and many people remember it as being a lot better then than it is now. A few

88
people use presentation software in extremely effective ways. Al Gore’s use of Keynote in the documentary “An Inconvenient Truth” was a good model. But this doesn’t look at all like the way most people use PowerPoint. Avoiding bad PowerPoint habits means, first and foremost, becoming a good public speaker. The Ten Sins of PowerPoint Microsoft PowerPoint is a powerful and nearly ubiquitous software tool that is commonly misused, and frequently in ways that detract from the quality and effectiveness of oral presentations. Nearly everyone has experienced a mediocre or bad PowerPoint presentation, but few people understand how to use PowerPoint effectively. Some critics of PowerPoint argue that it enforces a shallow, "pipeline" style of thinking and speaking, and a few (unfortunately common) techniques appear to dull the attention of audiences. Nevertheless, PowerPoint is almost certainly here to stay, but its use could be improved. 1. PowerPoint is now used frequently as a speaker's "crutch," especially when the speaker is repeating or simply following what's displayed on a PowerPoint slide. This has been shown to diminish a listener's attention, and at the very least it shifts attention from the speaker to the screen, which detracts from the speaker's ability to engage with his or her audience. Speakers who simply recite what is on their PowerPoint slides are notoriously dull public speakers.
2. PowerPoint users routinely put more information on a slide than slides should display. PowerPoint is best used as a tool of illustration – to show audiences things that supplement and enhancewhat the speaker is saying. Unfortunately, many PowerPoint users put so much information on a single slide that the typical audience member can't read it easily, or doesn't even try. (Such slides are humorously known as "eye charts.")
3. PowerPoint contains "tricks" of slide transition or text and graphics animation that are almost all unnecessary, distracting and too “cute.” Tricks such as text that bounces into the screen, or shoots into the slide from the side margins, or flips upside-down, etc., add nothing to the presentation and usually detract from its professionalism.
4. Everyone has seen a PowerPoint presentation that exhibits an awful, sometimes even embarrassing lack of design sense, especially when the presentation is displayed in low-contrast colors that make it difficult to read. Nothing destroys a presentation’s effectiveness more thoroughly than when the audience is straining to see what’s on the screen.
5. PowerPoint routinely does something that trips up a speaker and suddenly the speech is stalled, or it becomes a series of mutterings about what has gone wrong with PowerPoint. When PowerPoint’s behavior gets in the way of delivering a speech, the speech has gone wrong.
89
6. Many speakers today assume that when they use PowerPoint they should have a slide on the screen during the entire presentation. Or they simply leave a slide on the screen. A common result is that the audience is forced to stare at a PowerPoint slide that has lost any connection to what is being said.
7. Because speakers who use PowerPoint often assume that their audience will be, and should be, looking at the projector screen, they put little or no effort into their own visual engagement with the audience.
8. Speakers who use a projector attached to a computer routinely forget that the sizes of the computer screen and that of the projection screen are vastly different – the latter is a multiple of the former. This means that when a speaker whips a cursor around on the computer’s screen, audience members get whiplash trying to follow the cursor around on the projection screen. Plus, what seems “normal” to do on a computer screen often looks like an incomprehensible psychedelic light show on a projection screen. Speakers who orate while simultaneously operating a computer are almost certain to lose their audience.
9. Audiences sense when a speaker is dependent on PowerPoint and they quickly grasp that the content of the speech is tied to the length of the PowerPoint presentation. This shifts the audience’s attention to how many slides there are, or, if the slides are delivered as handouts, how many slides are left to go and they no longer listen to the speech.
10. People who use PowerPoint often think that preparing an oral presentation means preparing a PowerPoint presentation, and then delivering that, with accompanying oral commentary. Needless to say, the art of preparing a good speech is lost, or may never be developed in the first place. What PowerPoint can do should not be the starting point of an effective oral presentation.

90
Appendix F. Sample Lesson Guides From NSP Education Programs Outdoor Emergency Care, 5th Edition, from My NSP Kit Chapter 16.Gastrointestinal and Genitourinary Emergencies OEC Instructor Resources: Student text, Instructor’s Manual, PowerPoints, Test Bank, IRCD, myNSPkit (online resource), CD, website, gloves OEC Student Resources: Student text, Student CD, myNSPkit (online resource), website, PowerPoints Chapter Objectives Upon completion of this chapter, the OEC technician will be able to: 16-1. List at least six possible causes of emergencies involving the gastrointestinal and genitourinary systems. 16-2. List the signs and symptoms of emergencies involving the gastrointestinal and genitourinary systems. 16-3. Compare and contrast visceral pain and parietal pain. 16-4. Describe and demonstrate how to assess the abdomen. 16-5. Describe and demonstrate the management of a patient with a severe GI/GU emergency. Essential Content I. Anatomy and physiology A.Four quadrants of the abdomen, formed by two perpendicular lines that intersect at the
umbilicus B.Hollow organs: stomach, gallbladder, small and large bowel, appendix, ureters, urinary
bladder 1.Move materials such as food, bile, feces, and urine 2.Leakage from rupture or laceration causes peritonitis, or inflammation of the
peritoneum a.Can cause intense abdominal pain, nausea, vomiting, fever, and septic shock
C.Solid organs: liver, pancreas, spleen, ovaries 1.Liver makes protein, synthesizes blood-clotting chemicals, produces bile to aid in digestion of fat 2.Pancreas produces digestive enzymes and hormones to regulate blood sugar 3.Spleen stores blood cells, helps make antibodies for fighting infections 4.Ovaries produce eggs for reproduction 5.Highly vascular, when damaged can result in profuse internal bleeding, leading to hemorrhagic shock
D.Kidneys and ureters 1.Outside posterior abdominal cavity in the flanks 2.Filter and excrete liquid waste into bladder in pelvis

91
3. Located in retroperitoneal (behind the peritoneum/abdomen) space E. Large vessels
1.Abdomen contains two largest: the abdominal aorta and inferior vena cava 2.Numerous vascular structures contained within the pelvic cavity 3.Disorders affecting any of these blood vessels can lead to life-threatening blood loss, shock, even death
II. Acute abdomen A. Sudden, severe, unexplained pain in the abdomen 1.Encompasses many different maladies 2.More advanced medical care is often urgently needed 3.More important for OEC technicians to recognize a serious illness, and that patient
needs to go to hospital B. Two hallmarks of acute abdomen 1.Severe pain 2.Inflammation of the peritoneum (peritonitis) a.Thin membrane that lines the abdominal cavity and contains two types of
nerves b.When contacted by blood or contaminants, nerve endings become irritated,
resulting in pain i. nerves enable one to perceive touch, pressure, heat, cold, and pain a)Pain can be easily and precisely pinpointed to specific location b)Known as parietal pain ii.Visceral pain is diffuse, spread over a large area a)Patient cannot pinpoint exact location c.Distention or contraction of peritoneum stimulates visceral stretch receptors,
can cause pain to be perceived at a distant location, known as referred pain C. Causes of the acute abdomen 1.Appendicitis a.Inflammation of appendix b.Caused by obstruction due to infection, hard stools, undigested nuts or
parasites c.Requires urgent surgical intervention, can cause serious complications and/or
death if surgery delayed d.Rupture can result in peritonitis and internal bleeding e.Present with periumbilical or upper abdominal pain; with time can move to
right lower quadrant f.Pain accompanied by abdominal guarding, nausea, vomiting, fever, and, rarely,
diarrhea 2. Pancreatitis a.Inflammatory condition where digestive juices become trapped within the
pancreas, and organ begins to digest itself (auto-digestion) b.Can be mild or life threatening, can occur suddenly or recur throughout one’s life
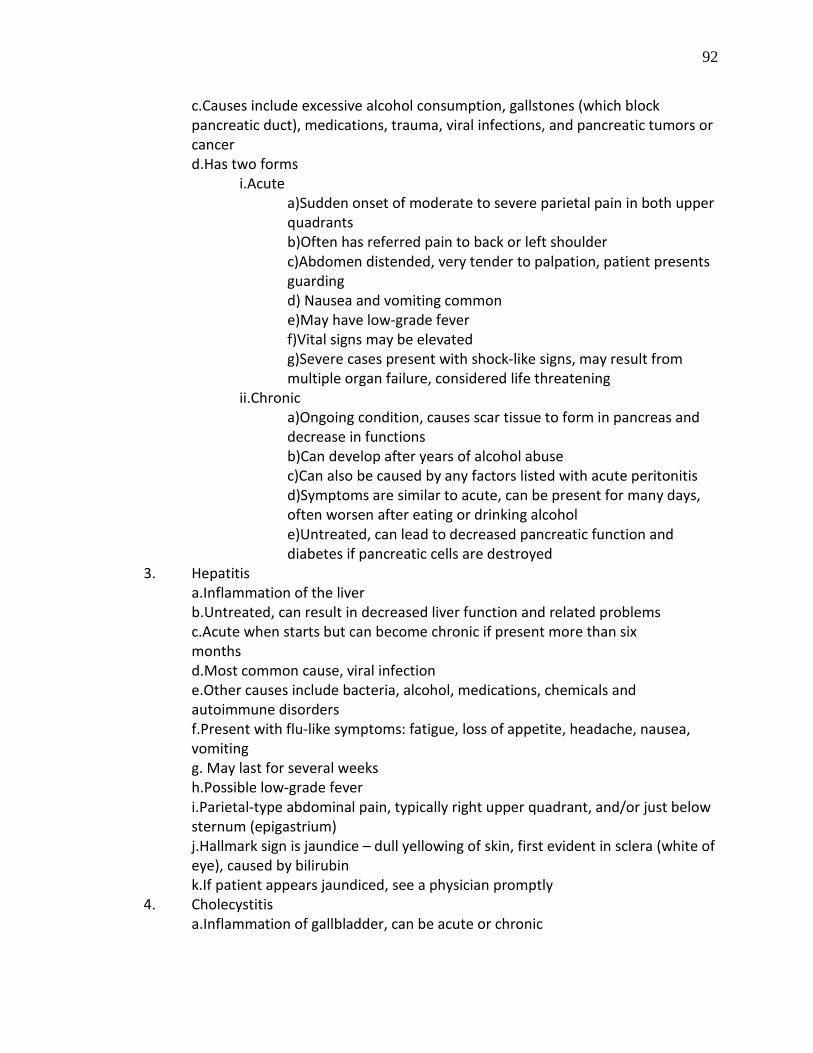
92
c.Causes include excessive alcohol consumption, gallstones (which block pancreatic duct), medications, trauma, viral infections, and pancreatic tumors or cancer
d.Has two forms i.Acute a)Sudden onset of moderate to severe parietal pain in both upper
quadrants b)Often has referred pain to back or left shoulder c)Abdomen distended, very tender to palpation, patient presents
guarding d) Nausea and vomiting common e)May have low-grade fever f)Vital signs may be elevated g)Severe cases present with shock-like signs, may result from
multiple organ failure, considered life threatening ii.Chronic a)Ongoing condition, causes scar tissue to form in pancreas and
decrease in functions b)Can develop after years of alcohol abuse c)Can also be caused by any factors listed with acute peritonitis d)Symptoms are similar to acute, can be present for many days,
often worsen after eating or drinking alcohol e)Untreated, can lead to decreased pancreatic function and
diabetes if pancreatic cells are destroyed 3. Hepatitis a.Inflammation of the liver b.Untreated, can result in decreased liver function and related problems c.Acute when starts but can become chronic if present more than six months d.Most common cause, viral infection e.Other causes include bacteria, alcohol, medications, chemicals and
autoimmune disorders f.Present with flu-like symptoms: fatigue, loss of appetite, headache, nausea,
vomiting g. May last for several weeks h.Possible low-grade fever i.Parietal-type abdominal pain, typically right upper quadrant, and/or just below
sternum (epigastrium) j.Hallmark sign is jaundice – dull yellowing of skin, first evident in sclera (white of
eye), caused by bilirubin k.If patient appears jaundiced, see a physician promptly 4. Cholecystitis a.Inflammation of gallbladder, can be acute or chronic
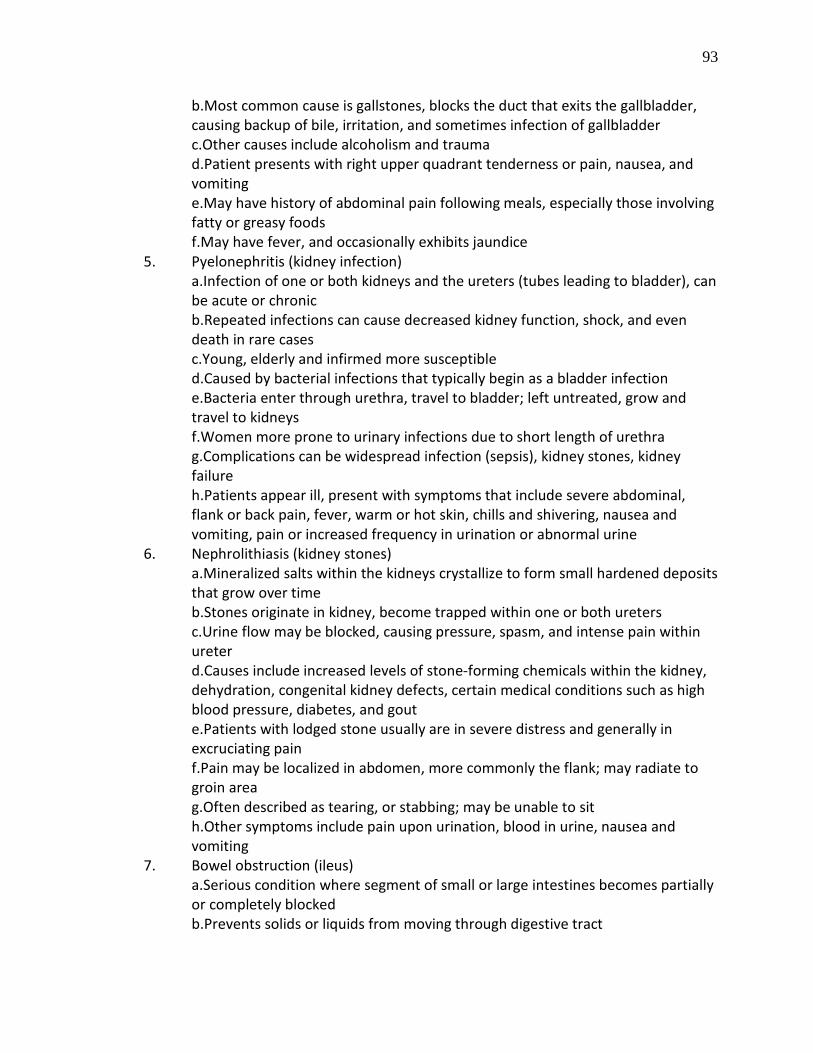
93
b.Most common cause is gallstones, blocks the duct that exits the gallbladder, causing backup of bile, irritation, and sometimes infection of gallbladder
c.Other causes include alcoholism and trauma d.Patient presents with right upper quadrant tenderness or pain, nausea, and
vomiting e.May have history of abdominal pain following meals, especially those involving
fatty or greasy foods f.May have fever, and occasionally exhibits jaundice 5. Pyelonephritis (kidney infection) a.Infection of one or both kidneys and the ureters (tubes leading to bladder), can
be acute or chronic b.Repeated infections can cause decreased kidney function, shock, and even
death in rare cases c.Young, elderly and infirmed more susceptible d.Caused by bacterial infections that typically begin as a bladder infection e.Bacteria enter through urethra, travel to bladder; left untreated, grow and
travel to kidneys f.Women more prone to urinary infections due to short length of urethra g.Complications can be widespread infection (sepsis), kidney stones, kidney
failure h.Patients appear ill, present with symptoms that include severe abdominal,
flank or back pain, fever, warm or hot skin, chills and shivering, nausea and vomiting, pain or increased frequency in urination or abnormal urine
6. Nephrolithiasis (kidney stones) a.Mineralized salts within the kidneys crystallize to form small hardened deposits
that grow over time b.Stones originate in kidney, become trapped within one or both ureters c.Urine flow may be blocked, causing pressure, spasm, and intense pain within
ureter d.Causes include increased levels of stone-forming chemicals within the kidney,
dehydration, congenital kidney defects, certain medical conditions such as high blood pressure, diabetes, and gout
e.Patients with lodged stone usually are in severe distress and generally in excruciating pain
f.Pain may be localized in abdomen, more commonly the flank; may radiate to groin area
g.Often described as tearing, or stabbing; may be unable to sit h.Other symptoms include pain upon urination, blood in urine, nausea and
vomiting 7. Bowel obstruction (ileus) a.Serious condition where segment of small or large intestines becomes partially
or completely blocked b.Prevents solids or liquids from moving through digestive tract

94
c.Causes can be scars from previous surgery, structural, diet, medications, chronic medical conditions, or cancer
d.Patient commonly presents with history of constipation, visceral abdominal pain, guarding, profound nausea and vomiting, possible fever
e.Abdomen may be bloated or grossly distended f.Initially vitals may be elevated, can fall quickly, leading to shock and even death
if not treated 8. Perforated bowel a.Hole or tear that develops in the intestines, resulting in contents leaking into
abdominal cavity b.Can rapidly lead to peritonitis, sepsis, and death if not corrected by surgery c. Causes include bowel obstruction, excess stomach acid, ulcerative disease,
trauma, chronic weakness of intestinal wall d. Patients present with intense visceral abdominal pain, worsens with movement
or deep inspiration, accompanied with guarding, high fever, severe nausea, intense vomiting
9. Peptic ulcerative disease (PUD), gastro-esophageal reflux disease (GERD), and gastrointestinal bleeding
a.Condition in which excess stomach acid creates a defect of the lining of the esophagus, stomach, or duodenum
b.Specific bacteria in lining of stomach can also lead to PUD c.Gastritis or esophagitis, inflammation of the stomach or esophagus, can occur
causing heartburn-type symptoms d.Esophagitis is caused by GERD, where stomach contents mix with hydrochloric
acid and flow back into the esophagus e.Factors that can cause excessive acid production include fatty foods, caffeine,
smoking, and alcohol f.May present with chest pain, upper abdominal pain, nausea, sour taste in
mouth g.Pain may be described as gnawing h.May be difficult to differentiate peptic ulcer pain and acute heart disease i.Assume pain is of serious nature j.Severe cases of PUD can lead to life-threatening hemorrhage (GI bleed) k.Can occur in any part of gastrointestinal tract i.Can be caused by medication, alcohol, tears within esophagus or
intestines, ruptured vessels ii.Upper GI bleeding can present as blood-tinged vomit (hematemesis),
either bright red or “coffee grounds” appearance iii.Can also present as bright red stools (hematochezia)—usually indicate
bleeding in lower GI tract iv.Tarry, black, foul-smelling stools (melena) indicate bleeding from the
upper GI tract v.Recommend hospital care for blood in vomit or stool 10.Abdominal aortic aneurysm (AAA)

95
a.Weakened aorta that develops a bulge formed by localized dilatation of the wall of the aorta (aneurysm)
b.Typically due to uncontrolled hypertension and arteriosclerosis c. Can become large enough to cause pain or dizziness upon standing d.Rupture of aneurysm is true emergency that can lead to massive blood loss
and sudden death e.Patients present in shock, may complain of flank or abdominal pain, weakness,
and/or dizziness f.History includes recent fainting spells, cool and pale skin g.Often have unequal femoral pulses 11. OB/GYN-related conditions a.Abdominal and pelvic cavity contains structures of female reproductive system
that when affected by disease can cause signs and symptoms of acute abdomen b.Common sources include ectopic pregnancy, ovarian cysts, bladder infection,
pelvic inflammatory disease III. Common gastrointestinal ailments A. Gastroenteritis 1.Inflammatory condition involving the stomach lining and/or intestines 2.Typically caused by bacterial, viral, parasitic infections, may result from noninfectious
source (excessive alcohol use, or prolonged aspirin/ibuprofen use) 3.Presents with cramping abdominal pain, bloating, nausea, vomiting, and/or diarrhea,
may or may not have fever 4.May become dehydrated from vomiting and diarrhea 5.Pain may be localized to upper quadrants or be diffuse 6.Seek medical care if: a.Symptoms persist over 24 hours, dehydration is possible b.Blood in vomit or stool may be due to undiagnosed GI bleed B. Indigestion 1.Upper GI tract can become inflamed due to stress, viral illness, rich or spicy foods, or
excessive alcohol 2.Can result in nausea and/or vomiting 3.Usually presents with dull cramping pain in upper abdominal quadrants, may be as
high as center of chest 4.Caused by stomach acid that ascends into lower esophagus, resulting in pain
(heartburn) 5.Can often mimic pain of heart attack 6.Persistent or severe indigestion warrants exam by a doctor to rule out more serious
medical conditions C. Nausea and vomiting 1.Vomiting is stomach muscles contracting violently, sending stomach contents up the esophagus and out the mouth 2.Nausea is a feeling of impending vomiting 3.Common causes of both include motion sickness, altitude, food poisoning, infection (viral or bacterial), irritating drugs or chemicals (aspirin, alcohol), ulcers, tumors, and

96
abdominal trauma 4.Excessive vomiting without fluid replacement can cause dehydration and other
problems 5.Vomiting from an unresponsive patient can cause aspiration 6.Aspiration can lead to lung infection, potentially life threatening 7.Important to quickly clean or suction vomit out of upper airway D. Colic 1.Intermittent, severe abdominal pain caused by obstruction and distention of a hollow
organ 2.Caused when muscular contractions within wall of organ try to force organ’s contents
past the obstruction 3.Common sources: gallstones, tumors, twisted bowel, trapped gas, mass of hard stool in bowel, kidney stones 4.Pain generally around navel, but can move over time 5.For a blocked ureter, colicky pain occurs in flank and radiates to the groin E. Diarrhea and bloody stools
1.Passing of frequent liquid stools 2.Caused by viruses, bacteria, protozoa, chemicals, and other gastric irritants,
medicalconditions such as bowel disease, intestinal tumors, and food allergies 3.Prolonged or excessive diarrhea can lead to dehydration 4.In outdoor environment most often caused by contaminated water or food 5.Modern sanitation has helped eliminate causes in urban setting 6.Adenovirus and rotavirus commonly occur in urban centers and on cruise ships
F. Viruses, protozoa, and bacteria 1.Staphylococci a.Grow everywhere in environment b.When contaminated, acute diarrhea and vomiting can occur 2.Salmonella a.Often present in undercooked poultry b.Cause same problems as staph, but lasts longer 3.Giardia lamblia and Cryptosporidium (protozoan) a.Protozoa present in untreated surface water b.Can cause chronic diarrhea and mild, chronic dehydration c.Medications can treat 4.Escherichia coli (E. coli) a.Common bacterial species found in human colons, aid in digestion b.Certain strains can cause deadly diarrhea; includes traveler’s diarrhea 5.Any of these listed can cause dehydration, loss of electrolytes, starvation, shock, and even death 6.Hospitalization with intravenous therapy is recommended
G. Constipation 1.Inability to excrete feces 2.Occurs due to inactivity, dehydration, lack of dietary fiber, or more urgent condition such as a tumor blocking the intestinal canal

97
IV. Assessment A.Abdominal/pelvic pain can be difficult to assess B.Do not diagnose – recognize signs and symptoms associated with an emergent condition C.Initiate lifesaving care if needed D.Refer patients to higher level of care if shock exists, and initiate lifesaving treatment in lieu of complete physical exam E.Ensure scene is safe F.Assess ABCDs and vital signs G.Question patient on medical history and pain symptoms using SAMPLE and OPQRST H.Determine type of pain 1.Constant or intermittent 2.How long pain has been present 3.If pain has moved since onset 4.Any aggravating or relieving factors: motion, coughing, breathing, belching, urination I.Identify associated symptoms: nausea, vomiting, diarrhea, bloody stool, fever, loss of appetite J.Physical exam 1.Calm patient to allay anxiety 2.Ask permission to examine and explain exam 3.Place patient in position of comfort, ideally in supine position with knees slightly flexed, which will allow abdominal and pelvic muscles to relax; move to a warm location K.Inspection and palpation 1.Inspection a.Expose and observe for clinical signs such as trauma, distention, bulging, or
discoloration b.Note if patient is motionless or unable to sit still and how abdominal wall
moves with respirations c.Identify pain and its location 2.Palpation a.Systematic – physically compress all four quadrants to determine presence or
absence of pain, masses, tensing, guarding or rigidity b.Begin with quadrant farthest away from site of pain c. Place one hand atop the other and place on patient’s abdomen d. Rest hands in this position to allow the patient to become comfortable e.Move slowly, apply firm but gentle downward pressure, and note the patient’s
response f.Feel if the abdominal muscles suddenly tense in response g.Slowly release pressure, gently glide the hands from one quadrant to the next,
repeating the process for each quadrant h.Note any evidence of tenderness on exam i.Rebound tenderness – release of pressure on exam of the abdomen resulting in
severe pain– usually indicates presence of serious intra-abdominal problem j.Check right and left flank V. Management

98
A.Move patient to moderate temperature location and keep patient warm and in comfortable position B.Provide supplemental oxygen as needed C.Anticipate vomiting D.Do not give food or drink E.Monitor vital signs F.Anticipate shock and treat accordingly G.Most patients require further medical evaluation 1.Transport to higher level of care, or 2.Encourage patient to seek physician evaluation and definitive treatment Case Presentation You are working first-aid duty in the patrol room when a 35-year-old man slowly walks in complaining of severe abdominal pain. You steer the patient to the nearest exam table and begin to assess his condition. Moments later, he vomits. The vomit is clear and does not appear to contain blood. The patient apologizes and states that he started feeling ill this morning but decided to come skiing anyway to be with his family. He has not suffered any recent trauma, and is not currently taking any medications. There is nothing pertinent in the patient’s past medical history. He says he has never experienced anything like this before and describes his abdominal pain as “intense.” What should you do? Case Update On examination of the patient, you notice that he is pale, sweating and feels warm to the touch. He relates that his pain was originally near his navel but has now “moved down and to the right.” Examination of the abdomen reveals severe tenderness in the right lower quadrant. He tells you that every bump in the road on the way to the ski hill felt like he was “being stabbed in my gut.” The patient has a heart rate of 116, blood pressure is 132/88, and respirations are 20 and shallow. What do you think is wrong with the patient? Case Disposition As you examine the patient and listen to his story, you become concerned the patient may have an acute abdomen. You place the patient on oxygen, keep him comfortable, and have him transported to the hospital. A week later the patient’s wife comes to the patrol room to thank you and the other patrollers for taking such great care of her husband. She reports that he had surgery for acute appendicitis and is now doing well. Discussion Points Has anyone had or known of someone with an acute abdomen? What are some more ways to make a patient comfortable while being examined or waiting for transport?
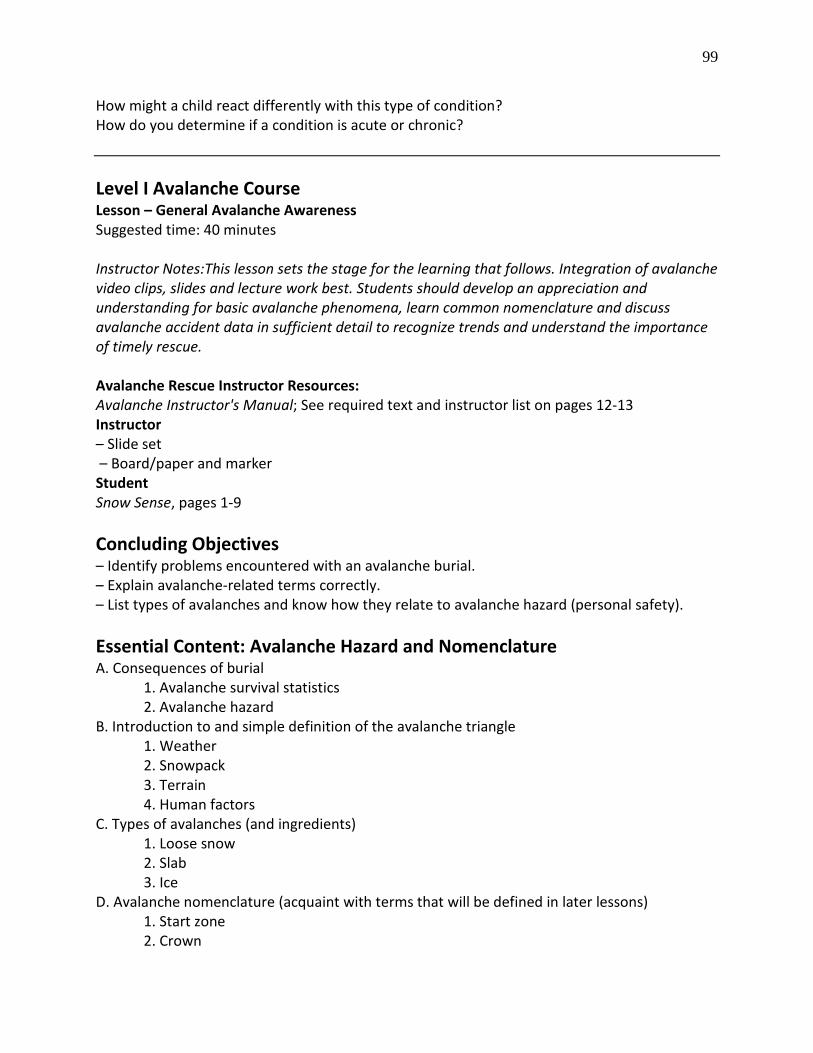
99
How might a child react differently with this type of condition? How do you determine if a condition is acute or chronic? Level I Avalanche Course Lesson – General Avalanche Awareness Suggested time: 40 minutes Instructor Notes:This lesson sets the stage for the learning that follows. Integration of avalanche video clips, slides and lecture work best. Students should develop an appreciation and understanding for basic avalanche phenomena, learn common nomenclature and discuss avalanche accident data in sufficient detail to recognize trends and understand the importance of timely rescue. Avalanche Rescue Instructor Resources: Avalanche Instructor's Manual; See required text and instructor list on pages 12-13 Instructor – Slide set – Board/paper and marker Student Snow Sense, pages 1-9 Concluding Objectives – Identify problems encountered with an avalanche burial. – Explain avalanche-related terms correctly. – List types of avalanches and know how they relate to avalanche hazard (personal safety). Essential Content: Avalanche Hazard and Nomenclature A. Consequences of burial 1. Avalanche survival statistics 2. Avalanche hazard B. Introduction to and simple definition of the avalanche triangle 1. Weather 2. Snowpack 3. Terrain 4. Human factors C. Types of avalanches (and ingredients) 1. Loose snow 2. Slab 3. Ice D. Avalanche nomenclature (acquaint with terms that will be defined in later lessons) 1. Start zone 2. Crown

100
3. Flanks 4. Stauchwall 5. Bed surface 6. Track/path 7. Toe 8. Deposition zone E. Avalanche triggering (broad view) 1. Natural a. Cornice b. Ice c. Other 2. Artificial 3. Most often by the victim F. Classification of avalanches 1. Slab, loose-snow, ice 2. Wet, dry 3. Airborne, ground, mixed 4. Trigger 5. Size Suggested Instructional Activities For problem solving, summary and evaluation: 1. Use excerpts from the Avalanche Awareness video.
2. View the Colorado Avalanche lnformation Center's U.S.Avalanche Accident
Statistics slide set.
3. Describe an actual accident scenario.
4. Develop a question-and-answer session using made-up names for things. Explain to students how avalanche terms are descriptive names for very specific things.
5. Use a blank drawing of a slab avalanche and have students name the parts.
6. Use the Avalanche Dynamics video or slides to illustrate various types of avalanches.
7. Make puzzle pieces for the key avalanche elements. (Alternative idea: Use slides or props.) Dissect and discuss each key avalanche element. Explain that if any piece is missing it is unlikely to avalanche, but if all are present – beware.
8. Use Activities references (Chapter 6).

101
Appendix G. Classifying Learning Learning Domains This appendix addresses different areas of learning as defined in the work by Bloom and others. It focuses on how instructors can plan lessons to match those learning areas. Educators have identified three major areas of learning: cognitive (i.e., thought), psychomotor (i.e., motor skills), and affective (values and beliefs). Within each domain, a set of learning levels have been defined. Due to the physical and mental activity required of NSP members, the organization's training focuses primarily on the cognitive and psychomotor domains. Moreover, while the following information can be very helpful to instructors, it is not essential to know them to be an effective NSP instructor. Because people learn skills in eacharea, or domain, in different ways (visual, auditory, and kinesthetic),instructors who understand the fundamental differences between these domains of learning can relate them to the various learning levels associated with each domain. This appendix focuses primarily on the first three levels of the cognitive domain, although general information on the remaining cognitive levels and the psychomotor and affective domains is also briefly presented. The NSP textbook Outdoor Emergency Care, 5th Edition, divides all objectives into these three domains (see Table G.1). Other courses and programs focus primarily on the cognitive learning levels of information, comprehension, and application. The cognitive level of learning refers to mental processes such as memorizing facts, understanding concepts, developing reasoning skills and applying logic. Much of what NSP members learn occurs at the cognitive level – for example, memorizing bones in the body, developing an ability to read a map, and understanding the importance of snowfall rates in assessing avalanche danger. The psychomotor domain of learning refers to physical skills, such as learning to drive a car, ski, apply a splint, or play tennis. The affective level pertains to the exploration of feelings, emotions and values. Examples of affective learning include being able to explain the importance of tolerance when caring for a stroke patient or valuing the skills that members with diverse talents bring to an organization. Each of these domain has associated learning levels, as can be seen in Table G.1. Cognitive learning levels are expressed in behavioral terms in the form of specific action verbs that help learners and instructors communicate objectives. NSP materials adapt the concept of learning levels from Taxonomy of Educational Objectives, developed by a committee chaired by Benjamin Bloom, Ph.D., of the University of Chicago. Bloom's six cognitive levels of thinking and processing information form the foundation for almost all education programs. His committee also prepared a taxonomy for the affective domain, and other researchers continued the work and provided information on the psychomotor domain. It is for the work in the cognitive domain that Bloom's committee is most recognized.

102
Table G.1 Three Major Areas Of Learning Cognitive: Thinking, logic Example: Memorizing facts, understanding principles Learning Levels
• Information • Comprehension • Application • Analysis • Synthesis • Evaluation
Psychomotor: Motor skills Example: Learning how to ski or ride a bike Learning Levels
• Imitate • Manipulate • Precision • Articulation • Naturalization
Affective: Values Example: Modifying education to take advantage of some of the concepts presented in the model and perhaps generatinga set of lessons using some ofthe concepts presented. Learning Levels
• Receiving • Responding • Valuing • Organization • Characterization by
value
Information on the affective domain is adapted from: Krathwohl, D., Bloom, B., & Masia, B. (1964).Taxonomy of Educational Objectives.Handbook II: Affective Domain. New York: Longman. Cognitive Learning Levels Learning levels help to categorize the complexity of thinking required to remember and use information. Instructors select learning activities that match the learning level abilities of their objectives. It is important to be able to detect the student's learning level, teach to that level, and evaluate progress at that level. The ultimate goal is for students not only to function at a beginning level but also to be able to advance to higher levels of learning by applying the new concepts to other problems and in other situations. The cognitive domain involves knowledge and the development of intellectual skills, which include the recall or recognition of specific facts, procedural patterns, and concepts that serve in the development of intellectual abilities. The levels can be thought of as degrees of difficulty. One level must be mastered before learning can take place at the next level (see Table G.2). The Instructor Development Course focuses on the first three levels of cognitive learning: information, comprehension, and application. (Additional information on the last three levels is available in the Taxonomy of Educational Objectives, cited above). Certainly, some outdoor tasks require analysis, synthesis and evaluation; however, initial instruction in outdoor skills generally focuses on integration of the first three levels.

103
These levels build sequentially. A student who can list or name the concepts covered in a lesson is at the information level. Being able to explain or describe how to apply the concept represents the comprehension level, and being able to demonstrate how or where the concept might be applied exemplifies the application level. Table G.2 Cognitive Learning Levels Foundation Levels: Lower level thinking skills
• Information – knowledge • Comprehension – understanding
Integrated levels: Higher level thinking skills • Application – using learned materials • Analysis – basis of logic and formal reasoning • Synthesis – putting parts together to form a whole • Evaluation – making judgments about value
A recent revision of Bloom’s Taxonomy indicates the following:
Table G.3.Bloom's Taxonomy
The Knowledge Dimension
The Cognitive Process Dimension Remember Understand Apply Analyze Evaluate Create
Factual Knowledge List Summarize Classify Order Rank Combine Conceptual Knowledge Describe Interpret Experiment Explain Assess Plan
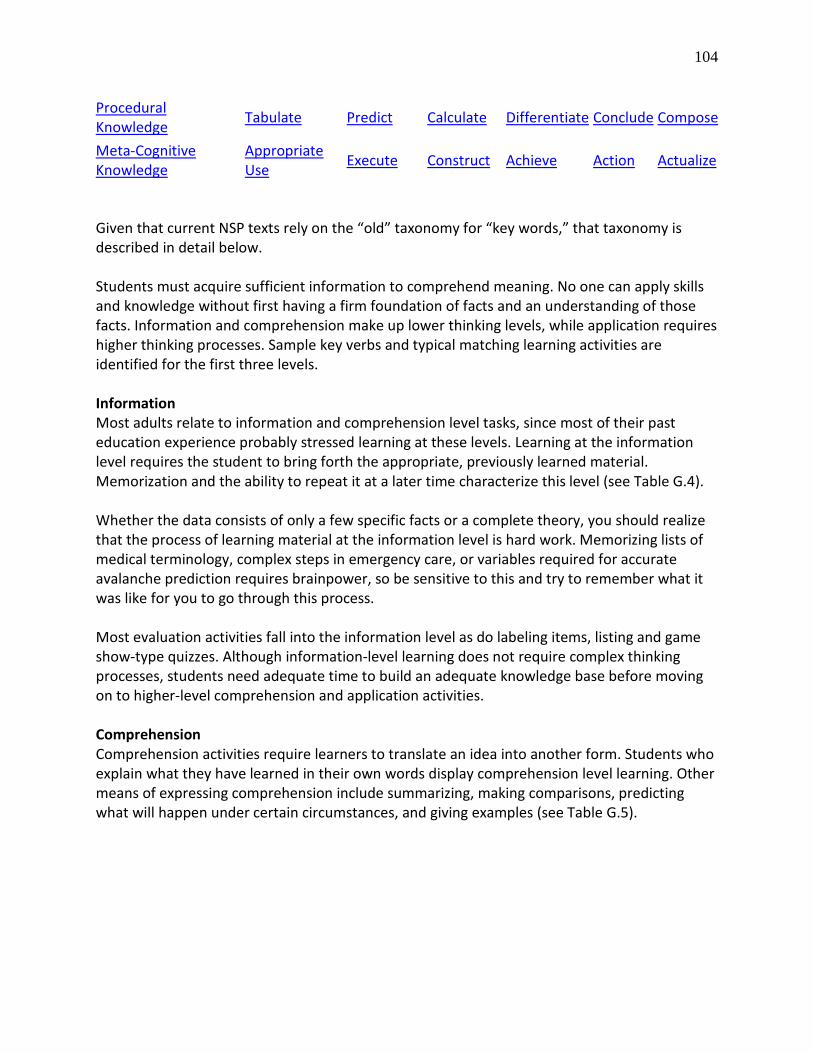
104
Procedural Knowledge Tabulate Predict Calculate Differentiate Conclude Compose
Meta-Cognitive Knowledge
Appropriate Use Execute Construct Achieve Action Actualize
Given that current NSP texts rely on the “old” taxonomy for “key words,” that taxonomy is described in detail below. Students must acquire sufficient information to comprehend meaning. No one can apply skills and knowledge without first having a firm foundation of facts and an understanding of those facts. Information and comprehension make up lower thinking levels, while application requires higher thinking processes. Sample key verbs and typical matching learning activities are identified for the first three levels. Information Most adults relate to information and comprehension level tasks, since most of their past education experience probably stressed learning at these levels. Learning at the information level requires the student to bring forth the appropriate, previously learned material. Memorization and the ability to repeat it at a later time characterize this level (see Table G.4). Whether the data consists of only a few specific facts or a complete theory, you should realize that the process of learning material at the information level is hard work. Memorizing lists of medical terminology, complex steps in emergency care, or variables required for accurate avalanche prediction requires brainpower, so be sensitive to this and try to remember what it was like for you to go through this process. Most evaluation activities fall into the information level as do labeling items, listing and game show-type quizzes. Although information-level learning does not require complex thinking processes, students need adequate time to build an adequate knowledge base before moving on to higher-level comprehension and application activities. Comprehension Comprehension activities require learners to translate an idea into another form. Students who explain what they have learned in their own words display comprehension level learning. Other means of expressing comprehension include summarizing, making comparisons, predicting what will happen under certain circumstances, and giving examples (see Table G.5).
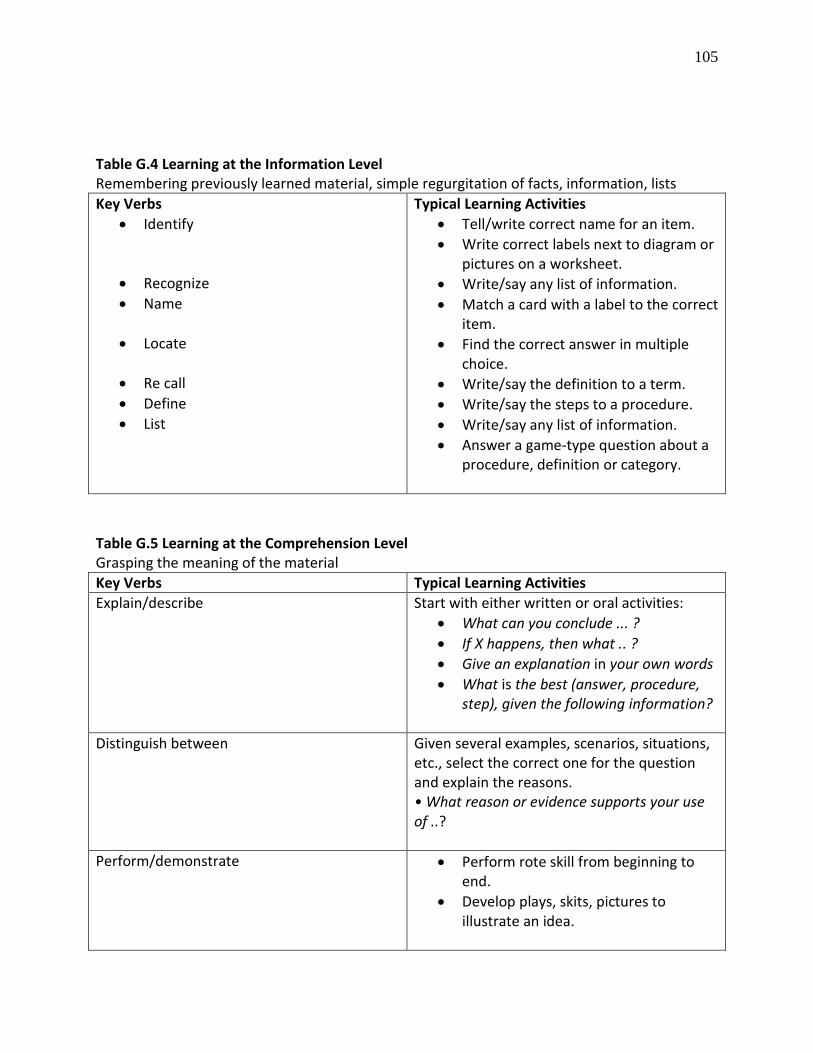
105
Table G.4 Learning at the Information Level Remembering previously learned material, simple regurgitation of facts, information, lists Key Verbs
• Identify
• Recognize • Name
• Locate
• Re call • Define • List
Typical Learning Activities • Tell/write correct name for an item. • Write correct labels next to diagram or
pictures on a worksheet. • Write/say any list of information. • Match a card with a label to the correct
item. • Find the correct answer in multiple
choice. • Write/say the definition to a term. • Write/say the steps to a procedure. • Write/say any list of information. • Answer a game-type question about a
procedure, definition or category.
Table G.5 Learning at the Comprehension Level Grasping the meaning of the material Key Verbs Typical Learning Activities Explain/describe Start with either written or oral activities:
• What can you conclude ... ? • If X happens, then what .. ? • Give an explanation in your own words • What is the best (answer, procedure,
step), given the following information?
Distinguish between
Given several examples, scenarios, situations, etc., select the correct one for the question and explain the reasons. • What reason or evidence supports your use of ..?
Perform/demonstrate • Perform rote skill from beginning to end.
• Develop plays, skits, pictures to illustrate an idea.

106
Discussion activities can be excellent avenues for developing student comprehension. Instructors need to check that learners comprehend major concepts and principles before expecting them to apply their comprehension in real situations. Application The ultimate goal of instruction is to develop students who can apply what they have learned. Application activities require students to use learned material in solving problems. Students must select the appropriate information and use it correctly for application-level tasks. The information must be used in its entirety, rather than in the smaller pieces in which it may have been taught. A student who can regurgitate all the right lists and information may not be able to use the information during an actual situation. Hands-on learning should not be confused with application-level learning. Hands-on activities can occur at any level but not all hands-on activities push learners to the application level. Frequently, instructors confuse basic (rote) skill performance with application-level performance. Rote skill performance, while a necessary step, does not push learners to application. Application, a higher-level thinking skill, demands considerable decision making and the use of integrated skills. Practicing the steps to apply a skill that has been demonstrated in class over and over again is rote learning; assessing a situation, determining which skill is needed, and then correctly using that skill requires application. To adequately demonstrate this learning level, the students must apply learned skills in different settings (see Table G.6). Table G.6 Learning at the Application Level Using learned materials in new and concrete situations Key Verbs Typical Learning Activities
Perform/demonstrate Role-play “patient” in scenarios when given a
minimum of signs and symptoms.
Reconstruct/assess/name Assess a situation and select the best treatment and/or technique. Rebuild probable preceding events. Improvise materials when necessary.
When working at the application level, a student solves a lifelike problem that requires identifying the issues and using appropriate generalizations and skills. You may find that learners seem to "hit the wall" when presented with application-level activities. This glazed-eye response relates to a sudden brain flurry as students frantically search their brains for all information relevant to the problem. NSP and other outdoor recreation instructors make frequent use of higher-level thinking and application activities through scenario-based exercises and role playing. Application activities require a minimum of directions since the situation is based on previous learning and the

107
students are expected to know what to do. To ensure success at the application level, make sure students have an adequate foundation of knowledge at the information and comprehension levels. Information: Remembering previously learned material. The recall of facts, information, lists, concepts, and theories without interpretation by the learner. Comprehension: Grasping the meaning of previously learned material. To restate, discuss, describe, explain, review, translate, or locate. Application: Using learned materials in new and real situations. To operate, illustrate, use, employ, sketch. Commonly misinterpreted terms are to show, to apply a thorough knowledge. Analysis: Breaking information into parts and detecting the relationships between those parts. Analysis is the basis of logic and formal reasoning. Behavior terms include appraise, calculate, test, compare, contrast, solve, criticize, infer, and distinguish. Synthesis: Putting together new elements and parts to form a whole. This level encompasses most creative behaviors. Including composing, proposing, planning, designing, managing, collecting, constructing, organizing, preparing, summarizing and revising. Evaluation: Making judgments about value for a specific purpose. Evaluation includes the development of criteria on which to base the judgment. Key behaviors include evaluating, rating, selecting, estimating, measuring criticism and justifying. Table G.7 Psychomotor Domain Level Definition Possible Verbs Imitate
Observe a skill and attempt to repeat it, or see Attempt, copy, duplicate, a finished product and attempt to replicate it.
Attempt, copy, duplicate, imitate, mimic
Manipulate
Perform the skill or produce the product in a recognizable fashion by following general instructions rather than through observation.
Complete, follow, play, perform, produce
Precision
Independently perform the skill or produce the product, with accuracy, proportion, andexactness (at an expert level).
Achieve automatically, excel, perform expertly, perform masterfully
Articulation
Modify the skill or the product to fit new situations; combine more than one skill in sequence with harmony and consistency.
Adapt, alter, customize, originate
Naturalization Complete one or more skills Perform naturally

108
with ease. Psychomotor Learning Levels The psychomotor domain pertains to the use and coordination of motor skills (see Table G.6). Development of these skills requires continual practice and is measured in terms of speed, precision and distance in the execution of procedures and techniques. Many outdoor recreation activities involve highly developed physical skills; consequently, it is important for instructors to be familiar with this learning domain. There are a number of different taxonomies available for the psychomotor domain. The following table was abstracted from material contained in Dave, R. (1967), Psychomotor domain. Berlin: International Conference of Educational Testing. Table G.8 Affective Domain Level
Definition
Possible Verbs
Receiving
Gain the learner's attention.
Awareness, willingness to receive, consciously attend, listen, focus
Responding
Engage the learner at the level at which interests are born.
Agree, respond, choose, believe
Valuing
Examine beliefs, ascribe worth, commit to living in accordance with stated values.
Examine, ascribe, seek, identify, act, promote
Organization
Analyze the internal consistency of one's value structure.
Analyze, prioritize, compare, contrast, question, expand
Characterization Act consistently in accordance with internalized principles.
Act, do, serve, share, demonstrate, argue
Affective Learning Levels This domain pertains to emotional responses – that is, feelings, values, appreciation, enthusiasm, motivation, and attitude. Effective learning is demonstrated by behaviors that indicate attitudes of awareness, interest, attention, concern, responsibility and the ability to listen and respond to others. Bloom's committee identified fivelevels as illustrated in Table G.8.This domain also incorporates values, such as enjoying, conserving, respecting, and

109
supporting others. As an instructor, being aware of the affective domain as you interact with students will help you.

110
Appendix H. Administrative Forms The administrative forms for instructors and instructor trainees are:
• Course Completion Record
• Instructor Application
• NSP Instructor Mentoring Completion Form
• Quality Assurance Course/Event Evaluation Form (for ITs)
• NSP Feedback Form (Student Course Evaluation Form)
• Release Form
• Six-Pack Planning Form
Links to these forms can be found at www.nsp.orgby clicking on Instructor Resources button. Since you are not an instructor yet, your instructor of record should provide you with copies of these forms.

111
Appendix I. Quality Management System
Section 1 – Purpose of the Quality Management System A Quality Management System (QMS) has been established to protect the interests of the National Ski Patrol by creating a quality control process that ensures programs and services are being delivered consistently and in accordance with national standards that embody best practices. The system also creates a quality assurance process that is designed to audit the programs being delivered by the membership, and creates a feedback loop to the national office and divisions necessary to foster continuous improvement and maintain the reputation and integrity of the National Ski Patrol as the premier provider of training and education programs for the outdoor recreation community. Mission The National Ski Patrol is a member-driven organization of registered ski patrols, patrollers and others, both paid and volunteer. The NSP supports its members through credentialed education and training in leadership, Outdoor Emergency Care, safety, and transportation services, which enable members to serve the community in the safe enjoyment of outdoor recreation. Core Values • Excellence • Service • Camaraderie • Leadership • Integrity • Responsiveness NSP Quality Policy The National Ski Patrol is the premier provider of training and education programs for emergency rescuers serving the outdoor recreation community. QMS sets quality guidelines that ensure that the process of delivering NSP educational programs follows national standards. It also ensures that these programs are being taught by accredited instructors, are monitored through independent auditing and are enhanced via continuous improvement measures. Section 2 – Management Responsibility and Organization Structure The NSP organization is required to carry out its mission as described in its federal charter and
112
state articles of incorporation, NSP Bylaws and NSPPolicies and Procedures. The educational and credentialing functions are provided by the:
• National officers • National volunteer staff and program directors • National office staff • Division officers • Division, region, section, and patrol staff (paid/pro or volunteer)
The services to the ultimate customer, the outdoor recreation community, are provided by the individual patrol members, organized in patrols under the direction and full responsibility of resort area management. The NSPPolicies and Procedures describe the responsibilities of the board of directors (BOD), which assigns responsibility for the delivery and quality of NSP’s programs to its division directors. The NSPPolicies and Procedures assigns responsibility for development, promotion and administration of the discipline programs to the national volunteer staff (NVS), and responsibility for the development and coordination of the QMS to the education committee. Several levels of learners and instructors are established to deliver NSP’s educational programs:
• Candidates – enrolled in basic courses • Patrollers – enrolled in courses for continued education and Senior electives • Mentees – training to be instructors • Instructors – members who deliver NSP educational courses to members and other
stakeholders • Mentors– (experienced instructors) who train instructor mentees • Instructor trainers– certify credentialing and ensure quality control • Region, division and national program leaders
Section 3 – Quality Management Process – Overview The NSPPolicies and Procedures establishes the environment for the delivery of the educational programs in the outdoor recreation community. The QMS of the National Ski Patrol is built on the two basic elements of quality: quality control and quality assurance. The quality control section defines the national standard for educational program delivery. The quality assurance section defines the auditing process necessary to ensure that programs are being delivered at the level prescribed by the national standard.
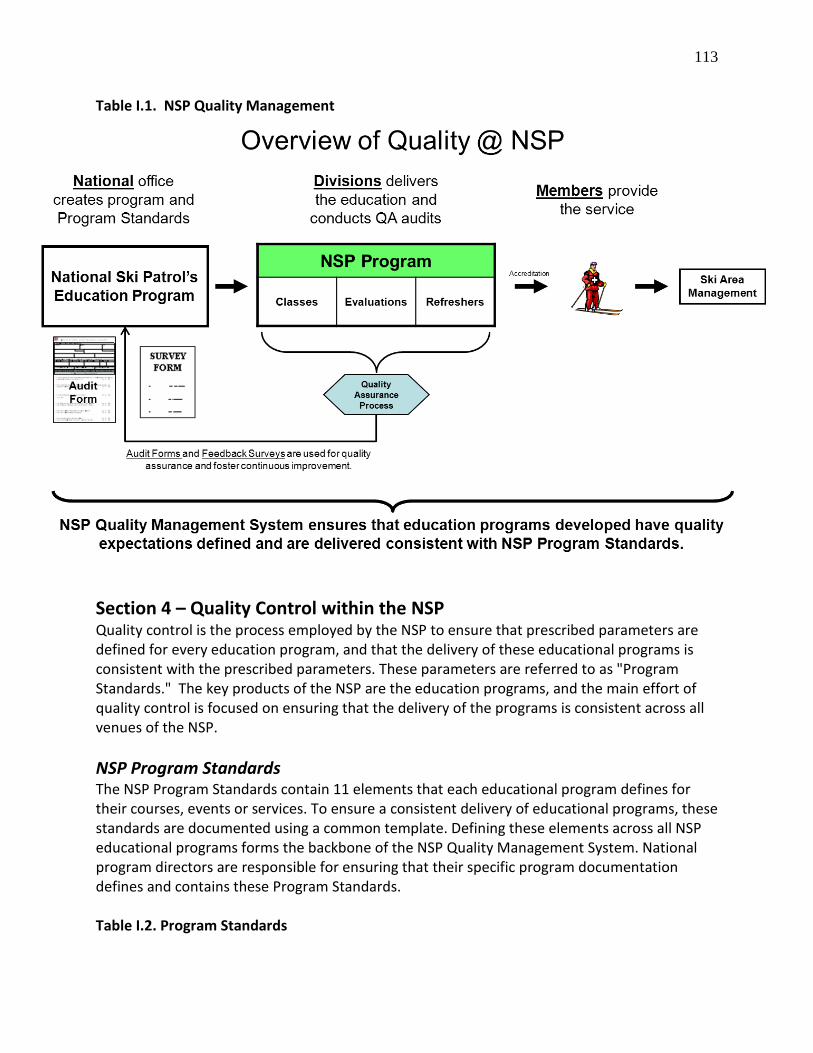
113
Table I.1. NSP Quality Management Section 4 – Quality Control within the NSP Quality control is the process employed by the NSP to ensure that prescribed parameters are defined for every education program, and that the delivery of these educational programs is consistent with the prescribed parameters. These parameters are referred to as "Program Standards." The key products of the NSP are the education programs, and the main effort of quality control is focused on ensuring that the delivery of the programs is consistent across all venues of the NSP. NSP Program Standards The NSP Program Standards contain 11 elements that each educational program defines for their courses, events or services. To ensure a consistent delivery of educational programs, these standards are documented using a common template. Defining these elements across all NSP educational programs forms the backbone of the NSP Quality Management System. National program directors are responsible for ensuring that their specific program documentation defines and contains these Program Standards. Table I.2. Program Standards

114
11/29/2009 Quality Management System Proposal for NSP: J. Cripps 1
1) Program Objective2) Program Structure3) Course Content4) Resources Required5) Instructor Credentials6) Course Prerequisites7) Evaluation Format8) Grade Scale/Structure9) Reporting Requirements10) Risk Management11) Conflict Resolution
Quality Control ‘Backbone’
Outdoor Emergency
Care Program
Mountain Travel & Rescue
Program
Transportation Program
Nordic Program
Avalanche Program
Instructor Development
Program Standard
The NSP ‘Program Standard’ has 11 key elements that each Educational Program defines in their documentation to help ensure the education is
being delivered in a uniform and consistent basis. Applying these elements across all NSP educational products forms the ‘Backbone’ of
the NSP Quality Management System.
Eleven Elements of the National Ski Patrol Program Standard
1) Program objective – Defines objective(s) of program and how they will be delivered. 2) Program structure – Defines program requirements, such as where, when and how the
class is held (i.e. classroom, outside, on-snow, what time of year) to best achieve the program objective.
a. Venue – classroom, outside, on-snow, etc. b. Class size – minimum and maximum number of students, as appropriate. c. Instructor/student ratio – for training effectiveness. d. Audit frequency – how often the event should be audited.
3) Course content – Defines what educational material is being taught and the level of detail that the students are expected to learn.
4) Resources required – What is necessary to deliver a program. a. Instructors – how many trainers are needed?

115
b. Helpers – how many helpers are needed, trained and untrained assistants? c. Equipment – defines what equipment is needed by the trainers and what is
required of the students to bring to class. d. Educational materials – defines material required by the student and trainer.
5) Instructor credentials – defines what instructor credentials are required for those delivering the educational program.
6) Course prerequisites – what other courses or credentials the student needs prior to attending this program.
7) Evaluation format – defines the type of format of the evaluation (i.e. written test, practical test, ski-along test, oral test, check sheet, etc.)
8) Grade scale/structure – defines the grade structure and what constitutes passing and failing.
9) Reporting requirements – defines the administration process/paperwork required. a. Class registration – defines how to register the course with the NSP. b. Course completion report – defines process/paperwork necessary to close out a
course. c. Course feedback – defines what feedback mechanisms are employed by
program participants, (i.e. instructors, helpers, students). 10) Risk management considerations – details risk management considerations for all
phases of program, (i.e. training, evaluation, refreshers). 11) Conflict resolution – defines process to follow in the event of issues/complaints from
any program participant, who to take complaint to, what process to follow. Section 5 – Quality Assurance (QA) within the NSP Quality assurance involves monitoring/evaluating the delivery of NSP programs and services. Audit frequency is defined in the program’s documentation. Quality Assurance is a process to audit courses and events being delivered to ensure that it is done in accordance with the program’s standards. It ensures that the Program Standards are being consistently applied across all programs and divisions in the NSP. The QA function is performed by instructor trainers (ITs), and monitored by division program supervisors. Purpose of the NSP Quality Assurance Process • Audit the program delivery process to ensure it meets the national standards. • Provide continuous improvement feedback at the region, division and national level. ITs Provide Evaluation and Oversight Function Instructor trainers (ITs) are experienced evaluators in their respective discipline(s), and are responsible for completing evaluations and program oversight. Experience in the evaluation and administration of the program is important for an understanding of the flow and procedure of the program being delivered. Other ITs from outside the discipline can serve as evaluators if an IT from that specific discipline is not available. In this case, the IT is specifically assigned to that event by the discipline-specific region administrator or division program supervisor for the program of the course in question. The IT will be able to QA the course teaching/presentation
116
but not the course content. A critical trait of the QA auditor is the ability to communicate, both by listening and providing feedback. The individual must be confident without being confrontational. Per the Policies and Procedures, the ITs responsible for program oversight (auditing/evaluating) of an event are assigned by the division program supervisor. Per division policies and needs, the region program administrator may make the IT assignment, who should develop his or her auditing skills by shadowing a competent and experienced IT. The assigned IT must be familiar with the Program Standards of the program regarding content and evaluation criteria. One intent of the QA program is for the IT to provide information and documentation to the region administrator and division program supervisor. Evaluation Process of an Educational Event An educational event may be a course, clinic, workshop or testing event in which knowledge or skills are acquired, practiced or evaluated. A course is a body of prescribed study whereby knowledge or skills are initially taught; it may extend for more than one session. When credentialing is involved, such as in OEC or Avalanche Level 1, the assigned IT must attend enough classes and the final evaluation to ascertain that the national standard has been met consistently for that course. Furthermore, the IT shall evaluate the instructional performance of each instructor participating in the course, such evaluations being required for instructor certification and recertification. Region program administrators and division supervisors review the submitted evaluation forms to ascertain that the national standards are being met across their region and division. Similarly, the IT must be present at a credentialing event like an OEC refresher, an OEC final evaluation, a Senior Alpine Toboggan evaluation, etc. The auditing IT will observe, certify and only intervene in the event when activity occurs (or does not occur) that falls well outside the national standards of the program.
Following the evaluation, the assigned IT will meet with the instructor of record (IOR) and any helping instructors for the event to review the completed QA form and, if needed, provide any additional suggestions to improve the event. If appropriate, the patrol director should be included in this process, especially if deficits were found. Copies of the evaluations will be sent to the region program administrator and the division program supervisor. This step in the process is not just an “evaluation of the evaluation,” but a means to give feedback toward improving the quality of the program or event or individual instructor(s)’ performance. Quality Assessment/Evaluation Form Each national program director shall design a course assessment/evaluation form that is consistent with that program’s quality standards. The IT uses that form to provide an independent assessment of an event to determine if it was delivered in accordance with the Program Standards. The IT provides a copy of the assessment to the IOR, the cognizant region administrator and the division program supervisor.

117
Similarly, the national program director shall design an instructor performance evaluation form consistent with that program’s instructional quality standard. The IT uses that form to provide an independent assessment of each participating instructor’s performance in lesson planning and delivery. The IT provides a copy of the instructor’s performance evaluation to the evaluated instructor, thecognizant region administrator and the division program supervisor. NSP Student Feedback Questionnaire To complete the quality assessment of an event, it is necessary to gain feedback from the participants after they complete the course/program. This is accomplished by using the NSP Feedback Questionnaire. This feedback helps gauge how satisfied the participants were, and helps identify any areas for improvement. This standard program feedback questionnaire is used at all educational events/courses, across all divisions. The IT responsible for oversight of the educational event will be responsible for circulating the NSP Feedback Questionnaire at the conclusion of the event and collecting the responses. Once collected/or reported, the completed questionnaires are sent to the region program administrator for review and tabulating the results. Division level: Copies of completed audit forms and Feedback Questionnaires are sent to the region program administrator and division supervisor for review and follow up if necessary. Quality Reporting Frequency Division level: Program oversight, minimum frequency and event type (classroom session and final evaluation) is determined by the national program director and outlined in each program’s standards documentation. Student Feedback Questionnaires are to be utilized at all NSP educational events/courses. Section 6 – Instructor Development and Mentoring Education is critical to NSP satisfying its federal charter and articles of incorporation as a public service organization. The application of effective teaching methods is therefore most important and necessary throughout all of its programs. These effective teaching skills are taught in the NSP Instructor Development (ID) Course, which focuses on principles of adult education and the associated Mentoring Program. The ID Program also includes teaching the NSP education programs' administrative policies and procedures (paperwork). Recognition of the importance of these educational basics to NSP is demonstrated by the fact that no instructor is allowed to manage or teach any course until he or she has satisfactorily completed the ID course and has been adequately mentored for a specific discipline.

118
Instructor Development The ID course covers the various areas of instruction and how instructors can apply them to create a positive learning experience for students. It also helps build a strong foundation of educational knowledge for use when planning and delivering lessons. The essentials for being an effective instructor are taught in this manual’s chapters, which includes the six pack. This is the standard for how NSP programs are to be taught. Instructor Mentoring Program The second component of instructor development is the Instructor Mentoring Program. In this phase, the potential instructor practices teaching under the observation and guidance of a credentialed instructor (mentor). The instructor trainee learns additional skills from the mentor via interactive sessions and by practice teaching real students. The mentoring program focuses on the practical application of teaching and assessment skills and the NSP or division-specific administrative polices for a specific program. Guide to Mentoring New Instructors is the manual that describes the mentoring process. It is found under Instructor Development on the NSP website. Instructor Continuing Education NSP instructor certification is valid for a period of three years, at which time it expires. In order to maintain, update and improve instructional quality, participation in at least one instructor continuing education (CE) activity during this period is required for renewal of certification. Suitable CE events are specified within each national program standard. Region administrators and division supervisors use evaluation data to help determine or develop appropriate CE content to improve the quality of program delivery. Section 7 – Measurement and Analysis QA Evaluation Forms The IT is responsible for completion of the program’s course evaluation form, and for making suggestions for course and program improvement. Similarly, the IT is responsible for completing individual instructor performance evaluations, and for making suggestions for improving instructional quality. Finally, the IT is responsible for distributing copies of all evaluation forms to the IOR, cognizant region program administrator and division program supervisor, as appropriate. Each recipient uses these evaluations to guide program improvements at their respective levels. NSP Feedback Questionnaire Student Feedback Questionnaire results are to be reported to the region program administrator and division program supervisor at the end of each course. This allows for reviewing and implementing suggestions in a timely manner.

119
The questionnaire results should contain the following categories: • Number of events where the questionnaire forms were collected, by program type. • Average score for each of the 10 questions. • A report of any variance of responses. • Any other relevant comments and/or issues identified in the surveys. • Continuous improvement suggestions.