introduction - netcommedia.netcomm.com.au/public/assets/pdf_file/0011/101333/3g21we... ·...
TRANSCRIPT

Introduction
User Guide

Introduction
2
Welcome
Preface
The purpose of th is manual i s to provide you with detai led information on the insta l lat ion , operat ion and
appl icat ion of your 3G21WE HSPA+ WiFi Router.
Important Not ice and Safety Precaut ion
• Beforeserv ic ingor d isassembl ingthis equipment , a lwaysd isconnect powerfromthedevice .
• Useanappropr iatepowersupply, preferably thesuppl iedpoweradapter, withanoutputof DC12V1 .5A.
• Do not operate the device near f lammable gas or fumes . Turn off the devicewhen you are near a petrol
stat ion , fuel depot or chemical p lant/depot . Operat ion of such equipment in potent ia l ly explos ive
atmospheres can represent a safety hazard .
• Thedeviceandantennashal l beusedonly witha minimumof20cmfromthehumanbody.
• Theoperat ionof this devicemayaffect medical e lectronic devices , suchas hear inga ids andpacemakers .
3
Etisalat HSPA+ WiFi Router USERGUIDE
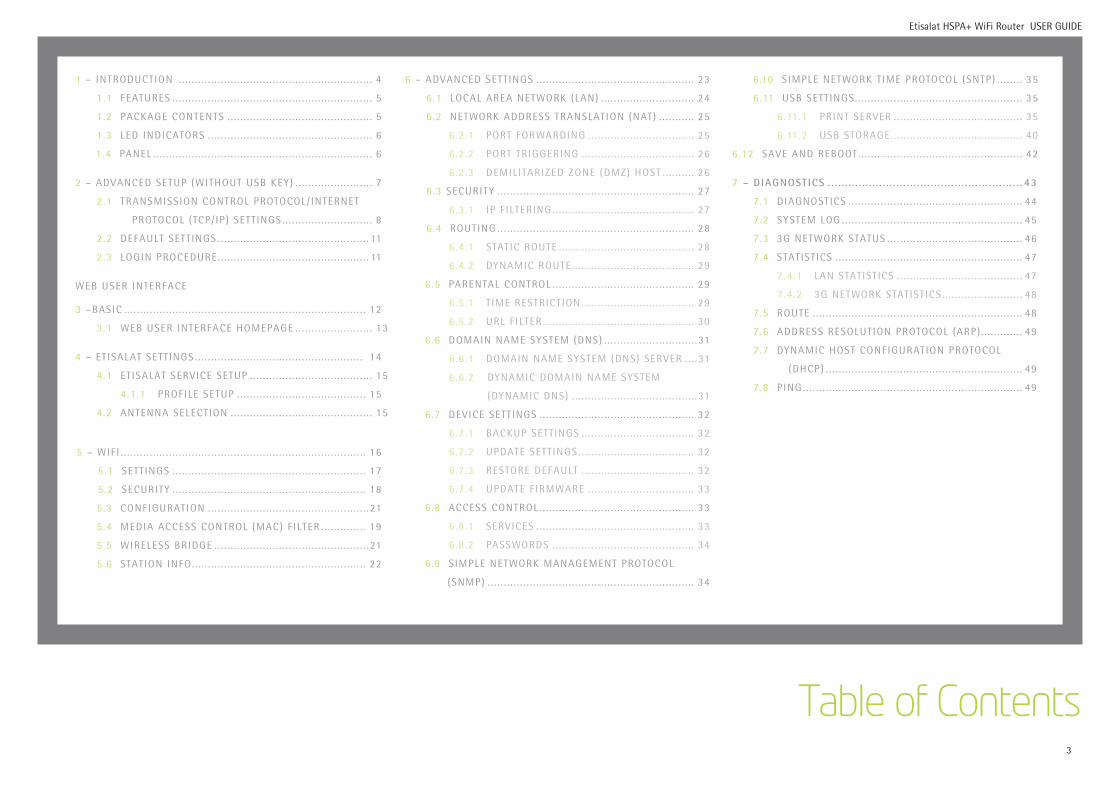
1 – INTRODUCTION . . . . . . . . . . . . . . . . . . . . . . . . . . . . . . . . . . . . . . . . . . . . . . . . . . . . . . . . . . . . 4
1 .1 FEATURES . . . . . . . . . . . . . . . . . . . . . . . . . . . . . . . . . . . . . . . . . . . . . . . . . . . . . . . . . . . . . . 5
1.2 PACKAGECONTENTS . . . . . . . . . . . . . . . . . . . . . . . . . . . . . . . . . . . . . . . . . . . . . 5
1.3 LED INDICATORS . . . . . . . . . . . . . . . . . . . . . . . . . . . . . . . . . . . . . . . . . . . . . . . . . . . 6
1 .4 PANEL . . . . . . . . . . . . . . . . . . . . . . . . . . . . . . . . . . . . . . . . . . . . . . . . . . . . . . . . . . . . . . . . . . . . 6
2 –ADVANCEDSETUP (WITHOUTUSBKEY) . . . . . . . . . . . . . . . . . . . . . . . . 7
2 .1 TRANSMISSIONCONTROLPROTOCOL/ INTERNET
PROTOCOL (TCP/ IP) SETTINGS . . . . . . . . . . . . . . . . . . . . . . . . . . . . 8
2 .2 DEFAULTSETTINGS . . . . . . . . . . . . . . . . . . . . . . . . . . . . . . . . . . . . . . . . . . . . . . . 11
2.3 LOGINPROCEDURE . . . . . . . . . . . . . . . . . . . . . . . . . . . . . . . . . . . . . . . . . . . . . . . 11
WEBUSER INTERFACE
3 –BASIC . . . . . . . . . . . . . . . . . . . . . . . . . . . . . . . . . . . . . . . . . . . . . . . . . . . . . . . . . . . . . . . . . . . . . . . . . . . 12
3.1 WEBUSER INTERFACEHOMEPAGE . . . . . . . . . . . . . . . . . . . . . . . . 13
4 – ET ISALAT SETTINGS . . . . . . . . . . . . . . . . . . . . . . . . . . . . . . . . . . . . . . . . . . . . . . . . . . . . 14
4.1 ETISALATSERVICESETUP . . . . . . . . . . . . . . . . . . . . . . . . . . . . . . . . . . . . . . 15
4 .1 .1 PROFILESETUP . . . . . . . . . . . . . . . . . . . . . . . . . . . . . . . . . . . . . . . . 15
4.2 ANTENNASELECTION . . . . . . . . . . . . . . . . . . . . . . . . . . . . . . . . . . . . . . . . . . . . 15
5 – WIFI . . . . . . . . . . . . . . . . . . . . . . . . . . . . . . . . . . . . . . . . . . . . . . . . . . . . . . . . . . . . . . . . . . . . . . . . . . . . 16
5.1 SETTINGS . . . . . . . . . . . . . . . . . . . . . . . . . . . . . . . . . . . . . . . . . . . . . . . . . . . . . . . . . . . . 17
5.2 SECURITY . . . . . . . . . . . . . . . . . . . . . . . . . . . . . . . . . . . . . . . . . . . . . . . . . . . . . . . . . . . . 18
5.3 CONFIGURATION . . . . . . . . . . . . . . . . . . . . . . . . . . . . . . . . . . . . . . . . . . . . . . . . . . 21
5.4 MEDIAACCESSCONTROL (MAC)F ILTER . . . . . . . . . . . . . . 19
5.5 WIRELESSBRIDGE . . . . . . . . . . . . . . . . . . . . . . . . . . . . . . . . . . . . . . . . . . . . . . . . 21
5.6 STATION INFO. . . . . . . . . . . . . . . . . . . . . . . . . . . . . . . . . . . . . . . . . . . . . . . . . . . . . . 22
6 –ADVANCEDSETTINGS . . . . . . . . . . . . . . . . . . . . . . . . . . . . . . . . . . . . . . . . . . . . . . . . . 23
6.1 LOCALAREANETWORK(LAN) . . . . . . . . . . . . . . . . . . . . . . . . . . . . . 24
6.2 NETWORKADDRESSTRANSLATION(NAT) . . . . . . . . . . . 25
6.2 .1 PORTFORWARDING . . . . . . . . . . . . . . . . . . . . . . . . . . . . . . . . . 25
6.2 .2 PORT TRIGGERING . . . . . . . . . . . . . . . . . . . . . . . . . . . . . . . . . . . 26
6.2 .3 DEMILITARIZEDZONE(DMZ)HOST . . . . . . . . . . 26
6.3 SECURITY . . . . . . . . . . . . . . . . . . . . . . . . . . . . . . . . . . . . . . . . . . . . . . . . . . . . . . . . . . . . . 27
6.3 .1 IP F ILTERING . . . . . . . . . . . . . . . . . . . . . . . . . . . . . . . . . . . . . . . . . . . . 27
6.4 ROUTING . . . . . . . . . . . . . . . . . . . . . . . . . . . . . . . . . . . . . . . . . . . . . . . . . . . . . . . . . . . . . 28
6.4 .1 STATICROUTE . . . . . . . . . . . . . . . . . . . . . . . . . . . . . . . . . . . . . . . . . . 28
6.4 .2 DYNAMICROUTE . . . . . . . . . . . . . . . . . . . . . . . . . . . . . . . . . . . . . . 29
6.5 PARENTALCONTROL . . . . . . . . . . . . . . . . . . . . . . . . . . . . . . . . . . . . . . . . . . . . 29
6.5 .1 T IMERESTRICTION . . . . . . . . . . . . . . . . . . . . . . . . . . . . . . . . . . . 29
6.5 .2 URLF ILTER . . . . . . . . . . . . . . . . . . . . . . . . . . . . . . . . . . . . . . . . . . . . . . . 30
6.6 DOMAINNAMESYSTEM(DNS) . . . . . . . . . . . . . . . . . . . . . . . . . . . . . 31
6.6 .1 DOMAINNAMESYSTEM(DNS) SERVER . . . . 31
6.6 .2 DYNAMICDOMAINNAMESYSTEM
(DYNAMICDNS) . . . . . . . . . . . . . . . . . . . . . . . . . . . . . . . . . . . . . . . 31
6.7 DEVICESETTINGS . . . . . . . . . . . . . . . . . . . . . . . . . . . . . . . . . . . . . . . . . . . . . . . . 32
6.7 .1 BACKUPSETTINGS . . . . . . . . . . . . . . . . . . . . . . . . . . . . . . . . . . . 32
6.7 .2 UPDATESETTINGS . . . . . . . . . . . . . . . . . . . . . . . . . . . . . . . . . . . . 32
6.7 .3 RESTOREDEFAULT . . . . . . . . . . . . . . . . . . . . . . . . . . . . . . . . . . . 32
6.7 .4 UPDATEF IRMWARE . . . . . . . . . . . . . . . . . . . . . . . . . . . . . . . . . 33
6.8 ACCESSCONTROL . . . . . . . . . . . . . . . . . . . . . . . . . . . . . . . . . . . . . . . . . . . . . . . . 33
6.8 .1 SERVICES . . . . . . . . . . . . . . . . . . . . . . . . . . . . . . . . . . . . . . . . . . . . . . . . . 33
6.8 .2 PASSWORDS . . . . . . . . . . . . . . . . . . . . . . . . . . . . . . . . . . . . . . . . . . . . 34
6.9 SIMPLENETWORKMANAGEMENTPROTOCOL
(SNMP) . . . . . . . . . . . . . . . . . . . . . . . . . . . . . . . . . . . . . . . . . . . . . . . . . . . . . . . . . . . . . . . . 34
6.10 S IMPLENETWORKTIMEPROTOCOL (SNTP) . . . . . . . . 35
6.11 USBSETTINGS . . . . . . . . . . . . . . . . . . . . . . . . . . . . . . . . . . . . . . . . . . . . . . . . . . . . 35
6.11.1 PRINTSERVER . . . . . . . . . . . . . . . . . . . . . . . . . . . . . . . . . . . . . . . . 35
6.11.2 USBSTORAGE . . . . . . . . . . . . . . . . . . . . . . . . . . . . . . . . . . . . . . . . . 40
6.12 SAVEANDREBOOT . . . . . . . . . . . . . . . . . . . . . . . . . . . . . . . . . . . . . . . . . . . . . . . . . . . 42
7 – DIAGNOSTICS . . . . . . . . . . . . . . . . . . . . . . . . . . . . . . . . . . . . . . . . . . . . . . . . . . . . . . . . . 43
7.1 DIAGNOSTICS . . . . . . . . . . . . . . . . . . . . . . . . . . . . . . . . . . . . . . . . . . . . . . . . . . . . . . 44
7.2 SYSTEMLOG . . . . . . . . . . . . . . . . . . . . . . . . . . . . . . . . . . . . . . . . . . . . . . . . . . . . . . . . 45
7.3 3GNETWORKSTATUS . . . . . . . . . . . . . . . . . . . . . . . . . . . . . . . . . . . . . . . . . . 46
7.4 STATISTICS . . . . . . . . . . . . . . . . . . . . . . . . . . . . . . . . . . . . . . . . . . . . . . . . . . . . . . . . . . 47
7.4 .1 LANSTATISTICS . . . . . . . . . . . . . . . . . . . . . . . . . . . . . . . . . . . . . . . 47
7.4 .2 3GNETWORKSTATISTICS . . . . . . . . . . . . . . . . . . . . . . . . . 48
7.5 ROUTE . . . . . . . . . . . . . . . . . . . . . . . . . . . . . . . . . . . . . . . . . . . . . . . . . . . . . . . . . . . . . . . . . 48
7.6 ADDRESSRESOLUTIONPROTOCOL (ARP) . . . . . . . . . . . . . 49
7.7 DYNAMICHOSTCONFIGURATIONPROTOCOL
(DHCP) . . . . . . . . . . . . . . . . . . . . . . . . . . . . . . . . . . . . . . . . . . . . . . . . . . . . . . . . . . . . . 49
7.8 P ING . . . . . . . . . . . . . . . . . . . . . . . . . . . . . . . . . . . . . . . . . . . . . . . . . . . . . . . . . . . . . . . . . . . . 49
Table of Contents

Introduction
Introduction
CHAPTER-14
Introduction

5
Etisalat HSPA+ WiFi Router USERGUIDE
Introduction
1.1 Features• Combines Et i sa lat Broadbandserv ice , WiF i andEthernet Router in onedevice
• Tr i-bandHSPA+/UMTS (850/1900/ 2100Mhz)
• Embeddedmult imodeHSUPA/HSDPA/HSPA+/UMTSmodule
• 2x USB2 .0host ports
• WEP/WPA/WPA2and802.1x
• MACaddress and IPf i l ter ing
• Stat ic route funct ions
• DNSProxy
• Integrated802.11nAP (backwardcompat ib le with802.11b/g)
• CLI command interface
• Web-basedmanagement
• Supports VPNPass-through
• NAT/PAT
• DHCPServer/Relay/Cl ient
• Conf igurat ionbackupandrestorat ion
1.2 Package ContentsYourpackagecontains thefo l lowing:
• Et isa lat HSPA+ WiFi Router
• Pr intedQuickStart Guide
• CD (ContainingUser Guide)
• Ethernet Cable
• Secur i ty Card
• Power Supply

6
Etisalat HSPA+ WiFi Router USERGUIDE
1.3 LED IndicatorsTheLED indicators are expla ined inthetable below.
LED Icon Color Mode Descr ipt ion
High
Green On Highs ignal strength
Off Noact iv i ty, Router poweredoff or onother s ignal strength
Med Green On Mediums ignal strength
Off Noact iv i ty. TheRouter i s poweredoff or i s current ly us inganother s ignal strength
Low Green On Lows ignal strength
Off Noact iv i ty. TheRouter i s poweredoff or i s current ly us inganother s ignal strength
3G
Green On Connect ionestabl i shedwiththe3Gnetwork
Off Either there is no activity, the Router is powered off , or there is no cableornopowereddeviceconnectedtotheassociatedport
Bl ink Connect ingwith3Gnetwork
2G Green On Connect ionestabl i shedwiththe2Gnetwork
Off Either there is no activity, the Router is powered off , or there is no cableornopowereddeviceconnectedtotheassociatedport
Bl ink Connect ingwith2Gnetwork
LAN 1~4 Green On PowereddeviceconnectedtotheassociatedLANport ( inc ludesdevices withWake-on-LANcapabi l i ty wherea s l ight voltage i ssuppl iedtoanEthernet connect ion)
Off Nodeviceconnectedor Connecteddevice i s off
Bl ink LANact iv i ty present ( t raff ic in e i ther d i rect ion)
Internet
Green On Internet connect ionestabl i shed
Off No connect ion to the internet or Router powered off
Bl ink DataiscurrentlybeingtransmittedthroughtheInternetconnection
WiFi
Green On Local WiF i access totheRouter i s enabledandworking
Off Local WiF i access totheRouter i s d isabled
Bl ink Databeingtransmittedor receivedover WiF i .
POWER
Green On Power on
Off Power off
1.4 PanelsTherear ands idepanels shownbelowcontaintheports for dataandpowerconnect ions .
67
1
2
34
5
(1) S IMcards lot
(2) Four RJ-45Ethernet LANports
(3) Reset button
(4) Power jackfor DCpower input (12VDC/ 1 .5A) .
(5) External 3GSMAConnector (Opt ional )
Note: TheExternal 3GConnector a l lowsyoutop lug inanexternal 3Gantenna (not provided) andse lect i t as the
main3Gs ignal input . Bydefault , thegatewayobtains a stable 3Gs ignal f romthe internal antennas (bui l t- in
thegateway) . For moredetai l s p leaserefer toChapter 4 .2 S ignal Se lect ion .
(6 ) TwoUSBPr inter/HardDr iveports
(7) Powerbutton
Introduction

7
Advanced
This chapter explains advanced setup for your Router:
CHAPTER-2

8
Etisalat HSPA+ WiFi Router USERGUIDE
2.1 TCP/IP SETTINGSI t i s l ike ly that your computer wi l l automatica l ly obtainan
IP Address and jo inthenetwork .
This i s because the Dynamic Host Conf igurat ion Protocol
(DHCP) server (on thedevice) wi l l s tart automatica l ly when
your Router powers up .
This automatic ass ignmentrequires that DHCPis conf igured
onyourcomputers . I t i s l ike ly that this i s a l ready thecase ,
but shouldyouberequiredtoconf igurethis , p leaseseethe
instruct ionsonthefo l lowingpage .
W I N D O W S X PTo access the d ia log box that a l lows you to conf igure
your network connect ion, c l ick on Start > Control Panel >
Network Connect ions . Then r ight mouse c l ick on the Local
Area Connect ion and se lect Propert ies . Se lect Internet
Protocol (TCP/ IP) thense lect Propert ies
DHCPMODE
Youcanset yourPCtoDHCPmodebyse lect ingObtainanIP
address automatica l ly in thed ia logboxshownbelow.
STATIC IP MODE
The fol lowing steps show how to ass ign a Stat ic IP address
toyourPCus ingsubnet192.168.1 .x
1: Change the IP address to the domain of 192.168.1 .x
(1<x<254) withsubnetmaskof 255.255.255.0 .
2 : Set the default Router and DNS server to the Router ’s
IP address .
NOTE: The IP address of theRouter i s 192.168.1 .1 . (Default ) , so thePCmust
beset witha d ifferent IP. In thecasebelow, thePC’s IP address i s
set as 192.168.1 .2
3: C l ick Oktosubmit thesett ings .
Advanced

9
Etisalat HSPA+ WiFi Router USERGUIDE
M A C O S X 10.46To access the d ia log box that a l lows you to conf igure your
network connect ion. Browse to the Apple menu and se lect
SystemPreferences . FromtheSystemPreferences menu, c l ick
theNetwork iconandthense lect theEthernet connect ion.
DHCPMODE
You can set yourMac to DHCP by se lect ing DHCP from the
Conf igure drop down l i s t . After c l ick ing Apply, your Mac’s
IP Address wi l l now be automatica l ly ass igned from the
Router.
STATICMODE
1. From the Conf igure drop down l i s t , you can set your
computer to Stat ic IP mode by se lect ing the opt ion
Manual ly.
The fol lowing steps show how to ass ign a Stat ic IP address
to your Mac
2. ChooseanIP address between192.168.1 .2–192.168.1 .254
(DonotchoosetheRouter IP of 192.168.1 .1) . enter th is
IP address into the f ie ld marked IPAddress , andenter a
SubnetMaskof 192.168.1 .1
3. Set theRouter andDNS server f ie ld to192.168.1 .1 (The
Router ’s IP address ) .
NOTE: The IP address of theRouter i s 192.168.1 .1 . (default ) , so the
computer must beset witha d ifferent IP totheRouter. In thecase
below, thePC’s IP address i s set as 192.168.1 .2
4. C l ick Apply tosubmit thesett ings .
WINDOWS VISTA/7Toaccess thed ia logboxthat a l lowsyoutoconf igure
yournetworkconnect ion, c l ick onStart >Control Panel
>Networkandshar ingcenter andse lect ManageNetwork
Connect ion. (For Windows7 , c l ick onchangeadapter
sett ings) . Thenr ight mousec l ick ontheLocal Area
Connect ionandse lect Propert ies . Se lect Internet Protocol
(TCP/ IP) thense lect Propert ies
Advanced

10
Etisalat HSPA+ WiFi Router USERGUIDE
DHCPMODE
Youcanset yourPCtoDHCPmodebyse lect ingObtainanIP
address automatica l ly in thed ia logboxshownbelow.
STATIC IP MODE
To conf igure your Router manual ly, your PC must have a
stat ic IP address within the Router ’s subnet . The fo l lowing
steps show how to ass ign a Stat ic IP address to your PC
us ingsubnet192.168.1x
1: Se lect Usethefo l lowingIPAddress . ChooseanIP address
between192.168.12–192.168.1 .254
NOTE: The Ip address of theRouter i s 192.168.1 .1 (default ) , so thePCmust
beset witha d ifferent Ip . In thecasebelow, thePC’s IP address i s
set as 192.168.2
2: Set theRouter andDNS server f ie ld to192.168.1 .1 (The
Router ’s IP address ) .
3. C l ick Oktoapply thesett ings .
2.2 Default SettingsThefol lowingarethedefault sett ings for theRouter
• Local (LAN)access (username: admin, password: admin)
• Remote (WAN) access (username: support , password:
support )
• User access (username: user, password: user )
• LAN IPaddress : 192.168.1 .1
• RemoteWANaccess : d isabled
• NATandf i rewal l : enabled
• Dynamic Host Conf igurat ion Protocol (DHCP) server on
LAN interface: enabled
Technical Note:
Dur ingpoweron, thedevice in i t ia l izes a l l sett ings todefault va lues . I t wi l l
thenreadtheconf igurat ionprof i le f romthepermanentstoragesect ionof
f lashmemory. Thedefault attr ibutes are overwrittenwhen ident ica l attr ibutes
withd ifferent values areconf igured. Theconf igurat ionprof i le in permanent
storagecanbecreatedv ia thewebuser interfaceor te lnet user interface ,
or other managementprotocols . Thefactorydefault conf igurat ioncanbe
restorede i ther bypushingthereset buttonfor morethanf ivesecondsunt i l
thepowerLEDbl inks or byc l ick ingtheRestoreDefault Conf igurat ionopt ion
intheRestoreDefault Sett ings screen (seesect ion6 .7 .3) .
Advanced

11
Etisalat HSPA+ WiFi Router USERGUIDE
2.3 Login ProcedureTo logintotheweb interface , fo l lowthesteps below:
NOTE: Thedefault sett ings canbefound in3 .3 Default Sett ings .
1 : Open a web browser and enter the default IP address
for the Router in the Web address f ie ld . In this case
http: / /192.168.1 .1
NOTE: For remoteaccess , usetheWANIPaddress shownontheWUI
Homepagescreenand loginwithremoteusernameandpassword.
2 : Ad ia logboxwi l l appear, as i l lustratedbelow. enter the
default username and password, as def ined in sect ion
3.3Default Sett ings .
C l ick Oktocont inue .
NOTE: The loginpasswordcanbechanged later ( see6 .8 .2 Passwords)
Advanced

12
Basic
This chapter explains basic setup for your Router:
CHAPTER-3

13
Etisalat HSPA+ WiFi Router USERGUIDE
3.1 WEB USER INTERFACE HOMEPAGEThewebuser interface(WUI) i s d iv idedintotwowindowpanels , themainmenu(onthetop)
and the disp lay screen (on the bottom) . The main menu has the fo l lowing opt ions: Bas ic ,
HSPA/3GSett ings , WiF i , AdvancedSett ings andDiagnost ics .
Se lect ing one of these opt ionswi l l open a submenuwithmore opt ions . Bas ic i s d iscussed
belowwhi le subsequentchapters introducetheother mainmenuse lect ions .
NOTE: Themenuopt ionsavai lable withinthewebuser interfacearebaseduponthedeviceconf igurat ionanduser
pr iv i leges ( i .e . local or remote) .
BASIC
TheBas ic screeni s theWUIhomepageandthef i rst se lect iononthemainmenu. I t provides
informationregardingthef i rmware , 3G, and IPconf igurat ion.
Thefo l lowingtable provides further deta i l s .
Option Descr ipt ion
Model Name The model name of the device .
Board ID The Hardware vers ion of the device
Bootloader vers ion Theboot loader vers ionof thedevice .
Router F i rmware vers ion The f i rmware vers ion of the device .
Wire less dr iver vers ion The wire less dr iver vers ion of the wire less module .
Mac Address TheMACaddress of thedevice ’s LANconnect ion interface
Ser ia l Number Theser ia l numberof thedevice
Network Thenameof or other referencetothemobi le network
operator.
L ink Shows the connect ion status of the current connect ion.
Mode Theradioaccess techniquecurrent ly usedtoenable internet
access . I t canbeHSUPA, HSDPA, UMTS, or Disconnected .
S ignal strength Themobi le network (UMTS) s ignal qual i ty avai lable
at thedevice locat ion. This s ignal qual i ty affects the
performanceof theunit . I f twoor morebars are green,
theconnect ion i s usual ly acceptable .
SIM info Shows the SIM card status on the device .
LAN IP Address Shows the IP address for LAN interface .
WAN IP Address Shows the IP address for WAN interface .
Pr imaryDNSServer Showsthe IP address of thepr imaryDNSserver.
SecondaryDNSserver Showsthe IP address of thesecondaryDNSserver.
Date/T ime Thet imeaccordingtothedevice ’s internal c lock
Basic

14
Settings
This menu includes Etisalat service Setup and PIN Configuration.
CHAPTER-4

15
Etisalat HSPA+ WiFi Router USERGUIDE
This menu inc ludes Et i sa lat serv ice Setup.
NOTE: Sect ions8 .3 and8 .4 .2 a lsoprovide informationabouttheEt i sa lat
serv ice .
4.1 Etisalat SERVICE SETUPSelect your serv ice sett ings according to predef ined or
custom prof i les .
Setup instruct ions are provided in the fo l lowing sect ions
for your ass i stance .
4.1 .1 PROFILESETUP
Et isa lat wi l l provide the information required to complete
thef i rst t imesetupinstruct ionsbelow. Only completethose
steps for whichyouhave informationandsk iptheothers .
The Modify Prof i les l ink enables you to enter a custom
3G network setup. To add a custom prof i le , c l ick the add
button and enter the appropr iate 3G network information
as suppl iedbyyourprovider.
1. I f your SIM card i s not inserted into the Router, p lease
turn the Router off . Then insert the SIM and turn the
Router on.
2 . To connect to Et i sa lat ’s 3G network p lease se lect the
Et i sa lat UAE prof i le with the Et i sa lat ’s APN as et isalat .ae . Authent icat ion Method should be provided by
Et i sa lat ; or just leave i t set to AUTO i f not required . I f
you have not received the username and password, leave
these f ie lds empty.
3 . Se lect IP compress ionandDatacompress ion tobeONor
OFF. Bydefault theyareset tooff .
4. C l ick theSavebuttontosavethenewsett ings .
5 . Press the Connect button to connect to Internet . The
Device Info for 3Gnetworkbox in theWUIBas ic screen
should indicate an act ive connect ion, as shown below.
The 3G and Internet LEDs on the front panel of the
Router shoulda lsobeb l ink ing.
If theLEDsareoff , theneitheryourprofi lesett ingsare
incorrect , theSIMcard is notworkingortheservicenetwork is
unavai lable . Ineithercase, contactTechnical Supportforfurther
instructions.
4.2 Antenna SelectionAl lows the end user the se lect the 3G s ignal input from
external antennas (not provided) . I t a l so provides a s ignal
strengthcompar isonbetweentheinternal antennasandthe
external antennas .
Settings

16
WIFI
Etisalat
CHAPTER-5

17
Etisalat HSPA+ WiFi Router USERGUIDE
The WiF i submenu provides access to Wire less Local Area
Network (LAN)conf igurat ionsett ings inc luding:
• Wire less networkname
• Channel restr ict ions (basedoncountry)
• Secur i ty
• Access point or br idgingbehaviour
• Stat ion information
5.1 SETTINGSThis screen a l lows you to conf igure bas ic features of the
wire less LAN interface . You can enable or d isable the
wire less LAN interface , h ide thenetwork fromact ive scans ,
set the wire less network name (a lso known as SSID) and
restr ict thechannel set basedoncountryrequirements . The
Wire less Guest Network funct ion adds extra networking
secur i ty whenconnect ingtoremotehosts .
WIFI

18
Etisalat HSPA+ WiFi Router USERGUIDE
Option Description
EnableWiFi Acheckboxthat enables or d isables thewire less LAN interface . Whense lected , theWebUI d isp lays HideAccess point , SSID, andCountysett ings . Thedefault i s EnableWiFi .
EnableSSIDBroadcast
Deselect Enable SSIDBroadcast toprotect theaccess point fromdetect ionbywire less act ive scans .
TocheckAPstatus in WindowsXP, openNetworkConnect ionsfromtheStart Menuandse lect V iewAvai lable NetworkConnect ions . I f theaccess point i s h idden, i twi l l not be l i s tedthere . Toconnect a c l ient toa h iddenaccess point , thestat ionmust addtheaccess point manual ly to i ts wire less conf igurat ion.
ClientsIsolation
1. Prevents c l ients PCfromseeingoneanother in MyNetworkP laces or NetworkNeighborhood.
2 . Prevents onewire less c l ient communicat ingwithanother wire less c l ient .
SSID Sets thewire less networkname. SSIDstandsfor Serv iceSet Ident if ier. A l l s tat ionsmust beconf iguredwiththecorrect SSIDtoaccess theWLAN. I f theSSIDdoesnot match, that user wi l l not begrantedaccess .
Thenamingconvent ionsare: Minimumnumberof characters : 1 , maximumnumberof characters : 32 .
BSSID TheBSSID i s a 48bit ident i ty usedto ident ify a part icular BSS (Bas ic Serv iceSet )withinanarea . In InfrastructureBSSnetworks , theBSSID i s theMAC(MediumAccess Control ) address of theAP (Access Point ) and in IndependentBSSor adhocnetworks , theBSSID i s generatedrandomly.
Country Adrop-downmenuthat permits wor ldwideandspecif ic nat ional sett ings . Eachcounty l i s ted inthemenuenforces specif ic regulat ions l imit ingchannel range:US=worldwide , Japan=1-14, Jordan=10-13, I s rae l=1-13
MaxClients Themaximumnumberof c l ients that canaccess therouter.
Wireless - Guest/VirtualAccess Points
This router supports mult ip le SSIDsca l ledGuest SSIDsor V i rtual Access Points . Toenable oneor moreGuest SSIDsse lect theradiobuttonsunder theEnable heading.Tohidea Guest SSID, se lect i t s radiobuttonunder theHiddenheading.
Dothesamefor I so lateCl ient andDisable WMMAdvert i se funct ions . For adescr ipt ionof thesetwofunct ions , seetheentr ies for “Cl ient I so lat ion” and“Disable WMMAdvert i se” in this table . S imi lar ly, for MaxCl ients andBSSIDheadings , consult thematchingentr ies in this table . NOTE: Remotewire less hostsare unable toscanGuest SSIDs .
5.2 SECURITYThis Router inc ludes a numberof opt ionstohelpprovidea secureconnect iontotheEt i sa lat
Network .
Secur i ty features inc lude:
• WEP / WPA / WPA2 data encrypt ion
• SPI F i rewal l
• VPNPass-Through
• MACaddress IP f i l ter ing
• Authent icat ionprotocols – PAP/ CHAP
Youcanauthent icateor encrypt yourserv iceontheWiF i ProtectedAccess a lgor i thm, which
provides protect ionagainst unauthor izedaccess suchas eavesdropping.
The fo l lowing screen appears when Secur i ty i s se lected . The Secur i ty page a l lows you to
conf iguresecur i ty features of yourRouter ’s wire less LANinterface . Youcanset thenetwork
authent icat ionmethod, se lect data encrypt ion, specify whether a network key i s required
toauthent icatetothis wire less networkandspecify theencrypt ionstrength.
Cl ick Save/Apply toconf igurethewire less secur i ty opt ions .
WIFI

19
Etisalat HSPA+ WiFi Router USERGUIDE
Option Descr ipt ion
Select SSID YourServ iceSet Ident if ier (SSID) , sets your Wire less NetworkName.Youcanconnect mult ip le devices inc ludingLaptops , DesktopPCsandPDAstoyourWire less Router. Toget addit ional devices connected ,scanfor a network , and locatetheSSIDshownonyourWire lessSecur i ty Card . I f theSSIDdoes not match, access i s denied .
NetworkAuthent icat ion This opt ion i s usedfor authent icat iontothewire less network . Eachauthent icat iontypehas i t s ownsett ings . For example , se lect ing802.1Xauthent icat ionwi l l reveal theRADIUSServer IP address , Portandkeyf ie lds .
WPA-Pre-SharedKey I t i s useful for smal l p laces without authent icat ion servers such as thenetworkat home. I t a l lowstheuseof manual ly-enteredkeys orpasswordsand i s des ignedtobeeas i ly set upfor homeusers .
WPAEncrypt ion: Select the data encrypt ion method for the WPA mode. There are three types that youcanchoose , TKIP, AES, TKIP+AES.
TKIP (TemporaryKey Integr i ty Protocol ) takes theor ig inal masterkeyonly as a start ingpoint andder ives i t s encrypt ionkeysmathematica l ly f romthis master key. Then i t regular ly changesandrotates theencrypt ionkeys sothat thesameencrypt ionkeywi l lnever beusedtwice .
AES (AdvancedEncrypt ionStandard) provides secur i ty betweenc l ient workstat ionsoperat ing inadhocmode. I t uses a mathematica lc ipher inga lgor i thmthat employs var iable keys izes of 128, 192or256bits .
TKIP+AEScombinethefeatures andfunct ionsof TKIPandAES.
5.3 CONFIGURATIONThe fol lowing screen appears when you se lect Conf igurat ion. This screen a l lows you to
control theadvancedfeatures of theWire less Local AreaNetwork (WLAN) interface:
• Select the channel which you wish to operate from
• Force the transmiss ion rate to a part icular speed
• Set thefragmentat ionthreshold
• Set the RTS threshold
• Set thewake-up interval for c l ients in power-savemode
• Set thebeacon interval for theaccess point
• Set Xpress mode
• Programshort or longpreambles
Cl ick Save/Apply toset theadvancedwire less conf igurat ion.
WIFI

20
Etisalat HSPA+ WiFi Router USERGUIDE
Option Descr ipt ion
Band Thenewamendmenta l lows IEEE802.11gunits tofa l l backtospeedsof 11Mbps ,so IEEE802.11band IEEE802.11gdevices cancoexist in thesamenetwork . Thetwostandards apply tothe2 .4GHzfrequencyband. IEEE802.11gcreates data-ratepar i ty at 2 .4 GHzwiththe IEEE802.11astandard , whichhas a 54Mbpsrateat 5GHz. ( IEEE802.11ahas other d ifferences comparedto IEEE802.11bor g ,suchas offer ingmorechannels . )
Channel Drop-downmenuthat a l lowsse lect ionof a specif ic channel .
AutoChannelT imer (min)
Autochannel scant imer in minutes (0 tod isable)
802.11n/EWC Withdrop-downmenu, “Auto” i s for 11nand“Disable” i s for 11g
Bandwidth Drop-downmenuspecif ies thefo l lowingbandwidth: 20MHzand40MHz.
ControlS ideband
This i s avai lable for 40MHz. Drop-downmenual lowsse lect ingupper s idebandorlowers ideband
802.11nRate Drop-downmenuspecif ies thefo l lowingf ixedrates . Themaximumrateforbandwidth , 20MHz, i s 130MHzandthemaximumbandwidth , 40MHz, i s 270MHz
802.11nProtect ion
I t i s s imi lar as 802.11gprotect ion. In Automodetherouter wi l l useRTS/CTSto improve802.11nperformance inmixed802.11n/ 802.11g/ 802.11bnetworks .Turnprotect ionoff tomaximize802.11nthroughputunder most condit ions .
Support 802.11nc l ientonly
Drop-downmenual lowsse lect ing“On/Off”. Choos ing“On”a l lowsthec l ient with11nonly toconnect , not for 11gor 11b; choos ing“Off” a l lowsthec l ient with11n/11g/11btoconnect
54gRate Drop-downmenuthat specif ies thefo l lowingf ixedrates : Auto: Default . Usesthe11Mbpsdataratewhenposs ib le but dropsto lowerrates whennecessary. 1 Mbps , 2Mbps , 5 .5Mbps , or 11Mbpsf ixedrates . Theappropr iatesett ing i sdependentons ignal strength.
Mult icast Rate Sett ingmult icast packet transmit rate .
Bas ic Rate Sett ingbas ic t ransmit rate .
Fragmentat ionThreshold
Athreshold , specif ied inbytes , that determines whether packets wi l l befragmentedandat whats ize . Onan802.11WLAN, packets that exceedthefragmentat ionthresholdarefragmented, i .e . , sp l i t into , smal ler units su itablefor thec i rcuit s ize . Packets smal ler thanthespecif iedfragmentat ionthresholdvaluearenot fragmented. Enter a va luebetween256and2346. I f youexper ienceahighpacket error rate , t ry tos l ight ly increaseyourFragmentat ionThreshold . Thevalueshouldremainat i t s default sett ingof 2346. Sett ingtheFragmentat ionThresholdtoo lowmayresult in poorperformance .
RTS Threshold Request toSend, whenset in bytes , specif ies thepacket s ize beyondwhichtheWLANCard invokes i t s RTS/CTSmechanism. Packets that exceedthespecif iedRTSthresholdtr igger theRTS/CTSmechanism. TheNICtransmits smal ler packetwithoutus ingRTS/CTS . Thedefault sett ingof 2347 (maximumlength) d isablesRTS Threshold .
DTIMInterval Del iveryTraff ic Indicat ionMessage (DTIM) , a l soknownas BeaconRate . Theentry range i s a va luebetween1and65535. ADTIM is a countdown informingc l ients of thenext windowfor l i s teningtobroadcast andmult icast messages .WhentheAPhas bufferedbroadcast or mult icast messages for associatedc l ients , i t sendsthenext DTIMwithaDTIMInterval va lue . APCl ients hearthebeaconsandawakentoreceivethebroadcast andmult icast messages . Thedefault i s 1 .
Beacon Interval Theamountof t imebetweenbeacontransmiss ions . Eachbeacontransmiss ionident if ies thepresenceof anaccess point . Bydefault , radioNICs pass ive lyscana l l RFchannels and l i s tenfor beaconscomingfromaccess points tof indasuitable access point . Beforea stat ionenters powersavemode, thestat ionneedsthebeacon interval toknowwhentowakeuptoreceivethebeacon(and learnwhether therearebufferedframesat theaccess point ) . Theenteredvalue i s represented inms . Default i s 100. Acceptable entry range i s 1 to0xffff(65535)
Global MaxCl ients
Thedevicecansupport 4SSID, andeachSSIDcanset i t s ownmaxc l ients , buti t can’t beb igger thanGlobal maxc l ients . “Global MaxCl ients” l imits thetota lassociatedc l ients of the4SSID.
Xpress TM Technology
XpressTMTechnology i s compl iant withdraft specif icat ionsof twoplannedwire less industry standards .
Transmit Power Therouter wi l l set d i fferent poweroutput (bypercentage) accordingtothisse lect ion .
WIFI

21
Etisalat HSPA+ WiFi Router USERGUIDE
5.4 MAC FILTERThis screenappears whenMediaAccess Control (MAC)F i l ter i s se lected . This opt iona l lows
access toberestr ictedbasedupontheunique48-bit MACaddress .
ToaddaMACAddress f i l ter, c l ick theAddbuttonshownbelow.
Todeletea f i l ter, se lect i t f romthetable belowandc l ick theRemovebutton.
Option Descr ipt ion
MACRestr ict
Mode
Disabled–Disables MACf i l ter ing
Al low–Permits access for thespecif iedMACaddresses .
NOTE: Addawire less device ’s MACaddress beforec l ick ingtheAl lowradiobutton
or e l se youwi l l needtoconnect totheRouter ’s webuser interfaceus ingthe
suppl iedye l lowEthernet cable andaddthewire less device ’s MACaddress .
Deny–Rejects access for thespecif iedMACaddresses
MACAddress L ists the MAC addresses subject to the MAC Restr ict Mode. The
Add button prompts an entry f ie ld that requires you type in a
MAC address in a two- character, 6-byte convent ion: xx:xx:xx:xx:
xx:xx where xx are hexadecimal numbers . A maximum of 60 MAC
addresses canbeadded.
Enter theMACaddress onthescreenbelowandc l ick Save/Apply.
5.5 WIRELESS BRIDGEThefol lowingscreenappears whense lect ingWire less Br idge , andgoes intoa deta i led
explanat ionof howtoconf igurewire less br idgefeatures of thewire less LAN interface .
Cl ick Save/Apply to implementnewconf igurat ionsett ings .
Option Description
AP Mode Select ing Wire less Br idge (Wire less D is t r ibut ion System) d i sab les Access Po int (AP) funct ional i ty whi le se lect ing Access Po int enables AP funct ional i ty. In Access Po int mode , wi re less br idge funct ional i ty wi l l s t i l l be ava i lab le and wire less s tat ions wi l l be ab le to assoc iate to the AP.
BridgeRestr ict Select ing Disab led in Br idge Restr ic t d i sab les Wire less Br idge rest r ic t ion , which means that any wire less br idge wi l l be granted access. Se lect ing enabled or enabled (Scan) a l lows wire less br idge rest r ic t ion . Only those br idges se lected in Remote Br idges wi l l be granted access. C l ick Refresh to update the s tat ion l i s t when Br idge Restr ic t i s enabled .
WIFI

22
Etisalat HSPA+ WiFi Router USERGUIDE
5 . 6 S TATION INFOThe fol lowing screen appears when you se lect Stat ion Info , and shows authent icated
wire less stat ions and their status . C l ick the Refresh button to update the l i s t of stat ions
in the WLAN
Option Description
BSSID The BSSID i s a 48-b i t ident i ty used to ident i fy a part icu lar BSS (Bas ic Serv ice Set ) with in an area . In Inf rast ructure BSS networks, the BSSID i s the MAC (Media Access Contro l ) address of the AP (Access Po int ) ; and in Independent BSS or ad hoc networks, the BSSID i s generated randomly.
Associated L i s ts a l l the s tat ions that are assoc iated with the Access Po int , a long with the amount of t ime s ince packets were t ransferred to and f rom each stat ion . I f a s tat ion i s id le for too long , i t i s removed f rom th is l i s t .
Authorized L i s ts those dev ices with author ized access.
WIFI

23
Advanced
This chapter explains advanced setup for your Router:
CHAPTER-6

24
Etisalat HSPA+ WiFi Router USERGUIDE
6.1 LOCAL AREA NETWORK (LAN)This screen a l lows you to conf igure the Local Area Network (LAN) interface on your
Router
Seethef ie ld descr ipt ionsbelowfor moredetai l s .
NOTE : I f youchangeyourRouter ’s IP address ( f i rst opt iononthechart ) , the insta l lat ionsoftware/connect ion
manager maynotbeable tocommunicatewiththeRouter. P leasereset theRouter ’s IP address to192.168.1 .1
i f th is occurs .
Opt ion Descr ipt ion
IP Address Enter the IP address for the LAN interface
SubnetMask Enter thesubnetmaskfor theLAN interface
Enable Internet Group
ManagementProtocol
( IGMP)Snooping
Enablebyt ick ingtheboxStandardMode: In standardmode, mult icastt raff ic wi l l f loodtoa l l br idgeports whennoc l ient subscr ibes toamult icast group.
BlockingMode: In b lockingmode, themult icast datatraff ic wi l l beb locked. Whentherearenoc l ient subscr ipt ionstoa mult icast group, i twi l l not f loodtothebr idgeports .
Enable NAT Toenable/disable NetworkAddress Trans lat ion (NAT, p leaserefer to7 .2for NATsett ing) . Bydefault NAT i s enabled .
Enable UPnP Ticktheboxtoenable Universa l P lugandPlay
DynamicHost
Conf igurat ion
Protocol (DHCP)
Server
Select enable DHCPserver andenter yourstart ingandending IPaddresses andthe leaset ime. This sett ingconf igures theRouter toautomatica l ly ass ign IP, default Router andDNSserver addresses toeveryDHCPc l ient onyourLAN
Stat ic IP Lease L i st Tospecify the IP address ass ignedthroughDHCPaccordingtotheMACaddress of the hosts connected to the Router.
EnableDHCPServer
Relay
Tore layDHCPrequests f romthesubnetwithnoDHCPserver on i t toaDHCPserver onother subnets . DHCPServer Relay i s d isabledbydefault .Toaccess enable DHCPre lay, p leaseun-t ickNATenable f i rst , that meanstod isable NATf i rst , andthenpress savebutton. Theenable DHCPserverRelayopt ionwi l l thenshowuponthesamepageas below:
Conf igurea secondIPaddress byt ick ingthecheckboxshownbelowandenter thefo l lowing
information:
IP Address : Enter the secondary IP address for the LAN interface .
SubnetMask: Enter thesecondarysubnetmaskfor theLAN interface .
NOTE: TheSavebuttonsaves newsett ings toa l lowcont inuedconf igurat ion, whi le theSave/Rebootbuttonnotonly
saves newsett ings but a lsoreboots thedevicetoapply thenewconf igurat ion ( i .e . a l l newsett ings) .
Advanced

25
Etisalat HSPA+ WiFi Router USERGUIDE
6.2 NETWORK ADDRESS TRANSLATION (NAT)
6.2 .1 PORTFORWARDING
Port Forwarding a l lows you to d i rect incoming traff ic f rom the Internet s ide ( ident i f ied
by Protocol and External port ) to the internal server with a pr ivate IP address on the LAN
s ide . The Internal port i s required only i f the external port needs to be converted to a
d ifferent port numberusedbytheserver ontheLANs ide . Amaximumof32entr ies canbe
conf igured.
ToaddaPort Forwardingrule , c l ick theAddbutton. Thefo l lowingscreenwi l l d i sp lay.
Options Descr ipt ion
Select a Serv ice
OrCustomServer
User shouldse lect theserv icefromthe l i s t . Or create a custom server and enter a name for the server
Server IP Address Enter the IP address for the server.
External Port Start Enter thestart ingexternal port number (whenyouse lect CustomServer ) . Whenaserv ice i s se lectedtheport rangesareautomatica l lyconf igured.
External Port End Enter theendingexternal port number (whenyouse lect CustomServer ) . Whenaserv ice i s se lectedtheport rangesareautomatica l lyconf igured.
Protocol User canse lect f rom:TCP, TCP/UDPor UDP.
Internal Port Start Enter the internal port start ingnumber (whenyouse lect CustomServer ) . Whenaserv ice i s se lectedtheport rangesareautomatica l lyconf igured
Internal Port End Enter the internal port endingnumber (whenyouse lect CustomServer ) . Whenaserv ice i s se lectedtheport rangesareautomatica l lyconf igured.
Advanced

26
Etisalat HSPA+ WiFi Router USERGUIDE
6.2 .2 PORT TRIGGERING
Some appl icat ions require specif ic ports in the Router ’s f i rewal l to be open for access by
remotepart ies . Port Tr igger ingopensupthe‘OpenPorts ’ in thef i rewal l whenanappl icat ion
on the LAN in it iates a TCP/UDP connect ion to a remote party us ing the ‘Tr igger ing Ports ’.
The Router a l lows the remote party from theWAN s ide to establ i sh new connect ions back
to the appl icat ion on the LAN s ide us ing the ‘Open Ports ’. A maximum 32 entr ies can be
conf igured
ToaddaTr igger Port , s implyc l ick theAddbutton. Thefo l lowingwi l l bed isp layed.
Options Descr ipt ion
Select an Appl icat ion or
CustomAppl icat ion
User shouldse lect theappl icat ionfromthe l i s t . or User canenterthe name of their choice .
Tr igger Port Start Enter thestart ingtr igger port number (whenyouse lect customappl icat ion) . Whenanappl icat ion i s se lected , theport rangesareautomatica l ly conf igured.
Tr igger Port End Enter theendingtr igger port number (whenyouse lect customappl icat ion) . Whenanappl icat ion i s se lected , theport rangesareautomatica l ly conf igured.
Tr igger Protocol TCP, TCP/UDPor UDP.
Open Port Start Enter thestart ingopenport number (whenyouse lect customappl icat ion) . Whenanappl icat ion i s se lected , theport rangesareautomatica l ly conf igured.
Open Port End Enter theendingopenport number (whenyouse lect customappl icat ion) . Whenanappl icat ion i s se lected , theport rangesareautomatica l ly conf igured.
Open Protocol TCP, TCP/UDPor UDP.
6 .2 .3 DEMILITARIZED(DMZ)HOST
YourRouter wi l l forwardIP packets f romtheWideAreaNetwork(WAN)that donot belongto
anyof theappl icat ionsconf igured intheVirtual Servers table totheDMZhost computer.
Enter thecomputer ’s IP address andc l ick Apply toact ivatetheDMZhost .
C lear the IP address f ie ld andc l ick Apply todeact ivatetheDMZhost .
Advanced

27
Etisalat HSPA+ WiFi Router USERGUIDE
6.3 SECURITYYourRouter canbesecuredwiththe IP F i l ter ingfunct ion.
6.3 .1 IP F ILTERING
TheIP F i l ter ingscreensets f i l ter ru les that l imit incomingandoutgoingIPtraff ic . Mult ip le
f i l ter ru les canbeset withat least one l imit ingcondit ion . Al l condit ions must befulf i l led
toa l low indiv idual IP packets topass throughthef i l ter.
OUTGOINGIPF ILTER
Thedefault sett ingfor Outgoingtraff ic i s ACCEPTED. Under this condit ion , a l l outgoing IP
packets that matchthef i l ter ru les wi l l beBLOCKED.
Toaddaf i l ter ingrule , c l ick theAddbutton. Thefo l lowingscreenwi l l d i sp lay.
Options Descr ipt ion
Fi l ter Name Thef i l ter ru le label
Protocol TCP, TCP/UDP, UDPor ICMP
Source IP address Enter source IP address
SourceSubnetMask Enter sourcesubnetmask
SourcePort (port or port :port ) Enter sourceport numberor port range
Dest inat ion IP address Enter dest inat ion IP address
Dest inat ionSubnetMask Enter dest inat ionsubnetmask
Dest inat ionport (port or port :port ) Enter dest inat ionport numberor range
Cl ick Save/Apply tosaveandact ivatethef i l ter.
Advanced

28
Etisalat HSPA+ WiFi Router USERGUIDE
INCOMINGIPF ILTER
The default sett ing for a l l Incoming traff ic i s BLOCKED. Under this condit ion only those
incoming IPpackets that matchthef i l ter ru les wi l l beACCEPTED.
Toaddaf i l ter ingrule , c l ick theAddbutton. Thefo l lowingscreenwi l l d i sp lay.
P leaserefer totheOutgoing IPF i l ter table for f ie ld descr ipt ions .
Cl ickSave/Apply tosaveandact ivatethef i l ter.
6.4 ROUTINGStat ic Route and Dynamic Route sett ings can be found in the Rout ing l ink as i l lustrated
below.
6 .4 .1 STATICROUTE
The Stat ic Route screen disp lays the conf igured stat ic routes . C l ick the Add or Remove
buttonstochangesett ings .
C l ick theAddbuttontod isp laythefo l lowingscreen.
Enter Dest inat ionNetworkAddress , SubnetMask , Router IP Address and/or WANInterface .
Thenc l ick Save/Apply toaddtheentry totherout ingtable .
Advanced

29
Etisalat HSPA+ WiFi Router USERGUIDE
Advanced
6.4 .2 DYNAMICROUTE
Toact ivatethis opt ion, se lect theenabledradiobuttonfor Global RIPMode.
Toconf igureanindiv idual interface , se lect thedes i redRIPvers ionandoperat ion, fo l lowed
byplac ingacheckintheenabledcheckboxfor that interface . C l ick Save/Apply tosavethe
conf igurat ionandtostart or stopdynamicrout ing .
6.5 PARENTAL CONTROL
6.5 .1 T IMERESTRICTION
Time Restr ict ion a l lows you to restr ict access f rom a device on your Local Area network
(LAN) to the Internet through the Router on se lected days at certa in t imes . Make sure to
act ivatetheInternet T imeserver synchronizat ionas descr ibedinsect ion7 .10SNTP, sothat
the scheduled t imes match your local t ime.
Cl ick Add to d isp lay the fo l lowing screen. Enter the MAC address of the device that you
wishtorestr ict access for andse lect days of theweekandt imestoapply therestr ict ion

30
Etisalat HSPA+ WiFi Router USERGUIDE
Advanced
Completethef ie lds l i s tedbelowandc l ick Save/Apply toapply thesett ings .
Options Descr ipt ion
User Name Auser-def ined label for th is restr ict ion
Browser ’s MACAddress Al lowseasy ident if icat ionof MACaddress of thecomputer runningtheBrowser
Other MACAddress MACaddress of another LANdevice
Days of theWeek Select one or more days for the restr ict ions to apply to .
Start B lockingT ime Enter the t ime you want the restr ict ion to start
EndBlockingT ime Enter the t ime you want the restr ict ion to end
6.5 .2 URLF ILTER
TheURLF i ler a l lowsyoutorestr ict access f romadeviceonyourLocal AreaNetwork (LAN)
tocerta inwebs ites onthe internet .
Tousethis feature , f i rst se lect whether toAl lowor BlocktheURL l i s t . I f Al lowis se lected ,
only theURL addresses l i s ted in the table wi l l be access ib le to the computers on the LAN.
I f B lock i s se lected , the URL addresses l i s ted in the table wi l l be b locked from computers
on the LAN.
ADDURLADDRESS
ToaddaURLaddress , c l ick Add, thencompletethef ie lds l i s tedbelowandc l ick Save/Apply
toapply thesett ings .
Options Descr ipt ion
URLAddress Select e i ther a URLaddress or a keywordtof i l ter. (e .g . www.badwebsite .com)
Port Number Either port 80or port 8080 i s accepted.
REMOVEURLADDRESS
ToremoveaURLaddress , se lect theURLkeywordyouwishtoremove, andc l ick Remove.

31
Etisalat HSPA+ WiFi Router USERGUIDE
Advanced
6.6 DOMAIN NAME SERVER (DNS)6.6 .1 DNSSERVERCONFIGURATION
If Enable Automatic Ass ignedDNSis se lected , th is devicewi l l accept thef i rst receivedDNS
ass ignment from the Wide Area Network (WAN) interface dur ing the connect ion process .
Otherwise , youcanenter thepr imaryandopt ional secondaryDNSserver IP addresses . C l ick
on Save to apply.
NOTE: Cl ick theSavebuttontosavethenewconf igurat ion. Tomakethenewconf igurat ioneffect ive , rebootyour
Router.
6.6 .2 DYNAMICDNS
TheDynamicDNSserv icea l lowsadynamic IP address tobea l iasedtoa stat ic hostname in
anyof a se lect ionof domains , a l lowingtheRouter tobemoreeas i ly accessedfromvar ious
locat ions on the internet .
NOTE : TheAdd/Removebuttonswi l l bed isp layedonly i f theRouter has beenass ignedan IP address f romtheremote
server.
ToaddadynamicDNSserv ice , c l ick theAddbuttonandthis screenwi l l d i sp lay
Options Descr ipt ion
D-DNSprovider Select a dynamicDNSprovider fromthe l i s t .
Hostname Enter thenamefor thedynamicDNSserver.
Interface Select the interface from the l i s t .
Username Enter theusernamefor thedynamicDNSserver.
Password Enter thepasswordfor thedynamicDNSserver.

32
Etisalat HSPA+ WiFi Router USERGUIDE
Advanced
6.7 DEVICE SETTINGSTheDeviceSett ings screensa l lowyoutobackup, retr ieveandrestorethedefault sett ings of
yourRouter. I t a l soprovides a funct ionfor youtoupdateyourRouter ’s sett ings .
6 .7 .1 BACKUPSETTINGS
Thefol lowingscreenappears whenBackup i s se lected . C l ick theBackupSett ings buttonto
savethecurrent conf igurat ionsett ings .
Youwi l l bepromptedtodef inethe locat ionof a backupf i le tosavetoyourPC.
6 .7 .2 UPDATESETTINGS
The fol lowing screenappears when se lect ingUpdate fromthe submenu. Byc l ick ingon the
Browsebutton, youcanlocatea previous ly savedf i lenameas theconf igurat ionbackupf i le .
C l ick ontheUpdatesett ings to load i t .
6 .7 .3 RESTOREDEFAULT
The fol lowing screen appears when se lect ing Restore Default . By c l ick ing on the Restore
Default Sett ings button, youcanrestoreyourGatewaysdefault f i rmwaresett ings . Torestore
systemsett ings , rebootyourRouter.
NOTE: Thedefault sett ings canbefound insect ion2 .3Default Sett ings .
Once you have se lected the Restore Default Sett ings button, the fo l lowing screen wi l l
appear. C lose the window and wait 2 minutes before reopening your browser. I f required ,
reconf igure
yourcomputer ’s IP address tomatchyournewconf igurat ion(seesect ion3 .2TCP/ IPSett ings
for deta i l s ) . After a successful reboot , thebrowser wi l l returntotheDevice Infoscreen. I f
thebrowser does not refreshtothedefault screen, c loseandrestart thebrowser.
NOTE: TheRestoreDefault funct ionhas thesameeffect as thereset button. I f thereset button i s cont inuously
pushedfor morethan5seconds (andnotmorethan12seconds) , theboot loader wi l l erasetheconf igurat ion
sett ings savedonf lashmemory.

33
Etisalat HSPA+ WiFi Router USERGUIDE
Advanced
6.7 .4 UPDATEF IRMWARE
The fol lowing screen appears when se lect ing Update F i rmware . By fo l lowing the steps on
this screen, youcanupdateyourRouter ’s f i rmware . Manual deviceupgrades froma local ly
storedf i le cana lsobeperformedus ingthefo l lowingscreen.
1: Obtainanupdatedf i rmware imagef i le
2: Enter thepathandf i lenameof thef i rmwareimagef i le in theF i rmwareF i le Namef ie ld
or c l ick theBrowsebuttonto locatethe imagef i le .
3 : C l ick theUpdateF i rmwarebuttononcetouploadand insta l l thef i le .
NOTE: Theupdateprocess wi l l takeabout2minutes tocomplete . TheRouter wi l l rebootandthebrowser windowwi l l
refresh to the default screen upon successful insta l lat ion . I t i s recommended that you compare the Software
Vers ionat thetopof theBas ic screen (WUIhomepage) withthef i rmware vers ion insta l led , to conf i rm the
insta l lat ion was successful .
6.8 ACCESS CONTROLThe Access Control opt ion found in the Management drop down menu conf igures access
re latedparameters in thefo l lowingtwoareas :
• Serv ices
• Passwords
Access Control i s usedtocontrol local andremotemanagementsett ings for yourRouter.
6 .8 .1 SERVICES
The Serv ice Control L i st (SCL) a l lowsyoutoenable or d isable yourLocal Areanetwork(LAN)
or Wide Area Network (WAN) serv ices by t ick ing the checkbox as i l lustrated below. These
access serv ices are avai lable : FTP, HTTP, ICMP, SSH, TELNET, and TFTP. C l ick Save/Apply to
cont inue .

34
Etisalat HSPA+ WiFi Router USERGUIDE
Advanced
6.8 .2 PASSWORDS
The Passwords opt ion conf igures your account access password for your Router. Access to
thedevice i s l imitedtothefo l lowingthreeuser accounts :
• admin i s tobeusedfor local unrestr ictedaccess control
• support i s tobeusedfor remotemaintenanceof thedevice
• user i s tobeusedtov iew informationandupdatedevicef i rmware
Usethef ie lds i l lustratedinthescreenbelowtochangeor createyourpassword. Passwords
must be16characters or less withnospaces . C l ick Save/Apply tocont inue .
6.9 Simple Network Management Protocol (SNMP)TheS impleNetworkManagementProtocol (SNMP)a l lowsanetworkadministrator tomonitor
a network by retr iev ing sett ings on remote network devices . To do this , the administrator
typica l ly runs an SNMPmanagement stat ion program such as MIB browser on a local host
to obtain information from the SNMP agent , in this case the 3G21WE ( i f SNMP enabled) .
AnSNMP‘community ’ performsthefunct ionof authent icat ingSNMPtraff ic . A‘community
name’ acts as a passwordthat i s typica l ly sharedamongSNMPagents andmanagers .
Bydefault , SNMPagent i s enabledontheRouter.
SETTINGUPSNMPAGENT
1. Open a web browser ( Ie /F i refox/Safar i ) , type in LAN address of the Router
(http: / /192.168.1 .1/ bydefault ) to log intotheweb interface .
2 . The loginusernameandpasswordbydefault i s admin/admin.
3 . GotoAdvancedSett ings >SNMP. Enable SNMPagentandset upa l l opt ionsaccording
tothescreenshotbelow.
4 . C l ick Save/Apply toact ivatethesesett ings .

35
Etisalat HSPA+ WiFi Router USERGUIDE
Advanced
6.10 SIMPLE NETWORK TIME PROTOCOL (SNTP)This screena l lowsyoutoconf igurethet imesett ings of yourRouter. Toautomatica l ly
synchronizewith Internet t imeservers , t ick theboxas i l lustratedbelow.
Thefo l lowingopt ionsshouldnowappear ( seescreenshotbelow):
Options Descr ipt ion
FirstNTPtimeserver: Selecttherequiredserver.
SecondNTPtimeserver: Selectsecondtimeserver,ifrequired.
Timezoneoffset: Select the local time zone.
Configuretheseopt ionsandthenc l ick Save/Apply toact ivate .
NOTE: SNTPmust beact ivatedtouseParental Control ( sect ion7 .5) .
6.11 USB SETTINGSThe USB Sett ings opt ion found in the Advanced Sett ings drop downmenu conf igures USB
port re latedparameters in thefo l lowingtwoareas :
• Pr int Server
• USBStorage
6.11.1PRINTSERVER
Thesesteps expla intheprocedurefor enabl ingthePr int Server.
1 : To enable the pr int server, Se lect Enable on-board pr int server checkbox and enter
Pr inter nameandMakeandmodel
NOTE: Thepr inter namecanbeanytext str ingupto40characters . TheMakeandmodel canbeanytext str ingupto
128 characters .

36
Etisalat HSPA+ WiFi Router USERGUIDE
Advanced
FORWINDOWS XP:
2 : GotothePr inters andFaxes appl icat ion intheControl Panel andse lect theAdda
pr inter funct ion (as locatedonthes idemenubelow) .
3 : C l ick Next tocont inue , whenyouseethed ia logboxbelow.
4:SelectNetworkPrinterandclickNext.
5 : Se lect Connect toa pr inter onthe Internet andenter yourpr inter l ink .
(e .g . http: / /192.168.1 .1/pr inters /pr intername) andc l ick Next .
NOTE: thepr inter namemust bethesamenameentered inthewebuser interface“pr inter server sett ing” as in step
1.

37
Etisalat HSPA+ WiFi Router USERGUIDE
6:ClickHaveDiskandinserttheprinterdriverCD.
7: Choose Yes or No for default pr inter sett ing and c l ick
Next .
8 : C l ick “F in ish”.
9 : Check the status of pr inter f romWindowsControl Panel ,
pr inter window. Status should show as Ready.
FOR MAC OSX:
1 . BrowsetotheApplemenuandse lect SystemPreferences .
In the System Preferences menu
2. c l ick onPr int &Fax .
3. With your Pr inter dr iver insta l led , p lease add your pr inter
fromthePr inter &Faxmenu.
Advanced

38
Etisalat HSPA+ WiFi Router USERGUIDE
4. C l ick +toaddyourpr inter f romthePr int &Faxmenu. 5 . Se lect Internet Pr int ingProtocol – IPPfromtheProtocol dropdown l i s t .
6 . Type into the Address f ie ld “GatewayIPAddress :631”where GatewayIPAddress i s the IP
address of your Router (default : 192.168.1 .1) . See screenshot below for an example .
Alsoenter intotheQueuef ie ld “ /pr inters /Pr interName” , wherePr interNameis thename
yougaveyourpr inter in step1
7. Se lect yourpr inter f romthePr int Us ingdropdown l i s t .
Advanced

39
Etisalat HSPA+ WiFi Router USERGUIDE
8. C l ick Addandcheckthepr inter status .
Pr int Server set up i s now complete . You wi l l now be able
topr int f romcommonappl icat ionsbyse lect ingthis pr inter
f romthePr int d ia loguebox .
FORWINDOWSVISTA
2. Go to the control panel , and se lect Pr inters . Once in the
Pr inters page , c l ick the Add a pr inter button as shown
below.
3 . Se lect addanetwork , wire less or Bluetoothpr inter.
4 . C l ick ontheradio-buttonlabeledSelect a sharedpr inter
by name, and type “http: / /192.168.1 .1:631/pr inters /
Pr interName” intheboxbelow. Cl ick Next .
NOTE: Thepr internamemust bethesameas thepr inter nameentered inthe
WebUser Interfacedur ingstep1
5 . Next , se lect the dr iver that came with your pr inter.
Browse through the l i s t to se lect your pr inter dr iver,
or c l ick ‘Have Disk ’ i f you have your pr inter dr iver
insta l lat ion media .
6. Choose whether you want this pr inter to be the default
pr inter, andthenc l ick Next .
Advanced

40
Etisalat HSPA+ WiFi Router USERGUIDE
7. C l ick F in ish . Yourdevice i s nowconf iguredandreadyfor use .
6 .11 .2 USBSTORAGE
The Et i sa lat HSPA+WiFi Router a l lows you to connect a USB storage device and share i t
witha l l of theusers onthenetwork .
Bydefault , th is feature i s a l readyenabled , so i t i s s implya matter of connect ingyourUSB
storagedeviceandenter ingtheappropr iatenetwork locat ion.
I f you wish to modify any of these features , the steps below expla in the procedure for
enabl ingtheUSBStorage .
1: Ensurethat theEnable USBStoragecheckbox i s checked intheWebUser Interface .
Todothis , logintothedeviceus ingtheprocedurefoundinSect ion3 .4thense lect Advanced
sett ings >USBsett ings >USBStoragefromthemenua longthetopof thepage . Enable USB
Storagecheckboxandenter theRouter NameandUSBDr iveName.
Field Description
Router Name Thehostnameof theRouter device . This shouldonly bemodif ied i f therearemult ip le Et i sa lat HSPA+WiFi Router ’s onyournetwork . Thedefaultname is “Et i sa lat21”.
USBDr iveName Thenameof USBdr ive . This shouldonly bemodif ied i f therearemult ip leUSBdevices connectedtoyourEt i sa lat HSPA+WiFi Router . Thedefaultname is “3G21WE”
FORWINDOWSXP:
2: Openaweb-browser ( suchas Internet explorer, F i refoxor Safar i ) andtypeintheaddress
\ \ ”GatewayName”\”USBDriveName”\ (e .g . \ \3G21WE\USB-Storage)
NOTE: There i s nousernameandpasswordrequiredtoaccess theUSBdr ive , theuser wi l l beable toread/write the
fo lder/f i les in theUSBdr ive .
TOMAPTHEUSBSTORAGEDRIVE
To enable easy access to theUSB Storage Dr ive , you canmap the network locat ion. To do
this , usethefo l lowingsteps :
Advanced

41
Etisalat HSPA+ WiFi Router USERGUIDE
1. C l ick ontheStart buttonandc l ick MyComputer
2 . C l inkontools >Mapnetworkdr ive
3 . In the Folder f ie ld , enter the address of the USB Storage Dr ive \ \GatewayName\
USBDriveName(e .g . \ \3G21WE\USB-Storage)
4 . Toaccess theUSBStorageDr ive in thefuture , youcans implydouble-c l ick onthe i tem
intheMyComputer menu
FORMACOSX:
2 . FromtheF inder, se lect theGoandthenc l ick Connect toServer
3 . In theaddress f ie ld of theConnect toServer d ia log , type intheaddress :
smb:/ / “GatewayName”/“USBDriveName” (e .g . smb:/ /3G21WE/USB-Storage)
4 . C l ick the+buttontoaddthis server tothe l i s t of Favour ites andthenc l ick Connect
5 . Se lect theGuest radiobuttonandthenc l ick Connect
FORWINDOWSVISTA
2. Openaweb-browser ( suchas Internet explorer, F i refoxor Safar i )
3 . Type intheaddress “ \ \GatewayName\USBDriveName\” (e .g . \ \3G21WE\USB-Storage)
NOTE: There i s nousernameandpasswordrequiredtoaccess theUSBdr ive . Anynetworkuser wi l l beable toread/
write thefo lder/f i les in theUSBdr ive .
Advanced

42
Etisalat HSPA+ WiFi Router USERGUIDE
TOMAPTHEUSBSTORAGEDRIVE
To enable easy access to theUSB Storage Dr ive , you canmap the network locat ion. To do
this , usethefo l lowingsteps :
5 . C l ick ontheStart buttonandc l ick Computer
6 . C l ick theMapnetworkdr ivebutton
7. In the Folder f ie ld , enter the address of the USB Storage Dr ive \ \GatewayName\
USBDriveName(e .g . \ \3G21WE\USB-Storage)
8 . Toaccess theUSBStorageDr ive in thefuture , youcans implydouble-c l ick onthe i tem
intheComputer menu
6.12 SAVE AND REBOOTThis funct ionsaves thecurrent conf igurat ionsett ings andreboots yourRouter.
NOTE1: I t maybenecessarytoreconf igureyourTCP/ IPsett ings toadjust for thenewconf igurat ion. For example , i f
youdisable theDynamicHost Conf igurat ionProtocol (DHCP) server youwi l l needtoapply Stat ic IP sett ings .
NOTE2: I f you losea l l access toyourwebuser interface , s implypress thereset buttonontherear panel for 5-7
secondstorestoredefault sett ings .
Advanced

Introduction
43
Diagnostics
CHAPTER-7

44
Etisalat HSPA+ WiFi Router USERGUIDE
TheDiagnost ics menuhas thefo l lowingsubmenus:
• Diagnost ics
• SystemLog
• 3GNetwork
• Stat ist ics
• Route
• ARP
• DHCP
• PING
7.1 DIAGNOSTICSThe Diagnost ics menu provides feedback on the connect ion status of the device . The
indiv idual tests are l i s tedbelow. I f a test d isp lays a fa i l s tatus :
1: C l ick ontheHelp l ink
2: Now c l ick Re-runDiagnost ic Tests at the bottomof the screen to re-test and conf i rm
the error
3: I f thetest cont inues tofa i l , fo l lowthetroubleshoot ingprocedures in theHelpscreen
Diagnostics

45
Etisalat HSPA+ WiFi Router USERGUIDE
Name Descr ipt ion
WiredConnect ion Pass : Indicates that theEthernet interfacefromyourcomputer i sconnected to the LAN port of th is Router.
Fai l : Indicates that theRouter does not detect theEthernet interfaceonyour computer.
Wire less connect ion Pass : Indicates that thewire less card i s ON.
Down: Indicates that thewire less card i s OFF.
P ingDefaultRouter
Pass : Indicates that theRouter cancommunicatewiththef i rst entry pointtothenetwork . I t i s usual ly the IP address of the ISP ’s local Router.
Fa i l : Indicates that theRouter wasunable tocommunicatewiththef i rstentry point onthenetwork . I t maynothaveaneffect onyour Internetconnect iv i ty. Therefore i f th is test fa i l s but youarest i l l able toaccess theInternet , there i s noneedtotroubleshootthis i s sue .
P ingPr imaryDomainName Server
Pass : Indicates that theRouter cancommunicatewiththepr imaryDomainNameServer (DNS) .
Fa i l : Indicates that theRouter wasunable tocommunicatewiththepr imaryDomainNameServer (DNS) . I t maynothaveaneffect onyourInternet connect iv i ty. Therefore i f th is test fa i l s but youarest i l l able toaccess the Internet , there i s noneedtotroubleshootthis i s sue .
7.2 SYSTEM LOGThis funct ion a l lows you to v iew system events and conf igure re lated opt ions . Fol low the
steps belowtoenable andv iewtheSystemLog.
1: C l ick Conf igureSystemLogtocont inue .
2: Se lect thesystem logopt ions ( seetable below)andc l ick Save/Apply.
Diagnostics

46
Etisalat HSPA+ WiFi Router USERGUIDE
Name Descr ipt ion
Log Indicates whether thesystem is current ly recordingevents . Youcanenable ord isable event logging. Bydefault , i t i s d isabled .
Log level Al lowsyoutoconf iguretheevent level andf i l ter out unwantedevents belowthislevel . Theevents rangingfromthehighest cr i t ica l leve l
“Emergency” downtothis conf igured level wi l l berecordedtothe logbuffer ontheRouter ’s SDRAM.Whenthe logbuffer i s fu l l , thenewest eventwi l l wrapuptothetopof the logbuffer andoverwrite theo ldest event . Bydefault , the loglevel i s “Debugging” , which i s the lowest cr i t ica l leve l . The log levels are def inedas fo l lows:
Emergency i s themost ser ious event level , whereas Debugging i s the leastimportant . For instance , i f the log level i s set toDebugging, a l l theevents f romthe lowest Debugging level tothemost cr i t ica l leve l emergency level wi l l berecorded. I f the log level i s set toerror, only error andthe level abovewi l l belogged.
DisplayLevel Al lowsyoutose lect the loggedevents anddisp lays ontheViewSystemLogwindowfor events of th is level andabovetothehighest emergency level .
Mode Al lowsyoutospecify whether events shouldbestored inthe local memory,
besent toa remotesys logserver, or toboths imultaneous ly. I f remotemodei s se lected , thev iewsystem logwi l l not beable tod isp layevents saved intheremotesys logserver. Whene ither Remotemodeor Bothmode i s conf igured, theWebUI wi l l prompttheyoutoenter theServer IP address andServer UDPport .
3 : C l ick V iewSystemLog. Theresults are d isp layedas fo l lows .
7.3 3G NETWORKSelect th is opt ion for deta i led status information on your Gateways 3G connect ion.
Consult thetable onthenext pagefor deta i ledf ie ld descr ipt ions
Diagnostics

47
Etisalat HSPA+ WiFi Router USERGUIDE
Fie ld Descr ipt ion
Manufacturer Themanufacturer of theembedded3Gmodule .
Model Themodel nameof theembedded3Gmodule .
FW Rev. The f i rmware vers ion of the 3G module .
IMEI The IMeI ( Internat ional Mobi le equipment Ident ity) i s a 15dig it numberthati s usedto ident ify a mobi le deviceonanetwork .
FSN FactorySer ia l Numberof the3Gmodule .
IMSI The IMSI ( Internat ional Mobi le Subscr iber Ident ity) i s a unique15-digitnumberusedto ident ify an indiv idual user onaUMTSnetwork .
HW Rev. The hardware vers ion of the 3G module .
System Mode WCDMA/EuropeCMDA2000/ America
WCDMAband The3Gradiofrequencybandwhichsupports dual-bandUTMS/HSDPA/HSUPAfrequencies (850/2100MHz) , IMT2000 i s 2100MHz, WCDMA800 is 850MHz
WCDMA
channel
The 3G channel .
MM(CS) state Circuit Switchingstate
Signal Strength The3Gs ignal strength indBm.
Signal level
in dBm
-109~-103 -101~-93 -91 ~ -87 -85~-79 -77~-52
5Signal
bars
LED Low Medium High
7.4 STATISTICSThesescreensprovidedetai led informationfor :
• Local AreaNetwork (LAN)andWire less Local AreaNetwork (WLAN)
• 3G Interfaces
NOTE: Thesestat i st ics pagerefreshevery15seconds
7 .4 .1 LANSTATISTICS
This screen disp lays stat i st ics for the Ethernet and Wire less LAN interfaces .
7.4 .2 3GSTATISTICS
Cl ick Et i sa lat™network intheStat i st ics submenutod isp laythescreenbelow.
Diagnostics

48
Etisalat HSPA+ WiFi Router USERGUIDE
7.5 ROUTESelect Route to d isp lay the paths the Router has found.
F ie ld Descr ipt ion
Dest inat ion Dest inat ionnetworkor dest inat ionhost
Router next hop IPaddress
SubnetMask Subnetmaskof Dest inat ion
F lag U:route i s up
! : re ject route
G: useRouter
H: target i s a host
R: re instateroutefor dynamicrout ing
D: dynamical ly insta l ledbydaemonor redirect
M:modif iedfromrout ingdaemonor redirect
Metr ic The ‘d istance ’ tothetarget (usual ly counted inhops) . I t i s not usedbyrecentkernels , but maybeneededbyrout ingdaemons .
Serv ice Shows the name for WAN connect ion
Interface Shows connect ion interfaces
Diagnostics

49
Etisalat HSPA+ WiFi Router USERGUIDE
7.6 ARPCl ickARPtod isp laytheARP information.
Fie ld Descr ipt ion
IP address Shows IP address of host pc
Flags Complete
Incomplete
Permanent
Publ i sh
HW Address ShowstheMACaddress of host pc
Device Shows the connect ion interface
7.7 DYNAMIC HOST CONFIGURATION PROTOCOL (DHCP)Cl ickDHCPtod isp laytheDHCP information.
Fie ld Descr ipt ion
Hostname Showsthedevice/host/Pcnetworkname
MACAddress ShowstheEthernet MACaddress of thedevice/host/Pc
IP address Shows IP address of device/host/Pc
Expires In Showshowmucht ime i s left for eachDHCPLease
7.8 PINGThePINGmenuprovides feedbackof connect iontest toan IP address or a host name.
Inputan IP address or a host name, e .g www.google .comandpress Submit . Theconnect ion
test result wi l l beshownas below.
Theabovescreen i s showingasuccessful p ingresult .
Diagnostics

Introduction
Introduction
CHAPTER-150