introduction to gnat toolchain - adacore · introductiontognattoolchain,release2020-05 obj/main...
TRANSCRIPT

Introduction to GNAT ToolchainRelease 2020-05
Gustavo A. Hoffmann
May 27, 2020

CONTENTS:
1 GNAT Community 31.1 Installation . . . . . . . . . . . . . . . . . . . . . . . . . . . . . . . . . . . . . . . . . . . . 31.2 Basic commands . . . . . . . . . . . . . . . . . . . . . . . . . . . . . . . . . . . . . . . . . 31.3 Compiler warnings . . . . . . . . . . . . . . . . . . . . . . . . . . . . . . . . . . . . . . . . 4
1.3.1 -gnatwa switch and warning suppression . . . . . . . . . . . . . . . . . . . . . 41.3.2 Style checking . . . . . . . . . . . . . . . . . . . . . . . . . . . . . . . . . . . . . . 6
2 GPRbuild 92.1 Basic commands . . . . . . . . . . . . . . . . . . . . . . . . . . . . . . . . . . . . . . . . . 92.2 Project files . . . . . . . . . . . . . . . . . . . . . . . . . . . . . . . . . . . . . . . . . . . . 9
2.2.1 Basic structure . . . . . . . . . . . . . . . . . . . . . . . . . . . . . . . . . . . . . . 92.2.2 Customization . . . . . . . . . . . . . . . . . . . . . . . . . . . . . . . . . . . . . . 10
2.3 Project dependencies . . . . . . . . . . . . . . . . . . . . . . . . . . . . . . . . . . . . . . 112.3.1 Simple dependency . . . . . . . . . . . . . . . . . . . . . . . . . . . . . . . . . . . 112.3.2 Dependencies to dynamic libraries . . . . . . . . . . . . . . . . . . . . . . . . . . 13
2.4 Configuration pragma files . . . . . . . . . . . . . . . . . . . . . . . . . . . . . . . . . . . 132.5 Configuration packages . . . . . . . . . . . . . . . . . . . . . . . . . . . . . . . . . . . . . 14
3 GNAT Studio 173.1 Start-up . . . . . . . . . . . . . . . . . . . . . . . . . . . . . . . . . . . . . . . . . . . . . . 17
3.1.1 Windows . . . . . . . . . . . . . . . . . . . . . . . . . . . . . . . . . . . . . . . . . 173.1.2 Linux . . . . . . . . . . . . . . . . . . . . . . . . . . . . . . . . . . . . . . . . . . . 17
3.2 Creating projects . . . . . . . . . . . . . . . . . . . . . . . . . . . . . . . . . . . . . . . . . 173.3 Building . . . . . . . . . . . . . . . . . . . . . . . . . . . . . . . . . . . . . . . . . . . . . . 183.4 Debugging . . . . . . . . . . . . . . . . . . . . . . . . . . . . . . . . . . . . . . . . . . . . . 18
3.4.1 Debug information . . . . . . . . . . . . . . . . . . . . . . . . . . . . . . . . . . . 183.4.2 Improving main application . . . . . . . . . . . . . . . . . . . . . . . . . . . . . . 193.4.3 Debugging the application . . . . . . . . . . . . . . . . . . . . . . . . . . . . . . . 19
3.5 Formal verification . . . . . . . . . . . . . . . . . . . . . . . . . . . . . . . . . . . . . . . . 20
4 GNAT Tools 234.1 gnatchop . . . . . . . . . . . . . . . . . . . . . . . . . . . . . . . . . . . . . . . . . . . . . 234.2 gnatprep . . . . . . . . . . . . . . . . . . . . . . . . . . . . . . . . . . . . . . . . . . . . . . 244.3 gnatxref and gnatfind . . . . . . . . . . . . . . . . . . . . . . . . . . . . . . . . . . . . . . 264.4 gnatmem . . . . . . . . . . . . . . . . . . . . . . . . . . . . . . . . . . . . . . . . . . . . . 274.5 gnatmetric . . . . . . . . . . . . . . . . . . . . . . . . . . . . . . . . . . . . . . . . . . . . . 284.6 gnatdoc . . . . . . . . . . . . . . . . . . . . . . . . . . . . . . . . . . . . . . . . . . . . . . 284.7 gnatpp . . . . . . . . . . . . . . . . . . . . . . . . . . . . . . . . . . . . . . . . . . . . . . . 304.8 gnatstub . . . . . . . . . . . . . . . . . . . . . . . . . . . . . . . . . . . . . . . . . . . . . . 31
i

ii
Introduction to GNAT Toolchain, Release 2020-05
Copyright © 2019 – 2020, AdaCore
This book is published under a CC BY-SA license, which means that you can copy, redistribute,remix, transform, and build upon the content for any purpose, even commercially, as long as yougive appropriate credit, provide a link to the license, and indicate if changes were made. If youremix, transform, or build upon the material, you must distribute your contributions under thesame license as the original. You can find license details on this page1
This course presents an introduction to the GNAT toolchain, which is included in the GNAT Commu-nity 2020 edition. The course includes first steps to get started with the toolchain and some detailson the project manager (GPRbuild) and the integrated development environment (GNAT Studio).
This document was written by Gustavo A. Hoffmann, with contributions and review from RichardKenner and Bob Duff.
1 http://creativecommons.org/licenses/by-sa/4.0
CONTENTS: 1

Introduction to GNAT Toolchain, Release 2020-05
2 CONTENTS:

CHAPTER
ONE
GNAT COMMUNITY
This chapter presents the steps needed to install the GNAT Community toolchain and how to usebasic commands from the toolchain.
1.1 Installation
These are the basics steps to install GNAT Community on all platforms:
• Go to the AdaCore Community page2.
• Download the GNAT installer.
• Run the GNAT installer.
– Leave all options checked on the ”Select Components” page.
On Windows platforms, continue with the following steps:
• Add C:\GNAT\2020\bin to your Path environment variable.
– The environment variables can be found in the System Properties window of theControl Panel.
• You might need to restart your computer for the settings to take effect.
On Linux platforms, perform the following steps:
• Make sure the GNAT installer has execution permissions before running it.
• Select the directory where you want to install the toolchain.
– For example: /home/me/GNAT/2020
• Add the path to the bin directory (within the toolchain directory) as the first directory in yourPATH environment variable.
– For example: /home/me/GNAT/2020/bin.
1.2 Basic commands
Now that the toolchain is installed, you can start using it. From the command line, you can compilea project using gprbuild. For example:
gprbuild -P project.gpr
You can find the binary built with the command above in the obj directory. You can the run it inthe same way as you would do with any other executable on your platform. For example:
2 https://www.adacore.com/community
3

Introduction to GNAT Toolchain, Release 2020-05
obj/main
A handy command-line option for gprbuild you might want to use is -p, which automaticallycreates directories such as obj if they aren’t in the directory tree:
gprbuild -p -P project.gpr
Ada source-code are stored in .ads and .adb files. To view the content of these files, you can useGNAT Studio. To open GNAT Studio, double-click on the .gpr project file or invoke GNAT Studioon the command line:
gps -P project.gpr
To compile your project using GNAT Studio, use the top-level menu to invoke Build → Project→ main.adb (or press the keyboard shortcut F4). To run the main program, click on Build → Run→ main (or press the keyboard shortcut Shift + F2).
1.3 Compiler warnings
One of the strengths of the GNAT compiler is its ability to generate many useful warnings. Someare displayed by default but others need to be explicitly enabled. In this section, we discuss someof these warnings, their purpose, and how you activate them.
1.3.1 -gnatwa switch and warning suppression
Section author: Bob Duff
We first need to understand the difference between a warning and an error. Errors are violationsof the Ada language rules as specified in the Ada Reference Manual; warnings don’t indicate viola-tions of those rules, but instead flag constructs in a program that seem suspicious to the compiler.Warnings are GNAT-specific, so other Ada compilers might not warn about the same things GNATdoes or might warn about them in a different way. Warnings are typically conservative; meaningthat some warnings are false alarms. The programmer needs to study the code to determine ifeach warning is describing a real problem.
Some warnings are produced by default while others are produced only if a switch enables them.Use the -gnatwa switch to turn on (almost) all warnings.
Warnings are useless if you don’t do anything about them. If you give your team member somecode that causes warnings, how are they supposed to knowwhether they represent real problems?If you don’t address each warning, people will soon starting ignoring warnings and there’ll be lotsof things that generates warnings scattered all over your code. To avoid this, you may want to usethe -gnatwae switch to both turn on (almost) all warnings and to treat warnings as errors. Thisforces you to get a clean (no warnings or errors) compilation.
However, as we said, some warnings are false alarms. Use pragma Warnings (Off) to suppressthose warnings. It’s best to be as specific as possible and narrow down to a single line of code and asingle warning. Then use a comment to explain why the warning is a false alarm if it’s not obvious.
Let’s look at the following example:
with Ada.Text_IO; use Ada.Text_IO;
package body Warnings_Example is
procedure Mumble (X : Integer) isbegin
(continues on next page)
4 Chapter 1. GNAT Community
Introduction to GNAT Toolchain, Release 2020-05
(continued from previous page)
Put_Line ("Mumble processing...");end Mumble;
end Warnings_Example;
We compile the above code with -gnatwae:
gnat compile -gnatwae ./src/warnings_example.adb
This causes GNAT to complain:
warnings_example.adb:5:22: warning: formal parameter "X" is not referenced
But the following compiles cleanly:
with Ada.Text_IO; use Ada.Text_IO;
package body Warnings_Example is
pragma Warnings (Off, "formal parameter ""X"" is not referenced");procedure Mumble (X : Integer) ispragma Warnings (On, "formal parameter ""X"" is not referenced");
-- X is ignored here, because blah blah blah...begin
Put_Line ("Mumble processing...");end Mumble;
end Warnings_Example;
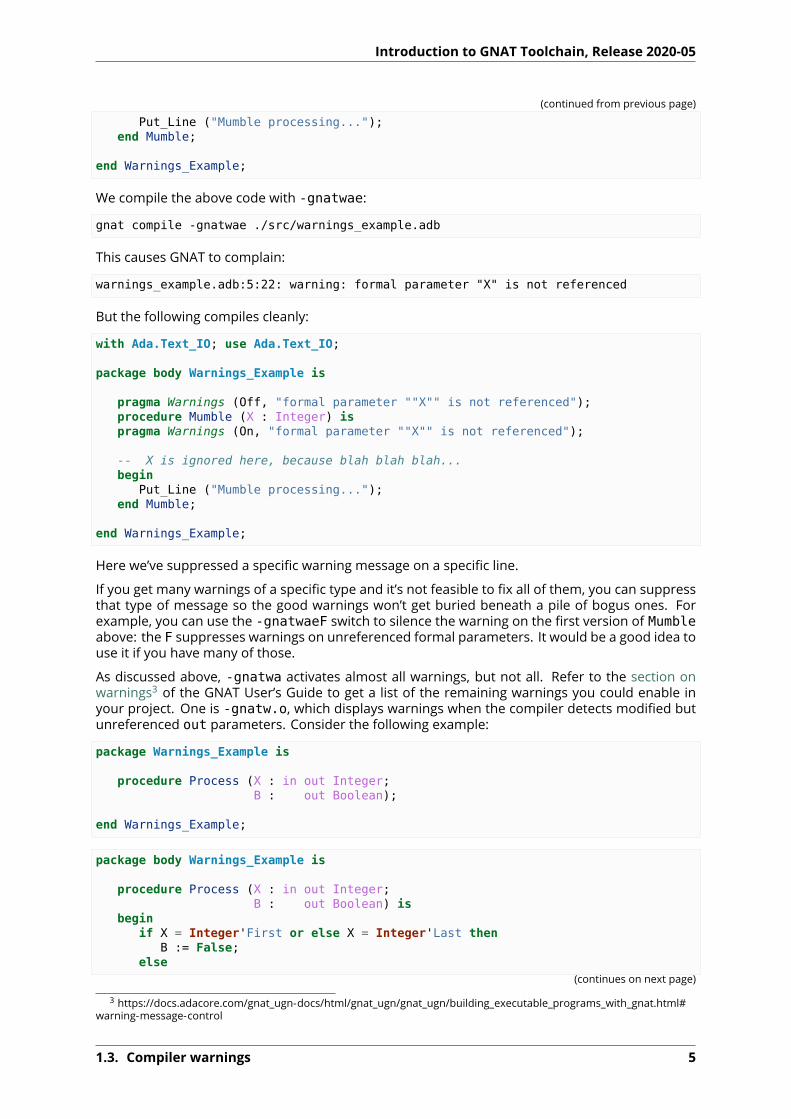
Here we’ve suppressed a specific warning message on a specific line.
If you get many warnings of a specific type and it’s not feasible to fix all of them, you can suppressthat type of message so the good warnings won’t get buried beneath a pile of bogus ones. Forexample, you can use the -gnatwaeF switch to silence the warning on the first version of Mumbleabove: the F suppresses warnings on unreferenced formal parameters. It would be a good idea touse it if you have many of those.
As discussed above, -gnatwa activates almost all warnings, but not all. Refer to the section onwarnings3 of the GNAT User’s Guide to get a list of the remaining warnings you could enable inyour project. One is -gnatw.o, which displays warnings when the compiler detects modified butunreferenced out parameters. Consider the following example:
package Warnings_Example is
procedure Process (X : in out Integer;B : out Boolean);
end Warnings_Example;
package body Warnings_Example is
procedure Process (X : in out Integer;B : out Boolean) is
beginif X = Integer'First or else X = Integer'Last then
B := False;else
(continues on next page)
3 https://docs.adacore.com/gnat_ugn-docs/html/gnat_ugn/gnat_ugn/building_executable_programs_with_gnat.html#warning-message-control
1.3. Compiler warnings 5

Introduction to GNAT Toolchain, Release 2020-05
(continued from previous page)
X := X + 1;B := True;
end if;end Process;
end Warnings_Example;
with Ada.Text_IO; use Ada.Text_IO;
with Warnings_Example; use Warnings_Example;
procedure Main isX : Integer := 0;Success : Boolean;
beginProcess (X, Success);Put_Line (Integer'Image (X));
end Main;
If we build the main application using the -gnatw.o switch, the compiler warns us that we didn’treference the Success variable, which was modified in the call to Process:
main.adb:8:16: warning: "Success" modified by call, but value might not be␣↪referenced
In this case, this actually points us to a bug in our program, since X only contains a valid value ifSuccess is True. The corrected code for Main is:
-- ...begin
Process (X, Success);
if Success thenPut_Line (Integer'Image (X));
elsePut_Line ("Couldn't process variable X.");
end if;end Main;
We suggest turning on as many warnings as makes sense for your project. Then, when you see awarning message, look at the code and decide if it’s real. If it is, fix the code. If it’s a false alarm,suppress the warning. In either case, we strongly recommend you make the warning disappearbefore you check your code into your configuration management system.
1.3.2 Style checking
GNAT provides many options to configure style checking of your code. The main compilerswitch for this is -gnatyy, which sets almost all standard style check options. As indicatedby the section on style checking4 of the GNAT User’s Guide, using this switch ”is equivalent to-gnaty3aAbcefhiklmnprst, that is all checking options enabled with the exception of -gnatyB,-gnatyd, -gnatyI, -gnatyLnnn, -gnatyo, -gnatyO, -gnatyS, -gnatyu, and -gnatyx.”
Youmay find that selecting the appropriate coding style is useful to detect issues at early stages. Forexample, the -gnatyO switch checks that overriding subprograms are explicitly marked as such.Using this switch can avoid surprises when you didn’t intentionally want to override an operationfor some data type. We recommend studying the list of coding style switches and selecting the
4 https://docs.adacore.com/gnat_ugn-docs/html/gnat_ugn/gnat_ugn/building_executable_programs_with_gnat.html#style-checking
6 Chapter 1. GNAT Community

Introduction to GNAT Toolchain, Release 2020-05
ones that seem relevant for your project. When in doubt, you can start by using all of them —using -gnatyy and -gnatyBdIL4oOSux, for example — and deactivating the ones that cause toomuch noise during compilation.
1.3. Compiler warnings 7

Introduction to GNAT Toolchain, Release 2020-05
8 Chapter 1. GNAT Community

CHAPTER
TWO
GPRBUILD
This chapter presents a brief overview of GPRbuild, the project manager of the GNAT toolchain.It can be used to manage complex builds. In terms of functionality, it’s similar to make and cmake,just to name two examples.
For a detailed presentation of the tool, please refer to the GPRbuild User’s Guide5.
2.1 Basic commands
As mentioned in the previous chapter, you can build a project using gprbuild from the commandline:
gprbuild -P project.gpr
In order to clean the project, you can use gprclean:
gprclean -P project.gpr
2.2 Project files
You can create project files using GNAT Studio, which presents many options on its graphicalinterface. However, you can also edit project files manually as a normal text file in an editor, sinceits syntax is human readable. In fact, project files use a syntax similar to the one from the Adalanguage. Let’s look at the basic structure of project files and how to customize them.
2.2.1 Basic structure
Themain element of a project file is a project declaration, which contains definitions for the currentproject. A project filemay also include other project files in order to compose a complex build. Oneof the simplest form of a project file is the following:
project Default is
for Main use ("main");for Source_Dirs use ("src");
end Default;
5 https://docs.adacore.com/gprbuild-docs/html/gprbuild_ug.html
9

Introduction to GNAT Toolchain, Release 2020-05
In this example, we declare a project named Default. The for Main use expression indicatesthat the main.adb file is used as the entry point (main source-code file) of the project. The mainfile doesn’t necessary be called main.adb; we could use any source-code implementing a mainapplication, or even have a list of multiple main files. The for Source_Dirs use expressionindicates that the src directory contains the source-file for the application (including the mainfile).
2.2.2 Customization
GPRbuild support scenario variables, which allow you to control the way binaries are built. Forexample, you may want to distinguish between debug and optimized versions of your binary. Inprinciple, you could pass command-line options to gprbuild that turn debugging on and off, forexample. However, defining this information in the project file is usually easier to handle and tomaintain. Let’s define a scenario variable called ver in our project:
project Default is
Ver := external ("ver", "debug");
for Main use ("main");for Source_Dirs use ("src");
end Default;
In this example, we’re specifying that the scenario variable Ver is initialized with the external vari-able ver. Its default value is set to debug.
We can now set this variable in the call to gprbuild:
gprbuild -P project.gpr -Xver=debug
Alternatively, we can simply specify an environment variable. For example, on Unix systems, wecan say:
export ver=debug
# Value from environment variable "ver" used in the following call:
gprbuild -P project.gpr
In the project file, we can use the scenario variable to customize the build:
project Default isVer := external ("ver", "debug");
for Main use ("main.adb");for Source_Dirs use ("src");
-- Using "ver" variable for obj directoryfor Object_Dir use "obj/" & Ver;
package Compiler iscase Ver is
when "debug" =>for Switches ("Ada") use ("-g");
when "opt" =>for Switches ("Ada") use ("-O2");
when others =>null;
end case;(continues on next page)
10 Chapter 2. GPRbuild

Introduction to GNAT Toolchain, Release 2020-05
(continued from previous page)
end Compiler;
end Default;
We’re now using Ver in the for Object_Dir clause to specify a subdirectory of the obj directorythat contains the object files. Also, we’re using Ver to select compiler options in the Compilerpackage declaration.
We could also specify all available options in the project file by creating a typed variable. For ex-ample:
project Default is
type Ver_Option is ("debug", "opt");Ver : Ver_Option := external ("ver", "debug");
for Source_Dirs use ("src");for Main use ("main.adb");
-- Using "ver" variable for obj directoryfor Object_Dir use "obj/" & Ver;
package Compiler iscase Ver is
when "debug" =>for Switches ("Ada") use ("-g");
when "opt" =>for Switches ("Ada") use ("-O2");
when others =>null;
end case;end Compiler;
end Default;
The advantage of this approach is thatgprbuild can now checkwhether the value that you providefor the ver variable is available on the list of possible values and give you an error if you’re enteringa wrong value.
2.3 Project dependencies
GPRbuild supports project dependencies. This allows you to reuse information from existingprojects. Specifically, the keyword with allows you to include another project within the currentproject.
2.3.1 Simple dependency
Let’s look at a very simple example. We have a package called Test_Pkg associatedwith the projectfile test_pkg.gpr, which contains:
project Test_Pkg isfor Source_Dirs use ("src");for Object_Dir use "obj";
end Test_Pkg;
This is the code for the Test_Pkg package:
2.3. Project dependencies 11
Introduction to GNAT Toolchain, Release 2020-05
package Test_Pkg is
type T is recordX : Integer;Y : Integer;
end record;
function Init return T;
end Test_Pkg;
package body Test_Pkg is
function Init return T isbegin
return V : T doV.X := 0;V.Y := 0;
end return;end Init;
end Test_Pkg;
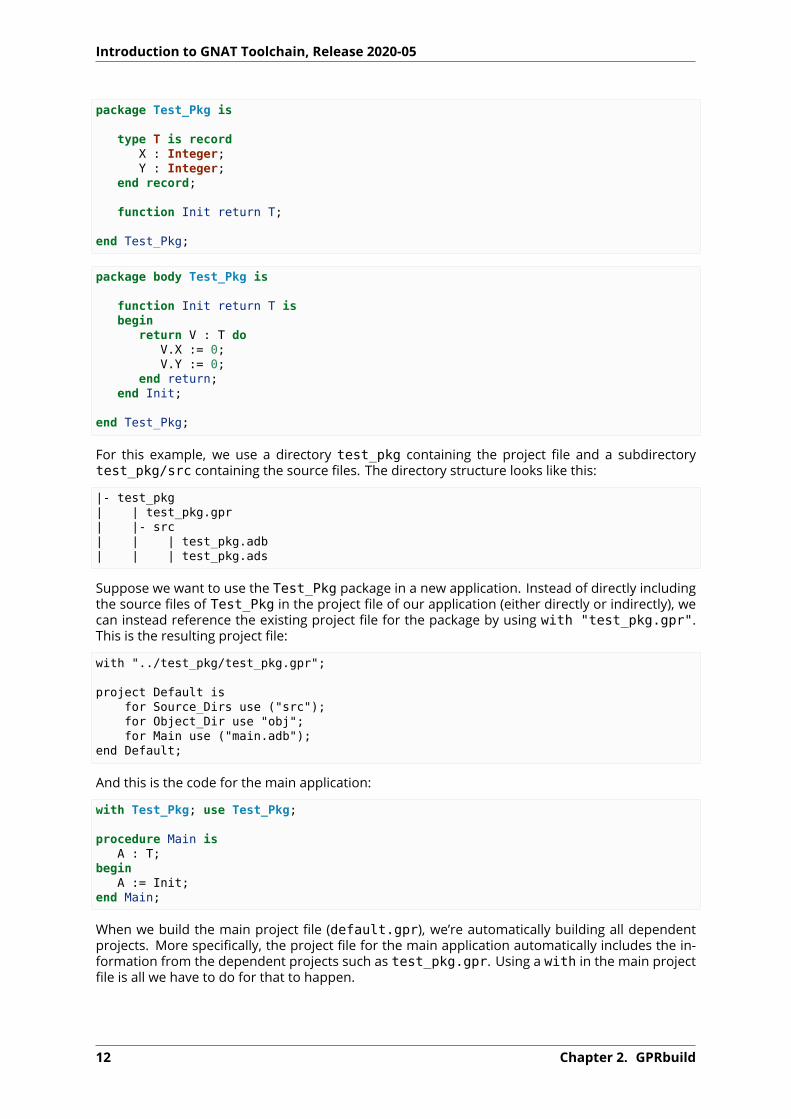
For this example, we use a directory test_pkg containing the project file and a subdirectorytest_pkg/src containing the source files. The directory structure looks like this:
|- test_pkg| | test_pkg.gpr| |- src| | | test_pkg.adb| | | test_pkg.ads
Suppose we want to use the Test_Pkg package in a new application. Instead of directly includingthe source files of Test_Pkg in the project file of our application (either directly or indirectly), wecan instead reference the existing project file for the package by using with "test_pkg.gpr".This is the resulting project file:
with "../test_pkg/test_pkg.gpr";
project Default isfor Source_Dirs use ("src");for Object_Dir use "obj";for Main use ("main.adb");
end Default;
And this is the code for the main application:
with Test_Pkg; use Test_Pkg;
procedure Main isA : T;
beginA := Init;
end Main;
When we build the main project file (default.gpr), we’re automatically building all dependentprojects. More specifically, the project file for the main application automatically includes the in-formation from the dependent projects such as test_pkg.gpr. Using a with in the main projectfile is all we have to do for that to happen.
12 Chapter 2. GPRbuild

Introduction to GNAT Toolchain, Release 2020-05
2.3.2 Dependencies to dynamic libraries
We can structure project files to make use of dynamic (shared) libraries using a very similar ap-proach. It’s straightforward to convert the project above so that Test_Pkg is now compiled into adynamic library and linked to our main application. All we need to do is to make a few additions tothe project file for the Test_Pkg package:
library project Test_Pkg isfor Source_Dirs use ("src");for Object_Dir use "obj";for Library_Name use "test_pkg";for Library_Dir use "lib";for Library_Kind use "Dynamic";
end Test_Pkg;
This is what we had to do:
• We changed the project to library project.
• We added the specification for Library_Name, Library_Dir and Library_Kind.
We don’t need to change the project file for the main application because GPRbuild automaticallydetects the dependency information (e.g., the path to the dynamic library) from the project file forthe Test_Pkg package. With these small changes, we’re able to compile the Test_Pkg package toa dynamic library and link it with our main application.
2.4 Configuration pragma files
Configuration pragma files contain a set of pragmas that modify the compilation of source files ac-cording to external requirements. For example, youmay use pragmas to either relax or strengthenrequirements depending on your environment.
In GPRbuild, we can use Local_Configuration_Pragmas (in the Compiler package) to indicatethe configuration pragmas file we want GPRbuild to use with the source files in our project.
The file gnat.adc shown here is an example of a configuration pragma file:
pragma Suppress (Overflow_Check);
We can use this in our project by declaring a Compiler package. Here’s the complete project file:
project Default is
for Source_Dirs use ("src");for Object_Dir use "obj";for Main use ("main.adb");
package Compiler isfor Local_Configuration_Pragmas use "gnat.adc";
end Compiler;
end Default;
Each pragma contained in gnat.adc is used in the compilation of each file, as if that pragma wasplaced at the beginning of each file.
2.4. Configuration pragma files 13

Introduction to GNAT Toolchain, Release 2020-05
2.5 Configuration packages
You can control the compilation of your source code by creating variants for various cases andselecting the appropriate variant in the compilation package in the project file. One example wherethis is useful is conditional compilation using Boolean constants, shown in the code below:
with Ada.Text_IO; use Ada.Text_IO;
with Config;
procedure Main isbegin
if Config.Debug thenPut_Line ("Debug version");
elsePut_Line ("Release version");
end if;end Main;
In this example, we declared the Boolean constant in the Config package. By having multipleversions of that package, we can create different behavior for each usage. For this simple example,there are only two possible cases: either Debug is True or False. However, we can apply thisstrategy to create more complex cases.
In our next example, we store the packages in the subdirectories debug and release of the sourcecode directory. Here’s the content of the src/debug/config.ads file:
package Config is
Debug : constant Boolean := True;
end Config;
Here’s the src/release/config.ads file:
package Config is
Debug : constant Boolean := False;
end Config;
In this case, GPRbuild selects the appropriate directory to look for the config.ads file accordingto information we provide for the compilation process. We do this by using a scenario type calledMode_Type in our project file:
gprbuild -P default.gpr -Xmode=release
project Default is
type Mode_Type is ("debug", "release");
Mode : Mode_Type := external ("mode", "debug");
for Source_Dirs use ("src", "src/" & Mode);for Object_Dir use "obj";for Main use ("main.adb");
end Default;
We declare the scenario variable Mode and use it in the Source_Dirs declaration to add the de-
14 Chapter 2. GPRbuild
Introduction to GNAT Toolchain, Release 2020-05
sired path to the subdirectory containing the config.ads file. The expression "src/" & Modeconcatenates the user-specified mode to select the appropriate subdirectory. For more complexcases, we could use either a tree of subdirectories or multiple scenario variables for each aspectthat we need to configure.
2.5. Configuration packages 15

Introduction to GNAT Toolchain, Release 2020-05
16 Chapter 2. GPRbuild
CHAPTER
THREE
GNAT STUDIO
This chapter presents an introduction to the GNAT Studio, which provides an IDE to develop ap-plications in Ada. For a detailed overview, please refer to the GNAT Studio tutorial6. Also, you canrefer to the GNAT Studio product page7 for some introductory videos.
In this chapter, all indications using ”→” refer to options from the GNAT Studio menu that you canclick in order to execute commands.
3.1 Start-up
The first step is to start-up the GNAT Studio. The actual step depends on your platform.
3.1.1 Windows
• You may find an icon (shortcut to GNAT Studio) on your desktop.
• Otherwise, start GNAT Studio by typing gnatstudio on the command prompt.
3.1.2 Linux
• Start GNAT Studio by typing gnatstudio on a shell.
3.2 Creating projects
After starting-up GNAT Studio, you can create a project. These are the steps:
• Click on Create new project in the welcome window
– Alternatively, if the wizard (which let’s you customize new projects) isn’t already opened,click on File → New Project... to open it.
– After clicking on Create new project, you should see a windowwith this title: CreateProject from Template.
• Select one of the options from the list and click on Next.
– The simplest one is Basic > Simple Ada Project, which creates a project containinga main application.
• Select the project location and basic settings, and click on Apply.6 http://docs.adacore.com/live/wave/gps/html/gps_tutorial7 https://www.adacore.com/gnatpro/toolsuite/gps
17

Introduction to GNAT Toolchain, Release 2020-05
– If you selected ”Simple Ada Project” in the previous step, you may now select the nameof the project and of the main file.
– Note that you can select any name for the main file.
You should now have a working project file.
3.3 Building
As soon as you’ve created a project file, you canuse it to build an application. These are the requiredsteps:
• Click on Build → Project → Build All
– You can also click on this icon:
• Alternatively, you can click on Build → Project → Build & Run → <name of your mainapplication>
– You can also click on this icon:
• You can also use the keyboard for building and running the main application:
– Press F4 to open a window that allows you to build the main application and click onExecute.
– Then, press Shift + F2 to open a window that allows you to run the application, andclick on Execute.
3.4 Debugging
3.4.1 Debug information
Before you can debug a project, you need tomake sure that debugging symbols have been includedin the binary build. You can do this by manually adding a debug version into your project, asdescribed in the previous chapter (see GPRbuild (page 9)).
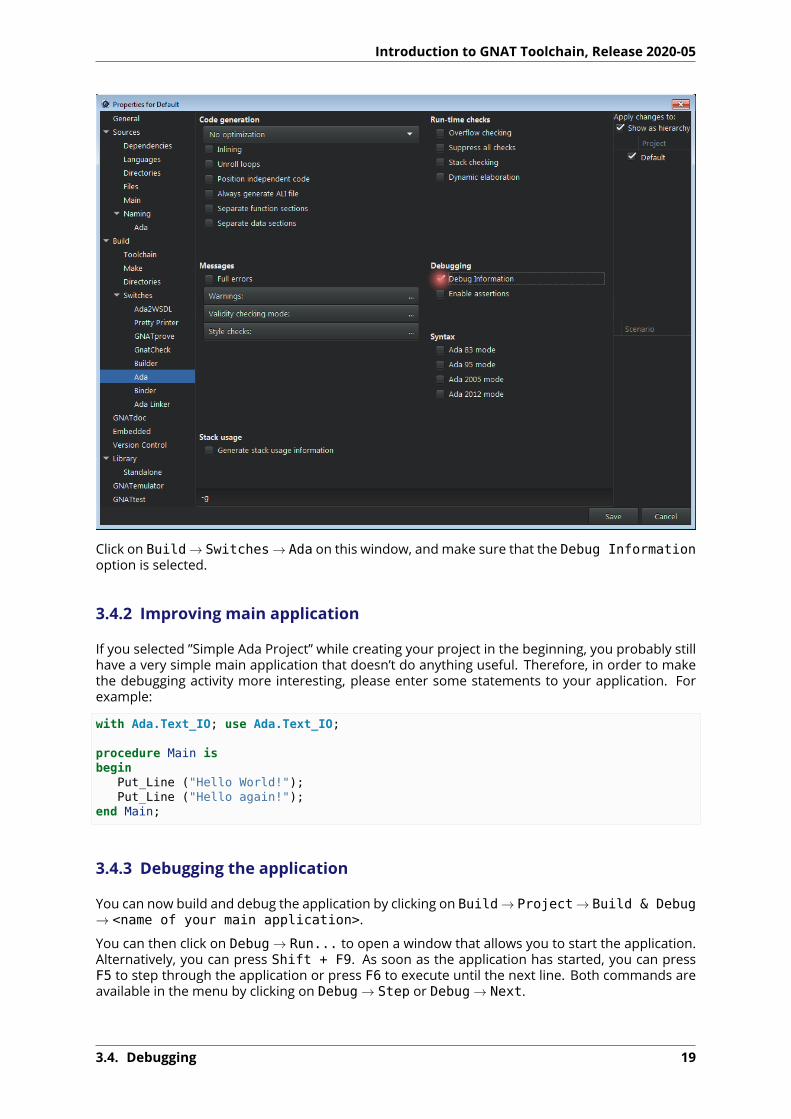
Alternatively, you can change the project properties directly in GNAT Studio. In order to do that,click on Edit → Project Properties..., which opens the following window:
18 Chapter 3. GNAT Studio
Introduction to GNAT Toolchain, Release 2020-05
Click on Build → Switches → Ada on this window, and make sure that the Debug Informationoption is selected.
3.4.2 Improving main application
If you selected ”Simple Ada Project” while creating your project in the beginning, you probably stillhave a very simple main application that doesn’t do anything useful. Therefore, in order to makethe debugging activity more interesting, please enter some statements to your application. Forexample:
with Ada.Text_IO; use Ada.Text_IO;
procedure Main isbegin
Put_Line ("Hello World!");Put_Line ("Hello again!");
end Main;
3.4.3 Debugging the application
You can now build and debug the application by clicking on Build → Project → Build & Debug→ <name of your main application>.
You can then click on Debug → Run... to open a window that allows you to start the application.Alternatively, you can press Shift + F9. As soon as the application has started, you can pressF5 to step through the application or press F6 to execute until the next line. Both commands areavailable in the menu by clicking on Debug → Step or Debug → Next.
3.4. Debugging 19

Introduction to GNAT Toolchain, Release 2020-05
When you’ve finished debugging your application, you need to terminate the debugger. To do this,you can click on Debug → Terminate.
3.5 Formal verification
In order to see how SPARK can detect issues, let’s creating a simple application that accumulatesvalues in a variable A:
procedure Mainwith SPARK_Mode is
procedure Acc (A : in out Natural;V : Natural) is
beginA := A + V;
end Acc;
A : Natural := 0;begin
Acc (A, Natural'Last);Acc (A, 1);
end Main;
You can now click on SPARK → Prove All, which opens a window with various options. For ex-ample, on this window, you can select the proof level — varying between 0 and 4 — on the Prooflevel list. Next, click on Execute. After the prover has completed its analysis, you’ll see a list ofissues found in the source code of your application.
For the example above, the prover complains about an overflow check that might fail. This is dueto the fact that, in the Acc procedure, we’re not dealing with the possibility that the result of theaddition might be out of range. In order to fix this, we could define a new saturating additionSat_Add that makes use of a custom type T with an extended range. For example:
procedure Mainwith SPARK_Mode is
function Sat_Add (A : Natural;V : Natural) return Natural
istype T is range Natural'First .. Natural'Last * 2;
A2 : T := T (A);V2 : constant T := T (V);A_Last : constant T := T (Natural'Last);
beginA2 := A2 + V2;
-- Saturate result if neededif A2 > A_Last then
A2 := A_Last;end if;
return Natural (A2);end Sat_Add;
procedure Acc (A : in out Natural;V : Natural) is
beginA := Sat_Add (A, V);
(continues on next page)
20 Chapter 3. GNAT Studio
Introduction to GNAT Toolchain, Release 2020-05
(continued from previous page)
end Acc;
A : Natural := 0;begin
Acc (A, Natural'Last);Acc (A, 1);
end Main;
Now, when running the prover again with the modified code, no issues are found.
3.5. Formal verification 21
Introduction to GNAT Toolchain, Release 2020-05
22 Chapter 3. GNAT Studio

CHAPTER
FOUR
GNAT TOOLS
In chapter we present a brief overview of some of the tools included in the GNAT Communitytoolchain.
For further details on how to use these tools, please refer to the GNAT User’s Guide8.
4.1 gnatchop
gnatchop renames files so they match the file structure and naming convention expected by therest of the GNAT toolchain. The GNAT compiler expects specifications to be stored in .ads filesand bodies (implementations) to be stored in .adb files. It also expects file names to correspondto the content of each file. For example, it expects the specification of a package Pkg.Child to bestored in a file named pkg-child.ads.
However, we may not want to use that convention for our project. For example, we may have mul-tiple Ada packages contain in a single file. Consider a file example.ada containing the following:
with Ada.Text_IO; use Ada.Text_IO;
package P isprocedure Test;
end P;
package body P isprocedure Test isbegin
Put_Line("Test passed.");end Test;
end P;
with P; use P;
procedure P_Main isbegin
P.Test;end P_Main;
To compile this code, we first pass the file containing our source code to gnatchop before we callgprbuild:
gnatchop example.adagprbuild p_main
This generates source files for our project, extracted from example_ada, that conform to the de-fault naming convention and then builds the executable binary p_main from those files. In this
8 https://docs.adacore.com/gnat_ugn-docs/html/gnat_ugn/gnat_ugn.html
23

Introduction to GNAT Toolchain, Release 2020-05
example gnatchop created the files p.ads, p.adb, and p_main.adb using the package names inexample.ada.
When we use this mechanism, any warnings or errors the compiler displays refers to the files gen-erated by gnatchop. We can, however, instruct gnatchop to instrument the generated files so thecompiler refers to the original file (example.ada in our case) when displaying messages. We dothis by using the -r switch:
gnatchop -r example.adagprbuild p_main
If, for example, we had an unused variable in example.ada, the compiler warning would now referto the line in the original file, not in one of the generated ones.
For documentation of other switches available for gnatchop, please refer to the gnatchop chapter9of the GNAT User’s Guide.
4.2 gnatprep
We may want to use conditional compilation in some situations. For example, we might need acustomized implementation of a package for a specific platform or need to select a specific versionof an algorithm depending on the requirements of the target environment. A traditional way todo this uses a source-code preprocessor. However, in many cases where conditional compilationis needed, we can instead use the syntax of the Ada language or the functionality provided byGPRbuild to avoid using a preprocessor in those cases. The conditional compilation section10 ofthe GNAT User’s Guide discusses how to do this in detail.
Nevertheless, using a preprocessor is ofen the most straightforward option in complex cases.When we encounter such a case, we can use gnatprep, which provides a syntax that remindsus of the C and C++ preprocessor. However, unlike in C and C++, this syntax is not part of the Adastandard and can only be used with gnatprep. Also, you’ll notice some differences in the syntaxfrom that preprocessor, such as shown in the example below:
#if VERSION'Defined and then (VERSION >= 4) then-- Implementation for version 4.0 and above...
#else-- Standard implementation for older versions...
#end if;
Of course, in this simple case, we could have used the Ada language directly and avoided the pre-pocessor entirely:
package Config isVersion : constant Integer := 4;
end Config;
with Config;procedure Do_Something isbegin
if Config.Version >= 4 thennull;-- Implementation for version 4.0 and above...
elsenull;-- Standard implementation for older versions...
(continues on next page)
9 https://docs.adacore.com/gnat_ugn-docs/html/gnat_ugn/gnat_ugn/the_gnat_compilation_model.html#renaming-files-with-gnatchop
10 https://docs.adacore.com/gnat_ugn-docs/html/gnat_ugn/gnat_ugn/the_gnat_compilation_model.html#conditional-compilation
24 Chapter 4. GNAT Tools
Introduction to GNAT Toolchain, Release 2020-05
(continued from previous page)
end if;end Do_Something;
But for the sake of illustrating the use of gnatprep, let’s use that tool in this simple case. This isthe complete package body, which we place in file do_something.org.adb:
procedure Do_Something isbegin
#if VERSION'Defined and then (VERSION >= 4) then-- Implementation for version 4.0 and above...null;#else-- Standard implementation for older versions...null;#end if;
end Do_Something;
To preprocess this file and build the application, we call gnatprep followed by GPRbuild:
gnatprep do_something.org.adb do_something.adbgprbuild do_something
If we look at the resulting file after preprocessing, we see that the #else implementation wasselected by gnatprep. To cause it to select the newer ”version” of the code, we include the symboland its value in our call to gnatprep, just like we’d do for C/C++:
gnatprep -DVERSION=5 do_something.org.adb do_something.adb
However, a cleaner approach is to create a symbol definition file containing all symbols we use inour implementation. Let’s create the file and name it prep.def:
VERSION := 5
Now we just need to pass it to gnatprep:
gnatprep do_something.org.adb do_something.adb prep.defgprbuild do_something
When we use gnatprep in that way, the line numbers of the output file differ from those of theinput file. To preserve line numbers, we can use one of these command-line switches:
• -b: replace stripped-out code by blank lines
• -c: comment-out the stripped-out code
For example:
gnatprep -b do_something.org.adb do_something.adb prep.defgnatprep -c do_something.org.adb do_something.adb prep.def
When we use one of these options, gnatprep ensures that the output file do_something.adbhas the same line numbering as the original file (do_something.org.adb).
The gnatprep chapter11. of the GNAT User’s Guide contains further details about this tool, such ashow to integrate gnatprep with project files for GPRbuild and how to replace symbols withoutusing preprocessing directives (using the $symbol syntax).
11 https://docs.adacore.com/gnat_ugn-docs/html/gnat_ugn/gnat_ugn/the_gnat_compilation_model.html#preprocessing-with-gnatprep
4.2. gnatprep 25

Introduction to GNAT Toolchain, Release 2020-05
4.3 gnatxref and gnatfind
We can use the gnatxref and gnatfind tools to retrieve information about individual elementsin our source-code, such as variable and subprogram declarations. Both tools are based on thecross-referencing information generated by the compiler and stored in .ali files.
Let’s reuse an example from the previous section:
package P isprocedure Test_1;procedure Test_2;
end P;
with Ada.Text_IO; use Ada.Text_IO;
package body P isprocedure Test_1 isbegin
Put_Line("Test #1 passed.");end Test_1;
procedure Test_2 isbegin
Put_Line("Test #2 passed.");end Test_2;
end P;
with P; use P;
procedure Main_App isbegin
P.Test_1;end Main_App;
After building the application, we can use gnatxref to display elements from individual files:
gnatxref p.adb
This generates the following report:
Ada packageDecl: ada.ads 16:9Ref: p.adb 1:6 1:23
P packageDecl: p.ads 1:9Body: p.adb 3:14
Put_Line procedureDecl: a-textio.ads 263:14Ref: p.adb 6:7 11:7
Test_1 procedureDecl: p.ads 2:14Body: p.adb 4:14
Test_2 procedureDecl: p.ads 3:14Body: p.adb 9:14
Text_IO packageDecl: a-textio.ads 49:13Ref: p.adb 1:27
This report contains the locations of the declaration and body of package P and procedures Test_1and Test_2 as well as of the declaration of Put_Line (from the Ada.Test_IO) package and of itsreference in the body of package P.
26 Chapter 4. GNAT Tools
Introduction to GNAT Toolchain, Release 2020-05
We can use gnatfind to retrieve all references to a specific pattern. For example, let’s search forall instances of Test_1:
gnatfind -r Test_1
This generates the following output:
p.ads:2:14: (spec) Test_1p.adb:4:14: (body) Test_1main_app.adb:5:6: Test_1p.adb:7:8: Test_1
The chapter on gnatxref and gnatfind12 of the GNAT User’s Guide contains further examples anddescribes the usage of more command-line switches for these tools.
4.4 gnatmem
Memory allocation errors involving mismatches between allocations and deallocations are a com-mon source of memory leaks. To test an application for memory allocation issues, we can usegnatmem. This tool monitors all memory allocations in our application. We use this tool by linkingour application to a special version of the memory allocation library (libgmem.a).
Let’s consider this simple example:
procedure Simple_Mem isI_Ptr : access Integer := new Integer;
beginnull;
end Simple_Mem;
To generate a memory report for this code, we need to:
• Build the application, linking it to libgmem.a;
• Run the application, which generates an output file (gmem.out);
• Run gnatmem to generate a report from gmem.out.
For our example above, we do the following:
# Build application using gmemgnatmake -g simple_mem.adb -largs -lgmem
# Run the application and generate gmem.out./simple_mem
# Call gnatmem to display the memory report based on gmem.outgnatmem simple_mem
For this example, gnatmem produces the following output:
Global information------------------
Total number of allocations : 1Total number of deallocations : 0Final Water Mark (non freed mem) : 4 BytesHigh Water Mark : 4 Bytes
(continues on next page)
12 https://docs.adacore.com/gnat_ugn-docs/html/gnat_ugn/gnat_ugn/gnat_utility_programs.html#the-cross-referencing-tools-gnatxref-and-gnatfind
4.4. gnatmem 27
Introduction to GNAT Toolchain, Release 2020-05
(continued from previous page)
Allocation Root # 1-------------------Number of non freed allocations : 1Final Water Mark (non freed mem) : 4 BytesHigh Water Mark : 4 BytesBacktrace :
simple_mem.adb:2 simple_mem
This shows all the memory we allocated and tells us that we didn’t deallocate any of it.
Please refer to the chapter on gnatmem13 of the GNAT User’s Guide for a more detailed discussionof gnatmem.
4.5 gnatmetric
We can use the GNAT metric tool (gnatmetric) to compute various programming metrics, eitherfor individual files or for our complete project.
For example, we can compute the metrics of the body of package P above by running gnatmetricas follows:
gnatmetric p.adb
This produces the following output:
Line metrics summed over 1 unitsall lines : 13code lines : 11comment lines : 0end-of-line comments : 0comment percentage : 0.00blank lines : 2
Average lines in body: 4.00
Element metrics summed over 1 unitsall statements : 2all declarations : 3logical SLOC : 5
2 subprogram bodies in 1 units
Average cyclomatic complexity: 1.00
Please refer to the section on gnatmetric14 of the GNAT User’s Guide for the many switches avail-able for gnatmetric, including the ability to generate reports in XML format.
4.6 gnatdoc
Use GNATdoc to generate HTML documentation for your project. It scans the source files in theproject and extracts information from package, subprogram, and type declarations.
13 https://docs.adacore.com/gnat_ugn-docs/html/gnat_ugn/gnat_ugn/gnat_and_program_execution.html#the-gnatmem-tool
14 https://docs.adacore.com/gnat_ugn-docs/html/gnat_ugn/gnat_ugn/gnat_utility_programs.html#the-gnat-metrics-tool-gnatmetric
28 Chapter 4. GNAT Tools

Introduction to GNAT Toolchain, Release 2020-05
The simplest way to use it is to provide the name of the project or to invoke GNATdoc from adirectory containing a project file:
gnatdoc -P some_directory/default.gpr
# Alternatively, when the :file:`default.gpr` file is in the same directory
gnatdoc
Just using this command is sufficient if your goal is to generate a list of the packages and a list ofsubprograms in each. However, to createmoremeaningful documentation, you can annotate yoursource code to add a description of each subprogram, parameter, and field. For example:
package P is-- Collection of auxiliary subprograms
function Add_One(V : Integer-- Coefficient to be incremented) return Integer;
-- @return Coefficient incremented by one
end P;
package body P is
function Add_One (V : Integer) return Integer isbegin
return V + 1;end Add_One;
end P;
with P; use P;
procedure Main is
I : Integer;
beginI := Add_One (0);
end Main;
Whenwe run this example, GNATdocwill extract the documentation from the specification of pack-age P and add the description of each element, which we provided as a comment in the line belowthe actual declaration. It will also extract the package description, which we wrote as a comment inthe line right after package P is. Finally, it will extract the documentation of function Add_One(both the description of the V parameter and the return value).
In addition to the approach we’ve just seen, GNATdoc also supports the tagged format that’s com-monly found in tools such as Javadoc and uses the @ syntax. We could rewrite the documentationfor package P as follows:
package P is-- @summary Collection of auxiliary subprograms
function Add_One(V : Integer) return Integer;
-- @param V Coefficient to be incremented-- @return Coefficient incremented by one
(continues on next page)
4.6. gnatdoc 29
Introduction to GNAT Toolchain, Release 2020-05
(continued from previous page)
end P;
You can control what parts of the source-code GNATdoc parses to extract the documentation. Forexample, you can specify the -b switch to request that the package body be parsed for additionaldocumentation and you can use the -p switch to request GNATdoc to parse the private part ofpackage specifications. For a complete list of switches, please refer to the GNATdoc User’s Guide15.
4.7 gnatpp
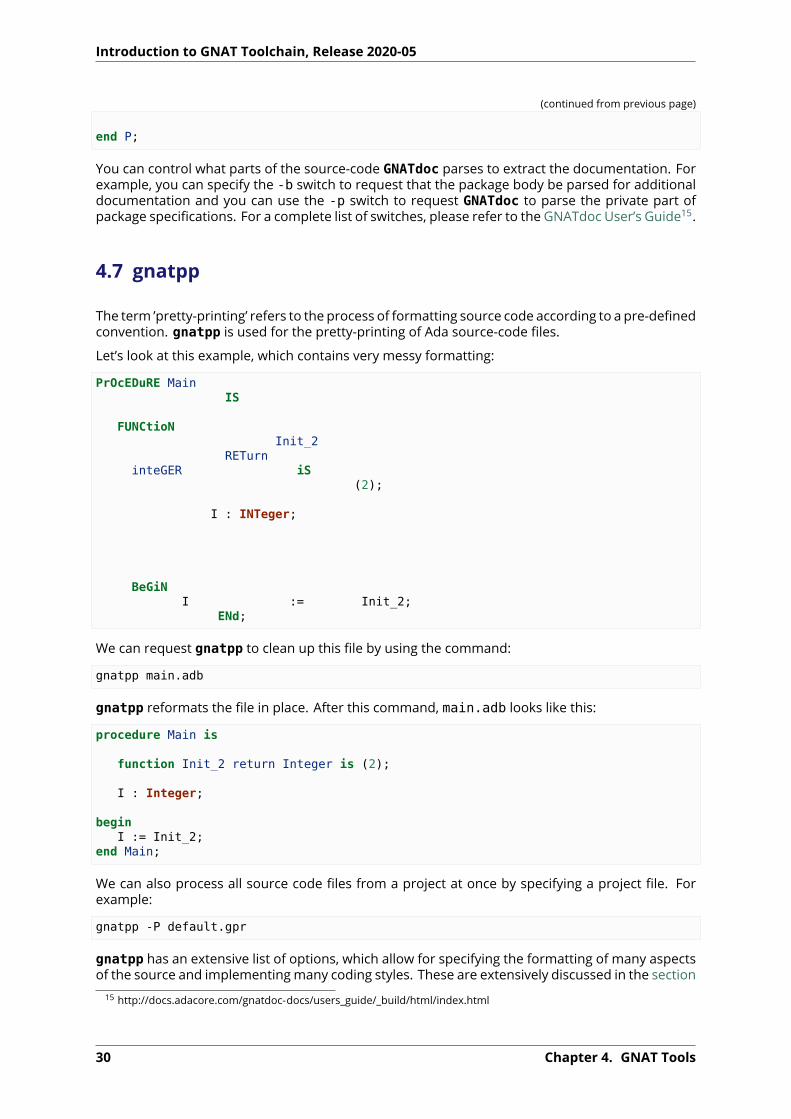
The term ’pretty-printing’ refers to the process of formatting source code according to a pre-definedconvention. gnatpp is used for the pretty-printing of Ada source-code files.
Let’s look at this example, which contains very messy formatting:
PrOcEDuRE MainIS
FUNCtioNInit_2
RETurninteGER iS
(2);
I : INTeger;
BeGiNI := Init_2;
ENd;
We can request gnatpp to clean up this file by using the command:
gnatpp main.adb
gnatpp reformats the file in place. After this command, main.adb looks like this:
procedure Main is
function Init_2 return Integer is (2);
I : Integer;
beginI := Init_2;
end Main;
We can also process all source code files from a project at once by specifying a project file. Forexample:
gnatpp -P default.gpr
gnatpp has an extensive list of options, which allow for specifying the formatting of many aspectsof the source and implementingmany coding styles. These are extensively discussed in the section
15 http://docs.adacore.com/gnatdoc-docs/users_guide/_build/html/index.html
30 Chapter 4. GNAT Tools

Introduction to GNAT Toolchain, Release 2020-05
on gnatpp16 of the GNAT User’s Guide.
4.8 gnatstub
Suppose you’ve created a complex specification of an Ada package. You can create the correspond-ing package body by copying and adapting the content of the package specification. But you canalso have gnatstub domuch of that job for you. For example, let’s consider the following packagespecification:
package Aux is
function Add_One (V : Integer) return Integer;
procedure Reset (V : in out Integer);
end Aux;
We call gnatstub, passing the file containing the package specification:
gnatstub aux.ads
This generates the file aux.adb with the following contents:
pragma Ada_2012;package body Aux is
--------------- Add_One ---------------
function Add_One (V : Integer) return Integer isbegin
-- Generated stub: replace with real body!pragma Compile_Time_Warning (Standard.True, "Add_One unimplemented");return raise Program_Error with "Unimplemented function Add_One";
end Add_One;
------------- Reset -------------
procedure Reset (V : in out Integer) isbegin
-- Generated stub: replace with real body!pragma Compile_Time_Warning (Standard.True, "Reset unimplemented");raise Program_Error with "Unimplemented procedure Reset";
end Reset;
end Aux;
Aswe can see in this example, not only has gnatstub created a package body fromall the elementsin the package specification, but it also created:
• Headers for each subprogram (as comments);
• Pragmas and exceptions that prevent us from using the unimplemented subprograms in ourapplication.
16 https://docs.adacore.com/gnat_ugn-docs/html/gnat_ugn/gnat_ugn/gnat_utility_programs.html#the-gnat-pretty-printer-gnatpp
4.8. gnatstub 31

Introduction to GNAT Toolchain, Release 2020-05
This is a good starting point for the implementation of the body. Please refer to the section ongnatstub17 of the GNAT User’s Guide for a detailed discussion of gnatstub and its options.
17 https://docs.adacore.com/gnat_ugn-docs/html/gnat_ugn/gnat_ugn/gnat_utility_programs.html#the-body-stub-generator-gnatstub
32 Chapter 4. GNAT Tools