ios: iphone (ios 11 - im ap) - zendeskios: iphone (ios 11 - im ap) this ar ticle will assist y ou in...
TRANSCRIPT
iOS: iPhone (iOS 11 - IMAP)This article will assist you in setting up your iPhone with your Hosted Email mailbox. This article
assumes that you have iOS 11 installed. If you have an older version, the screenshots below may
not align exactly. We recommend running the latest version of iOS. This will ensure your phone
has the latest features and security patches.
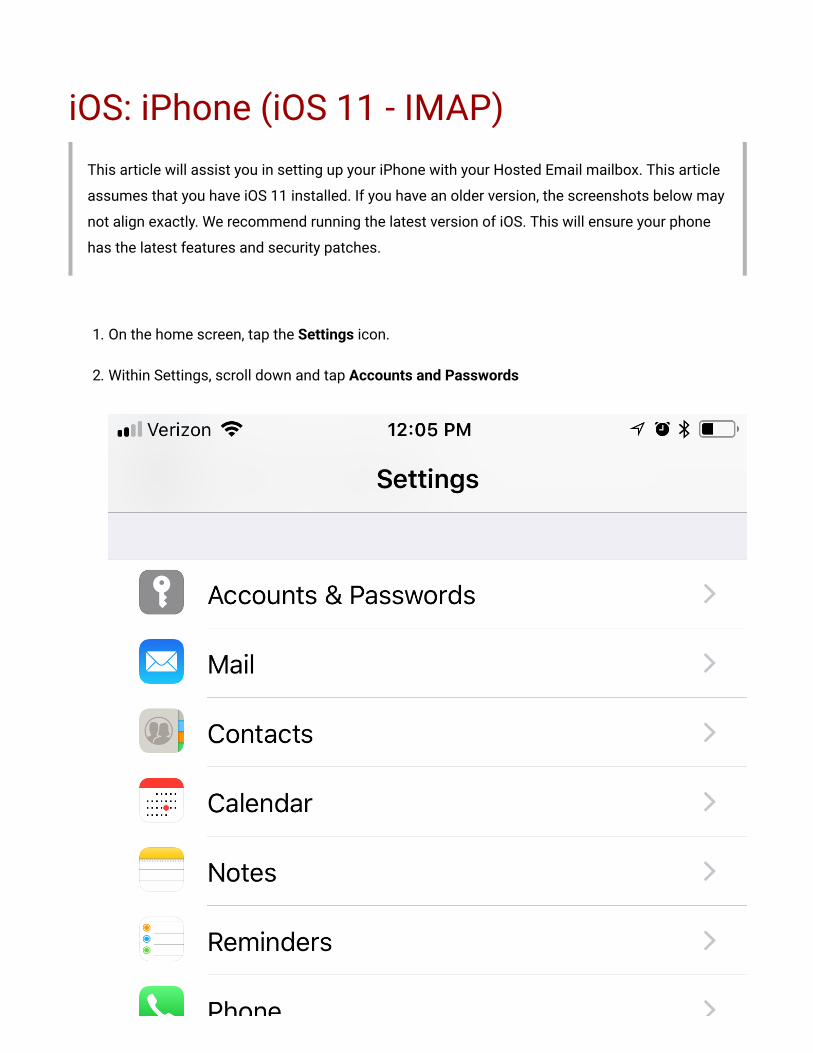
1. On the home screen, tap the Settings icon.
2. Within Settings, scroll down and tap Accounts and Passwords
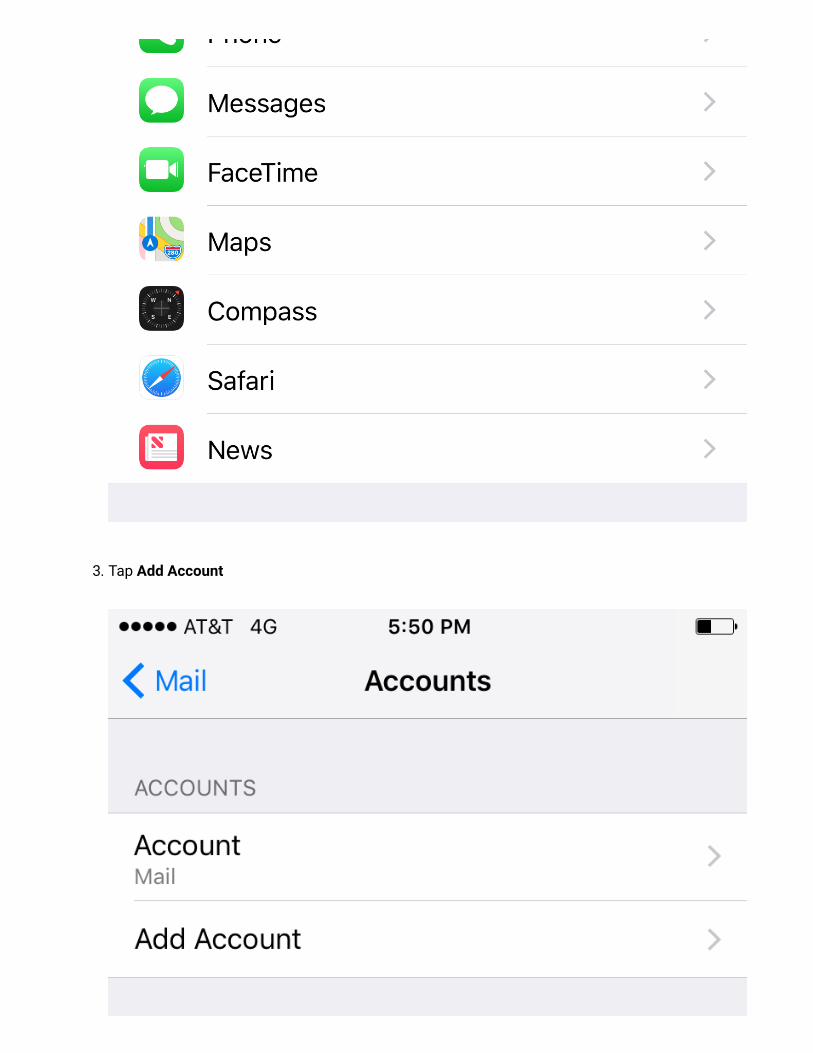
3. Tap Add Account
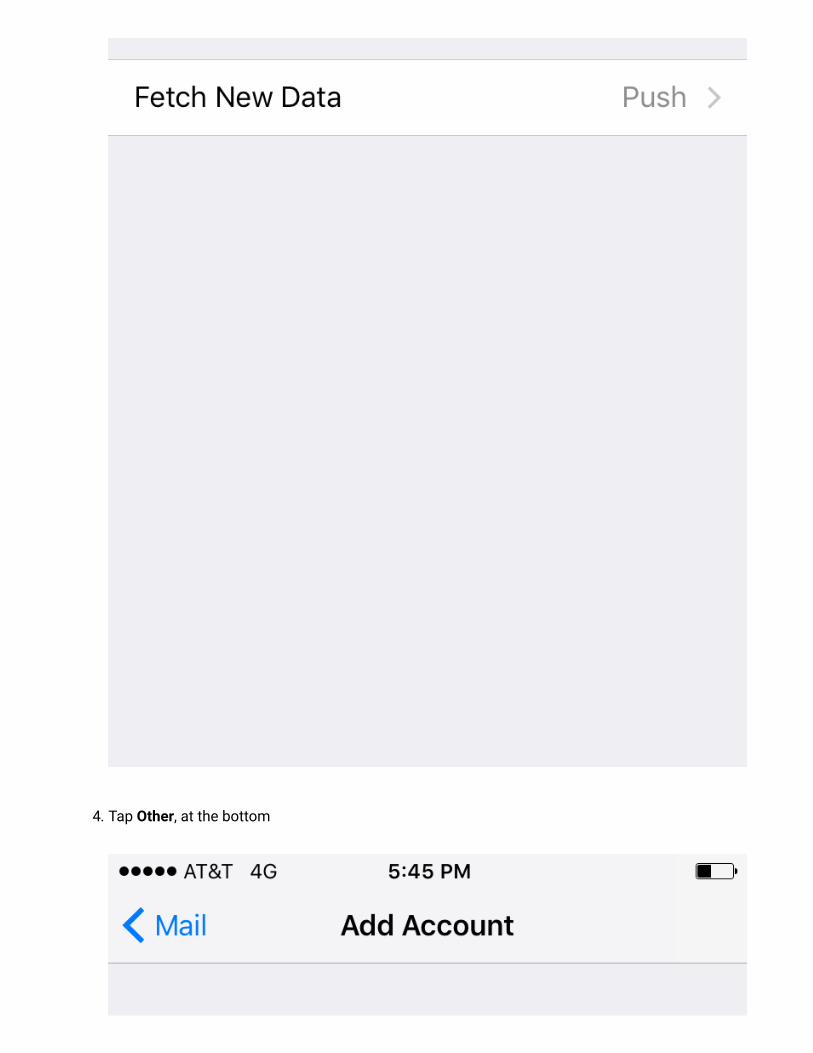
4. Tap Other, at the bottom


5. Tap Add Mail Account
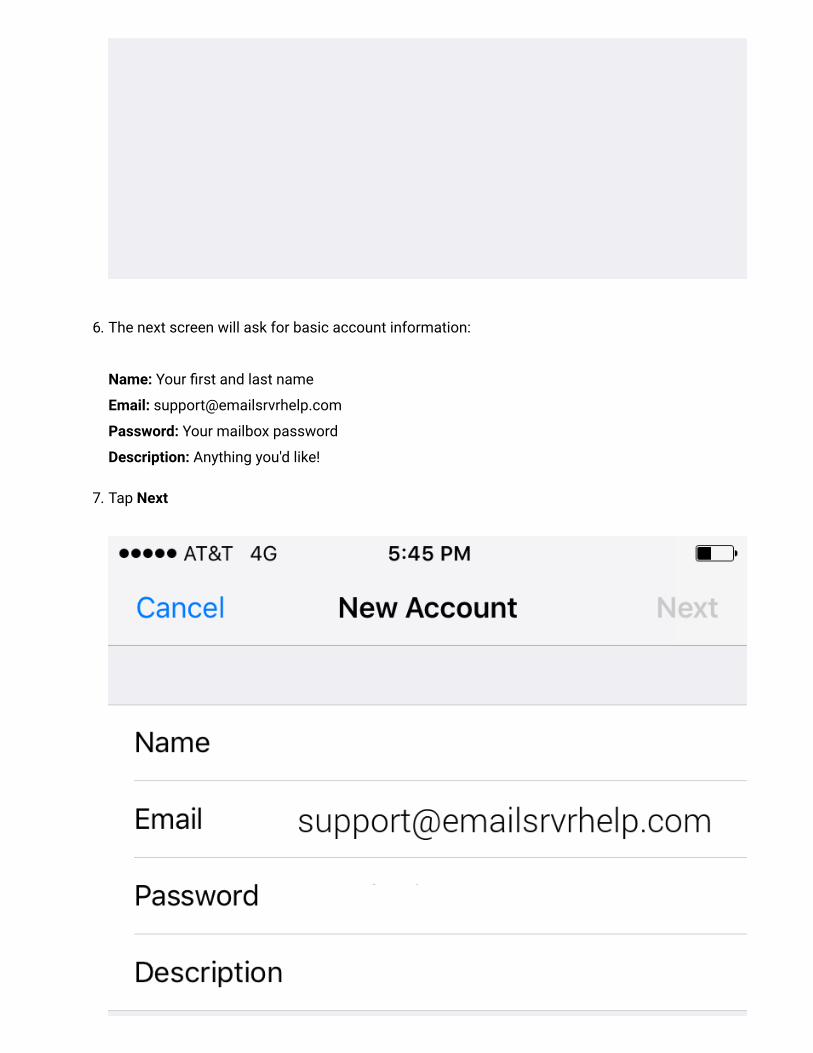
6. The next screen will ask for basic account information:
Name: Your �rst and last name
Email: [email protected]
Password: Your mailbox password
Description: Anything you'd like!
7. Tap Next
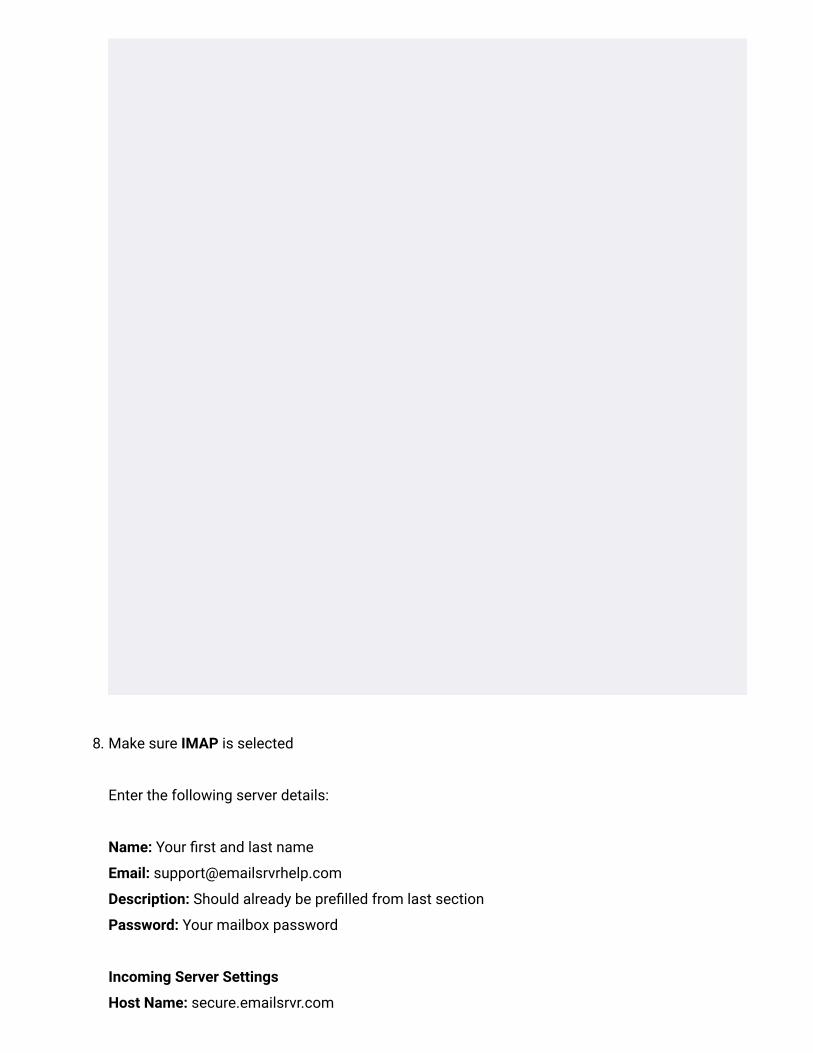
8. Make sure IMAP is selected
Enter the following server details:
Name: Your �rst and last name
Email: [email protected]
Description: Should already be pre�lled from last section
Password: Your mailbox password
Incoming Server Settings
Host Name: secure.emailsrvr.com
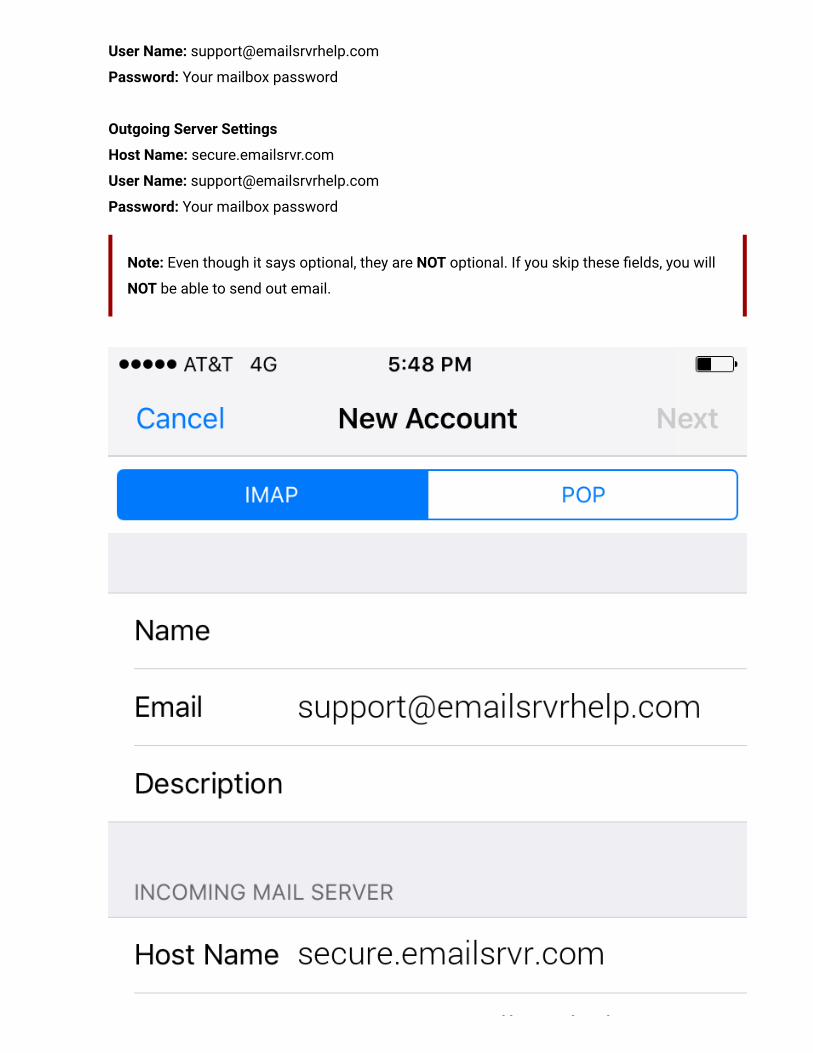
User Name: [email protected]
Password: Your mailbox password
Outgoing Server Settings
Host Name: secure.emailsrvr.com
User Name: [email protected]
Password: Your mailbox password
Note: Even though it says optional, they are NOT optional. If you skip these �elds, you will
NOT be able to send out email.
9. Tap Next
10. Select the desired settings and tap Save
Authentication failed? Click me for tips!
Next, we are con�guring your iPhone to sync your various IMAP folders and prevent duplicate folders
from showing up. We call this Folder Mapping; below are the steps to do so.
1. Within the Mail settings window, select the account that you just added.
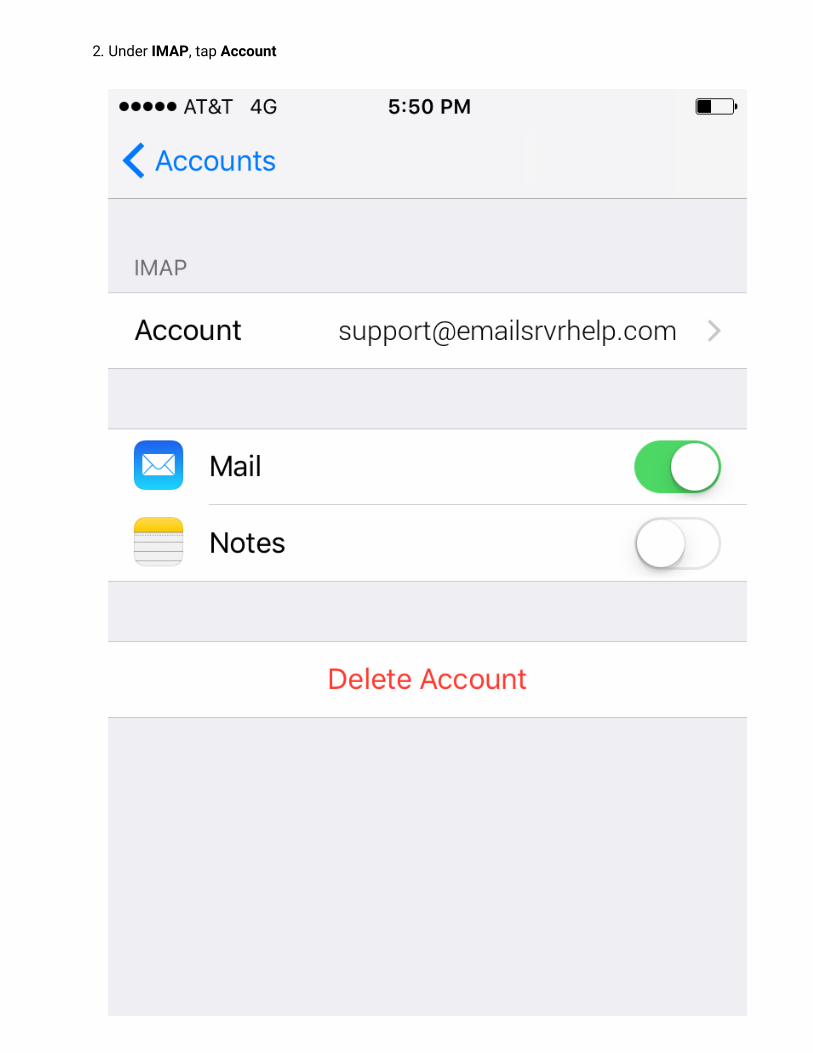
2. Under IMAP, tap Account
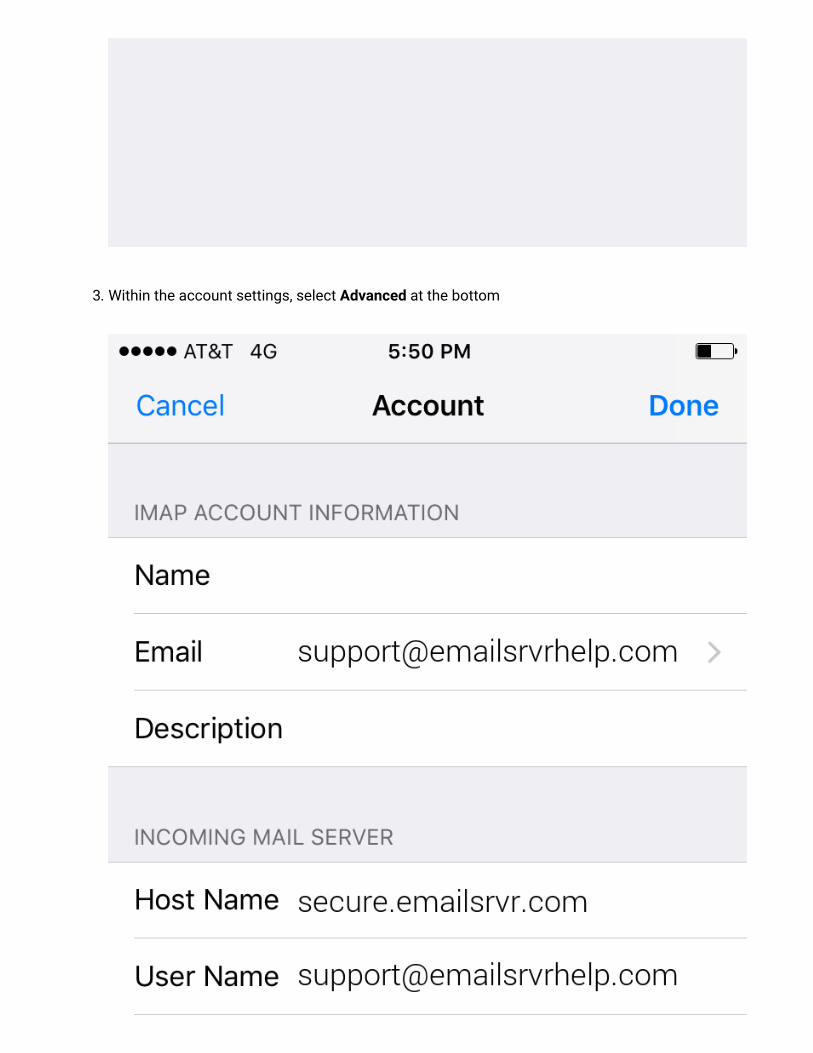
3. Within the account settings, select Advanced at the bottom
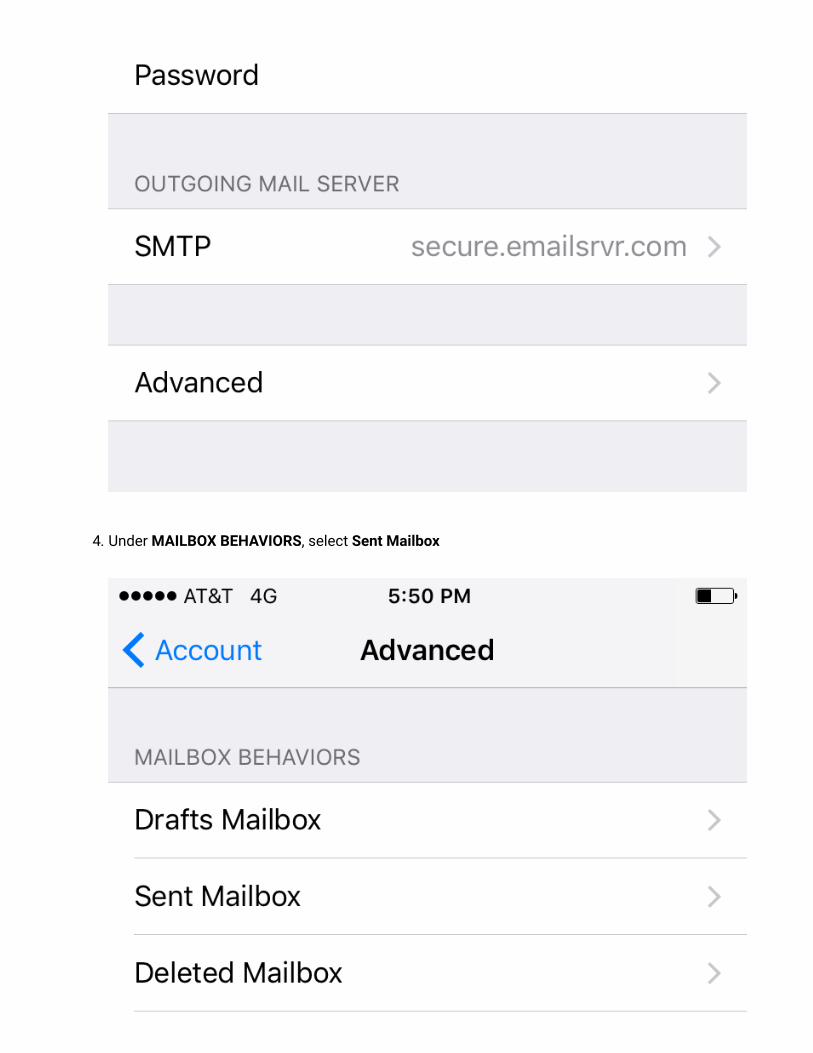
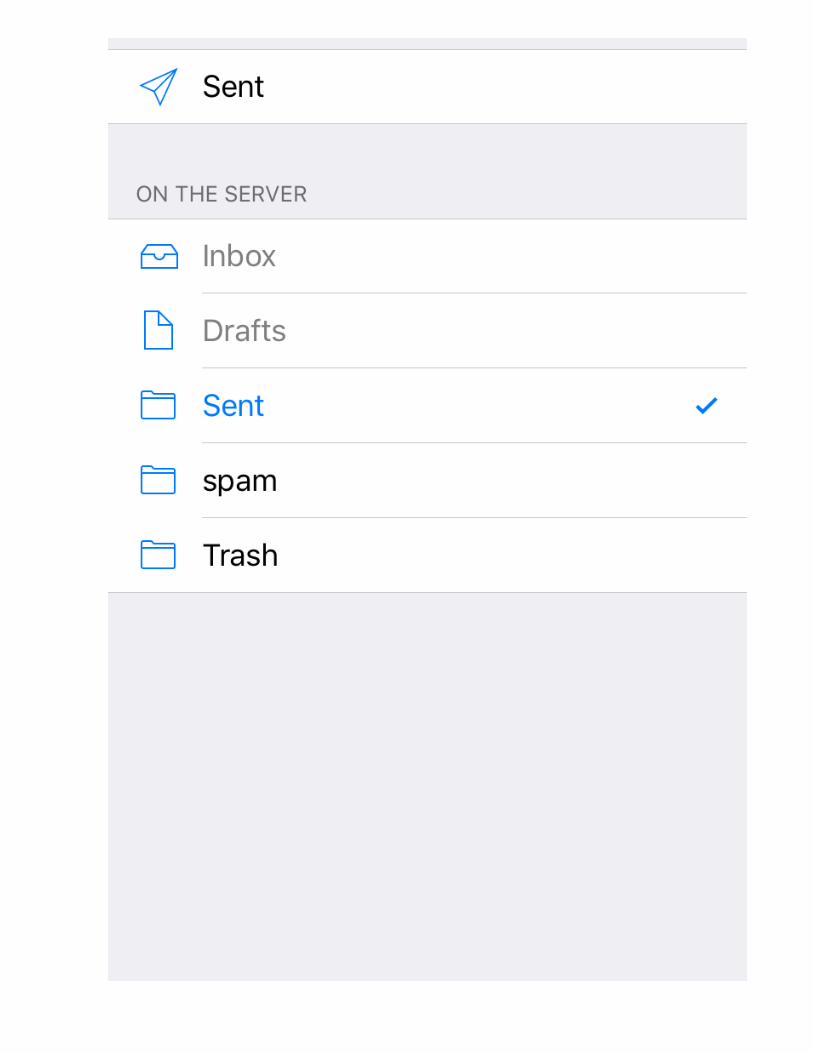
4. Under MAILBOX BEHAVIORS, select Sent Mailbox
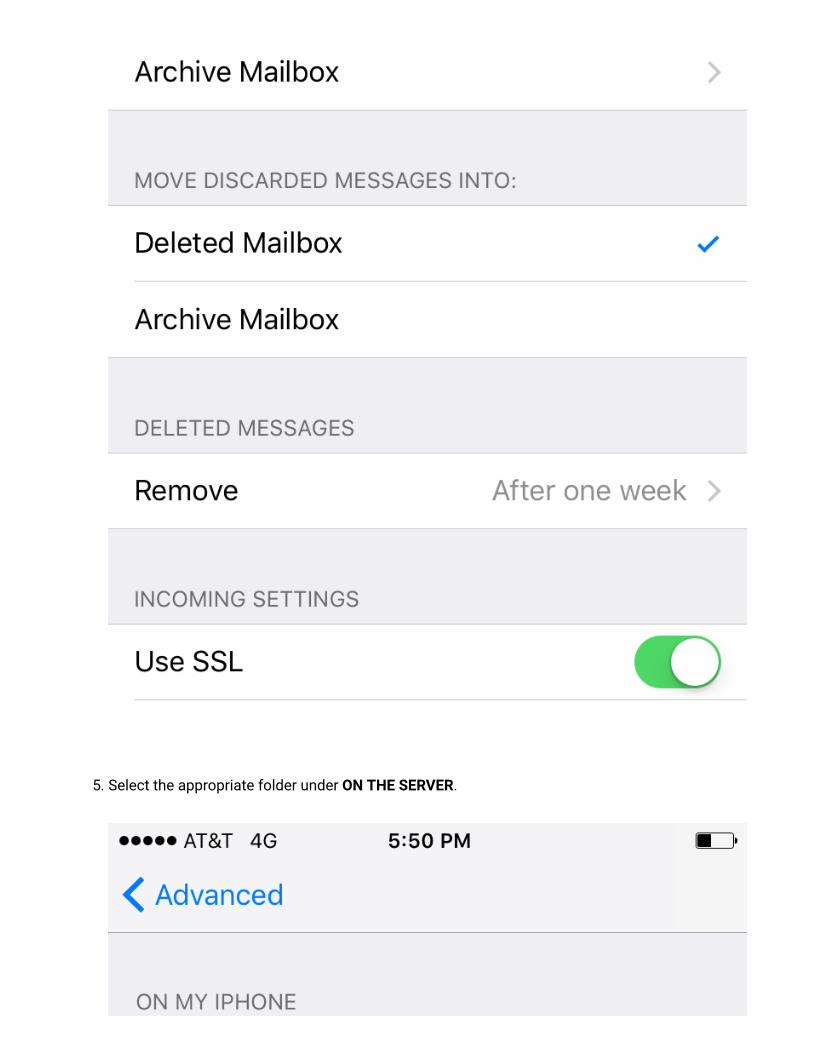
5. Select the appropriate folder under ON THE SERVER.

6. Now repeat the previous step for Deleted Mailbox.
Ignore the Archive Mailbox, it won't be used.
7. Last step! Make sure Deleted Mailbox is selected under MOVE DISCARDED MESSAGES INTO.
This will ensure deleted messages go to the Deleted Mailbox folder.
8. Now you're done! Go back to the home screen and launch the Mail app. Your email should
appear within a few minutes, depending on the amount of items to sync.
Note: If you have a large mailbox, it may take several minutes before email appears. Please wait
at least 15 minutes before troubleshooting.
Don't forget about your other devices! Click here (/setup/qa/) to set up a computer, tablet, or phone.
Have another computer, tablet, or phone to set up? Go tohttps://helptool.preprod.mlsrvr.com! We have set up articles for most currentdevices.