ip phone for ericsson businessphone€¦ · 17 troubleshooting 75 18 list of features and...
TRANSCRIPT
Dialog 5446 IP PremiumIP Phone for Ericsson BusinessPhone
USER GUIDE

Copyright
© Copyright Ericsson AB 2008. All rights reserved.
Disclaimer
No part of this document may be reproduced in any form without the writtenpermission of the copyright owner.
The contents of this document are subject to revision without notice due tocontinued progress in methodology, design and manufacturing. Ericsson shallhave no liability for any error or damage of any kind resulting from the useof this document.
Abstract
8/1553-DBC 446 01 Uen A 2008-04-11

Contents
Contents
1 Important User Information 1
2 Dialog 5446 Description 5
2.1 Keypad 7
2.2 Navigation 8
2.3 Display 9
2.4 Indicator Lights 13
2.5 Tones And Signals 13
2.6 Handset And Speakerphone 14
2.7 Headset 15
3 Starting the Phone 17
3.1 Starting and Logging On 17
3.2 Logon Options 18
3.3 Logging Off The Phone 20
3.4 Software Version and Communication Protocol 21
4 Incoming Calls 23
4.1 Answer Calls 23
4.2 Picking Up Calls 23
5 Outgoing Calls 25
5.1 Making Calls 25
5.2 When You Receive a Busy Tone or No Answer 25
5.3 Emergency Calls (SOS Calls) 27
5.4 Redial Calls 28
5.5 Name Keys 29
5.6 Monitoring Keys 29
5.7 Abbreviated Numbers 30
5.8 Common Abbreviated Numbers 30
5.9 Individual Abbreviated Numbers 30
6 During Calls 33
6.1 Inquiry 33
6.2 Transfer 33
8/1553-DBC 446 01 Uen A 2008-04-11

Dialog 5446 IP Premium
6.3 Conference 33
6.4 Parking 34
6.5 Suffix Dialing (Dialing During Speech) 34
6.6 Sending Messages 35
7 Call Forwarding 37
7.1 Follow-me 37
7.2 External Follow-me 39
7.3 Selecting a Profile 40
8 Managing Contacts 41
8.1 Microsoft® Outlook® Contacts 41
8.2 My Dialog Contacts 42
9 Corporate Directory 45
9.1 Finding A Contact 45
9.2 Calling A Contact 45
10 Presence Information 47
10.1 Selecting an Absence Reason 47
10.2 Canceling Absence 47
11 Voice Mailbox 49
11.1 Activating the Mailbox 49
11.2 Deactivating the mailbox 49
11.3 Accessing the Mailbox 50
11.4 Listening to your Messages 51
11.5 Changing your Personal Greeting 52
11.6 Sending messages via your mailbox 52
11.7 Outgoing (External) Notification 53
11.8 Changing Password 54
11.9 Dictaphone Function 54
12 Group Features 57
12.1 Group Call-pick-up 57
12.2 Group Hunting 57
12.3 Common Bell 58
13 Other Features 61
13.1 Tandem Configuration 61
8/1553-DBC 446 01 Uen A 2008-04-11

Dialog 5446 IP Premium
13.2 Reminder 62
13.3 Door Phone 62
13.4 Account Number 63
13.5 Hot-line (Non-dialed Connection) 63
13.6 Least Cost Routing 63
14 Settings 65
14.1 Presence Settings 65
14.2 Telephone Settings 65
14.3 Network Settings 69
15 Web Browser 71
15.1 Opening the Web Browser 71
15.2 Using the Web Browser 71
15.3 Exiting the Web Browser 72
16 Web Interface 73
16.1 Accessing the Telephone’s Web Interface 73
16.2 Using the Telephone Through the Web Interface 73
17 Troubleshooting 75
18 List of Features and Procedures 77
19 Telephony Function Codes 79
8/1553-DBC 446 01 Uen A 2008-04-11

Dialog 5446 IP Premium
8/1553-DBC 446 01 Uen A 2008-04-11

Important User Information
1 Important User Information
IMPORTANT SAFETY INSTRUCTIONS (ENGLISH)
When using your telephone equipment, basic safety precautions should alwaysbe followed to reduce the risk of fire, electric shock and injury to persons,including the following:
• Do not use this product near water, for example, near a bath tub, wash bowl,kitchen sink or laundry tub, in a wet basement or near a swimming pool.
• Avoid using a telephone (other than a cordless type) during an electricalstorm. There may be a remote risk of electric shock from lightning.
• Do not use the telephone to report a gas leak in the vicinity of the leak.
• Use only the power cord indicated in this manual.
SAVE THESE INSTRUCTIONS
IMPORTANTES MESURES DE SÉCURITÉ (FRANÇAIS)
Certaines mesures de sécurité doivent être prises pendant l’utilisation dematérial téléphonique afin de réduire les risques d’incendie, de choc électriqueet de blessures. En voici quelquesunes:
• Ne pas utiliser l’appareil près de l’eau, p.ex., près d’une bagnoire, d’unlavabo, d’un évier de cuisine, d’un bac à laver, dans un sous-sol humideou près d’une piscine.
• Éviter d’utiliser le téléphone (sauf s’il s’agit d’un appareil sans fil) pendantun orage électrique. Ceci peut présenter un risque de choc électriquecausé par la foudre.
• Ne pas utiliser l’appareil téléphonique pour signaler une fuite de gaz s’il estsitué près de la fuite.
• Utiliser seulement le cordon d’alimentation indiqué dans ce manuel.
CONSERVER CES INSTRUCTIONS
INTRODUCTION
These directions for use describe the user procedures to handle the featuresavailable for the Dialog 5446 IP phone (also known as DBC 446).
All the procedures, suffix digits, tone messages and times used in thisdocument are according to the standard application system.
18/1553-DBC 446 01 Uen A 2008-04-11

Dialog 5446 IP Premium
Not all exchanges are equipped with all features. By categorization, it ispossible to vary the number of features assigned to each individual extension.This can affect the display information. The person (department) responsiblefor telecommunications in your organization will inform you which features thathave been assigned to you.
The Dialog 5446 IP phone conforms to the H.323 standard.
The phone supports Dynamic Host Configuration Protocol (DHCP) fordetermination of IP addresses.
* * * * * * * * * * * * * * * * * * * * * * * * * * * * * * * * * * * * * * *
Note: Be careful not to keep credit cards near the phone, since they may bedemagnetized due to the strong magnets in the phone.
This phone can be used without lifting the handset.
When stated Lift the handset before dialing a procedure or a phone numberyou can also dial directly without lifting the handset.
For more information, see Section 2.7.1 Using the Headset on page 15
* * * * * * * * * * * * * * * * * * * * * * * * * * * * * * * * * * * * * * *
Important Safety Instructions
Save these instructions. Read these safety instructions before use! Note:When using your telephone or connected equipment, the following basic safetyprecautions should always be followed to reduce risk of fire, electrical shockand other personal injury.
Follow instructions in the equipment’s user guide or other documentation.
Always install equipment in a location and environment for which it is designed.
For mains powered telephones: Only operate with the mains power voltageindicated. If you are uncertain of the type of power supplied to the building,consult property management or your local power company.
For mains powered telephones: Avoid placing the telephone’s power cablewhere it can be exposed to mechanical pressure as this may damage thecable. If the power supply cord or plug is damaged, disconnect the product andcontact qualified service personnel.
Headsets used with this equipment must comply with EN/IEC 60950-1 andfor Australia AS/NZS 60950.1-2003.
Do not make any changes or modifications to equipment without seekingapproval from the party responsible for compliance. Unauthorized changes ormodifications could void the user’s authority to operate the equipment.
Do not use the telephone to report a gas leak in the vicinity of the leak.
2 8/1553-DBC 446 01 Uen A 2008-04-11

Important User Information
Do not spill liquid of any kind on the product or use the equipment near water,for example, near a bathtub, washbowl, and kitchen sink, in a wet basement ornear a swimming pool.
Do not insert any object into equipment slots that is not part of the product orauxiliary product.
Do not disassemble the product. Contact a qualified service agency whenservice or repair work is required.
Do not use a telephone (other than cordless type) during an electrical storm.
Disposal of the Product
Your product should not be placed in municipal waste. Please check localregulations for disposal of electronic products.
DECLARATION OF CONFORMITY
Hereby, Ericsson AB, declares that this telephone, is in conformity with theessential requirements and other relevant pros of the European R&TTEdirective 1999/5/EC.
Details to be found at: http://www.ericsson.com/sdoc.
FCC Statement
This equipment has been tested and found to comply with the limits for aClass B digital device, pursuant to Part 15 of the FCC rules. These limitsare designed to provide reasonable protection against harmful interferencein a residential installation. This equipment generates, uses and can radiateradio frequency energy and, if not installed and used in accordance withthe instructions, may cause harmful interference to radio communications.However, there is no guarantee that interference will not occur in a particularinstallation. If this equipment does cause harmful interference to radio ortelevision reception, which can be determined by turning the equipment off andon, the user is encouraged to try to correct the interference by one or more ofthe following measures:
• Reorient or relocate the receiving antenna.
• Increase the separation between the equipment and receiver.
• Connect the equipment into an outlet on a circuit different from that to whichthe receiver is connected.
• Consult the dealer or an experienced radio/TV technician for help.
38/1553-DBC 446 01 Uen A 2008-04-11

Dialog 5446 IP Premium
HAC (Hearing Aid Compatible)
4 8/1553-DBC 446 01 Uen A 2008-04-11

Dialog 5446 Description
2 Dialog 5446 Description
The Dialog 5446 IP phone (also known as DBC 446) has a backlit display with a478 x 270 pixel color touchscreen. Most features are activated from the display,and the phone is equipped with a stylus for this purpose. For more informationon the display, see Section 2.3 Display on page 9.
Note: Clean the phone with a damp cloth soaked in a mild soap solution.
Figure 1 Dialog 5446 IP: Front View
58/1553-DBC 446 01 Uen A 2008-04-11

Dialog 5446 IP Premium
Figure 2 Dialog 5446 IP: Back View
All connections at the back of the phone are marked for easier identification.The tiltable stand makes it easy to connect the cables, and allows you to adjustthe angle of the phone.
Table 1 Phone Connections
Type ofConnection
Description
(Optional) The phone is powered by an external 24 VAC/DC adapter (see details below) or, alternatively, over aPower over Ethernet (PoE) capable hub.
• If you use the external power adapter, connect oneend of the adapter to the phone connection marked“POWER”, and the other end to a power outlet.
• If you use the PoE connection, you only have to connectthe phone to the LAN.
Connect one end of the Ethernet cable to the phoneconnection marked “LAN”, and the other end to a LANconnection.
The phone conforms to the 802.1x standard for LANauthentication.
6 8/1553-DBC 446 01 Uen A 2008-04-11

Dialog 5446 Description
Connect one end of the PC cable to the phone connectionmarked “PC”, and the other cable end to a RJ45connection on your PC.
When the telephone is starting up (booting), a connectedPC will loose network connection for a few seconds.
(Optional) You can connect a headset to the phoneconnection marked “HEADSET”.
Connect the handset to the phone connection marked“HANDSET”.
USB connection intended for a memory stick, and forfuture use.
Note: The phone does not work during power failure, unless powered througha PoE.
The phone can be powered either from the network or from a 24 V AC/DCplug-in power adapter. Only use the 24 V AC/DC plug-in adapter (powersupply) listed below, or an adapter approved by your local retailer.
Ericsson Product Number Power Rating
RES 141 316/1 20VA 230V/24V
2.1 Keypad
The phone is equipped with a standard alpha numeric keypad and 7 functionkeys used for the most basic telephony functions, see table below. Most othertelephony functions are invoked from the display, see Section 2.3 Display onpage 9.
78/1553-DBC 446 01 Uen A 2008-04-11

Dialog 5446 IP Premium
Table 2 Dialog 5446 Function Keys
Key Function
Press the loudspeaker key to enable handsfree connection.
Press the volume control keys to adjust the volume level ofthe ring signal and incoming speech in the handset, headset,or loudspeaker.
Press the left volume control key to turn down the volumelevel, and the right volume control key to turn up the volumelevel.
Press the headset key to enable headset connection. Pressand hold down the headset key for 4 seconds to activate theheadset preset mode.
Leave the headset mode by pressing the speaker key for 4seconds (see above).
Press the mute key to turn off the microphone in speechstate. This is useful when you do not want the person at theother end of the line to hear what you say to your colleague.
If you press the mute key when the phone is in idle state,silent ringing is activated. Deactivate silent ringing bypressing any key.
Press the clear key to disconnect an ongoing call if you areusing the handsfree mode. In idle mode, you can press C toexit a page, except from the internet page.
Press the navigation key to move between display tabs, toselect menu items in a menu, and to move between fields ina screen.
Press up, down, left, or right on the navigation key to movebetween items in a display window, and press the square inthe middle of the navigation key to select an item, to enterinformation you have typed, or to confirm an action.
2.2 Navigation
Typically, you can highlight and select a display item such as an option or asetting in one of the following ways:
Highlight and select the item by tapping it with the stylus or with your finger.
Highlight the item using the navigation key and select it by tapping theSelect button (or relevant button).
8 8/1553-DBC 446 01 Uen A 2008-04-11

Dialog 5446 Description
Note: To return to the previous page, you press the back key, ,repeatedly.
NameKeys
Applicationsand Settings
My Presence
My Settings
Administrator Settings
Messages Main page Call List Contacts
My Dialog Contacts
Corporate Directory
Internet
Message Waiting
Voice Mailbox
• Information
• Log Off Restriction
• Network• LAN access control• DHCP• IP Address• Subnet Mask• Default Gateway• Automatic SW Server• SW Server• Proxy Server• Protocol• Gatekeeper Discovery• Gatekeeper• VLAN for Phone Port• VLAN for PC Port
• Programmable keys
• Ring Character
• Time & Date
• Language
• Backlight
• Option Unit
• Hearing Level
• Password
• Line 1 Key
• Time Format• Date Format
• Display Menus• Keypad Characters
• Select Profile• Follow-me• External Follow-me• Absence Reason
Figure 3
2.3 Display
In the Dialog 5446 IP phone, most functions are invoked from the display.When you have logged on to the phone, the main page is displayed, see below.
Note: The look of the page may vary depending on which features areactivated.
98/1553-DBC 446 01 Uen A 2008-04-11

Dialog 5446 IP Premium
Figure 4 Display Layout
The top of the display contains a menu bar with tabs that each open a pagewhere you can access a number of services that are available for yourextension. The tabs are, from left to right, applications and settings, name keys,messages, main page, call list, contacts, and internet.
In idle mode, and when you log on to your phone, the main page is displayedby default. The main page contains the following information:
• The right, central area of the page displays the date and time, as well as thename and number of the user logged in on the extension. Icons indicate thering volume for your extension, or that there are messages in your mailbox(if available), as well as activated features such as Follow me.
When you receive a call, the caller’s number and possibly name aredisplayed here.
• The left central area of the page displays status information on certainservices for your extension. It also contains information on how an incominghas been obtained, directly or by transfer.
When you make a call, the called party’s number and possibly name aredisplayed here. The called party’s status (that is, free, busy, and so on) isdisplayed here.
• The bottom area of the page contains buttons as well as information onnumber of missed calls.
10 8/1553-DBC 446 01 Uen A 2008-04-11

Dialog 5446 Description
2.3.1 Menu Tabs
The menu tabs appear in the menu bar at the top of the display window. Toopen a page, tap the tab icon.
Tap the applications and settings tab to open the Applicationsand Settings page, which contains the sub-pages My Presence,My Settings and My administrator Settings.
• For information on presence settings, see Section 14.1Presence Settings on page 65.
• For information on telephone settings, see Section 14.2Telephone Settings on page 65.
• Most administrator settings are blocked from changing, but canbe viewed by the user. See Section 14.3 Network Settings onpage 69.
Tap the name key list tab to open the Name Keys page, whereyour can store frequently used phone numbers for easy access.For more information on Name Keys, see Section 5.5 NameKeys on page 29.
Tap the messages tab to open the Messages page, where youcan retrieve your messages.
Tap the telephony tab to open the Telephone page. This pageis the default screen where you make and receive calls, setpresence options, log off the phone, etc. For detailed informationon how to make and receive calls, see Section 4 Incoming Callson page 23 and Section 5 Outgoing Calls on page 25.
Tap the call list tab to open the Call List page.
The phone keeps a call list of 50 positions listing answeredincoming calls, outgoing calls, and missed and rejected calls.Next to the number, you can see how calls have been madefrom that number.
When you select a contact number in the call list, that number ishighlighted and appears as a button. To call the number, tap thebutton. There is a position indicator showing where in the phonebook the present page is located.
In case of power failure, or if another user (extension number)logs on from this phone, the call list is cleared. For informationon how to use the call list, see Section 5.4.2 Redial A Call Fromthe Call List on page 28.
118/1553-DBC 446 01 Uen A 2008-04-11

Dialog 5446 IP Premium
Tap the contacts tab to open the Contacts page. For moreinformation on contacts, see Section 8 Managing Contacts onpage 41.
Tap the web browser tab to open the Internet page where youcan enter web address you wish to load. For more information onthe web browser, see Section 15 Web Browser on page 71.
2.3.2 Message Icons
On the right side of the main page, a number of message icons may appear indifferent situations. The icons are described below.
System warning. Indicates reduced system access, whichmeans that some features may not work. Reduced system accessoccur when the phone is registered towards another exchangethan the usual one.
Silent ringing/mute. Indicates that the ring signal is switched off.The icon appears in the same position as the volume level bar.
Volume level. Depending on the mode, this icon indicates thevolume level of the ring signal, the speech level of the ear piece,or the headset volume.
Headset. Indicates that incoming and outgoing calls will beconnected to the headset when you answer or make a call withoutlifting the handset.
Incoming call. Indicates an answered incoming call.
Outgoing call. Indicates an answered outgoing call.
Missed call. Indicates a missed incoming call.
12 8/1553-DBC 446 01 Uen A 2008-04-11

Dialog 5446 Description
,
Message. Indicates that you have one or more unread messageswaiting. You can retrieve the messages by tapping the messagetab in the top menu bar. When you have read the message, theicon changes so that it looks like an open envelope.
Soft keyboard. The built-in soft keyboard appears as an icon onpages where it is possible to enter text, for example when youwant to add a contact by typing the name and number manually.Tap the icon to enlarge the keyboard. By tapping the keyboardbuttons at the bottom of the soft keyboard, you can changecharacter sets, and switch between numbers and letters.
2.4 Indicator Lights
Instead of LED indicators on the phone keys, the IP phone has indicator lightsbuilt into the display buttons. The indicator lights indicates line status usingdifferent flash patterns, see below.
Off Indicates idle status
Fast blinking Indicates an incoming call
Fast blinking Indicates a parked call
Steady glow withfast blinking
Indicates a busy line
2.5 Tones And Signals
The Ring Signals settings page contains the Ring tone and Select RingMelody settings. You can choose between 10 different ring tones (between0 and 9) and a number of ring melodies. Ring melodies can also bedownloaded from the web. In order to distinguish between internal, externaland call back calls, the signal you choose will be used with different ringcadences/characteristics for each call type. You can also distinguish betweencallers by giving each phone number its own ring signal.
This section describes the ring signals and tones characteristics available inthe phone.
2.5.1 Ringing Volume
To adjust the ring volume, press the - and + keys on the phone in idle mode(when no call is connected), or when the phone is ringing.
138/1553-DBC 446 01 Uen A 2008-04-11
Dialog 5446 IP Premium
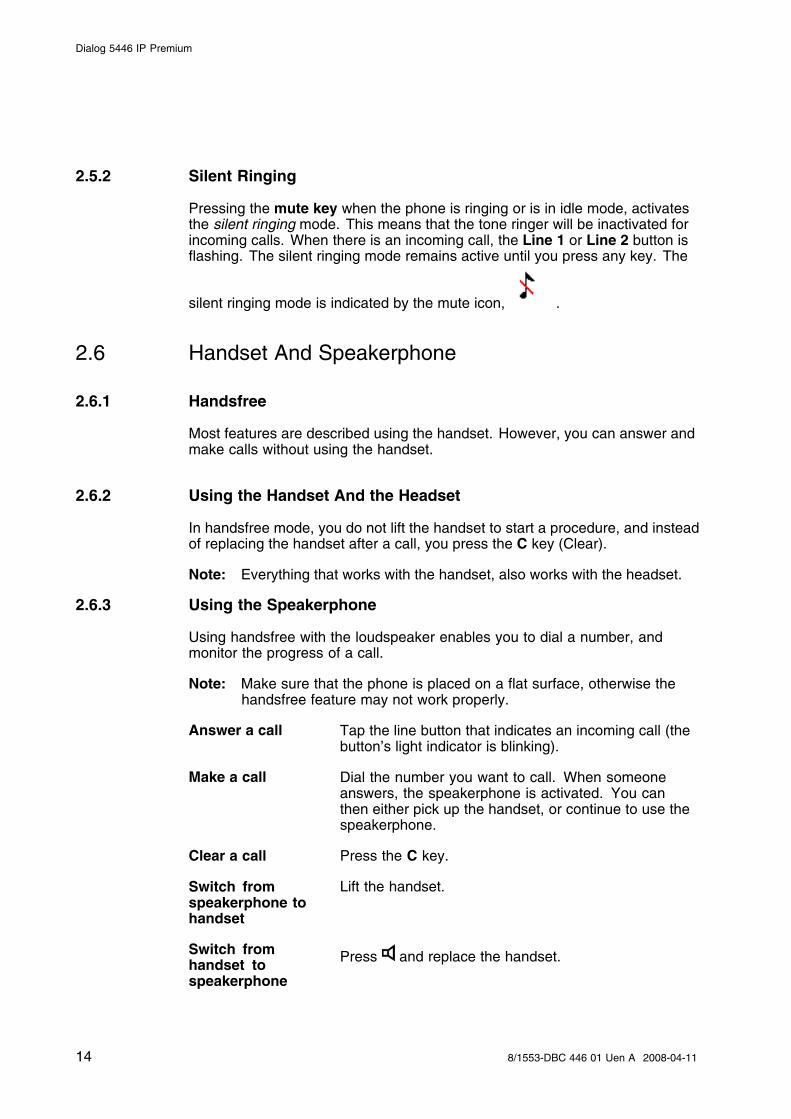
2.5.2 Silent Ringing
Pressing the mute key when the phone is ringing or is in idle mode, activatesthe silent ringing mode. This means that the tone ringer will be inactivated forincoming calls. When there is an incoming call, the Line 1 or Line 2 button isflashing. The silent ringing mode remains active until you press any key. The
silent ringing mode is indicated by the mute icon, .
2.6 Handset And Speakerphone
2.6.1 Handsfree
Most features are described using the handset. However, you can answer andmake calls without using the handset.
2.6.2 Using the Handset And the Headset
In handsfree mode, you do not lift the handset to start a procedure, and insteadof replacing the handset after a call, you press the C key (Clear).
Note: Everything that works with the handset, also works with the headset.
2.6.3 Using the Speakerphone
Using handsfree with the loudspeaker enables you to dial a number, andmonitor the progress of a call.
Note: Make sure that the phone is placed on a flat surface, otherwise thehandsfree feature may not work properly.
Answer a call Tap the line button that indicates an incoming call (thebutton’s light indicator is blinking).
Make a call Dial the number you want to call. When someoneanswers, the speakerphone is activated. You canthen either pick up the handset, or continue to use thespeakerphone.
Clear a call Press the C key.
Switch fromspeakerphone tohandset
Lift the handset.
Switch fromhandset tospeakerphone
Press and replace the handset.
14 8/1553-DBC 446 01 Uen A 2008-04-11

Dialog 5446 Description
Switch fromspeakerphone toheadset
Press .
Switch fromheadset tospeakerphone
Press .
2.7 Headset
2.7.1 Using the Headset
Using a headset enables you to make and receive calls without using thehandset.
Make a call Press and dial the desired number and. In headsetpreset mode, you are not required to press the headsetkey.
Receive a call Press .
Switch fromheadset to handset
Lift the handset.
Switch fromhandset to headset
Press and replace the handset.
Clear a call Press the C key.
2.7.1.1 Call Handling Via the Line Buttons
By default, the phone is set to connect calls to the loudspeaker when youanswer incoming calls, or when you make calls by tapping a Line button. Thisdefault setting is known as the loudspeaker preset mode. When you dial anumber without lifting the handset, the call is also connected to the loudspeakerby default.
When you use a headset, you can switch to the headset preset mode to havecalls connected to the headset. If the headset preset mode is activated and you
press , the call is connected to the loudspeaker.
Activating HeadsetPreset Mode
To activate the headset preset mode, press and holddown for 4 seconds. When you hear a ring signal,and the headset icon appears in the display to the right,the headset preset mode is activated.
158/1553-DBC 446 01 Uen A 2008-04-11
Dialog 5446 IP Premium
DeactivatingHeadset PresetMode
To deactivate the headset preset mode, press and hold
down for 4 seconds. When you hear a ring signal,and when the headset icon disappears from the displayto the right, the headset preset mode is deactivated.
Note: The headset preset mode can only be activated and deactivated whenthe phone is in idle mode. When you lift the handset to answer anincoming call, the call is automatically connected to the handset,regardless of which preset mode is active.
16 8/1553-DBC 446 01 Uen A 2008-04-11

Starting the Phone
3 Starting the Phone
3.1 Starting and Logging On
All the system settings for your IP phone must be set by the systemadministrator before you can use the phone.
Depending on the settings in your network and telephone system, the start upprocedure may differ from phone to phone. Check the display on your phoneand read the relevant sections in this chapter to continue with the startupprocedure.
When the phone is connected to the network, your phone automatically initiatesthe startup procedure when connected to the mains.
After a power failure the phone restarts automatically.
Note: During power-up, the phone display is black for a little while.
LAN access control
Your telephone might require a network authentication to gain access to thenetwork. You then have to enter a valid user name and password.
Note: The user identity and password used for the network authenticationare not the same user identity and password you use to log on to thetelephony system. Contact the system administrator to obtain a newpassword or change an old password.
1. On the main page, tap the Log on with field and enter your user name(typically the extension number).
If you need to edit the input, tap the Erase button.
2. Tap the Enter password field and enter your password. If you need toedit the input, tap the Erase button.
Note: You can enter the password from the keypad on the phone, or fromthe soft keyboard in the display.
3. Tap the Log on button to continue the startup procedure.
If your user name and password are not accepted, an error message isdisplayed. Contact your system administrator.
Continued startup procedure
178/1553-DBC 446 01 Uen A 2008-04-11

Dialog 5446 IP Premium
After you have logged on successfully, the display shows the logon progress.When the self test has been successfully completed, the phone either logs onautomatically, or prompts you to enter your user name and password.
Update software
If the system detects new software, the following display appears during thestartup procedure:
You have two options:
Select No to skip the update and keep the current software version.
Select Yes to start downloading the software update from the softwareserver. The update process takes approximately 60 seconds to complete,and the progress is displayed on screen.
If you do nothing, the software update will start automatically after 60 seconds.In the lower right corner of the window, a counter indicates how many secondsremain before the automatic update will start.
Note: Be careful not to disconnect the phone during the update since a powerfailure during the software update will require you to restart the update.
3.2 Logon Options
Depending on the user logon settings, your phone may require a logon.
Note: Changing the logon settings requires administrator rights.
There are three logon options:
Log Off Allowed: You are allowed to log on and log off the phone. This isthe most common option.
Default Number Used: The phone is always logged on with a defaultnumber. You cannot log on or log off. This option can be used for phonesin conference rooms, receptions, etc.
18 8/1553-DBC 446 01 Uen A 2008-04-11

Starting the Phone
Permit Individual Log On: The phone is always logged on with a defaultnumber, as in option 2 above, but you can log on with your own extensionnumber and get your personal categories. This option can used in a freeseating environment.
To view which option is active in your phone, see Section 3.3.1 Viewing theLogoff Restriction Settings on page 20.
3.2.1 Option 1: Log Off Allowed
When the log on screen appears, do the following:
1. Enter your personal extension number in the Log on with field. Theextension number that was used for the last logon is automaticallydisplayed. To clear the field and enter a new number, tap Erase.
2. If you are prompted for a password, enter your password in the Enterpassword field. If no password is required, your name and extensionnumber are displayed immediately.
Note: You can enter the password from the keypad on the phone, or fromthe soft keyboard in the display.
The password is the RAC initiated for this extension.
3. Tap Log on. The display shows your extension number, and the phoneis now ready to use.
Note: If the emergency call function is disabled, the text For SOS calls,dial 112 is not displayed. For more information on emergency calls,see Section 5.3 Emergency Calls (SOS Calls) on page 27.
3.2.2 Option 2: Default Number Used
The idle mode screen is displayed, and the phone is ready to use.
Note: It is not possible to log off a phone that has been programmed for thisoption.
3.2.3 Option 3: Permit Individual Log On
The phone is logged on with the default number, but you can log on with yourindividual number and get your personal categories.
To log on with your personal number, do the following:
1. On the main page, tap Log off to log off the current user.
2. When the message Log off? appears, tap Yes to confirm. The logondisplay appears.
198/1553-DBC 446 01 Uen A 2008-04-11

Dialog 5446 IP Premium
3. Enter your personal extension number in the Log on with field. To clearthe field and enter a new number, tap Erase.
4. If you are prompted for a password, enter your password in the Enterpassword field. If no password is required, your name and extensionnumber are displayed immediately.
Note: You can enter the password from the keypad on the phone, or fromthe soft keyboard in the display.
The password is the RAC initiated for this extension.
5. Tap Log on again. The display shows your extension number, and thephone is now ready to use.
Note: When you log off your personal extension number, the phone settingsautomatically return to the default number. Also, the phone isautomatically logged off with your individual number during the nightand logged on with the default number.
3.3 Logging Off The Phone
To log off from the phone, do the following:
1 On the main page, tap the Log off button.
2 When the message Log off? appears, tap Yes to confirm. The logondisplay appears.
3.3.1 Viewing the Logoff Restriction Settings
Changing the logoff restriction settings requires administrator rights, but youcan view the current settings.
To view the current logoff restrictions settings, do the following:
1. Tap to open the Applications and Settings page.
2. Select Administrator Settings and then Log Off Restriction.
For a description of the log off restriction settings, see Section 3.2 LogonOptions on page 18.
Note: The logoff restriction currently selected is marked with a filled radiobutton.
3. Tap until you return to the main page.
20 8/1553-DBC 446 01 Uen A 2008-04-11

Starting the Phone
3.4 Software Version and Communication Protocol
You can check which software version is currently installed in the phone. Youcan also view the active communication protocol.
To view the software version and protocol, do the following:
1. Tap to open the Applications and Settings page.
2. Select Administrator Settings, Information, and then Log OffRestriction.
These are the log off restriction settings:
Protocol Displays the protocol used (H.323).
Softwareversion
The currently installed software version. The systemautomatically checks for new software versions, andwhen an update is available, a message appears duringlogon, asking you if you want to install it.
3. Tap until you return to the main page.
218/1553-DBC 446 01 Uen A 2008-04-11

Dialog 5446 IP Premium
22 8/1553-DBC 446 01 Uen A 2008-04-11

Incoming Calls
4 Incoming Calls
Incoming calls are indicated by a ring signal and a presentation of name ornumber or both on either line button.
The ring signal differs depending on whether the incoming call is internal orexternal:
• Internal calls are identified by one long signal followed by a long pause.
• External calls are identified by two short signals followed by a short pause.
4.1 Answer Calls
An incoming call is indicated by a ring signal and a flashing indicator lamp.
Handset: Lift the handset. The call is automatically received on Line 1.
Handsfree: Press the Line 1 button to answer without lifting the handset.(You can then switch to the handset simply by lifting the handset.)
To reject an incoming call, tap the Reject button.
4.2 Picking Up Calls
You can answer calls to your extension from another phone. This feature isknown as picking up calls.
To pick up a call, do the following:
1. Lift the handset and wait for a dial tone.
2. Dial the extension number and wait for a busy tone.
3. Tap the numeric key 6. Start the conversation.
Note: Austria, Belgium, Brazil, Denmark, Germany: 8.
238/1553-DBC 446 01 Uen A 2008-04-11

Dialog 5446 IP Premium
24 8/1553-DBC 446 01 Uen A 2008-04-11

Outgoing Calls
5 Outgoing Calls
5.1 Making Calls
5.1.1 Calling an Extension
To make a call to another extension, do the following:
1 Lift the handset and wait for a dial tone.
2 Dial the desired extension number and wait for an answer.
5.1.2 Calling An External Number
To make an external call, do the following:
1 Lift the handset and wait for a dial tone.
2 Dial the external access code and the desired external number and wait foran answer.
5.2 When You Receive a Busy Tone or No Answer
When the number you have called is busy or does not answer, you haveseveral options available: try again later, or order automatic callback, callwaiting, or intrusion.
5.2.1 Callback
When the number you have called is busy or does not answer, you can requestautomatic callback. You can only have one callback on a busy external lineactivated at the same time.
While you are waiting for a call back answer, you can make and receive callsas usual.
You can request automatic callback in the following cases:
If the extension you have called (in your exchange or in your privatenetwork) is busy or does not answer. You can have several callbacksactivated at the same time.
If all external lines are busy. You can have only one callback on busyexternal line activated at the same time.
258/1553-DBC 446 01 Uen A 2008-04-11

Dialog 5446 IP Premium
As soon as the extension or line becomes free (or, when there is no answer,when the extension has been used), you will be called back.
Note: When you return to the office, you can tell the system that you arepresent by lifting the handset and immediately replacing it.
5.2.1.1 Ordering Callback
To order callback, do the following:
1 Tap the Callback button, or press the numeric key 5.
Note: Austria, Belgium, Brazil, Denmark, Germany: 6.
2 Replace the handset when the callback indicator icon is highlighted.
5.2.1.2 Answering Callback
As soon as an external line becomes free, you will be called back. Then lift thehandset (or press the loudspeaker button to use the speakerphone). You willhear the connection tone. You have to answer within 8 seconds, otherwise thecallback is cancelled. When you answer, the system calls the number youhave requested for callback
5.2.2 Call Waiting
If the calling party has activated the Camp on as active feature and CallWaitingas passive feature in their phone, and the system administrator has configuredyour phone to accept CallWaiting calls, you will hear the Call Waiting toneduring an ongoing conversation.
5.2.2.1 Activating CallWaiting
To send a call waiting signal to the busy number, do the following:
Press the numeric key 4 when you get a busy tone.
Note: Austria, Belgium, Brazil, Denmark, Germany: 5.
If the CallWaiting feature cannot be used due to categorization, you willcontinue to hear a busy tone.
If the busy extension ignores the CallWaiting indication, you can orderautomatic Callback, see Section 5.2.1 Callback on page 25.
5.2.2.2 Answering a Call Waiting Signal
To terminate and ongoing call and answer a waiting call do the following:
26 8/1553-DBC 446 01 Uen A 2008-04-11

Outgoing Calls
1 Replace the handset to finish the ongoing call. The waiting call is signalledon your phone.
2 Lift the handset to answer the new call or press and replace the handset toanswer in handsfree mode.
5.2.3 Intrusion
Depending on the authorization of your extension, you can get through to abusy extension using the Intrusion feature, which connects you to the ongoingcall after a short tone burst.
If intrusion is not allowed for the called extension, you will continue to receivebusy tone.
Before the intrusion is executed, an intrusion tone is sent to the parties inthe ongoing call. As long as the three parties are connected, you will hearan intrusion tone.
To intrude on an ongoing call at a busy extension, do the following:
Press the numeric key 8.
Note: Austria, Belgium, Brazil, Denmark, Germany: 4.
5.2.4 Bypass
If you need to get through to a certain extension currently being forwarded byfollow-me or external follow-me, you can bypass the extension. This requiresthat you have a category for bypass. There are two ways to order a bypass, byan extension or by assistance.
Bypass Ordered By An Extension
To request a bypass ordered by an extension, do the following:
1 Lift the handset and wait for a dial tone.
2 Dial * 60 * wanted number # .
Note: North America: 1.
3 Wait for answer.
5.3 Emergency Calls (SOS Calls)
You can always make an emergency call, regardless of whether you the phoneis logged on to the exchange or not. However, the procedure differs dependingon the logon status.
278/1553-DBC 446 01 Uen A 2008-04-11

Dialog 5446 IP Premium
When the phone is logged on
When the phone is logged on to the exchange, dial the emergency number(SOS number).
When the phone is logged off
When the phone is logged off from the exchange, you can dial the emergencynumber (SOS number) provided the emergency call feature is enabled.
Dial the emergency number and wait for an answer. After the call is terminated,the emergency centre can call back to your phone although it is logged off.
Note: If the emergency call feature is disabled, the SOS text is not displayed.In that case, you have to log on the phone to be able to makeemergency calls. The feature is enabled by the network administrator.
5.4 Redial Calls
5.4.1 Redial An External Number
To redial the last dialed external number, do the following:
1 Lift the handset and wait for a dial tone.
2 Dial *** (while in idle state or with dial tone).
The last dialed external number is redialed automatically.
Note: Finland, Sweden: **0.
5.4.2 Redial A Call From the Call List
To make a call using the call list, do the following:
1 Lift the handset and wait for a dial tone.
2 Tap in the menu bar to open the call list page.
3 Scroll the call list by tapping the scroll bar, or by pressing up or downon the navigation key.
4 Select the desired contact and tap the Call button, or press the navigationkey, and wait for an answer.
Note: The call list is cleared in case of power failure or in case another user(extension number) logs on to the same phone.
28 8/1553-DBC 446 01 Uen A 2008-04-11

Outgoing Calls
5.5 Name Keys
The Name Keys page contains buttons which you can program with for quickaccess to frequently used numbers. When you tap a name key, the numberassociated with it, is called. If the number you enter exists in the My DialogContacts, the name key button will automatically display the contact’s name, orelse the number.
The Name Key page can store a total of 30 contacts, arranged in two columnsper page, with five rows per column.
5.5.1 Calling Using Name Keys
To call using the name keys, do the following:
1 Lift the handset and wait for a dial tone.
2 Tap in the menu bar to open the Name Keys page.
3 Tap the desired name key button and wait for an answer.
5.5.2 Programming Name Keys
Before you can program a dial by function key, make sure the phone is loggedon to the exchange. Otherwise, contact the system administrator.
To program a name key, do the following:
1. Tap in the menu bar to open the Name Keys page.
2. Tap more... and select the name key button you wish to program.
3. Tap Edit .
4. Enter a new or change the currently displayed number in the Number fieldand tap Save to confirm.
Note: If you wish to delete the last entered character, tap the Erasebutton.
5.6 Monitoring Keys
The Name Keys page can be used for monitoring and extension numbersinstead of or in addition to the name keys you program. The monitoring keys(MNS) service, allows you to answer calls to the extensions, and enables youto see which extensions are free or busy, and is suitable for boss-secretary
298/1553-DBC 446 01 Uen A 2008-04-11

Dialog 5446 IP Premium
applications, and group functions. The MNS service must be initiated in theexchange by the system administrator.
The following status can be indicated on the MNS key:
• The monitored extension is free (the indicator light is turned off)
• An incoming call is received by the monitored extension (the indicator lightflashes quickly and the calling party number appears in the display)
• The monitored extension is busy (the indicator light is turned on)
• The monitored extension has performed common parking (the indicatorlight flashes slowly)
Note: The monitoring keys service does not work with software R1B.
5.7 Abbreviated Numbers
By using Abbreviated Numbers, you can make calls simply by pressing a fewkeys. Frequently used external numbers are stored as Common AbbreviatedNumbers in the exchange.
Your personal most frequently used external numbers can be stored and usedon the programmable keys on the telephone or on the keys 0 to 9.
5.8 Common Abbreviated Numbers
External numbers are stored centrally in your BusinessPhone CommunicationPlatform. Common Abbreviated Numbers can be dialled from every extensionthat has the authority to do so.
To dial a Common Abbreviated Number, do the following:
Enter the Common Abbreviated Number. Please refer to your telephonedirectory.
5.9 Individual Abbreviated Numbers
You can program and activate your most frequently used external numberson the numeric keys 0 to 9.
Note: To program individual abbreviated numbers, your extension has to beauthorized by the system administrator
To activate an individual abbreviated number, do the following:
1. Lift the handset and dial * *.
2. Enter the Abbreviated Number. The number can be between 0 and 9.
30 8/1553-DBC 446 01 Uen A 2008-04-11

Outgoing Calls
5.9.1 Programming Individual Abbreviated Numbers
To program external numbers on the numeric keys do the following:
1. Lift the handset and wait for the dial tone.
2. Dial * 51 * to enter programming mode.
3. Select an abbreviated number between 0 and 9 and press * .
4. Enter the digit(s) for external line access and the public number. Thenumber can consist of up to 24 digits.
Note: Which numeric key to press for external line access depends onthe configuration of the system. If your public network requireswaiting for a second dial tone, press * .
5. Press #.
5.9.2 Cancelling one specific Individual Abbreviated Number
To cancel one specific Individual Abbreviated Number, do the following:
1. Lift the handset and wait for the dial tone.
2. Dial # 51 * .
3. Enter an abbreviated number between 0 and 9 and press # .
5.9.3 Cancelling all Individual Abbreviated Numbers
To cancel all Individual Abbreviated Numbers, do the following:
1. Lift the handset and wait for the dial tone.
2. Dial # 51 # and wait for the verification tone.
318/1553-DBC 446 01 Uen A 2008-04-11

Dialog 5446 IP Premium
32 8/1553-DBC 446 01 Uen A 2008-04-11

During Calls
6 During Calls
6.1 Inquiry
When you have an ongoing call on Line 1, you can make an inquiry to anotherextension or to an external line.
6.1.1 Making an Inquiry
To make an inquiry to a third party during an ongoing call, do the following:
1 Tap Line. The ongoing call is automatically put on hold.
2 Dial the extension or external number.
6.1.2 Referring Back
During inquiry you can switch between the ongoing call and the parked call.
To switch between calls tap Line and tap numeric key 2.
To terminate a call tap Line and tap numeric key 1.
6.2 Transfer
You can transfer a call to another extension (in your exchange or privatenetwork), to an external number, or to the operator. If you have several parkedcalls, the call that was parked last will be transferred. You can to transfer thecall before or after answer.
To transfer an ongoing call to another number, do the following:
1 Tap Line and wait for a dial tone.
2 Dial the desired extension or external number.
3 Replace the handset. The parked call is transferred.
6.3 Conference
You can include up to six parties in a conference. Only the conference leader,that is the person initiating the conference, can admit participants.
Note: The conference tone might be disabled for your system.
338/1553-DBC 446 01 Uen A 2008-04-11

Dialog 5446 IP Premium
If you have an ongoing conversation on Line 1 and want to establish a phoneconference, you will become the conference leader.
To establish a conference, do the following:
1 Tap the Line button.
2 Dial the number to the third party and wait for an answer.
3 Tap Line and the numeric key 3.
4 Repeat the procedure to add more conference members.
5 Replace the handset or press C to leave the conference.
Note: A tone is heard each time a participant enters or leaves the conference.When the conference leader leaves the conference, the conference willcontinue with the other included parties. The conversation is changedback to a normal two party connection when there are only two partiesleft.
6.4 Parking
You can temporarily put the ongoing call on hold. Calls put on hold can beresumed on your own or on another phone.
To put a call on hold, do the following:
1 Tap the Line button.
2 Replace the handset.
6.4.1 Resuming a Call On Hold
To resume a call that has been put on hold, do the following:
1 Tap the Line button where you have the parked call.
6.5 Suffix Dialing (Dialing During Speech)
When communicating with and controlling a voice mail system, or whenretrieving information about your bank account through your phone, you mustuse Dual Tone Multi-Frequency (DTMF) signals, also known as suffix dialing.The suffix dialing function is always active for all calls in speech.
All digits entered are automatically converted by the exchange into DTMFsignals, which then are transmitted along the connected lines.
34 8/1553-DBC 446 01 Uen A 2008-04-11

During Calls
6.6 Sending Messages
You can send a message to an extension when you receive busy tone or get noanswer.
6.6.1 Callback messages
To send a Call Me message, do the following:
Dial 9 # .
6.6.2 Voice messages
To send a voice message, do the following:
1. Press the numeric keys 99 and speak.
2. Press * to playback and listen to your recording.
3. Press the numeric key 9 to speak and re-record.
4. Press # to send the message.
358/1553-DBC 446 01 Uen A 2008-04-11

Dialog 5446 IP Premium
36 8/1553-DBC 446 01 Uen A 2008-04-11
Call Forwarding
7 Call Forwarding
Follow-me is a feature that lets you divert all calls to an internal extension or toan external phone number of your choice.
7.1 Follow-me
This feature enables you to redirect incoming calls to other extensions. Even ifthe feature is enabled, you can still accept incoming calls to your extension.
With the Follow-me feature, you can divert calls to your extension to anotherextension within the private network. If, for example, you are temporarilyworking in another room and want your calls to follow you to that room, you canuse the internal Follow-me feature.
When Follow-me is activated on your phone, a reminder text appears in thedisplay.
Note: When Follow-me is activated on your phone, you can still make callsfrom the phone as usual.
7.1.1 Ordering Follow-me From Your Phone
From the Display
To order Follow-me from the display, do the following:
1. Tap the Presence button at the bottom of the display window.
2. Select Follow-me.
3. Enter the the extension number of the answering position and tap OK. TheFollow-me information will appear on the display.
From the Keypad
To order Follow-me from the keypad, do the following:
1 Dial * 21 * the extension number of the answering position # .
The Follow-me information will appear on the display.
2 Replace the handset.
378/1553-DBC 446 01 Uen A 2008-04-11

Dialog 5446 IP Premium
7.1.2 Redirecting From Another Phone
If you are already in the room with extension 1234 and are unable to return toyour own room before moving to another (third) room you can order a newanswering position from extension 1234 or from the new answering position.
From the Display
To redirect Follow-me using the display, do the following:
1 Press Presence.
2 Select Follow-me.
3 Enter your own extension number * the extension number of the newanswering position.
4 Tap the OK button.
From the Keypad
If you have ordered Follow-me to a room with, for example, extension number2222, and you are unable to return to your room before moving to another(third) room, you can order a new answering position from the extension 2222or from the new answering position. To redirect calls from an answeringposition, do the following:
1 Lift the handset and wait for a dial tone.
2 Dial * 21 * own extension number * the extension number of the newanswering position # and wait for a special dial tone.
Note: If you do not know the extension number in advance, you can orderFollow-me to unknown extension from extension 2222. Then dial *21 * own extension number * own extension number # instead.
3 Replace the handset.
7.1.3 Canceling Follow-me From Your Phone
You can tap the Presence button, select Follow-me and then Deactivate.
7.1.4 Canceling Follow-me From the Answering Position
To cancel Follow-me from the answering position, do the following:
1 Dial # 21 * own extension number # and wait for a dial tone.
2 Replace the handset.
38 8/1553-DBC 446 01 Uen A 2008-04-11

Call Forwarding
7.2 External Follow-me
This feature enables you to redirect incoming calls to other phone numbers.You can predefine default numbers that your extension will be redirected to.
With the External Follow-me feature, you can forward calls to your phonenumber to any external phone number you desire.
When External Follow-me is activated on your phone, a reminder text appearsin the display.
Note: When External Follow-me is activated on your phone, you can stillmake calls from the phone as usual.
7.2.1 Ordering External Follow-me from Your Phone
To order external follow-me from your phone, do the following:
From the Display
1. Select the External Follow-me menu and press Select.
2. Enter the external number and tap OK. The Follow-me indicator icon ishighlighted.
From the Keypad
1 Dial * 22 #.
Note: North America: 23.
2 Dial the route access code and external number #.The special dial tone and the Follow-me indicator icon are turned on.
3 Replace the handset.
7.2.2 Canceling External Follow-me from Your Phone
From the Display
Tap the in the right central area of the main page. The Follow-meindicator icon is turned off.
Note: You can also tap the Presence button, select External Follow-meand then Deactivate.
From the Keypad
1 Lift the handset and wait for a dial tone.
398/1553-DBC 446 01 Uen A 2008-04-11

Dialog 5446 IP Premium
2 Dial # 22 # .
The dial tone and the Follow-me indicator icon are turned off.
Note: North America: 23.
3 Replace the handset.
7.3 Selecting a Profile
A profile is a priority list of extension numbers where a specific user can bereached. The profiles are predefined in the exchange and cannot be changedby the user.
7.3.1 Selecting a Profile from Your Phone
To select a profile from your phone, do the following:
1. Tap the Presence button.
2. Select the Select Profile menu.
3. Enter the desired profile number and press OK on the navigation key.
7.3.2 Deselecting a Profile from Your Phone
To deselect a profile from your phone, do the following:
1. Tap the Presence button.
2. Select the Select Profile menu.
3. Tap No Profile to deselect the profile.
40 8/1553-DBC 446 01 Uen A 2008-04-11

Managing Contacts
8 Managing Contacts
From the Contacts page you can add, edit, and search contacts.
• You can add and edit contacts either by pressing the keys on the phonekeypad, or by tapping the keys on the built-in soft keyboard. Activate thesoft keyboard by tapping the keyboard icon.
• When entering the name by using the keypad, the most common letters arewritten above each key on the phone. To get the letter A press key 2 once,for B press key 2 twice, to get C press key 2 three times and so on.
• When entering the name by using the built-in soft keyboard, to enter digitsyou have to switch to the numeric keyboard by tapping the 123 button inthe lower left corner of the keyboard.
• Press * to switch between upper and lower case, and vice versa.
• By default, the first character you enter is written in upper case, and the restof the word is written in lower case. Every new word starts with an uppercase character (that is, after an entered space).
Note: You can select a different character set from the Settings page, seeSection 14.2.4 Language on page 67.
8.1 Microsoft® Outlook® Contacts
You can copy your Microsoft® Outlook® Contacts to your local contacts list, theMy Dialog Contacts list. The numbers will then be available in your phone inthe same way as they are stored in Microsoft® Outlook® Contacts. My DialogContacts can store up to 1,000 contact entries.
Before you can copy Microsoft® Outlook® contacts, you need to install the MyDialog 4000 Contacts application on your PC. Contact the system administratorto obtain a link to the installation page.
8.1.1 Installing My Dialog 4000 Contacts
To install the My Dialog 4000 Contacts on your PC, do the following:
1. On your PC, click the Install My Dialog 4000 Contacts now link to startthe installation.
2. To complete the installation, follow the instructions on screen.
3. Start the My Dialog 4000 Contacts application on your PC. The followingscreen appears:
418/1553-DBC 446 01 Uen A 2008-04-11
Dialog 5446 IP Premium
4. Enter the phone number, password, and the IP address to the phone.
• The password is the same as the one you use to access the webinterface.
• You will find the IP address in the phone’s administrator settings menu.
8.2 My Dialog Contacts
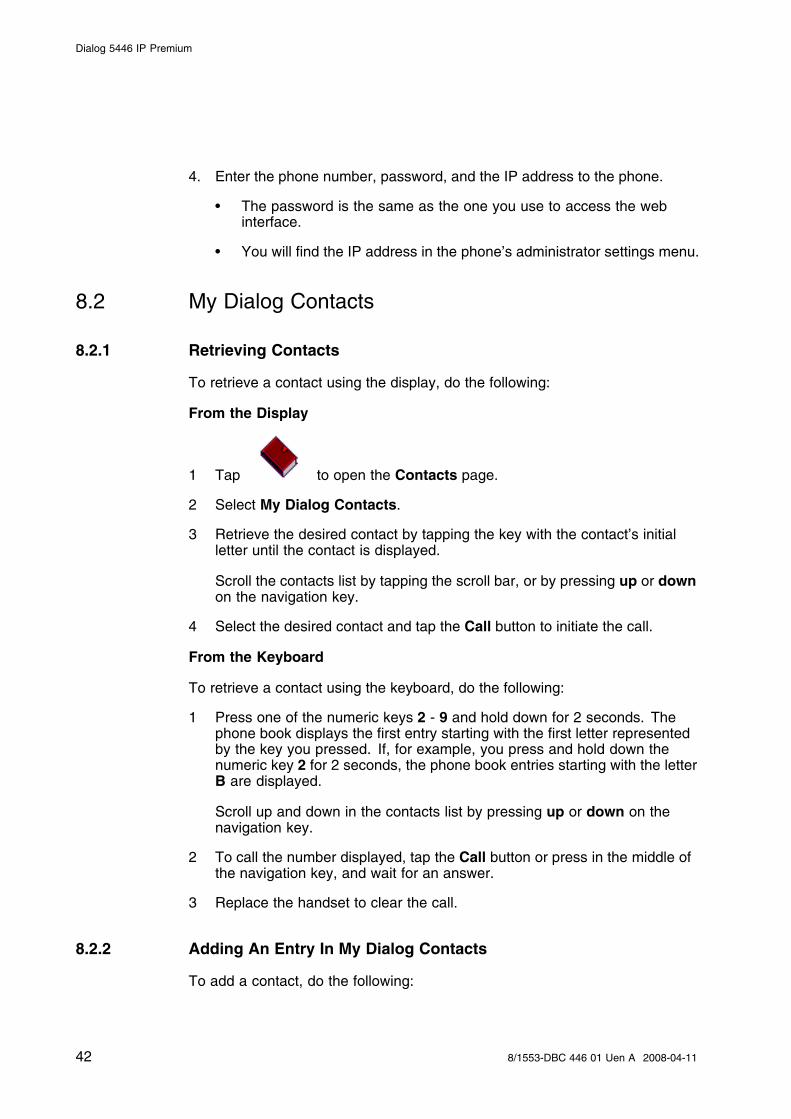
8.2.1 Retrieving Contacts
To retrieve a contact using the display, do the following:
From the Display
1 Tap to open the Contacts page.
2 Select My Dialog Contacts.
3 Retrieve the desired contact by tapping the key with the contact’s initialletter until the contact is displayed.
Scroll the contacts list by tapping the scroll bar, or by pressing up or downon the navigation key.
4 Select the desired contact and tap the Call button to initiate the call.
From the Keyboard
To retrieve a contact using the keyboard, do the following:
1 Press one of the numeric keys 2 - 9 and hold down for 2 seconds. Thephone book displays the first entry starting with the first letter representedby the key you pressed. If, for example, you press and hold down thenumeric key 2 for 2 seconds, the phone book entries starting with the letterB are displayed.
Scroll up and down in the contacts list by pressing up or down on thenavigation key.
2 To call the number displayed, tap the Call button or press in the middle ofthe navigation key, and wait for an answer.
3 Replace the handset to clear the call.
8.2.2 Adding An Entry In My Dialog Contacts
To add a contact, do the following:
42 8/1553-DBC 446 01 Uen A 2008-04-11

Managing Contacts
1. Tap to open the Call List page.
2. Select the number you wish to add.
3. Select AddContact , edit the number and add a name.
4. Click Save to make the contact available in the phone.
Note: Numbers beginning with the digit 0 are preceded by the digit or digitsrequired to reach an external line. The digits can also be stored byadding the country code number after a plus sign, for example +468 719 0000.
Note: To add a contact from the Contacts page
1 Tap to open the Contacts page.
2 Select My Dialog Contacts.
3 Select AddContact, edit the number and name.
4 Click Save and OK to make the contact available in the phone.
8.2.3 Editing An Entry In My Dialog Contacts
To edit a contact’s name or number, do the following:
1. Tap to open the Contacts page.
2. Select My Dialog Contacts and tap more....
3. Select the contact you wish to edit and tap Edit.
4. Make the changes you want and tap Save.
8.2.4 Deleting An Entry In My Dialog Contacts
To delete a contact, do the following:
1. Tap to open the Contacts page.
2. Select My Dialog Contacts and tap more....
3. Select the contact you wish to delete and tap More.
4. Tap OK to confirm the deletion.
438/1553-DBC 446 01 Uen A 2008-04-11

Dialog 5446 IP Premium
44 8/1553-DBC 446 01 Uen A 2008-04-11
Corporate Directory
9 Corporate Directory
To access the Corporate Directory, the Corporate Directory feature has to beactivated by the system. Contact the system administrator.
9.1 Finding A Contact
To search for a contact in the corporate directory, do the following:
1. Open the Contacts page and select Corporate Directory.
2. Enter the search criteria in the appropriate field and tap Search.
9.2 Calling A Contact
To call a contact in the corporate directory, do the following:
1. Select the search result and tap Select.
2. Select the phone number and tap Select. The call is initiated.
458/1553-DBC 446 01 Uen A 2008-04-11

Dialog 5446 IP Premium
46 8/1553-DBC 446 01 Uen A 2008-04-11

Presence Information
10 Presence Information
The presence information feature allows you to specify an absence reason,including Lunch, Trip, Vacation, Ill, Meetings, and Absent. Callers will thenbe informed of your whereabouts. The absence reason is displayed to theexchange operator. For all of the absence reasons, you are prompted to specifythe return time or date.
Note: A text message is also visible in the display.
You can make calls as usual although you have enabled absence.
10.1 Selecting an Absence Reason
To activate the absence feature from your phone, do the following:
1. Tap the Presence button and then the Absence reason button.
2. Select an absence reason and enter date or time of return (if required).
3. Tap OK . Absence information will appear on the display.
10.2 Canceling Absence
To cancel the absence feature from your phone, tap to the right in thedisplay window.
Alternatively, you can do the following:
1. Tap the Presence button and then the Absence Reasons button.
2. Tap No Absence. Absence information will disappear from the display.
478/1553-DBC 446 01 Uen A 2008-04-11

Dialog 5446 IP Premium
48 8/1553-DBC 446 01 Uen A 2008-04-11

Voice Mailbox
11 Voice Mailbox
You may be connected to a Voice Mail application. The Voice Mail applicationallows you to leave a voice message to the caller when you are unable toanswer calls, for example, when out of office, in a meeting, etc. The caller canthen leave a message in your mailbox. When you return to your office youcan enter your mailbox and listen to the received messages. If you use thePersonal Number feature, it is recommended to program Voice Mail as the lastanswering position for all search profiles.
The first time you enter the mailbox system (only possible from own extension),you might be requested to change your password if it is default (0000). Seesection Changing Password on Section 11.8 Changing Password on page 54or follow the voice announcements.
Note: To use the mailbox system, your extension has to be authorized bythe system administrator
11.1 Activating the Mailbox
To divert your extension to the mailbox system, do the following:
1. Dial * 21 *.
2. Enter the number of the mailbox system. Ask the system administrator forthe defined mailbox system number.
3. Press # to activate the diversion and wait for the verification tone.
4. Press C to finish the procedure.
Note: For daily use, it is recommended to ask your system administrator todefine the mailbox system as your pre-programmed diversion address.Once this is defined, you only have to dial * 21 # to activate yourmailbox.
The system administrator can also define whether or not the mailboxshould be activated if you do not answer your phone after a certaintime or if your extension is busy.
11.2 Deactivating the mailbox
To deactivate your mailbox, do the following:
1. Dial # 21 # and wait for the verification tone.
2. Press C to finish the procedure. New incoming calls will be signalled onyour phone again.
498/1553-DBC 446 01 Uen A 2008-04-11
Dialog 5446 IP Premium
Note: The mailbox is still active if it is defined as pre-programmed diversionaddress for the feature Diversion when there is no answer andDiversion when your extension is busy.
11.3 Accessing the Mailbox
The following mailbox functions can be accessed from your own extension,any other internal extension or from an external position (for example, mobilephone):
• Listen to available messages
• Change your personal greeting
• Send messages
• Set up external notification (configuration dependent)
• Change your password
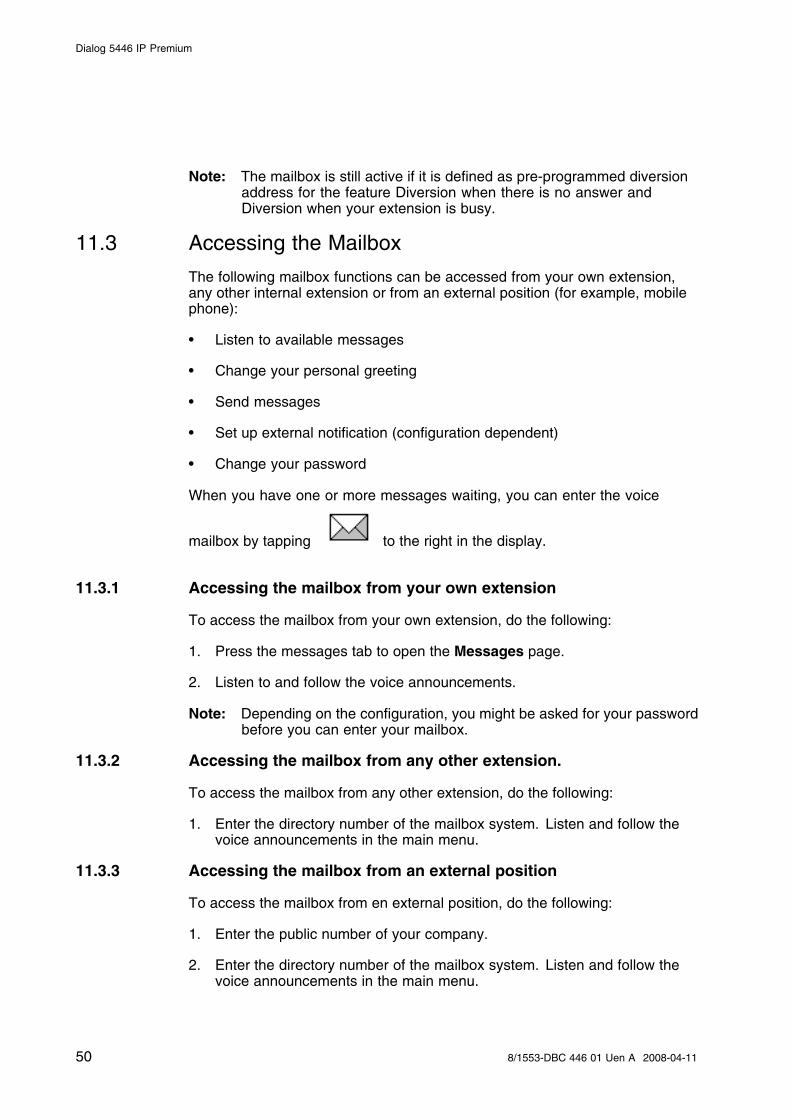
When you have one or more messages waiting, you can enter the voice
mailbox by tapping to the right in the display.
11.3.1 Accessing the mailbox from your own extension
To access the mailbox from your own extension, do the following:
1. Press the messages tab to open the Messages page.
2. Listen to and follow the voice announcements.
Note: Depending on the configuration, you might be asked for your passwordbefore you can enter your mailbox.
11.3.2 Accessing the mailbox from any other extension.
To access the mailbox from any other extension, do the following:
1. Enter the directory number of the mailbox system. Listen and follow thevoice announcements in the main menu.
11.3.3 Accessing the mailbox from an external position
To access the mailbox from en external position, do the following:
1. Enter the public number of your company.
2. Enter the directory number of the mailbox system. Listen and follow thevoice announcements in the main menu.
50 8/1553-DBC 446 01 Uen A 2008-04-11
Voice Mailbox
11.4 Listening to your Messages
Received messages are divided into the following three categories:
• New messages (not heard); indicated by a flashing message led and aspecial dial tone.
• Heard messages; indicated by a lighting message led and a special dialtone.
• Stored messages; not indicated.
Note: Messages are deleted from the system after a certain time. Please askyour system administrator regarding this.
To listen to your messages, do the following:
1. Access the mailbox. (See section Accessing the Mailbox on Section 11.3Accessing the Mailbox on page 50.)
2. Press the numeric key 1 to listen to available messages.
Note: If there are no messages in your mailbox, the option to listen toyour messages will not be available.
3. Select one of the three message categories (new, heard, stored). Listen toyour messages and follow the voice announcements in the dedicated menu.
• play message again
• forward a message
• get date and time info
• pause during play
• play previous message
• store message
• play next message
• erase message
Note: Voice messages will be heard. “Call me” messages will call thesender (these messages cannot be stored).
4. Press C to finish the procedure.
11.4.1 Forwarding a Voice Message
A copy of your received voice messages (in the individual mailbox) can beforwarded to other mailbox numbers (individual or common). When you forward
518/1553-DBC 446 01 Uen A 2008-04-11

Dialog 5446 IP Premium
a voice message (heard or stored) to an individual mailbox, the mailbox numberis the same as the extension number.
Note: The forwarded message is a copy, that is, it can be deleted withoutdeleting the original message.
There are no distribution list numbers available. Forwarding the samemessage to more than one mailbox must be done in single operations.
11.5 Changing your Personal Greeting
Depending on the type of call diversion to the mailbox, you can leave threedifferent personal greetings for the caller. You can activate a diversion when acaller receives busy tone, when there is no answer, or you can activate a fixedor individual diversion for all your calls.
To change your Personal Greeting, do the following:
1. Access the mailbox. (See section Accessing the Mailbox on Section 11.3Accessing the Mailbox on page 50.)
Listen and follow the voice announcements in the main menu.
2. Press the numeric key 2 to change your Personal Greeting.
3. Select the desired diversion type. Listen and follow the dedicated voiceannouncements.
When you activate the diversion, the recorded greeting is played to thenext caller.
4. Press C to finish the procedure.
Note: When you have activated a diversion with a Personal Greeting, callerswill receive this greeting instead of your activated absence information.
11.6 Sending messages via your mailbox
With this function, the mailbox system allows you to record and send messagesfrom your mailbox to any other internal mailbox without calling the respectivemailbox owner. A recorded message can either be sent to one or to multiplemailboxes.
Note: There are no distribution list numbers available. Sending the samemessage to more than one mailbox must be done in single operations.
To send messages via your mailbox, do the following:
1. Access the mailbox. (See section Accessing the Mailbox on Section 11.3Accessing the Mailbox on page 50.)
Listen and follow the voice announcements in the main menu.
52 8/1553-DBC 446 01 Uen A 2008-04-11

Voice Mailbox
2. Press the numeric key 3 to record and send messages. Listen and followthe dedicated voice announcements.
Messages can be heard or re-recorded before they are sent to a mailbox.
Note: A message can also be sent during a call, see section SendingMessages on Section 6.6 Sending Messages on page 35.
11.7 Outgoing (External) Notification
With this function, the message system can notify you when new voicemessages arrive. You can specify an external number where you will be calledat a pre-programmed time or as soon as a new message arrives.
Note: This feature may be restricted or not available. Ask the systemadministrator for the availability and more information.
You can be notified in two different ways (depending on the programming ofthe system:
• Notification with mailbox access:
You acknowledge the notification via your password (has to differ fromthe default value 0000). See section Changing Password on Section11.8 Changing Password on page 54 to select a new password. You havefull access to the mailbox system.
• Notification without mailbox access:
You get a short voice announcement informing you that someone has left amessage for you. You acknowledge the notification by pressing any key.You have to call back the mailbox system to retrieve the message.
Note: If you do not acknowledge the notification within thepre-programmed time, the connection is cancelled and repeatedlater (ask the system administrator for the programmed numberof notification attempts).
To activate an external notification, do the following:
1. Access the mailbox. (See section Accessing the Mailbox on Section 11.3Accessing the Mailbox on page 50.)
Listen and follow the voice announcements in the main menu.
2. Press the numeric key 4 to set up an external notification.
You can program the external notification number, the notification timeand activate/deactivate the function. The external number (including thedigit(s) for external line access) can consist of up to 24 digits. The time isentered in the 24 h format, for example, 2030 for half past eight with valuesautomatically set to even quarters, that is, 2013 will be 2015.
538/1553-DBC 446 01 Uen A 2008-04-11

Dialog 5446 IP Premium
Note: The notification number and time must be programmed before youactivate the notification.
3. Press C to finish the procedure.
11.8 Changing Password
11.8.1 Changing the password via your mailbox
To change the password via your mailbox, do the following:
1. Access the mailbox. (See section Accessing the Mailbox on Section11.3 Accessing the Mailbox on page 50. ) Listen and follow the voiceannouncements in the main menu.
2. Press the numeric key 5 to change the password. Listen and follow thededicated voice announcements.
3. Press C to finish the procedure.
Note: The password can also be changed without accessing the mailbox byusing the procedure Changing the password via the telephone onSection 11.8.2 Changing the password via the telephone on page 54.
11.8.2 Changing the password via the telephone
To change the password via the telephone, do the following:
1. Dial # * 72 * to select a new password.
2. Enter your present password. The default password is 0000.
3. Press * .
4. Enter your new password.
5. Press # and wait for the verification tone.
6. Press C to finish the procedure.
11.9 Dictaphone Function
If you want to record and retrieve personal voice messages you can use theDictaphone function. A Dictaphone message is treated as a normal message.For information on how to retrieve Dictaphone messages, see Listening toyour Messages on Section 11.4 Listening to your Messages on page 51.
To record a message, do the following:
1. Lift the handset and wait for the dial tone.
54 8/1553-DBC 446 01 Uen A 2008-04-11

Voice Mailbox
2. Dial * 58 # and record your message. The maximum recording time isfour minutes and 15 seconds.
3. Select from the options below:
• Press * to play-back.
• Press the numeric key 9 to speak and re-record.
• Press # to stop the recording and save the message.
4. Press C to finish the procedure.
558/1553-DBC 446 01 Uen A 2008-04-11

Dialog 5446 IP Premium
56 8/1553-DBC 446 01 Uen A 2008-04-11
Group Features
12 Group Features
12.1 Group Call-pick-up
The group call-pick-up feature allows any member of a group to answer anyindividual calls to the members of that group.
You answer a call to the group by dialling a special answering number. Pleaseask your system administrator for the configured number.
12.2 Group Hunting
An internal group hunting number is a common directory number for a group ofextensions. Calls to the group will be indicated at a free extension in the group.Your telephone can be included in one or several hunt groups. In a hunt groupall members are represented with one common directory number. 16 huntgroups can be programmed, each containing 1 to 20 members. A member canbe either an extension number, an operator console or a fictive number. Pleaseask your system administrator if you require this function.
Note: The number of cordless extensions in a hunt group are limited to eight(including Tandem configurations).
Incoming calls to the hunt group are directed to free extensions in the group.The hunt order within the group can be changed to suit your needs. If allmembers of the hunt group are busy, an incoming call is being queued. If noone answers this call before the programmed time, the call is forwarded to theprogrammed answering position (for example, the operator).
Note: If all members in a hunt group are busy, the Callback or Intrusionfunction is not available.
12.2.1 Log in to one hunt group
Before you can answer group hunting calls, you must log in. To log in to ahunt group, do the following:
1 Lift the handset and wait for a dial tone.
2 Dial * 28 * hunt group code # and wait for the verification tone.
3 Replace the handset.
578/1553-DBC 446 01 Uen A 2008-04-11

Dialog 5446 IP Premium
12.2.2 Log in to all hunt groups
Before you can answer group hunting calls, you must log in. To log in to allhunt groups, do the following:
1 Lift the handset and wait for a dial tone.
2 Dial * 28 * # and wait for the verification tone.
3 Replace the handset.
12.2.3 Answering a Group Call
A group call is answered in the normal way.
12.2.4 Log out from one hunt group
To log out from one hunt group, do the following:
1 Lift the handset and wait for a dial tone.
2 Dial # 28 * hunt group code # and wait for the verification tone.
3 Replace the handset.
12.2.5 Log out from all hunt groups
To log out from all hunt groups, do the following:
1 Lift the handset and wait for a dial tone.
2 Dial # 28 * * # and wait for the verification tone.
3 Replace the handset.
12.3 Common Bell
The Common Bell function allows all extensions of the system (operatorincluded) to pick up the call from an extension that has been predefined as aCommon Bell extension.
To activate the Common Bell function, do the following:
Enter the Common Bell pick-up code. Please ask your system administratorfor the Common Bell pick-up code.
If two or more extensions simultaneously attempt to answer a call from theCommon Bell extension, only the first extension will pick it up. The otherextensions will receive the number unobtainable tone. This will also happen
58 8/1553-DBC 446 01 Uen A 2008-04-11

Group Features
if you dial the Common Bell pick-up code and there are no calls waiting atthe Common Bell extension.
Note: You can also program the Common Bell code on a Function key.
598/1553-DBC 446 01 Uen A 2008-04-11

Dialog 5446 IP Premium
60 8/1553-DBC 446 01 Uen A 2008-04-11

Other Features
13 Other Features
13.1 Tandem Configuration
The Tandem configuration is a unit, consisting of two telephones using thesame directory number. One of the telephones is defined as the primary andthe other one as the secondary. This function enhances the communicationfor users that, for example, have a wired phone on their desk (the primarytelephone) and need to be mobile within their company’s building with their ownportable (the secondary telephone).
13.1.1 Activating Tandem configuration
To activate the Tandem configuration, do the following:
1. Dial * 28 # to log on the secondary phone.
2. Press C to finish the procedure.
For incoming calls:
• Both telephones are treated as 1 single extension.
For outgoing calls:
• Both telephones are treated as 2 separate extensions.
13.1.2 Deactivating Tandem configuration
To deactivate the tandem configuration, do the following:
Dial # 28 # to log off the secondary phone.
For incoming calls:
• The secondary telephone cannot be called and the primary telephoneworks as a normal standalone telephone.
For outgoing calls:
• Both telephones are treated as 2 separate extensions.
13.1.3 Transferring a call between members of a Tandem unit
To transfer a call between members of a Tandem unit, do the following:
1. Press the Line button.
618/1553-DBC 446 01 Uen A 2008-04-11
Dialog 5446 IP Premium
2. Enter your own directory number.
3. Press C to finish the procedure.
13.2 Reminder
The phone can be set to remind you at any time within the next 24 hours(multiple settings are allowed).
13.2.1 Programming Reminder
To program the Reminder, do the following:
1. Dial * 32 *.
2. Enter Reminder time and press #. Valid numbers are (00-23) hour + (00-59)minute. When the time is reached your phone rings with a recall signal.
Note: If you receive a busy tone, your extension does not have theauthority to set a Reminder
3. Press C to finish the programming.
13.2.2 Canceling Reminder
To cancel the Reminder, do the following:
1. Dial # 32 # to cancel all settings.
2. Press C to finish the procedure.
13.3 Door Phone
The door phone is used to monitor the admission to your company, that is, youcan open the door lock from your phone.
13.3.1 Answering Door Phone calls
To answer a door phone call, do the following:
Lift the handset. You will be in speech connection with the calling party.
13.3.2 Opening of the Door Lock
After you have answered the door phone, you can open the door by makingan inquiry to the door-opener’s directory number.
To open the door, do the following:
62 8/1553-DBC 446 01 Uen A 2008-04-11

Other Features
1. Press the Line button.
2. Enter the door opener’s directory number. Please ask your systemadministrator for the number.
Note: You can also program the door-opener’s directory number as aCommon Abbreviated Number or a Function key.
13.4 Account Number
An Account Number can be entered to debit telephone costs to differentaccounts. Depending on the system configuration the Account Number has tobe entered from a Verified Account Number list (predefined) or you can inventan own Account Number. The following prerequisites apply:
• With the Verified Account Number you can restrict the making of externalcalls (not a specific number or area), so everyone who is allowed to makeexternal calls will receive an Account Number which has to be used eachtime he/she wants to make an external call.
• Verified Account Numbers contain up to 10 digits.
• Own Account Numbers contain up to 15 digits.
To use verified or your own Account Numbers, do the following:
1. Dial * 9 *.
2. Enter Account Number and press #. Valid digits 0–9.
3. After the internal dial tone make the external call.
13.5 Hot-line (Non-dialed Connection)
You can define an extension number as a direct hot-line number.
To make a call from this type of phone, do one of the following:
• Lift the handset.
• Press a Line key.
A call is automatically generated to a predefined number (either an extensionnumber or an external subscriber number).
The only call that can be placed from this type of line is the direct hot-line call.
13.6 Least Cost Routing
Least cost routing (LCR) is a feature that automatically selects the leastexpensive way to connect an external call.
638/1553-DBC 446 01 Uen A 2008-04-11

Dialog 5446 IP Premium
The LCR feature can be accessed by dialing the Least Cost Routing AccessCode (LAC).
By using LAC you will automatically be routed over the least expensive routeavailable. You cannot choose the route yourself, this is done automatically bythe LCR feature.
Note: The least expensive way is not always the shortest distance.
13.6.1 Making an Outgoing Call Using LAC
To make a call using LAC, do the following:
1 Lift the handset.
2 Dial the LAC.
If provided, a dial tone is received.
3 Dial with the external number.
If no free trunk is selected, you will hear a busy tone.
You enable on-hook queuing by dialing the suffix digit for callback towardsthe busy route.
If the selected route is marked as expensive, you will receive an ExpensiveRoute Warning Tone which enables you to stop further call routing.
4 Replace the handset to end the call.
64 8/1553-DBC 446 01 Uen A 2008-04-11

Settings
14 Settings
14.1 Presence Settings
The page My Presence includes a number of presence settings that you canadjust according to your preferences.
To open the My Presence page, do the following:
1. Tap the icon at the top menu bar and select My Presence.
2. The following settings are displayed on the My Presence page:
• Follow me. See Section 7.1 Follow-me on page 37.
• External Follow me. See Section 7.2 External Follow-me on page 39.
• Absence reasons. See Section 10 Presence Information on page 47.
14.2 Telephone Settings
The page My Settings includes a number of telephone settings that you canadjust according to your preferences.
To open the My Settings page, do the following:
1. Tap the icon at the top menu bar and select My Settings.
2. The following settings are displayed on the My Settings page:
• Programmable keys. See Section 14.2.1 Programmable Keys onpage 66.
• Ring Character. See Section 14.2.2 Ring Character on page 66
• Time & Date. See Section 14.2.3 Time & Date on page 66
• Language. See Section 14.2.4 Language on page 67
• Backlight. See Section 14.2.5 Backlight on page 68
• Option Unit. Not implemented.
• Hearing Level. See Section 14.2.6 Hearing level on page 68.
658/1553-DBC 446 01 Uen A 2008-04-11
Dialog 5446 IP Premium
• Password. See Section 14.2.7 Password on page 68
14.2.1 Programmable Keys
The Programmable Keys page includes one key that is predefined: Line 1.You can change the ring signal for this key.
14.2.2 Ring Character
The ring signal setting contains the Ring Character setting. You can choosebetween 10 different ring tones (between 0 and 9) and a number of ringmelodies. Ring melodies can also be downloaded from the web. In order todistinguish between internal, external and call back calls, the signal you choosewill be used with different ring cadences for each call type. You can alsodistinguish between callers by giving each phone number its own ring signal.
14.2.2.1 Setting the Ring Character
Ring tones are generated by a tone ringer in the phone loudspeaker.
To change the ring tone, do the following:
1. From the My Settings page, select Ring Character.
2. The current setting is displayed.
3. Enter a number between 0 and 9 in the desired ring tone field.
Select a field by tapping it, or by pressing up or down on the navigationkey. You can choose between the following formats:
• Set new ring tones for incoming and outgoing calls and callback calls
• Set incoming external call signal
• Set incoming internal call signal
• Set Call Back ring signal
4. Tap Save to confirm the change and to return to the previous page.
14.2.3 Time & Date
The time and date are updated automatically through the exchange, but youcan adjust the format in which the time and date are displayed.
14.2.3.1 Changing the Time Format
To change the time format, do the following:
66 8/1553-DBC 446 01 Uen A 2008-04-11
Settings
1. From the My Settings page, select Time & Date.
2. Select Time Format.
3. Select a time format. Available options are the 24 hour and 12 hourformats.
4. Tap Select to confirm the setting and return to the previous page.
14.2.3.2 Changing the Date Format
To change the date format, do the following:
1. From the My Settings page, select Time & Date.
2. Select Date Format.
3. Select a date format. Example: ww dd mmm yyyy can be expressed asWe 30 Apr 2008.
4. Tap Select to confirm the setting and return to the previous page.
14.2.4 Language
You can change the language used in the display texts, and you can alsochange the character set, that is, the alphabet used for text that you enter. Thesystem administrator defines which languages are available.
Note: Before you can change the language settings, make sure the phone islogged on to the exchange, and that the desired language is available.Contact the system administrator if your phone is not logged on to theexchange, or if you cannot find the desired language.
14.2.4.1 Changing the Display Menu Language
To change the display text language, do the following:
1. From the My Settings page, select Language.
2. Select Display Menus to change the language of the displayed texts.
3. Select a language. Available options are English, French, German,Spanish, Italian, Swedish, Danish, and Norwegian.
4. Tap Select to confirm the selection and return to the previous page.
14.2.4.2 Changing the Keypad Characters
To change the keypad characters, do the following:
1. From the My Settings page, select Language.
2. Select Keypad Characters to change the character set of the input texts.
678/1553-DBC 446 01 Uen A 2008-04-11

Dialog 5446 IP Premium
3. Select a character. Available options are Default (Latin), Cyrillic, and Greek.
4. Tap Select to confirm the selection and return to the previous page.
14.2.5 Backlight
To change the display backlight, do the following
1. From the My Settings page, select Backlight.
2. Drag the backlight bar to the desired position by tapping the desiredposition, or by pressing left or right on the navigation key.
• Drag the bar to the right to increase the backlight level.
• Drag the bar to the left to decrease the backlight level.
3. Tap Save to confirm the selection and return to the previous page.
14.2.6 Hearing level
14.2.6.1 Setting the Hearing Level
It is possible to get increased hearing level in the handset and the headset.
To set the hearing level, do the following:
1. From the My Settings page, select Hearing Level.
2. Select a setting. Available options are Standard and Increased.
3. Tap Save to confirm the selection and return to the previous page.
14.2.7 Password
On the password setting page you define whether a password is required forthe active user account.
To change the password settings, do the following:
1. From the My Settings page, select Password.
2. Tap Select to confirm.
3. Select a setting. Available options are No password (which means that apassword is required at logon) and Use password.
4. Tap Save to confirm the selection and return to the previous page.
68 8/1553-DBC 446 01 Uen A 2008-04-11

Settings
14.3 Network Settings
The Network page includes a number of network settings that requireadministrator rights. However, you can view most of these settings, althoughyou cannot change them.
To open the Network page, tap the icon at the top menu bar, selectAdministrator Settings and then Network. The Network page is displayedwith all settings greyed out.
The page Administrator Settings includes a number of settings that you arenot allowed to change; these settings require administrator rights.
698/1553-DBC 446 01 Uen A 2008-04-11

Dialog 5446 IP Premium
70 8/1553-DBC 446 01 Uen A 2008-04-11

Web Browser
15 Web Browser
The Dialog 5446 IP phone has a built-in web browser which can be accessedfrom the menu bar at the top of the display window.
15.1 Opening the Web Browser
To open the web browser, do the following:
1. Tap in the menu bar to open the Internet page, see below.
2. Tap in the input field to activate it and enter a valid web address. Therequested page starts loading.
Note: For faster downloading, you are recommended to use only webpages that are optimized for mobile phones.
15.2 Using the Web Browser
The built-in web browser contains a number of icons which you use to navigatethe web, to handle bookmarks, and to exit the current page or the browser:
718/1553-DBC 446 01 Uen A 2008-04-11
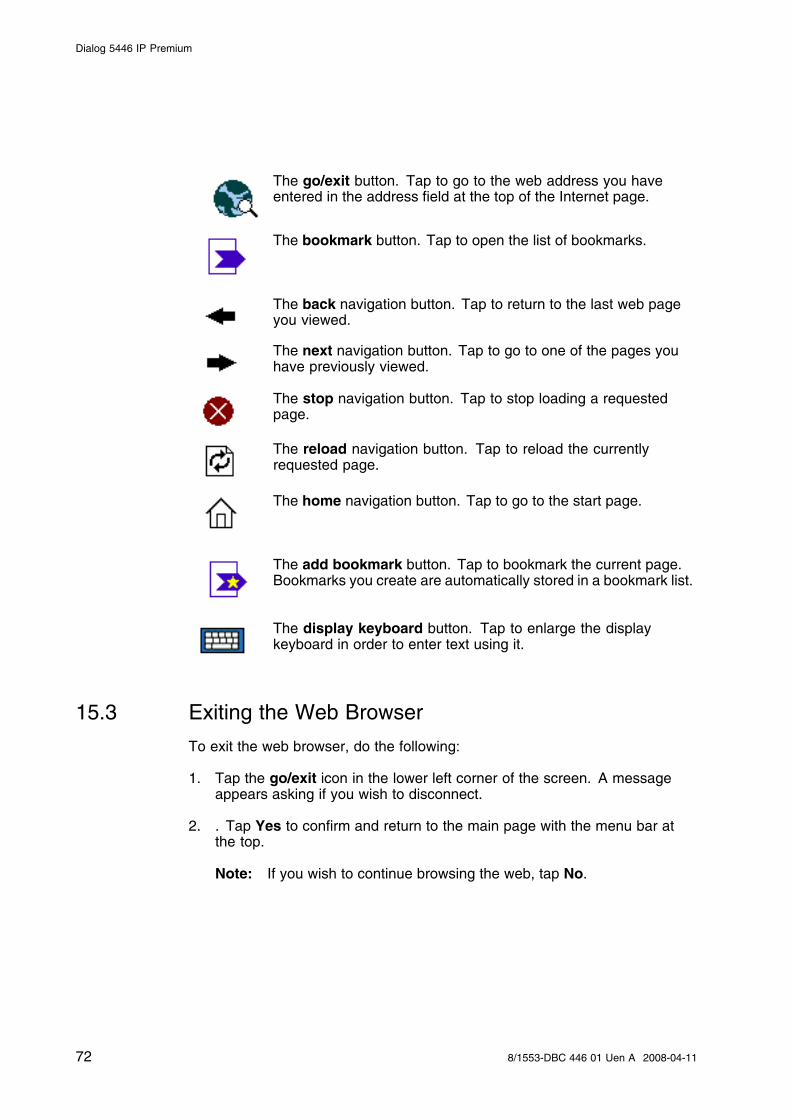
Dialog 5446 IP Premium
The go/exit button. Tap to go to the web address you haveentered in the address field at the top of the Internet page.
The bookmark button. Tap to open the list of bookmarks.
The back navigation button. Tap to return to the last web pageyou viewed.
The next navigation button. Tap to go to one of the pages youhave previously viewed.
The stop navigation button. Tap to stop loading a requestedpage.
The reload navigation button. Tap to reload the currentlyrequested page.
The home navigation button. Tap to go to the start page.
The add bookmark button. Tap to bookmark the current page.Bookmarks you create are automatically stored in a bookmark list.
The display keyboard button. Tap to enlarge the displaykeyboard in order to enter text using it.
15.3 Exiting the Web Browser
To exit the web browser, do the following:
1. Tap the go/exit icon in the lower left corner of the screen. A messageappears asking if you wish to disconnect.
2. . Tap Yes to confirm and return to the main page with the menu bar atthe top.
Note: If you wish to continue browsing the web, tap No.
72 8/1553-DBC 446 01 Uen A 2008-04-11
Web Interface
16 Web Interface
You can access your IP telephone from the web browser in your PC, andmanage your telephone remotely.
Before you can access the telephone’s web interface, you need to enter yourtelephone’s web or IP address in the web browser’s address field, see below.
16.1 Accessing the Telephone’s Web Interface
To access the telephone’s web interface, do the following:
1. To find out which web address or IP address the telephone has, go to theSettings page and select Network.
2. The Web address and IP address options show the web and IP addressesof the IP phone in parentheses.
3. Enter the web address or the IP address in the address field of the webbrowser in your PC.
4. Start using the features in the web interface, see next section.
16.2 Using the Telephone Through the Web Interface
To be able to use the telephone’s features through web interface, do thefollowing:
1. Log on to the telephone by entering a password in the Password text box.
Use the same (RAC) password as for the exchange logon. If you haveno exchange logon password, use the default password Welcome (casesensitive) the first time you log on to the web interface.
2. Click on the Log on button. If you used the default password, you need tochange it to your own personal password. The password must be at least 6characters long. You cannot use this password to log on to the exchange.
Note: If you have forgotten your password, contact the systemadministrator to receive a new one.
3. Click the plus signs to open the sub menus.
4. Click on the desired feature. You can select among the following features:
Contacts Select if you want to add or delete entries.
Call list Select if you want to delete the call list.
738/1553-DBC 446 01 Uen A 2008-04-11

Dialog 5446 IP Premium
Settings Includes the options Programmable keys, HearingLevel, and Ring Character.
5. Click Log off to exit.
74 8/1553-DBC 446 01 Uen A 2008-04-11

Troubleshooting
17 Troubleshooting
This section describes common operational problems and warnings, andsuggests actions to solve the problems.
Trouble: The message “No connection to network” appears
Cause: There is no connection to the LAN.
Solution: Check the LAN cable between the LAN port and the phone.
Trouble: The phone is locked
Cause: There is disturbance in the LAN.
Solution: Restart the phone by pressing the C (clear), mute and# keyssimultaneously for 2 seconds.
Trouble: The access warning triangle appears in the display
Cause: There is disturbance in the LAN or in the exchange.
Solution: Although some features may not work, the phone can still be usedfor making and receiving calls. If the trouble persists, contact the systemadministrator.
Trouble: You receive a congestion tone when you dial an area code
Cause: You are not allowed to call the area code.
Solution:Call the operator and ask for help to establish the call.
Trouble: The phone does not work properly
Cause: The network settings may be incorrectly configured.
Solution:Contact your system administrator.
758/1553-DBC 446 01 Uen A 2008-04-11

Dialog 5446 IP Premium
76 8/1553-DBC 446 01 Uen A 2008-04-11

List of Features and Procedures
18 List of Features and Procedures
Table 3 on page 77 summarizes the procedures for the Dialog 5446 IP phone.
Table 3 Features and Procedures
Features Procedure
ACCOUNT CODE *61*account code#
AUTOMATIC CALLBACK
- to order:
- busy extension or no reply Press key 6
- busy external line Press key 6
BYPASS *60*B-number#
CALL PICK UP
- individual Press key 8
- group *8#
CALL WAITING
- not applicable
CONFERENCE Press key 3
EXTERNAL FOLLOW-ME
- to order *22#route access code andexternal number#
- to cancel #22#
FOLLOW-ME
- to order from own extension *21*B-number#
- to cancel from own extension #21#
- to cancel from answering position #21*A-number #
- to order new follow-me position *21*A-number*C-number#
Table 4 Features and Procedures, cont.
Features Procedure
INQUIRY
- to initiate Line/Hold
- to revert to original party Let other party hang-up, and theoriginal party will call-back
778/1553-DBC 446 01 Uen A 2008-04-11

Dialog 5446 IP Premium
INTRUSION Press key 4
LAST EXTERNAL NUMBER REDIAL ***
MANUAL MESSAGE WAITING
- to order *31*extension number#
- to cancel #31#
NIGHT SERVICE
Universal 8
Flexible
- to order *84*route number* external linenumber#
- to cancel #84#
NUMBER PRESENTATIONRESTRICTION
*42# B-number
REBOOT Press the keys C, mute and #simultaneously for at least onesecond
SOFTWARE VERSION Press the keys C, *and 4simultaneously for at least onesecond
TRANSFER Press key C or hang up handset
78 8/1553-DBC 446 01 Uen A 2008-04-11

Telephony Function Codes
19 Telephony Function Codes
This section describes the country specific function codes that are relevant forthe Dialog 5446 01 phone used in the BusinessPhone environment.
Service codes are activated with * service code #, and deactivated with #service code #.
Table 5 Standard and Alternative Codes
Function Standard Alternative
Alternation on Inquiry N/A Sweden: R
Conference 3
Intrusion 8 Austria: 4Belgium: 4Brazil: 4Denmark: 4Germany: 4
Call Waiting Indication 4 Austria: 5Belgium: 5Brazil: 5Denmark: 5Germany: 5France: 6New Zealand: 6
Call Back 5 Austria: 6Belgium: 6Brazil: 6Denmark: 6Germany: 6
Common Parking or IndividualCall Pick-up
6 Austria: 8Belgium: 8Brazil: 8Denmark: 8Germany: 8France: 4New Zealand: 4
Service Codes
General Deactivation 001 North America: 0
Choice of Language 08
Ordering or Cancellation ofActive List (Personal Number)
10
798/1553-DBC 446 01 Uen A 2008-04-11

Dialog 5446 IP Premium
Follow Me 21
External Follow Me 22 North America: 23
Ordering or Cancellation ofInterception Message
23 North America: 24
Print Interception Message 26 Sweden: N/A
Manual Message Waiting 31
Cancellation of Message Waiting 31 North America: 56
Automatic Call Back,Cancellation
37 North America: 6
Malicious Call Tracing 39
Calling Line IdentificationRestriction Per Call
42
By-pass of Diversion 60 North America: 1
Account Code Predialing 61 Finland: 71Norway: 71
Authorization Code Predialing 72 Germany: 75The Netherlands: 75North America: 6Sweden: 75
Lock/Unlock CommonAuthorization Code
73 North America: 71
Change Individual AuthorizationCode
74
Dial With Individual AuthorizationCode
75 Germany: 72The Netherlands: 72Sweden: 72
Lock/Unlock IndividualAuthorization Code
76
Customer Identity Storage 77
Answer on Group Call Pick-up,and Answer on Night TimeConnection (* and # in theservice code can be excluded)
8 Finland: 0North America: 59Sweden: 0
Ordering of Night TimeConnection
84 North America: 8
Repetition of the Last ExternalNumber Dialed
*** Finland: **0Sweden: **0
Conference
Maximum number of parties whenexternal lines are connected
8
80 8/1553-DBC 446 01 Uen A 2008-04-11

Telephony Function Codes
Maximum number of parties in aconference
8
Maximum number of public trunklines in a conference
8 North America: 6
Maximum number of externallines in a conference
8 North America: 6
PBX Operator Service Codes
Selection of a specific line withina route
0 North America: 3
Conference 3 North America: 4
Day/night status for the exchange 80
Emergency switching 90
818/1553-DBC 446 01 Uen A 2008-04-11