ir sensors and encoders. lcds timothy friez class # 2
Post on 22-Dec-2015
215 views
TRANSCRIPT

IR SENSORS AND ENCODERS.
LCDs
Timothy Friez
Class # 2

Outline for Tonight
• Variables overview• IR Board
– Purpose– Wiring– Programming– Testing– Using in an Autonomous Program (code sample)
• *10 minute break*• Encoders
– Purpose– How it works– Testing and Developing a Program
• Questions

Why use variables?
• Variables help to simplify your code.– You can use variables more than once– When you change a variable once, it changes the
reference to that variable everywhere.– Makes your code more “english” readable.
• Example:motor[port1] = 100;motor[port2] = 100;Or, better…int speed = 100;motor[port1] = speed;motor[port2] = speed;

Other Advantages of variables
• Any variable declared appears in the “global variables”– This screen will show the current value of all
variables.
• Variables can be modified in a program– example:
• int motorspeed = 50;• motorspeed = motorspeed * 2;
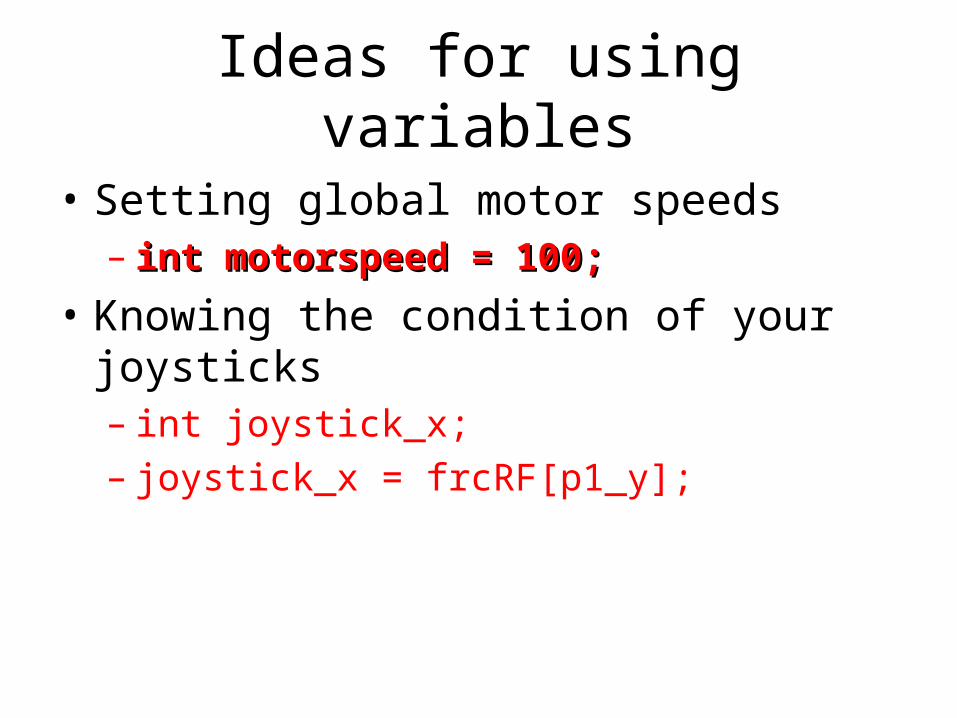
Ideas for using variables
• Setting global motor speeds– int motorspeed = 100;int motorspeed = 100;
• Knowing the condition of your joysticks– int joystick_x;– joystick_x = frcRF[p1_y];

Fun with Variables
• Common types of variables:– int = integer (whole numbers)– float = floating point number (decimals)– bool = boolean values (true or false)
• Valid uses:– int motorspeed = 100;– float pi = 3.14159;– bool sensor_check = true;

Types of Operators (Boolean)
• 7 primary types of Boolean operators for conditional statements< Less Than
> Greater Than
<= Less Than or Equal To
>= Greater Than or Equal To
&& And (both conditions must be true)
|| Or (either condition can be true)
== Equal (one condition equals another condition)
!= Not Equal (one condition does not equal another)
Values are Boolean, arguments not necessarily.
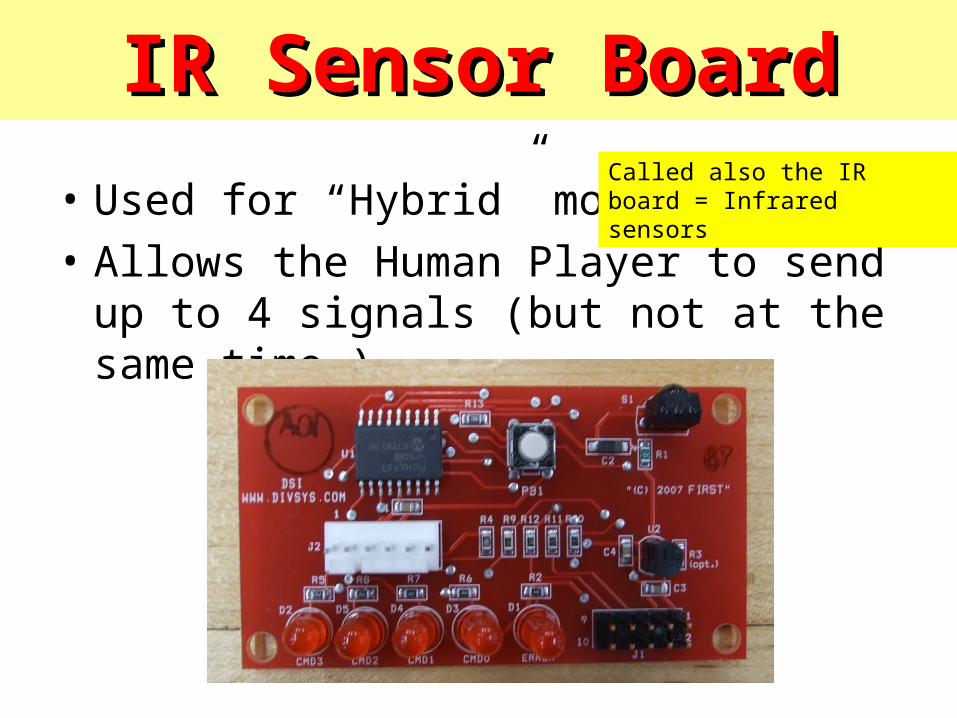
IR Sensor BoardIR Sensor Board
• Used for “Hybrid” mode
• Allows the Human Player to send up to 4 signals (but not at the same time…)
Called also the IR board = Infrared sensors

IR Sensor Board
• Wiring the board– 2 positive voltage wires (pin 1 and 2)– 2 negative voltage wires (pin 3 and 4)– 4 Signal wires (pins 5, 6, 7, 8)
• These wires go to the “Digital I/O” port on the FRC

Pin 1 and 2:
Voltage PosPin 3 and 4:
Voltage Ground
Pin 5 – Output #3
Pin 6 – Output #2
Pin 7 – Output #1
Pin 8 – Output #4
Pins 9 and 10 are not used.

But it’s not that easy…
• You have to hook the signal wires up to the white wire of a 3-pin PWM Cable– Pin 5, Pin 6, Pin 7, and Pin 8 are all signal wires
• You then have to hook the ground wire from the IR board to the Black wire of the PWM cable to complete the electrical circuit!– Pin 3 and Pin 4 are ground
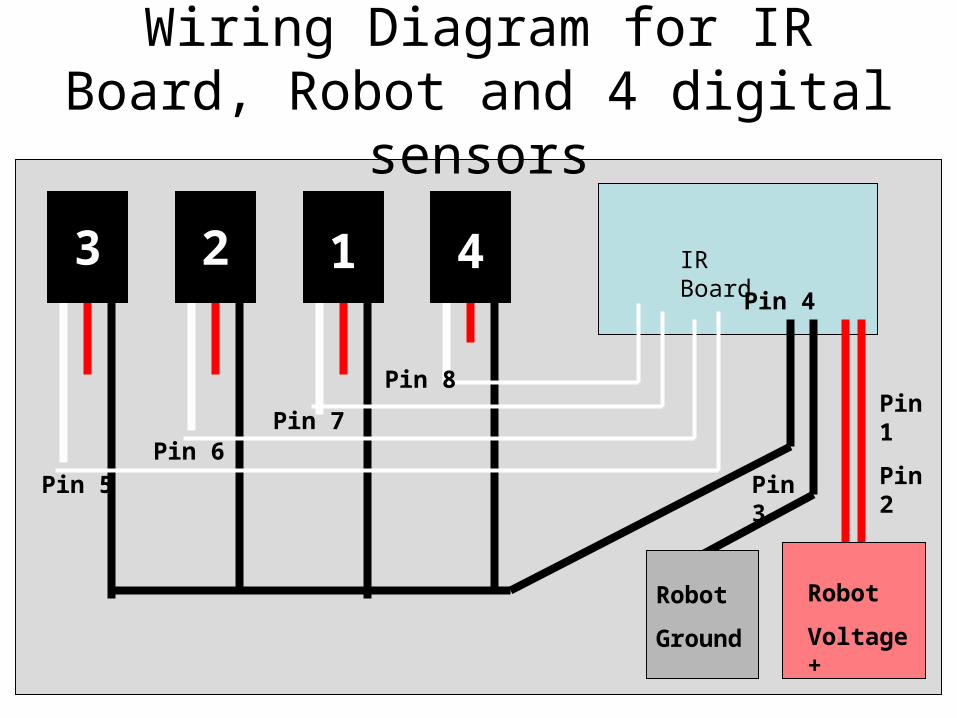
Wiring Diagram for IR Board, Robot and 4 digital sensors
IR Board
Robot
Voltage +
Pin 1
Pin 2
Robot
Ground
Pin 3
Pin 4
4123
Pin 5
Pin 6Pin 7
Pin 8

So what’s that look like?
• A mess, kind of.

So how do we “program” it?
• First you have to “train” the receiver.– Step 1: Turn power off– Step 2: Hold button down on IR Board– Step 3: When LED 1 turns on, press the first button.
• If the signal is good, the LED will go off, and then back on again.
– Step 4: Press the first button again until LED 1 goes off once more.
– Step 5: LED 2 will light up… repeat with buttons 2, 3 and 4.
• Once done, all LEDs will turn off, and the IR board is programmed.

How do we ROBOTC program it?
• All 4 of these inputs are treated like All 4 of these inputs are treated like digital inputsdigital inputs– Reminder: Digital inputs are like touch
sensors.
• Code: (assume we’ve put this on port 3)– frcDigitalIODirection[pio3] = dirInput;
– Access with frcDigitalIOValue[pio3]

EncodersEncoders• Know how many time your drive wheels
have gone around.
• Need an encoder on each drive motor output.

Our Encoders? Gear Tooth!
• Each FIRST kit comes with 2 gear tooth encoders.

How encoders work
• The gear tooth encoder works on a principal called the “Hall Effect”– Detects differences in magnetic fields and produces a
result.
• When the sensor reads a tip, it sends a high digital value (a “1”)
• When the sensor reads a valley, it sends a low digital value (a “0”)

How encoders work
Gear tooth Sensor
Output:
1
Metal Gear
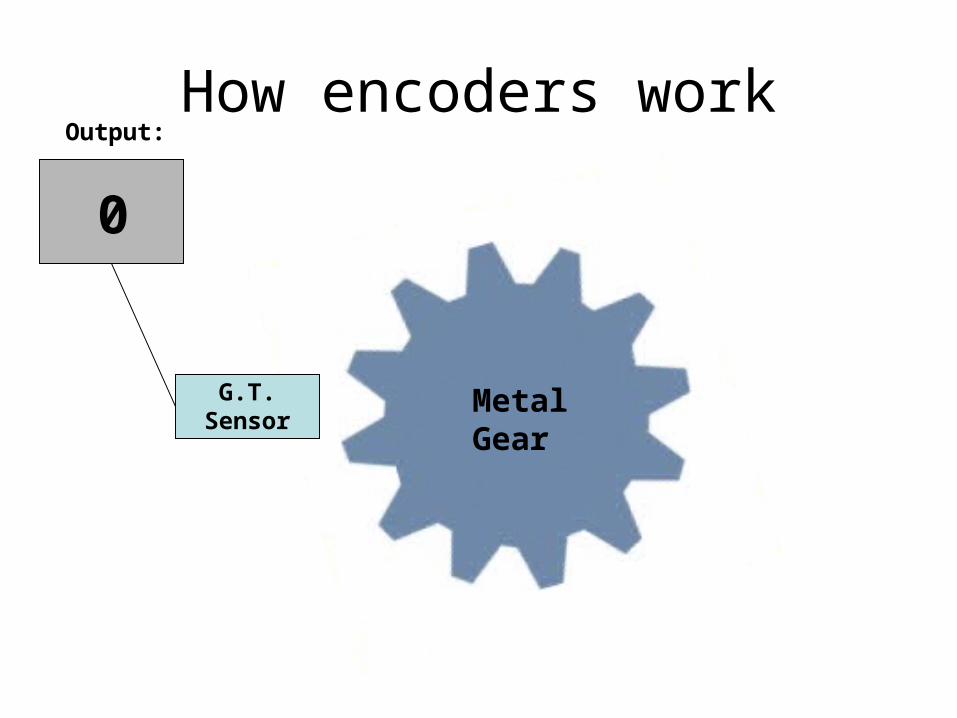
How encoders work
G.T. Sensor
Metal Gear
Output:
0

Problems with encoders
• Extremely fragile (look at how tiny it is!)• Requires 2 cables
– 12 volt power supply– 5 volt digital signal cable (PWM)
• Must be mounted no further than 2mm away from top of gear tooth.
• Not a problem?: – able to be mounted in the 2008 gearboxes able to be mounted in the 2008 gearboxes
directlydirectly

Recommendations for use
• Larger, more robust gear tooth sensor!
• Honeywell 1GT101DC - Hall Effect Gear Tooth Sensor
• Digikey.com - $22.29 each + shipping
• Advantages:– Only requires one PWM cable– Rated up to 10000 RPM

Mounting idea
Almost touching the gear… needs to be very close.

How to program encoders using RobotC?
• Wires into a Digital I/O port.• Will only tell number of rotations, not direction• Returns a 1 at a tip, returns a 0 at a valley• ROBOTC will take care of the counting for you.• Setup with Motors and Sensors Setup screen• Access with
– SensorValue[encoder1]
• Reset to zero with – SensorValue[encoder1] = 0;

Encoder – Go Straight
• Last Week’s Notes– Use Motors and Sensors Setup to configure
our encoders– Clear the encoders before using them– Program: Go straight using encoder feedback
• If left wheel lags behind, slow down right wheel• If right wheel lags behind, slow down left wheel• If both wheels are equal, go an equal speed.• Use Three “If” statements