ironhorse shaft mount gearbox user manual · ironhorse® shaft mount gearbox user manual final...
TRANSCRIPT

IronHorse® Shaft Mount Gearbox User Manual
IH-SG-UMW
1st Edition

IronHorse® sHaft Mount Gearbox user Manual table of Contents
iIronHorse® Shaft Mount Gearbox User Manual Final Review – May09-2017
IronHorse Shaft Mount Gearbox User Manual ContentsWarning ..............................................................................................................W-1
Trademarks .........................................................................................................W-1
Advertissement ...................................................................................................W-2
Marques de commerce .......................................................................................W-2
Limited Warranty ................................................................................................W-3
Publication History ..............................................................................................H-1
Chapter 1: Getting StartedManual Overview ................................................................................................. 1-2
Overview of This Publication ................................................................................... 1-2Who Should Read This Manual ................................................................................ 1-2Technical Support ................................................................................................... 1-2Special Symbols ....................................................................................................... 1-2
IronHorse® Shaft Mount Gearbox Introduction ................................................. 1-3Purpose of Shaft Mount Gearboxes ......................................................................... 1-3Package Contents .................................................................................................... 1-3Part Number Explanation ........................................................................................ 1-4Nameplate Information ........................................................................................... 1-4
Chapter 2: Cast-Iron Shaft Mount GearboxesGearbox Selection Factors ................................................................................... 2-2
Classes of Service and Service Factors ...................................................................... 2-2Output Shaft Overhung Load Ratings ...................................................................... 2-3Ratio to Speed ......................................................................................................... 2-3Gearbox Dimensions ............................................................................................... 2-4Mechanical Ratings ................................................................................................. 2-5

ii
Table of Contents
IronHorse® Shaft Mount Gearbox User Manual Training – May09-2017
Chapter 3: Installation and LubricationIronHorse® Shaft Mount Gearbox Installation ................................................... 3-2
Installation Instructions ............................................................................................ 3-2
Motor Mount Installation .................................................................................... 3-4
Gearbox Lubrication and Mounting Orientations .............................................. 3-5Lubrication Instructions ........................................................................................... 3-5Lubrication Schedule ............................................................................................... 3-5Mounting Orientations ............................................................................................ 3-6Lubricant Capacities ................................................................................................ 3-6
Guidelines for Long Term Storage ...................................................................... 3-7
Chapter 4: AccessoriesAccessories Selection ........................................................................................... 4-2
Backstop Installation ............................................................................................ 4-3Backstop Installation Warnings ................................................................................ 4-3Backstop Description ............................................................................................... 4-3Prior to Installation .................................................................................................. 4-3Backstop Installation ................................................................................................ 4-4After Installation ...................................................................................................... 4-4Dismantling ............................................................................................................. 4-4Lubrication and Maintenance of the Backstop Assembly ......................................... 4-4Backstop Assembly Type and Rotation Guidelines ................................................... 4-4
Screw Conveyor Drive Components ................................................................... 4-6Screw Conveyor Accessories Assembly..................................................................... 4-6Screw Conveyor Flange Adapters ............................................................................ 4-7Screw Conveyor Drive Shafts ................................................................................... 4-8
Bushing Kits − Dimensions .................................................................................. 4-9
Appendix A: Glossary of TermsGlossary of Gearbox Terms ................................................................................. A-2
Appendix B: Gearbox SelectionShaft Mount Gearbox Selection Procedure ........................................................ B-2
How to Select .......................................................................................................... B-2Example of SMR Gearbox Selection Procedure: ....................................................... B-3
A.G.M.A. Load Classification Numbers ............................................................... B-4Shaft Mount Reducers with Uniform Power Source ................................................. B-4

W-1IronHorse® Shaft Mount Gearbox User Manual 1st Ed. 062817
Trademarks
Warning
~WARNING ~Thank you for purchasing automation equipment from AutomationDirect.com®, doing business as, AutomationDirect. We want your new automation equipment to operate safely. Anyone who installs or uses this equipment should read this publication (and any other relevant publications) before installing or operating the equipment.
To minimize the risk of potential safety problems, you should follow all applicable local and national codes that regulate the installation and operation of your equipment. These codes vary from area to area and usually change with time. It is your responsibility to determine which codes should be followed, and to verify that the equipment, installation, and operation is in compliance with the latest revision of these codes.
At a minimum, you should follow all applicable sections of the National Fire Code, National Electrical Code, and the codes of the National Electrical Manufacturer’s Association (NEMA). There may be local regulatory or government offices that can also help determine which codes and standards are necessary for safe installation and operation.
Equipment damage or serious injury to personnel can result from the failure to follow all applicable codes and standards. We do not guarantee the products described in this publication are suitable for your particular application, nor do we assume any responsibility for your product design, installation, or operation.
Our products are not fault-tolerant and are not designed, manufactured or intended for use or resale as on-line control equipment in hazardous environments requiring fail-safe performance, such as in the operation of nuclear facilities, aircraft navigation or communication systems, air traffic control, direct life support machines, or weapons systems, in which the failure of the product could lead directly to death, personal injury, or severe physical or environmental damage (“High Risk Activities”). AutomationDirect specifically disclaims any expressed or implied warranty of fitness for High Risk Activities.
For additional warranty and safety information, see the Terms and Conditions section of our catalog. If you have any questions concerning the installation or operation of this equipment, or if you need additional information, please call us at 770-844-4200.
This publication is based on information that was available at the time it was printed. At AutomationDirect we constantly strive to improve our products and services, so we reserve the right to make changes to the products and/or publications at any time without notice and without any obligation. This publication may also discuss features that may not be available in certain revisions of the product.
Trademarks
This publication may contain references to products produced and/or offered by other companies. The product and company names may be trademarked and are the sole property of their respective owners. AutomationDirect disclaims any proprietary interest in the marks and names of others.
Copyright 2017 AutomationDirect.com® Incorporated All Rights Reserved
No part of this manual shall be copied, reproduced, or transmitted in any way without the prior, written consent of AutomationDirect.com® Incorporated. AutomationDirect retains the exclusive rights to all information included in this document.

W-2IronHorse® Shaft Mount Gearbox User Manual 1st Ed. 062817
Marques de commerce
Advertissement ~ADVERTISSEMENT ~
Nous vous remercions d’avoir acheté l’équipement d’automatisation de AutomationDirect.com®, en faisant des affaires comme, AutomationDirect. Nous tenons à ce que votre nouvel équipement d’automatisation fonctionne en toute sécurité. Toute personne qui installe ou utilise cet équipement doit lire la présente publication (et toutes les autres publications pertinentes) avant de l’installer ou de l’utiliser.
Afin de réduire au minimum le risque d’éventuels problèmes de sécurité, vous devez respecter tous les codes locaux et nationaux applicables régissant l’installation et le fonctionnement de votre équipement. Ces codes diffèrent d’une région à l’autre et, habituellement, évoluent au fil du temps. Il vous incombe de déterminer les codes à respecter et de vous assurer que l’équipement, l’installation et le fonctionnement sont conformes aux exigences de la version la plus récente de ces codes.
Vous devez, à tout le moins, respecter toutes les sections applicables du Code national de prévention des incendies, du Code national de l’électricité et des codes de la National Electrical Manufacturer’s Association (NEMA). Des organismes de réglementation ou des services gouvernementaux locaux peuvent également vous aider à déterminer les codes ainsi que les normes à respecter pour assurer une installation et un fonctionnement sûrs.
L’omission de respecter la totalité des codes et des normes applicables peut entraîner des dommages à l’équipement ou causer de graves blessures au personnel. Nous ne garantissons pas que les produits décrits dans cette publication conviennent à votre application particulière et nous n’assumons aucune responsabilité à l’égard de la conception, de l’installation ou du fonctionnement de votre produit.
Nos produits ne sont pas insensibles aux défaillances et ne sont ni conçus ni fabriqués pour l’utilisation ou la revente en tant qu’équipement de commande en ligne dans des environnements dangereux nécessitant une sécurité absolue, par exemple, l’exploitation d’installations nucléaires, les systèmes de navigation aérienne ou de communication, le contrôle de la circulation aérienne, les équipements de survie ou les systèmes d’armes, pour lesquels la défaillance du produit peut provoquer la mort, des blessures corporelles ou de graves dommages matériels ou environnementaux («activités à risque élevé»). La société AutomationDirect nie toute garantie expresse ou implicite d’aptitude à l’emploi en ce qui a trait aux activités à risque élevé.
Pour des renseignements additionnels touchant la garantie et la sécurité, veuillez consulter la section Modalités et conditions de notre documentation. Si vous avez des questions au sujet de l’installation ou du fonctionnement de cet équipement, ou encore si vous avez besoin de renseignements supplémentaires, n’hésitez pas à nous téléphoner au 770-844-4200.
Cette publication s’appuie sur l’information qui était disponible au moment de l’impression. À la société AutomationDirect, nous efforçons constamment d’améliorer nos produits et services. C’est pourquoi nous réservons le droit d’apporter des modifications aux produits ou aux publications en tout temps, sans préavis ni quelque obligation que ce soit. La présente publication peut aussi porter sur des caractéristiques susceptibles de ne pas être offertes dans certaines versions révisées du produit.
Marques de commerce
La présente publication peut contenir des références à des produits fabriqués ou offerts par d’autres entreprises. Les désignations des produits et des entreprises peuvent être des marques de commerce et appartiennent exclusivement à leurs propriétaires respectifs. AutomationDirect nie tout intérêt dans les autres marques et désignations.
Copyright 2017 AutomationDirect.com® Incorporated
Tous Droits Réservés
Nulle partie de ce manuel ne doit être copiée, reproduite ou transmise de quelque façon que ce soit sans le consentement préalable écrit de la société AutomationDirect.com® Incorporated. AutomationDirect conserve les droits exclusifs à l’égard de tous les renseignements contenus dans le présent document.

W-3IronHorse® Shaft Mount Gearbox User Manual 1st Ed. 062817
AutomationDirect.com® (The Company) warranties its products to be free from defect in materials or workmanship to the original purchaser for a period of three (3) years from the date of sale (invoice) for the “Ultimate” series shaft mount reducer. For this warranty to be effective, this product must be installed, used and maintained by the original purchaser in the accordance with good industry standards. The warranty does not cover normal wear, tear and erosion from use, misuse, abuse or corrosion.
In the event of failure, it shall be the responsibility of the original purchaser to notify The Company either in writing or by telephone to make arrangements for the correction of the problem. The purchaser shall be responsible for transportation charges connected with the return, exchange or repair of parts. Returns found defective upon inspection by our warranty department or authorized warranty service agent will be replaced free of charge.
The Company shall not be liable for any labor cost connected with the replacement of the equipment, the replacement of the parts or adjustments to the equipment by the purchaser or their contractor without The Company's prior written approval.
The Company, as the exclusive remedy under this warranty, shall at it's option, repair or replace defective items or, if agreed upon, refund the purchase price less reasonable allowance for depreciation in exchange for product. THE COMPANY MAKES NO OTHER WARRANTIES AND ALL IMPLIED OR EXPRESSED WARRANTIES AND REPRESENTATIONS, EXCEPT THAT OF TITLE, ARE DISCLAIMED. ALL IMPLIED WARRANTIES INCLUDING MERCHANTABILITY AND FITNESS FOR A PARTICULAR PURPOSE OR USE BUT NOT LIMITED TO JUST THOSE THAT ARE DISCLAIMED. LIABILITY FOR CONSEQUENTIAL, INCIDENTAL OR SPECIAL DAMAGES AND LOSSES UNDER ANY AND ALL WARRANTIES WHETHER IN CONTACT, TORT OR OTHERWISE ARE EXCLUDED TO THE EXTENT EXCLUSION IS PERMITTED BY LAW.
Limited Warranty

H-1
Publication History
IronHorse® Shaft Mount Gearbox User Manual 1st Ed. 062817
Publication HistoryIssue Date Description of Changes
First Edition 6/28/2017 Original Issue
Please include the Manual Number and the Manual Issue, both shown below, when communicating with Technical Support regarding this publication.
Manual Number: IH-SG-UMW
Issue: 1st Edition
Issue Date: xx/xx/2017
Publication HistoryIronHorse® sHaft Mount Gearbox user Manual

In this Chapter...
Manual Overview ...................................................................................1-2Overview of This Publication..................................................................................... 1-2
Who Should Read This Manual ................................................................................. 1-2
Technical Support ...................................................................................................... 1-2
Special Symbols ......................................................................................................... 1-2
IronHorse® Shaft Mount Gearbox Introduction ..................................1-3Purpose of Shaft Mount Gearboxes.......................................................................... 1-3
Package Contents ...................................................................................................... 1-3
Part Number Explanation .......................................................................................... 1-4
Nameplate Information ............................................................................................. 1-4
Chapter 1: GettinG Started

1-2
Chapter 1: Getting Started
IronHorse® Shaft Mount Gearbox User Manual 1st Ed. 062817
Manual OverviewOverview of This Publication
The IronHorse® Shaft Gearbox User Manual describes the installation, operation, and preventative maintenance of IronHorse® Shaft Gearboxes.
Who Should Read This ManualThis manual contains important information for people who will install, maintain, and/or operate any of the IronHorse® Shaft Gearboxes.
Technical SupportOur technical support group is glad to work with you to answer your questions. Please call the technical support group if you need technical assistance, or visit our web site. Our website contains technical and non-technical information about our products and our company.
By telephone: (770) 844-4200 (Mon – Fri, 9:00 am – 6:00 pm ET)On the Web: www.AutomationDirect.com
Special SymbolsNOTE: When you see the "notepad" icon in the left-hand margin, the paragraph to its immediate right will be a special
note which presents information that may make your work quicker or more efficient. The word "NOTE" will mark the beginning of the text as in this example.
CAUTION: When you see the "exclamation point" icon inside a yellow yield sign in the left-hand margin, the paragraph to its immediate right will be a caution. This information is provided to help the customer operate the equipment in a safe manner. The word "CAUTION" will mark the beginning of the text as in this example.
WARNING: When you see the "exclamation point" icon inside a red yield sign in the left-hand margin, the paragraph to its immediate right will be a warning. This information could prevent injury, loss of property, or even death (in extreme cases). Any warning in this manual should be regarded as critical information that should be read in its entirety. The word "WARNING" in boldface will mark the beginning of the text as in this example.

1-3
Chapter 1: Getting Started
IronHorse® Shaft Mount Gearbox User Manual 1st Ed. 062817
IronHorse® Shaft Mount Gearbox IntroductionPurpose of Shaft Mount Gearboxes
Gearboxes, also known as enclosed gear drives or speed reducers, are mechanical drive components that can control a load at a reduced fixed ratio of the motor speed. The output torque is also increased by the same ratio, while the horsepower remains the same (less efficiency losses.) For example, a 10:1 ratio gearbox outputs approximately the same motor output horsepower, motor speed divided by 10, and motor torque multiplied by 10.
IronHorse® Shaft Mount Gearboxes feature shafts and gears manufactured from the highest grade steel, case hardened and precision ground to AGMA standards for long lasting durability. Housings are 100% cast iron to provide industrial grade protection for the life of the unit. Shafts have reinforced double lip seals to protect against contamination and prevent oil from escaping. Premium ball and tapered roller bearings provide smooth operation and lower noise. Extended gear centers ensure tooth contact and provide consistent operation. Bore type is tapered with tapered bushing kits sold separately.
IronHorse® Shaft Mount Gearboxes are manufactured in an ISO9001 certified plant by one of the leading and most internationally acclaimed gearbox manufacturers in the world today. Only the highest quality materials are tested, certified, and used in the manufacturing process. Strict adherence to and compliance with the toughest international and U.S. testing standards and manufacturing procedures assure you the highest quality products.
Package ContentsAfter receiving the IronHorse® Shaft Gearbox, please check that you have a box of loose parts, which includes the following:
• Torque arm with mounting brackets and hardware
• Brass vent plug
• Magnetic drain plug

1-4
Chapter 1: Getting Started
IronHorse® Shaft Mount Gearbox User Manual 1st Ed. 062817
Part Number Explanation
SMR
RatioTwo digit input for output of 1Example: 09 = 9:1 ratio
Frame Size2: Size 23: Size 34: Size 45: Size 5
Gearbox Type Series DesignationSMR: Shaft Mount Reducer
2 - 09
Nameplate Information
Gearbox Model #
Gearbox Serial #
Country of Origin
Gearbox Ratio
Gearbox Frame Size
Gearbox Type

In this Chapter...
Gearbox Selection Factors .....................................................................2-2Classes of Service and Service Factors ...................................................................... 2-2
Output Shaft Overhung Load Ratings ...................................................................... 2-3
Ratio to Speed ........................................................................................................... 2-3
Gearbox Dimensions ................................................................................................. 2-4
Mechanical Ratings .................................................................................................... 2-5
Chapter 2: CaSt-iron Shaft Mount GearboxeS
2-2
Chapter 2: Cast-Iron Shaft Mount Gearboxes
IronHorse® Shaft Mount Gearbox User Manual 1st Ed. 062817
Gearbox Selection FactorsClasses of Service and Service Factors
Table 1 – Load Classification Numbers
Service Class
Service Factor
Total Operation Per DayUp to 3 Hours 3 to 10 Hours Over 10 Hours
I 1.0 Moderate Shock Load Uniform Load ―
II 1.4 Heavy Shock Load Moderate Shock Load Uniform Load
III 2.0 ― Heavy Shock Load Moderate Shock Load
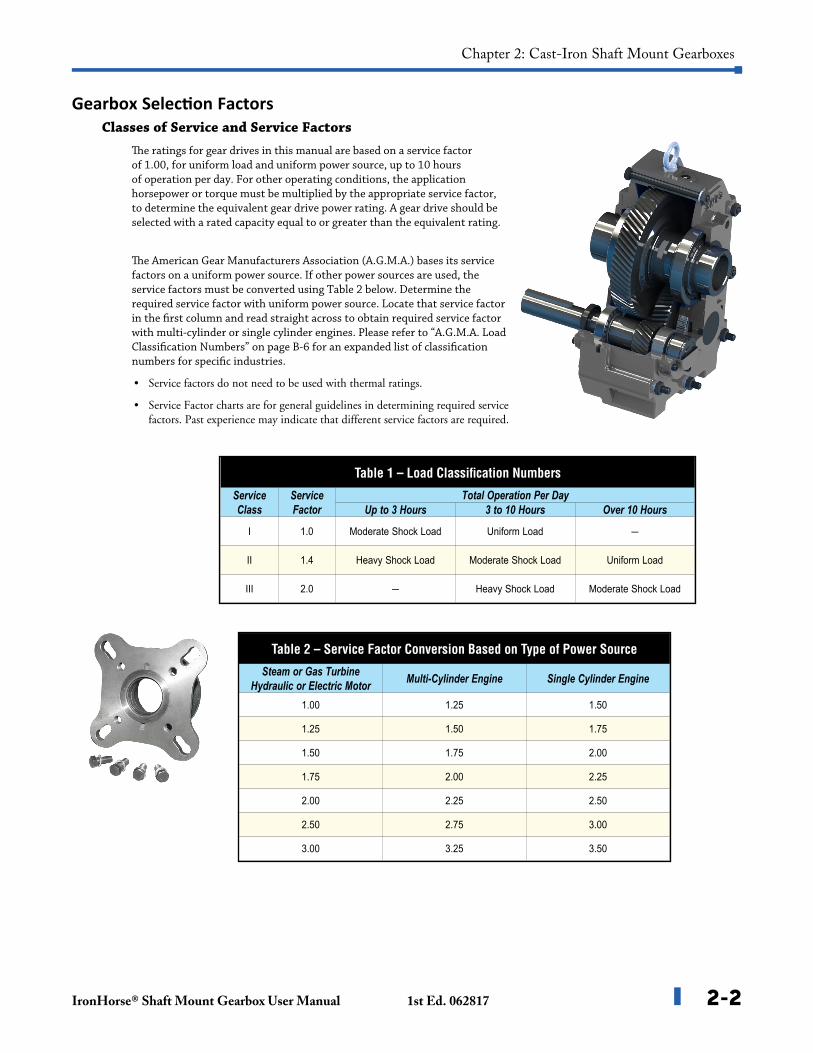
The ratings for gear drives in this manual are based on a service factor of 1.00, for uniform load and uniform power source, up to 10 hours of operation per day. For other operating conditions, the application horsepower or torque must be multiplied by the appropriate service factor, to determine the equivalent gear drive power rating. A gear drive should be selected with a rated capacity equal to or greater than the equivalent rating.
The American Gear Manufacturers Association (A.G.M.A.) bases its service factors on a uniform power source. If other power sources are used, the service factors must be converted using Table 2 below. Determine the required service factor with uniform power source. Locate that service factor in the first column and read straight across to obtain required service factor with multi-cylinder or single cylinder engines. Please refer to “A.G.M.A. Load Classification Numbers” on page B-6 for an expanded list of classification numbers for specific industries.
• Service factors do not need to be used with thermal ratings.
• Service Factor charts are for general guidelines in determining required service factors. Past experience may indicate that different service factors are required.
Table 2 – Service Factor Conversion Based on Type of Power Source
Steam or Gas TurbineHydraulic or Electric Motor Multi-Cylinder Engine Single Cylinder Engine
1.00 1.25 1.50
1.25 1.50 1.75
1.50 1.75 2.00
1.75 2.00 2.25
2.00 2.25 2.50
2.50 2.75 3.00
3.00 3.25 3.50

2-3
Chapter 2: Cast-Iron Shaft Mount Gearboxes
IronHorse® Shaft Mount Gearbox User Manual 1st Ed. 062817
IronHorse® Cast-Iron Shaft Mount Gearbox Ratio/Speed Table
Part NumberNominal Ratio 9:1 Nominal Ratio 15:1 Nominal Ratio 25:1
Actual Ratio Max Input Speed Actual Ratio Max Input Speed Actual Ratio Max Input SpeedSMR2-09
9.36 1872 14.04 1974 23.37 1994SMR2-15SMR2-25SMR3-09
9.21 1842 14.87 2083 24.75 2100SMR3-15SMR3-25SMR4-09
9.21 1842 15.13 2118 24.38 2072SMR4-15SMR4-25SMR5-09
9.10 1820 15.4 1925 25.56 2044SMR5-15SMR5-25
Ratio to Speed
Output Shaft Overhung Load RatingsFrame Size
Shaft Size
Overhung Load (lb) at Various RPMs10 20 30 50 80 100 120 140 160 180 200
21-7/16” 2000 1510 1270 1010 840 820 720 720 710 710 7001-15/16” 1750 1320 1110 890 730 710 630 630 620 620 610
31-15/16” 5400 4250 3680 3050 2620 2440 2310 2210 2110 2040 19802-3/16” 5240 4120 3570 2960 2540 2370 2240 2140 2050 1980 1920
42-3/16” 6520 5180 4510 3800 3230 3000 2830 2710 2600 2510 24302-7/16” 6360 5060 4410 3710 3160 2930 2770 2640 2530 2450 2370
52-7/16” 7460 5860 5080 4280 3690 3450 3270 3110 2980 2880 27902-15/16” 7060 5540 4800 4040 3490 3260 3090 2940 2820 2720 2640
Output Shaft Overhung Load Ratings

2-4
Chapter 2: Cast-Iron Shaft Mount Gearboxes
IronHorse® Shaft Mount Gearbox User Manual 1st Ed. 062817
Gearbox Dimensions
Dimensions
Part Number A B Cin mm in mm in mm
SMR2-098.35 212.0 11.50 292.0 5.87 149.0SMR2-15
SMR2-25SMR3-09
9.25 235.0 12.99 330.0 7.58 192.5SMR3-15SMR3-25SMR4-09
10.91 277.0 15.24 387.0 8.23 209.0SMR4-15SMR4-25SMR5-09
13.15 334.0 18.23 463.0 8.78 223.0SMR5-15SMR5-25

2-5
Chapter 2: Cast-Iron Shaft Mount Gearboxes
IronHorse® Shaft Mount Gearbox User Manual 1st Ed. 062817
IronHorse® Shaft Mount Gearboxes Mechanical Ratings
ModelService Class I Service Class II Service Class III
Power(hp)
Output (RPM)
Output Torque (lb·in)
Power(hp)
Output (RPM)
Output Torque (lb·in)
Power(hp)
Output (RPM)
Output Torque (lb·in)
SMR2-097.5 78-105 5434-4037 5 78-110 3658-2594 3 58-110 2952-155610 110-200 5188-2853 7.5 115-200 3722-2140 5 105-200 2717-1427
SMR2-15
2 16-24 7065-4710 1.5 18-24 4710-3532 1.5 26-34 3261-24933 26-45 6521-3768 2 24-34 4710-3324 2 38-58 2975-19495 46-74 6143-3819 3 38-70 4462-2422 3 58-100 2923-1695
7.5 78-105 5434-4037 5 70-105 4037-2691 5 105-140 2691-201810 105-140 5382-4037 7.5 110-140 3853-3028 — — —
SMR2-25
0.5 4-6 7065-4710 0.33 4-5 4663-3730 0.25 4-5 3532-28260.75 6-8 7065-5298 0.5 6-8 4710-3532 0.33 6-8 3108-2331
1 8-10 7065-5652 0.75 8-12 5298-3532 0.5 8-12 3532-23551.5 12-16 7065-5298 1 12-16 4710-3532 0.75 12-16 3532-26492 16-24 7065-4710 1.5 18-24 4710-3532 1 16-24 3532-23553 26-45 6521-3768 2 24-34 4710-3324 1.5 26-34 3261-24935 46-74 6143-3819 3 38-70 4462-2422 2 38-58 2975-1949
7.5 78-85 5434-4987 5 70-85 4037-3324 3 58-85 2923-1995
SMR3-0910 78-105 7246-5382 7.5 85-110 5035-3722 5 74-105 3856-281715 110-140 7707-6055 10 110-150 5188-3804 7.5 110-140 3891-305720 150-200 7609-5707 15 160-200 5350-4280 10 150-200 3804-2853
SMR3-15
3 28-30 6055-5652 2 16-24 7065-4710 2 24-38 4710-29755 32-50 8831-5652 3 26-46 6521-3686 3 40-70 4239-2422
7.5 52-74 8151-5728 5 50-74 5652-3819 5 74-105 3819-269110 78-105 7246-5382 7.5 78-105 5434-4037 7.5 110-140 3853-302815 110-140 7707-6055 10 100-140 5652-4037 — — —
SMR3-25
0.75 4-5 10597-8477 0.5 4-5 7065-5652 0.5 6-7 4710-40371 6-7 9419-8074 0.75 6-7 7065-6055 0.75 8-10 5298-4239
1.5 8-10 10597-8477 1 8-10 7065-5652 1 10-16 5652-35322 12-16 9419-7065 1.5 12-16 7065-5298 1.5 18-24 4710-35323 18-30 9419-5652 2 16-24 7065-4710 2 24-38 4710-29755 32-50 8831-5652 3 26-46 6521-3686 3 40-70 4239-2422
7.5 52-74 8151-5728 5 50-74 5652-3819 5 74-85 3819-332410 78-85 7246-6649 7.5 78-85 5434-4987 — — —
SMR4-09
15 58-80 14616-10597 15 90-115 9511-7443 7.5 58-78 7379-548720 80-110 14219-10276 20 120-140 9511-8152 10 80-115 7133-496225 100-140 14129-10092 25 150-200 9511-7133 15 120-200 7133-428030 120-200 14267-8560 — — — — — —
Continued on next page
Mechanical Ratings

2-6
Chapter 2: Cast-Iron Shaft Mount Gearboxes
IronHorse® Shaft Mount Gearbox User Manual 1st Ed. 062817
IronHorse® Shaft Mount Gearboxes Mechanical Ratings (continued)
ModelService Class I Service Class II Service Class III
Power(hp)
Output (RPM)
Output Torque (lb·in)
Power(hp)
Output (RPM)
Output Torque (lb·in)
Power(hp)
Output (RPM)
Output Torque (lb·in)
SMR4-15
5 18-24 15699-11774 3 14-22 12111-7707 3 20-34 8477-49877.5 26-34 16303-12467 5 24-34 11774-8311 5 38-54 7436-523310 38-54 14873-10466 7.5 38-54 11154-7849 7.5 58-80 7308-529815 58-80 14616-10597 10 54-80 10466-7065 10 80-140 765-403720 80-110 14219-10276 15 85-115 9973-7372 — — —25 100-140 14129-10092 20 110-140 10276-8074 — — —
SMR4-25
1 4-5 14129-11303 0.75 4-5 10597-8477 0.5 4-5 7065-56521.5 5-7 16955-12111 1 5-6 11303-9419 0.75 5-6 8477-70652 6-8 18839-14129 1.5 6-8 14129-10597 1 6-8 9419-70653 10-14 16955-12111 2 10-12 11303-9419 1.5 10-12 8477-70655 16-24 17551-11774 3 14-22 12111-7707 2 14-18 8074-6280
7.5 26-34 16303-12467 5 24-34 11774-8311 3 20-34 8477-498710 38-54 14873-10466 7.5 38-54 11154-7849 5 38-54 7436-523315 58-80 14616-10597 10 54-85 10466-6649 7.5 58-85 7308-498720 80-85 14129-13298 — — — — — —
SMR5-0925 70-95 20184-14873 20 85-115 13427-9925 15 85-115 10071-744330 85-115 19947-14743 25 105-125 13587-11413 20 115-200 7443-428040 110-200 20752-11413 30 125-200 13696-8560 — — —
SMR5-15
7.5 22-24 19267-17661 7.5 24-34 17661-12467 5 24-34 11774-831110 24-34 23548-16622 10 38-54 14873-10466 7.5 38-52 11154-815115 38-54 22309-15699 15 58-80 14616-10597 10 54-80 10466-706520 54-78 20932-14491 20 78-110 11491-10276 15 85-110 9973-770725 70-95 20184-14873 25 100-125 14129-11303 20 110-125 10276-904330 85-115 19947-14743 — — — — — —40 110-125 20551-18085 — — — — — —
SMR5-25
2 4-5 28258-22606 1.5 4-5 21194-16955 1 4-5 14129-113033 6-8 28258-21194 2 5-6 22606-18839 1.5 6-7 14129-121115 10-14 28258-20184 3 8-14 21194-12111 2 8-12 14129-9419
7.5 16-24 26492-17661 5 16-24 17661-11774 3 14-22 12111-770710 24-34 23548-16622 7.5 24-34 17661-12467 5 24-34 11774-831115 38-54 22309-15699 10 38-54 14873-10466 7.5 38-52 11154-815120 54-78 20932-14491 15 58-80 14616-10597 10 54-78 10466-724625 70-80 20184-17661 20 78-80 14491-14129 — — —
Mechanical Ratings (continued...)

In this Chapter...
IronHorse® Shaft Mount Gearbox Installation .....................................3-2Installation Instructions ............................................................................................. 3-2
Motor Mount Installation ......................................................................3-4
Gearbox Lubrication and Mounting Orientations ................................3-5Lubrication Instructions ............................................................................................. 3-5
Lubrication Schedule ................................................................................................. 3-5
Mounting Orientations .............................................................................................. 3-6
Lubricant Capacities .................................................................................................. 3-6
Guidelines for Long Term Storage ........................................................3-7
Chapter 3: inStallation and lubriCation

3-2
Chapter 3: Installation and Lubrication
IronHorse® Shaft Mount Gearbox User Manual 1st Ed. 062817
IronHorse® Shaft Mount Gearbox InstallationNOTE: Satisfactory performance depends on proper installation, lubrication and maintenance. Therefore, it is important
that the instructions in this manual are followed carefully.
Installation Instructions1. Use eyebolts or lifting lugs to lift reducer.
2. Determine the running positions of the reducer (see Figure 1). Note: The reducer is supplied with four plugs around the sides and one on each face for vertical installations. These plugs must be arranged relative to the horizontal running positions as follows: the bottom one is the magnetic drain plug (D). Install the brass vent plug (V) in the topmost hole. Of the three remaining plugs on the sides of the reducer, the lowest one is the minimum oil level plug (L). The running position of the reducer is not limited to the six positions shown in Figure 1. However, if running position is over 20 degrees from the position shown in sketches (B) or (D) or over 5 degrees from the position shown in sketches (A) or (C), then the oil in level plug cannot be used safely to check the oil level, unless during the checking, the torque arm is disconnected and the reducer is swung to within 20 degrees for position (B) and (D) or 5 degrees for position (A) or (C).
Figure 1 - Mounting PositionsHorizontal Applications Vertical Applications
V
L
D
P
V
V
V
L LL
P PP
D D D
V
P
D
L
V
L
D
P
A-Position B-Position C-Position D-Position E-Position F-PositionV=Vent, D=Drain, L=Level, P=Plug
NOTE: Below 15RPM output speed, oil level must be adjusted to reach the highest oil level plug (P).
Because of the many possible positions of the reducer, it may be necessary or desirable to make special adaptations using the lubrication filling holes furnished along with other standard pipe fittings, stand pipes and oil level gauges as required.
3. Mount reducer on drive shaft as follows:
WARNING: To ensure that the motor connected to the gearbox is not unexpectedly started, turn off and lock out or tag the power source before proceeding. Remove all external loads from drive before removing or servicing reducer or accessories. Failure to observe these precautions could result in bodily injury.
Figure 2
Keep close to machine.Leave clearance toremove bushing screws
Drive shaftto machine
Keep pulley asclose to reducer
as possible
Drivenpulley
4. Install pulley on gearbox input shaft as close to the reducer as possible and mount reducer on driven shaft as close to bearing as practical (maintain minimum distance to remove tapered bushing screw) (see Figure 2). Failure to do this will cause excess loads on the input shaft bearings and output bearings and could cause premature failure.

3-3
Chapter 3: Installation and Lubrication
IronHorse® Shaft Mount Gearbox User Manual 1st Ed. 062817
Installation Instructions (continued...)
Figure 3
90.00°
Belt drive may be located in any convenient position. If the torque arm is to be used to tighten the belts, the drive should be at about 90 degrees to the line between the input and output shafts.
Belt drive may be located to the right if desired.
5. Install motor and wedge belt drive with the belt pulley at approximately 90° to the centerline between driven and input shafts (see Figure 3). This will allow tensioning of the v-belt drive with the torque arm which should preferably be in tension. If output hub runs counterclockwise, torque arm should be positioned to the right (see Figure 4).
Figure 4
If the output hub rotates clock-wise, relocate the belt drive and torque arm in opposite direction to that shown in the illustration.
6. Install the torque arm fulcrum on a rigid support so that the torque arm will be at approximately 90° to the centerline through the driven shaft and the torque arm case bolt (see Figure 5). If output hub rotates clockwise, belt drive and torque arm in opposite direction to that shown in the illustration.
Figure 5
90.00° Torque arm and belt may vary up to a take-up.
This angle should be a right angle, but may vary up to a maximum of 30 degrees either way.
Torque arm may be mounted to the right if desired.
CAUTION: All IronHorse® shaft mount reducers are shipped without oil. Every IronHorse® shaft mount reducer must be filled with a recommended gear oil. Failure to observe these precautions could result in damage to or destruction of the equipment. Failure to lubricate the shaft mount reducer will void the manufacturer’s warranty.
CAUTION: Failure to install the vent plug may result in gearbox overheating and will prematurely cause the oil seals to leak. Failure to install the vent plug in the shaft mount reducer will void the manufacturer’s warranty.

3-4
Chapter 3: Installation and Lubrication
IronHorse® Shaft Mount Gearbox User Manual 1st Ed. 062817
Motor Mount InstallationWARNING: To ensure that the drive is not unexpectedly started, turn off and lock out or tag the power source before
proceeding. Remove all external loads from drive before removing or servicing the gearbox or accessories. Failure to observe these precautions could result in bodily injury.
1. Remove the two or three bolts required for mounting the motor mount from the reducer housing. Install the front and rear supports (2) using the new reducer bolts (1) supplied with the motor mount. Make sure support flanges face output side of reducer. Tighten bolts securely.
2. Mount bottom plate (3) on supports with bolts supplied. Insert bolts (7) from top through slotted holes. Add flat washer, lock washer, and nut. Hand tighten.
3. Thread two nuts (6) on each threaded stud (5) leaving approximately 1" of stud protruding at one end. Insert threaded stud with 1" of threads through corner holed of bottom plate. Thread a hex nut (6) on the studs and tighten securely.
4. Slide top plate (4) over the threaded stud, making sure the center handling hole is positioned opposite input side of reducer. Thread a hex nut (6) on the studs and tighten securely.
5. Locate the proper position for the motor and bolt it to the top plate. Tighten bolts securely.
6. Install motor sheave and reducer sheave as close to motor and reducer housings as possible. Accurately align the motor and reducer sheave by sliding bottom plate in relation to supports. Tighten bolts (7) securely.
7. Install V-belts and tension belts by alternately adjusting nut (6) on the threaded studs (jackscrews). Make certain that all bolts are securely tightened, the V- belt drive is properly aligned and an appropriate belt guard is installed before operating the drive.
Note: Refer to photo for positions of all parts before installation
2
76
3
5
1
4

3-5
Chapter 3: Installation and Lubrication
IronHorse® Shaft Mount Gearbox User Manual 1st Ed. 062817
Gearbox Lubrication and Mounting OrientationsLubricant selection is important to all gearboxes. An oil with special characteristics and a relatively high viscosity is required due to sliding action between the gear teeth where they mesh. Aside from improper gearbox selection, inadequate lubrication is the greatest factor contributing to premature gearbox failures. Improper lubrication also causes reduced gearbox performance.
Lubrication InstructionsIronHorse® Shaft Mount Gearboxes are shipped without oil. Oil must be added depending upon your mounting orientation, as shown on the following page.
Since many oils are not suitable for shaft mount gearboxes, it is very important to use the proper lubricant type. It is also very important to keep the oil free from oxidation and contamination by water or debris. For longer service life, the gearbox should be periodically drained (preferably while warm) and refilled to the proper level with a recommended gear oil. Non-synthetic oils should be changed every 6 months or 250 hours of operation under normal operating conditions. However, synthetic lubricants have increased resistance to thermal and oxidation degradation, and do not need to be changed as frequently.
For Best Results
1. Fill with recommended gear oil and operate for two weeks.
2. Drain after two weeks and flush with light oil.
3. Wipe any metal shavings from the magnetic drain plug and re-install.
4. Refill with recommended gear oil and continue.
5. Repeat every 2,500 hours to maximize unit life.
CAUTION: Every IronHorse® shaft mount reducer must be filled with a recommended gear oil. Failure to observe these precautions could result in damage or destruction of the equipment. Failure to lubricate the shaft mount reducer will void the manufacturer’s warranty.
CAUTION: Too much oil will cause overheating and too little will result in gear failure. Check oil level regularly. More frequent oil changes are recommended when operating continuously, at high temperatures or under conditions of extreme dirt or dust.
Lubrication ScheduleLubrication Schedule
Model Number 15° to 60°F (-9° to 16°C) 50° to 125°F (10° to 50°C)
Mobil SHC 629 Mobil SHC 630 Mobil SHC 630 Mobil SHC 632
AGMA Rating 4 5 5 6ISO Grade 150 220 220 320
SMR2-xx N/A 1-140 RPM N/A 1-140 RPM
SMR3-xx N/A 1-140 RPM N/A 1-140 RPM
SMR4-xx 126-140 RPM 1-125 RPM 126-140 RPM 1-125 RPM
SMR5-xx 101-125 RPM 1-100 RPM 101-125 RPM 1-100 RPM

3-6
Chapter 3: Installation and Lubrication
IronHorse® Shaft Mount Gearbox User Manual 1st Ed. 062817
Mounting OrientationsHorizontal Applications Vertical Applications
V
L
D
P
V
V
V
L LL
P PP
D D D
V
P
D
L
V
L
D
P
A-Position B-Position C-Position D-Position E-Position F-Position
V=Vent, D=Drain, L=Level, P=Plug
Lubricant Capacities
WARNING: Too much oil will cause over heating, and too little oil will result in gear failure. Check oil level regularly. More frequent oil changes are recommended when operating continuously at high temperatures, or under conditions of extreme dirt or dust.
Approximate Oil Capacity – Quarts [Liters]Position A B C D E FSMR2-xx 0.81 [0.77] 0.70 [0.66] 0.70 [0.66] 0.81 [0.77] 1.05 [0.99] 1.16 [1.10]
SMR3-xx 1.36 [1.29] 1.59 [1.50] 1.59 [1.50] 1.36 [1.29] 1.46 [1.38] 2.31 [2.19]
SMR4-xx 1.39 [1.32] 1.63 [1.54] 1.63 [1.54] 2.09 [1.98] 1.63 [1.54] 3.72 [3.52]
SMR5-xx 2.32 [2.20] 3.49 [3.30] 3.49 [3.30] 2.43 [2.30] 3.49 [3.30] 4.42 [4.18]

3-7
Chapter 3: Installation and Lubrication
IronHorse® Shaft Mount Gearbox User Manual 1st Ed. 062817
During periods of long storage, or when waiting for delivery or installation of other equipment, special care should be taken to protect a gear reducer to have it ready to be in the best condition when placed into service. By taking special precautions, problems such as seal leakage and reducer failure due to lack of lubrication, improper lubrication quality, or contamination can be avoided. The following precautions will protect gear reducers during periods of extended storage.
Preparation:
1. Drain the oil from the unit. Add a vapor phase corrosion inhibiting oil in accordance with followed table:
Quantities of Vapor Phase Oil
Frame Size 2 3 4 5Liters 0.1 0.1 0.2 0.3
2. Seal the unit airtight. Replace the air vent plug with a standard pipe plug and wire the vent to the unit.
3. Cover the shaft extension with a waxy rust preventative compound that will keep oxygen away from the bare metal.
4. The instruction manuals and lubrication tags are paper and must be kept dry. Either remove these documents and store them inside or cover the unit with a durable waterproof cover which can keep moisture away.
5. Protect reducer from dust, moisture, and other contaminants by storing the unit in a dry area.
6. In damp environments, the reducer should be packed inside a moisture- proof container or an envelope of polyethylene containing a desiccant material. If the reducer is to be stored outdoors, cover the entire exterior with a rust preventative.
When Placing the Reducer into Service:
1. Assemble the vent plug into the proper hole.
2. Clean the shaft extensions with petroleum solvents.
3. Fill the unit to the proper oil level using a recommended lubricant (See page 3-5 for lubrication instructions). The vapor phase corrosion inhibiting oil will not affect the new lubricant.
4. Follow the installation instructions provided in this manual.
Guidelines for Long Term Storage

In this Chapter...Accessories Selection .............................................................................4-2
Backstop Installation ..............................................................................4-3Backstop Installation Warnings . . . . . . . . . . . . . . . . . . . . . . . . . . . . . . . . . . . . . . . . . 4-3
Backstop Description . . . . . . . . . . . . . . . . . . . . . . . . . . . . . . . . . . . . . . . . . . . . . . . . . 4-3
Prior to Installation . . . . . . . . . . . . . . . . . . . . . . . . . . . . . . . . . . . . . . . . . . . . . . . . . . 4-3
Backstop Installation . . . . . . . . . . . . . . . . . . . . . . . . . . . . . . . . . . . . . . . . . . . . . . . . . 4-4
After Installation . . . . . . . . . . . . . . . . . . . . . . . . . . . . . . . . . . . . . . . . . . . . . . . . . . . . 4-4
Dismantling . . . . . . . . . . . . . . . . . . . . . . . . . . . . . . . . . . . . . . . . . . . . . . . . . . . . . . . . 4-4
Lubrication and Maintenance of the Backstop Assembly . . . . . . . . . . . . . . . . . . . . 4-4
Backstop Assembly Type and Rotation Guidelines . . . . . . . . . . . . . . . . . . . . . . . . . . 4-4
Screw Conveyor Drive Components .....................................................4-6Screw Conveyor Accessories Assembly . . . . . . . . . . . . . . . . . . . . . . . . . . . . . . . . . . . 4-6
Screw Conveyor Flange Adapters . . . . . . . . . . . . . . . . . . . . . . . . . . . . . . . . . . . . . . . 4-7
Screw Conveyor Drive Shafts . . . . . . . . . . . . . . . . . . . . . . . . . . . . . . . . . . . . . . . . . . 4-8
Bushing Kits Dimensions .......................................................................4-9
Chapter 4: aCCeSSorieS

4-2
Chapter 4: Accessories
IronHorse® Shaft Mount Gearbox User Manual 1st Ed. 062817
Accessories SelectionIronHorse® Shaft Mount Gearboxes Accessories
Part Number Description Fits Frame Size Includes Typical Photo
SMR2-TBK-20 1-1/4” tapered bushing kit
2
Fastening bolts and a full length
shaft key
SMR2-TBK-23 1-7/16” tapered bushing kitSMR2-TBK-24 1-1/2” tapered bushing kitSMR2-TBK-31 1-15/16” tapered bushing kitSMR3-TBK-27 1-11/16” tapered bushing kit
3SMR3-TBK-31 1-15/16” tapered bushing kitSMR3-TBK-32 2” tapered bushing kitSMR3-TBK-35 2-3/16” tapered bushing kitSMR4-TBK-31 1-15/16” tapered bushing kit
4SMR4-TBK-32 2” tapered bushing kitSMR4-TBK-35 2-3/16” tapered bushing kitSMR4-TBK-39 2-7/16” tapered bushing kitSMR5-TBK-35 2-3/16” tapered bushing kit
5SMR5-TBK-39 2-7/16” tapered bushing kitSMR5-TBK-40 2-1/2” tapered bushing kitSMR5-TBK-47 2-15/16” tapered bushing kit
SMR2-CF Screw conveyor flange 2
Mounting Hardware
SMR3-CF Screw conveyor flange 3
SMR4-CF Screw conveyor flange 4
SMR5-CF Screw conveyor flange 5
SMR2-CDS-24 1-1/2” screw conveyor drive shaft
2
Mounting Hardware
SMR2-CDS-32 2” screw conveyor drive shaftSMR2-CDS-39 2-7/16” screw conveyor drive shaftSMR2-CDS-48 3” screw conveyor drive shaftSMR3-CDS-24 1-1/2” screw conveyor drive shaft
3SMR3-CDS-32 2” screw conveyor drive shaftSMR3-CDS-39 2-7/16” screw conveyor drive shaftSMR3-CDS-48 3” screw conveyor drive shaftSMR4-CDS-24 1-1/2” screw conveyor drive shaft
4SMR4-CDS-32 2” screw conveyor drive shaftSMR4-CDS-39 2-7/16” screw conveyor drive shaftSMR4-CDS-48 3” screw conveyor drive shaftSMR5-CDS-32 2” screw conveyor drive shaft
5SMR5-CDS-39 2-7/16” screw conveyor drive shaftSMR5-CDS-48 3” screw conveyor drive shaftSMR5-CDS-55 3-7/16” screw conveyor drive shaft
SMR2-BG Belt guard 2
–SMR3-BG Belt guard 3
SMR4-BG Belt guard 4
SMR5-BG Belt guard 5
SMR2-MM Motor mount 2
Mounting hardware
SMR3-MM Motor mount 3
SMR4-MM Motor mount 4
SMR5-MM Motor mount 5
SMR2-TARM Torque arm 2
Mounting hardware
SMR3-TARM Torque arm 3
SMR4-TARM Torque arm 4
SMR5-TARM Torque arm 5
SMR2-BSK Backstop assembly 2
–SMR3-BSK Backstop assembly 3
SMR4-BSK Backstop assembly 4
SMR5-BSK Backstop assembly 5

4-3
Chapter 4: Accessories
IronHorse® Shaft Mount Gearbox User Manual 1st Ed. 062817
WARNING: Failure to install a backstop assembly correctly can result in injury to personnel and/or destruction of the backstop assembly, the speed reducer and other property. Read all backstop installation instructions completely before installing a backstop assembly.
WARNING TO ELECTRICIANS: Before powering up equipment that contains a shaft mount reducer containing an installed backstop assembly, disconnect the v-belts from the motor sheave and confirm the rotation direction of the motor. Applying power to the motor in a reverse direction against the free wheel direction of the backstop assembly will destroy the backstop assembly and possibly destroy the shaft mount reducer as well. Failure to comply with this instruction will void the manufacturer’s warranty of the speed reducer and the backstop assembly and may result in injury to personnel or property.
WARNING: Use only IronHorse® backstop assemblies in the SMR series shaft mount reducers. Do not use any other
brand or style of backstop assemblies in these speed reducers. Using other brands or styles of backstop assemblies may result in backstop assembly failure and may result in injury to personnel or property. Using another manufacturer or style of backstop assembly in the SMR series shaft mount reducer will void the manufacturer’s warranty of the speed reducer and the backstop assembly.
CAUTION: To avoid premature failure of the backstop or possible machine malfunction, installation of the backstop should
be carried out by suitably qualified personnel and according to the following instructions:
Backstop DescriptionIn applications where it is possible for the load to drive the gearbox in reverse when the motor is off (such as an inclined conveyor belt), a backstop should be installed to prevent the gearbox from turning in reverse.
1. The main components of SMRx-BSK units are: Outer race, a number of energized sprags and side plate.
2. The maximum permissible overrunning speed must not be exceeded.
3. When used in dual drive applications, the maximum driving speed must not be exceeded.
4. Backstops (cam clutches) are shaft mounted, so the shaft on which the clutch is mounted must be hardened to HRC 56-60 and 1.5 mm [0.06 in] case depth after grinding. Grind to 1.5S (16 micro-inch) finish. The taper of this shaft should not exceed 0.01 mm per 50mm [1.97 in].
Prior to Installation1. The units should be unpacked and installed in a clean dry working environment.
2. For units dispatched ‘dry’, corrosion inhibitor should be removed using flushing oil prior to Installation.
3. The mounting register for the outer race should be within the housing bore (0 to +0.03 mm) tolerance. Details for each type are shown in the dimensions tables.
4. The freewheeling direction should be checked prior to installation (see Backstop Assembly Type and Rotation Illustrations on the next page).
5. If reversal of the freewheeling direction is required, turn the backstop through 180 degrees.
Backstop InstallationBackstop Installation Warnings

4-4
Chapter 4: Accessories
IronHorse® Shaft Mount Gearbox User Manual 1st Ed. 062817
Backstop Installation1. The backstop (clutch) should be installed as an assembly.
2. The key should be the full length of the hub.
3. Warning: Drain off the oil before opening the backstop mounting compartment.
4. Refer to the illustration below for appropriate reducer size installation components.
1. Bolts
2. End cover
3. Backstop
4. Key
5. Gasket
5. Remove end cover and gasket from gearbox.
6. Determine the desired shaft rotation. IronHorse® backstops don’t have an inner race. The rotation arrow is marked on the outer race, meaning the outer race’s free direction; the shaft direction is opposite in other words.
7. The backstop should be mounted on the shaft by rotating it in the direction marked by the arrow shown on the backstop race. Do not apply shock to the backstop by hammering. The backstop may be tapped gently if necessary with a soft hammer (rawhide, not lead hammer).
8. Re-install the end cover and gasket.
9. Refill the gearbox with oil taking note of proper oil fill level based on gearbox mounting position.
After Installation1. After installation, ensure smooth rotation of the units in the freewheeling direction by manually turning the
input shaft of the reducer to confirm the desired direction of rotation.
2. Ensure the unit contains the correct volume of the lubricant prior to use.
3. The expected drag torque produced when freewheeling is about 1/1000 of the nominal torque.
Dismantling1. To dismantle the units, please follow the Installation section in reverse sequence.
Lubrication and Maintenance of the Backstop Assembly1. Type SMRx-BSK backstops are factory lubricated with oil.
2. Operating temperature ranges from -4°F to +158° (-20°C to +70°C).
3. The backstop can operate without maintenance.
4. In harsh conditions (i.e. high temperature/dusty conditions), the backstop should be re-lubricated every 3 to 6 months.
5. Do not use slip additives such as graphite, Molykote or similar agents in the oil and grease as they will shorten service life of the clutches.

4-5
Chapter 4: Accessories
IronHorse® Shaft Mount Gearbox User Manual 1st Ed. 062817
Backstop Assembly Type and Rotation Guidelines
SHAFT FREE DIRECTION
Type 1: Backstop with outer race, the rotation arrow is marked on the outer race; shaft free direction is opposite.
Backstop Tolerances – mm
Backstop
Model Housing Tolerance Input Shaft Ø Tolerance Inner Ø Tolerance Outer Ø Tolerance
SMR2-BSK ∮62 +0.06 to +0.03 24.65 0 to -0.013 24.65 – 62 0 to -0.019
SMR3-BSK ∮47 +0.05 to +0.03 18.8 0 to -0.013 18.796 – 47 0 to -0.016
SMR4-BSK ∮62 +0.06 to +0.03 22.57 0 to -0.013 22.57 – 62 0 to -0.019
SMR5-BSK ∮80 +0.06 to +0.03 30.8 0 to -0.016 30.862 – 80 0 to -0.019
― Inner configuration with a spring, no tolerance.
Maximum Overrunning Speed
Model Frame Size Max Overruning Speed
SMR2-BSK 2 1260 rpm
SMR3-BSK 3 1370 rpm
SMR4-BSK 4 1310 rpm
SMR5-BSK 5 1130 rpm

4-6
Chapter 4: Accessories
IronHorse® Shaft Mount Gearbox User Manual 1st Ed. 062817
Screw Conveyor Drive Components
Screw Conveyor Flange (SCF)
Screw Conveyor Drive Shaft (SCDS)
Screw Conveyor Flange (SCF)
SMR cross-sectional side view
Screw Conveyor Accessories Assembly
Step 1: Adapter Assembly
1. Adapter
2. Gland Seal
3. Oil Seal
4. Seal Retainer
Please follow the sequence of gland seal, oil seal, and seal retainer to complete the adapter assembly.
Step 2: Reducer Assembly
1. Adapter Bolt
2. Spring Washer
Please place adapter bolts through the spring washers; then fasten the adapter kit onto the reducer.

4-7
Chapter 4: Accessories
IronHorse® Shaft Mount Gearbox User Manual 1st Ed. 062817
31 2 4 5 6
Step 3: Drive Shaft Assembly
1. Drive Shaft
2. Drive Shaft Key
3. Bushing (sleeve)
4. Shaft Retainer
5. Spring Washer
6. Bolt
Screw Conveyor Flange Adapters
Dimensions – Inches
Model Frame Size Drive Shaft Ø J K A Figure
SMR2-xx 2
1-1/2 4 1/2 - 13UNC
7.75
1
2 5-1/8 5/82-7/16 5-5/8 5/8
3 6 3/4
SMR3-xx 3
1-1/2 4 1/2-13UNC
8.502 5-1/8 5/8
2-7/16 5-5/8 5/83 6 3/4
SMR4-xx 4
1-1/2 4 1-/2-13UNC
9.262 5-1/8 5/8
2-7/16 5-5/8 5/83 6 3/4
3-7/16 6-3/4 3/4
SMR5-xx 5
2 5-1/8 5/8
9.26 22-7/16 5-5/8 5/8
3 6 3/43-7/16 6-3/4 3/4
a) Insert the key onto the shaft.
b) Place the shaft through the reducer.
c) Place the bushing into the hollow shaft.
d) Place the spring washer through the bolt and shaft retainer then fasten it on to the drive shaft.

4-8
Chapter 4: Accessories
IronHorse® Shaft Mount Gearbox User Manual 1st Ed. 062817
Dimensions – Inches
Model Frame Size Drive Shaft Ø A B C D F
SMR2-CDS-xx 2
1-1/2 9.00 2.13 3.00 0.522 9.00 2.13 3.00 0.64
2-7/16 9.69 2.75 3.00 0.643 9.88 2.88 3.00 0.77
SMR3-CDS-xx 3
1-1/2 9.00 2.13 3.00 0.522 9.00 2.13 3.00 0.64
2-7/16 9.69 2.75 3.00 0.643 9.88 2.88 3.00 0.77
SMR4-CDS-xx 4
1-1/2 9.00 2.13 3.00 0.522 9.00 2.13 3.00 0.64
2-7/16 9.69 2.75 3.00 0.643 9.88 2.88 3.00 0.77
3-7/16 14.13 3.88 4.00 0.89
SMR5-CDS-xx 5
2 9.00 2.13 3.00 0.642-7/16 9.69 2.75 3.00 0.64
3 9.88 2.88 3.00 0.773-7/16 14.13 3.88 4.00 0.89
Screw Conveyor Drive Shafts

4-9
Chapter 4: Accessories
IronHorse® Shaft Mount Gearbox User Manual 1st Ed. 062817
Bushings Dimensions
Part Number Fits GearboxPart Number
A (Bore) B (Oal) C (Flange)in mm in mm in mm
SMR2-TBK-20
SMR2-xx
1.25 31.75 1.38 35.0 4.06 103.2
SMR2-TBK-23 1.4375 36.51 1.38 35.0 4.06 103.2
SMR2-TBK-24 1.5 38.10 1.38 35.0 4.06 103.2
SMR2-TBK-31 1.9375 49.21 1.38 35.0 4.06 103.2
SMR3-TBK-27
SMR3-xx
1.6875 42.86 1.63 41.5 4.37 111.1
SMR3-TBK-31 1.9375 49.21 1.63 41.5 4.37 111.1
SMR3-TBK-32 2.0 50.80 1.63 41.5 4.37 111.1
SMR3-TBK-35 2.1875 55.56 1.63 41.5 4.37 111.1
SMR4-TBK-31
SMR4-xx
1.9375 49.21 2.13 54.0 4.81 122.2
SMR4-TBK-32 2.0 50.80 2.13 54.0 4.81 122.2
SMR4-TBK-35 2.1875 55.56 2.13 54.0 4.81 122.2
SMR4-TBK-39 2.4375 61.91 2.13 54.0 4.81 122.2
SMR5-TBK-35
SMR5-xx
2.1875 55.56 2.07 52.5 5.63 142.9
SMR5-TBK-39 2.4375 61.91 2.07 52.5 5.63 142.9
SMR5-TBK-40 2.5 63.50 2.07 52.5 5.63 142.9
SMR5-TBK-47 2.9375 74.61 2.07 52.5 5.63 142.9
Bushing Kits – Dimensions

appendix a: GloSSary of terMS
In This Appendix...Glossary of Gearbox Terms ...................................................................A-2

A-2
Appendix A: Glossary of Terms
IronHorse® Shaft Mount Gearbox User Manual 1st Ed. 062817
Glossary of Gearbox Terms Axial MovementOften called “endplay.” The endwise movement of motor or gear shafts. Usually expressed in thousandths of an inch.
Back DrivingDriving the output shaft of a gearbox to increase speed rather than reduce speed. Shaft Mount gearboxes are not suitable for service to increase speed.
BacklashRotational movement of the output shaft clockwise and counter clockwise, while holding the input shaft stationary. Usually expressed in thousandths of an inch and measured at a specific radius at the output shaft.
BackstopIn applications where it is possible for the load to drive the gearbox in reverse when the motor is off (such as an inclined conveyor belt), a backstop should be installed to prevent the gearbox from turning in reverse.
Center Distance A basic measurement or size reference for worm gearboxes. The distance between the centerlines of the input and output shafts.
EfficiencyA ratio of the input power compared to the output power, usually expressed as a percentage.
Flanged ReducerUsually used to refer to a gearbox having provisions for close coupling of a motor either via a hollow (quill) shaft or flexible coupling. Most often a NEMA C-face motor is used.
GearboxAlso called a Speed Reducer. An enclosed set of gears used in mechanical power transmission to reduce speed and increase torque.
Input PowerThe power applied to the input shaft of a gearbox. There are separate ratings for Mechanical Input Power, Thermal Input Power, and Nominal Motor Horsepower.
K FactorAlso called an Overhung Load Factor. A constant used to modify the overhung load rating of a gearbox based on the type of load applied on the shaft. Use the K factor either to increase the calculated overhung load, or to reduce the gearbox overhung load rating.
Mechanical RatingsThe maximum power or torque a gearbox can transmit based on the strength and durability of its components. Some applications require the gearbox Mechanical Ratings to be reduced by a Service Factor.
Mounting PositionThe relationship of the input and output shafts of a gearbox relative to horizontal.

A-3
Appendix A: Glossary of Terms
IronHorse® Shaft Mount Gearbox User Manual 1st Ed. 062817
Nominal Motor HorsepowerThe highest horsepower 1800 rpm motor that can be used with the gearbox under 1.0 service factor conditions. This rating decreases as the motor speed decreases, and as the service factor increases.
Output HorsepowerThe amount of horsepower available at the output shaft of a gearbox. Output horsepower is always less than the input horsepower due to the efficiency of the gearbox.
Overhung LoadA force applied at right angles to a shaft beyond its outermost bearing. This shaft-bending load must be supported by the bearing. Overhung load ratings are listed for each gearbox size, and should not be exceeded. Some applications require the gearbox Overhung Load rating to be reduced by a K Factor and/or a Service Factor.
Overhung Load FactorK Factor.
Prime MoverIn industry, the prime mover is most often an electric motor. Occasionally engines, hydraulic or air motors are used. Special considerations are called for when other than an electric motor is the prime mover.
Self-LockingThe inability of a reducer to be driven backwards by its load. No IronHorse gearbox should be considered self-locking.
Service ClassThe American Gear Manufacturers Association (AGMA) standard 6009 lists many applications by a service class (I, II, III) with class I being the simplest applications and class III being the most complex. These applications are directly associated with specific service factor ranges (refer to the table on page 2-2).
Service Factor (for gearbox)A constant used to modify the Mechanical Rating of a gearbox based on the duration of service and characteristics of the driven load. Use the Service Factor either as a multiplier to increase the calculated loads, or as a divisor to reduce the gearbox Mechanical and Overhung Load ratings.
Service Factor (for motors)Refers to a motor’s ability to handle a load greater than the motor’s rated horsepower on a continuous basis.
Speed ReducerGearbox.
Thermal RatingsThe power or torque a gearbox can transmit continuously. These ratings are based upon the cast-iron gearbox’s ability to dissipate the heat caused by friction. (Not applicable for aluminum-frame gearboxes, due to their inherently better ability to dissipate heat.)
Thrust LoadForces along the axis of the output shaft, usually encountered in vertical-drive applications.

In This Appendix...
Shaft Mount Gearbox Selection Procedure ..........................................B-2How to Select ............................................................................................................ B-2
Example of SMR Gearbox Selection Procedure: ....................................................... B-3
A.G.M.A. Load Classification Numbers .................................................B-4Shaft Mount Reducers with Uniform Power Source ................................................ B-4
Appendix B: GeArBox Selection

B-2
Appendix B: Gearbox Selection
IronHorse® Shaft Mount Gearbox User Manual 1st Ed. 062817
Shaft Mount Gearbox Selection ProcedureFollow the procedure below to select Screw Conveyor Shaft Mount Reducers (SMR) up to 40 horsepower and/or output speeds to 200 RPM, using AGMA recommended application numbers as generally described herein.
How to Select1) Determine Class of Service (See “Classes of Service and Service Factors” on page 2-2)
To determine Load Classification for applications under normal conditions, find the type application and duty cycle that most closely matches your specific application. For a detailed list of applications and classifications numbers, see “A.G.M.A. Load Classification Numbers” on page B-6.
Class I: Steady load not exceeding Motor HP rating and light shock loads during 10 hours a day. Moderate shock loads are allowable if operation is intermittent.
Class II: Steady load not exceeding Motor HP rating for over 10 hours a day. Moderate shock loads are allowable during 10 hours a day.
Class III: Moderate shock loads for over 10 hours a day. Heavy shock loads are allowable during 10 hours a day.
2) Determine Reducer Size (See “Mechanical Ratings” on page 2-5)
To choose the correct size SMR gearbox find the Service Class Column that accurately represents the severity of the application, and then finding the correct gearbox output speed will denote the SMR reducer case size and ratio.
3) Select the corresponding Screw Conveyor Flange and correct Screw Conveyor Shaft Diameter (See “Accessories Selection” on page 4-2)
It is necessary to select a SMR gearbox that not only matches the proper HP and Class of Service, but must also clearly accommodate the CEMA* trough-end. Select the 3-Hole Screw Conveyor Shaft that’s compatible with the schedule pipe diameter of the screw conveyor.
4) Select the proper V-belt Drive Arrangement
All SMR reducers utilizing a Motor Mount require a V-belt and Sheave combination that in conjunction with the Motor (HP & RPM) and gearbox ratio, provide the desired output speed to the driven shaft. In addition to selecting the proper sheave ratio, care must be taken in selecting the correct V-Belt cross-section and number of belts to insure an adequate Service Factor (SF). In many instances, those that specify the V-belt & pulley sizes try to pick a system that prevents nuisance failures, yet still is the Weak Link; as V-belt drives are far less expensive and quicker to replace than damaged gearboxes. If needed, please consult AutomationDirect Tech Support for proper V-belt drive selection.
5) Select additional Accessories (See “Accessories Selection” on page 4-2)
In the accessories section of the catalog a selection of Motor Mounts, Belt Guards, Bushing Kits, and Backstop clutches can be found. The part numbers are easily selected, as they share nomenclature in common with the corresponding SMR case size. Backstops are a one-way clutch that prevent the driven load of an incline or vertical load from back-driving due to gravity. Always use the same brand of backstop as the manufacturer of the SMR gearbox.
*Conveyor Equipment Manufacturer Association

B-3
Appendix B: Gearbox Selection
IronHorse® Shaft Mount Gearbox User Manual 1st Ed. 062817
Example of SMR Gearbox Selection Procedure:
A 10 HP 1750 motor is used to drive a uniformly loaded screw conveyor moving sand at 100 RPM, operating 8 hours per day. The screw conveyor pipe diameter is 2-⁷⁄₁₆”. Select the required gearbox and accessories.
1) Determine Class of Service
From Table 1 on page 2-2 locate proper Class of Service; Uniformly loaded load operating less than 10 hours per day is classified as Class I
2) Determine Reducer Size
From the table on page 2-5 locate the correct SMR case size and ratio in accordance with Class I Service. The correct SMR selection is a SMR-315
3) Select the appropriate Screw Conveyor Flange and Shaft for this SMR Gearbox
From the table on page 4-2 in the accessories section we would select a Screw Conveyor Flange – Part# SMR3-CF and a 2-⁷⁄₁₆” Screw Conveyor Shaft – Part# SMR3-CDS-39
4) Select correct V-belt Drive
Using our 10 HP, 1750 RPM motor we can divide the motor RPM by out output speed of 100 RPM and conclude we require an overall reduction of 17.5:1. Since our gearbox has an actual ratio of 14.87:1 (p. 2-3) our required V-belt drive is a 1.18:1 ratio. Your V-belt drive should be sized to handle the applied HP, and provide sufficient headroom (Service Factor) to prevent nuisance belt failures.
5) Select additional Accessories
From the table on page 4-2, pick the appropriate accessories for a SMR-315 as indicated. For example:
Motor Mount: SMR3-MM Belt Guard: SMR3-BG

B-4
Appendix B: Gearbox Selection
IronHorse® Shaft Mount Gearbox User Manual 1st Ed. 062817
Class Numbers for Shaft Mount Reducers
Application Service Hours per DayUp to 3 3 - 10 Over 10
Agitators (mixers)Pure liquids I I IILiquids and solids I II IILiquids-variable density I II II
BlowersCentrifugal I I IILobe I II IIVane I II II
Brewing and distillingBottling machinery I I IIBrew kettles-continuous duty II II IICookers-continuous duty II II IIMash tubs-continuous duty II II IIScale hopper-frequent starts II II II
Can filling machines I I IICar dumpers I III IIICar pullers I II IIClarifiers I I IIClassifiers I II IIClay working machinery
Brick press II III IIIBriquette machine II III IIIPug mill I II II
Compactors III III IIICompressors
Centrifugal I I IILobe I II IIReciprocating, multi-cylinder II II IIIReciprocating, single-cylinder III III III
Cranes¹Dry dock
Main hoist 2.50 2.50 2.50Auxiliary hoist 2.50 2.50 3.00Boom hoist 2.50 2.50 3.00Slewing drive 2.50 2.50 3.00Traction drive 3.00 3.00 3.00
ContainerMain hoist 3.00 3.00 3.00Boom hoist 2.00 2.00 2.00Trolley drive, Gantry drive 3.00 3.00 3.00Trolley drive, Traction drive 2.00 2.00 2.00
Mill dutyMain hoist 3.50 3.50 3.50Auxiliary 3.50 3.50 3.50Bridge 2.50 3.00 3.00Tolley travel 2.50 3.00 3.00
Industrial dutyMain 2.50 2.50 3.00Auxiliary 2.50 2.50 3.00Bridge 2.50 3.00 3.00Trolley travel 2.50 3.00 3.00
CrushersStone or ore III III III
DredgesCable reels II II IIConveyors II II IICutter head drives III III IIIPumps III III IIIScreen drives III III IIIStackers II II IIWinches II II II
ElevatorsBucket I II IICentrifugal discharge I I IIEscalators I I IIFreight I II IIGravity discharge I I II
ExtrudersGeneral II II II
A.G.M.A. Load Classification NumbersShaft Mount Reducers with Uniform Power Source
Class Numbers for Shaft Mount Reducers (continued)
Application Service Hours per DayUp to 3 3 - 10 Over 10
PlasticsVariable speed drive III III IIIFixed speed drive III III III
RubberContinuous screw operation III III IIIIntermittent screw operation III III III
FansCentrifugal I I IICooling towers III III IIIForced draft II II IIInduced draft II II IIIndustrial and mine II II II
FeedersApron I II IIBelt I II IIDisc I I IIReciprocating II III IIIScrew I II II
Food industryCereal cooker I I IIDough mixer II II IIMeat grinders II II IISlicers I II II
Generators and exciters II II IIHammer mills III III IIIHoists
Heavy duty III III IIIMedium duty II II IISkip hoist II II II
LaundryTumblers II II IIWashers II II III
Lumber IndustryBarkers-spindle feed II II II
Main drive III III IIIConveyors-burner
Main or heavy duty II II IIMain log III III IIIRe-saw, merry-go-round II II II
ConveyorsSlab III III IIITransfer II II II
ChainsFloor II II IIGreen II II III
Cut-off sawsChain II II IIIDrag II II III
Debarking drums III III IIIFeeds
Edger II II IIGang III III IIITrimmer II II II
Log deck III III IIILog hauls-incline-well type III III IIILog turning devices III III IIIPlaner feed II II IIPlaner tilting hoists II II IIRolls-live-off bearing roll-cases III III IIISorting table II II IITipple hoist II II IITransfers
Chain II II IIICraneway II II III
Tray drives II II IIVeneer lathe drives II II II
Continued on Next Page

B-5
Appendix B: Gearbox Selection
IronHorse® Shaft Mount Gearbox User Manual 1st Ed. 062817
Class Numbers for Shaft Mount Reducers (continued)
Application Service Hours per DayUp to 3 3 - 10 Over 10
Metal millsDraw bench carriage and main drive II II II
Runout tableNon-reversing, Group drives II II IINon-reversing, Individual drives III III IIIReversing III III III
Slab pushers II II IIShears III III IIIWire drawing II II IIWire winding machine II II IIMetal strip processing machinery
Bridles II II IICoilers and uncoilers I I IIEdge trimmers I II IIFlatteners II II IILoopers (accumulators) I I IPinch rolls II II IIScrap choppers II II IIShears III III IIISlitters I II II
Mills, rotary typeBall & rod
Spur ring gear III III IIIHelical ring gear II II IIDirect connected III III IIICement kilns II II IIDryers & coolers II II II
MixersConcrete II II II
Paper MillsAgitator (mixer) II II IIAgitator for pure liquors II II IIBarking drums III III IIIBarkers - mechanical III III IIIBeater II II IIBreaker stack II II IICalender² II II IIChipper III III IIIChip feeder II II IICoating rolls II II II
ConveyorsChip, bark, chemical II II IILog (including slab) III III III
Couch rolls II II IICutter III III IIICylinder molds II II IIDryers²
Paper machine II II IIConveyor type II II II
Embosser II II IIExtruder II II IIFourdrinier rolls II II II
(includes lump breaker, dandy roll, wire turning, and return rolls)
Jordan II II IIKiln drive II II IIMt. Hope roll II II IIPaper rolls II II IIPlatter II II IIPresses - felt & suction II II IIPulper III III IIIPumps - vacuum II II IIReel (surface type) II II IIScreens
Chip II II IIRotary II II IIVibrating III III III
A.G.M.A. Load Classification NumbersShaft Mount Reducers with Uniform Power Source
Class Numbers for Shaft Mount Reducers (continued)
Application Service Hours per DayUp to 3 3 - 10 Over 10
Paper Mills (continued)Size press II II IISuper calender³ II II IIThickener (AC motor) II II II
(DC motor) II II IIWasher (AC motor) II II II
(DC motor) II II IIWind and unwind stand I I IWinders (surface type) II II IIYankee dryers² II II IIPlastic IndustryPrimary processing (intensive internal mixers)
Batch mixers III III IIIContinuous mixers II II II
Batch drop mill - 2 smooth rolls II II IIContinuous feed, holding, blend mill II II IICalenders II II IISecondary processing
Blow molders II II IICoating II II IIFilm II II IIPipe II II IIPre-plasticizers II II IIRods II II IISheet II II IITubing II II II
Pullers - barge haul II II IIPumps
Centrifugal I I IIProportioning II II II
ReciprocatingSingle acting, 3 or more cylinders II II IIDouble acting, 2 or more cylinders II II II
RotaryGear type I I IILobe I I IIVane I I II
Rubber industryIntensive internal mixers
Batch mixers III III IIIContinuous mixers II II II
Mixing mill - 2 smooth rolls II II IIMixing mill - 1 or 2 corrugated rolls III III IIIBatch drop mill - 2 smooth rolls II II IICracker warmer - 2 rolls; 1 corrugated roll III III IIICracker - 2 corrugated rolls III III IIIHolding, feed & blend mill - 2 rolls II II IIRefiner - 2 rolls II II IICalenders II II IISand muller II II IISewage disposal equipment
Bar screens II II IIChemical feeders II II IIDewatering screens II II IIScum breakers II II IISlow or rapid mixers II II IISludge collectors II II IIThickeners II II IIVacuum filters II II II
ScreensAir washing I I IIRotary - stone or gravel II II IITraveling water intake I I I
Screw conveyorsUniformly loaded or fed I I IIHeavy duty I II II
Continued on Next Page

B-6
Appendix B: Gearbox Selection
IronHorse® Shaft Mount Gearbox User Manual 1st Ed. 062817
Class Numbers for Shaft Mount Reducers (continued)
Application Service Hours per DayUp to 3 3 - 10 Over 10
Sugar industryBeet slicer III III IIICan knives II II IICrushers II II IIMills (low speed end) III III III
Textile industryBatchers II II IICalenders II II IICards II II IIDry cans II II IIDryers II II IIDyeing machinery II II IILooms II II IIMangles II II IINappers II II IIPads II II IISlashers II II IISoapers II II IISpinners II II IITenter frames II II IIWashers II II IIWinders II II II
A.G.M.A. Load Classification NumbersShaft Mount Reducers with Uniform Power Source
NOTES:¹ Crane drives are to be selected based on gear tooth bending strength, using the numeric
service factors in this table. Service factor in durability shall be a minimum of 1.00.² Anti-friction bearings only.³ A class number of I may be applied at base speed of a super calender operating over-speed
range or part range constant horsepower, part range constant torque where the constant horsepower speed range is greater than 1.5 to 1. A class number of II is applicable to super calenders operating over the entire speed range at constant torque or where the constant horsepower speed range is less than 1.5 to 1.