january 2015 the borgia cards, part two (a tale of an...
TRANSCRIPT

January 2015
The Borgia Cards, Part Two
(A Tale of an Ambitious Family)
Featuring: Larry Jennings’ “Optical Add-On” Fred Kaps’ “The Top”
This month I’ll present the concluding portion of my “Ambitious Card” routine. So far in the routine, you’ve had a spectator name any card in the deck and you’ve displayed the “Magical properties” of the card by having it rise from the middle to the top of the deck, three different times. The top card of the deck is face up. The three mates to this card lie directly underneath it. Now it’s time for the card to rise face up. This is a problematic part of the routine. The spectators should be fully engaged by now, and are very possibly burning your hands. On top of this, the move to get a face-up card to the top is the hardest in the routine. You’ll need your best technique to do it successfully. With this in mind, there are (at least) three different methods for effecting this rise. Choose the one that best matches your talent. (Of course, if you are faint of heart, you can just skip this final phase and go right to the discovery of the three mates to conclude the routine.) Face-up Rise #1 This rise is very pretty. First, you’ll need to prepare for Marlo’s “Tilt” as you turn the named card face up at the end of the previous (face-down) rise. Push the top (named) card off to the right about an inch, in preparation for turning it face up on top of the deck. As you do this, let the ball of your left thumb contact the second card and push it to the left also. Use a stud turnover to turn the top card face up, and in the action of squaring it back on the deck with your right hand, get a left little-finger break beneath both cards. (I find the stud turnover creates better misdirection when I need to get a break under some cards on top of the deck. The snapping sound it can make, as well as the extra distance needed for the end-to-end turnover, brings the

spectator’s eyes further from the top of the deck.) Continuing the squaring action, lift the inner ends of the cards about ¼ inch, and maintain that position with pressure from your left fingers pressing the left side of the cards into the heel of your hand. (Photo 1.) You’re now ready for Tilt. Since you will now be pattering about the upcoming face-up rise, I suggest you tilt the top of the deck to the right and towards you. This will obscure the tilt break from anyone at your right. (Photo 2. Photo 3 is the spectator’s view if you don’t tilt the deck as recommended.)
Photo 1. Magician’s View Photo 2. Spectator’s View Photo 3. Spectator’s View With your right hand, slide the face-up card off the top of the deck, being careful not to disturb the tilt break. (Photos 4 and 5.) Then insert the card into the break from the rear (Photo 6), and square the deck by lifting all the cards up to the top cards.
Photo 4 Photo 5 Photo 6 Finally, do an “Erdnase Color Change” (See last month’s column) to make the card rise. Face-up Rise #2 Cut the deck burying the top, face-up card. Look at the spectator as if he requires confirmation, and spread the cards from hand to hand, clearly showing his card face up in the middle. As you close the spread, get a left pinky break over his card. Now do your best pass to bring the face-up card to the top. As I mentioned in last month’s column, Steve Draun’s “Midnight Shift” works very well here (angles permitting).

Face-up Rise #3 This is an obvious way to make a card rise to the top, but one I’ve never tried in real life. Take the face-up card, and insert it in the center of the deck. Now spread the deck to show it is, indeed, face up in the center. As you re-square the deck, get a break below the card and do a side-steal color change to bring it to the top. I believe this is probably the most consistent way of handling the final rise, but unfortunately, I can’t do a side-steal very well. If you can, you might make this your first choice. Face-up Rises #4 – 1,000 I’m sure that there are other ways of putting a card face up into the center of the deck and bringing it to the top magically. If you have one you especially like, please let me know; I always like to learn new techniques. The Finale You’ve just made the card rise to the top of the deck three or four times. You should now have the named selection face up on the top, with the three mates face down below it. If you wish, you can finish by simply snapping your fingers and showing that the entire family has risen to the top. Instead, I suggest a handling that takes advantage of Larry Jennings’ “Optical Add-On” move. Hand the face-up card to the spectator and begin spreading the cards from your left hand to your right. After you’ve spread past the top six or seven cards ask the spectator to touch the index corner of his card to the backs of three cards in various places in the deck. Each time he touches one, outjog it for a little bit less than half its length. After the third card has been outjogged, square up the spread into your left hand. As you are squaring, lift up at least three cards at the inner end of the deck, and take a pinky break below them. With your right fingers, fan the outjogged cards. (Photo 7.)
Photo 7

Remind your spectator that the card he is holding was freely chosen, and it “guided him” to touch the three cards he can now see protruding from the deck. You’ll now strip these cards from the deck, switching them for the top cards using the “Optical Add-On.” Here’s how. Your right hand will come over the deck, fingers reaching out to the left side of the protruding cards. All your fingers are at the left side of the outjogged cards; your right thumb is extended behind the pack, at the rear right corner. (Photo 8, your view, photo 9, spectator’s view.)
Photo 8 Photo 9 Two things will now happen simultaneously. Your right hand will move forward, the thumb carrying all the cards above the break with it, until they are about even with the outjogged cards. As this is happening, your fingers will rotate all the cards clockwise out of the deck, pivoting around your left index finger. (The fanned cards will begin to square against the left index finger as this happens. Photos 10 and 11.) As soon as they clear the deck, put them on top and square them.
Photo 10 Photo 11 Although this move might appear transparent from your angle, a quick trip in front of a mirror will show you the add-on is completely covered by your right hand. The only caution needed is to be sure you don’t flash the faces of the outjogged cards before or during the move. This is particularly important if you are standing in front of a seated audience.

Once the add-on is completed, turn over the three top cards to show that their card has magically helped them find the rest of his family. Accept the astonished cries and huzzahs of your audience members with dignity and grace. The Top Last month I mentioned that I use a move I called the “Spin Move” after I put the face-up triple on top of the deck, to subliminally point out that it’s a single card. I wasn’t aware of who created it, but it seems to be a Fred Kaps move—possibly based on a move by Frank Garcia. It’s written up in Jose Carroll’s 52 Lovers, and called “The Top.” First, you must be aware that this move is very dependent on the deck you use. I have five decks on my desk right now, and it only works with three of them. It fails with a brand new League back Bicycle deck, as well as a very old one. It works pretty well with an old Tally-Ho deck, and perfectly with an old Aladdin deck, and a broken in Rider Back Bicycle deck. So if you read the description and watch the video of me doing the move (http://youtu.be/hx8pHxHGfZc), and still can’t get it to work, try it later, or with another deck. I recommend against using this in performance unless you’ve tested the deck first. Remember: I suggested you bridge the long ends of the face-down deck downward shortly before starting the trick. The move begins with a face-up triple on top. With the deck held horizontally in left-hand mechanic’s grip, cock your wrist as far clockwise as you can. (Photo 12.)
Photo 12 Photo 13. 30º of counter- Photo 14. Rotation clockwise rotation almost completed Now, being careful to keep the cards horizontal, un-cock your wrist briskly, and open your left fingers. (Photo 13) The card will begin a counter-clockwise rotation.
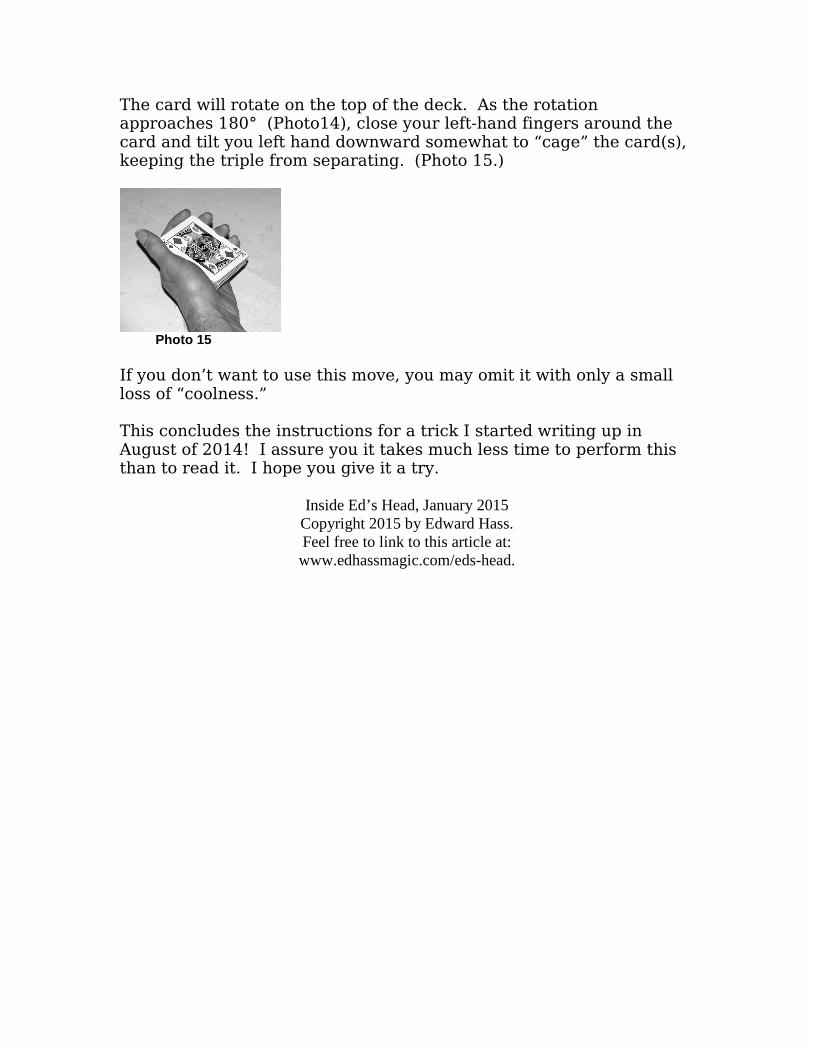
The card will rotate on the top of the deck. As the rotation approaches 180° (Photo14), close your left-hand fingers around the card and tilt you left hand downward somewhat to “cage” the card(s), keeping the triple from separating. (Photo 15.)
Photo 15 If you don’t want to use this move, you may omit it with only a small loss of “coolness.” This concludes the instructions for a trick I started writing up in August of 2014! I assure you it takes much less time to perform this than to read it. I hope you give it a try.
Inside Ed’s Head, January 2015 Copyright 2015 by Edward Hass. Feel free to link to this article at: www.edhassmagic.com/eds-head.