java grid computing for a high content screening … grid computing for a high content screening...
TRANSCRIPT

Handelswetenschappen en Bedrijfskunde Geel
Bachelor in de toegepaste informatica
CAMPUS
Geel
Bob Reynders
Academiejaar 2011-2012
Java Grid Computing for a High Content
Screening Environment

PREFACE
It is a normal thing for a last year bachelor student to do an apprenticeship. We had
many options but only few were appealing to me. The one at Janssen Pharmaceuticals
provided the most challenges I could find and was therefore also the most interesting. I
will describe the progress I made during the apprenticeship in this document.
My personal goal during this internship and thesis was to gain knowledge. Looking back
I cannot complain. I had the honor of having an expert Java developer as a colleague
who always took the time and effort to answer all of my questions. Due to my hunger
for knowledge these questions became very technical and the answers that were given
me often exceeded my expectations. The knowledge I have gained about the in-depth
workings of the used technologies is priceless to me. I would like to give special thanks
to this colleague, Frederick Michielssen, for sharing all this knowledge on those subjects
with me.
I would further like to thank my school, K.H.Kempen and the company, Janssen
Pharmaceuticals, for providing me this amazing internship. Frans Cornelissen, my
supervisor at Janssen, has my gratitude for believing in my capabilities and allowing me
to do such large and challenging tasks. His guidance was crucial in entire process. I
would like to thank my instructor Kristine Mangelschots for her guidance through this
internship. Finally I would like to thank all my colleagues in general, Frederick
Michielssen, Ari De Groot and my fellow interns, Jan Dockx, Benjamins Marinus, Pieter
Van Hees and Michaël Jacobs for their support and for creating an amazing workplace.

3
SUMMARY
This document describes the work I have done during my internship at Janssen
Pharmaceuticals.
At Janssen Pharmaceuticals people work hard to discover new medicine. This is a
process of trial-and-error. All the tests that are being done have to be analyzed
thoroughly and as efficient as possible. The project, PHAEDRA, which I worked on, is
created to suit these specific needs.
The data and information that is collected from these tests are very large. To maintain
a good user experience, PHAEDRA has to maintain a minimum amount of speed. The
original PHAEDRA code already ran multithreaded and still proved to be to slow in most
cases. My task involved speeding up processes using distributed computing.
During my work I used the JPPF framework to create a distributed computing
environment for the existing Eclipse RCP application. To distribute existing code I
always went through the process of isolating the task from other code so that it would
be able to run on a separate environment. JPPF works in a master/slave principle using
the concept of clients, drivers and nodes. To gain optimal performance and solve class
loading issues the entire framework was embedded in the PHAEDRA OSGi runtime.
The PHAEDRA project has lots of internship developers come and go. This creates an
incredibly dynamic codebase that can change very quickly. It is currently not a unit-
tested application so manual testing is very important. To test such a dynamic
codebase an automatic build system had to be created. During the last weeks of my
internship I worked with the Buckminster build tool and the Jenkins build server to
create this build system.
This document will go over my work in a detailed manner, talking about using JPPF,
correct design principles for distributed computing and automatic build systems for
Eclipse RCP products by using Buckminster and Jenkins.

4
TABLE OF CONTENTS
PREFACE ............................................................................................................ 2
SUMMARY ........................................................................................................... 3
TABLE OF CONTENTS .......................................................................................... 4
LIST OF FIGURES ............................................................................................... 6
LIST OF SNIPPETS .............................................................................................. 7
LIST OF TABLES ................................................................................................. 9
LIST OF ABBREVIATIONS ................................................................................. 10
INTRODUCTION................................................................................................ 11
1 JANSSEN PHARMACEUTICALS ............................................................ 12
1.1 Johnson & Johnson ............................................................................ 12 1.2 Translational Informatics ................................................................... 13
2 PLAN OF APPROACH ........................................................................... 14
2.1 Reason and Background of the Internship ......................................... 14 2.2 Shared vision ..................................................................................... 14 2.3 Business Case .................................................................................... 14 2.4 Phases ............................................................................................... 15 2.5 Primary and Secondary Stakeholders ................................................. 15 2.6 Reporting ........................................................................................... 15
3 USED TECHNOLOGIES ........................................................................ 16
3.1 PHAEDRA ........................................................................................... 16 3.2 Java ................................................................................................... 17 3.2.1 Java Classloaders ................................................................................... 17 3.2.2 Serializing ............................................................................................. 18 3.3 Apache Ant ......................................................................................... 19 3.3.1 Getting Started ...................................................................................... 19 3.3.2 Compile ................................................................................................ 19 3.3.3 Jar ....................................................................................................... 19 3.4 Eclipse ............................................................................................... 20 3.4.1 Equinox and OSGi .................................................................................. 20 3.4.2 Eclipse RCP ........................................................................................... 24 3.4.3 PDE ...................................................................................................... 25 3.4.4 Buckminster .......................................................................................... 26 3.5 Java Distributed Computing Frameworks ........................................... 30 3.5.1 Akka .................................................................................................... 30 3.5.2 JPPF ..................................................................................................... 32 3.5.3 Other Notable Frameworks ...................................................................... 35 3.5.4 Comparison ........................................................................................... 36 3.6 JPPF in depth ..................................................................................... 37 3.6.1 JPPFTasks, Annotated tasks, Callables, Runnables, POJOs and non-Java
commandline tasks ................................................................................ 37 3.6.2 Class Loading in JPPF .............................................................................. 43 3.6.3 Load-balancing ...................................................................................... 44 3.6.4 Basic JPPF Topology ............................................................................... 47 3.6.5 Basic Peer-to-Peer Topology .................................................................... 49 3.6.6 Pure Peer-to-Peer Topology ..................................................................... 50 3.7 Windows Service for Java .................................................................. 51 3.7.1 Yet Another Java Service Wrapper ............................................................ 51

5
3.8 Jenkins ............................................................................................... 53 3.8.1 Hudson ................................................................................................. 53 3.8.2 Plugins ................................................................................................. 53 3.8.3 Build .................................................................................................... 53
4 OFFLOADING PHAEDRA ON A GRID .................................................... 55
4.1 JPPF in an OSGi Environment ............................................................. 55 4.1.1 PHAEDRA Structure ................................................................................ 55 4.1.2 Topology ............................................................................................... 57 4.1.3 Embedding JPPFDriver ............................................................................ 60 4.1.4 Embedding JPPFClient ............................................................................. 61 4.1.5 Embedding JPPFNode ............................................................................. 65 4.1.6 Serialization in OSGi ............................................................................... 66 4.2 Design principles................................................................................ 68 4.2.1 Unsuitable Design .................................................................................. 68 4.2.2 Suitable Design ...................................................................................... 69 4.3 Chart Layers ....................................................................................... 70 4.3.1 Original Design ...................................................................................... 71 4.3.2 Distributed Design.................................................................................. 73 4.3.3 Benchmarks .......................................................................................... 84 4.4 MATLAB Analysis ................................................................................ 85 4.4.1 Original Design ...................................................................................... 85 4.4.2 Distributed Design.................................................................................. 89 4.5 KNIME Workflows .............................................................................. 95 4.5.1 Original Design ...................................................................................... 96 4.5.2 Distributed Design................................................................................ 100 4.6 PHAEDRA as a JPPF Node ................................................................. 107 4.6.1 Headless PHAEDRA............................................................................... 107 4.6.2 PHAEDRA under YAJSW ........................................................................ 115 4.7 Phaedra Build Process ...................................................................... 117 4.7.1 Original Build Process ........................................................................... 117 4.7.2 Buckminster in Jenkins ......................................................................... 120 4.7.3 Automatic P2 Repository Build ............................................................... 122
CONCLUSION .................................................................................................. 127
REFERENCES .................................................................................................. 128

6
LIST OF FIGURES
Figure 1: Janssen Pharmaceuticals ...................................................................... 12 Figure 2: JnJ logo .............................................................................................. 12 Figure 3: Beerse II building 160 .......................................................................... 13 Figure 4: PHAEDRA splashscreen......................................................................... 16 Figure 5: Classloader delegation model ................................................................ 17 Figure 6: P2 repository file structure .................................................................... 23 Figure 7: Eclipse RCP structure ........................................................................... 24 Figure 8: Dependency tree ................................................................................. 26 Figure 9: Class loading delegation model in JPPF ................................................... 43 Figure 10: Class loading request ......................................................................... 43 Figure 11: Load-balancing .................................................................................. 44 Figure 12: Basic topology ................................................................................... 47 Figure 13: Basic topology with a router ................................................................ 47 Figure 14: Basic topology with fall back ............................................................... 48 Figure 15: Basic peer-to-peer topology ................................................................ 49 Figure 16: Pure peer-to-peer topology ................................................................. 50 Figure 17: New Job ........................................................................................... 54 Figure 18: Job configuration ............................................................................... 54 Figure 19: PHAEDRA structure ............................................................................ 55 Figure 20: Dependency loop ............................................................................... 55 Figure 21: PHAEDRA computer ........................................................................... 56 Figure 22: PHAEDRA peer-to-peer topology .......................................................... 57 Figure 23: PHAEDRA basic topology ..................................................................... 59 Figure 24: Serialization example ......................................................................... 66 Figure 25: PHAEDRA subwellscatter layer ............................................................. 70 Figure 26: Original SubWellScatterLayer .............................................................. 71 Figure 27: Distributed SubWellScatterLayer .......................................................... 73 Figure 28: SubwellScatterLayer benchmark .......................................................... 84 Figure 29: Original KineticPAMAnalysis ................................................................. 85 Figure 30: Distributed KineticPAMAnalysis ............................................................ 89 Figure 31: KNIME workflow in PHAEDRA .............................................................. 95 Figure 32: KNIME select workflow dialog .............................................................. 96 Figure 33: Distributed workflow ......................................................................... 100 Figure 34: KNIME select workflow distributed ...................................................... 103 Figure 35: com.jnj.phaedra.headless src structure ............................................... 108 Figure 36: Build history ..................................................................................... 119 Figure 37: Buckminster Installation .................................................................... 120 Figure 38: Build flow ........................................................................................ 125
7
LIST OF SNIPPETS
Snippet 1: Ant example ..................................................................................... 19 Snippet 2: META-INF/MANIFEST.MF .................................................................... 20 Snippet 3: OSGi DefaultClassLoader loadClass method .......................................... 22 Snippet 4: RMAP example .................................................................................. 27 Snippet 5: CQUERY ........................................................................................... 29 Snippet 6: Akka example ................................................................................... 30 Snippet 7: Akka remote config ............................................................................ 31 Snippet 8: Akka remote example ........................................................................ 31 Snippet 9: JPPF client example ........................................................................... 34 Snippet 10: JPPF task - InfoGrabber .................................................................... 35 Snippet 11: Task interface ................................................................................. 37 Snippet 12: Cancel and Timeout JPPF example ..................................................... 38 Snippet 13: Serializable Annotated POJO InfoGrabber ............................................ 39 Snippet 14: Static Annotated POJO InfoGrabber .................................................... 39 Snippet 15: Callable InfoGrabber ........................................................................ 40 Snippet 16: Regular POJO InfoGrabber ................................................................ 41 Snippet 17: CommandLine InfoGrabber ............................................................... 42 Snippet 18: Bundler interface ............................................................................. 44 Snippet 19: Manual algorithm configuration .......................................................... 45 Snippet 20: Autotuned algorithm configuration ..................................................... 45 Snippet 21: Proportional algorithm configuration ................................................... 46 Snippet 22: Rl algorithm configuration ................................................................. 46 Snippet 23: Nodethreads algorithm configuration .................................................. 46 Snippet 24: YAJSW configure JRE ........................................................................ 51 Snippet 25: YAJSW configure application .............................................................. 52 Snippet 26: YAJSW configure extra application parameters .................................... 52 Snippet 27: YAJSW configure Windows service parameters ..................................... 52 Snippet 28: JPPFDriverService ............................................................................ 60 Snippet 29: JPPFDriver EarlyStarter ..................................................................... 60 Snippet 30: JPPF Client service ........................................................................... 61 Snippet 31: JPPF client service offloading methods ................................................ 62 Snippet 32: TaskResultListener and a TaskResultEvent .......................................... 63 Snippet 33: JPPFJob cancel through RCP Jobs ....................................................... 64 Snippet 34: JPPFClientService cancelJob .............................................................. 65 Snippet 35: JPPFNodeService .............................................................................. 65 Snippet 36: ObjectInputStream resolveClass() ...................................................... 66 Snippet 37: Threaded shared example ................................................................. 68 Snippet 38: Threaded isolated example ............................................................... 69 Snippet 39: SubWellScatterLayer ........................................................................ 71 Snippet 40: Original MTRenderSupport ................................................................ 72 Snippet 41: Grid ............................................................................................... 73 Snippet 42: BaseConcurrentGridCellRenderer prerender ......................................... 74 Snippet 43: RenderingTask ................................................................................ 75 Snippet 44: SubWellScatterLayer ChartRenderer ................................................... 76 Snippet 45: SubWellScatterRenderTask ............................................................... 77 Snippet 46: CellImageRenderMessage ................................................................. 78 Snippet 47: IConcurrentRenderSupport................................................................ 79 Snippet 48: putIfValid() ..................................................................................... 79 Snippet 49: reset() and resetRendering() ............................................................. 80 Snippet 50: offloadTaskBatch() and handleTask() ................................................. 80 Snippet 51: JPPFRenderSupport .......................................................................... 81 Snippet 52: CellImageResultListener ................................................................... 82 Snippet 53: MTRenderSupport2 .......................................................................... 83 Snippet 54: AbstractMatlabAnalysis ..................................................................... 85

8
Snippet 55: prepareLauncher() and createProcessArgs() of KineticPAMAnalysis ......... 86 Snippet 56: execute() ........................................................................................ 87 Snippet 57: MCRProcessCallable ......................................................................... 88 Snippet 58: IConcurrentExecutor ........................................................................ 89 Snippet 59: JPPFExecutor ................................................................................... 90 Snippet 60: JPPFCallableImpl .............................................................................. 91 Snippet 61: Isolated MCRProcessCallable ............................................................. 91 Snippet 62: getInputPath() ................................................................................ 92 Snippet 63: getOutputPath() .............................................................................. 93 Snippet 64: preProcess() ................................................................................... 93 Snippet 65: postProcess() .................................................................................. 94 Snippet 66: createFactory() ................................................................................ 94 Snippet 67: Original workflow design ................................................................... 96 Snippet 68: OpenWorkflowCmd .......................................................................... 97 Snippet 69: OpenUI() part 1 ............................................................................... 98 Snippet 70: OpenUI part 2 ................................................................................. 98 Snippet 71: OpenUI part 3 ................................................................................. 99 Snippet 72: openUI() ........................................................................................ 100 Snippet 73: configure() ..................................................................................... 101 Snippet 74: getWorkflowManager() .................................................................... 102 Snippet 75: OpenWorkflowCmd ......................................................................... 104 Snippet 76: executeDistributed() ....................................................................... 105 Snippet 77: WorkflowTask ................................................................................. 106 Snippet 78: start() in Application ....................................................................... 108 Snippet 79: authenticated() properties ............................................................... 109 Snippet 80: createShutdownHook() .................................................................... 110 Snippet 81: HeadlessStartup extensions ............................................................. 110 Snippet 82: EarlyStarter for R ............................................................................ 111 Snippet 83: EarlyStarter for JPPF node................................................................ 112 Snippet 84: Updater ......................................................................................... 112 Snippet 85: P2UpdateRun run() ......................................................................... 113 Snippet 86: reloadUpdateRepos() ....................................................................... 114 Snippet 87: createUpdateOperation() and hasUpdates() ....................................... 114 Snippet 88: createProvisioningJob() ................................................................... 115 Snippet 89: PHAEDRA YAJSW properties 1 .......................................................... 115 Snippet 90: PHAEDRA YAJSW properties 2 .......................................................... 116 Snippet 91: PHAEDRA YAJSW properties 3 .......................................................... 116 Snippet 92: init task ......................................................................................... 117 Snippet 93: build-feature-repo task .................................................................... 118 Snippet 94: pde-build task ................................................................................ 118 Snippet 95: pre-publish task.............................................................................. 119 Snippet 96: archive option ................................................................................ 119 Snippet 98: Custom Buckminster JSON ............................................................... 121 Snippet 99: Target platform for PHAEDRA builds .................................................. 122 Snippet 100: PHAEDRA CQUERY ........................................................................ 123 Snippet 101: PHAEDRA RMAP ............................................................................ 123 Snippet 102: pre-p2 task .................................................................................. 124 Snippet 103: build-feature-repo task .................................................................. 124 Snippet 104: Buckminster commands ................................................................. 126

9
LIST OF TABLES
Table 1: OSGi bundle MANIFEST.MF .................................................................... 21 Table 2: JPPF client configuration ........................................................................ 32 Table 3: JPPF driver configuration ....................................................................... 33 Table 4: JPPF node configuration ......................................................................... 34 Table 5: JPPF vs Akka ........................................................................................ 36

10
LIST OF ABBREVIATIONS
ADHD Attention Deficit Hyperactivity Disorder
AES Advanced Encryption Standard
API Application Programming Interface
BSD Berkely Software Distribution
BOM Bill of Materials
CPU Central Processing Unit
CQUERY Component Query
CSPEC Component Specification
CVS Concurrent Versions System
EPL Eclipse Public License
GC Garbage Collector
GEF Graphical Editing Framework
GPL General Public License
GUI Graphical User Interface
HCA High Content Analysis
HCS High Content Screening
IDE Integrated Development Environment
IO Input/Output
IP Internet Protocol
IT Information Technology
JNI Java Native Interface
JPPF Java Parallel Processing Framework
JRE Java Runtime Environment
JSON JavaScript Object Notation
JSW Java Service Wrapper
JVM Java Virtual Machine
MCR Matlab Compiler Runtime
MF Manifest
OSGi Open Services Gateway initiative
PDE Plugin Development Environment
PHAEDRA Protocol-based High-Content Analysis, Evaluation, Data
Reduction and Approval
POM Project Object Model
RCP Rich Client Platform
RMAP Resource Map
SPOF Single Point of Failure
SVN Subversion
SWT Standard Widget Toolkit
UDP User Datagram Protocol
UI User Interface
UNC Universal Naming Convention
URI Uniform Resource Identifier
XML Extensible Markup Language
YAJSW Yet Another Java Service Wrapper
11
INTRODUCTION
As a last year bachelor student I had to do an apprenticeship. Programming is a
passion for me and not just my profession so, for me it was very important to find a
challenging and stimulating environment. Janssen Pharmaceuticals offered just that. A
challenging task that combined a few of the most difficult aspects of programming: threading and networking.
Janssen Pharmaceuticals has lots of IT projects to support internal research, most of
the software is custom made to fit the unique needs of researchers. The project I was
assigned to is called PHAEDRA, an extremely well-developed application for High
Content Screening (HCS). The application supports researchers by visualizing data and
calculating features. The rendering of complex charts often takes a very long time, on
slow computers it became too slow to be useful. Measurements to improve the speed
had to be taken, one approach was the implementation of distributed computing in the
form of a Java grid. It is my goal to increase the overall performance of the PHAEDRA
application by implementing a distributed computing grid.
Lots of the PHAEDRA developers are students which means the codebase is very
dynamic as students come and go. To be able to test this dynamic codebase an
automatic nightly build system was required. Part of my internship consists of creating an automatic build system using the Buckminster tool for Eclipse RCP products.
The contents of this document describe the PHAEDRA application and its role in the
company, my work on PHAEDRA and my learning process. My first goal for this
document is to create a detailed explanation of my work so that other people can learn
how to efficiently distribute existing code onto a newly created Java grid. My second
goal is to provide a detailed process on how to build P2 repositories using the
Buckminster tool embedded in a Jenkins build server.
At the end I will form a conclusion and summarize the results of my apprenticeship.

12
1 JANSSEN PHARMACEUTICALS
Figure 1: Janssen Pharmaceuticals
Janssen Pharmaceuticals is a Belgian pharmaceutical company founded by Doctor Paul
Janssen. He was a passionate worker who was often called a genius. It is said that
Janssen often roamed the workplace to discuss matters in person. He never took on a
pure manager job and always kept close contact with the working people. In only three
years Janssen Pharmaceuticals grew from a small laboratory to a large 30-man
company.
Doctor Paul Janssen had one important mission, creating better care for the patient
through research. Up till now research is still a very large section in the company.
Drugs are being developed for:
Attention deficit hyperactivity disorder (ADHD)
Acid reflux disease
Infectious diseases
Bipolar I disorder
Schizophrenia
Alzheimer’s disease
Epilepsy
Migraine prevention and treatment
Pain management
Women’s health
Currently the company has several sites. The site where my internship took place is
called Beerse II.
1.1 Johnson & Johnson
Figure 2: JnJ logo
In 1961 Janssen Pharmaceuticals joined Johnson & Johnson. This merge has allowed a
rapid expansion and helped make it into the company we know today. Johnson &
Johnson is a large company in the pharmaceutical industry. They focus on medical and
consumer products.
13
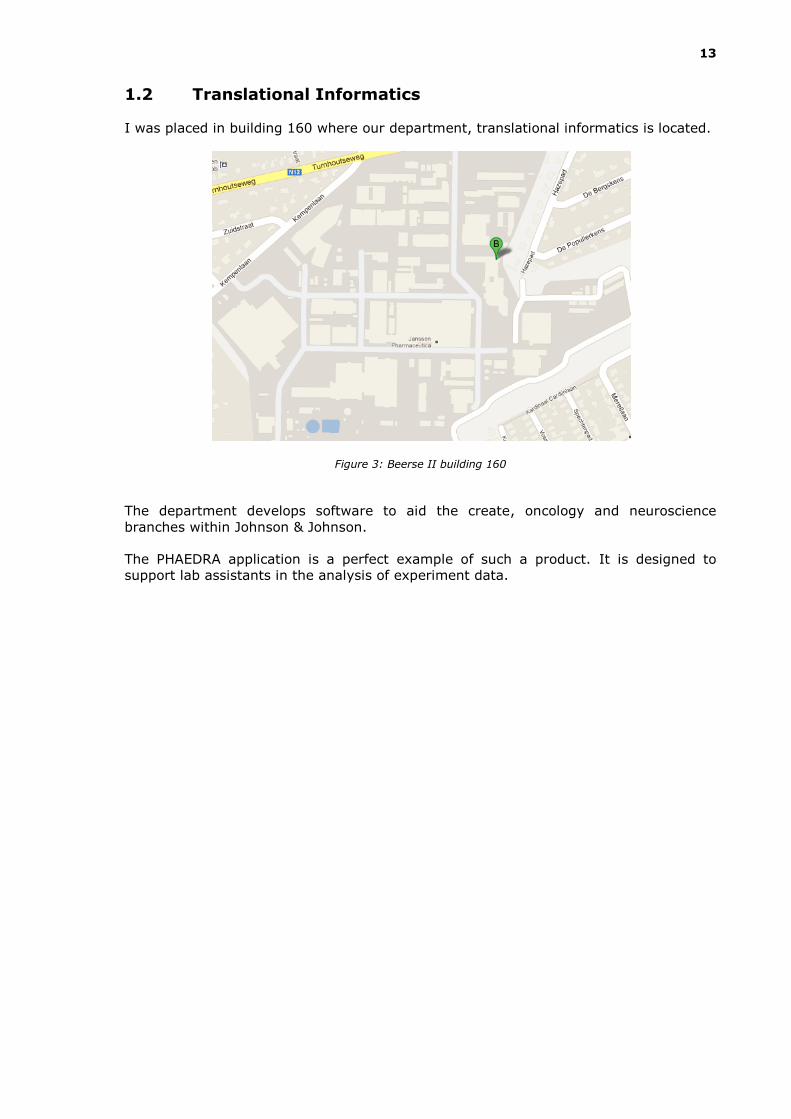
1.2 Translational Informatics
I was placed in building 160 where our department, translational informatics is located.
Figure 3: Beerse II building 160
The department develops software to aid the create, oncology and neuroscience
branches within Johnson & Johnson.
The PHAEDRA application is a perfect example of such a product. It is designed to
support lab assistants in the analysis of experiment data.

14
2 PLAN OF APPROACH
2.1 Reason and Background of the Internship
The PHAEDRA software application was designed to help researchers and lab
technicians of Janssen Pharmaceuticals. Their biological screening research is
conducted in wells, which in turn are located on plates. An important aspect of High
Content Screening is image analysis. For reviewing purposes, the analyzed data is
presented graphically, in charts. Because there are multiple wells on each plate, there
are multiple graphs and charts per plate.
Creating 96 or 384 graphs and charts on the fly is quite a task even for modern CPUs.
The current code generates these graphs client-side using multiple threads. Making
them client-sided is a must since the charts need to be available in about any resolution
because users can choose the size of the plate-view.
PHAEDRA does not always run on state-of-the-art machines, it does not have twelve
threads at its disposal. With such a great amount of charts the system shows a visible
lag. This lag is something that should be improved.
2.2 Shared vision
The objective of the internship is figuring out if deploying a grid is beneficial to the
rendering process. Due to the networking overload it might not be.
The final result may be a fast rendering PHAEDRA but it may as well be a conclusion
that using a grid is not the way to go. Either way, it has to be designed, implemented
and tested to acquire this knowledge.
2.3 Business Case
There are two possible outcomes of this internship.
The implementation of the grid will be beneficial to the rendering of graphs or other
computationally expensive tasks in PHAEDRA. My internship will result in an increase in
performance and will further improve the user experience for PHAEDRA.
On the other hand the networking overload might be so vast that it could outweigh the
benefits of having extra rendering power. In this case the final product of my internship
will be knowledge. Not to be underestimated as the current and future PHAEDRA
developers will be able to focus on other means of improving the performance.

15
2.4 Phases
First I will have to prepare the current codebase. Certain calculations have to be
isolated from their current classes so that they can run on remote machines. This will
take quite a bit of time as everything that has to run remotely has to be either
serializable or has to have a separate node-sided backend.
After I have isolated some code I can run tests with the framework. It will require some
time as testing computations is a slow process.
If a grid implementation seems beneficial after all this I will implement as much of
PHAEDRAs current computationally expensive code as I can.
A load-balancing system will be required as well, as this will make sure that the client
will only submit tasks when it is beneficial and that the distribution of the tasks will be
as ideal as possible.
2.5 Primary and Secondary Stakeholders
The people who will be influenced most by my internship will be the PHAEDRA
developers. The assignment is more research based and knowledge is the main goal.
Depending on the results of my work the researchers at Janssen Pharmaceuticals will
be influenced as well. The user experience of PHAEDRA will be improved by reducing
delay, which will make the entire workflow with PHAEDRA more fluent for any of its
users.
2.6 Reporting
To keep my supervisor up-to-date I will report weekly by mail. These mails will be very
short logs of my daily progress. If this does not suffice I will increase the
communication by sending longer messages or by sending more mails.
Keeping my internship supervisor up-to-date is quite easy as I talk to him about my
progress daily or at least once every two days.

16
3 USED TECHNOLOGIES
During my internship I have come in contact with many technologies. If you fully want
to understand my work it is recommended to read these technologies before you
proceed any further. Basic knowledge of programming is required to fully understand
everything.
3.1 PHAEDRA
Figure 4: PHAEDRA splashscreen
PHAEDRA stands for Protocol-based High-Content Analysis, Evaluation, Data Reduction
and Approval. It is an Eclipse RCP application that is designed to aid lab assistants with
the analysis of their experiments.
It is designed for High-Content Screening experiments which means that the
application has to cope with large amounts of data and images. The application is
equipped with lots of different views and perspectives to guarantee the optimal user
experience.
The PHAEDRA project is relatively new compared to some of its commercial
competitors. The project started in 2009 with Frans Cornelissen as project lead. The
main developers are Frederick Michielssen and Ari De Groot but lots of the code was
written by interns.

17
3.2 Java
The programming language I used during my apprenticeship was Java. It is an
extremely popular object oriented programming language. Though mostly used for web
development Java was created as a general purpose language. As PHAEDRA proves, it
can be used to create excellent client-sided applications.
I will assume that you, the reader, know a thing or two about Java. I will not explain
classes, objects or the syntax. What I will explain is how classloaders and serialization
work as these are key concepts of my thesis.
3.2.1 Java Classloaders
Classloaders are Java classes that load class definitions into the Java Virtual Machine’s
non-heap memory. Because classloaders are Java classes they also need to be loaded
into the JVM. The bootstrap classloader is a native classloader typically written in C and
it has three main tasks.
1. Loading the core Java classes (java.*)
2. Loading the extension classloader
3. Loading the system classloader
After doing its duty the bootstrap classloader transfers its control down to the extension
classloader. This will load the extension classes (javax.* and the JREs ext folder) into
memory. When this is done control is passed to the system classloader which in its case
will load the classes of the classpath.
When a class is needed for the first time, a load request will be launched for the system
classloader. The system classloader will delegate this request to the extension
classloader which, in turn, will delegate to the core classloader. If the class is not a core
class the extension loader will check for extension classes, if it is neither core nor
extension the system classloader will load the class. If none of the loaders find the
class, a ClassNotFoundException is thrown. The image below graphically represents
the delegation flow in a class loading request.
Figure 5: Classloader delegation model
Custom classloaders can be made by subclassing java.lang.ClassLoader. ClassLoader
has a constructor which takes the parent classloader as a parameter, simplifying
participation in the delegation system.
18
3.2.2 Serializing
The primary purpose of serialization is to transfer Java objects from one JVM to
another. The Java serialization API will handle the serialization of the object into a
stream on one JVM and the deserialization of the object on the other.
Objects are not serializable by default in Java. Serializing may not make sense for
objects and may sometimes cause problems. For example a platform dependent object
like an SWT widget would cause great problems when serialized because the native
components may not exist when deserialized. Which is why making an object
serializable should be a design choice and not something that should be required.
A serializable class in Java has to implement the marker interface java.io.Serializable and each non-transient field has to be a serializable object as
well. The Serializable interface is a marker interface, all it does is mark an object, it
does not enforce any methods.
A serializable object is usually stamped with a serialVersionUID. The purpose of this
field is to version a class. Upon deserialization the object will be checked against the current class. If the serialVersionUID’s do not match, a
java.io.InvalidClassException will be thrown.
So you may be wondering how an object gets serialized and deserialized. The default implementation is the java.io.ObjectOutputStream class. The methods used are
readObject(), writeObject(), readExternal() and writeExternal(). The methods
writeExternal() and readExternal() wrap the methods of an Externalizable. It is an
interface that extends Serializable to specify your own serialization for the
implementing class.

19
3.3 Apache Ant
Another Neat Tool by the Apache Software Foundation is a cross-platform build tool
that can help automate software builds for developers, though not limited to just Java
builds it is usually used just for that.
Those who are familiar with C/C++ software development will quickly make the link to
the Make build system. Make uses their own Makefile format where Apache uses XML to
describe their tasks meaning it is more verbose than Make but more accessible as there
are more developers that know how to read XML.
3.3.1 Getting Started
The example from the Ant manual quickly shows the goal of the project.
<project> <target name="compile"> <mkdir dir="build/classes"/> <javac srcdir="src" destdir="build/classes"/> </target> <target name="jar"> <mkdir dir="build/jar"/> <jar destfile="build/jar/HelloWorld.jar" basedir="build/classes"> <manifest> <attribute name="Main-Class" value="test.HelloWorld"/> </manifest> </jar> </target> </project>
Snippet 1: Ant example
This build.xml file has two targets, jar and run. This is a very small example that
assumes execution in a directory that contains a src folder.
3.3.2 Compile
When you manually compile .java files you use the javac command. Ant has a similar
command which is accessed through the javac XML tag. You can see that the src and
destdir have been set. When the compile task is activated it will compile all the .java
files in ./src to .class files in ./build/classes.
3.3.3 Jar
Similar to the javac XML tag there is a jar XML tag. In this case you have to add a
manifest file which will specify the main class. When the jar task is activated it will
package the built .class files into an executable jar file with a manifest that sets the main class as test.HelloWorld.

20
3.4 Eclipse
Development of software has grown rapidly in the last years. A very important aspect
of this growth is probably the usage of an Integrated Development Environment, an IDE. The IDE used for Java development at Janssen Pharmaceuticals is the Eclipse IDE.
Eclipse is more than just an IDE it is a software pack. Originally developed by IBM, all
the Eclipse code is now publicly available. Eclipse is open source but not licensed under
the more commonly known GPL, Apache or BSD licenses but under the EPL, Eclipse’s own license.
Because of the open source license Eclipse has gotten a lot of feedback and bug
patches from other developers. It is one of the most known Java IDEs. The community
is very large which is noticeable in all the documentation that is available.
3.4.1 Equinox and OSGi
The Open Services Gateway initiative framework is a specification that defines a
component based model for the Java programming language. The core of its success
lies in the bundling system; it requires each component to handle its own dependencies
and exported packages. This gives the developer full control over what will be made
public in its plugin and what will remain private.
There are several OSGi implementations including Knopflerfish and Apache Felix. The
reference implementation for OSGi is Equinox, a famous software package from Eclipse.
Bundle
An OSGi bundle is nothing more than a jar package with a more detailed manifest file.
Each bundle specifies its public API and its dependencies to other bundles.
A bundle is actually nothing more than a standard .jar file. OSGi uses the existing
MANIFEST.MF file and expands it with more metadata.
Manifest-Version: 1.0 Bundle-ManifestVersion: 2 Bundle-Name: Helloworld Bundle-SymbolicName: com.jnj.helloworld Bundle-Version: 1.0.0.qualifier Bundle-Activator: com.jnj.helloworld.Activator Require-Bundle: org.eclipse.ui, org.eclipse.core.runtime Bundle-ActivationPolicy: lazy Bundle-RequiredExecutionEnvironment: JavaSE-1.7 Import-Package: com.jnj.hellothesis DynamicImport-Package: * Eclipse-BuddyPolicy: dependent
Snippet 2: META-INF/MANIFEST.MF

21
Table 1: OSGi bundle MANIFEST.MF
Bundle-ManifestVersion The OSGi specification to use when reading this
bundle.
Bundle-Name The human-readable name for this bundle.
Bundle-SymbolicName The only required value, it specifies a unique
identifier for the bundle.
Bundle-Version The current version number of the bundle.
Bundle-Activator The class that has to be invoked when a bundle is
activated.
Require-Bundle Specifies the bundles dependency upon other
bundles by symbolic name.
Bundle-ActivationPolicy
The policy that defines when a bundle should be
started. ‘Lazy’ will only trigger the Activator when
the bundle is needed.
Bundle-
RequiredExecutionEnvironment
Specifies which executionenvironment is required.
This assures the right java.* classes.
Export-Package Specifies the public Java packages of the plugin.
Import-Package Specifies the external packages that are required
to fulfil the dependencies of this plugin.
DynamicImport-Package
Often considered bad practice as it is a clear
symbol of non-modular design. It can however be
a life saver when a library uses lots of dynamic
class accesses such as Hibernate or the Groovy
libraries.
Eclipse-BuddyPolicy
This specifies which bundles that should be
consulted for buddy class loading. This allows
two-way dependencies.

22
Class loading
In plain Java every classloader delegates to the corresponding parent all the way up to
the native bootstrap classloader.
Delegation in OSGi is different. Each bundle in OSGi has its own DefaultClassLoader.
From the DefaultClassLoader source it can be clearly see that it just delegates the
request.
protected Class<?> loadClass(String name, boolean resolve) throws ClassNotFoundException {
if (Debug.DEBUG_LOADER) ------ try {
// Just ask the delegate. This could result in // findLocalClass(name) being called.
Class<?> clazz = delegate.findClass(name); // resolve the class if asked to. if (resolve) resolveClass(clazz); return (clazz); } catch (Error e) { // debug and rethrow ------ } catch (ClassNotFoundException e) {
// debug and rethrow ------ } }
Snippet 3: OSGi DefaultClassLoader loadClass method
The delegate implements the ClassLoaderDelegate interface which is part of the OSGi
framework. This ClassLoaderDelegate implementation is called a BundleLoader.
For all java.* and ‘boot delegation’ classes it will delegate to the parent classloader else
it will try to find the class internally following the OSGi specification.
1. Search the imported packages
2. Search the required bundles
3. Search the local bundle
4. Attempt to find a dynamic import source.
5. Do buddy-policy loading
Services
The OSGi specification has services, these are specified by a Java interface. Bundles
can implement this interface and register the service. Clients of the services can find
them in the registry and use them accordingly. As RCP 3.7.X does not use services but
extensively uses its own extensions as service provider I will not elaborate on OSGi
services. RCP 4.X will simplify the use of services in an RCP context and reduce the use
of extensions.

23
Features
Features are groups of bundles and do not hold actual code, they are not part of the
OSGi standard but are an addition of Equinox. Features are used in building and
updating procedures and are designed to make these operations easier for developers.
Equinox P2
The P2 project is a part of the Equinox project. It focuses on provisioning for OSGi-
based applications. It is primarily made for RCP and Equinox applications but it includes
a general infrastructure that could be used for a wide variety of software.
It is a transactional update mechanism that can provide safe state changes for
applications. A provisioning client requires a file-serving server that provides access to
artifacts and installable units.
Artifacts are the actual bundles and plugins that will be installed. The metadata around
these bundles are called installable units. A client holds a P2 agent which will compare
local versions with the versions on remote repositories.
Such a repository is called an update site or a P2 repository. A P2 repository is a
collection of artifacts and installable units. These are the bundles itself and the
metadata around it. A P2 repository has the following directory structure:
Figure 6: P2 repository file structure
The artifacts.jar holds an artifacts.xml file that will list all the artifacts that are available
in the site. Content.jar holds a similar file for the installable units named content.xml.
As the name implies the features directory holds Eclipse features and the plugins
directory holds the actual plugins. The binary section in the update site will contain
static contributions to other features or plugins. These are typically platform specific
binary files, licenses, etc.

24
3.4.2 Eclipse RCP
An RCP is a rich client platform, it will provide a developer with a lifecycle manager, a
standard bundling framework, a portable widget toolkit, a workbench and an update
manager. A few existing open-source RCPs are: the Netbeans RCP platform, Spring RCP
and Eclipse RCP.
In Eclipse RCP the lifecycle and bundling is handled by the Eclipse OSGi
implementation, Equinox. The widget toolkit is provided by JFace and SWT and on top
of that a Workbench will provide developers with an easy way of creating views,
wizards, etc. The figure below graphically represents the layered model of the Eclipse
RCP platform.
Figure 7: Eclipse RCP structure
In Eclipse RCP a software component is called a plugin. This essentially is an OSGi
bundle that specifies its API and its dependencies. The way of specifying its API and
dependencies differs from the OSGi implementations, it is not done by services but by
extensions and extension points.
Starting an Eclipse RCP application is done by activating the Equinox launcher. You can
pass an application parameter to start an application that is different from the default
configuration. An application is an extension and can be seen as the ‘main method’ for
RCP applications.
Extensions
Extension points define interfaces that can be implemented by other plugins. This
implementation is called an Extension. Extensions assure a modular system as plugins
can contribute functionality to other plugins.
The extension configuration is done in a plugin.xml file. Plugin.xml resides in the root
directory of the plugin project. The Eclipse IDE provides an editor in its Plugin
Development Environment, eliminating the tedious task of editing raw XML files.
SWT
The widget toolkit of Eclipse RCP is the Standard Widget Toolkit better known as SWT.
A further abstraction of the SWT API is provided by JFace.
The primary goal of SWT is to use all the native widgets that are available from the
platform. This is a very important feature for Java based applications as they can fit
right into the platform.
All this is done by using the Java Native Interface (JNI) to access native elements of
the platform. In case the native element is not available SWT will emulate it.
25
Target platform
In an Eclipse environment the target platform is a collection of other plugins that your
current workspace is run or built against. A target definition can specify which plugins
will be taken into the target platform.
Target platforms are very useful when dealing with large projects, you will often have
as-is plugins that do not need to be changed manually. These belong in the target
platform, it will de-clutter the workspace lots.
A good example of such plugins are the Eclipse plugins. These are available on any
Eclipse IDE installation which is also why a default target definition points to the current
Eclipse IDE’s home.
3.4.3 PDE
The Plugin Development Environment created by the Eclipse foundation is a
development environment for RCP products. It includes several tooling options for OSGi
environments as well.
The PDE project itself is divided into three sub-projects:
1. PDE Build
2. PDE UI
3. PDE API Tools
PDE Build is a collection of Ant-based build scripts that will help developers with
building fragments, plugins, features, update sites and entire RCP products.
PDE UI maintains the user interface components such as editors to enhance the
working environment regarding plugin development for the Eclipse IDE.
PDE API Tools is a project made to assist developers in API maintenance by reporting
incompatibilities, incorrect version numbers, missing annotations, etc.
I will only focus on PDE Build as that is the only project that has an impact on my
thesis.
PDE Build
The main goal of PDE Build is to provide the means necessary to automate Eclipse RCP
builds. It is an Ant based build system and resides in the org.eclipse.pde.build plugin.
To use the PDE built system you need to define specific parameters and create an Ant
task. This Ant task will merely configure and call the Ant tasks that are delivered by the
PDE build system.
PDE Build works because it uses the metadata provided by each plugin such as
build.properties and plugin.xml.
It is completely integrated with P2 support, you can build products based upon other P2
repositories and build your own P2 repositories.
PDE Build is tightly integrated into the PDE project and will abstract all of the lower-
level work from the user by replacing it with simple wizards in the Eclipse IDE. Manually
calling the PDE Build Ant scripts is needed for automatic headless builds that integrate
into build servers.

26
3.4.4 Buckminster
I have briefly spoken about Ant and the PDE Build system. You may have noticed that
these are quite low level. Combined with PDE Build, Ant can build Eclipse RCP
applications perfectly, but with big projects that require different builds for different
reasons Ant scripts might get very complicated.
Ant also has no real way of getting everything set-up pre-build, it relies on other tools
e.g. an SVN check-out.
Buckminster was created to address all these issues. It is a wrapper over several
systems such as Ant and PDE and will abstract much of the technical build process from
its user and focus more on getting things done pre-build. Buckminster can do three
things: assemble, build and deploy.
The first step, assembling is often called materializing. It is the collection action to
setup a complete workspace. When everything is assembled by Buckminster, actions
can be configured to build the parts of the assembled workspace. After building,
Buckminster can package the build and deliver a deployable end-product.
CQUERY
The problem with building a project is often assembling it in the first place. Buckminster
tries to solve this problem by introducing automated materializing. This section will
explain the query that starts the entire materializing process.
A component query is an XML document and is saved as a .cquery file. The query will
hold just one component. This component will be the topmost component. Your goal
should be to materialize this component and nothing else.
Figure 8: Dependency tree
In the project modeled above, the root component is obviously the Main Component. If
this component and its dependencies were to be materialized, the entire project would
be too. Buckminster will automatically resolve the dependencies of the root component
and continue resolving the dependencies recursively. This means that when it tries to materialize Main Component it will notice its dependency to Dependency 1 and
Dependency 2 and their own dependencies and start resolving everything. When the
entire dependency tree is mapped in what is called a Bill of Materials an actual
materialize could start.

27
To specify a root component in the CQUERY file you also need to know its type. The
possible component types in Buckminster are:
1. osgi.bundle
2. eclipse.feature
3. jar
4. maven
5. buckminster
6. bill of materials
Maven is another build system which also has dependency support. It is basically an
extended Jar that has a maven POM to define dependencies. The Buckminster type is
there for components that are none of the above. Developers can write their own
dependency file called a CSPEC. I will not address CSPECs further as they are not used
in any of my work. Just think of them as a manual way of defining dependencies
because that is their main task. Finally you can also point to a BOM. I mentioned it
earlier, a fully resolved dependency tree is stored as a BOM. You can point to an
existing BOM as a component, this will increase the speed immensely because the
entire resolving step can be skipped.
Before I even talk about materializing I will address the issue of the components
location. Buckminster cannot magically know the location of this one component and all
its dependencies, well not on remote locations at least.
RMAP
A resource map has only one goal and that is locating resources. It is not used to issue
any tasks or to resolve components but merely to locate them. Developers who are
familiar with regex based url-routing in popular web frameworks will find a resource
map a very easy thing to deal with.
<?xml version="1.0" encoding="UTF-8"?> <rmap xmlns:xsi="http://www.w3.org/2001/XMLSchema-instance" xmlns="http://www.eclipse.org/buckminster/RMap-1.0" xmlns:bc="http://www.eclipse.org/buckminster/Common-1.0"> <searchPath name="eclipse"> <provider readerType="p2" componentTypes="eclipse.feature,osgi.bundle"
mutable="false" source="false"> <uri format="http://download.eclipse.org/eclipse/updates/3.7?importType=binary"/> </provider> </searchPath> <searchPath name="gef"> <provider readerType="p2" componentTypes="eclipse.feature,osgi.bundle"
mutable="false" source="false"> <uri format="http://download.eclipse.org/tools/gef/updates/releases/?importType=binary"/> </provider> </searchPath> <locator searchPathRef="gef" pattern="^org\.eclipse\.(gef|draw2d)"/> <locator searchPathRef="eclipse" pattern="^org\.eclipse\."/> </rmap>
Snippet 4: RMAP example

28
A components name is first matched with locators. It will try a top to bottom pattern
match. The patterns for locators are based on Java regular expressions. The two
patterns in the example are very basic expressions, if you need more complicated
pattern matching I suggest you take a look at some Java regex tutorials.
In ^org\.eclipse\.(gef|draw2d) the ^ means that the matching String has to start
with the following characters which is org.eclipse.(gef|draw2d). Dots have to be
escaped as they are the regex character for ‘any character’. Similar to Java the pipe
symbol | marks a boolean OR operation. So basically anything that starts with
org.eclipse.gef or org.eclipse.draw2d will match the first locator and anything that
starts with org.eclipse that is not gef or draw2d will match the last locator.
After the component name is matched by a locator it will pass on to a searchPath.
Search paths are a way to map remote or local locations to locators which in turn
matches patterns. Search paths hold a provider with specific details on the possible
whereabouts of the component. Both of the providers have the readerType p2 and
component type eclipse.feature and osgi.bundle. This component type parameter can
have the same values as I mentioned earlier.
The possible reader types are the following:
1. cvs
2. svn
3. git
4. p4
5. maven, maven2
6. p2
7. eclipse.import
8. url
9. url.catalog
10. url.zipped
11. local
CVS, SVN, Git and p4 are all reader types that match the corresponding versioning
systems. As the name implies Maven readers can read Maven repositories similar to
url.catalog. P2 is the reader type that will be used lots when working with Eclipse RCP
as it can read directly from p2 repositories. Eclipse.import replicates the Eclipse IDE
import utility. Url is used to point at one artifact e.g. a jar or dll. Url.catalog is more
advanced and can read multiple directories. Url.zipped can read directly from a zip and
the local reader can read directly from existing components. Local is usually used when
the materializing has already been done by another system e.g. an SVN checkout.
The uri that corresponds with the gef provider points directly to the GEF p2 repository.
This is enough for Buckminster to find the required component on the condition that the
component exists in this repository.
With the RMAP, Eclipse and the Eclipse Graphical Editing Framework can be located.
You may have noticed that the mutable and source flags are both set to ‘off’. This is
because the required components are not source plugins and should not be mutable.

29
Materialize
It is now possible to materialize Eclipse and GEF by using the RMAP in the CQUERY,
which now looks like this:
<?xml version="1.0" encoding="UTF-8"?> <cq:componentQuery xmlns:cq="http://www.eclipse.org/buckminster/CQuery-1.0" resourceMap="file:/C:/bucky_props/gef.rmap"> <cq:rootRequest name="org.eclipse.gef.rootfeature" componentType="eclipse.feature"/> </cq:componentQuery>
Snippet 5: CQUERY
Every dependency would be resolved and materialized with this CQUERY. In a headless
Buckminster installation this would work as follows:
buckminster import "gef.cquery”.
This action would start the entire resolve procedure. When everything is resolved into a
BOM, Buckminster will proceed by downloading the entire dependency tree.
Build
The hardest task in Buckminster builds has now been completed. A fully materialized
workspace can be used to run all kinds of builds by Buckminster. With the exception of
some properties these build tasks can all be used without any user-input.
The build tasks are defined as attributes and can vary per component type. A complete
list of attributes per type is available in the BuckyBook. I will discuss only one
component, the eclipse.feature, as all of my work during the internship revolved around
building P2 repositories.
An eclipse.feature has many public attributes, the most important once regarding P2
repositories are the following:
1. feature.exports
2. site.p2
3. site.p2.zip
Feature.exports calls the copy.features and the copy.plugins actions which in turn will
call feature.jars, source.feature.jars, bundle.jars and source.bundle.jars. It will make
sure all the referenced and included features and plugins are built and exported.
Site.p2 will call features.exports directly or indirectly depending on some properties. It
will take the input of features.exports and perform a P2 publish action. It will make use
of any category.xml file included in the feature project.
Finally the site.p2.zip action calls the site.p2 action and directly zips the input, creating
an archive of a P2 repository that can easily be moved to other locations.
This short explanation of Buckminster is nowhere close to explaining all the
functionalities of the build tool. Everything is documented in the 286 page BuckyBook
which is available on the Eclipse website.
30
3.5 Java Distributed Computing Frameworks
When multiple computers are connected through a network and interact together to
reach a common goal you can talk about distributed computing.
The most important part in distributed computing is the distribution of computation
tasks. Tasks have to travel across the network to be executed remotely therefore they
need to be serialized and streamed over a socket using a communication protocol.
Distributed programming involves the same problems as multithreaded programming.
Most modern applications are built around shared memory and mutable state. In Java
nearly everything is done by getters and setters, it has become such a habit for most
programmers. Just think about loops for a second, it is common to adjust a value in a
loop. This means the value is in a mutable state. When that loop has to run in parallel
the value will be accessed concurrently, this means that a piece of memory is being
shared between two tasks.
There are plenty of Java frameworks that make distributed computing easier by
abstracting the network programming from the developer and by pushing the correct
design principles.
3.5.1 Akka
Akka is a framework that is mainly used to simplify concurrent programming on the
JVM. It is written in Scala with a complete Java API.
Akka abstracts parallelism and concurrency from the developer by introducing the
Actors model. Actors eliminate the need of thread management and locking making it
easier to write concurrent applications.
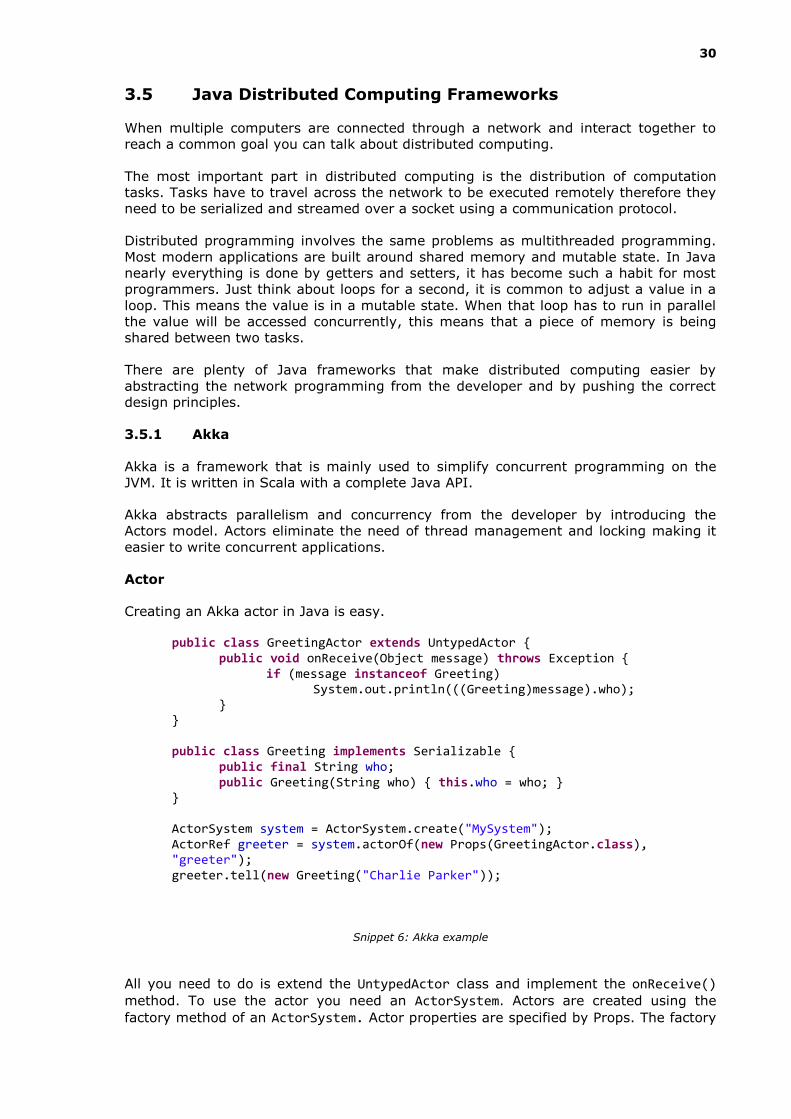
Actor
Creating an Akka actor in Java is easy.
public class GreetingActor extends UntypedActor { public void onReceive(Object message) throws Exception { if (message instanceof Greeting) System.out.println(((Greeting)message).who); } } public class Greeting implements Serializable { public final String who; public Greeting(String who) { this.who = who; } } ActorSystem system = ActorSystem.create("MySystem"); ActorRef greeter = system.actorOf(new Props(GreetingActor.class), "greeter"); greeter.tell(new Greeting("Charlie Parker"));
Snippet 6: Akka example
All you need to do is extend the UntypedActor class and implement the onReceive()
method. To use the actor you need an ActorSystem. Actors are created using the
factory method of an ActorSystem. Actor properties are specified by Props. The factory

31
method does not return an actual actor but a reference to it. An ActorRef is serializable
and network-aware.
A message is passed to an actor by calling the tell() method on its reference. This
message has to be serializable and should be completely immutable. As Akka cannot
force immutable state in Java this should be seen as a convention.
Distributed computing
Actors can be integrated in distributed computing fairly easy as they are isolated by
design. You need a configuration file on each machine if you want to enable the remote
features of Akka.
akka { actor { provider = "akka.remote.RemoteActorRefProvider" deployment { /greeter { remote = akka://MySystem@machine1:2552 } } } }
Snippet 7: Akka remote config
The configuration instructs the system to deploy Greeter on machine1 using the
ActorSystem, MySystem. It is also possible to deploy systems programmatically, thus
dynamically.
If you take the code from the Akka example and add more computers to the topology,
each running the following lines of code. Actors will be deployed remotely and results
processed locally.
//------------------------------ //on machine 1: empty system, target for deployment ActorSystem system = ActorSystem.create("MySystem"); //------------------------------ //on machine 2: Remote Deployment - deploying on machine1 ActorSystem system = ActorSystem.create("MySystem"); ActorRef greeter = system.actorOf(new Props(GreetingActor.class), "greeter"); //------------------------------ //on machine 3: Remote Lookup (logical home of “greeter” is machine2, remote deployment is transparent) ActorSystem system = ActorSystem.create("MySystem"); ActorRef greeter = system.actorFor("MySystem@machine2:2552/user/greeter"); greeter.tell(new Greeting("Sonny Rollins"));
Snippet 8: Akka remote example
In this case machine 1 is the deployment machine, machine 2 houses the Actor, in this case the Greeter and machine 3 sends the Greeting message.

32
Machine 3 will request an actor on machine 2 and send a Greeting message. Machine 2
will deploy the actor on machine 1 as written in the config. The actual GreetingActor
will execute on the 3rd machine.
Conclusion
Akka is a very solid framework. It is designed for concurrent computing and it fits the
bill perfectly. Correct concurrent design is enforced through the Actor system. It was
however primarily designed for multithreaded concurrent computing. As of version 2.0
it is still lacking support for multiple topologies. Basic remote computing is possible but
a self-expanding dynamic grid is not.
Version 2.1 of Akka will have cluster support in the form of a peer-to-peer topology.
Akka is definitely a future contender as distributed computing platform for a Java or
Scala environment.
3.5.2 JPPF
The Java Parallel Processing Framework is designed to distribute tasks across multiple
machines. Applications with large processing requirements are the main target of this
approach. JPPF aims to make the implementation of such an approach as easy as
possible.
A JPPF grid consists of three main identities; the client, the driver and the node. A JPPF
client submits tasks, these tasks are small parts of the actual program that can be run
in parallel and in isolation. A JPPF driver receives tasks from the client and distributes
the tasks to nodes. Nodes receive tasks and process them, upon completion they send
their results to the driver. A JPPF driver collects results and sends these back to the appropriate client.
Client
Every JPPF machine can be configured through a .properties file. The most important
client-side configurations consist of the following values. For the complete configuration possibilities please consult the JPPF website.
http://www.jppf.org/doc/v3/index.php?title=Client_and_administration_console_config
uration
Table 2: JPPF client configuration
jppf.drivers A space separated list of drivers the client may connect to.
driver-1.jppf.server.host Hostname or IP address of the JPPF driver.
driver-1.jppf.server.port Port on which the JPPF driver is listening.
driver-1.priority Priority given to this JPPF driver.
driver-1.jppf.pool.size Size of the connection pool reserved for Driver-1.
jppf.discovery.enabled Boolean flag indicating whether or not a Client should
automatically discover JPPF drivers by listening to a UDP
multicast.
jppf.local.execution.enabled Boolean flag indicating whether or not tasks should be
executed in the Client’s JVM.
You are not limited to driver-1, you could create driver-2, driver-3, etc... By statically
assigning a hostname to a driver you can avoid lots or routing issues. The downside is that you cannot dynamically add JPPF drivers to a grid.

33
A fail-over system is created by creating two or more drivers with different priorities,
likewise a load-balancing system is created by using two or more drivers with the same
priority. Load-balancing between drivers should not be confused with balancing the execution of tasks as this is a driver’s job.
Enabling JPPF discovery means a client will dynamically pick up drivers that are enabled
with multicasting. To use this effectively on a larger network you would have to configure routers to route UDP multicast correctly.
Enabling the local execution feature can greatly speed up an executing process. It
means that the local client JVM will be used to process tasks as well. Tasks will be offloaded to the local JVM and to a JPPF driver.
Driver
A JPPF driver also reads its configuration from a .properties file. As I did with the JPPF
client I will list the most important values below.
Table 3: JPPF driver configuration
jppf.server.port The port on which the JPPF driver will listen to for
connections.
jppf.discovery.enabled Enable automatic discovery for this JPPF driver. This
will turn on a UDP multicast.
jppf.peer.discovery.enabled Enable automatic discovery of other JPPF drivers to
acquire a peer-to-peer connection.
jppf.load.balancing.algorithm The algorithm used to determine the load-balancing of
tasks.
jppf.load.balancing.strategy The algorithm-specific settings.
jppf.local.node.enabled A Boolean flag indicating whether or not a driver
should process tasks in its own local JVM.
A JPPF driver has sufficient default configurations to be used in a regular environment.
By enabling peer discovery you can establish an automatic peer-to-peer connection
between drivers. This setup has the same limitations as automatic discovery, you need
to configure your network to route multicasts properly.
Enabling the local node will give a JPPF driver the ability to compute tasks on its own.
The main advantage is that a driver can contribute to the process while eliminating the
network overhead of running a driver and a node on the same machine. Passing tasks to a local node happens through memory and not over the network.
Load-balancing is a very important aspect of JPPF, I will dedicate a chapter on this in
‘JPPF In Depth’.

34
Node
A JPPF node will execute tasks, as every other JPPF component its customizable through properties. The most important values are listed below.
Table 4: JPPF node configuration
jppf.server.host Hostname or IP address of the JPPF driver.
jppf.server.port Port on which the JPPF driver is listening.
jppf.discovery.enabled Boolean flag indicating whether or not a Node should
automatically discover JPPF drivers by listening to a UDP
multicast.
These three main settings are similar to those of a JPPF client and the same restrictions
apply.
Getting Started
public class JPPFExample { 1 2 private JPPFClient client; 3 4 public static void main(String[] args) throws JPPFException, Exception { 5 new JPPFExample(); 6 } 7 8 public JPPFExample() throws JPPFException, Exception { 9 client = new JPPFClient(); 10 11 // Submit a job to the client and wait for results. 12 List<JPPFTask> submit = client.submit(createJob()); 13 14 for (JPPFTask jppfTask : submit) { 15 System.out.println(jppfTask.getResult()); 16 } 17 } 18 19 private JPPFJob createJob() throws JPPFException{ 20 // Create a jppf job and add new tasks. 21 JPPFJob jppfJob = new JPPFJob(); 22 jppfJob.addTask(new InfoGrabber()); 23 jppfJob.addTask(new InfoGrabber()); 24 return jppfJob; 25 } 26 } 27
Snippet 9: JPPF client example
In this piece of code you can see the JPPFClient being created. This object will handle
the submitting of jobs. The createJob() method factories a job that holds two tasks.
By submitting a job to the JPPFClient it will be sent to a JPPF driver which, in turn, will
distribute it to nodes for execution. All the results are later processed by iterating through the JPPFTask list.

35
The JPPFTask used in the example, an InfoGrabber, is a very simple class. It can be
compared to a Callable.
public class InfoGrabber extends JPPFTask { @Override public void run() { System.out.println("Grabbing info..."); try { setResult(new File(".").getCanonicalPath()); } catch (IOException e) { setException(e); } System.out.println("Finished the attempt."); } }
Snippet 10: JPPF task - InfoGrabber
This task shows two great features of a JPPFTask, error handling and result handling.
You can set custom exceptions with a tasks setException() method. The same thing
can be done for results.
In the example it will print two lines on the execution node while setting either the local path or an exception.
As you can see programming with JPPF is very easy. There are five main steps involved.
1. Initialize a JPPFClient, this will handle the offloading to a JPPF Driver which, in
turn, will offload tasks to JPPF Nodes.
2. Create tasks that should be executed.
3. Create a JPPFJob to hold the tasks.
4. Submit the job through the client to the driver.
5. Process results.
Conclusion
JPPF is a solid framework built for transparent distributed computing in Java. It can
provide many topologies through simple settings in the configuration file. Tasks are serialized which can create some overhead.
3.5.3 Other Notable Frameworks
Other frameworks that really deserve to be mentioned that I did not thoroughly test:
ProActive, http://proactive.inria.fr/
JADIF, http://jadif.sourceforge.net
Gridgain, http://www.gridgain.com/

36
3.5.4 Comparison
By comparing JPPF with Akka for the features that are most important in my thesis I
came to the following conclusion:
Table 5: JPPF vs Akka
Feature JPPF Akka
Extensive topology support
Switch from local to
distributed
Load-balancing
Open-source Apache 2.0 Apache 2.0
Supports existing Java
paradigms
Futures, Callables,
Runnables
Callables and Runnables
through wrappers
Although the actual code and design principles of Akka are more appealing to me than
JPPF I would still go for JPPF if the main goal is to create a distributed platform.
JPPF is very mature in the creation of topologies because of the driver principle. It is a
framework that is designed to create topologies. Akka on the other hand was extended
with distributed computing and while I am not saying that the same topologies are not
possible with Akka, they will be a lot harder to create and maintain.
The last deciding factor is that JPPF allows the usage of existing Callables and
Runnables making it possible to use existing code without making intrusive changes.

37
3.6 JPPF in depth
There is more to JPPF than what was written in the previous section. Some more
advanced topics will be addressed here. Class loading in particular played an important
role in my internship work.
3.6.1 JPPFTasks, Annotated tasks, Callables, Runnables, POJOs and non-
Java commandline tasks
A task is the object that will serve as an execution unit to the JPPF framework. There
are many classes that can serve as a task for the JPPF framework. Each has its perks
and downsides.
JPPFTask
A JPPFTask is an abstract implementation of the Task interface.
public interface Task<T> extends Runnable, Serializable { T getResult(); void setResult(T result); Exception getException(); void setException(Exception exception); DataProvider getDataProvider(); void setDataProvider(DataProvider dataProvider); String getId(); void setId(String id); void onCancel(); void onTimeout(); Object getTaskObject(); JPPFSchedule getTimeoutSchedule(); void setTimeoutSchedule(JPPFSchedule timeoutSchedule); int getPosition(); void setPosition(int position); }
Snippet 11: Task interface
A JPPFTask is the implementation of Task<Object>, this has some implications. It
means you can set any result as an object but it also means that you have to cast each
result.
You have seen the basic result and exception handling in the InfoGrabber example,
simply use the setters for results and exceptions. Even without explicitly setting
exceptions there will never be an actual exception on the node. All exceptions that are
thrown in the run block of the task will be caught and automatically wrapped, similar to the setException() method.

38
As you can see a Task also exposes hooks to act upon life cycle changes. The run
method from the Runnable interface is the most obvious hook and will manage the
execution code of a task. There are two more methods, onCancel() and onTimeout(), as the names say these provide hooks for cancel and timeout actions on a task.
public class WebServiceGrabber extends JPPFTask { private IWebService service; @Override public void run() { service = new WebService(); service.open(); setResult(service.getData()); } @Override public void onTimeout() { service.close(); setException(new JPPFException("Service did not respond in time.")); } @Override public void onCancel() { service.close(); } }
Snippet 12: Cancel and Timeout JPPF example

39
Annotated tasks
JPPF tries to remain as transparent as possible. It provides an annotation that makes it
possible to turn existing POJOs into JPPFTasks.
public class SerInfoGrabber implements Serializable{ public static void main(String[] args) throws JPPFException { JPPFJob job = new JPPFJob(); job.addTask(new SerInfoGrabber(), true); } @JPPFRunnable public String grabInfo(boolean absolute) throws IOException { System.out.println("Grabbing info..."); if(absolute) return new File(".").getAbsolutePath(); return new File(".").getCanonicalPath(); } }
Snippet 13: Serializable Annotated POJO InfoGrabber
As you can see the annotation marks the method that has to be executed. To add a
task to a job you pass an instance of the annotated POJO and the arguments.
There are several restrictions involved with the annotation.
Non-static annotated methods require a serializable POJO
Non-void methods will have their return value set as the tasks result There is no way to access onCancel() and onTimeout() methods
It is possible to annotate static methods and constructors, there is an overloaded addTask() method on JPPFJobs that can handle these situations.
public class StaticInfoGrabber { public static void main(String[] args) throws JPPFException { JPPFJob job = new JPPFJob(); job.addTask(StaticInfoGrabber.class, true); } @JPPFRunnable public static String grabInfo(boolean absolute) throws IOException { System.out.println("Grabbing info..."); if(absolute) return new File(".").getAbsolutePath(); return new File(".").getCanonicalPath(); } }
Snippet 14: Static Annotated POJO InfoGrabber

40
Callables and Runnables
Callable and Runnable classes suffer the same restrictions as annotated tasks, they
have to be serializable and there is no way to access the cancel or timeout hooks.
public class CallableInfoGrabber implements Callable<String>{ private boolean absolute; public static void main(String[] args) throws JPPFException { JPPFJob job = new JPPFJob(); job.addTask(new CallableInfoGrabber(true)); } public CallableInfoGrabber(boolean absolute) { this.absolute = absolute; } @Override public String call() throws Exception { System.out.println("Grabbing info..."); if(absolute) return new File(".").getAbsolutePath(); return new File(".").getCanonicalPath(); } }
Snippet 15: Callable InfoGrabber
Callable and Runnable tasks are wrapped in a similar manner with one main
difference. The return value of call() will be set as the tasks result.

41
POJO
The most transparent way of using a POJO as a JPPF task is by providing the addTask()
method with additional information.
public class InfoGrabber { public static void main(String[] args) throws JPPFException { JPPFJob job = new JPPFJob(); // Constructor job.addTask("InfoGrabber", InfoGrabber.class, true); // Static info method job.addTask("grabStaticInfo", InfoGrabber.class, true); // Info method job.addTask("grabInfo", new InfoGrabber(), true); } public InfoGrabber() { } public InfoGrabber(boolean absolute) throws IOException { System.out.println("Printing info with the constructor!"); if(absolute) System.out.println(new File(".").getAbsolutePath()); System.out.println(new File(".").getCanonicalPath()); } public static String grabStaticInfo(boolean absolute) throws IOException { System.out.println("Grabbing info with a static method..."); if(absolute) return new File(".").getAbsolutePath(); return new File(".").getCanonicalPath(); } public String grabInfo(boolean absolute) throws IOException { System.out.println("Grabbing info..."); if(absolute) return new File(".").getAbsolutePath(); return new File(".").getCanonicalPath(); } }
Snippet 16: Regular POJO InfoGrabber
As you can see, depending on the type of method you need to supply different
arguments. It is very similar to the annotated tasks but instead of marking the
execution method you simply pass it along.

42
CommandLineTask
Running native applications in Java always follows the same process over and over
again: building the command, setting variables, setting the directory, launching the
process and eventually capturing the stdout and stderr.
JPPF provides you with a CommandLineTask to make all of this easier.
public class NativeInfoGrabber extends CommandLineTask { public void run() { setStartDir(".."); setCommandList("cmd", "/C", "dir"); setCaptureOutput(true); try { launchProcess(); String err = getErrorOutput(); if (err.equals("")) setResult(out); else setException(new Exception(getErrorOutput())); } catch (Exception e) { setException(e); } } }
Snippet 17: CommandLine InfoGrabber

43
3.6.2 Class Loading in JPPF
The execution of tasks is not the only distributed thing in the JPPF framework, the class
loading mechanism is too. This makes it possible to execute code that has not been
deployed on the node.
This mechanism is completely transparent to the developer. A good understanding of
how classes are loaded will save developers lots of headaches when doing distributed
computing through JPPF.
Delegation
JPPF follows the same delegation principle to load its classes. As explained in the Java
section of this thesis it is possible to add custom loaders into the delegation model.
Figure 9: Class loading delegation model in JPPF
Remote class loading request
Figure 10: Class loading request
When a node requires a class four steps are taken:
1. Node sends request to the driver
2. Driver forwards the request to the correct client
3. Client sends the class definition to the driver
4. Driver forwards the class definition to the node
After these steps a node has the correct class definition and can define its own
instances just as it can with any other Java class.

44
3.6.3 Load-balancing
Load-balancing in JPPF is done on the driver. This concept defines how many tasks will
be sent to each node and will greatly influence the performance.
Figure 11: Load-balancing
A set of tasks that are being submitted for distribution is called a Job. These tasks are
then sent to nodes for execution. A group of tasks that is sent to nodes is called a
bundle.
Defining the size of these bundles is load-balancing. It can greatly affect the
performance when your computing grid is not identical e.g. Node 1 has a slower
network connection than Node 2. The biggest differences will probably be due to the
CPU speed or the number of cores. It doesn’t make sense to send four tasks to a single
core machine and 1 task to a quad core machine.
JPPF comes with four predefined algorithms. If these do not suit your needs you can create custom load-balancers by implementing the Bundler interface.
public interface Bundler { // Get the current size of bundle. int getBundleSize();
// Feedback the bundler with the result, data will be execution time and number // of tasks that were executed.
void feedback(final int nbTasks, final double totalTime); // Make a hard copy of this bundler. Bundler copy(); // Get the timestamp at which this bundler was created. long getTimestamp(); // Release the resources used by this bundler. void dispose(); // Perform context-independent initializations. void setup(); // Get the parameters profile used by this load-balancer. LoadBalancingProfile getProfile(); }
Snippet 18: Bundler interface
Bundlers are feedback driven. The next bundle size should be changed with the
additional information that has been made available through the feedback method. A
driver will create a bundler per node that is connected to it. When a node returns tasks
after execution it will call the feedback method on a bundler to update its information.

45
Each bundler has a load-balancing profile. It is the setting module for the bundler and
makes it possible for the user to define parameters. The parameters are defined by the
bundler implementation.
Manual algorithm
The manual algorithm is the most basic usable implementation of a Bundler. It has a
profile on which you can set a size. This size will be the fixed size used in each bundle.
# algorithm name jppf.load.balancing.algorithm = manual # name of the set of parameter values or profile for the algorithm jppf.load.balancing.strategy = manual_profile # "manual" profile strategy.manual_profile.size = 1
Snippet 19: Manual algorithm configuration
It is only useful in identical computing grids or for testing purposes.
Autotuned algorithm
The autotuned algorithm is based on the Monte Carlo algorithm. It is feedback based
and does not rely on information regarding hardware or software of the node. It makes
slight alterations every time it gets updated through the feedback method after which is
randomly chooses a new solution.
# specify the algorithm task.bundle.strategy = autotuned # name of the performance profile to use task.bundle.autotuned.strategy = optimized_strategy # define the algorithm parameters strategy.optimized_strategy.minSamplesToAnalyse = 100 strategy.optimized_strategy.minSamplesToCheckConvergence = 50 strategy.optimized_strategy.maxDeviation = 0.2 strategy.optimized_strategy.maxGuessToStable = 50 strategy.optimized_strategy.sizeRatioDeviation = 1.5
Snippet 20: Autotuned algorithm configuration

46
Proportional algorithm
The proportional algorithm is purely based on the feedback and known performance of
the nodes. It will recalculate the bundle size for each node every time information is
provided through the feedback method. This makes it unsuitable for weak drivers or for
large grids as the computational overtime will severely hurt the performance.
# specify the algorithm task.bundle.strategy = proportional # name of the performance profile to use task.bundle.autotuned.strategy = optimized_strategy # define the algorithm parameters strategy.optimized_strategy.performanceCacheSize = 2000 strategy.optimized_strategy.proportionalityFactor = 2
Snippet 21: Proportional algorithm configuration
Rl algorithm
The rl algorithm is based on the artificial intelligence technique called reinforcement
learning. Explaining the algorithm is out of the scope of this document. I suggest you
read up on ‘reinforcement learning’.
# algorithm name jppf.load.balancing.algorithm = rl # name of the set of parameter values or profile for the algorithm jppf.load.balancing.strategy = rl_profile # "rl" profile strategy.rl_profile.performanceCacheSize = 3000 strategy.rl_profile.performanceVariationThreshold = 0.001
Snippet 22: Rl algorithm configuration
Nodethreads algorithm
Nodethreads is the simplest useful algorithm. It sends a static amount of tasks to a
node relative to the amount of cores. If you have an identical grid speed/core and
network wise this is the perfect algorithm.
# algorithm name jppf.load.balancing.algorithm = nodethreads # name of the set of parameter values or profile for the algorithm jppf.load.balancing.strategy = nodethreads_profile # means that multiplicator * nbThreads tasks will be sent to each node strategy.nodethreads_profile.multiplicator = 1
Snippet 23: Nodethreads algorithm configuration

47
3.6.4 Basic JPPF Topology
JPPF has support for many topologies and configurations. Due to its design; submitting,
routing and executing can all be separated from each other. Each part is written with
compatibility and freedom in mind. If a developer wishes to create another setup there
is little to stand in his way.
Figure 12: Basic topology
This topology shown above is the most basic JPPF topology, it is the topology I used in
my earlier example. A separate JVM is used for clients, drivers and nodes. The picture
shows the JVMs on separate computers but this is not required.
This setup in networking terms is called a star topology as everything connects to a
centralized machine, in this case the JPPF driver. It would be possible to turn on
automatic discovery of drivers in this topology but in the topology below we would run
into a problem.
Figure 13: Basic topology with a router

48
As I have mentioned before, the automatic discovery in JPPF is done by means of an
UDP multicast. To have a working multicast environment across different subnets your
routers need to support it. The routers that do support routing multicast traffic usually
have it disabled by default. In companies it is often impossible to support multicast
routing. Depending on the size I would recommend against the automatic discovery in
this topology.
The default configuration of clients and nodes could easily house a static hostname for
the JPPF driver. This would enable dynamic deployment of nodes and clients in any kind
of network without relying on multicast traffic.
The basic topology is a powerful one, it is however prone to error because of the single
point-of-failure in the driver, as is the problem with every star topology.
Figure 14: Basic topology with fall back
The figure above shows the fall back solution. The SPOF can easily be removed by
adding a second driver with a lower priority. All routing will still be done the driver with
the highest priority. On failure, clients and nodes will be able to contact the fall back.

49
3.6.5 Basic Peer-to-Peer Topology
I’ve already mentioned a peer-to-peer setting in the configuration example of JPPF
drivers. What this means is a driver-to-driver connection as shown below.
Figure 15: Basic peer-to-peer topology
Driver 1 will see all the nodes connected to driver 2 as nodes that are connected to
driver 1. The peer-to-peer connection makes it possible to use all nodes in the entire
grid while clients and nodes connected to driver 1 do not need to know the specifics of
driver 2. This could be a way to cross subnets with a single connection keeping each
configuration isolated to its subnet. Fixing the subnet specific SPOFs can be done in a
similar matter as with the star topology.

50
3.6.6 Pure Peer-to-Peer Topology
The previous topology had separate machines for drivers and nodes. Remember the
local node option I talked about during the driver configuration? By combining all the
options of a driver, a full-fledged peer-to-peer network is possible. The topology would
look like this:
Figure 16: Pure peer-to-peer topology
Turning on auto-discovery you could create a grid that is completely dynamic. Each
driver supplies its own execution node. When your network allows multicast transport
this option will provide you with a completely dynamic grid. Deploying an extra node is
easy and there is no SPOF.
Though at first sight this may look like the best possible topology, depending on your
situation it may not be. The multicast problem applies here as well, which in any
reasonably sized network will cause problem and severely limit the dynamic capabilities
of the peer-to-peer grid.
In JPPF a task is sent from client to driver and eventually to node. By using a local node
a driver can pass the task on through memory but it still needs to pass its task. Load-
balancing is also done by a driver, so a driver with complete knowledge of the grid can
provide better load-balancing. These are two main issues with the pure peer-to-peer
topology and might be enough to keep you from using it.

51
3.7 Windows Service for Java
Long-running applications in Windows are often configured and installed as services.
Windows services run in their own sessions and are user-independent. Services can
start automatically upon boot and can be paused or restarted. They do not have a user
interface and are typically configured and controlled through another application that
interfaces with the service such as tray icon menus.
A windows service is not an ordinary application and a regular Java executable is not fit
to run as one. To solve these issues wrappers have been developed to wrap Java
applications into a windows service.
3.7.1 Yet Another Java Service Wrapper
YAJSW is such a service wrapper, it is written in Java for Java. It is en implementation
and expansion of the Java Service Wrapper by tanuki. JSW is a dual licensed
GPL/Commercial program.
YAJSW is licensed as LGPL and has more features than JSW. Some key features that I
will use are the System Tray and GUI console.
It is rather straightforward to use. The download contains many folders, the ones that
are most important are the ./bat and ./conf directories. These contain the startup and
configure scripts as well as the configuration.
Getting started
YAJSW comes with a solid default configuration file that is fully documented in
./conf/wrapper.conf.default, it should serve as a default foundation for any application.
The first thing to do in a new wrapping configuration is defining how to find the JRE.
# Java Application #wrapper.java.command=java # or define conditions for YAJSW searching for a JVM # currently only valid for windows wrapper.java.command.minVersion=1.5 wrapper.java.command.maxVersion=1.7 #wrapper.java.command.jreOnly=true wrapper.java.command.jdkOnly=true #wrapper.java.command.preferJre=true #wrapper.java.command.preferJdk=true #wrapper.java.command.javaw=true
Snippet 24: YAJSW configure JRE
You can do this by specifying the command name which could be an absolute or
relative path or by configuring YAJSW to search for one.
After having a JRE configured you need to specify your to-be-wrapped program.

52
# Java Application main class wrapper.java.app.mainclass=com.jnj.hello.jppf.JPPFExample # or jar file #wrapper.java.app.jar=
Snippet 25: YAJSW configure application
There are two ways to specify a Java program, either by configuring its main class or
by configuring an executable jar.
# Java Classpath (include wrapper.jar) Add class path elements as # needed starting from 1 #wrapper.java.classpath.1= # Java Library Path # YAJSW: required dll are encapsulated in jar files -> only library path of your application required wrapper.java.library.path.1=../lib # Java Additional Parameters #wrapper.java.additional.1= # Initial Java Heap Size (in MB) # alternative for wrapper.java.additional.<n>=-Xms #wrapper.java.initmemory=3
Snippet 26: YAJSW configure extra application parameters
A Java application rarely runs on its own, you can specify classpath and library entries
as well as extra JVM parameters in the configuration file. There are special parameters
made for convenience e.g. wrapper.java.initmemory which act as an alias to JVM
parameters.
# Name of the service wrapper.ntservice.name=yajsw # Display name of the service wrapper.ntservice.displayname=yajsw # Description of the service wrapper.ntservice.description=yajsw
Snippet 27: YAJSW configure Windows service parameters
The whole point in using this wrapper is the creation of services. These services are
controlled in the services.msc window provided by the Windows operating system. This
window displays extra information for services such as name, displayname and the
description. These can be configured in YAJSW as well using the appropriate
parameters.
You can find an in depth explanation of how I used YAJSW in PHAEDRA in the chapter
about headless PHAEDRA.

53
3.8 Jenkins
Jenkins is an open-source application that monitors and executes repeated jobs. A
perfect example of such a job is the building process of a software project. Jenkins
focuses on two main things:
1. Delivering a continuous build and testing environment for projects
2. Monitor execution of external jobs
I will primarily discuss features of the first focus point as this is how I used Jenkins
during my thesis. Their second focus point is not to be taken lightly though, in lots of
organizations people have problem monitoring cron jobs successfully. The monitoring is
usually done by reading e-mails. This is not an effective way of monitoring at all,
Jenkins can keep track of the success of cron jobs for you.
Jenkins is written in Java and comes with a ready-to-deploy .war file. There is no
additional installation needed, not even a database setup.
3.8.1 Hudson
Jenkins was first known as Hudson. Hudson was a tool initially created by Kohsuke
Kawaguchi. After a disagreement on between the original Hudson community and
Oracle a community vote was held to decide the future of the Hudson project. The
votes severely tipped over into the favor of forking the project under a different name.
Oracle still holds the rights to the name Hudson so simply taking over the original name
was not an option. The newly forked project was called Jenkins. The new project was,
and still is, led by its original founder, Kohsuke Kawaguchi. Due to the strong faith in
Kohsuke Kawaguchi most of the community and users switched from Hudson to
Jenkins.
3.8.2 Plugins
A very important aspect of Jenkins is its plugin system. By default there is little that
Jenkins can do, this means you start with a very lean product. Jenkins currently has
over 570 plugins available. The list is huge and contains nearly everything you would
want. It has support for all the versioning systems from Accurev to Subversion.
Part of the reason of why there are so many plugins and extra functionalities available
for Jenkins is the process you have to go through to make a plugin. Jenkins was built
with plugins in mind. Similar to Eclipse RCP, Jenkins has extension points. It makes it
very easy for other users to contribute code. A plugin merely has to implement an
extension point interface. Users can also define their own extension points which makes
Jenkins a very extendable project.
3.8.3 Build
The main feature that I used during my internship was the automatic building system.
Jenkins has support for many versioning systems and build tools through the plugin
system.
It is a very easy task to setup a Jenkins task which will first checks out a Subversion
repository and later run an Ant task.

54
Getting Started
Jenkins has its own user system with authentication and permissions, make sure you
have sufficient permissions when following these steps.
First you will have to create a new Jenkins job like in the image below, you do this with
the ‘new job’ wizard. With this little example project you should just choose a free-style
project. This is basically a clean template that allows you to build any code from any
versioning system with any build tool.
Figure 17: New Job
Next a configuration wizard will show like the image below. This is the main page for a
Jenkins job. You will configure everything from setting up the code to executing the
actual build process. I will keep it real simple and create an easy setup that will
continuously build the project that was used during the Ant example.
Figure 18: Job configuration
These are the only properties required for the little local Ant build. The example
directory will contain sources in the /src file and a build.xml in the root. When adding
an Ant step to Jenkins, Jenkins will automatically call a build.xml in the root if present.
You specify the targets you made in the Ant example which are ‘compile’ and ‘jar’. I
want Jenkins to invoke these actions daily but I do not want to be interrupted at during
the day. Jenkins has a scheduling system similar to cron, 0 22 * * * will built at 22:00
every day of the week, every day of the month and every month.

55
4 OFFLOADING PHAEDRA ON A GRID
The main goal of my internship was to build a proof-of-concept grid computing backend
for all computationally expensive tasks in the PHAEDRA application.
I went through certain phases, each with its own technical difficulties. In this chapter
you will be able to find a thorough explanation of my work regarding Java grid
computing using the JPPF framework.
4.1 JPPF in an OSGi Environment
Since OSGi does not load classes in the traditional hierarchical manner. Basic OSGi
knowledge and an understanding of the JPPF class loading mechanism is needed to
completely understand this section.
4.1.1 PHAEDRA Structure
PHAEDRA is a layered application as shown below. Layers are basically dependency
restrictions and are necessary in enterprise-level applications as they provide a solid
structure and vastly increase the maintainability of a codebase.
Figure 19: PHAEDRA structure
Plugins of upper layers can have dependencies to plugins of lower layers but not the
other way around, e.g. a plugin that resides in the third party layer is not allowed to
depend on a plugin from the HCA layer. Keeping this rule in mind will force developers
to make correct design choices. If one breaks this rule you could end up in dependency
cycles as shown below.
Figure 20: Dependency loop

56
Say there is a plugin A which resides in the HCA layer and a plugin B which is part of
the Screening layer. Plugin A depends on plugin C from the Screening layer while B also
depends on plugin C. This will not cause any problems, if the rule were to be broken
and C made dependent of A, a dependency loop would have been created.
PHAEDRA is a very multi-featured program. It requires statistical analysis, image
analysis and very use-case specific calculations.
To solve these problems in the most optimal way PHAEDRA uses lots of third party
libraries. In total there are over 100 third party plugins that are being used at the
moment.
Figure 21: PHAEDRA computer
A few of these external libraries serve as an interface to other computational
environments. This is clearly shown in the diagram above. These include the functional
programming language designed for statistical solutions, R and the mathematics
programming environment that offers superb data analysis capabilities, MATLAB.
Naturally these services cannot be deployed remotely and even if they can be it would
not be recommended as it would have a large negative impact on performance to
transfer entire environments or libraries. This introduces my next problem.
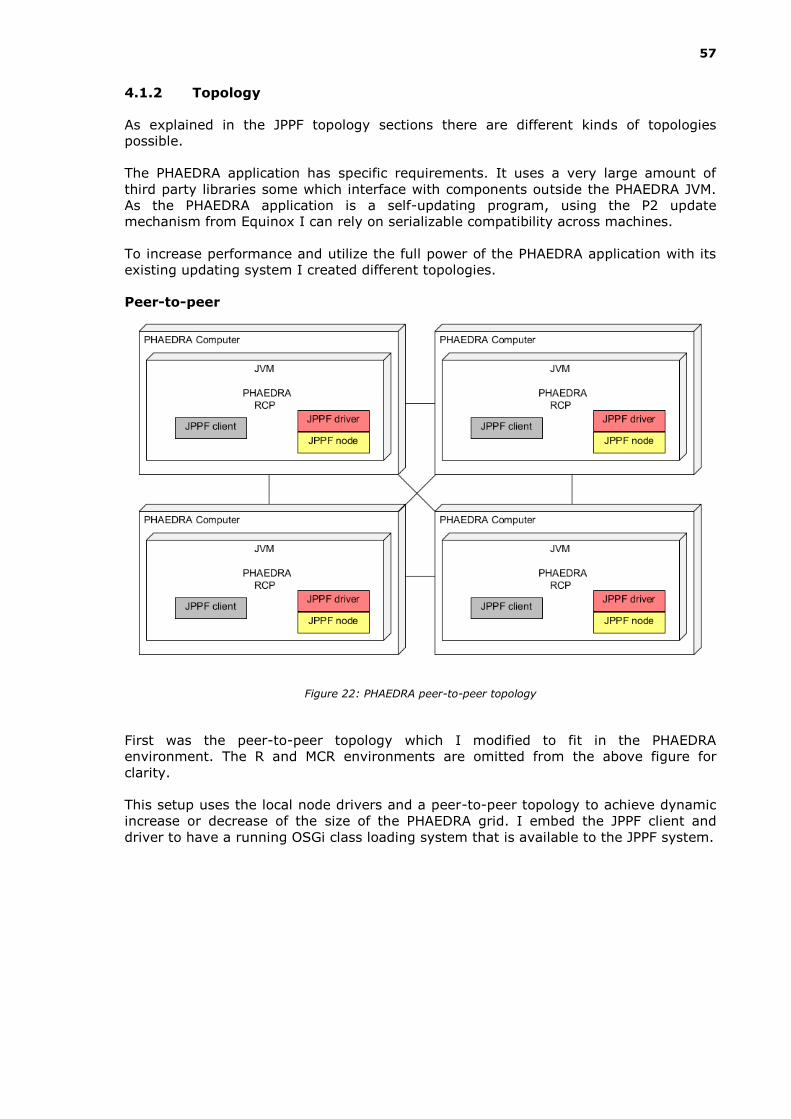
57
4.1.2 Topology
As explained in the JPPF topology sections there are different kinds of topologies
possible.
The PHAEDRA application has specific requirements. It uses a very large amount of
third party libraries some which interface with components outside the PHAEDRA JVM.
As the PHAEDRA application is a self-updating program, using the P2 update
mechanism from Equinox I can rely on serializable compatibility across machines.
To increase performance and utilize the full power of the PHAEDRA application with its
existing updating system I created different topologies.
Peer-to-peer
Figure 22: PHAEDRA peer-to-peer topology
First was the peer-to-peer topology which I modified to fit in the PHAEDRA
environment. The R and MCR environments are omitted from the above figure for
clarity.
This setup uses the local node drivers and a peer-to-peer topology to achieve dynamic
increase or decrease of the size of the PHAEDRA grid. I embed the JPPF client and
driver to have a running OSGi class loading system that is available to the JPPF system.

58
Basic topology
I liked the peer-to-peer topology as it did not have a single point of failure. JPPF
however handles load-balancing on the JPPF driver. In the peer-to-peer topology there
are lots of drivers available to each client. A random driver is picked from the grid and
used for task routing. The implications are rather large since correct load-balancing is
done by keeping statistics for each task. In peer-to-peer topologies this information is
scattered over the grid. If I use a single driver it would mean all the information gained
over time resides in one place which will provide better load-balancing.
In the peer-to-peer topology every PHAEDRA application was possibly a JPPF driver,
client and node. This might look like a very good feature but it really was not.
PHAEDRA often deals with very large datasets. An experiment’s plate usually consists of
96 wells but it can go up to 384 or even reach the thousands. A well usually consists of
10.000 points of data but there are extreme cases of 500.000 points. These points
have data attached to them and are modeled object-oriented in the PHAEDRA
application. Java has good memory management but 500.000 * 96 objects explodes
the memory usage and of course the GC activities. If one person on the PHAEDRA grid
needs to submit such a task it would render the JVM of others useless.
I quickly realized I needed to separate the grid execution code from the regular
PHAEDRA application JVM. To address both the memory issues and create the optimal
load-balancing capabilities I created another topology, strongly based on the basic JPPF
topology.

59
Figure 23: PHAEDRA basic topology
As you can see this opens the door for lots of other uses. A PHAEDRA node is simply a
non-GUI, or headless PHAEDRA installation that serves no purpose to the user and is
dedicated to executing tasks from the grid.
I have decided to implement this topology as it creates lots of possibilities. I could, for
example, give PHAEDRA nodes a lower priority than PHAEDRA clients. Combined with
the separate JVM it would guarantee a smooth user experience of the PHAEDRA client
even while tasks are executing on the node.

60
4.1.3 Embedding JPPFDriver
public class JPPFDriverService { private static JPPFDriverService instance; private JPPFDriverService(){ String configFilePath = "jppfP2P.properties"; System.setProperty(JPPFConfiguration.CONFIG_PROPERTY, config-
FilePath); JPPFDriver.main(new String[]{"noLauncher"}); } public static JPPFDriverService getInstance() { if (instance == null) instance = new JPPFDriverService(); return instance; } public void shutdown() { JPPFDriver.getInstance().shutdown(); } }
Snippet 28: JPPFDriverService
The JPPFDriverService is a simple wrapper over a JPPFDriver. Its sole purpose is to
start, configure and shutdown the driver.
In PHAEDRA these kinds of services are started by implementing the IStartup extension point.
public class EarlyStarter implements IStartup{
private static Logger log = Logger.getLogger(JPPFDriverService.class);
@Override
public void earlyStartup() {
log.info("Starting JPPF driver");
JPPFDriverService.getInstance();
}
}
Snippet 29: JPPFDriver EarlyStarter
In this case the EarlyStarter logs and starts the JPPFDriverService.
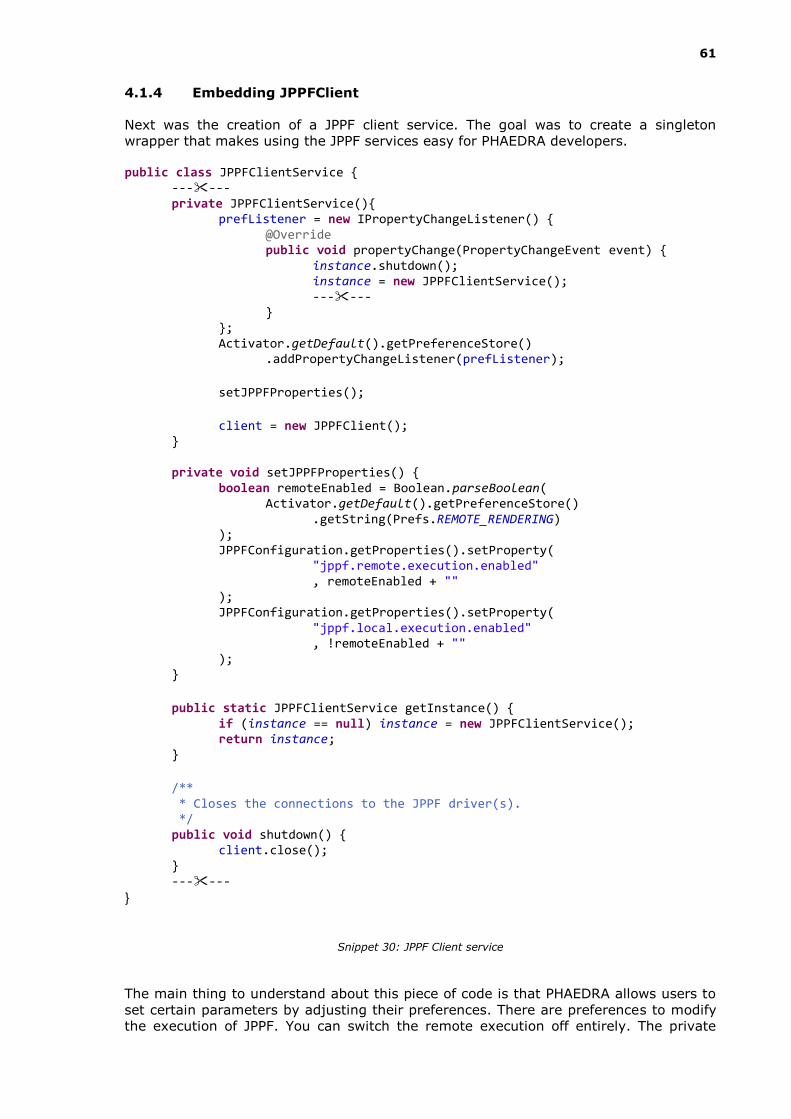
61
4.1.4 Embedding JPPFClient
Next was the creation of a JPPF client service. The goal was to create a singleton
wrapper that makes using the JPPF services easy for PHAEDRA developers.
public class JPPFClientService { ------
private JPPFClientService(){ prefListener = new IPropertyChangeListener() { @Override public void propertyChange(PropertyChangeEvent event) { instance.shutdown(); instance = new JPPFClientService();
------ } }; Activator.getDefault().getPreferenceStore()
.addPropertyChangeListener(prefListener); setJPPFProperties(); client = new JPPFClient(); } private void setJPPFProperties() { boolean remoteEnabled = Boolean.parseBoolean( Activator.getDefault().getPreferenceStore()
.getString(Prefs.REMOTE_RENDERING) ); JPPFConfiguration.getProperties().setProperty( "jppf.remote.execution.enabled" , remoteEnabled + "" ); JPPFConfiguration.getProperties().setProperty( "jppf.local.execution.enabled" , !remoteEnabled + "" ); } public static JPPFClientService getInstance() { if (instance == null) instance = new JPPFClientService(); return instance; } /** * Closes the connections to the JPPF driver(s). */ public void shutdown() { client.close(); }
------ }
Snippet 30: JPPF Client service
The main thing to understand about this piece of code is that PHAEDRA allows users to
set certain parameters by adjusting their preferences. There are preferences to modify
the execution of JPPF. You can switch the remote execution off entirely. The private

62
constructor adds a listener to the values of this preference store. When the values
change, the instance will restart itself to make sure the changes are made immediately. The preferences are set through the setJPPFProperties() method. The other methods
should be obvious.
/** * Offload a batch of tasks with a matching result listener, creates 1 non * blocking JPPFJob. */ public JPPFJob offloadTaskBatch(List<JPPFTask> tasks, TaskResultListener listener) throws Exception{ JPPFJob job = createJPPFJob(); job.setResultListener(listener); job.setBlocking(false); for (JPPFTask jppfTask : tasks) { job.addTask(jppfTask); } client.submit(job); return job; } /** * Offload a batch of callables with a matching result listener, creates 1
* blocking JPPFJob. * Any exceptions or results a callable returns will be set in the JPPFTask * that returns as a result. */
@SuppressWarnings("unchecked") public <T> List<T> offloadCallables(List<? extends Callable<T>> tasks) throws Exception{ JPPFJob job = createJPPFJob(); job.setBlocking(true); for (Callable<T> jppfTask : tasks) { job.addTask(jppfTask); } List<T> results = new ArrayList<>(); for (JPPFTask task : client.submit(job)) { if(task.getException() != null){ throw task.getException(); } else{ results.add((T)task.getResult()); } } return results; }
Snippet 31: JPPF client service offloading methods
The snippet above shows the heart of the system. These methods expose the offloading
capabilities to a PHAEDRA developer. The first method works in an asynchronous way, you provide a callback in the form of a TaskResultListener.

63
public interface TaskResultListener extends EventListener { void resultsReceived(TaskResultEvent event); } public class TaskResultEvent extends EventObject { public TaskResultEvent(final List<JPPFTask> taskList) { super(taskList); } public TaskResultEvent(final Throwable throwable) { super(throwable); } @SuppressWarnings("unchecked") public List<JPPFTask> getTaskList() { Object o = getSource();
return (o instanceof List) ? (List<JPPFTask>) getSource() : Collections.<JPPFTask>emptyList();
} public Throwable getThrowable() { Object o = getSource(); return (o instanceof Throwable) ? (Throwable) o : null; } }
Snippet 32: TaskResultListener and a TaskResultEvent
A TaskResultEvent holds the list of tasks which in turn hold the task results or task
errors. Each event can also hold a throwable in case something went wrong on a higher
level.
A job is created in offloadTaskBatch(), that job is hooked with a TaskResultListener
and filled with the passed list of tasks before being submitted to the running JPPFClient. The job is then returned through the method for future use; e.g. cancelling
it. The execution runs non-blocking and the callback will be called upon completion.
The second offloading method is there to provide a transparent way to integrate with
other PHAEDRA services. It is a blocking method and will wait for the job to finish. It
takes a regular Callable<?>, again to assure a transparent integration with existing
PHAEDRA code.
As JPPF jobs are distributed over a network and executed by other machines the user
loses some of the control. To give the user as much as control as possible I had to
provide a way to cancel tasks, preferably by using an already existing system;
something users were familiar with.
In the RCP environment you can run jobs. These jobs have progress monitors that can
be shown to users. These monitors include cancel actions. To cancel the offloading of JPPFJobs I start an Eclipse Job that constantly checks if a user has cancelled the
offloading while the JPPFJob is still being processed.

64
private JPPFJob createJPPFJob() throws JPPFException { JPPFJob job = new JPPFJob(); final AtomicBoolean running = new AtomicBoolean(true); final Job progressJob = createProgressJob(job, running); job.addJobListener(new JobListener() { @Override public void jobStarted(JobEvent event) { progressJob.schedule(); } @Override public void jobEnded(JobEvent event) { running.getAndSet(false); } }); return job; } private Job createProgressJob(final JPPFJob jppfJob, final AtomicBoolean running) { final Job progressJob = new Job("Offloading tasks to the grid.") { @Override protected IStatus run(IProgressMonitor monitor) { monitor.beginTask( "Tasks have been submitted to the grid" , IProgressMonitor.UNKNOWN ); while(!monitor.isCanceled() && running.get()){ try { Thread.sleep(50); } catch (InterruptedException e) { return Status.OK_STATUS; } if(monitor.isCanceled()) try { cancelJob(jppfJob); } catch (Exception e) { e.printStackTrace(); } } return Status.OK_STATUS; } }; progressJob.setUser(true); return progressJob; } public void cancelJob(JPPFJob job) throws Exception{ JMXDriverConnectionWrapper drvCon = getJmxConnection(); if (drvCon.isConnected()) drvCon.cancelJob(job.getUuid()); }
Snippet 33: JPPFJob cancel through RCP Jobs

65
To track the state of a JPPFJob I create an AtomicBoolean ‘running’. This value will be
changed and accessed from multiple threads. I add a listener on the actual JPPFJob to
schedule my monitor Job and to modify the ‘running’ flag. The JPPFJob will be cancelled
as soon as a user activates the cancel flag on the monitoring job while ‘running’ is still tracked as true. The JPPFJob listener will put the ‘running’ flag on false; this will
introduce a normal shutdown of the monitoring job.
public void cancelJob(JPPFJob job) throws Exception{ JMXDriverConnectionWrapper drvCon =
((JPPFClientConnectionImpl)client.getClientConnection()) .getJmxConnection(); if (drvCon.isConnected()) drvCon.cancelJob(job.getUuid()); }
Snippet 34: JPPFClientService cancelJob
Cancelling a JPPFJob is quite a hassle at the moment. You need to grab the
JMXConnection from the client to the driver as this exposes the cancel method on the
driver side. In future releases it will be possible to cancel jobs through the JPPFClient
interface, when this is made possible the PHAEDRA wrapper should also be adapted.
4.1.5 Embedding JPPFNode
public class JPPFNodeService { private static JPPFNodeService instance; private Node node; private JPPFNodeService() { node = new JPPFRemoteNode(); Executors.newSingleThreadExecutor().submit(node); } public static JPPFNodeService getInstance() { if (instance == null) instance = new JPPFNodeService(); return instance; } public void shutdown() { node.stopNode(); } }
Snippet 35: JPPFNodeService
It does exactly the same as JPPFDriverService which is control the JPPF component, in
this case a Node. The JPPFNode is started in its own thread and is kept running there
until the shutdown method is called.

66
4.1.6 Serialization in OSGi
The biggest problem of embedding a distribution framework in OSGi is the combination
of OSGi class loading and deserialization.
Say we have the following setup:
Figure 24: Serialization example
A class from Plugin B in the HCA layer has a dependency on the third party plugin
org.jppf which contains the JPPF libraries. In Plugin B a class, chart, will be used in
JPPF. It will be serialized and deserialized in a similar OSGi runtime on a different
environment.
It is no problem to call JPPF methods in the HCA layer with the correct dependencies,
org.jppf is definitely in a lower layer so it is allowed. It will however be a problem when
deserializing classes.
The class responsible for deserialization is ObjectInputStream. It resolves classes using
the following code:
protected Class<?> resolveClass(ObjectStreamClass desc) throws IOException, ClassNotFoundException { String name = desc.getName(); try { return Class.forName(name, false, latestUserDefinedLoader()); } catch (ClassNotFoundException ex) { Class<?> cl = primClasses.get(name); if (cl != null) { return cl; } else { throw ex; } } }
Snippet 36: ObjectInputStream resolveClass()

67
Class definitions are needed when deserializing objects because they need to be
reconstructed from their serialized state. In our case the deserialization will take place
in the org.jppf plugin. You can see it in the above snippet from the Java sources that
the class delegates class loading to the latest classloader. This will classloader will have
access to the bundleloader for org.jppf which in turn exposes classes through the
dependency system. The JPPF plugin has no access to the serialized classes because a
lower level plugin cannot have dependencies on a higher level plugin, else dependency
loops would occur. Deserialization with this classloader will fail and in this case JPPF will
try to serialize the class definition itself only to run into the same problems client-sided,
no access to higher level classes.
Some third party libraries have similar problems because of the class loading in OSGi.
The problem will mostly occur when libraries depend on serialization or reflection. To
solve most of these problems the Equinox platform provides an expansion of the OSGi
specification with a ‘buddy-policy’.
Buddy-policy creates a special bi-directional dependency allowing org.jppf to access
classes of plugins that depend on it. By using buddy policy on org.jppf it is assured that
deserialization works flawlessly throughout the JPPF system in the OSGi runtime.

68
4.2 Design principles
The key feature of a distributable task is isolation. If you can isolate a piece of code
from your environment the chances are high it can be distributed.
4.2.1 Unsuitable Design
Multithreaded programs often share similarities with distributed programs. It is
however of extreme importance to realize that there is a large difference between the
two.
public class SharedDesign { private List<Integer> list; private List<Future<?>> runningList;
------ private void start() throws InterruptedException, ExecutionException { ExecutorService pool = Executors.newFixedThreadPool(2); for (int i = 0; i < 10; i++) { runningList.add(pool.submit(new Runnable() { @Override public void run() { int i = 5+5; list.add(i); } })); } for (Future<?> future : runningList) future.get(); System.out.println(list); }
------ }
Snippet 37: Threaded shared example
The above example will run perfectly. Each thread accesses the shared lists and adds
their calculation result, in this case 10, to the collection. It becomes a bigger problem
when you try to distribute this example. The key in distributed design is isolation. Due
to the shared variables the Runnable implementation cannot be isolated from its
environment. This kind of design is a leftover way of doing things the old way by
spawning and synching threads manually.

69
4.2.2 Suitable Design
The biggest different between distributed and multithreaded applications is the difficulty
of dealing with shared memory. In threads you can lock and synchronize but in a
distributed application you would have to synchronize access over the network from
one environment to another. It is best to alter the design and make it isolated.
public class IsolatedDesign { private List<Integer> list; private List<Future<Integer>> runningList;
------ private void start() throws InterruptedException, ExecutionException { ExecutorService pool = Executors.newFixedThreadPool(2); for (int i = 0; i < 10; i++) runningList.add(pool.submit(new IsolatedCallable())); for (Future<Integer> future : runningList) list.add(future.get()); System.out.println(list); } private static class IsolatedCallable implements Callable<Integer>{ @Override public Integer call() throws Exception { return 5+5; } }
------ }
Snippet 38: Threaded isolated example
Now an IsolatedCallable can run entirely on its own. It does not interact with a
shared variable as the last example does. The operation of adding results to the list is
delegated to the main thread.
If you can maintain the isolated design principle, multithreading will become a lot more
robust as well. As everything runs isolated, there is no need for acquiring locks to
certain objects. When creating a multithreaded application you should think of threads
as isolated separate environments.
A real life example would be fishing. Imagine you give two men the job to catch five
fish. The fish have to be stored in a container. If both men catch a fish at the same
time one will end up waiting for access to the container. It is better to give both men a
small container and wait for them both to finish. You can collect the fish afterwards and
avoid all conflicts. An additional perk is that the men are not limited to fishing in the
same pond. They can fish in other ponds which will be beneficial if the gained speed in
catching fish outweighs the extra travelling time.
This is exactly how isolated design works in programming. Isolated multithreaded
programs can be easily adapted to run on distributed systems. This is what I will aim
for when working on PHAEDRA, to create clean and isolated tasks suitable for running
multithreaded and distributed.

70
4.3 Chart Layers
PHAEDRA is made to display lots of information as compact and as user friendly as
possible. The charting layers play a large part in this.
Figure 25: PHAEDRA subwellscatter layer
You can see the heatmap of a plate in the figure above. The heatmap itself shows data
regarding a feature. On top of the heatmap more data is displayed in the form of
charts. Each chart contains two more features. This makes it possible to link three
forms of data and make connections between them across multiple wells.
It is a perfect scenario for parallel computing. Each chart represents subwell data
corresponding to one well which means the sources of the charts are isolated from each
other.

71
4.3.1 Original Design
The original design in PHAEDRA regarding the layering system of charts is already
running multithreaded. It is highly based on the composition design pattern and allows
for flexible creation of new layers without modifying original code.
Figure 26: Original SubWellScatterLayer
The charting layer “SubWellScatter” is defined by the class SubWellScatterLayer. It
defines the name and implements the extension point that will add it to the PHAEDRA
layering system.
public class SubWellScatterLayer extends PlateLayer { private MTRenderSupport mtRendering; private boolean initialized; private String featureNameX; private String featureNameY;
------ private class ChartRenderer extends BaseGridCellRenderer { @Override public void render(GridCell cell, GC gc, int x, int y, int w, int h) {
------ if (!initialized) return;
------ Image image = mtRendering.getImage(cell, w, h); if (image != null) gc.drawImage(image, x, y); } } private class ChartImageCreator implements ImageCreator { @Override public Image createImage(GridCell cell, int w, int h) {
------ String[] parameters = new String[]{featureNameX,featureNameY};
------ return AWTImageConverter.convert(null, bufImg); } } }
Snippet 39: SubWellScatterLayer
A SubWellScatterLayer has inner classes for the interface ImageCreator and the base
class BaseGridCellRenderer, which in turn is an implementation of IGridCellRenderer.

72
The ImageCreator holds all the code to render a chart. This is the code I aim to isolate
and distribute.
I can see that the ChartRenderer uses MTRenderSupport to get an image. The actual
execution of the code in the ImageCreator is delegated to MTRenderSupport.
public class MTRenderSupport {
------ public Image getImage(GridCell cell, int w, int h) { accessLock.lock();
------ try { if (imageCache.containsKey(key)) { // 1: If image ready, return it } else { if (rendersInProgress.contains(cell)) { // 2: If image in progress, return a placeholder // or null } else { // 3: If image not available, queue it threadPool.schedule(new ImageBuilder(cell, w, h)); } } } finally { accessLock.unlock(); } return img; } private void imageReady(final GridCell cell, Image img) { ------ // Cache img and redraw entire layer
} private class ImageBuilder implements Callable<Image> {
------ @Override public Image call() throws Exception { Image img = imageCreator.createImage(cell, w, h); imageReady(cell, img); return img; } }
}
Snippet 40: Original MTRenderSupport
The original MTRenderSupport executes an ImageBuilder on a thread. This
ImageBuilder uses the aforementioned ImageCreator. Upon completion it will call a
method of its outer class, imageready(). This method will add the completed chart to
the cache and initiate a redraw of the layer. This redraw will pick up the cached images
and successfully draw the current version of the layer. MTRenderSupport is written with
a non-thread-safe caching system so explicit locking is required.

73
4.3.2 Distributed Design
It should be obvious to spot the incompatibility of the previous design. None of the
code can be isolated due to the usage of field variables of the outer classes. Isolating the ImageCreator code into a RenderTask is the main goal.
Figure 27: Distributed SubWellScatterLayer
There are quite a few issues. First, distributing tasks as efficiently as possible requires a
grouping of tasks so that they can distributed across multiple machines with load
balancing. A task is created and handled entirely on its own. There is no way to group
any of the code. This will be the first thing to change.
public class Grid extends Canvas implements MouseListener, MouseMoveListener, KeyListener { ------ private void paint(GC gc) {
------ cellRenderer.prerender(this); // Paint the body cells for (int row=0; row<rows; row++) { for (int col=0; col<columns; col++) { GridCell cell = bodyCells[row][col]; Rectangle bounds = calculateBounds(cell); cell.paint(
gc , bounds.x , bounds.y , bounds.width , bounds.height
); } }
------ } ------ }
Snippet 41: Grid

74
The line marked in yellow shows the extension of the interface IGridCellRenderer to
make this possible. The previous code relied purely on the paint method of a cell. This
paint() method delegates image creation to an implementation of IGridCellRenderer.
The added method prerender() will be used to queue all the distribution tasks. It
requires access to Grid to acquire all data from the therefore Grid passes itself upon
calling prerender().
A base implementation was provided for the IGridCellRenderer called
BaseGridCellRenderer, merely a null implementation of all methods except for the
render() method which returned a text-based image. As there will be lots of common
code between distributed cell renderers, a BaseConcurrentGridCellRenderer is
created.
When creating GUI applications you have to assume that the paint methods can be
called millions of times. The prerender() and render() methods have to return as soon
as possible in our case. Keep this in mind when reading the next section.
public abstract class BaseConcurrentGridCellRenderer extends BaseGridCellRenderer{ ------
public void initiate(IConcurrentRenderSupport rendering) { this.rendering = rendering; executor = new ScheduledThreadPoolExecutor(1); executor.setRemoveOnCancelPolicy(true); } @Override public void prerender(Grid grid) { Rectangle bounds = grid.calculateBounds(grid.getCell(0, 0)); if(!rendering.isValidCache(bounds.width, bounds.height)){ rendering.reset(bounds.width, bounds.height); } if(rendering.shouldRender()){ rendering.setShouldRender(false); if(future != null) future.cancel(true); Runnable task = new RenderingTask(
grid , bounds.width , bounds.height
); future = executor.schedule(task, 250, TimeUnit.MILLISECONDS); } }
Snippet 42: BaseConcurrentGridCellRenderer prerender
The first method is a simple setter for the initialization of the rendering component
IConcurrentRenderSupport. This method also creates the executor that will be used to
queue the distribution.
In prerender() the bounds of one cell are being calculated. I can assume that each cell
has the same boundaries. If I know the bounds, I can verify the cache in the rendering
component. This is a basic check of width and height to see if the images are still at the
ideal size, if not they should be recalculated to provide an optimal presentation.
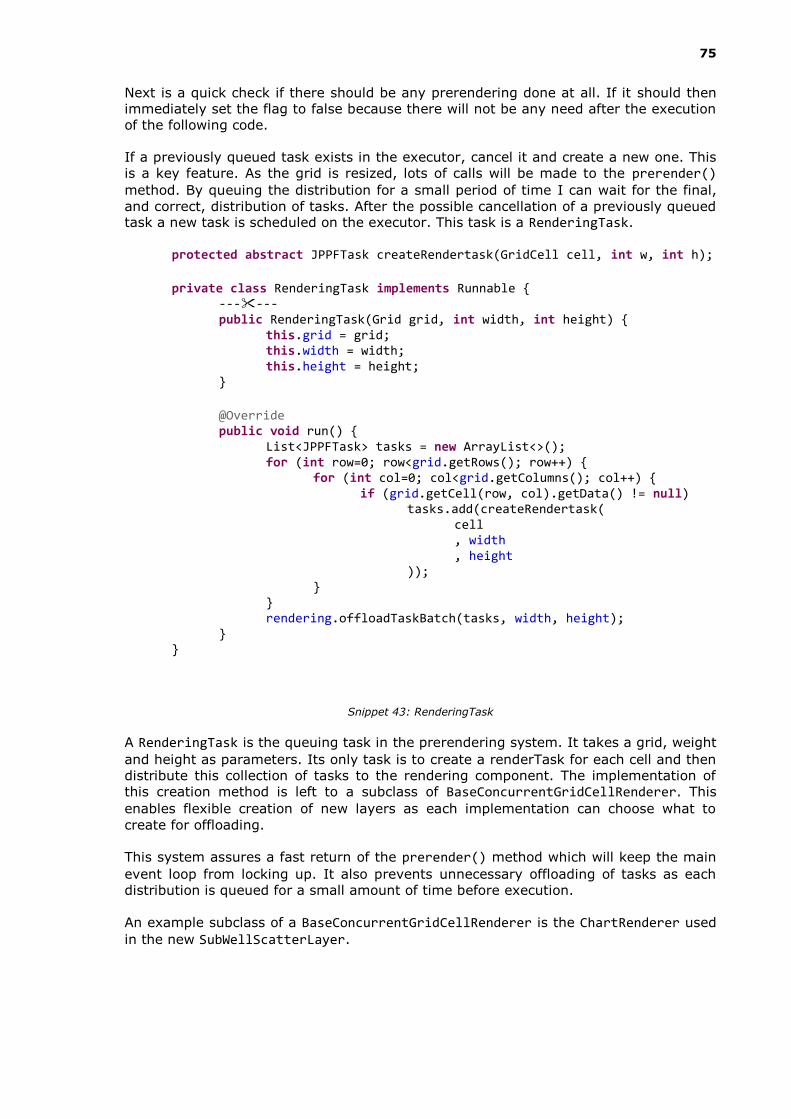
75
Next is a quick check if there should be any prerendering done at all. If it should then
immediately set the flag to false because there will not be any need after the execution
of the following code.
If a previously queued task exists in the executor, cancel it and create a new one. This
is a key feature. As the grid is resized, lots of calls will be made to the prerender()
method. By queuing the distribution for a small period of time I can wait for the final,
and correct, distribution of tasks. After the possible cancellation of a previously queued task a new task is scheduled on the executor. This task is a RenderingTask.
protected abstract JPPFTask createRendertask(GridCell cell, int w, int h); private class RenderingTask implements Runnable {
------ public RenderingTask(Grid grid, int width, int height) { this.grid = grid; this.width = width; this.height = height; } @Override public void run() { List<JPPFTask> tasks = new ArrayList<>(); for (int row=0; row<grid.getRows(); row++) { for (int col=0; col<grid.getColumns(); col++) { if (grid.getCell(row, col).getData() != null) tasks.add(createRendertask(
cell , width , height
)); } } rendering.offloadTaskBatch(tasks, width, height); } }
Snippet 43: RenderingTask
A RenderingTask is the queuing task in the prerendering system. It takes a grid, weight
and height as parameters. Its only task is to create a renderTask for each cell and then
distribute this collection of tasks to the rendering component. The implementation of
this creation method is left to a subclass of BaseConcurrentGridCellRenderer. This
enables flexible creation of new layers as each implementation can choose what to
create for offloading.
This system assures a fast return of the prerender() method which will keep the main
event loop from locking up. It also prevents unnecessary offloading of tasks as each
distribution is queued for a small amount of time before execution.
An example subclass of a BaseConcurrentGridCellRenderer is the ChartRenderer used
in the new SubWellScatterLayer.
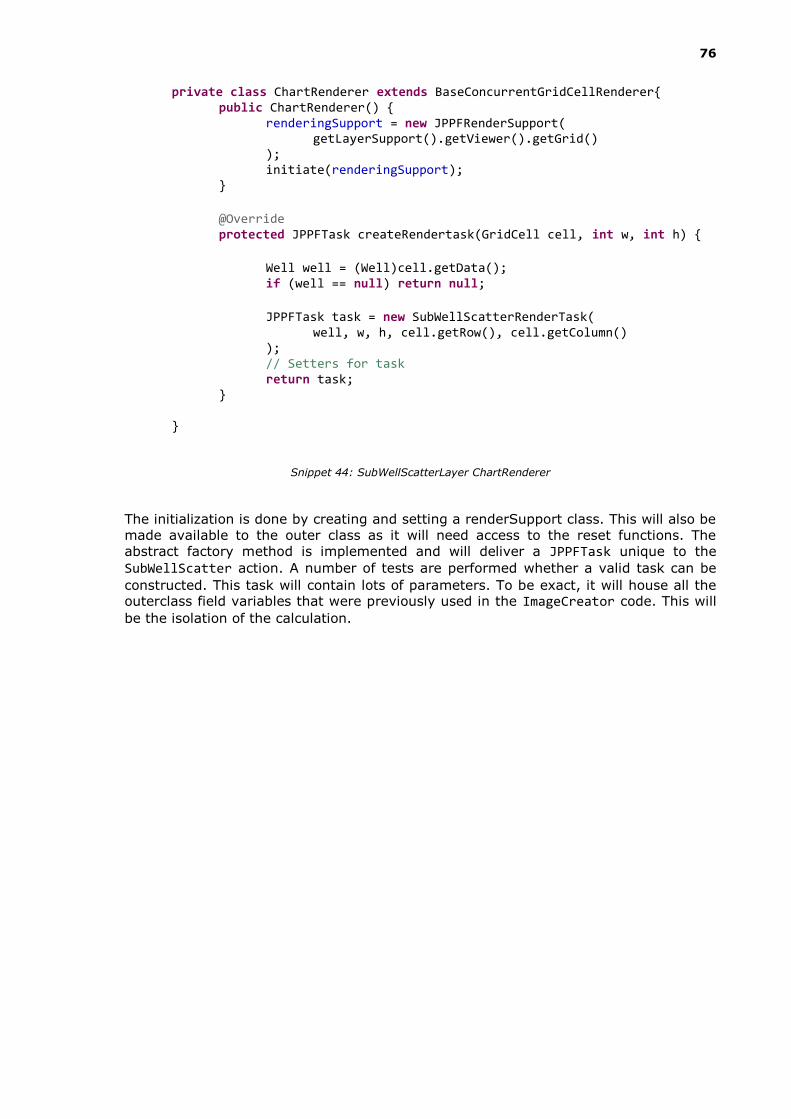
76
private class ChartRenderer extends BaseConcurrentGridCellRenderer{ public ChartRenderer() { renderingSupport = new JPPFRenderSupport(
getLayerSupport().getViewer().getGrid() );
initiate(renderingSupport); } @Override protected JPPFTask createRendertask(GridCell cell, int w, int h) { Well well = (Well)cell.getData(); if (well == null) return null; JPPFTask task = new SubWellScatterRenderTask(
well, w, h, cell.getRow(), cell.getColumn() );
// Setters for task return task; }
}
Snippet 44: SubWellScatterLayer ChartRenderer
The initialization is done by creating and setting a renderSupport class. This will also be
made available to the outer class as it will need access to the reset functions. The
abstract factory method is implemented and will deliver a JPPFTask unique to the
SubWellScatter action. A number of tests are performed whether a valid task can be
constructed. This task will contain lots of parameters. To be exact, it will house all the outerclass field variables that were previously used in the ImageCreator code. This will
be the isolation of the calculation.

77
public class SubWellScatterRenderTask extends JPPFTask{ private static final long serialVersionUID = 4824647241961715538L; private Well well;
------ @Override public void run() {
------ // create a chart with all required parameters
int padX = BaseConcurrentRenderSupport.getXPadding(w); int padY = BaseConcurrentRenderSupport.getYPadding(h); BufferedImage bi = BaseConcurrentRenderSupport.addPadding( chart.createBufferedImage(w-2*padX, h-2*padY) , padX , padY ); setResult(new CellImageRenderMessage( this.row , this.col , bi )); ------ } }
Snippet 45: SubWellScatterRenderTask
Our rendering task is a JPPFTask. It has to be serializable and as I already explained
when an object has to be serializable, each field needs to be serializable as well. The class Well did not provide much problems. As it is a pure data object it can easily be
made serializable by implementing the marker interface Serializable.
The code above is just a mere fraction of the actual code. The actual code takes 16
parameters to create a fully configured chart. Configuring the chart includes extra IO to
fetch subwell data from the well.
Leaving the IO aside, the longest action is the line in the above snippet highlighted in yellow. Building a BufferedImage from JFreeChart takes nearly as much time as
fetching the subwell data. This is the computational block I attempted to isolate.
Because I am dealing with images, extra problems occur. A regular BufferedImage is
not serializable. On top of that I will need more info about the resulting image. I need
to know where the chart belongs. A ‘Message’ object is introduced. In this particular
case the message will be Image meta-data, a row and a column.

78
public class CellImageRenderMessage implements Serializable{ ------
public CellImageRenderMessage(final int row, final int column, final BufferedImage bi) {
------ this.w = bi.getWidth();
this.h = bi.getHeight(); this.type = bi.getType(); this.data = new int[w*h]; bi.getRGB(0, 0, w, h, data, 0, w); }
------ public Image getImage() { BufferedImage bi = new BufferedImage(w, h, type); bi.setRGB(0, 0, w, h, data, 0, w); return AWTImageConverter.convert(null, bi); } }
Snippet 46: CellImageRenderMessage
The only goal of this message is to transport data from one location to another and
provide it as convenient as possible. A BufferedImage is not serializable so I collect
everything I need from it to rebuild it. This is the raw image data in the form of an
integer array, the size and the type in which the image data is structured. This
information is stored in the object. In its constructed state, the object will be serialized
and transported from one environment to another.
The receiving end can easily fetch the required Image from the object without having to
go through all the hassle of building it from scratch. There are also getters provided for
the column and row position as they are required in the result as well. This message
only transports data and it is important it does this as convenient as possible.
If you have data that is hard to transfer, I suggest you create a message object that
transfers the serializable primitive data with getters that contain logic to reconstruct
your complex objects.
Now that the isolation of code has been completed it is time to create the distribution
code. A transparent switch between distributed execution and multithreaded distribution is required. To accomplish this, the IConcurrentRenderSupport interface
was created.

79
public interface IConcurrentRenderSupport { // Caching public boolean isValidCache(int width, int height); public void putIfValid(int row, int col, Image image); public Image getImage(GridCell cell); public void reset(int width, int height); // Execution public boolean shouldRender(); public void setShouldRender(boolean b); public void offloadTaskBatch(List<JPPFTask> tasks, int width, int height); public void resetRendering(); public void handleResult(JPPFTask task);
// Other public void dispose(); }
Snippet 47: IConcurrentRenderSupport
Most of these methods have already been explained in previous snippets. The render
support is tightly integrated in the entire system.
A RenderSupport class has to provide two main roles: a way to execute rendering tasks
and a method of caching results. With exceptions to managing tasks the entire class
shares common code between a multithreaded and a distributed implementation. An
abstract base class BaseConcurrentRenderSupport is created that houses all the logic of
the original MTRenderSupport. @Override public void putIfValid(final int row, final int col, Image image) { Rectangle bounds = image.getBounds(); if(isValidCache(bounds.width, bounds.height)) { imageCache.add(getCacheKey(row, col), image); Display.getDefault().asyncExec(new Runnable() { @Override public void run() { redraw(row, col); } }); } }
Snippet 48: putIfValid()
This method provides access to the caching system. When a new image has been
rendered for a cell in the grid it will first go through a validity check. This is simply a
check on size to see if the image has the correct size. If everything is checked, it is
added to the threadsafe imageCache and a redraw is called on the appropriate cell to
update its view.

80
@Override public void reset(int w, int h) { currentWidth = w; currentHeight = h; resetRendering(); } @Override public void resetRendering() { clearCache(); cancelCurrentTasks(); shouldRender = true; }
Snippet 49: reset() and resetRendering()
In several occasions the rendering process has to be reset. Sometimes when
parameters have changed and the views need to be updated or sometimes when the
size of the grid has changed and the views need to be recalculated. In both cases the
cache needs to be cleared, the running tasks cancelled and the shouldRender flag
enabled.
In the case of a resize the current dimensions have to be changed as well. These
dimensions determine whether or not an incoming image is valid. Resetting the rendering and the current dimension is done by the reset() method.
@Override public void offloadTaskBatch(List<JPPFTask> tasks, int w, int h) { shouldRender = false; this.currentWidth = w; this.currentHeight = h; handleTasks(tasks); }
@Override public void handleResult(JPPFTask task) { final CellImageRenderMessage msg = (CellImageRenderMessage)task.getResult(); putIfValid(msg.getRow(), msg.getColumn(), msg.getImage()); }
Snippet 50: offloadTaskBatch() and handleTask()
The first method defines how a batch of tasks should be offloaded. The common code is
kept inside the Base class but the specifics are delegated to an abstract method, handleTasks().
The second method defines the result handling. It is pretty simple in this case. I grab
the message and call the put method. The put method will add it to the cache and
make sure the cell is updated as seen in previous snippets.
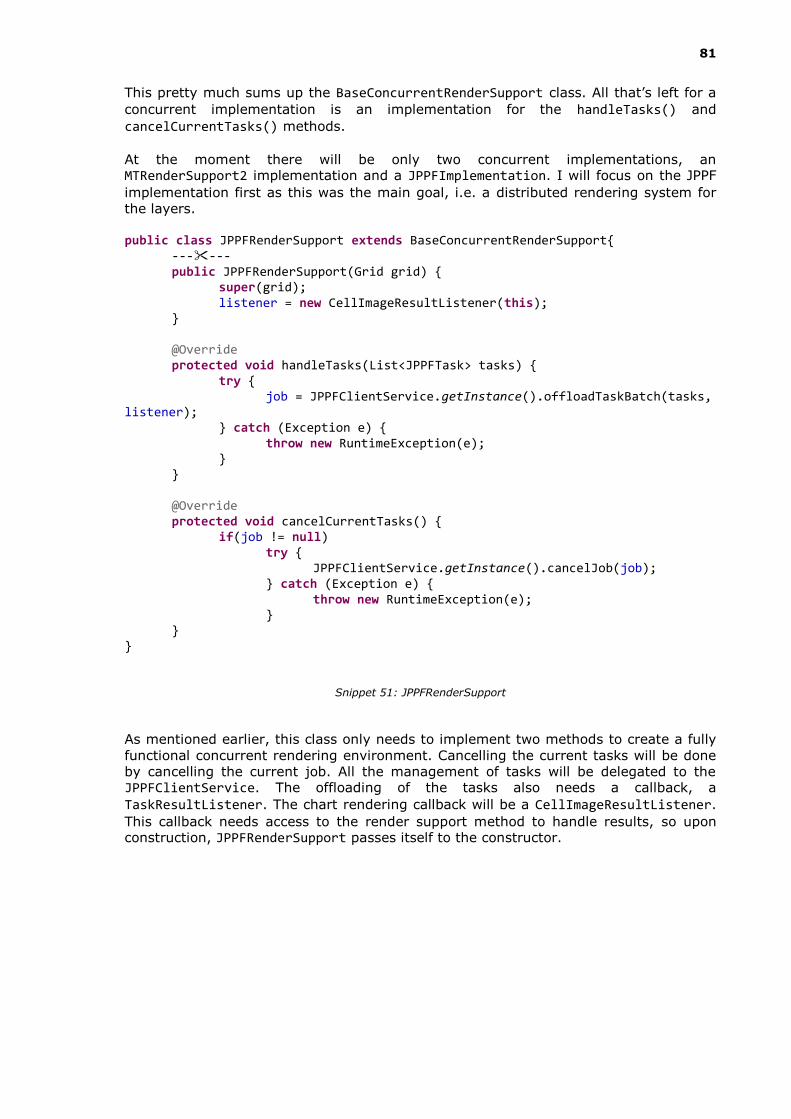
81
This pretty much sums up the BaseConcurrentRenderSupport class. All that’s left for a
concurrent implementation is an implementation for the handleTasks() and
cancelCurrentTasks() methods.
At the moment there will be only two concurrent implementations, an MTRenderSupport2 implementation and a JPPFImplementation. I will focus on the JPPF
implementation first as this was the main goal, i.e. a distributed rendering system for
the layers.
public class JPPFRenderSupport extends BaseConcurrentRenderSupport{
------ public JPPFRenderSupport(Grid grid) { super(grid); listener = new CellImageResultListener(this); } @Override protected void handleTasks(List<JPPFTask> tasks) { try { job = JPPFClientService.getInstance().offloadTaskBatch(tasks, listener); } catch (Exception e) { throw new RuntimeException(e); } } @Override protected void cancelCurrentTasks() { if(job != null) try { JPPFClientService.getInstance().cancelJob(job); } catch (Exception e) { throw new RuntimeException(e); } } }
Snippet 51: JPPFRenderSupport
As mentioned earlier, this class only needs to implement two methods to create a fully
functional concurrent rendering environment. Cancelling the current tasks will be done
by cancelling the current job. All the management of tasks will be delegated to the JPPFClientService. The offloading of the tasks also needs a callback, a
TaskResultListener. The chart rendering callback will be a CellImageResultListener. This callback needs access to the render support method to handle results, so upon construction, JPPFRenderSupport passes itself to the constructor.
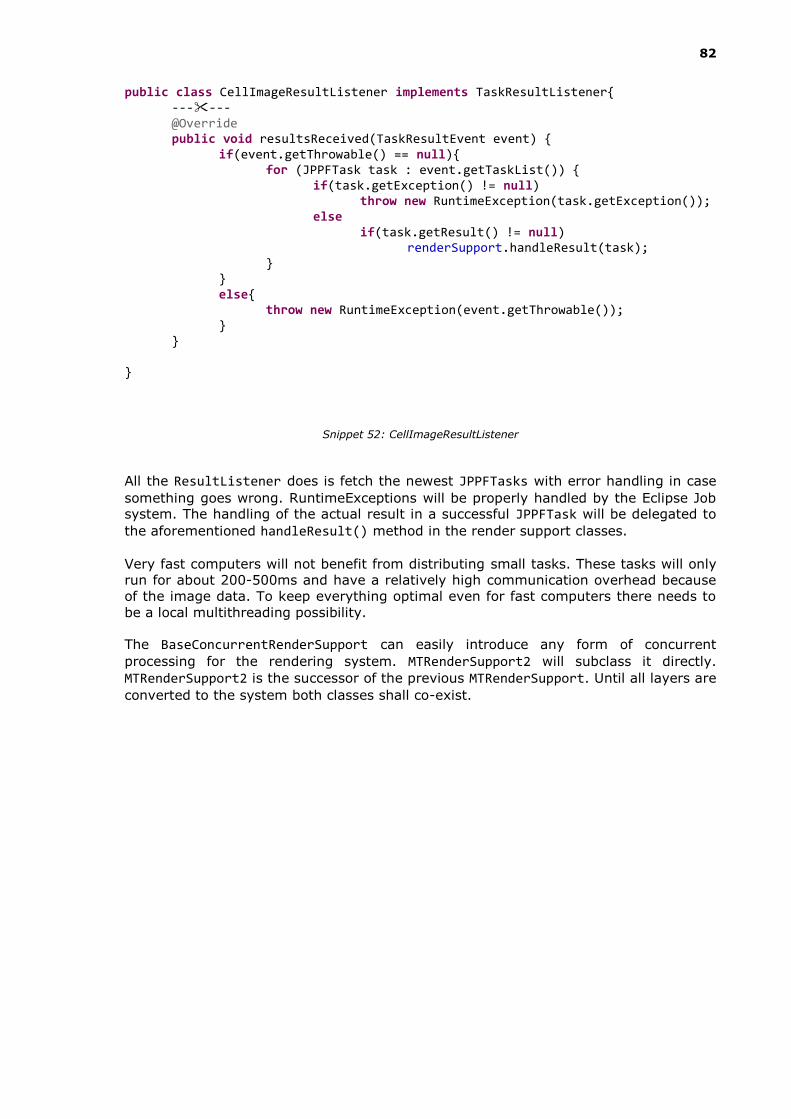
82
public class CellImageResultListener implements TaskResultListener{ ------
@Override public void resultsReceived(TaskResultEvent event) { if(event.getThrowable() == null){ for (JPPFTask task : event.getTaskList()) { if(task.getException() != null) throw new RuntimeException(task.getException()); else if(task.getResult() != null)
renderSupport.handleResult(task); } } else{ throw new RuntimeException(event.getThrowable()); } } }
Snippet 52: CellImageResultListener
All the ResultListener does is fetch the newest JPPFTasks with error handling in case
something goes wrong. RuntimeExceptions will be properly handled by the Eclipse Job system. The handling of the actual result in a successful JPPFTask will be delegated to
the aforementioned handleResult() method in the render support classes.
Very fast computers will not benefit from distributing small tasks. These tasks will only
run for about 200-500ms and have a relatively high communication overhead because
of the image data. To keep everything optimal even for fast computers there needs to
be a local multithreading possibility.
The BaseConcurrentRenderSupport can easily introduce any form of concurrent
processing for the rendering system. MTRenderSupport2 will subclass it directly.
MTRenderSupport2 is the successor of the previous MTRenderSupport. Until all layers are
converted to the system both classes shall co-exist.

83
public class MTRenderSupport2 extends BaseConcurrentRenderSupport { ------
public MTRenderSupport2(Grid grid) { super(grid); pool = new ThreadPool(4); runningTasks = new ArrayList<>(); } @Override protected void handleTasks(List<JPPFTask> tasks) { for (final JPPFTask task : tasks) { Runnable runnable = new Runnable() { @Override public void run() { task.run(); handleResult(task); } }; runningTasks.add(pool.schedule(runnable)); } } @Override protected void cancelCurrentTasks() { for (Future<?> task : runningTasks) { task.cancel(true); } runningTasks.clear(); } }
Snippet 53: MTRenderSupport2
MTRenderSupport2 will execute JPPFTasks in a threadpool. The JPPFTask is run in a
different thread and immediately after it will be processed for its results. The Future<?>
object of every Runnable is kept in a list in case the current tasks need to be cancelled.
With this the changes to the rendering system are complete.

84
4.3.3 Benchmarks
The layers are kind of a worst-case scenario for distribution. There is a large overhead
and the tasks are limited in execution time. It is important to benchmark the current
set-up to make sure that an increase in speed will be made. The following graph clearly
shows the performance increase:
Figure 28: SubwellScatterLayer benchmark
The machines that were used in the test were not identical, not in the slightest. I did
what I could with the resources I had to benchmark as correct as possible.
These figures show a significant increase of speed. With only one machine and two
cores it took 35.58 seconds on an average of 5 runs to render 96 charts each
representing 15.000 points of data. These 35.58 seconds include IO operations.
The speed quickly increased when tasks were being distributed, when adding another
computer, which pushed the amount of cores up to four, I saw a 100%+ increase in
speed. The computer that was added was faster than the first computer hence the
extra increase.
The speed kept increasing as more computers were added however it was not an
increase linear to the amount of cores. This can be explained by the IO part of the task.
The increase of speed will also hit a limit when the networking overhead outperforms
the gained performance.
With this worst-case scenario test I conclude that the Java grid for PHAEDRA will indeed
increase the performance. Other distributed tasks have much longer execution times
and will not be tested as the performance increase will be obvious.
35,58s
17,47s
10,88s 8,53s
2 4 8 20
Tim
e(s
)
# Cores
SubwellScatterLayer

85
4.4 MATLAB Analysis
Currently PHAEDRA uses MATLAB to analyze images and signals. These calculations can
take a very long time. The MATLAB scripts take regular folders as input. These folders
contain raw plate data. The output of these scripts is also a regular file. As all of this is
done outside of the JVM environment it should be easy to distribute once the input and
output is somehow made available.
The current MATLAB analysis code runs multithreaded by offloading code to the MTExector class. Interfacing this MTExecutor class and creating a distributed
implementation will be the main goal.
4.4.1 Original Design
Figure 29: Original KineticPAMAnalysis
KineticPAMAnalysis is an implementation of AbstractMatlabAnalysis. It defines how
the specific MATLAB operation can be separated and started.
public abstract class AbstractMatlabAnalysis extends AbstractAnalysis { @Override public void execute(IProgressMonitor monitor) throws AnalysisException {
------ }
protected abstract MCRProcessLauncher prepareLauncher(); protected abstract String[] createProcessArgs(String entry, int blockIndex); protected abstract int getBlocks(String entry); protected abstract boolean skipBlock(String entry, int blockIndex);
------ }
Snippet 54: AbstractMatlabAnalysis
An implementation of AbstractMatlabAnalysis has to provide several implementations.
The most important are prepareLauncher() and createProcessArgs(). The other
methods will define in how many blocks the task can be split.

86
@Override protected MCRProcessLauncher prepareLauncher() { MCRProcessLauncher launcher = new MCRProcessLauncher(
KineticPAMAnalysisProcess.class.getName() );
launcher.addClassPathPlugin(Activator.PLUGIN_ID); return launcher; } @Override protected String[] createProcessArgs(String entry, int blockIndex) {
------ String[] args = new String[] { inputPath, fileName, outputPath, tempDir, getConfig().getParameterValue(PARAM_AUC_TIME_AGO), getConfig().getParameterValue(PARAM_AUC_TIME_PAM) }; return args; }
Snippet 55: prepareLauncher() and createProcessArgs() of KineticPAMAnalysis
The prepareLauncher() method is actually a factory method for MCRProcessLauncher
objects. It will construct and configures an object accordingly. The other method only
creates a String array that will serve as arguments for the MATLAB routine.
With these specifics implemented in a subclass, the AbstractMatlabAnalysis class will
execute the proper MATLAB routines in its execute() method.

87
@Override public void execute(IProgressMonitor monitor) throws AnalysisException {
------ if (blocksPerEntry == 1) { // Attempt to multi-process entries instead.
------ for (String entry: getConfig().getSourceEntries()) { if (skipBlock(entry, 0)) continue; String[] args = createProcessArgs(entry, 0); MCRProcessCallable callable = new MCRProcessCallable(
args, monitor );
mtExecutor.queue(callable); } } else { // Multi-process blocks.
------ for (String entry: getConfig().getSourceEntries()) {
------ for (int block = 0; block < blockCount; block++) { if (skipBlock(entry, block)) continue;
------ mtExecutor.queue(callable); } } } if (monitor.isCanceled()) return; // All entries and blocks have been submitted, wait for completion. SubProgressMonitor subMonitor = new SubProgressMonitor(monitor, 90); mtExecutor.run(subMonitor); subMonitor.done();
------ // Perform post-processing steps (optional).
------ }
Snippet 56: execute()
There are three main blocks of logic in this method:
1. Queue callables on MTExecutor
2. Run and wait for MTExecutor to finish
3. Perform post-processing
The callables that are being created for queuing are of the type MCRProcessCallable.
They will provide a way to launch the MATLAB processes in different threads while
waiting for input. This is the computational task that I wish to distribute to other
machines.

88
private class MCRProcessCallable extends BaseMTCallable<String> { ------
public MCRProcessCallable(String[] args, IProgressMonitor cancelMonitor) { this.args = args; this.cancelMonitor = cancelMonitor; } @Override protected String callInternal() throws Exception { MCRProcessLauncher launcher = prepareLauncher(); launcher.addArgs(args); ByteArrayOutputStream stdErr = new ByteArrayOutputStream(); launcher.setStdErr(stdErr); int retCode = launcher.launch(cancelMonitor);
------ // Handle return code return null; } }
Snippet 57: MCRProcessCallable
This callable is entirely isolated except for the launcher statement marked in yellow above. It uses the previously implemented method of KineticPAMAnalysis as an inner
class to construct a configured launcher. The MCRProcessCallable extends a BaseMTCallable<?> class, you can see the normal call() method is already
implemented in the parent class. The callInternal() method holds the specific logic
while BaseMTCallable<?> handles everything else from logging to performance metrics.

89
4.4.2 Distributed Design
A distributed implementation of MTExecutor will require other changes. Other classes
use MTExecutor as well, so it will be very important that the changes are easy to
implement. Once that is done a solution for the input and output will be created as the
MATLAB analysis fetch and write data to folders.
Figure 30: Distributed KineticPAMAnalysis
A common interface for MTExector will be the first thing to create. Only a small amount
of methods of the MTExecutor class is actually used so I can narrow the interface down
to the following methods:
public interface IConcurrentExecutor<T> { public void init(Object... args); public void queue(Callable<T> task); public List<T> run(IProgressMonitor monitor); public long getAvgDuration(); }
Snippet 58: IConcurrentExecutor
As opposed to MTRenderSupport in the layers, MTExecutor will first collect the tasks with
a queuing system and execute them later through the run() command. This makes the
original design more compatible with a distributed environment than the layering
system.

90
public class JPPFExecutor<T> implements IConcurrentExecutor<T> { private List<JPPFCallableImpl<T>> tasks; public JPPFExecutor() { tasks = new ArrayList<>(); }
------ @Override public void queue(Callable<T> task) { if(task instanceof JPPFCallableImpl) tasks.add((JPPFCallableImpl<T>) task); else throw new IllegalArgumentException(
"A JPPFExecutor requires JPPFCallable tasks." );
} @Override public List<T> run(IProgressMonitor monitor) { List<T> results = null; try { results = JPPFClientService.getInstance()
.<T>offloadCallables(tasks); } catch (Exception e) { throw new RuntimeException(e); } return results; }
------ }
Snippet 59: JPPFExecutor
The queuing system will first check the type of the incoming task. If it is not a JPPFCallable it should not be allowed to execute. After queuing up tasks the run
method will distribute them using the blocking method offloadCallables() in
JPPFClientService.
Originally, a delegation system was already in place. It worked by subclassing an MCRProcessCallable and implementing an abstract method called callInternal(). The
delegator was a call() method of the parent class.
In the new system I need to create isolated delegation. The wrapper callable that will
be used to manage this delegation task will be different depending on the concurrent
implementation. Implementing a one-size-fits-all will not work anymore. This will be the only large change in the redesign of the MTExecutor system.

91
public static class JPPFCallableImpl<T> implements JPPFCallable<T>{ ------
@Override public T call() throws Exception{ T outcome = null; try { outcome = delegate.call(); } finally { delegate = null; } return outcome; } }
Snippet 60: JPPFCallableImpl
The JPPFCallableImpl is purely made to preserve the MTExecutor type of processing
where the wrapping code monitors the delegated code closely. This is not possible
anymore with JPPF as all of this code runs distributed in a different environment.
Monitoring and managing the execution of distributed tasks will be done on a higher
level.
public class MCRProcessCallable implements Callable<String>, Serializable{
------ public MCRProcessCallable(String[] args, String[] classPathPlugins, String launcherClassName) { this.args = args; this.classPathPlugins = classPathPlugins; this.launcherClassName = launcherClassName; }
------ public String call() throws AnalysisException{ MCRProcessLauncher launcher = new MCRProcessLauncher(
launcherClassName );
for (String plugin : classPathPlugins) launcher.addClassPathPlugin(plugin); launcher.addArgs(args);
------ // Handle return code
return null; } }
Snippet 61: Isolated MCRProcessCallable
The original MCRProcessCallable participated in the delegation system by implementing
an abstract method of its parent class. This parent class would wrap and manage the
delegated code.
In the new design there has to be a transparent switch between a local multithreaded
environment and a distributed environment. The delegator is different for each of these
implementations as the wrapper code is unique to each case. To create an optimal design the MCRProcessCallable became a class that houses all the MCR logic. This code
has to be isolated from its environment to be distributable. Isolation is easily achieved by eliminating the use of the outer class factory method prepareLauncher(). Instead,
MCRProcessCallable is passed the required information to construct its own launcher.

92
With the isolated delegation process setup completed it is possible to launch a MATLAB
process on a distributed environment by queuing and executing the tasks on the JPPFExecutor.
The only problem is the MATLAB code itself. The input is in the form of raw files. The
KineticPAMAnalysis is started with the following arguments:
Input path
Filename
Output path
Temporary directory
The MATLAB analysis requires raw files as input data. This is a problem in a distributed
environment as each environment needs access to the data. There were two ways to
solve this. Sending the required input files to the correct environments and collecting
the results when they are available or use shared file paths that are accessible by each
environment.
I opted for the second option. Although it is not the most isolated option and therefore
not the best option for distributed computing, it was the most suitable option for my
case.
At the moment analysis input data is often already placed on a share. In this case I can
use the share directly without creating a long process of overhauling data. I solve the
output path in a similar manner. The MATLAB analysis will write directly to a share as
output, when everything is done this location on the share will be mirrored to the users
local drive.
To realize this, lots of convenience methods have to be created to fetch correct
addresses.
* @param platePath Path to base the local input folder on * @return inputpath, depending on the factory this will be a shared folder protected String getInputPath(String platePath) { String path = FileUtils.getPath(platePath); try { path = FileUtils.resolveMappedPath(path); } catch (IOException e) { // Mapped drive can't be resolved, continue without any issues. } if(hasToShare(path)) return TMPSHARE + File.separator + id + File.separator + "in"; return path; }
Snippet 62: getInputPath()
There is a good chance that the people use a mapped drive as input data, as mentioned
earlier the raw data is often already on share, because the share is often accessed by
people it is often mapped. The first logical thing to do is to resolve the mapped drive to
a correct UNC path. This path is then checked to see if it actually has to be shared, if
the current process does not have to run distributed it does not have to be. If the path
is already a UNC path it does not have to be shared either. If the path does have to be
shared a unique location on TMPSHARE is returned.

93
* @param experimentName * @return outputpath, this can be a shared folder in case of a * distributed analysis
protected String getOutputPath(String experimentName) { String path = getResultPath(experimentName); try { path = FileUtils.resolveMappedPath(path); } catch (IOException e) { // Mapped drive can't be resolved, continue without any issues. } if(hasToShare(path)) return getSharedOutputPath(experimentName); return path; }
Snippet 63: getOutputPath()
The output path goes through a similar process and will return a proper output path for the analysis though the getSharedOutputPath() method.
This will take care of the launching arguments for the MATLAB process but it will not
copy the actual files to the shares. To do this I opted for pre- and post-processing
methods that will be called every time a MATLAB process is queued and finished.
/** * You can override this to do extra startup operations, do not forget to
* call the super.preProcess operation * as this will do critical cleanups when tasks have to be distributed. * @param entry * @throws AnalysisException */ protected void preProcess(String entry) throws AnalysisException { if(hasToShare(entry)) { try { FileUtils.copyDir(entry, getInputPath(entry)); } catch (IOException e) { throw new AnalysisException(e.getMessage()); } } }
Snippet 64: preProcess()
When actual queuing occurs, this method is called. If the entry should be shared it will
copy the entry to the reserved input path. This makes the entry available to external
environments.

94
protected void postProcess(String entry) throws AnalysisException { ------
if(hasToShare(entry)) { String share = TMPSHARE + File.separator + id; String dirPathFrom = share + File.separator + "out"; try { if(new File(dirPathFrom).list().length > 0) FileUtils.copyDir(dirPathFrom, getConfig().getParameterValue(PARAM_OUTDIR)); } catch (IOException e) { e.printStackTrace(); throw new AnalysisException(e.getMessage()); } finally { try { FileUtils.remove(share); } catch (IOException e) { // Do nothing } } } }
Snippet 65: postProcess()
So all files are copied to a share and the output is also written to it. This leaves one
problem, a user can define its own output path. A post-processing task simply copies
the results from the share to the user defined path when needed. A clean-up process is
also done so the share is not polluted with left-over data.
Everything that runs distributed in PHAEDRA has to have a transparent switch to a local
multithreaded environment. There is more than one concurrent implementation in the whole Executor system so a factory is created to create both the JPPFCallableImpl and
JPPFExecutor. The factory has a multithreaded implementation as well which will create
the MTCallable and MTExecutor.
One method, createFactory(), has to be overridden to run an analysis distributed.
protected IConcurrentFactory<String> createFactory(){ return new JPPFFactory<>(); }
Snippet 66: createFactory()
This concludes the distributed design of the PHAEDRA MATLAB analysis. Since it is not a
pure Java environment the code is filled with native operations such as copying files
and accessing mapped shares. The code of these methods is abstracted in utility
classes and is not in the scope of this thesis.

95
4.5 KNIME Workflows
Figure 31: KNIME workflow in PHAEDRA
KNIME workflows are also processing tools in PHAEDRA. They process multiple plates
by using workflows similar to the figure above. At the moment a KNIME workflow
executes graphically. A user selects the input, opens the flow and executes it. There is
nothing running multithreaded in the KNIME workflows at the moment. Many workflows
however accept multiple plates as input to manually loop over each plate. This means
that there is hope for isolating the processing.
A little introduction to KNIME, in the image above you can see something that is called
KNIME workflow. It is a collection of KNIME nodes, a KNIME node is a small graphical
representation of code. These blocks of code are written and have defined input and/or
output ports making it possible to link nodes together to create a workflow of nodes.
These nodes are used in PHAEDRA to create complicated calculations while maintaining
a high-level visual overview.

96
4.5.1 Original Design
Snippet 67: Original workflow design
The original design was pretty straightforward. Fetching the users selection of plates
and sending them with the corresponding workflow into the KNIME environment. The
user had to execute the workflow manually from there in the UI.
Figure 32: KNIME select workflow dialog
Users need to choose which workflow to run on which kind of data. They first make a
data selection and continue with a selection of the workflow as shown above. The OpenWorkflowCmd class will handle the input gotten from the workbench environment
and the SelectWorkflowDialog.

97
public class OpenWorkflowCmd extends AbstractHandler implements IHandler { @Override public Object execute(ExecutionEvent event) throws ExecutionException { // Get currently selected object(s) (any pojo) IWorkbenchPage page = PlatformUI.getWorkbench()
.getActiveWorkbenchWindow().getActivePage(); ISelection selection = page.getSelection(); // Show dialog to choose a workflow SelectWorkflowDialog dialog = new SelectWorkflowDialog(
Display.getCurrent().getActiveShell() );
int retCode = dialog.open(); if (retCode == Dialog.OK) { WorkflowReference ref = dialog.getSelectedWorkflow(); if (ref != null) { try { WorkflowService.getInstance().openUI(ref, selection); } catch (WorkflowException e) { throw new ExecutionException(
"Failed to open workflow", e );
} } } return null; } }
Snippet 68: OpenWorkflowCmd
First the ISelection object is retrieved from the workbench. The workbench is the
graphical shell in PHAEDRA and selection is handled there. I will not focus on this as it
is not important and is abstracted away from this area of code. After a user made his
selection he will have to choose the appropriate workflow in a dialog. The result from this SelectWorkflowDialog will be a WorkflowReference, as the name implies it is a
reference to a workflow. This is needed to open the workflow in the KNIME
environment.
After collecting all the required information the following actions are done by the
WorkflowService, in this case it will open the workflow in the KNIME UI. The openUI()
method holds quite a lot of logic so I will go through it in three steps.

98
@Override public void openUI(WorkflowReference ref, ISelection selection) throws WorkflowException { // Check if the workflow is available locally. if(!WorkflowService.getInstance().getRepository().existsLocal(ref)) { try { download(ref); } catch (IOException e) { throw new WorkflowException(
"Workflow download failed", e );
} } // Find the local workflow folder IContainer wfProject = WorkflowService.getInstance()
.getRepository().getLocal(ref); IFile wfFile = (IFile)wfProject.getFile(
new Path(WorkflowPersistor.WORKFLOW_FILE) ); ------
}
Snippet 69: OpenUI() part 1
The first thing that is handled is the existence of the location of the WorkflowReference.
KNIME workflows are stored in a central fileserver but are executed locally. This means
that a KNIME workflow has to be downloaded if it is not yet locally available.
After making sure the workflow is made available the local workflow folder is fetched with the reference. Using the WorkflowPersistor an IFile is fetched for future use in
an editor.
@Override public void openUI(WorkflowReference ref, ISelection selection) throws WorkflowException {
------ // Launch appropriate workflow editor OpenFileAction action = new OpenFileAction( PlatformUI.getWorkbench()
.getActiveWorkbenchWindow().getActivePage() );
action.selectionChanged(new StructuredSelection(wfFile)); action.run();
------ }
Snippet 70: OpenUI part 2
Using the resolved workflow file, an action is created for the workbench. The action will
open the correct workflow editor. This editor will contain the actual workflow.

99
@Override public void openUI(WorkflowReference ref, ISelection selection) throws WorkflowException {
------ // Create a workflow variable holding the selection List<FlowVariable> wkfVars = createSelectionVars(selection); URI workflowPath = wfProject.getLocation().toFile().toURI(); WorkflowManager wfm = (WorkflowManager)ProjectWorkflowMap.getWorkflow(workflowPath); wfm.addWorkflowVariables(
true , wkfVars.toArray(new FlowVariable[wkfVars.size()])
); // Reset all nodes. wfm.resetAndConfigureAll(); eventManager.fire(new WorkflowEvent(WorkflowEventType.OPENED, ref)); }
Snippet 71: OpenUI part 3
The last part of the openUI() method will handle the user selection. The KNIME
environment has its input set using the FlowVariable class. A FlowVariable object will
be exposed in the KNIME environment so that nodes can read them.
Firstly the ISelection object is passed to a method which will return the appropriate FlowVariables. The previously fetched workflow folder is used and resolved to an
actual URI. Using this URI a WorkflowManager is created. This is the class that will
actually serve as a direct interface for a workflow, in fact it could be seen as the
workflow.
With this manager the FlowVariables can be set, with everything set the
resetAndConfigureAll() method is called on the manager, as the name implies it will
reset and configure the entire workflow. Execution is not done with this command, it
has to be done manually in the UI.

100
4.5.2 Distributed Design
The original KNIME design has no way to be compatible with a distributed design. There
is one upside to the KNIME design and that is the isolation of code. A workflow is configured with FlowVariables before it is executed. The execution runs entirely
isolated in the KNIME environment from other PHAEDRA code.
Figure 33: Distributed workflow
To distribute KNIME workflows there are two large steps to be taken:
1. Execute a workflow without user interaction or GUI
2. Create distributed tasks that run isolated
Not all workflows are suited to be run headless. Most of the workflows require user input throughout the execution. Some expansions have to be made in WorkflowService
to allow a suitable workflow to be executed headless.
@Override public void openUI(WorkflowReference ref, ISelection selection) throws WorkflowException {
------ // Create a workflow variable holding the selected // plate/experiment/etc id(s).
configure(ref, WorkflowUtils.createSelectionData(selection), false); }
Snippet 72: openUI()
The third part of the openUI() method has now been changed. The last part of the logic
which involved configuring the workflow manager has been extracted to another method, the configure() method.
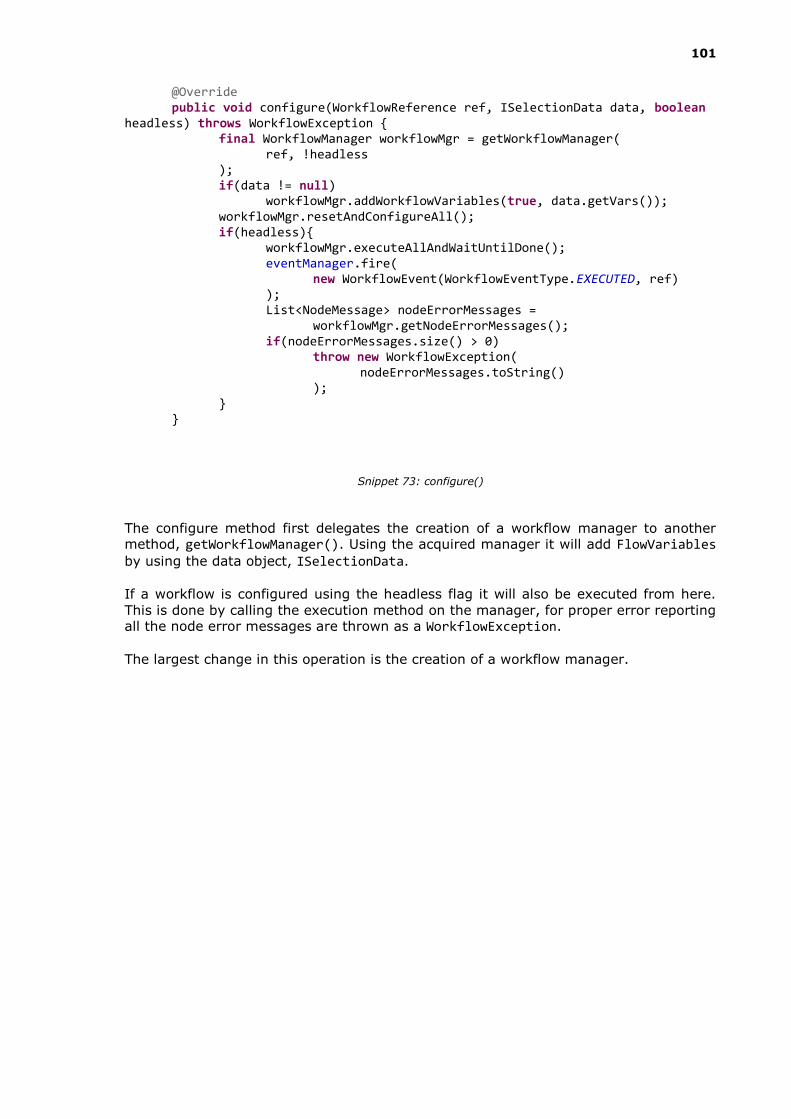
101
@Override public void configure(WorkflowReference ref, ISelectionData data, boolean headless) throws WorkflowException { final WorkflowManager workflowMgr = getWorkflowManager(
ref, !headless );
if(data != null) workflowMgr.addWorkflowVariables(true, data.getVars()); workflowMgr.resetAndConfigureAll(); if(headless){ workflowMgr.executeAllAndWaitUntilDone(); eventManager.fire(
new WorkflowEvent(WorkflowEventType.EXECUTED, ref) );
List<NodeMessage> nodeErrorMessages = workflowMgr.getNodeErrorMessages(); if(nodeErrorMessages.size() > 0) throw new WorkflowException(
nodeErrorMessages.toString() );
} }
Snippet 73: configure()
The configure method first delegates the creation of a workflow manager to another method, getWorkflowManager(). Using the acquired manager it will add FlowVariables
by using the data object, ISelectionData.
If a workflow is configured using the headless flag it will also be executed from here.
This is done by calling the execution method on the manager, for proper error reporting all the node error messages are thrown as a WorkflowException.
The largest change in this operation is the creation of a workflow manager.

102
private WorkflowManager getWorkflowManager(WorkflowReference ref, boolean ui) throws WorkflowException { IContainer wfProject = WorkflowService.getInstance()
.getRepository().getLocal(ref); IPath path = wfProject.getLocation(); if(ui){ URI workflowPath = wfProject.getLocation().toFile().toURI(); return (WorkflowManager)ProjectWorkflowMap.getWorkflow(workflowPath); }else{ WorkflowLoadResult loadResult; try { loadResult = WorkflowManager.loadProject( path.toFile(), new ExecutionMonitor(), new WorkflowLoadHelper(){ @Override public String getDotKNIMEFileName() { return WorkflowPersistor.WORKFLOW_FILE; } } ); } catch (Exception e) { throw new WorkflowException("Failed to load workflow " + path, e); } return loadResult.getWorkflowManager(); } }
Snippet 74: getWorkflowManager()
The previous method of getting a workflow manager was through the ProjectWorkflowMap. This is still the method I will use when a workflow has to be
executed in the KNIME user interface. The problem with this method is that the
workflow is bound to the UI. If there is no KNIME environment at the moment the ProjectWorkflowMap will be empty and it becomes impossible to fetch the manager.
This does not meet the requirements of headless execution. To solve this I use the static method on WorkflowManager made to load projects. I need to load the workflow
manually and fetch its manager instead of delegating this job to the KNIME
environment.
The loadProject() method requires a few parameters with the WorkflowLoadHelper as
the key component. I made a small and quick implementation which will roughly
emulate the KNIME environments way of loading workflows. The implementation
merely returns the same parameter that is used in the KNIME environment.
After getting a load result I return the manager. This will end the process of loading a
workflow and getting the matching manager without being bound to the UI. Note that I
cannot use this method of loading workflows for UI execution. There would be no link to the workflow manager and the UI workflow, making it impossible to set FlowVariables.
So a workflow can now be run headless if the configure() method is called with the
headless flag on true. This still does not mean an isolated distributed task can be
created.
To do that, I first have to find a possible point of distribution. A workflow is opened
after a selection of data, e.g. plates, is made. A workflow is designed to work with 0..n

103
selections. If there are 20 plates selected I could run a workflow with 20 plates as input
or I could run the same workflow 20 times with 1 plate as input. This will be the point
of distribution.
Running a workflow distributed is something that will introduce behavior that users are
not used to, up till now a workflow has always been associated with a graphical user
interface. In the process of distributing PHAEDRA I have not yet had such a change for
users. It was always just the back-end that changed. It was clear that users had to
make up their own decision on whether or not to distribute their workflow execution.
The execution of workflows is handled by the OpenWorkflowCmd class. It will act upon
the result of a SelectWorkflowDialog. After expending this class with an alternative OK
option, the run distributed option, it looks like the following image:
Figure 34: KNIME select workflow distributed

104
public class OpenWorkflowCmd extends AbstractHandler implements IHandler { @Override public Object execute(ExecutionEvent event) throws ExecutionException {
------ int retCode = dialog.open(); if (retCode == Dialog.OK) {
------ }else if(retCode == SelectWorkflowDialog.OKALT){ WorkflowReference ref = dialog.getSelectedWorkflow(); if(ref != null){ try { WorkflowService.getInstance()
.executeDistributed(ref, selection); } catch (WorkflowException e) { throw new ExecutionException(
"Failed to execute workflow", e );
} } } return null; } }
Snippet 75: OpenWorkflowCmd
The WorkflowService is expanded as well, an executeDistributed() command is
added and as the name implies it will run a workflow in a distributed manner by
sending out tasks.
A KNIME workflow typically does not return anything, it executes and does all the data
modifications during the execution. It makes this the first task that is not result based.
There will be no collection of results, only exception handling.

105
@Override public void executeDistributed(final WorkflowReference ref, final ISelection selection) throws WorkflowException { List<JPPFTask> tasks = new ArrayList<>(); if(selection != null) for (ISelectionData data : WorkflowUtils.createSelectionData(selection, true)) tasks.add(new WorkflowTask(ref.getId(), data)); try { JPPFClientService.getInstance().offloadTaskBatch(tasks, new TaskResultListener() { @Override public void resultsReceived(TaskResultEvent event) { if (event.getThrowable() != null) event.getThrowable().printStackTrace(); for (JPPFTask jppfTask : event.getTaskList()) if (jppfTask.getException() != null) jppfTask.getException().printStackTrace(); } }); } catch (Exception e) { throw new WorkflowException(e); } }
Snippet 76: executeDistributed()
The first thing to do in distribution is the creation of separate and isolated tasks. The createSelectionData() method will return 1..n SelectionData because the split flag is
set to true. The splitting of input data is handled in the method, plates will be split into multiple data items for distribution. For each fetched data item a new WorkflowTask is
made.
In this particular case result handling is not important as there are no useful results
that can be gotten from executing a KNIME workflow. While offloading tasks I supply a simple implementation for a TaskResultListener that will fetch and print exceptions.

106
public class WorkflowTask extends JPPFTask{ ------
@Override public void run() { WorkflowReference ref = WorkflowService.getInstance()
.getRepository().findWorkflow(refId); if(!WorkflowService.getInstance().getRepository().existsLocal(ref)) { try { WorkflowService.getInstance().download(ref); } catch (IOException e) { setException(e); } } try { WorkflowService.getInstance().configure(ref, data, true); } catch (Exception e) { setException(e); } setResult(true); } }
Snippet 77: WorkflowTask
A workflow task is a simple wrapper made to execute workflows in a headless manner.
If the workflow is not available locally it is first downloaded to the node, any exceptions that happen here will be set as an exception result for the current JPPFTask. Following
the download I configure the flow with the headless flag on, this will also execute the
workflow and again exceptions are caught and set.
Everything needed for a task to execute a workflow is defined as a class variable, this is
a SelectionData object and a workflow reference id.
Workflows that will be executed in a distributed manner have two very important
requirements:
1. Must run without user input
2. Must be able to run concurrent
Definitely requirement one is something that most workflows cannot offer yet. A
distribution system has been laid out for the workflows, it is now up to other developers
to create compatible workflows.
107
4.6 PHAEDRA as a JPPF Node
The PHAEDRA application is a client application that gets its user interface components
through Eclipse RCP with SWT and JFaces. Our distributed topology requires the
creation of a PHAEDRA application without a graphical user interface to function as a
JPPF node. It cannot be intrusive to possible users and it should be self-sustainable.
To create this application lots of changes had to happen to PHAEDRA. The user
interface should not be started and property files should replace any required user-
input. The application has to keep itself up-to-date automatically and it should be able
to recover from failures and restart autonomously.
This headless application should be installed on other computers and servers. Since the
target operating system will be Windows this installation will be done as a Windows
service. This way the headless PHAEDRA will run in its own session independent of user
sessions which make it possible to install it on fast desktop computers that are still in
use by other people.
This breaks down in four main tasks:
1. Start without the user interface
2. Create a self-updating mechanism
3. Recover from crashes
4. Wrap as a Windows service
4.6.1 Headless PHAEDRA
Creating a headless Eclipse RCP application should not be hard as Eclipse RCP has a
headless environment at its core, the OSGi implementation, Equinox.
When inspecting a built Eclipse RCP application for its startup parameters you quickly
see the application parameter.
The application that is passed as a parameter has to be an extension of the
org.eclipse.core.runtime.applications extension point. You can treat this like the
main method of a regular Java application, this will be the start of the entire
application.
The original user interface application quickly starts the Workbench and delegates
everything else to other plugins. The next window that will pop-up is the splash screen
and the login screen. All of this is part of the graphical user interface and all of this has
to be deactivated in the headless version of PHAEDRA.
The new Application class will also be an extension to the aforementioned extension
point but will handle lots of setup itself. An entire new plugin is created for the headless
bootstrapping of PHAEDRA.

108
Figure 35: com.jnj.phaedra.headless src structure
The new plugin holds four classes and the bundle activator. It is layered into two packages that will assist the Application with the bootstrapping of the PHAEDRA
environment. The Application class will handle authentication through the
Authentication class and updates through the Updater class.
The start() method in Application is where everything begins.
private static AtomicBoolean run = new AtomicBoolean(true);
@Override public Object start(IApplicationContext context) throws Exception { if(!Authentication.authenticated()) return IApplication.EXIT_OK; createShutdownHook(); executeStartupExtensions(); while(run.get()) Thread.sleep(500); return IApplication.EXIT_OK; }
Snippet 78: start() in Application
The very first thing to do is check if this PHAEDRA node can authenticate as a valid PHAEDRA user in the environment. If this authenticated() method has true as its
return value it means the session is authenticated and logged in. If there is no
successful authentication, the application will exit silently. If there is an authentication
the first thing to do is to create a JVM shutdown hook and to execute the startup
extensions, more about these later. Finally I place the main thread in an infinite loop while listening to a static AtomicBoolean as a running flag.

109
Authentication
First the authentication, in regular PHAEDRA users login with their username and
password. Headless PHAEDRA has to run without any user input so this forms a
problem. To solve this problem a property file was introduced which contains the
username in clear text and a password encrypted through AES.
public static boolean authenticated() throws GeneralSecurityException { Properties configFile = new Properties(); try(FileInputStream in = new FileInputStream("update.properties")){ configFile.load(in); } catch (IOException e) { e.printStackTrace(); } String username = configFile.getProperty("username"); String hexpw = configFile.getProperty("password"); byte[] password = new HexBinaryAdapter().unmarshal(hexpw); password = AESEncryptor.decrypt(password).getBytes();
String envId = configFile.getProperty("environment"); ------
Snippet 79: authenticated() properties
The above snippet shows the usage of the aforementioned property file. The configFile is loaded with an inputstream. The username and environment are simply
fetched from the file and assigned to a String in their raw form. The password is
decrypted and stored as a byte array.
These values are then used to authenticate, I use the PHAEDRA environment ID to set
the node to a specific environment. Each environment has its own set of connection
strings for databases and file servers.
The authenticated() method is a complete headless replacement of the original
PHAEDRA login screen that allows login and selection of environment, the values are
set through properties.
Shutdown hook
The first thing that will happen in the Application after authentication is the creation
of a shutdown hook, from the JavaDoc:
A shutdown hook is simply an initialized but unstarted thread. When the virtual
machine begins its shutdown sequence it will start all registered shutdown hooks in
some unspecified order and let them run concurrently.
This is where the crucial cleanups will occur. When a headless PHAEDRA application is
forcibly shutdown there are still cleanup methods that have to be called.

110
private void createShutdownHook() { Thread hook = new Thread(){ @Override public void run() { Screening.getEnvironment().shutdown(); try { EclipseStarter.shutdown(); } catch (Exception e) { e.printStackTrace(); } } }; Runtime.getRuntime().addShutdownHook(hook); }
Snippet 80: createShutdownHook()
The shutdown hook will close the PHAEDRA Screening environment which will properly close database connections and such. I also manually call the EclipseStarter from
here to force a clean shutdown of the OSGi platform. This will write some files to the
workspace that could else corrupt the workspace and render the installation useless.
Startup extensions
The Application will execute extensions from its extension point immediately after the
shutdown hook is placed on the JVM.
The extension point provided by the com.jnj.phaedra.headless plugin is called
HeadlessStartup. The HeadlessStartup is a sequence of extensions in the form of an
interface implementation. This interface is the org.eclipse.ui.IStartup interface and
is the same interface that is used to add startup hooks to a normal Eclipse RCP
application. This makes the existing startup classes compatible with the
HeadlessStartup extension point.
The following extensions contribute to the extension point:
<extension point="com.jnj.phaedra.headless.headlessStartup"> <startup class="com.jnj.phaedra.headless.updater.Updater"> </startup> </extension> <extension point="com.jnj.phaedra.headless.headlessStartup"> <startup class="com.jnj.screening.jppf.node.EarlyStarter"> </startup> </extension> <extension point="com.jnj.phaedra.headless.headlessStartup"> <startup class="com.jnj.screening.r.rservi.EarlyStarter"> </startup> </extension>
Snippet 81: HeadlessStartup extensions

111
The first extension is in the same plugin as the extension point and you can see it is the Updater class, as the name implies this class is responsible for keeping the application
up-to-date.
The other extensions make sure a JPPF node is kept running and that the R
programming environment is started.
I will first take a look at the EarlyStarter class for R and work my way up to the
Updater.
public class EarlyStarter implements IStartup { ------
@Override public void earlyStartup() { log.info("Starting R engine"); RService.getInstance().initialize(); try{ StatusManager.getInstance().forcePoll(RStatusChecker.class); }catch(NullPointerException npe){ //PHAEDRA is running headless } boolean isRunning = RService.getInstance().isRunning(); if (isRunning) log.info("R engine up and running"); else log.warn("------"); } }
Snippet 82: EarlyStarter for R
This implementation of IStartup is made to start an instance of the RService which in
turn will start the R pools and expose the R programming language environment to
PHAEDA.
PHAEDRA has a user interface notification in the form of traffic lights, they are the basic green=good and red=bad icons. The EarlyStarter for R is also used in the original
PHAEDRA and thus contains calls to user interface components, I simply ignore a NullPointerException here to make the class compatible with a headless environment.
The JPPF node EarlyStarter is the key class of the entire headless PHAEDRA setup as
it will provide its core functionality, JPPF node capabilities.

112
public class EarlyStarter implements IStartup{ private static Logger log = Logger.getLogger(JPPFNodeService.class); @Override public void earlyStartup() { log.info("Starting JPPF node"); JPPFNodeService.getInstance(); } }
Snippet 83: EarlyStarter for JPPF node
The code is quite an anticlimax as it only does one thing, get an instance of the JPPFNodeService singleton to construct a JPPFNodeService object. This object will run
a JPPFNode in one thread. As with most things in JPPF it is very simple and this is all
that is required to get a node running inside a JVM.
Finally the Updater class, this class will handle the self-sustainable update mechanism.
The standard PHAEDRA application also has an update mechanism, it uses the P2
update services that are bundled with Equinox. Everything related to P2 from building
to user interface configurations is provided for you. The biggest disadvantage of this, is
abstraction of certain methods. Low-level methods are exactly what I will need when
updating an Eclipse RCP application automatically.
public class Updater implements IStartup{ @Override public void earlyStartup() { Properties configFile = new Properties(); try(FileInputStream in = new FileInputStream("update.properties")){ configFile.load(in); } catch (IOException e) { e.printStackTrace(); } JobChangeAdapter provisionListener = new JobChangeAdapter(){ @Override public void done(IJobChangeEvent event) { Application.shutdown(); } }; ScheduledThreadPoolExecutor scheduler =
new ScheduledThreadPoolExecutor(1); scheduler.scheduleWithFixedDelay( new P2UpdateRun(provisionListener) , 0 , Integer.parseInt(configFile.getProperty("interval")) , TimeUnit.valueOf(configFile.getProperty("unit")) ); } }
Snippet 84: Updater

113
Similar to the Authentication class the Updater class needs some values from properties so fetching the property file is the first thing that is done. Next an IJobChangeListener
is created that will set the AtomicBoolean running flag to false through
Application.shutdown() when a job is done. This is required to restart the program
after updates were downloaded and installed.
There is no implementation for a push system so our nodes have to pull from the
update site and manually check for changes. This has to be done periodically and is done by using a ScheduledThreadPoolExecutor. The executor is configured using the
interval settings from the property file and will run a new P2UpdateRun after each
interval.
P2UpdateRun is the class that will handle pulling and installing from the P2 update site.
public class P2UpdateRun implements Runnable { ------
@Override public void run() { BundleContext context = FrameworkUtil.getBundle(P2UpdateRun.class)
.getBundleContext(); ServiceReference<?> reference = context.getServiceReference(
IProvisioningAgent.SERVICE_NAME );
if (reference == null) return; IProvisioningAgent agent = (IProvisioningAgent) context
.getService(reference); IMetadataRepositoryManager repoManager = (IMetadataRepositoryManager)
agent.getService(IMetadataRepositoryManager.SERVICE_NAME); reloadUpdateRepos(repoManager); UpdateOperation updateOperation = createUpdateOperation(agent); if (hasUpdates(updateOperation)) { createProvisioningJob(updateOperation).schedule(); log.info("ProvisioningJob has been scheduled"); } else { log.info("No updates have been found"); } context.ungetService(reference); }
------ }
Snippet 85: P2UpdateRun run()
The main update method is the run() method from the Runnable P2UpdateRun. The P2
system uses the OSGi standard services instead of the proprietary extension points.
After grabbing the needed objects from the OSGi bundle system the first thing to do
will be to reload the update repositories. Standard P2 only grabs the information from
the update site once. The data that is gotten from this information grab will be cached
until the application is shut down. I need to poll for changes continuously so caching is
not an option.

114
private void reloadUpdateRepos(IMetadataRepositoryManager repoManager) { try { URI[] uris = repoManager.getKnownRepositories(
IMetadataRepositoryManager.REPOSITORIES_ALL );
for (URI uri : uris) { repoManager.removeRepository(uri); repoManager.addRepository(uri); repoManager.loadRepository(
uri , new NullProgressMonitor()
); } } catch (ProvisionException | OperationCanceledException e) { log.error(e.printStackTrace()); } }
Snippet 86: reloadUpdateRepos()
The only way to make P2 refresh its cache is to reload the update repositories. I do this
by fetching all known repositories and looping over them to remove, add and load them
again. This will force a new cache of repository metadata.
When newer versions are found in the new cache of update repositories the old ones
are marked as old and updateable. The first thing to do will be to create an update
operation and check if there are in fact any marked updateable units.
private UpdateOperation createUpdateOperation(IProvisioningAgent agent) { ProvisioningSession session = new ProvisioningSession(agent); UpdateOperation update = new UpdateOperation(session); return update; }
private boolean hasUpdates(UpdateOperation updateOperation) { IStatus result = updateOperation.resolveModal(
new NullProgressMonitor() );
return result.getCode() != UpdateOperation.STATUS_NOTHING_TO_UPDATE; }
Snippet 87: createUpdateOperation() and hasUpdates()
The UpdateOperation that is created by using the ProvisioningSession for the
ProvisioningAgent service will hold the update information and by resolving it I can
make sure there are updates to be made.

115
private ProvisioningJob createProvisioningJob(UpdateOperation updateOperation) { ProvisioningJob provisioningJob = updateOperation.getProvisioningJob(
new NullProgressMonitor() );
provisioningJob.addJobChangeListener(provisionListener); return provisioningJob; }
Snippet 88: createProvisioningJob()
If there are indeed updates present in the update operation I can use the operation to create a ProvisioningJob. I also add the provisionListener to this job so I can create
a clean shutdown of the program after provisioning is completed.
This job is scheduled immediately in the main run() method of P2UpdateRun which
means that when updates are found they are to be installed immediately. The provisionListener that is set to the job will make sure the application does a clean
shutdown.
So a little summary of what I have now, there is a headless PHAEDRA application that
can be extended through IStartup extensions. One of these extensions is the JPPF
Node and another extension takes care of updating. The updates are installed
immediately and on completion the program is shutdown.
This takes care of two of the requirements, now I need recovery from failures and a
Windows service installation. Recovery from failures and crashes will be handled by a
wrapping application, I will also use this wrapping application to handle the reboot after
updates.
4.6.2 PHAEDRA under YAJSW
I have briefly explained what YAJSW is capable of. It can wrap Java applications and
run them as Windows services. The main goal is to use YAJSW to wrap a PHAEDRA
version and make it call the headless Application instead of the regular Application. This
translates to the following properties.
# Java Application wrapper.java.command = ..\\jre\\bin\\java.exe # working directory wrapper.working.dir=..\\..\\phaedra\\ # Java Application jar file wrapper.java.app.mainclass = org.eclipse.equinox.launcher.Main wrapper.java.classpath.1 = plugins\\org.eclipse.equinox.launcher_*.jar wrapper.app.parameter.1 = -application wrapper.app.parameter.2 = com.jnj.phaedra.headless wrapper.app.parameter.3 = -console wrapper.app.parameter.4 = -consoleLog
Snippet 89: PHAEDRA YAJSW properties 1

116
The Java command that should be used points to the packaged JRE within a PHAEDRA
installation. I set the working directory to the actual PHAEDRA dir which is two paths up
since the wrapper is launched in phaedra/YAJSW/bat/.
Usually Eclipse RCP applications are started by using a product build, this product build
will bundle a launcher into an executable while reading its startup parameters from an
.ini file. I want to wrap the Java command itself and not the native executable. The first
thing to do is getting an OSGi environment up and running, I do this by starting the
org.eclipse.equinox.launcher Jar. The launcher can take an application parameter
which should point to an extension of the org.eclipse.runtime.applications
extension point. After passing the headless Application I set some convenience flags to
expose the OSGi console.
With all this YAJSW knows enough to start a headless PHAEDRA as a service, on top of
everything it can be plugged into an existing PHAEDRA build because it does not
require a separate build process. It will launch the application directly using the
Equinox launcher.
There is still one issue to resolve regarding the services. I have mentioned it before
that services run in their own sessions, these sessions also need to have permissions.
The permissions are still set by a user account, the service user that will run and install
the service. To keep this secure yet easy and managed by YAJSW I use the YAJSW
util.inquireCLI() command to ask for input.
# wrapper service user. only for windows. on *nix system this is root. wrapper.ntservice.account=eu\phaedra wrapper.ntservice.password=${util.inquireCLI('Please enter the password for the NTSERVICE account ')}
Snippet 90: PHAEDRA YAJSW properties 2
This will use the phaedra user on the EU domain and ask for a password through
command prompt during the installation of the service.
With this the service requirement is completely fulfilled. YAJSW can successfully start
and install the service on any Windows machine.
This leaves one requirement to solve and that is the recovery of failures and crashes. I
can use YAJSW for this as well with the following properties:
# Exit Code Properties # Restart on non zero exit code wrapper.on_exit.0=RESTART wrapper.on_exit.default=RESTART
Snippet 91: PHAEDRA YAJSW properties 3
This makes YAJSW restart on any exit code. It is easily configured to restart only on a
non-zero exit code but in our case it can be very useful to recover from hard crashes
with a reboot.
Using this, all the requirements for a headless PHAEDRDA version are fulfilled. Using the headless Application wrapped with YAJSW I have a non-interactive, self-
sustainable, self-recovering JPPF Node embedded in PHAEDRA with the OSGi runtime.

117
4.7 Phaedra Build Process
The original PHAEDRA build process was not entirely automatic so no nightly builds
were available for testing purposes. During my internship lots of different code was
written, which had an immense impact on how PHAEDRA worked. There were however
no daily integrations of code into a daily product.
It quickly became a necessity to have some kind of automated build system. The first
goal was to replace the manual build steps in the original build process.
4.7.1 Original Build Process
The original process was written in Ant using the PDE Build tasks. A Jenkins job was
created to do three things:
1. Checkout the bare necessities to build a PHAEDRA product
2. Execute an Ant script
3. Archive the results
These bare necessities include the build project itself which contains the Ant scripts and
properties, the PHAEDRA product project which contains the configurations and
branding such as icons, the PHAEDRA feature which holds references to other PHAEDRA
projects and at last a shell project to include a JRE in the build process.
When all these are checked out and made available locally on the build server the Ant
script will be executed, it takes four tasks.
<target name="init"> <delete dir="${buildDirectory}" /> <mkdir dir="${buildDirectory}" /> <mkdir dir="${buildDirectory}/plugins" /> <copy todir="${buildDirectory}/plugins"> <fileset dir="../"> <include name="com.jnj.phaedra/**" /> </fileset> </copy> <mkdir dir="${buildDirectory}/features/com.jnj.phaedra" /> <copy todir="${buildDirectory}/features/com.jnj.phaedra"> <fileset dir="../com.jnj.phaedra-feature"/> <fileset dir="../com.jnj.screening.jre"/> </copy> </target>
Snippet 92: init task
The first task is the init task. It will handle all the pre-configuring of the build process.
This includes the recreation of the build directory structure. This build.xml will be
executed in the build project directory which is one step down from the root directory. I
copy the plugins and features, which were first made available with the Jenkins SVN
commands, to the build directory.

118
<target name="build-feature-repo"> <echo message="Creating p2 repository from Phaedra update site"/> <java classname="org.eclipse.equinox.launcher.Main"
fork="true" failonerror="true"> <arg value="-application" /> <arg value="org.eclipse.equinox.p2.publisher.UpdateSitePublisher" /> <arg value="-metadataRepository" /> <arg value="file:${buildDirectory}/buildRepo" /> <arg value="-artifactRepository" /> <arg value="file:${buildDirectory}/buildRepo" /> <arg value="-source" /> <arg value="${updateSitePath}" /> <arg value="-compress" /> <arg value="-publishArtifacts" /> <classpath> <pathelement location="${equinox.launcher}" /> </classpath> </java> </target>
Snippet 93: build-feature-repo task
The follow-up task will build the local P2 repository. It will do this by calling the UpdateSitePublisher. It will build a mirror of an existing P2 repository. This is where
the manual section of the PHAEDRA building process lies. It requires an existence of a
P2 repository. A developer has to publish certain features manually to this P2 site if he
wants to update the final product build.
<target name="pde-build"> <echo message="Creating Phaedra product"/> <java classname="org.eclipse.equinox.launcher.Main"
fork="true" failonerror="true"> <arg value="-application" /> <arg value="org.eclipse.ant.core.antRunner" /> <arg value="-buildfile" /> <arg value="${pde.build.dir}/scripts/productBuild/productBuild.xml" /> <arg value="-Dtimestamp=${timestamp}" /> <classpath> <pathelement location="${equinox.launcher}" /> </classpath> </java> </target>
Snippet 94: pde-build task
After a build folder structure is setup and all the necessities copied there, including the
P2 repository mirror, I start the actual build. I will use the PDE build scripts to start the
product build. This task will built the entire PHAEDRA product. First by creating a small
lean product that has no functionalities whatsoever. It does this by using the features
and plugins that were first checked out. After this barebones build has completed it will
be filled with features and plugins from the local P2 repository.

119
<target name="pre-publish"> <echo message="Copying ${buildDirectory}/${buildLabel} to ${deployDirectory}"/> <copy todir="${deployDirectory}"> <fileset dir="${buildDirectory}/${buildLabel}"> <include name="*.zip" /> </fileset> </copy> </target>
Snippet 95: pre-publish task
The task above will perform the relocation of the final product to a directory that is
easily accessible for Jenkins. This directory is the deployment directory.
In Jenkins the files in this deployment directory are archived with the following setting:
Snippet 96: archive option
This will make Jenkins save all the zip files in the dist folder. In this case it will be a
32bit and a 64bit build of PHAEDRA. The files are saved per build allowing us to have a
history of daily builds as shown in the following picture:
Figure 36: Build history

120
4.7.2 Buckminster in Jenkins
There is still a large manual factor in the PHAEDRA build process, the P2 repository
build. It may look like a small step when explaining the build process but it actually
contains 99% of all the PHAEDRA functionality. It is the export process of over 120
plugins.
This step has to be automated to create nightly builds. I have chosen Buckminster as
the tool to build the P2 repository. Although I could have gone with more Ant scripts or
an even more extensive use of the PDE Build project, I did not. Buckminster can do
much more than just build update sites and do it with less work than Ant or PDE Build.
The first task was to setup Buckminster in Jenkins. There is a Buckminster plugin
available in the large list of Jenkins plugins. It can be installed through the built-in
plugin manager. Having the Buckminster plugin installed does not mean that a
Buckminster installation has been added to the Jenkins system.
Once the plugin is installed you can find a Buckminster entry in the Configure System
section of Jenkins.
Figure 37: Buckminster Installation
This is where you have to go to add your first Buckminster installation. When trying to
add a Buckminster installation you will notice that the most recent version available is
Buckminster 3.6, this is not the most recent version of Buckminster.
Luckily the plugin has support for custom Buckminster installations. The installation file
has to be located at JENKINS_HOME/userContent/buckminster/buckminster.json. It is
written in JSON and contains the location of all the necessary repositories.

121
Snippet 97: Custom Buckminster JSON
This JSON file tells the Buckminster plugin where to look. I create a Buckminster 3.7
installation by pointing the repositories to the 3.7 releases.
When this is done a Buckminster 3.7 should show up in the Configure Section of
Buckminster, add it and check the Install automatically flag. This will make sure the
Buckminster plugin will download the appointed Buckminster installation automatically
when it cannot be found. It is recommended to increase the –Xmx parameter in this
configuration window as the default 256MB is not enough to build a large application.
After adding a Buckminster installation to the Jenkins configuration it will be possible to
add a Buckminster build step in Jenkins jobs, which is why I went through the trouble
of installing a plugin in the first place.

122
4.7.3 Automatic P2 Repository Build
The original build script could build PHAEDRA automatically if a P2 repository was
present. The goal of this section is to automatically build a P2 repository.
To build all the features I need lots of components, in PHAEDRA I can identify the
following:
1. Eclipse plugins
2. Third party plugins that are delivered as an OSGi bundle
3. Third party plugins we packaged as an OSGi bundle
4. PHAEDRA plugins
The Eclipse plugins can be found in the Eclipse IDE home, these will be included in the
build process through a target definition. The bundles that are provided as-is were first
included in the target definition by copying them to a local destination. I decided to
create a P2 repository for the third party plugins, this way I can create a common
target platform regardless of its environment. Third party plugins that we packaged
manually as well as the PHAEDRA plugins that reside in our Subversion repository.
The first step in the automatic build is the automatic materialization of a workspace
through Buckminster.
First the target definition was created, it had to include Eclipse plugins and the third
party P2 repository.
<?xml version="1.0" encoding="UTF-8" standalone="no"?> <?pde version="3.6"?> <target name="PHAEDRA Target" sequenceNumber="33"> <locations> <location path="D:/phaedra-build/eclipse/rcp-3.7.1-x64-delta"
type="Directory"/> <location includeAllPlatforms="false" includeMode="slicer"
includeSource="true" type="InstallableUnit"> <unit id="com.jnj.phaedra.thirdparty.collection.feature.group"
version="1.0.0.201205230912"/> <repository
location="http://itsbebesvc237.eu.jnj.com:8081/target_p2_site/"/> </location> </locations> <environment> <os>win32</os> <ws>win32</ws> <arch>x86_64</arch> <nl>nl_BE</nl> </environment> </target>
Snippet 98: Target platform for PHAEDRA builds
There are two locations defined, the first location points to a local Eclipse installation
that is setup with the Eclipse Delta Pack. The Delta Pack ensures the existence of
plugins beyond the current architecture, this is necessary for us as PHAEDRA is built for
32bit and 64bit Windows operating systems. The second location points to the third
party P2 repository.

123
To materialize the PHAEDRA Subversion repository I create a root feature which has
references to all other features I want to build. The feature is named com.jnj.phaedra.buildfeature.
<?xml version="1.0" encoding="UTF-8"?> <cq:componentQuery xmlns:cq="http://www.eclipse.org/buckminster/CQuery-1.0" resourceMap="file:/D:/phaedra-build/bucky_props/phaedra.rmap.xml"> <cq:rootRequest name="com.jnj.phaedra.buildfeature"
componentType="eclipse.feature"/> <cq:property key="target.arch" value="*"/> <cq:property key="target.os" value="*"/>
<cq:property key="target.ws" value="*"/> </cq:componentQuery>
Snippet 99: PHAEDRA CQUERY
With the wrapping build feature the CQUERY looks like the above. I set the properties
for architecture, operating system and windowing system to make sure that all of the
plugins are materialized. In reality these will only be plugins for x86 and x86_64
Windows systems.
<?xml version="1.0" encoding="UTF-8"?> <rmap xmlns:xsi="http://www.w3.org/2001/XMLSchema-instance" xmlns="http://www.eclipse.org/buckminster/RMap-1.0" xmlns:bc="http://www.eclipse.org/buckminster/Common-1.0"> <searchPath name="resources"> <provider readerType="svn" componentTypes="eclipse.feature,osgi.bundle"
mutable="true" source="true"> <uri format="svn://{1}:{2}@svn.na.jnj.com/src/proj/phaedra/trunk/v2/{0}"> <bc:propertyRef key="buckminster.component" /> <bc:propertyRef key="svn.user" /> <bc:propertyRef key="svn.password" /> </uri> </provider> </searchPath> <searchPath name="features"> <provider readerType="svn" componentTypes="eclipse.feature,osgi.bundle"
mutable="true" source="true"> <uri format="svn://svn.na.jnj.com/src/proj/phaedra/trunk/v2/{0}-feature"> <bc:propertyRef key="buckminster.component" /> </uri> </provider> </searchPath> <!-- PHAEDRA svn --> <locator searchPathRef="resources" failOnError="false"/> <!-- Find features in PHAEDRA svn marked by id-feature instead of id --> <locator searchPathRef="features"/> </rmap>
Snippet 100: PHAEDRA RMAP
The PHAEDRA RMAP that is used in the CQUERY has two entries. The first entry will
point to the resources search path. The buckminster.component property will hold the
current property that is being searched for. The SVN username and password is set in a
different property file because this RMAP will be made public with the CQUERY. It can
download most of the components here.
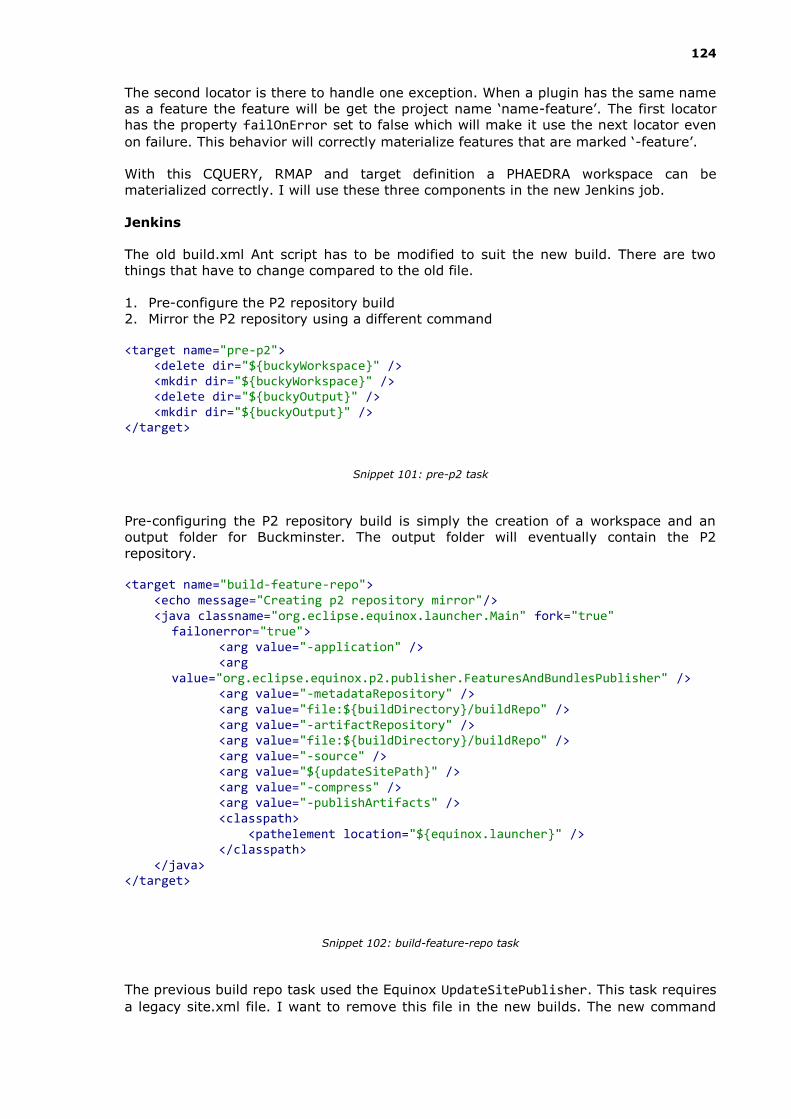
124
The second locator is there to handle one exception. When a plugin has the same name
as a feature the feature will be get the project name ‘name-feature’. The first locator has the property failOnError set to false which will make it use the next locator even
on failure. This behavior will correctly materialize features that are marked ‘-feature’.
With this CQUERY, RMAP and target definition a PHAEDRA workspace can be
materialized correctly. I will use these three components in the new Jenkins job.
Jenkins
The old build.xml Ant script has to be modified to suit the new build. There are two
things that have to change compared to the old file.
1. Pre-configure the P2 repository build
2. Mirror the P2 repository using a different command
<target name="pre-p2"> <delete dir="${buckyWorkspace}" /> <mkdir dir="${buckyWorkspace}" /> <delete dir="${buckyOutput}" /> <mkdir dir="${buckyOutput}" /> </target>
Snippet 101: pre-p2 task
Pre-configuring the P2 repository build is simply the creation of a workspace and an
output folder for Buckminster. The output folder will eventually contain the P2
repository.
<target name="build-feature-repo"> <echo message="Creating p2 repository mirror"/> <java classname="org.eclipse.equinox.launcher.Main" fork="true"
failonerror="true"> <arg value="-application" /> <arg
value="org.eclipse.equinox.p2.publisher.FeaturesAndBundlesPublisher" /> <arg value="-metadataRepository" /> <arg value="file:${buildDirectory}/buildRepo" /> <arg value="-artifactRepository" /> <arg value="file:${buildDirectory}/buildRepo" /> <arg value="-source" /> <arg value="${updateSitePath}" /> <arg value="-compress" /> <arg value="-publishArtifacts" /> <classpath> <pathelement location="${equinox.launcher}" /> </classpath> </java> </target>
Snippet 102: build-feature-repo task
The previous build repo task used the Equinox UpdateSitePublisher. This task requires
a legacy site.xml file. I want to remove this file in the new builds. The new command

125
that I will use is the FeaturesAndBundlesPublisher, which does the same thing without
the need of a site.xml file.
With the changes completed I will adapt the Jenkins job itself, the flow of actions will be
modified accordingly.
Figure 38: Build flow
The items highlighted in green are added in the new Jenkins job. Apart from the pre-
configure Ant task all the new steps are done in Buckminster. These are commands
executed on the headless Buckminster installation that was configured by a custom
install with the Buckminster plugin for Jenkins.

126
Building the P2 repository translates into the following Buckminster commands:
importtargetdefinition -A "D:/phaedra-build/bucky_props/thirdparty.target" import -P "D:/phaedra-build/bucky_props/p2build.properties"
"D:/phaedra-build/bucky_props/phaedra.cquery.xml" clean build perform -Dqualifier.replacement.*=generator:buildTimestamp -Dgenerator.buildTimestamp.format=\'Dev\'yyyyMMdd-HHmm -P "D:/phaedra-build/bucky_props/p2build.properties" com.jnj.phaedra.buildfeature#site.p2.zip
Snippet 103: Buckminster commands
Importtargetdefinition will take a target definition to set the target platform. In our
case this will point to a locally installed Eclipse + Delta pack and the third party P2
repository. It will not use the remote components of the P2 repository but mirror it
instead, this is why importing the target definition can take a while.
The second command will activate the entire materialize procedure. Extra properties
are added to make provide the SVN credentials.
After cleaning and building the newly materialized Buckminster workspace I do the final
step, the P2 repository build. I add parameters to resolve our qualifiers into “Dev-
timestamp”. A qualifier is a marking in a plugin or feature that should be replaced on
built. These replacements can be anything from SVN revisions to timestamps. I opted
for timestamps so every development snapshot gets tagged with its date, making it
easy for us to track errors. Properties are provided to set the target architecture,
window system and operating system.
I perform the site.p2.zip action provided by Buckminster. It will build the P2
repository and archive it for us. This repository will contain all PHAEDRA features for all
architectures, in reality this will be x86 and x86_64.
With this, the automatic build is complete. The result is a snapshot of PHAEDRA code
built into a working product for both architectures and an archived update site. I can
use this update site later to maintain self-sustainable headless PHAEDRA development
snapshots. This way I can configure several computers to act as development PHAEDRA
JPPF Nodes without having to manually reconfigure them every day.

127
CONCLUSION
During my internship I learned lots about the Java Virtual Machine, network
programming and build systems. I adapted the original design of the PHAEDRA
application and distributed lots of functionalities to a computing grid that I created. In
the last weeks of my internship I learned how to automatically build Eclipse RCP
applications using the Buckminster tool and the Jenkins build server.
I believe I exceeded my initial goals of implementing grid computing. I built a Java
grid, distributed lots of functionality, created a self-sustainable headless Windows
service in Java and managed to create an automatic build process for the entire
application.
The technology is there for future developers to use, if developers create new
functionalities with isolated design in mind it will be very easy to add distributed tasks.
All this will increase the user experience for PHAEDRA users by delivering a better
tested and faster application.
I conclude that this internship was one of the most educational experiences I have ever
had. My new knowledge of the Java Virtual Machine is not limited to just Java but can
transfer easily to other languages for the Java Virtual Machine. For this I am very
grateful. I believe that I learnt more in these few months than I ever could during
class.

128
REFERENCES
Akka. (n.d.). Akka. Retrieved April 10, 2012, from akka.io: http://akka.io/
Apache. (n.d.). Apache Ant. Retrieved April 22, 2012, from ant.apache.org:
http://ant.apache.org/
Apache. (n.d.). Foundation Project. Retrieved April 22, 2012, from www.apache.org:
http://www.apache.org/foundation/
ATIS. (n.d.). Telecom glossary: network topology. Retrieved April 25, 2012, from
atis.org: http://www.atis.org/glossary/definition.aspx?id=3516
Blewitt, A. (2011, January 31). Hudson Renames to Jenkins. Retrieved June 3, 2012,
from infoq.com: http://www.infoq.com/news/2011/01/jenkins
Eclipse. (n.d.). BuckyBook. Retrieved June 1, 2012, from eclipse.org:
http://www.eclipse.org/downloads/download.php?file=/tools/buckminster/doc/BuckyBo
ok.pdf
Eclipse. (n.d.). Equinox P2. Retrieved May 27, 2012, from eclipse.org:
http://www/equinox/p2/
Eclipse. (n.d.). PDE. Retrieved June 1, 2012, from eclipse.org:
http://www.eclipse.org/pde/
Eclipse. (n.d.). Rich Client Platform. Retrieved April 22, 2012, from wiki.eclipse.org:
http://wiki.eclipse.org/index.php/Rich_Client_Platform
Eclipse. (n.d.). Target Platform. Retrieved June 4, 2012, from help.eclipse.org:
http://help.eclipse.org/galileo/index.jsp?topic=/org.eclipse.pde.doc.user/concepts/targ
et.htm
Implementing Serializable. (n.d.). Retrieved April 3, 2012, from javapractices.com:
http://www.javapractices.com/topic/TopicAction.do?Id=45
Janssen Pharmaceuticals. (n.d.). Our Company. Retrieved April 10, 2012, from
janssenpharmaceuticalsinc.com: http://www.janssenpharmaceuticalsinc.com/our-
company
JPPF 3.x Documentation. (n.d.). Retrieved April 6, 2012, from jppf.org:
http://www.jppf.org/doc/v3/index.php?title=JPPF_3.x_Documentation
jutzig-. (2011, January 17). Buckminster Plugin. Retrieved June 4, 2012, from
wiki.jenkins-ci.org: https://wiki.jenkins-ci.org/display/JENKINS/Buckminster+PlugIn
Kulandai, J. (2009, November 23). Java Serialization. Retrieved April 12, 2012, from
javapapers.com: http://javapapers.com/core-java/java-serialization/
Molter, T., & Kawaguchi, K. (2012, April 27). Meet Jenkins. Retrieved June 3, 2012,
from wiki.jenkins-ci.org: https://wiki.jenkins-ci.org/display/JENKINS/Meet+Jenkins
Oracle. (n.d.). Guide: Java RMI. Retrieved April 24, 2012, from docs.oracle.com:
http://docs.oracle.com/javase/1.5.0/docs/guide/rmi/index.html

129
Vogel, L. (2012, May 8). Eclipse RCP Tutorial. Retrieved May 20, 2012, from
vogella.com: http://www.vogella.com/articles/EclipseRCP/article.html
Vogel, L. (2012, February 2). SWT Tutorial. Retrieved March 23, 2012, from
vogella.com: http://www.vogella.com/articles/SWT/article.html
wistrand. (n.d.). What is a service. Retrieved April 17, 2012, from knopflerfish.org:
http://www.knopflerfish.org/osgi_service_tutorial.html