jewelry for you! · pdf filejewelry for you! ebook from consumer crafts and crafts unleashed...
TRANSCRIPT
Jewelry for You! eBook from Consumer Crafts and Crafts Unleashed
Find more jewelry projects and more at www.craftsunleashed.com and http://www.consumercrafts.com. 2
Jewelry for You! eBook from Consumer Crafts and Crafts Unleashed
Find more jewelry projects and more at www.craftsunleashed.com and www.consumercrafts.com. 3
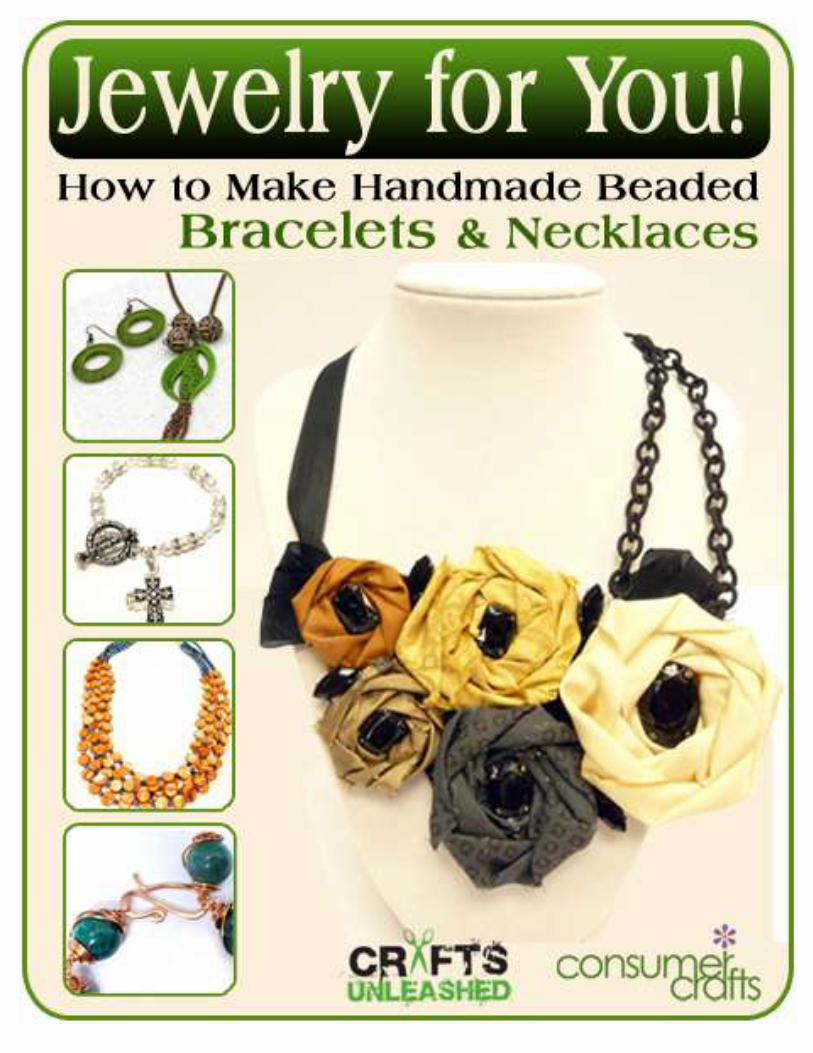
Jewelry for You!
How to Make Handmade Beaded Bracelets and Necklaces
Copyright 2011 by Prime Publishing LLC All rights reserved. No part of this book may be reproduced or transmitted in any form or by any means, electronic or mechanical, including photocopying, recording, or by any information storage or retrieval
system, without written permission from the publisher, except in the case of brief quotations embodied in critical articles and reviews.
Trademarks are property of their respective holders. When used, trademarks are for the benefit of the trademark owner only.
Published by Prime Publishing LLC, 3400 Dundee Road, Northbrook, IL 60062 – www.primecp.com
Free Craft Projects
Free Crochet Projects Free Knitting Projects Free Sewing Projects
Free Crochet Afghan Projects Free Quilt Projects Free Beaded Jewelry Projects
Free Holiday Projects Free Christmas Projects
Jewelry for You! eBook from Consumer Crafts and Crafts Unleashed
Find more jewelry projects and more at www.craftsunleashed.com and http://www.consumercrafts.com. 4
Letter from the Editors
Dear Reader, Jewelry is one of the oldest forms of personal expression and adornment, and making your own jewelry is both easy and rewarding. Looking for just the right piece to complete a special outfit? Want to wear or gift a piece of jewelry with special meaning? Handmade jewelry is the perfect answer for a unique look you’ll love! With today’s variety of chains, findings, beads, crystals and other supplies, creating jewelry can be as simple as you want it to be. Combine lengths of beaded chain from the Boho Collection™ with basic leather cording, or add Mix & Mingle™ beads to a serpentine chain for a quick accessory. Beads, chains, pearls, crystals, and metal accents can be strung onto knotted necklaces for an easy wardrobe update. Vintage jewelry parts, game tiles, and other common household items can be given fresh life as focal elements. A photo or other small keepsake can be kept close to your heart in a memory necklace. Scroll through thousands of jewelry components on ConsumerCrafts.com and check out our blog at CraftsUnleashed.com for even more ideas and inspiration. The only limit to what you can create is your own imagination! Sincerely,
Consumer Crafts.com
Jewelry for You! eBook from Consumer Crafts and Crafts Unleashed
Find more jewelry projects and more at www.craftsunleashed.com and www.consumercrafts.com. 5
Jewelry for You! Table of Contents
About Consumer Crafts ............................. 5
Bracelets ................................................... 6 Caged Wire-Wrapped Beads Bracelet .......... 6 Crystal Pearl Prayer Bracelet ........................ 8 Bead Soup Cuff Bracelet ............................... 9 Get a Blue Clue Memory Wire Bracelet and Earrings .............................................. 10
Fillable Frames Bracelet ............................. 11
Necklaces ................................................ 14 Fillable Frames Necklace ............................ 14 Roses, Ribbon & Chain Bib Necklace .......... 16 Distressed Wooden Pendant Necklace ...... 18 Gypsy Roses Chain Necklace ...................... 19
The Key to Everything Necklace.................. 21 Mossy Woods Two-Strand Necklace .......... 22 Easy Keepsake Collar .................................. 24 Skinner Blend Polymer Pendant ................. 25 “Tin Cup” Floating Pearl Necklace .............. 27 Shower of Blessings Necklace ..................... 28 It’s Easy Being Green Necklace & Earrings .................................................. 30
Multistrand Disc Bead Necklace and Earrings .............................................. 32
Happy Blue Bird Necklace and Earrings ...... 34
About Consumer Crafts
Consumer Crafts is your headquarters for low priced and affordable craft products. Our extensive line of products includes everything from the newest, most innovative craft trends to hard to find, niche items. We carry a huge selection of craft basics, jewelry making and beads, kids crafts, scrapbooking, DIY bridal crafts, floral, fine art supplies, needle crafting & yarn, craft organization tools, home décor crafts, soap and
candle making supplies and much, much more. Some of our brands include: Ek Success, Provo Craft, K&Company, Ranger, Tim Holtz, Core’dinations, Darice, Toho, Die Cuts with a View, Martha Stewart Crafts, Plaid, Creativity for Kids, Crayola, Melissa & Doug, Wilton, Caron, Lion Brand, We R Memory Keepers, Sanford, Royal & Langnickel, Sakura, Windsor Newton, Jill McKay, Swarovski, Beadalon, Victoria Lynn, Strathmore, Studio 71, Simplicity and MORE!
Jewelry for You! eBook from Consumer Crafts and Crafts Unleashed
Find more jewelry projects and more at www.craftsunleashed.com and http://www.consumercrafts.com. 6
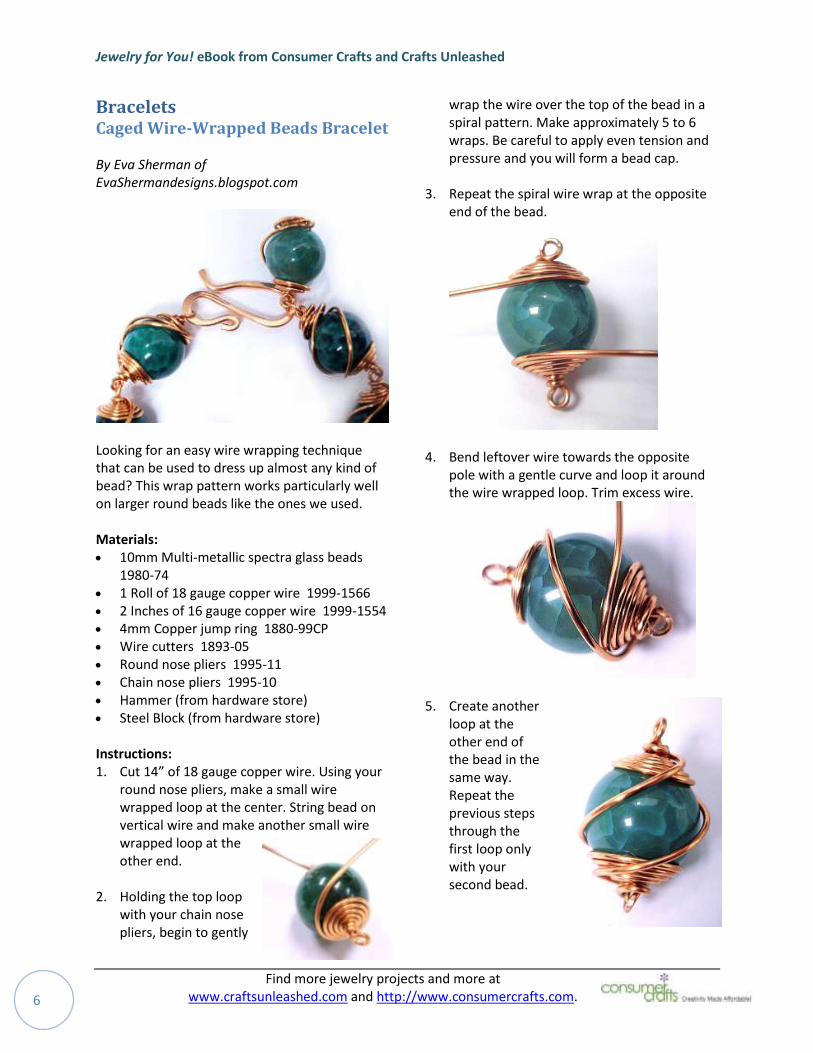
Bracelets Caged Wire-Wrapped Beads Bracelet By Eva Sherman of EvaShermandesigns.blogspot.com
Looking for an easy wire wrapping technique that can be used to dress up almost any kind of bead? This wrap pattern works particularly well on larger round beads like the ones we used. Materials: 10mm Multi-metallic spectra glass beads
1980-74 1 Roll of 18 gauge copper wire 1999-1566 2 Inches of 16 gauge copper wire 1999-1554 4mm Copper jump ring 1880-99CP Wire cutters 1893-05 Round nose pliers 1995-11 Chain nose pliers 1995-10 Hammer (from hardware store) Steel Block (from hardware store)
Instructions: 1. Cut 14” of 18 gauge copper wire. Using your
round nose pliers, make a small wire wrapped loop at the center. String bead on vertical wire and make another small wire wrapped loop at the other end.
2. Holding the top loop with your chain nose pliers, begin to gently
wrap the wire over the top of the bead in a spiral pattern. Make approximately 5 to 6 wraps. Be careful to apply even tension and pressure and you will form a bead cap.
3. Repeat the spiral wire wrap at the opposite end of the bead.
4. Bend leftover wire towards the opposite pole with a gentle curve and loop it around the wire wrapped loop. Trim excess wire.
5. Create another loop at the other end of the bead in the same way. Repeat the previous steps through the first loop only with your second bead.

Jewelry for You! eBook from Consumer Crafts and Crafts Unleashed
Find more jewelry projects and more at www.craftsunleashed.com and http://www.consumercrafts.com. 7
6. At the opposite end of the second bead, start the wire wrapped loop as shown.
7. Before closing the wire loop, slip the first bead on, then continue with making the wire wrapped loop and the bead cap. Repeat these steps until you have enough beads to go around your wrist, less 1/2 inch.
8. For the dangle bead begin by making a spiral as shown. It should be about the same size as the other bead caps.
9. Instead of a spiral wrap on the other end, create a loop: Bend leftover wire towards the opposite pole with a gentle curve and loop it around the wire wrapped loop. Spiral wrap back to bottom again. Trim excess wire. Connect the dangle bead to the last bead with the jump ring.
10. Make an “S” hook using the 16 gauge copper wire. Hammer it on the steel block to harden. Attach it to the last bead as shown. Hook the “S” hook in the jump ring to close. The dangle bead will keep the bracelet evenly weighted so it does not spin on your wrist.
Jewelry for You! eBook from Consumer Crafts and Crafts Unleashed
Find more jewelry projects and more at www.craftsunleashed.com and http://www.consumercrafts.com. 8
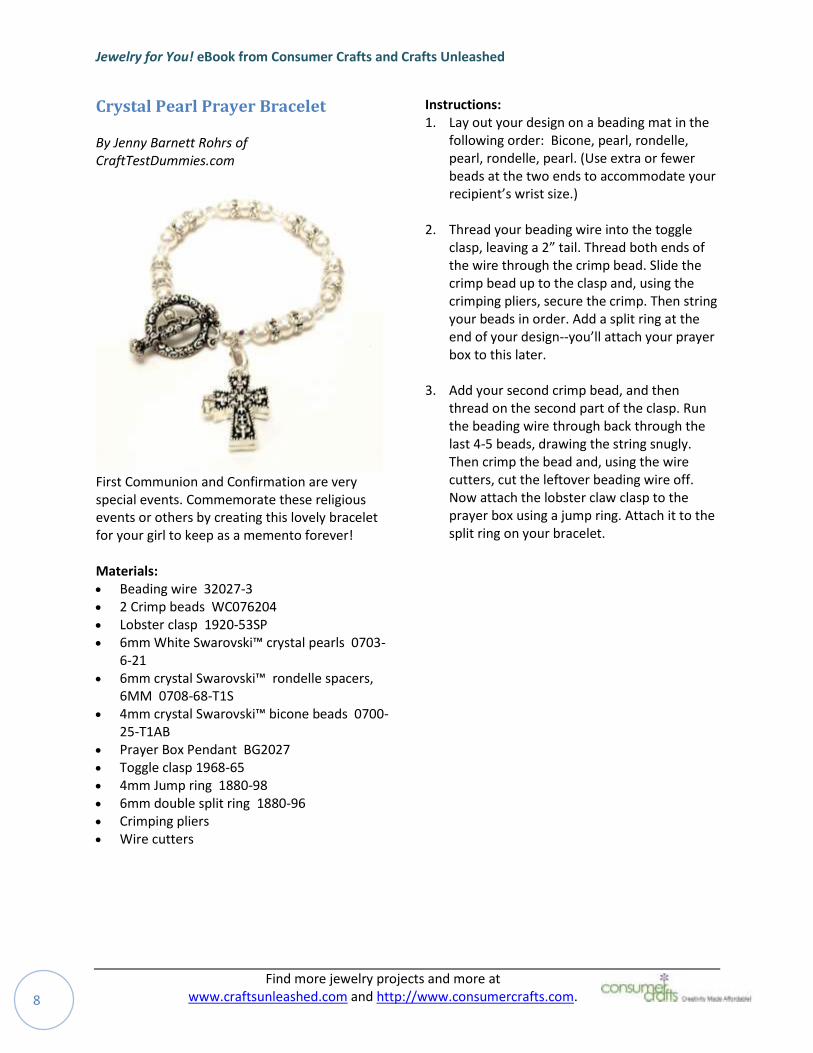
Crystal Pearl Prayer Bracelet By Jenny Barnett Rohrs of CraftTestDummies.com
First Communion and Confirmation are very special events. Commemorate these religious events or others by creating this lovely bracelet for your girl to keep as a memento forever! Materials: Beading wire 32027-3 2 Crimp beads WC076204 Lobster clasp 1920-53SP 6mm White Swarovski™ crystal pearls 0703-
6-21 6mm crystal Swarovski™ rondelle spacers,
6MM 0708-68-T1S 4mm crystal Swarovski™ bicone beads 0700-
25-T1AB Prayer Box Pendant BG2027 Toggle clasp 1968-65 4mm Jump ring 1880-98 6mm double split ring 1880-96 Crimping pliers Wire cutters
Instructions: 1. Lay out your design on a beading mat in the
following order: Bicone, pearl, rondelle, pearl, rondelle, pearl. (Use extra or fewer beads at the two ends to accommodate your recipient’s wrist size.)
2. Thread your beading wire into the toggle
clasp, leaving a 2” tail. Thread both ends of the wire through the crimp bead. Slide the crimp bead up to the clasp and, using the crimping pliers, secure the crimp. Then string your beads in order. Add a split ring at the end of your design--you’ll attach your prayer box to this later.
3. Add your second crimp bead, and then
thread on the second part of the clasp. Run the beading wire through back through the last 4-5 beads, drawing the string snugly. Then crimp the bead and, using the wire cutters, cut the leftover beading wire off. Now attach the lobster claw clasp to the prayer box using a jump ring. Attach it to the split ring on your bracelet.
Jewelry for You! eBook from Consumer Crafts and Crafts Unleashed
Find more jewelry projects and more at www.craftsunleashed.com and http://www.consumercrafts.com. 9
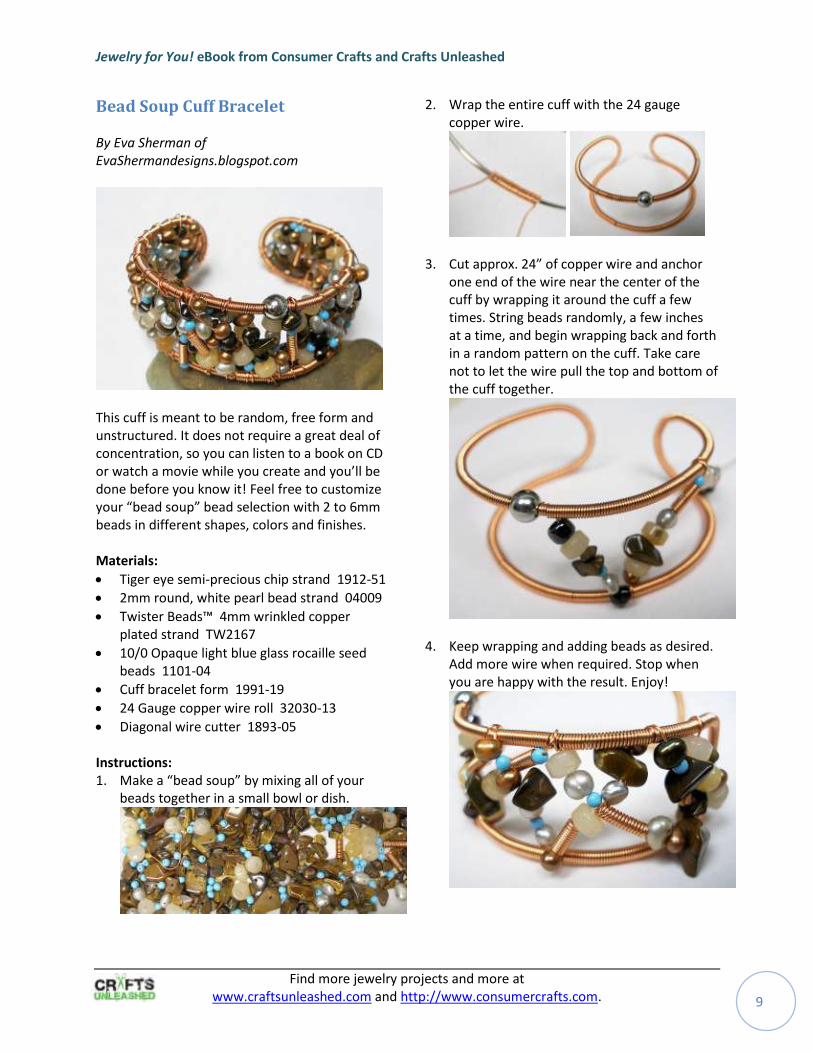
Bead Soup Cuff Bracelet By Eva Sherman of EvaShermandesigns.blogspot.com
This cuff is meant to be random, free form and unstructured. It does not require a great deal of concentration, so you can listen to a book on CD or watch a movie while you create and you’ll be done before you know it! Feel free to customize your “bead soup” bead selection with 2 to 6mm beads in different shapes, colors and finishes. Materials:
Tiger eye semi-precious chip strand 1912-51
2mm round, white pearl bead strand 04009
Twister Beads™ 4mm wrinkled copper plated strand TW2167
10/0 Opaque light blue glass rocaille seed beads 1101-04
Cuff bracelet form 1991-19
24 Gauge copper wire roll 32030-13
Diagonal wire cutter 1893-05 Instructions: 1. Make a “bead soup” by mixing all of your
beads together in a small bowl or dish.
2. Wrap the entire cuff with the 24 gauge copper wire.
3. Cut approx. 24” of copper wire and anchor
one end of the wire near the center of the cuff by wrapping it around the cuff a few times. String beads randomly, a few inches at a time, and begin wrapping back and forth in a random pattern on the cuff. Take care not to let the wire pull the top and bottom of the cuff together.
4. Keep wrapping and adding beads as desired. Add more wire when required. Stop when you are happy with the result. Enjoy!
Jewelry for You! eBook from Consumer Crafts and Crafts Unleashed
Find more jewelry projects and more at www.craftsunleashed.com and http://www.consumercrafts.com. 10
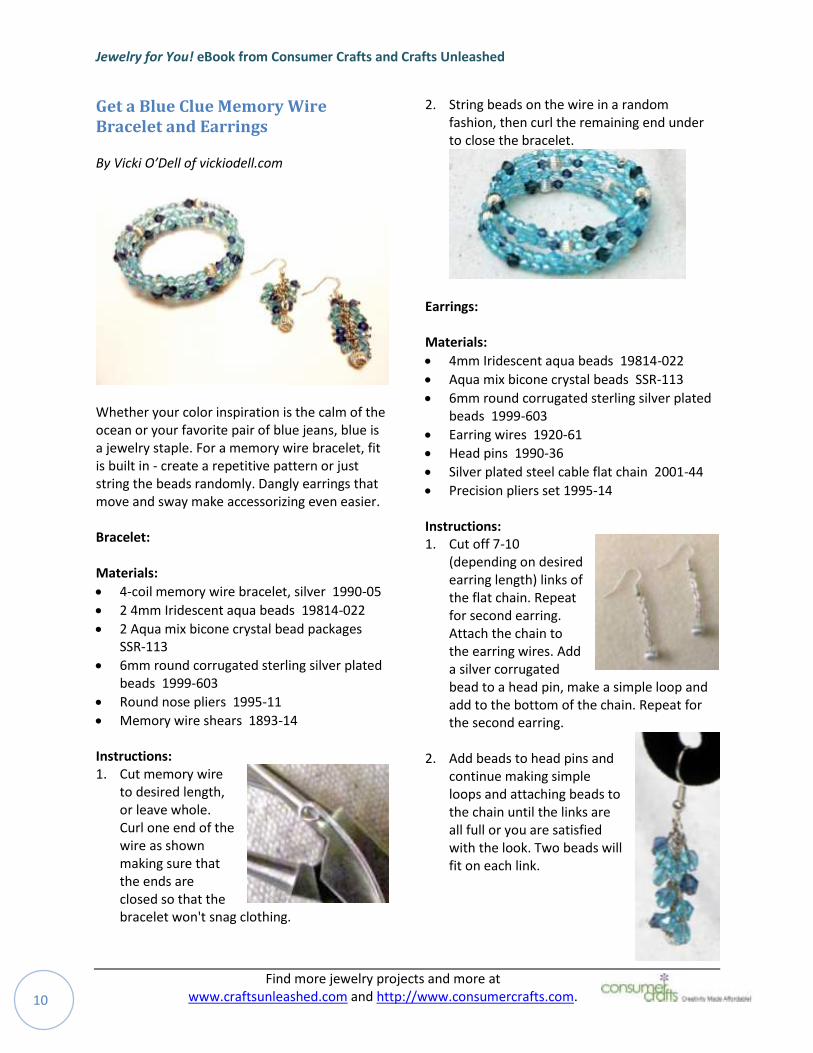
Get a Blue Clue Memory Wire Bracelet and Earrings By Vicki O’Dell of vickiodell.com
Whether your color inspiration is the calm of the ocean or your favorite pair of blue jeans, blue is a jewelry staple. For a memory wire bracelet, fit is built in - create a repetitive pattern or just string the beads randomly. Dangly earrings that move and sway make accessorizing even easier. Bracelet: Materials:
4-coil memory wire bracelet, silver 1990-05
2 4mm Iridescent aqua beads 19814-022
2 Aqua mix bicone crystal bead packages SSR-113
6mm round corrugated sterling silver plated beads 1999-603
Round nose pliers 1995-11
Memory wire shears 1893-14 Instructions: 1. Cut memory wire
to desired length, or leave whole. Curl one end of the wire as shown making sure that the ends are closed so that the bracelet won't snag clothing.
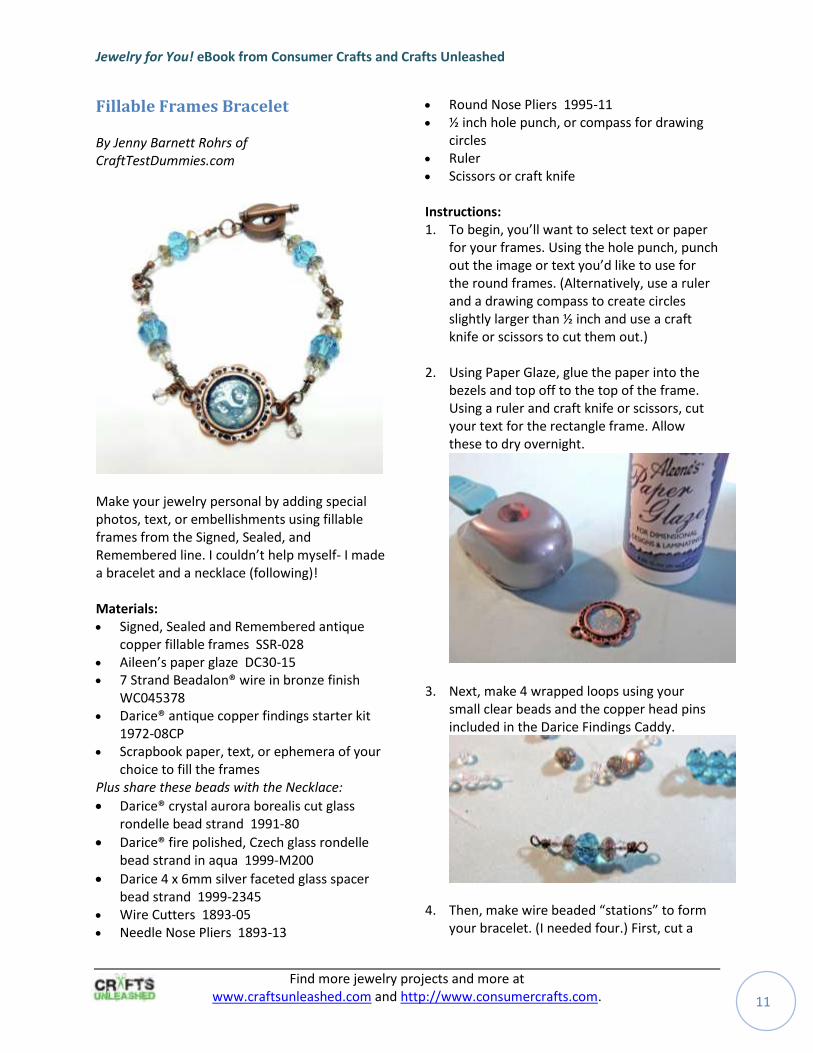
2. String beads on the wire in a random fashion, then curl the remaining end under to close the bracelet.
Earrings: Materials:
4mm Iridescent aqua beads 19814-022
Aqua mix bicone crystal beads SSR-113
6mm round corrugated sterling silver plated beads 1999-603
Earring wires 1920-61
Head pins 1990-36
Silver plated steel cable flat chain 2001-44
Precision pliers set 1995-14 Instructions: 1. Cut off 7-10
(depending on desired earring length) links of the flat chain. Repeat for second earring. Attach the chain to the earring wires. Add a silver corrugated bead to a head pin, make a simple loop and add to the bottom of the chain. Repeat for the second earring.
2. Add beads to head pins and
continue making simple loops and attaching beads to the chain until the links are all full or you are satisfied with the look. Two beads will fit on each link.
Jewelry for You! eBook from Consumer Crafts and Crafts Unleashed
Find more jewelry projects and more at www.craftsunleashed.com and http://www.consumercrafts.com. 11
Fillable Frames Bracelet By Jenny Barnett Rohrs of CraftTestDummies.com
Make your jewelry personal by adding special photos, text, or embellishments using fillable frames from the Signed, Sealed, and Remembered line. I couldn’t help myself- I made a bracelet and a necklace (following)! Materials: Signed, Sealed and Remembered antique
copper fillable frames SSR-028 Aileen’s paper glaze DC30-15 7 Strand Beadalon® wire in bronze finish
WC045378 Darice® antique copper findings starter kit
1972-08CP Scrapbook paper, text, or ephemera of your
choice to fill the frames Plus share these beads with the Necklace:
Darice® crystal aurora borealis cut glass rondelle bead strand 1991-80
Darice® fire polished, Czech glass rondelle bead strand in aqua 1999-M200
Darice 4 x 6mm silver faceted glass spacer bead strand 1999-2345
Wire Cutters 1893-05 Needle Nose Pliers 1893-13
Round Nose Pliers 1995-11 ½ inch hole punch, or compass for drawing
circles Ruler Scissors or craft knife
Instructions: 1. To begin, you’ll want to select text or paper
for your frames. Using the hole punch, punch out the image or text you’d like to use for the round frames. (Alternatively, use a ruler and a drawing compass to create circles slightly larger than ½ inch and use a craft knife or scissors to cut them out.)
2. Using Paper Glaze, glue the paper into the
bezels and top off to the top of the frame. Using a ruler and craft knife or scissors, cut your text for the rectangle frame. Allow these to dry overnight.
3. Next, make 4 wrapped loops using your
small clear beads and the copper head pins included in the Darice Findings Caddy.
4. Then, make wire beaded “stations” to form your bracelet. (I needed four.) First, cut a

Jewelry for You! eBook from Consumer Crafts and Crafts Unleashed
Find more jewelry projects and more at www.craftsunleashed.com and http://www.consumercrafts.com. 12
length of wire about 5 inches long. Using your round-nose pliers, make a wrapped loop. Then thread on your beads in the following order: aurora borealis bead, silver rondelle, aqua rondelle, silver rondelle, aurora borealis bead. Finish off with another wrapped loop. Repeat 3 more times. Now you can assemble your bracelet! Attach a
wrapped loop component to each side of your bezel using a jump ring. Before closing the ring, thread on one of your small wrapped loop dangles. Then add the subsequent beaded components to each other in the same fashion. Lastly, add your clasp using jump rings, too.
Jewelry for You! eBook from Consumer Crafts and Crafts Unleashed
Find more jewelry projects and more at www.craftsunleashed.com and http://www.consumercrafts.com. 13
Jewelry for You! eBook from Consumer Crafts and Crafts Unleashed
Find more jewelry projects and more at www.craftsunleashed.com and http://www.consumercrafts.com. 14
Necklaces
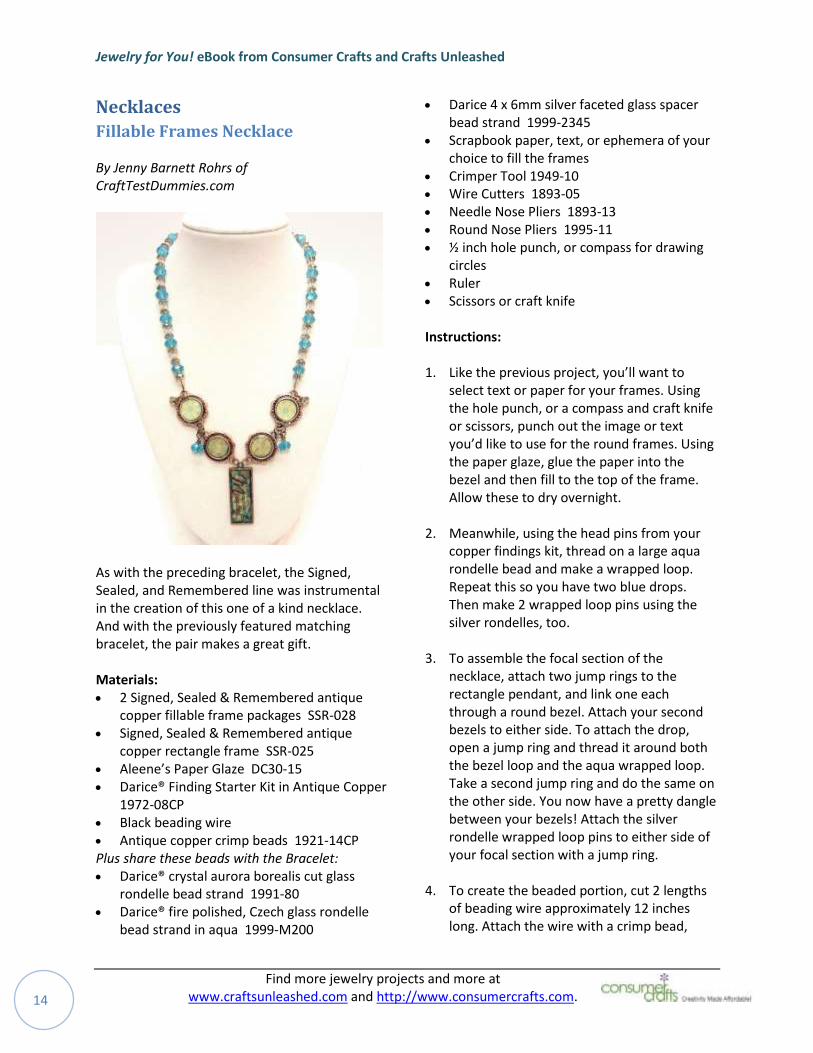
Fillable Frames Necklace By Jenny Barnett Rohrs of CraftTestDummies.com
As with the preceding bracelet, the Signed, Sealed, and Remembered line was instrumental in the creation of this one of a kind necklace. And with the previously featured matching bracelet, the pair makes a great gift. Materials: 2 Signed, Sealed & Remembered antique
copper fillable frame packages SSR-028 Signed, Sealed & Remembered antique
copper rectangle frame SSR-025 Aleene’s Paper Glaze DC30-15 Darice® Finding Starter Kit in Antique Copper
1972-08CP Black beading wire Antique copper crimp beads 1921-14CP Plus share these beads with the Bracelet: Darice® crystal aurora borealis cut glass
rondelle bead strand 1991-80 Darice® fire polished, Czech glass rondelle
bead strand in aqua 1999-M200
Darice 4 x 6mm silver faceted glass spacer bead strand 1999-2345
Scrapbook paper, text, or ephemera of your choice to fill the frames
Crimper Tool 1949-10 Wire Cutters 1893-05 Needle Nose Pliers 1893-13 Round Nose Pliers 1995-11 ½ inch hole punch, or compass for drawing
circles Ruler Scissors or craft knife
Instructions:
1. Like the previous project, you’ll want to
select text or paper for your frames. Using the hole punch, or a compass and craft knife or scissors, punch out the image or text you’d like to use for the round frames. Using the paper glaze, glue the paper into the bezel and then fill to the top of the frame. Allow these to dry overnight.
2. Meanwhile, using the head pins from your copper findings kit, thread on a large aqua rondelle bead and make a wrapped loop. Repeat this so you have two blue drops. Then make 2 wrapped loop pins using the silver rondelles, too.
3. To assemble the focal section of the necklace, attach two jump rings to the rectangle pendant, and link one each through a round bezel. Attach your second bezels to either side. To attach the drop, open a jump ring and thread it around both the bezel loop and the aqua wrapped loop. Take a second jump ring and do the same on the other side. You now have a pretty dangle between your bezels! Attach the silver rondelle wrapped loop pins to either side of your focal section with a jump ring.
4. To create the beaded portion, cut 2 lengths of beading wire approximately 12 inches long. Attach the wire with a crimp bead,

Jewelry for You! eBook from Consumer Crafts and Crafts Unleashed
Find more jewelry projects and more at www.craftsunleashed.com and http://www.consumercrafts.com. 15
leaving a 1 inch tail. Now thread on your beads in the following pattern: aurora borealis bead, silver rondelle, aqua rondelle, silver rondelle, aurora borealis bead.
5. Repeat this pattern for as long as you need your necklace to be. Finish off by adding a crimp bead, your clasp, and crimping off. Trim your beading wire, and you are ready to wear!
Jewelry for You! eBook from Consumer Crafts and Crafts Unleashed
Find more jewelry projects and more at www.craftsunleashed.com and http://www.consumercrafts.com. 16
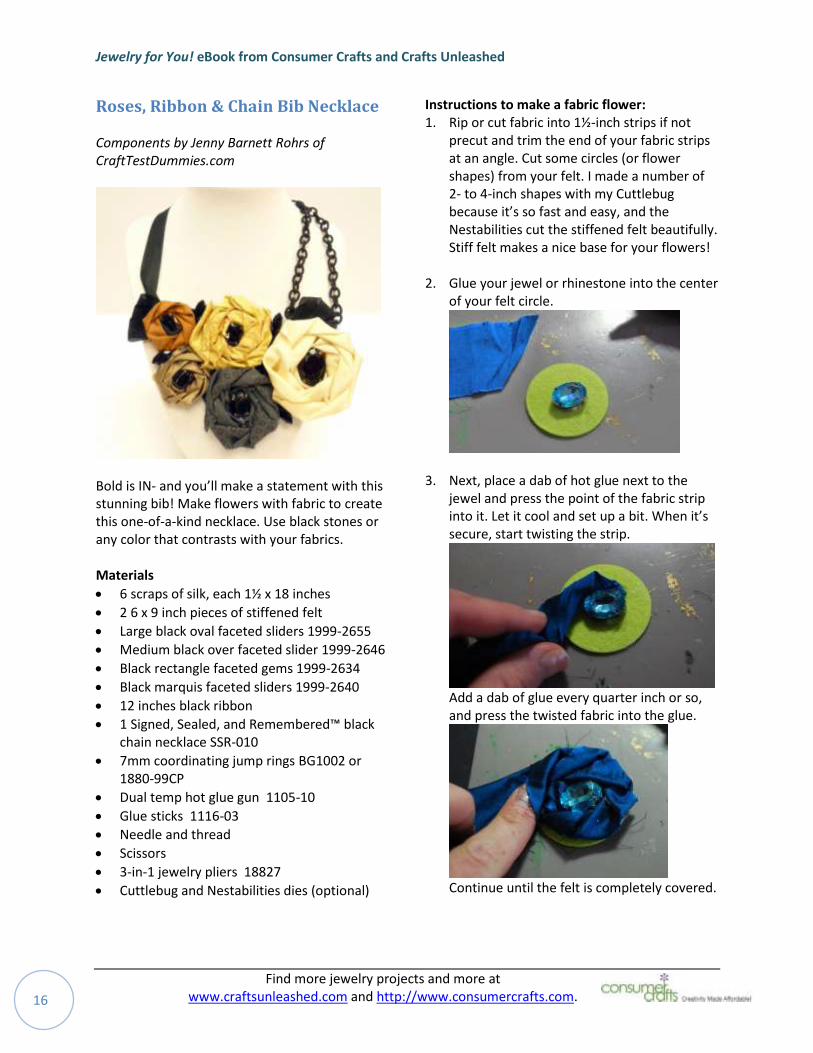
Roses, Ribbon & Chain Bib Necklace Components by Jenny Barnett Rohrs of CraftTestDummies.com
Bold is IN- and you’ll make a statement with this stunning bib! Make flowers with fabric to create this one-of-a-kind necklace. Use black stones or any color that contrasts with your fabrics. Materials
6 scraps of silk, each 1½ x 18 inches
2 6 x 9 inch pieces of stiffened felt
Large black oval faceted sliders 1999-2655
Medium black over faceted slider 1999-2646
Black rectangle faceted gems 1999-2634
Black marquis faceted sliders 1999-2640
12 inches black ribbon
1 Signed, Sealed, and Remembered™ black chain necklace SSR-010
7mm coordinating jump rings BG1002 or 1880-99CP
Dual temp hot glue gun 1105-10
Glue sticks 1116-03
Needle and thread
Scissors
3-in-1 jewelry pliers 18827
Cuttlebug and Nestabilities dies (optional)
Instructions to make a fabric flower: 1. Rip or cut fabric into 1½-inch strips if not
precut and trim the end of your fabric strips at an angle. Cut some circles (or flower shapes) from your felt. I made a number of 2- to 4-inch shapes with my Cuttlebug because it’s so fast and easy, and the Nestabilities cut the stiffened felt beautifully. Stiff felt makes a nice base for your flowers!
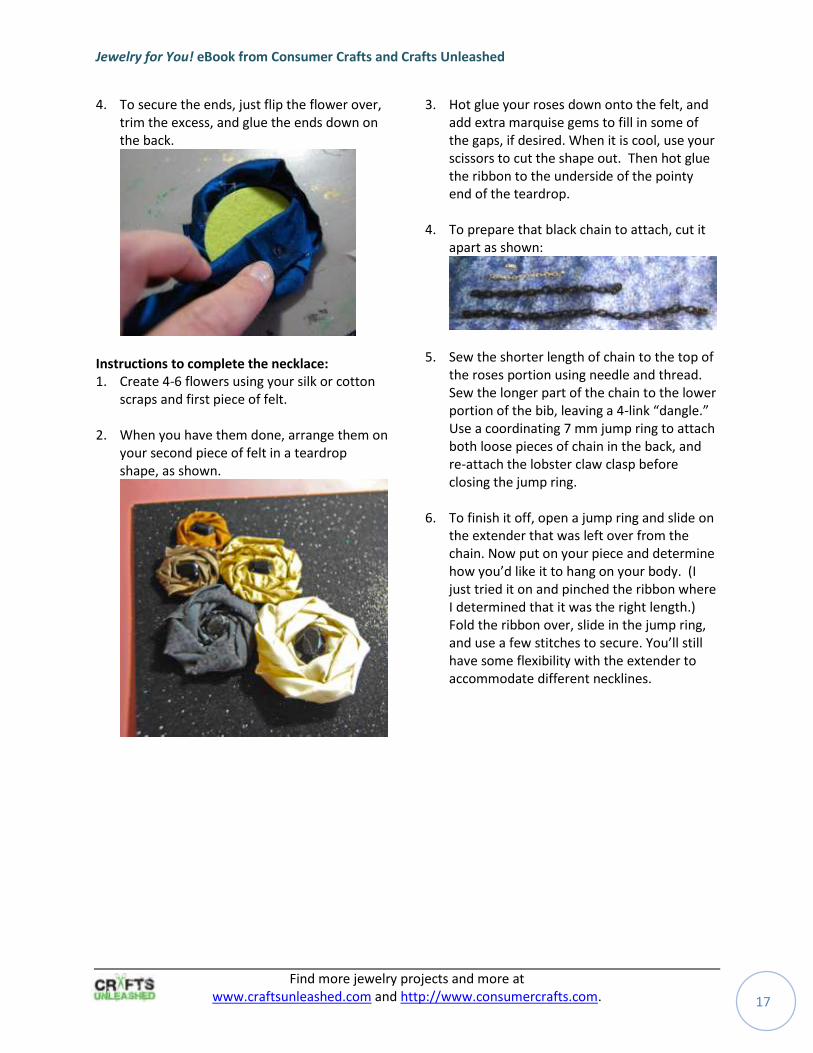
2. Glue your jewel or rhinestone into the center of your felt circle.
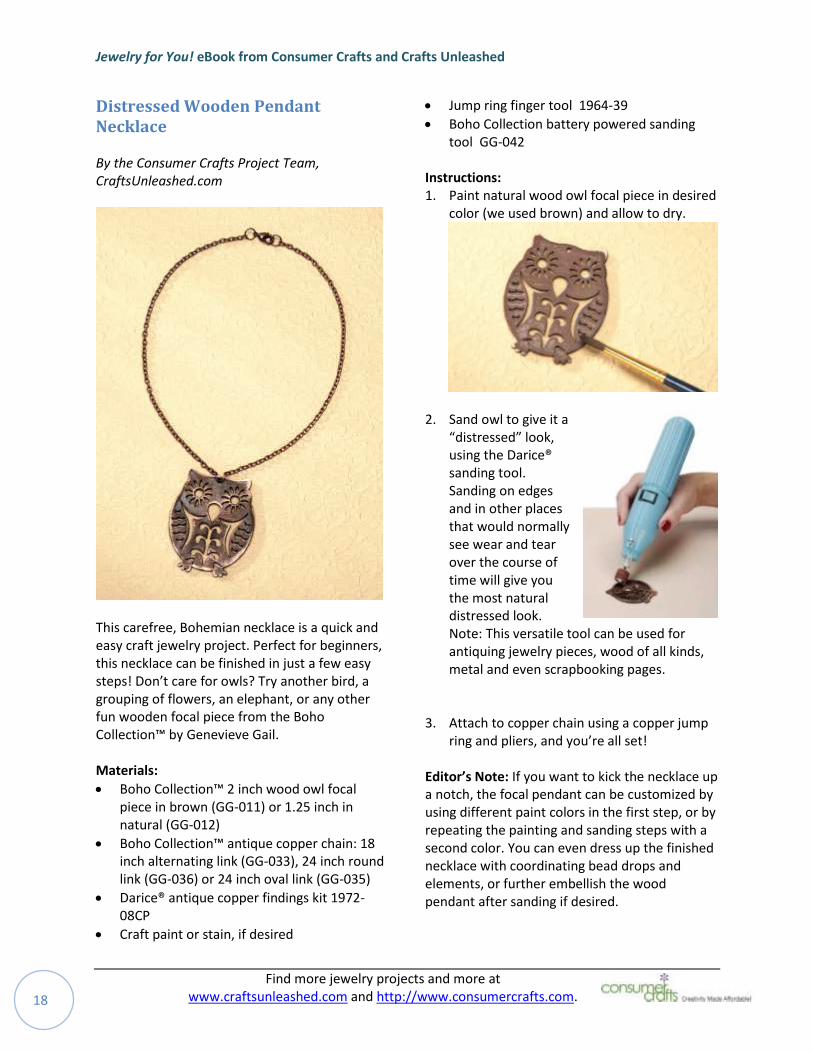
3. Next, place a dab of hot glue next to the jewel and press the point of the fabric strip into it. Let it cool and set up a bit. When it’s secure, start twisting the strip.
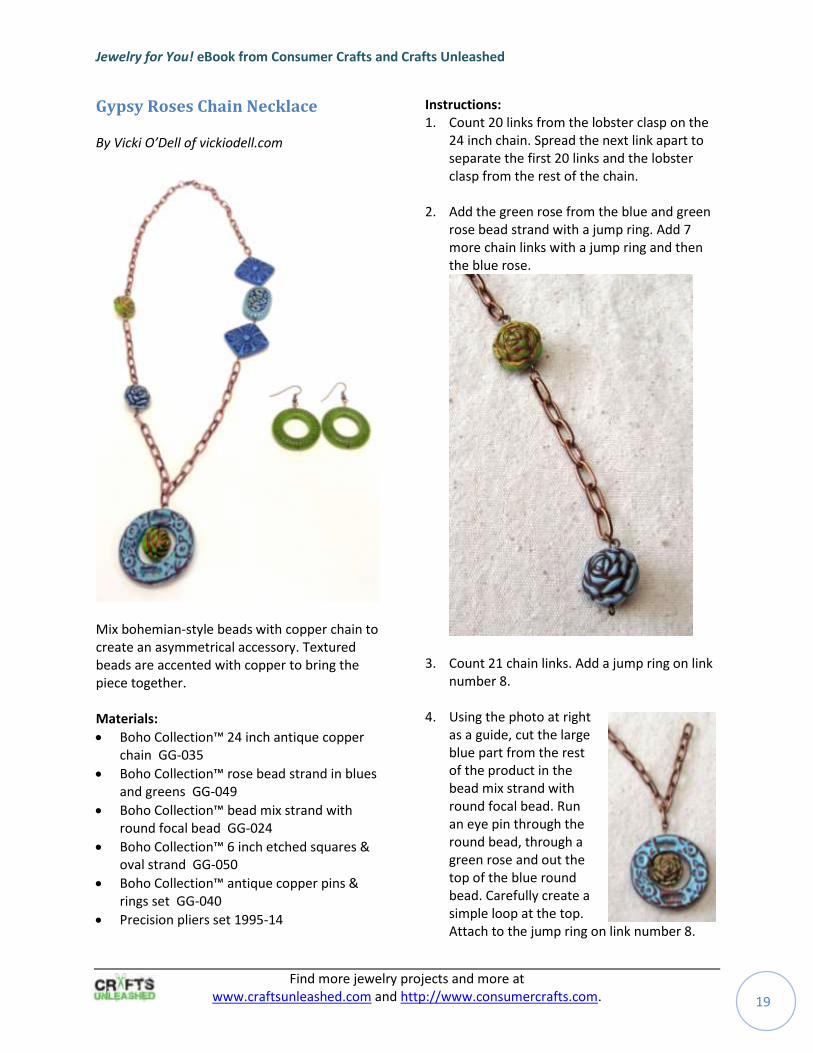
Add a dab of glue every quarter inch or so, and press the twisted fabric into the glue.
Continue until the felt is completely covered.
Jewelry for You! eBook from Consumer Crafts and Crafts Unleashed
Find more jewelry projects and more at www.craftsunleashed.com and http://www.consumercrafts.com. 17
4. To secure the ends, just flip the flower over, trim the excess, and glue the ends down on the back.
Instructions to complete the necklace: 1. Create 4-6 flowers using your silk or cotton
scraps and first piece of felt.
2. When you have them done, arrange them on your second piece of felt in a teardrop shape, as shown.
3. Hot glue your roses down onto the felt, and add extra marquise gems to fill in some of the gaps, if desired. When it is cool, use your scissors to cut the shape out. Then hot glue the ribbon to the underside of the pointy end of the teardrop.
4. To prepare that black chain to attach, cut it
apart as shown:
5. Sew the shorter length of chain to the top of
the roses portion using needle and thread. Sew the longer part of the chain to the lower portion of the bib, leaving a 4-link “dangle.” Use a coordinating 7 mm jump ring to attach both loose pieces of chain in the back, and re-attach the lobster claw clasp before closing the jump ring.
6. To finish it off, open a jump ring and slide on the extender that was left over from the chain. Now put on your piece and determine how you’d like it to hang on your body. (I just tried it on and pinched the ribbon where I determined that it was the right length.) Fold the ribbon over, slide in the jump ring, and use a few stitches to secure. You’ll still have some flexibility with the extender to accommodate different necklines.
Jewelry for You! eBook from Consumer Crafts and Crafts Unleashed
Find more jewelry projects and more at www.craftsunleashed.com and http://www.consumercrafts.com. 18
Distressed Wooden Pendant Necklace By the Consumer Crafts Project Team, CraftsUnleashed.com
This carefree, Bohemian necklace is a quick and easy craft jewelry project. Perfect for beginners, this necklace can be finished in just a few easy steps! Don’t care for owls? Try another bird, a grouping of flowers, an elephant, or any other fun wooden focal piece from the Boho Collection™ by Genevieve Gail. Materials:
Boho Collection™ 2 inch wood owl focal piece in brown (GG-011) or 1.25 inch in natural (GG-012)
Boho Collection™ antique copper chain: 18 inch alternating link (GG-033), 24 inch round link (GG-036) or 24 inch oval link (GG-035)
Darice® antique copper findings kit 1972-08CP
Craft paint or stain, if desired
Jump ring finger tool 1964-39
Boho Collection battery powered sanding tool GG-042
Instructions: 1. Paint natural wood owl focal piece in desired
color (we used brown) and allow to dry.
2. Sand owl to give it a
“distressed” look, using the Darice® sanding tool. Sanding on edges and in other places that would normally see wear and tear over the course of time will give you the most natural distressed look. Note: This versatile tool can be used for antiquing jewelry pieces, wood of all kinds, metal and even scrapbooking pages.
3. Attach to copper chain using a copper jump
ring and pliers, and you’re all set! Editor’s Note: If you want to kick the necklace up a notch, the focal pendant can be customized by using different paint colors in the first step, or by repeating the painting and sanding steps with a second color. You can even dress up the finished necklace with coordinating bead drops and elements, or further embellish the wood pendant after sanding if desired.
Jewelry for You! eBook from Consumer Crafts and Crafts Unleashed
Find more jewelry projects and more at www.craftsunleashed.com and http://www.consumercrafts.com. 19
Gypsy Roses Chain Necklace By Vicki O’Dell of vickiodell.com
Mix bohemian-style beads with copper chain to create an asymmetrical accessory. Textured beads are accented with copper to bring the piece together. Materials:
Boho Collection™ 24 inch antique copper chain GG-035
Boho Collection™ rose bead strand in blues and greens GG-049
Boho Collection™ bead mix strand with round focal bead GG-024
Boho Collection™ 6 inch etched squares & oval strand GG-050
Boho Collection™ antique copper pins & rings set GG-040
Precision pliers set 1995-14
Instructions: 1. Count 20 links from the lobster clasp on the
24 inch chain. Spread the next link apart to separate the first 20 links and the lobster clasp from the rest of the chain.
2. Add the green rose from the blue and green rose bead strand with a jump ring. Add 7 more chain links with a jump ring and then the blue rose.
3. Count 21 chain links. Add a jump ring on link number 8.
4. Using the photo at right
as a guide, cut the large blue part from the rest of the product in the bead mix strand with round focal bead. Run an eye pin through the round bead, through a green rose and out the top of the blue round bead. Carefully create a simple loop at the top. Attach to the jump ring on link number 8.
Jewelry for You! eBook from Consumer Crafts and Crafts Unleashed
Find more jewelry projects and more at www.craftsunleashed.com and http://www.consumercrafts.com. 20
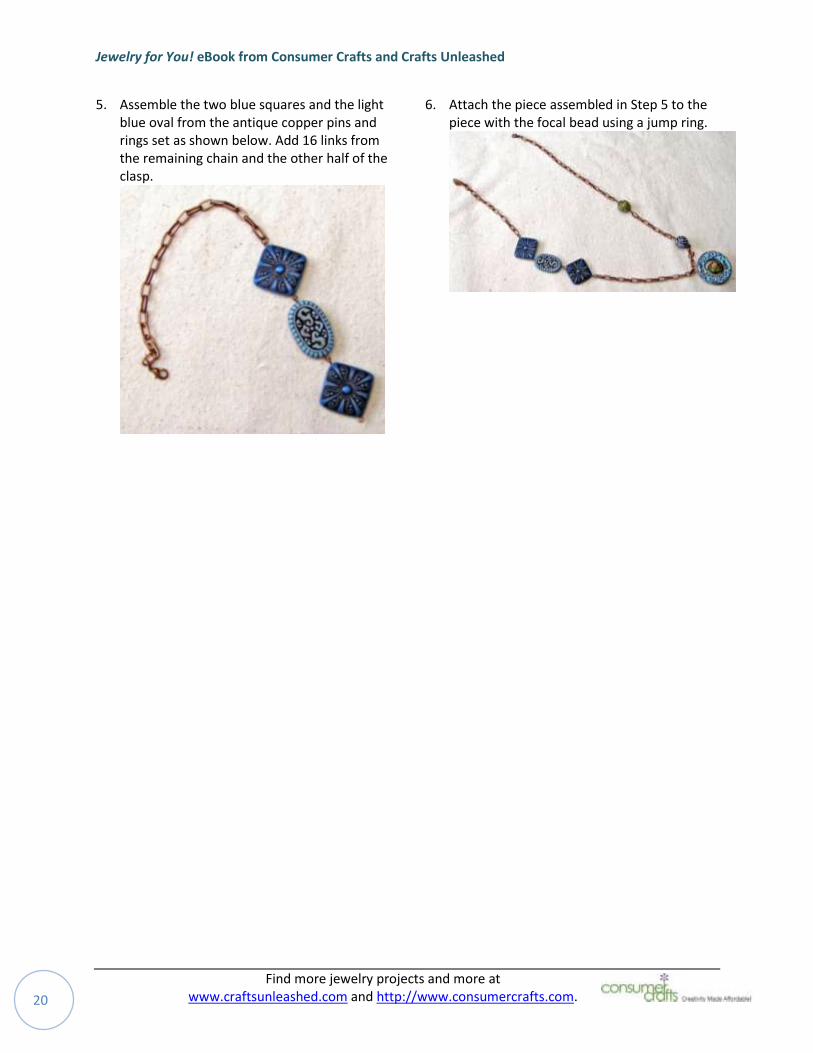
5. Assemble the two blue squares and the light blue oval from the antique copper pins and rings set as shown below. Add 16 links from the remaining chain and the other half of the clasp.
6. Attach the piece assembled in Step 5 to the piece with the focal bead using a jump ring.
Jewelry for You! eBook from Consumer Crafts and Crafts Unleashed
Find more jewelry projects and more at www.craftsunleashed.com and http://www.consumercrafts.com. 21
The Key to Everything Necklace By Vicki O’Dell of vickiodell.com
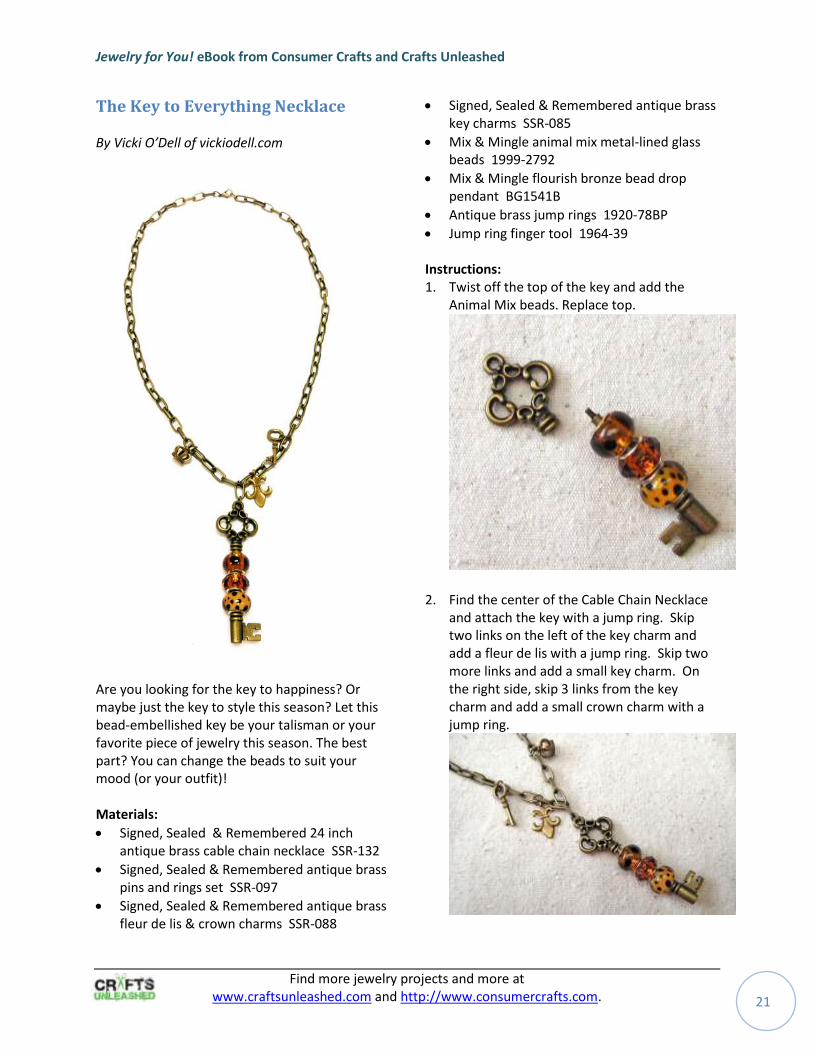
Are you looking for the key to happiness? Or maybe just the key to style this season? Let this bead-embellished key be your talisman or your favorite piece of jewelry this season. The best part? You can change the beads to suit your mood (or your outfit)! Materials:
Signed, Sealed & Remembered 24 inch antique brass cable chain necklace SSR-132
Signed, Sealed & Remembered antique brass pins and rings set SSR-097
Signed, Sealed & Remembered antique brass fleur de lis & crown charms SSR-088
Signed, Sealed & Remembered antique brass key charms SSR-085
Mix & Mingle animal mix metal-lined glass beads 1999-2792
Mix & Mingle flourish bronze bead drop pendant BG1541B
Antique brass jump rings 1920-78BP
Jump ring finger tool 1964-39 Instructions: 1. Twist off the top of the key and add the
Animal Mix beads. Replace top.
2. Find the center of the Cable Chain Necklace and attach the key with a jump ring. Skip two links on the left of the key charm and add a fleur de lis with a jump ring. Skip two more links and add a small key charm. On the right side, skip 3 links from the key charm and add a small crown charm with a jump ring.
Jewelry for You! eBook from Consumer Crafts and Crafts Unleashed
Find more jewelry projects and more at www.craftsunleashed.com and http://www.consumercrafts.com. 22
Mossy Woods Two-Strand Necklace By Vicki O’Dell of vickiodell.com
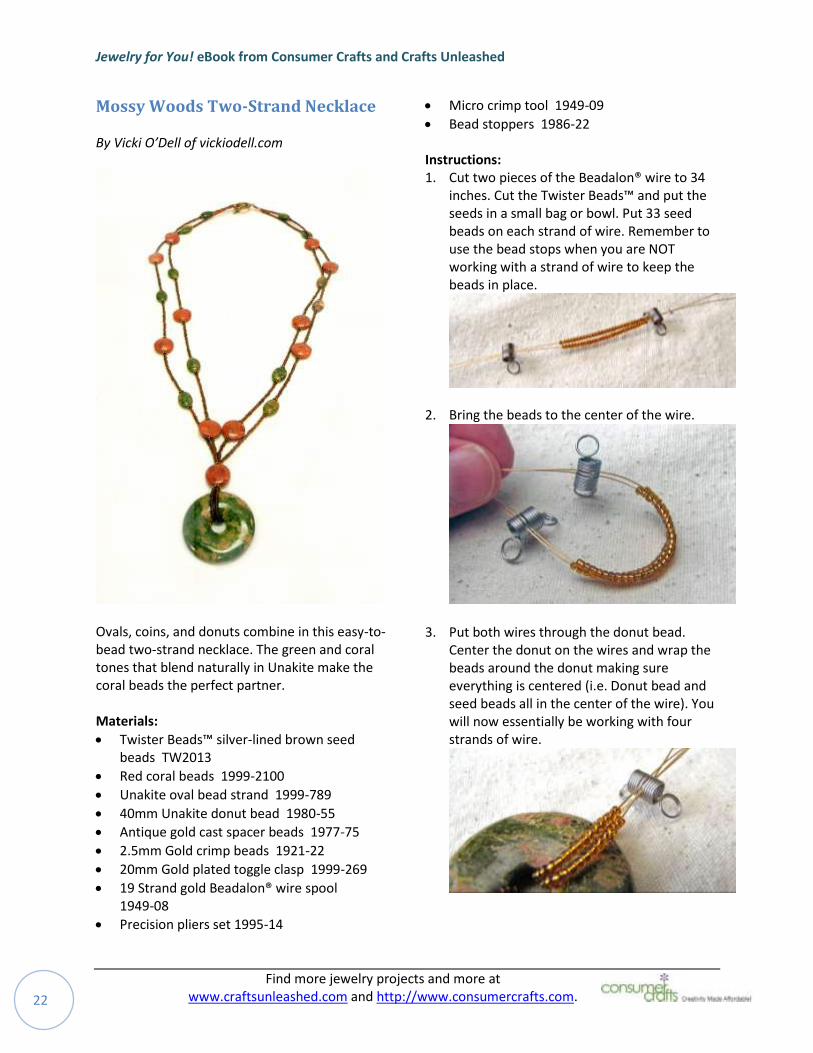
Ovals, coins, and donuts combine in this easy-to-bead two-strand necklace. The green and coral tones that blend naturally in Unakite make the coral beads the perfect partner. Materials:
Twister Beads™ silver-lined brown seed beads TW2013
Red coral beads 1999-2100
Unakite oval bead strand 1999-789
40mm Unakite donut bead 1980-55
Antique gold cast spacer beads 1977-75
2.5mm Gold crimp beads 1921-22
20mm Gold plated toggle clasp 1999-269
19 Strand gold Beadalon® wire spool 1949-08
Precision pliers set 1995-14
Micro crimp tool 1949-09
Bead stoppers 1986-22 Instructions: 1. Cut two pieces of the Beadalon® wire to 34
inches. Cut the Twister Beads™ and put the seeds in a small bag or bowl. Put 33 seed beads on each strand of wire. Remember to use the bead stops when you are NOT working with a strand of wire to keep the beads in place.
2. Bring the beads to the center of the wire.
3. Put both wires through the donut bead. Center the donut on the wires and wrap the beads around the donut making sure everything is centered (i.e. Donut bead and seed beads all in the center of the wire). You will now essentially be working with four strands of wire.
Jewelry for You! eBook from Consumer Crafts and Crafts Unleashed
Find more jewelry projects and more at www.craftsunleashed.com and http://www.consumercrafts.com. 23
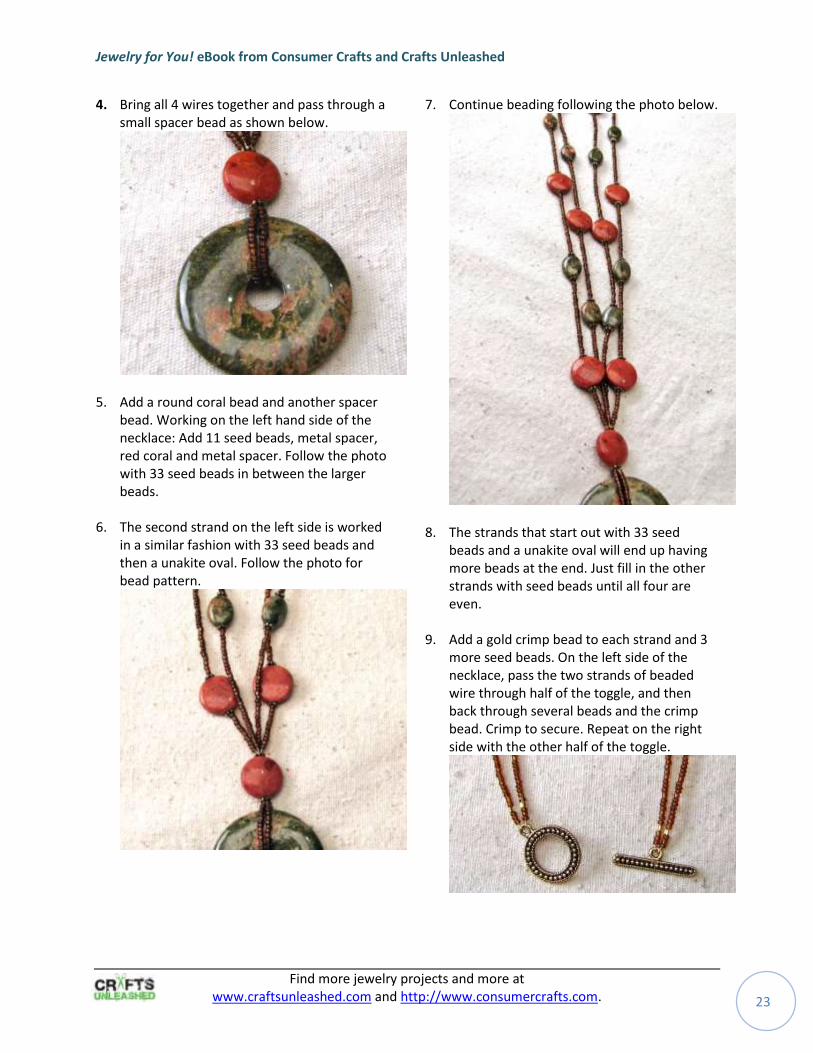
4. Bring all 4 wires together and pass through a small spacer bead as shown below.
5. Add a round coral bead and another spacer bead. Working on the left hand side of the necklace: Add 11 seed beads, metal spacer, red coral and metal spacer. Follow the photo with 33 seed beads in between the larger beads.
6. The second strand on the left side is worked
in a similar fashion with 33 seed beads and then a unakite oval. Follow the photo for bead pattern.
7. Continue beading following the photo below.
8. The strands that start out with 33 seed beads and a unakite oval will end up having more beads at the end. Just fill in the other strands with seed beads until all four are even.
9. Add a gold crimp bead to each strand and 3
more seed beads. On the left side of the necklace, pass the two strands of beaded wire through half of the toggle, and then back through several beads and the crimp bead. Crimp to secure. Repeat on the right side with the other half of the toggle.
Jewelry for You! eBook from Consumer Crafts and Crafts Unleashed
Find more jewelry projects and more at www.craftsunleashed.com and http://www.consumercrafts.com. 24
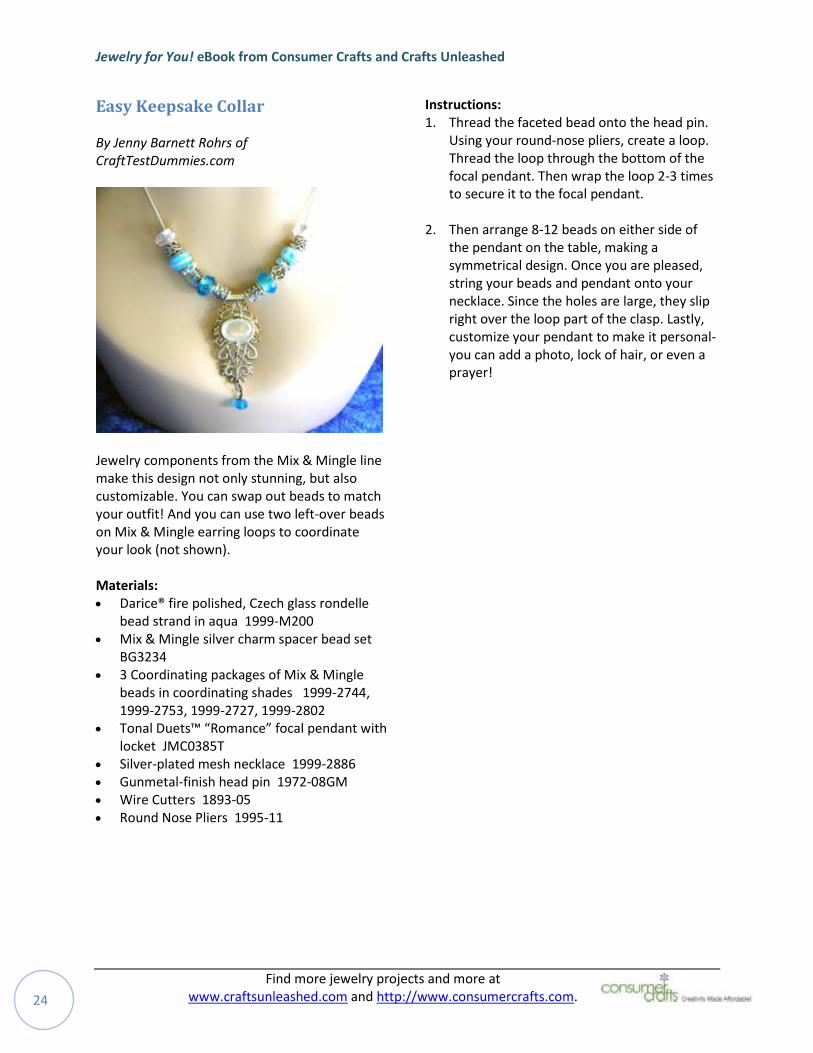
Easy Keepsake Collar By Jenny Barnett Rohrs of CraftTestDummies.com
Jewelry components from the Mix & Mingle line make this design not only stunning, but also customizable. You can swap out beads to match your outfit! And you can use two left-over beads on Mix & Mingle earring loops to coordinate your look (not shown). Materials: Darice® fire polished, Czech glass rondelle
bead strand in aqua 1999-M200 Mix & Mingle silver charm spacer bead set
BG3234 3 Coordinating packages of Mix & Mingle
beads in coordinating shades 1999-2744, 1999-2753, 1999-2727, 1999-2802
Tonal Duets™ “Romance” focal pendant with locket JMC0385T
Silver-plated mesh necklace 1999-2886 Gunmetal-finish head pin 1972-08GM Wire Cutters 1893-05 Round Nose Pliers 1995-11
Instructions: 1. Thread the faceted bead onto the head pin.
Using your round-nose pliers, create a loop. Thread the loop through the bottom of the focal pendant. Then wrap the loop 2-3 times to secure it to the focal pendant.
2. Then arrange 8-12 beads on either side of the pendant on the table, making a symmetrical design. Once you are pleased, string your beads and pendant onto your necklace. Since the holes are large, they slip right over the loop part of the clasp. Lastly, customize your pendant to make it personal- you can add a photo, lock of hair, or even a prayer!
Jewelry for You! eBook from Consumer Crafts and Crafts Unleashed
Find more jewelry projects and more at www.craftsunleashed.com and http://www.consumercrafts.com. 25
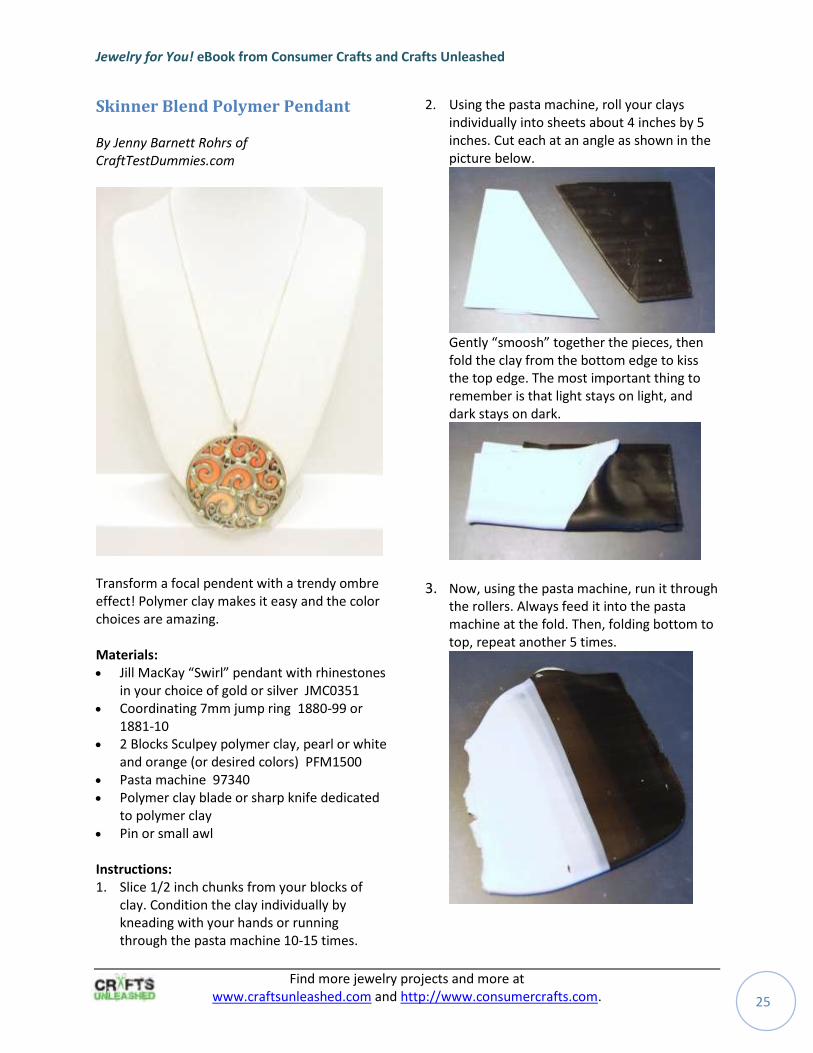
Skinner Blend Polymer Pendant By Jenny Barnett Rohrs of CraftTestDummies.com
Transform a focal pendent with a trendy ombre effect! Polymer clay makes it easy and the color choices are amazing. Materials: Jill MacKay “Swirl” pendant with rhinestones
in your choice of gold or silver JMC0351 Coordinating 7mm jump ring 1880-99 or
1881-10 2 Blocks Sculpey polymer clay, pearl or white
and orange (or desired colors) PFM1500 Pasta machine 97340 Polymer clay blade or sharp knife dedicated
to polymer clay Pin or small awl Instructions: 1. Slice 1/2 inch chunks from your blocks of
clay. Condition the clay individually by kneading with your hands or running through the pasta machine 10-15 times.
2. Using the pasta machine, roll your clays individually into sheets about 4 inches by 5 inches. Cut each at an angle as shown in the picture below.
Gently “smoosh” together the pieces, then fold the clay from the bottom edge to kiss the top edge. The most important thing to remember is that light stays on light, and dark stays on dark.
3. Now, using the pasta machine, run it through the rollers. Always feed it into the pasta machine at the fold. Then, folding bottom to top, repeat another 5 times.
Jewelry for You! eBook from Consumer Crafts and Crafts Unleashed
Find more jewelry projects and more at www.craftsunleashed.com and http://www.consumercrafts.com. 26
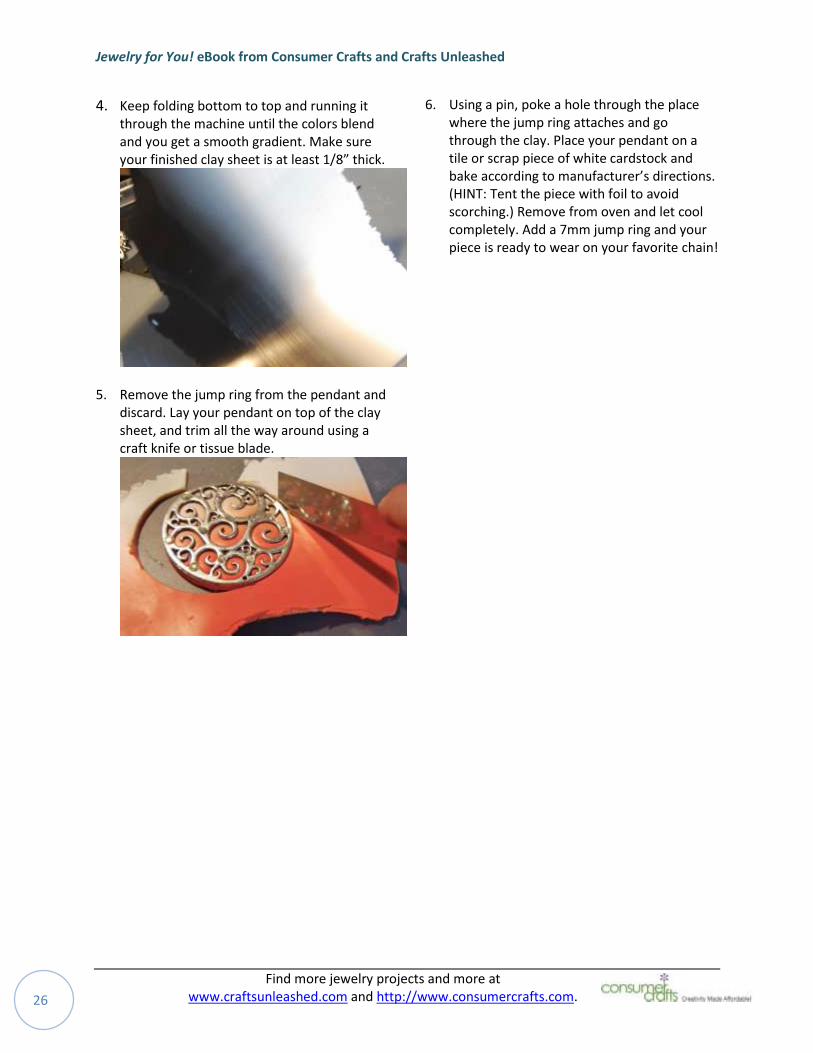
4. Keep folding bottom to top and running it through the machine until the colors blend and you get a smooth gradient. Make sure your finished clay sheet is at least 1/8” thick.
5. Remove the jump ring from the pendant and discard. Lay your pendant on top of the clay sheet, and trim all the way around using a craft knife or tissue blade.
6. Using a pin, poke a hole through the place where the jump ring attaches and go through the clay. Place your pendant on a tile or scrap piece of white cardstock and bake according to manufacturer’s directions. (HINT: Tent the piece with foil to avoid scorching.) Remove from oven and let cool completely. Add a 7mm jump ring and your piece is ready to wear on your favorite chain!
Jewelry for You! eBook from Consumer Crafts and Crafts Unleashed
Find more jewelry projects and more at www.craftsunleashed.com and http://www.consumercrafts.com. 27
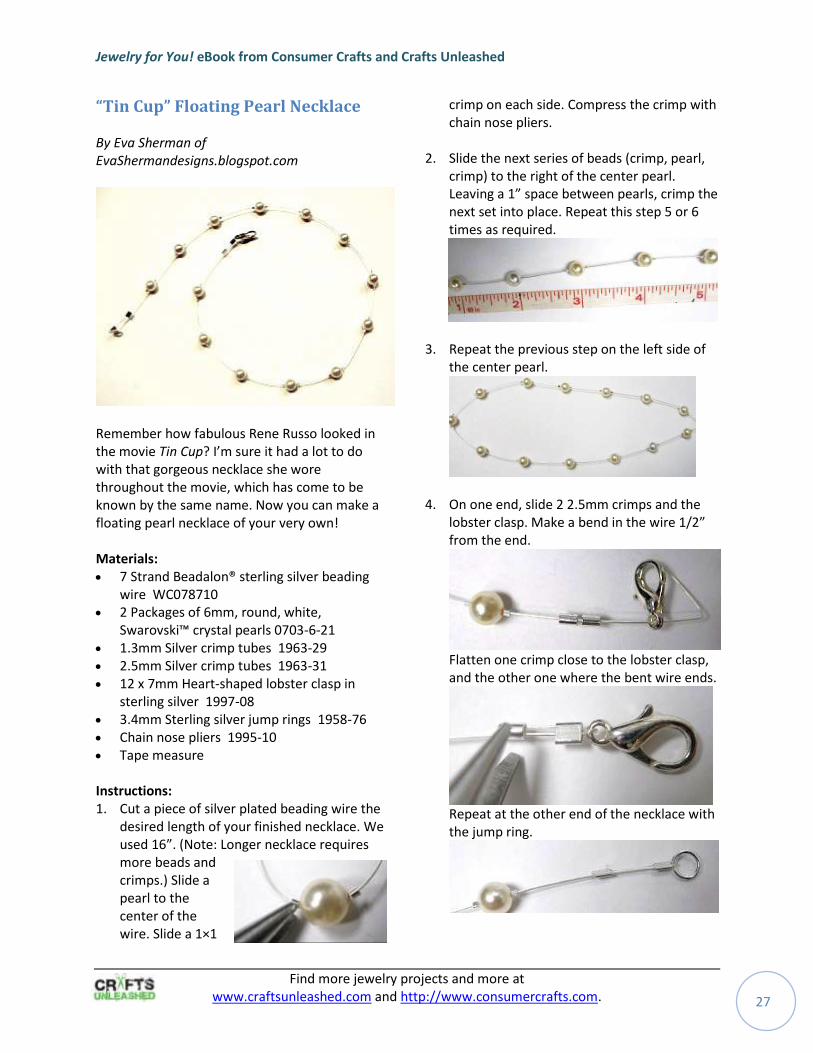
“Tin Cup” Floating Pearl Necklace By Eva Sherman of EvaShermandesigns.blogspot.com
Remember how fabulous Rene Russo looked in the movie Tin Cup? I’m sure it had a lot to do with that gorgeous necklace she wore throughout the movie, which has come to be known by the same name. Now you can make a floating pearl necklace of your very own! Materials: 7 Strand Beadalon® sterling silver beading
wire WC078710 2 Packages of 6mm, round, white,
Swarovski™ crystal pearls 0703-6-21 1.3mm Silver crimp tubes 1963-29 2.5mm Silver crimp tubes 1963-31 12 x 7mm Heart-shaped lobster clasp in
sterling silver 1997-08 3.4mm Sterling silver jump rings 1958-76 Chain nose pliers 1995-10 Tape measure
Instructions: 1. Cut a piece of silver plated beading wire the
desired length of your finished necklace. We used 16”. (Note: Longer necklace requires more beads and crimps.) Slide a pearl to the center of the wire. Slide a 1×1
crimp on each side. Compress the crimp with chain nose pliers.
2. Slide the next series of beads (crimp, pearl, crimp) to the right of the center pearl. Leaving a 1” space between pearls, crimp the next set into place. Repeat this step 5 or 6 times as required.
3. Repeat the previous step on the left side of
the center pearl.
4. On one end, slide 2 2.5mm crimps and the lobster clasp. Make a bend in the wire 1/2” from the end.
Flatten one crimp close to the lobster clasp, and the other one where the bent wire ends.
Repeat at the other end of the necklace with the jump ring.

Jewelry for You! eBook from Consumer Crafts and Crafts Unleashed
Find more jewelry projects and more at www.craftsunleashed.com and http://www.consumercrafts.com. 28
Shower of Blessings Necklace By Vicki O'Dell of vickiodell.com
This necklace takes its inspiration from the world of gardening. Leaf-shaped beads in the colors of nature, a watering can with chains and beads to emulate water, and the intermingling of the strands is perfect for your favorite gardener, nature lover, or jewelry aficionado. Materials:
Tonal Duets™ magnetic flower clasp JMC1045T or JMC1046T
Tonal Duets™ watering can tassel JMC0380T
5 Grape ivy mix bead strands 1999-M248
Twister Beads™ silver seed bead strand TW2012
49 Strand sterling silver plated Beadalon® wire 1949-03
Jump rings 1880-98
Crimp beads silver 1858-2
Precision pliers set 1995-14
Micro crimp tool 1949-09
Bead stoppers 1986-22
Instructions: 1. Cut one strand Beadalon wire to 26 inches,
cut another to 25 inches and cut a third to 24 inches.
2. Starting with the 26 inch wire: Thread a few
beads on the wire, followed by a crimp bead and then a few more beads. Pass the wire through one half of the clasp and down through the beads and crimp. Crimp the crimp bead in place.
3. Fill the strand with beads. Don't think too
much about it. Just make it random and use 3-5 seed beads in between the grape ivy mix beads. At the other end of the strand, thread on a crimp bead and then a few more beads. Pass the wire through the clasp and back down through the beads, then crimp the crimp bead in place.
4. Repeat steps 2 and 3 on the 25 inch strand of
wire, using 5-8 seed beads in between the grape ivy mix beads.
Jewelry for You! eBook from Consumer Crafts and Crafts Unleashed
Find more jewelry projects and more at www.craftsunleashed.com and http://www.consumercrafts.com. 29
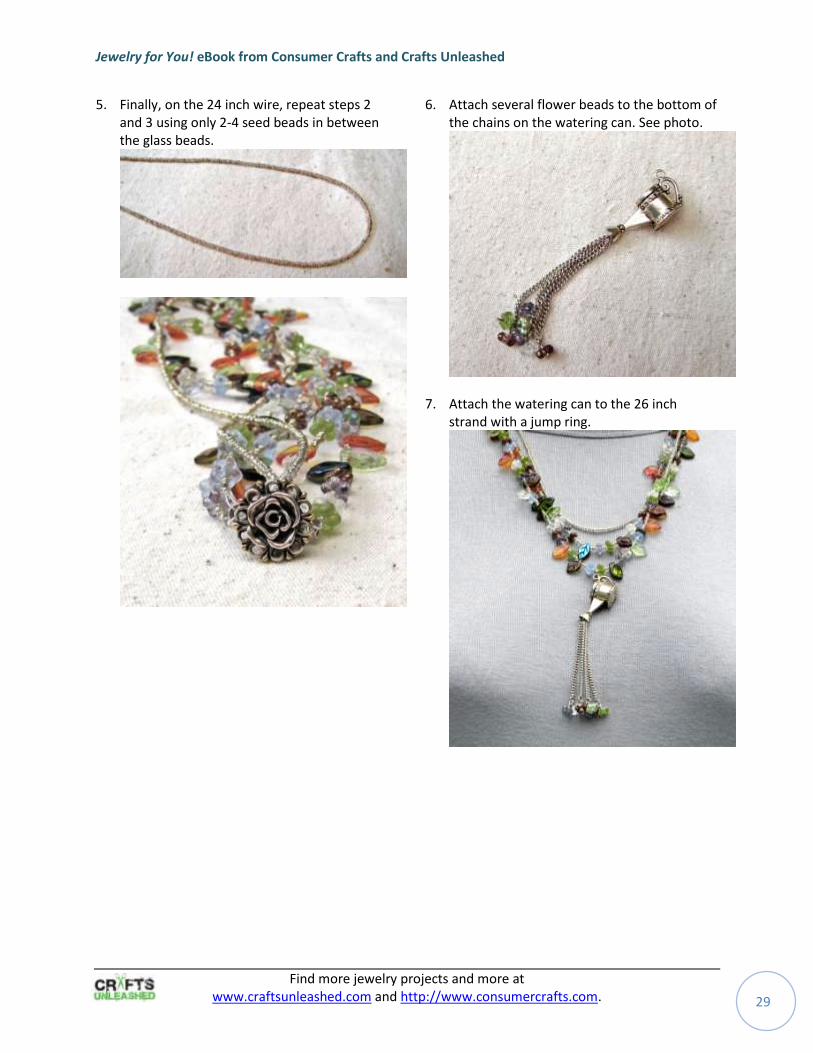
5. Finally, on the 24 inch wire, repeat steps 2 and 3 using only 2-4 seed beads in between the glass beads.
6. Attach several flower beads to the bottom of the chains on the watering can. See photo.
7. Attach the watering can to the 26 inch
strand with a jump ring.
Jewelry for You! eBook from Consumer Crafts and Crafts Unleashed
Find more jewelry projects and more at www.craftsunleashed.com and http://www.consumercrafts.com. 30
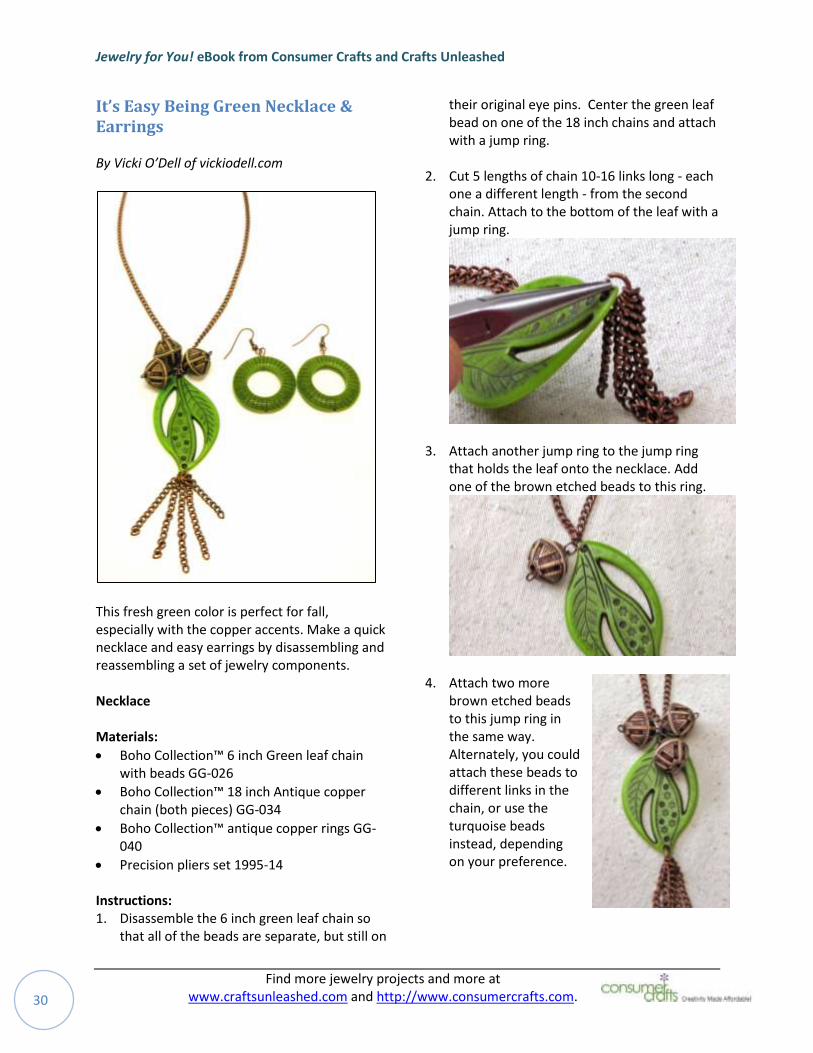
It’s Easy Being Green Necklace & Earrings By Vicki O’Dell of vickiodell.com
This fresh green color is perfect for fall, especially with the copper accents. Make a quick necklace and easy earrings by disassembling and reassembling a set of jewelry components. Necklace Materials:
Boho Collection™ 6 inch Green leaf chain with beads GG-026
Boho Collection™ 18 inch Antique copper chain (both pieces) GG-034
Boho Collection™ antique copper rings GG-040
Precision pliers set 1995-14 Instructions: 1. Disassemble the 6 inch green leaf chain so
that all of the beads are separate, but still on
their original eye pins. Center the green leaf bead on one of the 18 inch chains and attach with a jump ring.
2. Cut 5 lengths of chain 10-16 links long - each
one a different length - from the second chain. Attach to the bottom of the leaf with a jump ring.
3. Attach another jump ring to the jump ring
that holds the leaf onto the necklace. Add one of the brown etched beads to this ring.
4. Attach two more
brown etched beads to this jump ring in the same way. Alternately, you could attach these beads to different links in the chain, or use the turquoise beads instead, depending on your preference.
Jewelry for You! eBook from Consumer Crafts and Crafts Unleashed
Find more jewelry projects and more at www.craftsunleashed.com and http://www.consumercrafts.com. 31
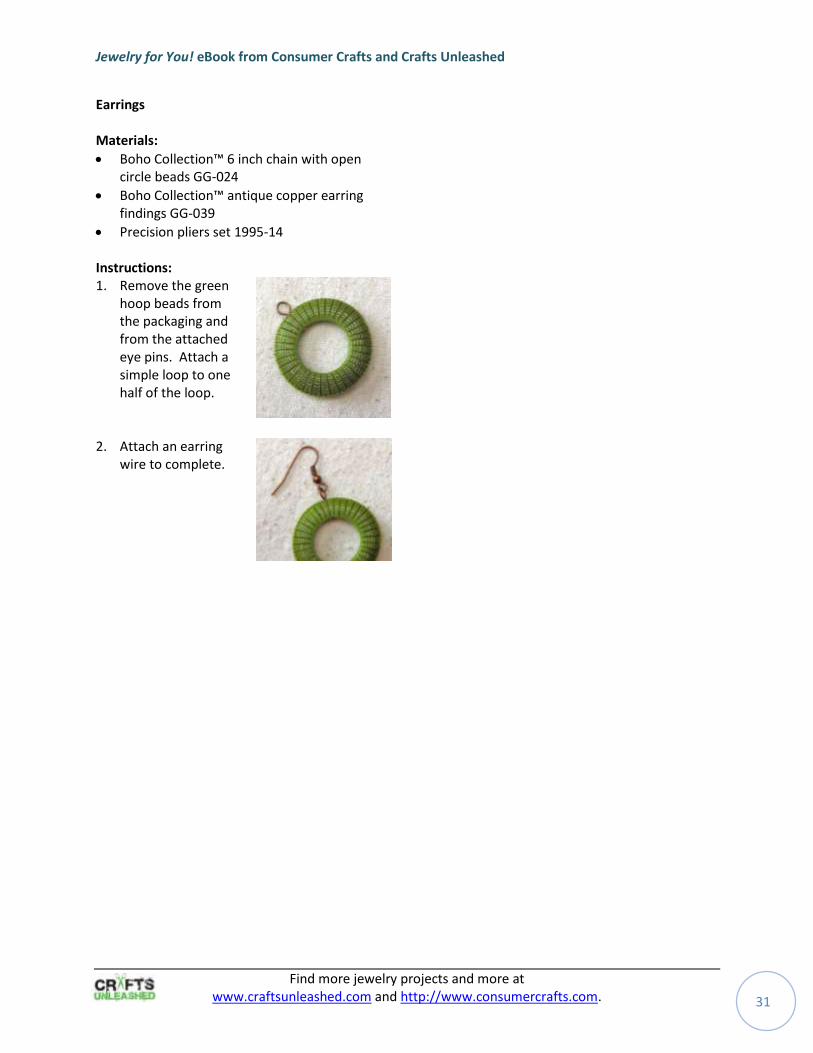
Earrings Materials:
Boho Collection™ 6 inch chain with open circle beads GG-024
Boho Collection™ antique copper earring findings GG-039
Precision pliers set 1995-14 Instructions: 1. Remove the green
hoop beads from the packaging and from the attached eye pins. Attach a simple loop to one half of the loop.
2. Attach an earring
wire to complete.
Jewelry for You! eBook from Consumer Crafts and Crafts Unleashed
Find more jewelry projects and more at www.craftsunleashed.com and http://www.consumercrafts.com. 32
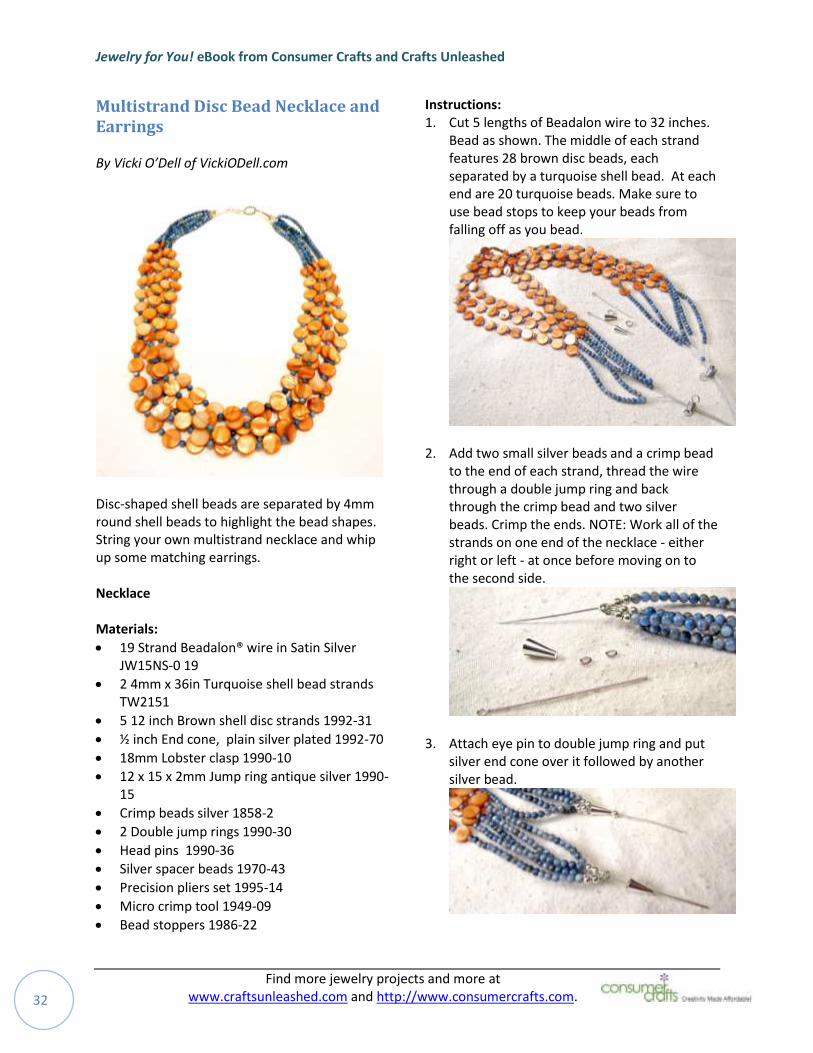
Multistrand Disc Bead Necklace and Earrings By Vicki O’Dell of VickiODell.com
Disc-shaped shell beads are separated by 4mm round shell beads to highlight the bead shapes. String your own multistrand necklace and whip up some matching earrings. Necklace Materials:
19 Strand Beadalon® wire in Satin Silver JW15NS-0 19
2 4mm x 36in Turquoise shell bead strands TW2151
5 12 inch Brown shell disc strands 1992-31
½ inch End cone, plain silver plated 1992-70
18mm Lobster clasp 1990-10
12 x 15 x 2mm Jump ring antique silver 1990-15
Crimp beads silver 1858-2
2 Double jump rings 1990-30
Head pins 1990-36
Silver spacer beads 1970-43
Precision pliers set 1995-14
Micro crimp tool 1949-09
Bead stoppers 1986-22
Instructions: 1. Cut 5 lengths of Beadalon wire to 32 inches.
Bead as shown. The middle of each strand features 28 brown disc beads, each separated by a turquoise shell bead. At each end are 20 turquoise beads. Make sure to use bead stops to keep your beads from falling off as you bead.
2. Add two small silver beads and a crimp bead
to the end of each strand, thread the wire through a double jump ring and back through the crimp bead and two silver beads. Crimp the ends. NOTE: Work all of the strands on one end of the necklace - either right or left - at once before moving on to the second side.
3. Attach eye pin to double jump ring and put silver end cone over it followed by another silver bead.
Jewelry for You! eBook from Consumer Crafts and Crafts Unleashed
Find more jewelry projects and more at www.craftsunleashed.com and http://www.consumercrafts.com. 33
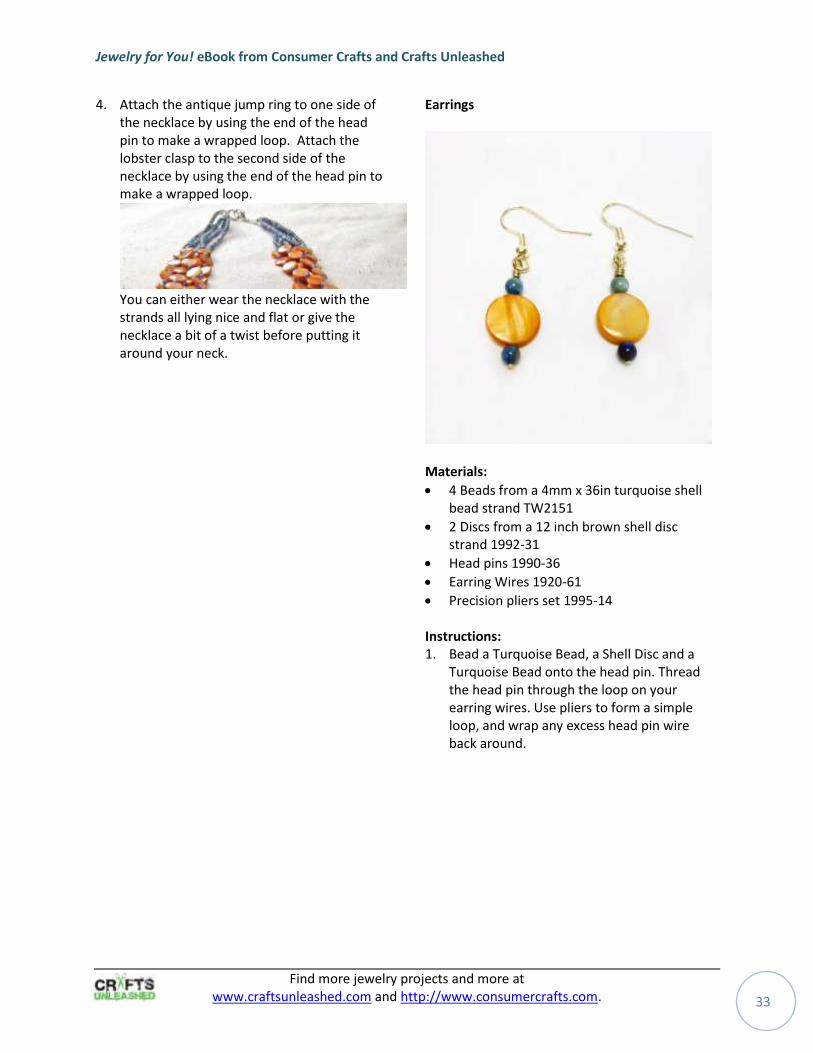
4. Attach the antique jump ring to one side of the necklace by using the end of the head pin to make a wrapped loop. Attach the lobster clasp to the second side of the necklace by using the end of the head pin to make a wrapped loop.
You can either wear the necklace with the strands all lying nice and flat or give the necklace a bit of a twist before putting it around your neck.
Earrings
Materials:
4 Beads from a 4mm x 36in turquoise shell bead strand TW2151
2 Discs from a 12 inch brown shell disc strand 1992-31
Head pins 1990-36
Earring Wires 1920-61
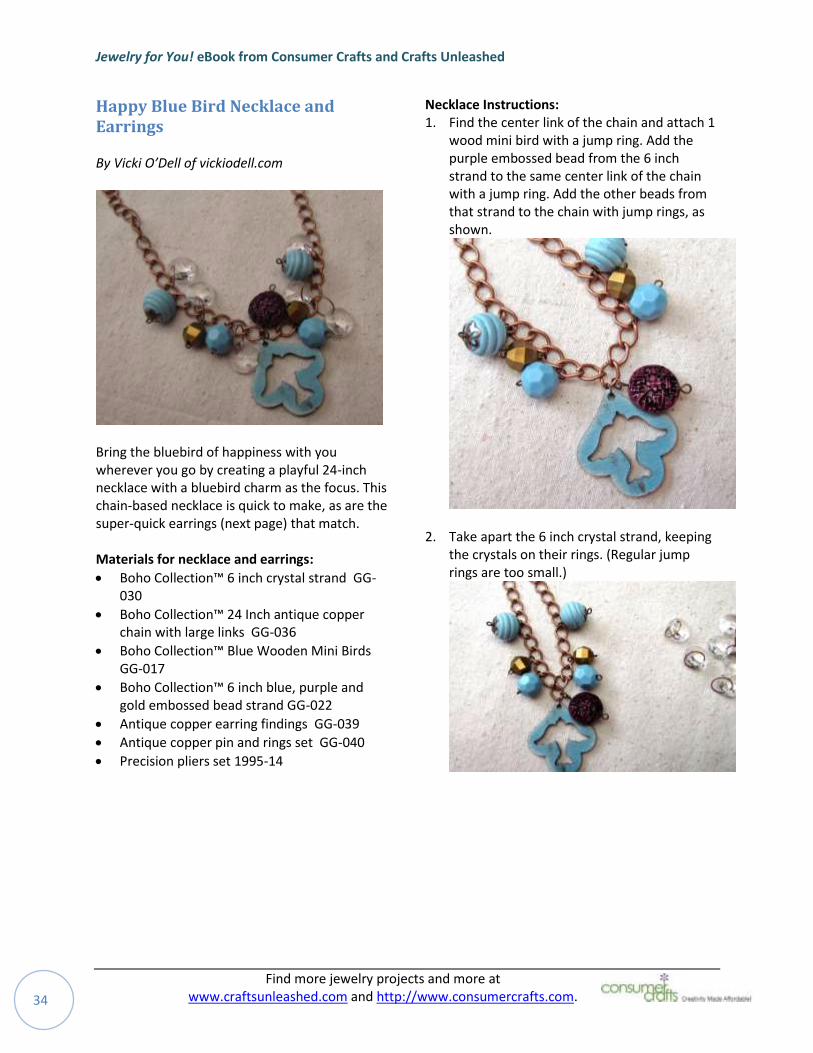
Precision pliers set 1995-14 Instructions: 1. Bead a Turquoise Bead, a Shell Disc and a
Turquoise Bead onto the head pin. Thread the head pin through the loop on your earring wires. Use pliers to form a simple loop, and wrap any excess head pin wire back around.
Jewelry for You! eBook from Consumer Crafts and Crafts Unleashed
Find more jewelry projects and more at www.craftsunleashed.com and http://www.consumercrafts.com. 34
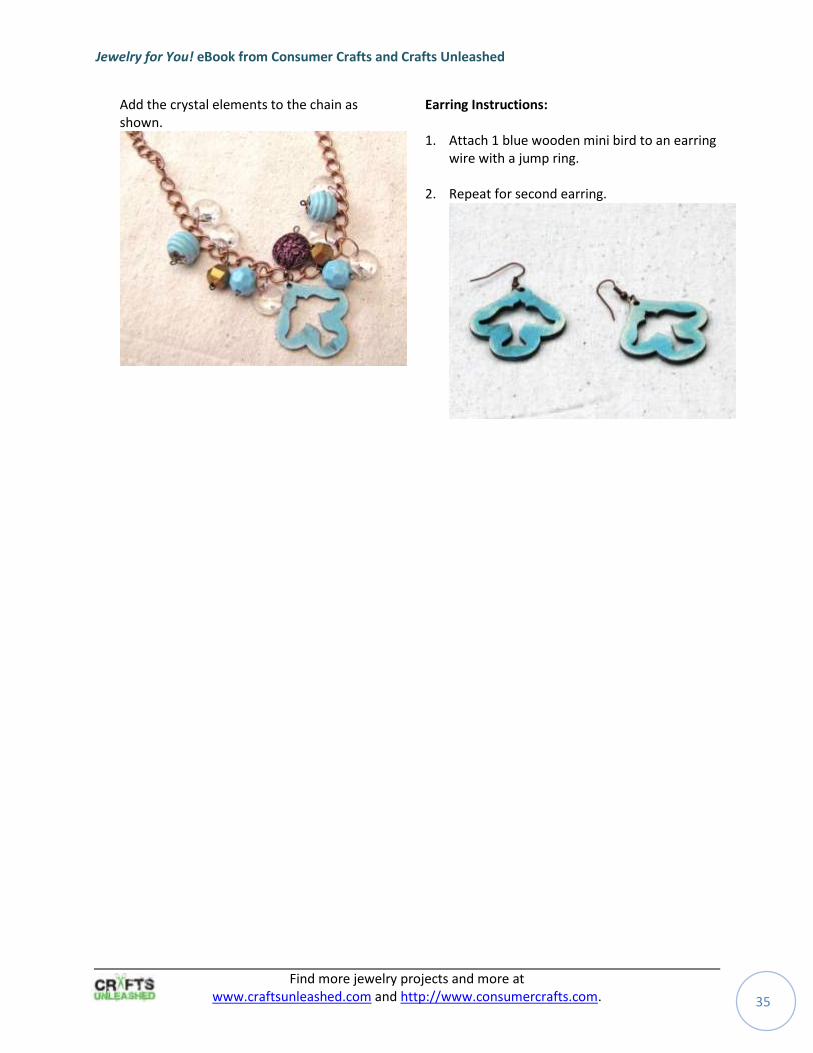
Happy Blue Bird Necklace and Earrings By Vicki O’Dell of vickiodell.com
Bring the bluebird of happiness with you wherever you go by creating a playful 24-inch necklace with a bluebird charm as the focus. This chain-based necklace is quick to make, as are the super-quick earrings (next page) that match. Materials for necklace and earrings:
Boho Collection™ 6 inch crystal strand GG-030
Boho Collection™ 24 Inch antique copper chain with large links GG-036
Boho Collection™ Blue Wooden Mini Birds GG-017
Boho Collection™ 6 inch blue, purple and gold embossed bead strand GG-022
Antique copper earring findings GG-039
Antique copper pin and rings set GG-040
Precision pliers set 1995-14
Necklace Instructions: 1. Find the center link of the chain and attach 1
wood mini bird with a jump ring. Add the purple embossed bead from the 6 inch strand to the same center link of the chain with a jump ring. Add the other beads from that strand to the chain with jump rings, as shown.
2. Take apart the 6 inch crystal strand, keeping
the crystals on their rings. (Regular jump rings are too small.)
Jewelry for You! eBook from Consumer Crafts and Crafts Unleashed
Find more jewelry projects and more at www.craftsunleashed.com and http://www.consumercrafts.com. 35
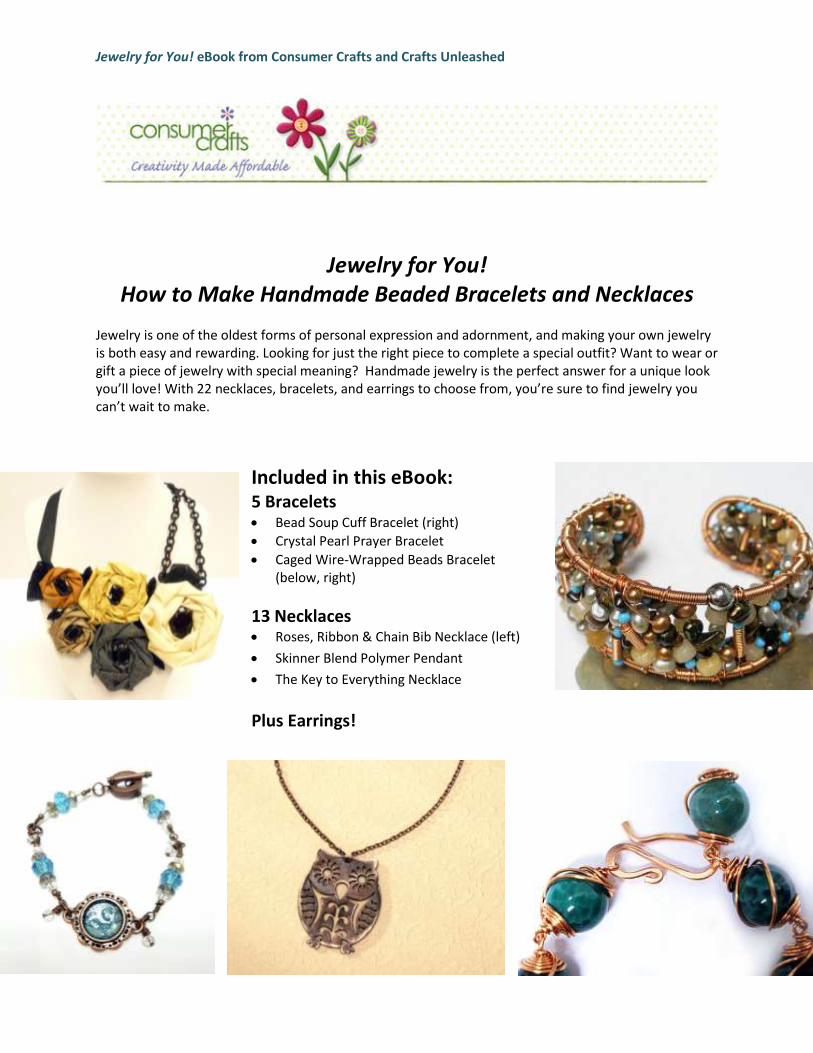
Add the crystal elements to the chain as shown.
Earring Instructions: 1. Attach 1 blue wooden mini bird to an earring
wire with a jump ring.
2. Repeat for second earring.
Jewelry for You! eBook from Consumer Crafts and Crafts Unleashed
Jewelry for You! How to Make Handmade Beaded Bracelets and Necklaces
Jewelry is one of the oldest forms of personal expression and adornment, and making your own jewelry is both easy and rewarding. Looking for just the right piece to complete a special outfit? Want to wear or gift a piece of jewelry with special meaning? Handmade jewelry is the perfect answer for a unique look you’ll love! With 22 necklaces, bracelets, and earrings to choose from, you’re sure to find jewelry you can’t wait to make.
Included in this eBook: 5 Bracelets Bead Soup Cuff Bracelet (right)
Crystal Pearl Prayer Bracelet
Caged Wire-Wrapped Beads Bracelet (below, right)
13 Necklaces Roses, Ribbon & Chain Bib Necklace (left)
Skinner Blend Polymer Pendant
The Key to Everything Necklace
Plus Earrings!