juggernaut clinic manual 1fa68f6a5f58061b9090e-969cb379cc67059b5d8c03d344b65325.r5.cf1.ra… ·...
TRANSCRIPT

J U G G E R N A U T C L I N I C M A N U A L 1

P O W E R L I F T I N G C L I N I C M A N U A L
JUGGERNAUT

J U G G E R N A U T C L I N I C M A N U A L 3
We strive to bring you the highest quality education and coaching to
help you improve and reach your goals. We hope you enjoy this bonus
gift to take home with you, remind you of key concepts from the clinic
and continue your journey towards improved strength.
Before we get too much into it though, make sure you remember a few
key tenets of powerlifting, programming and training in general...
DO THE LEAST AMOUNT NECESSARY TO GET
THE DESIRED RESULT
Whether lifting, conditioning or dieting, you must use the minimum
effective dose. If you can get stronger from doing 3 sets, why do 5?
If you can get leaner from cutting 20g of carbs, why cut 50g? If you
can improve aerobic capacity with 20 min of tempo circuits, why do
an hour? Regardless of what adjustment is made, it will eventually
THE BAISICS1

J U G G E R N A U T C L I N I C M A N U A L 4
cease to yield results and you will have to increase the workload from
whatever it currently is. These kind of incremental improvements is
what will set you up for long term success.
SPORT PRACTICE IS KING
If you want to squat more, squat more. If you want to bench more,
bench more. If you want to deadlift more, deadlift more. Nothing can
replace the specificity and carryover of the competition exercise at
varying intensities. No football player would ever think that they could
improve from just drills and no scrimmaging, yet powerlifters often try
to make misnamed special exercises the focus of their training. Don’t
make the mistake of thinking that good mornings are the key to a big
squat, or board presses the key to a big bench, or rack pulls the key to
a big deadlift-practice your sport.

J U G G E R N A U T C L I N I C M A N U A L 5
THERE ARE MANY WAYS TO PR
Training PRs can come in many varieties and falling into the trap of
thinking that only more weight on the bar for a 1-rep max means
improvement. You can do more weight, more reps or better reps to
signify improvement in training. If one week you squat 315 for 3 and
the 3rd rep is a grinder and a few weeks later you squat 315 for 3 and
the 3rd rep is explosive, have you not improved? Of course you have.
Find more ways to PR and you’ve found more ways to improve.
(WEIGHT X REPS X .033) + WEIGHT
= PROJECTED MAX
J U G G E R N A U T C L I N I C M A N U A L 6
A good powerlifting warmup will achieve a few key goals, 1-Increase
the core temperature of the body, 2-Activate the musculature that is
going to be utilized in the training session and 3-Excite the Central
Nervous System to prepare it for the work ahead.
Breathing drills are a powerful tool to improve your performance
and keep you healthy, they will also kill two birds with one stone by
raising your core temperature (well done breathing drills will have you
dripping sweat) and activating muscles throughout your body.
A WELL DESIGNED WARMUP CAN BE
STRUCTURED AS FOLLOWS. . .
1-Feet Up Breathing Drills x10-20 breaths
-Focus on pressing the low back into the ground
WARM UP2

J U G G E R N A U T C L I N I C M A N U A L 7
2-Half Kneeling Breathing Drills x10-20 breaths each side
-Keep firing the glute of the down leg to rotate the hip under you
3-Glute Bridges x10-20 reps
-Grab the ground with your feet (big toe, little toe, heel), press the arch
into the ground before initiating the bridge. Squeeze something soft
(foam roller, airex pad) between your knees to improve the drill.
After this general warmup, you’ll want to move to a more specific
warmup of joint circles to improve range of motion in the bodyparts to
be used in the training session and low intensity calisthenics to improve
bloodflow to the muscles and activation...
PRE-BENCH WARMUP
1-Shoulder Circles x10 each way 2-Small Arm Circles x10 each way
3-Big Arm Circles x10 each way 4-PNF Chest Stretch x10 each way
5-Pushups x10-20
6-Face Pulls or Band Pullaparts x20-50 Pre-Squat/Deadlift Warmup
1-Banded Hip Distraction x1 min each leg 2-Quad Bench Stretch x1 min
each leg 3-Bodyweight Squats x10-20
Once this warmup is done, a few sets of explosive movements will
cause a post- activation potentiation effect.
For the bench, choose from either clapping pushups, pushups onto
box, drop pushups or rebound pushups (depending on your fitness
level) for 3-5 sets of 2-5 reps.
For the squat, seated box jumps are a great option. Sit on one box (8-
18”) and from that seated position, jump onto a higher box. Focus on
landing softly and in a parallel or above squat. 3 to 5 sets of 2-5 jumps
will suffice here.

J U G G E R N A U T C L I N I C M A N U A L 8
For the deadlift, weighted squat jumps holding a dumbbell or kettlebell
between your legs will be excellent. Focus more on the speed of
movement, rather than the weight being used. Focus on short ground
contacts, landing on your whole foot and full extension through the hip
for 3-5 sets of 2-5 jumps for maximum effect.
Taking an extra 15 minutes before your training to make sure you
are effectively and full warmed up is critical to maximizing your
performance and increasing the longevity of your training career.
J U G G E R N A U T C L I N I C M A N U A L 9
THE SQUAT3The squat, as with all the competitive lifts, requires great strength
throughout all the prime movers and great technique. Great squatters
have tremendous strength from head to toe; the quads, hamstrings,
glutes, hips, abs and entire back must be well developed for success.
Total body strength and technique is best developed in concert with
each other, so that your technique doesn’t hold back your strength
development, nor your strength not being enough to hold proper
technical positions.
KEY TECHNICAL POINTS IN THE SQUAT ARE. . .
1-The closer you can put your hands to each other on the bar the easier
it will be to have a tight setup. Make sure though that your elbows are
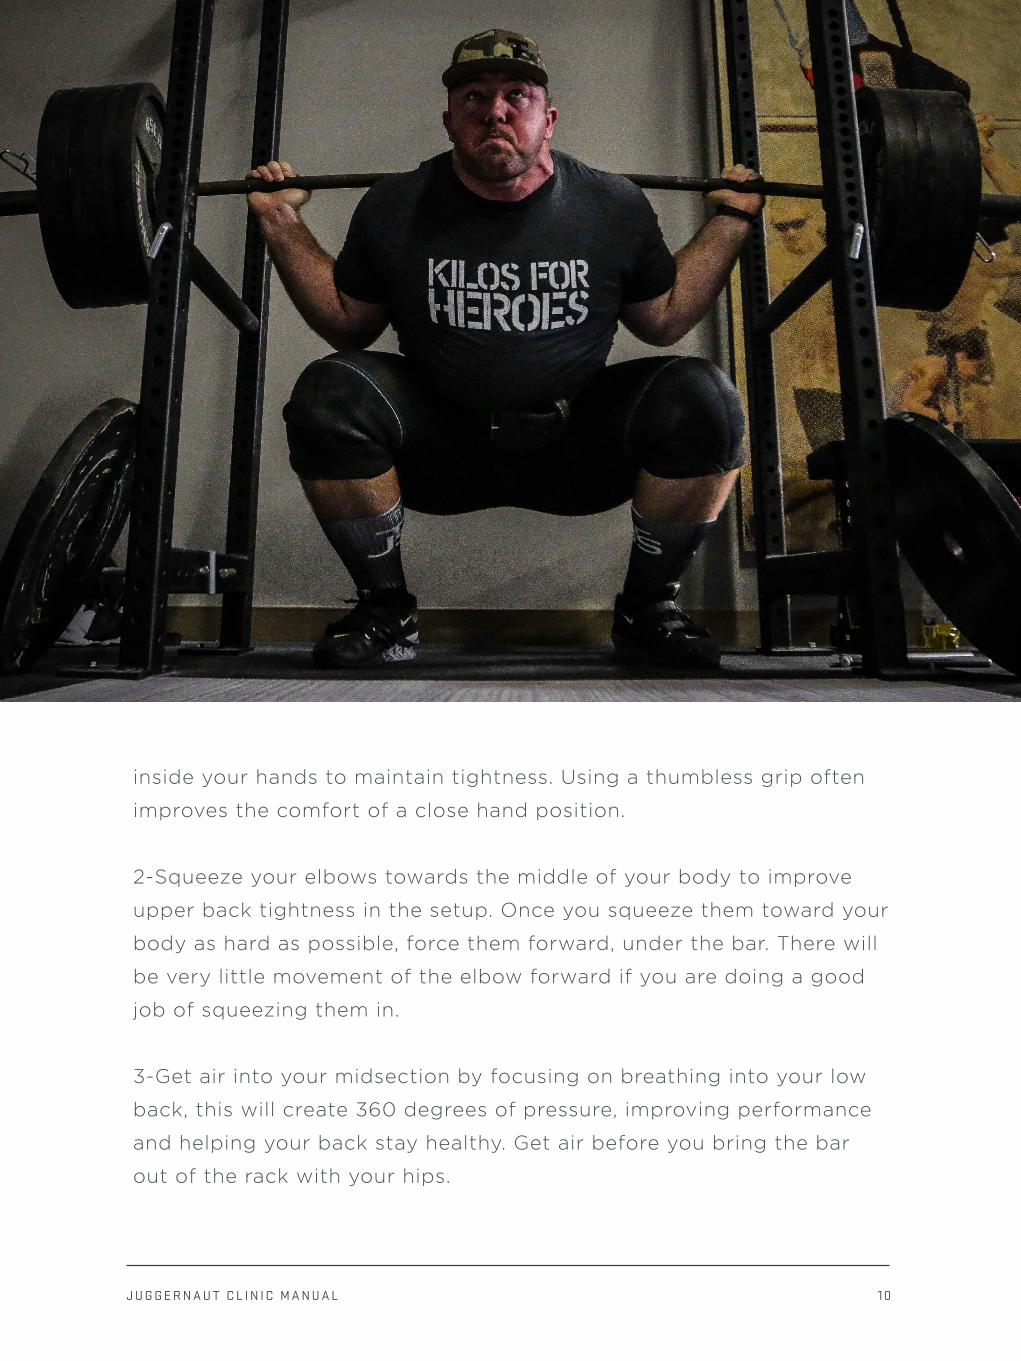
J U G G E R N A U T C L I N I C M A N U A L 1 0
inside your hands to maintain tightness. Using a thumbless grip often
improves the comfort of a close hand position.
2-Squeeze your elbows towards the middle of your body to improve
upper back tightness in the setup. Once you squeeze them toward your
body as hard as possible, force them forward, under the bar. There will
be very little movement of the elbow forward if you are doing a good
job of squeezing them in.
3-Get air into your midsection by focusing on breathing into your low
back, this will create 360 degrees of pressure, improving performance
and helping your back stay healthy. Get air before you bring the bar
out of the rack with your hips.
J U G G E R N A U T C L I N I C M A N U A L 1 1
4-The walkout should be achieved in 3 steps maximum and can be
achieved in 2. Step back with your off foot, set your dominant foot
and then make any repositions of your off foot necessary to find your
stance.
5-Once your feet are set, take more air into your midsection by
breathing into your low back, while also flexing your glutes hard to
neutral your spine and squeezing the bar hard in your hands.
6-Focus on maintaining 3 even points on contact in your feet
throughout the lift, weight should be even through the big toe, little
toe and heel. Do not focus on excessively sitting back onto your heels
if you are a raw lifter, this is not advantageous because you don’t
have a suit to sit back into. There will be some forward movement on
the knees in the lift and that is fine. A short movement of the hips
backwards and then squat down from there. “Back, back, back” isn’t for
you, it is more “down, down, down”.
7-Commit to the descent in the lift. Going down as fast as possible is
critical to take advantage of the stretch reflex and avoid expending
unnecessary energy on the way down. This doesn’t mean you need
to divebomb squat by any means. You need to descend as quickly as
YOUR TECHNIQUE can hold up to. There are great squatters
like Stan Efferding that descend very slowly because he has balance
issues, so that is as fast as he can go down. However fast it is, practice
it from an empty bar to your max and keep it consistent.
8-Keeping the knees in line with the toes or slightly outside is valuable
to create torque in the hips. “Knees out” though is often not the proper
cue to achieve this as it causes the lifter to shift the weight to the
outside of their feet and lose 3 points of contact. Instead, try to “screw
your feet into the ground” by externally rotating them throughout the
lift.
J U G G E R N A U T C L I N I C M A N U A L 1 2
9-The last thing to move during the descent is the lift, so it should be
the first thing to move on the way up. Keep your chest up out of the
hole by driving your head and shoulder back into the bar. Also drive
your elbows forward under the bar (again there may not be much
actual movement of the elbows but the intent will help you avoid
collapsing forward) as you initiate the drive out of the hole.
10-Focus on accelerating the bar throughout the concentric movement
all the way to the top of the lift. The bar doesn’t need to actually jump
off your back (ala Eric Lilliebridge) but that intent should be there.
COMMON SQUAT PROBLEMS AND EXERCISES
TO HELP FIX THEM
The first step in fixing all of these is technique, once that is dealt with,
work on these...
Folding Forward Out of the Hole -Front Squats
-Safety Squat Bar Squats
-Upper Back Work (Rows, Chinups/Pullups, Upright Rows)-My favorite
variation is chest supported rows with a static hold at the end of each
set
Getting Stuck In The Hole
-Pause Squats in the Bottom Position (2 to 10 second holds in the hole)
-Pause Squats Just Above Parallel On the Way Down (2 to 5 count)
this is effective for those who squat with a quicker descent in a more
Olympic style. If you squat with a slower descent and wider stance
and just break parallel on a normal squat, these will not help as they
will really just be high squats. -Wide Stance Squats will help build hip
power out of the hole
J U G G E R N A U T C L I N I C M A N U A L 1 3
Getting Stuck Just Above Parallel
-Pause Squats in the Bottom Position, the more speed you can
generate out of the hole, the better you will break through any sticking
point on the way up. -Pause Squats Just Above Parall On the Way Up
(2 to 5 count) these are extremely difficult as you will descend drive
out of the hole and then hold right above parallel. It is the spot right
where you don’t want to stop, that you need to hold at.
-Dead Squats, set the bar on pins at 1-2” above parallel and start
the movement from there at a dead stop. These are always done for
singles.
JUMP TRAINING TO IMPROVE SQUAT POWER
Building explosive power is key to a big squat, as well as athletic
performance. Jumps are the most effective and simplest way to build
this power. In regards to improving the squat, my favorite exercises to
build explosive power are the seated box jump and the depth jump.
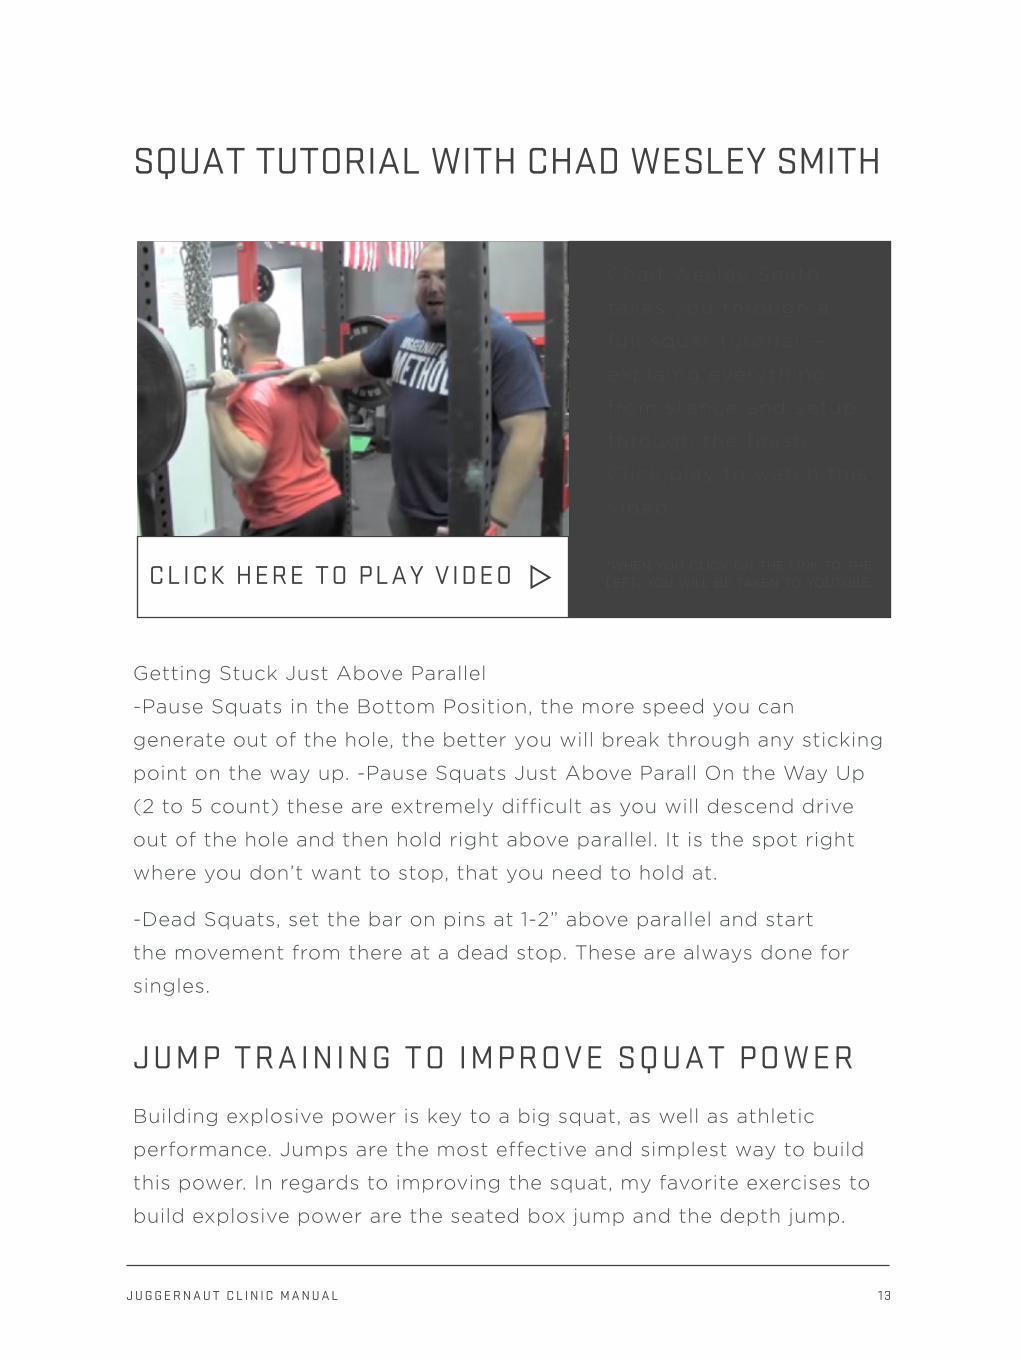
SQUAT TUTORIAL WITH CHAD WESLEY SMITH
CLICK HERE TO PLAY VIDEO *WHEN YOU CL ICK ON THE L INK TO THE LEFT, YOU W ILL BE TAKEN TO YOUTUBE.
Chad Wes ley Smi th
takes you th rough a
fu l l squat tu tor ia l —
exp la ing everyth ing
f rom stance and setup
th rough the f in i sh .
C l i ck p lay to watch th i s
v ideo.

J U G G E R N A U T C L I N I C M A N U A L 1 4
The seated box jump starts by squatting to a box or bench, holding
static on that bench for a moment and then jumping from there onto
another higher box. Avoid rocking back on the box and using your
momentum to go back into the jump, this defeats the purpose of
squatting onto the box in the first place. Don’t let box jumps turn into
an exercise of how well you can pull your knees to your ears, rather
focus on vertically displacing hips as much as possible and landing
softly in an above parallel squat. Try using 8 weeks of these jumps, as
the first 8 weeks of a meet training cycle to enhance explosiveness.
Week 1-6 sets of 3 jumps at 75% intensity wearing a medium/
heavyweight vest Week 2-5 sets of 2 jumps at 85% intensity wearing
a medium/heavyweight vest Week 3-4 sets of 1 jump up to a max
wearing a medium/heavyweight vest Week 4-3 sets of 3 jumps at 70%
intensity.

J U G G E R N A U T C L I N I C M A N U A L 1 5
Week 5-6 sets of 3 jumps at 75% intensity wearing a medium/
lightweight vest Week 6-5 sets of 2 jumps at 85% intensity wearing a
medium/lightweight vest Week 7-4 sets of 1 jump up to a max wearing
a medium/lightweight vest Week 8-3 sets of 3 jumps at 70% intensity.
After this 8 week phase you’ll want to move to depth jumps. Depth
jumps are a powerful but very taxing tool, because you’re overcoming
so much inertia and for this reason they must be used sparingly. To
perform a depth jump drop from one box (12-36”, higher box for
relatively stronger and lighter athletes) and immediately upon landing
jump as high as possible, either into the air or on to a second box. This
depth jump cycle will peak you for maximum explosiveness going into
a meet.
Week 9-2 sets of 5 jumps from relatively low box
Week 10-2 sets of 4 jumps from relatively moderate box Week 11-2 sets
of 3 jumps from relatively high box Week 12-No jumps

J U G G E R N A U T C L I N I C M A N U A L 1 6
THE BENCH4Building massive pressing power requires a combination of strength
through the pecs, triceps, shoulders, biceps, forearms, lats, rear
delts, rhomboids and traps, as well as technique and confidence.
It is important to understand that as with all the lifts, much of the
information you have been presented with in the past via articles/
videos, was written with geared lifters in mind and that while they are
strong, the techniques and exercises (max width grip, reduced range
of motion lifts, accommodating resistance) they use to improve won’t
necessarily translate to your success.
KEY TECHNICAL POINTS IN THE BENCH ARE. . .
1-Grip width will be individual based upon limb length. Set your hands

J U G G E R N A U T C L I N I C M A N U A L 1 7
at a width that allows the bar to be right over your wrist and wrist right
over your elbow when it is on your chest. Keeping these three things in
line is critical to maximizing power.
2-A tight setup is critical to a big press. In your setup, your knees need
to be aligned below your hips to ensure that your butt stays down
on the bench through the movement. Think about squeezing your
shoulder blades together as tight as possible make sure your chest is
as high as possible.
3-Whether you are using a thumbless or full thumb grip, you need to
squeeze the bar as hard as possible. This will send a tightness response
through the body.
4-Tuck the elbows as you bring the bar to your chest. Whether you
want to think about bending the bar or any other cue, it is key to
engage the lats. Thinking about loading your lats, like you are loading a
spring.
5-There are two styles that are widely used in the bench, a more
dynamic style (Dan Green style) in which you lower the bar quickly
letting it sink into your chest before the press command-which allows
for great leg drive but is a more high risk-high reward technique. A
more strict style (Brandon Lilly style) where you pause the bar on
your chest by touching it as lightly as possible, maintaining as much
tightness as possible through the whole body before getting the press
command. One isn’t necessarily better than the other, you just need to
see what works best for you.
6-Regardless of style you use, leg drive is critical. Your leg drive should
drive you down the bench towards your head, but since your shoulder
blades are dug into the bench you won’t move, instead the highpoint of
your chest will rise. Your feet should be pressed into the ground (heel

J U G G E R N A U T C L I N I C M A N U A L 1 8
up or down depending on federation and comfort) and you should
think about doing an explosive leg extension action but instead of you
leg extending, you will drive your body towards your head.
7-The bench press is a violent movement. As you loaded the spring
with the descent of the bar, now you must violently uncoil it in the
press. As your elbows tuck on the way down, they should flare on the
way up.
8-Practice a strong lockout by fully locking out every rep, rather than
cutting them short as ‘bodybuilder reps’ and hold the final rep of each
set at lockout for a 3-5 count before racking it.
COMMON BENCH PROBLEMS AND EXERCISES
TO HELP FIX THEM
The first step in fixing all of these is technique, once that is dealt with,
work on these...
Weak Off the Chest
-Paused Reps, training a longer pause than you will be required to do
in competition is the simplest way to build strength off of the chest.
Pauses of 3- 10 seconds will work best.
-Deep Stretch DB Press, letting the dumbbells sink deep and stretch
your chest will build strength off the chest. Reps in the 6-12 range
will work best. -Cambered Bar Bench Presses, if you have access to a
cambered bar that will increase your range of motion by 1-2” this will
be very beneficial in improving bottom end strength.
-Back Strength, stronger lats and upper back will not only increase
the thickness of the back and shorten the range of motion it will also
improve drive from the chest.

J U G G E R N A U T C L I N I C M A N U A L 1 9
Weak In The Midrange
-Spoto Press, pause the weight 1” off your chest, try to quickly drop
the weight to that point and stop it with the tension in your lats. The
bar never touches the chest in this variation.
-Dead Bench, set the bar on pins 1” above your chest. Press up from
this dead position. These are done only for singles.
Weak At Lockout
-Closegrip Bench, your grip doesn’t need to be excessively close 1-2”
inside your competition grip will suffice
-Dips, these worked for Pat Casey, Kaz, Al Davis and plenty of other all
time greats. Take them through a full range of motion, load them up
and work them hard in the 5 to 12 rep range.
-Slingshot Bench, overload the top end of the movement by 3-10% with
this great tool from Mark Bell. An overload more than 10% is overkill
and won’t carryover. My favorite way to use the slingshot is to work
up raw, then take an over set with slingshot for a heavy set of 1-3,
then drop 10% from that set and do max reps with the slingshot on, all
paused.
DEVELOPING EXPLOSIVE PRESSING POWER
Pushups and throws are a tremendous tool to build explosive strength
in the bench press. Improve explosive strength will enhance off the
chest and help you generate more force to carry you through any
subsequent sticking points. Developing explosive strength is about
high quality efforts, so very short work periods are necessary. Two
to 5 reps in a set for 3 to 8 sets, is enough to build the power you
need. Any of these drills can be intensified by adding a weight vest or
increasing the height of the boxes.
J U G G E R N A U T C L I N I C M A N U A L 2 0
Listed here are a series of drills to develop explosive power, listed in
order from least to most advanced.
-Explosive Pushups, a regular pushup done so your hands leave the
ground.
-Clapping Pushups, these can be done with a single clap in front of the
body, multiple claps or add difficulty by clapping behind your head or
back.
-Pushups onto Boxes, situate yourself between two boxes and in an
explosive pushup, jump your body up to the boxes landing one hand
on each. As with box jumps, don’t let this turn into an exercise in how
well you can pull your hands up as this will defeat the purpose of the
drill and stress the shoulders, so focus on landing with your arm in an
above parallel angle and landing as softly as possible. Walk your hands
back down to the ground to begin the next rep.
-Drop Pushups, starting with one hand on top of each box, jump off

J U G G E R N A U T C L I N I C M A N U A L 2 1
the boxes and land between them. Quickly decelerate yourself upon
landing and stop yourself halfway down into a pushup. Walk your
hands back to the top of the boxes to begin the next reps.
-Paused Pushups onto Boxes, starting between two boxes, lower
yourself into a pushup position, so your chest is a few inches off the
ground, pause in this position for a 1-3 count, then explosively pushup
and launch yourself to the top of the boxes. Walk your hands down to
ground to begin the next rep.
-Rebound Pushups, a combination of drop pushups and pushups onto
boxes. Start on top of boxes, jump off, land between the boxes and
immediately jump back up. You should land softly on both boxes and
smoothly decelerate yourself and rebound yourself back onto the
boxes. This is the equivalent of a depth jump.
-MB Bench Throws, laying on a bench, lower a medicine ball from
arms length to your chest and explosively throw it into the air. Have a
partner catch the ball and hand it back to you to begin the next rep.
A heavier ball (ie. A weight you can throw 2-4’ out of your hands) will
be best to develop strength for the bench while a lighter ball (a weight
you can throw 5’+ out of your hands) will be better for athletic
development for people like football linemen who have to develop an
explosive double hand punch.
-MB Drops, lay on the ground and have a training partner drop the ball
to you from their shoulder height and you’ll quickly absorb the force,
stopping the ball before it hits your chest.
-MB Rebound Throws, have a partner drop you a ball (like MB Drops),
quickly absorb the force and then rapidly reverse that energy and
throw the ball as high as possible.
J U G G E R N A U T C L I N I C M A N U A L 2 2
THE DEADLIFT5The deadlift in some ways is the simplest exercise, just pick the bar
up off the floor and in other ways, the most complex, as it is the most
taxing to the CNS and the technique varies the greatest from athlete to
athlete based upon individual leverages.
KEY TECHNICAL POINTS IN THE
CONVENTIONAL DEADLIFT ARE. . .
1-Stance width will vary from athlete to athlete based upon individual
body types, limb proportions and strengths/weaknesses but a good
starting point is where the athlete would do a vertical jump from.
2-Bar placement in relation to the shin will also be pretty individual

J U G G E R N A U T C L I N I C M A N U A L 2 3
based upon the athlete’s size but a good rule of thumb is to have the
bar covering the knot in your shoelaces (or where that knot would
be if you’re barefoot). Bigger lifters may move the bar a bit farther
away from themselves, while smaller lifters may have it a bit closer.
Rolling the bar in during the setup is a popular move (ala Benedikt
Magnusson), especially among larger lifters and for thicker waisted
lifters it may be necessary to get into a good starting position. Just
understand with this type of dynamic move is another thing to think
about/screw up in your technique, so weigh the risk/reward for
yourself.
3-Grip width is a bit individual as well, you want it set just outside
your legs so that your hands don’t scrape up your legs during the pull.
Larger athletes may need to set their hands a bit wider, this will also
force you to get your hips down a bit more. Improve your grip strength
by giving the bar an indian burn, this will dig the bar into your hands
and lessen the chance of dropping a heavy dead.
4-Hip height/shin angle is yet another individual characteristic of
the deadlift start, controlled by limb length and ankle mobility. Your
shins may not be quite vertical at the start of the pull due to mobility
limitations, but you should strive to get as much of your weight
behind the bar as possible and have your shoulders directly over, or
even slightly behind the bar. This position will put everyone’s hip in a
different place.
5-Creating tension in the start position is critical to a big pull. Think
about externally rotating your feet into the ground (screw your feet
into the ground), flexing the glutes and hamstrings as you pull yourself
down into position. Pack your neck, flex your triceps, pull slack out of
the bar and engage your lats (protect your armpits). Draw big air into
your core (breathe into your low back). Now you’re ready to pull.

J U G G E R N A U T C L I N I C M A N U A L 2 4
6-Iniate the pull from the floor by driving your shoulders up and back
as if you are driving them into the bar during a squat. This plus an
aggressive driving of the feet into the floor as if you’re trying to trying
to jump up and backwards will generate speed from the floor.
7-Avoiding bar drift throughout the lift, but particularly with the bar at
the knees is critical. Make sure to flex your lats hard and think about
pull the bar up and back into the body.
8-As the bar pass the knees and you approach lockout, many people
want to throw their head back. Avoid this for two reasons, 1-this will
lengthen the distance to lockout and 2-it will shut off your glutes which
are the prime muscles needed for lockout. Keep your head neutral or
even tuck your chin down as you lockout.
9-Toe position can influence starting strength and lockout ability.
J U G G E R N A U T C L I N I C M A N U A L 2 5
Straighter toes improve the lockout, while a more toe-out position will
improve power from the floor but reduces it at lockout as it is harder to
fully engage the glutes in a toe-out position.
KEY TECHNICAL POINTS IN THE SUMO
DEADLIFT ARE. . .
1-Sumo deadlift stance width, like conventional, will vary from athlete
to athlete. The ultra wide stance, when it looks like the athlete is
going to drop the weight on their toes, it better suited to an athlete
with great groin/hip strength. The modified sumo, ala Ed Coan, is
best suited to athletes with great quad (squatting) strength. Choose
accordingly based on your own strengths.
2- Bar placement in relation to the shin will also be pretty individual
based upon the athlete’s size but a good rule of thumb is to have the
bar covering the knot in your shoelaces (or where that knot would
be if you’re barefoot). Bigger lifters may move the bar a bit farther
away from themselves, while smaller lifters may have it a bit closer.
Rolling the bar in during the setup is a popular move (ala Benedikt
Magnusson), especially among larger lifters and for thicker waisted
lifters it may be necessary to get into a good starting position. Just
understand with this type of dynamic move is another thing to think
about/screw up in your technique, so weigh the risk/reward for
yourself.
3-Grip width in the sumo pull will be at shoulder width so the arms fall
in plumb lines down from the shoulders.
4-Hip height in the sumo start is a bit misunderstood, as often people
want to start with their hips too low so they can seemingly squat
the weight up, but for most (Andrey Malanichev excepted) an above

J U G G E R N A U T C L I N I C M A N U A L 2 6
parallel position will be best. Once the bar is in it’s starting place over
the foot, stretch your hamstrings by raising your hips until your legs
are straight. From here, lower your hips while maintaining tension
in the hamstrings. Externally rotate the feet (screw the feet into the
ground) and arch up at the t-spine until your shins are touching the
bar. The pull will start from this position.
5- Creating tension in the start position is critical to a big pull. Think
about externally rotating your feet into the ground (screw your feet
into the ground), flexing the glutes and hamstrings as you pull yourself
down into position. Pack your neck, flex your triceps, pull slack out of
the bar and engage your lats (protect your armpits). Draw big air into
J U G G E R N A U T C L I N I C M A N U A L 2 7
your core (breathe into your low back). Now you’re ready to pull.
6-Iniate the pull from the floor by driving your shoulders up and back
as if you are driving them into the bar during a squat. This plus an
aggressive driving of the feet into the floor as if you’re trying to trying
to jump up and backwards will generate speed from the floor.
7-Avoiding bar drift throughout the lift, but particularly with the bar at
the knees is critical. Make sure to flex your lats hard and think about
pull the bar up and back into the body.
8-As the bar pass the knees and you approach lockout, many people
want to throw their head back. Avoid this for two reasons, 1-this will
lengthen the distance to lockout and 2-it will shut off your glutes which
are the prime muscles needed for lockout. Keep your head neutral or
even tuck your chin down as you lockout.
9-Timing and sequencing of the lockout is critical, the power of the
legs must drive the lockout. The legs should lockout slightly before the
hips. Finish the leg drive violently so the back/hips can finish it the last
few inches once the legs are fully extended.
COMMON DEADLIFT PROBLEMS AND
EXERCISES TO HELP FIX THEM
The first step in fixing all of these is technique, once that is dealt with,
work on these...
Weak Off the Floor Both Styles
-If you are weak from the floor but are training your deadlifts, touch-
and-go you are missing out on the simplest way to improve strength
from the floor. Train your reps dead stop.

J U G G E R N A U T C L I N I C M A N U A L 2 8
Conventional
-Front Squats or Safety Squat Bar Squats, these will improve quad
strength. Paused variations of both of these will be even better. Do
them in the 3-8 rep range.
-Deficit Deads, don’t make the deficit excessively high as this will put
you in an unrealistic starting position. Longer/leaner athletes can use a
3-5” deficit, while heavier athletes should stick to a 1-3” deficit.
-Depth Jumps, a powerful tool that must be used carefully since it is
very stressful to the body.
Sumo
-Dead Squats, doing these with a stance that mimics your start position
is key.

J U G G E R N A U T C L I N I C M A N U A L 2 9
-Deficit KB Swings, heavy KB swings while you stand on two blocks so
the KB can swing lower (at or slightly below the level of you feet) will
help enhance mobility and strength in this position.
-Weighted Squat Jumps, let the weight (DB or KB) hang between your
legs as you go from a half squat into a powerful jump. 3-5 sets of 2-5
jump will be best.
Weak at the Knees Both Styles
-Bentover Rows, lat strength and engagement is key to keep the bar
close to the body during a heavy pull.
-Paused Deadlifts, deadlifts can be paused for a 1-5 count at any point
during the lift to address a specific weakpoint. Pause either where you
are sticking or an inch below it.
Weak at Lockout Both
-BB Glute Bridges/Hip Thrusts, weight is certainly important here
but do not sacrifice full hip extension. Train them hard in the 5-12 rep
range.
Conventional
-Sumo Deads, training the opposite style will strengthen other muscles
that aren’t as developed from conventional pulls, particularly the glutes
and hips. -Snatch Grip Deadlifts, either done from the floor or from
blocks. Wear straps for these and train them in a higher rep range like
6-15 reps.
Sumo
-Block Pulls, pulls from 3-6” blocks, following the same prescription
as with deficit pulls will allow you to overload the top portion of the
lift. Mostly focus on pulls for reps in the 2-8 rep range, while very
occasionally working up to a heavy single. Straps are acceptable here
as well.

J U G G E R N A U T C L I N I C M A N U A L 3 0
BUILDING EXPLOSIVE PULLING POWER
Improved explosive qualities will lead to enhanced speed off the floor.
As with any of the lifts, improving force at the start of the concentric
phase will improve your ability to overcome sticking points throughout
the rest of the lift. Deadlifts do not have the benefit of an eccentric
phase to load the stretch reflex, so you will benefit from training your
explosive work from paused/dead stop positions.
My go to movements to build explosive power from the floor in the
deadlift are weighted jumps and throws.
For throws, either an overhead backward or rocket (underhand throw
for height) from a static starting position will be great. Six to 10 total
reps done with a complete recovery will suffice.
Paused squat jumps holding a kettlebell or dumbbell between your legs
will be the best way to build power in the starting position. Squat down
so you are a few inches above parallel, hold in that position for a 2 to 5
count and jump powerfully from there. Three to 6 sets of 1 to 3 jumps
will be sufficient.

J U G G E R N A U T C L I N I C M A N U A L 3 1
TRAINING Q/A6Q: WHEN SHOULD I WEAR A BELT?
A: Belts and other supportive equipment can have a valuable role in
your training, but training without it can also be valuable tool to build
the body. Training without a belt will help you ‘build your own belt’
of strength and muscle through the midsection but you can’t train
beltless for a whole cycle and expect to hit a belted PR as soon as you
add the belt back in. Within the context of a 12 week training cycle for
a lifter who competes in belt and wraps, I would dedicate the first 3-4
weeks towards beltless training and higher frequency squatting. The
next 3-4 weeks would be for belt only training and slightly decreased
frequency and then the last 3-4 weeks would be dedicated to full
equipment and the lowest frequency/highest intensity. Not using a
belt during higher frequency training is the best option because it will
reduce your output capability. The belt will cause the limiting factor
of your lifts to be your back though, so to ensure that your legs are

J U G G E R N A U T C L I N I C M A N U A L 3 2
provided with enough stimulus to improve you must reintroduce the
belt to use heavier loads. Take times in the off-season to work without
equipment and build your body and as competition approaches
become more specific and use your competition equipment.
Q: WHEN SHOULD YOU WEAR KNEE WRAPS?
A: There is no distinction by strength that needs to be made in regards
to wearing knee wraps, as in you don’t need to squat X amount of
pounds before you wear wraps, but as with the belt, working with less
equipment will allow you to build your strength and musculature while
equipment will allow you to overload your body and accommodate
your CNS to heavier loads. As I mentioned with the SlinghShot though,
an overload of more than 10% will be at the point of diminishing returns
for the raw lifter. So with that addressed, I would try to avoid wearing
wraps as much as possible. Of course there are some very successful
lifters (Andrey Malanichev and Eric Lilliebridge) who are basically
always in wraps and maybe this is my aversion to wrapping my own
knees talking but ultra-tight knee wraps can actually add stress to
the knees. Try to wear wraps as little as necessary to accommodate
yourself to any technical changes they cause and the increased loads
you’ll need to be able to handle.
Q: HOW OFTEN SHOULD I SQUAT/BENCH/
DEADLIFT?
There isn’t a right or wrong answer here and what is right for me
may be wrong for you or vice versa. I know that probably sounds like
a cop out but it is the truth. Different people with different training
backgrounds, life stress, genetics, etc will respond better to different
programs. As an extremely general rule of thumb, the more beginner
J U G G E R N A U T C L I N I C M A N U A L 3 3
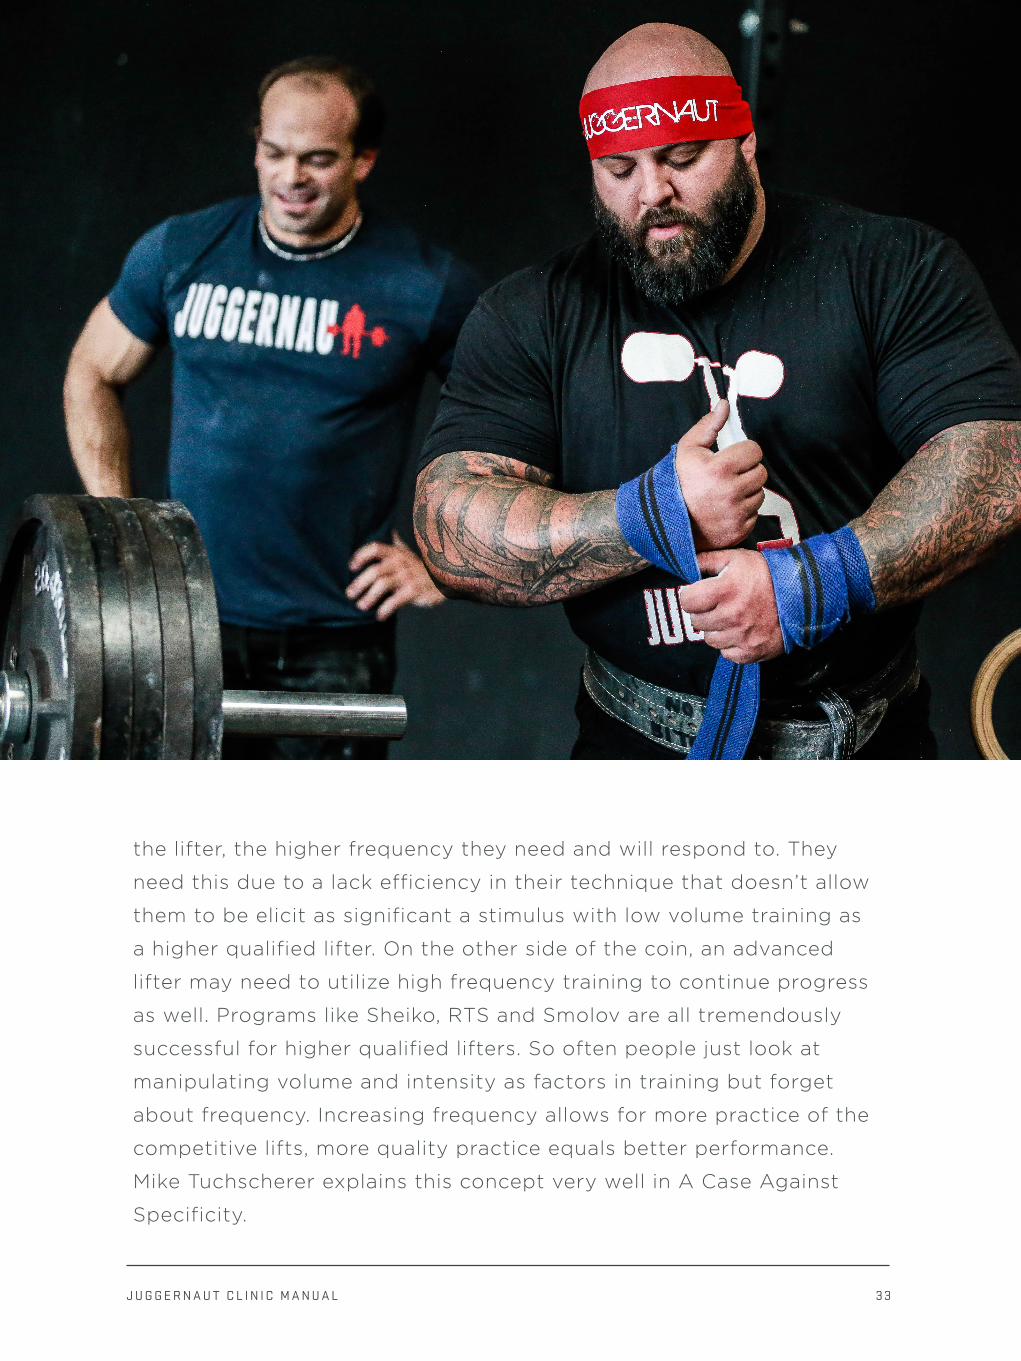
the lifter, the higher frequency they need and will respond to. They
need this due to a lack efficiency in their technique that doesn’t allow
them to be elicit as significant a stimulus with low volume training as
a higher qualified lifter. On the other side of the coin, an advanced
lifter may need to utilize high frequency training to continue progress
as well. Programs like Sheiko, RTS and Smolov are all tremendously
successful for higher qualified lifters. So often people just look at
manipulating volume and intensity as factors in training but forget
about frequency. Increasing frequency allows for more practice of the
competitive lifts, more quality practice equals better performance.
Mike Tuchscherer explains this concept very well in A Case Against
Specificity.
J U G G E R N A U T C L I N I C M A N U A L 3 4
Q : I HAD XYZ INJURY, HOW SHOULD I
PROGRESS BACK INTO TRAINING?
A: Well first off, I’m not a PT or a Doctor so I would encourage you to
reach out to Dr. Quinn Henoch of Darkside Strength, who along with
Ryan Brown, coaches our Juggernaut Mobility Clinics. My general
recommendation though is, as soon as you are cleared for activity,
return to whatever scaled version you can handle of whatever activity
you are trying to return to. So if you had a back injury deadlifting
and need to return to deadlifting, start pulling from very high blocks
or pins (this may only mean a few inch range of motion), each week
progress by moving the start height down a small increment until you
are pulling from the floor again. I would also advocate reverse band
work during a time like this. Most likely in this scenario, your back
would hurt the most during the start position of the pull, using reverse
bands would alleviate the stress in the most vulnerable position while
still allowing you to go through a full ROM and properly retrain your
movement patterns. During a time like this it is critical that you employ
high frequency training, even up to 6x/week depending on how low
intensity you are using.
Q: HOW SHOULD I CHOOSE BETWEEN PULLING
SUMO OR CONVENTIONAL (SQUATTING HIGH
BAR OR LOW BAR)?
A: Train both and choose the one you are best at. When making any
technical adjustment, grip width, stance width, bar position, etc or
programming change you need to give yourself adequate time to
accommodate to it to know if it is really working. For a technical
change, give it a minimum of 6 weeks and a programming change, a
minimum of 12 weeks.

J U G G E R N A U T C L I N I C M A N U A L 3 5
Q : HOW SHOULD YOUR APPROACH YOUR
ACCESSORY WORK?
A: I refer to this as secondary work, supplementary work-compound
movements that aren’t the competitive movement on a variation of
it and accessory work-single joint and machine movements. The goal
of both of these are to build the competitive movement through
improving strength in lagging bodyparts and allowing you better
hold your technique under maximal loads. Testing these secondary
lifts should not be your goal, but rather training them with volume
at submaximal loads. Use the same supplementary movements for
a minimum of 3 weeks at a time, but better for at least 6 weeks.
Smaller accessory movements can be rotated more frequently as their
carryover is much smaller and it is just significant that you give the
muscle stimulus. Don’t try to set PRs on accessory work during the
J U G G E R N A U T C L I N I C M A N U A L 3 6
course of a meet training cycle, save that for the off-season. Pushing
these exercise with less transfer to the competitive movement too hard
will detract from your energy to put towards the exercises that matter
most. Do they have value of course, just understand where they fall in
the hierarchy of your training.
Q: WHAT CHANGES SHOULD YOU MAKE TO
YOUR TRAINING WHEN YOU GET SICK?
A: Illness is a huge stress to the body and like any stress (training,
emotional, etc) it must be accounted for. As I’m not a doctor, please
don’t take this as medical advice, but training while sick can be done
but obviously must be adjusted. A 30% reduction in intensity is a
good rule of thumb for training while sick or recovering from sickness.
Adding stress to the system with high intensity training will only make
recovery from illness more difficult and taking a week or two off is a
very small thing in the grand scheme of your training career. Keep in
mind to do the least amount necessary to get the desired result when
approaching training around an illness.
J U G G E R N A U T C L I N I C M A N U A L 3 7
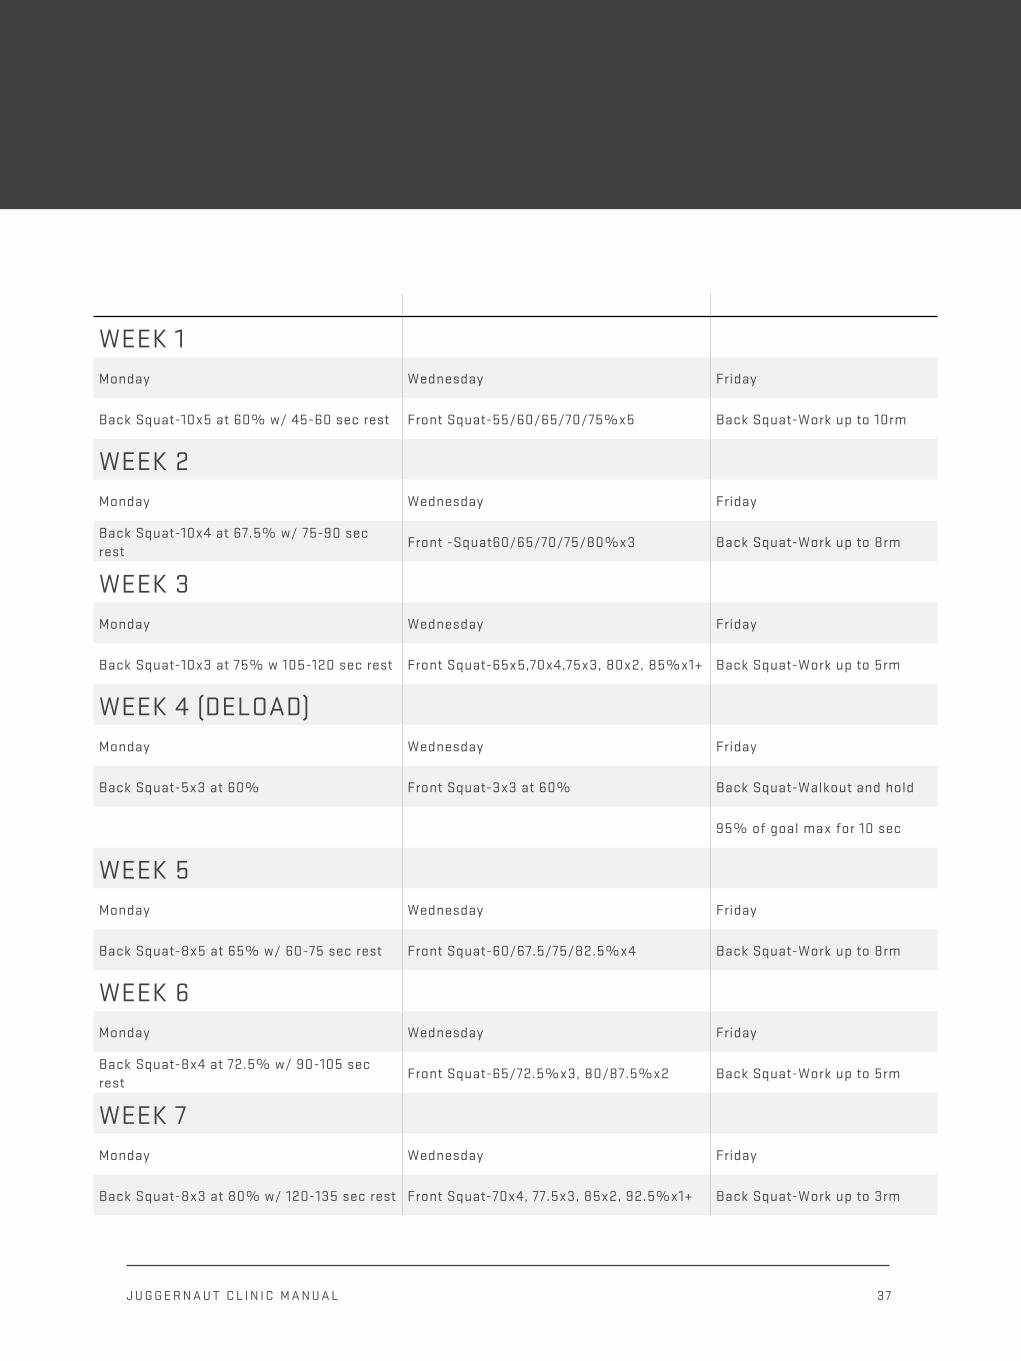
WEEK 1
Monday Wednesday Friday
Back Squat-10x5 at 60% w/ 45-60 sec rest Front Squat-55/60/65/70/75%x5 Back Squat-Work up to 10rm
WEEK 2
Monday Wednesday Friday
Back Squat-10x4 at 67.5% w/ 75-90 sec rest
Front -Squat60/65/70/75/80%x3 Back Squat-Work up to 8rm
WEEK 3
Monday Wednesday Friday
Back Squat-10x3 at 75% w 105-120 sec rest Front Squat-65x5,70x4,75x3, 80x2, 85%x1+ Back Squat-Work up to 5rm
WEEK 4 (DELOAD)
Monday Wednesday Friday
Back Squat-5x3 at 60% Front Squat-3x3 at 60% Back Squat-Walkout and hold
95% of goal max for 10 sec
WEEK 5
Monday Wednesday Friday
Back Squat-8x5 at 65% w/ 60-75 sec rest Front Squat-60/67.5/75/82.5%x4 Back Squat-Work up to 8rm
WEEK 6
Monday Wednesday Friday
Back Squat-8x4 at 72.5% w/ 90-105 sec rest
Front Squat-65/72.5%x3, 80/87.5%x2 Back Squat-Work up to 5rm
WEEK 7
Monday Wednesday Friday
Back Squat-8x3 at 80% w/ 120-135 sec rest Front Squat-70x4, 77.5x3, 85x2, 92.5%x1+ Back Squat-Work up to 3rm
COWBOY METHOD SQUAT

J U G G E R N A U T C L I N I C M A N U A L 3 8
COWBOY METHOD SQUAT
WEEK 8 (DELOAD)
Monday Wednesday Friday
Back Squat-5x3 at 65% Front Squat-3x3 at 65% Back Squat-Walkout and hold
100% of goal max for 10 sec
WEEK 9
Monday Wednesday Friday
Back Squat-5x5 at 70% w/ 75-90 sec rest Front Squat-65/75/85%x3 Back Squat-Work up to 5rm
WEEK 10
Monday Wednesday Friday
Back Squat-5x4 at 77.5% w/ 105-120 sec rest
Front Squat-70/80/90%x2 Back Squat-Work up to 3rm
WEEK 11
Monday Wednesday Friday
Back Squat-5x3 at 85% w/ 135-150 sec rest Front Squat-75x3, 85x2, 95x1+ Back Squat-Work up to 2rm
WEEK 12 (DELOAD)
Monday Wednesday Friday
Back Squat-5x3 at 70% Front Squat-3x3 at 70% Back Squat-Walkout and hold
105% of goal max for 10 sec
WEEK 13 (TEST WEEK)
Monday Wednesday Friday
Front Squat-Work up to 1rm Off Back Squat-Work up to 1rm