katherine kyle - s3.amazonaws.comgreen+thickies+recipe... · i 1 mashed banana i 3 tablespoons...
TRANSCRIPT

Katherine Kyle
1

11 Essential Smoothie Staples Recipes
2
11 Essential Smoothie Staples Recipes
Make your own Milk, Jam, Nut Butter and Syrup for an Extra Healthy Smoothie
Copyright © 2015 by Katherine Kyle. All Rights Reserved.
No part of this publication may be copied, shared or republished without express written permission of the author. Please do not share this book with others.
Please visit www.greenthickies.com for more smoothie recipes and articles.
If you find an error in this book, have a suggestion for improvement, or have a question please contact [email protected].
Disclaimer This book has been written and published strictly for informational and
educational purposes only. This book is not intended to diagnose, treat, cure or prevent disease. The statements in this book have not been evaluated by the Food and Drug Administration (FDA). This book is not intended to serve as medical advice or to be any form of medical treatment. The author is not responsible for any adverse effects that may result from the use or application of the recipes and information contained in this book.

Katherine Kyle
3
Table of Contents 11 ESSENTIAL SMOOTHIE STAPLES RECIPES 4
| 01 | CHUNKY MONKEY SMOOTHIE TOPPER 5
| 02 | DATE PASTE RECIPE: SWEETEN YOUR FOOD WITH WHOLE FRUIT 8
| 03 | HOW TO MAKE COCONUT CREAM… WITH JUST ONE INGREDIENT 14
| 04 | HOW TO MAKE PEANUT BUTTER WITH A BLENDER OR A FOOD PROCESSOR 17
| 05 | HOW TO MAKE ALMOND MILK 21
| 06 | HOW TO MAKE COCONUT MILK: A CREAMY, SWEET AND DELICIOUS DAIRY ALTERNATIVE 25
| 07 | HOW TO MAKE CARAMEL… WITH JUST ONE INGREDIENT 28
| 08 | HOMEMADE COCONUT BUTTER 32
| 09 | HOMEMADE RAW VEGAN DATE SYRUP RECIPE (DATE HONEY/ DATE NECTAR) 36
| 10 | RAW RASPBERRY CHIA SEED JAM 40
| 11 | MAKE YOUR OWN ALMOND BUTTER 42
I WANT TO HEAR FROM YOU! 44

11 Essential Smoothie Staples Recipes
4
11 Essential Smoothie Staples Recipes
Did you know that a lot of the processed smoothie ingredients that you buy at the store contain less than desirable ingredients?
Many of the ingredients in store bought almond butter contain preservatives linked to cancer. And a lot of the commercial coconut milk cartons contain refined sugar. Some of the cans of coconut milk contain other undesirable preservatives.
So what can you do?
Make your own ingredients for your smoothies!
Why settle for less than the best when you can make many of these ingredients in a very short amount of time – and they taste so much better!

Katherine Kyle
5
| 01 | Chunky Monkey Smoothie Topper Are you looking for a way to liven up your smoothies? It can sometimes be boring drinking smoothies all the time. I have been drinking my GreenTHICKIES for breakfast and lunch for over 3 years now so I do know what it’s like to miss chewing meals.
Now you can have the best of both worlds with a healthy smoothie that is quick to drink, portable and delicious, but with that added crunch that turns drinks into meals.
This Chunky Monkey Smoothie Topper is like a chunky granola so you could also eat it with milk or yoghurt and fruit. It’s so delicious I just find myself eating it straight out of the box.
Ingredients
i 1 cup Oats or Dried Coconut
i 1 mashed Banana
i 3 tablespoons Peanut Butter
i 1 tablespoon Dairy Free Milk or Almond Butter
i 1 tablespoon Sunflower Seeds
i ¼ cup Raisins or Chopped Dates

11 Essential Smoothie Staples Recipes
6
Instructions
1. Pre-heat the oven to 300 degrees F / 150 degrees C
2. Mix all the ingredients together in a large bowl
3. Spread the mixture out on a non stick baking tray or using a non stick
baking mat
4. Bake for 15 minutes
5. Remove and break into bite sized pieces
6. Bake for 5 more minutes
7. Remove and cool for 1 hour before storing in an air tight container

Katherine Kyle
7

11 Essential Smoothie Staples Recipes
8
| 02 | Date Paste Recipe: Sweeten your food with whole fruit
One of the questions I get asked a lot is: what is the healthiest sweetener?
My answer is always any sweet whole food still pretty much in its original form. I
think anything that’s been extracted and heavily processed and preserved isn’t
going to be anywhere near as healthy as a whole fruit, such as dates. Dates are
so good for you as they contains loads of vitamins and minerals such as
calcium, iron and magnesium and are great for constipation and weight loss.
A perfect post-holiday addition to your diet!
What is Date Paste?
I used to put whole dates, raisins or any dried fruit straight into my smoothie but
now I generally just use Date Paste. This is also referred to as date syrup or
date honey. It is basically just pureed dates. You can buy it, which saves you
the hassle of making it, but it won’t be as fresh as making it yourself. I like to
make my own as it’s cheaper and healthier. It also blends much easier and
saves time pitting dates every time you make a smoothie.

Katherine Kyle
9
5 Ways to make Date Paste
There are several ways to make date paste, you can:
1. Use a blender: You may need to use quite a lot of water with the dates,
and this is easier with high-speed blenders.
2. Use a food processor: This uses less water than a blender but the date
paste won’t be as smooth.
3. Use a pestle and mortar: This is great for small quantities of date paste
but requires a bit more effort.
4. Hob method: Simmer pre-blended date paste in a pan to reduce the
amount of water content in it, or you can simmer first and then process
once it’s cooled.
5. Use a fork: See my Date Syrup recipe on page 36 for instructions on how
to leave your date syrup to pretty much make itself in the fridge!
How long can I store Date Paste for?
Date paste will keep for at least a week in the fridge and about 3 months in the
freezer. I usually make a large mason jar’s worth every couple of weeks and it
seems to last fine for this length of time. I would advise you to make this in bulk
as if you’re like me you’ll soon be using this in everything!
What foods can I use Date Paste in?
Any liquid sweetener (honey, agave nectar, maple syrup) in most recipes can be
replaced with date paste. I use date paste in pretty much everything including:
o Smoothies/ GreenTHICKIES
o Ice cream/ Sundaes

11 Essential Smoothie Staples Recipes
10
o Yoghurt
o Puddings
o Cakes/ Pies/ Muffins/ Sweet pastry
o Pancakes
o Savory dishes such as stews or beans
o Homemade peanut butter
o Homemade healthy Chocolates
o Homemade bread
o Porridge/ Oatmeal
o Granola/ Cereal
o Add it to hot drinks such as cocoa/ hot chocolate/ tea/ coffee
o Salad dressings
o Baked/ Stewed fruit
What type of dates should I use?
Use any type of dates that you like, but make sure there are no added
ingredients as sometimes dates are coated with syrup to make them look shiny.
Fresh whole dates are the healthiest as they are the freshest but personally I use
dried pitted dates as I get through so many of them.
How much date paste should I add to my recipes?
If you are making baked goods I would replace the liquid sweetener with exactly
the same amount of date syrup as it may alter the consistency if you change
the quantity of wet ingredients. However, for other recipes you might be able to
experiment with the quantity a bit more. For smoothies and recipes where it’s
easy to adjust the amounts I would just add the date paste to taste. The date

Katherine Kyle
11
paste is watered down with water so it may not be quite as sweet as other
sweeteners, so you might need to add more if you want it a bit sweeter. My
GreenTHICKIE recipes usually call for between ¼ and ½ a cup of dates. I would
add in exactly the same amount of date paste, but you can easily adjust this.
Optional extras for your date paste
To make a gorgeous tasting sweetener you could include any one of the
following ingredients:
o Vanilla
o Pinch of salt
o Cinnamon/ Nutmeg/ Mixed Spice/ Ground cloves/ Ginger
o Lemon/ Lime juice or zest
o Almond/ Mint/ Orange essence
o Cocoa/ Cacao/ Carob powder
Ingredients
i 2 cups pitted dates… Soaked in…
i 2 cups water (keep the soak water and follow the directions below)

11 Essential Smoothie Staples Recipes
12
Instructions
Soak the 2 cups of dates in 2 cups of water overnight or for at least 8 hours.
Keep the soaking water for the recipe.
FOOD PROCESSOR METHOD
Drain the dates but reserve the dates and add them to the food processor with
just enough water (start with 2 tablespoons) and process until it's as smooth as
you can get, scraping down the sides as needed.
BLENDER METHOD
Add the dates and just enough water to blend the dates until smooth. Start with
1 cup of the reserved date soaking water.
PESTLE AND MORTAR METHOD
Add just enough dates for the recipe you need with a splash of water if required.
Use some muscle power to grind the dates into as smooth a paste as you can
manage.
HOB METHOD
If you want your finished date paste to include less water you can either blend
the dates with the soaking liquid in a blender then simmer in a saucepan until
the paste has reduced. Or you can add the dates with the liquid straight to the
pan, simmer until the water has reduced and then leave to cool and process
with the food processor until as smooth as you can get it.
Katherine Kyle
13

11 Essential Smoothie Staples Recipes
14
| 03 | How to make Coconut Cream…
with just one ingredient This recipe was inspired when I bought myself a Magic Bullet blender. I already
had a Vitamix – which was brilliant! – but it was not so great for making really
small batches of things such as this Coconut Cream.
When my baby boy started eating solid foods I tried something different to
exclusive baby-led weaning that I did with my little girl, so I needed something to
make him small batches of sloppy stuff.
So of course I took advantage of my great new kitchen gadget and literally
started whipping up all sorts of things. There is actually a whipping
attachment with this Magic Bullet and the container is so small that you don’t
end up wasting any food, which also makes it so quick to wash up. I love it! So
much that this recipe makes a regular appearance in my house now.
You don’t actually need to use a blender for this recipe, you could quite easily
use a hand mixer, just a hand whisk or even just eat the coconut cream as it is!
How to make Coconut Cream
This recipe is so simple and it’s only got one ingredient! Of course you can jazz it
up with a variety of different flavors and I’ll give you a few suggestions in the
recipe.

Katherine Kyle
15
You can serve this cream anywhere you’d normally use cream. The simplest
and healthiest is just to serve it with fruit. I actually made Chocolate Orange
Puddings topped with this Whipped Coconut Cream. Yum!
Ingredient
i 1 Can Natural Coconut Milk
OPTIONAL EXTRAS
o Juice from 1 Lemon plus the zest o Juice from ½ Orange plus the zest o ½ teaspoon Cinnamon o 1 teaspoon Vanilla Extract o 1 tablespoon Maple syrup or Raw honey
Instructions
1. Leave the can of coconut milk in the fridge overnight. This allows the cream to separate from the coconut water.
2. Either turn the can upside down, open it and pour off the water (keep and add it to a smoothie or GreenTHICKIE – or drink it)
3. Or open the can and spoon out the cream from the top of the can
4. Now whip it either giving it a quick blend in a blender or use a hand mixer, whisk or just simply eat it as it is.
5. Add in some of the optional extras for different flavoured cream.

11 Essential Smoothie Staples Recipes
16

Katherine Kyle
17
| 04 | How to make Peanut Butter with a blender or a food processor
Continuing with my mission to make everything from scratch I knew Peanut
Butter would have to make an appearance. Organic Peanut butter without any
nasties is expensive and I wanted to have complete control over my own
ingredients. This homemade peanut butter just happens to be the most
gorgeous peanut butter I’ve ever tasted too!
How to make Peanut Butter
I have tried this recipe 2 different ways: one way with a very cheap food
processor and another with my high-powered blender (Vitamix). It works
really well both ways but the Vitamix is faster as it only takes 1 minute and you
can’t get better than that for something you make yourself.
I bought myself a big batch of organic peanuts for this recipe which will see me
through many batches of peanut butter. I like buying in bulk to save money but
also get better quality.
To make this recipe you roast your peanuts in the oven, leave them to cool, then
add the rest of the ingredients and either process in the food processor or blend
in the Vitamix.
The food processor method is a bit easier although it takes longer. If I can do it
with a cheap food processor I’m sure it’s possible for anyone.

11 Essential Smoothie Staples Recipes
18
There is a bit of a knack involved with using the Vitamix. I had tried and failed
several times to make peanut butter in my Vitamix. The instructions I’d followed
said to turn my machine to high quickly and use the tamper to press the
peanuts down for 1 minute and then stop. When I first tried this my machine
made such a loud noise I was scared I’d burn out the motor so I didn’t have the
guts to continue with the machine on high. I tried to blend the peanuts with the
machine on low and ended up burning out my motor anyway. It did start
working again thankfully but I didn’t want to risk that happening again. A few
weeks later I was determined to try again and this time I turned the machine
very quickly up to high and pushed the peanuts down quickly and managed to
stand the noise for a minute. After that time I had peanut butter. Yay! It is very
easy to do but you’ve just got to have confidence in your machine.
Ingredients
i 3 cups Raw Peanuts
i 2 tablespoons Oil (Extra Virgin Olive Oil or Cold Pressed Oil)
i 1 tablespoon Sea Salt
i 1½ teaspoons Sweetener (Honey, date paste or maple syrup etc.)
i 2 tablespoons Oil (Extra Virgin Olive Oil or Cold Pressed Oil)

Katherine Kyle
19
Instructions
1. Pre-heat the oven to 350 F / 175 C
2. Rinse the peanuts and toss with the 2 Tablespoons of Oil and the salt
3. Spread out in a single layer on a baking tray (you might have to use 2)
4. Roast for 30-35 minutes rotating the pans half way through
5. Remove from the oven and allow to cool
Food Processor Method
a. Add the peanuts, the other 2 tablespoons of Oil and the sweetener to the food processor
b. Process until the peanut butter is as smooth as you want it
c. You will have to stop and scrape down the sides every so often
Vitamix (High Speed Blender) Method
a. Add the peanuts, the other 2 tablespoons of Oil and the sweetener to the blender.
b. Get your tamper ready in position. Turn the machine on and quickly up to high and start immediately pushing the peanuts down with the tamper until you've got peanut butter. Don't leave your machine running any longer than 1 minute or you risk burning out your motor. Similarly this won't work unless your machine is on high and you risk burning out your motor.
6. Transfer Peanut Butter to a Jar. This will keep for 2 months in the fridge.

11 Essential Smoothie Staples Recipes
20

Katherine Kyle
21
| 05 | How to make almond milk
Almond milk is another of my absolutely essential smoothie ingredients. I use
this in so many of my smoothie recipes that it has earned its rightful place in this
book. But it took me longer than I would have liked to get a recipe that I actually
liked.
I always used to buy my almond milk from the shop thinking I was being healthy.
Then when I read about hidden chemicals lurking in a lot of processed foods, I
started trying to make pretty much everything from scratch. Almond milk is
another processed food and doesn’t actually have much goodness left after
processing
The only good thing about buying processed almond milk is that it’s often
fortified with Vitamin D and Vitamin B12 which are harder to come by
especially if on a vegan diet or living in a cold climate with little sunshine. So, if
you do cut out processed foods that contain these vitamins you might want to
supplement.
The first time I made almond milk I just didn’t like it. I wanted something that
tasted like my unsweetened Almond Breeze and my homemade almond milk
tasted rich, a little bit bitter and a bit sickly. I’m not sure if it was my pregnancy
taste buds playing up when I first started experimenting but I tried various
different recipes and didn’t like any of them. I made them thick, thin, tried
different brands of almonds but it wasn’t until I added some sweetener in
the form of dates that I actually liked it. I’m not sure why that is as I usually
didn’t need all my food sweetened but when I made a recipe containing dates
and vanilla I absolutely fell in love with it and couldn’t stop drinking it plain. I

11 Essential Smoothie Staples Recipes
22
never fancied my Almond Breeze just on it’s own so I knew I’d found a good
recipe. I will give you the option of leaving the dates out though, and you can try
it both ways.
How to make Almond Milk
For this recipe you will need some whole almonds, and a nut milk bag to strain
your milk. I have used nut milk bags for making green juice from the blender,
almond milk, coconut milk, coconut cream, homemade vegetable broth and
other delicious drinks. Some people also like to use cheesecloth which is a bit
cheaper. I’ve never tried using cheesecloth and the nut milk bag just seemed a
lot easier to me.
All you do is soak your almonds in water overnight, then blend up your
almonds with water, and dates, vanilla and salt (if using) and strain in through
the nut milk bag – couldn’t be easier!
The Almond Milk will keep in the fridge for about 3-4 days but check it before
you use it. The amount made for this recipe can be used for about 4 servings of
GreenTHICKIES (2 recipes that serve 2) that are made with milk.
If you want to use Date Paste in this Almond Milk you can find the recipe for
date paste on page 8.

Katherine Kyle
23
Ingredients
i 1 cup Almonds i 5 cups Water
OPTIONAL EXTRAS
o ½ cup Date Paste (or pitted dates or use healthy sweetener to taste) o Pinch Sea Salt o 1 teaspoon Vanilla Extract
(or a chopped vanilla pod or teaspoon of ground vanilla)
Instructions
1. Soak the almonds in enough water to cover them overnight for about 8 hours. Drain the almonds and rinse them.
2. Add the almonds, 5 cups of water (and the dates, salt and vanilla if using) into your blender. Blend until smooth.
3. Put the nut milk bag inside a large bowl. Pour the contents of the blender into the nut milk bag. Close up the bag and squeeze it gently until you can't get any more liquid squeezed out.
4. You can either throw away the almond pulp or use it for a different recipe. The internet is full of recipes for almond pulp!
5. Store your milk in the fridge for up to 4-5 days.

11 Essential Smoothie Staples Recipes
24
Katherine Kyle
25
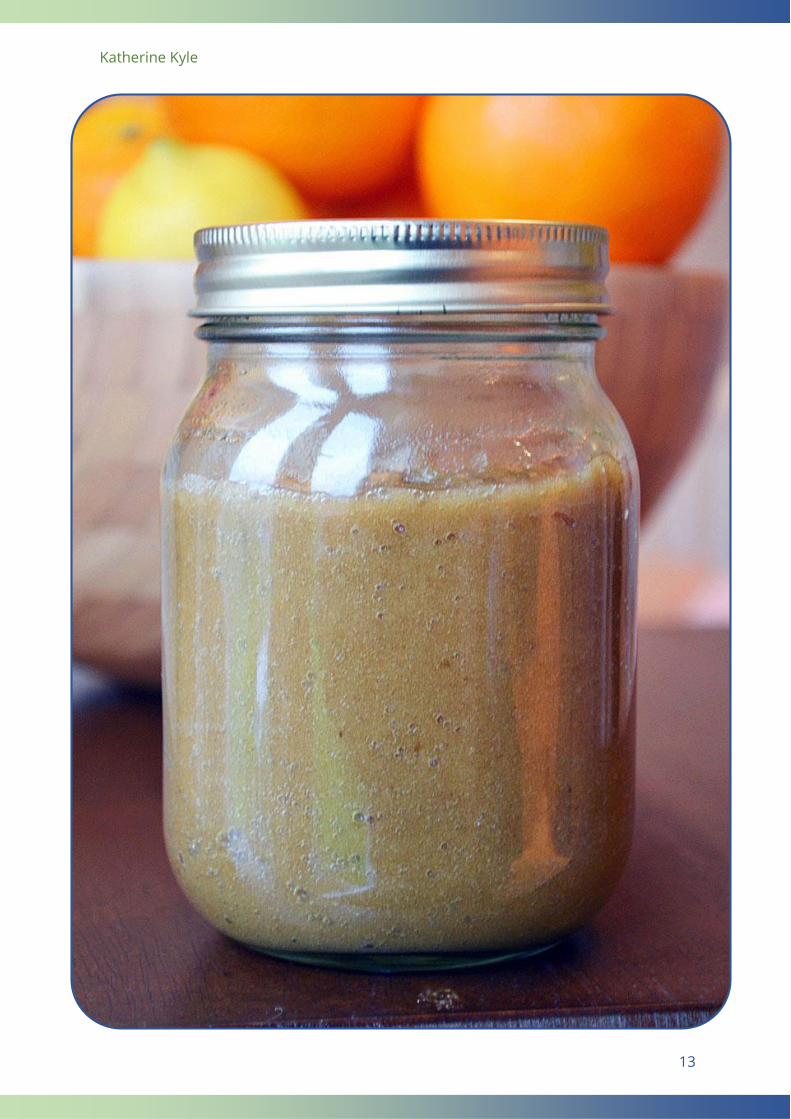
| 06 | How to make Coconut Milk: A Creamy, Sweet and Delicious dairy alternative
Here is another great dairy-free milk recipe for you. My first homemade milk
was Almond Milk, which I absolutely love. But as soon as I tasted this
homemade Coconut Milk I was blown away. It’s so sweet, creamy and delicious
I knew I had found my favourite milk!
Another important reason for me to settle on this coconut milk recipe was that
it’s much cheaper for me to buy Dried Coconut in bulk than it is to buy almonds
in bulk. So that was settled, my new favourite milk was decided. I hope you
enjoy it as much as I do. If you love coconut, it’s pretty hard not to love this
recipe!
How to make Coconut Milk
This coconut milk recipe is a substitute for dairy milk. So it’s got pretty much the
same consistency as full fat dairy milk. This means it’s great on cereal, in
GreenTHICKIES and just as a drink in its own right. It’s not as thick as the
creamy coconut milk that you get in a can. All you need is either a nut milk bag
or cheesecloth to strain the milk, but it’s extremely quick to do this.

11 Essential Smoothie Staples Recipes
26
Ingredients
i 1 cup Dried Coconut (shredded or desiccated)
i 2 cups Hot water
i 2 ½ cups Cold Water
i 1 teaspoon Vanilla Extract (or 1 vanilla pod or 1 teaspoon ground vanilla)
i 1/2 cup Dates (Pitted) (or 1/2 Cup Date paste)
i Pinch Sea Salt
Instructions
1. Blend all the ingredients in a blender
2. Strain the milk through a nut milk bag or cheese cloth

Katherine Kyle
27
11 Essential Smoothie Staples Recipes
28
| 07 | How to make caramel… with just one ingredient
You will never believe how good this caramel is when it actually only has one
ingredient. It is a vegan honey just made from apples. Now you don’t have to
go without your caramel any longer. You can use it as a honey substitute, as a
syrup that you control the thickness of, instead of unhealthy corn syrup. It is
also much cheaper than buying expensive healthy sweeteners such as maple
syrup or agave nectar.
As this recipe only contains apples, it is perfect for a number of diets including
vegetarian, vegan, gluten free, paleo, unprocessed and most healthy diets.
Best of all, this recipe is refined sugar free so you know that all this sticky
goodness comes straight from the healthy apple.
This recipe couldn’t be easier but it’s not quick. However, it’s worth it for the
thick sticky syrup that you get at the end of it.
How to make Caramel
To make the caramel, you just take 1 liter or about 4 cups of apple juice. You
can use whatever type of apple juice you like. To make things easier, you can
use a carton of store bought apple juice but if you want to be ultra healthy, you
can juice your own apple juice if you have a juicer. Some people don’t see what
the point of juicing your own apple juice is, if you are just going to cook it
anyway, but it’s still healthier and fresher to use freshly squeezed apple juice
rather than store bought apple juice as you have complete control over the

Katherine Kyle
29
ingredients. You can use organic apples and you know it’s not been heavily
processed or been sitting in a warehouse for a very long time before it gets to
you. I, however, don’t have a juicer so I just used a carton of apple juice and it
works very well. I’m sure the flavour would also be better with freshly squeezed
apple juice.
All you do is bring the apple juice to the boil in a large pan and then simmer it
until it turns a dark color and reduces in quantity. This will take anywhere from
between 30-60 minutes depending on the size of your pan and how hot the pan
heats. Just be sure to watch it when it’s been on for a while as it can very
easily burn. If you stir it you’ll see how thick it is. The longer you leave it, the
thicker the syrup will become.
If you want to test this to see whether it’s ready, take a small spoonful out and
place it in a bowl until it cools down. You can now check whether it’s syrupy
enough for you.
Be careful with it when you are pouring it as it’s very hot. Make sure there
are no young children around.
Pour this into a glass jar or a bowl, cover and store in the fridge. When you want
to use it, you may find it has hardened so you can either leave it at room
temperature for a while or you can place the glass jar inside a bowl of boiling
water to melt it quickly.

11 Essential Smoothie Staples Recipes
30
How to use caramel
Now you can use your new syrup in any number of gorgeous ways. For example
you could:
o Add it to your smoothies or GreenTHICKIES
o Top ice cream with it
o Use it as a dip for fruit
o Use it as a jam or fruit spread
o Sweeten cakes, puddings or breads
The possibilities are endless – just use your imagination!
Ingredient
i 1 liter Apple Juice (Fresh or from a carton)
Instructions
1. Bring the apple juice to the boil in a large pan. 2. Simmer the apple juice for 30-60 minutes until it changes color and
thickens. 3. Test the syrup be placing a teaspoon of apple juice on a plate, wait until
it cools to check the thickness. 4. Turn the heat off when the syrup reaches the desired consistency. 5. Pour straight into a jar and allow to cool. (Carefully. It is very hot.) 6. Store in the fridge. 7. When you want to use it, if you want to soften it, place the jar inside a
bowl of boiling water until it melts slightly (if required).

Katherine Kyle
31

11 Essential Smoothie Staples Recipes
32
| 08 | Homemade Coconut Butter
Have you ever tried coconut butter before? It’s absolutely gorgeous in loads of
recipes such as on top of pancakes or toast, and it’s especially good in smoothies
or GreenTHICKIES. This coconut butter recipe is so easy to make as it only uses
one ingredient. There is a lot of confusion surrounding coconut products so I’m
going to try and explain the differences between some of the coconut products.
The difference between coconut butter and coconut oil
Coconut oil is just the oil extracted from the coconut where as coconut butter is
the whole coconut ground up into a butter. Coconut oil can be used in place of
other oils and has a very subtle coconut taste. Coconut butter tastes very much
of coconut and is a lot thicker and creamier so it’s nicer used as a spread if you
enjoy the taste of coconut.
Coconut Butter is actually the same thing as Creamed Coconut (Not coconut
cream. Confusing I know!) Coconut butter is often sold in a jar where as
creamed coconut is usually sold as a block. Both are the same thing. Coconut
butter/Creamed Coconut will melt at high temperatures and will normally be a
solid block especially if you keep it in the fridge.
The difference between creamed coconut and coconut cream
Coconut cream is the cream that is left on top of the whole blended coconut
when it’s been sitting a while, and is a thick liquid the same consistency as dairy

Katherine Kyle
33
cream, whereas creamed coconut/coconut butter is the whole coconut
blended and is usually solid, the same consistency as a butter kept in the fridge.
This is a recipe for coconut butter which is the whole coconut usually in a
solid state. Sometimes when I haven’t got round to making this myself I buy
Creamed Coconut from my local store. This is kept in the Asian section as it’s
often used for making curry. You can also buy Creamed Coconut or Coconut
Butter online. They are the same thing even though they have different names
and look completely different. Coconut butter is often a lot more expensive so
look out for creamed coconut if you want to save some money or make your
own for a lot less. The main thing to look out for when you are buying coconut
butter is that it’s made with 100% pure coconut.
Homemade Coconut Butter Recipe
This recipe is so easy to make – and the best part of all is it only has one
ingredient which is dried coconut. Where you live this might be called
shredded coconut, dried coconut, desiccated coconut or coconut powder.
They are all fine but it has to be the fine grains of coconut, not flakes as it won’t
process properly. You can use either a food processor or a high-speed
blender to make this. I’ve tried both and my high-speed blender was a lot
quicker, about a minute in total. The main thing is you’ve got to add enough
coconut so it covers the blades properly when they’re spinning round.
As this is warm when you make it, it will be a thick yet soft consistency. You can
store it in an airtight container such as a jar. You don’t actually need to keep this
in the fridge and it will go rock solid if you do keep it in there. Depending on
how warm your house is the consistency will vary when it’s kept out of the
fridge. If it’s totally solid when you come to use it the best thing to do is to place

11 Essential Smoothie Staples Recipes
34
the jar in a bowl of boiling water for just long enough for it to melt a bit. Then
you can add it to your recipes.
Coconut butter in smoothies
Coconut butter is absolutely gorgeous in smoothies or GreenTHICKIES. It gives
them such a rich creamy flavour and texture and you can make a much creamier
smoothie than simply adding the dried coconut to your smoothie which can be a
bit gritty depending on your blender.
Ingredient
i 4 or more cups of dried coconut (small grains not flakes of coconut)
Instructions
FOOD PROCESSOR
1. Process the coconut in the food processor stopping to scrape down the sides when required. This may take 10-15 minutes depending on your food processor.
HIGH SPEED BLENDER
1. Blend the coconut on medium to high power stopping to scrape down the sides. If you use a Vitamix you can use the tamper to make this even faster. This may take 1-3 minutes.

Katherine Kyle
35

11 Essential Smoothie Staples Recipes
36
| 09 | Homemade Raw Vegan Date Syrup Recipe (Date Honey/ Date Nectar)
Are you trying to decide between all the healthy sweeteners out there? There
is too much choice and most of them aren’t as healthy as they claim. They are
also usually very expensive. So what’s the alternative? Make your own quick,
simple and very healthy date syrup.
Finally, the search is over for the healthiest sweetener!
I’m always trying to decide whether to use maple syrup or agave nectar. They
are both very expensive and I don’t like using them too often as they are both
heat-treated or processed. Honey raises the blood sugar levels and isn’t suitable
for vegans. I do like adding dates to my smoothies but if a recipe calls for a
liquid sweetener I become unstuck. Not anymore. This date syrup is a perfect
liquid sweetener and unprocessed. It is much cheaper especially if you buy
dried dates. It also hardly takes any work to make it. What could be better than
that?
I made this date syrup for the first time in my Healthy Cherry and Coconut Hot
Fudge Sundae recipe. I really prefer using whole fruits such as dates to
sweeten my recipes rather than sweetener as I think it’s much better for you to
eat the whole fruit rather than part of it, as it’s fresher and has more nutrients.
This date syrup contains the whole date and it’s so easy to make. It is actually a
raw food too as fresh dates are usually in an untreated state (still check the
ingredients, though, as they sometimes glaze them with other sweeteners).

Katherine Kyle
37
Date Syrup Health Benefits
Dates give you a very quick source of energy. Within half an hour of eating
them, you will feel revived if you are lacking in energy. For that reason they are
great just before a workout. Yes they are very high in sugars, but natural fruit
sugars that the body actually needs.
Dates are also great for constipation and many other health problems.
Dates are a whole fruit which in my opinion makes them far superior to other
sweeteners. Have the best of both worlds with this healthy date syrup. You
can either eat it straight from the bowl for a quick energy boost or here are
some serving suggestions:
o Added to your GreenTHICKIES or other drinks
o Dip apple or melon chunks into it
o Replace jam on crackers, oat cakes or rice cakes
o In baking instead of other syrups
o Added to ice cream
o Replace sugar in tea or coffee
o Added to yoghurt
o Top your oatmeal or porridge with it
o Spread it on some celery with some almond butter
How to make date syrup
All you do is add some dates, such as medjool dates to about ½ cup of water,
cover and put it in the fridge. Leave it at least 24 hours and stir it a few
times. The dates dissolve in the water and produce a gorgeous yet very healthy
syrup that you can use in all your recipes.

11 Essential Smoothie Staples Recipes
38
For all date syrup recipes you may need to double the amount of date syrup as
this recipe contains half water, half dates.
Ingredients
i 1/2 Cup Water i ½ Cup Pitted Dates (any type)
VARIATIONS
You can add any of the following ingredients to change the flavour:
o 1 teaspoon vanilla o 1 teaspoon cinnamon o 1 teaspoon ground ginger
OPTIONAL EXTRAS
Soak the dates in:
o Coconut water o Orange Juice
Instructions
1. Pit the dates by making a slit down one side and removing the stone. 2. Add the dates to the water in a bowl. 3. Cover and leave it in the fridge. 4. Leave it at least 24 hours and stir it a few times whenever you
remember. The dates dissolve in the water and produce a syrup that can be used to replace any other type of syrup or liquid sweetener.
5. If you need this date syrup more quickly, you can always blend it, but you may need to increase the quantity and use a high-speed blender.

Katherine Kyle
39

11 Essential Smoothie Staples Recipes
40
| 10 | Raw Raspberry Chia Seed Jam
Why eat unhealthy processed refined sugar laden commerical jam when you can whip up a batch of this delicious healthy chia seed jam?
Ingredients
i 1 Cup Raspberries i 2 Tablespoons water i 1 Tablespoon date paste or maple syrup i 2 Tablespoons Chia Seeds
OPTIONAL EXTRA
o 1 Cup Greens
Instructions
1. Add all the ingredients to a high-powered blender and blend until smooth. You might have to add some more water to help it along.
2. Add to a saucepan on a medium heat until it begins to bubble. Reduce the heat and whisk it until it thickens. This will take about 3-5 minutes.
3. You can keep this in the fridge in a sealed jar for up to 1 week.

Katherine Kyle
41

11 Essential Smoothie Staples Recipes
42
| 11 | Make your own Almond Butter
Can’t eat peanut butter? No problem. Replace peanut butter with almond butter in any recipe. You will adore this just as much. I certainly do!
Ingredient
i 3 cups almonds
Instructions
1. Add almonds to a food processor and pulse until a smooth almond butter forms. You will need to keep stopping and scraping down the sides every so often.

Katherine Kyle
43

11 Essential Smoothie Staples Recipes
44
I want to hear from you!
Thank you so much for reading my book. I hope you have enjoyed these recipes and are inspired to create some of your own!
I would love to hear from you!
Please email me at [email protected] if you have any comments or suggestions about any of these recipes.
Ready to step up to amazing health and reach your ideal weight? Please join us for the FREE GreenTHICKIES challenge at http://www.greenthickies.com/challenge