kirkwood scan to e-mail set up. scan to e-mail set up 1. click on start, settings, printers to get...
Post on 22-Dec-2015
222 views
TRANSCRIPT

Kirkwood
Scan to E-mail Set Up
Scan to E-mail Set up
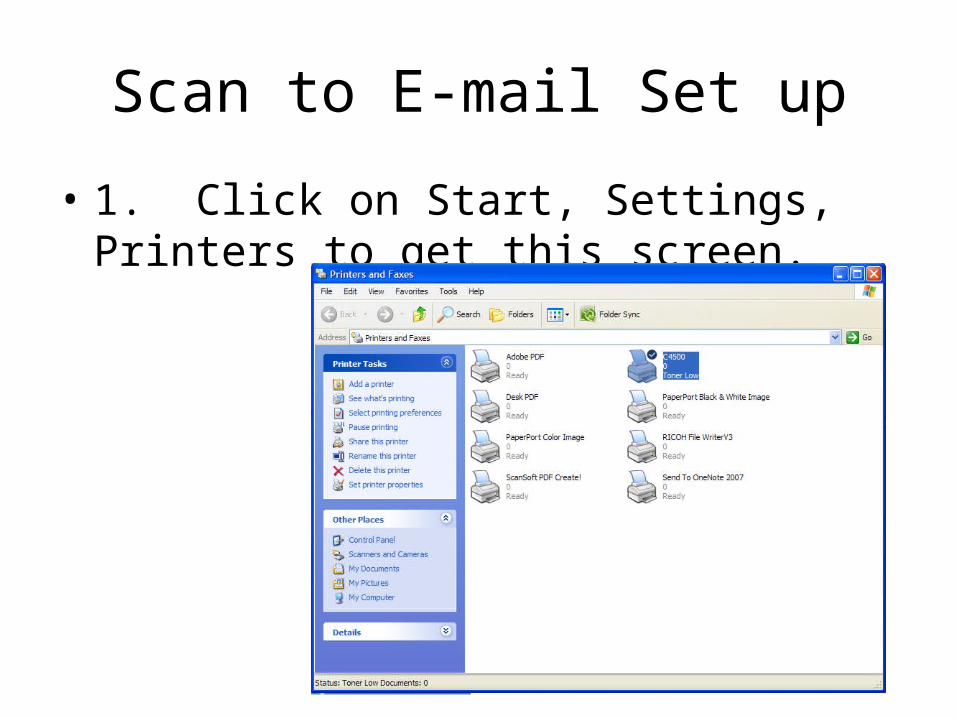
• 1. Click on Start, Settings, Printers to get this screen.

• 2. Right click on your printer and select Properties

Scan to E-mail Set Up
• 3. Click on the “Ports” tab and expand the port column to get
your ip address
Note, this IP addressin this example is10.0.1.24

Scan to E-mail Set Up4. Open a web page using Internet explorer5. Enter the IP address from the previous page in the address bar.

Scan to E-mail Set Up
• 6. Username is “admin” (all lowercase letters); Leave password field empty and click “Login”
Scan to E-mail Set Up
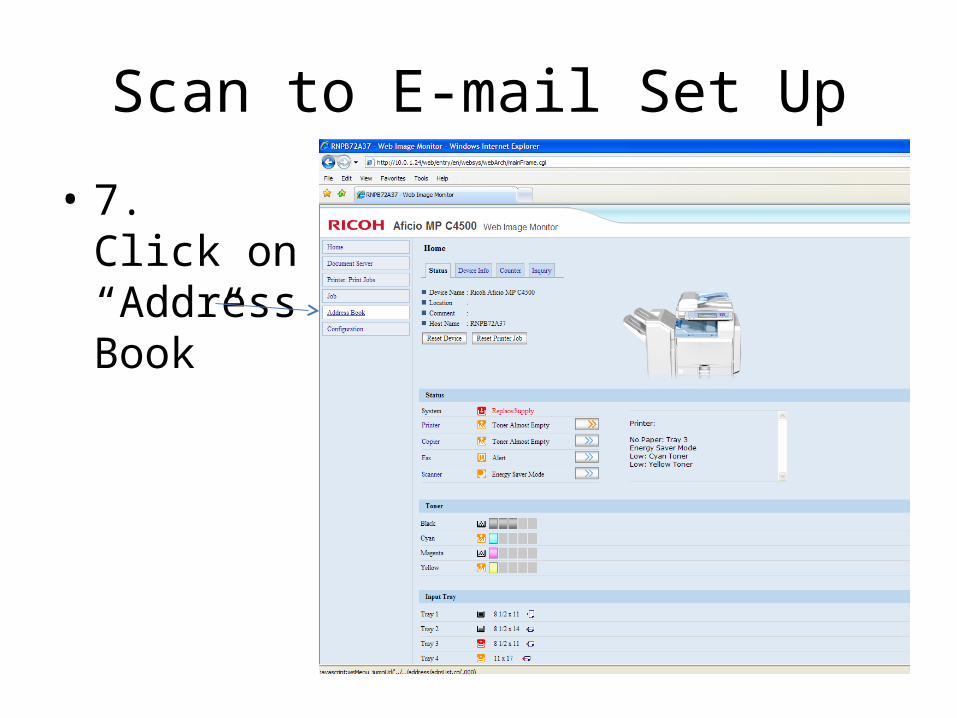
• 7. Click on “Address Book”

Scan to E-mail Set Up
• 8. Here you will see the current address book. Click on “Add user”

Scan to E-mail Set Up• 10. Enter the new
user in both the “Name” and “Key Display” Fields.
• 11. Select the correct Alpha keys from the drop down list under Title. Ex. “CD” for Doug or “RST” for Schweizer
Scan to E-mail Set Up
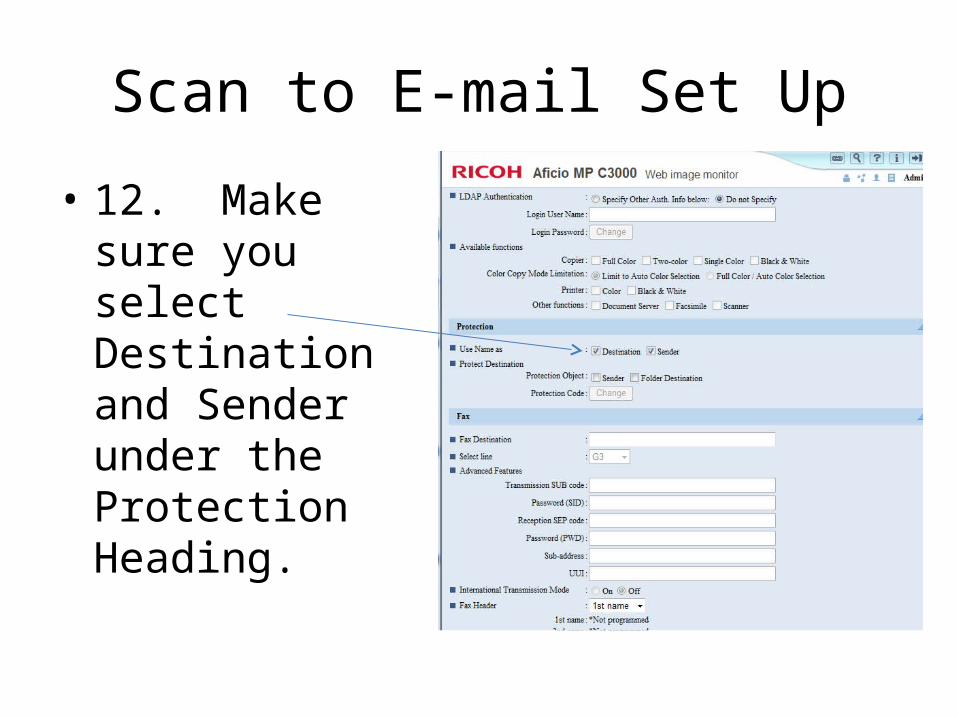
• 12. Make sure you select Destination and Sender under the Protection Heading.

Scan to E-mail Set Up
• 13. Scroll down to the E-mail Heading
• 14. Type in the E-mail address of the user being added

Scan to E-mail Set Up
• 15. Scroll back to the top and select ok