kyocera net device manager - sign in · net device manager i table of contents chapter 1 overview...
TRANSCRIPT

KYOCERA Net Device Manager User Guide

© 2017 KYOCERA Document Solutions Inc.
Legal NotesUnauthorized reproduction of all or part of this guide is prohibited.The information in this guide is subject to change without notice.We cannot be held liable for any problems arising from the use of this product, regardless of the information herein.
Regarding TrademarksMicrosoft®, Windows®, and Active Directory® are registered trademarks of Microsoft Corporation in the U.S. and/or othercountries.All other brand and product names herein are registered trademarks or trademarks of their respective companies.

Net Device Manager i
Table of Contents
Chapter 1 Overview
Chapter 2 System requirements
Chapter 3 NDM Standard InstallationMS SQL server installation ............................................................................................................ 3-1Launch NDM installer .................................................................................................................... 3-1Firewall Configuration ................................................................................................................... 3-2Configuration (first time launch) .................................................................................................... 3-3
Chapter 4 NDM - Main tabs
Chapter 5 NDM FunctionsAddress book ................................................................................................................................ 5-1
Address Book: Add contacts on a single device ...................................................................... 5-2Address Book: Add groups on a single device ......................................................................... 5-3Address Book: Add One Touch Keys on a single device ......................................................... 5-4Address Book: Delete contacts, groups or One Touch Keys on a single device ...................... 5-5Address Book: Duplicate contacts or groups on a single device .............................................. 5-6Address Book: Edit contacts on a single device ...................................................................... 5-6Address Book: Edit groups on a single device ......................................................................... 5-7Address Book: Edit One Touch Keys on a single device ......................................................... 5-8Address Book: Export contacts on a single device .................................................................. 5-8Address Book: Export groups on a single device ..................................................................... 5-9Address Book: Export One Touch Keys on a single device ..................................................... 5-9Address Book: Import contacts, groups or One Touch Keys on a single device ...................... 5-9Address Book: Refresh contacts, groups and One Touch Keys ............................................ 5-10Address Book: Settings in Multi-set configurations ................................................................ 5-11
Administrator password change .................................................................................................. 5-11Advanced search ........................................................................................................................ 5-12Applications list ........................................................................................................................... 5-13
Applications: Activate on a single device ............................................................................... 5-13Applications: Deactivate on a single device ........................................................................... 5-14Applications: Install on a single device .................................................................................. 5-14Applications: Upgrade on a single device .............................................................................. 5-15
Audit log ...................................................................................................................................... 5-15Certificate list ............................................................................................................................... 5-15
Certificates: Actions on the certificate list screen ................................................................... 5-16Certificates: Assign a certificate to protocols for a single device ............................................ 5-17Certificates: Delete a certificate from a single device ............................................................ 5-17Certificates: Import on a single device ................................................................................... 5-17Certificates: View a certificate ............................................................................................... 5-18
Certificates: Multi-set configurations ........................................................................................... 5-18Assign .................................................................................................................................... 5-18

User Guideii
Delete .................................................................................................................................... 5-18Import .................................................................................................................................... 5-19
Communication Settings: Change for a single device ................................................................. 5-19Communication Settings: Change for multiple devices ............................................................... 5-20Configurations ............................................................................................................................. 5-21
Configurations: Create new configurations ............................................................................ 5-22Configurations: Replicate configurations – custom ................................................................ 5-24Configurations: Replicate configurations – express ............................................................... 5-25Configurations: Upload configurations – custom ................................................................... 5-27Configurations: Upload configurations – express .................................................................. 5-28
Dashboard .................................................................................................................................. 5-29Dashboard: Active tasks ........................................................................................................ 5-29Dashboard: Polling requests ................................................................................................. 5-29Dashboard: Status of devices ................................................................................................ 5-30Dashboard: Scheduled tasks ................................................................................................. 5-30Dashboard: Device reports .................................................................................................... 5-30Dashboard: Notifications ....................................................................................................... 5-30
Data collection ............................................................................................................................. 5-30Database connection .................................................................................................................. 5-30Devices / Device list .................................................................................................................... 5-31Devices: Add devices .................................................................................................................. 5-32
Devices: Smart Discovery ..................................................................................................... 5-33Devices: Add devices using saved discovery settings ........................................................... 5-34Devices: Automatic discovery ................................................................................................ 5-34
Devices: Columns ....................................................................................................................... 5-35Devices: Delete devices .............................................................................................................. 5-36Devices: Restore deleted devices ............................................................................................... 5-36Device Groups ............................................................................................................................ 5-37
Device Groups: Fixed vs. dynamic ........................................................................................ 5-37Device Groups: Add a dynamic device group ........................................................................ 5-37Device Groups: Columns in dynamic groups ......................................................................... 5-38Device Groups: Add a fixed device group .............................................................................. 5-38Device Groups: Add a folder .................................................................................................. 5-39Device Groups: Delete a device group .................................................................................. 5-39Device Groups: Delete a device group folder ........................................................................ 5-39Device Groups: Download ..................................................................................................... 5-39Device Groups: Duplicate a device group .............................................................................. 5-40Device Groups: Edit a device group ...................................................................................... 5-40Device Groups: Rename a device group folder ..................................................................... 5-40
Device Home on a single device ................................................................................................. 5-41Device properties ........................................................................................................................ 5-41
Device Properties: General ................................................................................................... 5-41Device Properties: Counters .................................................................................................. 5-42Device Properties: Alerts ....................................................................................................... 5-42Device Properties: Logs ........................................................................................................ 5-42
Device Properties: Management ................................................................................................. 5-42Device Settings: Multiple devices ................................................................................................ 5-42
Create New ........................................................................................................................... 5-43Create from source device .................................................................................................... 5-43Create from source file .......................................................................................................... 5-43Advanced device settings ...................................................................................................... 5-44Device settings preview ......................................................................................................... 5-44Create a source file ............................................................................................................... 5-44
Device Settings: Single device .................................................................................................... 5-45Device Settings: Tasks ................................................................................................................ 5-45Device Settings: Scenarios ......................................................................................................... 5-45Device Tags: Set for a single device ........................................................................................... 5-46
Net Device Manager iii
Device Tags: Set for multiple devices ......................................................................................... 5-46Device Users ............................................................................................................................... 5-47
Device Users: Add users ....................................................................................................... 5-47Device Users: Delete users ................................................................................................... 5-48Device Users: Edit users ....................................................................................................... 5-48Device Users: Export a user list ............................................................................................. 5-48Device Users: Import a user list ............................................................................................. 5-48
Device Users: Authentication ...................................................................................................... 5-49Authentication: General ......................................................................................................... 5-50Authentication: Network user properties ................................................................................ 5-51Authentication: Password policy ............................................................................................ 5-51Authentication: User account lockout .................................................................................... 5-52
Device Users: Network groups .................................................................................................... 5-52Network Groups: Add a network group .................................................................................. 5-52Network Groups: Delete a network group .............................................................................. 5-53Network Groups: Edit a network group .................................................................................. 5-53Setting group authorization .................................................................................................... 5-53
Device Users: Simple Login keys ................................................................................................ 5-54Simple Login Keys: Add a key ............................................................................................... 5-54Simple Login Keys: Delete a key ........................................................................................... 5-55Simple Login Keys: Edit a key ............................................................................................... 5-55
Device Users: Settings in Multi-set configurations ...................................................................... 5-55Document Box ............................................................................................................................. 5-55
Document Box: Add a document box .................................................................................... 5-56Document Box: Delete a document box ................................................................................ 5-57Document Box: Edit a document box ..................................................................................... 5-58Document Box: Export a document box ................................................................................ 5-58Document Box: Import a document box ................................................................................. 5-58Document Box: Settings in Multi-set configurations ............................................................... 5-59
Firmware Upgrade ...................................................................................................................... 5-59Firmware Upgrade: Risks and recovery ................................................................................ 5-60Firmware Upgrade: Single device ......................................................................................... 5-60Firmware Upgrade: Multiple devices ..................................................................................... 5-62
General behaviors that apply to multiple actions ......................................................................... 5-64HTTP Protocol ............................................................................................................................. 5-64Importing KYOCERA Net Admin data ......................................................................................... 5-64
Data imported from KNA backup ........................................................................................... 5-65License agreement ...................................................................................................................... 5-67Login/Logout ............................................................................................................................... 5-67Multi-set configurations ............................................................................................................... 5-68Notifications ................................................................................................................................ 5-68
Notifications: Add device notifications ................................................................................... 5-69Notifications: Create user notifications .................................................................................. 5-70Notifications: Receive task notifications ................................................................................ 5-71Notifications: System ............................................................................................................. 5-71
Optional Functions: Activate ....................................................................................................... 5-71Paging ......................................................................................................................................... 5-72Password policy .......................................................................................................................... 5-72Proxy settings .............................................................................................................................. 5-73Quick search ............................................................................................................................... 5-73Refresh ....................................................................................................................................... 5-74Reports: Configure and run reports ............................................................................................. 5-74
Reports: Add scheduled report .............................................................................................. 5-74Reports: Delete scheduled report .......................................................................................... 5-76Reports: Edit scheduled report .............................................................................................. 5-76Reports: Enable/Disable report ............................................................................................. 5-76
Restart a single device ................................................................................................................ 5-77

User Guideiv
Restart multiple devices .............................................................................................................. 5-77Send Data ................................................................................................................................... 5-78SMTP .......................................................................................................................................... 5-79Smart Polling ............................................................................................................................... 5-79System Users .............................................................................................................................. 5-80
System Users: Add users ...................................................................................................... 5-80System Users: Delete users .................................................................................................. 5-81System Users: Edit users ...................................................................................................... 5-81System Users: Unlock users ................................................................................................. 5-81
Tasks .......................................................................................................................................... 5-82Common features on the tasks tabs ...................................................................................... 5-82Active tasks ........................................................................................................................... 5-82Scheduled tasks .................................................................................................................... 5-83Completed tasks .................................................................................................................... 5-84Create tasks .......................................................................................................................... 5-85Event triggers ........................................................................................................................ 5-85Pre-defined tasks .................................................................................................................. 5-86
Tasks: Detail screens .................................................................................................................. 5-86Active task detail screen ........................................................................................................ 5-86Scheduled task detail screen ................................................................................................. 5-86Completed task detail screen ................................................................................................ 5-86
Tasks: Retry completed tasks ..................................................................................................... 5-87Tasks: Scheduling ....................................................................................................................... 5-87
Tasks: Scheduling for later run .............................................................................................. 5-87Tasks: Select multiple devices for tasks ...................................................................................... 5-88
Using check boxes ................................................................................................................ 5-88Using device groups .............................................................................................................. 5-88

Net Device Manager 1-1
1 Overview
KYOCERA Net Device Manager (NDM) provides IT Administrators and servicetechnicians a centralized printing device management. You can monitor andmanage thousands of devices (up to 10,000 or more in special configurations)from one location.
• Upgrade firmware• Configure settings• Install applications• Receive automated problem alerts• Check toner levels at a glance• Generate device reports• Arrange devices in groups
NDM is web based, running on all current browsers, including Microsoft Edgeand Google Chrome. It can run as a server or as a utility tool.
User Guide2-1
2 System requirements
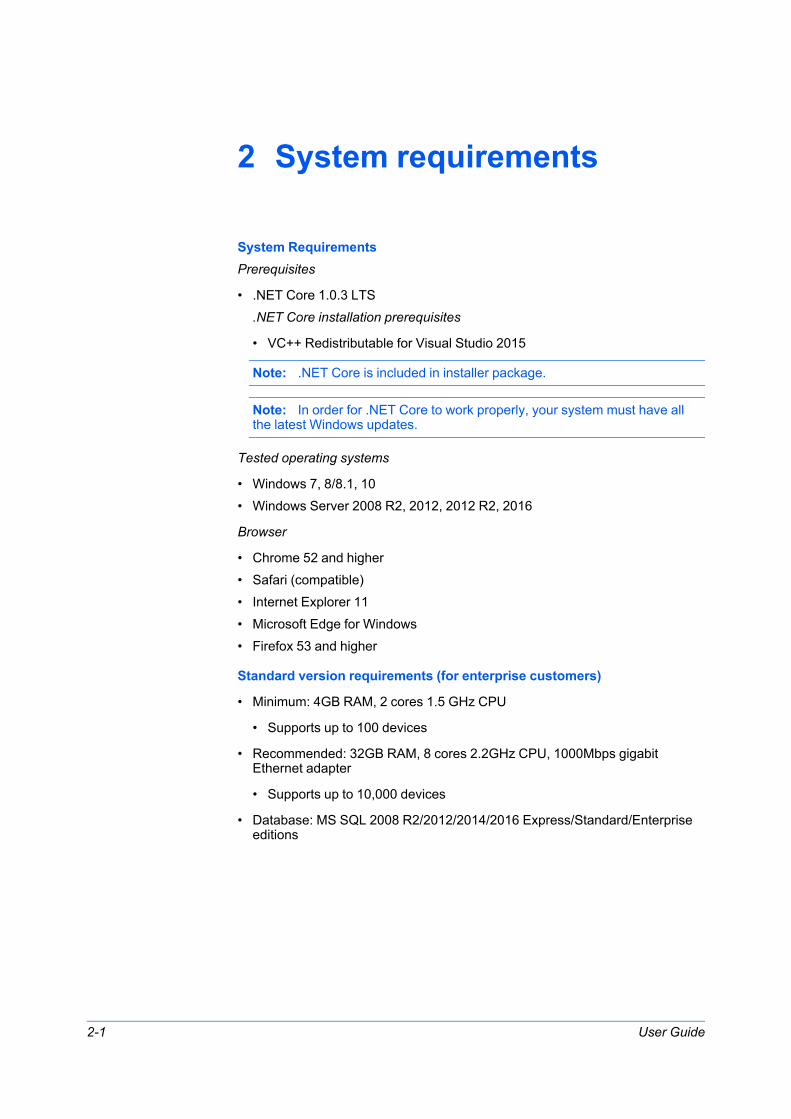
System RequirementsPrerequisites
• .NET Core 1.0.3 LTS.NET Core installation prerequisites
• VC++ Redistributable for Visual Studio 2015
Note: .NET Core is included in installer package.
Note: In order for .NET Core to work properly, your system must have allthe latest Windows updates.
Tested operating systems
• Windows 7, 8/8.1, 10• Windows Server 2008 R2, 2012, 2012 R2, 2016
Browser
• Chrome 52 and higher• Safari (compatible)• Internet Explorer 11• Microsoft Edge for Windows• Firefox 53 and higher
Standard version requirements (for enterprise customers)
• Minimum: 4GB RAM, 2 cores 1.5 GHz CPU
• Supports up to 100 devices
• Recommended: 32GB RAM, 8 cores 2.2GHz CPU, 1000Mbps gigabitEthernet adapter
• Supports up to 10,000 devices
• Database: MS SQL 2008 R2/2012/2014/2016 Express/Standard/Enterpriseeditions

Net Device Manager 3-1
3 NDM Standard Installation
Overview of NDM Installation:
1 Install MS SQL DB.
2 Run NDM Installer.
During the installation .NET Core is installed automatically.
3 Launch and configure NDM.
MS SQL server installation
1 Download Microsoft SQL Server 2014 or SQL Server 2016 Express.
2 Run the Installer.
3 Make sure that the installing instance is a Default instance.
4 Specify mixed authentication mode.
5 Create SQL Server user (NDM uses this user to connect to the SQL Server) e.g.ndmdba.
6 Make sure the newly created user has "sysadmin" access.
Launch NDM installer
1 Download NDM Standard.
2 Unzip package and run Setup.exe.
3 Read and accept the EULA.
Installer checks for Prerequisite: Port and Operating System.
Note: If HTTP port 9191 is closed, installer cannot proceed to the next level.
4 Specify the installation location: C:/Program Files.
5 Read and reply to the Anonymous Data Collection agreement.

NDM Standard Installation
User Guide3-2
6 Installation starts including .NET Core.
7 Installer displays NDM default Username, password and URL.
8 Installation is complete.
Firewall ConfigurationMake the following ports accessible:
Device:
DestinationPort Number
Protocol Description
80 TCP (HTTP) Device home page.
443 TCP (HTTPS) Device secure home page.
161 UDP (SNMP) To request data from a device.
9090 TCP (HTTP) To request data from a device.
9091 TCP (HTTPS) To request data from a device.
9100 TCP To send a firmware upgrade PRESCRIBEcommand to a device; enable the Raw Portoption on the Device Operational panel.
NDM:
DestinationPort Number
Protocol Description
9191 TCP (HTTP) NDM web page.
9292 TCP (HTTPS) NDM secure web page.
9595 TCP (HTTP) To manage internal NDM operations.
800-899 TCP (HTTP) To request the firmware files from the NetDevice Manager server by a device.
External server:
DestinationPort Number
Protocol Description
25 TCP (SMTP) The SMTP port number can be configured onUI.
1433 TCP Microsoft SQL database default port over thenetwork.
NDM Standard Installation
Net Device Manager 3-3
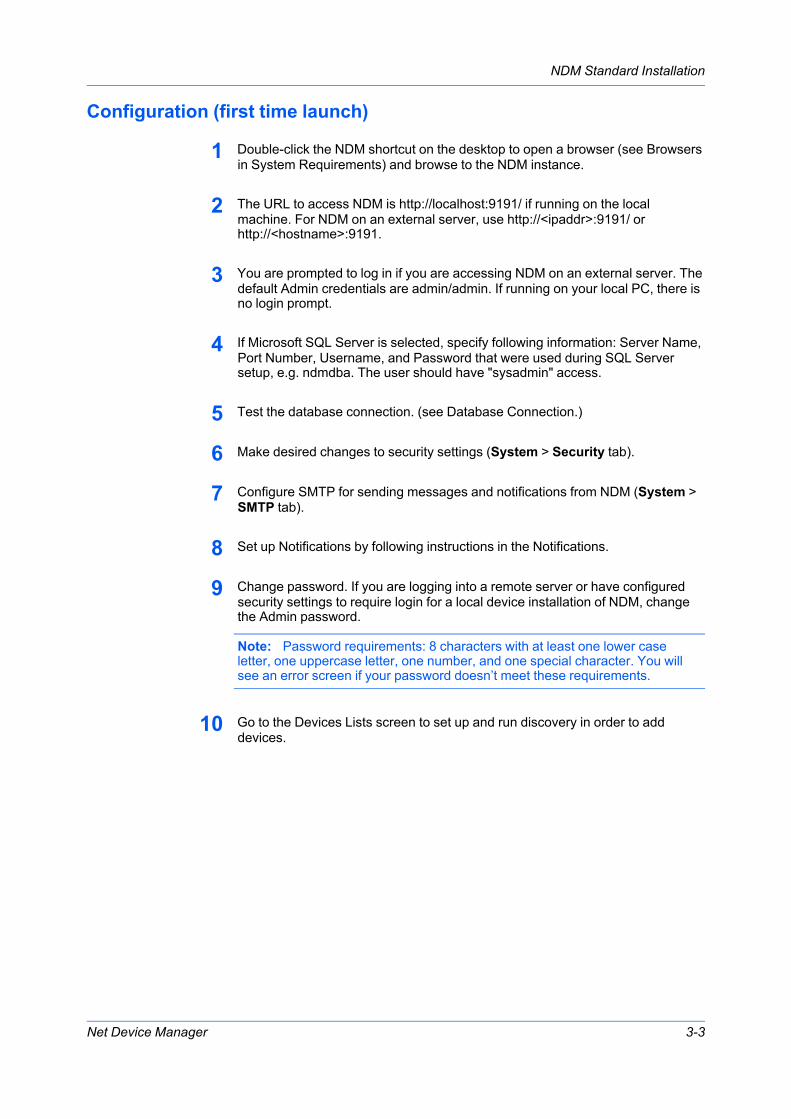
Configuration (first time launch)
1 Double-click the NDM shortcut on the desktop to open a browser (see Browsersin System Requirements) and browse to the NDM instance.
2 The URL to access NDM is http://localhost:9191/ if running on the localmachine. For NDM on an external server, use http://<ipaddr>:9191/ orhttp://<hostname>:9191.
3 You are prompted to log in if you are accessing NDM on an external server. Thedefault Admin credentials are admin/admin. If running on your local PC, there isno login prompt.
4 If Microsoft SQL Server is selected, specify following information: Server Name,Port Number, Username, and Password that were used during SQL Serversetup, e.g. ndmdba. The user should have "sysadmin" access.
5 Test the database connection. (see Database Connection.)
6 Make desired changes to security settings (System > Security tab).
7 Configure SMTP for sending messages and notifications from NDM (System >SMTP tab).
8 Set up Notifications by following instructions in the Notifications.
9 Change password. If you are logging into a remote server or have configuredsecurity settings to require login for a local device installation of NDM, changethe Admin password.
Note: Password requirements: 8 characters with at least one lower caseletter, one uppercase letter, one number, and one special character. You willsee an error screen if your password doesn’t meet these requirements.
10 Go to the Devices Lists screen to set up and run discovery in order to adddevices.
User Guide4-1
4 NDM - Main tabs
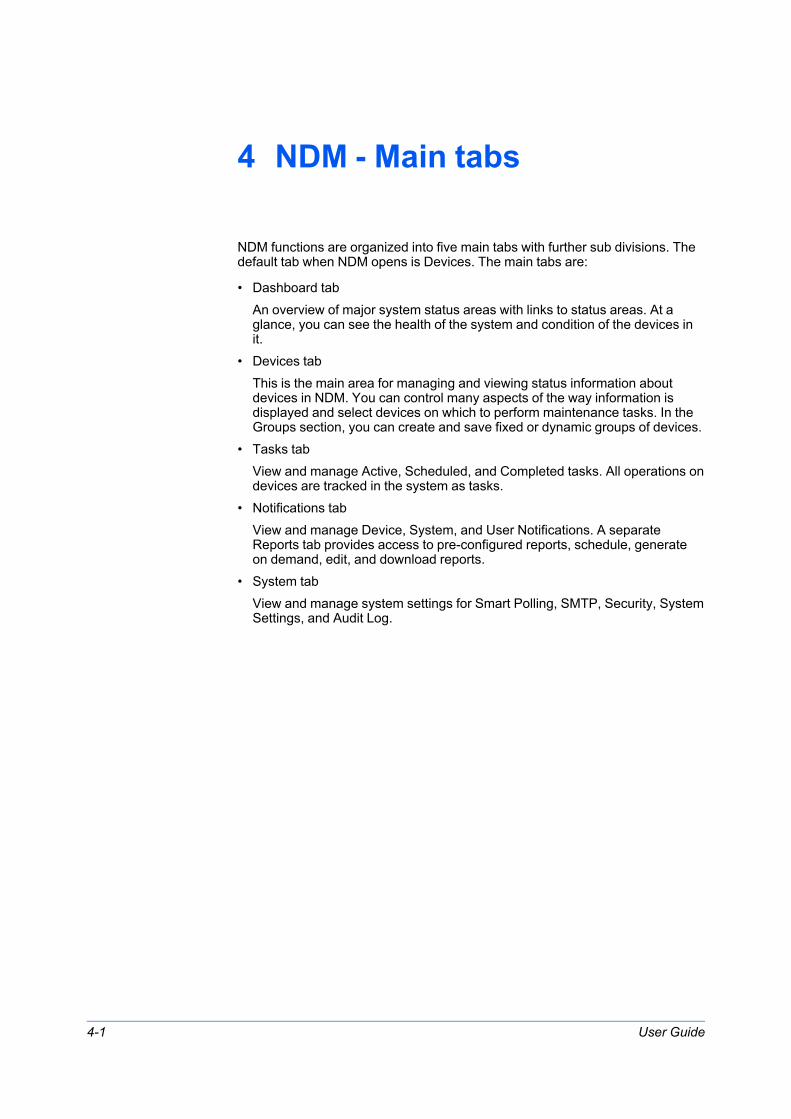
NDM functions are organized into five main tabs with further sub divisions. Thedefault tab when NDM opens is Devices. The main tabs are:
• Dashboard tabAn overview of major system status areas with links to status areas. At aglance, you can see the health of the system and condition of the devices init.
• Devices tabThis is the main area for managing and viewing status information aboutdevices in NDM. You can control many aspects of the way information isdisplayed and select devices on which to perform maintenance tasks. In theGroups section, you can create and save fixed or dynamic groups of devices.
• Tasks tabView and manage Active, Scheduled, and Completed tasks. All operations ondevices are tracked in the system as tasks.
• Notifications tabView and manage Device, System, and User Notifications. A separateReports tab provides access to pre-configured reports, schedule, generateon demand, edit, and download reports.
• System tabView and manage system settings for Smart Polling, SMTP, Security, SystemSettings, and Audit Log.

Net Device Manager 5-1
— continued
5 NDM Functions
Address bookDevice Properties > Address BookThe Address Book is a list of individuals and their contact information that isstored on the device. Each entry for an individual is a Contact, and you canorganize contacts into groups. This contact and group information is stored onthe device, and is used for faxing and scanning operations.
Note: If authentication is set, accessing the address book requires the correctLogin username and Password in the Communication Settings for the device. Ifauthentication is not set, the login dialog box may appear, depending on yourmodel.
Address book has three sub-tabs: Contacts, Groups, and One Touch Keys(model dependent) and each tab has a set of function buttons:
• Add• Delete• Edit• Import• Export• Refresh• Duplicate (on Contacts and Groups screens)
There is also a Search function at the far right of the button bar, and a SubmitAddress Book button used to submit changes made to contacts, groups, andone touch keys.Changes made on any of these tabs result in the change being displayed on theUI with an X to undo. To complete a change, click the Submit Address Bookbutton.
Contacts Manage individual contacts on the Contacts tab.The listing screen shows contacts (15 to a page withan indicator and navigation arrows).
Groups From the Groups tab, you can manage groups ofusers/contacts on the device.

NDM Functions
User Guide5-2
— continued
One Touch Keys(model dependent)
You can access Address Book entries for contactsand groups by pressing one key on the device'soperation panel. The number of One Touch keysthat you can create varies depending on yourdevice. The application does not support thisfeature on all devices.If the device does not support One Touch Keys, thisfunction is disabled and you will not see a OneTouch Keys tab under Address Book.
Address Book: Add contacts on a single deviceDevice Properties > Address Book > Contacts
1 Click Add.
2 Fill in as much information about the user as you want. Required fields areName and Number.
Name andNumber Name (required)
Number (required) - canbe auto-generated
Basic Info RecipientCompanyDepartment
Email Email: If you enter anemail address, thesystem validates theformat before you cansave.
FTP Host namePort number (def.: 21)PathLogin User nameLogin password
SMB Host namePort number (def.: 445)PathLogin User nameLogin password
Fax Fax NumberTransmit start speed(33600 bps, 14400 bps,9600 bps)ECM: On/OffSub AddressLogin passwordEncryption key number:None or 1 through 20"Not registered"Encryption box: On/OffEncryption box number

NDM Functions
Net Device Manager 5-3
InternetFax Internet Fax address
Mode: Simple/FullFile format:
• TIFF_MMR• TIFF_MR• TIFF_MH• TIFF_JBIG
Resolution (checkboxes):
• 200x100• 200x200• 200x400• 400x400• 600x600
Paper size (checkboxes):
• A4/LTE• B4• A3/11x17
3 Click Save.
4 Perform other Address Book operations (add, delete, edit, duplicate for contactsand groups; add, delete, and edit for One Touch Keys).
5 Click Open Submit Panel .
The submit panel opens on the right side of the screen with the informationdisplayed with an X in a bubble. Cancel the change by clicking the X.
6 Click Submit at the bottom of the panel.
7 Click Submit on the pop-up confirmation.
Check the progress either by leaving the progress window open or looking forthe task the Tasks tab.When you close the progress window, the screen refreshes to show thechange(s).
Address Book: Add groups on a single deviceDevice Properties > Address Book > Groups
1 Click Add on the Groups tab.
2 Enter a name for the Group.
NDM Functions
User Guide5-4
3 Select a number for the group from the drop-down list or allow NDM to auto-populate the number field.
Note: Previously assigned numbers do not appear in the list.
4 Use the check boxes to select Contacts to add to the Group.
The drop-down list at the right on the column header can serve as a filter toshow only users that have data in a selected field. Choices are:
• SMB• FTP• Email• Fax• IFax
5 Click Save.
6 Perform other Address Book operations (add, delete, edit, duplicate for contactsand groups; add, delete, and edit for One Touch Keys).
7 Click Open Submit Panel .
The submit panel opens on the right side of the screen with the informationdisplayed with an X in a bubble. Cancel the change by clicking the X.
8 Click Submit at the bottom of the panel.
9 Click Submit on the pop-up confirmation.
Check the progress either by leaving the progress window open or looking forthe task the Tasks tab.When you close the progress window, the screen refreshes to show thechange(s).
Address Book: Add One Touch Keys on a single deviceDevice Properties > Address Book > One Touch Keys
1 Click Add.
2 Enter a name for the One Touch Key.
3 Select a number for the key from the drop-down list.
Note: Previously assigned numbers do not appear in the list.
4 Select a destination for the One Touch Key by clicking a radio button by acontact from the list.The drop-down list at the right on the column header can serve as a filter toshow only users that have data in a selected field. Choices are:
NDM Functions
Net Device Manager 5-5
• SMB• FTP• Email• Fax• IFax
5 Click Save.
6 Perform other Address Book operations (add, delete, edit, duplicate for contactsand groups; add, delete, and edit for One Touch Keys).
7 Click Open Submit Panel .
The submit panel opens on the right side of the screen with the informationdisplayed with an X in a bubble. Cancel the change by clicking the X.
8 Click Submit at the bottom of the panel.
9 Click Submit on the pop-up confirmation.
Check the progress either by leaving the progress window open or looking forthe task the Tasks tab.When you close the progress window, the screen refreshes to show thechange(s).
Address Book: Delete contacts, groups or One Touch Keys on asingle device
Device Properties > Address Book > Contacts / Groups / One Touch Keys
1 On the Contacts, Groups, or One Touch Keys tab, select one or more entriesusing the checkboxes.
2 Click Delete.
3 Perform other Address Book operations (add, delete, edit, duplicate for contactsand groups; add, delete, and edit for One Touch Keys).
4 Click Open Submit Panel .
The submit panel opens on the right side of the screen with the informationdisplayed with an X in a bubble. Cancel the change by clicking the X.
5 Click Submit at the bottom of the panel.
6 Click Submit on the pop-up confirmation.
Check the progress either by leaving the progress window open or looking forthe task the Tasks tab.When you close the progress window, the screen refreshes to show thechange(s).

NDM Functions
User Guide5-6
Address Book: Duplicate contacts or groups on a single deviceDevice Properties > Address Book > Contacts / GroupsThe Duplicate function makes a copy of the selected contact or group.
1 Select a single contact or group using the check boxes. (Duplicate will not workon more than one selection.)
2 Click Duplicate.
3 Perform other address book operations (add, delete, edit, duplicate for contactsand groups; add, delete and edit for One Touch Keys).
4 Click Open Submit Panel.The submit panel opens on the right side of the screen with the informationabout the change displayed with an X in a bubble. Cancel the change byclicking the X in the bubble.
5 Click Submit at the bottom of the panel.
6 Click Submit on the pop-up confirmation.
Check the progress either by leaving the progress window open or looking forthe task on the Tasks tab.When you close the progress window, the screen refreshes to show thechanges.
Address Book: Edit contacts on a single deviceDevice Properties > Address Book > Contacts
1 Select an existing contact by clicking the checkbox next it. (You may only edit asingle entry at a time.)
2 Click Edit.
3 Add or remove information about the contact. Number refers to the record ID,which is not editable.
4 Click Save.
5 Perform other Address Book operations (add, delete, edit, duplicate for contactsand groups; add, delete, and edit for One Touch Keys).
6 Click Open Submit Panel .
The submit panel opens on the right side of the screen with the informationdisplayed with an X in a bubble. Cancel the change by clicking the X.
7 Click Submit at the bottom of the panel.

NDM Functions
Net Device Manager 5-7
8 Click Submit on the pop-up confirmation.
Check the progress either by leaving the progress window open or looking forthe task the Tasks tab.When you close the progress window, the screen refreshes to show thechange(s).
Address Book: Edit groups on a single deviceDevice Properties > Address Book > GroupsYou can change the group name and add or remove contacts in groups usingthe Edit function.
1 Select an group by clicking the checkbox on the group row. (You may only edit asingle entry at a time.)
2 Click Edit.
3 Edit the name of the group, if wanted.
4 Add or remove users from the group by checking or unchecking boxes bynames of contacts.The drop-down list at the right on the column header can serve as a filter toshow only users who have data in a selected field. Choices are:
• SMB• FTP• Email• Fax• IFax
5 Click Save.
6 Perform other Address Book operations (add, delete, edit, duplicate for contactsand groups; add, delete, and edit for One Touch Keys).
7 Click Open Submit Panel .
The submit panel opens on the right side of the screen with the informationdisplayed with an X in a bubble. Cancel the change by clicking the X.
8 Click Submit at the bottom of the panel.
9 Click Submit on the pop-up confirmation.
Check the progress either by leaving the progress window open or looking forthe task the Tasks tab.When you close the progress window, the screen refreshes to show thechange(s).

NDM Functions
User Guide5-8
Address Book: Edit One Touch Keys on a single deviceDevice Properties > Address Book > One Touch Keys
1 Select a One Touch Key by clicking the checkbox on the key row. (You mayonly edit a single entry at a time.)
2 Click Edit.
3 You can change the name of the key or the person/group with which it isassociated. You cannot change the Number of the key.
4 Add or remove entries for the key by checking or unchecking boxes in the list ofcontacts and groups.The drop-down list under the Number field can serve as a filter to show onlyusers that have data in a selected field. Choices are:
• SMB• FTP• Email• Fax• IFax
5 Click Save.
6 Perform other Address Book operations (add, delete, edit, duplicate for contactsand groups; add, delete, and edit for One Touch Keys).
7 Click Open Submit Panel .
The submit panel opens on the right side of the screen with the informationdisplayed with an X in a bubble. Cancel the change by clicking the X.
8 Click Submit at the bottom of the panel.
9 Click Submit on the pop-up confirmation.
Check the progress either by leaving the progress window open or looking forthe task the Tasks tab.When you close the progress window, the screen refreshes to show thechange(s).
Address Book: Export contacts on a single deviceDevice Properties > Address Book > ContactsThe Export function creates a .csv with all data from the Address Book. It willexecute without waiting for the Submit Address Book confirmation.
1 Using checkboxes, select contacts to export.
2 Click Export.

NDM Functions
Net Device Manager 5-9
3 On the confirmation screen, you can choose to open with Excel (default) orselect another program, or save the file. If you choose Save, you can changethe name of the exported file from the default of AddressBookExport.csv towhatever you want.
4 Click OK.
The exported file will either open in Excel or a save dialog will appear.
Address Book: Export groups on a single deviceDevice Properties > Address Book > groupsThe Export function creates a .csv with all data from the Address Book. It willexecute without waiting for the Submit Address Book confirmation.
1 Using checkboxes, select groups to export.
2 Click Export.
3 On the confirmation screen, you can choose to open with Excel (default) orselect another program, or save the file. If you choose Save, you can changethe name of the exported file from the default of AddressBookExport.csv towhatever you want.
4 Click OK.
The exported file will either open in Excel or a save dialog will appear.
Address Book: Export One Touch Keys on a single deviceDevice Properties > Address Book > One Touch KeysThe Export function creates a .csv with all data from the Address Book. It willexecute without waiting for the Submit Address Book confirmation.
1 Using checkboxes, select One Touch Keys to export.
2 Click Export.
3 On the confirmation screen, you can choose to open with Excel (default) orselect another program, or save the file. If you choose Save, you can changethe name of the exported file from the default of AddressBookExport.csv towhatever you want.
4 Click OK.
The exported file will either open in Excel or a save dialog will appear.
Address Book: Import contacts, groups or One Touch Keys on asingle device
Device Properties > Address Book > Contacts / Groups / One Touch Keys

NDM Functions
User Guide5-10
The process is the same for importing data from files into Address BookContact, Groups, or One Touch Keys in NDM.
1 On the Contacts, Groups, or One Touch Keys tab, click Import.
2 Select Manual or Auto import, and click Next.Use Auto Import for importing files from NDM or KNV, where there is expecteddata in an expected order. With Auto Import, you cannot make changes to thefield mappings.Use Manual Import when you may need to select columns to match the NDMcontact fields.
3 You can drag and drop a .csv file onto the upload area or click to locate andopen a .csv file to use, then click Upload File.
4 For Manual import:
• On the first line, ID, check the Assign automatically box (in case ofduplicate IDs, existing records will be overwritten)
• Review other field mappings, change as needed• Click Save
5 For Auto Import just click Save after uploading the import file.
6 Perform other Address Book operations (add, delete, edit, duplicate for contactsand groups; add, delete and edit for One Touch Keys).
7 Click Open Submit Panel.The submit panel opens on the right side of the screen with the informationdisplayed with an X in a bubble. Cancel the change by clicking the X.
8 Click Submit at the bottom of the panel.
9 Click Submit on the pop-up confirmation.
Check the progress either by leaving the progress window open or looking forthe task on the Tasks tab.When you close the progress window, the screen refreshes to show thechanges.
Note: You can get the correct format for a .csv file to use for contact import byexporting the contact list. You could delete all current contacts from the exportfile and add new data to use for an import. Remember that the fields Numberand Name are required.
Address Book: Refresh contacts, groups and One Touch KeysDevice Properties > Address BookClick Refresh to update all Address Book entries: Contacts, Groups, and OneTouch Keys. Each Address Book tab has a refresh icon, but the refresh actionaffects all three entry types.

NDM Functions
Net Device Manager 5-11
Warning: If you have made changes to Contacts, Groups, or One TouchKeys and have not submitted them, clicking Refresh will delete alluncommitted changes.
Address Book: Settings in Multi-set configurationsDevices > Create Task > ConfigurationsYou can make all the same changes to device Address Books using Multi-setconfigurations that you can on a single device, with the exception of export.With Multi-set, each tab of the Address Book settings (Contacts, Groups, andOne Touch Keys) appears on the left side of the screen, with a listing of allentries read from the device presented with checkboxes. Task buttons appearat the top or each tab to Add, Edit, Delete, or Import.The Enable switch gives you the option to disable configuration changesentirely for each tab. (Note: If you set it to Disable on all the tabs, the systemwill pop up a warning icon for the Address Book configuration or disable theNext button.)Changes in progress (add, delete, edit, and individual entries to be imported)appear in a Change History area to the right, where you could delete individualchanges, if needed.When making Address Book changes through Multi-set configurations, there isan extra tab for Preferences that only applies to Multi-set. These Preferencessettings let you choose how to apply changes to the Address Book. ThePreferences choices are:
• Full OverwriteThis option will overwrite the existing address books of devices selected forthis Multi-set operation. It ignores all current settings on the device(s), andoverwrites all data. A Full Overwrite cannot be undone.
• Smart Merge (default/recommended)This option combines existing data on the target device(s) with source datafor the Multi-set operation (a source device or saved file). Smart Mergeperforms the merge based on the Number of the address book entry. Wherethere are duplicate Numbers, Smart Merge overwrites target device data withsource data having a matching ID number.
• Auto-generateThis option keeps all source and target data, creating new Numbers (keepingthe same Name) for duplicate entries from the source data (device or savedfile) on the target device(s).With Enable set to On, no other selections and/or changes made, and thedefault of Smart Merge selected in Preferences, all source address bookentries will be merged or added to the target device(s) entries.
Administrator password changeIf you are using NDM on a remote server, or have configured NDM to requirelogging in when running locally (see System > Security Tab) change theAdministrator password, which defaults to admin / admin (ID/password).
1 Click the drop-down list at the top right corner of the NDM screen:

NDM Functions
User Guide5-12
2 Select Change Password.
3 Enter the current password (though the system will allow a change without firstentering the current password).
4 Enter a new password that meets the default password requirements:
• 4 characters• at least one lower case letter• at least one uppercase letter• at least one number• at least one special character
5 Re-enter the new password.
You will see a warning screen if your password doesn't meet the requirements,but the system will allow the change.
6 Click Apply to make the change.
Advanced searchDevice list > Search > Advanced SearchThe Advanced Search option is available only on the Devices tab. You can useAdvanced Search on the All devices group or any selection from the Groupslist. Using Advanced Search, you can configure up to six Properties withCondition and Value selections to hone a search to precise selections. Toconfigure Advanced Search:
1 Click the filters icon to the left of the search box and choose Advanced Search.
2 Click the radio button by Match all criteria or Match any criteria to define howNDM uses your property selections.
3 Select a Property from the drop-down selection.
Property is an alphabetic list of all device properties in NDM. You can jump to aproperty selection by starting to type the word's initial characters in the SelectProperty box.
4 Select a Condition from the drop-down list.

NDM Functions
Net Device Manager 5-13
Choices under Condition will vary depending on the type of Property selected.
5 Type the Value in the next field.
6 Enter up to six properties; when finished, click OK.
The Device list screen will refresh restricted to devices with properties thatmatch your search.
Applications listDevice Properties > Management > Applications ListDisplays a list of applications with the following information:
Column Name Description
Name Application name
Version Application version
License• Not used - application not activated• Trial - application using a trial license• Official - application has been activated
License date When (date/time) the license was activated
Remaining counts Number of launches remaining in trial for the app
Trial expiration date Trial expiration date
Type• Resident• User initiated
State• Ready• Running• Error
The top row of the Applications List screen has buttons for Install, Upgrade,Activate, Deactivate, and Refresh. There is also a Search box to the right.
Applications: Activate on a single deviceDevice Properties > Management > Applications list
1 Select an application that has not been activated (not used in the Licensecolumn).
Note: You can only activate one application at a time.
2 Click Activate.
3 Choose Trial or Official as the License.

NDM Functions
User Guide5-14
4 If Official, drag and drop or browse to a .csv license file and click open ormanually enter a 20-digit license key. (Some applications do not require alicense key to activate).
5 Click Next.
6 Confirm details and click Activate to continue, Back to make changes, orCancel to exit the process.
View progress on the next screen, which you can close without affecting theinstallation. You may check progress of the task on the Tasks screen.
Applications: Deactivate on a single deviceDevice Properties > Management > Applications list
1 Select one or more applications.
2 Click Deactivate.
3 If you want to deactivate and uninstall the application, click the Uninstallapplications checkbox. In some cases, Uninstall applications may bechecked by default when working with older models that do not supportdeactivation.
4 Click Next.
5 Confirm details and click Deactivate to continue, Back to make changes, orCancel to exit the process.
View progress on the next screen, which you can close without affecting theinstallation. You may check progress of the task on the Tasks screen.
Applications: Install on a single deviceDevice Properties > Management > Application list
1 Click Install.
2 Drag and drop or browse to an application package (.pkg) and click UploadFile.
3 Review application name and version, change if not what you expected.
4 Click the Activate application checkbox if you want it to activate uponinstallation.View progress on the next screen, which you can close without affecting theinstallation. You may check progress of the task on the Tasks screen.
5 Click Next.

NDM Functions
Net Device Manager 5-15
6 Confirm details and click Next to continue with installation, Back to makechanges, or Cancel to exit the process.
View progress on the next screen, which you can close without affecting theinstallation. You may check progress of the task on the Tasks screen.
Applications: Upgrade on a single deviceDevice Properties > Management > Applications list
1 Select an installed application and click Upgrade.
2 Drag and drop a file, or browse to an upgrade package (.pkg) and click UploadFile.You will receive a warning if the file is the same version or a lower version thanthe one already installed.
3 Click Next.
4 Confirm details and click Upgrade to continue with the upgrade, Back to makechanges, or Cancel to exit the process.
View progress on the next screen, which you can close without affecting theinstallation. You may check progress of the task on the Tasks screen.
Audit logSystem > Audit LogAn audit log is a document that records events in a system. In addition todocumenting resources accessed, audit log entries usually include destinationand source addresses, a timestamp and user login information. Options on theSystem > Audit Log page:
• Log storage period (1 week to 12 months)• Export audit logs before deleting (immediately download in .csv format)• Receive daily audit log report• Notify Admins of log operation errors
NDM deletes (and exports, if enabled) expired logs on two events:
• Immediately after the user selects a new Log Storage Period that is shorterthan the previous setting; i.e., user switches Log Storage Period from OneMonth to One Week, NDM exports and deletes all entries older than 1 weekimmediately after clicking the button
• Daily: checks if any audit log expires today; i.e., AuditLog1 is 7 days old todayand the Log Storage period is 1 week. At tomorrow's daily check, NDMexports and deletes it
Certificate listDevice Properties > Management > Certificate ListDisplays a listing page of Certificates employed on the device. Columns providedata on:
NDM Functions
User Guide5-16
— continued
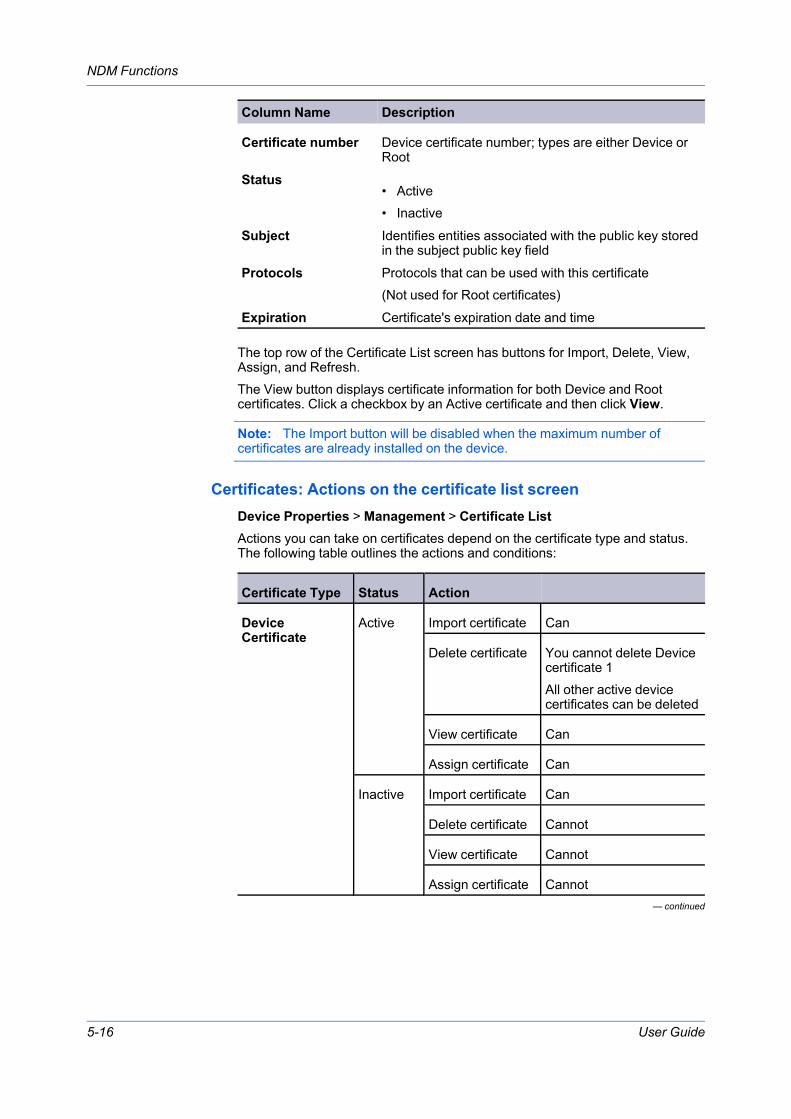
Column Name Description
Certificate number Device certificate number; types are either Device orRoot
Status• Active• Inactive
Subject Identifies entities associated with the public key storedin the subject public key field
Protocols Protocols that can be used with this certificate(Not used for Root certificates)
Expiration Certificate's expiration date and time
The top row of the Certificate List screen has buttons for Import, Delete, View,Assign, and Refresh.The View button displays certificate information for both Device and Rootcertificates. Click a checkbox by an Active certificate and then click View.
Note: The Import button will be disabled when the maximum number ofcertificates are already installed on the device.
Certificates: Actions on the certificate list screenDevice Properties > Management > Certificate ListActions you can take on certificates depend on the certificate type and status.The following table outlines the actions and conditions:
Certificate Type Status Action
DeviceCertificate
Active Import certificate Can
Delete certificate You cannot delete Devicecertificate 1All other active devicecertificates can be deleted
View certificate Can
Assign certificate Can
Inactive Import certificate Can
Delete certificate Cannot
View certificate Cannot
Assign certificate Cannot

NDM Functions
Net Device Manager 5-17
Certificate Type Status Action
Root Certificate Active Import certificate Can
Delete certificate Can
View certificate Can
Assign certificate Cannot
Inactive Import certificate Can
Delete certificate Cannot
View certificate Cannot
Assign certificate Cannot
Certificates: Assign a certificate to protocols for a single deviceDevice Properties > Management > Certificate list
1 Select an Active Device certificate, and click Assign.
Installation area is pre-selected for the chosen certificate.
2 In Protocols, select protocols to which you want the certificate to apply.
You can add and remove protocols as needed.
3 Click Next.
4 Review the details, click Back to make changes, or Assign to complete.
You can close the Progress window without stopping the import. You can alsodownload the import results to a .csv file.
Certificates: Delete a certificate from a single deviceDevice Properties > Management > Certificate list
1 Select one or more certificates by clicking the checkboxes, and then clickDelete.
2 Use the checkboxes on the first Delete Certificates screen to make changes,and then click Next.
3 Review choices on the confirmation screen, click Back for changes, or clickDelete.
You can close the Progress window without stopping the process. You can alsodownload the results to a .csv file.
Certificates: Import on a single deviceDevice Properties > Management > Certificate list

NDM Functions
User Guide5-18
1 Click Import.
2 Select the Certificate type (Device or Root).
3 Select the Installation area (Auto or an already configured certificate number).
4 Drag and drop or browse to a certificate file, and then click Upload file.
Note: For importing Device certificates on a single device, you need both a.pfx certificate file and associated password.
5 Enter the password for a Device certificate.
6 Click Next.
7 Review the details, click Back to make any changes, or Import.
You can close the Progress window without stopping the process. You can alsodownload the results to a .csv file.
Certificates: View a certificateDevice Properties > Management > Certificate list
1 Select an active Device or Root certificate by clicking the checkbox.
2 Click View.
Certificates: Multi-set configurationsThere are a few minor differences in how you work with certificates when usingMulti-set configurations. See the steps for Assign, Import, and Delete, below.
Assign
1 Select one or more protocols from the drop-down list.
2 Using the radio buttons, select an option to identify the certificate to assign:
• Specify subject of the certificate• Select a certificate file
• Drag and drop or browse for a file and then click Upload file• Enter the certificate password
3 Click Next.
Delete
1 Select certificate type from the drop-down list (device or root).

NDM Functions
Net Device Manager 5-19
2 Using the radio buttons, select an option to identify the certificate to assign:
• Specify subject of the certificate• Select a certificate file
• Drag and drop or browse for a file and then click Upload file• Enter the certificate password
3 Click Next.
Import
1 Select certificate type from the drop-down list (device or root).
2 Drag and drop or browse for the certificate file(s).
• .csv configuration and .zip package files for Device certificate• .cer for Root certificate
If importing a Device certificate, you can choose to assign protocols as part ofthe import:
3 Check the box for Assign device certificate protocols.
4 In the Assign protocols tab, select one or more protocols from the drop-downlist.
5 Click Next.
For certificate import in Multi-set Configurations, note that the file type isdifferent from what is required when importing for a single device. For Multi-setyou must have a .zip and .csv file set.The .csv configuration file should contain the following information:
• Device serial number
• If device serial number is duplicated, the row for second and subsequentnumbers are ignored
• If device serial number does not match with selected target devices, therow is ignored
• File name of certificate file in the .zip package• Certificate password
The selected .csv configuration should contain at least one serial number thatmatches any of the selected devices. The .zip package should also contain atleast one file described in the .csv configuration.
Communication Settings: Change for a single deviceDevice Properties > General > Communication Settings (Edit icon)From the Device Properties screen, you can make changes to the way thatNDM communicates with a single device.

NDM Functions
User Guide5-20
1 Click the pencil icon by Connection Settings on the Device Properties >General screen.
2 Make changes as needed to the connection parameters:
TCP/IP Port -- Default = 9100; set from 1024 to 65535Secure protocol (SSL) -- Checkbox to Enable SSL protocolCommunication timeout (seconds) -- Default = 10, set from 5 to 120SNMP connection retries -- Default = 0, set from 0 to 5SNMP type -- Default = SNMPv1/v2, option: SNMPv3
• SNMPv1/v2 options
• Read community name• Write community name
• SNMPv3 options
• User name and password• SNMP authentication (MD5 of SHA1)• SNMP Privacy (DES or AES)
Command Center password -- Password to use on devices web UI (CCRX)Authentication type -- Local authentication or Device settingsAuthentication information -- User name and Password
3 When finished, click Save.
You can also Close without saving changes or Reset to defaults.
Communication Settings: Change for multiple devicesDevice list > ...More > Communication SettingsWith a group of multiple individual devices selected, you can make changes toNDM's communication settings for several devices at once.
1 Click ...More, then Communication Settings at the far right of the Device list ora group screen.This opens the same Connection Settings page that you would see from DeviceProperties for a single device.
2 Make changes as needed to the connection parameters:
TCP/IP Port -- Default = 9100; set from 1024 to 65535Secure protocol (SSL) -- Checkbox to Enable SSL protocolCommunication timeout (seconds) -- Default = 10, set from 5 to 120SNMP connection retries -- Default = 0, set from 0 to 5SNMP type -- Default = SNMPv1/v2, option: SNMPv3
• SNMPv1/v2 options
• Read community name

NDM Functions
Net Device Manager 5-21
• Write community name
• SNMPv3 options
• User name and password• SNMP authentication (MD5 of SHA1)• SNMP Privacy (DES or AES)
Command Center password -- Password to use on devices web UI (CCRX)Authentication type -- Local authentication or Device settingsAuthentication information -- User name and Password
3 When finished, click Save, or Cancel to close without saving.
These changes immediately affect all selected devices or all devices in thegroup.
Note: The settings shown when you open …More > CommunicationSettings are the default settings that NDM uses to communicate with devices.If you make changes for a group or selected devices, and then come back tothe …More > Communication Settings option, they revert to the defaultsettings.
To restore a group or multiple selected devices to default communicationsettings, go back to …More > Communication Settings with the devices orgroup selected again and click Save.
ConfigurationsConfigurations (also called Multi-set Configuration) allows you to set up multipledevice actions to run on multiple devices. They allow you to schedule theConfiguration to run by date and time, or to configure event triggers for startinga multi-configuration session.The basics of setting the individual action details are covered in detailelsewhere in this guide. The actions that can be set under the Configurationsaction are:
• Device Settings• Certificate Management (see Certificates: Multi-set Configurations for
differences from single device)• Restart Devices• Application (HyPAS) actions (install, activate, deactivate, and upgrade)• Address book actions (see Address Book: Settings in Multi-set
configurations)• Firmware Upgrade• Document Box (see Document Box: Settings in Multi-set configurations)• Optional Functions• Device Users and Groups (see Device Users: Settings in Multi-set
configurations for differences from single device)• Send Data
You can choose from five different configuration sources:
NDM Functions
User Guide5-22
• Replicate settings from a selected device:
• Custom – and make changes to those settings.• Express – use unchanged settings.
• Upload from a previously saved Configurations file:
• Custom – and make changes.• Express – use unchanged.
• Create new.
You can select any number of devices or an entire group to use as targets forthe Configurations.When you've set up a multi-device, multi-settings configuration, you can save itto use for the Upload option in the future. NDM saves the following operations:Device Settings, Device Restart, Address Book, Document Box, and DeviceUsers and Groups.
Warning: Be careful with device or group selection for Configurations:
• Device settings, application actions, or firmware upgrades can causedamage if applied to an incompatible device
• Address books can be overwritten or deleted• Restarting a device at the wrong time can interrupt printing operations• If using a dynamic or default group, keep in mind that while you may see 10
devices listed when you are setting up a Configuration task, if you arescheduling the task for later or event-triggered execution, there could bedifferent devices in that group when the task is run
Configurations: Create new configurations
1 Select devices or groups from the Device list page.
2 Click Create Task, then Configurations.
3 Confirm device(s) selections; remove devices by unchecking boxes or clickCancel to start over.
4 Click Next.
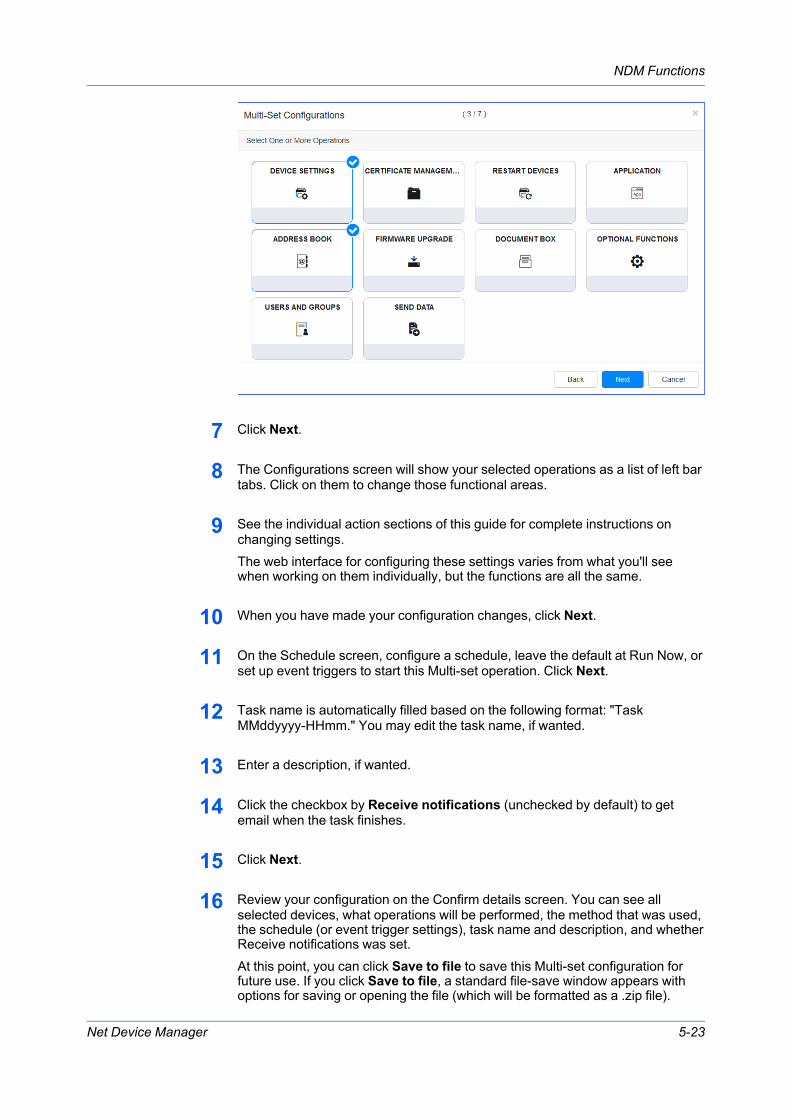
5 The Configuration Source screen has Create New set as the default, so clickNext.
6 Click the Operations buttons to select. Selections are indicated by a checkmark.
NDM Functions
Net Device Manager 5-23
7 Click Next.
8 The Configurations screen will show your selected operations as a list of left bartabs. Click on them to change those functional areas.
9 See the individual action sections of this guide for complete instructions onchanging settings.The web interface for configuring these settings varies from what you'll seewhen working on them individually, but the functions are all the same.
10 When you have made your configuration changes, click Next.
11 On the Schedule screen, configure a schedule, leave the default at Run Now, orset up event triggers to start this Multi-set operation. Click Next.
12 Task name is automatically filled based on the following format: "TaskMMddyyyy-HHmm." You may edit the task name, if wanted.
13 Enter a description, if wanted.
14 Click the checkbox by Receive notifications (unchecked by default) to getemail when the task finishes.
15 Click Next.
16 Review your configuration on the Confirm details screen. You can see allselected devices, what operations will be performed, the method that was used,the schedule (or event trigger settings), task name and description, and whetherReceive notifications was set.At this point, you can click Save to file to save this Multi-set configuration forfuture use. If you click Save to file, a standard file-save window appears withoptions for saving or opening the file (which will be formatted as a .zip file).

NDM Functions
User Guide5-24
Choose Save File and give the configuration file a meaningful name andlocation for easy access in the future.
17 If you have any changes to make, you can click Back to move back through theprevious screens and make changes.
18 Click Apply to launch this configuration (or set it for delayed or triggeredexecution), or Cancel to exit. (If you saved the configuration, it will still be thereeven if you cancel at this point.)
You can view your configuration task on the Tasks tab, on either the Active orScheduled tab.
Configurations: Replicate configurations – custom
1 Select devices or groups from the Device list page.
2 Click Create Task, then Configurations.
3 Confirm device(s) selections; remove devices by unchecking boxes or clickCancel to start over.
4 Click Next.
5 On Configuration Source, click Replicate from device, and Custom, and thenclick Next.
6 On the Select Configuration Source screen, select a device from the list as yoursource, or type in a name, IP address, keyword, etc. Click the device in the list,and then click Next.
7 Click the Operations buttons to select. Selections are indicated by bluecheckmarks.
NDM Functions
Net Device Manager 5-25
8 Click Next.NDM reads the configuration of the selected device. Since Restart Device is nota setting on the device, the restart type is set to the default of Device.
9 The Configurations screen will show your selected operations as a list of left bartabs. Click on them to make changes to the settings read in from the selecteddevice.See the individual action sections of this guide for complete instructions onchanging settings.The web interface for configuring these settings varies from what you'll seewhen working on them individually, but the functions are all the same.
10 When you have made your configuration changes, click Next.
11 On the Schedule screen, configure a schedule, leave the default at Run Now, orset up event triggers to start this Multi-set operation. Click Next.
12 Task name is automatically filled based on the following format: "TaskMMddyyyy-HHmm." You may edit the task name, if wanted.
13 Enter a description, if wanted.
14 Click the checkbox by Receive notifications (unchecked by default) to get emailwhen the task finishes.
15 Click Next.
16 Review your configuration on the Confirm details screen. You can see allselected devices, what operations will be performed, the method that was used,the schedule (or event trigger settings), task name and description, and whetherReceive notifications was set.At this point, you can click Save to file to save this Multi-set configuration forfuture use. If you click Save to file, a standard file-save window appears withoptions for saving or opening the file (which will be formatted as a .zip file).Choose Save File and give the configuration file a meaningful name andlocation for easy access in the future.
17 If you have any changes to make, you can click Back to move back through theprevious screens and make changes.
18 Click Apply to launch this configuration (or set it for delayed or triggeredexecution), or Cancel to exit. (If you saved the configuration, it will still be thereeven if you cancel at this point.)
You can view your configuration task on the Tasks tab, on either the Active orScheduled tab.
Configurations: Replicate configurations – express
1 Select devices or groups from the Device list page.
NDM Functions
User Guide5-26
2 Click Configurations.
3 Confirm device(s) selections; remove devices by unchecking boxes or clickCancel to start over.
4 Click Next.
5 On Configuration Source, click Replicate from device, and Express, and thenclick Next.
6 On the Select Configuration Source screen, select a device from the list as yoursource, or type in a name, IP address, keyword, etc. Click the device in the list,and then click Next.NDM reads the configuration of the selected device. Since Restart Device is nota setting on the device, the restart type is set to the default of Device.
7 On the Schedule screen, configure a schedule, leave the default at Run Now, orset up event triggers to start this Multi-set operation. Click Next.
8 Task name is automatically filled based on the following format: "TaskMMddyyyy-HHmm." You may edit the task name, if wanted.
9 Enter a description, if wanted.
10 Click the checkbox by Receive notifications (unchecked by default) to getemail when the task finishes.
11 Click Next.
12 Review your configuration on the Confirm details screen. You can see allselected devices, what operations will be performed, the method that was used,the schedule (or event trigger settings), task name and description, and whetherReceive notifications was set.At this point, you can click Save to file to save this Multi-set configuration forfuture use. If you click Save to file, a standard file-save window appears withoptions for saving or opening the file (which will be formatted as a .zip file).Choose Save File and give the configuration file a meaningful name andlocation for easy access in the future.
13 If you have any changes to make, you can click Back to move back through theprevious screens and make changes.
14 Click Apply to launch this configuration (or set it for delayed or triggeredexecution), or Cancel to exit. (If you saved the configuration, it will still be thereeven if you cancel at this point.)
You can view your configuration task on the Tasks tab, on either the Active orScheduled tab.

NDM Functions
Net Device Manager 5-27
Configurations: Upload configurations – custom
1 Select devices or groups from the Device list page.
2 Click Configurations.
3 Confirm device(s) selections; remove devices by unchecking boxes or clickCancel to start over.
4 Click Next.
5 On Configuration Source, click Upload from file, and Custom.
6 Drag and drop or browse to a location with a saved Multi-set configurations file(.zip and .xml format) click Upload file, then click Next.
Note: Multi-set configuration files created by KNV, KNA, or MSTE can beused in NDM.
7 On the Select Configuration Source screen, click Browse, locate a savedConfiguration template and open it, and then click Next.NDM reads the saved configuration options and operations from the file. It willalso import task information that was saved with the settings: task name,description and schedule, or event trigger settings.
8 Selected operations from the imported file are indicated by blue checkmark.Click the Operations buttons to add or remove operations.
Note: Operations that are not supported will be grayed out.
9 The Configurations screen will show your selected operations as a list of left bartabs. Click on them to make changes to the settings read in from the selecteddevice.

NDM Functions
User Guide5-28
10 See the individual action sections of this guide for complete instructions onchanging settings.The web interface for configuring these settings varies from what you'll seewhen working on them individually, but the functions are all the same.
11 When you have made your configuration changes, click Next.
12 On the Schedule screen, any scheduling or event trigger options are copiedfrom the file. Make any changes you prefer and click Next.
13 The Task name, Description, and Receive notifications settings are copied fromthe source. Make changes to these, as needed, and click Next.
14 Review your configuration on the Confirm details screen. You can see allselected devices, what operations will be performed, the method that was used,the schedule (or event trigger settings), task name and description, and whetherReceive notifications was set.At this point, you can click Save to file to save this Multi-set configuration forfuture use. If you click Save to file, a standard file-save window appears withoptions for saving or opening the file (which will be formatted as a .zip file).Choose Save File and give the configuration file a meaningful name andlocation for easy access in the future. If you're using this as part of Upload fromfile and save it again, make sure not to overwrite your original file.
15 If you have any changes to make, you can click Back to move back through theprevious screens and make changes.
16 Click Apply to launch this configuration, or Cancel to exit. If set for delayed ortriggered start, it will be added to Scheduled Tasks. If you saved theconfiguration, it will still be there even if you cancel at this point.
You can view your configuration task on the Tasks tab, on either the Active orScheduled tab.
Configurations: Upload configurations – express
1 Select devices or groups from the Device list page.
2 Click Configurations.
3 Confirm device(s) selections; remove devices by unchecking boxes or clickCancel to start over.
4 Click Next.
5 On Configuration Source, click Upload from file, and Express.
6 Drag and drop or Browse to a saved configurations file, click Upload file, andthen click Next. NDM reads the saved configuration options and operations
NDM Functions
Net Device Manager 5-29
from the file. It will also import task information that was saved with the settings:task name, description and schedule, or event trigger settings.
Note: You cannot change settings on options found in the selected file.
7 On the Schedule screen any scheduling or event trigger options are copied fromthe file. Make any changes and click Next.
8 The Task name, Description, and Receive notifications settings are copied fromthe source. Make changes to these, as needed, and click Next.
9 Review your configuration on the Confirm details screen. You can see allselected devices, what operations will be performed, the method that was used,the schedule (or event trigger settings), task name and description, and whetherReceive notifications was set.At this point, you can click Save to file to save this Multi-set configuration forfuture use. If you click Save to file, a standard file-save window appears withoptions for saving or opening the file (which will be formatted as a .zip file).Choose Save File and give the configuration file a meaningful name andlocation for easy access in the future. If you're using this as part of Upload fromfile and save it again, make sure not to overwrite your original file.
10 If you have any changes to make, you can click Back to move back through theprevious screens and make changes.
11 Click Apply to launch this configuration, or Cancel to exit. If set for delayed ortriggered start, it will be added to Scheduled Tasks. If you saved theconfiguration, it will still be there even if you cancel at this point.
You can view your configuration task on the Tasks tab, on either the Active orScheduled tab.
DashboardWith Dashboard, you have one place to look at overall system health andfunctions, and the ability to jump to detail screens.The Dashboard offers six overview sections:
Dashboard: Active tasksThis widget displays the number of active tasks and average percentage ofexecution in progress, with a link to go to the Active Tasks page.
Dashboard: Polling requestsThis widget displays the estimated number of polling requests with pollingstatus label and a link to the Smart Polling page. Status indicators are:
• Empty – no maximum calculated yet• Good (green) – Current polling below 50% of maximum• Moderate (orange) – Current polling over 50% of maximum• Excessive (red) – Current polling at or over maximum
NDM Functions
User Guide5-30
Dashboard: Status of devicesThis widget displays the number of devices with Ready status and a link to theDevice list page.
Dashboard: Scheduled tasksShows the number of scheduled tasks and a link to the Scheduled Tasks page.
Dashboard: Device reportsThe largest widget shows four charts, and allows you to select groups to use assource for the charts. The default uses the All devices group, but all customgroups from the Device list page are available from the drop-down list at the topright corner of Device Reports. Within the Device Reports widget, you also havechoices for each chart to show the top 5–10 devices. Available charts are:
1 Highest Cumulative Errors – a pie chart showing total cumulative errors perdevice using all error type alerts for the last month. Click any section of the chartto jump to Device properties for that device (except the cumulative Othersection, which jumps to the last selected group on Device list).
2 Highest Device Counters – Displays top highest models by average of devicecounters over multiple devices using the total printed pages counter.
3 Fewest Remaining Days – Shows devices with the lowest average of tonerremaining days.
4 Lowest % of toner – Devices with lowest average toner % level compared withother devices.
Dashboard: NotificationsDisplays the five most recent notifications showing: Notification type, date andtime of notification, how long ago it was issued, and a link to the Notificationspage (the link itself shows the total of all notifications in the system).
Data collectionData collection allows Kyocera to improve the NDM product. Data such asuser's location, user's browser, what pages are visited, etc., are all sent toexternal systems (such as Google Analytics), where Kyocera can aggregateand analyze information. The user can opt in or out of this data collection on theData Collection tab. Kyocera does not collect or send personal data.The Data Collection page displays the Privacy Policy. Select the radio button forthe option you want to accept, and click Apply. There is also a Download link toget a copy of the KYOCERA Privacy Policy.
Database connectionSystem > System Settings > Database ConnectionFollow these steps to configure access to the database used for NDM data:
1 Go to System > System Settings > Database Connection.

NDM Functions
Net Device Manager 5-31
2 Click Edit (far right of the screen, at the top).
A warning screen is displayed.
3 Click Cancel or Continue on the warning screen.
4 Enter settings for connection to MS SQL database (installed separately): server,port number, user ID, and password (required for TCP connection to remoteSQL server).
• NDM connects to the MS SQL DB and checks for an existing DB; creates oneif necessary.
• If there is an existing DB, NDM checks the version and runs migration scripts
5 Click Test Connection to confirm server availability and validate settings.
6 Click Apply to accept changes or Cancel to leave unchanged from originalsettings.
For both Test Connection and Apply, if NDM cannot make a connection, itdisplays a red "Test failed" banner with a link. Clicking that link will providedetails on why the connection failed. Change your connection settings and try toconnect again.
Note: The Import Data button on the Database Connection edit screen letsyou upload KYOCERA Net Admin data into NDM. See Importing KYOCERANet Admin Data.
Devices / Device listThe Devices tab is the default screen for NDM. All devices that have beendiscovered by NDM are listed on the Device list page. You have the ability tocustomize your view of device data by managing columns, pagination,searching for keywords within device data, and configuring groups of devicesfor custom access.The main toolbar on the Devices tab contains the following buttons:
• Device groups – add, view, and manage devices in custom fixed or dynamicgroups; the default group is All devices
• Search
• Perform a quick search by typing all or part of a search term into the box• Advanced search options let you create specialize queries into device data
within NDM
• Add devices
• Add devices now• Save discovery settings• View deleted devices
• Delete devices• Device home• Refresh

NDM Functions
User Guide5-32
• Create Task
• Restart devices• Firmware upgrade• Device settings• Configurations
• More…
• Communication settings• Device tags
When paging is set to show more than a screen's worth of devices, as you scrolldown, a Back to top button will appear. Click it to jump back to the top of thescreen.
Devices: Add devicesDevice list > Add DevicesAdd devices is a process that scans networks for devices. If it finds newdevices, the application updates its database with information about the device.You can perform this process manually for single or multiple devices, orschedule it to run automatically according to a set schedule or based onconfigured event triggers. It is also possible to exclude devices from beingadded.Add devices uses a variety of discovery methods (local network, IP address /host name, IP address range, or imported list) to find printing devices on thenetwork. All found devices are added to NDM. If you wish to exclude one ormore devices from NDM management, delete them from the main Device listscreen.
1 Click Add Devices on the Device list screen.
Note: Click Add devices now to configure new discovery options, or Saveddiscovery settings to use previously saved options.
2 Select one or more Discovery Methods from the drop-down list using thecheckboxes.Choices are:
• By local network• By IP address or host name• By IP addrss range• By importing a list
Note: The format of the imported list is .txt or .csv. The imported file cancontain a list of IP address, a list of hostnames, or a combination of both. Eachaddress or hostname should be on a separate line. When importing a list, youwill see a preview of the list after browsing to and opening the file. If the file isinvalid, there will be no preview. When the file contains both IP Address andHostname, NDM will use whichever appears first.
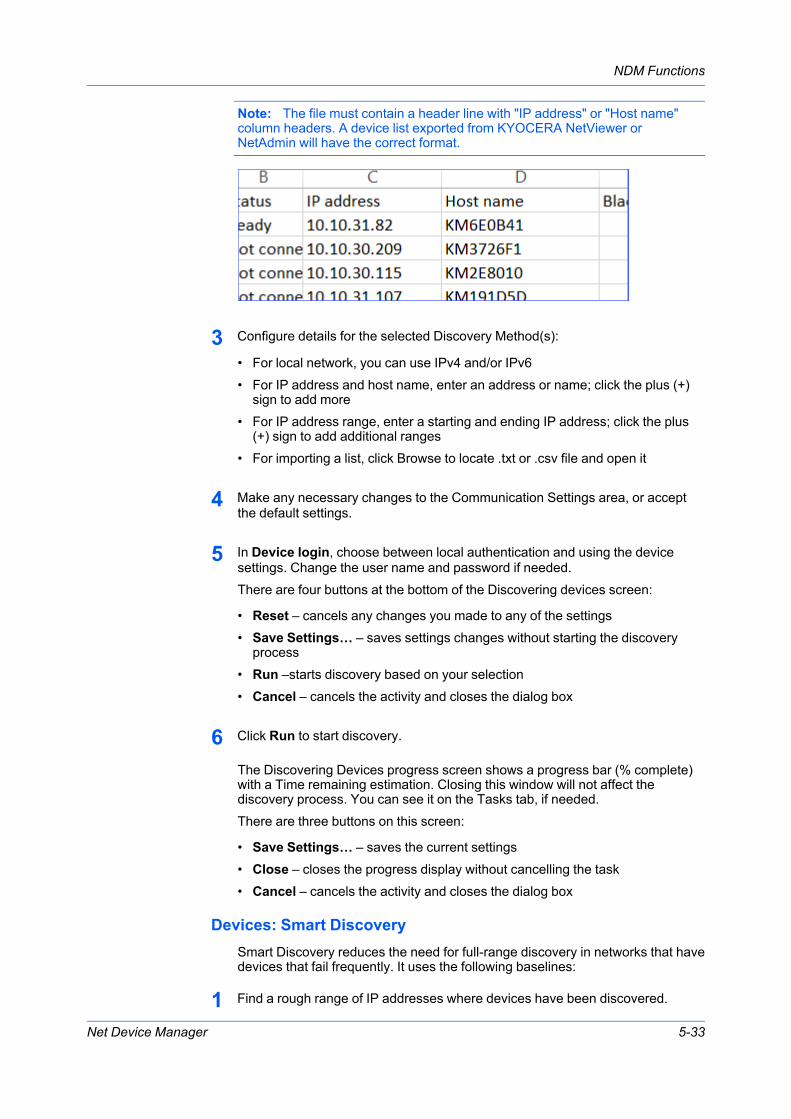
NDM Functions
Net Device Manager 5-33
Note: The file must contain a header line with "IP address" or "Host name"column headers. A device list exported from KYOCERA NetViewer orNetAdmin will have the correct format.
3 Configure details for the selected Discovery Method(s):
• For local network, you can use IPv4 and/or IPv6• For IP address and host name, enter an address or name; click the plus (+)
sign to add more• For IP address range, enter a starting and ending IP address; click the plus
(+) sign to add additional ranges• For importing a list, click Browse to locate .txt or .csv file and open it
4 Make any necessary changes to the Communication Settings area, or acceptthe default settings.
5 In Device login, choose between local authentication and using the devicesettings. Change the user name and password if needed.There are four buttons at the bottom of the Discovering devices screen:
• Reset – cancels any changes you made to any of the settings• Save Settings… – saves settings changes without starting the discovery
process• Run –starts discovery based on your selection• Cancel – cancels the activity and closes the dialog box
6 Click Run to start discovery.
The Discovering Devices progress screen shows a progress bar (% complete)with a Time remaining estimation. Closing this window will not affect thediscovery process. You can see it on the Tasks tab, if needed.There are three buttons on this screen:
• Save Settings… – saves the current settings• Close – closes the progress display without cancelling the task• Cancel – cancels the activity and closes the dialog box
Devices: Smart DiscoverySmart Discovery reduces the need for full-range discovery in networks that havedevices that fail frequently. It uses the following baselines:
1 Find a rough range of IP addresses where devices have been discovered.

NDM Functions
User Guide5-34
• Select a subset (some % from the middle) of these ranges on which to focus.
2 If there are known "not connected" devices outside of the found ranges,discover those individually.
3 Discover the two groups.
• Each "smart range" of IPs where there may be missing devices.• The group of known unconnected devices outside those ranges.
Smart Discovery runs in the background, once a day, at a time determined inthe NDM Maintenance component.
Devices: Add devices using saved discovery settingsDevices > Add devicesWhen you select Saved discovery settings, you have a choice of previouslyconfigured discovery options.
1 Use checkboxes to select from the list of saved settings:
• Click Add to create new settings to save• Click Edit to make changes to previously saved settings• Click Delete to delete settings
2 Click Run to start discovery using the saved settings.
The Discovering Devices progress screen shows a progress bar (% complete)with a Time remaining estimation. Closing this window will not affect thediscovery process. You can see it on the Tasks tab, if needed.There are three buttons on this screen:
• Save Settings… – saves the current settings• Close – closes the progress display without cancelling the task• Cancel – cancels the activity and closes the dialog box
Devices: Automatic discoveryDevices > Add devices > Saved discovery settingsConfigure automatic device discovery to run on a schedule. Follow these stepsto configure and use Automatic discovery:
1 Click Add devices on the Device list page.
2 Set discovery parameters as needed. When you have an acceptable set ofconditions, click Save Settings…
3 Give the saved settings a name, and click OK.
4 On the Saved discovery settings screen, click the checkbox by the settings youjust saved and click Edit.

NDM Functions
Net Device Manager 5-35
5 Scroll down to the Automatic Discovery area.
6 Enable Automatic Discovery by setting the On/Off switch to On.
7 Click the checkbox by On recurring schedule.
8 Select the recurrence interval by clicking one of the radio buttons for:
• Daily
• Set the time of day
• Weekly
• Choose a day of the week, and time of day
• MOnthly
• Set a day of the month, between 1 and 31 (or "Last day of the month") andtime of day
9 Click Save.
Saved discovery settings will now have a Run Schedule entry added.
To access a saved discovery in the future, click Add devices > Saveddiscovery settings.If you want to run a scheduled discovery immediately, click Run on the page.
Devices: ColumnsThe column selection button (+) is at the far right of the column headers row onthe Device list screen.Using column selections, you can customize the data presented on the Devicelist and in device groups by setting configurations for Dynamic groups.The column selections are grouped into properties groups as follows:
• Common columns• General• Capability• Counter• Firmware• Asset
Select a column group that has a subset of columns preconfigured and you canuse the column group checkbox to select or remove ALL columns in that group.The basic Device list display uses Common columns and General as defaults.To change, click the column select button and then check or uncheck thecolumn group name to add or remove all columns in that group from yourdisplay.If you want to add or remove individual columns to customize the Device listdisplay temporarily, use the individual column checkboxes.To close the column selection list, click the column group icon again.
NDM Functions
User Guide5-36
Once you've set the columns to use for the Device list, you can rearrange themby dragging them into a new position (click on the column name on the list anddrag left or right). You can also resize the columns; hover over the dividing linesuntil the cursor changes, then click and drag the column width.
Note: Changes made to column selections hold until you change the DeviceGroup that you are viewing. They remain in place if you switch pages, orchange the paging option (to show more or fewer devices on the screen). Youcan switch to another tab (Tasks or Notifications, for example) and return toDevices with the column changes maintained, as well.
Similarly, changes made by dragging and dropping columns to reposition themrevert to default positions when you change Device Groups.All column changes revert to defaults when you log off and back on to NDM.
Devices: Delete devicesWhen you delete a device from a device list, NDM places it in a Deleted devicesgroup. Remove devices to make them non-discoverable for security purposes.The Add devices task cannot find deleted devices, and NDM cannot modifydeleted devices.
1 From any device group (default or custom), select one or more devices usingthe checkboxes.
2 Click Delete devices at the top of the screen.
3 Click Yes on the pop-up window to confirm.
NDM removes the device(s) from all groups.
Note: You can delete devices from any group. The effect is global, affectingall groups. If you delete a device from a custom group (fixed or dynamic), it isremoved from all other groups. If you then restore that device, it reappears in allgroups that previously showed it. You can restore deleted devices only from theDeleted Devices list, accessed from the Add devices menu.
Devices: Restore deleted devicesDevice list > Add Devices > View Deleted DevicesWhen you restore devices that have been deleted, they can be managed inNDM and will be found when Add devices is run.
1 Click Add devices, and select View deleted devices from the menu.
2 Select one or more devices from the Deleted Devices list using thecheckboxes.
3 Click Include Devices.
There is no confirmation; NDM restores the selected device(s).You can download a list of deleted devices by clicking Download Log on theDeleted Devices screen. The result is a zipped .csv file showing:

NDM Functions
Net Device Manager 5-37
• Model name• Serial number• IP address• Host name• Description
Device GroupsDevices > Groups>Rather than sorting or selecting columns to display each time you want to seejust certain devices or device property, use Device Groups to organize deviceson meaningful criteria; i.e. location, buildings, floors, specific device properties,etc.Fixed groups will contain a static set of devices and use the selected columnsfrom the source group. Dynamic groups let you set up detailed search criteriafor adding devices and choosing columns to be displayed for that group.You can create as many folders and sub-folders as you need under DeviceGroups. Folders can help you further organize your device information. Usingthe Move icon, you can click and drag folders and groups to rearrange thedisplay order and move groups in and out of folders.
Device Groups: Fixed vs. dynamicWith a Fixed group, the devices displayed do not change except for deletion ofone or more devices.With Dynamic groups, on the other hand, the system adds newly discovereddevices that match your group criteria. Dynamic groups behave the same waywith Deleted devices – the device is moved to Deleted devices and stays there,undiscoverable, until and unless it is edited to Include Device. Other conditionsthat affect whether or not device display in Dynamic groups include DeviceProperty updates from polling, i.e.; a change in Device Status if that is specifiedin the criteria of a Dynamic group.A simple example of when to use a Dynamic rather than a Fixed custom group:You want to have a listing that shows all devices with "TASKalfa" as part of themodel name. You can sort All devices to find them, you can use quick search tofilter for them on the All devices screen, but you don't want to have to set up asearch or sort whenever you want to see just those devices. You can select alldevices with "ASKalfa" in the model name in the All devices group and create aFixed group, but the only condition under which that list would change would beif one or more devices were deleted (or included).However, you want to know when Add Devices discovers a new TASKalfadevice. That won't work with a Fixed group; you'd have to delete it, reselect allTASKalfa devices and create a new Fixed group to capture any newlydiscovered devices.By configuring a Dynamic group to search for devices where the Model Namecontains "TASKalfa," when the system discovers new TASKalfa devices, itupdates the custom Dynamic group automatically.
Device Groups: Add a dynamic device groupDevices > GroupsDynamic group allows you to create a device group based on selected searchcriteria.
NDM Functions
User Guide5-38
1 Click Groups.
2 Click the Add Group icon.
3 Click Dynamic.
4 Type the name of the new group, up to 64 characters.
5 Select the location for the Group (a pre-existing folder or no folder.)
6 Configure selection criteria.
• You can choose to match all or any of the selected criteria• Choose the Property, Condition and Value for each
Note: To jump to a specific property, start typing the property name to limitthe list
• Click the + symbol to add additional criteria (maximum: 5 criteria)
7 Customize the columns that will be shown (see Device Groups: Columns indynamic groups)
8 When done click Submit.
Device Groups: Columns in dynamic groupsWhen creating or editing a Dynamic group, you have complete control overcolumn selection and order. Selecting columns or groups of columns works thesame way as it does on the Device list screen. Use the Organize columns drop-down (+) list to select or deselect column groups (default is for Commoncolumns plus General, as with the Device list page). You can select individualcolumns with checkboxes as well. Once you've made your selections, you canarrange them using the list of columns under the drop down list.That list shows all the columns that you've already selected in their defaultsequence. There are up and down arrows on the right side of the box. Click onany column name and use the up and down arrows to reposition it in the list.You can also remove a selected column here by click the X by the name onceyou've selected it.
Device Groups: Add a fixed device groupDevices > GroupsA Fixed group is a custom group that includes devices selected from an existinggroup. You can use a fixed group to select specific devices, or devices withspecific properties from any existing group and save it as a custom fixed groupto organize into folders to help you find just those devices in the future.
1 With any group displayed (custom or default), select one or more devices fromthe list.
Note: If you want to create the new group in a folder, start the process withthe folder selected.

NDM Functions
Net Device Manager 5-39
2 Click Groups.
3 Click the Add Group icon.
4 Click Fixed.
5 Type the name of the new group, up to 64 characters.
6 Click Submit.
The new group appears in the selected folder.
Device Groups: Add a folderDevices > GroupsFolders are containers of groups that help you to organize groups intohierarchies.
1 Click the Add Folder icon.
2 Provide a name and select a location from the drop-down list.
3 Click Add.
Device Groups: Delete a device groupDevices > Groups
1 Click the Delete icon (trash can) by the group to delete.
2 Click Yes on the next screen.
Device Groups: Delete a device group folderDevices > Groups
1 Click the Delete icon (trash can) by the name of a folder to delete.
2 Click Yes on the next screen.
Groups stored in that folder are also deleted.
Device Groups: DownloadDevices > GroupsDownload a list of devices in a selected group with all columns of data, in .csvformat.
1 Select a group on the Groups list panel.
Select individual devices using checkboxes on the group list, if you want to limitthe list.

NDM Functions
User Guide5-40
2 Click Download at the bottom of the panel.
3 Click Yes on the confirmation screen.
4 Save or open the resulting file.
Device Groups: Duplicate a device groupDevices > GroupsYou can create a copy of a fixed or dynamic group. This is useful if you want tocreate a new group that is only slightly different from an existing group.
1 Select a group.
2 Click Clone group.
The new group, named Copy (#) of [original name] is added to the same folder.
3 Edit the new group, rename, and change criteria, as needed after cloning.
Remember that if you clone a Fixed group, you can only change the name andfolder location.
Device Groups: Edit a device groupDevices > GroupsFor Fixed groups, you can change the group name, folder in which the group isstored, and edit devices in the group. Select a fixed group and click Edit.Change the name, if wanted. Use check boxes to select devices in the groupand click Submit. The edited group will only have the devices selected.For Dynamic groups, you can also make changes to the selection criteria.Deleting a device from any group moves it into the Deleted devices, removes itfrom all groups, and makes that device undiscoverable. If you want to makechanges to a Fixed group, delete the group and start over selecting devicesfrom another group to use.You can move groups, put them into, or remove from folders, change the order,etc. by clicking and dragging the move icon on the Groups list.
Device Groups: Rename a device group folder
1 Select a folder.
2 Click Edit.The name on the folder becomes editable.
3 Edit the folder name in the edit box, and press Enter to save.
Note: To exit edit mode without change, you must still place your cursor in thename field and press Enter.
NDM Functions
Net Device Manager 5-41
Device Home on a single deviceDevices > Device HomeDevice Properties > Device HomeDevices that contain web servers can display a web page containinginformation about the device's status and settings. The layout and informationshown on this page differs by device model. Select a device or start from theDevice Properties page, and click Device home to open the web page for thatdevice. (This action only works for single devices, not for groups or multipledevice selections).
Device propertiesWhen you click the hyperlink of any device model name on the Device list, youaccess detailed information about that device with multiple tabs and options forviewing and managing device information. The main tabs (depending on thedevice) are Device Properties, Management, Address Book, Users, andDocument Box. No matter which tab you are using in this area, at the top left ofthe screen, there is a Back to Device List option.The following buttons and tabs are available with all selections on the DeviceProperties tab:
• Buttons at the top: Restart devices, Firmware upgrade, Device Settings,Device home, and Refresh (device dependent)
• Four tabs to select the type of information to view: General, Counters, Alerts,and Logs
Device Properties: GeneralThis screen is divided into functional areas to display information in the followingcategories (listed here alphabetically):
• Capabilities• Communication Settings (editable by clicking the pencil icon, opens in a pop-
up window)• Description (editable by clicking the pencil icon, opens in a pop-up window)• Firmware versions• General (printing device image, model, serial number, host name,
manufacturer, IP address, Mac address, status and connection date/time)
• Hover over the Information icon (i) to see a pop up display of optionsinstalled on the device
• Click the hyperlinked status message to jump to the Alerts tab
• Location (editable by clicking the pencil icon, opens in a pop-up window)• Media Input• Memory (total memory, RAM disk status, RAM disk capacity, SD card
capacity, SD free space)• Options• Panel Message• Polling Intervals• Tags (editable by clicking the pencil icon, opens in a pop-up window)• Toner Information (color, name, remaining days, level)
NDM Functions
User Guide5-42
• Wi-Fi
Device Properties: CountersPresents count information in a table format for multiple functions and papersizes for Black & White, Full Color, Single Color printing and a Total column.
Device Properties: AlertsPresents a table of alert information: Date, Status, Alert Description,Troubleshooting, and Code (PJL code). The system will show all current alertmessages per device and up to 15 historical alerts. Status listed will be eitherActive or Resolved. The Troubleshooting column provides a tip for resolving thealert.
Device Properties: LogsShows two charts: Toner Log and Counter Log. If there have been no changesto data in the log on a given day, NDM shows only one plot point for that day.
Device Properties: ManagementManagement has three sub-sections: Applications List, Certificate List, andOptional Functions. If a device does not support a particular feature set, thecorresponding management sub-tab will be hidden.
Device Settings: Multiple devices
1 Use check boxes to select individual devices from the Device list screen orselect a Group from the Groups area.
2 Click Create task.
3 Click Device Settings.
4 Confirm selected devices, uncheck if needed, or cancel to start over.
5 Click Next.
6 Follow the steps in sections below based on the Method you select:
Create New, Create from Source Device, or Create from Source File
7 When done with Settings, click Next.
8 On the Schedule screen, configure options to run now, later, or based on aconfigured event trigger and click Next.The Task screen shows Name, Description and Receive notifications options.
9 The system automatically files in the task name based on the following format:Task MMddyyyy-HHmm. You may edit the task name, if wanted.
NDM Functions
Net Device Manager 5-43
10 Enter a description, if wanted.
11 Click the check box by Receive notifications (unchecked by default) to getemail when the task finishes.
12 Click Next.
13 Confirm details screen: review the changes, click Back to make other changes,or click Apply to run the task.View Progress on the next screen. Closing this window will not affect the taskprogress.
14 On the Tasks tab, check the Active tab to view the task if still running, check theScheduled tab to view the scheduled task or review completion status on theCompleted tab.
Create NewThe Create New method starts from a set of all default values, all unchecked.Make changes to preferred settings by checking the boxes and entering newsettings to apply to the target device(s).
1 On the Device Settings screen, configure the selected settings. You can scrollthrough All settings, or filter your choices using System, Default, or Network.See sections below for Advanced and Preview selections.
2 Save your selections to a file for future re-use, if wanted. See Creating a sourcefile.
3 Click Next.
Create from source deviceThis method loads settings from the source device and provides the opportunityto make changes to apply to the target device(s).
1 Select a device from the list to use as the source for settings changes and clickNext.You can search the list on Model name, Serial number, IP address, orDescription.Wait while NDM establishes a connection to the device and loads the settings.
2 On the Device Settings screen, configure selected settings. You can scrollthrough All settings, or filter your choices using System, Default, or Network.See sections below for Advanced and Preview selections.
3 Save your selections to a file for future re-use, if wanted. See Creating a sourcefile.
Create from source file
1 On the Source screen, browse to select a settings file and click Next.
NDM Functions
User Guide5-44
2 Review the selected settings on the Device Settings screen.
You may change or add additional selections here, as well. You can scrollthrough All settings, or filter your choices using System, Default, or Network.
3 If you make any changes to the settings from the original source file, you cansave your selections for future re-use. See Creating a source file.
See other sections for Advanced and Preview selections.
Advanced device settingsIf you wish to change settings that are accessed through the Advanced section,please contact your Sales company. Changing Advanced settings poses a riskof causing damage to printing devices and should not be attempted withoutguidance.
Device settings previewTo check that selected settings will be applicable to the devices selected, usethe Preview function.
1 Click Preview on the Settings screen.
2 Select a device model from the drop-down list.
3 Review the selected settings and notes to confirm that each is supported on theselected device
Note: If no selected settings are supported, the Preview screen will be blankfor the selected device.
Warning: If you do not see a setting reflected for a particular device in thePreview, or the Preview shows that the model does not support the selectedproperty or setting, you may consider removing that device from the list ofdevices for this action. NDM will skip unsupported settings when DeviceSettings runs.
4 Make any needed settings changes and click Next to continue.
Create a source file
1 On the Method screen, choose New or From source device.
2 Configure the settings.
3 Click Save to file.
Save to file creates a zip file of checked device settings in .xml format. If youchanged settings in only one of the areas, Save to file will create a single .xmlfile, i.e.; just "DeviceSystemSettings.xml."
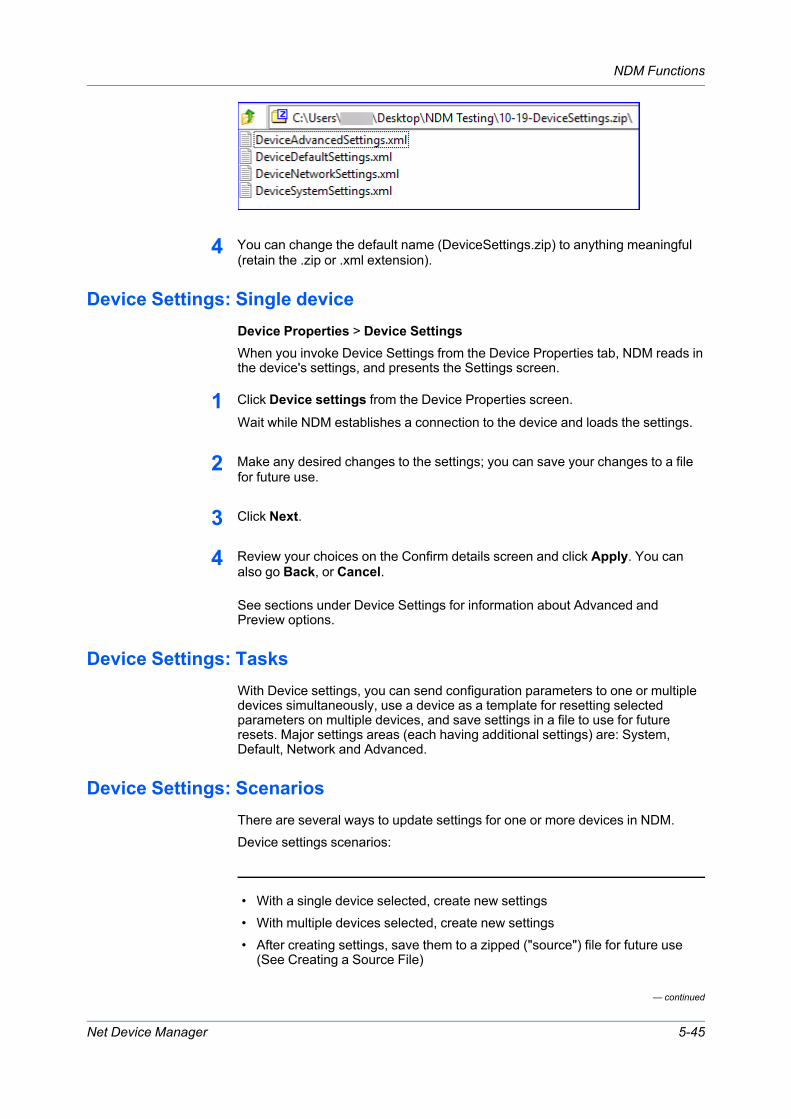
NDM Functions
Net Device Manager 5-45
— continued
4 You can change the default name (DeviceSettings.zip) to anything meaningful(retain the .zip or .xml extension).
Device Settings: Single deviceDevice Properties > Device SettingsWhen you invoke Device Settings from the Device Properties tab, NDM reads inthe device's settings, and presents the Settings screen.
1 Click Device settings from the Device Properties screen.
Wait while NDM establishes a connection to the device and loads the settings.
2 Make any desired changes to the settings; you can save your changes to a filefor future use.
3 Click Next.
4 Review your choices on the Confirm details screen and click Apply. You canalso go Back, or Cancel.
See sections under Device Settings for information about Advanced andPreview options.
Device Settings: TasksWith Device settings, you can send configuration parameters to one or multipledevices simultaneously, use a device as a template for resetting selectedparameters on multiple devices, and save settings in a file to use for futureresets. Major settings areas (each having additional settings) are: System,Default, Network and Advanced.
Device Settings: ScenariosThere are several ways to update settings for one or more devices in NDM.Device settings scenarios:
• With a single device selected, create new settings• With multiple devices selected, create new settings• After creating settings, save them to a zipped ("source") file for future use
(See Creating a Source File)

NDM Functions
User Guide5-46
• With a single device selected, select a source device (on intermediate"Source" screen) and use its settings
• With multiple devices selected, select a source device (on intermediate"Source" screen) and use its settings
• After creating settings, save them to a zipped ("source") file for future use(See Creating a Source File)
• With a single device selected, select a previously saved source file• With multiple devices selected, select a previously saved source file
Note that if you only need to use Device Settings for a single device, you canaccess a simplified wizard by clicking the Device Properties icon for thatdevice and then clicking Device Settings from the Device Properties screen.
Device Tags: Set for a single deviceDevice Properties > General > Tags (Edit icon)From the Device Properties screen, you can make changes to the way thatNDM communicates with a single device.
1 Click the Pencil icon by Tags on the Device Properties > General screen.
2 Type text into the box (maximum per tag is 128 characters).
3 Click the plus (+) sign to add more tags.
4 Click Save when done.
To change or remove tags, follow this process and use the delete (-) to removetags.
Device Tags: Set for multiple devicesDevice list > ...More > TagsFrom the Device list, either select multiple devices using check boxes, or selecta group to act on the entire list.
1 Click …More and then Device Tags from Device list.
2 Type text into the box (maximum per tag is 128 characters).
3 Click the plus (+) sign to add more tags.
4 Click Save when done.
NDM applies the tags to all selected devices or all devices in the selectedgroup. To change for individual devices, start from Device Properties. Formultiple devices or a group, remove tags using this process.

NDM Functions
Net Device Manager 5-47
Device UsersDevice Properties > UsersUsers who are authorized to use a device are on a user list with their logininformation and passwords. When user authentication is set, only users who areadministrators on the device are able to use the various functions of the device.In Device Users, an administrator can create entries for the following featuresand send them to the device.
• Users – manage authorized device users• Simple Login Keys – simplify device login• Network groups – manage groups of network users• Authentication – select settings for user login, network user properties,
password policy, and user account lockout
Any entries awaiting submission to the device appear below the toolbar asbubbles with Add user, Edit user, or Delete user and a name. To remove anentry before submitting, click the X below the bubble. If you switch tabs beforeclicking Submit Address Book, a pop up will ask for confirmation to abandonuncommitted changes.
Note: To access the user list of a device, the correct Login username andPassword must be in Communication Settings for the device. If anadministrator password is set for the device, then only an administrator canchange the user list.
To access device users functions, start with Device Properties:
1 In the Device list, click a device under Model name.
2 Click Users.
3 Click Users (different tab) again.
Device Users: Add usersDevice Properties > Users > UsersYou can add users to the user list on the device. You can use the list to controlwhich users are able to operate or access the device.
1 In the Users tab, click Add.
2 Select available device user options under General, Advanced, andAuthorization. Login username and User name are required.
3 Click Save.
4 Perform other Device User operations (add, delete, and edit for Users, SimpleLogin Keys and Network Groups; plus import for Users, Groups authorization forNetwork Groups, and options on the Authentication tab).
5 Click Open Submit Panel.

NDM Functions
User Guide5-48
The submit panel opens on the right side of the screen with the informationdisplayed with an X in a bubble. Cancel the change by clicking the X.
6 Click Submit at the bottom of the panel.
7 Click Submit on the pop-up confirmation.
Check the progress either by leaving the progress window open or looking forthe task on the Tasks tab.When you close the progress window, the screen refreshes to show thechange(s).
Device Users: Delete usersDevice Properties > Users > UsersTo delete a device user, click the check box by the user and click Delete. Followthe rest of the steps under Add.
Device Users: Edit usersDevice Properties > Users > UsersTo edit a device user, click the check box by the user and click Edit. Follow therest of the steps under Add.
Device Users: Export a user listDevice Properties > Users > UsersYou can save a list of users to a file on your computer or network. Once saved,you can import it to another device. NDM does not export or import Passwords;you must enter them manually.
1 In the Device Users tab, Click Export.
2 Click Continue.
3 Open or save the exported file (CSV).
Device Users: Import a user listDevice Properties > Users > UsersYou can import a list of device users that was exported from another device.Passwords are not exported or imported and must be entered manually.
1 In the Device Users tab, click Import.
2 In the Import Users dialog box, drag a valid user file (CSV) into the box, or clickthe box and browse to find a file.
3 Click Upload File to import the file, or click REMOVE FILE to delete it.
NDM Functions
Net Device Manager 5-49
4 If the first line of the .CSV file contains headers, select Include file headers toinclude them. Clear the check box if you want the first line of the file to beignored and only the data used.
5 To map the columns to the properties, select available options under eachproperty.
6 Click Save.
7 Perform other Device User operations (add, delete, and edit for Users, SimpleLogin Keys and Network Groups; plus import for Users, Groups authorization forNetwork Groups, and options on the Authentication tab).
8 Click Open Submit Panel.The submit panel opens on the right side of the screen with the informationdisplayed with an X in a bubble. Cancel the change by clicking the X.
9 Click Submit at the bottom of the panel.
10 Click Submit on the pop-up confirmation.
Check the progress either by leaving the progress window open or looking forthe task on the Tasks tab.When you close the progress window, the screen refreshes to show thechange(s).
Device Users: AuthenticationDevice Properties > Users > AuthenticationWith Authentication, an administrator can select settings for user login, networkuser properties, password policy, and user account lockout.Changes in progress on the Authentication tab use the same Submit Panel asother actions in Device Users.To access, start with Device Properties:
1 In the Device list, click a device under Model name.
2 Click Users.
3 Click Authentication.
To submit authentication changes, follow these steps:
4 Click Open Submit Panel.The submit panel opens on the right side of the screen with the informationabout the change displayed with an X in a bubble. Cancel the change byclicking the X in the bubble.
Note: For Authentication there is only a single bubble to reflect alluncommitted changes.
NDM Functions
User Guide5-50
5 Click Submit at the bottom of the panel.
6 Click Submit on the pop-up confirmation.
Check the progress either by leaving the progress window open or looking forthe task the Tasks tab.When you close the progress window, the screen refreshes to show thechanges.
Authentication: GeneralDevice Properties > Users > AuthenticationUnder General, an administrator can configure devices to require a user loginbefore access. If you select Use local authentication, the device uses theDevice User List to authenticate the login user. If you select Use networkauthentication, the device uses the domain server to authenticate the loginuser. Support varies by model.
1 Click the arrow to open General.
2 If you want to set user authentication as a device setting, click Enable userLogin.
3 Select the authentication mode.
If you select Use network authentication, the related feature below it becomeavailable. Only ASCII characters are allowed in the text boxes.
4 Type a domain name in the Domain name text box to a maximum of 256characters, depending on the format of the firmware file used on your device.For some models, you may select multiple domains from a list of registereddomains. If more than one domain is specified, select one for the default.Change the domain name by selecting it from the list and clicking Edit.
5 Select a Server type from the list. If the server type is not External, only Servertype and Host name settings are available.
6 Type a host name or IP address in the Host name text box.
7 Type a Port number, if available. The valid range is 1-65535.
Select additional options:
• Permit jobs with unknown IDs – Select if you want a device to have no userrestrictions and accept print jobs without a user login and password.
• Local authorization – Select to prohibit job use by specific users on a devicethat supports this feature.
• Group authorization – Select to permit all users to operate withinpermissions set for the group.
• Simple login – Select to enable simple login for a device. Support for thisfeature varies by model.
• ID card login – Depending on the model, there will be choices for ID cardlogin, password login, on, off, use password or use pin

NDM Functions
Net Device Manager 5-51
8 Click Save.
See submit instructions under Device Users: Authentication.
Authentication: Network user propertiesDevice Properties > Users > AuthenticationUnder Network User Properties, an administrator can set network userproperties as a device setting. Settings for user properties vary by model.
1 Click the arrow to open Network User Properties.
2 To set network user properties as a device setting, select Obtain network userproperties. Settings vary by model.
3 Select LDAP settings:
• Server name – Enter a server name to a maximum of 64 characters• Port number – Type or select a port number from 1 to 65535• Search timeout – Type or select a search timeout from 5 to 255 seconds• Encryption – Select an encryption type. The LDAP encryption can be saved
to SSL/TLS, STARTTLS, or it can be set to Off• Authentication type – Select authentication type: Simple or SASL
4 The device uses Acquisition of user information settings for search and retrievalof login user information from the LDAP server. Enter one or two user names, toa maximum of 32 characters. Enter a valid email address, to a maximum of 32characters.
5 Click Save.
See submit instructions under Device Users: Authentication.
Authentication: Password policyDevice Properties > Users > AuthenticationAn administrator can set password policy for all device users.
1 Click the arrow to open Password Policy.
2 To enable password policy settings, select Use password policy.
3 To set a password expiration, select Maximum password age, and select thenumber of days, from 1 to 64.
4 You can set the Maximum password length from 1 to 64 characters.
5 Under Password complexity, select desired password restrictions.
6 Click Save.
NDM Functions
User Guide5-52
See submit instructions under Device Users: Authentication.
Authentication: User account lockoutDevice Properties > Users > AuthenticationAn administrator can set device user account lockout settings.
1 Click the arrow to open User Account Lockout.
2 Select Enable lockout.
3 Select the allowed number of retries, from 1 to 10.
4 Select the lockout time, from 1 to 60 minutes.
5 Select whether to lock out all connections or remote login only.
6 Click Save.
See submit instructions under Device Users: Authentication.
Device Users: Network groupsWith Network groups, you can create and manage groups of network users onthe device. You can set printing permissions and restrictions for the group. Thisis useful when Use network authentication is selected in the Authentication tab.To access, start with Device Properties:
1 In the Device list, click a device under Model name.
2 Click Device Users.
3 Click Network groups.
Network Groups: Add a network groupDevice Properties > Users > Network groupsYou can add user groups to the group list on the device.
1 Click Add.
2 In the Add group dialog box, enter a Group ID (numerals only) and a GroupName.
3 Select the Access level.
4 Under Authorization, select the desired permissions and restrictions. Availableoptions vary by model.
5 Click Save.

NDM Functions
Net Device Manager 5-53
6 Perform other Device User operations (add, delete, and edit for Users, SimpleLogin Keys and Network Groups; plus import for Users, Groups authorization forNetwork Groups, and options on the Authentication tab).
7 Click Open Submit Panel.The submit panel opens on the right side of the screen with the informationdisplayed with an X in a bubble. Cancel the change by clicking the X.
8 Click Submit at the bottom of the panel.
9 Click Submit on the pop-up confirmation.
Check the progress either by leaving the progress window open or looking forthe task on the Tasks tab.When you close the progress window, the screen refreshes to show thechange(s).
Network Groups: Delete a network groupTo delete a network group, click the check box by the group name and clickDelete. Follow the rest of the steps under Add.
Network Groups: Edit a network groupTo edit a network group, click the check box by the group name and click Edit.Follow the rest of the steps under Add.
Setting group authorizationDevice Properties > Users > Network GroupsYou can choose whether all users can operate within permissions set for thegroup.
1 Click Group authorization.
2 In the Group authorization dialog box, select whether to enable or disable groupauthorization.
3 Click Save.
4 Perform other Device User operations (add, delete, and edit for Users, SimpleLogin Keys and Network Groups; plus import for Users, Groups authorization forNetwork Groups, and options on the Authentication tab).
5 Click Open Submit Panel. The submit panel opens on the right side of thescreen with the information about the change displayed with an X in a bubble.Cancel the change by clicking the X in the bubble.
6 Click Submit at the bottom of the panel.
7 Click Submit on the pop-up confirmation.

NDM Functions
User Guide5-54
Check the progress either by leaving the progress window open or looking forthe task the Tasks tab.When you close the progress window, the screen refreshes to show thechanges.
Device Users: Simple Login keysWith Simple login keys, you can create a number shortcut to bypass the loginrequirement on a device.To configure Simple Login settings for your device:
1 In the Device list, click a device under Model name.
2 Click Device Users.
3 Click Simple Login Keys.
Simple Login Keys: Add a keyDevice Properties > Users > Simple Login Keys
1 Click Add.
2 In the Add Simple Login Key dialog box, select an icon and type a name to amaximum of 32 characters.
3 Select a Specific number, or select Next available number to set the numberautomatically.
4 Select an Authentication mode.
• If Use local authentication is selected, click Select, and select a login username
• If Use network authentication is selected, type a Login username and Loginpassword
5 Select Enable password login to require a password at login. Clear the checkbox to disable the password requirement.
6 Click Save.
7 Perform other Device User operations (add, delete, and edit for Users, SimpleLogin Keys and Network Groups; plus import for Users, Groups authorization forNetwork Groups, and options on the Authentication tab.)
8 Click Open Submit Panel.The submit panel opens on the right side of the screen with the informationdisplayed with an X in a bubble. Cancel the change by clicking the X.
9 Click Submit at the bottom of the panel.
NDM Functions
Net Device Manager 5-55
10 Click Submit on the pop-up confirmation.
Check the progress either by leaving the progress window open or looking forthe task on the Tasks tab.When you close the progress window, the screen refreshes to show thechange(s).
Simple Login Keys: Delete a keyTo delete a key, click the check box by the key name and click Delete. Followfrom step 7 under Add.
Simple Login Keys: Edit a keyTo edit a key, click the check box by the key name and click Edit. Follow fromstep 7 under Add.
Device Users: Settings in Multi-set configurationsManaging Device Users in a Multi-set configuration follows the same basicsteps as managing Device Users for a single device from the Device Propertiesscreen. You can manage device users, network groups, simple login keys, andauthentication settings. You can add, edit, delete, and import device users; add,edit, and delete network groups and simple login keys; and change allauthentication settings.The Enable switch gives you the option to disable configuration changesentirely for each tab. (Note: If you set it to Disable on all the tabs, the system willpop up a warning icon for the Users and Groups configuration or disable theNext button.)On the Preferences tab in Multi-set, there are two options for handling existingdata:
• Full Overwrite• This option ignores current device entries and overwrites all data on the
device. A Full Overwrite cannot be undone.• Smart Merge (default/recommended)
This option combines existing data on the target device(s) with source data forthe Multi-set operation (a source device or saved file.) Smart Merge performsthe merge based on the Number of the entry. Where there are duplicateNumbers, Smart Merge overwrites target device data with source data having amatching ID number.Warning: both Full Overwrite and Smart Merge overwrite existingauthentication settings.With Enable set to On, no other selections and/or changes made, and thedefault of Smart Merge selected in Preferences, all source entries will bemerged or added to the target device(s) entries.
Document BoxA Document Box is a type of virtual mailbox on a device, used by individualsand groups to manage files that are stored on the device.

NDM Functions
User Guide5-56
— continued
Note: If authentication is set, accessing the document box requires thecorrect User name and Password in the Communication Settings for thedevice.
Depending on the device model, the following kinds of document boxes areavailable:
• Custom Box – stores print data for each individual user on the printer andallows the user to print single or multiple copies of the stored data later usingthe printer's operation panel
• Subaddress Box –- a box for storing received originals on the machine forforwarding with a sub address and password
• Fax Box – a box for storing received originals on the machine to which thefax system is installed
• Fax Polling Box – a box for storing originals to be used in pollingtransmissions
Document boxes can be created, edited, deleted, imported, and exported. Youcannot add or delete a Fax Polling Box. Password protected document boxescannot be exported unless device authentication is set.CCRX linkYou can open the device home page from the Document Box view. ClickDevice home to display this web page.Open Submit PanelWhen you add, edit, delete, or import document boxes, the task appears in theSubmit Panel list. In this list, you can choose whether to finish or cancel thetask.
Document Box: Add a document boxDevice Properties > Document BoxYou can create a new document box on a device. You cannot add a Fax PollingBox.
1 Click Add.
2 Configure the properties of the new document box:
Property Description
Name Type the new box name.
Type Box type depends on model: Custom box, SubaddressBox, Fax box.
Number Use automatic numbering or select from list (boxnumbers may not be reused).
Owner Select a new owner from the list.
Owner setting Select the type of owner from the list (Off, Local user,or Network user).
Domain Select a domain.
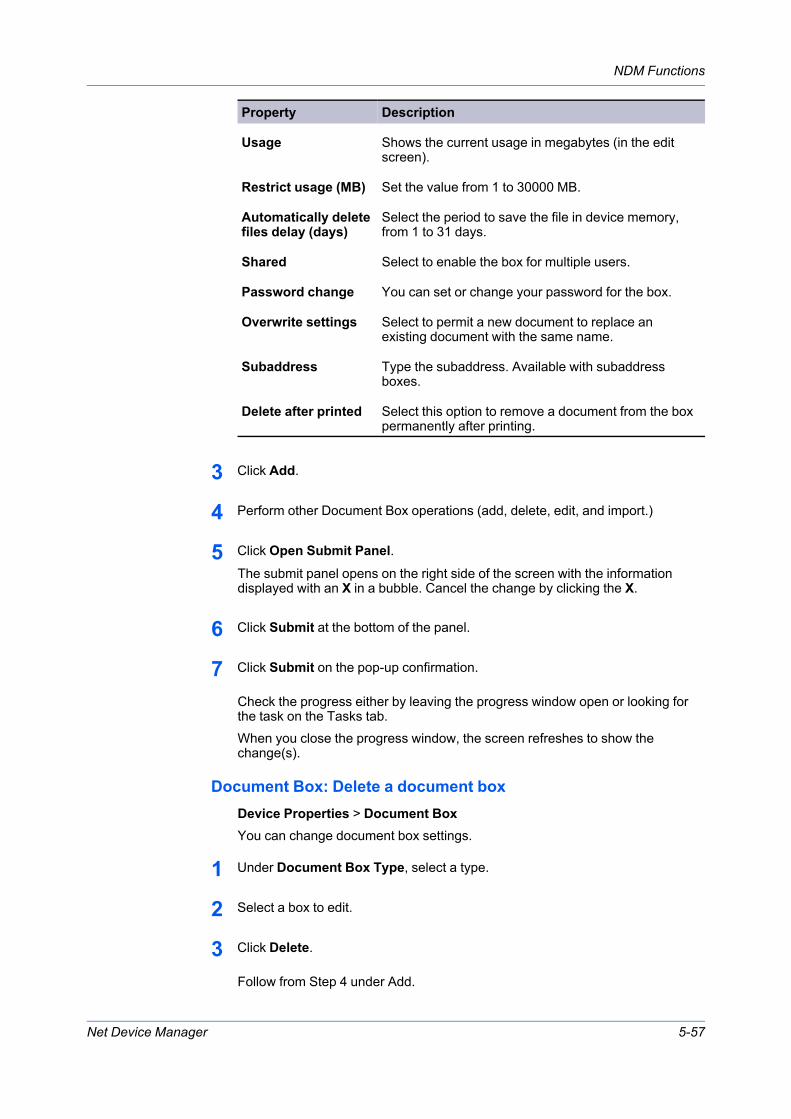
NDM Functions
Net Device Manager 5-57
Property Description
Usage Shows the current usage in megabytes (in the editscreen).
Restrict usage (MB) Set the value from 1 to 30000 MB.
Automatically deletefiles delay (days)
Select the period to save the file in device memory,from 1 to 31 days.
Shared Select to enable the box for multiple users.
Password change You can set or change your password for the box.
Overwrite settings Select to permit a new document to replace anexisting document with the same name.
Subaddress Type the subaddress. Available with subaddressboxes.
Delete after printed Select this option to remove a document from the boxpermanently after printing.
3 Click Add.
4 Perform other Document Box operations (add, delete, edit, and import.)
5 Click Open Submit Panel.The submit panel opens on the right side of the screen with the informationdisplayed with an X in a bubble. Cancel the change by clicking the X.
6 Click Submit at the bottom of the panel.
7 Click Submit on the pop-up confirmation.
Check the progress either by leaving the progress window open or looking forthe task on the Tasks tab.When you close the progress window, the screen refreshes to show thechange(s).
Document Box: Delete a document boxDevice Properties > Document BoxYou can change document box settings.
1 Under Document Box Type, select a type.
2 Select a box to edit.
3 Click Delete.
Follow from Step 4 under Add.

NDM Functions
User Guide5-58
Document Box: Edit a document boxDevice Properties > Document BoxYou can change document box settings.
1 Under Document Box Type, select a type.
2 Select a box to edit.
3 Click Edit.
4 Change settings as desired, see properties under Add a document box. Youcannot change the box type.
5 Click OK.
Follow from Step 4 under Add.
Document Box: Export a document boxDevice Properties > Document BoxYou can export one or more document boxes to a file, and then import the fileinto another device. Password protected document boxes cannot be exportedunless authentication is set on the device.
1 Under Document Box Type, select a type.
2 Select one or more document boxes.
3 Click Export.
4 Name and save the file (CSV).
Document Box: Import a document boxDevice Properties > Document BoxYou can import document boxes to a device. NDM merges the imported boxeswith existing boxes.
1 Under Document Box Type, select a type.
2 Click Import.
3 In the Import Document Box dialog box, drag a valid CSV file into the box, orbrowse to find a file.
4 Click Upload file to import the file, or click REMOVE FILE to delete it.
5 To map the columns to the properties, select available options under Filemapping.

NDM Functions
Net Device Manager 5-59
6 Click Import.
7 Perform other Document Box operations (add, delete, edit, and import).
8 Click Open Submit Panel.The submit panel opens on the right side of the screen with the informationdisplayed with an X in a bubble. Cancel the change by clicking the X.
9 Click Submit at the bottom of the panel.
10 Click Submit on the pop-up confirmation.
Check the progress either by leaving the progress window open or looking forthe task on the Tasks tab.When you close the progress window, the screen refreshes to show thechange(s).
Document Box: Settings in Multi-set configurationsManaging Document Boxes in a Multi-set configuration follows the same basicsteps as managing them for a single device from the Device Properties screen.You can manage all box types. You can add, edit, delete, and import.The Enable switch gives you the option to disable configuration changesentirely for each box type tab. (Note: If you set it to Disable on all the tabs, thesystem will pop up a warning icon for Document Box configuration or disable theNext button.)When adding, editing or importing a document box in a Multi-set configuration,NDM presents merge options as part of the configuration set up (Preferencestab). These Preferences settings let you choose how to apply changes. ThePreferences choices are:
• Full OverwriteThis option will overwrite the existing document boxes of devices selected forthis Multi-Set operation. It ignores all current settings on the device(s), andoverwrites all data. A Full Overwrite cannot be undone.
• Smart Merge (recommended)This option merges imported boxes with those on the device. In case of aconflict, boxes on the device are overwritten by imported boxes. If the existingbox cannot be overwritten (password protection, for example) a new numberis generated for the imported box.
• Auto-generateThis option keeps all source and target data, and generates new numbers forimported boxes that conflict with existing ones.
With Enable set to On, no other selections and/or changes made, and thedefault of Smart Merge selected in Preferences, all source entries will bemerged or added to the target device(s) entries.
Firmware UpgradeFrom a master file, you can install firmware on a single device or groups ofdevices. When upgrading multiple devices or a group, the process will fail if

NDM Functions
User Guide5-60
there are any devices that do not match the models for the selected firmware. Ifthe same or newer version of firmware is already on the device(s), you will see amessage to that effect.You can get the firmware file from an administrator or dealer. If the firmware fileversion is older than the installed version on the device, then the firmware isdowngraded.Before performing a firmware upgrade, ensure TCP ports 800-899 are availableand not blocked by a firewall.
Firmware Upgrade: Risks and recoveryRisks and recovery options can differ depending on the type of upgrade.Using this wizard poses a risk of damaging device(s). When preparing toupgrade firmware, remember to review the process with your administrator ordealer and establish contingency plans. The wizard requires that youacknowledge and accept the potential risk of firmware installation.Danger Period during UpgradeLeave the Progress window open to see status of devices being upgraded.
• Any Device – Processing times will vary but do not turn off the device duringthe firmware upgrade
If a device is turned off or loses power at a critical point during the upgrade, thedevice could become inoperable and require servicing to replace damagedcomponents.
• IB-2x – No indication of the upgrade appears on the device operation panel.Check for the new firmware version in Firmware view
Upgrade Completion IndicatorsCheck the Tasks tabs: Active, Scheduled, or Completed. If the upgrade isfinished, it will appear on the Completed tab and you will be able to view thecompletion status.Upgrade Error Indicators
• Any Device – The result of the device upgrade is recorded in the log file asFailed
• System – The device fails the power-on self-test• FAX – Faxing does not operate• IB-2x – No link light appears. Option (for some models: Network) does not
appear on the Interface menu on the operation panel
Upgrade Error Recovery
• System – You must replace the DIMM in the device. The old DIMM, however,is not physically damaged. You can erase and reload it using a DIMM writer
• FAX – You must replace the FAX board• IB-2x – A special recovery mode for the IB-2x called Boot Loader mode is
available. You can use a jumper setting to set IB-2x to Boot Loader mode:SW1 on IB-20/21 and IB-21E, or J2-1 on IB-22. Once in Boot Loader mode,you can use a Windows utility named IBVERUP to load a new firmware file
Firmware Upgrade: Single deviceDevice Properties > General
NDM Functions
Net Device Manager 5-61
1 Click Firmware upgrade.
2 Click Next on the Devices screen.
3 Drag and drop or browse to select a firmware upgrade package, and clickUpload.
Note: NDM accepts a firmware package only as a zip file. If your firmwarepackage is a folder with *.DL and other files, zip all together before attemptingto upload it to NDM.
NDM validates the package and checks against the selected model(s). If thepackage fails validation or will not work with the selected model, you will see anerror message and the Next button will be disabled. Either cancel the operationand start over, try a different firmware package, or go back and review yourdevice selections.
4 Click Next.
5 If the device has the same or a newer version of firmware, a Resolve Conflictsscreen appears. The Description will tell you what the issue is and you candecide whether to continue with the operation or cancel.
• To continue, click the checkbox by the device name and click Next.• To cancel, click Cancel.• Click Back to return to the upload screen and try a different package.
6 On the Schedule screen, Run Now is the only choice. You can set a retryinterval (in minutes) and a number of retry attempts. Click Next.The Task screen shows Name, Description, and Receive notifications options.
7 Task name is filled in based on the following format: "Task MMddyyyy-HHmm."You may edit the task name, if wanted.
8 Enter a description, if wanted.
9 Click the checkbox by Receive notifications (unchecked by default) to getemail when the task finishes.
10 Click Next.
11 Confirm task details on the next screen. Check the box to acknowledge thewarning about potential damage to printing devices caused by a firmwareupgrade. When satisfied with the selections, click Apply.
Note: The Apply button will not be active unless you've accepted the risk bychecking the box.
A progress screen appears which you can close without affecting the overalltask progress.

NDM Functions
User Guide5-62
— continued
You can check on the progress of the task or adjust a scheduled task on theTasks tab (active or scheduled).
Firmware Upgrade: Multiple devices
1 On the Device list page, select similar printing device(s) to upgrade (using theselection check boxes), or select an entire group (either default or custom).
2 Click Firmware upgrade on the Create task drop-down list.
If you have manually selected devices that are incompatible to have the samefirmware upgrade applied, the first screen will show the eligible selected devicesgrouped together.
3 Select the entire group with the radio button and, if wanted, individual deviceswithin a group using the check boxes. You cannot select devices from morethan one group together.If you start from a group, the first screen shows the group name and number ofprinting devices in that group.
4 Click Next.
5 Drag and drop or browse to select a firmware upgrade package, and clickUpload.
Note: NDM accepts a firmware package only as a zip file. If your firmwarepackage is a folder with *.DL and other files, zip all together before attemptingto upload it to NDM.
NDM validates the package and checks against the selected model(s). If thepackage fails validation or will not work with all selected models, you will see anerror message and the Next button will be disabled. Either cancel the operationand start over, try a different firmware package, or go back and review yourdevice selections.
6 Click Next.
7 The Resolve Conflicts screen will look different depending on whether youstarted from a group or multiple devices:

NDM Functions
Net Device Manager 5-63
If you started from a Group and thereare devices with the same or newerversions of firmware in yourselections, NDM will not try to upgradeincompatible devices, but you have achoice for supported devices:
• Skip the operation on devices thathave the same or a newer versionof firmware already installed
• Force this version of firmware tosupported devices, even if thatmeans downgrading the firmware.
Choose the option to Skip deviceswith newer or the same firmwareversion or Upgrade all supporteddevices.
Starting from device selections, theResolve Conflicts screen shows youeach device with a notation of theissue and lets you choose with whichdevice(s) to continue.
8 Click Next.
9 On the Schedule screen, run the upgrade immediately, configure options to runit at a specific date/time, or configure event triggers to run the upgrade as arecurring task. Click Next.The Task screen shows Name, Description and Receive notifications options.
10 Task name filled in based on the following format: "Task MMddyyyy-HHmm."You may edit the task name, if wanted.
11 Enter a description, if wanted.
12 Click the check box by Receive notifications (unchecked by default) to get emailwhen the task finishes.
13 Click Next.
14 Confirm task details on the next screen. Check the box to acknowledge thewarning about potential damage to printing devices caused by a firmwareupgrade. When satisfied with the selections, click Apply.
Note: The Apply button will not be active unless you've accepted the risk bychecking the box.

NDM Functions
User Guide5-64
A progress screen appears which you can close without affecting the overalltask progress.You can check on the progress of the task or adjust a scheduledtask on the Tasks tab (active or scheduled).
General behaviors that apply to multiple actionsActions that set up tasks: Restart devices, Firmware upgrade, Device settings,and Configurations, can be configured to run on single or multiple devices.There are two ways to select multiple devices: clicking the selection boxes byeach device or selecting all devices in a Group by making no individualselections. Restart devices requires individual or multiple selection of devices;you cannot use a Group with Restart devices, but you can select multipledevices from a Group.
HTTP ProtocolYou may turn the HTTPS protocol on or off for all NDM services. HTTPS worksover underlying secure protocols – SSL or TLS that encrypts all traffic betweenbrowser and server. SSL/TLS requires a certificate with private key, public key,domain information, and chain of signatures by certificate authorities.For HTTPS, obtain a certificate from a trusted certificate authority to upload.The uploaded certificate file should be in pkcs#12 format (typically with .pfxextension) and you should provide a password for a password-protectedcertificate.You can also configure HTTPS to use a local self-signed certificate. In thatcase, NDM generates self-signed certificate if there is no already generatedone.When you click Apply to change protocol type, NDM saves the settings andrestarts all services. After restarting, NDM is available on the same port with thenew protocol.The default for NDM is the HTTP protocol.
Importing KYOCERA Net Admin dataSystem > System Settings> Database ConnectionYou can import your data from KYOCERA Net Admin into NDM by followingthese steps:Pre-requisite: Create a new KNA database backup from the KNA application.
1 Navigate to the Databased Connections tab in System Settings.
2 Click the Edit icon in the upper right corner.
3 Click Continue on the Warning pop-up.
4 Click Import Data.
The Import Data button is not available if NDM already has devices listed.
5 Upload the KNA backup file on the Import Data screen.
The KNA backup will be a zip file that contains the "data.sql" file.
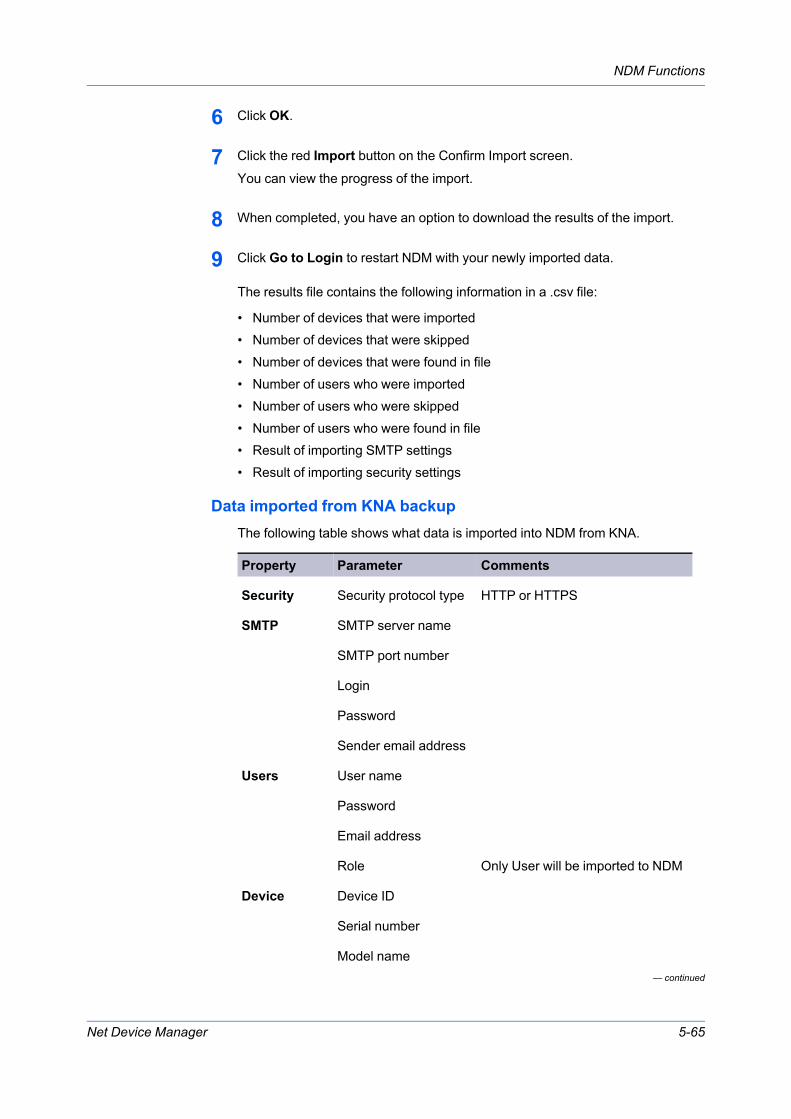
NDM Functions
Net Device Manager 5-65
— continued
6 Click OK.
7 Click the red Import button on the Confirm Import screen.
You can view the progress of the import.
8 When completed, you have an option to download the results of the import.
9 Click Go to Login to restart NDM with your newly imported data.
The results file contains the following information in a .csv file:
• Number of devices that were imported• Number of devices that were skipped• Number of devices that were found in file• Number of users who were imported• Number of users who were skipped• Number of users who were found in file• Result of importing SMTP settings• Result of importing security settings
Data imported from KNA backupThe following table shows what data is imported into NDM from KNA.
Property Parameter Comments
Security Security protocol type HTTP or HTTPS
SMTP SMTP server name
SMTP port number
Login
Password
Sender email address
Users User name
Password
Email address
Role Only User will be imported to NDM
Device Device ID
Serial number
Model name

NDM Functions
User Guide5-66
Property Parameter Comments
— continued
Base model name
Asset number
IP address
Host name
MAC Address
Descriptione
Manufactured
Location
Print speed
Deleted view Set NOW if device is unmanagedon the KNA
Color Is device Color
Duplex Is device Duplex
TCP/IP port
Communicationtimeout
SNMP connectionretries
SMNP type
Secure protocol (SSL)
Authentication type
Read communityname
Write community name
User name
Password
User name Authentication information
Password Authentication information
SNMP authentication
SNMP Privacy

NDM Functions
Net Device Manager 5-67
Property Parameter Comments
— continued
Command Centerpassword
System firmware
Scanner firmware
Fax port 2 firmware
Panel firmware
NIC firmware
Engine firmware
Fax system firmware
Total memory
Black toner level Only current toner level
Cyan toner level Only current toner level
Yellow toner level Only current toner level
Magenta toner level Only current toner level
Counters About 125 counters; only lastcounters
Media input List of media inputs (Name, Size,Type, Capacity, Level)
License agreementClick the License tab to read KYOCERA End User License Agreement terms.Click Download to save a copy in PDF.
Login/LogoutSystem > Security > Login/LogoutConfigure the requirements for how and where users login to NDM, accountlocking, and timeout settings from the Login/Logout page.

NDM Functions
User Guide5-68
Name Default value DescriptionLocal loginrequired
Unchecked If NDM is installed on the samecomputer that you use toaccess it, no login will berequired. NDM goes directly tothe devices list page; logoffdisabled.When accessing NDM fromanother computer, you mustalways log in. Logoff enabled.
Allow remoteaccess Checked (for NDM
Standard)Unchecked (forNDM Lite)
Indicates whether remoteaccess is allowed.
Delay betweenconsecutivelogins
Checked Require a delay between loginattempts (deter brute-forcelogin attacks).
Delay betweenattempts
2 seconds Delay period before re-loginafter failed login attempt. Enter1–5 seconds.
Lock accountaccess
Checked Lock account after specifiednumber of consecutive failedlogin attempts.
Consecutive failedlogins
3 Number of login attemptsbefore account lockout. Enter1–10.
Account locked(minutes)
30 Period after which a lockeduser is automatically unlocked.Enter 10–120 minutes inincrements of 10.
Automaticaccount logout
Checked Inactivity timeout enforced.
Period of inactivity(minutes)
10 Inactivity period before timeout
Clicking Apply for a change to the login requirement does not restart NDMservices. The changed login will apply the next time you start an NDM browsersession.
Multi-set configurationsSee Configurations.
NotificationsNDM provides the ability to send notifications about some events on device(s).Notifications require SMTP to be configured. User can create and editnotification templates, choose devices and recipients for notification tasks,create custom user notifications, and view the list of system notifications.NDM has three categories of notifications, each with its own tab under theNotifications tab. They are:

NDM Functions
Net Device Manager 5-69
• Devices• System• User
Using buttons on the Notifications toolbar (available on each Notifications tab)you can perform the following actions on one or more selected notifications (usethe left side check boxes to select):
• Mark as: change from Read to Unread or vice-versa. (Unread notificationsare displayed in bold face on the UI)
• Set importance to change the importance of one or more notification• Delete one or more notifications. Warning: there is no confirmation for this
action, selected item is immediately deleted and cannot be restored
A search box on the tool bar lets you filter the notifications using terms found inthe Subject or Message fields. The search defaults to both, but can be limited byselecting just one or the other from the search options selection.The notifications lists can sorted by any of the column headings by clicking.Change column width by hovering your mouse over the column heading rowuntil you see the column width adjustment tool and then dragging to resize.
Notifications: Add device notificationsNotifications > Notifications > UserThe Devices notifications tab shows notifications generated from templates withthe Send to inbox property enabled. Columns on the Devices tab show devicedata relating to the notice: Event type, Condition type, Subject, Message, Serialnumber, Model name, Date, and Info icons to see the full notification.The initial set of templates consists of:
• No toner• Waste toner box full• Paper jam• Call for service
You can edit each notification template to change timing, devices covered, andnotification recipients.To create a new Device notification:
1 Click Templates.
2 Click Add.
3 Provide a name for the template, and click Next.
4 Configure notification conditions. (See Event triggers for a full explanation of allpossible settings.)
Note: NDM will set the importance level based on the type of event; forexample: Toner level change, Firmware change and Counter change are all setas Low.
5 The Trigger option defaults to "On every occurrence," but can be changed.

NDM Functions
User Guide5-70
6 Click Next.
7 Specify device properties to include in the notification, such as IP address,sysLocation, Host name, etc.
8 Click Next.
9 Use check boxes to select devices to be part of this notification.
You can select devices individually or set Select source device to Group toselect predefined groups.You can use the search to enter terms or partial terms to filter the list on any ofthe columns.
10 Click Next.
11 Enter or delete (x by email) email addresses of notification recipients. CheckSend to inbox if you want these notifications to show on the Devicesnotifications tab (otherwise they are sent in email to the recipient(s) but notshown in the NDM UI.)
12 Click Next.
13 Confirm details of your notification and click Apply or Back if you want to makechanges.
Your new notification is displayed on the Notification Templates screen. TheInbox tag appears if you checked Send to inbox. The notification is enabled bydefault; you can disable it by selecting it and clicking Disable on the toolbar.You can take the following actions on items on the Notifications Templatespage: Add, Edit, Delete, Enable, Disable. The four predefined templates (Paperjam, Call for service, No toner, and Waste toner box full cannot be enabledunless you edit them to select devices and add recipients.)Warning: You can delete ANY notification template by selecting it and clickingDelete. There is no confirmation and no recovery option for this action. You canalso delete the predefined templates in any state (enabled, disabled, etc.)
Notifications: Create user notificationsNotifications > Notifications > UserNDM displays user notifications only on the User tab of Notifications. For thisfunction, a "user" is an NDM User, created and managed on the System >System Settings > Users tab. User notifications are intended as generalmessages to all NDM users. They are not emailed; they can only be viewed inthe NDM UI.To create user notifications:
1 On the Notifications > Users tab, click Create.
2 Provide a subject and message text, set the importance (high, medium, or low),and click Save.
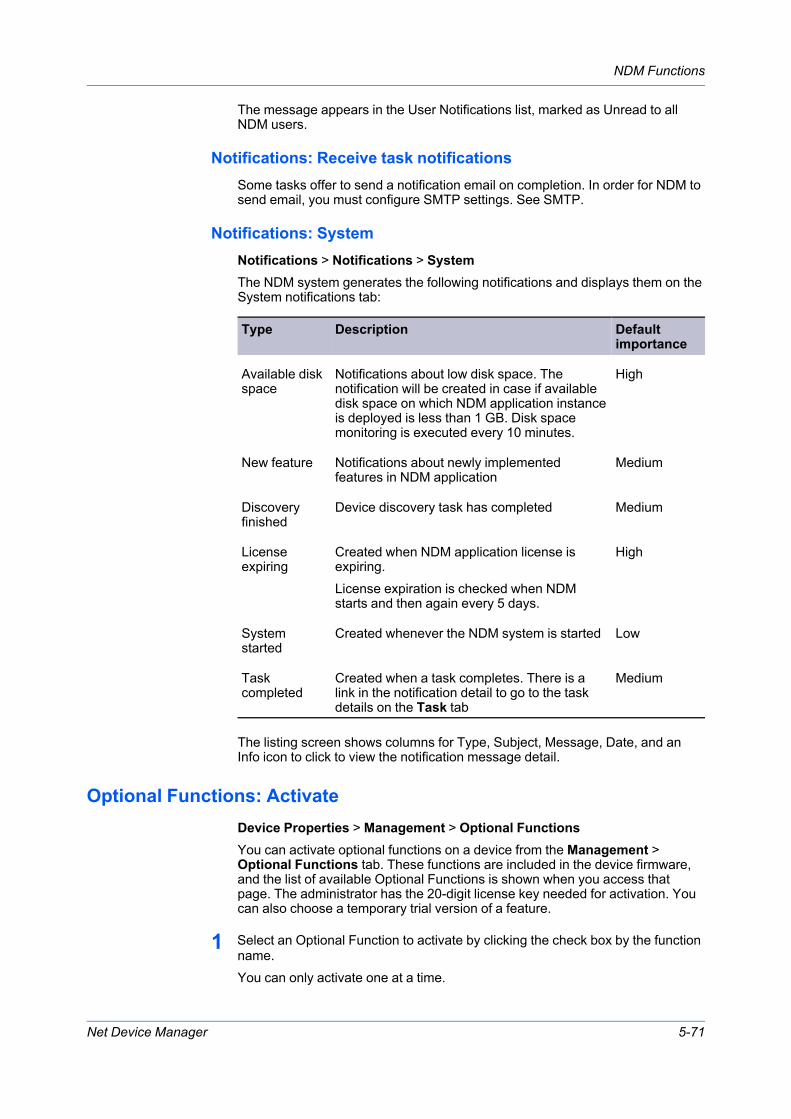
NDM Functions
Net Device Manager 5-71
The message appears in the User Notifications list, marked as Unread to allNDM users.
Notifications: Receive task notificationsSome tasks offer to send a notification email on completion. In order for NDM tosend email, you must configure SMTP settings. See SMTP.
Notifications: SystemNotifications > Notifications > SystemThe NDM system generates the following notifications and displays them on theSystem notifications tab:
Type Description Defaultimportance
Available diskspace
Notifications about low disk space. Thenotification will be created in case if availabledisk space on which NDM application instanceis deployed is less than 1 GB. Disk spacemonitoring is executed every 10 minutes.
High
New feature Notifications about newly implementedfeatures in NDM application
Medium
Discoveryfinished
Device discovery task has completed Medium
Licenseexpiring
Created when NDM application license isexpiring.License expiration is checked when NDMstarts and then again every 5 days.
High
Systemstarted
Created whenever the NDM system is started Low
Taskcompleted
Created when a task completes. There is alink in the notification detail to go to the taskdetails on the Task tab
Medium
The listing screen shows columns for Type, Subject, Message, Date, and anInfo icon to click to view the notification message detail.
Optional Functions: ActivateDevice Properties > Management > Optional FunctionsYou can activate optional functions on a device from the Management >Optional Functions tab. These functions are included in the device firmware,and the list of available Optional Functions is shown when you access thatpage. The administrator has the 20-digit license key needed for activation. Youcan also choose a temporary trial version of a feature.
1 Select an Optional Function to activate by clicking the check box by the functionname.You can only activate one at a time.
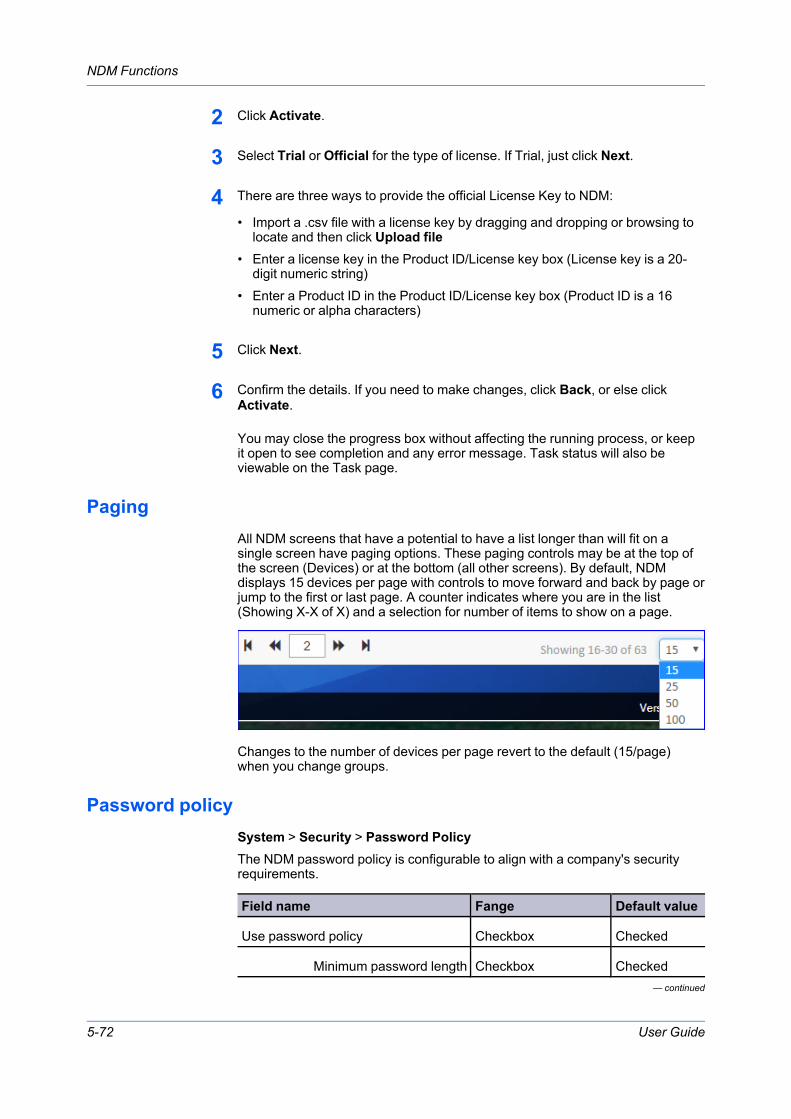
NDM Functions
User Guide5-72
— continued
2 Click Activate.
3 Select Trial or Official for the type of license. If Trial, just click Next.
4 There are three ways to provide the official License Key to NDM:
• Import a .csv file with a license key by dragging and dropping or browsing tolocate and then click Upload file
• Enter a license key in the Product ID/License key box (License key is a 20-digit numeric string)
• Enter a Product ID in the Product ID/License key box (Product ID is a 16numeric or alpha characters)
5 Click Next.
6 Confirm the details. If you need to make changes, click Back, or else clickActivate.
You may close the progress box without affecting the running process, or keepit open to see completion and any error message. Task status will also beviewable on the Task page.
PagingAll NDM screens that have a potential to have a list longer than will fit on asingle screen have paging options. These paging controls may be at the top ofthe screen (Devices) or at the bottom (all other screens). By default, NDMdisplays 15 devices per page with controls to move forward and back by page orjump to the first or last page. A counter indicates where you are in the list(Showing X-X of X) and a selection for number of items to show on a page.
Changes to the number of devices per page revert to the default (15/page)when you change groups.
Password policySystem > Security > Password PolicyThe NDM password policy is configurable to align with a company's securityrequirements.
Field name Fange Default value
Use password policy Checkbox Checked
Minimum password length Checkbox Checked
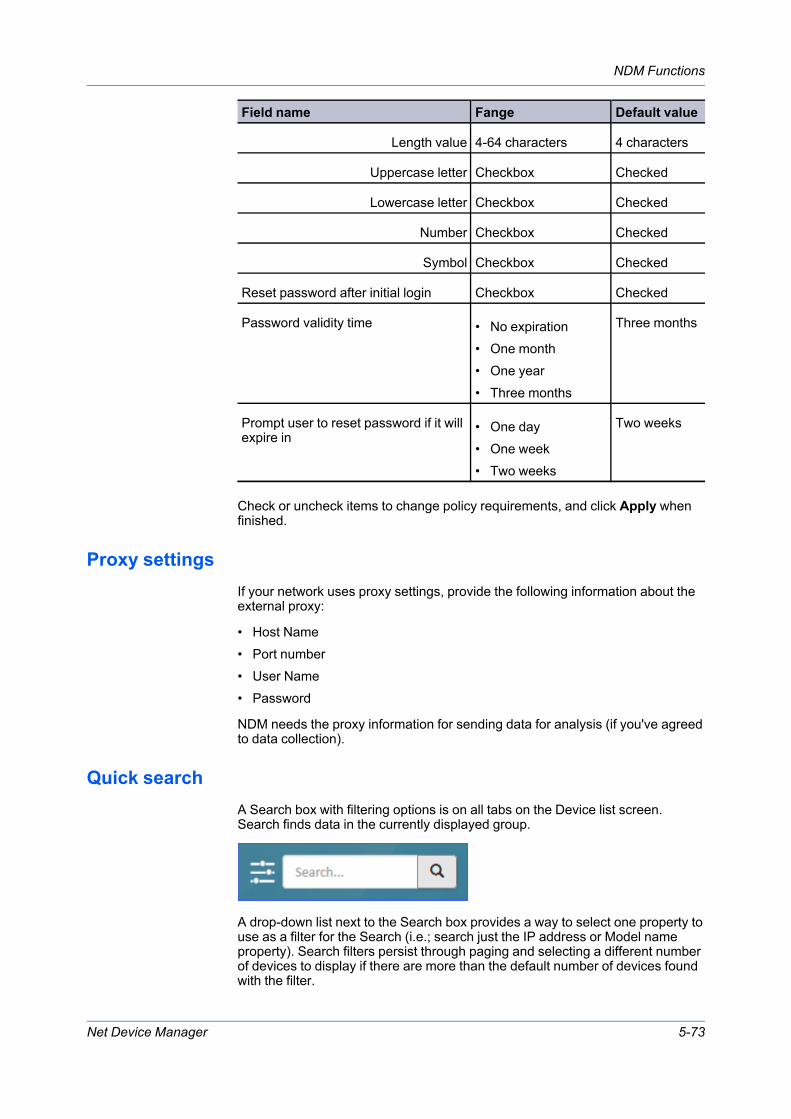
NDM Functions
Net Device Manager 5-73
Field name Fange Default value
Length value 4-64 characters 4 characters
Uppercase letter Checkbox Checked
Lowercase letter Checkbox Checked
Number Checkbox Checked
Symbol Checkbox Checked
Reset password after initial login Checkbox Checked
Password validity time • No expiration• One month• One year• Three months
Three months
Prompt user to reset password if it willexpire in
• One day• One week• Two weeks
Two weeks
Check or uncheck items to change policy requirements, and click Apply whenfinished.
Proxy settingsIf your network uses proxy settings, provide the following information about theexternal proxy:
• Host Name• Port number• User Name• Password
NDM needs the proxy information for sending data for analysis (if you've agreedto data collection).
Quick searchA Search box with filtering options is on all tabs on the Device list screen.Search finds data in the currently displayed group.
A drop-down list next to the Search box provides a way to select one property touse as a filter for the Search (i.e.; search just the IP address or Model nameproperty). Search filters persist through paging and selecting a different numberof devices to display if there are more than the default number of devices foundwith the filter.

NDM Functions
User Guide5-74
1 If wanted, click the Search Filter list and select a property. The default,Descriptive Columns is for all.
2 Type a keyword into the Search box. You may type only a partial keyword, IPaddress, etc. (TASK, or 31.143 for example).
3 With your cursor at the end of your entry, press the space bar.
The entry appears in a bubble near the Search box, which also shows theselected property used, and the list of devices is filtered to show just devicesthat match.
4 Enter another keyword or clear the search by clicking on the X in the bubblewith the search term. You can also select a new filter and search term to refinethe results further. You can enter up to three separate search terms.
Note: QuickSearch adds additional search terms as an "and" condition; i.e. ifyou type TASK, press the space bar, and then type 31.143 and press thespace bar, it is the same as telling the search to find all devices that containTASK and 31.143 in the device properties.
Note: If you have selected one of the properties to use in the Quick Search,remember to clear it, as well, by resetting the drop-down list selection toDescriptive Columns when done.
RefreshWith one or more devices selected from Device list, click Refresh to updateinformation displayed about selected device(s).
Reports: Configure and run reportsNDM provides the ability to create report for devices and groups based on fourreporting types. Users can add, edit, delete, enable, and disable scheduledreports. Within the selected reporting type, they can select devices or group,format, generation frequency, email recipients, report range parameters), andmanually generate a scheduled report.The report types are:
• Consumables• Error counts – Error totals for the last 30 days• Device properties• Device counters
Access reports that have been saved on the main Reports screen. You can sortthe list on any column header, view details by clicking the information icon,search and filter the list. There are paging options as with other listings screens.
Reports: Add scheduled reportNotifications > Reports> Scheduled
1 Click Scheduled.

NDM Functions
Net Device Manager 5-75
2 On the Scheduled Reports screen, click Add.
3 Fill in Report information.
Choose the Report template:
• Device Counters• Device Properties• Error total for last 30 days• Consumable (Toner)
Choose the File format:
• HTML• CSV• PDF• XML
4 If you want the report to be mailed directly to any recipient(s), enter their emailaddress(es), clicking +Add after each addition.
5 When finished, click Next.
6 Set Report range:
• Latest date• Last X days (enter number of days)• Current month• Previous month• Date range (set start and end dates)
7 Set Frequency:
• On demand• On scheduled intervals (Daily, Weekly, Monthly)• At scheduled time (configure specific date and time)
8 Click Next.
9 You can select devices on the Source page from a device list, or a group list.Use checkboxes to select.You can sort the list on any column header by clicking it or search for text in anyof the visible columns.
10 Click Next.
11 Review your settings on the Confirmation screen, and click Finish.

NDM Functions
User Guide5-76
If you left the report as On Demand, you will need to click the checkbox by thename in Scheduled and then click Generate.After the report has run, you can download or delete it on the main Reportsscreen.If the report is scheduled to run, you can find the most current version on thesame Reports screen.
Reports: Delete scheduled reportNotifications > Reports> Scheduled
1 Click Scheduled Reports.
2 Click the check box(es) by the name of the report(s) to delete.
3 Click Delete.
Note: This action permanently deletes the selected report(s) with noconfirmation.
Reports: Edit scheduled reportNotifications > Reports> ScheduledMake changes to reports that have been configured on the Scheduled Reportspage.
1 Click Scheduled Reports.
2 Click the check box by the name of the report to edit.
3 Click Edit.
4 Review settings and make changes (follow steps from Add report, step 3).
Note: If multiple devices had been selected, you will have to find and uncheckeach one to remove it from the list for your revised report.
5 Review your settings on the Confirmation screen, and click Finish.
Reports: Enable/Disable reportNotifications > Reports> ScheduledThis option lets you disable (or re-enable) scheduled reports. Disabled reportswill not run on the selected schedule; nor can they be generated on demand.
1 Click the checkbox(es) by the name of report(s) to be enabled or disabled.
2 Click Enable Disable and select either Enable or Disable from the drop-downchoices.
The report(s) will have a disabled icon on the screen.
NDM Functions
Net Device Manager 5-77
Restart a single deviceDevice Properties > Restart devicesRestart individual devices from the Device Properties screen (click thehyperlinked Model name in the Device list.)
1 Click Restart devices from the Device Properties screen.
2 Click a radio button to select Device or Network restart. Device restart –Restarts the selected devices Network restart – Restarts just the networkinterface for the selected device
3 Click Next.
4 Review the details and click Back (to make changes), Restart, or Cancel.
Restart multiple devicesDevice Properties >Create Task > Restart devicesYou can restart one or more printing devices or device networks remotely.
1 Select multiple devices using check boxes or a group, click Create Task, andthen Restart devices.
2 Review your selections.
• If you selected multiple devices, you can make changes by clicking thecheckbox(es) for devices to restart
• If you started from a group the number of devices in the group will bedisplayed; you cannot make changes
3 Click Next.
4 Click a radio button to select Device or Network restart.
• Device – Restarts the selected devices• Network – Restarts only the network interface for the selected device
5 Click Next.
6 Accept the default to run the restart now, configure the restart to run at aspecified date and time, or configure event triggers for automated restarts.If you choose to run now:
7 Click Next on the Schedule screen.
If you want to set the Restart for a later date/time or configure event triggers:
8 Set up the schedule, using date/time or by configuring event triggers, and clickNext.
NDM Functions
User Guide5-78
The Task screen shows Name, Description and Receive notifications options.
9 Task name is automatically filled based on the following format: "TaskMMddyyyy-HHmm." You may edit the task name, if wanted.
10 Enter a description, if wanted.
11 Click the check box by Receive notifications (unchecked by default) to getemail when the task finishes.
12 Click Next.
13 Review task details, and click Restart. You can also cancel or click Back tomake changes.
A Progress screen will appear, showing the percentage complete for eachdevice. Closing the screen will not interrupt the tasks. When completed, eachdevice will show the percentage completed and a status of Succeeded orFailed. Click Download results to get a .csv file with details about this task. ClickClose to close the Progress screen.You can also go to the Active Tasks tab to view progress, or the ScheduledTasks tab to view, modify, enable, or disable scheduled tasks.
Send DataThe Send Data feature allows you to send file and text commands to devices.Accessed through Multi-set Configurations, the feature allows sending data andPJL commands via text, file, or both. When using PJL commands, you mustprepend the messages with the 0x1b hex string to specify the command start.
Note: Send Data only works through Configurations in the Create Newscenario, you cannot use Replicate or Upload.
To use Send Data through Configurations, follow these steps:
1 With one or more devices selected, click Create task, and thenConfigurations.
2 Click Create new, and then Next.
3 Click Send Data (you may select other operations at the same time), and thenclick Next.
4 For Transmission Method, select from three methods: Default TCP Port,Specified TCP Port, or IPPS (and provide the path).
5 On the Send Text tab, enter PJL commands with the command start hex string.Sample:0x1b%-12345X@PJL JOB NAME="asd.aa"@PJL SET JOBNAME="asd.aa"@PJL SET HOLD=KUSERBOX @PJL SET KUSERBOXID="0001"
NDM Functions
Net Device Manager 5-79
— continued
@PJL SET KUSERBOXPASSWORD="{#FILE#}0x1b%-12345X@PJL EOJ NAME="asd.aa"
6 Alternatively, click Send File to upload a text file of commands. You can dragand drop or browse to locate the tile, and then click Upload File.
7 On the Preview tab, review the Transmission Method, the Source (which willshow either the file name or the text you entered) and the selected devices withstatus indicators (whether the device supports the operation).
8 When ready, click Next.
9 Set the job to run now or on a schedule and click Next.
10 Review options on the Task screen, and click Next.
11 On the Confirmation screen, click Apply to run the job.
12 Check the progress either by leaving the progress window open or looking forthe task the Tasks tab.
SMTPConfigure SMTP server settings for NDM to use when sending notificationemails. A Test Email button provides a way to check the settings andconnection.
Smart PollingSmart Polling collects specific information from all devices registered anddiscovered by NDM on a configurable schedule. It currently supports collectionof the following information:
Device Information Includes host name, mac address, serial number,system description, system location, capabilities,firmware versions, application lists, other deviceproperties and settings
Counters Includes all device counters (i.e. fax, printer, copier,letter, statement, etc.)
Toner level Includes toner colors and their levels, capacities, andcontainer names.

NDM Functions
User Guide5-80
Device Alerts Includes all device error codes and their severities.Each of the four polling categories have a configurableinterval at which they are polled. After configuringpolling, you can review the settings for individualdevices on the Device Properties screen, in the PollingIntervals section.You can set polling intervals for Device information,Toner level, and Counters to:
• 15 minutes• 60 minutes• 2 hours• 6 hours• 12 hours• 24 hours
There are two additional intervals for Device alerts, inaddition to the intervals provided for the other threecategories, of 1 and 5 minutes. Longer intervals putless stress on the network and PC resources, butresult in outdated information in NDM. Defaultintervals for each category are:
• Device Information – 6 hours• Device Alerts – 5 minutes• Counters – 60 minutes• Toner Level – 60 minutes
The Smart Polling screen displays an estimate of the number of (polling)requests at the top of the page based on the interval selections and number ofdevices managed by NDM.
Note: If you want your notifications and task triggers to be more accurate,adjust the polling intervals to make them shorter. Expect polling delays whenrunning heavy operations like firmware upgrade.
System UsersYou may create up to 10 NDM users to login and use the system. There are twousers "roles:" User and Admin. The User role does not have privileges tomanage system settings, and so does not see the System tab.
System Users: Add usersSystem > System Settings > (NDM) Users
1 Click Add.
Note: If there are 10 users in the system already, the Add button will not beavailable.
2 Enter a Username (up to 64 characters).
NDM Functions
Net Device Manager 5-81
3 Enter a Password that adheres to the password policy for the system (it will bedisplayed under the Password field).If the password fails to meet any of the policy rules, that rule turns red to guideyou.
4 Enter an Email address.
5 Select a Role (User or Admin).
6 Click Save.
The system shows the new user with Password expiration date and Passwordexpiration status unpopulated. If your system has Reset password after initiallogin checked, the user will be forced to change the password the first time theylogin. After this initial login change, the system populates the two expirationfields.
System Users: Delete usersSystem > System Settings > (NDM) Users
1 Go to the (NDM) User tab.
2 Select one or more users to delete using check boxes.
3 Click Delete, and then click Yes on the confirmation dialog.
System Users: Edit usersSystem > System Settings > (NDM) Users
1 Go to the (NDM) User tab.
2 Select the user to edit.
3 Click Edit.
4 Make changes as needed and click Save.
Note: If you change the User's password and the system has Resetpassword after initial login checked, the user will be forced to change theirpassword again when they log in, and they may not reuse the last password.
Note: You cannot change the name and role of the default admin account(Admin).
System Users: Unlock usersSystem > System Settings > (NDM) UsersIf a user has locked their account, they can wait until the timeout period expires(set on the System > Security > Login/Logout tab) or contact an Admin toreset.
NDM Functions
User Guide5-82
1 Go to the User tab. Locked out users have a red lock symbol next to theusername in the list.
2 Select one or more locked users using check boxes.
3 Click Unlock, and then click Yes on the confirmation dialog.
TasksTasks are composites of management operations and device information thatprovide the ability to remotely manage and collect information from devices in anetwork. Task views display actions or operations that are currently active,scheduled, or have been completed. Tasks are created in wizards from theDevice list and Device Properties screens and show up in one of the Task viewsas soon as they are submitted. Individual tasks serve as operational templates.Run, modified, and re-run tasks on the same or a different schedule with thesame or different device selection.
Common features on the tasks tabsQuick Search – A drop-down list next to the Search box provides a way to selectone property (column) to use as a filter. Choices are:
• Descriptive columns (all columns)• Name• Serial number• Description• Operation type
Search filters apply to all tabs (Active, Scheduled, and Completed).See Quick search for more detail.Sort – Click on any column header to sort the entire list of tasks in ascending ordescending alphabetic order. The sort applies across paging selections. Thedefault sort is different for each Tasks tab:
• Active uses Start time• Scheduled uses Time created• Completed uses End time
Add/Remove Columns – As with the Devices tabs, there is an option toadd/remove columns from the view. Click the + icon and check boxes on the listto add or remove columns. (Appears only when there are tasks to display.)Details – The right-most column has info icons to click for detailed informationabout each task. The details screens vary depending on the task tab. (Appearsonly when there are tasks to display.)
Active tasksShows tasks that are currently running. Columns on the Active tab:
• Selection check boxes (if there is data displayed)• Name• Operation type

NDM Functions
Net Device Manager 5-83
• Serial number of the device (if only one, the group name if a group was used,or a count of the number of devices affected by the task)
• Model name• IP address• Description• Created by• Time created• Start time• Progress• Time remaining• Column selection drop-down list and info icons are in the right-most column
(if there are active tasks displayed)Actions you can take on the Active tasks tab: Cancel a task in progress.
Scheduled tasksTasks > ScheduledShows scheduled tasks (not yet run). Columns on the Scheduled tab:
• Selection check boxes• Enable/disable icons• Name• Operation type• Serial number of the device (if only one, the group name if a group was used,
or a count of the number of devices affected by the task)• Model name• IP address• Description• Created by• Schedule• Time created• Scheduled time for the task to begin or event trigger that will start the task• Column selection drop-down list and info icons are in the right-most column
Actions you can take on the Scheduled tasks tab: Modify, Delete, Enable,and Disable.Modifying a task will take you through the same screens and steps ascreating the task and set the task to Enabled when done.To delete a scheduled task, select one or more tasks using the check boxesin the first column and click Delete to remove them from the list. Confirm inthe pop-up dialog box.You can enable or disable scheduled tasks in two ways:
• Select one or more tasks using the check boxes in the first column and thenclick the Enable or Disable button as needed. While you can select multipletasks this way, they must all be in the same state, or the buttons will beunavailable.
• Click the icon in the second column to toggle between enabled and disabled.

NDM Functions
User Guide5-84
Either method for enabling or disabling scheduled tasks will pop up aconfirmation box before completing the action.
Note: NDM comes with three pre-configured "sample" Scheduled tasks(Set Sleep Timer, Enable EnhancedWSD, and Enable EcoPrint). Modify ordelete these as needed.
Completed tasksTasks > CompletedShows canceled or completed tasks. Columns on the completed tasks page:
• Selection check boxes• Name• Operation type• Serial number of the device (if only one, the group name if a group was used,
or a count of the number of devices affected by the task)• Model name• IP address• Description• Created by• Schedule• Time created• Start time• End time• Result (Succeeded or Failed; a task is marked as failed if at least one
operation on one device has failed)• Column selection drop-down list and info icons are in the right-most column
The info icon in the last column brings up the task summary screen, showingdetails about the task:
• Task name• Task status• Number of devices• Number successful• Number failed• Operation type• Start time• End time• Date created• Created by• A list of the devices with individual status notations
A drop-down list at the top of the task summary screen shows a list of thedevices affected by the task. Click on each device to see more detail aboutthe task.A Download option at the bottom of the task details screen lets you downloada .csv file with the task details for one or all devices.

NDM Functions
Net Device Manager 5-85
— continued
Actions you can take on the Completed tasks tab: Retry or Delete acompleted task.
Create tasksYou can create tasks for one device, multiple devices (using the checkboxes),or entire groups (select a group and do not check any individual devices) on theDevice list page. Configure a task to run immediately, at a scheduled future dateand time, or triggered by selected NDM events. Select tasks from the Createtask drop-down list:
• Restart devices• Firmware upgrade• Device settings• Configurations (configure multiple operations to run as a single task)
See sections about each task for detailed information about configuration.
Event triggersNDM uses the following events as triggers for running tasks:
Alert detected Select from the following alert types:
• Paper jam• Cover is opened• Toner is low• Toner is empty• Low paper• No paper• Waste toner is almost full• Waste toner is full• Call for service• MK change
Counter reached Set a threshold for total of: pages, b/w, color,single color, printed, scanned, or total copierpages
Firmware version becomes Select the type of Firmware and set a versionon which to trigger:
• System• Scanner• Fax port 1• Fax port 2• Panel• NIC• Browser• Engine
NDM Functions
User Guide5-86
Toner level reached Select black, magenta, cyan, or yellow and seta level number (0-100)
After selecting the event to use as a trigger, select the trigger conditions.Choices are:
• On every occurrence• After number of occurrences: the event occurs X times in a day (applies only
to alerts)• After event remains unresolved for X: select a number of hours or days
(applies only to alerts)
Pre-defined tasksThe Scheduled Tasks screen shows the three pre-defined NDM sample tasks:
1 Enable Eco Print.
2 Enable Enhanced WSD.
3 Set Sleep Timer.
The first two tasks are triggered when any new device is discovered, and can beenabled or disabled. Set Sleep Timer is a scheduled task. The target devicegroup for pre-defined tasks is All devices. You may keep, modify, or deletethese sample tasks as needed.
Tasks: Detail screensEach tab of the Tasks tab offers detailed views of selected tasks. Access detailsby clicking the info (double-arrow) icon for the task.
Active task detail screenThe Active tab detail screen shows the progress of each operation within thetask. NDM calculates the operation's progress based on how many of theselected devices have completed or failed the specific operation. A pull-downmenu by the task description reveals a list of all devices with individual progressbars, or you can drop-down the top Details list and select a device to view. Thiswill show all tasks that are running on the device (in a Multi-set configuration).
Scheduled task detail screenThe Scheduled tab details shows basic task details, schedule parameters,conflicts with existing tasks, and included devices. The drop-down list at the topwill give you a look at individual devices and actions configured in the task (ifmultiple selections). If a group was used for the tasks, you'll see only the totalnumber of devices.
Completed task detail screenThe Completed tab details shows basic task details, start and end times, andincluded devices with status. The drop-down list at the top will give you a look atindividual devices, actions configured in the task (if multiple selections), and abrief description in the event of task failure.
NDM Functions
Net Device Manager 5-87
From the Completed detail screen, you can download a .csv file with task resultsfor either individual or all devices.
Tasks: Retry completed tasksTasks > Completed
1 Select a single task on the Completed tasks tab, by checking the box.
2 Click Retry.
3 Depending on the type of task, go through detail screens to adjust settings forthe original task.
4 You can let the retried task run immediately or configure a schedule, you canalso reset automatic retry options on the Schedule screen.
Tasks: SchedulingFor most tasks run on single or multiple devices, Multi-set configurations orgroups, you have the option to run the task immediately, schedule it to run at aspecified date and time, or configure it to run when a selected event occurs. TheSchedule page in the task creation sequence also give you the ability toconfigure automatic retries in the event the task fails. To configure the Schedulefor tasks, follow these steps:
1 To run a task immediately with no other configuration or retries, accept thedefault of Now and click Next.
2 To schedule to run at a specified date and time, click Later. (See Tasks:Scheduling for later run)
3 Configure event triggers (see Event Triggers for details on all choices).
4 Configure retries by clicking the check box by Enable, and setting an interval(from 1 to 120 minute) and number of retry attempts (1 to 5).
5 When you have set the schedule options as needed, click Next.
6 Accept the default task name or enter a new one, click Next.
7 Review selections on the Confirm details page.
Tasks: Scheduling for later runWhen scheduling a task to run, the main choices are Later and On event (seeEvent Triggers). Later scheduling offers the following options:
• OnceSelect a future date and time for a single run of the task
• Daily
NDM Functions
User Guide5-88
Set a time for the task to run every day• Weekly
Set a time and select one or more days of the week for running the task.Remove individually selected days by clicking the X for each.
• MonthlySet a time and select the day of the month to run the task. Day choices are 1through 31 or "Last day of the month."
Tasks: Select multiple devices for tasksThere are several ways to select devices for use with tasks. For performing atask on a single device, go to the Device Properties screen for the device andstart the task from there.NDM supports listings for all discoverable devices on your network, but not allNDM tasks will work on all listed devices. If a group of devices is selected for aset of tasks and some tasks are not compatible for certain devices in the group,the incompatible tasks will have a "failed" status.
Using check boxes• From Device list or any group, click the check boxes by individual devices• From Device list or any group, click the "check all" box (top of the check box
column)
This action selects all devices on the current page. Devices on other pages arenot checked.When working with a single device, incompatible tasks will be grayedout/unavailable. With multiple devices selected, depending on the feature, alltasks will be available, but task results will show "fail" for the devices that areincompatible with the task.When you select a task, the first screen shows the selected device(s) with checkboxes to confirm your selections. You may uncheck individual devices here toremove them from the task.
Using device groupsSelect a Device group (or the default All devices group), leave all check boxesempty, and select a task from the Create task menu. The first screen will showthe number of devices in the group and you can proceed with configuring andrunning the task. If, however, there are members of the group that areincompatible with the selected task, the task will still run, but fail on theindividual devices. You can review the overall status of the task from the Tasks> Completed tab and get details about individual devices from the task infoscreens.
KYOCERA Document Solutions America, Inc. Headquarters 225 Sand Road, Fairfield, New Jersey 07004-0008, USA Phone: +1-973-808-8444 Fax: +1-973-882-6000
Latin America 8240 NW 52nd Terrace Dawson Building, Suite 100 Miami, Florida 33166, USA Phone: +1-305-421-6640 Fax: +1-305-421-6666 KYOCERA Document Solutions Canada, Ltd. 6120 Kestrel Rd., Mississauga, ON L5T 1S8, Canada Phone: +1-905-670-4425 Fax: +1-905-670-8116 KYOCERA Document Solutions Mexico, S.A. de C.V. Calle Arquimedes No. 130, 4 Piso, Colonia Polanco Chapultepec, Delegacion Miguel Hidalgo, Distrito Federal, C.P. 11560, México Phone: +52-555-383-2741 Fax: +52-555-383-7804 KYOCERA Document Solutions Brazil, Ltda. Alameda África, 545, Pólo Empresarial Consbrás, Tamboré, Santana de Parnaíba, State of São Paulo, CEP 06543-306, Brazil Phone: +55-11-2424-5353 Fax: +55-11-2424-5304
KYOCERA Document Solutions Chile SpA Jose Ananias 505, Macul. Santiago, Chile Phone: +562-2350-7000 Fax: +562-2350-7150 KYOCERA Document Solutions Australia Pty. Ltd. Level 3, 6-10 Talavera Road North Ryde N.S.W, 2113, Australia Phone: +61-2-9888-9999 Fax: +61-2-9888-9588 KYOCERA Document Solutions New Zealand Ltd. Ground Floor, 19 Byron Avenue, Takapuna, Auckland, New Zealand Phone: +64-9-415-4517 Fax: +64-9-415-4597
KYOCERA Document Solutions Asia Limited 13/F.,Mita Centre, 552-566, Castle Peak Road Tsuen Wan, New Territories, Hong Kong Phone: +852-2496-5678 Fax: +852-2610-2063 KYOCERA Document Solutions (China) Corporation 8F, No. 288 Nanjing Road West, Huangpu District, Shanghai,200003, China Phone: +86-21-5301-1777 Fax: +86-21-5302-8300 KYOCERA Document Solutions (Thailand) Corp., Ltd. 335 Ratchadapisek Road, Wongsawang, Bangsue, Bangkok 10800, Thailand Phone: +66-2-586-0333 Fax: +66-2-586-0278 KYOCERA Document Solutions Singapore Pte. Ltd. 12 Tai Seng Street #04-01A, Luxasia Building, Singapore 534118 Phone: +65-6741-8733 Fax: +65-6748-3788 KYOCERA Document Solutions Hong Kong Limited 16/F.,Mita Centre, 552-566, Castle Peak Road Tsuen Wan, New Territories, Hong Kong Phone: +852-3582-4000 Fax: +852-3185-1399 KYOCERA Document Solutions Taiwan Corporation 6F., No.37, Sec. 3, Minquan E. Rd., Zhongshan Dist., Taipei 104, Taiwan R.O.C. Phone: +886-2-2507-6709 Fax: +886-2-2507-8432 KYOCERA Document Solutions Korea Co., Ltd. #10F Daewoo Foundation Bldg 18, Toegye-ro, Jung-gu, Seoul, Korea Phone: +822-6933-4050 Fax: +822-747-0084 KYOCERA Document Solutions India Private Limited Second Floor, Centrum Plaza, Golf Course Road, Sector-53, Gurgaon, Haryana 122002, India Phone: +91-0124-4671000 Fax: +91-0124-4671001
KYOCERA Document Solutions Europe B.V. Bloemlaan 4, 2132 NP Hoofddorp, The Netherlands Phone: +31-20-654-0000 Fax: +31-20-653-1256
KYOCERA Document Solutions Nederland B.V. Beechavenue 25, 1119 RA Schiphol-Rijk, The Netherlands Phone: +31-20-5877200 Fax: +31-20-5877260
KYOCERA Document Solutions (U.K.) Limited Eldon Court, 75-77 London Road, Reading, Berkshire RG1 5BS, United Kingdom Phone: +44-118-931-1500 Fax: +44-118-931-1108
KYOCERA Document Solutions Italia S.p.A. Via Monfalcone 15, 20132, Milano, Italy, Phone: +39-02-921791 Fax: +39-02-92179-600
KYOCERA Document Solutions Belgium N.V. Sint-Martinusweg 199-201 1930 Zaventem, Belgium Phone: +32-2-7209270 Fax: +32-2-7208748
KYOCERA Document Solutions France S.A.S. Espace Technologique de St Aubin Route de I’Orme 91195 Gif-sur-Yvette CEDEX, France Phone: +33-1-69852600 Fax: +33-1-69853409
KYOCERA Document Solutions Espana, S.A. Edificio Kyocera, Avda. de Manacor No.2, 28290 Las Matas (Madrid), Spain Phone: +34-91-6318392 Fax: +34-91-6318219
KYOCERA Document Solutions Finland Oy Atomitie 5C, 00370 Helsinki, Finland Phone: +358-9-47805200 Fax: +358-9-47805212
KYOCERA Document Solutions Europe B.V., Amsterdam (NL) Zürich Branch Hohlstrasse 614, 8048 Zürich, Switzerland Phone: +41-44-9084949 Fax: +41-44-9084950
KYOCERA Bilgitas Document Solutions Turkey A.S. Gülbahar Mahallesi Otello Kamil Sk. No:6 Mecidiyeköy 34394 Şişli İstanbul, Turkey Phone: +90-212-356-7000 Fax: +90-212-356-6725
is a trademark of KYOCERA Corporation
KYOCERA Document Solutions Deutschland GmbH Otto-Hahn-Strasse 12, 40670 Meerbusch, Germany Phone: +49-2159-9180 Fax: +49-2159-918100
KYOCERA Document Solutions Austria GmbH Wienerbergstraße 11, Turm A, 18. OG, 1100 Wien, Austria Phone: +43-1-863380 Fax: +43-1-86338-400
KYOCERA Document Solutions Nordic AB Esbogatan 16B 164 75 Kista, Sweden Phone: +46-8-546-550-00 Fax: +46-8-546-550-10
KYOCERA Document Solutions Norge Nuf Olaf Helsetsv. 6, 0619 Oslo, Norway Phone: +47-22-62-73-00 Fax: +47-22-62-72-00
KYOCERA Document Solutions Danmark A/S Ejby Industrivej 60, DK-2600 Glostrup, Denmark Phone: +45-70223880 Fax: +45-45765850
KYOCERA Document Solutions Portugal Lda. Rua do Centro Cultural, 41 (Alvalade) 1700-106 Lisboa, Portugal Phone: +351-21-843-6780 Fax: +351-21-849-3312
KYOCERA Document Solutions South Africa (Pty) Ltd. KYOCERA House, Hertford Office Park, 90 Bekker Road (Cnr. Allandale), Midrand, South Africa Phone: +27-11-540-2600 Fax: +27-11-466-3050
KYOCERA Document Solutions Russia LLC. Building 2, 51/4, Schepkina St., 129110, Moscow, Russia Phone: +7(495)741-0004 Fax: +7(495)741-0018
KYOCERA Document Solutions Middle East Dubai Internet City, Bldg. 17, Office 157 P.O. Box 500817, Dubai, United Arab Emirates Phone: +971-04-433-0412
KYOCERA Document Solutions Inc. 2-28, 1-chome, Tamatsukuri, Chuo-kuOsaka 540-8585, JapanPhone: +81-6-6764-3555http://www.kyoceradocumentsolutions.com
NDMUGKDEN100.2017.16