lab sop for whole genome sequencing on miseq · laboratory standard operating procedure for whole...
TRANSCRIPT
LABORATORY STANDARD OPERATING PROCEDURE FOR WHOLE GENOME SEQUENCING ON MISEQ
Doc. No. PNL38 Ver. No. 01 Effective Date: Page 1 of 20 1. PURPOSE: This SOP describes the standardized laboratory protocol for whole genome sequencing
of bacterial organisms on the MiSeq, including instrument requirements and maintenance.
2. SCOPE: This document applies to all PulseNet WGS certified laboratories performing whole genome sequencing using the MiSeq on enteric bacteria for submission of sequence data to PulseNet. Participating PulseNet laboratories may adopt this SOP to their workflow as necessary.
3. DEFINITIONS 3.1. CD: Cluster Density 3.2. CDC: Centers for Disease Control and Prevention 3.3. CSV: Comma-Separated Values (file) or Comma Delimited (file) 3.4. DNA: Deoxyribonucleic acid 3.5. DNase: Deoxyribonuclease 3.6. dsDNA: double-stranded DNA 3.7. EBT: Elution buffer with Tween 20 3.8. EDTA: Ethylenediaminetetraacetic Acid 3.9. gDNA: Genomic DNA 3.10. GHS: Globally Harmonized System 3.11. HT1: Hybridization buffer 3.12. IEM: Illumina Experiment Manager 3.13. LRM: Local Run Manager 3.14. MCS: MiSeq Control Software 3.15. MSR: MiSeq Reporter 3.16. NaOH: Sodium Hydroxide 3.17. PHL: Public Health Laboratory 3.18. PPE: Personal Protective Equipment 3.19. PN: PulseNet 3.20. PR2: Incorporation Buffer 3.21. QC: Quality Control 3.22. RFID: Radio-Frequency Identification 3.23. SAV: Sequencing Analysis Viewer 3.24. SDS: Safety Data Sheet 3.25. SOP: Standard Operating Procedure 3.26. UPS: Uninterrupted Power Supply 3.27. WGS: Whole Genome Sequencing
4. RESPONSIBILITIES/PROCEDURE 4.1. PulseNet Public Health Laboratories:
4.1.1. Sequence isolates and perform quality check of the sequencing run and subsequent sequence data
4.1.2. Re-sequence any isolates that do not meet quality thresholds
LABORATORY STANDARD OPERATING PROCEDURE FOR WHOLE GENOME SEQUENCING ON MISEQ
Doc. No. PNL38 Ver. No. 01 Effective Date: Page 2 of 20
4.1.3. Communicate any instrument or sequencing issues with PulseNet Central, as necessary 4.2. PulseNet Central:
4.2.1. Perform additional sequence data quality analysis, if necessary 4.2.2. Notify PN PHL if any sequences submitted do not meet quality thresholds 4.2.3. Assist PN PHL with troubleshooting as necessary
5. SAFETY 5.1. Biosafety warning: This document describes handling of DNA and associated products, and
does not describe best practices for handling of biological infectious material. 5.2. Chemical Safety Warning:
5.2.1. The MiSeq Reagent Cartridges contain formamide (GHS classification Category 1B for reproductive toxicity), an aliphatic amide that is a potential reproductive toxin. Personal injury can occur through inhalation, ingestions, skin and eye contact. See the Illumina kit SDS for additional information and take proper precautions when handling the cartridges and MiSeq waste. Ensure spent containers and unused contents are disposed of in accordance with governmental safety standards.
5.2.1.1. Ethanol is flammable (GHS Flammability Category 2); take precautions when handling, storing and disposing of ethanol in the laboratory.
5.2.1.2. Sodium hydroxide is corrosive (GHS Category 1A and 1, GHS Category 3 for acute hazards to aquatic environment); take precautions when handling, storing and disposing of sodium hydroxide in the laboratory.
6. Reagents: Store reagents per manufacturer’s instructions 6.1. MiSeq Reagent Kit Options:
• v2 Nano, 300 Cycles – Illumina, Cat# MS-103-1001 • v2 Nano, 500 Cycles – Illumina, Cat# MS-103-1003 • v2 Micro, 300 Cycles – Illumina, Cat# MS-103-1002 • v2 300 Cycles – Illumina, Cat# MS-102-2002 • v2 500 Cycles – Illumina, Cat# MS-102-2003 • v3 600 Cycles – Illumina, Cat# MS-102-3003
6.1.1. Box 1 of 2. Store at -15°C to -25°C, away from light • MiSeq Cartridge (see Section 5.2.1 for chemical safety information) • Hybridization Buffer (HT1)
6.1.2. Box 2 of 2. Store at 2-8°C • Incorporation Buffer (PR2) • Flow Cell
6.2. Ethanol, molecular-grade, 95-100% (Fisher Scientific, Cat# BP2818-500 or equivalent) 6.3. Ethanol, lab-grade, 70% or equivalent for disinfection purposes (Fisher Scientific, Cat# 04-355-
309 or equivalent) 6.4. EBT (prepared in house)
6.4.1. 100 µl Tween 20 6.4.2. 99.9 ml of 10 mM Tris-HCl, pH 8.0
LABORATORY STANDARD OPERATING PROCEDURE FOR WHOLE GENOME SEQUENCING ON MISEQ
Doc. No. PNL38 Ver. No. 01 Effective Date: Page 3 of 20 6.5. Water, molecular-grade (Fisher Scientific, Cat# BP24701 or equivalent) 6.6. Sodium Hypochlorite, 4 - 4.99% (Sigma-Aldrich, Cat# 239305-25ML or equivalent) 6.7. Sodium Hydroxide, 1N (Sigma-Alrich, Cat# S2770-100ML or equivalent) pH should be ≥ 12.5. 6.8. Tween 20 (Sigma-Aldrich, Cat# P9416-50ML or equivalent) 6.9. OPTIONAL: 10nM PhiX Library (Illumina, Cat# FC-110-3001). Store at -25°C to -15°C.
7. Supplies 7.1. Ice 7.2. Illumina MiSeq Wash Tray (n=2; recommended one for bleach washes, one for water washes
only) 7.3. Lint-free wipes (Fisher Scientific, Cat# 06-666 or equivalent) 7.4. Lens paper (Fisher Scientific, Cat# 11-996 or equivalent) 7.5. MiSeq wash tubes (Contact Illumina for information on obtaining wash tubes) 7.6. Microseal B film (BioRad, Cat# MSB-1001) 7.7. 1.5 ml microcentrifuge tubes (ThermoFisher, Cat# AM12400 or equivalent) 7.8. Serological pipets, 1ml to 10ml volumes (various catalog numbers) 7.9. Sterile pipette tips, filtered: 20 µl, 200 µl and 1000 µl volumes (Rainin, Cat# 17001865,
17001863 & 17001864 or equivalent)
8. Equipment 8.1. MiSeq Desktop Sequencer 8.2. Micropipettes, capable of volumes from 1 µl to 1000 µl. 8.3. Heat block 8.4. Ice buckets 8.5. Pipet-aid 8.6. Microcentrifuge 8.7. Microplate centrifuge or equivalent 8.8. OPTIONAL: UPS back-up for the MiSeq (Recommended: Staples, Cyberpower AVR Series
Line Interactive 1.5 kVA UPS, Cat# IM1M14018) 8.9. OPTIONAL: External encrypted hard drive or server for data transfer and storage if BaseSpace
or networking of the instrument is not available (Suggested: CDW, DataLocker H350 Basic Hard Drive 1 TB USB 3.0, Cat# 4075102)
9. Procedure 9.1. Preparing the Reagent Cartridge for the MiSeq
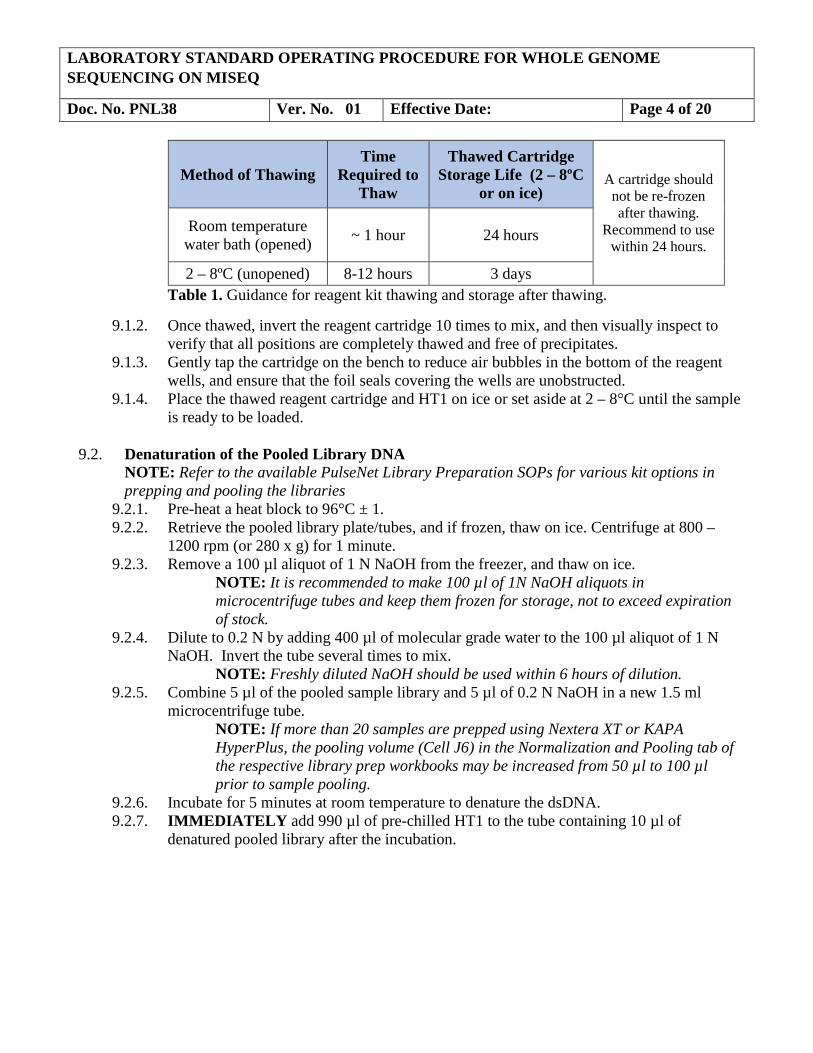
9.1.1. Plan sufficient time for thawing the cartridge and note that the HT1 buffer is in the same box as the cartridge and must be thawed as well (on ice or at 2 – 8°C). See the table below for guidance regarding reagent kit storage after thawing:
LABORATORY STANDARD OPERATING PROCEDURE FOR WHOLE GENOME SEQUENCING ON MISEQ
Doc. No. PNL38 Ver. No. 01 Effective Date: Page 4 of 20
Time Thawed Cartridge Method of Thawing Required to Storage Life (2 – 8ºC A cartridge should
Thaw or on ice) not be re-frozen after thawing.
Recommend to use within 24 hours.
Room temperature water bath (opened) ~ 1 hour 24 hours
2 – 8ºC (unopened) 8-12 hours 3 days Table 1. Guidance for reagent kit thawing and storage after thawing.
9.1.2. Once thawed, invert the reagent cartridge 10 times to mix, and then visually inspect to verify that all positions are completely thawed and free of precipitates.
9.1.3. Gently tap the cartridge on the bench to reduce air bubbles in the bottom of the reagent wells, and ensure that the foil seals covering the wells are unobstructed.
9.1.4. Place the thawed reagent cartridge and HT1 on ice or set aside at 2 – 8°C until the sample is ready to be loaded.
9.2. Denaturation of the Pooled Library DNA
NOTE: Refer to the available PulseNet Library Preparation SOPs for various kit options in prepping and pooling the libraries
9.2.1. Pre-heat a heat block to 96°C ± 1. 9.2.2. Retrieve the pooled library plate/tubes, and if frozen, thaw on ice. Centrifuge at 800 –
1200 rpm (or 280 x g) for 1 minute. 9.2.3. Remove a 100 µl aliquot of 1 N NaOH from the freezer, and thaw on ice.
NOTE: It is recommended to make 100 µl of 1N NaOH aliquots in microcentrifuge tubes and keep them frozen for storage, not to exceed expiration of stock.
9.2.4. Dilute to 0.2 N by adding 400 µl of molecular grade water to the 100 µl aliquot of 1 N NaOH. Invert the tube several times to mix.
NOTE: Freshly diluted NaOH should be used within 6 hours of dilution. 9.2.5. Combine 5 µl of the pooled sample library and 5 µl of 0.2 N NaOH in a new 1.5 ml
microcentrifuge tube. NOTE: If more than 20 samples are prepped using Nextera XT or KAPA HyperPlus, the pooling volume (Cell J6) in the Normalization and Pooling tab of the respective library prep workbooks may be increased from 50 µl to 100 µl prior to sample pooling.
9.2.6. Incubate for 5 minutes at room temperature to denature the dsDNA. 9.2.7. IMMEDIATELY add 990 µl of pre-chilled HT1 to the tube containing 10 µl of
denatured pooled library after the incubation.

LABORATORY STANDARD OPERATING PROCEDURE FOR WHOLE GENOME SEQUENCING ON MISEQ
Doc. No. PNL38 Ver. No. 01 Effective Date: Page 5 of 20
Library Prep Kit Initial Library Pool Concentration
Denatured Library Concentration After Addition of 990 µl of HT1
Nextera XT & KAPA HyperPlus 2 nM 10 pM
Nextera XT & KAPA HyperPlus 4 nM 20 pM
DNA Flex 4 nM 20 pM Table 2. Denatured Library Concentration from Initial Library Pool Concentration
9.2.8. Place the denatured DNA on ice until ready to proceed to the next steps.
9.3. Dilution to Desired Final Loading Concentration 9.3.1. Final loading concentration is determined empirically for a particular instrument and
user, and is related to achieving optimal cluster density (CD). Recommended loading concentrations are given below:
Library Prep Kit Recommended Loading Concentration The loading
concentration may be increased or decreased to help achieve desired
cluster density.
Nextera XT & KAPA HyperPlus 10 pM (15 pM for v3 kit)
Nextera DNA Flex 15 pM (18 pM for v3 kit)*
Table 3. Recommended Loading Concentrations for different Library Prep Kits (*v3 loading concentration for DNA Flex is still being evaluated, as of January 2019)
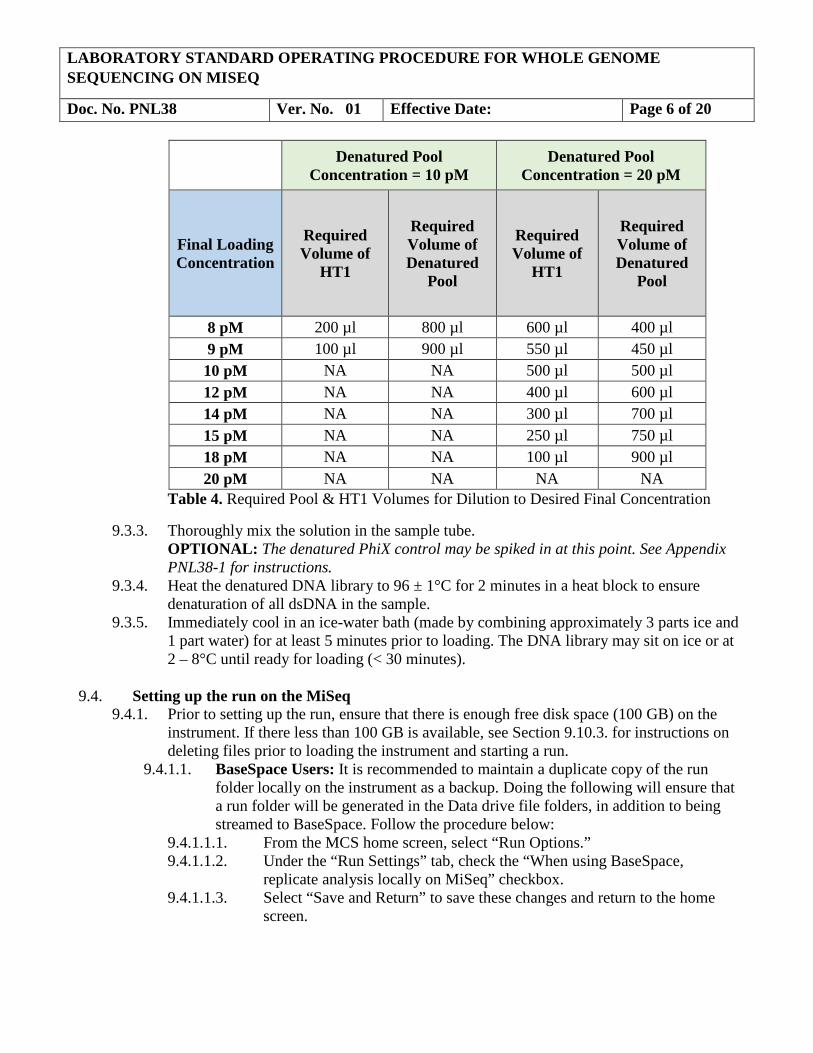
9.3.2. Refer to Table 4 below to prepare the final dilution (if necessary) of the pooled library
according to the desired final loading concentration.
LABORATORY STANDARD OPERATING PROCEDURE FOR WHOLE GENOME SEQUENCING ON MISEQ
Doc. No. PNL38 Ver. No. 01 Effective Date: Page 6 of 20
Denatured Pool Denatured Pool Concentration = 10 pM Concentration = 20 pM
Final Loading Concentration
Required Volume of
HT1
Required Volume of Denatured
Pool
Required Volume of
HT1
Required Volume of Denatured
Pool
8 pM 200 µl 800 µl 600 µl 400 µl 9 pM 100 µl 900 µl 550 µl 450 µl 10 pM NA NA 500 µl 500 µl 12 pM NA NA 400 µl 600 µl 14 pM NA NA 300 µl 700 µl 15 pM NA NA 250 µl 750 µl 18 pM NA NA 100 µl 900 µl 20 pM NA NA NA NA
Table 4. Required Pool & HT1 Volumes for Dilution to Desired Final Concentration
9.3.3. Thoroughly mix the solution in the sample tube. OPTIONAL: The denatured PhiX control may be spiked in at this point. See Appendix PNL38-1 for instructions.
9.3.4. Heat the denatured DNA library to 96 ± 1°C for 2 minutes in a heat block to ensure denaturation of all dsDNA in the sample.
9.3.5. Immediately cool in an ice-water bath (made by combining approximately 3 parts ice and 1 part water) for at least 5 minutes prior to loading. The DNA library may sit on ice or at 2 – 8°C until ready for loading (< 30 minutes).
9.4. Setting up the run on the MiSeq
9.4.1. Prior to setting up the run, ensure that there is enough free disk space (100 GB) on the instrument. If there less than 100 GB is available, see Section 9.10.3. for instructions on deleting files prior to loading the instrument and starting a run.
9.4.1.1. BaseSpace Users: It is recommended to maintain a duplicate copy of the run folder locally on the instrument as a backup. Doing the following will ensure that a run folder will be generated in the Data drive file folders, in addition to being streamed to BaseSpace. Follow the procedure below:
9.4.1.1.1. From the MCS home screen, select “Run Options.” 9.4.1.1.2. Under the “Run Settings” tab, check the “When using BaseSpace,
replicate analysis locally on MiSeq” checkbox. 9.4.1.1.3. Select “Save and Return” to save these changes and return to the home
screen.
LABORATORY STANDARD OPERATING PROCEDURE FOR WHOLE GENOME SEQUENCING ON MISEQ
Doc. No. PNL38 Ver. No. 01 Effective Date: Page 7 of 20
NOTE: This run folder may be deleted if run data was successfully streamed to BaseSpace and local data storage is not required.
9.4.2. Ensure that the Sample Sheet (and Sample Plate, if applicable) setup has been completed in the Illumina Experiment Manager (IEM) on the instrument. See Appendix PNL38-2 for instructions.
9.4.3. Open the MiSeq Control Software window, select “Sequence” and proceed immediately to Preparing and Loading the Flow Cell.
NOTE: If using BaseSpace, on the following screen, check the box to make the user info fields active and enter credentials to ensure the run data will be streamed to BaseSpace.
9.5. Preparing and Loading the Flow Cell
9.5.1. Retrieve the Flow Cell and Incorporation buffer (PR2) that are part of the MiSeq Reagent Box v2 stored at 2 – 8°C.
9.5.2. While wearing clean, powder-free gloves, carefully remove the flow cell from the container, without touching the glass of the flow cell.
9.5.3. Lightly rinse the flow cell assembly with molecular-grade water, making sure that both the glass and plastic casing are thoroughly rinsed of excess salts.
9.5.4. Using care around the black port gasket, pat dry the flow cell and cartridge using a lint-free wipe. Make sure to remove all excess fluid.
9.5.5. Wet a clean piece of lens paper with ethanol and clean the flow cell glass, making sure that the glass is free of streaks, lint and tissue fibers.
NOTE: Do not add ethanol directly to flow cell. Avoid getting ethanol on the flow cell port gasket.
9.5.6. Dry any excess alcohol with the lens paper, and visually inspect to make sure that the flow cell ports are free of obstructions, that the gasket is well-seated around the flow cell ports, and that there are no smudges or debris on the glass.
9.5.7. Raise the flow cell compartment door and press the release button to open the clamp and remove the previously used flow cell.
9.5.8. Ensure that the flow cell stage is free of lint. If necessary, wipe with an alcohol wipe or similar and allow to dry.
9.5.9. Place the flow cell on the stage, and close the flow cell clamp (it will click when closed fully) and close the compartment door and select “Next” in the MiSeq Control Software.
9.6. Loading the Incorporation Buffer 9.6.1. Gently invert the capped bottle to mix the Incorporation buffer (PR2), and then remove
the lid. 9.6.2. Open the reagent compartment door and raise the sipper handle in the right-hand until it
locks into place. 9.6.3. Remove the MiSeq Wash Buffer bottle, re-cap, and set aside for future use. 9.6.4. Place the PR2 bottle where the MiSeq Wash Buffer bottle was previously located. 9.6.5. Empty the contents of the waste bottle into an appropriate waste container for chemical
waste, if necessary.

LABORATORY STANDARD OPERATING PROCEDURE FOR WHOLE GENOME SEQUENCING ON MISEQ
Doc. No. PNL38 Ver. No. 01 Effective Date: Page 8 of 20
NOTE: All liquid that accumulates in the MiSeq waste bottle should be disposed of as formamide waste, including liquid from wash cycles. All formamide waste bottles must be clearly labeled with contents, date of first use, and date of final use. Waste must be stored in a designated, clearly labeled waste disposal site.
9.6.6. Slowly lower the sipper handle. Make sure that the sippers lower into the PR2 and waste bottles.
9.6.7. Check the lower-right corner of the screen to confirm that the RFID of the PR2 bottle was read successfully.
NOTE: If the RFID is not read by the system for any step, the software prompts you through the steps to obtain a temporary bypass code and proceed with setting up the run. For more information, see “Resolving RFID Read Failure” in the MiSeq System User Guide.
9.6.8. Select “Next” on MCS.
9.7. Loading the Sample into the Cartridge & Loading the Instrument 9.7.1. Remove the thawed reagent cartridge from storage, ensuring that it has been thoroughly
dried and the reagents mixed by gentle inversion. 9.7.2. Tap the reagent cartridge on a hard surface to collect contents at the bottom of the
reservoirs. 9.7.3. Use a clean 1000 µl pipette tip to pierce the foil seal over the reservoir labeled “Load
Sample.” 9.7.4. Transfer 600 µl of the denatured DNA library into the “Load Sample” reservoir and tap
gently on a hard surface to bring all contents to the bottom. NOTE: It is recommended to load the sample toward the bottom of reservoir using an extended 1000 µl pipette tip to reduce the risk of droplets forming on the sides. Take care to avoid droplets on the foil seal as the sample is dispensed.
9.7.5. Confirm the MiSeq screen states “load reagent cartridge” to ensure the sippers in the chiller have been raised.
9.7.6. Open the reagent chiller door, remove the wash tray, and dry bottom of chiller compartment if necessary using absorbent wipes.
NOTE: Do not leave the reagent chiller door open for extended periods of time. 9.7.7. Hold the reagent cartridge on the end with the Illumina label and slide it into the chiller
until it stops. 9.7.8. Close the chiller door and check the screen to confirm that the RFID of the reagent
cartridge has been read successfully. 9.7.9. Close the reagent compartment door. 9.7.10. Select “Change Sample Sheet” and in the subsequent screen, select the “Browse” button,
and navigate to the appropriate sample sheet. 9.7.11. Select the desired sample sheet and click “OK”. 9.7.12. Select “Next” to proceed to the run parameters review screen. Review Run Parameters
and ensure that they are correct (Experiment Name, Analysis Workflow, Read Length, etc.) then select “Next” to proceed to the Pre-Run Check.
NOTE1: If the IDT for Illumina Unique Dual Indexes were used for library prep, the Index Reads need to be changed to 10 cycles (instead of 8 cycles)!
LABORATORY STANDARD OPERATING PROCEDURE FOR WHOLE GENOME SEQUENCING ON MISEQ
Doc. No. PNL38 Ver. No. 01 Effective Date: Page 9 of 20
NOTE2: The system performs a check of all run components, disk space, and network connections prior to run start. If any part of the pre-run check fails, a message will appear on the screen with general instructions describing the error or detailing how to correct it. For more information, see “Resolving Run Setup Errors” in the MiSeq System User Guide. If all items successfully pass the pre-run check, the system is ready to start the run.
9.7.13. Select “Start Run”. NOTE1: Once the run has been started, do not open the flow cell compartment or the reagent compartment doors, neither should the instrument monitor be engaged unless the run is to be stopped or paused. NOTE2: Image capture on the MiSeq is sensitive to vibration. Performing tasks that cause vibration near/on the instrument during a run could cause the run to halt or adversely impact sequencing results.
9.7.14. Upon run completion, run statistics (i.e. Q30, cluster density, clusters passing filter, estimated yield) may be recorded in the Workbook.
9.8. Exporting Data from the MiSeq:
NOTE: This section is only necessary for users unable to stream to BaseSpace or if a secondary data repository (i.e. local server) is desired for local data analysis or storage.
9.8.1. Data is found on the D:\ drive → Illumina → MiSeqOutput → Run folder (choose the most recent run folder) → Data → Intensities → BaseCalls. Within the BaseCalls folder the raw read data is in fastq.gz format. There will be 2 files per isolate for paired reads (R1 and R2). This data can be copied onto an external hard drive and moved to a computer workstation. Alternatively, the MiSeq instrument can also be connected to a local network share drive to directly transfer files from the instrument.
NOTE1: It may take up to 1 hour for the MiSeq to generate fastq files post-run as the Real-Time Analysis Software lags behind the sequencing run. If using BaseSpace, the data can be accessed through the run or in a designated project. NOTE2: If fastq data is unavailable for a given isolate(s) due to incorrect index assignment or sample sheet error, the run can be requeued for analysis using either MiSeq Reporter (MSR) or corrective options in BaseSpace (see Appendix PNL38-3).
9.9. Post-Run Washes and Reagent Disposal
9.9.1. Once the run is complete, select the “Start Wash” option at the bottom right-hand side of the screen.
9.9.2. Ensure the “Perform optional template line wash” checkbox is checked to proceed with a Post-Run bleach wash. Bleach, or sodium hypochlorite is used to reduce carry-over of nucleic acid from previous runs.
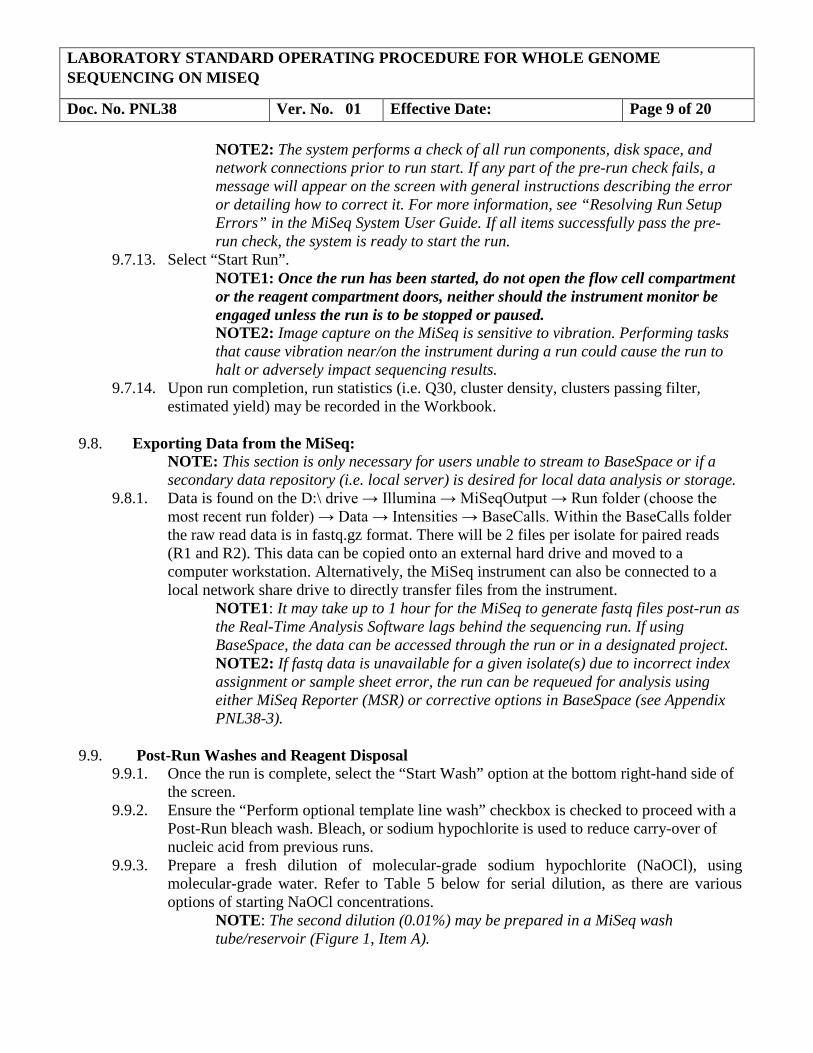
9.9.3. Prepare a fresh dilution of molecular-grade sodium hypochlorite (NaOCl), using molecular-grade water. Refer to Table 5 below for serial dilution, as there are various options of starting NaOCl concentrations.
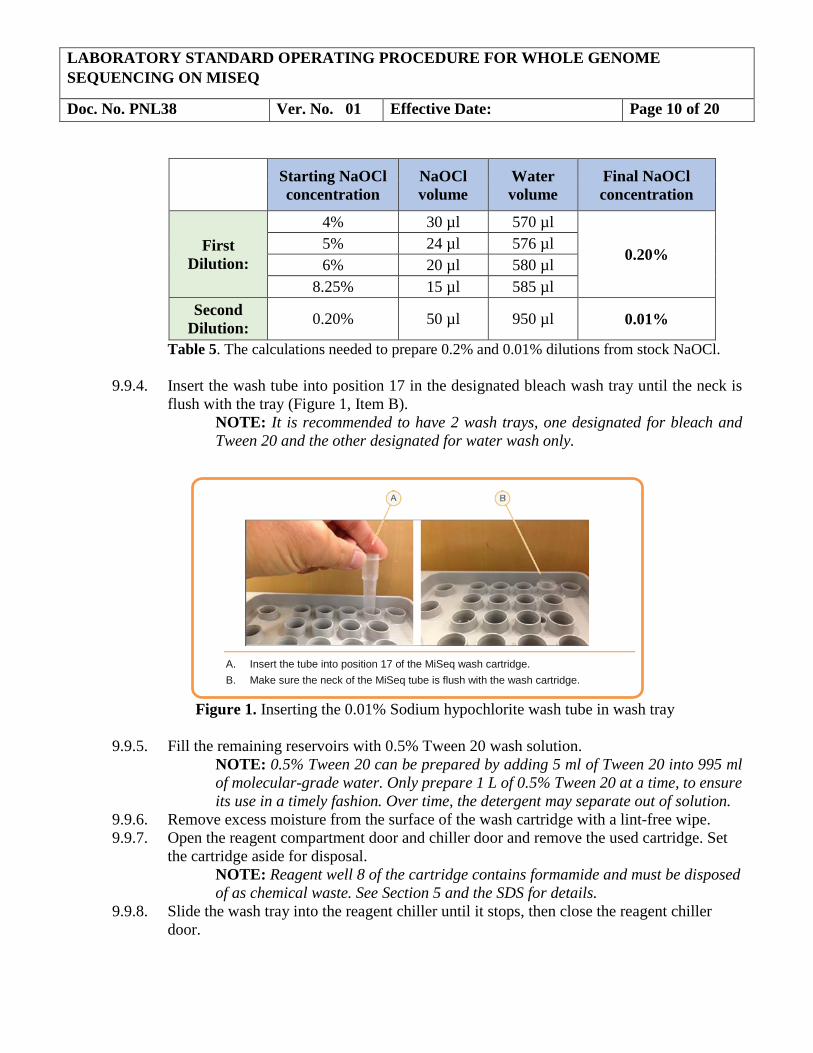
NOTE: The second dilution (0.01%) may be prepared in a MiSeq wash tube/reservoir (Figure 1, Item A).
LABORATORY STANDARD OPERATING PROCEDURE FOR WHOLE GENOME SEQUENCING ON MISEQ
Doc. No. PNL38 Ver. No. 01 Effective Date: Page 10 of 20
Starting NaOCl concentration
NaOCl volume
Water volume
Final NaOCl concentration
First Dilution:
4% 30 µl 570 µl
0.20% 5% 24 µl 576 µl 6% 20 µl 580 µl
8.25% 15 µl 585 µl Second
Dilution: 0.20% 50 µl 950 µl 0.01%
Table 5. The calculations needed to prepare 0.2% and 0.01% dilutions from stock NaOCl.
9.9.4. Insert the wash tube into position 17 in the designated bleach wash tray until the neck is flush with the tray (Figure 1, Item B).
NOTE: It is recommended to have 2 wash trays, one designated for bleach and Tween 20 and the other designated for water wash only.
Figure 1. Inserting the 0.01% Sodium hypochlorite wash tube in wash tray
9.9.5. Fill the remaining reservoirs with 0.5% Tween 20 wash solution. NOTE: 0.5% Tween 20 can be prepared by adding 5 ml of Tween 20 into 995 ml of molecular-grade water. Only prepare 1 L of 0.5% Tween 20 at a time, to ensure its use in a timely fashion. Over time, the detergent may separate out of solution.
9.9.6. Remove excess moisture from the surface of the wash cartridge with a lint-free wipe. 9.9.7. Open the reagent compartment door and chiller door and remove the used cartridge. Set
the cartridge aside for disposal. NOTE: Reagent well 8 of the cartridge contains formamide and must be disposed of as chemical waste. See Section 5 and the SDS for details.
9.9.8. Slide the wash tray into the reagent chiller until it stops, then close the reagent chiller door.
A. Insert the tube into position 17 of the MiSeq wash cartridge. B. Make sure the neck of the MiSeq tube is flush with the wash cartridge.
LABORATORY STANDARD OPERATING PROCEDURE FOR WHOLE GENOME SEQUENCING ON MISEQ
Doc. No. PNL38 Ver. No. 01 Effective Date: Page 11 of 20
9.9.9. Raise the sipper handle, remove the PR2 bottle and replace with a MiSeq Wash Buffer bottle (containing 300-500 ml of 0.5% Tween 20 solution).
NOTE: Replace the Wash Buffer bottle as needed to limit contaminants. 9.9.10. Remove the waste container and dispose of contents in a chemical waste receptacle that is
appropriate for formamide (see Section 5.2.1. for safety information). NOTE: All liquid that accumulates in the MiSeq waste bottle should be disposed of as toxic formamide waste, including liquid from wash cycles. All formamide waste bottles must be clearly labeled with contents, date of first use, and date of final use. Waste must be stored in a designated, clearly labeled waste disposal site.
9.9.11. Return the emptied waste container to the reagent compartment, lower the sipper arm, and close the reagent compartment door.
9.9.12. Select “Next” to begin the wash. This will take approximately 20 minutes. 9.9.13. Once the post-run bleach wash is complete, select “Done” on the screen to return to the
MiSeq Control Software home screen. 9.9.14. Following the bleach wash, a second Post-Run wash with molecular-grade water must be
completed to ensure any trace amount of sodium hypochlorite is removed from the template line:
9.9.14.1. From the home screen select Perform Wash > Perform Post-Run Wash. 9.9.14.2. Select “Start Wash”.
NOTE: The “Template Line Wash” box should remain un-checked. 9.9.14.3. Fill all reservoirs of the designated water wash tray with molecular-grade water. 9.9.14.4. Remove excess moisture from the surface of the wash cartridge with a lint-free
wipe. 9.9.14.5. Remove the bleach wash tray from the reagent chiller compartment and rinse the
wash tube that contained the 0.01% NaOCl from Position 17. Rinse the wash tray with de-ionized water (or equivalent) and let dry.
9.9.14.6. Place the water wash tray in the chiller compartment and close the door. 9.9.14.7. Raise the reagent sipper arm and replace the 0.5% Tween 20 wash bottle with a
wash bottle containing 300-500 ml of molecular-grade water and lower the sipper arm.
9.9.14.8. Close the reagent compartment door and select “Next” to begin the wash. 9.9.14.9. Once the wash is complete, select “Done” to complete the wash cycle and return
to the home screen. 9.9.14.10. The flow cell, wash bottle, and liquid waste receptacle should remain in place
until the next sequencing run is to be performed. 9.10. Instrument Maintenance
9.10.1. Weekly Maintenance: 9.10.1.1. Wash: A minimum of once a week, a Post-Run Wash with 0.5% Tween 20 should
be performed to ensure proper instrument fluidics performance. This may be performed as a manual Post-Run Wash if the instrument will not be used.
9.10.1.2. Reboot: The instrument should be rebooted weekly and after a file deletion to free the virtual memory. On the MCS home screen, select the button “Manage

LABORATORY STANDARD OPERATING PROCEDURE FOR WHOLE GENOME SEQUENCING ON MISEQ
Doc. No. PNL38 Ver. No. 01 Effective Date: Page 12 of 20
Instrument” then push “Reboot.” It will take approximately 10 minutes for the system to reboot and start the MiSeq Control software.
NOTE: Alternatively, the instrument can be power cycled by selecting the “Manage Instrument” menu option on the home screen and then the “Shut Down” option. Once the instrument has shut down (noted by a distinct click sound), reach behind the right-hand side of the instrument and flip the power switch located near the power cord. Let the instrument power down for at least 10 minutes and then flip the switch back on. The instrument will boot up the MCS without additional interference (~10 minutes).
9.10.2. Monthly Maintenance:
9.10.2.1. Wash: A maintenance wash should be performed at least once a month. This is a series of 3 washes that requires refilling of the wash tray after each wash cycle (30 minutes). The total time for a maintenance wash is approximately 90 minutes.
9.10.2.1.1. Under Wash Options select “Maintenance Wash.” 9.10.2.1.2. Fill the wash tray and wash buffer bottle with 0.5% Tween 20. 9.10.2.1.3. After each wash, top off the reservoirs of the wash tray and wash buffer
bottle with 0.5% Tween 20. NOTE: If desired, the third wash can be a water wash instead.
Monthly Wash Schedule Options
Example 1
Week 1 Week 2 Week 3 Week 4
PB,W (post run) M
PB,W (post run) PB,W (post run) PB,W (post run)
PB,W (post run) PB,W (post run)
P (no run) PB,W (post run)
Example 2 P (no run) PB,W (post run) P (no run) M, W
Example 3 P (no run) P (no run) P (no run) PB,W (post run) M, W
Example 4 P (no run) PB,W (post run) PB,W (post run) P (no run) PB,W (post run)
PB,W (post run)
Example 5 P (no run) PB,W (post run) - on a Monday M, W P (no run)
PB,W (post run)
Table 6. Options for monthly wash schedules, by week, with varied number of runs. Maintenance wash (M), Post-Run wash w/ Tween 20 (P), Post-Run wash w/ bleach (PB), Water wash (W)
LABORATORY STANDARD OPERATING PROCEDURE FOR WHOLE GENOME SEQUENCING ON MISEQ
Doc. No. PNL38 Ver. No. 01 Effective Date: Page 13 of 20
9.10.3. Management of Disk Space on the Data (D:\) Drive: 9.10.3.1. The MiSeq requires 100GB of free disk space on the D:\ drive before starting a
sequencing run. Data should be cleared only after any data transfer / back-up is complete, and if no troubleshooting is necessary for that run. The following instructions outline which files may be deleted and their locations:
9.10.3.2. Navigate to Data (D:\ Drive)/Illumina/MiSeqOutput/(most recent run folder)/. 9.10.3.3. Within this folder select the “Images” and “Thumbnail_images” folders and
delete. 9.10.3.4. Go to Data (D:\ Drive)/Illumina/MiSeqAnalysis/. 9.10.3.5. Delete any run folders excluding the most recent folder.
NOTE: It is suggested to reboot the instrument following data deletion in order to free virtual memory in the system.
10. FLOW CHART: N/A
11. REFERENCES: 11.1. Illumina, Inc. BaseSpace Sequence Hub “How to Requeue Analysis for a Run”.
https://help.basespace.illumina.com/articles/tutorials/requeue-analysis-for-run/ 11.2. Illumina, Inc. Illumina Adapter Sequences. (Doc. # 1000000002694 v08). October 2018.
https://support.illumina.com/content/dam/illumina-support/documents/documentation/chemistry_documentation/experiment-design/illumina-adapter-sequences-1000000002694-09.pdf
11.3. Illumina, Inc. Illumina Experiment Manager Software Guide. (Doc.# 15031335 v07). January 2018. https://support.illumina.com/content/dam/illumina-support/documents/documentation/software_documentation/iem/illumina-experiment-manager-software-guide-15031335-07.pdf
11.4. Illumina, Inc. Miseq Reporter Software Guide. (Doc.# 15042295 v05). January 2017. https://support.illumina.com/sequencing/sequencing_software/miseq_reporter/documentation.html
11.5. Illumina, Inc. MiSeq System Guide. (Doc# 1000000061014 v00). July 2018. https://support.illumina.com/content/dam/illumina-support/documents/documentation/system_documentation/miseq/miseq-system-guide-for-miseq-reporter-1000000061014-00.pdf
11.6. Illumina, Inc. Illumina Experiment Manager: Narration Transcript. https://support.illumina.com/content/dam/illumina-support/courses/illumina-experiment-manager/story_content/external_files/Experiment_Manager_Narration_Transcript.pdf
12. CONTACTS: 12.1. PulseNet NGS Lab:
12.2. Eija Trees, D.V.M., Ph.D.
LABORATORY STANDARD OPERATING PROCEDURE FOR WHOLE GENOME SEQUENCING ON MISEQ
Doc. No. PNL38 Ver. No. 01 Effective Date: Page 14 of 20
(404) 639-3672 [email protected]
12.3. Ashley Sabol, M.S.
(404) 639-2947 [email protected]
12.4. Jeniffer Concepcion-Acevedo, Ph.D. (404) 639-2828
13. AMENDMENTS: 13.1. 01/31/2019:
− Pulled procedures pertaining to setting up a run on the MiSeq out of PNL32 to create separate document (PNL38)
14. APPROVAL SIGNATURES: Approved By: ______________________________________ Date: _______________
PulseNet QA/QC Personnel
Approved By: ______________________________________ Date: _______________
PulseNet Outbreak Detection and Surveillance Unit Chief
Approved By: ______________________________________ Date: _______________
PulseNet PFGE Reference Unit Chief
Approved By: ______________________________________ Date: _______________
PulseNet Next Generation Subtyping Methods Unit Chief
Approved By: ______________________________________ Date: _______________ PulseNet Reference Outbreak Surveillance Team Lead
LABORATORY STANDARD OPERATING PROCEDURE FOR WHOLE GENOME SEQUENCING ON MISEQ
Doc. No. PNL38 Ver. No. 01 Effective Date: Page 15 of 20
Appendix PNL38-1
Addition of PhiX Control
1. Purpose PhiX is a 500 bp balanced genome of a bacteriophage and is recommended by Illumina as a control which can indicate how well the sequencing instrument is performing. A PhiX run after an instrument maintenance or repair is recommended. The “Aligned (%)” in SAV should match the percentage of PhiX spiked into a run, and if not matching, this is an indicator of alignment error in the MiSeq instrument. Refer to PNQ07 for expected PhiX results.
2. Procedure NOTE: If using a previously prepared PhiX denatured dilution, proceed to Step 2.7.
2.1. Prepare 0.2 N NaOH by adding 400 µl of molecular-grade water to a 100 µl aliquot of 1 N NaOH and place on ice until ready to use.
2.2. Combine 1 µl of 10 nM PhiX library from the stock and 4 µl of EBT to obtain 2 nM PhiX library in a new 1.5 ml microcentrifuge tube.
2.3. Combine 5 µl of 2nM PhiX library and 5 µl of 0.2 N NaOH and mix well. 2.4. Incubate for 5 minutes at room temperature to denature the PhiX library into single strands. 2.5. IMMEDIATELY add 490 µl of pre-chilled HT1 to the tube containing 10 µl of denatured PhiX
library after the incubation to obtain 20 pM of denatured PhiX library. 2.6. Label, date and initial the microcentrifuge tube. Denatured 20 pM PhiX libraries may be stored
up to three weeks at -15o to -25oC. 2.7. Dilute the denatured 20 pM PhiX library to 8 pM by adding 40 µl of 20 pM denatured PhiX
library to 60 µl of pre-chilled HT1. 2.8. Determine percentage of PhiX (N%) to add to run. If troubleshooting a library preparation, then
1-10% is appropriate. If troubleshooting a MiSeq instrument issue, then 5% or above (also depending on Illumina tech support guidance) is appropriate. If using PhiX routinely in every run, then 1% is recommended.
2.9. Combine N x 10µl of 8 pM PhiX with 1000 – (N x 10) µl of sample library of desired concentration.
• For example: for 1% PhiX addition, add 10 µl of 8 pM PhiX to 990 µl of denatured 10-20 pM sample library.
2.10. Place on ice until ready to proceed with heat denaturation of sample library (see section 9.3.4.) and addition of PhiX.
LABORATORY STANDARD OPERATING PROCEDURE FOR WHOLE GENOME SEQUENCING ON MISEQ
Doc. No. PNL38 Ver. No. 01 Effective Date: Page 16 of 20
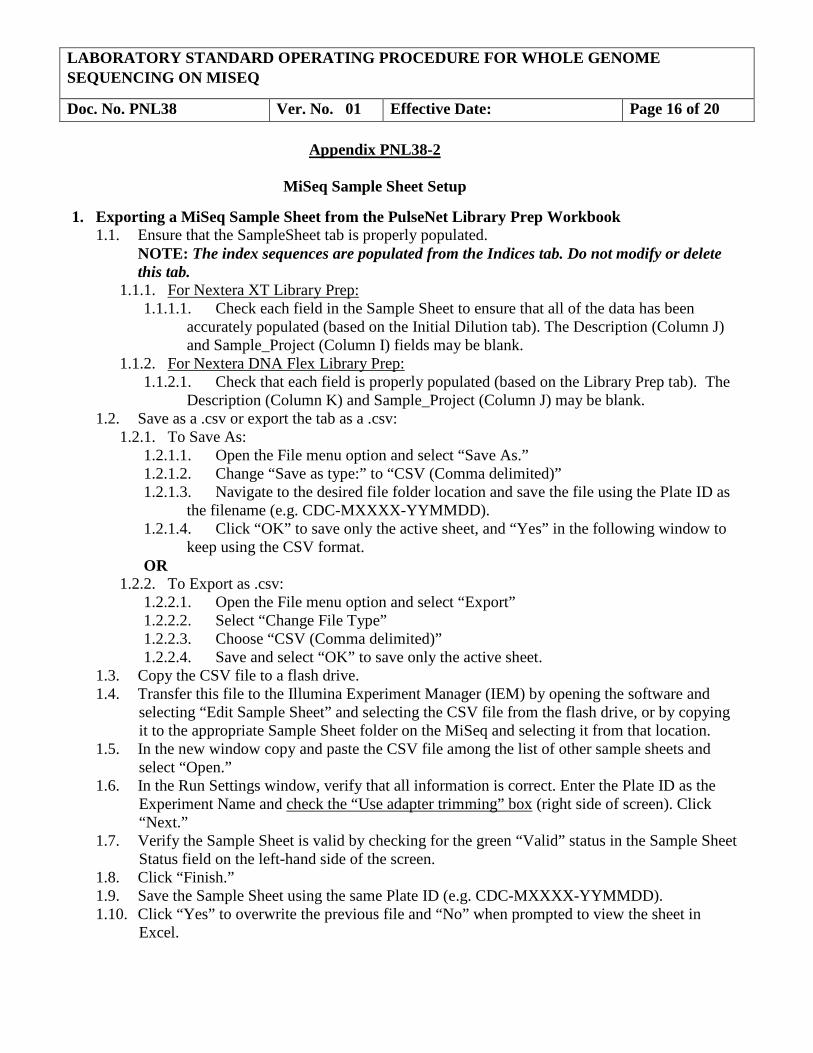
Appendix PNL38-2
MiSeq Sample Sheet Setup
1. Exporting a MiSeq Sample Sheet from the PulseNet Library Prep Workbook 1.1. Ensure that the SampleSheet tab is properly populated.
NOTE: The index sequences are populated from the Indices tab. Do not modify or delete this tab.
1.1.1. For Nextera XT Library Prep: 1.1.1.1. Check each field in the Sample Sheet to ensure that all of the data has been
accurately populated (based on the Initial Dilution tab). The Description (Column J) and Sample_Project (Column I) fields may be blank.
1.1.2. For Nextera DNA Flex Library Prep: 1.1.2.1. Check that each field is properly populated (based on the Library Prep tab). The
Description (Column K) and Sample_Project (Column J) may be blank. 1.2. Save as a .csv or export the tab as a .csv:
1.2.1. To Save As: 1.2.1.1. Open the File menu option and select “Save As.” 1.2.1.2. Change “Save as type:” to “CSV (Comma delimited)” 1.2.1.3. Navigate to the desired file folder location and save the file using the Plate ID as
the filename (e.g. CDC-MXXXX-YYMMDD). 1.2.1.4. Click “OK” to save only the active sheet, and “Yes” in the following window to
keep using the CSV format. OR
1.2.2. To Export as .csv: 1.2.2.1. Open the File menu option and select “Export” 1.2.2.2. Select “Change File Type” 1.2.2.3. Choose “CSV (Comma delimited)” 1.2.2.4. Save and select “OK” to save only the active sheet.
1.3. Copy the CSV file to a flash drive. 1.4. Transfer this file to the Illumina Experiment Manager (IEM) by opening the software and
selecting “Edit Sample Sheet” and selecting the CSV file from the flash drive, or by copying it to the appropriate Sample Sheet folder on the MiSeq and selecting it from that location.
1.5. In the new window copy and paste the CSV file among the list of other sample sheets and select “Open.”
1.6. In the Run Settings window, verify that all information is correct. Enter the Plate ID as the Experiment Name and check the “Use adapter trimming” box (right side of screen). Click “Next.”
1.7. Verify the Sample Sheet is valid by checking for the green “Valid” status in the Sample Sheet Status field on the left-hand side of the screen.
1.8. Click “Finish.” 1.9. Save the Sample Sheet using the same Plate ID (e.g. CDC-MXXXX-YYMMDD). 1.10. Click “Yes” to overwrite the previous file and “No” when prompted to view the sheet in
Excel.

LABORATORY STANDARD OPERATING PROCEDURE FOR WHOLE GENOME SEQUENCING ON MISEQ
Doc. No. PNL38 Ver. No. 01 Effective Date: Page 17 of 20 2. Manually Entering Run Information:
2.1. Create MiSeq Sample Plate – The Sample Plate stores information in a 96-well plate format, designates index assignment and allows creation of a Sample Sheet in the proper format.
2.1.1. Open Illumina Experiment Manager (IEM icon on the MiSeq screen.) 2.1.2. Choose “Create Sample Plate” 2.1.3. Select the appropriate Sample Prep Kit and push “Next” (e.g. NexteraXT) 2.1.4. Name the plate (Plate ID) in the following format: Lab ID, Machine ID, Run Date (For
Example: CDC-MXXXX-YYMMDD). 2.1.5. Select ‘2’ for the number of index reads and select “Next”. 2.1.6. Under the ‘Plate’ tab, start in position A01 and enter the first Sample ID (this is the
PulseNet state ID entered in the BioNumerics “Key” field). NOTE: This is effective after PFGE has been dropped. Up until then the PNUSA_ids assigned by the PulseNet Database Team are used as the sample ID.
2.1.7. In position A02, enter the Sample Name which should be the Sample ID plus the Plate ID (<Sample ID> - <Plate Id>), e.g. 2016K1234- CDC-M12345-160601 for an isolate sequenced at CDC on the instrument M12345 with the run started on June 1st 2016.
2.1.8. Repeat step 2.1.6 – 2.1.7 for all samples, entering the information in the wells corresponding to their positions on the library prep worksheet.
2.1.9. Assign indices for all samples by selecting “Indices” from the drop-down menu at the top left of the screen. For each sample, select the appropriate index from the drop-down menu in each cell. Repeat these steps for index 2.
2.1.10. Verify the layout by clicking on the “Table” tab. 2.1.11. Click “Finish.” 2.1.12. Save the Plate file as the Plate ID (e.g. LabID-MXXXX-YYMMDD).
2.2. Create the Sample Sheet – The Sample Sheet sets the parameters for run set-up, performance and analysis.
2.2.1. Open the Illumina experiment Manager (IEM icon on the MiSeq screen.) 2.2.2. Choose Create Sample Sheet. 2.2.3. Choose “MiSeq” and select “Next”. 2.2.4. Select the appropriate category and application and then press the “Next” button
2.2.4.1. Category: Other. 2.2.4.2. Application: FastQ Only
2.2.5. On the Run Settings page, enter the following: 2.2.5.1. Reagent Cartridge Barcode: provide Plate ID (e.g. LabID-MXXXX-YYMMDD) 2.2.5.2. Assay: Select the library prep method used (E.g. Nextera XT) 2.2.5.3. Index kit: Select the indices used for library prep 2.2.5.4. Index Reads: 2 2.2.5.5. Experiment Name: Enter the Plate ID 2.2.5.6. Investigator Name: Initials of technician(s) performing the run 2.2.5.7. Description: May use the Plate ID 2.2.5.8. Cycle Reads:
2.2.5.8.1. For a v2 300 cycle kit, set at 151 x 151 2.2.5.8.2. For a v2 500 cycle kit, set at 251 x 251

LABORATORY STANDARD OPERATING PROCEDURE FOR WHOLE GENOME SEQUENCING ON MISEQ
Doc. No. PNL38 Ver. No. 01 Effective Date: Page 18 of 20
2.2.5.8.3. For a v3 600 cycle kit, set at 251 x 251 (recommended) or 301 x 301 2.2.5.9. Leave all other settings as default.
2.2.6. Verify that the “use adapter trimming” box is checked (right-hand side of screen) and push “Next”.
2.2.7. On the Sample Selection Page, click on “Select Plate”. NOTE: If this option is not displayed, uncheck the “Maximize” box at the top right-hand side of the screen.
2.2.8. Find the appropriate plate from the directory in the new pop-up window. 2.2.9. Highlight the correct plate and select “Open”. 2.2.10. Click the “Select All” button at the bottom left-hand side of screen. 2.2.11. Click “Add Selected Samples”. 2.2.12. Verify the successful addition of all desired samples to the Sample Sheet in the “Samples
To Include in the Sample Sheet Field” window on the right-hand side of the screen. 2.2.13. Verify the Sample Sheet is ‘valid’ by checking for the green “Valid” status in the Sample
Sheet Status field on the right-hand side of the screen. 2.2.14. Click “Finish”. 2.2.15. Save the Sample Sheet using the Plate ID (e.g. CDC-MXXXX-YYMMDD). Select No
when prompted to view the sheet in Excel.
LABORATORY STANDARD OPERATING PROCEDURE FOR WHOLE GENOME SEQUENCING ON THE MISEQ BENCHTOP SEQUENCER Doc. No. PNL38 Ver. No. 01 Effective Date: Page 19 of 20
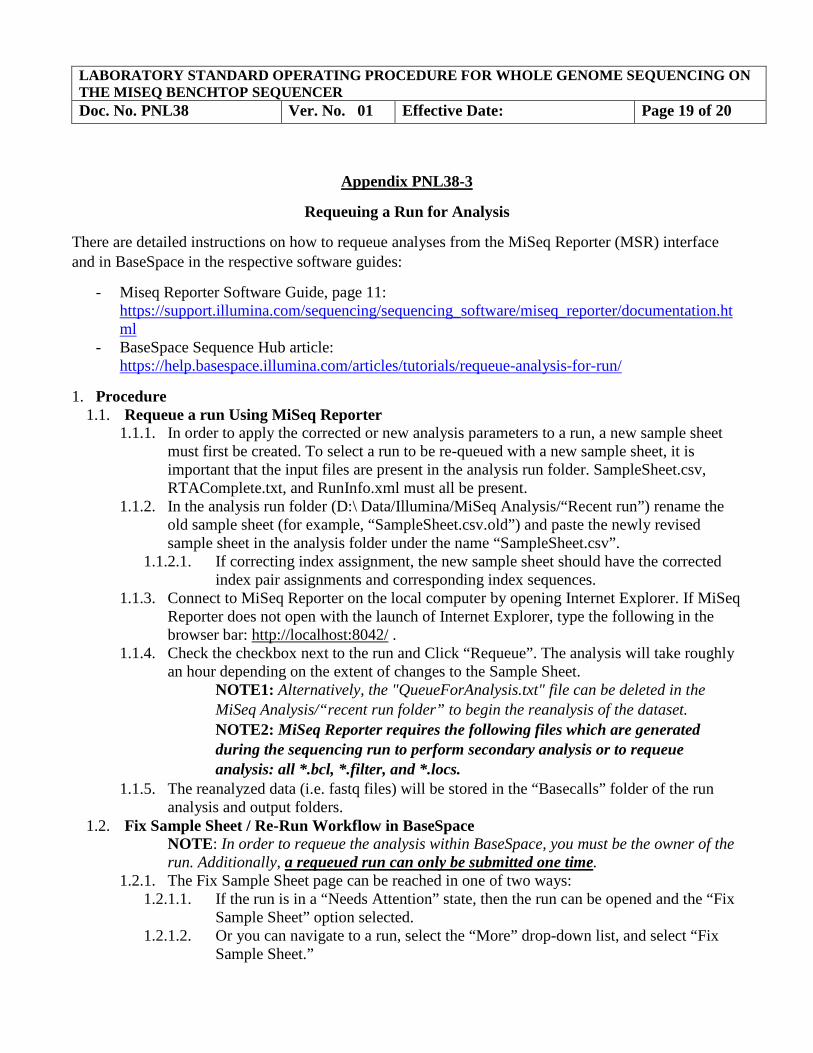
Appendix PNL38-3
Requeuing a Run for Analysis
There are detailed instructions on how to requeue analyses from the MiSeq Reporter (MSR) interface and in BaseSpace in the respective software guides:
- Miseq Reporter Software Guide, page 11: https://support.illumina.com/sequencing/sequencing_software/miseq_reporter/documentation.html
- BaseSpace Sequence Hub article: https://help.basespace.illumina.com/articles/tutorials/requeue-analysis-for-run/
1. Procedure 1.1. Requeue a run Using MiSeq Reporter
1.1.1. In order to apply the corrected or new analysis parameters to a run, a new sample sheet must first be created. To select a run to be re-queued with a new sample sheet, it is important that the input files are present in the analysis run folder. SampleSheet.csv, RTAComplete.txt, and RunInfo.xml must all be present.
1.1.2. In the analysis run folder (D:\ Data/Illumina/MiSeq Analysis/“Recent run”) rename the old sample sheet (for example, “SampleSheet.csv.old”) and paste the newly revised sample sheet in the analysis folder under the name “SampleSheet.csv”.
1.1.2.1. If correcting index assignment, the new sample sheet should have the corrected index pair assignments and corresponding index sequences.
1.1.3. Connect to MiSeq Reporter on the local computer by opening Internet Explorer. If MiSeq Reporter does not open with the launch of Internet Explorer, type the following in the browser bar: http://localhost:8042/ .
1.1.4. Check the checkbox next to the run and Click “Requeue”. The analysis will take roughly an hour depending on the extent of changes to the Sample Sheet.
NOTE1: Alternatively, the "QueueForAnalysis.txt" file can be deleted in the MiSeq Analysis/“recent run folder” to begin the reanalysis of the dataset. NOTE2: MiSeq Reporter requires the following files which are generated during the sequencing run to perform secondary analysis or to requeue analysis: all *.bcl, *.filter, and *.locs.
1.1.5. The reanalyzed data (i.e. fastq files) will be stored in the “Basecalls” folder of the run analysis and output folders.
1.2. Fix Sample Sheet / Re-Run Workflow in BaseSpace NOTE: In order to requeue the analysis within BaseSpace, you must be the owner of the run. Additionally, a requeued run can only be submitted one time.
1.2.1. The Fix Sample Sheet page can be reached in one of two ways: 1.2.1.1. If the run is in a “Needs Attention” state, then the run can be opened and the “Fix
Sample Sheet” option selected. 1.2.1.2. Or you can navigate to a run, select the “More” drop-down list, and select “Fix
Sample Sheet.”
LABORATORY STANDARD OPERATING PROCEDURE FOR WHOLE GENOME SEQUENCING ON THE MISEQ BENCHTOP SEQUENCER Doc. No. PNL38 Ver. No. 01 Effective Date: Page 20 of 20
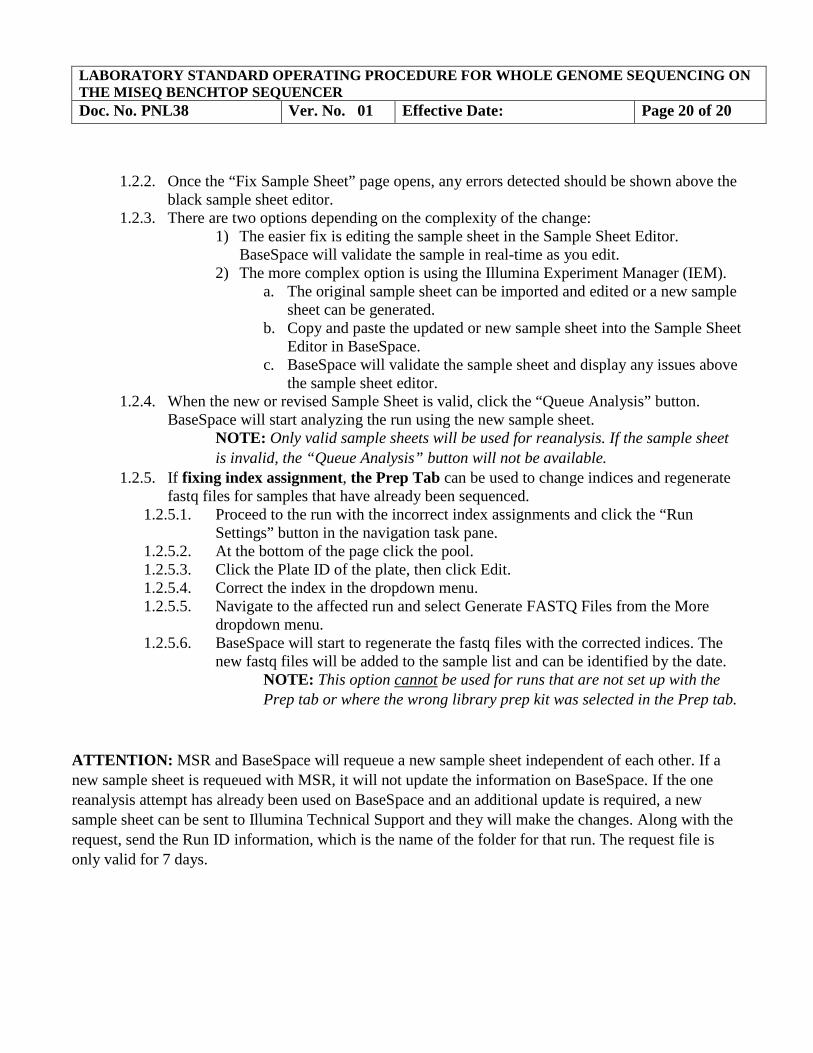
1.2.2. Once the “Fix Sample Sheet” page opens, any errors detected should be shown above the black sample sheet editor.
1.2.3. There are two options depending on the complexity of the change: 1) The easier fix is editing the sample sheet in the Sample Sheet Editor.
BaseSpace will validate the sample in real-time as you edit. 2) The more complex option is using the Illumina Experiment Manager (IEM).
a. The original sample sheet can be imported and edited or a new sample sheet can be generated.
b. Copy and paste the updated or new sample sheet into the Sample Sheet Editor in BaseSpace.
c. BaseSpace will validate the sample sheet and display any issues above the sample sheet editor.
1.2.4. When the new or revised Sample Sheet is valid, click the “Queue Analysis” button. BaseSpace will start analyzing the run using the new sample sheet.
NOTE: Only valid sample sheets will be used for reanalysis. If the sample sheet is invalid, the “Queue Analysis” button will not be available.
1.2.5. If fixing index assignment, the Prep Tab can be used to change indices and regenerate fastq files for samples that have already been sequenced.
1.2.5.1. Proceed to the run with the incorrect index assignments and click the “Run Settings” button in the navigation task pane.
1.2.5.2. At the bottom of the page click the pool. 1.2.5.3. Click the Plate ID of the plate, then click Edit. 1.2.5.4. Correct the index in the dropdown menu. 1.2.5.5. Navigate to the affected run and select Generate FASTQ Files from the More
dropdown menu. 1.2.5.6. BaseSpace will start to regenerate the fastq files with the corrected indices. The
new fastq files will be added to the sample list and can be identified by the date. NOTE: This option cannot be used for runs that are not set up with the Prep tab or where the wrong library prep kit was selected in the Prep tab.
ATTENTION: MSR and BaseSpace will requeue a new sample sheet independent of each other. If a new sample sheet is requeued with MSR, it will not update the information on BaseSpace. If the one reanalysis attempt has already been used on BaseSpace and an additional update is required, a new sample sheet can be sent to Illumina Technical Support and they will make the changes. Along with the request, send the Run ID information, which is the name of the folder for that run. The request file is only valid for 7 days.