landforms - pbworks...include: modeling clay, plastic cups, baking soda, vinegar, red food coloring...
TRANSCRIPT
Landforms Page 1
Landforms
(FOSS)
and
Alignment Lessons
Landforms Page 2
Table of Contents NC Essential Standards and Clarifying Objectives ......................................................................................... 3
Essential Question(s) for the Unit ................................................................................................................. 3
Unit Pre-Assessment ..................................................................................................................................... 3
Notes about the Landforms Unit .................................................................................................................. 3
Lesson 1 – Pre-Unit Assessment ................................................................................................................... 7
Lesson 2 - Let’s Get Physical (Alignment Lesson) ......................................................................................... 9
Lesson 3 - FOSS Investigation 2, part 2 - Erosion ........................................................................................ 11
Lesson 4 - Glaciers, Water, and Wind (Alignment Lesson) ......................................................................... 13
Lesson 5 - FOSS Investigation 2, part 2 - Deposition................................................................................... 15
Lesson 6 - FOSS Investigation 3, part 1 - Slope ........................................................................................... 17
Lesson 7 - FOSS Investigation 3, part 2 - Flood ........................................................................................... 19
Lesson 8 - Volcanic Eruptions (Alignment Lesson) ...................................................................................... 21
Lesson 9 - Earthquakes (Alignment Lesson) ............................................................................................... 23
Lesson 10 - Fossils (Alignment Lesson) ....................................................................................................... 26
Lesson 11 - History of Earth: Fossils (Alignment Lesson) ............................................................................ 28
Lesson 12 - History of Earth: Landforms (Alignment Lesson) ..................................................................... 30
Lesson 13 - History of Earth: Geologic Time (Alignment Lesson) ............................................................... 32
Lesson 14 - Earth’s Changing Surface (Alignment Lesson) ......................................................................... 34
Lesson 15 - Science & Literacy Connection (Alignment Lesson) ................................................................. 36

Landforms Page 3
NC Essential Standards and Clarifying Objectives 4.P.2 Understand the composition and properties of matter before and after they undergo a change or
interaction.
4.P.2.1 Compare physical properties of samples of matter: (strength, hardness, flexibility, ability to
conduct heat, ability to conduct electricity, ability to be attracted to magnets, reactions to water and
fire).
4.E.2 Understand the use of fossils and changes in the surface of the Earth as evidence of the history
of Earth and its changing life forms.
4.E.2.1 Compare fossils (including molds, casts, and preserved parts of plants and animals) to one
another and to living organisms.
4.E.2.2 Infer ideas about Earth’s early environments from fossils of plants and animals that lived long
ago.
4.E.2.3 Give examples of how the surface of the Earth changes due to slow processes such as erosion
and weathering, and rapid processes such as landslides, volcanic eruptions, and earthquakes.
Essential Question(s) for the Unit How does the surface of the Earth change?
Ho w can we use fossils and landforms to describe the history of the Earth?
Unit Pre-Assessment A formative assessment probe called “Beach Sand” is available on page 163 of Uncovering Student
Ideas in Science Volume 1 (Pink Cover), by Page Keeley et al. This probe is designed to elicit students’
ideas about weathering, erosion, deposition, and landforms.
Another formative assessment probe called “Mountain Age” can be found on page 169 of Uncovering
Student Ideas in Science Volume 1 (Pink Cover), by Page Keeley et al. This probe elicits students’ ideas
about the weathering of rock in another context.
Notes about the Landforms Unit Four lessons from FOSS Landforms will be taught in order to meet the NC Essential Standards for
Science: Investigation 2, part 1: Erosion, Investigation 2, part 2: Deposition, Investigation 3, part 1: Slope,
and Investigation 2, part 2: Flood. The rest of the unit is a collection of Alignment Lessons to address
rapid changes to Earth’s surface (earthquakes, volcanic eruptions), fossils, and Earth history. With that
Landforms Page 4
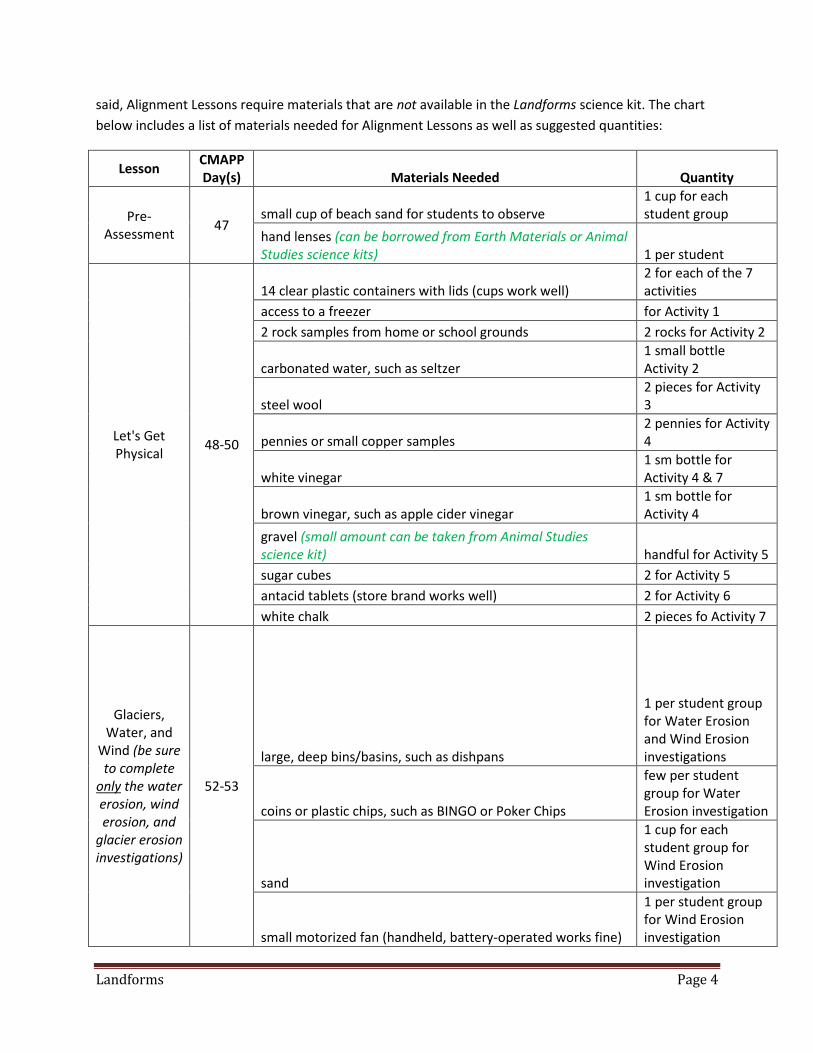
said, Alignment Lessons require materials that are not available in the Landforms science kit. The chart
below includes a list of materials needed for Alignment Lessons as well as suggested quantities:
Lesson CMAPP Day(s) Materials Needed Quantity
Pre-Assessment
47 small cup of beach sand for students to observe
1 cup for each student group
hand lenses (can be borrowed from Earth Materials or Animal Studies science kits) 1 per student
Let's Get Physical
48-50
14 clear plastic containers with lids (cups work well) 2 for each of the 7 activities
access to a freezer for Activity 1
2 rock samples from home or school grounds 2 rocks for Activity 2
carbonated water, such as seltzer 1 small bottle Activity 2
steel wool 2 pieces for Activity 3
pennies or small copper samples 2 pennies for Activity 4
white vinegar 1 sm bottle for Activity 4 & 7
brown vinegar, such as apple cider vinegar 1 sm bottle for Activity 4
gravel (small amount can be taken from Animal Studies science kit) handful for Activity 5
sugar cubes 2 for Activity 5
antacid tablets (store brand works well) 2 for Activity 6
white chalk 2 pieces fo Activity 7
Glaciers, Water, and
Wind (be sure to complete
only the water erosion, wind erosion, and
glacier erosion investigations)
52-53
large, deep bins/basins, such as dishpans
1 per student group for Water Erosion and Wind Erosion investigations
coins or plastic chips, such as BINGO or Poker Chips
few per student group for Water Erosion investigation
sand
1 cup for each student group for Wind Erosion investigation
small motorized fan (handheld, battery-operated works fine)
1 per student group for Wind Erosion investigation
Landforms Page 5
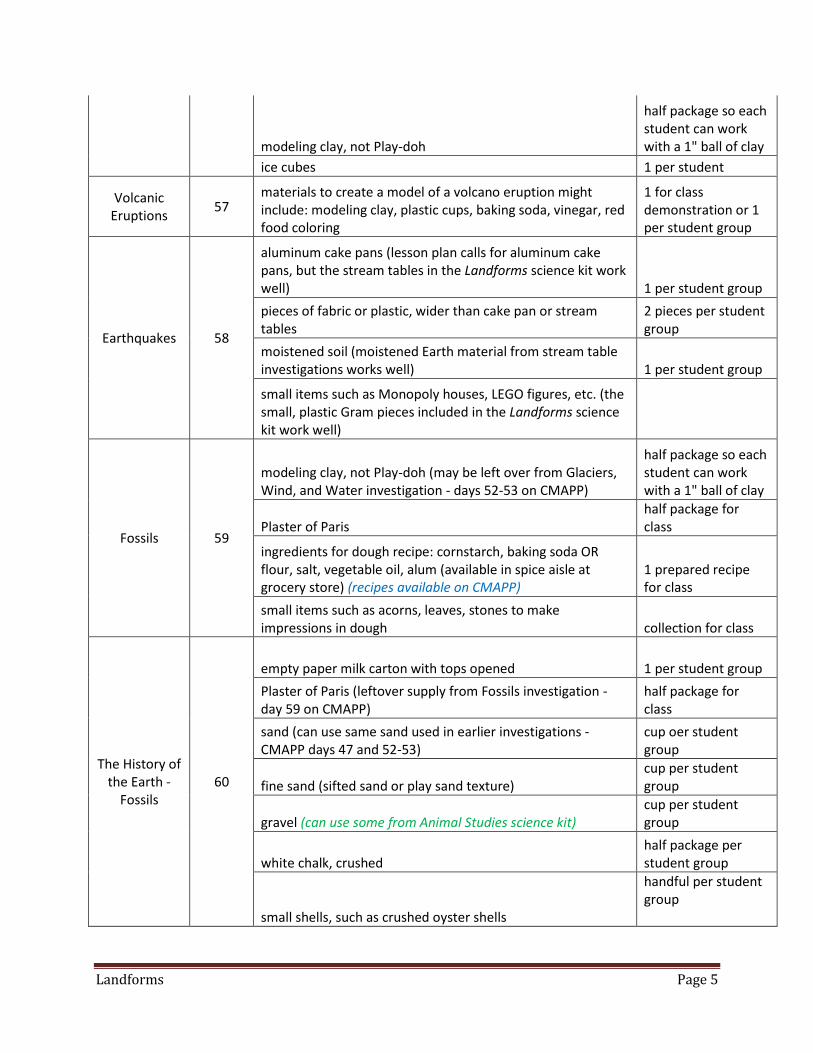
modeling clay, not Play-doh
half package so each student can work with a 1" ball of clay
ice cubes 1 per student
Volcanic Eruptions
57 materials to create a model of a volcano eruption might include: modeling clay, plastic cups, baking soda, vinegar, red food coloring
1 for class demonstration or 1 per student group
Earthquakes 58
aluminum cake pans (lesson plan calls for aluminum cake pans, but the stream tables in the Landforms science kit work well) 1 per student group
pieces of fabric or plastic, wider than cake pan or stream tables
2 pieces per student group
moistened soil (moistened Earth material from stream table investigations works well) 1 per student group
small items such as Monopoly houses, LEGO figures, etc. (the small, plastic Gram pieces included in the Landforms science kit work well)
Fossils 59
modeling clay, not Play-doh (may be left over from Glaciers, Wind, and Water investigation - days 52-53 on CMAPP)
half package so each student can work with a 1" ball of clay
Plaster of Paris half package for class
ingredients for dough recipe: cornstarch, baking soda OR flour, salt, vegetable oil, alum (available in spice aisle at grocery store) (recipes available on CMAPP)
1 prepared recipe for class
small items such as acorns, leaves, stones to make impressions in dough collection for class
The History of the Earth -
Fossils 60
empty paper milk carton with tops opened 1 per student group
Plaster of Paris (leftover supply from Fossils investigation - day 59 on CMAPP)
half package for class
sand (can use same sand used in earlier investigations - CMAPP days 47 and 52-53)
cup oer student group
fine sand (sifted sand or play sand texture) cup per student group
gravel (can use some from Animal Studies science kit) cup per student group
white chalk, crushed half package per student group
small shells, such as crushed oyster shells
handful per student group

Landforms Page 6
The History of the Earth - Landforms
61 model strata created in previous lesson: The History of the Earth - Fossils CMAPP Day 60 1 per student group
The History of the Earth -
Geologic Time 62 large piece of bulletin board paper 1 for the class
geologic timeline cards, printed (available on CMAPP) 1 set for the class
Earth's Changing Surface
64-65 access to satellite and topographic images of Earth's surface to project for class (many links to websites available on CMAPP)
Science and Literacy
Connection 66
informational texts about glaciers, landforms, Earth's changing surface (CMAPP includes some links to online, leveled texts for students to read) text for each student
FOSS Science Stories reader (Included in Landforms science kit) text for each student
Landforms Page 7
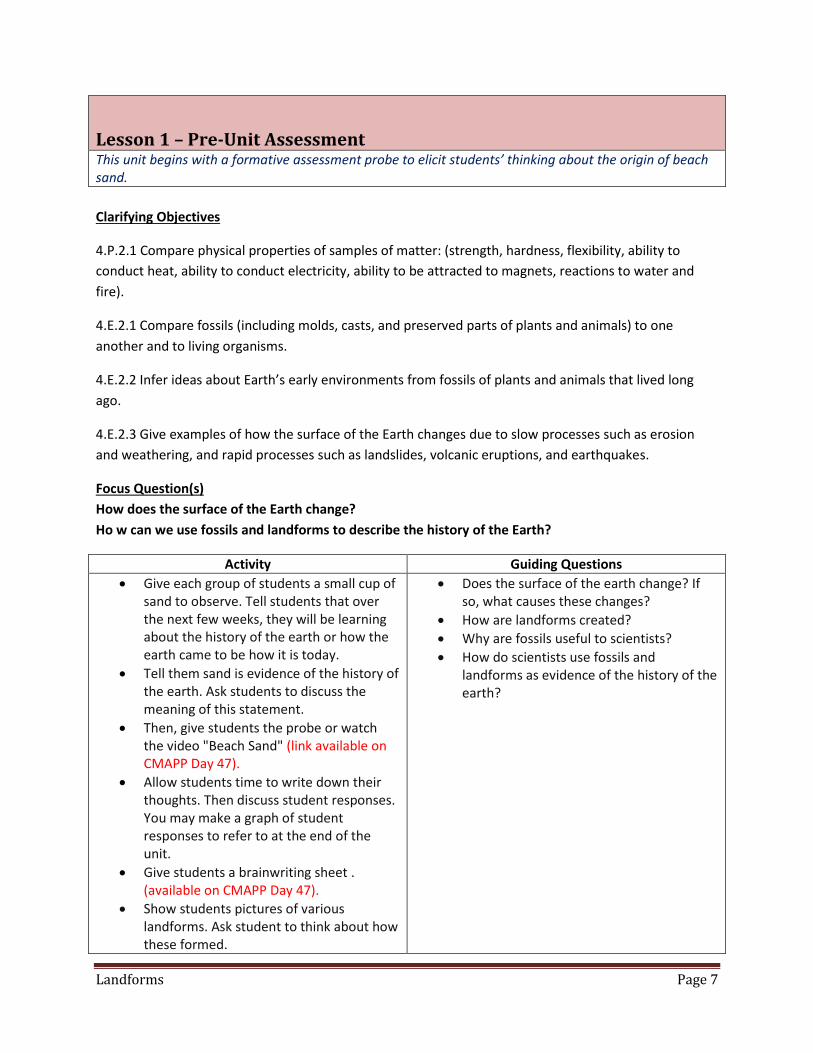
Lesson 1 – Pre-Unit Assessment This unit begins with a formative assessment probe to elicit students’ thinking about the origin of beach sand.
Clarifying Objectives
4.P.2.1 Compare physical properties of samples of matter: (strength, hardness, flexibility, ability to
conduct heat, ability to conduct electricity, ability to be attracted to magnets, reactions to water and
fire).
4.E.2.1 Compare fossils (including molds, casts, and preserved parts of plants and animals) to one
another and to living organisms.
4.E.2.2 Infer ideas about Earth’s early environments from fossils of plants and animals that lived long
ago.
4.E.2.3 Give examples of how the surface of the Earth changes due to slow processes such as erosion
and weathering, and rapid processes such as landslides, volcanic eruptions, and earthquakes.
Focus Question(s)
How does the surface of the Earth change?
Ho w can we use fossils and landforms to describe the history of the Earth?
Activity Guiding Questions
Give each group of students a small cup of sand to observe. Tell students that over the next few weeks, they will be learning about the history of the earth or how the earth came to be how it is today.
Tell them sand is evidence of the history of the earth. Ask students to discuss the meaning of this statement.
Then, give students the probe or watch the video "Beach Sand" (link available on CMAPP Day 47).
Allow students time to write down their thoughts. Then discuss student responses. You may make a graph of student responses to refer to at the end of the unit.
Give students a brainwriting sheet . (available on CMAPP Day 47).
Show students pictures of various landforms. Ask student to think about how these formed.
Does the surface of the earth change? If so, what causes these changes?
How are landforms created?
Why are fossils useful to scientists?
How do scientists use fossils and landforms as evidence of the history of the earth?
Landforms Page 8
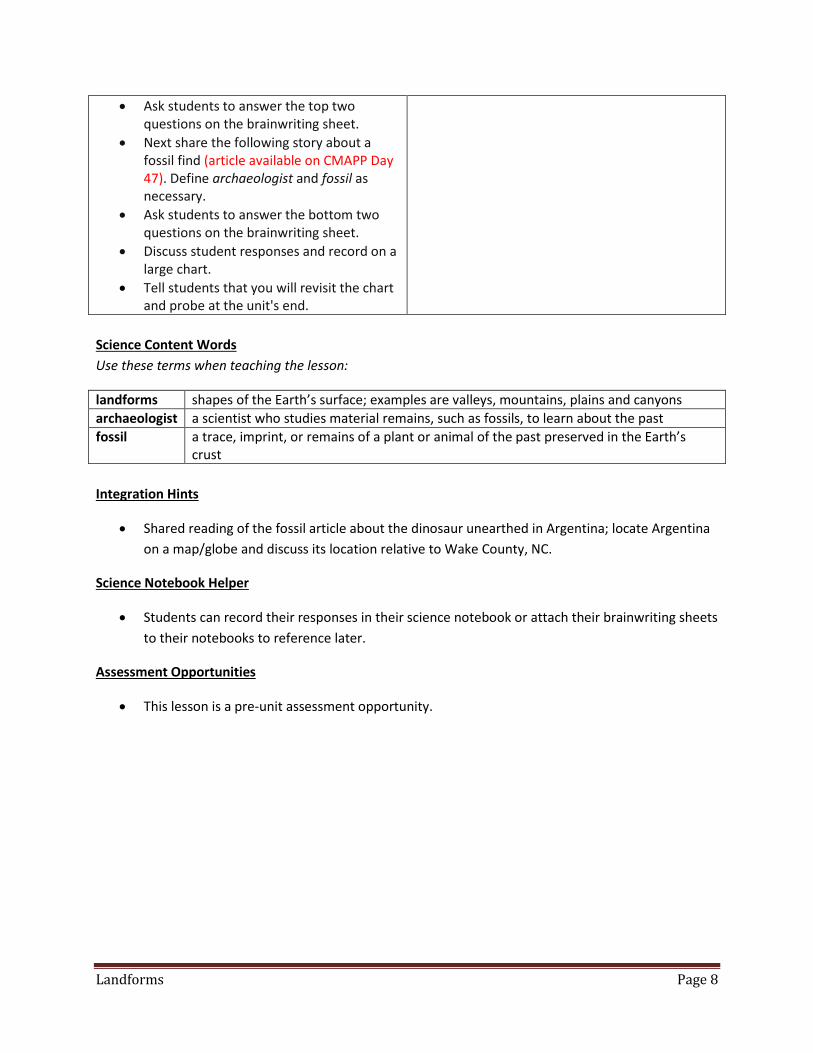
Ask students to answer the top two questions on the brainwriting sheet.
Next share the following story about a fossil find (article available on CMAPP Day 47). Define archaeologist and fossil as necessary.
Ask students to answer the bottom two questions on the brainwriting sheet.
Discuss student responses and record on a large chart.
Tell students that you will revisit the chart and probe at the unit's end.
Science Content Words
Use these terms when teaching the lesson:
landforms shapes of the Earth’s surface; examples are valleys, mountains, plains and canyons
archaeologist a scientist who studies material remains, such as fossils, to learn about the past
fossil a trace, imprint, or remains of a plant or animal of the past preserved in the Earth’s crust
Integration Hints
Shared reading of the fossil article about the dinosaur unearthed in Argentina; locate Argentina
on a map/globe and discuss its location relative to Wake County, NC.
Science Notebook Helper
Students can record their responses in their science notebook or attach their brainwriting sheets
to their notebooks to reference later.
Assessment Opportunities
This lesson is a pre-unit assessment opportunity.
Landforms Page 9
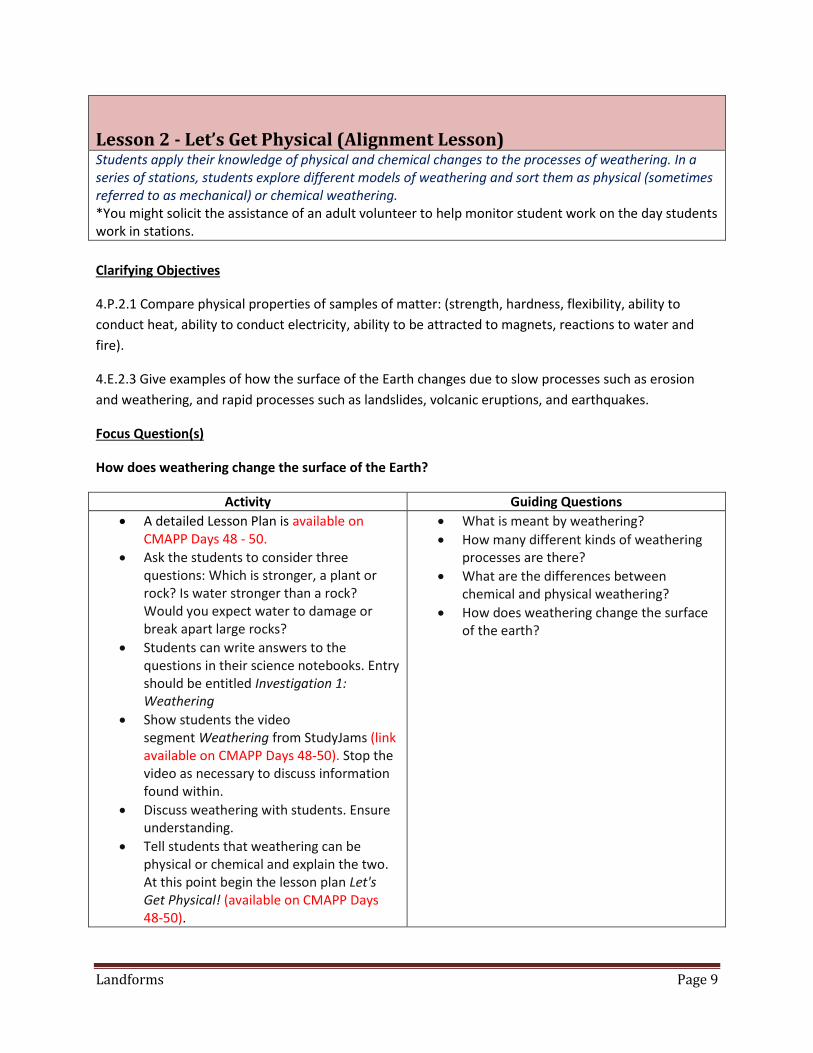
Lesson 2 - Let’s Get Physical (Alignment Lesson) Students apply their knowledge of physical and chemical changes to the processes of weathering. In a series of stations, students explore different models of weathering and sort them as physical (sometimes referred to as mechanical) or chemical weathering. *You might solicit the assistance of an adult volunteer to help monitor student work on the day students work in stations.
Clarifying Objectives
4.P.2.1 Compare physical properties of samples of matter: (strength, hardness, flexibility, ability to
conduct heat, ability to conduct electricity, ability to be attracted to magnets, reactions to water and
fire).
4.E.2.3 Give examples of how the surface of the Earth changes due to slow processes such as erosion
and weathering, and rapid processes such as landslides, volcanic eruptions, and earthquakes.
Focus Question(s)
How does weathering change the surface of the Earth?
Activity Guiding Questions
A detailed Lesson Plan is available on CMAPP Days 48 - 50.
Ask the students to consider three questions: Which is stronger, a plant or rock? Is water stronger than a rock? Would you expect water to damage or break apart large rocks?
Students can write answers to the questions in their science notebooks. Entry should be entitled Investigation 1: Weathering
Show students the video segment Weathering from StudyJams (link available on CMAPP Days 48-50). Stop the video as necessary to discuss information found within.
Discuss weathering with students. Ensure understanding.
Tell students that weathering can be physical or chemical and explain the two. At this point begin the lesson plan Let's Get Physical! (available on CMAPP Days 48-50).
What is meant by weathering?
How many different kinds of weathering processes are there?
What are the differences between chemical and physical weathering?
How does weathering change the surface of the earth?
Landforms Page 10
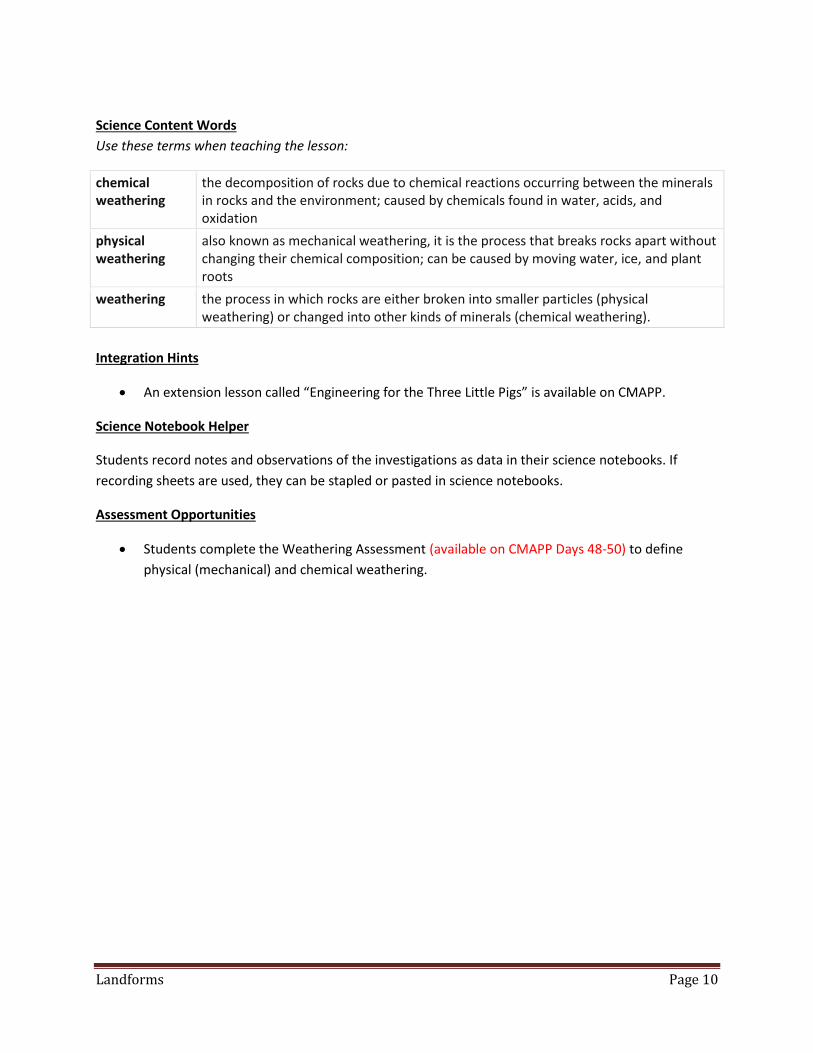
Science Content Words
Use these terms when teaching the lesson:
chemical weathering
the decomposition of rocks due to chemical reactions occurring between the minerals in rocks and the environment; caused by chemicals found in water, acids, and oxidation
physical weathering
also known as mechanical weathering, it is the process that breaks rocks apart without changing their chemical composition; can be caused by moving water, ice, and plant roots
weathering the process in which rocks are either broken into smaller particles (physical weathering) or changed into other kinds of minerals (chemical weathering).
Integration Hints
An extension lesson called “Engineering for the Three Little Pigs” is available on CMAPP.
Science Notebook Helper
Students record notes and observations of the investigations as data in their science notebooks. If
recording sheets are used, they can be stapled or pasted in science notebooks.
Assessment Opportunities
Students complete the Weathering Assessment (available on CMAPP Days 48-50) to define
physical (mechanical) and chemical weathering.
Landforms Page 11
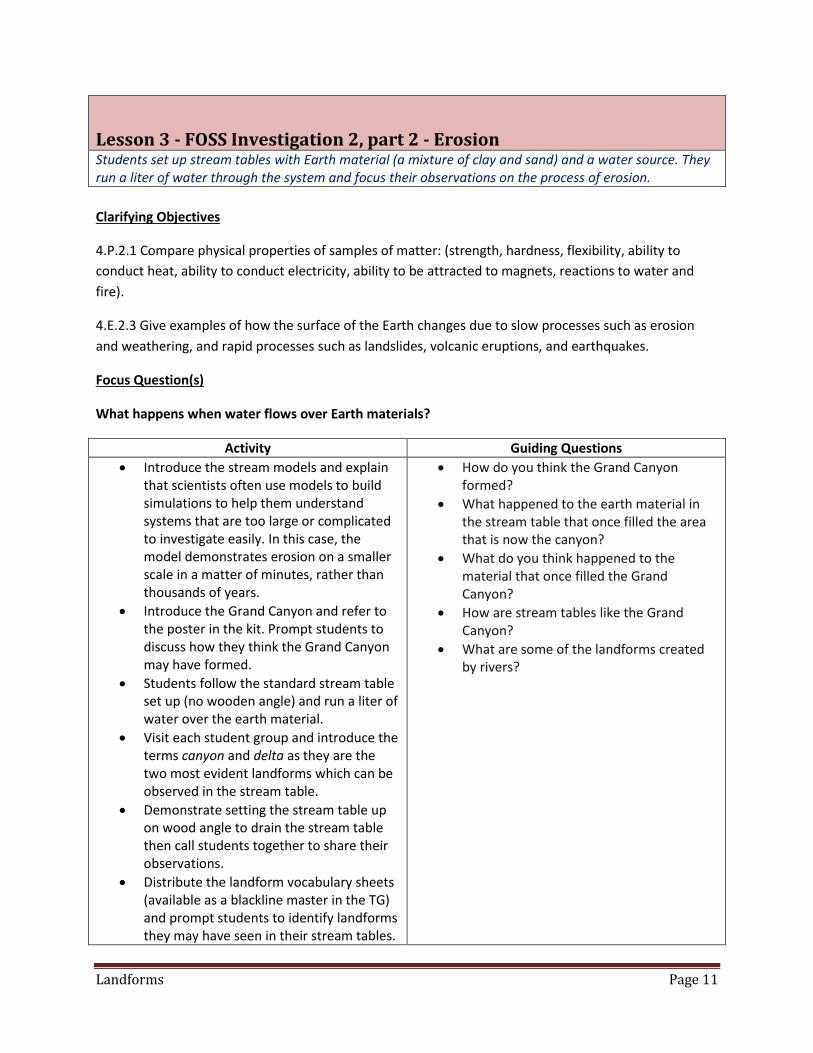
Lesson 3 - FOSS Investigation 2, part 2 - Erosion Students set up stream tables with Earth material (a mixture of clay and sand) and a water source. They run a liter of water through the system and focus their observations on the process of erosion.
Clarifying Objectives
4.P.2.1 Compare physical properties of samples of matter: (strength, hardness, flexibility, ability to
conduct heat, ability to conduct electricity, ability to be attracted to magnets, reactions to water and
fire).
4.E.2.3 Give examples of how the surface of the Earth changes due to slow processes such as erosion
and weathering, and rapid processes such as landslides, volcanic eruptions, and earthquakes.
Focus Question(s)
What happens when water flows over Earth materials?
Activity Guiding Questions
Introduce the stream models and explain that scientists often use models to build simulations to help them understand systems that are too large or complicated to investigate easily. In this case, the model demonstrates erosion on a smaller scale in a matter of minutes, rather than thousands of years.
Introduce the Grand Canyon and refer to the poster in the kit. Prompt students to discuss how they think the Grand Canyon may have formed.
Students follow the standard stream table set up (no wooden angle) and run a liter of water over the earth material.
Visit each student group and introduce the terms canyon and delta as they are the two most evident landforms which can be observed in the stream table.
Demonstrate setting the stream table up on wood angle to drain the stream table then call students together to share their observations.
Distribute the landform vocabulary sheets (available as a blackline master in the TG) and prompt students to identify landforms they may have seen in their stream tables.
How do you think the Grand Canyon formed?
What happened to the earth material in the stream table that once filled the area that is now the canyon?
What do you think happened to the material that once filled the Grand Canyon?
How are stream tables like the Grand Canyon?
What are some of the landforms created by rivers?
Landforms Page 12
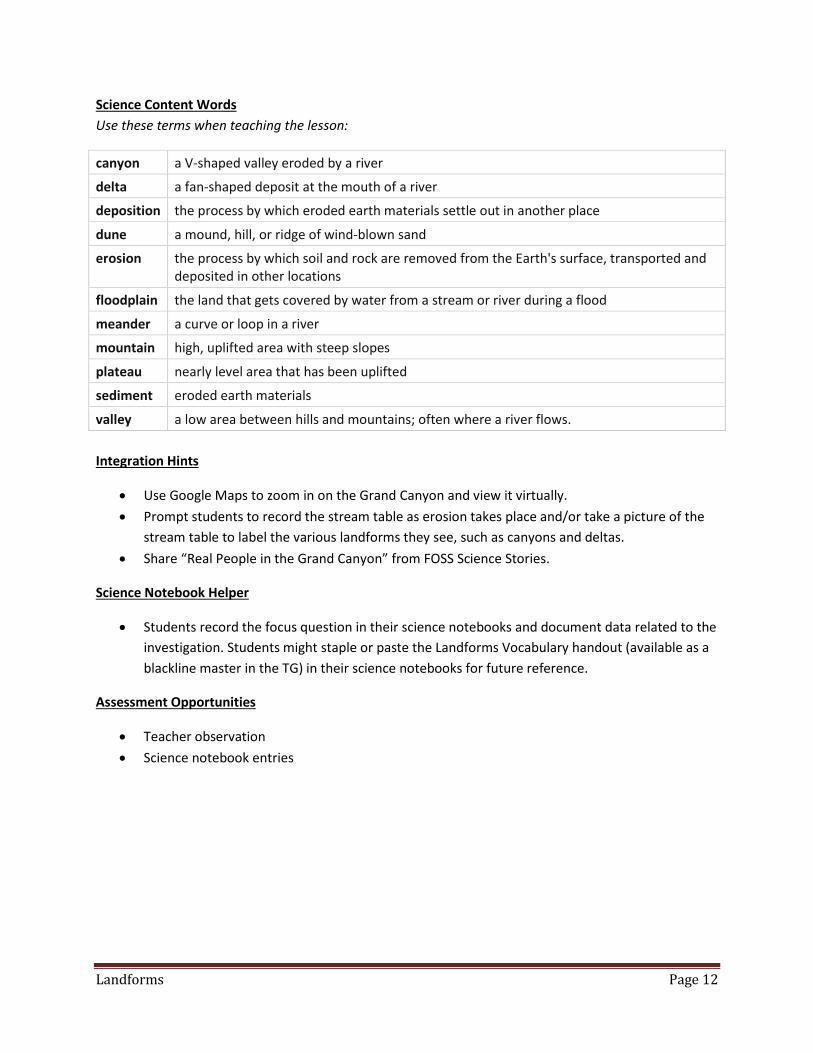
Science Content Words
Use these terms when teaching the lesson:
canyon a V-shaped valley eroded by a river
delta a fan-shaped deposit at the mouth of a river
deposition the process by which eroded earth materials settle out in another place
dune a mound, hill, or ridge of wind-blown sand
erosion the process by which soil and rock are removed from the Earth's surface, transported and deposited in other locations
floodplain the land that gets covered by water from a stream or river during a flood
meander a curve or loop in a river
mountain high, uplifted area with steep slopes
plateau nearly level area that has been uplifted
sediment eroded earth materials
valley a low area between hills and mountains; often where a river flows.
Integration Hints
Use Google Maps to zoom in on the Grand Canyon and view it virtually.
Prompt students to record the stream table as erosion takes place and/or take a picture of the
stream table to label the various landforms they see, such as canyons and deltas.
Share “Real People in the Grand Canyon” from FOSS Science Stories.
Science Notebook Helper
Students record the focus question in their science notebooks and document data related to the
investigation. Students might staple or paste the Landforms Vocabulary handout (available as a
blackline master in the TG) in their science notebooks for future reference.
Assessment Opportunities
Teacher observation
Science notebook entries
Landforms Page 13
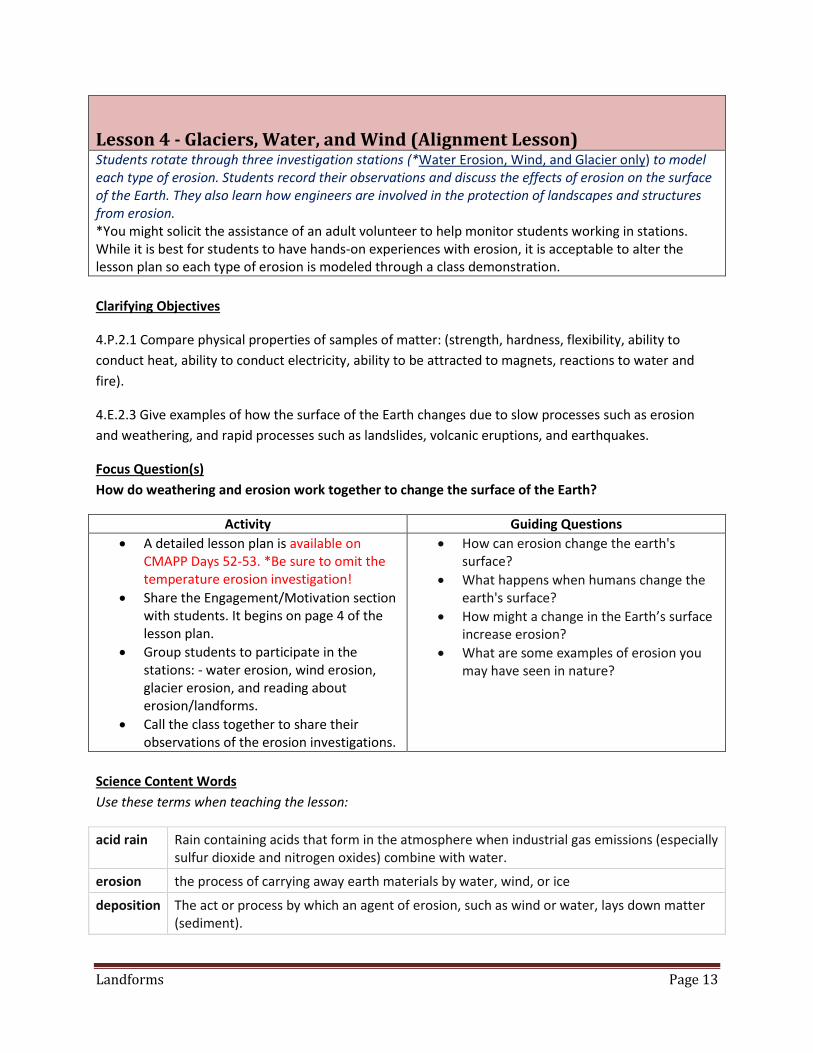
Lesson 4 - Glaciers, Water, and Wind (Alignment Lesson) Students rotate through three investigation stations (*Water Erosion, Wind, and Glacier only) to model each type of erosion. Students record their observations and discuss the effects of erosion on the surface of the Earth. They also learn how engineers are involved in the protection of landscapes and structures from erosion. *You might solicit the assistance of an adult volunteer to help monitor students working in stations. While it is best for students to have hands-on experiences with erosion, it is acceptable to alter the lesson plan so each type of erosion is modeled through a class demonstration.
Clarifying Objectives
4.P.2.1 Compare physical properties of samples of matter: (strength, hardness, flexibility, ability to
conduct heat, ability to conduct electricity, ability to be attracted to magnets, reactions to water and
fire).
4.E.2.3 Give examples of how the surface of the Earth changes due to slow processes such as erosion
and weathering, and rapid processes such as landslides, volcanic eruptions, and earthquakes.
Focus Question(s)
How do weathering and erosion work together to change the surface of the Earth?
Activity Guiding Questions
A detailed lesson plan is available on CMAPP Days 52-53. *Be sure to omit the temperature erosion investigation!
Share the Engagement/Motivation section with students. It begins on page 4 of the lesson plan.
Group students to participate in the stations: - water erosion, wind erosion, glacier erosion, and reading about erosion/landforms.
Call the class together to share their observations of the erosion investigations.
How can erosion change the earth's surface?
What happens when humans change the earth's surface?
How might a change in the Earth’s surface increase erosion?
What are some examples of erosion you may have seen in nature?
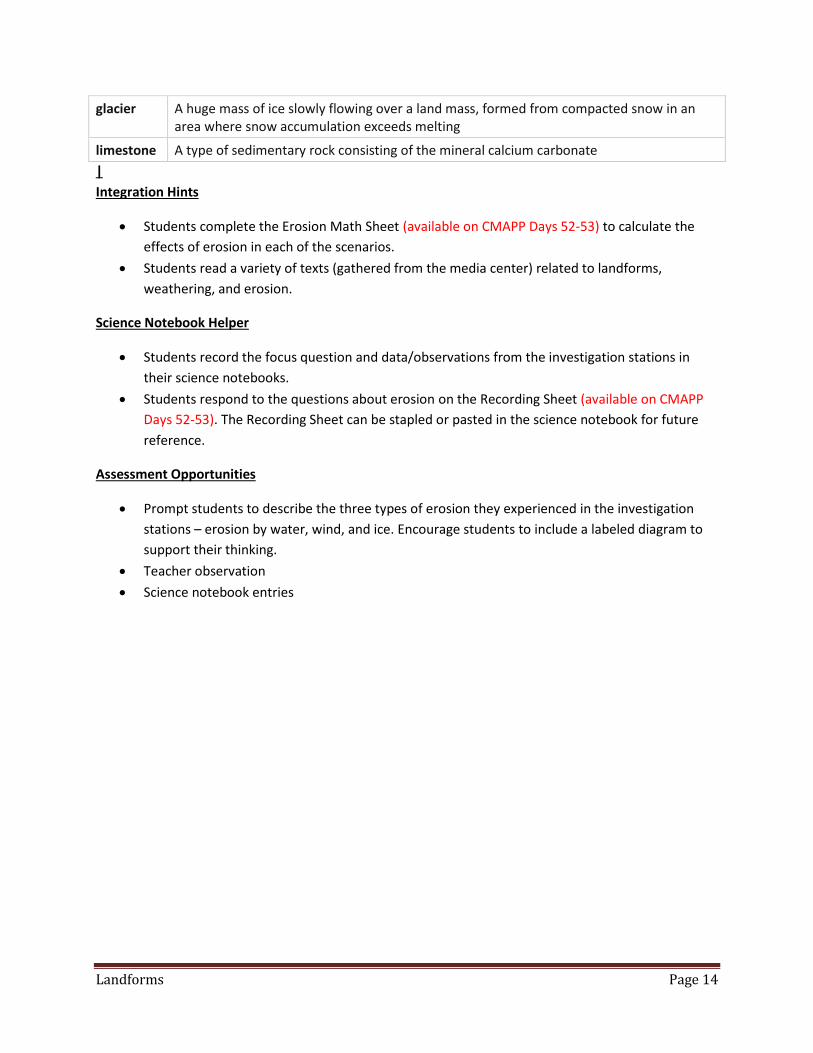
Science Content Words
Use these terms when teaching the lesson:
acid rain Rain containing acids that form in the atmosphere when industrial gas emissions (especially sulfur dioxide and nitrogen oxides) combine with water.
erosion the process of carrying away earth materials by water, wind, or ice
deposition The act or process by which an agent of erosion, such as wind or water, lays down matter (sediment).
Landforms Page 14
glacier A huge mass of ice slowly flowing over a land mass, formed from compacted snow in an area where snow accumulation exceeds melting
limestone A type of sedimentary rock consisting of the mineral calcium carbonate
|
Integration Hints
Students complete the Erosion Math Sheet (available on CMAPP Days 52-53) to calculate the
effects of erosion in each of the scenarios.
Students read a variety of texts (gathered from the media center) related to landforms,
weathering, and erosion.
Science Notebook Helper
Students record the focus question and data/observations from the investigation stations in
their science notebooks.
Students respond to the questions about erosion on the Recording Sheet (available on CMAPP
Days 52-53). The Recording Sheet can be stapled or pasted in the science notebook for future
reference.
Assessment Opportunities
Prompt students to describe the three types of erosion they experienced in the investigation
stations – erosion by water, wind, and ice. Encourage students to include a labeled diagram to
support their thinking.
Teacher observation
Science notebook entries
Landforms Page 15
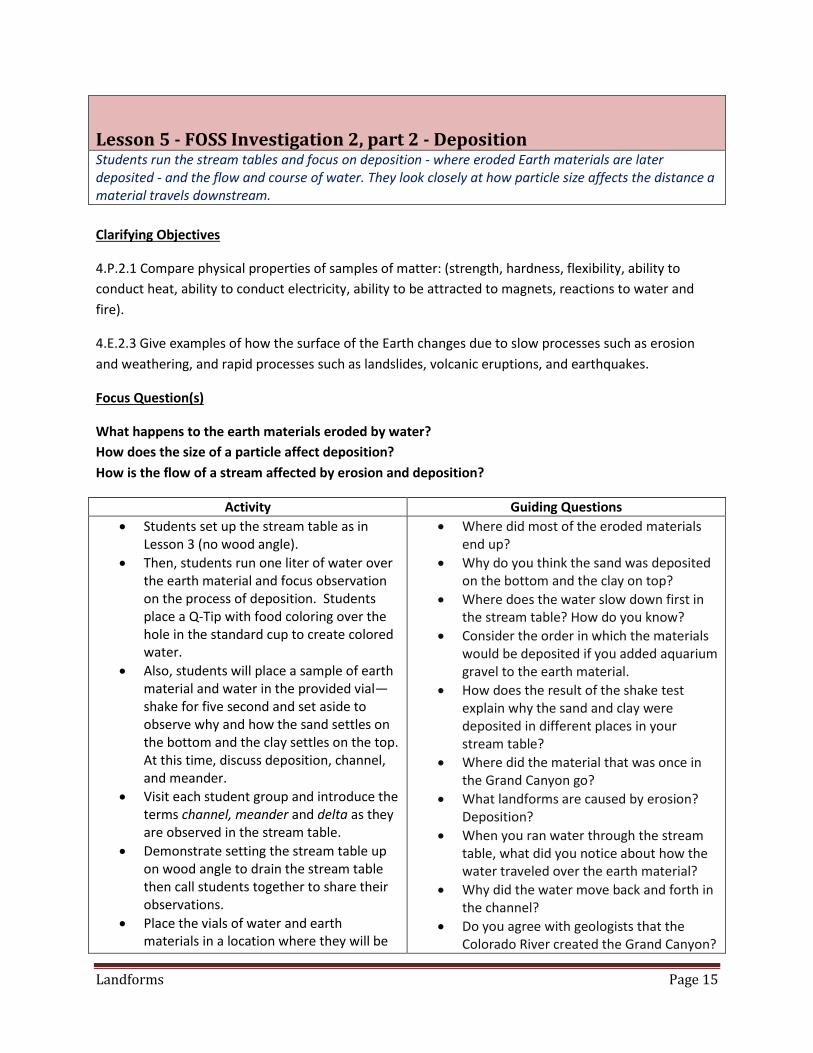
Lesson 5 - FOSS Investigation 2, part 2 - Deposition Students run the stream tables and focus on deposition - where eroded Earth materials are later deposited - and the flow and course of water. They look closely at how particle size affects the distance a material travels downstream.
Clarifying Objectives
4.P.2.1 Compare physical properties of samples of matter: (strength, hardness, flexibility, ability to
conduct heat, ability to conduct electricity, ability to be attracted to magnets, reactions to water and
fire).
4.E.2.3 Give examples of how the surface of the Earth changes due to slow processes such as erosion
and weathering, and rapid processes such as landslides, volcanic eruptions, and earthquakes.
Focus Question(s)
What happens to the earth materials eroded by water?
How does the size of a particle affect deposition?
How is the flow of a stream affected by erosion and deposition?
Activity Guiding Questions
Students set up the stream table as in Lesson 3 (no wood angle).
Then, students run one liter of water over the earth material and focus observation on the process of deposition. Students place a Q-Tip with food coloring over the hole in the standard cup to create colored water.
Also, students will place a sample of earth material and water in the provided vial—shake for five second and set aside to observe why and how the sand settles on the bottom and the clay settles on the top. At this time, discuss deposition, channel, and meander.
Visit each student group and introduce the terms channel, meander and delta as they are observed in the stream table.
Demonstrate setting the stream table up on wood angle to drain the stream table then call students together to share their observations.
Place the vials of water and earth materials in a location where they will be
Where did most of the eroded materials end up?
Why do you think the sand was deposited on the bottom and the clay on top?
Where does the water slow down first in the stream table? How do you know?
Consider the order in which the materials would be deposited if you added aquarium gravel to the earth material.
How does the result of the shake test explain why the sand and clay were deposited in different places in your stream table?
Where did the material that was once in the Grand Canyon go?
What landforms are caused by erosion? Deposition?
When you ran water through the stream table, what did you notice about how the water traveled over the earth material?
Why did the water move back and forth in the channel?
Do you agree with geologists that the Colorado River created the Grand Canyon?
Landforms Page 16
undisturbed for observation at a later time.
Why or why not?
Science Content Words
Use these terms when teaching the lesson:
basin a low area in which sediments are often deposited
channel the course or path water takes over the earth's surface
deposition the process by which eroded earth materials settle out in another place
meander a curving channel; a curve or a loop in a river
Integration Hints
Research rivers – either a local river like the Neuse River or a large river like the Nile.
Look for evidence of erosion and deposition around the school or community following a heavy
rain or storm.
Science Notebook Helper
Students record the focus question in their science notebooks and document data related to the
investigation. Students might also draw and label the earth materials settling in the vial.
Assessment Opportunities
Teacher observation
Science notebook entries
Landforms Page 17
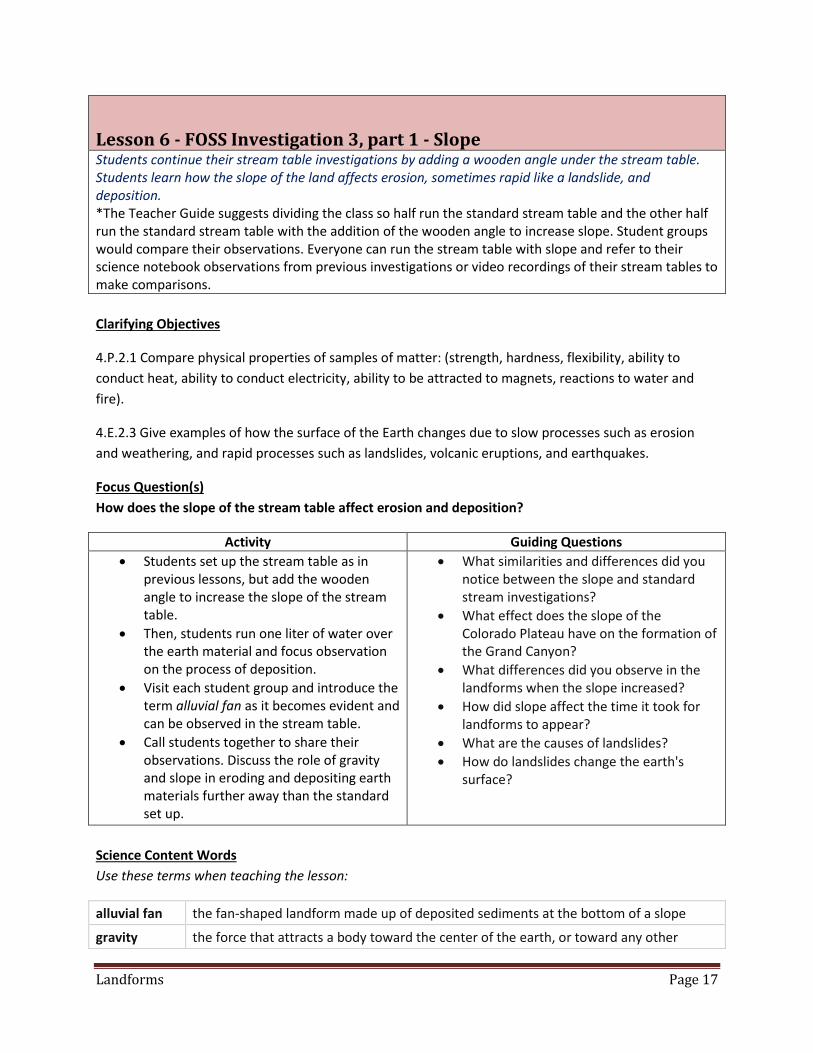
Lesson 6 - FOSS Investigation 3, part 1 - Slope Students continue their stream table investigations by adding a wooden angle under the stream table. Students learn how the slope of the land affects erosion, sometimes rapid like a landslide, and deposition. *The Teacher Guide suggests dividing the class so half run the standard stream table and the other half run the standard stream table with the addition of the wooden angle to increase slope. Student groups would compare their observations. Everyone can run the stream table with slope and refer to their science notebook observations from previous investigations or video recordings of their stream tables to make comparisons.
Clarifying Objectives
4.P.2.1 Compare physical properties of samples of matter: (strength, hardness, flexibility, ability to
conduct heat, ability to conduct electricity, ability to be attracted to magnets, reactions to water and
fire).
4.E.2.3 Give examples of how the surface of the Earth changes due to slow processes such as erosion
and weathering, and rapid processes such as landslides, volcanic eruptions, and earthquakes.
Focus Question(s)
How does the slope of the stream table affect erosion and deposition?
Activity Guiding Questions
Students set up the stream table as in previous lessons, but add the wooden angle to increase the slope of the stream table.
Then, students run one liter of water over the earth material and focus observation on the process of deposition.
Visit each student group and introduce the term alluvial fan as it becomes evident and can be observed in the stream table.
Call students together to share their observations. Discuss the role of gravity and slope in eroding and depositing earth materials further away than the standard set up.
What similarities and differences did you notice between the slope and standard stream investigations?
What effect does the slope of the Colorado Plateau have on the formation of the Grand Canyon?
What differences did you observe in the landforms when the slope increased?
How did slope affect the time it took for landforms to appear?
What are the causes of landslides?
How do landslides change the earth's surface?
Science Content Words
Use these terms when teaching the lesson:
alluvial fan the fan-shaped landform made up of deposited sediments at the bottom of a slope
gravity the force that attracts a body toward the center of the earth, or toward any other
Landforms Page 18
matter having mass
landslide the usually rapid downward movement of a mass of rock, earth, or artificial fill on a slope
slope A surface of which one end or side is at a higher level than another; the angle or slant of a stream channel or land surface
Integration Hints
Students can create a map of the stream table as suggested in the lesson. You may need to
model the mapping process since Investigation 1 was not covered in this unit.
Share “Rivers and Controlling the Flow” from FOSS Science Stories
Science Notebook Helper
Students record the focus question in their science notebooks and document data related to the
investigation.
The teacher guide offers extension ideas such as taking stream table photos or using a
transparency as an overlay grid to map the stream table.
Assessment Opportunities
Teacher observation
Science notebook entries
Landforms Page 19
Lesson 7 - FOSS Investigation 3, part 2 - Flood Students continue to experiment with the stream tables by testing the effects of different amounts of flowing water by running 1 liter of water through the water source labeled "Flood".
Clarifying Objectives
4.P.2.1 Compare physical properties of samples of matter: (strength, hardness, flexibility, ability to
conduct heat, ability to conduct electricity, ability to be attracted to magnets, reactions to water and
fire).
4.E.2.3 Give examples of how the surface of the Earth changes due to slow processes such as erosion
and weathering, and rapid processes such as landslides, volcanic eruptions, and earthquakes.
Focus Question(s)
How does the amount of water that flows through a stream affect erosion and deposition?
Activity Guiding Questions
Students set up the stream table as in previous lessons, but this time the wooden angle is removed and the water source labeled “flood” is used.
Then, students run one liter of water over the earth material and focus observation on the process of deposition.
Visit each student group and introduce the term alluvial fan as it becomes evident and can be observed in the stream table.
Call students together to share their observations. Discuss the role of gravity and slope in eroding and depositing earth materials further away than the standard set up.
How were the results of the flood and slope investigations similar? How were they different?
What do you think happens to flood waters when they reach another body of water like a lake?
What might happen in the Grand Canyon when there is a flash flood?
What might make water flowing through a stream channel slow down?
What would you expect to see where the slope changes?
How can you use what you now about flooding and increased volume of water to explain why rivers could flow more quickly over a flatter slope as they approach their mouths?
What differences did you observe in the landforms when you used the flood water source?
What differences did you notice in how long it took for features to form in the standard and flood setups?
Landforms Page 20
Science Content Words
Use these terms when teaching the lesson:
flash flood
The result of heavy or excessive amounts of rainfall within a short period of time, usually less than 6 hours, causing water to rise and fall quite rapidly
flood An overflow of water onto normally dry land; The inundation of a normally dry area caused by rising water in an existing waterway, such as a river, stream, or drainage ditch (Flooding is a longer term event than flash flooding: it may last days or weeks)
floodplain the area around a river that is covered by water flowing over the riverbank during a flood.
Integration Hints
Students can research the flooding caused by hurricane Katrina through an interactive site
(available on CMAPP Day 56)
Students write haiku using streams as the subject. Haiku is unrhymed poetry made up of three
lines – the first line has five syllables, the second line seven syllables, and the third line five
syllables. An example is available in the Teacher Guide.
Science Notebook Helper
Students record the focus question in their science notebooks and document data related to the
investigation.
The teacher guide offers extension ideas such as taking stream table photos or using a
transparency as an overlay grid to map the stream table.
Assessment Opportunities
Teacher observation
Science notebook entries
Landforms Page 21
Lesson 8 - Volcanic Eruptions (Alignment Lesson) Students observe a model volcano or videos of erupting volcanoes and record their observations through drawings or sketches. Students are introduced to basic volcano concepts and learn how they are responsible for changing the surface of the Earth.
Clarifying Objectives
4.P.2.1 Compare physical properties of samples of matter: (strength, hardness, flexibility, ability to
conduct heat, ability to conduct electricity, ability to be attracted to magnets, reactions to water and
fire).
4.E.2.3 Give examples of how the surface of the Earth changes due to slow processes such as erosion
and weathering, and rapid processes such as landslides, volcanic eruptions, and earthquakes.
Focus Question(s)
How do volcanic eruptions change the surface of the Earth?
Activity Guiding Questions
A detailed lesson plan is available on CMAPP Day 57.
Students observe the eruption of a model volcano and compare it to the eruptions of real volcanic eruptions on video.
Students should sketch their observations in their science notebooks.
Call the class together to share their observations and introduce content and vocabulary related to volcanoes.
How do volcanic eruptions occur?
How do volcanic eruptions change the earth's surface?
How can volcanic eruptions be destructive and constructive?
How can volcanoes cause landslides and floods?
What differences did you observe between the model volcano and the actual volcano in the video?
Based on your observations from the video, what do you think you might see, hear, and smell near an erupting volcano?
What are some of the effects of volcanic eruptions? How might an eruption change the earth's surface?
What can scientists tell from the lava at different eruption sites?
What did you notice about the lava flows? Did each new flow layer on top of a previous lava flow? How do you think lava flows build volcanoes?
What do you think makes volcanoes erupt?
Landforms Page 22
Science Content Words
Use these terms when teaching the lesson:
lava molten rock on the earth's surface
lava flow stream of molten or hardened lava coming out from a volcano or crack in the earth's surface
magma molten rock under the earth's surface
strata layers of lava flows
volcano a vent in the crust of the earth or another planet or a moon; usually molten or hot rock, steam, and gas come out of the vent ; also : a hill or mountain made up of hardened lava flows; usually have a crater or caldera
Integration Hints
Use Google Earth to take a “field trip” to some well-known volcanoes such as Mt. St. Helens in
Washington, Mauna Loa in Hawaii (the Earth’s largest volcano), or Mt. Etna in Sicily.
Science Notebook Helper
Students record the focus question and sketches of their observations. Students can add labels
to their sketches as the teacher introduces vocabulary and content.
Assessment Opportunities
Teacher observation
Science notebook entries
Landforms Page 23
Lesson 9 - Earthquakes (Alignment Lesson) Students are introduced to some basic types of faults. They also learn that earthquakes are responsible for rapidly changing the surface of the Earth.
Clarifying Objectives
4.E.2.3 Give examples of how the surface of the Earth changes due to slow processes such as erosion
and weathering, and rapid processes such as landslides, volcanic eruptions, and earthquakes.
Focus Question(s)
How do earthquakes change the surface of the Earth?
Activity Guiding Questions
Invite students to think about what causes earthquakes, how the Earth moves, and what effects this movement might have on Earth’s surface. Prompt students to write a prediction in their science notebooks.
Introduce the term fault and explain that movement and resulting earthquakes occur along faults when pressure from within is either applied or released.
Model each type of fault with your hands and invite students to follow. They can also sketch their hand movements and label the type of fault movement in their science notebooks:
- Side-to-Side Movement/Lateral Faulting occurs
along the San Andreas Fault in California. To
model, Place the sides of the hands together with
the thumbs folded underneath. Begin even and
firm contact with the index fingers between the
base of the thumbs. Lay the hands out in front of
the body to represent a flat surface. Press the
hands together applying as much pressure as can
be maintained. As you slowly release the
pressure, slide your hands past each other. One
hand will move toward the body and the other
will move away. - Reverse Fault To model, make fists and press
them together in front of the body. The fists
How might the movement at each type of fault impact the Earth’s surface?
What are the causes of earthquakes?
Landforms Page 24
should fit together so that the knuckles fit into the indentations of the other hand tightly. The pressure is not released in this fault. Keeping the pressure as constant as possible, slowly let one hand slide up from 3 to 5 cm. The raised hand may look like a cliff. It may also buckle or bend over the other hand slightly.
- Normal Fault To model, place your hands into the same beginning position as was used in the reverse the fists together tightly. This fault occurs when the pressure is released slowly and one hand slips down about 3 to 5 cm. The straight fingers and knuckles of the non-moving hand are now similar to a fault cliff. The feeling of this process differs from the reverse fault.
Ask students to summarize how earthquakes happen and what may happen to the Earth’s surface as a result.
Develop the idea that earthquakes change the Earth’s surface by creating mountains, valleys, depressions where lakes can form, and canyons. They can also destroy existing landforms and cause landslides. Volcanic eruptions might cause an earthquake. Earthquakes happen all the time.
Share some of the video links (available on CMAPP Day 58) about earthquakes and discuss the effects of the earthquakes on the Earth’s surface. Students should jot down information they learned in their science notebooks.
Science Content Words
Use these terms when teaching the lesson:
earthquake A sudden and violent shaking of the ground, sometimes causing great destruction, as a result of movements within the earth's crust or volcanic activity
fault a crack in the earth's crust
Integration Hints
Use Google Earth to view the San Andreas fault in California.
Students can research engineering techniques that have been developed to make buildings
“earthquake-proof.”
Students can explore weblinks related to earthquakes and earthquake safety.
Landforms Page 25
Science Notebook Helper
Students record the focus question and information about the three types of faults by sketching
the movement of their hands in the demonstrations. They also jot down notes and information
they have learned about the effects earthquakes have in changing the surface of the Earth.
Assessment Opportunities
Teacher observation
Science notebook entries
Landforms Page 26
Lesson 10 - Fossils (Alignment Lesson) Students are introduced to mold and cast fossils and the process to create each type of fossil. Students learn that fossils are direct evidence of past life and are used by geologists and paleontologists to make sense of Earth's history. *Depending on the order in which you have taught the science units, this lesson will be a review of fossils if you have already taught Earth Materials. Otherwise, this lesson will be an introduction to fossils, which will be studied more in depth in the Earth Materials unit.
Clarifying Objectives
4.E.2.1 Compare fossils (including molds, casts, and preserved parts of plants and animals) to one
another and to living organisms.
4.E.2.2 Infer ideas about Earth’s early environments from fossils of plants and animals that lived long
ago.
Focus Question(s)
What are the different types of fossils?
Activity Guiding Questions
Invite students to share what they know or remember about fossils. Share actual fossils, if available, or display fossil images.
Tell students they will be creating two types of fossils – molds and casts.
Fossil dough recipes and directions for creating fossils are available on CMAPP Day 59.
What type of information would scientists get from each type of fossil?
Compare the types of fossils. Which one would be the most useful for a scientist? Why?
How are the models of a fossil mold and fossil cast similar to real fossils? How are they different?
Under what circumstances might real fossil molds or casts have been formed?
Science Content Words
Use these terms when teaching the lesson:
body fossils preserved remains of body parts such as teeth, shells, or bones
cast fossil a positive imprint of an organism preserved in rock; when a mold fossil fills in with minerals or sediment and hardens
fossil the preserved remains of organisms
mold fossils a negative imprint of an organism preserved in rocks; a hollow space is left in the rock once the organism has decomposed
petrification occurs when parts of the organism are saturated with minerals
Landforms Page 27
trace fossils fossilized evidence of the behavior of past organisms such as footprints, eggs, nests, and droppings
Integration Hints
Plan a visit to the science museum to view fossils and learn how scientists use fossils and
fossilized bones to learn about organisms that lived long ago.
Science Notebook Helper
Students record the focus question and data gathered during their investigation. Students may
list the steps they followed to create model fossils, noting the similarities and differences in
mold and cast fossils.
Assessment Opportunities
Students create two different types of fossils – casts and molds – and note similarities and
differences.
Teacher observation
Science notebook entries
Landforms Page 28
Lesson 11 - History of Earth: Fossils (Alignment Lesson) Students create a model of sedimentary rock layers to gain an understanding of how rocks form layers, fossils are found within layers, and how the layers and fossils found within are representative of ancient environments. *While it is best for students to engage in hands-on investigations, it is acceptable for the layered models to be made ahead of time and offered to students to observe. If students will be creating the layered models in class, you might consider taking the activity outdoors and soliciting the assistance of one or two adult volunteers.
Clarifying Objectives
4.E.2.1 Compare fossils (including molds, casts, and preserved parts of plants and animals) to one
another and to living organisms.
4.E.2.2 Infer ideas about Earth’s early environments from fossils of plants and animals that lived long
ago.
Focus Question(s)
How can we use fossils to describe the history of the Earth?
Activity Guiding Questions
A detailed lesson plan is available on CMAPP Day 60.
Review sedimentary rock forming in layers and display a stack of papers. Ask students to identify the first paper that was put in place.
Explain that sedimentary rocks form in the same manner – in layers, with the older layers at the bottom.
Tell students they will make and/or observe a model of what happens over hundreds of thousands of years as sedimentary rocks are formed in different environments.
Students consider four environments – river, beach, bottom of a shallow ocean, and bottom of a deep ocean – and create the layered model according to the directions in the lesson plan.
As the models dry, guide students through the activity which looks at the “fossil” of the horse and guide students through analyzing information that can be gathered from fossil evidence.
What is a model? How do models help us understand? What processes build or create
sedimentary rocks? What type of information can we get from
fossils? How can we use evidence from fossils to
make guesses about the environment in which an organism lived?
How might finding a fossil in a particular layer tell us about the environment?

Landforms Page 29
Once the models are dry and ready to be observed, lead a discussion about what might have caused the various layers and what kind of organisms may have left fossil evidence in particular layers.
Science Content Words
Use these terms when teaching the lesson:
fossil record fossils and their placement within the earth's rock strata. The fossil record provides information about the history of life on earth, for instance what the organisms looked like, where and when they lived, how they evolved, etc
inference a conclusion based on evidence
strata layers of rock
Integration Hints
As an extension, students can analyze the information that might be provided by the fossil of a
Stegosaurus (similar to the guided activity about the horse) included in the lesson plan.
Students can research the work of geologists and paleontologists and report their findings to the
class.
Science Notebook Helper
Students record the focus question, a prediction, and data (including labeled diagrams and
writing) about the investigation.
Assessment Opportunities
Students create a model strata.
Teacher observation
Science notebook entries
Landforms Page 30
Lesson 12 - History of Earth: Landforms (Alignment Lesson) Students will utilize and identify various landforms to describe how landforms represent the history of the Earth. *This lesson utilizes the sedimentary rock model created/observed in the previous lesson.
Clarifying Objectives
4.E.2.2 Infer ideas about Earth’s early environments from fossils of plants and animals that lived long
ago.
4.E.2.3 Give examples of how the surface of the Earth changes due to slow processes such as erosion
and weathering, and rapid processes such as landslides, volcanic eruptions, and earthquakes.
Focus Question(s)
How can we use landforms to describe the history of the Earth?
Activity Guiding Questions
A detailed lesson plan is available on CMAPP Day 61.
Prompt students to review the definitions of landforms. Tell them that landforms provide clues about the history of the Earth.
Refer to the Grand Canyon and point out the layers within the rocks and make connections to the sedimentary rock model from the previous lesson.
Share that geologists continue debating about the origin and age of the Grand Canyon, but agree that it is, at the most, 8 million years old. Research is ongoing.
Discuss clues to tell the relative age of a person and relate this to landforms. For example, rounded mountains are older due to weathering and erosion.
Student groups analyze pictures of various landforms looking for signs that indicate relative age.
Students share their claims with the class and provide supporting evidence.
What clues might landforms provide about Earth’s history?
How old might the Grand Canyon be?
How might we determine the relative age of a landform such as a mountain?
How might we determine the relative age of a river? What about canyons?
Why would it be important for geologists to know about the age of a landform?
How do landforms help geologists make guesses about Earth’s history?
Landforms Page 31
Science Content Words
Use these terms when teaching the lesson:
relative age the geologic age of a fossil, rock, geologic feature or event relative to other fossils , rocks, geologic features or events
Integration Hints
Students can create a picture dictionary of landforms. Assign each student or pair a landform to
name and describe how it forms. Each entry is compiled alphabetically into a class landform
dictionary that includes pictures.
Students can create models of landforms and host a “Landform Museum” where they can
display their models and discuss landforms with one another, a visiting class, or
parents/guardians.
Science Notebook Helper
Students record the focus question, make a prediction, and collect data (including labeled
diagrams and writing) about the investigation.
Students make claims about the relative age of landforms and support their thinking with
evidence.
Assessment Opportunities
Teacher observation
Science notebook entries
Landforms Page 32
Lesson 13 - History of Earth: Geologic Time (Alignment Lesson) Students will work to construct a timeline of Earth's geologic history through sequencing geologic events that occurred at the Grand Canyon. Students will begin to understand a relationship between human historical events and geologic events.
Clarifying Objectives
4.E.2.2 Infer ideas about Earth’s early environments from fossils of plants and animals that lived long
ago.
4.E.2.3 Give examples of how the surface of the Earth changes due to slow processes such as erosion
and weathering, and rapid processes such as landslides, volcanic eruptions, and earthquakes.
Focus Question(s)
What evidence do geologists use to refine and revise Earth’s geologic timeline?
Activity Guiding Questions
A detailed lesson plan is available on CMAPP Days 62-63.
Prompt students to share what they know about timelines and to give examples of processes or steps needed to complete a task. Examples might include step by step directions to make a cake, a morning routine to get ready for school, or planning a trip across the country.
Introduce the idea of making a timeline to trace the events that led to the formation of the Grand Canyon that we see today.
Complete a class version of the timeline as described in the lesson plan.
Call students together to share important content:
- Fossils and landforms provide evidence for geologist to draw conclusions about the Earth’s history. - Sedimentary rocks are laid down horizontally which means younger rocks are deposited on top of older rocks. -Scientists arrange the geologic timeline with the oldest at the bottom (or to the far left, if the timeline is horizontal). - As newer rocks and sediments are added, they accumulate on top of on top of older rocks layer by
What type of information do geologists use to create a geologic timeline of the Earth?
What are some of the slow processes which contributed to the formation of the Grand Canyon?
What are some of the rapid processes which contributed to the formation of the Grand Canyon?
What took longer, the building of layers or the carving of the canyon?
We usually think of dinosaurs as very old. But looking at the timeline, can dinosaur fossils be found in the layers of the Grand Canyon? [No, all the rocks are older than the dinosaurs.]
Are dinosaurs old compared to the oldest rocks at Grand Canyon?
How might a timeline help you see or learn more than just an order of events through time?
Where do you fit on the timeline? [Human history would be less than the width of a strand of hair on a 46 foot timeline!]
Landforms Page 33
layer. The older fossil evidence would be buried deeper and deeper into the Earth’s surface while younger fossils remain closer to the top. -If we traveled down into the Grand Canyon, we would start with the most recent (younger) rock formations near the top and the oldest rock formations would be at the bottom of the canyon walls.
Prompt students to jot down new information they have learned or any new questions they might have.
Science Content Words
Use these terms when teaching the lesson:
geologic time a period of time covering the formation and development of earth
Integration Hints
Use Google Earth or Google Maps to zoom in on the Grand Canyon.
Science Notebook Helper
Students record the focus question, a prediction, and data (including labeled diagrams and
writing) gathered as a result of the investigation.
Assessment Opportunities
Teacher observation
Science notebook entries
Landforms Page 34
Lesson 14 - Earth’s Changing Surface (Alignment Lesson) Students will learn about various technological techniques used by scientists to study Earth's surface. They will compare the type of information each technique provides and which technique provides information that would be most useful to scientists.
Clarifying Objectives
4.E.2.2 Infer ideas about Earth’s early environments from fossils of plants and animals that lived long
ago.
4.E.2.3 Give examples of how the surface of the Earth changes due to slow processes such as erosion
and weathering, and rapid processes such as landslides, volcanic eruptions, and earthquakes.
Focus Question(s)
How might geologists use technology to collect evidence about changes to the Earth’s surface?
Activity Guiding Questions
A detailed lesson plan is available on CMAPP Days 64-65.
Compare the work of geologists to detectives who use a variety of techniques to collect evidence of Earth’s history. This includes visiting sites, collecting samples, taking pictures or filming videos.
Introduce satellite imagery as another means for geologists to collect evidence.
Explore satellite imagery on Google Maps and compare satellite images to photographs.
Introduce other techniques to collect information such as aerial photography, which is used before, during, and after an Earth-changing event.
Students observe before and after photos of the Earth’s surface following an event, such as a volcanic eruption or hurricane, to note changes in the surface of the Earth.
Call students together to share their observations. Prompt students to jot down in their science notebooks new learning or questions they might have for further research.
How might satellite imagery help geologists track changes in the Earth’s surface?
How might aerial photography help geologists track changes in the Earth’s surface?
Which technologies would be most helpful to a scientist studying landforms? Which would be most helpful to a scientist studying fossils? Why do you think so?

Landforms Page 35
Science Content Words
Use these terms when teaching the lesson:
3D Scanner a device that uses laser to scan and analyze an object or environment to collect data on its shape and possibly its appearance; collected data can be used to construct digital, three dimensional (3D) models.
CT scan a series of X-ray beams passed through an organism; the method creates cross-sectional images shows the structure, but not the function.
satellite An artificial body placed in orbit around the earth or another planet in order to collect information or for communication
Integration Hints
Students explore the various weblinks (available on CMAPP Days 64-65) to view examples of
satellite imagery and aerial photography.
Check news sources for present day examples of changes to the Earth’s surface such as flooding,
landslides, earthquakes, or volcanic eruptions.
Science Notebook Helper
Students record the focus question, a prediction, and data (including labeled diagrams and
writing) collected during the investigation.
Assessment Opportunities
Teacher observation
Science notebook entries
Landforms Page 36
Lesson 15 - Science & Literacy Connection (Alignment Lesson) Students will read informational text about various topics relevant to the Landforms unit. They will utilize the reporter's formula to gather key details to synthesize information and write an effective summary.
Clarifying Objectives
4.P.2.1 Compare physical properties of samples of matter: (strength, hardness, flexibility, ability to
conduct heat, ability to conduct electricity, ability to be attracted to magnets, reactions to water and
fire).
4.E.2.1 Compare fossils (including molds, casts, and preserved parts of plants and animals) to one
another and to living organisms.
4.E.2.2 Infer ideas about Earth’s early environments from fossils of plants and animals that lived long
ago.
4.E.2.3 Give examples of how the surface of the Earth changes due to slow processes such as erosion
and weathering, and rapid processes such as landslides, volcanic eruptions, and earthquakes.
Focus Question(s)
(Essential Questions for the Unit)
How does the surface of the Earth change?
Ho w can we use fossils and landforms to describe the history of the Earth?
Activity Guiding Questions
A detailed lesson plan is available on CMAPP Day 66.
This lesson gives students an opportunity to synthesize information from various sources – articles, videos, hands-on investigations – and write a summary. Students share what they have learned throughout the unit regarding slow and rapid changes to the surface of the Earth as well as scientists using landforms and fossil evidence to piece together a geologic timeline of Earth’s history.
The lesson plan includes questions and summary frames to scaffold the process of writing a summary.
Science Content Words
Use these terms when teaching the lesson:
informational a type of nonfiction that gives information about the natural and social world; its
Landforms Page 37
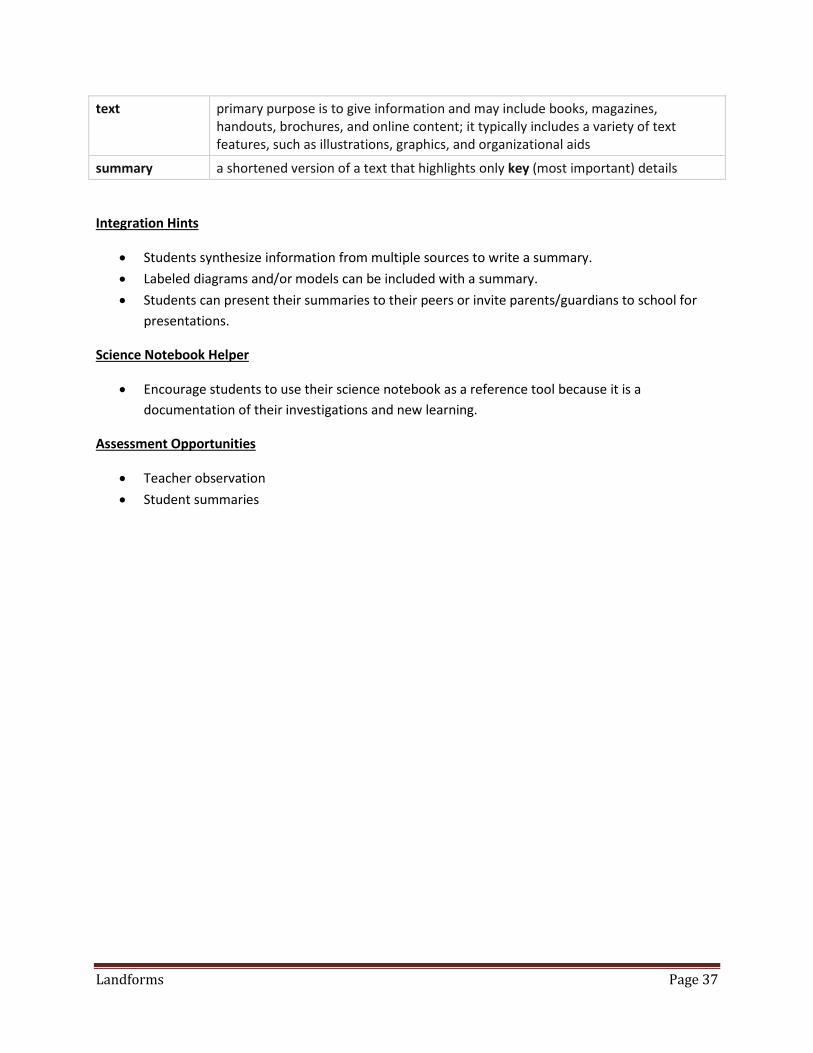
text primary purpose is to give information and may include books, magazines, handouts, brochures, and online content; it typically includes a variety of text features, such as illustrations, graphics, and organizational aids
summary a shortened version of a text that highlights only key (most important) details
Integration Hints
Students synthesize information from multiple sources to write a summary.
Labeled diagrams and/or models can be included with a summary.
Students can present their summaries to their peers or invite parents/guardians to school for
presentations.
Science Notebook Helper
Encourage students to use their science notebook as a reference tool because it is a
documentation of their investigations and new learning.
Assessment Opportunities
Teacher observation
Student summaries