lava handling and prep guide - technic dental laboratory
TRANSCRIPT

Lava™
Precision Solutions
Made EasyHandling & Prep
Handling and Preparation Guidelinesfor Dentists and Labs


It’s easy to offer 3M™ ESPE™ Lava™ Restorations.
The Lava™ brand integrates digital technology and material science in an intuitive way to help dentists and labs improve productivitywhile offering excellent oral care.
The Lava system works together in harmony. From the digitization of the model with our Lava scanner to the virtual design with oursoftware and the milling of our specially-formulated zirconia, the system has been designed to produce high-strength restorationswith outstanding marginal fit and excellent esthetics.
Our preparation and handling guidelines have been designed for dentists and their dental labs. We are sharing the entire guideline withclinicians and labs so both groups understand the complete process. We hope you both enjoy working with Lava restorations.
Possible Indications with the Lava™ System ...............................4
Clinical Requirements for Adhesive and Inlay Bridges ................5
Preparation for Lava™ Crowns and Bridges .......................... 6 – 7
Preparation for Lava™ Adhesive and Inlay Bridges ................ 8 – 9
Model Preparation at the Lab ...................................................10
Scanning and Design of Lava™ Restorations ............................11
Design Choices for Labs and Dentists ......................................12
Finishing of Lava™ Restorations ...............................................13
Cementation of Lava™ Restorations .........................................14
3

Due to its excellent mechanical and opticalcharacteristics, 3M™ ESPE™ Lava™ zirconia canbe used for a wide range of indications.
Figure 4: 4-unit Bridges1
Figure 5: 5-unit Bridges1
Figure 6: 6-unit Bridges1
1) 3 – 6 unit bridges with a maximum of two bridge units next to one another in the posteriorarea and a maximum of four bridge units next to one another in the anterior area.
2) with a maximum of 1 pendant at the position of a premolar or incisor (cantilever bridgesare not approved for use in patients with bruxism)
3) Tests have proven: Lava™ zirconia shows a sufficient strength for this indication. However,this type of indication overall can have a higher failure risk due to de-cementation andsecondary caries regardless of manufacturer. Please refer to national and regional dentalassociations for more information.
Figure 7: Cantilever bridges2
Figure 8: Inlay Bridges andOnlay Bridges3
(excluded for patients with bruxism)
Figure 9: Maryland Bridges3
(excluded for patients with bruxism)
Figure 10: Primary/telescopes
Possible Indications with the Lava™ System.
Figure 1: Single crowns
Figure 2: Splinted Crowns
Figure 3: 3-unit Bridges1
4
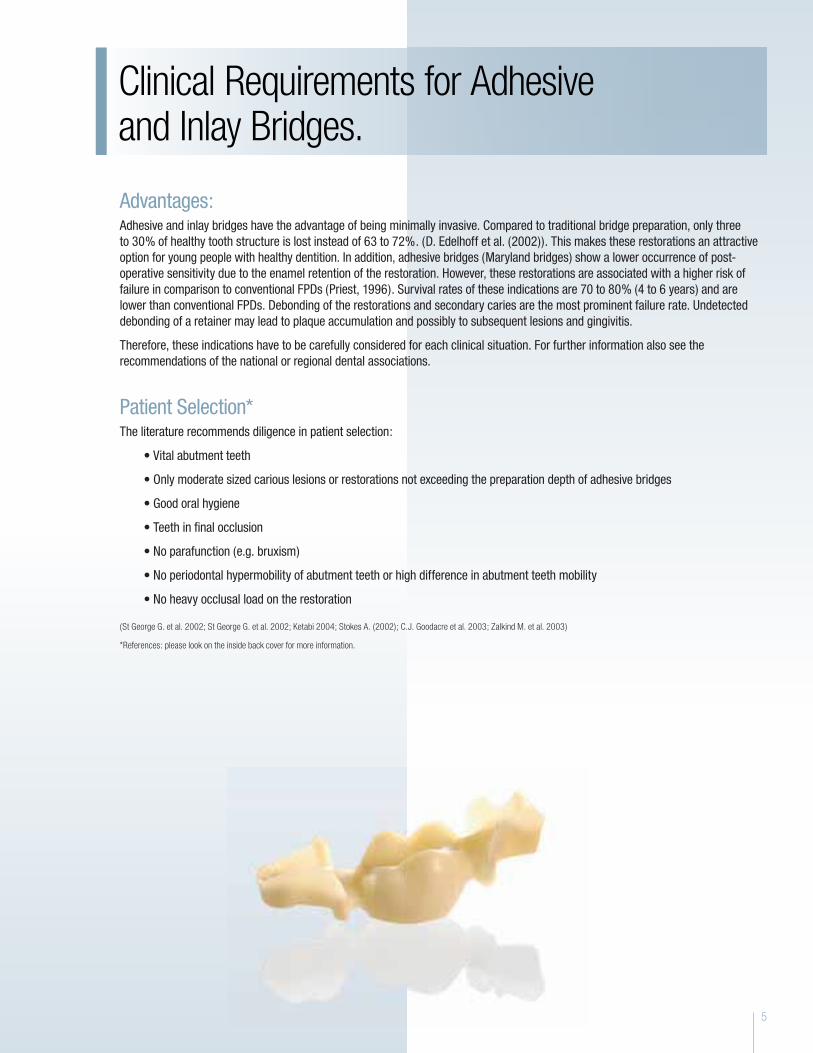
Advantages:Adhesive and inlay bridges have the advantage of being minimally invasive. Compared to traditional bridge preparation, only threeto 30% of healthy tooth structure is lost instead of 63 to 72%. (D. Edelhoff et al. (2002)). This makes these restorations an attractiveoption for young people with healthy dentition. In addition, adhesive bridges (Maryland bridges) show a lower occurrence of post-operative sensitivity due to the enamel retention of the restoration. However, these restorations are associated with a higher risk offailure in comparison to conventional FPDs (Priest, 1996). Survival rates of these indications are 70 to 80% (4 to 6 years) and arelower than conventional FPDs. Debonding of the restorations and secondary caries are the most prominent failure rate. Undetecteddebonding of a retainer may lead to plaque accumulation and possibly to subsequent lesions and gingivitis.
Therefore, these indications have to be carefully considered for each clinical situation. For further information also see therecommendations of the national or regional dental associations.
Patient Selection*The literature recommends diligence in patient selection:
• Vital abutment teeth
• Only moderate sized carious lesions or restorations not exceeding the preparation depth of adhesive bridges
• Good oral hygiene
• Teeth in final occlusion
• No parafunction (e.g. bruxism)
• No periodontal hypermobility of abutment teeth or high difference in abutment teeth mobility
• No heavy occlusal load on the restoration
(St George G. et al. 2002; St George G. et al. 2002; Ketabi 2004; Stokes A. (2002); C.J. Goodacre et al. 2003; Zalkind M. et al. 2003)
*References: please look on the inside back cover for more information.
Clinical Requirements for Adhesiveand Inlay Bridges.
5

Many Procedures Remain the SameWith 3M™ ESPE™ Lava™ crowns and bridges, you providehigh-quality restorations to your customers. In addition tonatural esthetics and durability, Lava crowns and bridges alsostand out for their excellent fit. To achieve this, practice andlaboratory have to meet just a few basic requirements.
Zirconium Oxide – the FrameworkMaterial of the FutureUnlike traditional all-ceramic restorations, Lava™ restorations are made of zirconium oxide. This strong material does not require adistinct shoulder to support the framework or to enhance the esthetics. In addition, the margins can be thinly tapered. This meansthe preparation for Lava restorations protects the tooth structure.
Minimal ReductionThe zirconia used for Lava™ framework is strong enough to allow for thin walls. Space for an opaque layer is not required. Therefore, areduction of the tooth structure based on the dimensions indicated below is sufficient.
Shoulder or Chamfer to set Precise LimitsIdeally, the preparation includes a circumferential shoulder or chamfer with a horizontal angle of at least 5°. The vertical preparationangle should be at least 4°. The inside angle of the shoulder preparation must be given a rounded contour. All occlusal and incisaledges should also be rounded.
The marginal edge of the preparation needs to be continuous and clearly visible. A bevel should be avoided. For posterior and anteriorteeth, a supragingival margin poses no problems. Due to the tooth-colored framework, very aesthetic results can be achieved.
Courtesy Dr. J. Manhart, University of Munich
Recommended preparation for anterior teeth.
1.5 – 2.0 mm
1.0 – 1.5 mm1.0 – 1.5 mm
1.0 mm1.0 mm
Preparation for Lava™ Crowns and Bridges.
Recommended preparation for posterior teeth.
1.5 – 2.0 mm
1.0 – 1.5 mm1.0 – 1.5 mm
1.0 mm1.0 mm
6

Special Preparations
Tangential preparation: Steep tangentialpreparations may result in extremely thintapered margins. In principle, this type ofpreparation is possible, but caution is advised.
Preparation for Lava™ Crowns and Bridges.
Parallel walls: In principle, parallel wallpreparations are feasible. However, a cementgap cannot be milled in this case. This maysignificantly affect the fit.
Sharp incisal-occlusal edges must be avoided.The rounding radius should be > 0.4 mm.
Divergent stumps in the bridge cannot be milled.Due to the restricted path of insertion inclinationof the two stumps can not be realized.
Unacceptable Preparations
Gutter Preparation: Margin cannot bedetected unambiguously.
Undercuts must be avoided.90° Shoulder: Margin cannot be detectedunambiguously.
7

Preparation:Tooth preparation has an influence on the survival of the restoration. Especially in the case of Maryland bridges (anterior adhesivebridges) retentive elements should be prepared (e.g. seating groove and pinhole (M. Behr and A. Leibrock, 1998, El Mowafy 2003,Kern (2005), see dental textbooks).
The teeth to be restored by a 3M™ ESPE™ Lava™ zirconia adhesive bridge should be prepared according to the following instructions.In general, rounded edges and clear margins are required for full ceramic restorations.
Preparation Maryland bridges (anterior adhesive bridges):Preparation depth: up to 0.7 mm; The preparation needs to be in enamel instead of dentin. The enamel depth of a tooth can
vary from 0.4 to 1.0 mm (W. Kullmann 1990). Wall thickness of zirconia framework: 0.5 mm minimum toensure sufficient strength.
Veneering: 0.1 mm (Glazing is necessary to prevent abrasion of antagonist); If the preparation depth can not be realizedwith the minimum wall thickness of 0.6 mm (zirconia + glazing) due to insufficient enamel thickness, thedentist should re-evaluate this indication. If the zirconia is not glazed, the restoration should not have anyocclusal contact. We recommend the use of a preparation matrix before tooth preparation to be able tocheck the preparation depth.
For the preparations of retentive elements see figure 1 to 3 (e.g. pinholes, seating groove). In general a radius of ≥ 0.4 mm is requiredfor the milling in the Lava system.
Preparation for Lava™ Adhesive andInlay Bridges.
Remember: Adhesive andinlay bridges are more complexto manufacture. With theserestorations, it is even moreimportant than ever to follow thepreparation guidelines to avoidinferior marginal adaptation andlengthy manual fitting effortsafter milling.
Figure 1: Rounded angles (Radius ≥ 0.4 mm,no sharp edges), clear margin and horizontalangle ≥ 2°.
Figure 3: Retentive element: roundedpinhole (no sharp edges, radius ≥ 0.4 mm).
Figure 4: Not possible: circular preparation of the wings, no preparation in the middle, only onepreparation margin can be detected by the system.
Not prepared
Preparation margin
Not prepared
Radius ≥ 0.4 mm
Figure 2: Retentive element: rounded ridge(Radius ≥ 0.4 mm).
Radius ≥ 0.4 mm
Radius ≥ 0.4 mm
angle ≥ 2°
8

In comparison to a 3-unit Maryland bridge, fixed-pontic-fixed, a cantilever 2-unit Maryland bridge, fixed-pontic, design is even moreconservative, since only one abutment tooth needs to be prepared. The risk of unnoticed debonding and consecutive secondarycaries is low. However, debonding of a single retainer adhesive bridge could directly lead to loss or swallowing/aspiration of therestoration. In general clinical studies show a better survival rate of 2-unit cantilever bridges. When considering adhesive bridges,the recommendations of the national or regional dental association need to be followed where applicable.
Preparation of Inlay Bridge (see Figure 5 and 6):Preparation depth: 2 – 4 mm
It is important to have sufficient space for a connector of 9 mm2.The preparation should have a taper of ≥ 2° to 3° and have no friction.The margins must be clearly indicated.Full ceramic preparation in general requires rounded angles (no sharp edges,minimum radius ≥ 0.4 mm)Wall thickness of zirconia inlay: ≥ 0.5 mm
Veneering: Veneering or glazing is necessary to prevent abrasion of antagonist.Maximal length of pontic: 10 mm
In the case of vestibular and lingual/palatinal wings inaddition to the inlay cavity, the wings can be prepared bythe Lava system maximally until a 90° angle to the inlaypreparation (see figure 7 a + b).
*References: please turn back for further informations
Figure 7 a+b: Additional lingual or vestibularwing only with an extension maximally untiltooth equator.
Figure 7 b
90°
Preparation for Lava™ Adhesive andInlay Bridges.
Figure 5: Proximal view inlay preparation.
{ }Conicitv > 2 to 3°
ProximalPreparationdepth ≥ 4 mm
Proximaldepth≥ 2 mm
Clear margin,horizontal angle ≥ 2°
Figure 6: Occlusal view inlay preparation.
{
Preparation width ≥ 4 mm
9

Model PreparationA precise model preparation is vital for quality and fit of therestoration. To ensure that all data can be collected, the saw cutmodel for the scanning process is made of a light-colored,unvarnished gypsum laboratory stone (Class IV) with a dull surface.
All stumps, the alveolar ridge and all other segments need tobe removable and need to have a defined seat in the base.For optimal analysis of the situation in the scanned area themaximum height of the model, measured from the bottom of thebase to the incisal edge, should not exceed approx. 40 mm.
A magnet split cast system available from SAM (Order 526) isrecommended. However, in principle, all systems are feasible,provided that they meet the general requirements. A biteregistration in the form of a simple silicon or polyether keyserves as an aid in placing the bridge elements.
Segmented model: The scanner digitizes the stumps, alveolarridge, bite registration, and adjacent teeth (optional). They canbe visualized on the screen according to the individual needs.
Undercut before being blocked out.
Model Preparation at the Lab.
Undercut blocked out with Lava™ Design Software.
10
Blocking OutDips, cavities and pores can be blocked out in a con ventional waywith light colored wax or by use of the digital wax knife.
Undercuts are automatically blocked out by the software.

Coping PreparationThe complete surface of the stump is scanned with anon-contact white light fringe pattern. Approx. 120,000data points are measured and digitised for each stump.Detection is carried out from incisal/occlusal to the stump.
The complete surface must be easily visible under thescanner light. The system automatically defines the overallpreparation margin.
Ditching.
Precise preparation margin.
Scanning and Design of Lava™ Restorations.
Margin detection Inlay bridges.
DitchingThe prepared margin must be clearly defined on the model;pencil marks are not suitable. The prepared margin can beprecisely ditched using a rotary instrument under magnification.
Inadequate ditching may effect the quality of the scan.
Inlay and Maryland Wing PreparationThe margin is detected automatically. However, the scanoperator can manually refine the margin if desired.
11

Design Choices for Labs and Dentists.
Coping ThicknessCement Gap ExpansionCement Gap
Margin ReinforcementDie
Begin aboveMargin CementGap Expansion
Begin aboveMargin Cement Gap
Framework Coloring3M™ ESPE™ Lava™ restorations offer the option of coloring the framework in one of seven different shades based on the Vita®*Classic shade guide (plus one shade, i.e. uncolored).
Wall Thickness and connector designYou can determine the thickness of the framework wall to fit yourneeds. The minimum wall thickness is 0.5 mm for bridges andposterior crowns and 0.3 mm for anterior crowns. The minimumconnector cross section highly depends on the bridge position andthe amount of pontics.
For special indication, please contact your laboratory or millingcenter.
*Registered trademark of Vita Zahnfabrik H. Rauter GmbH & Co. KG, Bad Säckingen, Germany.
Optimal Framework DesignIt is important to optimally support the veneering porcelain. The framework should be designed to leave an even thickness of no morethan two millimeters. This can be accomplished by using the digital wax knife. Moreover in addition, it is also possible to directly scanyour designed wax up.
In addition to the parameters above, you may discuss other design ideas with your milling/design center.
Opposing
Veneer Porcelain
Lava Coping
Die
Optimal framework design with the digitalwax knife.
Tangentialpreparation:Steep tangentialprepa rationsmay result inextremely thintapered margins.In principle, thistype of preparationis possible, butcaution is advised.
Cement GapThe size of the cement gap can be adjusted using standardvalues or individually. For certain parts of the framework, forexample the top half of a coping, the cement gap may beincreased. The cement gap is adjusted by the CAD specialist atthe milling center in accordance with the customer and basedon each individual situation.
Opposing
Veneer Porcelain
Lava Coping
Die
Inadequate porcelain support.
Minimum Connector Cross SectionAnterior Posterior
3-unit bridges 7 mm2 9 mm2
4-unit bridges 7 mm2 9/12/9 mm2
Wall thickness Connector
Maryland bridges 0.5 mm 7 mm2
In-/ Onlay bridges 0.5 mm 9 mm2
12

Finishing of Lava™ Restorations.
Treatment of Ceramic MaterialsWhen working on the surface of a ceramic restoration, defects can be introduced and may affect the strength of the restoration.Although zirconium oxide is very forgiving for these kinds of defects, it is nevertheless important, to keep this in mind. This is criticalin the areas of the restoration, which may be under tension during application. The use of water during finishing is alwaysrecommended. Sandblasting should not be used for surfaces, which will be veneered. It can be used for surfaces, which arecemented, using a grain size ≤ 50 μm and 2 bar pressure.
Removal of Marginal Reinforcement and Undesired ContactsStandard contact sprays or color are suitable markers for the zirconium oxide framework. Diamond instruments with a particle sizeof ≤ 30 μm (color code: red) are ideal for removing marginal reinforcement and undesired contacts. The use of a turbine and wateris recommended. Marginal reinforcement should be removed under magnification to create a precise margin.
Esthetic Advantages of Colored FrameworkThe esthetics of the colored framework eliminates the need for a fired porcelain shoulder (butt margin). Since an esthetic appearancecan be created by using effect and glaze materials, a narrow collar may be left on the coping. A perfectly aesthetic appearance canbe achieved by using effect and glaze materials with no additional layers. Lava™ frameworks can be shaded in seven different colors(FS1 – FS7).
Trimming of the coping. Interdental separation with a separation disk.
Noshading FS1 FS2 FS3 FS4 FS5 FS6 FS7
Interdental Separation of a Veneered BridgeA natural look of the interdental area of bridges is achieved by using diamond separation cutters. The framework should notbe cut since sharp notches in the interdental area may affect the durability of the restoration. If the framework is inadvertentlydamaged during separation, the area has to be polished. Rubber polishing disks with diamonds (polishing system for ceramicsfrom Komet No. 4330, series grey) are suitable for this purpose. For better access to the notch, the diamond disk may besharpened with a conditioning stone.
13

Cementation of Lava™ Restorations.
Due to the strength of Lava™ zirconia frameworks, adhesive cementation is not necessary. For Maryland and Inlay bridges, see“Cementation of Maryland (adhesive) and Inlay bridges”. Restorations can be placed in the mouth in a conventional way by using aglass ionomer cement or by using an adhesive or self-adhesive cement. Before cementation, thoroughly clean the restoration andsandblast the interior surfaces of the crowns with aluminum oxide ≤ 50 μm. For detailed cementation please see always theappropriate Instructions for Use of the respective cements for detailed information.
1. Conventional Cementation• Use a conventional glass ionomer cement, e.g., Ketac™ Cem, manufactured by 3M ESPE. The use of phosphate cements will
not provide the desired esthetic results.
2. Cementation with RelyX™ Unicem Self-Adhesive Universal Resin Cement• Thoroughly clean the Lava restoration, sandblast the interior surfaces of the crown with aluminum oxide ≤ 50 μm.
It is not necessary to pre-treat with 3M™ ESPE™ Rocatec™ or to silanate it, if 3M™ ESPE™ RelyX™ Unicem Cement is used.• Please refer to the product’s instructions for use when using RelyX Unicem Cement.
3. Adhesive Cementation• Lava zirconia frameworks cannot be etched or silanized with a silane coupling agent. For adhesive cementation with resin
cements, the adhesive surfaces must be treated for 15 seconds with Rocatec™ Soft or 3M™ ESPE™ CoJet™ Sand and silanizedwith ESPE™ Sil.
• If the restoration is to be tried in, it must be done before the treatment described above.• See the Instructions for use for Rocatec™ System or CoJet Sand for detailed information.• Place the restoration in the mouth with a resin cement (e.g., RelyX™ ARC) as soon as possible after silanization• Please follow the Instructions for use of the respective resin cement
Cementation of Maryland (adhesive) and Inlay Bridges*:• Maryland bridges must be cemented adhesively.
• Cementation is only allowed with a cement clearly indicated for the cementation of these indications made of zirconia.The recommendations of the cement manufacturer need to be followed to ensure optimum bonding. Please consider thatthe zirconia part of the restoration needs to be pre-treated differently than the veneering part.
• Before cementation Lava restorations should be sandblasted (≤ 50 μm grain size) in order to increase the surface roughness.
• Especially for Maryland bridges the bonding should be mainly to enamel surfaces.
• Sufficient enamel surface are required for an optimal bonding. Some textbooks recommend to have a 1.5 to 2 times largersurface for bonding compared to the palatinal or lingual surface of the pontic (W. Kullmann, 1990). Therefore, the abutmentteeth should be characterized by low enamel abrasion.
• The working area needs to be free of contamination. The adhesive cementation has to be performed using a rubber dam isolation.
• Debonding of the Maryland/ Inlay bridges and secondary caries are the most prominent failure reason for these indications.Unnoticed decementation of one of two retainers leads to plaque accumulation and possibly subsequent carious lesionsand gingivitis.
• To prevent decementation additional retentive elements should be prepared (see preparation guidelines for Maryland andInlay bridges).
• Please see also the recommendations of the national and regional dental associations.*References: please look at the right page
14

Cementation of Maryland (adhesive) and Inlay Bridges*:References:
Audenino G et al. (2006) Resin-bonded fixed partial dentures, ten year follow-up; Int J Prosthodont 19, 1, 22 – 23
Behr M, Leibrock A et al Clin Oral Invest 1998
Boening KW (1996) Clinical Performance of resin-bonded fixed partial dentures, J Prosthet Dent 76, 39 – 44Preparation and Handling Guidelines for Dentists and Laboratories
Briggs P, Dunne s, Bishop K 1996, The single unit, single retainer, cantilever resin-bonded bridge,Restorative Dentistry 181, 373 – 379
D.Edelhoff et al. (2002) The Journal of Prosthetic Dentistry 87, 5, 503 – 509
El-Mowafy, Omar (2003) Resin-Bonded fixed partial denture as alternative to conventional fixed treatment,The Inter J Prosthodontics, 16, 60 – 70
Goodacre CJ et al. (2003) The journal of Prosthetic Dentistry 90, 1, 31 – 40
Kern (2005) Einfügelige Adhesivbrücken und Adhäsivattachemnts- Innovation mit Bewährung, ZM 95, 21, 54 – 60
Kern (2005) Clinical long term survival rate of two retainer and single retainer all-ceramic resin-bonded fixed partial dentures,Quintessenz International 36, 2, 141 – 147
Ketabi A.R. et al. (2004) Quintessenz 35, 5, 407 – 410
Werner Kullmann (1990) Atlas der Zahnerhaltung, Verlag Hanser, p. 379
Priest, 1996, Failure rate of restorations fopr single tooth replacement, Int J Prosthodont 9, 38 – 45
St George G. et al. 2002 Prim Dent Care 9, 3, 87 – 91
St George G. et al. 2002 Prim Dent Care 9, 4, 139 – 144
Stokes A. (2002) N Z Dent J. 98, 434, 107
Van Dalen A, Feilzer AJ, Kleverlaan CJ Int J Prosthodont 2004, 17(3) 281 – 284
Zalkind M., Ever-Hadani P., Hochman N. (2003) Resin-bonded FPD retention: a retrospective 13 years follow-up,J Oral Rehabil 30, 10, 971 – 977
References.
15

3M CanadaPost Office Box 5757London, Ontario N6A 4T1Canada1-888-363-3685
Dental Products3M CenterBuilding 275-2SE-03St. Paul, MN 55144-1000USA
3M, ESPE, CoJet, Ketac, Lava,RelyX and Rocatec are trademarksof 3M or 3M ESPE AG. Used underlicense in Canada.
Vita is not a trademark of 3M or3M ESPE AG.
70-2009-3969-5
Customer Care Center: 1-800-216-9502 Visit www.3MESPE.com/lava for more information
Please recycle. Printed in USA.© 3M 2007. All rights reserved.