lawn establishment - extension.psu.edu
TRANSCRIPT
Lawn Establishment
Establishing a new lawn begins with carefulplanning, knowledge of soil conditions, and anunderstanding of the environmental andcultural requirements of turfgrasses.
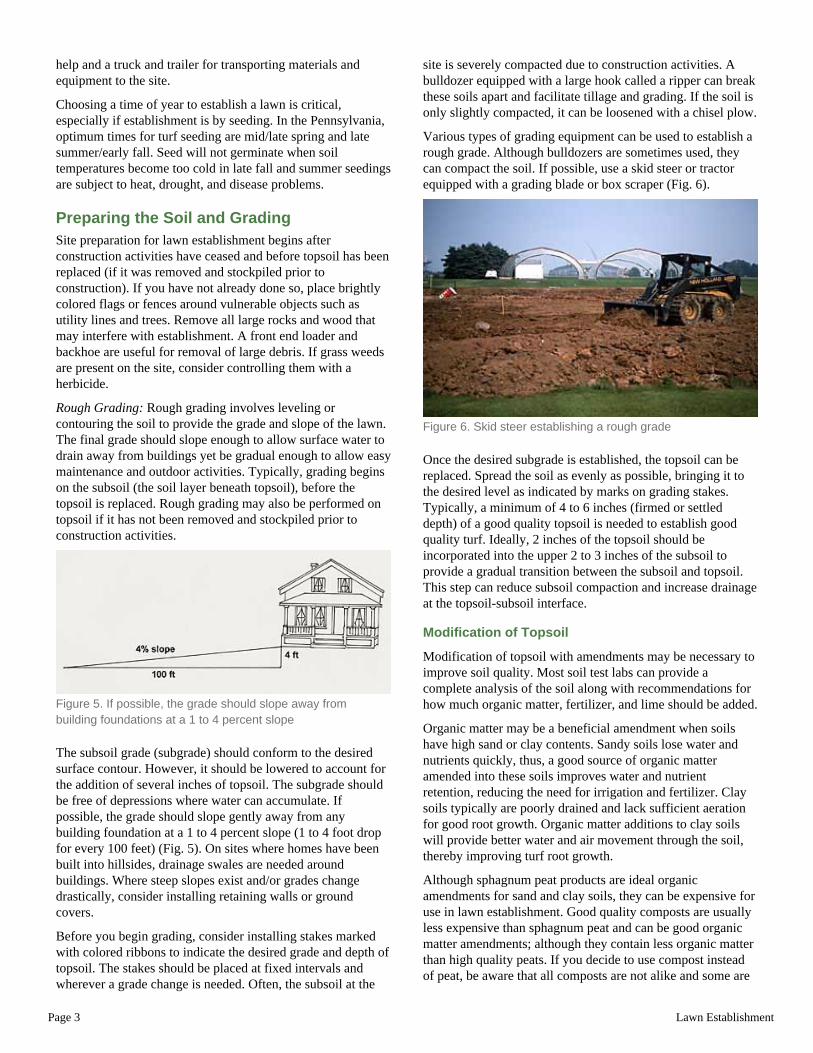
IntroductionThe quality of a new lawn is directly related to the success ofestablishment. Turf establishment begins with carefulplanning, knowledge of soil conditions, and an understandingof the environmental and cultural requirements of turfgrasses.This publication provides a stepwise approach to turfestablishment and renovation and includes information onpreparing the site for establishment, seeding, sodding,renovation, and care of newly-established turf.
Preparing the site
Planning the new lawnPlanning is an often overlooked, but important part ofestablishing turfgrasses. It begins by visiting the site anddetermining how much area is to be prepared and planted,locating obstacles that may interfere with soil preparation,assessing the condition of the soil, and noting site conditionsthat may influence the type of grass you will use. Visiting thesite will also give you some idea of the materials andequipment needed to complete the job. Perhaps the mostimportant phase of planning involves scheduling a time toprepare the soil and begin planting.
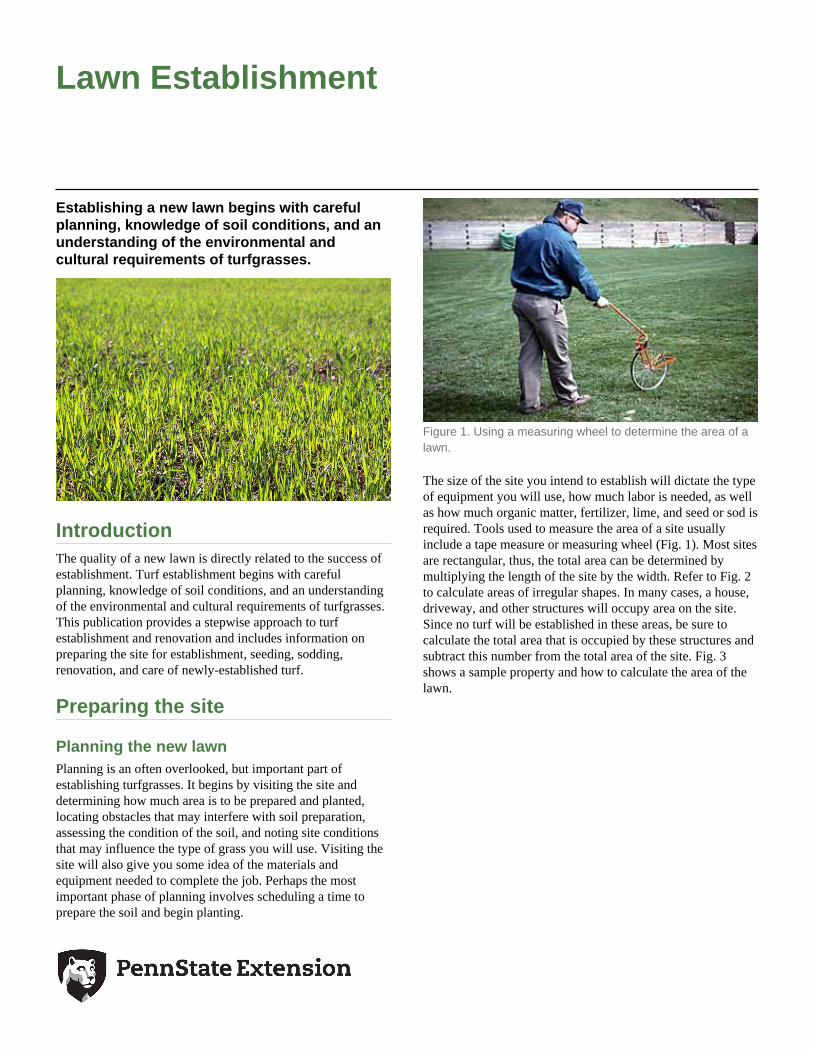
Figure 1. Using a measuring wheel to determine the area of alawn.
The size of the site you intend to establish will dictate the typeof equipment you will use, how much labor is needed, as wellas how much organic matter, fertilizer, lime, and seed or sod isrequired. Tools used to measure the area of a site usuallyinclude a tape measure or measuring wheel (Fig. 1). Most sitesare rectangular, thus, the total area can be determined bymultiplying the length of the site by the width. Refer to Fig. 2to calculate areas of irregular shapes. In many cases, a house,driveway, and other structures will occupy area on the site.Since no turf will be established in these areas, be sure tocalculate the total area that is occupied by these structures andsubtract this number from the total area of the site. Fig. 3shows a sample property and how to calculate the area of thelawn.

Page 2 Lawn Establishment
Figure 2. Calculations used to determine areas of differentshapes
Figure 3. Sample property and how to calculate the area of alawn.
After determining the area of the site, mark the location of anyobstacles that interfere with soil preparation or that may bedamaged. Rocks, stumps, lumber, and large roots will interferewith grading and tilling and create establishment problems ifburied in soil. Assess the amount and size of debris at the siteto determine if you need to bring a backhoe and/or front endloader to facilitate removal. Marking the location of utility
lines and irrigation heads with brightly-colored flags will helpto avoid damaging these objects with excavating equipment.Place fences around trees to avoid damaging roots, bark, andbranches.
Certain types of weeds growing on the site may interfere withestablishment if not controlled prior to planting. Tilling theseweeds into the soil prior to establishment may not eliminatethem and new growth from roots, crowns, and seeds mayoccur. If grass weeds are present in large quantities on the site,make provisions to control them with herbicides. Broadleafweeds, such as dandelion and clover, are usually controlledafter the lawn is established.
An assessment of soil conditions is another important, butoften overlooked, phase of planning a lawn. Check the degreeof compaction and the amount of topsoil present. Determine ifthe soil is well drained or poorly drained and if drainageproblems need to be corrected. Note the grade of the site anddetermine the extent of grading that is required.
Since you cannot determine which nutrients and how muchorganic matter are needed for establishment simply by lookingat the soil, purchase a soil test kit from a university or privatetest lab and test the soil. A soil test report should tell you howmuch organic matter, fertilizer, and lime you will need toincorporate into the soil prior to establishment. Collect the soilsamples three to four weeks before you begin preparing thesoil to allow the lab to process the sample and mail the reportto you (Fig. 4).
Figure 4. Take a soil test prior to establishment
During the site visit, be sure to note conditions which mayinfluence the grass species you will use to seed the lawn.These may include the amount of shade present, drainagecharacteristics of the soil, and quality of the topsoil. Ifpossible, determine the level of turf quality expected by theowner or developer and if they are willing to pay costsassociated with a high-quality lawn. Ask the customer if thelawn will receive a lot of traffic and how often he/she intendsto fertilize, water, and mow.
Obtain all materials needed for establishment prior to startingthe job. Allow enough time for delivery if you are orderingmaterials. Make a list of all items needed at the site for eachstep of the establishment. Also, make sure you have enough
Page 3 Lawn Establishment
help and a truck and trailer for transporting materials andequipment to the site.
Choosing a time of year to establish a lawn is critical,especially if establishment is by seeding. In the Pennsylvania,optimum times for turf seeding are mid/late spring and latesummer/early fall. Seed will not germinate when soiltemperatures become too cold in late fall and summer seedingsare subject to heat, drought, and disease problems.
Preparing the Soil and GradingSite preparation for lawn establishment begins afterconstruction activities have ceased and before topsoil has beenreplaced (if it was removed and stockpiled prior toconstruction). If you have not already done so, place brightlycolored flags or fences around vulnerable objects such asutility lines and trees. Remove all large rocks and wood thatmay interfere with establishment. A front end loader andbackhoe are useful for removal of large debris. If grass weedsare present on the site, consider controlling them with aherbicide.
Rough Grading: Rough grading involves leveling orcontouring the soil to provide the grade and slope of the lawn.The final grade should slope enough to allow surface water todrain away from buildings yet be gradual enough to allow easymaintenance and outdoor activities. Typically, grading beginson the subsoil (the soil layer beneath topsoil), before thetopsoil is replaced. Rough grading may also be performed ontopsoil if it has not been removed and stockpiled prior toconstruction activities.
Figure 5. If possible, the grade should slope away frombuilding foundations at a 1 to 4 percent slope
The subsoil grade (subgrade) should conform to the desiredsurface contour. However, it should be lowered to account forthe addition of several inches of topsoil. The subgrade shouldbe free of depressions where water can accumulate. Ifpossible, the grade should slope gently away from anybuilding foundation at a 1 to 4 percent slope (1 to 4 foot dropfor every 100 feet) (Fig. 5). On sites where homes have beenbuilt into hillsides, drainage swales are needed aroundbuildings. Where steep slopes exist and/or grades changedrastically, consider installing retaining walls or groundcovers.
Before you begin grading, consider installing stakes markedwith colored ribbons to indicate the desired grade and depth oftopsoil. The stakes should be placed at fixed intervals andwherever a grade change is needed. Often, the subsoil at the
site is severely compacted due to construction activities. Abulldozer equipped with a large hook called a ripper can breakthese soils apart and facilitate tillage and grading. If the soil isonly slightly compacted, it can be loosened with a chisel plow.
Various types of grading equipment can be used to establish arough grade. Although bulldozers are sometimes used, theycan compact the soil. If possible, use a skid steer or tractorequipped with a grading blade or box scraper (Fig. 6).
Figure 6. Skid steer establishing a rough grade
Once the desired subgrade is established, the topsoil can bereplaced. Spread the soil as evenly as possible, bringing it tothe desired level as indicated by marks on grading stakes.Typically, a minimum of 4 to 6 inches (firmed or settleddepth) of a good quality topsoil is needed to establish goodquality turf. Ideally, 2 inches of the topsoil should beincorporated into the upper 2 to 3 inches of the subsoil toprovide a gradual transition between the subsoil and topsoil.This step can reduce subsoil compaction and increase drainageat the topsoil-subsoil interface.
Modification of Topsoil
Modification of topsoil with amendments may be necessary toimprove soil quality. Most soil test labs can provide acomplete analysis of the soil along with recommendations forhow much organic matter, fertilizer, and lime should be added.
Organic matter may be a beneficial amendment when soilshave high sand or clay contents. Sandy soils lose water andnutrients quickly, thus, a good source of organic matteramended into these soils improves water and nutrientretention, reducing the need for irrigation and fertilizer. Claysoils typically are poorly drained and lack sufficient aerationfor good root growth. Organic matter additions to clay soilswill provide better water and air movement through the soil,thereby improving turf root growth.
Although sphagnum peat products are ideal organicamendments for sand and clay soils, they can be expensive foruse in lawn establishment. Good quality composts are usuallyless expensive than sphagnum peat and can be good organicmatter amendments; although they contain less organic matterthan high quality peats. If you decide to use compost insteadof peat, be aware that all composts are not alike and some are

Page 4 Lawn Establishment
better for use in turf establishment than others. Make sure thatthe compost you choose has been successfully used by otherprofessionals for lawn establishment or has been successfullytested on turf at a university. Poor quality composts should notbe used.
Sand is occasionally used to improve clay soils; however,large amounts are needed to achieve noticeable soilimprovement. Clay soils must contain about 60 percent byvolume of a coarse, uniform sand to achieve significantimprovement in drainage. This would involve incorporating a3 to 4-inch layer of sand into a 6-inch layer of clay soil.Although possible, this method is too expensive for most lawnestablishments.
A soil test report for turf establishment should specify theamount of organic matter needed in a soil. Once you know therecommended amount, spread the material evenly over theentire site. The soil should be tilled before spreading theamendment as this will make mixing the amendment with thesoil easier. Spreading can be done with a loader bucket,grading blade, or York rake for large sites or with shovels andgrading rakes for small lawns. Typically, a 1 to 2-inch layer ofsphagnum peat or compost can be worked 4 to 6 inches intothe soil with conventional rototilling equipment. If more than2 inches of organic matter is required, till the 2-inch layer intothe soil, then spread more of the amendment and till again.Organic layers greater than 2 inches are difficult to till evenlyinto soils.
The only way to determine how much fertilizer and lime arerequired for turf establishment is with a soil test. The nutrientsmost often needed by turfgrasses in the form of fertilizersupplements are nitrogen, phosphorus, and potassium.Because phosphorus and potassium do not move into the soilfast enough when surface applied, they usually are tilled intothe soil to a depth of 4 to 6 inches before establishment. Thisis accomplished by spreading the amount recommended in thesoil test report on the soil surface with a fertilizer spreader,then tilling. Lime can be applied in a similar manner if the soilis too acidic. The amount needed should be specified on thesoil test report. Nitrogen should not be tilled into the soil sinceit can be leached out of the topsoil before the turf can use it.Nitrogen, as well as additional phosphorus and potassium,should be applied to the surface as starter fertilizer just beforeor just after seeding.
Figure 7. Tilling topsoil with a rototiller
Tillage
Tilling is typically done with a rototiller and serves to mixamendments into topsoil while loosening soil for better rootgrowth (Fig. 7). Tilling should be done on moist, but not wet,soils. The depth of tilling for most turf establishments shouldbe at least 4 inches. One or two passes with a rototiller isusually sufficient to mix and loosen soil. Tilling should breakthe soil into small aggregates, creating a loose, crumblystructure. Excessive tilling can turn soil into a powder,destroying soil structure and resulting in surface crusting and apoor quality seedbed.
Fine Grading
Following rough grading, incorporation of amendments, andtilling, the soil should be ready for fine grading. Fine gradinginvolves firming and smoothing the soil surface in preparationfor seeding or sodding. Firming can be accomplished bydragging a heavy mat over the surface several times. Theweight of the mat will firm-up the soil and the dragging willsmooth the surface. If a mat is not available, a light-weightroller or a cultipacker can be used instead. Mechanical firmingshould be done when the soil is relatively dry and withlightweight equipment so as not to overly compact the soil. Analternative to mechanical firming is to allow rainfall orirrigation water to settle the soil. Be aware that if you usewater to firm the surface you may have to wait several daysuntil the soil is dry enough to begin fine grading. Stones largerthan two inches in diameter should be removed by hand with astone rake and shovel or mechanically with a landscape rake(Fig. 8).

Page 5 Lawn Establishment
Figure 8. Landscape rake
After you firm the soil and remove stones, begin smoothingthe remaining high areas and depressions. Do this by handraking with a grading rake. Grading rakes are designed formoving small amounts of soil and should not be used for stoneremoval. If you are establishing a large area, soil blades,harrows, cultipackers, landscape rakes, brushes, or steel matscan be used to smooth the soil surface.
Seeding
Seed Mixtures and BlendsSeveral cool-season turfgrass species and many cultivars areavailable for use in lawns. This is fortunate because no onegrass is ideal for all environments and cultural conditions.Many lawns are established on sites having both sunny andshaded areas, different drainage properties, and varyingamounts of traffic. Also, cultural practices such as mowing,fertilization, and irrigation vary from season to season.Because conditions differ, mixtures of different species and/orblends of different cultivars can be used to create a diversestand that will adapt to a range of environments and culturalpractices.
Although there are no established rules for which speciesshould or should not be mixed, homeowners usually wantgrass mixtures that result in a uniform lawn free ofdifferent-colored patches and clumps of coarse-textured grass.Select species with similar colors, textures, and growth habitsto avoid patches and clumps. Suggested mixtures ofcool-season turfgrass species for specific site conditions inPennsylvania are listed in Table 1.
Blending turfgrass cultivars is a good way to introducediversity into a turf stand, especially if only one species isused for the establishment. Blending is especially importantwith Kentucky bluegrass because there is little geneticvariation within cultivars of this species. By blending three orfour cultivars of Kentucky bluegrass you can significantlyincrease diversity, thereby improving disease resistance andadaptability to different site conditions.
SpeciesSeed Rate(lb./1000 sq ft)
% by weight inSeed Mixture
Sunny areas and well-drained soils
Turf-type tallfescue 6-8 100
Kentuckybluegrass 2-3 100
Perennial ryegrass 4-5 100
Kentuckybluegrass &perennial ryegrass 2-3 80-90 10-20
Kentuckybluegrass & finefescues &perennial ryegrass 3-4 40-60 20-40 10
Partially-shaded areas
Fines fescues &Kentuckybluegrass &perennial ryegrass 4 40-50 40-50 10
Turf type tallfescue 6-8 100
Fine fescues 4-5 100
Fully-shaded areas
Fine fescues 4-5 100
Rough bluegrass 2-3 100
Overseeding or renovation of lawns
Perennial ryegrass 4-6 100
Table 1. Some suggested seed mixtures for home lawns,parks, grounds, and commercial properties.
Seed Labels and QualitySelection of high-quality seed is an important step inestablishing a lawn. Low-quality seed (seed that is low inviability, high in weed seed, or of low purity) will result in athin, weedy lawn that is more susceptible to damage frompests and adverse environmental conditions.
By law, the turfgrass seed label must contain certaininformation concerning the origin and quality of the seed. Asample of a typical turfgrass seed label is shown in Fig. 9.

Page 6 Lawn Establishment
Figure 9. Example of a turfgrass seed label
Information provided on the label includes:
• The name and address of the company responsible for thecontents of the container.
• A lot number for tracing the seed back to the originalproduction site.
• Kind and variety of turfgrass seed listed in order ofpredominance
• The percentages by weight of the individual cultivars.
• Percent by weight of other crop seed and weed seed.
• Percentage by weight of inert matter.
• The date of the most recent germination test.
Indicators of Seed Quality - Purity, Viability, andPure Live Seed
All species and cultivars of turfgrasses in the container mustbe listed on the seed label. The percent by weight of seed foreach species and cultivar is also provided and is referred to asseed purity. Sometimes, seed is sold for which no cultivarname(s) exist. In this case, 'variety not stated' (VNS) or'common' is listed next to the species name. Variety not statedor common generally indicates low quality seed. However,just because a variety is named does not necessarily mean it issuperior in quality to seed listed as VNS or common.
Official seed regulatory agencies responsible for inspectingseed will certify seed that meets the specifications set by theagency. This seed is referred to as 'certified seed' and is theonly real guarantee of cultivar purity. Whenever possible, buycertified seed for use in lawn establishment.
The seed label also lists the percent germination for eachturfgrass species and variety in the container. Percentgermination indicates seed viability and must be determinedby special test procedures within a specified time period,usually within nine months of sale.
Together, seed purity and germination provide a goodindicator of seed quality. Occasionally, seed is sold that is lowin purity and germination for what may appear to be a bargainprice. However, be aware that in order to achieve the samequality of turf as with 'good seed' of high germination andpurity, more seed is required.
The amount of seed required to compensate for poor purityand germination can be determined by calculating percentpure live seed (PLS). Pure live seed indicates the amount ofseed in the container that is capable of developing intoseedlings. To calculate PLS, the percentage of pure seed of acultivar is multiplied by the percent germination, and theproduct is divided by 100. For example, 92 percent pure seedof the cultivar x 80 percent germination / 100 = 74 percentPLS. To determine how much seed to plant, divide 100 by thepercentage PLS (74 percent in this case). Thus, in thisexample, 100/74 = 1.4. Thus, 1.4 pounds of seed with a purityof 92 percent and a germination of 80 percent would beneeded for each pound specified in the desired seed mixture.
Often, seed that is low in purity and germination is sold at areduced price. One way of determining if the reduced price isreally a good bargain is to divide the PLS into 100 thenmultiply by the cost of the seed. A comparison of two seedlots is provided as an example.
Seedlot A (sold at 'reduced' price of $0.95 per lb):
PLS = (85% purity) x (60% germination) / 100 = 51% 100 /51 = 2 lb of seed needed per lb of seed specifed Cost = $0.95 x2 = $1.90 per lb of PLS
Seedlot B (sold at regular price of $1.50 per lb):
PLS = (99% purity) x (90% germination) / 100 = 89% 100 /89 = 1.1 lb of seed needed per lb seed specified Cost = $1.50 x1.1 = $1.65 per lb of PLS
A comparison of actual cost per pound of pure, viable seedreveals that the seed that appeared to be a bargain was actuallymore expensive.
Seeding RatesRate suggestions for seeding the different turfgrass species areusually given in pounds per 1000 sq ft and are designed toprovide about 1000 to 2000 seedlings per 1000 sq ft. Typicalseeding rates for individual species are provided in Table 1.
Occasionally, seeding rates that are higher or lower thannormal are used for lawn establishment. High seeding rates aresometimes used if seeding takes place past the optimum periodof late summer/early fall as cold temperatures decrease seedgermination. High rates can also be used if a quick and denseestablishment is desired or if the turf will be subjected toheavy wear, such as on a football field. Simply increasing theseeding rate, however, does not always ensure a healthy turf.An excessively dense stand resulting from high seeding ratescan result in increased disease problems and mower scalping.
Low seeding rates may be justified where high turf density isnot required, such as a low maintenance planting that will notbe mowed or mowed infrequently at a high cutting height.Sometimes low seeding rates are used when budgets prohibitseeding at optimum rates. Realize that by using lower thanoptimum seeding rates the resulting turf stand will be thin andweeds may be more of a problem.

Page 7 Lawn Establishment
Timing of SeedingSeeding of cool-season turfgrass species can be done from midspring to early fall, but late summer is the optimum time toseed in most areas of Pennsylvania. Soils tend to be dryer andwarmer during late August and early September than inspring. Soils that are slightly moist are easier to prepare forseeding than wet soils and warm soils allow faster germinationand establishment than cold soils. When planted in latesummer, seedlings will have two cool growing seasons (falland spring) to become established, whereas seedlingsdeveloping from spring establishments will be subjected to theheat and drought of summer, making survival more difficult.Weeds are usually more of a problem in spring establishmentsthan in late summer establishments as the cool temperaturesand frosts in late summer/early fall will slow weeddevelopment.
Seeding MethodsTo obtain a uniform turf, seed should be evenly distributedover the prepared soil. A drop-type spreader is ideal fordistributing seed on small areas. Seeding in two directionsresults in fewer skips and a more uniform application. Thus,you should calibrate your spreader to deliver half of thedesired amount of seed and cover the entire lawn area twice inopposite directions (Fig. 10).
Figure 10. Diagram showing seeding in opposite directions
Starter fertilizer should be applied just before or just afterseeding. Starter fertilizer will provide the new seedlings withsufficient nutrients to ensure rapid establishment. Many starterfertilizers have equal amounts of nitrogen, phosphate, andpotash. Others have two parts nitrogen to one part phosphateto one part potash. Examples of starter fertilizer analyses are10-10-10, 16-8-8, and 20-10-10. Similar products such as10-6-4 or 15-10-10 are acceptable. Most starter fertilizerscontain quick-release nitrogen.
Starter fertilizers should be applied at 0.5 to 1 lb nitrogen/1000sq ft. Amounts in excess of 1.5 lb nitrogen/1000 sq ft can burnthe young turf and result in poor establishment. Application ofa starter fertilizer is not a substitute for the phosphate andpotash recommended on your soil test report.
Figure 11. Dragging the seeded area in straight lines with aleaf rake
After you have applied the seed and starter fertilizer, it isbeneficial to drag small-scale establishments with a leaf rake.Drag in straight lines taking care not to apply pressure to therake since you don't want to move the seeds, only cover themwith a small amount of soil. If done correctly, dragging shouldcover most the seeds with about ¼ inch of soil. Some of theseeds will be visible on the soil surface (Fig. 11).
Next, use a lightweight roller to roll the entire area. Rollingpresses the seed into the soil. Make sure that the roller surfaceand the soil are dry before rolling the seedbed to avoidcollecting seed and soil.
For larger seeding jobs, you can use a tractor-drawncultipacker seeder (Fig. 12). Cultipackers firm the surface anddeposit seed in the soil. Most units have a box for seedmounted above a grooved roller. The box has small openingsin the bottom through which seed falls onto the soil surface.The seed is dropped into shallow grooves created by the rollerand the soil is firmed around the seed.
Figure 12. Cultipacker seeder
Hydroseeding is a method of lawn seeding that has becomepopular in recent years. It involves preparing a mixture ofseed, water, fertilizer, and mulch in a large tank and pumpingthe mixture through a hose or gun onto a prepared seedbed.Although lawns of any size can be established throughhydroseeding, this method is most efficient for large sites or

Page 8 Lawn Establishment
steep slopes.
Most hydroseeding equipment consists of a large tank (500 to1500 gallon capacity for use in lawn establishment) equippedwith an agitation system to keep the mix of seed, water,fertilizer, and mulch in suspension. An engine powers thepump which agitates the mix and forces it through a hose andnozzle. Some hydroseeders are equipped with a gun thatshoots the mix out of the tank in a stream that can extend over100 feet. The hydroseeder operator moves the hose or gunback and forth until the entire area is covered with theprepared mix (Fig. 13).
Figure 13. Hydroseeder operator covers area with preparedmix
Advantages of hydroseeding over other methods of lawnestablishment from seed are that large areas can be seededquickly and sloped areas are easier to seed. Disadvantagesinclude the high cost of hydroseeding equipment, the fact thatseed is placed on the soil surface and may not be in closecontact with the soil (sometimes resulting in seedlings dryingout), and a hydroseeder takes some experience to operate.
MulchingApplication of suitable mulch to new establishments helpsretain soil moisture, prevents movement of seed and soilerosion, reduces surface crusting, and helps to moderate soiltemperatures. Mulching usually helps turf establish faster andresults in a more uniform stand. It is particularly important onsloped areas where there is a higher chance of erosion. Use ofpoor quality mulch or poor mulching practices may result inseed movement and soil erosion, smothering of new seedlings,introduction of weed seeds, and disease problems. Poormulching practices may also result in extra clean-up work.
Straw (not to be confused with hay) is the most widely usedand least expensive mulch for lawn establishment from seed(Fig. 14). It comes in bales from areas where small grains(wheat, barley, rye, or oats) are produced. The straw used formulching lawns should contain few grain and weed seeds.Although straw usually has fewer weed seeds than hay, expectsome weed introduction with straw mulch.
Figure 14. Straw mulch on newly-seeded lawn
Be sure to apply the proper amount of straw mulch to thenewly-seeded lawn. Too much straw can smother newseedlings and lead to disease problems. Insufficient amountswill not retain soil moisture or prevent seed movement andsoil erosion. Rates of 80 to 100 lb of straw/1000 sq ft aregenerally sufficient on level or gently sloping areas (a typicalbale of straw weighs between 30 and 40 lb). Higher rates maybe required on steeper slopes. Excess straw should be removedfollowing establishment.
Hydroseeding units can be used for mulching areas where seedhas already been applied. In these cases, the practice is calledhydromulching. The most common mulches used forhydromulching are virgin wood fiber and chopped recycledpaper (usually newspaper). These mulches are mixed withwater and a tackifier (an organic-based glue) and sprayed overthe seed and soil in a thin layer. Rates of 30 to 40 lb/1000 sq ft(900 to 1600 lb/acre) can be used on level and gently slopingareas and up to 3000 lb/acre are sometimes used on steepslopes. Increasing rates of mulch may cause smothering ofseedlings, disease problems, and may also deplete soilnitrogen.
Pelletized mulches made from newspaper compressed intopellets are now available for use in newly-seeded turf (Fig.15). Some of these mulches have starter fertilizer incorporatedinto the pellets. Pelletized mulches are designed to expandwhen wetted, thereby covering most of the soil surface. Theseproducts have the advantages of being free of weed seed andeasy to apply. The pellets are applied with certain models ofdrop-type spreaders. Pelletized mulches are more expensivethan straw mulch and do not control erosion on sloped areas aswell as straw when applied at normal rates.
Page 9 Lawn Establishment
Figure 15. Pelletized mulch
Occasionally, mats or covers are used as mulches for newestablishments. These can be geotextile fabrics, wood fibermats, burlap, or other types of loose-woven fabrics or mats.Mats or covers may be used in high value establishmentswhen soil temperatures are cold or on steep banks. Theyprovide weed free, uniform coverage, but are a labor intensivemeans of mulching because they are bulky and must beanchored with pins or staples. It is important to remove coversor mats soon after germination to prevent disease and to allowlight to reach seedlings.
Different types of plant fiber mulches are sometimes used inturf establishments. Although they may not be as effective asthe types discussed previously, they may be priced lower andreadily available. Each of these products must be evaluated forits merits as mulch and used at specific rates.
SoddingSodding is usually the most expensive method of establishingcool-season turfgrasses. However, it is the quickest way toachieve a mature lawn. It can be done at almost anytime of theyear except when soils are frozen. The optimum times forsodding cool-season turfgrasses are in late summer, spring, orfall.
Sod can deteriorate if proper site preparation and follow-upmaintenance practices are not followed. Soil preparationmethods for sodding are identical to those for establishing turffrom seed. The soil surface should be smooth and firm but notcompacted. The soil should be dry to slightly moist whensodding. Never lay sod on wet soil.
Turfgrasses used for sod production typically producerhizomes or stolons which knit turf together and providelateral strength. Kentucky bluegrass is the most commoncool-season turfgrass species used for sod in Pennsylvania.Occasionally, tall fescue and fine fescues are used, but someKentucky bluegrass is usually included with these species togive the sod more lateral strength.
Sod is usually cut into rectangular strips that can be lifted byhand and delivered folded or rolled on pallets. Sod should beused immediately upon delivery because it deteriorates rapidly(within 24 to 48 hours) in warm weather. If you are unable to
lay the sod immediately, unroll it and place it turf side up in ashady, cool place. Water it thoroughly and frequently to keepit from drying.
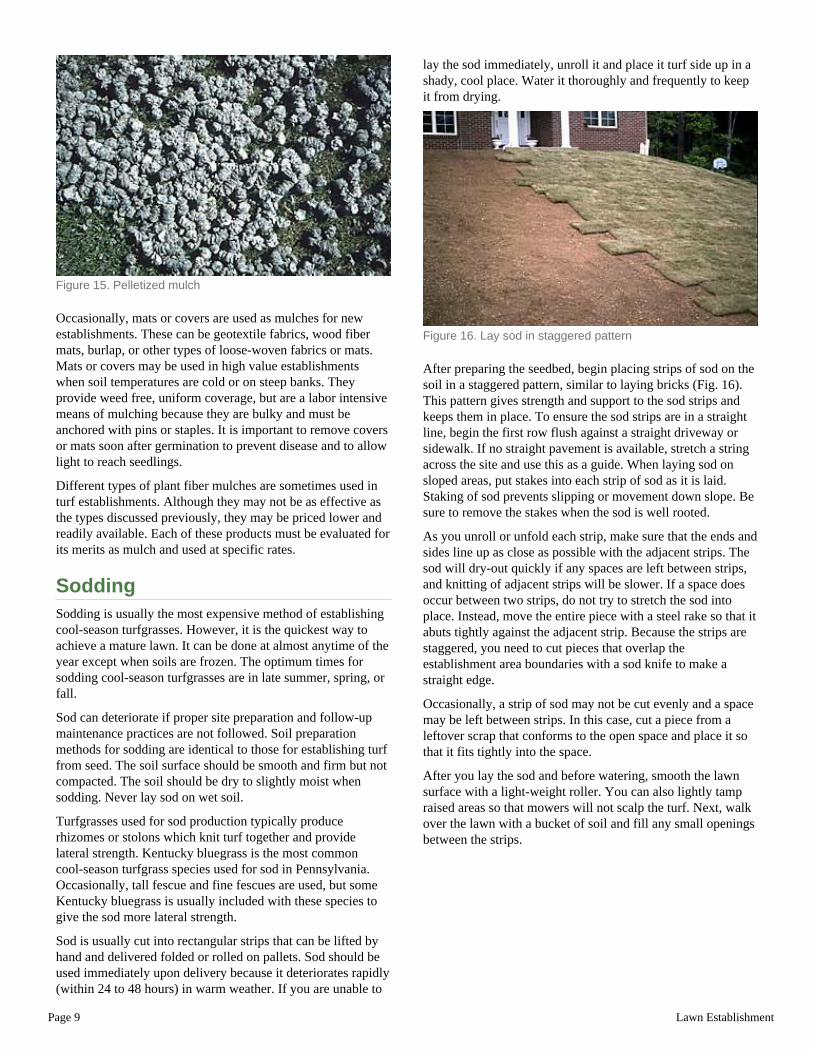
Figure 16. Lay sod in staggered pattern
After preparing the seedbed, begin placing strips of sod on thesoil in a staggered pattern, similar to laying bricks (Fig. 16).This pattern gives strength and support to the sod strips andkeeps them in place. To ensure the sod strips are in a straightline, begin the first row flush against a straight driveway orsidewalk. If no straight pavement is available, stretch a stringacross the site and use this as a guide. When laying sod onsloped areas, put stakes into each strip of sod as it is laid.Staking of sod prevents slipping or movement down slope. Besure to remove the stakes when the sod is well rooted.
As you unroll or unfold each strip, make sure that the ends andsides line up as close as possible with the adjacent strips. Thesod will dry-out quickly if any spaces are left between strips,and knitting of adjacent strips will be slower. If a space doesoccur between two strips, do not try to stretch the sod intoplace. Instead, move the entire piece with a steel rake so that itabuts tightly against the adjacent strip. Because the strips arestaggered, you need to cut pieces that overlap theestablishment area boundaries with a sod knife to make astraight edge.
Occasionally, a strip of sod may not be cut evenly and a spacemay be left between strips. In this case, cut a piece from aleftover scrap that conforms to the open space and place it sothat it fits tightly into the space.
After you lay the sod and before watering, smooth the lawnsurface with a light-weight roller. You can also lightly tampraised areas so that mowers will not scalp the turf. Next, walkover the lawn with a bucket of soil and fill any small openingsbetween the strips.

Page 10 Lawn Establishment
Figure 17. Sod deterioration due to lack of water
After you have finished laying the sod, trimming edges,rolling, and filling openings with soil, thoroughly water thesod. Lack of water is the most common cause of soddeterioration so make sure that the water moves through thesod and wets the soil underneath (Fig. 17). Continue to waterdaily (if needed) until the sod is well rooted into the soil. Thismay take up to 4 weeks depending on the site and weatherconditions.
Do not walk on the sod after you have begun to irrigate as thiswill create depressions in the surface. Keep traffic off the areauntil the sod is well rooted. Do not apply herbicides tonewly-laid sod or to the soil prior to sodding. Herbicidesinterfere with root development and often result inestablishment failure.
Lawn establishment without tilling(renovation)Lawn renovation involves reestablishing an existing, poorquality lawn without tilling and grading. Renovation can bedone when drastic soil improvement is not needed and thelawn has an acceptable grade. It is usually faster and lessexpensive than traditional methods of establishment, but stillrequires careful planning as well as knowledge of soils and theenvironmental/cultural needs of turfgrasses.
Before you begin to renovate, correct the primary causes oflawn deterioration. Some common causes include drought,heavy shade, exteme soil acidity, weed or insect infestation,
disease, thatch, improper mowing, and grass species andcultivars that are poorly-adapted to the site. Most of theseproblems can be corrected by renovation, proper turfgrassselection, and improved cultural practices. Once the cause(s)of deterioration are recognized, and plans are made to correctthe problems, renovation can begin.
As with other establishment methods, renovation involvescareful planning. Visit the site and assess the area to beplanted. Note conditions that may influence the type of grassyou will use. Take a soil test and examine the grade andsmoothness of the surface. Also, note the presence of utilitylines and irrigation heads that may be damaged by renovationequipment (aeration and slicing machines), the presence oftree roots and rocks at the soil surface, and how much thatch ispresent.
After you have completed the site assessment, treat the entirelawn with a total vegetation control herbicide that does notleave a soil residual. The most effective herbicide used forlawn renovation is glyphosate (a frequently used formulationof glyphosate is Round-up Pro™). Glyphosate will kill allvegetation it contacts and since it is inactivated when itcontacts soil, there is no residual that will interfere withturfgrass seed germination (Fig. 18). Glyphosate does not killweed seeds.
Figure 18. Lawn sprayed with glyphosate
Many types of sprayers are available for applying glyphosateand you should choose one that fits the scope of yourrenovation program. Other important aspects of spraying aremaking sure that you cover the area uniformly, that theherbicide is applied at the correct rate, and that there is little tono spray drift. To avoid skips, spray in two directions,perpendicular to one another, using ½ rates for each direction.Never spray on a windy day as glyphosate spray can drift intoa neighbor's lawn or onto valuable ornamental plantings. Keeptraffic off the site for several hours following sprayapplications to avoid tracking the herbicide onto untreatedturf. Never spray when rain is expected since the herbicidewill be washed off the grass and be ineffective.
Wait until the lawn is killed by the herbicide before continuingthe renovation operation. Depending on the weatherconditions and the plants you are attempting to kill, this can
Page 11 Lawn Establishment
take a few days or up to three weeks.
After the turf and weeds have died, remove excess thatch (ifnecessary). This can be accomplished by running a slicing ordethatching machine over the lawn in several directions oruntil most of the thatch has been removed. Then rake up thethatch and remove it from the site.
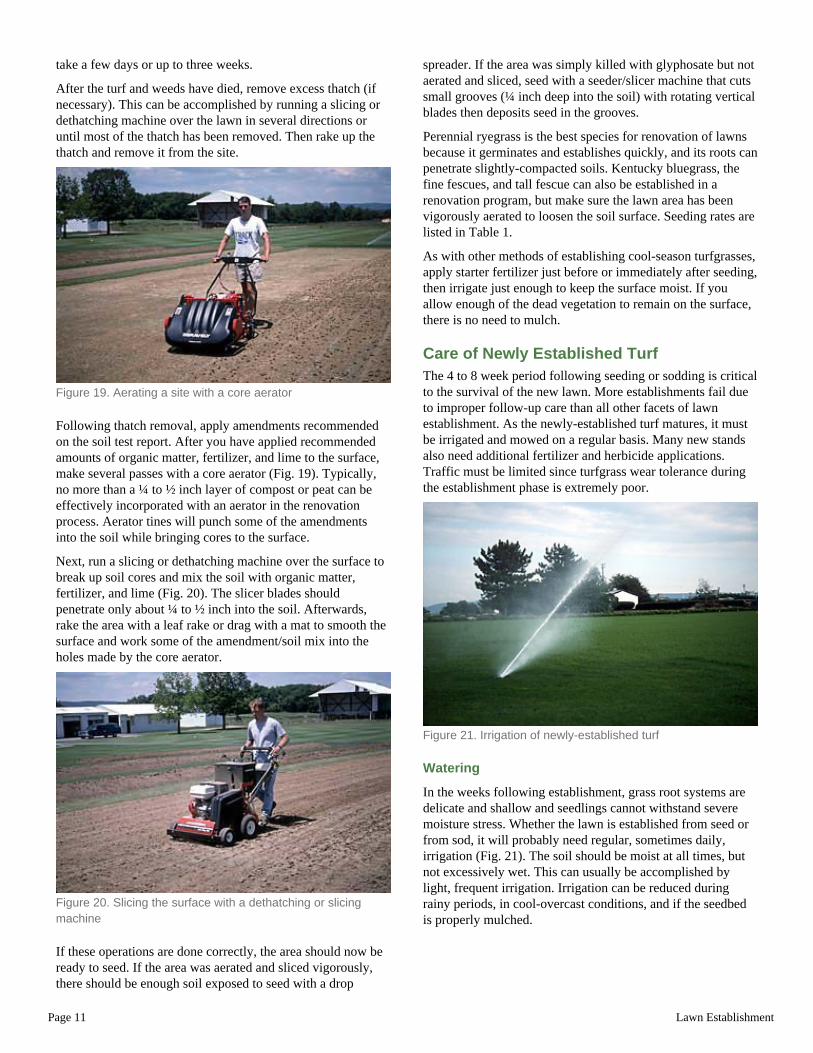
Figure 19. Aerating a site with a core aerator
Following thatch removal, apply amendments recommendedon the soil test report. After you have applied recommendedamounts of organic matter, fertilizer, and lime to the surface,make several passes with a core aerator (Fig. 19). Typically,no more than a ¼ to ½ inch layer of compost or peat can beeffectively incorporated with an aerator in the renovationprocess. Aerator tines will punch some of the amendmentsinto the soil while bringing cores to the surface.
Next, run a slicing or dethatching machine over the surface tobreak up soil cores and mix the soil with organic matter,fertilizer, and lime (Fig. 20). The slicer blades shouldpenetrate only about ¼ to ½ inch into the soil. Afterwards,rake the area with a leaf rake or drag with a mat to smooth thesurface and work some of the amendment/soil mix into theholes made by the core aerator.
Figure 20. Slicing the surface with a dethatching or slicingmachine
If these operations are done correctly, the area should now beready to seed. If the area was aerated and sliced vigorously,there should be enough soil exposed to seed with a drop
spreader. If the area was simply killed with glyphosate but notaerated and sliced, seed with a seeder/slicer machine that cutssmall grooves (¼ inch deep into the soil) with rotating verticalblades then deposits seed in the grooves.
Perennial ryegrass is the best species for renovation of lawnsbecause it germinates and establishes quickly, and its roots canpenetrate slightly-compacted soils. Kentucky bluegrass, thefine fescues, and tall fescue can also be established in arenovation program, but make sure the lawn area has beenvigorously aerated to loosen the soil surface. Seeding rates arelisted in Table 1.
As with other methods of establishing cool-season turfgrasses,apply starter fertilizer just before or immediately after seeding,then irrigate just enough to keep the surface moist. If youallow enough of the dead vegetation to remain on the surface,there is no need to mulch.
Care of Newly Established TurfThe 4 to 8 week period following seeding or sodding is criticalto the survival of the new lawn. More establishments fail dueto improper follow-up care than all other facets of lawnestablishment. As the newly-established turf matures, it mustbe irrigated and mowed on a regular basis. Many new standsalso need additional fertilizer and herbicide applications.Traffic must be limited since turfgrass wear tolerance duringthe establishment phase is extremely poor.
Figure 21. Irrigation of newly-established turf
Watering
In the weeks following establishment, grass root systems aredelicate and shallow and seedlings cannot withstand severemoisture stress. Whether the lawn is established from seed orfrom sod, it will probably need regular, sometimes daily,irrigation (Fig. 21). The soil should be moist at all times, butnot excessively wet. This can usually be accomplished bylight, frequent irrigation. Irrigation can be reduced duringrainy periods, in cool-overcast conditions, and if the seedbedis properly mulched.
Page 12 Lawn Establishment
Mowing
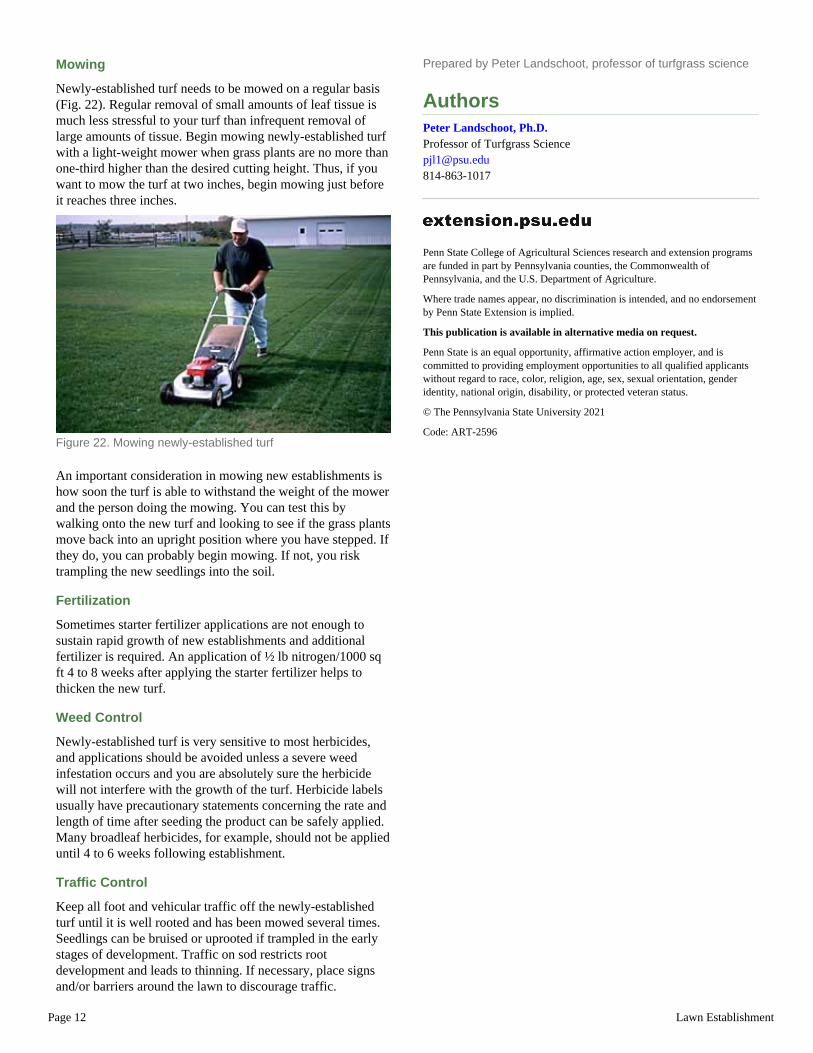
Newly-established turf needs to be mowed on a regular basis(Fig. 22). Regular removal of small amounts of leaf tissue ismuch less stressful to your turf than infrequent removal oflarge amounts of tissue. Begin mowing newly-established turfwith a light-weight mower when grass plants are no more thanone-third higher than the desired cutting height. Thus, if youwant to mow the turf at two inches, begin mowing just beforeit reaches three inches.
Figure 22. Mowing newly-established turf
An important consideration in mowing new establishments ishow soon the turf is able to withstand the weight of the mowerand the person doing the mowing. You can test this bywalking onto the new turf and looking to see if the grass plantsmove back into an upright position where you have stepped. Ifthey do, you can probably begin mowing. If not, you risktrampling the new seedlings into the soil.
Fertilization
Sometimes starter fertilizer applications are not enough tosustain rapid growth of new establishments and additionalfertilizer is required. An application of ½ lb nitrogen/1000 sqft 4 to 8 weeks after applying the starter fertilizer helps tothicken the new turf.
Weed Control
Newly-established turf is very sensitive to most herbicides,and applications should be avoided unless a severe weedinfestation occurs and you are absolutely sure the herbicidewill not interfere with the growth of the turf. Herbicide labelsusually have precautionary statements concerning the rate andlength of time after seeding the product can be safely applied.Many broadleaf herbicides, for example, should not be applieduntil 4 to 6 weeks following establishment.
Traffic Control
Keep all foot and vehicular traffic off the newly-establishedturf until it is well rooted and has been mowed several times.Seedlings can be bruised or uprooted if trampled in the earlystages of development. Traffic on sod restricts rootdevelopment and leads to thinning. If necessary, place signsand/or barriers around the lawn to discourage traffic.
Prepared by Peter Landschoot, professor of turfgrass science
AuthorsPeter Landschoot, Ph.D.Professor of Turfgrass [email protected]
Penn State College of Agricultural Sciences research and extension programsare funded in part by Pennsylvania counties, the Commonwealth ofPennsylvania, and the U.S. Department of Agriculture.
Where trade names appear, no discrimination is intended, and no endorsementby Penn State Extension is implied.
This publication is available in alternative media on request.
Penn State is an equal opportunity, affirmative action employer, and iscommitted to providing employment opportunities to all qualified applicantswithout regard to race, color, religion, age, sex, sexual orientation, genderidentity, national origin, disability, or protected veteran status.
© The Pennsylvania State University 2021
Code: ART-2596