lenses: adapting, purchasing - stampede...
TRANSCRIPT

48
nofilmschool.com/dslr/lenses-adapting
To adapt a different brand of lens to your DSLR, you need a lens adapter. On the discount end, users report widespread praise for those sold by eBay seller kawaphoto, and my experiences have bore this out (adapting both Olympus and Contax-mount lenses to Canon EOS). Considering some lens adapters run $50+, being able to buy a $10 adapter for every lens in your kit and keeping the adapters on them (preventing you from ever having to interchange them in the field) makes it feasible to base an entire lens kit around glass designed for a different camera, further saving you money. For example, Dan Chung has recommended buying Contax/Yashica-mount Zeiss lenses — less expensive than other Zeiss lenses due to their obsolete nature — and adapting them to Canon (advice that I followed, although I
LENSES: ADAPTING,
PURCHASINGHow can I use a different
brand of lens on my DSLR?
49
nofilmschool.com/dslr/lenses-adapting
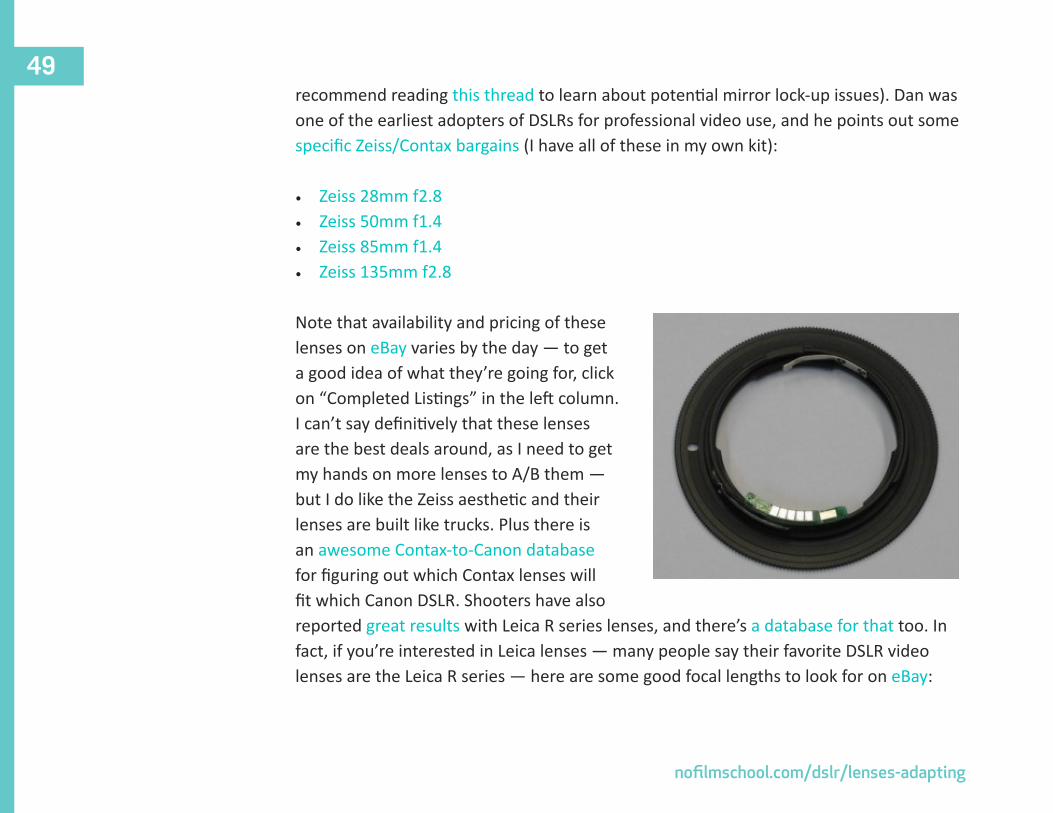
recommend reading this thread to learn about potential mirror lock-up issues). Dan was one of the earliest adopters of DSLRs for professional video use, and he points out some specific Zeiss/Contax bargains (I have all of these in my own kit):
• Zeiss 28mm f2.8• Zeiss 50mm f1.4• Zeiss 85mm f1.4• Zeiss 135mm f2.8
Note that availability and pricing of these lenses on eBay varies by the day — to get a good idea of what they’re going for, click on “Completed Listings” in the left column. I can’t say definitively that these lenses are the best deals around, as I need to get my hands on more lenses to A/B them — but I do like the Zeiss aesthetic and their lenses are built like trucks. Plus there is an awesome Contax-to-Canon database for figuring out which Contax lenses will fit which Canon DSLR. Shooters have also reported great results with Leica R series lenses, and there’s a database for that too. In fact, if you’re interested in Leica lenses — many people say their favorite DSLR video lenses are the Leica R series — here are some good focal lengths to look for on eBay:

50
nofilmschool.com/dslr/lenses-adapting
• Leica R 28mm• Leica R 35mm• Leica R 50mm• Leica R 60mm• Leica R 90mm• Leica R 135mm
If you’re wondering what the strange term appended to each Leica lens means, it signifies the speed of the lens: Noctilux are the fastest lenses at f1.2 (sometimes even f0.95!), followed by Summilux at f1.4, Summicron at f2, and Elmarit at f2.8. As you’d expect, the fastest lenses are usually the most expensive (Leica R lens can run a bit more expensive than other brands, so I’ve created custom searches above that focus on Summilux, Summicron, and Elmarit glass). If you put together a kit based on Leica glass, you’ll want to check out Leitax adapters, generally thought of to be the best Leica R-to-Canon adapters.
When adapting any brand (not just Zeiss or Leica) lenses to your DSLR, if you want to use them for still use as well as movie-shooting, there are more expensive adapters that offer an AF-confirm feature.

51
nofilmschool.com/dslr/lenses-adapting
Such adapters contain electronics that allow the camera to confirm (depending on your settings, a red flash in the viewfinder and/or an audible beep) when sharp focus is obtained, even though the lens is of a different brand than the camera. Note that there is often some tweaking necessary with the settings, but if you’re planning on taking stills with your manual lenses, the AF-confirm adapters from eBay seller happypagehk are well-liked (I have several “dumb” adapters and one such “smart” one in my kit). Additionally, if you’re going to be shooting stills with fast primes on a 5D you’re probably going to want to swap out the standard focus screen for the Eg-S Super Precision Matte model, which makes objects “pop” into focus a bit more (at the expense of viewfinder brightness — Canon recommends precision screens for lenses f/2.8 and faster).
As I said earlier, lenses hold their value. If you’ve got the money, buy new lenses that are made for your camera — you will avoid a lot of potential pitfalls. For example, Zeiss makes their ZE series of manual lenses specifically for Canon DSLRs; you may want to get these instead of used lenses if you can afford it (for more on why you might want to get Nikon-mount ZF Zeiss lenses instead, see “Lenses: Renting, Converting).” Here’s why: while you can definitely get great results finding bargains and adapting older lenses to newer cameras, you will probably run into some problems along the way. Nothing is free, and if you’re going to buy a used lens for $300 and slap on a $10 adapter, don’t expect it to be every bit as great as its brand-new $1,200 counterpart.
So — what are some of the potential pitfalls of using adapted lenses? There are two main issues to be aware of: infinity focus and mirror obstruction. I’ve had issues obtaining perfect infinity focus using adapted lenses — this is when your lens can focus “past” infinity, causing distant objects to be blurry when they should be sharp — and
If you’re going to buy a used lens for $300 and slap on a
$10 adapter, don’t expect
it to be every bit as great
as its brand-new $1,200
counterpart.

52
nofilmschool.com/dslr/lenses-adapting
my 28mm Zeiss lens causes my 5D’s mirror to sometimes get stuck when focused to infinity (more of an issue for shooting stills than movies, since the mirror is in lock-up position in movie mode). Adapting lenses is not for the faint of heart; we’re talking about mechanical devices where millimeters matter, and in many cases individual lenses behave differently with different adapters. For everything gained, something is lost — in this case, you’re gaining a bunch of leftover dollars in your pocket, and losing some reliability and performance. For many shooters, myself included, it’s not a choice: I had to go with adapted lenses as a matter of budget.

53
nofilmschool.com/dslr/lenses-focal-lengths-depth-of-field
While older, manual SLR lenses are very inexpensive, there are disadvantages to using them for cinematography; these shortcomings are chiefly noticeable while pulling focus. For one, most still lenses breathe, meaning, they actually change focal lengths slightly while racking focus, which can be visually distracting for those used to cine lenses (which do not). As a related matter this breathing is accompanied by a physical lengthening (or shortening) of the lens while pulling focus, which can wreak havoc with the ability to use a matte box (see the matte box section). However, SLR lenses are exponentially cheaper than cine lenses — not to mention your DSLR probably doesn’t have an Arri PL mount or any way of easily affixing cine lenses — so go with used SLR glass and be happy that you’ve got a video camera with
LENSES: FOCAL LENGTHS,
DEPTH OF FIELDWith which lenses should I
build a kit?

54
nofilmschool.com/dslr/lenses-focal-lengths-depth-of-field
The first lens you should
purchase is a 50mm prime.
interchangeable lenses for several times less $$$ than any of us would’ve imagined a few years ago.
When it comes to choosing focal lengths, the first lens you should purchase is a 50mm prime, which is wide enough to get room coverage, yet not so wide that it introduces much geometric distortion. Hitchcock used it for the majority of his shots, and I shot 90% of The West Side with a 50 (pictured); they’re workhorse lenses and are generally inexpensive. When buying lenses you will generally want faster glass for the best low-light performance and flexibility (f/1.4 is basically as fast as it gets). To the layman, f/stop numbers seem undifferentiated, but the drop-off in light transmission from stop to stop is significant; exposure is logarithmic, so f/1.4 transmits twice as much light as f2, f/2 twice as much as f/2.8, f/2.8 twice as much as f/4, etc. After the 50mm one should expand in both directions, adding a 28mm or 35mm lens on the wider side as well as an 85mm and 135mm on the telephoto side (these numbers are approximate, given the varying lens lineup of different manufacturers). It’s also a good idea to have a general zoom lens to

55
nofilmschool.com/dslr/lenses-focal-lengths-depth-of-field
hit particular focal lengths, especially on the longer side, so something like a 70-200mm would serve you well.
If you’re shooting on a full-frame camera like the 5D, the focal length listed on the barrel of a SLR lens will be accurate. However, if you’re shooting on a DSLR with an APS-C or similar-sized sensor, you’ll need to calculate the corresponding crop factor of your camera to get the accurate focal length. For example, if you’re shooting with a 7D or T2i you’ll need to multiply by 1.6, so a 28mm lens becomes 45mm, a 50mm becomes 80mm, and so on and so forth. This makes crop-factor cameras better for telephoto work (they’re a popular choice of wildlife and sports photographers) because your lenses automatically gain more “reach” — but it can often be harder to find good wide-angle lenses. The 1D Mark IV has a crop factor of 1.3, which effectively splits the difference between full-frame and APS-C.
If you’re just getting started and don’t have a whole lot of money for lenses, ask friends and family if they have an old SLR they’re not using, and if you can borrow/have their old lenses. Get an adapter for that brand and try them out (note that some manufacturers designed their lenses with rear tabs or flaps that may interfere with your camera’s mirror, so you may have to file down such protrusions). If they perform well, then you’ve just saved yourself some money with the added bonus of clearing out your aunt’s closet space. You’ll probably want to upgrade eventually, but this can be a good way of shooting ASAP and learning on the fly.
Once you’ve got your lenses and start shooting, you’ll notice that fast primes have a very narrow depth-of-field when wide open. This is mostly a blessing: for years, guerilla
If you’re just getting started and don’t have
a whole lot of money for
lenses, ask friends and
family if they have an old
SLR they’re not using, and if you
can borrow/have their old
lenses.

56
nofilmschool.com/dslr/lenses-focal-lengths-depth-of-field
filmmakers have been after a narrow depth of field (previous video cameras in this price range had tiny imaging sensors, which yielded images with a very deep DOF), as most audiences associate shallow DOF with narrative filmmaking. A shallow DOF also allows you to defocus backgrounds that might not be production-designable and direct the viewer’s attention to what you deem important in a scene. However, when working with full-frame sensors like that of the 5D, your DOF can become too narrow, so that it’s nigh impossible to achieve sharp focus on a moving object (such as a person’s face). Also from Shane (he’s talking about a full-frame sensor): “With a Canon 85mm lens, at a 1.4 T-stop you have a 1/32” of focus.” This means: your focus on a subject’s face might be limited to the tip of their nose and not their eyes, or vice versa; this can be distracting to say the least, especially over the course of a shot. Even if your subject is stationary (say, in an interview), when they lean forward they might drop out of focus if you’re using a wide-open aperture, and so you’ll have to choose your f/stop wisely. Note that, at the same f/stop, perceived DOF is deeper on wider lenses and shallower on longer lenses (I say

57
nofilmschool.com/dslr/lenses-focal-lengths-depth-of-field
perceived because technically this is not true; see this article on DOF for why). To further understand the relationship between sensor size, lens length, and f/stop, you can use a calculator to figure out the depth of field for a given lens (this is calculated based on “acceptable sharpness” a.k.a. the circle of confusion).

58
nofilmschool.com/dslr/lenses-converting-renting
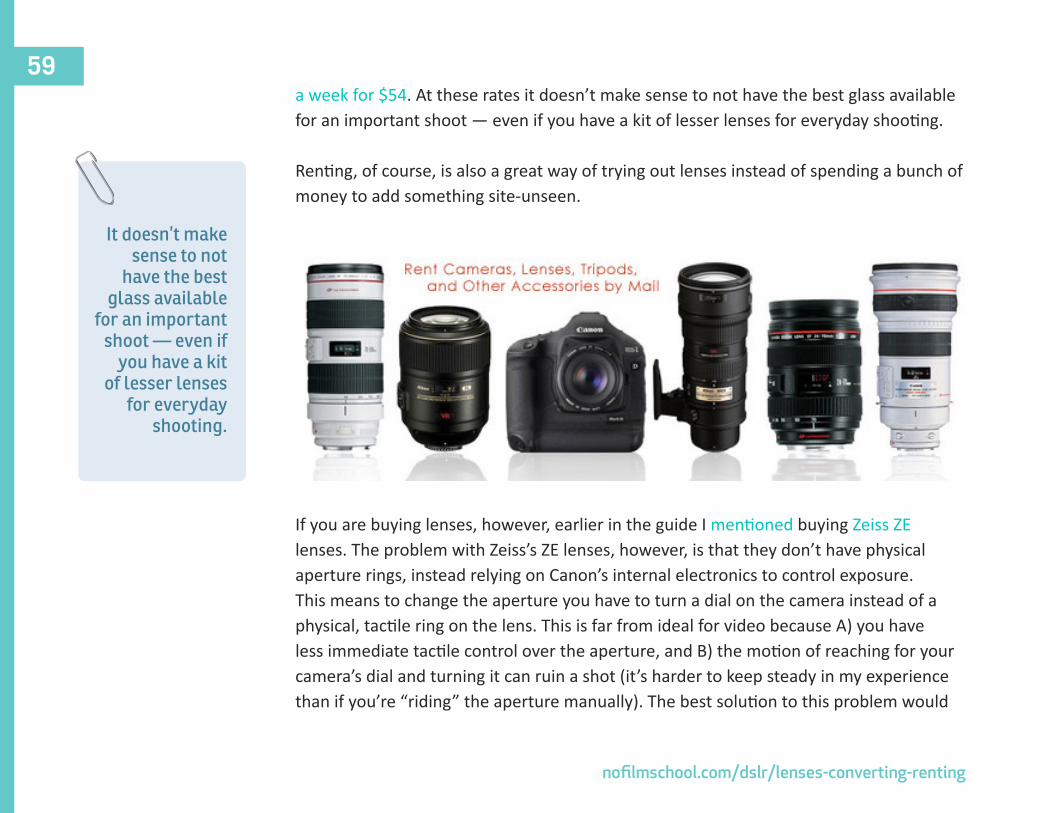
Is all this glass getting too expensive? Well, there’s another thing to keep in mind: you can rent lenses. There’s no better way to try different lenses than by… trying different lenses. If there’s a local camera shop that has a well-stocked lens rental program, great. But if not, BorrowLenses.com has a very wide selection of lenses (and other equipment, like audio accessories, memory cards, and underwater housings, not to mention DSLRs) available for rent by mail (you can rent for a period of 3 days all the way up to a month). Their prices are great — Canon’s gorgeous 50mm f/1.2 prime goes for $1,500 new, but at BorrowLenses you can rent it for a week for $65 (plus shipping, which means it makes sense to rent several items at once). Another stunning lens, the Zeiss ZE 50mm f/2 Makro retails for $1,300 but rents for
LENSES: RENTING, CONVERTING
Can I upgrade my lenses — or rent better ones?
59
nofilmschool.com/dslr/lenses-converting-renting
a week for $54. At these rates it doesn’t make sense to not have the best glass available for an important shoot — even if you have a kit of lesser lenses for everyday shooting.
Renting, of course, is also a great way of trying out lenses instead of spending a bunch of money to add something site-unseen.
If you are buying lenses, however, earlier in the guide I mentioned buying Zeiss ZE lenses. The problem with Zeiss’s ZE lenses, however, is that they don’t have physical aperture rings, instead relying on Canon’s internal electronics to control exposure. This means to change the aperture you have to turn a dial on the camera instead of a physical, tactile ring on the lens. This is far from ideal for video because A) you have less immediate tactile control over the aperture, and B) the motion of reaching for your camera’s dial and turning it can ruin a shot (it’s harder to keep steady in my experience than if you’re “riding” the aperture manually). The best solution to this problem would
It doesn’t make sense to not
have the best glass available
for an important shoot — even if
you have a kit of lesser lenses
for everyday shooting.

60
nofilmschool.com/dslr/lenses-converting-renting
be to get the Zeiss CP.2 lenses, which come with stopless physical aperture rings, but they’re $4,000 apiece. So: is there a way to get physical aperture controls on your Canon DSLR while buying new Zeiss lenses, without spending $4k apiece? Yes! The solution is to buy Zeiss ZF lenses, which are made for Nikon’s F-mount lens system, and then convert them.
This tip comes via Philip Bloom, who recommends sending ZF lenses to Duclos, who for $250/lens (on average) will “cinemod” your ZF lens. What is the “cinemod?” Duclos de-clicks your iris ring (giving you stopless control over exposure), adds a physical gear for follow focus use, and adds a common-size front ring (for example, if you have a 77mm Fader ND, you can have all of your lenses fit with 77mm front threads). Note that the problem with sending in Zeiss ZF lenses is that Nikon lenses pull focus in the opposite direction of all other brands, so for that reason alone I have a distaste for them (pulling focus on Nikon lenses and then switching to any other brand is a pain in the ass in terms of muscle memory). So while Bloom may recommend sending in ZF lenses — which is a great option (and I should note that some follow focuses (focusi?) allow you to reverse their gearing to correct this problem) — Duclos says they can cinemod many still lenses. I emailed the company asking which lenses they offer the service for, and got a prompt response from Matthew Duclos, their Optical Technician:

61
nofilmschool.com/dslr/lenses-converting-renting
“Our cine-mod is totally customizable per the customer and their needs. The back bone of the cine-mod consists of three parts: an 80mm front ring with 77mm screw in thread, a 32-pitch seamless focus gear, and lastly the iris de-clicking for smooth aperture manipulation. The front rings are made of aluminum and screw into the existing filter thread on the lens. We can also cut custom delrin front rings for lenses that don’t have a front thread. The focus gear can vary in size from 2″ all the way to 4″ depending on what is needed for the lens and/or setup. Each gear is cut to size individually and installed by a technician for a perfect fit. The aperture de-clicking is pretty self explanatory. As you can imagine, this makes the cine-mod very versatile in regards to your question about which brands we can modify. Just about anything that is well suited for motion picture use. Feel free to read some of my material on MatthewDuclos.com as to what lenses work well for motion and why some lenses don’t.”
I’m hoping to have my Contax-mount Zeiss lenses cinemodded by Duclos and will write a review here at NoFilmSchool when/if I do so.
62
nofilmschool.com/dslr/storage-for-the-shoot
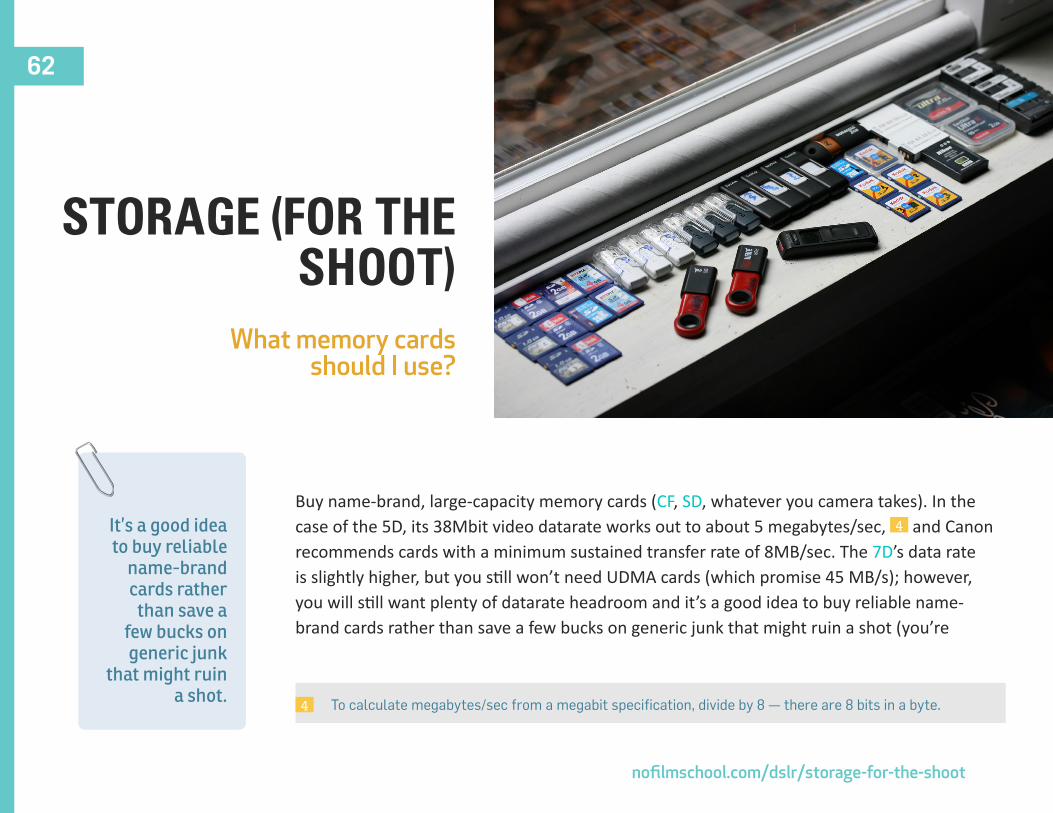
Buy name-brand, large-capacity memory cards (CF, SD, whatever you camera takes). In the case of the 5D, its 38Mbit video datarate works out to about 5 megabytes/sec, 4 and Canon recommends cards with a minimum sustained transfer rate of 8MB/sec. The 7D’s data rate is slightly higher, but you still won’t need UDMA cards (which promise 45 MB/s); however, you will still want plenty of datarate headroom and it’s a good idea to buy reliable name-brand cards rather than save a few bucks on generic junk that might ruin a shot (you’re
STORAGE (FOR THESHOOT)
What memory cards should I use?
To calculate megabytes/sec from a megabit specification, divide by 8 — there are 8 bits in a byte.4
It’s a good idea to buy reliable
name-brand cards rather
than save a few bucks on generic junk
that might ruin a shot.
63
nofilmschool.com/dslr/storage-for-the-shoot
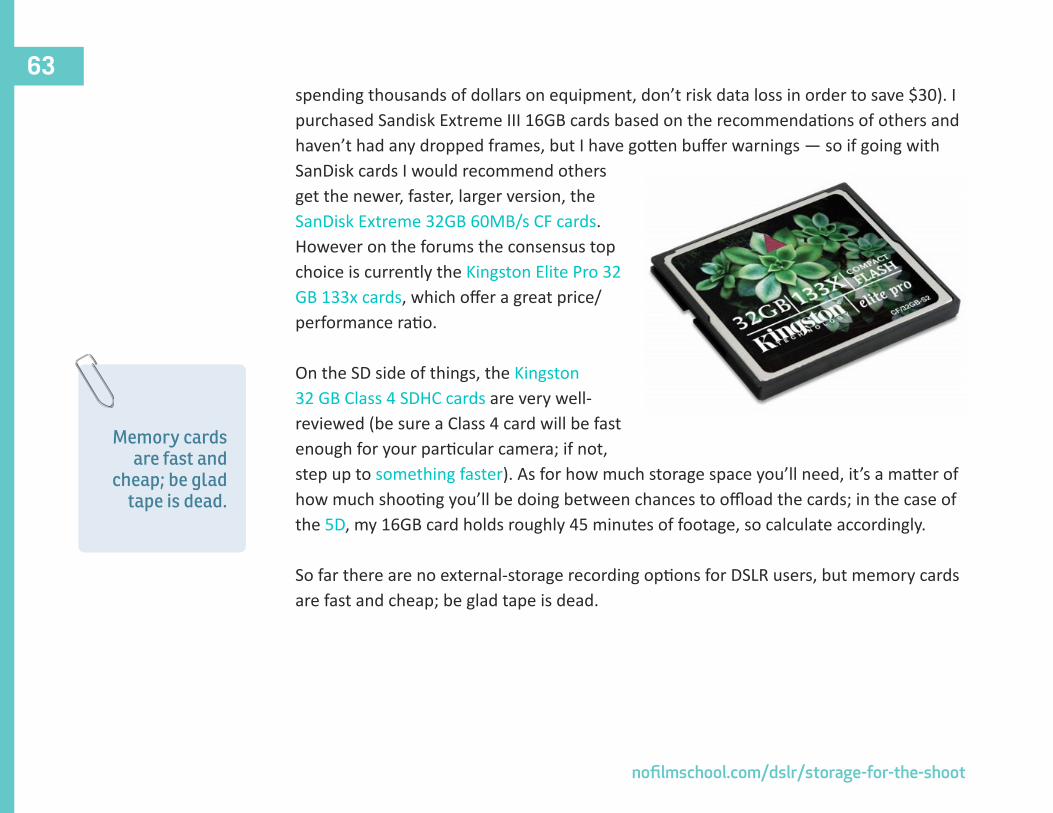
spending thousands of dollars on equipment, don’t risk data loss in order to save $30). I purchased Sandisk Extreme III 16GB cards based on the recommendations of others and haven’t had any dropped frames, but I have gotten buffer warnings — so if going with SanDisk cards I would recommend others get the newer, faster, larger version, the SanDisk Extreme 32GB 60MB/s CF cards. However on the forums the consensus top choice is currently the Kingston Elite Pro 32 GB 133x cards, which offer a great price/performance ratio.
On the SD side of things, the Kingston 32 GB Class 4 SDHC cards are very well-reviewed (be sure a Class 4 card will be fast enough for your particular camera; if not, step up to something faster). As for how much storage space you’ll need, it’s a matter of how much shooting you’ll be doing between chances to offload the cards; in the case of the 5D, my 16GB card holds roughly 45 minutes of footage, so calculate accordingly.
So far there are no external-storage recording options for DSLR users, but memory cards are fast and cheap; be glad tape is dead.
Memory cards are fast and
cheap; be glad tape is dead.
64
nofilmschool.com/dslr/support-system
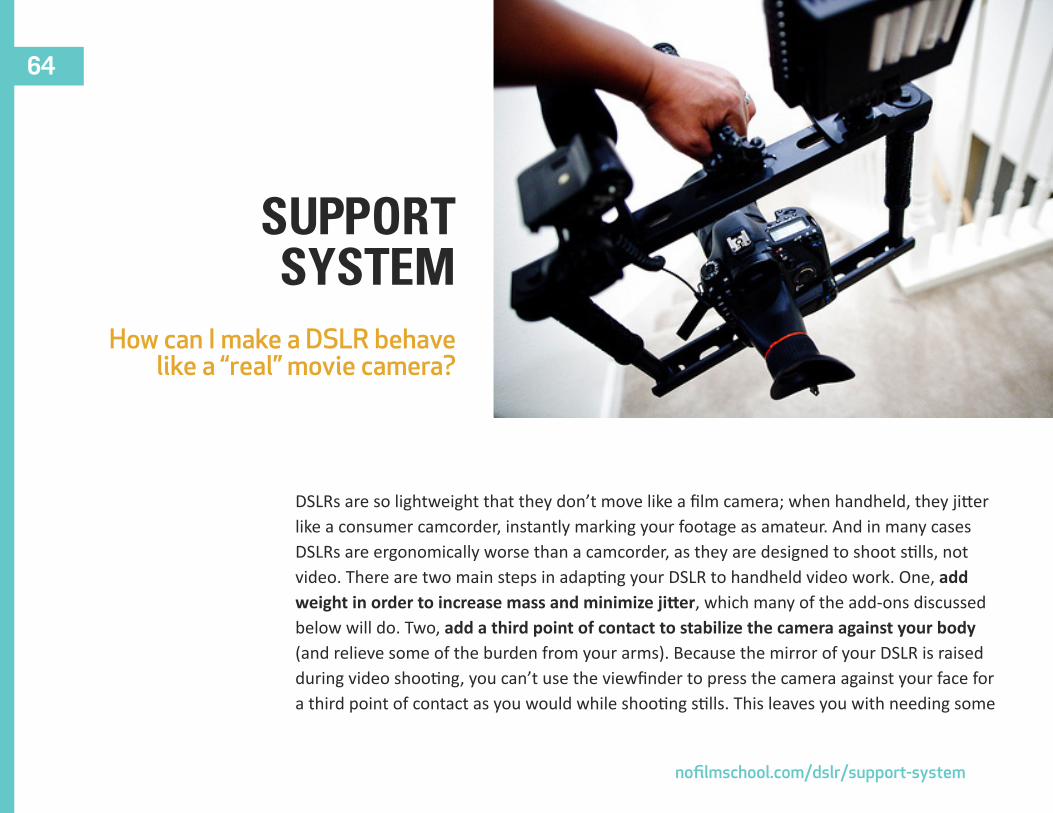
DSLRs are so lightweight that they don’t move like a film camera; when handheld, they jitter like a consumer camcorder, instantly marking your footage as amateur. And in many cases DSLRs are ergonomically worse than a camcorder, as they are designed to shoot stills, not video. There are two main steps in adapting your DSLR to handheld video work. One, add weight in order to increase mass and minimize jitter, which many of the add-ons discussed below will do. Two, add a third point of contact to stabilize the camera against your body (and relieve some of the burden from your arms). Because the mirror of your DSLR is raised during video shooting, you can’t use the viewfinder to press the camera against your face for a third point of contact as you would while shooting stills. This leaves you with needing some
SUPPORTSYSTEM
How can I make a DSLR behave like a “real” movie camera?
65
nofilmschool.com/dslr/support-system
sort of attachment to adapt a fundamentally unergonomic chunk of metal to your fleshy human form.
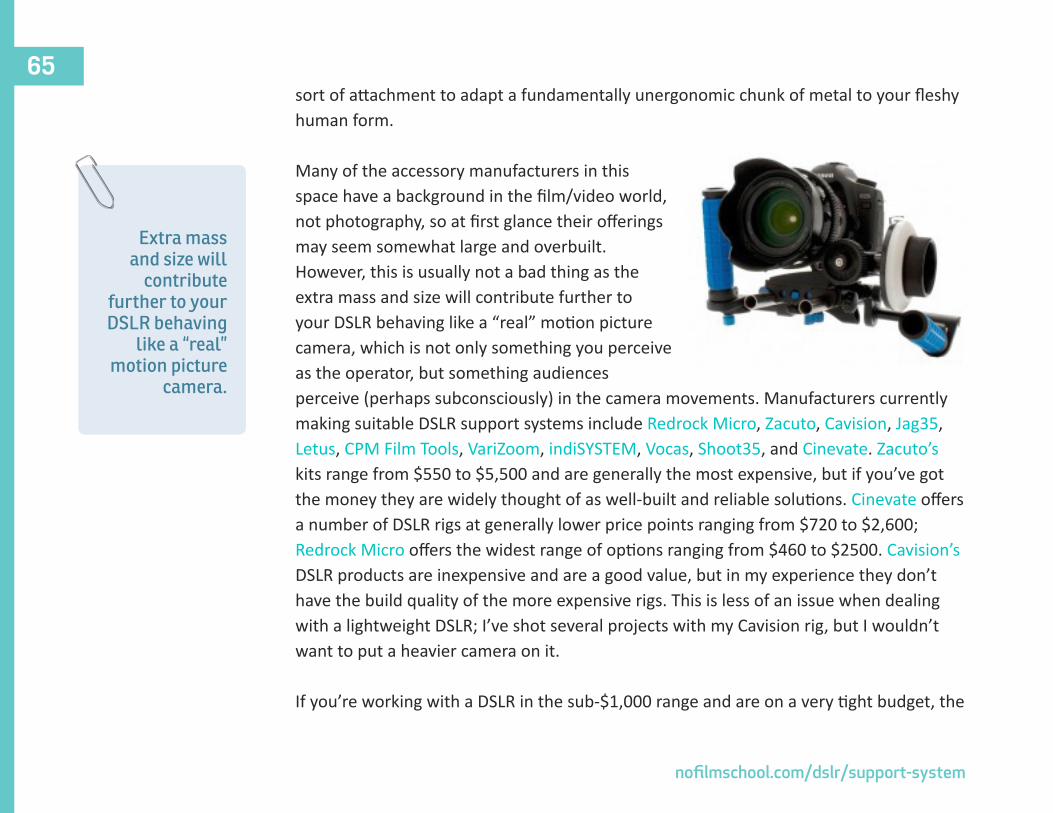
Many of the accessory manufacturers in this space have a background in the film/video world, not photography, so at first glance their offerings may seem somewhat large and overbuilt. However, this is usually not a bad thing as the extra mass and size will contribute further to your DSLR behaving like a “real” motion picture camera, which is not only something you perceive as the operator, but something audiences perceive (perhaps subconsciously) in the camera movements. Manufacturers currently making suitable DSLR support systems include Redrock Micro, Zacuto, Cavision, Jag35, Letus, CPM Film Tools, VariZoom, indiSYSTEM, Vocas, Shoot35, and Cinevate. Zacuto’s kits range from $550 to $5,500 and are generally the most expensive, but if you’ve got the money they are widely thought of as well-built and reliable solutions. Cinevate offers a number of DSLR rigs at generally lower price points ranging from $720 to $2,600; Redrock Micro offers the widest range of options ranging from $460 to $2500. Cavision’s DSLR products are inexpensive and are a good value, but in my experience they don’t have the build quality of the more expensive rigs. This is less of an issue when dealing with a lightweight DSLR; I’ve shot several projects with my Cavision rig, but I wouldn’t want to put a heavier camera on it.
If you’re working with a DSLR in the sub-$1,000 range and are on a very tight budget, the
Extra mass and size will
contribute further to your DSLR behaving
like a “real” motion picture
camera.

66
nofilmschool.com/dslr/support-system
above support systems might cost more than you’re able or willing to spend. In this case, the place to go is eBay. For whatever reason, a whole community of cheap DSLR support system manufacturers has sprung to life in India, and while I’m not endorsing any of their products (I have a knockoff Indian matte box which I would evaluate by saying “you get what you pay for”), if you’re just getting started and funds are minimal, they’re worth a look. Some eBay sellers proffering DSLR support gear include DVcare, Cine-City, HDVshop, and the creatively named Digital Video Product.
The industry standard rod system for camera support is based on 15mm rods spaced 60mm apart (there is also a larger standard based on 19mm rods which is overkill for DSLRs), so you can mix and match most parts from different manufacturers to build your own frankensystem. In my own experience it’s a trial-and-error process to piece together the ideal kit for your particular shooting needs, so this is one area for which you should definitely spend some time on the forums. Also, these companies are
smaller than your average multinational corporation, and therefore will usually take the time to answer your questions. I hope to have more answers in this area when I’ve used a wider variety of gear.
67
nofilmschool.com/dslr/support-system
Cinema5d has a 60-page DSLR rig review covering a number of DSLR support systems, although there have been rumblings about the methodology and objectivity of their roundup; as with the info in this very guide, seek out as many experienced opinions on the forums as you can before you pull the trigger on a purchase, and then experiment to get the best results for your particular needs.

68
nofilmschool.com/dslr/power
Shooting movies on your DSLR drains batteries rapidly, so you’ll need plenty of spares. For the 5D and 7D, each genuine Canon LP-E6 battery runs $100, which can add up quickly. Even the lower-priced T2i uses batteries that are equally expensive: the LP-E8. Nikons aren’t any better on the high end, although the D90 does have cheap batteries available. However, generic imported batteries can be had on eBay for $10. The difference? In Canon’s case, the cheap imports lack the internal computer chip that their genuine counterparts have, which tells you how much battery life remains. The cheap ones, therefore, could potentially run out at the worst time during your shoot: mid-take. Then again, you can get 6 of them for the price of one “real” battery, so they’re an attractive alternative for no-budget filmmakers. It’s important to
POWERWhat are the best options
for powering my DSLR?

69
nofilmschool.com/dslr/power
note that the knockoff batteries won’t work in Canon’s charger; they require their own. The first time I plugged in the off-brand charger that came with my generic batteries, it fried itself in 5 minutes (the seller sent me another); YMMV. Finally, off-brand batteries do not work with the Magic Lantern firmware (as of version 0.1.6). More recently, Series 7 SL-E6 batteries have appeared at B&H, which do contain the appropriate computer chip (they aren’t significantly less expensive than the Canon originals, however).
You can also purchase a battery grip (for the Canon 5D: BG-E6; for the 7D: BG-E7; for Nikons) for double the battery life, although many still photographers purchase a battery grip for the ergonomic aid it provides while shooting vertically in addition to the extra battery life (you can also use AA batteries with grips). For filmmaking shooting vertically is a moot issue, but considering most support systems require a riser to raise the low-sitting DSLR into a suitable position, the battery grip can also serve such a purpose. Generic battery grips are also available for 1/3 the price of their genuine Canon counterpart (for both Canons and Nikons users report Zeikos makes a quality alternative).

70
nofilmschool.com/dslr/power
An alternative to using stock batteries is an external powering solution, where a cable can run from your battery compartment to a larger power source; one instance of this comes from battery specialist Anton Bauer:
Switronix has also released an external battery pack for DSLRs, but I haven’t seen any test results to date. Furthermore, Hawk-Woods has created power adapters for the 5D and 7D that offer connection to external batteries: the DC-5D1 and the DC-5D2 (they’re the same unit with different battery connectors). Word on the street is they run around $120.
This video can be watched on the online version of this chapter, at:http://nofilmschool.com/dslr/power/

71
nofilmschool.com/dslr/audio
DSLRs aren’t designed to record high-quality audio; they lack professional inputs for microphones and have an auto-gain (AGC) circuit that ruins any chance of manually setting your levels. This has changed with the recent introduction of Canon’s firmware upgrade for the 5d, which enables manual audio recording, so it’s not to say you can’t record theatrical-quality audio on your DSLR production; you just need the right equipment. Essentially, you have two options for audio recording: on-camera, or separate-system. On-camera is what any video camera user will be familiar with; you plug in your microphone(s), and the audio is recorded together with your video. Separate-system is what filmmakers accustomed to shooting celluloid will be familiar with; you record visuals to one medium and sounds to a
AUDIOHow can I record high-quality
audio with my DSLR?

72
nofilmschool.com/dslr/audio
separate recorder, and then have to sync the two up during editing (thus the need for a clapper on shoots). Both approaches have their pros and cons (briefly: separate system affords you higher quality audio recording at the expense of convenience in the editing room; on camera is the converse), and which approach you go with will depend on your production needs and whether you even have the option of on-camera recording (your DSLR may not have a mic input, or you may be unable to disable the auto gain).
For a series of very helpful DSLR audio recording tests watch Jon Fairhurst’s roundup of audio recorders (he also makes uncompressed audio samples available):
1. Boom Mic 2. Camera Mounted Mic 3. Wireless Lavalier 4. Foley 5. Noise 6. Conclusions
To record pro-level audio in-camera, you will need a device to connect your microphones (usually a XLR connector) to your camera (in the case of DSLRs, the audio input is a consumer-grade 1/8″ stereo jack). The consensus on “best pre-amp/XLR adapter” is
Separate-system affords
you higher quality audio
recording at the expense
of convenience in the
editing room; on-camera is the converse.
73
nofilmschool.com/dslr/audio
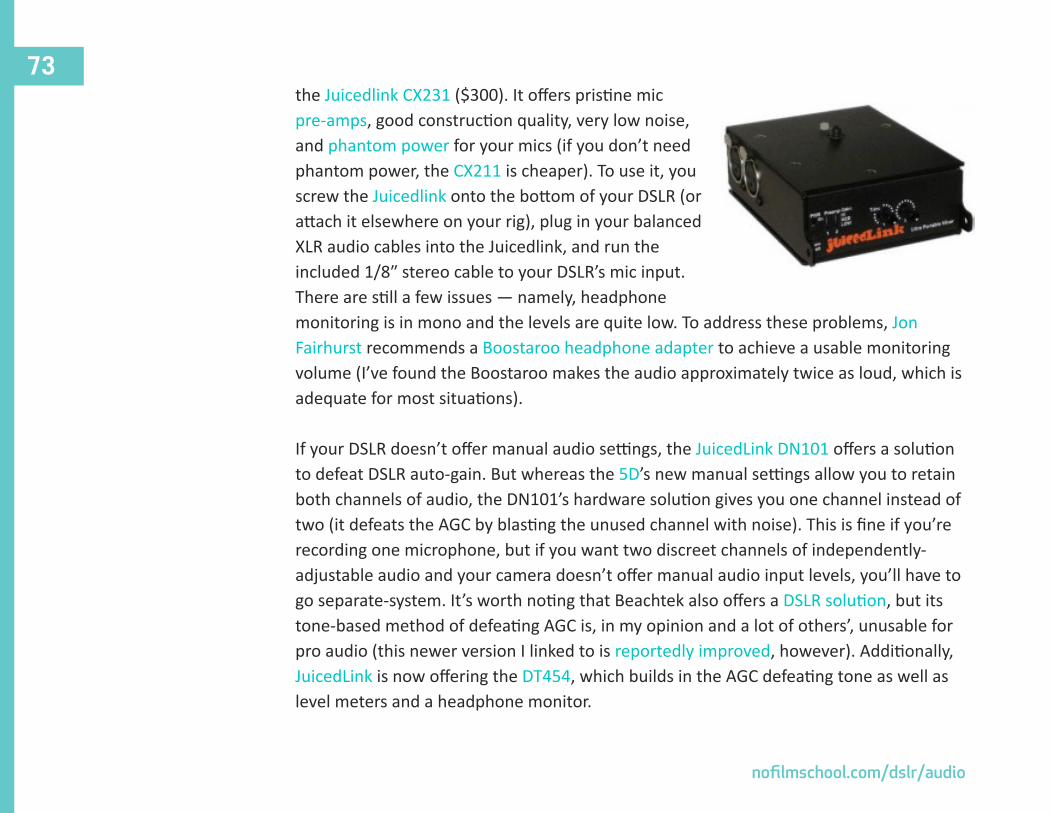
the Juicedlink CX231 ($300). It offers pristine mic pre-amps, good construction quality, very low noise, and phantom power for your mics (if you don’t need phantom power, the CX211 is cheaper). To use it, you screw the Juicedlink onto the bottom of your DSLR (or attach it elsewhere on your rig), plug in your balanced XLR audio cables into the Juicedlink, and run the included 1/8″ stereo cable to your DSLR’s mic input. There are still a few issues — namely, headphone monitoring is in mono and the levels are quite low. To address these problems, Jon Fairhurst recommends a Boostaroo headphone adapter to achieve a usable monitoring volume (I’ve found the Boostaroo makes the audio approximately twice as loud, which is adequate for most situations).
If your DSLR doesn’t offer manual audio settings, the JuicedLink DN101 offers a solution to defeat DSLR auto-gain. But whereas the 5D’s new manual settings allow you to retain both channels of audio, the DN101’s hardware solution gives you one channel instead of two (it defeats the AGC by blasting the unused channel with noise). This is fine if you’re recording one microphone, but if you want two discreet channels of independently-adjustable audio and your camera doesn’t offer manual audio input levels, you’ll have to go separate-system. It’s worth noting that Beachtek also offers a DSLR solution, but its tone-based method of defeating AGC is, in my opinion and a lot of others’, unusable for pro audio (this newer version I linked to is reportedly improved, however). Additionally, JuicedLink is now offering the DT454, which builds in the AGC defeating tone as well as level meters and a headphone monitor.

74
nofilmschool.com/dslr/audio
As with any XLR adapter of similar size, a Juicedlink or Beachtek can also double as a riser plate on your support system. Furthermore, the Juicedlink website offers a catalog of very helpful audio recording tutorials — indispensable if you find yourself trying to turn a friend into an audio crewmember.
If on-camera audio recording isn’t an option for your DSLR — or if you have a need to untether your audio from your camera — there are a number of quality flash memory recorders available at very inexpensive price points. One of the most widely-used is the Zoom H4n (review, review), which records at (up to) 24-bit/96kHz on SD or SDHC cards. It offers 2 XLR inputs, a built-in stereo mic, and offers 4 tracks of simultaneous recording, which enables the ability to simultaneously record its own stereo pickup in addition to audio from the 2 XLR inputs; for filmmaking where foley won’t be possible, this can offer a nice mixing alternative, in that you can adjust separately-recorded ambient levels independently from your boom and lav levels. Having such a scratch track, assuming the H4n is protected by a windscreen and is well-positioned, can be a boon for post-production turnaround time on low-budget shows that have web, mobile, or low-end TV releases in mind. At $350, the H4n is a great deal. One alternative: The Tascam DR100, which others review well, but I witnessed the silver jog dial fall off repeatedly on a shoot (YMMV).

75
nofilmschool.com/dslr/audio
In addition to these two methods of recording, there’s a third approach: purchase a CX231 to enable on-camera audio when you want it, and add a flash memory recorder for separate-system sound when the production calls for higher quality audio or needs the recordist to roam. A top choice for this purpose is the Sony PCM-D50, which is similar to the H4n in size and functionality, but it only accepts a 1/8″ stereo input. However, when connected to a CX231, the combination offers a great combination of mic pre-amps and recording medium — you could use this recording setup for a feature film, the self-noise is so low. Videographer/reporter Dan Chung has reported good results, and my own tests to date have confirmed this (however, your audio will travel over an unbalanced 1/8″ cable for a short length, so you’ll have to be vigilant for interference). An important feature of the PCM-D50 (review, review) is its built-in limiter, which records each input at two levels simultaneously and automatically switches to the lower level if clipping results at the higher setting. For DSLR-based crews where the audio guy might not be a union man with decades of experience, this extra fault tolerance is crucial. Other advantages include 4GB of built-in flash memory (good for 6 hours of 48kHz audio), a 5-second pre-buffer (you can automatically start the recording 5 seconds before you pressed the button in case you weren’t rolling for something), and a real, rideable input level knob (instead of the H4n’s pushbuttons). Disadvantages to the PCM-D50 include its higher price, its 1/8″ input, and its reliance on proprietary Memory Stick cards (honestly, Sony, still?).

76
nofilmschool.com/dslr/magic-lantern-firmware
The Canon 5D shipped with an amazing movie mode that was often infuriating because it lacked basic video camera functionality. Canon has done a nice job of adding some of the missing features — manual aperture and shutter speed and additional framerates — but
MAGIC LANTERN FIRMWARE
Is there unofficial firmware available for my Canon 5D?
NOTE: Since Canon released firmware 2.0.4 for the 5D, the utility of Magic Lantern firmware has been somewhat reduced.

77
nofilmschool.com/dslr/magic-lantern-firmware
additional features have been added by Tramm Hudson, who hacked the camera’s firmware and developed new features for the camera all on his own. I wondered about the 5D’s hackability before the camera was even released, and I cannot overstate the value of what Tramm’s managed with this free downloadable upgrade.
The Magic Lantern firmware adds the following features (taken from the ML wiki):
• On-screen audio meters• Manual gain control with no AGC• Zebra stripes (video peaking)• Custom Cropmarks for 16:9, 2.35:1, 4:3 and any other format• Control of focus and bracketing
These aren’t “nice to have” features — they’re must-haves. Here’s Tramm with a demonstration of ML’s capabilities (including some upcoming features):
This video can be watched on the online version of this chapter, at:http://nofilmschool.com/dslr/magic-lantern-firmware/

78
nofilmschool.com/dslr/magic-lantern-firmware
The Magic Lantern firmware is currently only available for the 5D but is coming soon to the 7D and T2i. However, it’s currently incompatible with the 5D’s latest firmware, so if you’re a current 5D owner, be wary of upgrading (if you deem it necessary, you can downgrade in order to use Magic Lantern). The firmware is free, so please donate to Tramm to support ML’s continued development and to thank him for his considerable contributions to DSLR cinematography.

79
nofilmschool.com/dslr
Thanks to the brilliance of Vitaliy Keslev, the Panasonic GH1 – a plastic, mirrorless, thousand-dollar camera – is now a real contender in the battle for DSLR supremacy. 5
Unfortunately I’m only now getting my hands on a GH1, so at press time I’ll have to reserve judgment as to how the camera compares to my 5D (I also have a Nikon D3100 and Canon
GH1 FIRMWARE
Is there unofficial firmware available for my Panasonic GH1?
Due to its lack of an optical viewfinder and mirror, the GH1 is technically not a DSLR – but given all DSLRs are in mirror lock-up position when shooting movies, for all intents and purposes this makes no difference for DSLR filmmakers. I’m going to call it a DSLR just for consistency’s sake.
5

80
nofilmschool.com/dslr
60D on the way, all courtesy B&H Photo Video, so stay tuned to NoFilmSchool for future DSLR updates). However, in some comparisons, shooters are claiming the GH1 is a better camera than the 5D. As with all claims and comparisons, your mileage may vary, and even with the higher bitrate there are some disadvantages to the GH1. Namely, that no matter what you do, the GH1 will never be a great low-light camera compared to the 5D (it has a smaller Micro 4/3 sensor that drinks in less light). Also, there is no way to set audio levels manually, so plan on shooting with separate system sound (upon unpacking the GH1, it may seem like there is no audio input, but in fact the camera has a combination remote/mic input).
Enough about the camera itself – if you already have it, you’re going to be interested in the hacked firmware, which drastically increases the AVCHD codec maximum bitrate to 44Mbit. This should singlehandedly vault the GH1 into viable filmmaking territory. The program is called PTool, and while it’s Windows-only, Mac users can run it using Winebottler. Get the hacked firmware, and instructions for using it, here at EOSHD.
81
nofilmschool.com/dslr/matte-box
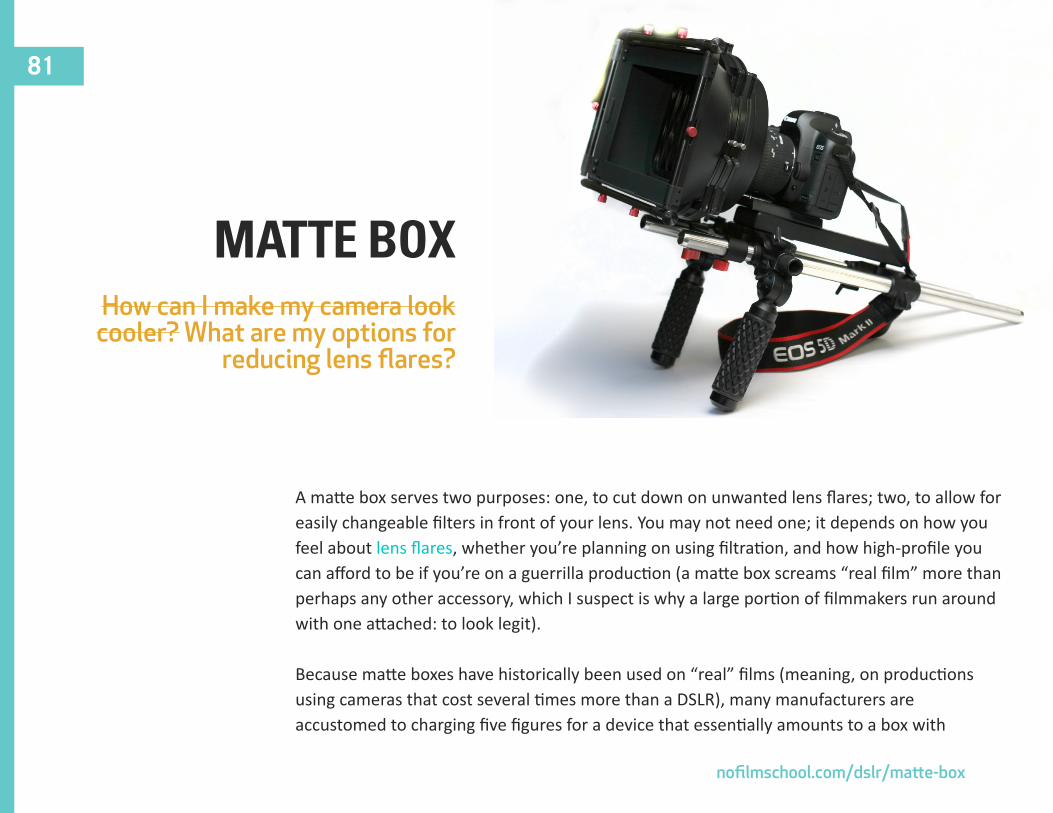
A matte box serves two purposes: one, to cut down on unwanted lens flares; two, to allow for easily changeable filters in front of your lens. You may not need one; it depends on how you feel about lens flares, whether you’re planning on using filtration, and how high-profile you can afford to be if you’re on a guerrilla production (a matte box screams “real film” more than perhaps any other accessory, which I suspect is why a large portion of filmmakers run around with one attached: to look legit).
Because matte boxes have historically been used on “real” films (meaning, on productions using cameras that cost several times more than a DSLR), many manufacturers are accustomed to charging five figures for a device that essentially amounts to a box with
MATTE BOXHow can I make my camera look
cooler? What are my options for reducing lens flares?

82
nofilmschool.com/dslr/matte-box
attachable metal flaps and a couple of slots. To be sure, it is important to get a quality matte box if you’re adding one to your rig, but it doesn’t make any sense in the world of relatively inexpensive DSLRs to spend as much on a box that sits in front of your camera as you did on the camera itself.
In the sub-$1000 category, shooters laud the Redrock Micro microMatteboxes as good values if you’re looking for something large for narrative filmmaking, or the more compact Genus for run-and-gun and documentary work. Other low-cost options include those from Cavision and GearDear. Because I am a poor independent filmmaker I went the route of purchasing a matte box from an Indian eBay seller (the matte box seems to me like a good area to save money in order to divert funds towards other equipment, e.g. another lens), but I plan on replacing it with something more professional as soon as I can afford it. FreshDV has a good roundup review of a number of matte boxes on the higher end (the Genus is the least expensive in the review).
The issue to be aware of with any matte box is getting its rear opening to fit your lenses; generally a matte box’s rear opening is 105mm or larger, and your lenses likely have various front thread sizes ranging from 49-82mm. Some matte boxes come with a set of “donuts” for stepping down to a variety lens sizes, whereas others come with a single ring. I prefer a universal donut like those from Zacuto or Genus, which can save you a lot of time when it comes to changing lenses. Without a universal donut, you’ll need a variety of step down and step up rings (good source: camerafilters.com), and every time you change a lens you’ll have to fiddle with step up rings, which rarely align perfectly. A universal donut is a time-saving advantage and also gives you some leeway with your lenses displacing as they focus (extending or retracting).
The issue to be aware of with
any matte box is getting its rear
opening to fit your lenses.
83
nofilmschool.com/dslr/filtration
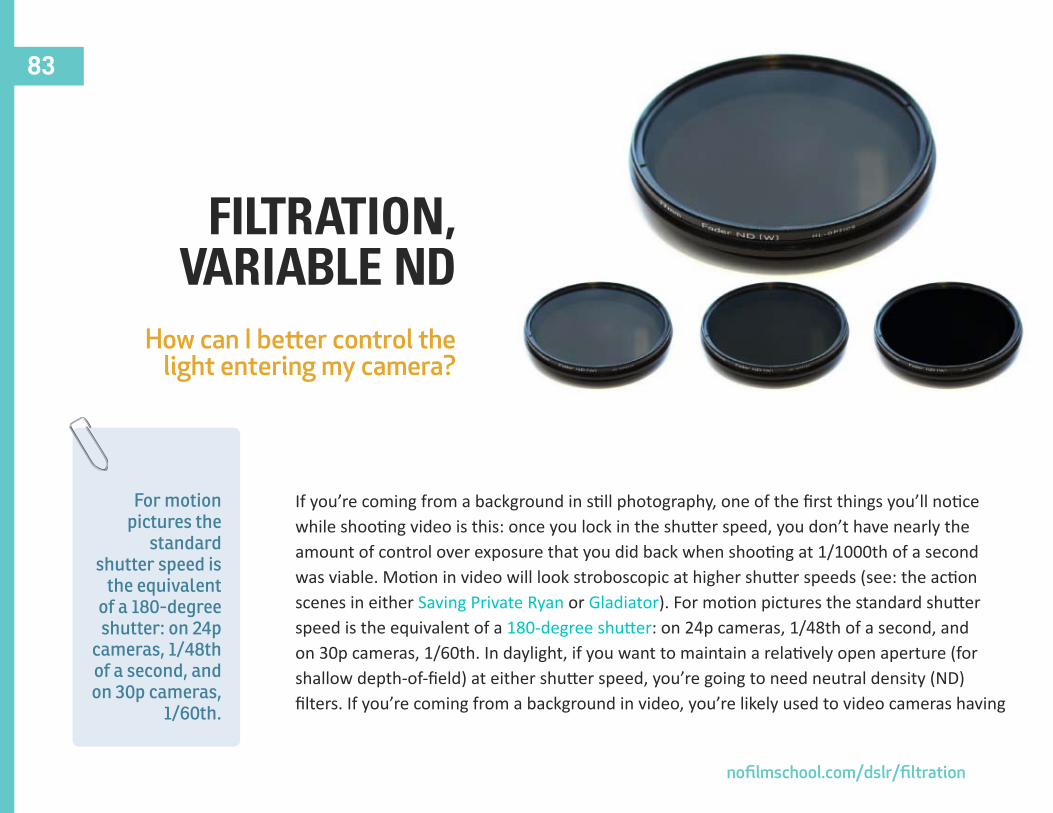
If you’re coming from a background in still photography, one of the first things you’ll notice while shooting video is this: once you lock in the shutter speed, you don’t have nearly the amount of control over exposure that you did back when shooting at 1/1000th of a second was viable. Motion in video will look stroboscopic at higher shutter speeds (see: the action scenes in either Saving Private Ryan or Gladiator). For motion pictures the standard shutter speed is the equivalent of a 180-degree shutter: on 24p cameras, 1/48th of a second, and on 30p cameras, 1/60th. In daylight, if you want to maintain a relatively open aperture (for shallow depth-of-field) at either shutter speed, you’re going to need neutral density (ND) filters. If you’re coming from a background in video, you’re likely used to video cameras having
FILTRATION,VARIABLE ND
How can I better control the light entering my camera?
For motion pictures the
standard shutter speed is
the equivalent of a 180-degree shutter: on 24p
cameras, 1/48th of a second, and on 30p cameras,
1/60th.

84
nofilmschool.com/dslr/filtration
built-in, switchable ND filters; welcome to the world of still cameras, where this is no longer the case. Therefore ND filters are the first thing to add to your filter kit; they come in a variety of strengths, with the most common denominations being 0.3, 0.6, and 0.9 (respectively, 1, 2, and 3 stops of light reduction). You can stack them in a mattebox for greater light attenuation in order to maintain your desired shutter speed and aperture in bright settings.
The above method is the traditional “movie” way of doing things — using drop-in glass filters in a matte box — but in our new era of hybridized imaging, another option is to use a variable ND solution. In this situation, rather than using a drop-in filter or combination of filters in hopes of getting your ideal exposure, you can continuously adjust a rotating filter to darken the scene faster and more precisely. 6 A variable ND setup offers as little as 2 stops and as many as 8 stops of attenuation; the Singh-Ray is the original variable ND filter but the Fader ND series of filters on eBay are just as good and a lot cheaper. Note that newer versions of the Fader ND, known as the Fader ND Mark II (review), alleviate reported image softness problems. What were these problems? Essentially, at longer focal lengths (100mm +), the original Fader ND caused the image to soften — note that this was mostly an issue on still images, where resolutions are several times that of 1080p video. I haven’t experienced any such issues
This is achieved by using two polarizers (a circular and a linear) in conjunction with each other; because a polarizer filter only allows light to pass through in one direction (which makes it most commonly useful for eliminating reflections off of windows or water), when stacked with a second polarizer, the two can be oriented so each only allows light through in the opposite direction of the other; therefore, no light is transmitted.
6

85
nofilmschool.com/dslr/filtration
while shooting video with my Fader ND, but I haven’t put it to use as much as I’d like, and I haven’t used it to shoot stills. Note that there are a lot of bootleg Fader NDs on eBay, which are rife with color cast and softness issues — be sure to buy from Light Craft Workshop, the only “authorized” dealer on eBay.
Here is a clip of a variable ND filter in action:
In practice, you wouldn’t do this during a shot; to use a variable ND, you lock in your desired shutter speed and aperture, and if the scene is overexposed (often in daylight), you use the ND filter to bring down the exposure to the correct level. Note that with a screw-in variable ND filter, you will want to buy the size that fits your largest lens (e.g. 72mm) and then use step-up rings on the front of your smaller lenses. A word of caution with using variable ND filters, however: their response to light is not entirely linear, i.e. at higher levels of light attenuation they may let more green light through than other wavelengths. You can see one slight example of this at the end of the embedded video; I would not worry about the Fader for web video and television work as it’s been tested by a lot of shooters (myself included), but if you’re going to the big screen and are very color-critical (and have a sizable shoot budget and the schedule to match), you may want to think about going with the traditional stackable ND approach.
Once you have your ND filters,
there is a whole world of
creative uses for filters beyond
simple exposure
correction.
This video can be watched on the online version of this chapter, at:http://nofilmschool.com/dslr/filtration/

86
nofilmschool.com/dslr/filtration
Once you have your ND filters, there is a whole world of creative uses for filters beyond simple exposure correction. This could be its own guide, so for now here is an overview of some different types of lens filters. Note that filters are going in front of your lens, so they are one area where bargain-hunting can be risky; whereas a cheap shoulder support could give you a sore shoulder, a cheap filter could outright ruin your image; beware the reaper of cheap glass.
87
nofilmschool.com/dslr/lcd-viewfinder
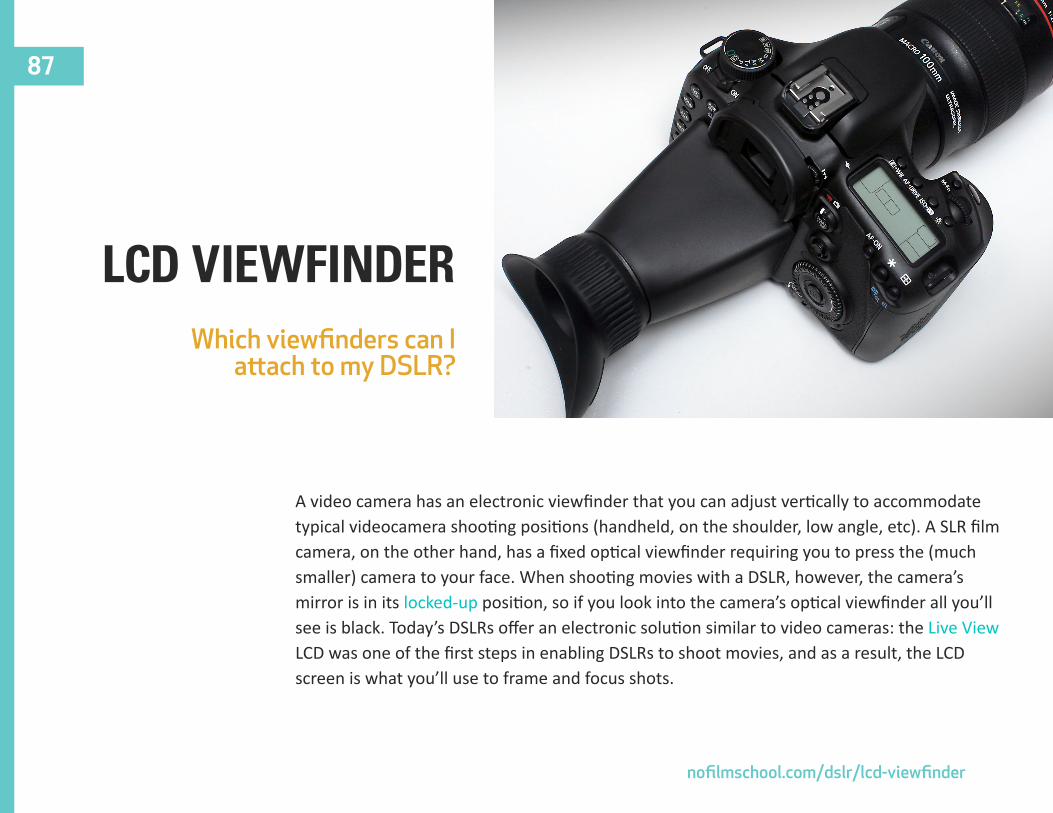
A video camera has an electronic viewfinder that you can adjust vertically to accommodate typical videocamera shooting positions (handheld, on the shoulder, low angle, etc). A SLR film camera, on the other hand, has a fixed optical viewfinder requiring you to press the (much smaller) camera to your face. When shooting movies with a DSLR, however, the camera’s mirror is in its locked-up position, so if you look into the camera’s optical viewfinder all you’ll see is black. Today’s DSLRs offer an electronic solution similar to video cameras: the Live View LCD was one of the first steps in enabling DSLRs to shoot movies, and as a result, the LCD screen is what you’ll use to frame and focus shots.
LCD VIEWFINDERWhich viewfinders can I
attach to my DSLR?
88
nofilmschool.com/dslr/lcd-viewfinder
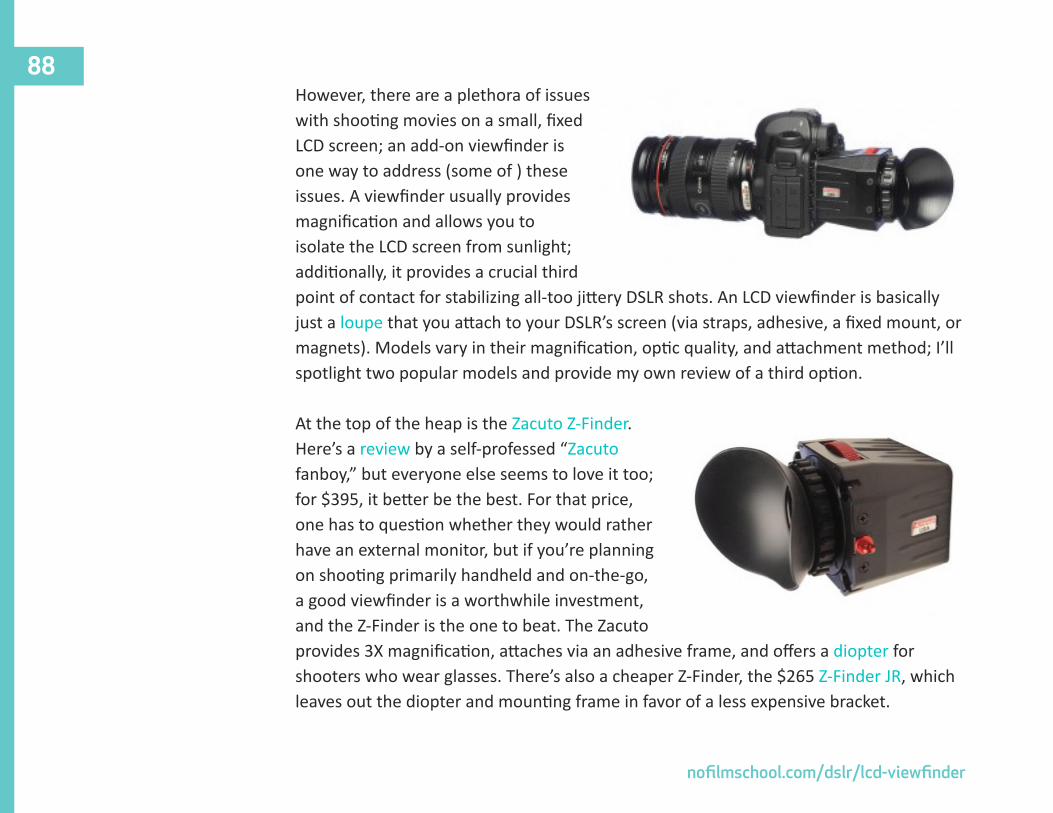
However, there are a plethora of issues with shooting movies on a small, fixed LCD screen; an add-on viewfinder is one way to address (some of ) these issues. A viewfinder usually provides magnification and allows you to isolate the LCD screen from sunlight; additionally, it provides a crucial third point of contact for stabilizing all-too jittery DSLR shots. An LCD viewfinder is basically just a loupe that you attach to your DSLR’s screen (via straps, adhesive, a fixed mount, or magnets). Models vary in their magnification, optic quality, and attachment method; I’ll spotlight two popular models and provide my own review of a third option.
At the top of the heap is the Zacuto Z-Finder. Here’s a review by a self-professed “Zacuto fanboy,” but everyone else seems to love it too; for $395, it better be the best. For that price, one has to question whether they would rather have an external monitor, but if you’re planning on shooting primarily handheld and on-the-go, a good viewfinder is a worthwhile investment, and the Z-Finder is the one to beat. The Zacuto provides 3X magnification, attaches via an adhesive frame, and offers a diopter for shooters who wear glasses. There’s also a cheaper Z-Finder, the $265 Z-Finder JR, which leaves out the diopter and mounting frame in favor of a less expensive bracket.

89
nofilmschool.com/dslr/lcd-viewfinder
At half the price of the Z-Finder is the very popular LCDVF, which was bootstrapped in Estonia by Cinema5d user Tonis. Originally sold direct and now distributed by a network of dealers, the LCDVF is available for $180, offers 2X magnification, and attaches via a magnetic frame. There are some user opinions here, and even Philip Bloom (the aforementioned Zacuto fanboy) seems to like it; dozens more reviews can be found via search. Tonis might just have hit the sweet spot for price/performance, but the LCD omits an adjustable diopter: if you wear glasses, you may or may not be able to focus through the viewfinder.
Because I had some old Cavision parts lying around from my previous camera rig, I went with the Canadian manufacturer’s LCD model because I liked the idea of having a viewfinder that could swing-away. However, while the direct sales staff were very helpful, I can’t say the same about the viewfinder itself. Cavision parts are modestly priced, but many of them are also modestly manufactured, and I’ve found that the viewfinder has too narrow a field of focus, so that the edges of the screen appear blurry. With a magnification factor of 6X, the Cavision offers the largest image size of the bunch, but I’ve also found this to be a disadvantage for two reasons: one, the resolution of DSLR LCD screens isn’t high enough to support a 6X magnification, so you become too aware of the distracting gridlines between pixels; two, the image is large enough that

90
nofilmschool.com/dslr/lcd-viewfinder
it takes up too much of your field of view and it’s not easy to “take it all in” for composing shots. I found my eye frequently panning across the magnified image, and I’d rather have something that doesn’t force me to shift my focal point so often. It’d be like trying to compose a shot with an IMAX screen in front of you; as a cinemagoer, the huge screen size offers an immersive experience, but as a cinematographer you’d want to back up for framing purposes. Some of these issues have been corroborated by others, so I’d have to recommend one of the other two options.
The chief drawback when shooting with a viewfinder attached is: you don’t have the vertical adjustability of a real videocamera, where the eyepiece swivels up and down. This allows you to get low and high angles; with a DSLR viewfinder, you’re locked in to shooting straight ahead from head-level. This is why DSLR viewfinders have some sort of release mechanism, but even without a viewfinder it can be hard to get low and high shots since the LCD screen itself does not articulate. When you’re thinking about monitor versus viewfinder, a lot of it comes down to what size rig you’re planning on using. Smaller rig for low profile shooting? Viewfinder. Larger rig for narrative projects? Field monitor.
Smaller rig for low profile
shooting? Viewfinder.
Larger rig for narrative
projects? Field monitor.

91
nofilmschool.com/dslr/field-monitor
First off, I don’t currently own a field monitor. This is primarily because they cost money, but I’ve also been waiting for Tramm to get 1080i HDMI-out enabled during recording on the 5D (which may or may not make it into the next release). Currently, as soon as recording starts on the 5D, the output resolution drops to 480p, which makes an external monitor much less useful for focusing. This change in resolutions also introduces a number of issues with monitor switching; every monitor is different, but many monitors take a few seconds to switch modes, and repeated hundreds of times a day, this can be an exercise in frustration. The 7D has its own issues as well, and presumably the T2i introduces a host of new (but different!) problems. Despite these issues, however, I’m currently planning on buying the SmallHD
FIELD MONITORWhich LCD monitors can I
attach to my DSLR?

92
nofilmschool.com/dslr/field-monitor
DP-SLR, which at 5.6″ is a bit smaller than many monitors but large enough to provide for more precise focus monitoring while still being able to mount it to a handheld rig (with an articulating arm, which will allow for more angles). It’s very high resolution, has upgradeable firmware, and should work great on whatever camera I shoot with next (a RED, for example).
Until then, to digest what’s currently being said on the forums:
For $230 the Lilliput 669 is a great cheap option. A monitor at this price point isn’t going to have a lot of adjustment options and won’t offer the most accurate color reproduction, but again, if you spent $800 on a DSLR then you probably don’t want to spend $1,000 or more on a field monitor (some would disagree). The Lilliput has a 7″ screen and is 800×480 native resolution; there’s a lot of good info in this thread at Cinema5d. Note for the Lilliput you will need a few accessories (miniHDMI to HDMI adapter, batteries, etc.) to get properly connect and mount the monitor; I haven’t tested it myself but there are some forum tips in here as well as more details on battery options.

93
nofilmschool.com/dslr/field-monitor
For $800 the SmallHD DP1 is a very popular choice; it has a higher 1024×768 resolution for what approximates to 720p resolution. Similarly to the LCDVF, the guys at the North Carolina-based SmallHD bootstrapped their own 10″ LCD monitor and are now selling them at volume, and the general consensus on the forums is the SmallHD can’t be beat at the $800 price point. I look forward to shooting with their smaller model; after all I have to help my fellow Carolinians raise up.
There are plenty of more expensive monitors on the market from manufacturers like Marshall, Ikan, Manhattan, and Panasonic, but for DSLR use I’ll move on; if you’re spending $2,000 on a field monitor, you’ll probably want to do your own research rather than take my word for it. If I do come across any of these other monitors, I’ll add my thoughts. In the meantime, Cinema5D has published a four monitor review, comparing the smallHD DP-1, ikan V8000HDMI, Marshall V-LCD70P-HDMI, and ikan V5600. There were also some new monitors demonstrated at NAB.

94
nofilmschool.com/dslr/picture-style-editor
When shooting with a Canon DSLR one of the first things you should do is to switch the in-camera Picture Style from “Standard” to “Neutral” and dial down the contrast all the way; this will give you a flatter image that gives you more flexibility with the image in post.
Shooting with the factory-supplied Neutral setting is just the beginning of optimizing your camera for filmmaking. The next step is to put to use the Picture Style Editor software, which is one of the most important features for Canon DSLR cinematographers (Nikon users have a similar software, the Picture Control Utility). The software allows you to make a wide range of adjustments to your camera’s “look” — color response, gamma curve, etc. — sort of like
PICTURE STYLE EDITOR
How can I gain finer control over my image?

95
nofilmschool.com/dslr/picture-style-editor
giving you a choice of film stocks. It’s a bit user-unfriendly, but it affords you the ability to implement a pesudo-RAW workflow (it’s not a true RAW image ala the RED camera, wherein one can losslessly manipulate the camera’s white balance, brightness, contrast, etc. after the fact), and used wisely, you can get a nice, flat, gradable image out of a camera that ships with woefully pumped contrast and crushed blacks. The fact is, many guerilla cinematographers were happy to have Cinegamma and other custom knee settings when they made their low-end debut on the venerable DVX-100 in 2002, but most of us wouldn’t have guessed that gamma curves and color matrices would ever be user-editable on a $2,000, mass-market camera. But it just so happens that Canon’s software for customizing photo styles also works in movie mode, and thus another feature from six-figure cameras has made its way down to four-figure DSLRs.
Here’s a great video tutorial, with example shots, of the benefits of using the Picture Style Editor:
This video can be watched on the online version of this chapter, at:http://nofilmschool.com/dslr/picture-style-editor/

96
nofilmschool.com/dslr/picture-style-editor
Many users would just download the freely available Marvels, Superflat, or Extraflat picture styles; across the board, they give you a flatter image than the default shipping preset. However, every individual camera is different, and one user designing an optimized setting for their own camera does not mean that same setting will be optimal for yours. Using preset custom picture styles is becoming more controversial, with many shooters (myself included) noticing some drawbacks to using over-flattened picture styles. While you often gain perceived latitude and shadow detail by using custom styles, you can also lose detail and introduce more noise and banding thanks to the h.264 compression algorithm. I’ve noticed these artifacts in post-production with footage shot with the Marvels and Superflat styles, and am currently creating my own subtle flat look tailored for the unique characteristics of my particular 5D. Shane has a great tutorial on setting up your own Picture Style, by optimizing the white balance and tonal curve of your particular camera (also handy for matching mutiple DSLRs to each other). Users have also created Picture Styles emulating specific film stocks, as posted by sumitagarwal, but most of these are probably too extreme for shooting under normal conditions (the h.264 compression algorithm breaks down pretty easily when pushed). If you’re willing to put in the work, it’s definitely worth it to create your own Picture Style; don’t assume that someone else’s testing with their camera will yield the same results for yours. If you’re just looking to shoot out of the box as quickly as possible, I’d use Neutral and turn down the Contrast all the way, and worry about custom Picture Styles later.
If you’re willing to put
in the work, it’s definitely worth it to create your
own Picture Style.

97
nofilmschool.com/dslr/post-production-overview
This is “The DSLR Cinematography Guide,” not “The DSLR Post-Production Guide,” so these sections will be a bit shorter (if I expand them, maybe I’ll move them to their own separate guide one day). The chief issue with DSLR post-production is transcoding your camera’s files to an editable format (their natives files aren’t optimal for editing) and synching audio (if you recorded it separately). Thankfully Canon has released their own plugin for Final Cut-based editors that takes care of the transcoding, but read on for my suggested workflow, storage solutions, transcoding recommendations, and other workarounds. If you want someone else’s (longer) take, check out Oliver Peters’ post.
POST-PRODUCTIONOVERVIEW
I shot beautiful footage with my DSLR. Now what?
The chief issue with DSLR post-
production is transcoding
your camera’s files to an
editable format.
98
nofilmschool.com/dslr/storage-for-the-edit
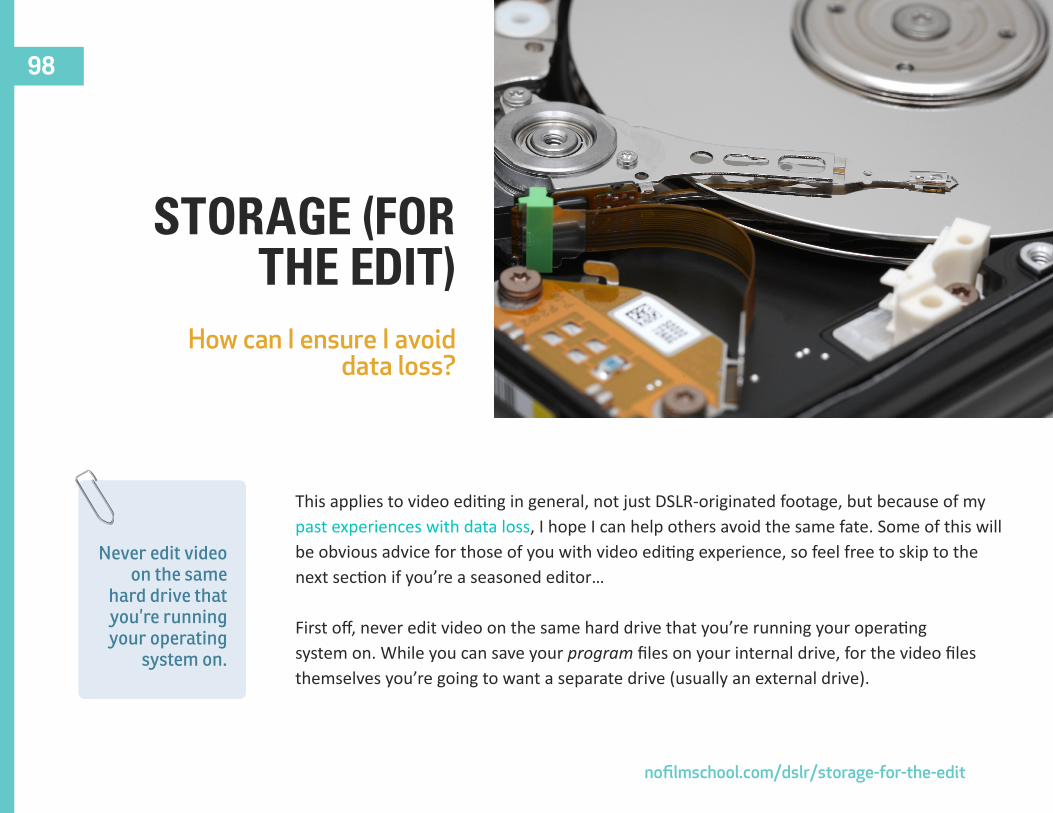
This applies to video editing in general, not just DSLR-originated footage, but because of my past experiences with data loss, I hope I can help others avoid the same fate. Some of this will be obvious advice for those of you with video editing experience, so feel free to skip to the next section if you’re a seasoned editor…
First off, never edit video on the same hard drive that you’re running your operating system on. While you can save your program files on your internal drive, for the video files themselves you’re going to want a separate drive (usually an external drive).
STORAGE (FORTHE EDIT)
How can I ensure I avoid data loss?
Never edit video on the same
hard drive that you’re running your operating
system on.

99
nofilmschool.com/dslr/storage-for-the-edit
Some tips when buying an external drive:
• If possible, buy a drive enclosure that has a fan. Heat is a killer.
• Buy the fastest interface your computer has (obviously). USB 2 is a minimum; if you have a Firewire port, get a Firewire drive; even if it’s FW400, it will be faster than USB 2.0 eSATA is a good deal faster than both but FW800 is also quick. If you notice those different links return a lot of the same results, it’s because many drives have multiple interfaces; this is a good thing for portability between machines.
• Don’t buy LaCie. I’m sure they make some decent products, but I’ve known too many people who’ve had LaCie drives fail on them (myself included) to be able to recommend their drives. Maybe this is because their drives are very popular and therefore there are more of them out there, but still. I don’t trust ‘em.
• If you’re going with a multi-drive RAID enclosure, don’t use RAID 0 unless you’re going to be doing daily backups — “RAID 0″ should actually be “AID 0,” because there is nothing Redundant about it. If you can afford it, get a good 4-drive enclosure and set it to RAID 5.
• Look for drives that run at 7200RPM instead of 5400RPM. They’re a good deal faster.
If you can afford it, get a
good 4-drive enclosure and
set it to RAID 5.

100
nofilmschool.com/dslr/storage-for-the-edit
However, I would not recommend 10000RPM drives unless you have cash to burn, as they’re significantly more expensive than 7200RPM drives — without being a proportionately faster (for the best bang-for-buck, build a multi-drive RAID array out of 7200RPM drives).
If you’re shooting in 1080p you’re going to need a lot of space; 1TB is a good place to start these days. You can also build your own enclosure if you have a spare hard drive sitting around; I’ve built four cheap ones using this ugly Rosewill enclosure, because it has a big-ass fan and is USB2 and eSATA. Suffice to say this ugly drive has never failed on me, which is not to say that “this is a a great drive enclosure,” but I take it as evidence that a cooling fan should be a necessary feature for external drives — in the same time period I’ve been using this Rosewill, I’ve had three fanless LaCie drives brick themselves in my possession.

101
nofilmschool.com/dslr/transferring-viewing-transcoding
First things first: if your computer has a firewire port, buy a firewire CF reader (assuming your camera shoots on CF cards). Firewire-based readers are far faster than their USB counterparts, and this simple purchase will save you a lot of time in offloading the sizable movie files. Once you’ve copied the files over to your external drive, you might discover that your computer can’t play back the files smoothly. These are high-resolution, highly compressed files — and while the compression does a good job of keeping file size down, it also means you need a sizable computer to decode them. While you may be able to playback the native files without any stuttering if you have a recent and/or expensive desktop — or if your camera uses an inferior MotionJPEG codec (as do all Nikon DSLRs to date) — if the files play more smoothly
TRANSFERRING, VIEWING,
TRANSCODINGHow can I prepare my
footage for editing?
102
nofilmschool.com/dslr/transferring-viewing-transcoding
on your camera’s LCD than they do on your desktop, try downloading the latest version of VLC (PC and Mac), and follow these instructions to configure it for playback.
The h.264 files that Canon DSLRs shoot aren’t well suited for editing, what with their 4:2:0 chroma subsampling and processor-intensive, interframe codec (the same goes for the files spawned by Panasonic and Nikon DSLRs). You’ll want to transcode the clips into a format that will play smoothly and maintain quality during color correction. The lone exception to this rule is if you’re editing in Premiere Pro CS5 (or later), which can sometimes handle DSLR footage natively. If you’re going to be editing in Final Cut Pro, download Canon’s EOS Movie Plugin-E1 for Final Cut Pro. The E1 plugin adds timecode to your footage, transcodes footage as quickly as possible, and brings the clips in using FCP’s native Log & Transfer function. On most reasonable Macs, the ProRes clips are laptop editable in real-time (with the FCP viewer zoomed to 50% or less at Medium quality, my four year-old

103
nofilmschool.com/dslr/transferring-viewing-transcoding
laptop can edit the 1080p transcodes from an external USB 2.0 hard drive in real-time).
If you’re not editing in FCP, you can use MPEG Streamclip, a cross-platform freeware utility, to transcode footage. Note that Premiere Pro CS4 on a Mac, in my experience, is unable to adequately handle any flavor of Canon DSLR footage, so for Mac users I recommend Final Cut; on the PC, users report good experiences with Vegas, and the Windows version of Premiere Pro CS4 will also edit Cineform files. If you’re going with a PC-based NLE, Cineform Neo Scene is a good transcoding/editing plugin (note the software costs $129 (or $99 at B&H). Here are some Neo Scene workflow tips.

104
nofilmschool.com/dslr/audio-sync-drift
If you’re shooting separate-system sound, you’ll have separate audio clips on a recorder or memory card and will need to sync them to your video files. However, unlike ye old method of using sticks (aka a clapper) and visually matching up the audio waveform to the video by hand, you can use an automated plugin called Pluraleyes. This plugin will take your high-quality audio files and automatically sync them to your “dummy” track (the inferior audio recorded on-camera), as illustrated in Philip Bloom’s tutorial.
Pluraleyes is currently available for FCP, Vegas, and Premiere Pro CS5. If you don’t want to spend $99 to save a lot of time, or if you’re not synching all that much material, you can do it by hand. Here’s a video tutorial on the basics of synching audio manually in FCP, including sub-
AUDIO SYNC,DRIFT
How do I ensure my audio perfectly matches my video?
Pluraleyes will take your high- quality
audio files and automatically
sync them to your “dummy”
track.
105
nofilmschool.com/dslr/audio-sync-drift
frame audio editing to make sure sync is exact:
Depending on your DSLR, you might experience audio drift when working with longer sequences. Audio drift is when a shot’s audio and video are in sync at the beginning of the shot but not at the end. This is most common with Canon 5D footage shot at 30 frames per second, which doesn’t conform to the industry-standard 29.97fps. 7 Most NLEs are configured to interpret imported audio at 29.97, not a “true” 30p, and this discrepancy can cause audio sync problems. Many users have reported that slowing audio clips to 99.99% in the editing timeline fixes the problem, but a better solution is to start with the correct setup in FCP, which keeps both video and audio at native settings without any drift.
Bruce Sharpe illustrates this and even offers the correct FCP setup file for download. If you’re using Cineform Neo Scene for transcoding, it should automatically correct this problem, and if you’re shooting at 24p, you shouldn’t have to worry about drift as long as your sequence presets are correct.
29.976 frames per second is an industry standard as a result of the legacy NTSC field rate of 59.94 Hz.
7
This video can be watched on the online version of this chapter, at:http://nofilmschool.com/dslr/audio-sync-drift/

106
nofilmschool.com/dslr
Thanks to the increased sensitivity of large CMOS sensors found in DSLRs, many shooters are now accustomed to shooting in available light, nighttime settings, and other conditions that would’ve been previously impossible to film under. This is a blessing and a curse; thanks to some highly publicized demos, many DSLR shooters now think their cameras can see in the dark. And while DSLRs are much more sensitive than film stock thanks to sophisticated noise reduction algorithms, high ISO settings are still accompanied by noise.
In an ideal world, you’d still bring in enough light for every scene. But the reality of independent and guerilla filmmaking is such that this is not always possible. You should
NOISE REDUCTION
What’s the best way to get rid of noise in post?

107
nofilmschool.com/dslr
always try to shoot with enough light to keep the ISO further down on the scale, because in addition to bringing with them more noise, higher ISO settings are also less sharp. Shooting in the dark and applying noise reduction later is not a substitute for lighting – but noise reduction can get you out of a jam.
My favorite noise reduction application is Neat Video. It’s an amazingly flexible, customizable plugin for Final Cut, After Effects, Premiere Pro, Vegas, and other host programs as well. The Pro version (which is what you’ll want – the Home plugin is restricted to SD resolutions) costs $99 and pays for itself the first time you use it. Note that you should know your workflow in advance, as each different host program requires a different purchase; I use the After Effects version because I almost always finish using AE, but I won’t lie: I wish Neat’s license was more liberal (along the lines of, say, Red Giant’s Magic Bullet set of plugins, which work in any host program with one purchase). Regardless, tasteful use of Neat Video can save many shots, and it also offers some sharpness controls to regain perceptual sharpness that might’ve been lost due to high ISO settings.
This image, of the Manhattan skyline as seen from Brooklyn at night, was a noisy shot as a camera original. As
Shooting in the dark and
applying noise reduction
later is not a substitute for lighting – but
noise reduction can get you out
of a jam.

108
nofilmschool.com/dslr
it should’ve been – the only lights were the ambient lights of the city. As a still image, it looked fine – but in motion, the skyline shimmered with noisy artifacts, which I was able to remove completely using Neat Video. The finished image is rock-solid, sharp, and usable – a perfect example of a situation where we couldn’t bring any lights, and thus had to rely on noise reduction in post.
The effectiveness of Neat Video can be more readily seen in motion than it can in any still I can show you, so take a look at this video by Photoframd for an example of Neat Video in action. Neat’s examples page also contains some good examples; I can state from experience that Neat can salvage many shots with amazing results.
Just be careful not to overdo it, as too much noise reduction can result in an image that appears plasticky. One further caution: Neat Video is able to use multiple processor cores, but it doesn’t (at press time) use your GPU to accelerate its rendering, which means it’s slow. Render times can add up quickly, so I recommend applying Neat as a last step and running noise reduction overnight if you must. But when it comes to getting the absolute best image out of your DSLR, using Neat Video is worth the wait.
Too much noise reduction
can result in an image
that appears plasticky.

109
nofilmschool.com/dslr/color-grading
Color grading is commonly known as “color correction,” but I prefer the more British term “grading” since “correction” implies a colorist’s job is to fix mistakes, when it’s really much more creative than that. In fact, the line between cinematographer and colorist is increasingly blurring, and today you can’t be great at one job if you don’t have a good understanding of the other.
Since this is a “cinematography” guide, I won’t go too deep into grading other than to say that you should absolutely have a project-specific aesthetic in mind before you shoot, as
COLOR GRADING
How can I modify my image in post to suit my tastes?
The line between cinematographer
and colorist is increasingly
blurring.

110
nofilmschool.com/dslr/color-grading
opposed to figuring it out once the footage is already in your NLE. As for how to grade, Stu Maschwitz has made a terrific tutorial demystifying color correction using his own software Magic Bullet Looks and Colorista, collectively part of the Magic Bullet Suite (of which I’m a user). The techniques presented in the tutorial apply to any three-way color correction tool (such as those included in Final Cut and Premiere Pro, the incredibly deep but frustrating Apple Color, or the oft-overlooked Color Finesse plugin that ships with After Effects). Here’s the tutorial, which focuses on “summer blockbuster” looks:
Deft use of digital color grading, in conjunction with a DSLR’s shallow depth-of-field images, can make for amazing images at incredibly low prices points.
This video can be watched on the online version of this chapter, at:http://nofilmschool.com/dslr/color-grading/

111
nofilmschool.com/dslr/thanks-for-reading
I hope you found a lot of valuable information in these hundred-odd pages! Rather than charge $20 for such a guide, my philosophy is that you should get the full guide for free — and after reading it, if you found it valuable, then you can decide what it was worth to you. It took me a long time to write, and I hope it helps people shoot better films and save some money too. In fact, if you put to use the “saving money” section, this guide should’ve cost you negative dollars! Compare that to a DSLR training DVD that costs $100!
So, what was this guide worth to you? Think about it, and please consider donating that amount. To donate, please go to:
http://nofilmschool.com/support
THANKS FOR READING
How can I help support NoFilmSchool?

112
nofilmschool.com/dslr/thanks-for-reading
Another way to support NoFilmSchool is to buy your DSLR gear via the Amazon and B&H Photo links in the guide — it doesn’t cost you anything, but it might help me get my hands on some more gear, and get some film projects off the ground too. In fact, whatever it is you’re looking for, if you click on these links to start your search, you’ll be supporting NoFilmSchool at no cost! These merchants give a small percentage to NoFilmSchool, which comes out of their margin (it doesn’t cost you a penny):
A final way to support the site is to share NoFilmSchool around. Post it to your blog, share it via Facebook and Twitter... whatever you can do to spread the word! Also, be sure to add me as a friend on:
FacebookTwitterVimeo
I would like to say two things in closing. First: receiving donations from people I’ve never met has meant a lot to me to — this has been the greatest confirmation that the guide and site are useful to others, and it keeps me going. Second: we’re all in this together. I believe the opportunity exists for all of us to forge independent, self-sustaining,

113
nofilmschool.com/dslr/thanks-for-reading
creatively fulfilling careers — as long as we actively support each other and share what we learn. Next time you go to an independent film or web site, please keep this in mind! Thanks for reading.

114
nofilmschool.com/dslr
Images appearing in this guide are either by Koo, are publicly available product photos, or are Public Domain or Creative Commons-licensed images. Page numbers and attributions for Creative Commons images are as follows:
12 – Scope Aperture by I B Wright13 – Josefina with Bokeh by Che17 – Angle of Views by Koyaanis Qatsi19 – Interlaced video frame (car wheel) by Mikus37 – Rolling Shutter Artefact, again by henry…53 – DOF-ShallowDepthofField by Ligar62 – 139GB, batteries by SoulRider.222
IMAGE CREDITS