level 2 / unit gh12 - bespoke hairdressing training ... 2 / unit gh12 step by step | page 2 of 12 !!...
TRANSCRIPT

LEVEL 2 / UNIT GH12 Step By Step
| Page 1 of 12
Student Name Student
Unit: Tutorial:
Contributor:
Cutting Hair Using Basic Techniques Graduated Bob Haircut Stacey Broughton
Stacey Broughton’s tutorial cover the graduated bob, which is a vital part of any hairdressing training. This method starts with a vertical section from crown to nape which acts as a guide for the entire shape and ensures the correct balance of graduation throughout.
Technical Skills: Graduation - Scissor-over-comb - Clipper-over-comb Layering - Slicing - Blow-drying - Freehand cutting

LEVEL 2 / UNIT GH12 Step By Step
| Page 2 of 12
Before
You will re-cut your previously cut one length bob on your head block making good use of this resource.
Step 1
Begin by creating a horse shoe section following the curve of the head and incorporating the crown.
Notice the parting will be inside the top section and will be placed at a later stage.
Step 2
Next work with the interior guideline from crown to nape vertically to ensure balance of the graduation.
Step 3
The first guideline is cut to assess movement and texture leave it longer than desired to accommodate hair type. You can then visually assess and adjust the balance of graduation to suit the hair quality and bone structure.
Note: Stacey angles his fingers inwards slightly to avoid creating a step.

LEVEL 2 / UNIT GH12 Step By Step
| Page 3 of 12
Step 4
Note: Stacey checks the graduation guide to ensure it remains below the occipital bone. Going above the bone will distort and flatten the shape.
Step 5
Now work with diagonal sections pivoting from the occipital bone. Continue in this manner until you reach the desired angle in the side. Then continue with parallel sections.
Note: the section mirrors the cutting angle.
Step 6
Once you have established the desired angle, repeat this process on the second side for accuracy.
Step 7 - Appendix C
Cross check your work technically and visually to maintain balance.
Note: the perimeter will be refined after the internal shape is achieved.

LEVEL 2 / UNIT GH12 Step By Step
| Page 4 of 12
Step 8
Now revise Stacey’s method and try on your own block being mindful of the following points to watch:
1. Ensure the fingers are angled evenly into the nape to accommodate a flowing graduation between top and bottom lengths.
Step 9
Points to watch:
2. Pivot your sections from the occipital area until you reach your desired angle, which is just below the ear.
Step 10
Points to watch:
3. At this point don’t worry about the outline, as it will be refined at a later stage.
Step 11
Points to watch:
4. To ensure even balance on both sides, work three sections on one side then move to the other side.

LEVEL 2 / UNIT GH12 Step By Step
| Page 5 of 12
Step 12
Points to watch:
5. Check your balance technically and visually.
Step 13
Work from the back into the side areas maintaining the desired angle and working through to the horseshoe section.
Remember to maintain consistent finger and body angles when working from the guide in the nape over the ear into the jaw line. Note: The angle is gradually moved forwards with minimal over-direction. Employ slight elevation in the back area which decreases as you reach the front outline.
Step 14
To promote graduation, twist the hair a fraction to allow your finger placement to lay close to the skin. This technique also accommodates the hairline perimeter around the ear area and into the front.
Step 15
Continue with this technique to the top of the ear using parallel sections and the previous sections as a guide.

LEVEL 2 / UNIT GH12 Step By Step
| Page 6 of 12
Step 16
Repeat this process on the second side staying mindful of your finger and body angles. Working with small amounts of sections alternating between sides provides the base for good balance and flow of graduation.
Step 17
Check your work using a strand from the top of the completed sections on both sides. Be aware of growth patterns in the hair.
Step 18
Work up to middle of the section checking that you work parallel to the cutting line with correct elevation and over-direction. Stacey chooses to run these sections into the front ensuring a fluid balance from back to front.
Repeat this process on the second side using the underneath as a guide and maintaining accurate tension, elevation and over-direction.
Step 19
Having completed the mid-sections, check and refine your work. Checking your work in key stages allows for quick and continued adjustment.

LEVEL 2 / UNIT GH12 Step By Step
| Page 7 of 12
Step 20
Continue this process through to the top of the sections.
Note: the section slightly narrows towards the front. Be mindful to maintain the correct angle.
Step 21
Repeat this process on the second side and cross check your work in the opposite direction diagonally.
Step 22
Now revise Stacey’s method and try on your own block, being mindful of the following points to watch:
1. Ensure your sections run parallel to your cutting angle.
Step 23
Points to watch:
2. Ensure your fingers are pointing in the direction of the jaw, mirroring the section to attain correct elevation.

LEVEL 2 / UNIT GH12 Step By Step
| Page 8 of 12
Step 24
Points to watch:
3. Avoid too much over-direction backwards, instead follow the head shape around towards the jaw line.
Step 25
Points to watch:
4. If doubtful about the amount of elevation, leave it heavier and refine once dry.
Step 26
Once dry, refine the outline perimeter using a combination of freehand techniques. Ensure that the hair is laying in its natural position and work with the side outline first. This will enable you to attain the correct balance over the ear, which then runs down into the nape.
Step 27
Work with a pointing technique to refine the outline. Start in the centre-back and work to the back of the ear connecting to the guide.

LEVEL 2 / UNIT GH12 Step By Step
| Page 9 of 12
Step 28
Bring down the top section to connect, place the parting and, using diagonal sections from the front, connect the top into the underneath leaving out the crown, which will later be blended visually.
Step 29
Proceed using a diagonal section from the low side of the parting and work back to just before the crown using the underneath section as a guide.
This allows you to achieve correct weight and elevation. Leave this section slightly longer to accommodate hair type.
Step 30
Cross check diagonally in the opposite direction moving forwards to allow you to refine the balance.
Step 31
Repeat this process on the heavier side of the parting.
Note: Stacey employs his twisting technique again to ensure the correct mirrored angle.
LEVEL 2 / UNIT GH12 Step By Step
| Page 10 of 12
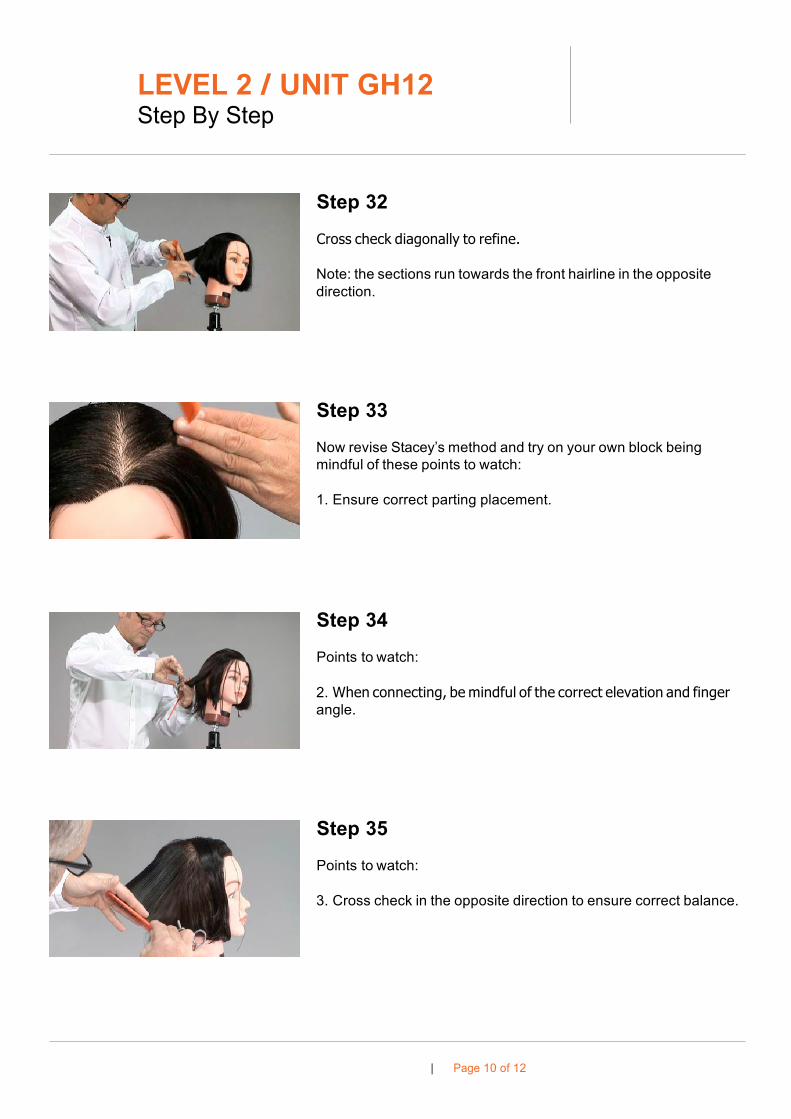
Step 32
Cross check diagonally to refine.
Note: the sections run towards the front hairline in the opposite direction.
Step 33
Now revise Stacey’s method and try on your own block being mindful of these points to watch:
1. Ensure correct parting placement.
Step 34
Points to watch:
2. When connecting, be mindful of the correct elevation and finger angle.
Step 35
Points to watch:
3. Cross check in the opposite direction to ensure correct balance.

LEVEL 2 / UNIT GH12 Step By Step
| Page 11 of 12
Step 36
Use freehand techniques to remove excess length in the crown area. Then, blow-dry the hair and refine the crown.
Note: when blow-drying it is essential to work in a similar pattern to your cutting methods and to start with the underneath hair.
Step 37
Refine the internal graduation with the disconnected area in the crown using a pointing technique.
Pointing is a technique used to reduce subtle amounts of weight, where the blades are closed in a downward direction.
Step 38
Finally, elevate the hair and refine the internal blend to achieve a looser result on the technical shape.
Finish
This completes Stacey’s process.

| Page 12 of 12
LEVEL 2 / UNIT GH12 Evaluation Page
Graduated Bob Haircut by Stacey Broughton
Level of Competence Key 1. Learning this technique. 2. Practicing this technique. 3. I can demonstrate competence of this technique to standards. 4. I can work at commercial standards and timings for this technique.
Student Name
Signature
Student Number
Date
Assessor’s Comments
Assessor Name
Assessor Signature Date
Verifier Name
Verifier Signature Date
Attempt
Tick Level of
Competence
Self Evaluation
1
2
3
4
5