lighting create a surreal miniature portrait: the...
TRANSCRIPT

LIGHTING
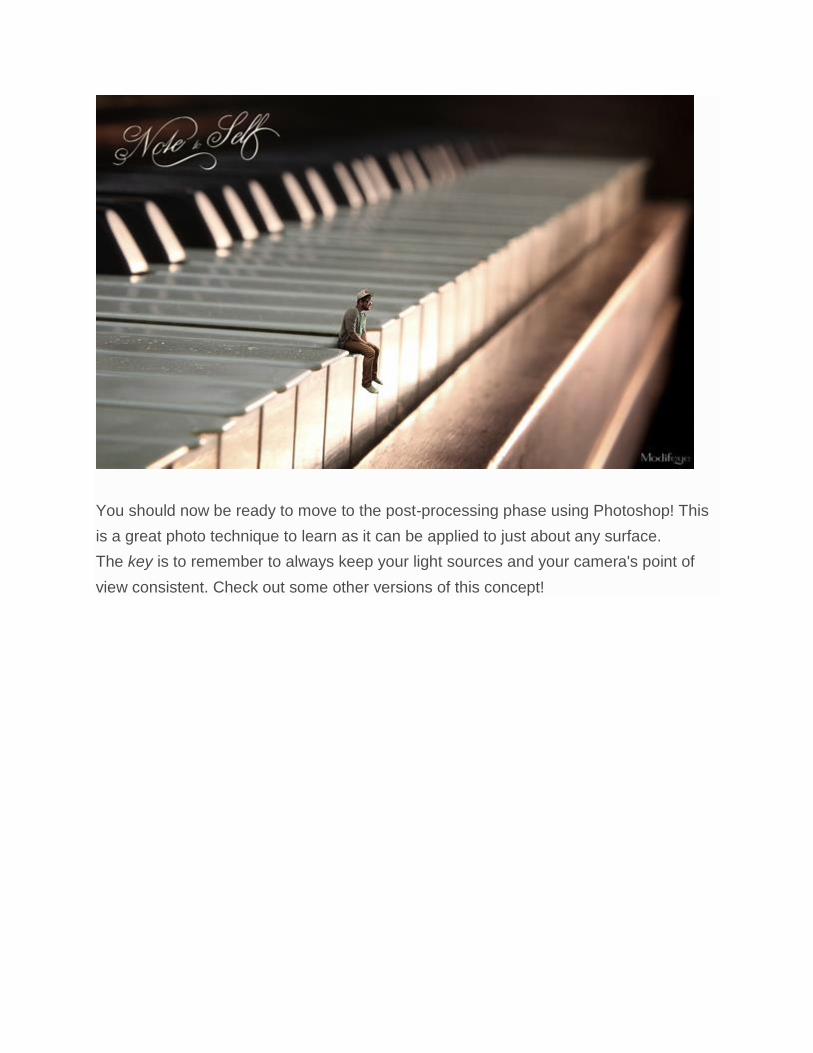
Create a Surreal Miniature Portrait: The Shoot by Nathan Colantonio17 Mar 2014
In this tutorial, you will be learning how to create a surrealistic portrait with extreme
proportions. I'll run you through how to setup and capture the images you need to create
this kind of photo, so you can then apply this knowledge for your own creations! I'll then
show you how to composite the images together in Photoshop.
Let's get started! For this composition, we will need a total of three images: the piano,
a pressed piano key and the model.
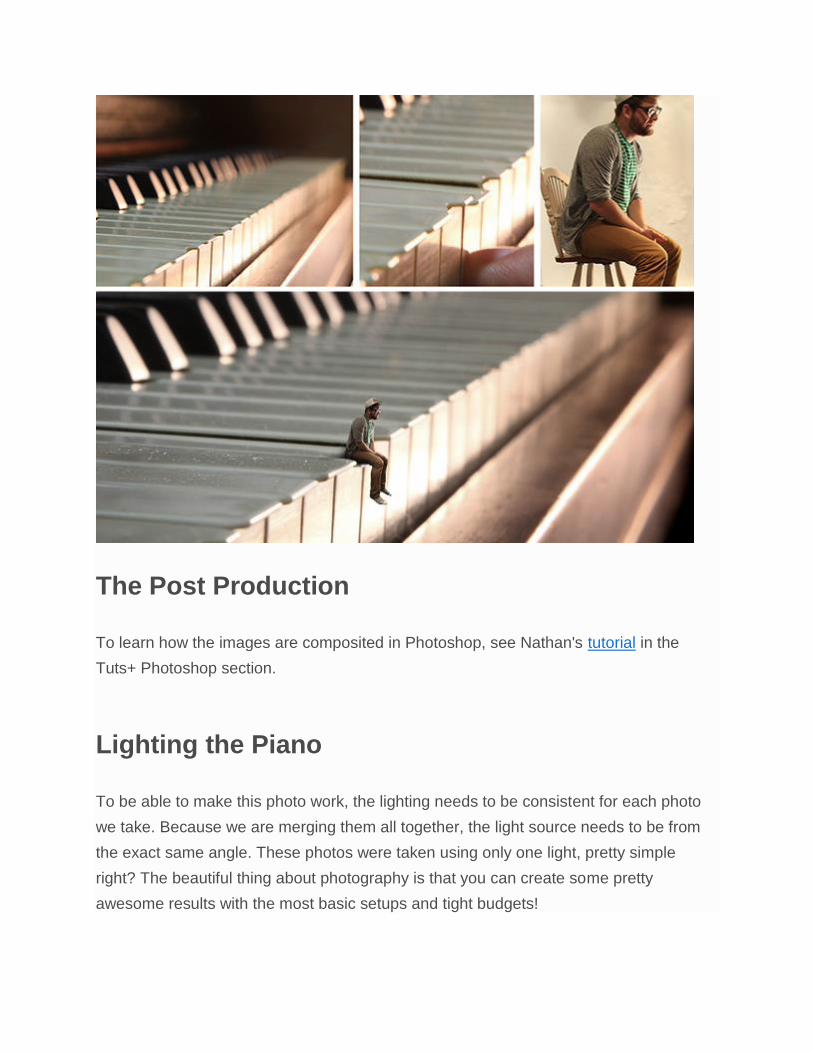
The Post Production
To learn how the images are composited in Photoshop, see Nathan's tutorial in the
Tuts+ Photoshop section.
Lighting the Piano
To be able to make this photo work, the lighting needs to be consistent for each photo
we take. Because we are merging them all together, the light source needs to be from
the exact same angle. These photos were taken using only one light, pretty simple
right? The beautiful thing about photography is that you can create some pretty
awesome results with the most basic setups and tight budgets!
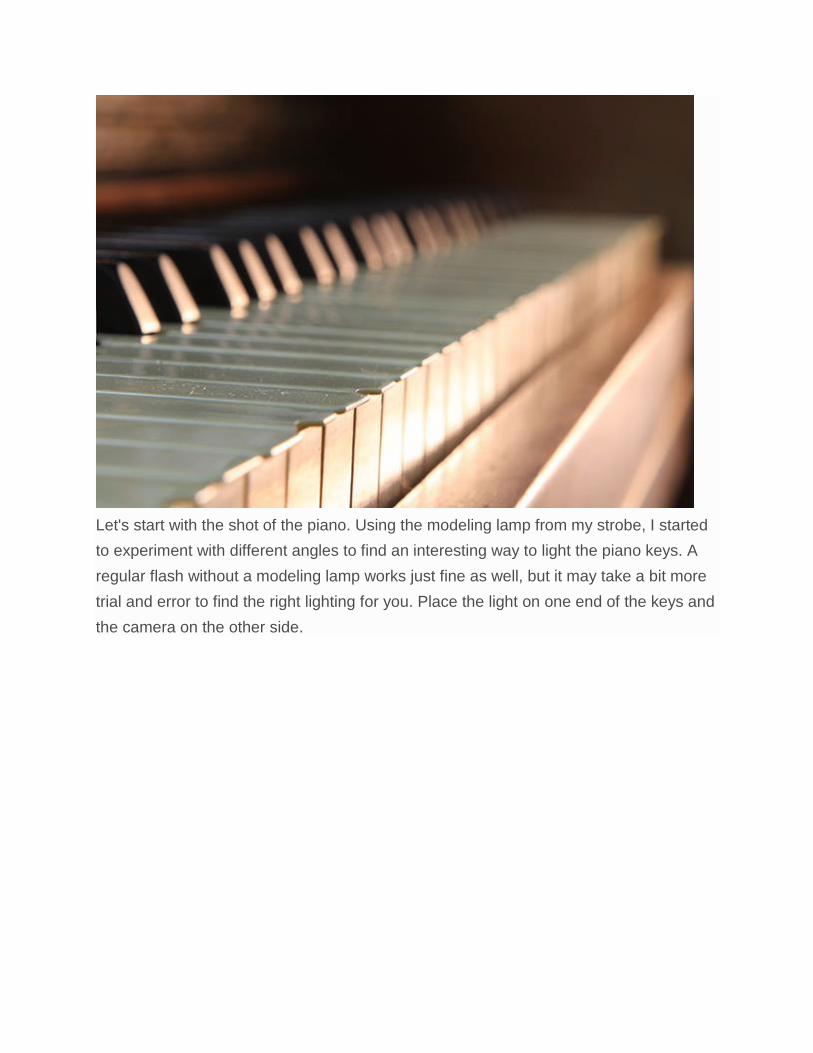
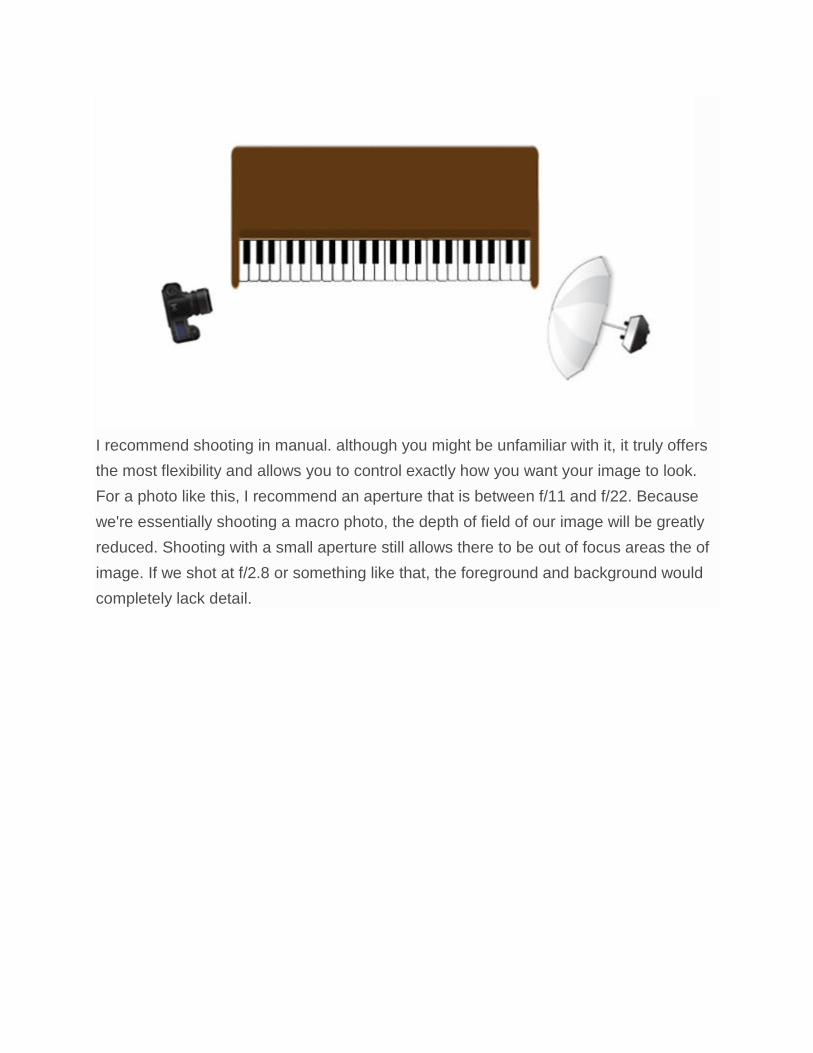
Let's start with the shot of the piano. Using the modeling lamp from my strobe, I started
to experiment with different angles to find an interesting way to light the piano keys. A
regular flash without a modeling lamp works just fine as well, but it may take a bit more
trial and error to find the right lighting for you. Place the light on one end of the keys and
the camera on the other side.
I recommend shooting in manual. although you might be unfamiliar with it, it truly offers
the most flexibility and allows you to control exactly how you want your image to look.
For a photo like this, I recommend an aperture that is between f/11 and f/22. Because
we're essentially shooting a macro photo, the depth of field of our image will be greatly
reduced. Shooting with a small aperture still allows there to be out of focus areas the of
image. If we shot at f/2.8 or something like that, the foreground and background would
completely lack detail.
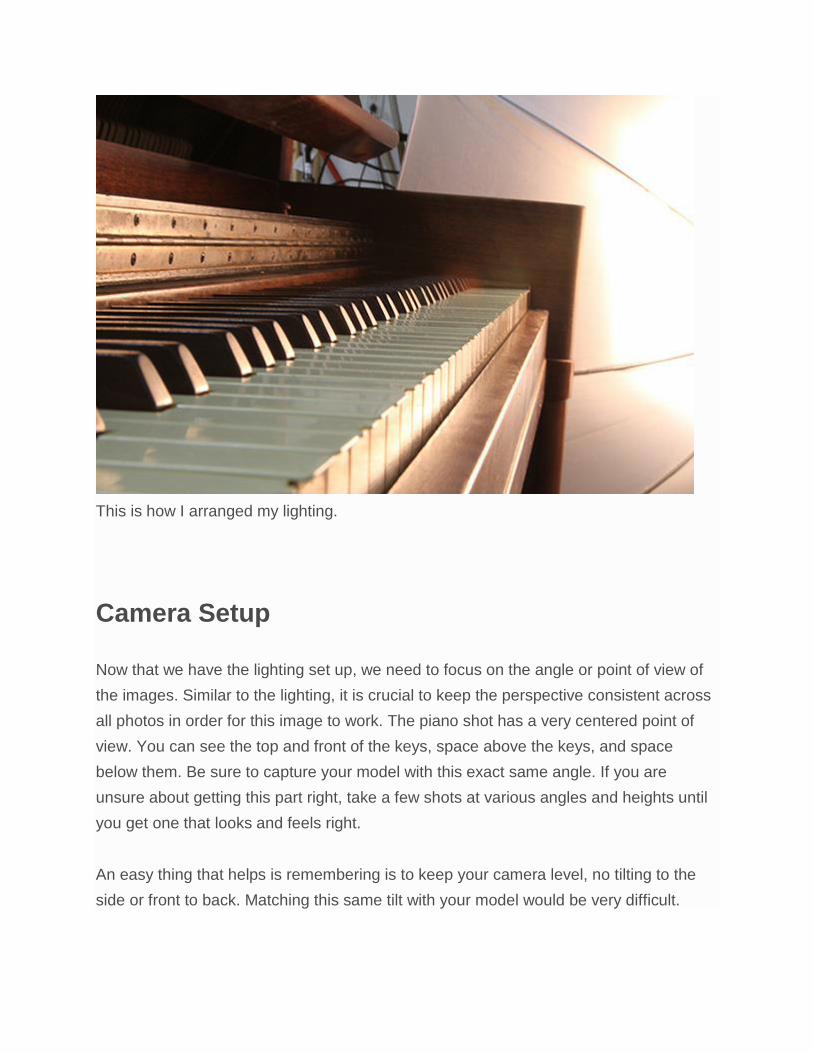
This is how I arranged my lighting.
Camera Setup
Now that we have the lighting set up, we need to focus on the angle or point of view of
the images. Similar to the lighting, it is crucial to keep the perspective consistent across
all photos in order for this image to work. The piano shot has a very centered point of
view. You can see the top and front of the keys, space above the keys, and space
below them. Be sure to capture your model with this exact same angle. If you are
unsure about getting this part right, take a few shots at various angles and heights until
you get one that looks and feels right.
An easy thing that helps is remembering is to keep your camera level, no tilting to the
side or front to back. Matching this same tilt with your model would be very difficult.
Shooting the Pressed Key
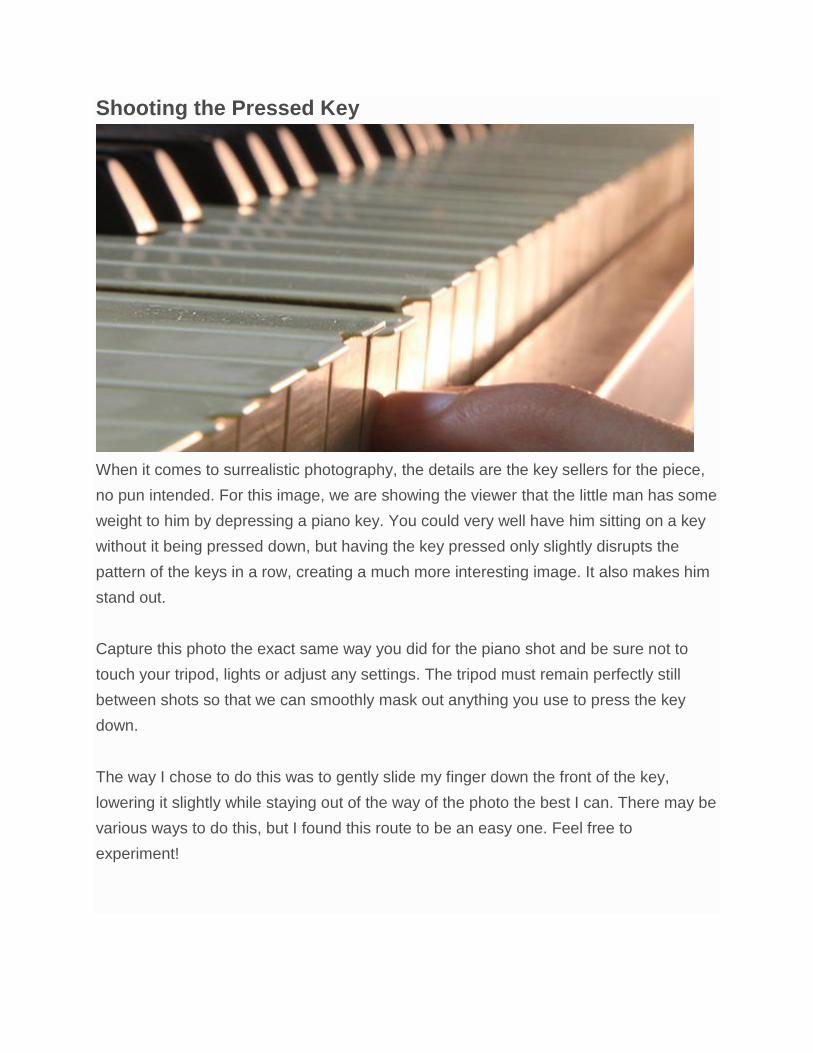
When it comes to surrealistic photography, the details are the key sellers for the piece,
no pun intended. For this image, we are showing the viewer that the little man has some
weight to him by depressing a piano key. You could very well have him sitting on a key
without it being pressed down, but having the key pressed only slightly disrupts the
pattern of the keys in a row, creating a much more interesting image. It also makes him
stand out.
Capture this photo the exact same way you did for the piano shot and be sure not to
touch your tripod, lights or adjust any settings. The tripod must remain perfectly still
between shots so that we can smoothly mask out anything you use to press the key
down.
The way I chose to do this was to gently slide my finger down the front of the key,
lowering it slightly while staying out of the way of the photo the best I can. There may be
various ways to do this, but I found this route to be an easy one. Feel free to
experiment!
Photographing the Model
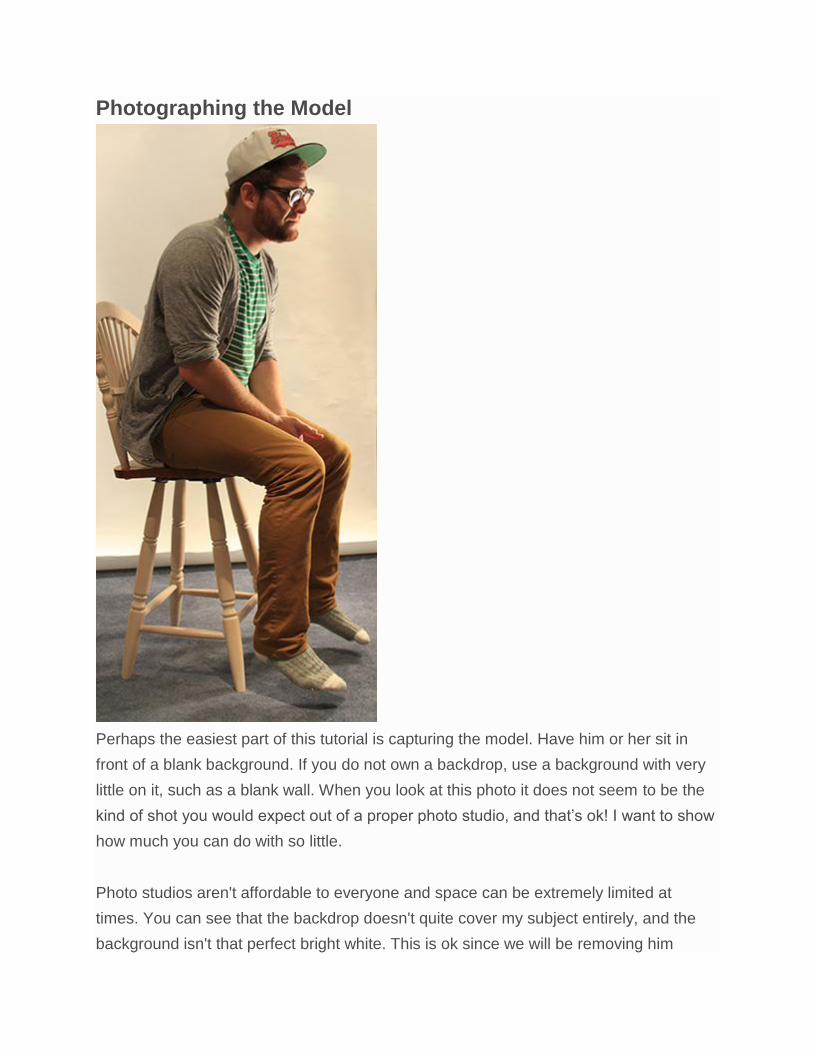
Perhaps the easiest part of this tutorial is capturing the model. Have him or her sit in
front of a blank background. If you do not own a backdrop, use a background with very
little on it, such as a blank wall. When you look at this photo it does not seem to be the
kind of shot you would expect out of a proper photo studio, and that’s ok! I want to show
how much you can do with so little.
Photo studios aren't affordable to everyone and space can be extremely limited at
times. You can see that the backdrop doesn't quite cover my subject entirely, and the
background isn't that perfect bright white. This is ok since we will be removing him

completely from this image. Don’t be afraid to improvise with what you have, amazing
results can be achieved with simple work-arounds!
Applying the previous tips about camera height and light placement, begin setting up
your subject. Exactly like the keys, the main light source must come from the top right of
the image. Using a modeling lamp makes lighting your subject a lot easier as "what you
see is what you get" for shadows. Make sure to choose an F-stop that gets the model
completely in focus. I recommend using at least f/8 to do this. Make sure the model is
facing the same direction as the keys.
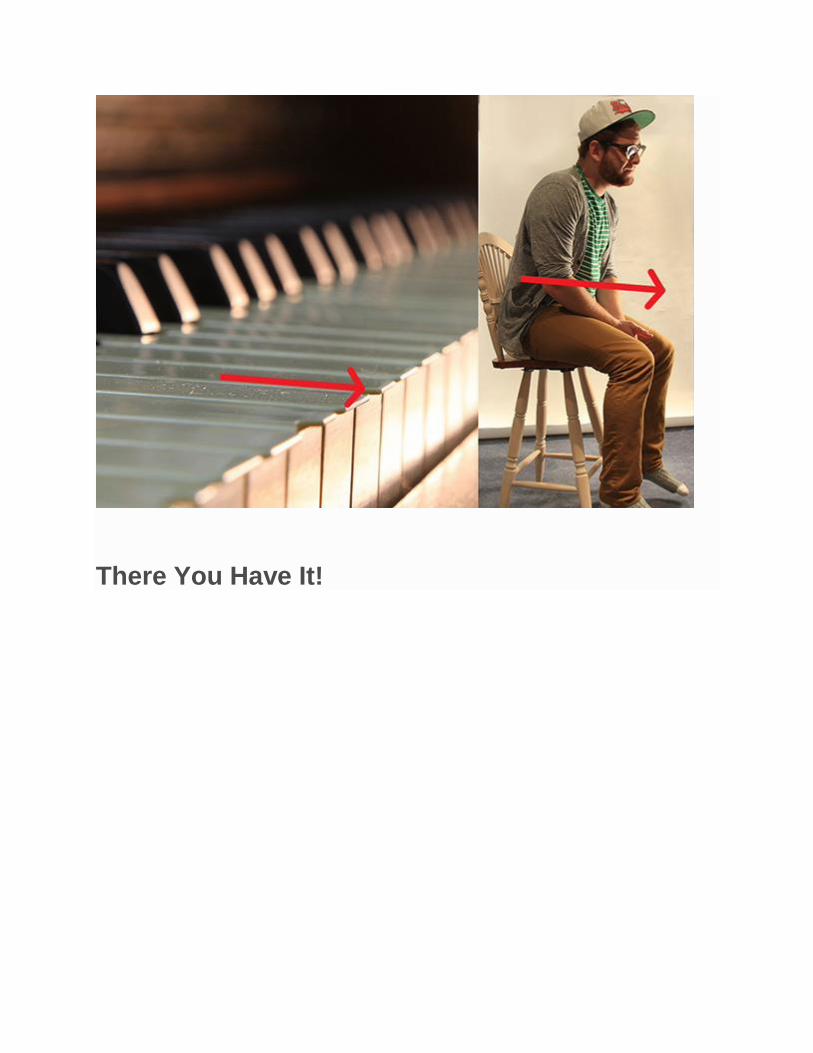
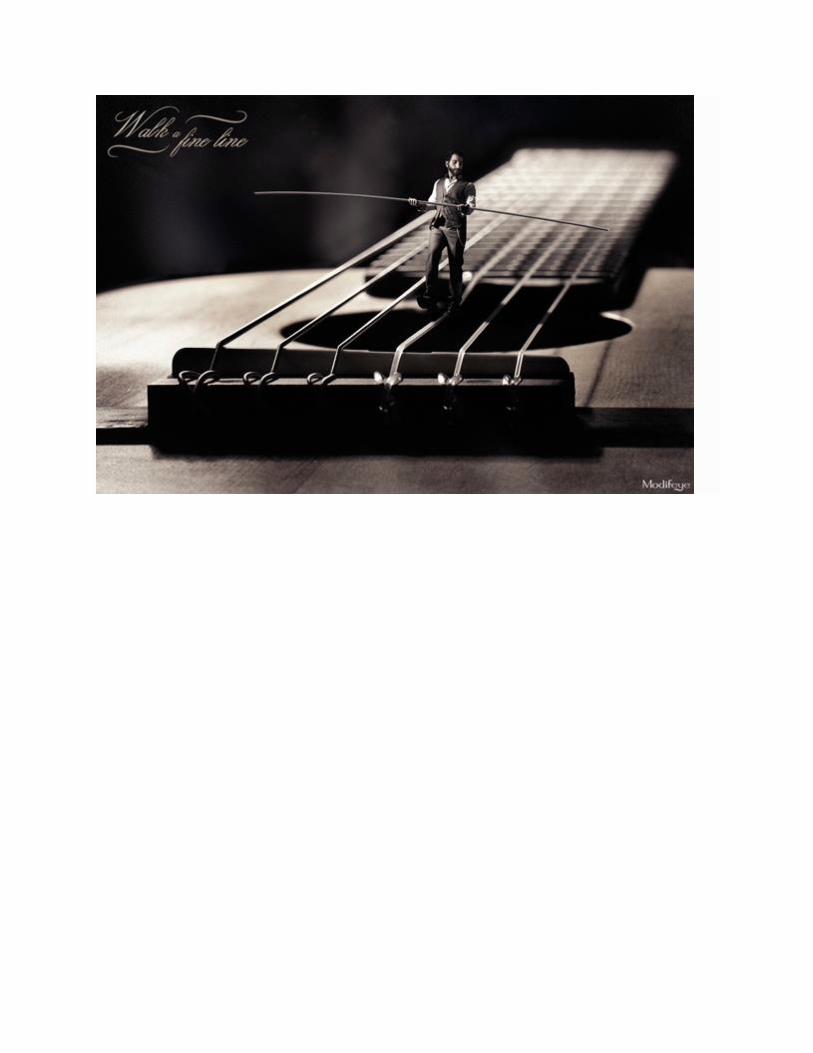
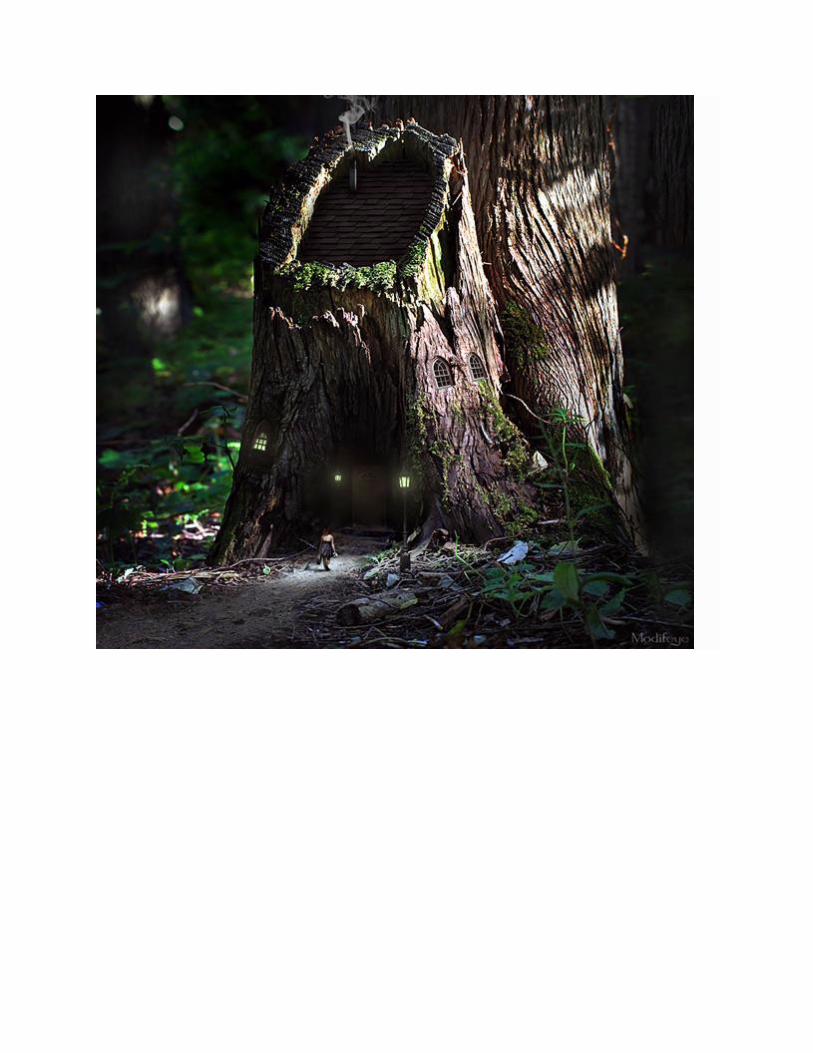
There You Have It!
You should now be ready to move to the post-processing phase using Photoshop! This
is a great photo technique to learn as it can be applied to just about any surface.
The key is to remember to always keep your light sources and your camera's point of
view consistent. Check out some other versions of this concept!