linux virtual delivery agent 7 - docs.citrix.com · linux virtual delivery agent 7.12 jan 25, 2017...
TRANSCRIPT

© 1999-2017 Citrix Systems, Inc. All rights reserved. p.1https://docs.citrix.com
Linux Virtual Delivery Agent 7.12
Jan 25, 2017
This pdf file includes the Linux Virtual Delivery Agent 7.12 documentation. You can save a local copy of this file and use it offline.Use the built-in Search and Bookmark features to find what you need.
You can creat e Linux virtual desktops and applicat ions based on a RedHat , CentOS, SUSE or Ubunt u distributions.
Prepare your Linux virt ual machines, install the new sof tware on them, configure your Delivery Cont roller, and then use
Studio to make the desktops and applicat ions available t o users.

© 1999-2017 Citrix Systems, Inc. All rights reserved. p.2https://docs.citrix.com
What's New
Feb 06, 2017
The following new and enhanced features are part of this release of the Linux VDA.
This release provides support for Xauthority. With this functionality, cookie-based access for X Window authorization is
now supported by the Linux VDA. For more information, see Configure Xauthority.
TipThe Xauthority file can be found in the logon user’s home directory, and is used to store credentials in cookies that are used by
xauth for the authentication of X sessions. Once an X session is launched, the cookie is used to authenticate connections to that
specific display.
This release provides support for IPv6. With this support, the 128-bit addressing schema is now extended to the Linux VDA.
For more information, see Configure IPv6.
Support for secure LDAP (LDAPS) is implemented in this version of the Linux VDA. With this support, you can enable the
Secure Lightweight Directory Access Protocol for your Active Directory managed domains to provide communication over
SSL (Secure Socket Layer)/TLS (Transport Layer Security). For more information, see Configure LDAPS.
NoteWhen using LDAPS, you must acquire a valid certificate before you can enable secure LDAP. Consider the following guidelines when
using secure LDAP certificates:
Certificates must be issued by an authority trusted by the Linux VDA that will use it to connect to the domain. This authority can be
an enterprise certification authority, or a publicly available authority that is trusted by devices running the Linux VDA.
Certificates must be valid for a long period. A good rule of thumb is that they should be valid for at least 3-6 months to prevent
unnecessary disruptions when a certificate expires.
It’s considered best practice to use a wildcard for the certificate subject name on managed domains. For example, if your
domain is named ‘mydomain.com’, the certificate’s subject name should be ‘*mydomain.com’. Additionally set the DNS name to
this wildcard name.
The secure LDAP certificate should be configured for digital signatures and key encipherment.
The certificate must be valid for SSL server authentication.
This release of the Linux VDA provides administrators with the ability to use SSSD for domain joining of Linux machines. This
functionality provides access to different identity and authentication providers as opposed to using the current method of
© 1999-2017 Citrix Systems, Inc. All rights reserved. p.3https://docs.citrix.com
using winbind (and other methods).
SSSD is a system daemon, whose primary function is to provide access to identify and authenticate remote resources
through a common framework that can provide caching and offline support. It provides both PAM and NSS modules. For
more information, see Configuring SSSD for RHEL and Configuring SSSD for Ubuntu.
This release of the Linux VDA now provides support for systems running Ubuntu 16.04:
Ubuntu Linux 16.04 Server
Ubuntu Linux 16.04 Desktop
In previous releases of the Linux VDA, NIS (Network Information Service) integration with Active Directory was considered
an experimental feature. In this release, NIS as an identity provider is supported. For more information, see Integrate NIS
with Active Directory.
In this release, Citrix added technical preview for seamless applications to RHEL/CentOS 7.2. No specific installation
procedures are required to use this functionality. For more information, see Publish applications.
Easy install is a technical preview feature. It helps users set up the running environment of the Linux VDA by installing the
necessary packages and customizing the configuration files automatically. For more information, see Easy install.
Ubuntu Linux is a brand new distribution for the Linux VDA. For SLES 11, gnome-session dependency has been removed.

© 1999-2017 Citrix Systems, Inc. All rights reserved. p.4https://docs.citrix.com
Fixed issues
Dec 06, 2016
The following issues have been resolved in this release of the Linux VDA:
Linux VDA session logoff during login
The value of Umask was changed from 022 (the default value) to 027 for a special request. This change reduced the read
permission for the newly created file, which prevents the Xclient file from being used in the session startup.
[LC6115]
User unable to launch Linux VDA
When a user puts another executable Xhost file into the VDA server, and its location is also in the PATH variable, it causes
the wrong Xhost file to be called in the session startup.
[LC6017]

© 1999-2017 Citrix Systems, Inc. All rights reserved. p.5https://docs.citrix.com
Known Issues
Jan 23, 2017
The following issues have been identified in this release:
The Linux Virtual Delivery Agents (Linux VDA 1.4 and earlier) cannot register with the XenApp and XenDesktop 7.12 brokers
when the VDA versions are not the English language version. To work around this issue, use the Linux VDA 7.12.
Ubunt u graphicsUbunt u graphics
In HDX 3D Pro, a black frame might appear around applications after resizing the desktop viewer, or in some cases, the
background can appear black.
Print ingPrint ing
Printers created by the Linux VDA printing redirection might not be deleted after logging out of a session.
CDM files are missing when a direct ory cont ains numerous files and subdirect ories.CDM files are missing when a direct ory cont ains numerous files and subdirect ories.
This issue might occur if the client side has too many files or directories. It is isolated to Windows Receiver.
UT F-8 encoding supportUT F-8 encoding support
In this release, only UTF-8 encoding is supported for non-English languages.
Client IME supportClient IME support
The Linux VDA does not support Client IME.
East Asian charact er inputEast Asian charact er input
The Linux VDA does not support East Asian character input.
Cit rix Receiver f or Android CAPS LOCK st at e can be reversed when session roamingCit rix Receiver f or Android CAPS LOCK st at e can be reversed when session roaming
The CAPS LOCK state can be lost when roaming an existing connection to the Citrix Receiver for Android. The workaround
is to use the Shift key on the extended keyboard to switch between upper case and lower case.
Short cut keys wit h ALT do not always work when connect ing t o t he Linux VDA using Cit rix Receiver f or MacShort cut keys wit h ALT do not always work when connect ing t o t he Linux VDA using Cit rix Receiver f or Mac
Citrix Receiver for Mac sends AltGr for both left and right Options/Alt keys by default. It is possible to change this within
the Citrix Receiver settings but the results vary with different applications.
Slow session launches might occur when using t he Linux VDA wit h a Delivery Cont roller f rom XenDeskt opSlow session launches might occur when using t he Linux VDA wit h a Delivery Cont roller f rom XenDeskt op
v7 .1v7 .1
The slow launch is caused by the presence of CGP settings in the ICA file generated by the v7.1 Delivery Controller. When
these settings are present, Citrix Receiver attempts to establish a connection on TCP port 2598. The default firewall
settings on some Linux distributions, such as SLED 12, is to drop the TCP SYN packets, resulting in a timeout and hence a
slow session launch. The workaround is to configure the firewall on the Linux VDA to reject the TCP SYN on port 2598. This
issue has been addressed in newer versions of the Delivery Controller.

© 1999-2017 Citrix Systems, Inc. All rights reserved. p.6https://docs.citrix.com
Regist rat ion f ails when t he Linux VDA is rejoined t o t he domainRegist rat ion f ails when t he Linux VDA is rejoined t o t he domain
Under certain circumstances, when the Linux VDA is rejoined to the domain and a fresh set of Kerberos keys are generated,
the Broker fails to establish a security context with the VDA. This is often caused by the Broker using a cached out-of-date
VDA service ticket based on the previous set of Kerberos keys. This won’t stop the VDA from connecting to the Broker, but
the Broker will not be able to establish a return security context to the VDA. The usual symptom is that the VDA
registration fails.
This problem will eventually resolve itself when the VDA service ticket eventually expires and is renewed, but service tickets
are usually long-lived. This could potentially take a long time.
The solution is to clear the Broker’s ticket cache. You can reboot the Broker or run the following on the Broker from a
command prompt as Administrator:
klist -li 0x3e4 purge
This will purge all service tickets in the LSA cache held by the Network Service principal under which the Citrix Broker Service
runs. This will remove service tickets for other VDAs and potentially other services. However, this is harmless – these service
tickets will be reacquired from the KDC when needed again.
Audio plug-n-play not support edAudio plug-n-play not support ed
Citrix recommends that any audio capture device is connected to the client machine before starting to record audio in the
ICA session. If a device is attached after the audio recording application has started, the application might become
unresponsive. If this issue occurs, restart the application. A similar issue can occur if a capture device is unplugged while
recording.
Audio Dist ort ionAudio Dist ort ion
Citrix Receiver for Windows 10 might experience audio distortion during audio recording.

© 1999-2017 Citrix Systems, Inc. All rights reserved. p.7https://docs.citrix.com
This release of the Linux VDA can include third party software licensed under the terms defined in this
document.
Third party notices
Jan 23, 2017
Linux Virtual Desktop Version 7.12

© 1999-2017 Citrix Systems, Inc. All rights reserved. p.8https://docs.citrix.com
System Requirements
Jan 23, 2017
The following Linux distributions are supported by the Linux VDA:
SUSE Linux Enterprise:
Desktop 12 Service Pack 1
Server 11 Service Pack 4
Server 12 Service Pack 1
Red Hat Enterprise Linux
Workstation 6.8
Workstation 7.2
Server 6.8
Server 7.2
CentOS Linux
CentOS 6.8
CentOS 7.2
Ubuntu Linux
Ubuntu Desktop 16.04
Ubuntu Server 16.04
NoteIn all cases, the processor architecture supported is x86-64.
ImportantGnome and KDE desktops are supported in SUSE, RedHat and CentOS. Unity desktop is supported in Ubuntu only. At least one
desktop should be installed.
TipCentOS Linux is supported since version 1.3. The information contained in the installation article for RHEL is also appropriate for
CentOS. For more information, see Install Linux Virtual Delivery Agent for RHEL.
The following versions of XenDesktop are supported by the Linux VDA:
XenDesktop 7.12

© 1999-2017 Citrix Systems, Inc. All rights reserved. p.9https://docs.citrix.com
XenDesktop 7.11
XenDesktop 7.9
XenDesktop 7.8
XenDesktop 7.7
XenDesktop 7.6
XenDesktop 7.5
XenDesktop 7.1
The configuration process for Linux VDAs differs slightly from that for Windows VDAs. However, any Delivery Controller
farm is capable of brokering both Windows and Linux desktops.
NoteThe Linux VDA is incompatible with XenDesktop version 7.0 or earlier.
The following versions of Citrix Receiver are supported:
Citrix Receiver for Windows version 4.5 or later
Citrix Receiver for Linux version 13.4 or later
Citrix Receiver for Mac OSX version 12.3 or later
Citrix Receiver for Android version 3.9 or later
Citrix Receiver for iOS version 7.1 or later
Citrix Receiver for Chrome version 2.2 (only via Access Gateway)
Citrix Receiver for HTML5 version 2.2 (only via Access Gateway)
The following hypervisors for hosting Linux VDA guest VMs are supported:
XenServer
VMware ESX and ESXi
Microsoft Hyper-V
Bare metal hosting is also supported.
TipRefer to the hypervisor vendor’s documentation for the list of supported platforms.
The following Active Directory integration packages or products are supported by the Linux VDA:
Samba Winbind
Quest Authentication Services v4.1 or later

© 1999-2017 Citrix Systems, Inc. All rights reserved. p.10https://docs.citrix.com
Centrify DirectControl
SSSD
TipFor the list of supported platforms, see the documentation from the vendors of the Active Directory integration packages.
The following hypervisors, Linux Distributions, and NVIDIA GRID™ GPU are required to support HDX 3D Pro.
Hypervisors
The following hypervisors are supported:
XenServer
VMware ESX and ESXi
Linux distributions
The following Linux distributions support HDX 3D Pro:
Red Hat Enterprise Linux - Workstation 6.8
Red Hat Enterprise Linux - Server 6.8
Red Hat Enterprise Linux - Workstation 7.2
Red Hat Enterprise Linux - Server 7.2
CentOS Linux 6.8
CentOS Linux 7.2
SUSE Linux Enterprise Desktop 12 Service Pack 1
SUSE Linux Enterprise Server 12 Service Pack 1
Ubuntu Linux Desktop 16.04
Ubuntu Linux Server 16.04
GPU
The following GPUs are supported for GPU pass-through:
NVIDIA GRID™ 3.0 - Tesla M60
NVIDIA GRID™ - K2
The following GPUs are supported for vGPU:
NVIDIA GRID™ 3.0 - Tesla M60
NVIDIA GRID™ 3.0 - Tesla M10

© 1999-2017 Citrix Systems, Inc. All rights reserved. p.11https://docs.citrix.com
Configure Delivery Controllers
Feb 06, 2017
XenDesktop 7.6 or an earlier version requires the necessary changes to support the Linux VDA. Thus, for these versions of
XenDesktop, a hotfix or update script is required. The installation and verification are provided in this article.
For XenDesktop 7.6 SP2, apply Hotfix Update 2 to update the Broker for Linux Virtual Desktops. Hotfix Update 2 is
available here:
CTX142438: Hotfix Update 2 - For Delivery Controller 7.6 (32-bit) – English
CTX142439: Hotfix Update 2 - For Delivery Controller 7.6 (64-bit) – English
For earlier versions of XenDesktop, you can use the PowerShell script named Updat e-BrokerServiceConfig.ps1Updat e-BrokerServiceConfig.ps1 to
update the Broker Service configuration. This script is available in the following package:
citrix-linuxvda-scripts.zip
Repeat the following steps on every Delivery Controller in the farm:
1. Copy the Update-BrokerServiceConfig.ps1 script to the Delivery Controller machine.
2. Open a Windows PowerShell console in the context of the local administrator.
3. Browse to the folder containing the script.
4. Execute the script:
.\Update-BrokerServiceConfig.ps1
TipBy default, PowerShell is configured to prevent the execution of PowerShell scripts. If the script fails to run, you need to change the
PowerShell execution policy before trying again:
Set-ExecutionPolicy Unrestricted
The Updat e-BrokerServiceConfig.ps1Updat e-BrokerServiceConfig.ps1 script updates the Broker Service configuration file with new WCF endpoints

© 1999-2017 Citrix Systems, Inc. All rights reserved. p.12https://docs.citrix.com
required by the Linux VDA and restarts the Broker Service. The script determines the location of the Broker Service
configuration file automatically. A backup of the original configuration file is created in the same directory with the
extension .prelinux.prelinux .
These changes will have no impact on the brokering of Windows VDAs configured to use the same Delivery Controller farm.
This allows for a single Controller farm to manage and broker sessions to both Windows and Linux VDAs seamlessly.
To verify whether the required configuration changes have been applied to a Delivery Controller, confirm that the
st ringEndpoint Linuxst ringEndpoint Linux appears five times in the file:
%PROGRAMFILES%\Citrix\Broker\Service\BrokerService.exe.config
From the Windows command prompt, log on as a local administrator:
cd "%PROGRAMFILES%"\Citrix\Broker\Service\
findstr EndpointLinux BrokerService.exe.config

© 1999-2017 Citrix Systems, Inc. All rights reserved. p.13https://docs.citrix.com
Installation Overview
Dec 06, 2016
Installing the Linux Virtual Delivery Agent (VDA) follows the same general steps for all supported Linux distributions.
1. Prepare for installation.
2. Prepare the hypervisor.
3. Add the Linux virtual machine (VM) to the Windows domain.
4. Install the Linux VDA.
5. Configure the Linux VDA.
6. Create the machine catalog in XenApp or XenDesktop.
7. Create the delivery group in XenApp or XenDesktop.
Variations and specific commands are documented by distribution.
© 1999-2017 Citrix Systems, Inc. All rights reserved. p.14https://docs.citrix.com
Easy install
Feb 06, 2017
Easy install helps users set up the running environment of the Linux VDA by installing the necessary packages and
customizing the configuration files automatically.
ImportantThe Easy Install feature is provided as a Technical Preview feature. Consider the following limitations:
Support is limited to the following distributions:
RHEL 6.8 & 7.2
CentOS 6.8 & 7.2
Ubuntu 16.04
Winbind and SSSD AD integrations are supported.
To use this feature, follow these steps:
1. Collect necessary installation information.
2. Install the desktop and X Windows systems and configure the package repository on the Linux VDA server.
3. Install the Linux VDA package.
4. Set up the runtime environment for the Linux VDA.
Step 1: Collect information
Collect the following information:
Hostname – Linux VDA hostname
IP address of DNS server
IP address or name of NTP server
Domain name
Realm name
FQDN of domain controller
Step 2: Install components and configure repository
After collecting required system information, install the desktop and X Windows systems, and then configure the package
repository on the Linux VDA machine.
Step 3: Install the Linux VDA package
Execute the following commands to set up the environment for the Linux VDA.
For RHEL and CentOS distributions:

© 1999-2017 Citrix Systems, Inc. All rights reserved. p.15https://docs.citrix.com
sudo yum -y localinstall <PATH>/<Linux VDA RPM>
For Ubuntu distributions:
sudo apt-get install <PATH>/<Linux VDA deb>
Step 4: Set up the runtime environment for the Linux VDA
Excecute the following command to set up the running environment for the Linux VDA:
sudo /opt/Citrix/VDA/sbin/ctxinstall.sh
Use the information in this section to troubleshoot issues that might arise from using this feature.
Failure when joining a domain with SSSD
An error condition might occur when attemping to join a domain, with the output resembling (verify logs for screen printing):
Step 6: join Domain!Enter ctxadmin's password:Failed to join domain: failed to lookup DC info for domain 'CITRIXLAB.LOCAL' over rpc: The network name cannot be found
/var/log/xdl/vda.log:

© 1999-2017 Citrix Systems, Inc. All rights reserved. p.16https://docs.citrix.com
http://CTXDDC.citrixlab.local:80/Citrix/CdsController/IRegistrar
http://CTXDDC.citrixlab.local:80/Citrix/CdsController/IRegistrar
javax.xml.ws.soap.SOAPFaultException'.
/var/log/messages:
MEMORY:/etc/krb5.keytab]: Client '[email protected]' not found in Kerberos database. Unable to create GSSAPI-encrypted LDAP connection.Nov 4 02:15:27 RH-WS-68 [sssd[ldap_child[14867]]]: Client '[email protected]' not found in Kerberos database
2016-11-04 02:11:52.317 [INFO ] - The Citrix Desktop Service successfully obtained the following list of 1 delivery controller(s) with which to register: 'CTXDDC.citrixlab.local (10.158.139.214)'.
2016-11-04 02:11:52.362 [ERROR] - RegistrationManager.AttemptRegistrationWithSingleDdc: Failed to register with
2016-11-04 02:11:52.362 [ERROR] - The Citrix Desktop Service cannot connect to the delivery controller '
Check the following:- The system clock is in sync between this machine and the delivery controller.
- The Active Directory provider (e.g. winbind daemon) service is running and correctly configured.
- Kerberos is correctly configured on this machine.
If the problem persists, please refer to Citrix Knowledge Base article CTX117248 for further information.
Error Details:
Exception 'General security error (An error occurred in trying to obtain a TGT: Client not found in Kerberos database (6))' of type 'class
2016-11-04 02:11:52.362 [INFO ] - RegistrationManager.AttemptRegistrationWithSingleDdc: The current time for this VDA is Fri Nov 04 02:11:52 EDT 2016.
Ensure that the system clock is in sync between this machine and the delivery controller.
Verify the NTP daemon is running on this machine and is correctly configured.
2016-11-04 02:11:52.364 [ERROR] - Could not register with any controllers. Waiting to try again in 120000 ms. Multi-forest - false
2016-11-04 02:11:52.365 [INFO ] - The Citrix Desktop Service failed to register with any controllers in the last 470 minutes.
Nov 4 02:15:27 RH-WS-68 [sssd[ldap_child[14867]]]: Failed to initialize credentials using keytab [

© 1999-2017 Citrix Systems, Inc. All rights reserved. p.17https://docs.citrix.com
To resolve this issue:
1. rm -f /etc/krb5.keytab
2. net ads leave $REALM -U $domain-administrator
3. Delete the machine catalog and delivery group on the DDC
4. Execute /opt/Citrix/VDA/sbin/ctxinstall.sh
5. Create the machine catalog and delivery group on the DDC
Ubuntu can launch a session, but is blocked in an empty desktop
This issue occurs when you launch a session, which is then blocked in a blank desktop. In addition, the console of the server
OS machine appears in the same state when you log in with domain administrator credentials.
To resolve this issue:
1. sudo apt-get install unity lightdm
2. sudo apt-get update
3. Add the following line to /etc/lightdm/lightdm.conf:
greeter-show-manual-login=true
Ubuntu launches a session, but cannot log on due to missing home directory
/var/log/xdl/hdx.log:
TipThe root cause of this issue is that the home directory is not created for the domain administrator.
To resolve this issue:
1. From a command line, enter pam-aut h-updat epam-aut h-updat e .
2. In the resulting popup window, verify that Creat e home direct ory loginCreat e home direct ory login is selected.
2016-11-02 13:21:19.015 <P22492:S1> citrix-ctxlogin: StartUserSession: failed to change to directory(/home/CITRIXLAB/ctxadmin) errno(2)
2016-11-02 13:21:19.017 <P22227> citrix-ctxhdx: logSessionEvent: Session started for user ctxadmin.
2016-11-02 13:21:19.023 <P22492:S1> citrix-ctxlogin: ChildPipeCallback: Login Process died: normal.
2016-11-02 13:21:59.217 <P22449:S1> citrix-ctxgfx: main: Exiting normally.

© 1999-2017 Citrix Systems, Inc. All rights reserved. p.18https://docs.citrix.com
Session cannot be launched or is quickly terminated with dbus/message bus error
/var/log/messages (for RHEL or CentOS):
Or, alternately for Ubuntu distributions, use the log /var/log/syslog:
Oct 27 04:17:16 CentOS7 citrix-ctxhdx[8978]: Session started for user CITRIXLAB\ctxadmin.
Oct 27 04:17:18 CentOS7 kernel: traps: gnome-session[19146] trap int3 ip:7f89b3bde8d3 sp:7fff8c3409d0 error:0
Oct 27 04:17:18 CentOS7 gnome-session[19146]: ERROR: Failed to connect to system bus: Exhausted all available authentication mechanisms (tried: EXTERNAL, DBUS_COOKIE_SHA1, ANONYMOUS) (available: EXTERNAL, DBUS_COOKIE_SHA1, ANONYMOUS)#012aborting...
Oct 27 04:17:18 CentOS7 gnome-session: gnome-session[19146]: ERROR: Failed to connect to system bus: Exhausted all available authentication mechanisms (tried: EXTERNAL, DBUS_COOKIE_SHA1, ANONYMOUS) (available: EXTERNAL, DBUS_COOKIE_SHA1, ANONYMOUS)
Oct 27 04:17:18 CentOS7 gnome-session: aborting...
Oct 27 04:17:18 CentOS7 citrix-ctxgfx[18981]: Exiting normally.
Oct 27 04:17:18 CentOS7 citrix-ctxhdx[8978]: Session stopped for user CITRIXLAB\ctxadmin.

© 1999-2017 Citrix Systems, Inc. All rights reserved. p.19https://docs.citrix.com
Some groups or modules do not take effect until after a reboot. When dbusdbus or message busmessage bus error messages appear in
the log, Citrix recommends that you reboot the system, then retry.
Nov 3 11:03:52 user01-HVM-domU pulseaudio[25326]: [pulseaudio] pid.c: Stale PID file, overwriting.
Nov 3 11:03:52 user01-HVM-domU pulseaudio[25326]: [pulseaudio] bluez5-util.c: Failed to get D-Bus connection: Did not receive a reply. Possible causes include: the remote application did not send a reply, the message bus security policy blocked the reply, the reply timeout expired, or the network connection was broken.
Nov 3 11:03:52 user01-HVM-domU pulseaudio[25326]: [pulseaudio] hashmap.c: Assertion 'h' failed at pulsecore/hashmap.c:116, function pa_hashmap_free(). Aborting.
Nov 3 11:03:52 user01-HVM-domU pulseaudio[25352]: [pulseaudio] core-util.c: Failed to connect to system bus: Did not receive a reply. Possible causes include: the remote application did not send a reply, the message bus security policy blocked the reply, the reply timeout expired, or the network connection was broken.
Nov 3 11:03:52 user01-HVM-domU pulseaudio[25352]: message repeated 10 times: [ [pulseaudio] core-util.c: Failed to connect to system bus: Did not receive a reply. Possible causes include: the remote application did not send a reply, the message bus security policy blocked the reply, the reply timeout expired, or the network connection was broken.]
Nov 3 11:03:52 user01-HVM-domU pulseaudio[25352]: [pulseaudio] pid.c: Daemon already running.Nov 3 11:03:58 user01-HVM-domU citrix-ctxgfx[24693]: Exiting normally

© 1999-2017 Citrix Systems, Inc. All rights reserved. p.20https://docs.citrix.com
Install Linux Virtual Delivery Agent for RHEL
Feb 06, 2017
Verify the network configuration
Citrix recommends that the network is connected and configured correctly before proceeding.
Set the hostname
To ensure that the hostname of the machine is reported correctly, change the /et c/host name/et c/host name file to contain only the
hostname of the machine.
HOSTNAME=host namehost name
Assign a loopback address to the hostname
To ensure that the DNS domain name and FQDN of the machine are reported back correctly, change the following line of
the /et c/host s/et c/host s file to include the FQDN and hostname as the first two entries:
127.0.0.1 host name-f qdn host namehost name-f qdn host name localhost localhost.localdomain localhost4 localhost4.localdomain4
For example:
127.0.0.1 vda01.example.com vda01 localhost localhost.localdomain localhost4 localhost4.localdomain4
Remove any other references to host name-f qdnhost name-f qdn or host namehost name from other entries in the file.
NoteThe Linux VDA currently does not support NetBIOS name truncation, therefore the hostname must not exceed 15 characters.
TipUse a-z, A-Z, 0-9, and hyphen (-) characters only. Avoid underscrore characters (_), spaces, and other symbols. Do not start a
hostname with a number and do not end it with a hyphen.
Check the hostname
Verify that the hostname is set correctly:

© 1999-2017 Citrix Systems, Inc. All rights reserved. p.21https://docs.citrix.com
hostname
This should return only the machine's host name and not its fully qualified domain name (FQDN).
Verify that the FQDN is set correctly:
hostname -f
This should return the machine's FQDN.
Check name resolution and service reachability
Verify that you can resolve the FQDN and ping the domain controller and XenDesktop Delivery Controller:
nslookup domain-controller-fqdn
ping domain-controller-fqdn
nslookup delivery-controller-fqdn
ping delivery-controller-fqdn
If you cannot resolve the FQDN or ping either of these machines, review the steps before proceeding.
Configure clock synchronization (NTP)
Maintaining accurate clock synchronization between the VDAs, XenDesktop Controllers, and domain controllers is crucial.
Hosting the Linux VDA as a virtual machine can cause clock skew problems. For this reason, synchronizing time with a
remote time service is preferred.
RHEL 6.x and earlier releases use the NTP daemon (ntpd) for clock synchronization, whereas an RHEL 7.x
default environment uses the newer Chrony daemon (chronyd) instead. The configuration and operational process between
the two services is similar.

© 1999-2017 Citrix Systems, Inc. All rights reserved. p.22https://docs.citrix.com
Configure NTP service
As root, edit /et c/nt p.conf/et c/nt p.conf and add a server entry for each remote time server:
server peer1-fqdn-or-ip-address iburst
server peer2-fqdn-or-ip-address iburst
In a typical deployment, time should be synchronized from the local domain controllers and not directly from public NTP
pool servers. Add a server entry for each Active Directory domain controller in the domain.
Remove any other serverserver entries listed including loopback IP address, localhost, and public server * .pool.nt p.org*.pool.nt p.org entries.
Save changes and restart the NTP daemon:
sudo /sbin/service ntpd restart
Install OpenJDK
The Linux VDA is dependent on OpenJDK. The runtime environment should have been installed as part of the operating
system installation.
Confirm the correct version with:
sudo yum info java-1.7.0-openjdk
The prepackaged OpenJDK might be an earlier version. Update to the latest version as required:

© 1999-2017 Citrix Systems, Inc. All rights reserved. p.23https://docs.citrix.com
sudo yum -y update java-1.7.0-openjdk
Set the JAVA_HOMEJAVA_HOME environment variable by adding the following line to the ~ /.bashrc~ /.bashrc file:
export JAVA_HOME=/usr/lib/jvm/java
Open a new shell and verify the version of Java:
java –version
TipTo avoid problems, make sure that you installed only OpenJDK version 1.7.0 or 1.8.0. Remove all other versions of Java on your
system.
Install PostgreSQL
The Linux VDA requires either PostgreSQL 8.4 or later on RHEL 6.
Install the following packages:
sudo yum -y install postgresql-server
sudo yum -y install postgresql-jdbc
The following post-installation step is required to initialize the database and ensure service starts on boot. This will create
database files under /var/lib/pgsql/dat a/var/lib/pgsql/dat a .

© 1999-2017 Citrix Systems, Inc. All rights reserved. p.24https://docs.citrix.com
sudo /sbin/service postgresql initdb
Start PostgreSQL
Configure the service to start on boot, and to start now:
sudo /sbin/chkconfig postgresql on
sudo /sbin/service postgresql start
Check the version of PostgreSQL using:
psql --version
Verify that the data directory is set using the psqlpsql command-line utility:
sudo -u postgres psql -c 'show data_directory'
Verify the network configuration
Citrix recommends that the network is connected and properly configured correctly before proceeding.
Set the hostname
To ensure that the hostname of the machine is reported correctly, change the /et c/host name/et c/host name file to contain only the
hostname of the machine.
© 1999-2017 Citrix Systems, Inc. All rights reserved. p.25https://docs.citrix.com
Assign a loopback address to the hostname
To ensure that the DNS domain name and FQDN of the machine are reported back correctly, change the following line of
the /et c/host s/et c/host s file to include the FQDN and hostname as the first two entries:
127.0.0.1 host name-f qdn host namehost name-f qdn host name localhost localhost.localdomain localhost4 localhost4.localdomain4
For example:
127.0.0.1 vda01.example.com vda01 localhost localhost.localdomain localhost4 localhost4.localdomain4
Remove any other references to host name-f qdnhost name-f qdn or host namehost name from other entries in the file.
NoteThe Linux VDA currently does not support NetBIOS name truncation, therefore the hostname must not exceed 15 characters.
TipUse a-z, A-Z, 0-9 and hyphen (-) characters only. Avoid underscores (_), spaces and other symbols. Do not start a hostname with a
number and do not end it with a hyphen.
Check the hostname
Verify that the hostname is set correctly:
hostname
This should return only the machine's host name and not its fully qualified domain name (FQDN).
Verify that the FQDN is set correctly:
hostname -f
This should return the machine's FQDN.

© 1999-2017 Citrix Systems, Inc. All rights reserved. p.26https://docs.citrix.com
Check name resolution and service reachability
Verify that you can resolve the FQDN and ping the domain controller and XenDesktop Delivery Controller:
nslookup domain-controller-fqdn
ping domain-controller-fqdn
nslookup delivery-controller-fqdn
ping delivery-controller-fqdn
If you cannot resolve the FQDN or ping either of these machines, review the steps before proceeding.
Configure clock synchronization (NTP)
Maintaining accurate clock synchronization between the VDAs, XenDesktop Controllers and domain controllers is crucial.
Hosting the Linux VDA as a virtual machine can cause clock skew problems. For this reason, synchronizing time with a
remote time service is preferred.
RHEL 6.x and earlier releases use the NTP daemon (ntpd) for clock synchronization, whereas an RHEL 7.x
default environment uses the newer Chrony daemon (chronyd) instead. The configuration and operational process between
the two services is similar.
Chrony service
As root, edit /et c/chrony.conf/et c/chrony.conf and add a server entry for each remote time server:
server peer1-f qdn-or-ip-addresspeer1-f qdn-or-ip-address iburst
server peer2-f qdn-or-ip-addresspeer2-f qdn-or-ip-address iburst
In a typical deployment, time should be synchronized from the local domain controllers and not directly from public NTP
pool servers. Add a server entry for each Active Directory domain controller in the domain.
Remove any other server entries listed including loopback IP address, localhost, and public server * .pool.nt p.org *.pool.nt p.org entries.
Save changes and restart the Chrony daemon:

© 1999-2017 Citrix Systems, Inc. All rights reserved. p.27https://docs.citrix.com
sudo /sbin/service chronyd restart
Install OpenJDK
The Linux VDA is dependent on OpenJDK. The runtime environment should have been installed as part of the operating
system installation.
Confirm the correct version with:
sudo yum info java-1.8.0-openjdk
The prepackaged OpenJDK might be an earlier version. Update to the latest version as required:
sudo yum -y update java-1.8.0-openjdk
Set the JAVA_HOMEJAVA_HOME environment variable by adding the following line to ~ /.bashrc~ /.bashrc file:
export JAVA_HOME=/usr/lib/jvm/java
Open a new shell and verify the version of Java:
java –version
TipTo avoid problems, make sure that you installed only OpenJDK version 1.8.0. Remove all other versions of Java on your system.
© 1999-2017 Citrix Systems, Inc. All rights reserved. p.28https://docs.citrix.com
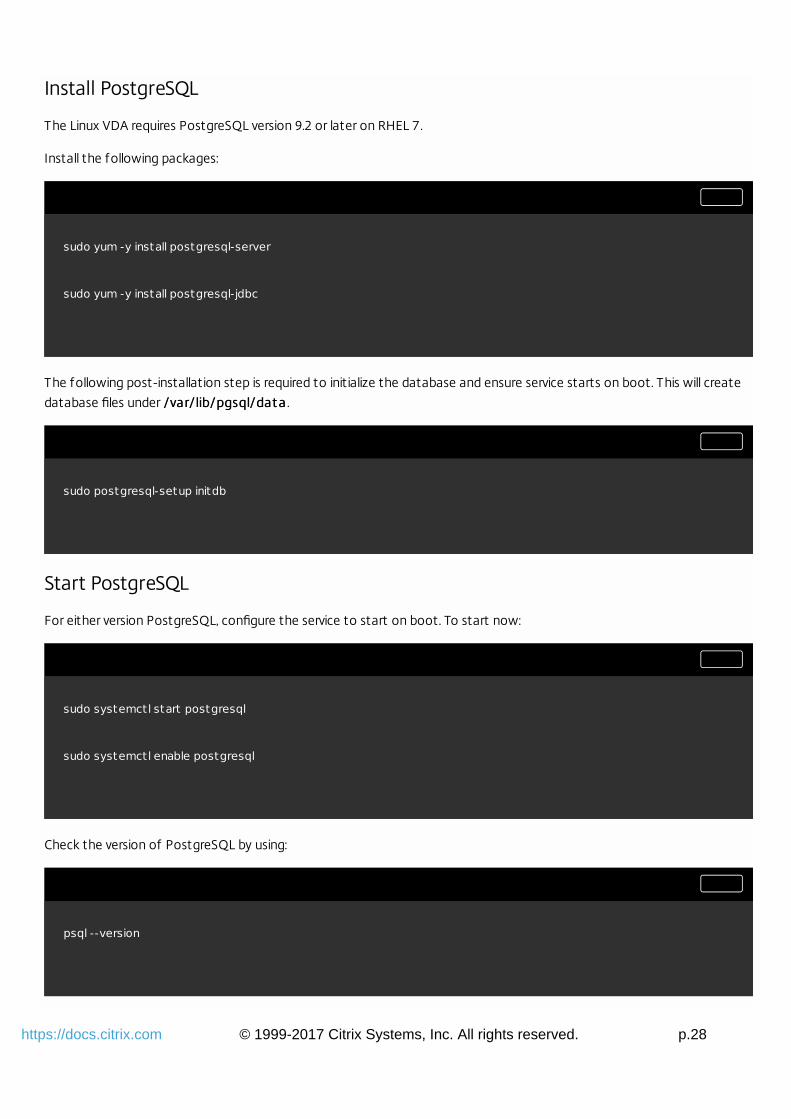
Install PostgreSQL
The Linux VDA requires PostgreSQL version 9.2 or later on RHEL 7.
Install the following packages:
sudo yum -y install postgresql-server
sudo yum -y install postgresql-jdbc
The following post-installation step is required to initialize the database and ensure service starts on boot. This will create
database files under /var/lib/pgsql/dat a /var/lib/pgsql/dat a .
sudo postgresql-setup initdb
Start PostgreSQL
For either version PostgreSQL, configure the service to start on boot. To start now:
sudo systemctl start postgresql
sudo systemctl enable postgresql
Check the version of PostgreSQL by using:
psql --version

© 1999-2017 Citrix Systems, Inc. All rights reserved. p.29https://docs.citrix.com
Verify that the data directory is set using the psqlpsql command-line utility:
sudo -u postgres psql -c 'show data_directory'
Some changes are required when running the Linux VDA as a virtual machine on a supported hypervisor. Make the following
changes according to the hypervisor platform in use. No changes are required if you are running the Linux machine on bare
metal hardware.
Fix time synchronization on Citrix XenServer
If the XenServer T ime Sync feature is enabled, within each paravirtualized Linux VM you will experience issues with NTP and
XenServer both trying to manage the system clock. To avoid the clock becoming out of sync with other servers, the system
clock within each Linux guest must be synchronized with NTP. This requires disabling host time synchronization. No changes
are required in HVM mode.
On some Linux distributions, if you are running a paravirtualized Linux kernel with XenServer Tools installed, you can check
whether the XenServer T ime Sync feature is present and enabled from within the Linux VM:
su -
cat /proc/sys/xen/independent_wallclock
This will return either:
0 - The time sync feature is enabled, and needs to be disabled.
1 - The time sync feature is disabled, and no further action is required.
If the /proc/sys/xen/indepent_wallclock file is not present, the following steps are not required.
If enabled, disable the time sync feature by writing 1 to the file:

© 1999-2017 Citrix Systems, Inc. All rights reserved. p.30https://docs.citrix.com
sudo echo 1 > /proc/sys/xen/independent_wallclock
To make this change permanent and persist after reboot, edit the /et c/sysct l.conf/et c/sysct l.conf file and add the line:
xen.independent_wallclock = 1
To verify these changes, reboot the system:
su -
cat /proc/sys/xen/independent_wallclock
This should return the value 1.
Fix time synchronization on Microsoft Hyper-V
Linux VMs with Hyper-V Linux Integration Services installed can leverage the Hyper-V time synchronization feature to use
the host operating system's time. To ensure the system clock remains accurate, this feature should be enabled alongside
NTP services.
From the management operating system:
1. Open the Hyper-V Manager console.
2. For the settings of a Linux VM, select Int egrat ion ServicesInt egrat ion Services .
3. Ensure T ime synchronizat ionT ime synchronizat ion is selected.
NoteThis approach is different from VMware and XenServer, where host time synchronization is disabled to avoid conflicts with NTP.
Hyper-V time synchronization can coexist and supplement NTP time synchronization.
Fix time synchronization on ESX and ESXi

© 1999-2017 Citrix Systems, Inc. All rights reserved. p.31https://docs.citrix.com
If the VMware Time Synchronization feature is enabled, within each paravirtualized Linux VM you will experience issues with
NTP and the hypervisor both trying to synchronize the system clock. To avoid the clock becoming out of sync with other
servers, the system clock within each Linux guest must be synchronized with NTP. This requires disabling host time
synchronization.
If you are running a paravirtualized Linux kernel with VMware Tools installed:
1. Open the vSphere Client.
2. Edit settings for the Linux VM.
3. In the Virt ual Machine Propert iesVirt ual Machine Propert ies dialog, open the Opt ionsOpt ions tab.
4. Select VMware T oolsVMware T ools .
5. In the Advanced box, clear Synchronize guest t ime wit h hostSynchronize guest t ime wit h host .
There are a number of methods for adding Linux machines to the Active Directory domain that are supported by
XenDesktop for Linux:
Samba Winbind
Quest Authentication Service
Centrify DirectControl
Follow the instructions below for your chosen method.
Samba Winbind
Install or update the required packages:
sudo yum -y install samba-winbind samba-winbind-clients krb5-workstat ion authconfig oddjob-mkhomedir
Enable Winbind Daemon t o St art on BootEnable Winbind Daemon t o St art on Boot
The Winbind daemon must be configured to start on boot:
sudo /sbin/chkconfig winbind on
Configure Winbind Aut hent icat ionConfigure Winbind Aut hent icat ion
Configure the machine for Kerberos authentication using Winbind:

© 1999-2017 Citrix Systems, Inc. All rights reserved. p.32https://docs.citrix.com
sudo authconfig --disablecache --disablesssd --disablesssdauth --enablewinbind --enablewinbindauth --disablewinbindoffline --smbsecurity=ads --smbworkgroup=
Where REALM is the Kerberos realm name in uppercase and domain is the short NetBIOS name of the Active Directory
domain.
If DNS-based lookups of the KDC server and realm name is required, add the following two options to the above command:
--enablekrb5kdcdns --enablekrb5realmdns
Ignore any errors returned from the authconfig command about the winbind service failing to start. These are due to
authconfig trying to start the winbind service without the machine yet being joined to the domain.
Open /et c/samba/smb.conf /et c/samba/smb.conf and add the following entries under the [Global] section, but after the section generated by
the authconfig tool:
kerberos method = secrets and keytab
winbind refresh t ickets = true
The system keytab file /etc/krb5.keytab is required by the Linux VDA to authenticate and register with the Delivery
Controller. The kerberos method setting above will force Winbind to create the system keytab file when the machine is first
joined to the domain.
Join Windows DomainJoin Windows Domain
This requires that your domain controller is reachable and you have a Active Directory user account with permissions to add
computers to the domain:

© 1999-2017 Citrix Systems, Inc. All rights reserved. p.33https://docs.citrix.com
sudo net ads join REALM -U user
Where REALM is the Kerberos realm name in uppercase, and user is a domain user with permissions to add computers to the
domain.
Configure PAM f or WinbindConfigure PAM f or Winbind
By default, the configuration for the Winbind PAM module (pam_winbind) does not enable Kerberos ticket caching and
home directory creation. Open /etc/security/pam_winbind.conf and add or change the following entries under
the [Global] section:
krb5_auth = yes
krb5_ccache_type = FILE
mkhomedir = yes
Ensure that any leading semi-colons from each setting are removed. These changes require restarting the Winbind daemon:
sudo /sbin/service winbind restart
TipThe winbind daemon will stay running only if the machine is joined to a domain.
Open /et c/krb5.conf /et c/krb5.conf and change the following setting under the [libdefaults] section from KEYRING to FILE type:

© 1999-2017 Citrix Systems, Inc. All rights reserved. p.34https://docs.citrix.com
default_ccache_name = FILE:/tmp/krb5cc_%{uid}
Verif y Domain MembershipVerif y Domain Membership
The XenDesktop Controller requires that all VDA machines, whether Windows or Linux, have a computer object in Active
Directory.
Verify the machine is joined to a domain using Samba's net adsnet ads command:
sudo net ads test join
Additional domain and computer object information can be verified with:
sudo net ads info
Verif y Kerberos Configurat ionVerif y Kerberos Configurat ion
To verify Kerberos is configured correctly for use with the Linux VDA, check that the system keytab file has been created
and contains valid keys:
sudo klist -ke
This should display the list of keys available for the various combinations of principal names and cipher suites. Run the
Kerberos kinit command to authenticate the machine with the domain controller using these keys:
© 1999-2017 Citrix Systems, Inc. All rights reserved. p.35https://docs.citrix.com
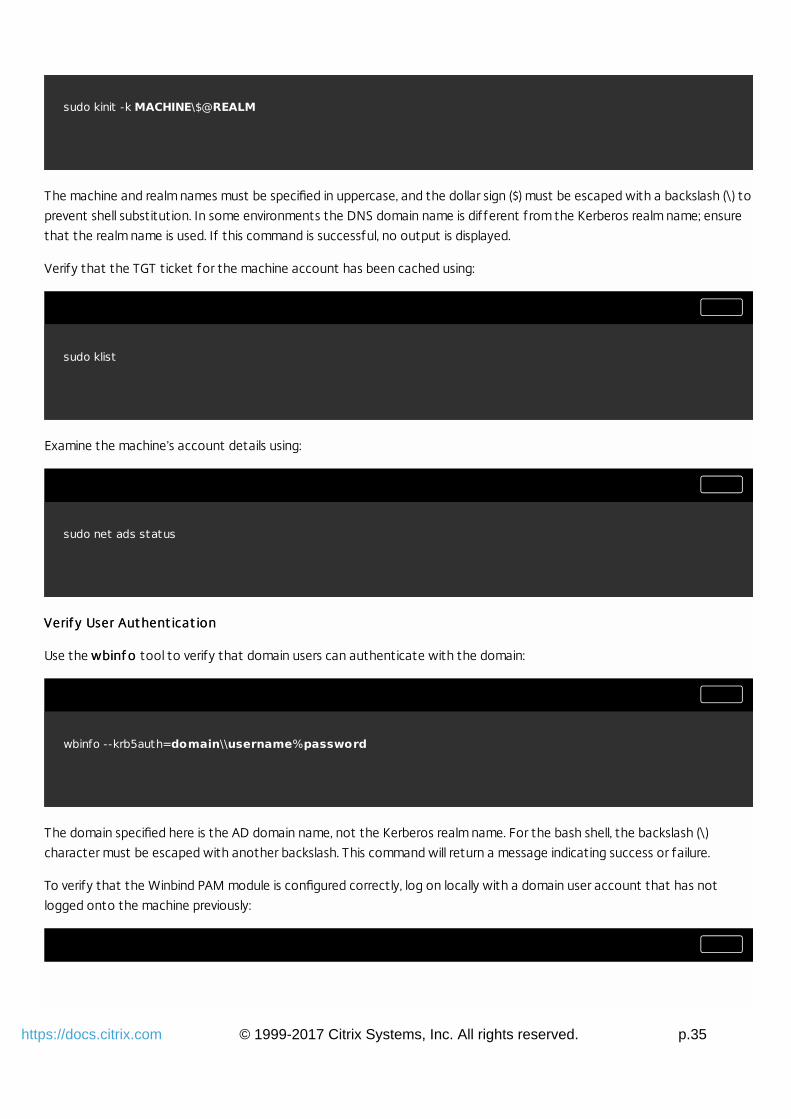
sudo kinit -k MACHINE\$@REALM
The machine and realm names must be specified in uppercase, and the dollar sign ($) must be escaped with a backslash (\) to
prevent shell substitution. In some environments the DNS domain name is different from the Kerberos realm name; ensure
that the realm name is used. If this command is successful, no output is displayed.
Verify that the TGT ticket for the machine account has been cached using:
sudo klist
Examine the machine’s account details using:
sudo net ads status
Verif y User Aut hent icat ionVerif y User Aut hent icat ion
Use the wbinf owbinf o tool to verify that domain users can authenticate with the domain:
wbinfo --krb5auth=domain\\username%password
The domain specified here is the AD domain name, not the Kerberos realm name. For the bash shell, the backslash (\)
character must be escaped with another backslash. This command will return a message indicating success or failure.
To verify that the Winbind PAM module is configured correctly, log on locally with a domain user account that has not
logged onto the machine previously:

© 1999-2017 Citrix Systems, Inc. All rights reserved. p.36https://docs.citrix.com
ssh localhost -l domain\\username
id -u
Check that the tickets in the user’s Kerberos credential cache are valid and not expired:
klist
Exit the session:
exit
A similar test can be performed by logging onto the Gnome or KDE console directly.
Quest authentication service
Configure Quest on Domain Cont rollerConfigure Quest on Domain Cont roller
This assumes you have installed and configured the Quest software on the Active Directory domain controllers, and have
been granted administrative privileges to create computer objects in Active Directory.
Enable Domain Users t o Log on t o Linux VDA MachinesEnable Domain Users t o Log on t o Linux VDA Machines
For each domain user that needs to establish HDX sessions on a Linux VDA machine:
1. In the Active Directory Users and Computers management console, open Active Directory user properties for that user
account.
2. Select Unix AccountUnix Account tab.
3. Check Unix-enabledUnix-enabled.
4. Set the Primary GID Number Primary GID Number to the group ID of an actual domain user group.
NoteThese instructions are equivalent for setting up domain users for logon using the console, RDP, SSH or any other remoting protocol.

© 1999-2017 Citrix Systems, Inc. All rights reserved. p.37https://docs.citrix.com
Configure Quest on Linux VDA Configure Quest on Linux VDA
Workaround SELinux Policy Enf orcementWorkaround SELinux Policy Enf orcement
The default RHEL environment has SELinux fully enforced. This interferes with the Unix domain socket IPC mechanisms
used by Quest and prevents domain users from logging on.
TipThere are a few ways to workaround outlined here.
The easiest is to disable SELinux. As root, edit /et c/selinux/config/et c/selinux/config and change the SELinuxSELinux setting:
SELINUX=disabled
This change requires a reboot:
reboot
ImportantUse this setting carefully. Reenabling SELinux policy enforcement after disabling can cause a complete lockout, even for the root
user and other local users.
Configure VAS daemonConfigure VAS daemon
Auto-renewal of Kerberos tickets needs to be enabled and disconnected; authentication (offline logon) needs to be
disabled:

© 1999-2017 Citrix Systems, Inc. All rights reserved. p.38https://docs.citrix.com
sudo /opt/quest/bin/vastool configure vas vasd auto-t icket-renew-interval 32400
sudo /opt/quest/bin/vastool configure vas vas_auth allow-disconnected-auth false
This sets the renewal interval to 9 hours (32400 seconds) which is an hour less than the default 10 hour ticket lifetime. Set
this parameter to a lower value on systems with a shorter ticket lifetime.
Configure PAM and NSSConfigure PAM and NSS
Quest requires that PAM and NSS be manually configured to enable domain user login via HDX and other services such as
su, ssh, and RDP. To configure PAM and NSS:
sudo /opt/quest/bin/vastool configure pam
sudo /opt/quest/bin/vastool configure nss
Join Windows DomainJoin Windows Domain
Join the Linux machine to the Active Directory domain using the Quest vastool command:
sudo /opt/quest/bin/vastool -u user join domain-name
The user is any domain user with permissions to join computers to the Active Directory domain. The domain-name is the
DNS name of the domain; for example, example.com.
Verif y Domain MembershipVerif y Domain Membership
The XenDesktop Controller requires that all VDA machines, whether Windows or Linux, have a computer object in Active
Directory. To verify that a Quest-joined Linux machine is on the domain:

© 1999-2017 Citrix Systems, Inc. All rights reserved. p.39https://docs.citrix.com
sudo /opt/quest/bin/vastool info domain
If the machine is joined to a domain this will return the domain name. If not joined, you will see the following error:
ERROR: No domain could be found.
ERROR: VAS_ERR_CONFIG: at ctx.c:414 in _ctx_init_default_realm
default_realm not configured in vas.conf. Computer may not be joined to domain
Verif y User Aut hent icat ionVerif y User Aut hent icat ion
To verify that Quest can authenticate domain users using PAM, log on with a domain user account that has not logged
onto the machine previously:
ssh localhost -l domain\\username
id -u
Check that a corresponding Kerberos credential cache file was created for the UID returned by the id -uid -u command:
ls /tmp/krb5cc_uid
Check that the tickets in user’s Kerberos credential cache are valid and not expired:
© 1999-2017 Citrix Systems, Inc. All rights reserved. p.40https://docs.citrix.com
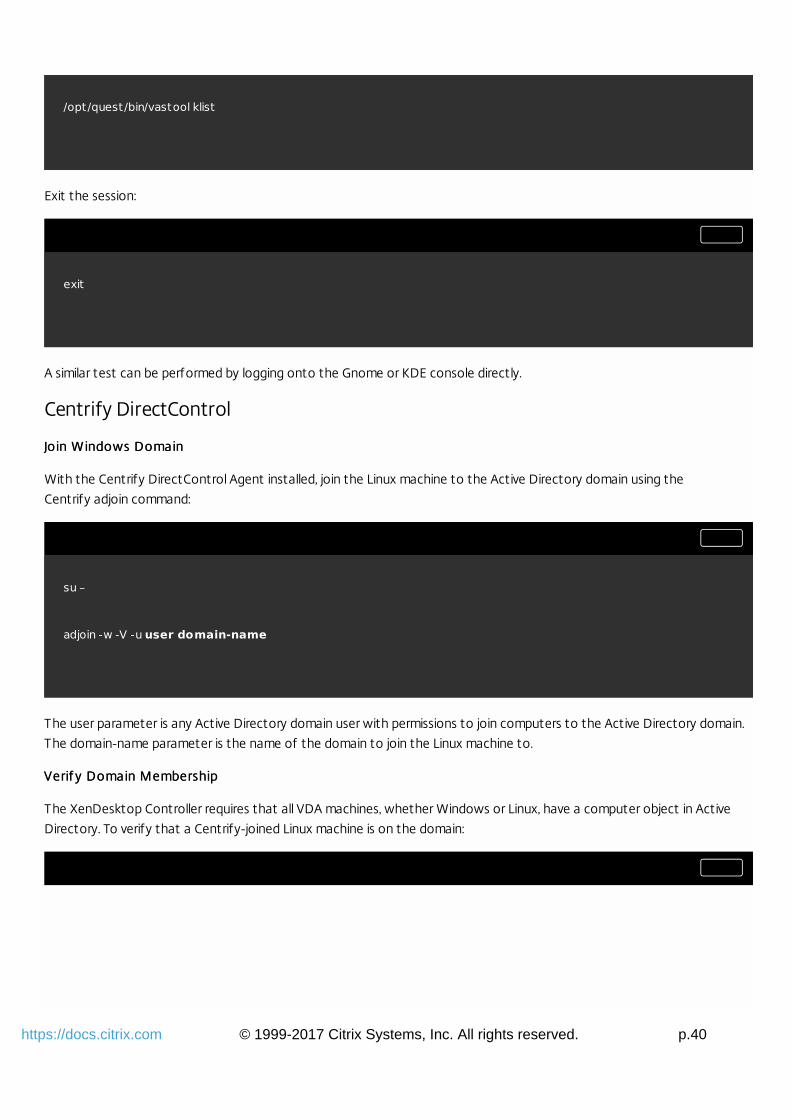
/opt/quest/bin/vastool klist
Exit the session:
exit
A similar test can be performed by logging onto the Gnome or KDE console directly.
Centrify DirectControl
Join Windows DomainJoin Windows Domain
With the Centrify DirectControl Agent installed, join the Linux machine to the Active Directory domain using the
Centrify adjoin command:
su –
adjoin -w -V -u user domain-name
The user parameter is any Active Directory domain user with permissions to join computers to the Active Directory domain.
The domain-name parameter is the name of the domain to join the Linux machine to.
Verif y Domain MembershipVerif y Domain Membership
The XenDesktop Controller requires that all VDA machines, whether Windows or Linux, have a computer object in Active
Directory. To verify that a Centrify-joined Linux machine is on the domain:

© 1999-2017 Citrix Systems, Inc. All rights reserved. p.41https://docs.citrix.com
su –
adinfo
Check that the Joined to domain value is valid and the CentrifyDC mode returns connected. If the mode remains stuck in
the starting state, then the Centrify client is experiencing server connection or authentication problems.
More comprehensive system and diagnostic information is available using:
adinfo --sysinfo all
adinfo –diag
To test connectivity to the various Active Directory and Kerberos services:
adinfo --test
SSSD
Use the following information to set up SSSD; it includes instructions for joining a Linux VDA machine to a Windows domain
and provides guidance for configuring Kerberos authentication.
NoteIf you are using SSSD, follow the instructions contained in this section instead of the information provided by the Add Linux machine
to Windows domain section.
What is SSSD?What is SSSD?
SSSD is a system daemon. It's primary function is to provide access to identify and authenticate remote resources through
a common framework that can provide caching and offline support to the system. It provides both PAM and NSS modules,
and in the future will support D-BUS based interfaces for extended user information. It also provides a better database to
© 1999-2017 Citrix Systems, Inc. All rights reserved. p.42https://docs.citrix.com
store local users as well as extended user data.
Setting up SSSD on RHEL and CentOS involves the following:
1. Join the domain and create host keytab with Samba
2. Set up SSSD
3. Configure NSS/PAM
4. Verify the Kerberos configuration
5. Verify user authentication
The Active Directory provider was first introduced with SSSD version 1.9.0. If you are using an older version, follow the
instructions provided in configuring the LDAP provider with Active Directory.
The following environments have been tested and verified when using the instructions included in this article:
RHEL 7.2/CentOS 7.2
Linux VDA versions 1.3, 1.4, 7.12
SSSD does not provide Active Directory client functions for joining the domain and managing the system keytab file. There
are a few methods for achieving this, including:
adcli
realmd
winbind
samba
The information in this section describes the Samba approach only. For realmd, see the RHEL or CentOS documentation.
These steps must be followed before configuring SSSD.
On the Linux client with properly configured files:
/etc/krb5.conf
/etc/samba/smb.conf:
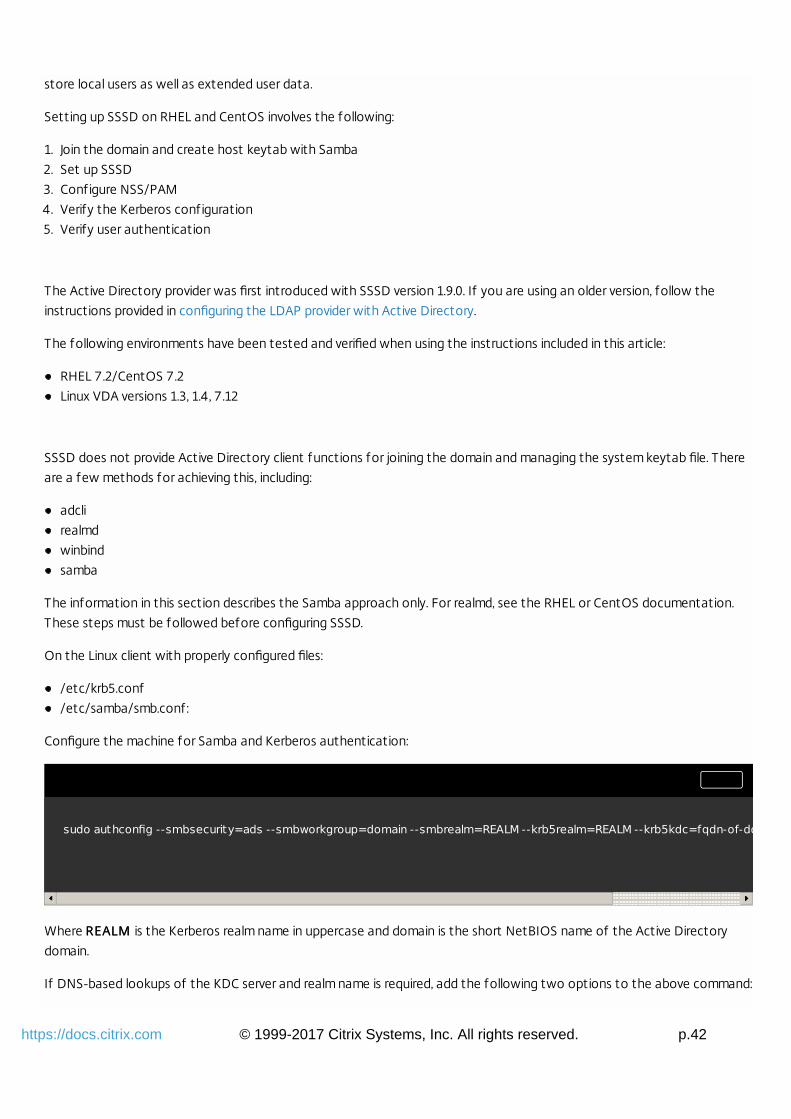
Configure the machine for Samba and Kerberos authentication:
sudo authconfig --smbsecurity=ads --smbworkgroup=domain --smbrealm=REALM --krb5realm=REALM --krb5kdc=fqdn-of-domain-controller --update
Where REALMREALM is the Kerberos realm name in uppercase and domain is the short NetBIOS name of the Active Directory
domain.
If DNS-based lookups of the KDC server and realm name is required, add the following two options to the above command:

© 1999-2017 Citrix Systems, Inc. All rights reserved. p.43https://docs.citrix.com
--enablekrb5kdcdns --enablekrb5realmdns
Open /et c/samba/smb.conf/et c/samba/smb.conf and add the following entries under the [Global][Global] section, but after the section generated
by the aut hconfigaut hconfig tool:
kerberos method = secrets and keytab
Joining the Windows domain requires that your domain controller is reachable and you have an Active Directory user
account with permissions to add computers to the domain:
sudo net ads join REALM -U user
Where REALMREALM is the Kerberos realm name in uppercase, and user is a domain user with permissions to add computers to
the domain.
Setting up SSSD consists of the following steps:
install the sssd-adsssd-ad package on the Linux client machine
make configuration changes to various f iles (for example, sssd.conf)
start the sssdsssd service:
An example sssd.conf sssd.conf configuration (additional options can be added as needed):
[sssd]
config_file_version = 2
domains = ad.example.com

© 1999-2017 Citrix Systems, Inc. All rights reserved. p.44https://docs.citrix.com
services = nss, pam
[domain/ad.example.com]
# Uncomment if you need offline logins
# cache_credentials = true
id_provider = ad
auth_provider = ad
access_provider = ad
ldap_id_mapping = true
ldap_schema = ad
# Should be specified as the lower-case version of the long version of the Active Directory domain.
ad_domain = ad.example.com
# Kerberos sett ings
krb5_ccachedir = /tmp
krb5_ccname_template = FILE:%d/krb5cc_%U
# Uncomment if service discovery is not working

© 1999-2017 Citrix Systems, Inc. All rights reserved. p.45https://docs.citrix.com
# Uncomment if service discovery is not working
# ad_server = server.ad.example.com
# Comment out if the users have the shell and home dir set on the AD side
default_shell = /bin/bash
fallback_homedir = /home/%d/%u
# Uncomment and adjust if the default principal SHORTNAME$@REALM is not available
# ldap_sasl_authid = host/[email protected]
Replace ad.example.comad.example.com, server.ad.example.comserver.ad.example.com with the corresponding values. For more details, see sssd-ad(5) - Linux
man page.
Set the file ownership and permissions on sssd.conf:
chown root:root /etc/sssd/sssd.conf
chmod 0600 /etc/sssd/sssd.conf
restorecon /etc/sssd/sssd.conf
RHEL/Cent OSRHEL/Cent OS
Use authconfig to enable SSSD, install oddjob-mkhomediroddjob-mkhomedir to make sure home directory creation works with SELinux:

© 1999-2017 Citrix Systems, Inc. All rights reserved. p.46https://docs.citrix.com
authconfig --enablesssd --enablesssdauth --enablemkhomedir –-update
sudo service sssd start
sudo chkconfig sssd on
To verify Kerberos is configured correctly for use with the Linux VDA, check that the system keyt abkeyt ab file has been created
and contains valid keys:
sudo klist -ke
This should display the list of keys available for the various combinations of principal names and cipher suites. Run the
Kerberos kinitkinit command to authenticate the machine with the domain controller using these keys:
sudo kinit –k MACHINE\$@REALM
The machine and realm names must be specified in uppercase, and the dollar sign ($$) must be escaped with a backslash (\\ ) to
prevent shell substitution. In some environments the DNS domain name is different from the Kerberos realm name; ensure
that the realm name is used. If this command is successful, no output is displayed.
Verify that the TGT ticket for the machine account has been cached using:
sudo klist
Use the get entget ent command to verify that the logon format it supported and whether the NSS works:

© 1999-2017 Citrix Systems, Inc. All rights reserved. p.47https://docs.citrix.com
sudo getent passwd DOMAIN\\username
The DOMAINDOMAIN parameter should be the short version domain name. If another logon format from Citrix Receiver is needed,
verify by using the get entget ent command first.
The supported logon formats are:
Down-level logon name: DOMAIN\username
UPN: [email protected]
NetBIOS Suffix format: username@DOMAIN
To verify that the SSSD PAM module is configured correctly, log on locally with a domain user account that has not logged
onto the machine previously.
sudo ssh localhost –l DOMAIN\\username
id -u
Check that a corresponding Kerberos credential cache file was created for the uiduid returned by the command:
ls /tmp/krb5cc_{uid}
Check that the tickets in the user’s Kerberos credential cache are valid and not expired:
klist
Inst all NVIDIA GRID drivers Inst all NVIDIA GRID drivers

© 1999-2017 Citrix Systems, Inc. All rights reserved. p.48https://docs.citrix.com
To enable HDX 3D Pro, additional installation steps are required to install the requisite graphics drivers on the hypervisor as
well as on the VDA machines.
Configure the following:
1. Citrix XenServer
2. VMware ESX
Follow the instructions for your chosen hypervisor.
Cit rix XenServerCit rix XenServer
This detailed section walks through the install and configuration of the NVIDIA GRID drivers on Citrix XenServer.
VMware ESXVMware ESX
Follow the information contained in this guide to install and configure the NVIDIA GRID drivers for VMware ESX.
VDA Machines VDA Machines
Follow these steps to install and configure the drivers for each of the Linux VM guests:
1. Before starting, ensure that the Linux VM is shut down.
2. In XenCenter, add a GPU in GPU Passthrough mode to the VM.
3. Start the RHEL VM.
To prepare the machine for the NVIDIA GRID drivers, the following steps are required:
yum install gcc
yum install "kernel-devel-uname-r == $(uname -r)"
systemctl set-default mult i-user.target
Once complete, follow the steps in the Red Hat Enterprise Linux document to install the NVIDIA GRID driver.
NoteDuring the GPU driver install, select the default ('no') for each question.
ImportantOnce GPU Passthrough has been enabled, the Linux VM is no longer accessible via XenCenter so you need to use SSH to connect.

© 1999-2017 Citrix Systems, Inc. All rights reserved. p.49https://docs.citrix.com
Set the correct configuration for the card:
etc/X11/ctx-nvidia.sh
To take advantage of large resolutions and multi-monitor capabilities, you need a valid NVIDIA license. To apply the license,
follow the product documentation from “GRID Licensing Guide.pdf - DU-07757-001 September 2015”.
1. Uninstall the old version
If you have previously installed a version of the Linux VDA earlier than v1.0, uninstall it before installing the new version.
(a) Stop the Linux VDA services:

© 1999-2017 Citrix Systems, Inc. All rights reserved. p.50https://docs.citrix.com
sudo /sbin/service ctxvda stop
sudo /sbin/service ctxhdx stop
(b) Uninstall the package:
sudo rpm -e XenDesktopVDA
NoteUpgrading from the latest two versions is supported.
NoteStarting with version 1.3, the installation path changed. In previous releases, installation components were located in /us r/local//us r/local/ ;
the new location is /opt/Citrix/VDA//opt/Citrix/VDA/ .
To execute a command, the full path is needed; alternately, you can add /opt/Citrix/VDA/s bin/opt/Citrix/VDA/s bin and /opt/Citrix/VDA/bin/opt/Citrix/VDA/bin to the
system path.
2. Install the Linux VDA
Install the Linux VDA software using Yum:
For RHEL 6/Cent OS 6:For RHEL 6/Cent OS 6:
sudo yum install -y XenDesktopVDA-7.12.0.375-1.el6_8.x86_64.rpm
For RHEL 7 /Cent OS 7 :For RHEL 7 /Cent OS 7 :

© 1999-2017 Citrix Systems, Inc. All rights reserved. p.51https://docs.citrix.com
sudo yum install -y XenDesktopVDA-7.12.0.375-1.el7_2.x86_64.rpm
Install the Linux VDA software using the RPM package manager; before doing so, you must resolve the following
dependencies:
For RHEL 6/Cent OS 6:For RHEL 6/Cent OS 6:
sudo rpm -i XenDesktopVDA-7.12.0.375-1.el6_8.x86_64.rpm
For RHEL 7 /Cent OS 7 :For RHEL 7 /Cent OS 7 :
sudo rpm -i XenDesktopVDA-7.12.0.375-1.el7_2.x86_64.rpm
RPM dependency list f or RHEL 6:RPM dependency list f or RHEL 6:
postgresql-jdbc >= 8.4
postgresql-server >= 8.4
java-1.7.0-openjdk >= 1.7.0
ImageMagick >= 6.5.4.7
GConf2 >= 2.28.0
system-config-firewall-base >= 1.2.27
policycoreutils-python >= 2.0.83

© 1999-2017 Citrix Systems, Inc. All rights reserved. p.52https://docs.citrix.com
policycoreutils-python >= 2.0.83
xorg-x11-server-ut ils >= 7.7
xorg-x11-xinit >= 1.0.9
ConsoleKit >= 0.4.1
dbus >= 1.2.24
dbus-x11 >= 1.2.24
gnome-session >= 2.28.0
libXpm >= 3.5.10
libXrandr >= 1.4.1
libXtst >= 1.2.2
openmotif >= 2.3.3
pam >= 1.1.1
util-linux-ng >= 2.17.2
bash >= 4.1
findutils >= 4.4
gawk >= 3.1
sed >= 4.2
cups >= 1.4.0
foomatic >= 4.0.0
openldap >= 2.4

© 1999-2017 Citrix Systems, Inc. All rights reserved. p.53https://docs.citrix.com
cyrus-sasl >= 2.1
cyrus-sasl-gssapi >= 2.1
libxml2 >= 2.7
RPM dependency list f or RHEL 7 :RPM dependency list f or RHEL 7 :
postgresql-server >= 9.2
postgresql-jdbc >= 9.2
java-1.8.0-openjdk >= 1.8.0
ImageMagick >= 6.7.8.9
firewalld >= 0.3.9
policycoreutils-python >= 2.0.83
dbus >= 1.6.12
dbus-x11 >= 1.6.12
xorg-x11-server-ut ils >= 7.7
xorg-x11-xinit >= 1.3.2
libXpm >= 3.5.10
libXrandr >= 1.4.1
libXtst >= 1.2.2
motif >= 2.3.4

© 1999-2017 Citrix Systems, Inc. All rights reserved. p.54https://docs.citrix.com
pam >= 1.1.8
util-linux >= 2.23.2
bash >= 4.2
findutils >= 4.5
gawk >= 4.0
sed >= 4.2
cups >= 1.6.0
foomatic-filters >= 4.0.9
openldap >= 2.4
cyrus-sasl >= 2.1
cyrus-sasl-gssapi >= 2.1
libxml2 >= 2.9
ImportantThe Linux VDA package requires a specific Xorg version.
For RHEL 6.8 and RHEL 7.2, the Linux VDA requires Xorg-x11-server-Xorg Version 1.17; do not upgrade this package.
3. Upgrade the Linux VDA (optional)
If you have previously installed Versions 1.3 or 1.4 of the Linux VDA, upgrade the Linux VDA software using Yum:
For RHEL 6/Cent OS 6:For RHEL 6/Cent OS 6:

© 1999-2017 Citrix Systems, Inc. All rights reserved. p.55https://docs.citrix.com
sudo yum install -y XenDesktopVDA-7.12.0.375-1.el6_8.x86_64.rpm
For RHEL 7 /Cent OS 7 :For RHEL 7 /Cent OS 7 :
sudo yum install -y XenDesktopVDA-7.12.0.375-1.el7_2.x86_64.rpm
Upgrade the Linux VDA software using the RPM package manager:
For RHEL 6/Cent OS 6:For RHEL 6/Cent OS 6:
sudo rpm -U XenDesktopVDA-7.12.0.375-1.el6_8.x86_64.rpm
For RHEL 7 /Cent OS 7 :For RHEL 7 /Cent OS 7 :
sudo rpm -U XenDesktopVDA-7.12.0.375-1.el7_2.x86_64.rpm
ImportantYou must reboot the Linux VDA machine after upgrading.
Once you have configured the Linux VDA using the ctxsetup.sh script, you use the following commands to control the Linux
VDA.
St art t he Linux VDASt art t he Linux VDA
To start the Linux VDA services:

© 1999-2017 Citrix Systems, Inc. All rights reserved. p.56https://docs.citrix.com
sudo /sbin/service ctxhdx start
sudo /sbin/service ctxvda start
St op t he Linux VDASt op t he Linux VDA
To stop the Linux VDA services:
sudo /sbin/service ctxvda stop
sudo /sbin/service ctxhdx stop
Rest art t he Linux VDARest art t he Linux VDA
To restart the Linux VDA services:
sudo /sbin/service ctxvda stop
sudo /sbin/service ctxhdx restart
sudo /sbin/service ctxvda start
Check t he st at us of t he Linux VDACheck t he st at us of t he Linux VDA
To check the running state of the Linux VDA services:

© 1999-2017 Citrix Systems, Inc. All rights reserved. p.57https://docs.citrix.com
sudo /sbin/service ctxvda status
sudo /sbin/service ctxhdx status
ImportantAfter installing the package, you must configure the Linux VDA by running the ctxs etup.s hctxs etup.s h script. If you have upgraded the package,
you must run the ctxs etup.s hctxs etup.s h script to finalize your upgrade. Before making any changes, this script will verify the environment and
ensure all dependencies are installed. If necessary, you can rerun this script at any time to change settings.
You can run the script manually with prompting, or automatically with preconfigured responses. Review Help about this
script before proceeding:
sudo /opt/Citrix/VDA/sbin/ctxsetup.sh --help
Prompted configuration
Run a manual configuration with prompted questions:
sudo /opt/Citrix/VDA/sbin/ctxsetup.sh
Automated configuration
For an automated install, provide the options required by the setup script with environment variables. If all required variables
are present, the script does not prompt for any information.
Supported environment variables include:
CT X_XDL_SUPPORT _DDC_AS_CNAMECT X_XDL_SUPPORT _DDC_AS_CNAME = Y | N - The Linux VDA supports specifying a Delivery Controller name using
a DNS CNAME record. This is typically set to N.

© 1999-2017 Citrix Systems, Inc. All rights reserved. p.58https://docs.citrix.com
CT X_XDL_DDC_LISTCT X_XDL_DDC_LIST = list-ddc-fqdns – The Linux VDA requires a space-separated list of Delivery Controller Fully
Qualif ied Domain Names. (FQDNs) to use for registering with a Delivery Controller. At least one FQDN or CNAME alias
must be specif ied.
CT X_XDL_VDA_PORTCT X_XDL_VDA_PORT = port-number – The Linux VDA communicates with Delivery Controllers using a TCP/IP port.
This is typically port 80.
CT X_XDL_REGIST ER_SERVICECT X_XDL_REGIST ER_SERVICE = Y | N - The Linux Virtual Desktop services support starting during boot. This is
typically set to Y.
CT X_XDL_ADD_FIREWALL_RULESCT X_XDL_ADD_FIREWALL_RULES = Y | N – The Linux Virtual Desktop services require incoming network
connections to be allowed through the system firewall. You can automatically open the required ports (by default ports
80 and 1494) in the system firewall for the Linux Virtual Desktop. This is typically set to Y.
CT X_XDL_AD_INT EGRAT IONCT X_XDL_AD_INT EGRAT ION = 1 | 2 | 3 | 4 – The Linux VDA requires Kerberos configuration settings to
authenticate with the Delivery Controllers. The Kerberos configuration is determined from the installed and configured
Active Directory integration tool on the system. Specify the supported Active Directory integration method to use:
1 – Samba Winbind
2 – Quest Authentication Service
3 – Centrify DirectControl
4 – SSSD
CT X_XDL_HDX_3D_PROCT X_XDL_HDX_3D_PRO = Y | N – Linux Virtual Desktop supports HDX 3D Pro, a set of graphics acceleration
technologies designed to optimize the virtualization of rich graphics applications. HDX 3D Pro requires a compatible
NVIDIA Grid graphics card to be installed. If HDX 3D Pro is selected, the Virtual Delivery Agent is configured for VDI
desktops (single-session) mode – (i.e. CTX_XDL_VDI_MODE=Y). This is not supported on SUSE. Ensure this value is set to
N.
CT X_XDL_VDI_MODECT X_XDL_VDI_MODE = Y | N - Whether to configure the machine as a dedicated desktop delivery model (VDI) or
hosted shared desktop delivery model. For HDX 3D Pro environments, set this to Y. This is typically set to N.
CT X_XDL_SIT E_NAMECT X_XDL_SIT E_NAME = dns-name – The Linux VDA discovers LDAP servers using DNS, querying for LDAP service
records. To limit the DNS search results to a local site, specify a DNS site name. This is typically empty [none].
CT X_XDL_LDAP_LISTCT X_XDL_LDAP_LIST = list-ldap-servers – The Linux VDA by default queries DNS to discover LDAP servers. However if
DNS cannot provide LDAP service records, you can provide a space-separated list of LDAP Fully Qualif ied Domain Names
(FQDNs) with LDAP port (e.g. ad1.mycompany.com:389). This is typically empty [none].
CT X_XDL_SEARCH_BASECT X_XDL_SEARCH_BASE = search-base – The Linux VDA by default queries LDAP using a search base set to the root
of the Active Directory Domain (e.g. DC=mycompany,DC=com). However to improve search performance, you can
specify a search base (e.g. OU=VDI,DC=mycompany,DC=com). This is typically empty [none].
CT X_XDL_ST ART _SERVICECT X_XDL_ST ART _SERVICE = Y | N - Whether or not the Linux VDA services are started when the Linux VDA
configuration is complete. This is typically set to Y.
Set the environment variable and run the configure script:

© 1999-2017 Citrix Systems, Inc. All rights reserved. p.59https://docs.citrix.com
export CTX_XDL_SUPPORT_DDC_AS_CNAME=Y|N
export CTX_XDL_DDC_LIST=list-ddc-fqdns
export CTX_XDL_VDA_PORT=port-number
export CTX_XDL_REGISTER_SERVICE=Y|N
export CTX_XDL_ADD_FIREWALL_RULES=Y|N
export CTX_XDL_AD_INTEGRATION=1|2|3|4
export CTX_XDL_HDX_3D_PRO=Y|N
export CTX_XDL_VDI_MODE=Y|N
export CTX_XDL_SITE_NAME=dns-name
export CTX_XDL_LDAP_LIST=list-ldap-servers
export CTX_XDL_SEARCH_BASE=search-base
export CTX_XDL_START_SERVICE=Y|N
sudo -E /opt/Citrix/VDA/sbin/ctxsetup.sh
You must provide the -E-E option with sudo to pass the existing environment variables to the new shell it creates. Citrix
recommends that you create a shell script file from the commands above with #!/bin/bash#!/bin/bash on the first line.
Alternatively, you can specify all parameters with a single command:

© 1999-2017 Citrix Systems, Inc. All rights reserved. p.60https://docs.citrix.com
sudo CTX_XDL_SUPPORT_DDC_AS_CNAME=Y|N \
CTX_XDL_DDC_LIST=list-ddc-fqdns \
CTX_XDL_VDA_PORT=port-number \
CTX_XDL_REGISTER_SERVICE=Y|N \
CTX_XDL_ADD_FIREWALL_RULES=Y|N \
CTX_XDL_AD_INTEGRATION=1|2|3|4 \
CTX_XDL_HDX_3D_PRO=Y|N \
CTX_XDL_VDI_MODE=Y|N \
CTX_XDL_SITE_NAME=dns-name \
CTX_XDL_LDAP_LIST=list-ldap-servers \
CTX_XDL_SEARCH_BASE=search-base \
CTX_XDL_START_SERVICE=Y|N \
/opt/Citrix/VDA/sbin/ctxsetup.sh
Remove configuration changes
In some scenarios, you might have to remove the configuration changes made by the ct xset up.sh ct xset up.sh script withoutuninstalling the Linux VDA package.
Review Help about this script before proceeding:
sudo /opt/Citrix/VDA/sbin/ctxcleanup.sh --help

© 1999-2017 Citrix Systems, Inc. All rights reserved. p.61https://docs.citrix.com
To remove configuration changes:
sudo /opt/Citrix/VDA/sbin/ctxcleanup.sh
ImportantThis script will delete all configuration data from the database and will make the Linux VDA inoperable.
Configuration logs
The ct xset up.shct xset up.sh and ct xcleanup.shct xcleanup.sh scripts display errors on the console, with additional information written to the
configuration log file /t mp/xdl.configure.log/t mp/xdl.configure.log.
Restart the Linux VDA services to have the changes take effect.
The process for creating machine catalogs and adding Linux VDA machines is very similar to the traditional Windows VDA
approach. For a more detailed description of how to complete these tasks, see Create Machine Catalogs and Manage
Machine Catalogs.
For creating machine catalogs that contain Linux VDA machines, there are a few restrictions that differentiate the process
from creating machine catalogs for Windows VDA machines:
For the operating system, select:
Window Server OS or Server OS option for a hosted shared desktops delivery model.
Windows Desktop OS or Desktop OS option for a VDI dedicated desktop delivery model.
Ensure that machines are set as not power managed.
Because PVS and MCS are not supported for Linux VDAs, choose the Another service or technology (existing images)
deployment method.
Do not mix Linux and Windows VDA machines in the same machine catalog.
NoteEarly versions of Citrix Studio did not support the notion of a "Linux OS"; however, selecting the Windows Server OS or Server OS
option implies an equivalent hosted shared desktops delivery model. Selecting the Windows Desktop OS or Desktop OS option
implies a XenDesktop single user per machine delivery model.
Tip
© 1999-2017 Citrix Systems, Inc. All rights reserved. p.62https://docs.citrix.com
If a machine leaves and is rejoined to the Active Directory domain, the machine will need to be removed and re-added again to the
machine catalog.
The process for creating a delivery group and adding machine catalogs containing Linux VDA machines is almost identical to
Windows VDA machines. For a more detailed description of how to complete these tasks, see Create Delivery Groups.
For creating delivery groups that contain Linux VDA machine catalogs, the following restrictions apply:
For the delivery type, select Desktops or Applications.
Ensure that the AD users and groups you select have been properly configured to log on to the Linux VDA machines.
Do not allow logon of unauthenticated (anonymous) users.
Do not mix the delivery group with machine catalogs that contain Windows machines.
ImportantPublishing applications is supported with Linux VDA version 1.4 and later. However, the Linux VDA does not support the delivery of
desktops and apps to the same machine.
The Citrix documentation for creating machine catalogs and delivery groups is referenced below:
XenDesktop 7.12
XenDesktop 7.11
XenDesktop 7.9
XenDesktop 7.8
XenDesktop 7.7
XenDesktop 7.6
XenDesktop 7.5
XenDesktop 7.1
Earlier versions of XenDesktop are not supported.

© 1999-2017 Citrix Systems, Inc. All rights reserved. p.63https://docs.citrix.com
Install Linux Virtual Delivery Agent for SUSE
Feb 06, 2017
1. Launch YaST tool
The SUSE Linux Enterprise YaST tool is used for configuring all aspects of the operating system.
To launch the text-based YaST tool:
su -
yast
Alternatively, launch the UI-based YaST tool:
su -
yast2 &
The following sections provide information on configuring the various networking settings and services used by the Linux
VDA. Configuring networking should be carried out via the YaST tool, not via other methods such as Network Manager.
These instructions are based on using the UI-based YaST tool; the text-based YaST tool can be used but has a different
method of navigation which is not documented here.
Configure hostname and DNS
1. Open YaST Network Settings.
2. SLED 12 Only: On the Global Opt ionsGlobal Opt ions tab, change the Net work Set up Met hodNet work Set up Met hod to Wicked ServiceWicked Service .
3. Open the Host name/DNSHost name/DNS tab.
4. Clear Change host name via DHCPChange host name via DHCP .
5. Check Assign Host name t o Loopback IPAssign Host name t o Loopback IP .
6. Edit the following to reflect your networking setup:
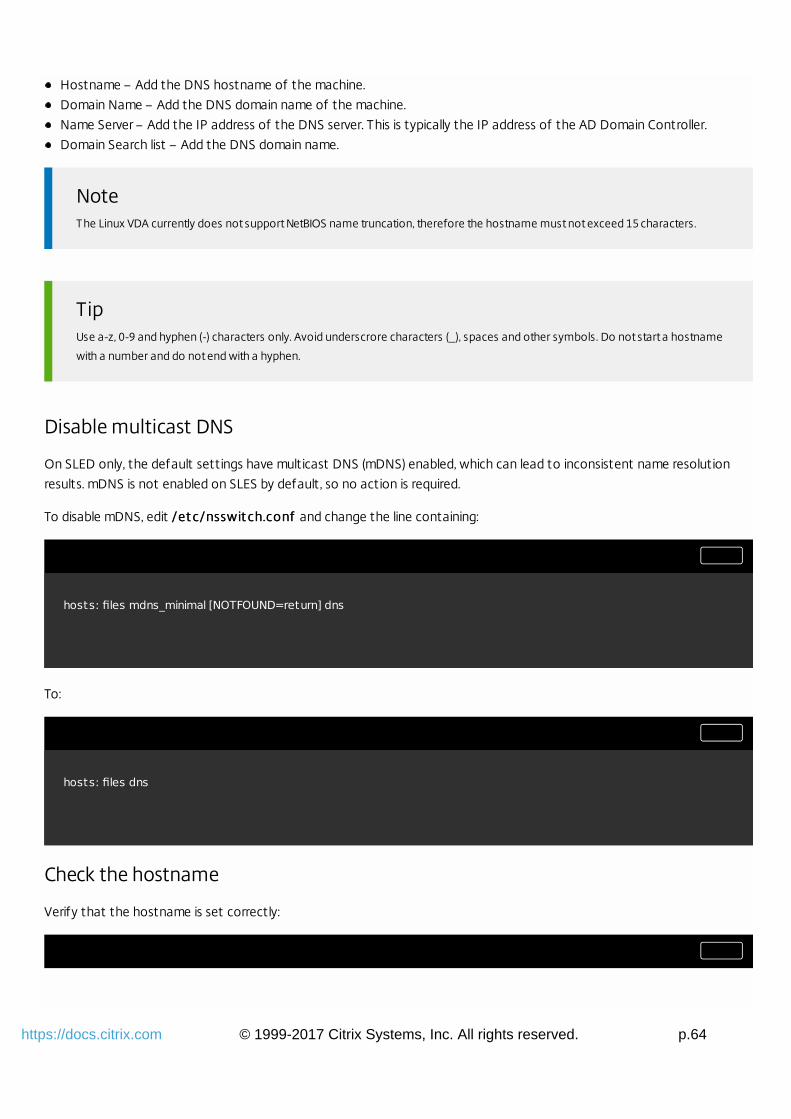
© 1999-2017 Citrix Systems, Inc. All rights reserved. p.64https://docs.citrix.com
Hostname – Add the DNS hostname of the machine.
Domain Name – Add the DNS domain name of the machine.
Name Server – Add the IP address of the DNS server. This is typically the IP address of the AD Domain Controller.
Domain Search list – Add the DNS domain name.
NoteThe Linux VDA currently does not support NetBIOS name truncation, therefore the hostname must not exceed 15 characters.
TipUse a-z, 0-9 and hyphen (-) characters only. Avoid underscrore characters (_), spaces and other symbols. Do not start a hostname
with a number and do not end with a hyphen.
Disable multicast DNS
On SLED only, the default settings have multicast DNS (mDNS) enabled, which can lead to inconsistent name resolution
results. mDNS is not enabled on SLES by default, so no action is required.
To disable mDNS, edit /et c/nsswit ch.conf/et c/nsswit ch.conf and change the line containing:
hosts: files mdns_minimal [NOTFOUND=return] dns
To:
hosts: files dns
Check the hostname
Verify that the hostname is set correctly:
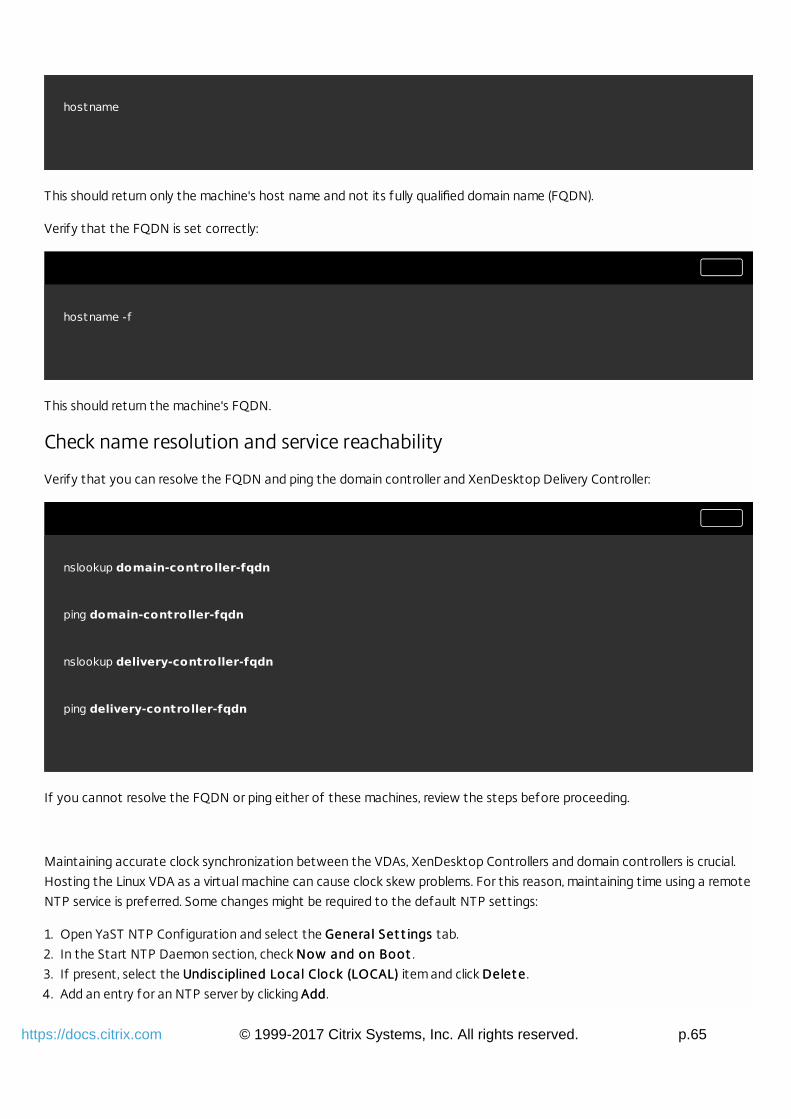
© 1999-2017 Citrix Systems, Inc. All rights reserved. p.65https://docs.citrix.com
hostname
This should return only the machine's host name and not its fully qualified domain name (FQDN).
Verify that the FQDN is set correctly:
hostname -f
This should return the machine's FQDN.
Check name resolution and service reachability
Verify that you can resolve the FQDN and ping the domain controller and XenDesktop Delivery Controller:
nslookup domain-controller-fqdn
ping domain-controller-fqdn
nslookup delivery-controller-fqdn
ping delivery-controller-fqdn
If you cannot resolve the FQDN or ping either of these machines, review the steps before proceeding.
Maintaining accurate clock synchronization between the VDAs, XenDesktop Controllers and domain controllers is crucial.
Hosting the Linux VDA as a virtual machine can cause clock skew problems. For this reason, maintaining time using a remote
NTP service is preferred. Some changes might be required to the default NTP settings:
1. Open YaST NTP Configuration and select the General Set t ingsGeneral Set t ings tab.
2. In the Start NTP Daemon section, check Now and on BootNow and on Boot .
3. If present, select the Undisciplined Local Clock (LOCAL)Undisciplined Local Clock (LOCAL) item and click Delet eDelet e .
4. Add an entry for an NTP server by clicking AddAdd.

© 1999-2017 Citrix Systems, Inc. All rights reserved. p.66https://docs.citrix.com
5. Select the Server T ypeServer T ype and click NextNext .
6. Enter the DNS name of the NTP server in the Address f ield. This service is normally hosted on the Active Directory
domain controller.
7. Leave the Options f ield unchanged.
8. Click T estT est to check that the NTP service is reachable.
9. Click OKOK through the set of windows to save the changes.
NoteFor SLES 12 implementations, if the NTP daemon fails to start, this might be due to a known SUSE issue with AppArmor policies.
Follow the resolution here for additional information.
The Linux VDA software for SUSE Linux Enterprise is dependent on the following packages:
PostgreSQL
SLED/SLES 11: Version 9.1 or later
SLED/SLES 12: Version 9.3 or later
OpenJDK 1.7.0
OpenMotif Runtime Environment 2.3.1 or later
Cups
SLED/SLES 11: Version 1.3.7 or later
SLED/SLES 12: Version 1.6.0 or later
Foomatic f ilters
SLED/SLES 11: Version 3.0.0 or later
SLED/SLES 12: Version 1.0.0 or later
ImageMagick
SLED/SLES 11: Version 6.4.3.6 or later
SLED/SLES 12: Version 6.8 or later
Add repositories
Some required packages are not available in all SUSE Linux Enterprise repositories:
SLED 11: PostgreSQL is available for SLES 11 but not SLED 11.
SLES 11: OpenJDK and OpenMotif are available for SLED 11 but not SLES 11.
SLED 12: PostgreSQL is available for SLES 12 but not SLED 12. ImageMagick is available via the SLE 12 SDK ISO or online
repository.
SLES 12: There are no issues; all packages are available. ImageMagick is available via the SLE 12 SDK ISO or online
repository.
To resolve this, the recommended approach is to obtain missing packages from the media for the alternate edition of SLE
from which you are installing. That is, on SLED install missing packages from the SLES media, and on SLES install missing
packages from the SLED media. The approach described below mounts both SLED and SLES ISO media files and adds
repositories.

© 1999-2017 Citrix Systems, Inc. All rights reserved. p.67https://docs.citrix.com
SLED 11
sudo mkdir -p /mnt/sles
sudo mount -t iso9660 \
path-to-iso/SLES-11-SP4-DVD-x86_64-GM-DVD1.iso /mnt/sles
sudo zypper ar -f /mnt/sles sles
SLES 11
sudo mkdir -p /mnt/sled
sudo mount -t iso9660 \
path-to-iso/SLED-11-SP4-DVD-x86_64-GM-DVD1.iso /mnt/sled
sudo zypper ar -f /mnt/sled sled
SLED 12
sudo mkdir -p /mnt/sles
sudo mount -t iso9660 \
path-to-iso/SLES-12-SP1-DVD-x86_64-GM-DVD1.iso /mnt/sles
sudo zypper ar -f /mnt/sles sles
SLED/SLES 12
sudo mkdir -p /mnt/sdk
sudo mount -t iso9660 \
path-to-iso/SLE-12-SP1-SDK-DVD-x86_64-GM-DVD1.iso /mnt/sdk
sudo zypper ar -f /mnt/sdk sdk
Install Kerberos client
Install the Kerberos client for mutual authentication between the Linux VDA with the XenDesktop Controllers:
sudo zypper install krb5-client
The Kerberos client configuration is dependent on which Active Directory integration approach is used, which is described
later.
Install OpenJDK

© 1999-2017 Citrix Systems, Inc. All rights reserved. p.68https://docs.citrix.com
The Linux VDA dependent on OpenJDK 1.7.0.
TipTo avoid problems, make sure you only installed the 1.7.0 version of OpenJDK. Remove all other versions of Java on your system.
SLED
On SLED, the Java runtime environment should have been installed with the operating system. Confirm this with:
sudo zypper info java-1_7_0-openjdk
Update to the latest version if status is reported as out-of-date:
sudo zypper update java-1_7_0-openjdk
Check the Java version:
java -version
SLES
On SLES, the Java runtime environment needs to be installed:
sudo zypper install java-1_7_0-openjdk
Check the Java version:
java -version
Install PostgreSQL
SLED/SLES11
Install the packages:
sudo zypper install libecpg6
sudo zypper install postgresql-init
sudo zypper install postgresql
sudo zypper install postgresql-server
sudo zypper install postgresql-jdbc
Some post-installation steps are required to initialize the database service and ensure PostgreSQL starts
on boot:
sudo /sbin/insserv postgresql
sudo /etc/init.d/postgresql restart
Install the packages:

© 1999-2017 Citrix Systems, Inc. All rights reserved. p.69https://docs.citrix.com
SLED/SLES12
sudo zypper install postgresql-init
sudo zypper install postgresql-server
sudo zypper install postgresql-jdbc
Post-installation steps are required to initialize the database service and ensure PostgreSQL starts on
boot:
sudo systemctl enable postgresql
sudo systemctl restart postgresql
Database files will reside under /var/lib/pgsql/data.
Remove repositories
With dependent packages installed, the alternative edition repositories setup earlier can now be removed and the media
unmounted:
SLED 11
Remove the following packages:
sudo zypper rr sles
sudo umount /mnt/sles
sudo rmdir /mnt/sles
SLES 11
Remove the following packages:
sudo zypper rr sled
sudo umount /mnt/sled
sudo rmdir /mnt/sled
SLED 12
Remove the following packages:
sudo zypper rr sles
sudo umount /mnt/sles
sudo rmdir /mnt/sles
SLED/SLES 12
Remove the following packages:
sudo zypper rr sdk
sudo umount /mnt/sdk
sudo rmdir /mnt/sdk

© 1999-2017 Citrix Systems, Inc. All rights reserved. p.70https://docs.citrix.com
Some changes are required when running the Linux VDA as a virtual machine on a supported hypervisor. Make the following
changes according to the hypervisor platform in use. No changes are required if you are running the Linux machine on bare
metal hardware.
Fix time synchronization on Citrix XenServer
If the XenServer T ime Sync feature is enabled, within each paravirtualized Linux VM you will experience issues with NTP and
XenServer both trying to manage the system clock. To avoid the clock becoming out of sync with other servers, the system
clock within each Linux guest must be synchronized with NTP. This requires disabling host time synchronization. No changes
are required in HVM mode.
On some Linux distributions, if you are running a paravirtualized Linux kernel with XenServer Tools installed, you can check
whether the XenServer T ime Sync feature is present and enabled from within the Linux VM:
su -
cat /proc/sys/xen/independent_wallclock
This will return either:
0 - The time sync feature is enabled, and needs to be disabled.
1 - The time sync feature is disabled, and no further action is required.
If the /proc/sys/xen/indepent _wallclock/proc/sys/xen/indepent _wallclock file is not present, the following steps are not required.
If enabled, disable the time sync feature by writing 11 to the file:
sudo echo 1 > /proc/sys/xen/independent_wallclock
To make this change permanent and persist after reboot, edit the /et c/sysct l.conf /et c/sysct l.conf file and add the line:

© 1999-2017 Citrix Systems, Inc. All rights reserved. p.71https://docs.citrix.com
xen.independent_wallclock = 1
To verify these changes, reboot the system:
reboot
After reboot, check that this has been set correctly:
su -
cat /proc/sys/xen/independent_wallclock
This should return the value 1.
Fix time synchronization on Microsoft Hyper-V
Linux VMs with Hyper-V Linux Integration Services installed can leverage the Hyper-V time synchronization feature to use
the host operating system's time. To ensure the system clock remains accurate, this feature should be enabled alongside
NTP services.
From the management operating system:
1. Open the Hyper-V Manager console.
2. For the settings of a Linux VM, select Int egrat ion ServicesInt egrat ion Services .
3. Ensure T ime synchronizat ionT ime synchronizat ion is selected.
NoteThis approach is different from VMware and XenServer, where host time synchronization is disabled to avoid conflicts with NTP.
Hyper-V time synchronization can coexist and supplement NTP time synchronization.
Fix time synchronization on ESX and ESXi

© 1999-2017 Citrix Systems, Inc. All rights reserved. p.72https://docs.citrix.com
If the VMware Time Synchronization feature is enabled, within each paravirtualized Linux VM you will experience issues with
NTP and the hypervisor both trying to synchronize the system clock. To avoid the clock becoming out of sync with other
servers, the system clock within each Linux guest must be synchronized with NTP. This requires disabling host time
synchronization.
If you are running a paravirtualized Linux kernel with VMware Tools installed:
1. Open the vSphere Client.
2. Edit settings for the Linux VM.
3. In the Virt ual Machine Propert iesVirt ual Machine Propert ies dialog, open the Opt ionsOpt ions tab.
4. Select VMware T oolsVMware T ools .
5. In the AdvancedAdvanced box, clear Synchronize guest t ime wit h hostSynchronize guest t ime wit h host .
There are a number of methods for adding Linux machines to the Active Directory domain that are supported by
XenDesktop for Linux:
Samba Winbind
Quest Authentication Service
Centrify DirectControl
Follow the instructions below for your chosen method.
Samba Winbind
Join Windows DomainJoin Windows Domain
This requires that your domain controller is reachable and you have an Active Directory user account with permissions to
add machines to the domain:
1. Open YaST Windows Domain Membership.
2. Make the following changes:
Set the Domain or Workgroup to the name of your Active Directory domain or the IP address of the domain controller.
Ensure the domain is entered in uppercase.
Check Also Use SMB information for Linux Authentication.
Check Create Home Directory on Login.
Check Single Sign-on for SSH.
Ensure Offline Authentiation is not checked. This option is not compatible with the Linux VDA.
3. Click OKOK . If prompted to install some packages, click Inst allInst all.
4. If a domain controller is found, it will ask whether you want to join the domain. Click YesYes.
5. When prompted, enter the credentials of a domain user with permission to add computers to the domain and click OKOK .
6. A message indicating success is displayed.
7. If prompted to install some samba and krb5 packages, click Inst allInst all.

© 1999-2017 Citrix Systems, Inc. All rights reserved. p.73https://docs.citrix.com
YaST might have indicated that these changes will require some services to be restarted or the machine needs to be
rebooted. It is advisable to reboot:
su -
reboot
SLED/SLES 12 Only: Pat ch Kerberos credent ial cache nameSLED/SLES 12 Only: Pat ch Kerberos credent ial cache name
SLED/SLES 12 has changed the default Kerberos credential cache name specification from the usual FILE:/t mp/krb5cc_%FILE:/t mp/krb5cc_%
{ uid}{ uid} to DIR:/run/user/% { uid} /krb5ccDIR:/run/user/% { uid} /krb5cc . This new DIR caching method is not compatible with the Linux VDA and must be
manually changed. As root, edit /et c/krb5.conf/et c/krb5.conf and add the following setting under the [libdef ault s][libdef ault s] section if not set:
default_ccache_name = FILE:/tmp/krb5cc_%{uid}
Verif y domain membershipVerif y domain membership
The XenDesktop Controller requires that all VDA machines, whether Windows or Linux, have a computer object in Active
Directory.
Verify that the machine is joined to a domain using Samba's net ads command:
sudo net ads test join
Verify additional domain and computer object information with:
sudo net ads info

© 1999-2017 Citrix Systems, Inc. All rights reserved. p.74https://docs.citrix.com
Verif y t he Kerberos configurat ion Verif y t he Kerberos configurat ion
To verify Kerberos is configured correctly for use with the Linux VDA, check that the system keytab file has been created
and contains valid keys:
sudo klist –ke
This should display the list of keys available for the various combinations of principal names and cipher suites. Run the
Kerberos kinit command to authenticate the machine with the domain controller using these keys:
sudo kinit -k MACHINE\$@REALM
The machine and realm names must be specified in uppercase, and the dollar sign ($) must be escaped with a backslash (\) to
prevent shell substitution. In some environments, the DNS domain name is different from the Kerberos realm name; ensure
the realm name is used. If this command is successful, no output is displayed.
Verify that the TGT ticket for the machine account has been cached using:
sudo klist
Examine the machine account details using:
sudo net ads status
Verif y user aut hent icat ion Verif y user aut hent icat ion
Use the wbinfo tool to verify that domain users can authenticate with the domain:

© 1999-2017 Citrix Systems, Inc. All rights reserved. p.75https://docs.citrix.com
wbinfo --krb5auth=domain\\username%password
The domain specified here is the AD domain name, not the Kerberos realm name. For the bash shell, the backslash (\)
character must be escaped with another backslash. This command will return a message indicating success or failure.
To verify that the Winbind PAM module is configured correctly, log on locally with a domain user account that has not
logged onto the machine previously:
ssh localhost -l domain\\username
id -u
Check that a corresponding Kerberos credential cache file was created for the uid returned by the id -uid -u command:
ls /tmp/krb5cc_uid
Check that the tickets in the user’s Kerberos credential cache are valid and not expired:
klist
Exit the session

© 1999-2017 Citrix Systems, Inc. All rights reserved. p.76https://docs.citrix.com
exit
A similar test can be performed by logging onto the Gnome or KDE console directly.
Quest authentication service
Configure Quest on Domain Cont rollerConfigure Quest on Domain Cont roller
This assumes you have installed and configured the Quest software on the Active Directory domain controllers, and have
been granted administrative privileges to create computer objects in Active Directory.
Enable Domain Users t o Log on t o Linux VDA MachinesEnable Domain Users t o Log on t o Linux VDA Machines
For each domain user that needs to establish HDX sessions on a Linux VDA machine:
1. In the Active Directory Users and Computers management console, open Active Directory user properties for that user
account.
2. Select Unix AccountUnix Account tab.
3. Check Unix-enabledUnix-enabled.
4. Set the Primary GID NumberPrimary GID Number to the group ID of an actual domain user group.
NoteThese instructions are equivalent for setting up domain users for logon using the console, RDP, SSH or any other remoting protocol.
Configure Quest on Linux VDA Configure Quest on Linux VDA
Configure VAS daemonConfigure VAS daemon
Auto-renewal of Kerberos tickets needs to be enabled and disconnected; authentication (offline logon) needs to be
disabled:

© 1999-2017 Citrix Systems, Inc. All rights reserved. p.77https://docs.citrix.com
sudo /opt/quest/bin/vastool configure vas vasd \
auto-t icket-renew-interval 32400
sudo /opt/quest/bin/vastool configure vas vas_auth \
allow-disconnected-auth false
This sets the renewal interval to 9 hours (32400 seconds) which is an hour less than the default 10 hour ticket lifetime. Set
this parameter to a lower value on systems with a shorter Kerberos ticket lifetime.
Configure PAM and NSSConfigure PAM and NSS
Quest requires that PAM and NSS be manually configured to enable domain user login via HDX and other services such as
su, ssh, and RDP. To configure PAM and NSS:
sudo /opt/quest/bin/vastool configure pam
sudo /opt/quest/bin/vastool configure nss
Join Windows DomainJoin Windows Domain
Join the Linux machine to the Active Directory domain using the Quest vastool command:
sudo /opt/quest/bin/vastool -u user join domain-name
The user is any domain user with permissions to join computers to the Active Directory domain. The domain-name is the
DNS name of the domain; for example, example.com.
Verif y Domain MembershipVerif y Domain Membership
The XenDesktop Controller requires that all VDA machines, whether Windows or Linux, have a computer object in Active
Directory. To verify that a Quest-joined Linux machine is on the domain:

© 1999-2017 Citrix Systems, Inc. All rights reserved. p.78https://docs.citrix.com
sudo /opt/quest/bin/vastool info domain
If the machine is joined to a domain, the domain name is returned. If not joined, you will see the following error:
ERROR: No domain could be found.
ERROR: VAS_ERR_CONFIG: at ctx.c:414 in _ctx_init_default_realm
default_realm not configured in vas.conf. Computer may not be joined to domain
Verif y User Aut hent icat ionVerif y User Aut hent icat ion
To verify that Quest can authenticate domain users using PAM, log on with a domain user account that has not logged
onto the machine previously:
ssh localhost -l domain\\username
id -u
Check that a corresponding Kerberos credential cache file was created for the uid returned by the id -uid -u command:
ls /tmp/krb5cc_uid
Check that the tickets in user’s Kerberos credential cache are valid and not expired:

© 1999-2017 Citrix Systems, Inc. All rights reserved. p.79https://docs.citrix.com
/opt/quest/bin/vastool klist
Exit the session:
exit
A similar test can be performed by logging onto the Gnome or KDE console directly.
Centrify DirectControl
Join Windows DomainJoin Windows Domain
With the Centrify DirectControl Agent installed, join the Linux machine to the Active Directory domain using the
Centrify adjoinadjoin command:
su –
adjoin -w -V -u user domain-name
The useruser parameter is any Active Directory domain user with permissions to join computers to the Active Directory domain.
The domain-name parameter is the name of the domain to join the Linux machine to.
Verif y Domain MembershipVerif y Domain Membership
The XenDesktop Controller requires that all VDA machines, whether Windows or Linux, have a computer object in Active
Directory. To verify that a Centrify-joined Linux machine is on the domain:

© 1999-2017 Citrix Systems, Inc. All rights reserved. p.80https://docs.citrix.com
su –
adinfo
Check that the Joined t o domainJoined t o domain value is valid and the Cent rif yDCCent rif yDC modemode returns connect edconnect ed. If the mode remains stuck
in the starting state, then the Centrify client is experiencing server connection or authentication problems.
More comprehensive system and diagnostic information is available using:
adinfo --sysinfo all
adinfo –diag
To test connectivity to the various Active Directory and Kerberos services:
adinfo --test
Uninstall the old version
If you have previously installed a version of the Linux VDA older than V. 1.1, uninstall it before installing the new version.
(a) Stop the Linux VDA services:
sudo /sbin/service ctxvda stop
sudo /sbin/service ctxhdx stop

© 1999-2017 Citrix Systems, Inc. All rights reserved. p.81https://docs.citrix.com
(b) Uninstall the package:
sudo rpm -e XenDesktopVDA
ImportantUpgrading from the latest two versions is supported.
NoteStarting with Version 1.3, the installation path has changed. In previous releases, installation components were located
in /us r/local//us r/local/ ; the new location is /opt/Citrix/VDA//opt/Citrix/VDA/ .
To execute a command, the full path is needed; alternately, you can add /opt/Citrix/VDA/s bin/opt/Citrix/VDA/s bin and /opt/Citrix/VDA/bin/opt/Citrix/VDA/bin to the
system path.
Install the Linux VDA
Install the Linux VDA software using Zypper:
For SUSE 11:For SUSE 11:
sudo zypper install XenDesktopVDA-7.12.0.375-1.sle11_4.x86_64.rpm
For SUSE 12:For SUSE 12:
sudo zypper install XenDesktopVDA-7.12.0.375-1.sle12_1.x86_64.rpm
Install the Linux VDA software using the RPM package manager; before doing so, you must resolve the following

© 1999-2017 Citrix Systems, Inc. All rights reserved. p.82https://docs.citrix.com
dependencies before installation:
For SUSE 11:For SUSE 11:
sudo rpm -i XenDesktopVDA-7.12.0.375-1.sle11_4.x86_64.rpm
For SUSE 12:For SUSE 12:
sudo rpm -i XenDesktopVDA-7.12.0.375-1.sle12_1.x86_64.rpm
Upgrade the Linux VDA
If you have previously installed v1.2 or v1.3 of the Linux VDA, upgrade the Linux VDA software using the RPM package
manager:
For SUSE 11:For SUSE 11:
sudo rpm -U XenDesktopVDA-7.12.0.375-1.sle11_4.x86_64.rpm
For SUSE 12:For SUSE 12:
sudo rpm -U XenDesktopVDA-7.12.0.375-1.sle12_1.x86_64.rpm
RPM Dependency list f or SUSE 11RPM Dependency list f or SUSE 11
postgresql-server >= 9.1.9

© 1999-2017 Citrix Systems, Inc. All rights reserved. p.83https://docs.citrix.com
postgresql-server >= 9.1.9
postgresql-jdbc >= 9.1
java-1_7_0-openjdk >= 1.7.0.6
ImageMagick >= 6.4.3.6
ConsoleKit >= 0.2.10
dbus-1 >= 1.2.10
dbus-1-x11 >= 1.2.10
xorg-x11-libXpm >= 7.4
xorg-x11-libs >= 7.4
openmotif-libs >= 2.3.1
pam >= 1.1.5
libdrm >= 2.4.41
libpixman-1-0 >= 0.24.4
Mesa >= 9.0
openssl >= 0.9.8j
xorg-x11 >= 7.4
xorg-x11-fonts-core >= 7.4
xorg-x11-libXau >= 7.4
xorg-x11-libXdmcp >= 7.4
bash >= 3.2
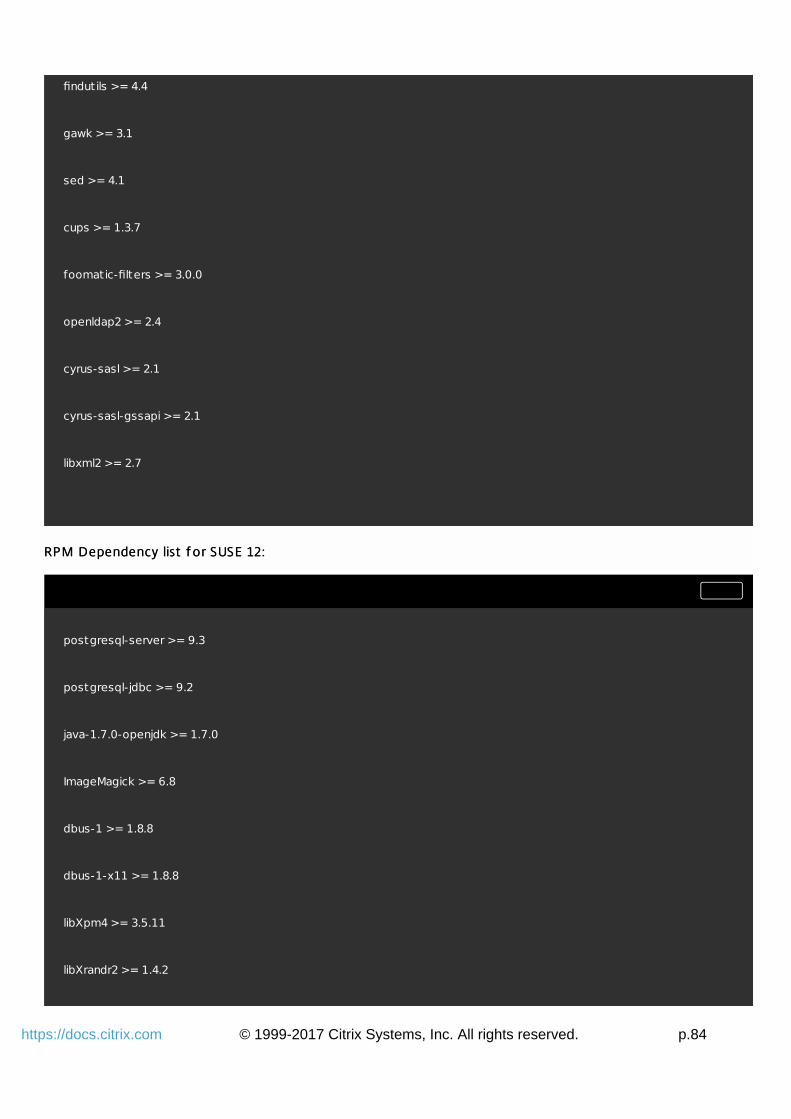
© 1999-2017 Citrix Systems, Inc. All rights reserved. p.84https://docs.citrix.com
findutils >= 4.4
gawk >= 3.1
sed >= 4.1
cups >= 1.3.7
foomatic-filters >= 3.0.0
openldap2 >= 2.4
cyrus-sasl >= 2.1
cyrus-sasl-gssapi >= 2.1
libxml2 >= 2.7
RPM Dependency list f or SUSE 12:RPM Dependency list f or SUSE 12:
postgresql-server >= 9.3
postgresql-jdbc >= 9.2
java-1.7.0-openjdk >= 1.7.0
ImageMagick >= 6.8
dbus-1 >= 1.8.8
dbus-1-x11 >= 1.8.8
libXpm4 >= 3.5.11
libXrandr2 >= 1.4.2

© 1999-2017 Citrix Systems, Inc. All rights reserved. p.85https://docs.citrix.com
libXtst6 >= 1.2.2
motif >= 2.3
pam >= 1.1.8
bash >= 4.2
findutils >= 4.5
gawk >= 4.1
sed >= 4.2
cups >= 1.6.0
cups-filters-foomatic-rip >= 1.0.0
openldap2 >= 2.4
cyrus-sasl >= 2.1
cyrus-sasl-gssapi >= 2.1
libxml2 >= 2.9
ImportantYou must reboot the Linux VDA machine after upgrading.
Once you have configured the Linux VDA using the ctxsetup.sh script, you use the following commands to control the Linux
VDA.
St art t he Linux VDASt art t he Linux VDA
To start the Linux VDA service:

© 1999-2017 Citrix Systems, Inc. All rights reserved. p.86https://docs.citrix.com
sudo /sbin/service ctxhdx start
sudo /sbin/service ctxvda start
St op t he Linux VDASt op t he Linux VDA
To stop the Linux VDA service:
sudo /sbin/service ctxvda stop
sudo /sbin/service ctxhdx stop
Rest art t he Linux VDARest art t he Linux VDA
To restart the Linux VDA service:
sudo /sbin/service ctxvda stop
sudo /sbin/service ctxhdx restart
sudo /sbin/service ctxvda start
Check t he Linux VDA st at usCheck t he Linux VDA st at us
To check the status of the Linux VDA:

© 1999-2017 Citrix Systems, Inc. All rights reserved. p.87https://docs.citrix.com
sudo /sbin/service ctxvda status
sudo /sbin/service ctxhdx status
After installing the package, you must configure the Linux VDA by running the ct xset up.shct xset up.sh script. If you have upgraded the
package, you must run the ct xset up.shct xset up.sh script to finalize your upgrade. Before making any changes, this script will verify the
environment and ensure all dependencies are installed. If nevessary, you can rerun this script at any time to change settings.
You can run the script manually with prompting, or automatically with preconfigured responses. Review Help about this
script before proceeding:
sudo /opt/Citrix/VDA/sbin/ctxsetup.sh –help
Prompted configuration
Run a manual configuration with prompted questions:
sudo /opt/Citrix/VDA/sbin/ctxsetup.sh
Automated configuration
For an automated install, provide the options required by the setup script with environment variables. If all required variables
are present, the script does not prompt for any information.
Supported environment variables include:
CT X_XDL_SUPPORT _DDC_AS_CNAME = Y | NCT X_XDL_SUPPORT _DDC_AS_CNAME = Y | N - The Linux VDA supports specifying a Delivery Controller name
using a DNS CNAME record. This is typically set to N.
CT X_XDL_DDC_LIST = list -ddc-f qdnsCT X_XDL_DDC_LIST = list -ddc-f qdns – The Linux VDA requires a space-separated list of Delivery Controller Fully
Qualif ied Domain Names. (FQDNs) to use for registering with a Delivery Controller. At least one FQDN or CNAME alias
must be specif ied.
CT X_XDL_VDA_PORT = port -numberCT X_XDL_VDA_PORT = port -number – The Linux VDA communicates with Delivery Controllers using a TCP/IP port.

© 1999-2017 Citrix Systems, Inc. All rights reserved. p.88https://docs.citrix.com
This is typically port 80.
CT X_XDL_REGIST ER_SERVICE = Y | NCT X_XDL_REGIST ER_SERVICE = Y | N - The Linux Virtual Desktop services support starting during boot. This is
typically set to Y.
CT X_XDL_ADD_FIREWALL_RULES = Y | NCT X_XDL_ADD_FIREWALL_RULES = Y | N – The Linux Virtual Desktop services require incoming network
connections to be allowed through the system firewall. You can automatically open the required ports (by default ports
80 and 1494) in the system firewall for the Linux Virtual Desktop. This is typically set to Y.
CT X_XDL_AD_INT EGRAT ION = 1 | 2 | 3 | 4CT X_XDL_AD_INT EGRAT ION = 1 | 2 | 3 | 4 – The Linux VDA requires Kerberos configuration settings to
authenticate with the Delivery Controllers. The Kerberos configuration is determined from the installed and configured
Active Directory integration tool on the system. Specify the supported Active Directory integration method to use:
1 – Samba Winbind
2 – Quest Authentication Service
3 – Centrify DirectControl
4 – SSSD
CT X_XDL_HDX_3D_PRO= Y | NCT X_XDL_HDX_3D_PRO= Y | N – Linux Virtual Desktop supports HDX 3D Pro, a set of graphics acceleration
technologies designed to optimize the virtualization of rich graphics applications. HDX 3D Pro requires a compatible
NVIDIA Grid graphics card to be installed. If HDX 3D Pro is selected, the Virtual Delivery Agent is configured for VDI
desktops (single-session) mode – (i.e. CTX_XDL_VDI_MODE=Y). This is not supported on SUSE. Ensure this value is set to
N.
CT X_XDL_VDI_MODE = Y | NCT X_XDL_VDI_MODE = Y | N - Whether to configure the machine as a dedicated desktop delivery model (VDI) or
hosted shared desktop delivery model. For HDX 3D Pro environments, set this to Y. This is typically set to N.
CT X_XDL_SIT E_NAME = dns-nameCT X_XDL_SIT E_NAME = dns-name – The Linux VDA discovers LDAP servers using DNS, querying for LDAP service
records. To limit the DNS search results to a local site, specify a DNS site name. This is typically empty [none].
CT X_XDL_LDAP_LIST = list -ldap-serversCT X_XDL_LDAP_LIST = list -ldap-servers – The Linux VDA by default queries DNS to discover LDAP servers.
However if DNS cannot provide LDAP service records, you can provide a space-separated list of LDAP Fully Qualif ied
Domain Names (FQDNs) with LDAP port (e.g. ad1.mycompany.com:389). This is typically empty [none].
CT X_XDL_SEARCH_BASE = search-baseCT X_XDL_SEARCH_BASE = search-base – The Linux VDA by default queries LDAP using a search base set to the
root of the Active Directory Domain (e.g. DC=mycompany,DC=com). However to improve search performance, you can
specify a search base (e.g. OU=VDI,DC=mycompany,DC=com). This is typically empty [none].
CT X_XDL_ST ART _SERVICE = Y | NCT X_XDL_ST ART _SERVICE = Y | N - Whether or not the Linux VDA services are started when the Linux VDA
configuration is complete. This is typically set to Y.
NoteHDX 3D Pro is not currently available on SUSE.
Set the environment variable and run the configure script:

© 1999-2017 Citrix Systems, Inc. All rights reserved. p.89https://docs.citrix.com
export CTX_XDL_SUPPORT_DDC_AS_CNAME=Y|N
export CTX_XDL_DDC_LIST=list-ddc-fqdns
export CTX_XDL_VDA_PORT=port-number
export CTX_XDL_REGISTER_SERVICE=Y|N
export CTX_XDL_ADD_FIREWALL_RULES=Y|N
export CTX_XDL_AD_INTEGRATION=1|2|3|4
export CTX_XDL_HDX_3D_PRO=Y|N
export CTX_XDL_VDI_MODE=Y|N
export CTX_XDL_SITE_NAME=dns-name
export CTX_XDL_LDAP_LIST=list-ldap-servers
export CTX_XDL_SEARCH_BASE=search-base
export CTX_XDL_START_SERVICE=Y|N
sudo -E /opt/Citrix/VDA/sbin/ctxsetup.sh
You must provide the -E-E option with sudo to pass the existing environment variables to the new shell it creates. Citrix
recommends that you create a shell script file from the commands above with #!/bin/bash#!/bin/bash on the first line.
Alternatively, you can specify all parameters with a single command:

© 1999-2017 Citrix Systems, Inc. All rights reserved. p.90https://docs.citrix.com
sudo CTX_XDL_SUPPORT_DDC_AS_CNAME=Y|N \
CTX_XDL_DDC_LIST=list-ddc-fqdns \
CTX_XDL_VDA_PORT=port-number \
CTX_XDL_REGISTER_SERVICE=Y|N \
CTX_XDL_ADD_FIREWALL_RULES=Y|N \
CTX_XDL_AD_INTEGRATION=1|2|3|4 \
CTX_XDL_HDX_3D_PRO=Y|N \
CTX_XDL_VDI_MODE=Y|N \
CTX_XDL_SITE_NAME=dns-name \
CTX_XDL_LDAP_LIST=list-ldap-servers \
CTX_XDL_SEARCH_BASE=search-base \
CTX_XDL_START_SERVICE=Y|N \
/opt/Citrix/VDA/sbin/ctxsetup.sh
Remove configuration changes
In some scenarios, you might have to remove the configuration changes made by the ct xset up.shct xset up.sh script without
uninstalling the Linux VDA package.
Review Help about this script before proceeding:
sudo /usr/local/sbin/ctxcleanup.sh --help

© 1999-2017 Citrix Systems, Inc. All rights reserved. p.91https://docs.citrix.com
To remove configuration changes:
sudo /usr/local/sbin/ctxcleanup.sh
ImportantThis script will delete all configuration data from the database and will make the Linux VDA inoperable.
Configuration logs
The ct xset up.shct xset up.sh and ct xcleanup.shct xcleanup.sh scripts display errors on the console, with additional information written to a
configuration log file:
/tmp/xdl.configure.log
Restart the Linux VDA services to have the changes take effect.
The process for creating machine catalogs and adding Linux VDA machines is very similar to the traditional Windows VDA
approach. For a more detailed description of how to complete these tasks, see Create Machine Catalogs and Manage
Machine Catalogs.
For creating machine catalogs that contain Linux VDA machines, there are a few restrictions that differentiates the
process from creating machine catalogs for Windows VDA machines:
For operating system, select:
Window Server OS or Server OS option for a hosted shared desktops delivery model.
Windows Desktop OS or Desktop OS option for a VDI dedicated desktop delivery model.
Ensure machines are set as not power managed.
As PVS and MCS are not supported for Linux VDAs, choose the Anot her service or t echnologyAnot her service or t echnology (existing images)
deployment method.
Do not mix Linux and Windows VDA machines in the same machine catalog.
Note

© 1999-2017 Citrix Systems, Inc. All rights reserved. p.92https://docs.citrix.com
Early versions of Citrix Studio did not support the notion of a "Linux OS"; however, selecting the Windows Server OS or Server OS
option implies an equivalent hosted shared desktops delivery model. Selecting the Windows Desktop OS or Desktop OS option
implies a XenDesktop single user per machine delivery model.
TipIf a machine leaves and is rejoined to the Active Directory domain, the machine will need to be removed and re-added again to the
machine catalog.
The process for creating a delivery group and adding machine catalogs containing Linux VDA machines is almost identical to
Windows VDA machines. For a more detailed description of how to complete these tasks, see Create Delivery Groups.
For creating delivery groups that contain Linux VDA machine catalogs, the following restrictions apply:
For delivery type, select Desktops or Applications.
Ensure the AD users and groups you select have been properly configured to log on to the Linux VDA machines.
Do not allow logon of unauthenticated (anonymous) users.
Do not mix the delivery group with machine catalogs that contain Windows machines.
ImportantPublishing applications is supported with Linux VDA version 1.4 and later. However, the Linux VDA does not support the delivery of
desktops and apps to the same machine.
The Citrix documentation for creating machine catalogs and delivery groups is referenced below:
XenDesktop 7.12
XenDesktop 7.11
XenDesktop 7.9
XenDesktop 7.8
XenDesktop 7.7
XenDesktop 7.6
XenDesktop 7.5
XenDesktop 7.1
Earlier versions of XenDesktop are not supported.

© 1999-2017 Citrix Systems, Inc. All rights reserved. p.93https://docs.citrix.com
Install Linux Virtual Delivery Agent for Ubuntu
Feb 06, 2017
Verify the network configuration
Citrix recommends that the network is connected and properly configured correctly before proceeding.
Set the hostname
To ensure that the hostname of the machine is reported correctly, change the /et c/host name /et c/host name file to contain only the
hostname of the machine.
host namehost name
Assign a loopback address to the hostname
To ensure that the DNS domain name and FQDN of the machine are reported back correctly, change the following line of
the /et c/host s /et c/host s file to include the FQDN and hostname as the first two entries:
127.0.0.1 host name-f qdn host namehost name-f qdn host name localhost
For example:
127.0.0.1 vda01.example.com vda01 localhost
Remove any other references to host name-f qdnhost name-f qdn or host namehost name from other entries in the file.
NoteThe Linux VDA currently does not support NetBIOS name truncation, therefore the hostname must not exceed 15 characters.
TipUse a-z, A-Z, 0-9 and hyphen (-) characters only. Avoid underscrore characters (_), spaces and other symbols. Do not start a
hostname with a number and do not end with a hyphen.
Check the hostname
Verify that the hostname is set correctly:

© 1999-2017 Citrix Systems, Inc. All rights reserved. p.94https://docs.citrix.com
hostname
This should return only the machine's host name and not its fully qualified domain name (FQDN).
Verify that the FQDN is set correctly:
hostname -f
This should return the machine's FQDN.
Disable multicast DNS
The default settings have multicast DNS (mDNSmDNS ) enabled, which can lead to inconsistent name resolution results.
To disable mDNSmDNS , edit /et c/nsswit ch.conf/et c/nsswit ch.conf and change the line containing:
hosts: files mdns_minimal [NOTFOUND=return] dns
To:
hosts: files dns
Check name resolution and service reachability
Verify that you can resolve the FQDN and ping the domain controller and XenDesktop Delivery Controller:

© 1999-2017 Citrix Systems, Inc. All rights reserved. p.95https://docs.citrix.com
nslookup domain-controller-fqdn
ping domain-controller-fqdn
nslookup delivery-controller-fqdn
ping delivery-controller-fqdn
If you cannot resolve the FQDN or ping either of these machines, review the steps before proceeding.
Configure clock synchronization (chrony)
Maintaining accurate clock synchronization between the VDAs, XenDesktop Controllers and domain controllers is crucial.
Hosting the Linux VDA as a virtual machine can cause clock skew problems. For this reason, synchronizing time with a
remote time service is preferred.
Install chrony:
apt-get install chrony
As root, edit /et c/chrony/chrony.conf/et c/chrony/chrony.conf and add a server entry for each remote time server:
server peer1-fqdn-or-ip-address iburst
server peer2-fqdn-or-ip-address iburst
In a typical deployment, time should be synchronized from the local domain controllers and not directly from public NTP
pool servers. Add a server entry for each Active Directory domain controller in the domain.
Remove any other serverserver or poolpool entries listed including loopback IP address, localhost, and public server * .pool.nt p.org*.pool.nt p.org
entries.
Save changes and restart the Chrony daemon:

© 1999-2017 Citrix Systems, Inc. All rights reserved. p.96https://docs.citrix.com
sudo systemctl restart chrony
Install OpenJDK
The Linux VDA is dependent on OpenJDK. The runtime environment should have been installed as part of the operating
system installation. Confirm this with:
sudo apt-get install -y default-jdk
Install PostgreSQL
The Linux VDA requires PostgreSQL version 9.x on Ubuntu 16.04:
sudo apt-get install -y postgresql
sudo apt-get install -y libpostgresql-jdbc-java
Install Motif
sudo apt-get install -y libxm4
Install other packages

© 1999-2017 Citrix Systems, Inc. All rights reserved. p.97https://docs.citrix.com
sudo apt-get install -y libsasl2-2
sudo apt-get install -y libsasl2-modules-gssapi-mit
sudo apt-get install -y libldap-2.4-2
sudo apt-get install -y krb5-user
sudo apt-get install -y cups
Some changes are required when running the Linux VDA as a virtual machine on a supported hypervisor. Make the following
changes according to the hypervisor platform in use. No changes are required if you are running the Linux machine on bare
metal hardware.
Fix time synchronization on Citrix XenServer
If the XenServer T ime Sync feature is enabled, within each paravirtualized Linux VM you will experience issues with NTP and
XenServer both trying to manage the system clock. To avoid the clock becoming out of sync with other servers, the system
clock within each Linux guest must be synchronized with NTP. This requires disabling host time synchronization. No changes
are required in HVM mode.
On some Linux distributions, if you are running a paravirtualized Linux kernel with XenServer Tools installed, you can check
whether the XenServer T ime Sync feature is present and enabled from within the Linux VM:
su -
cat /proc/sys/xen/independent_wallclock
This will return either:
0 - The time sync feature is enabled, and needs to be disabled.
1 - The time sync feature is disabled, and no further action is required.
If the /proc/sys/xen/indepent_wallclock file is not present, the following steps are not required.
If enabled, disable the time sync feature by writing 1 to the file:

© 1999-2017 Citrix Systems, Inc. All rights reserved. p.98https://docs.citrix.com
sudo echo 1 > /proc/sys/xen/independent_wallclock
To make this change permanent and persist after reboot, edit the /et c/sysct l.conf file/et c/sysct l.conf file and add the line:
xen.independent_wallclock = 1
To verify these changes, reboot the system:
su -
cat /proc/sys/xen/independent_wallclock
This should return the value 1.
Fix time synchronization on Microsoft Hyper-V
Linux VMs with Hyper-V Linux Integration Services installed can leverage the Hyper-V time synchronization feature to use
the host operating system's time. To ensure the system clock remains accurate, this feature should be enabled alongside
NTP services.
From the management operating system:
1. Open the Hyper-V Manager console.
2. For the settings of a Linux VM, select Int egrat ion ServicesInt egrat ion Services .
3. Ensure T ime synchronizat ionT ime synchronizat ion is selected.
NoteThis approach is different from VMware and XenServer, where host time synchronization is disabled to avoid conflicts with NTP.
Hyper-V time synchronization can coexist and supplement NTP time synchronization.

© 1999-2017 Citrix Systems, Inc. All rights reserved. p.99https://docs.citrix.com
Fix time synchronization on ESX and ESXi
If the VMware Time Synchronization feature is enabled, within each paravirtualized Linux VM you will experience issues with
NTP and the hypervisor both trying to synchronize the system clock. To avoid the clock becoming out of sync with other
servers, the system clock within each Linux guest must be synchronized with NTP. This requires disabling host time
synchronization.
If you are running a paravirtualized Linux kernel with VMware Tools installed:
1. Open the vSphere Client.
2. Edit settings for the Linux VM.
3. In the Virt ual Machine Propert iesVirt ual Machine Propert ies dialog, open the Opt ionsOpt ions tab.
4. Select VMware T oolsVMware T ools .
5. In the AdvancedAdvanced box, clear Synchronize guest t ime wit h hostSynchronize guest t ime wit h host .
There are a number of methods for adding Linux machines to the Active Directory domain that are supported by
XenDesktop for Linux:
Samba Winbind
Quest Authentication Service
Centrify DirectControl
Follow the instructions below for your chosen method.
Samba Winbind
Install or update the required packages:
sudo apt-get install winbind samba libnss-winbind libpam-winbind krb5-config krb5-locales krb5-user
Enable Winbind Daemon t o St art on BootEnable Winbind Daemon t o St art on Boot
The Winbind daemon must be configured to start on boot:
sudo systemctl enable winbind
Configure KerberosConfigure Kerberos

© 1999-2017 Citrix Systems, Inc. All rights reserved. p.100https://docs.citrix.com
Open /etc/krb5.conf as root, and make the following settings:
[libdefaults]
default_realm = REALM
dns_lookup_kdc = false
[realms]
REALM = {
admin_server = domain-controller-fqdn
kdc = domain-controller-fqdn
}
[domain_realm]
domain-dns-name = REALM
.domain-dns-name = REALM
The domain-dns-namedomain-dns-name property in this context is the DNS domain name, such as example.comexample.com. The REALM REALM is the
Kerberos realm name in uppercase, such as EXAMPLE.COMEXAMPLE.COM .
Configure Winbind Aut hent icat ionConfigure Winbind Aut hent icat ion
You should configure manually since Ubuntu does not have a tool like authconfig in RHEL and yast2 in SUSE.
Open /etc/samba/smb.conf, and make the following settings:

© 1999-2017 Citrix Systems, Inc. All rights reserved. p.101https://docs.citrix.com
[global]
workgroup = WORKGROUP
security = ADS
realm = RELEAM
encrypt passwords = yes
idmap config *:range = 16777216-33554431
winbind trusted domains only = no
kerberos method = secrets and keytab
winbind refresh t ickets = yes
template shell = /bin/bash
WORKGROUP WORKGROUP is the first field in REALMREALM , and REALM is the Kerberos realm name in uppercase.
Configure nsswit chConfigure nsswit ch
Open /etc/nsswitch.conf, and append winbind to the following lines:
passwd: compat winbind
group: compat winbind
Join Windows DomainJoin Windows Domain
This requires that your domain controller is reachable and you have an Active Directory user account with permissions to
add computers to the domain:

© 1999-2017 Citrix Systems, Inc. All rights reserved. p.102https://docs.citrix.com
sudo net ads join REALM -U user
Where REALM is the Kerberos realm name in uppercase, and user is a domain user with permissions to add computers to the
domain.
Rest art winbind:Rest art winbind:
sudo systemctl restart winbind
Configure PAM f or WinbindConfigure PAM f or Winbind
Run the following command, ensure the Winbind NT /Act ive Direct ory aut hent icat ionWinbind NT /Act ive Direct ory aut hent icat ion, and Creat e home direct oryCreat e home direct ory
on loginon login is checked:
sudo pam-auth-update
TipThe winbind daemon will stay running only if the machine is joined to a domain.
Verif y Domain MembershipVerif y Domain Membership
The XenDesktop Controller requires that all VDA machines, whether Windows or Linux, have a computer object in Active
Directory.
Verify the machine is joined to a domain using Samba's net adsads command:

© 1999-2017 Citrix Systems, Inc. All rights reserved. p.103https://docs.citrix.com
sudo net ads test join
Additional domain and computer object information can be verified with:
sudo net ads info
Verif y Kerberos Configurat ionVerif y Kerberos Configurat ion
To verify Kerberos is configured correctly for use with the Linux VDA, check that the system keyt abkeyt ab file has been created
and contains valid keys:
sudo klist -ke
This should display the list of keys available for the various combinations of principal names and cipher suites. Run the
Kerberos kinit command to authenticate the machine with the domain controller using these keys:
sudo kinit -k MACHINE\$@REALM
The machine and realm names must be specified in uppercase, and the dollar sign ($) must be escaped with a backslash (\) to
prevent shell substitution. In some environments the DNS domain name is different from the Kerberos realm name; ensure
the realm name is used. If this command is successful, no output is displayed.
Verify that the TGT ticket for the machine account has been cached using:

© 1999-2017 Citrix Systems, Inc. All rights reserved. p.104https://docs.citrix.com
sudo klist
Examine the machine’s account details using:
sudo net ads status
Verif y User Aut hent icat ionVerif y User Aut hent icat ion
Use the wbinf owbinf o tool to verify that domain users can authenticate with the domain:
wbinfo --krb5auth=domain\\username%password
The domain specified here is the AD domain name, not the Kerberos realm name. For the bash shell, the backslash (\)
character must be escaped with another backslash. This command will return a message indicating success or failure.
To verify that the Winbind PAM module is configured correctly, log on locally with a domain user account that has not
logged onto the machine previously:
ssh localhost -l domain\\username
id -u
Check that a corresponding Kerberos credential cache file was created for the uid returned by the id -uid -u command:

© 1999-2017 Citrix Systems, Inc. All rights reserved. p.105https://docs.citrix.com
ls /tmp/krb5cc_uid
Check that the tickets in the user’s Kerberos credential cache are valid and not expired:
klist
Exit the session:
exit
A similar test can be performed by logging onto the Gnome or KDE console directly.
TipIf you succeed in user authentication but can't show your desktop when logging in with a domain account, restart the machine and
then try again.
Quest authentication service
Configure Quest on Domain Cont rollerConfigure Quest on Domain Cont roller
This assumes you have installed and configured the Quest software on the Active Directory domain controllers, and have
been granted administrative privileges to create computer objects in Active Directory.
Enable Domain Users t o Log on t o Linux VDA MachinesEnable Domain Users t o Log on t o Linux VDA Machines
For each domain user that needs to establish HDX sessions on a Linux VDA machine:
1. In the Active Directory Users and Computers management console, open Active Directory user properties for that user
account.
2. Select Unix AccountUnix Account tab.
3. Check Unix-enabledUnix-enabled.
4. Set the Primary GID NumberPrimary GID Number to the group ID of an actual domain user group.

© 1999-2017 Citrix Systems, Inc. All rights reserved. p.106https://docs.citrix.com
NoteThese instructions are equivalent for setting up domain users for logon using the console, RDP, SSH or any other remoting protocol.
Configure Quest on Linux VDA Configure Quest on Linux VDA
Workaround SELinux Policy Enf orcementWorkaround SELinux Policy Enf orcement
The default RHEL environment has SELinux fully enforced. This interferes with the Unix domain socket IPC mechanisms
used by Quest and prevents domain users from logging on.
TipThere are a few ways to workaround outlined here.
The easiest is to disable SELinux. As root, edit /et c/selinux/config/et c/selinux/config and change the SELinuxSELinux setting:
SELINUX=disabled
This change requires a reboot:
reboot
ImportantUse this setting carefully. Reenabling SELinux policy enforcement after disabling can cause a complete lockout, even for the root
user and other local users.
Configure VAS daemonConfigure VAS daemon
Auto-renewal of Kerberos tickets needs to be enabled and disconnected; authentication (offline logon) needs to be
disabled:

© 1999-2017 Citrix Systems, Inc. All rights reserved. p.107https://docs.citrix.com
sudo /opt/quest/bin/vastool configure vas vasd auto-t icket-renew-interval 32400
sudo /opt/quest/bin/vastool configure vas vas_auth allow-disconnected-auth false
This sets the renewal interval to 9 hours (32400 seconds) which is an hour less than the default 10 hour ticket lifetime. Set
this parameter to a lower value on systems with a shorter ticket lifetime.
Configure PAM and NSSConfigure PAM and NSS
Quest requires that PAM and NSS be manually configured to enable domain user login via HDX and other services such as
su, ssh, and RDP. To configure PAM and NSS:
sudo /opt/quest/bin/vastool configure pam
sudo /opt/quest/bin/vastool configure nss
Join Windows DomainJoin Windows Domain
Join the Linux machine to the Active Directory domain using the Quest vastool command:
sudo /opt/quest/bin/vastool -u user join domain-name
The user is any domain user with permissions to join computers to the Active Directory domain. The domain-name is the
DNS name of the domain; for example, example.com.
Verif y Domain MembershipVerif y Domain Membership
The XenDesktop Controller requires that all VDA machines, whether Windows or Linux, have a computer object in Active
Directory. To verify that a Quest-joined Linux machine is on the domain:

© 1999-2017 Citrix Systems, Inc. All rights reserved. p.108https://docs.citrix.com
sudo /opt/quest/bin/vastool info domain
If the machine is joined to a domain this will return the domain name. If not joined, you will see the following error:
ERROR: No domain could be found.
ERROR: VAS_ERR_CONFIG: at ctx.c:414 in _ctx_init_default_realm
default_realm not configured in vas.conf. Computer may not be joined to domain
Verif y User Aut hent icat ionVerif y User Aut hent icat ion
To verify that Quest can authenticate domain users using PAM, log on with a domain user account that has not logged
onto the machine previously:
ssh localhost -l domain\\username
id -u
Check that a corresponding Kerberos credential cache file was created for the UID returned by the id -uid -u command:
ls /tmp/krb5cc_uid
Check that the tickets in user’s Kerberos credential cache are valid and not expired:

© 1999-2017 Citrix Systems, Inc. All rights reserved. p.109https://docs.citrix.com
/opt/quest/bin/vastool klist
Exit the session:
exit
Centrify DirectControl
Join Windows DomainJoin Windows Domain
With the Centrify DirectControl Agent installed, join the Linux machine to the Active Directory domain using the
Centrify adjoin command:
su –
adjoin -w -V -u user domain-name
The user user parameter is any Active Directory domain user with permissions to join computers to the Active Directory domain.
The domain-namedomain-name parameter is the name of the domain to join the Linux machine to.
Verif y Domain MembershipVerif y Domain Membership
The XenDesktop Controller requires that all VDA machines, whether Windows or Linux, have a computer object in Active
Directory. To verify that a Centrify-joined Linux machine is on the domain:
su –
adinfo

© 1999-2017 Citrix Systems, Inc. All rights reserved. p.110https://docs.citrix.com
Check that the Joined t o domainJoined t o domain value is valid and the Cent rif yDC mode Cent rif yDC mode returns connect edconnect ed. If the mode remains stuck
in the starting state, then the Centrify client is experiencing server connection or authentication problems.
More comprehensive system and diagnostic information is available using:
adinfo --sysinfo all
adinfo --diag
To test connectivity to the various Active Directory and Kerberos services:
adinfo --test
Configure SSSD on Linux VDA
Configure KerberosConfigure Kerberos
Inst all kerberosInst all kerberos
sudo apt-get install krb5-user
To configure Kerberos, open /etc/krb5.conf as root, and make the following settings:

© 1999-2017 Citrix Systems, Inc. All rights reserved. p.111https://docs.citrix.com
[libdefaults]
default_realm = REALM
dns_lookup_kdc = false
[realms]
REALM = {
admin_server = domain-controller-fqdn
kdc = domain-controller-fqdn
}
[domain_realm]
domain-dns-name = REALM
.domain-dns-name = REALM
The domain-dns-name property in this context is the DNS domain name, such as example.com. The REALMREALM is the Kerberos
realm name in uppercase, such as EXAMPLE.COM.
Join t he domainJoin t he domain
SSSD must be configured to use Active Directory as its Identity provider and Kerberos for authentication. However, SSSD
does not provide AD client functions for joining the domain and managing the system keytab file. There are a few methods
achieving this:
adcli
samba
realmd
NoteThis section only provides information for adcliadcli and s ambas amba .

© 1999-2017 Citrix Systems, Inc. All rights reserved. p.112https://docs.citrix.com
Use adcli t o join t he domainUse adcli t o join t he domain
Inst all adcliInst all adcli
Install the required package:
sudo apt-get install adcli
Join Domain wit h adcliJoin Domain wit h adcli
Remove the old system keytab file and join the domain using:
su -
rm -rf /etc/krb5.keytab
adcli join domain-dns-name -U user -H hostname-fqdn
The user user is a domain user with permission to add machines to the domain, the host name-f qdnhost name-f qdn is the hostname in fqdn
format for the machine.
The -H-H option is needed to let adcli generate SPN in this format: host/hostname-fqdn@REALM, which is required by the
Linux VDA.
Verif y Syst em Keyt abVerif y Syst em Keyt ab
The capabilities of the adcliadcli tool are limited and do not provide a way to test whether a machine is joined to the domain.
The best alternative to ensure the system keytab file has been created:
sudo klist -ket
Verify that the timestamp for each key matches the time the machine was joined to the domain.

© 1999-2017 Citrix Systems, Inc. All rights reserved. p.113https://docs.citrix.com
Use samba t o join t he domainUse samba t o join t he domain
Inst all t he packageInst all t he package
sudo apt-get install samba
Configure sambaConfigure samba
Open /etc/samba/smb.conf, and make the following settings:
[global]
workgroup = WORKGROUP
security = ADS
realm = RELEAM
client signing = yes
client use spnego = yes
kerberos method = secrets and keytab
WORKGROUPWORKGROUP is the first field in REALMREALM , and REALM is the Kerberos realm name in uppercase.
Join t he domain wit h sambaJoin t he domain wit h samba
This requires that your domain controller is reachable and you have a Windows account with permissions to add computers
to the domain.

© 1999-2017 Citrix Systems, Inc. All rights reserved. p.114https://docs.citrix.com
sudo net ads join REALM -U user
Where REALMREALM is the Kerberos realm name in uppercase, and user user is a domain user with permissions to add computers to
the domain.
Set up SSSDSet up SSSD
Inst all or Updat e Required PackagesInst all or Updat e Required Packages
Install the required SSSD and configuration packages if not already installed:
sudo apt-get install sssd
If the packages are already installed, an update is recommended:
sudo apt-get update sssd
NoteBy default, the install process in Ubuntu will automatically configure ns s witch.conf ns s witch.conf and the PAM login module.
Configure SSSDConfigure SSSD
SSSD configuration changes are required before starting the SSSD daemon. For some versions of SSSD, the
/et c/sssd/sssd.conf/et c/sssd/sssd.conf configuration file is not installed by default and must be manually created. As root, either create or
open /et c/sssd/sssd.conf /et c/sssd/sssd.conf and make the following settings:
[sssd]
services = nss, pam

© 1999-2017 Citrix Systems, Inc. All rights reserved. p.115https://docs.citrix.com
config_file_version = 2
domains = domain-dns-name
[domain/domain-dns-name]
id_provider = ad
access_provider = ad
auth_provider = krb5
krb5_realm = REALM
# Set krb5_renewable_lifet ime higher if TGT renew lifet ime is longer than 14 days
krb5_renewable_lifet ime = 14d
# Set krb5_renew_interval to lower value if TGT t icket lifet ime is shorter than 2 hours
krb5_renew_interval = 1h
krb5_ccachedir = /tmp
krb5_ccname_template = FILE:%d/krb5cc_%U
# This ldap_id_mapping sett ing is also the default value
ldap_id_mapping = true
override_homedir = /home/%d/%u
default_shell = /bin/bash
ad_gpo_map_remote_interactive = +ctxhdx

© 1999-2017 Citrix Systems, Inc. All rights reserved. p.116https://docs.citrix.com
Noteldap_id_mapping is set to truetrue so that SSSD itself takes care of mapping Windows SIDs to Unix UIDs. Otherwise, the Active Directory
must be able to provide POSIX extensions (for more information, see the RHEL site). PAM service ctxhdx is added into
ad_gpo_map_remote_interactive. For more information, see SSSD GPO-Based Access Control.
The domain-dns-name property in this context is the DNS domain name, such as example.com. The REALM is the Kerberos
realm name in uppercase, such as EXAMPLE.COM. There is no requirement to configure the NetBIOS domain name.
TipFor information on these configuration settings, see the man pages for sssd.conf and sssd-ad.
The SSSD daemon requires that the configuration file must have owner read permission only:
sudo chmod 0600 /etc/sssd/sssd.conf
St art SSSD daemonSt art SSSD daemon
Start the SSSD daemon and enable it to start on boot:
sudo systemctl start sssd
sudo systemctl enable sssd
PAM configurat ionPAM configurat ion
Run the following command, and ensure the S S S a uthe ntica tio nS S S a uthe ntica tio n and C re a te ho me dire cto ry o n lo ginC re a te ho me dire cto ry o n lo gin are selected:
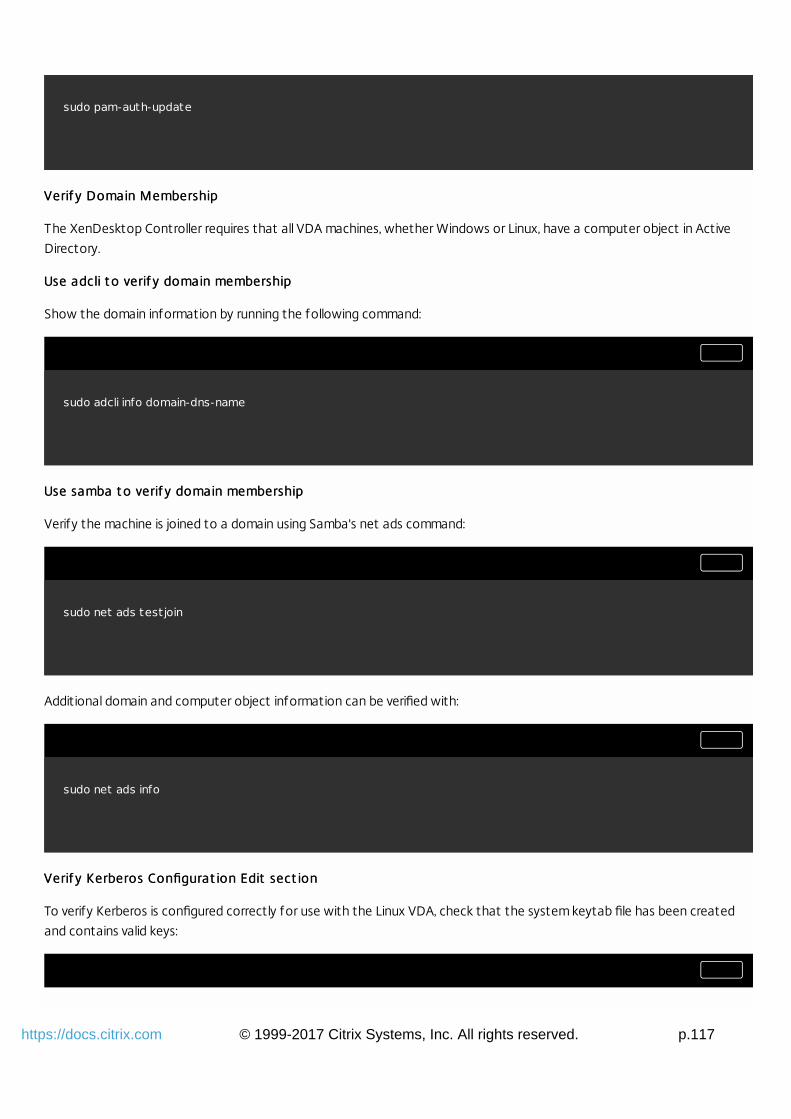
© 1999-2017 Citrix Systems, Inc. All rights reserved. p.117https://docs.citrix.com
sudo pam-auth-update
Verif y Domain MembershipVerif y Domain Membership
The XenDesktop Controller requires that all VDA machines, whether Windows or Linux, have a computer object in Active
Directory.
Use adcli t o verif y domain membershipUse adcli t o verif y domain membership
Show the domain information by running the following command:
sudo adcli info domain-dns-name
Use samba t o verif y domain membershipUse samba t o verif y domain membership
Verify the machine is joined to a domain using Samba's net ads command:
sudo net ads test join
Additional domain and computer object information can be verified with:
sudo net ads info
Verif y Kerberos Configurat ion Edit sect ionVerif y Kerberos Configurat ion Edit sect ion
To verify Kerberos is configured correctly for use with the Linux VDA, check that the system keytab file has been created
and contains valid keys:
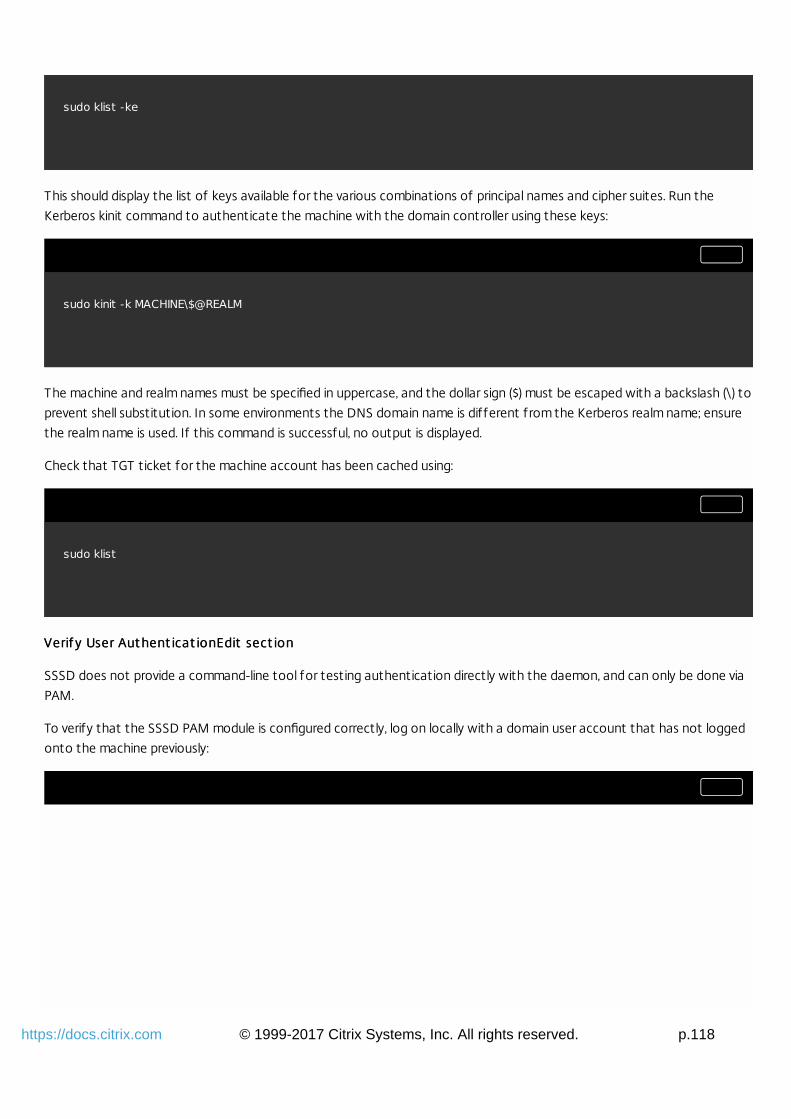
© 1999-2017 Citrix Systems, Inc. All rights reserved. p.118https://docs.citrix.com
sudo klist -ke
This should display the list of keys available for the various combinations of principal names and cipher suites. Run the
Kerberos kinit command to authenticate the machine with the domain controller using these keys:
sudo kinit -k MACHINE\$@REALM
The machine and realm names must be specified in uppercase, and the dollar sign ($) must be escaped with a backslash (\) to
prevent shell substitution. In some environments the DNS domain name is different from the Kerberos realm name; ensure
the realm name is used. If this command is successful, no output is displayed.
Check that TGT ticket for the machine account has been cached using:
sudo klist
Verif y User Aut hent icat ionEdit sect ionVerif y User Aut hent icat ionEdit sect ion
SSSD does not provide a command-line tool for testing authentication directly with the daemon, and can only be done via
PAM.
To verify that the SSSD PAM module is configured correctly, log on locally with a domain user account that has not logged
onto the machine previously:

© 1999-2017 Citrix Systems, Inc. All rights reserved. p.119https://docs.citrix.com
ssh localhost -l domain\\username
id -u
klist
exit
Check that the Keberos tickets returned by the klistklist command are correct for that user and have not expired.
As root, check that a corresponding ticket cache file was created for the uid returned by the previous id -uid -u command:
ls /tmp/krb5cc_uid
A similar test can be performed by logging onto KDE or Gnome Display Manager.
1. Install the Linux VDA
Install the Linux VDA software using the Debian package manager:
sudo dpkg -i xendesktopvda_7.12.0.375-1.ubuntu16.04_amd64.deb
Debian dependency list for Ubuntu:
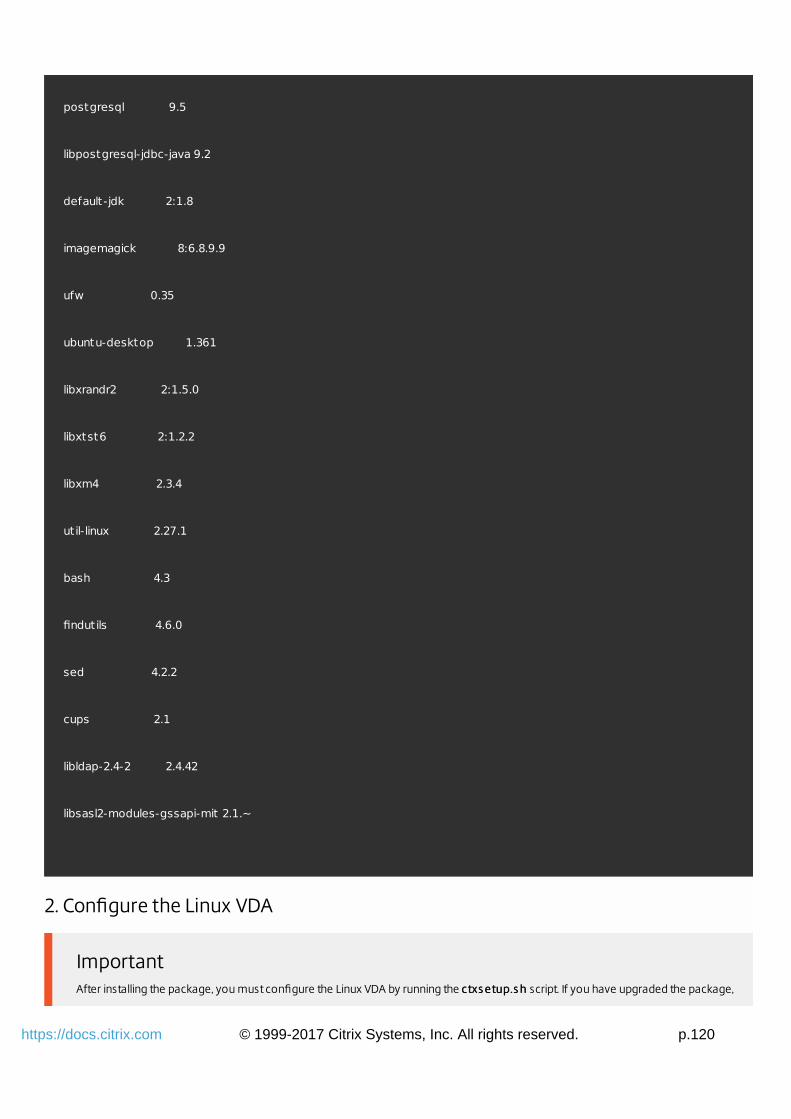
© 1999-2017 Citrix Systems, Inc. All rights reserved. p.120https://docs.citrix.com
postgresql 9.5
libpostgresql-jdbc-java 9.2
default-jdk 2:1.8
imagemagick 8:6.8.9.9
ufw 0.35
ubuntu-desktop 1.361
libxrandr2 2:1.5.0
libxtst6 2:1.2.2
libxm4 2.3.4
util-linux 2.27.1
bash 4.3
findutils 4.6.0
sed 4.2.2
cups 2.1
libldap-2.4-2 2.4.42
libsasl2-modules-gssapi-mit 2.1.~
2. Configure the Linux VDA
ImportantAfter installing the package, you must configure the Linux VDA by running the ctxs etup.s hctxs etup.s h script. If you have upgraded the package,
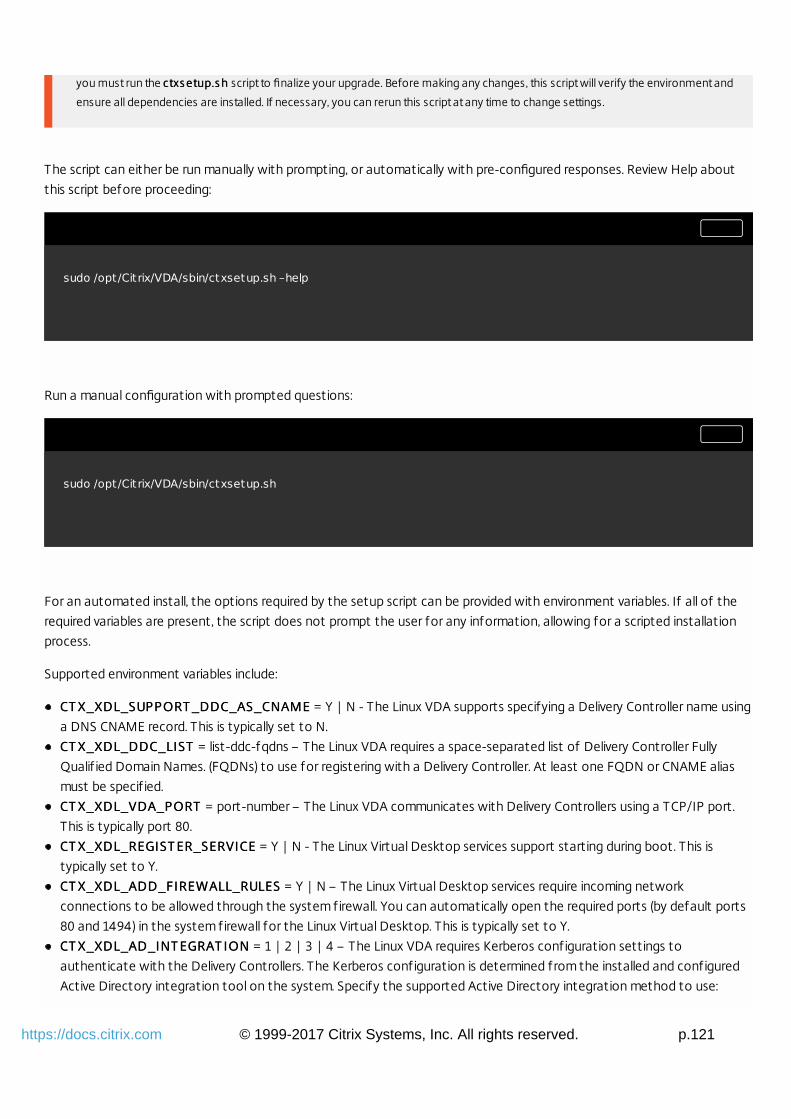
© 1999-2017 Citrix Systems, Inc. All rights reserved. p.121https://docs.citrix.com
you must run the ctxs etup.s hctxs etup.s h script to finalize your upgrade. Before making any changes, this script will verify the environment and
ensure all dependencies are installed. If necessary, you can rerun this script at any time to change settings.
The script can either be run manually with prompting, or automatically with pre-configured responses. Review Help about
this script before proceeding:
sudo /opt/Citrix/VDA/sbin/ctxsetup.sh –help
Run a manual configuration with prompted questions:
sudo /opt/Citrix/VDA/sbin/ctxsetup.sh
For an automated install, the options required by the setup script can be provided with environment variables. If all of the
required variables are present, the script does not prompt the user for any information, allowing for a scripted installation
process.
Supported environment variables include:
CT X_XDL_SUPPORT _DDC_AS_CNAMECT X_XDL_SUPPORT _DDC_AS_CNAME = Y | N - The Linux VDA supports specifying a Delivery Controller name using
a DNS CNAME record. This is typically set to N.
CT X_XDL_DDC_LISTCT X_XDL_DDC_LIST = list-ddc-fqdns – The Linux VDA requires a space-separated list of Delivery Controller Fully
Qualif ied Domain Names. (FQDNs) to use for registering with a Delivery Controller. At least one FQDN or CNAME alias
must be specif ied.
CT X_XDL_VDA_PORTCT X_XDL_VDA_PORT = port-number – The Linux VDA communicates with Delivery Controllers using a TCP/IP port.
This is typically port 80.
CT X_XDL_REGIST ER_SERVICECT X_XDL_REGIST ER_SERVICE = Y | N - The Linux Virtual Desktop services support starting during boot. This is
typically set to Y.
CT X_XDL_ADD_FIREWALL_RULESCT X_XDL_ADD_FIREWALL_RULES = Y | N – The Linux Virtual Desktop services require incoming network
connections to be allowed through the system firewall. You can automatically open the required ports (by default ports
80 and 1494) in the system firewall for the Linux Virtual Desktop. This is typically set to Y.
CT X_XDL_AD_INT EGRAT IONCT X_XDL_AD_INT EGRAT ION = 1 | 2 | 3 | 4 – The Linux VDA requires Kerberos configuration settings to
authenticate with the Delivery Controllers. The Kerberos configuration is determined from the installed and configured
Active Directory integration tool on the system. Specify the supported Active Directory integration method to use:

© 1999-2017 Citrix Systems, Inc. All rights reserved. p.122https://docs.citrix.com
1 – Samba Winbind
2 – Quest Authentication Service
3 – Centrify DirectControl
4 – SSSD
CT X_XDL_HDX_3D_PROCT X_XDL_HDX_3D_PRO = Y | N – Linux Virtual Desktop supports HDX 3D Pro, a set of graphics acceleration
technologies designed to optimize the virtualization of rich graphics applications. HDX 3D Pro requires a compatible
NVIDIA Grid graphics card to be installed. If HDX 3D Pro is selected, the Virtual Delivery Agent is configured for VDI
desktops (single-session) mode – (i.e. CTX_XDL_VDI_MODE=Y).
CT X_XDL_VDI_MODECT X_XDL_VDI_MODE = Y | N - Whether to configure the machine as a dedicated desktop delivery model (VDI) or
hosted shared desktop delivery model. For HDX 3D Pro environments, set this to Y. This is typically set to N.
CT X_XDL_SIT E_NAMECT X_XDL_SIT E_NAME = dns-name – The Linux VDA discovers LDAP servers using DNS, querying for LDAP service
records. To limit the DNS search results to a local site, specify a DNS site name. This is typically empty [none].
CT X_XDL_LDAP_LISTCT X_XDL_LDAP_LIST = list-ldap-servers – The Linux VDA by default queries DNS to discover LDAP servers. However if
DNS cannot provide LDAP service records, you can provide a space-separated list of LDAP Fully Qualif ied Domain Names
(FQDNs) with LDAP port (e.g. ad1.mycompany.com:389). This is typically empty [none].
CT X_XDL_SEARCH_BASECT X_XDL_SEARCH_BASE = search-base – The Linux VDA by default queries LDAP using a search base set to the root
of the Active Directory Domain (e.g. DC=mycompany,DC=com). However to improve search performance, you can
specify a search base (e.g. OU=VDI,DC=mycompany,DC=com). This is typically empty [none].
CT X_XDL_ST ART _SERVICECT X_XDL_ST ART _SERVICE = Y | N - Whether or not the Linux VDA services are started when the Linux VDA
configuration is complete. This is typically set to Y.
Set the environment variable and run the configure script:

© 1999-2017 Citrix Systems, Inc. All rights reserved. p.123https://docs.citrix.com
export CTX_XDL_SUPPORT_DDC_AS_CNAME=Y|N
export CTX_XDL_DDC_LIST=list-ddc-fqdns
export CTX_XDL_VDA_PORT=port-number
export CTX_XDL_REGISTER_SERVICE=Y|N
export CTX_XDL_ADD_FIREWALL_RULES=Y|N
export CTX_XDL_AD_INTEGRATION=1|2|3|4
export CTX_XDL_HDX_3D_PRO=Y|N
export CTX_XDL_VDI_MODE=Y|N
export CTX_XDL_SITE_NAME=dns-name
export CTX_XDL_LDAP_LIST=list-ldap-servers
export CTX_XDL_SEARCH_BASE=search-base
export CTX_XDL_START_SERVICE=Y|N
sudo -E /opt/Citrix/VDA/sbin/ctxsetup.sh
You must provide the -E-E option with sudo to pass the existing environment variables to the new shell it creates. Citrix
recommends that you create a shell script file from the commands above with #!/bin/bash#!/bin/bash on the first line.
Alternatively, you can specify all parameters with a single command:

© 1999-2017 Citrix Systems, Inc. All rights reserved. p.124https://docs.citrix.com
sudo CTX_XDL_SUPPORT_DDC_AS_CNAME=Y|N \
CTX_XDL_DDC_LIST=list-ddc-fqdns \
CTX_XDL_VDA_PORT=port-number \
CTX_XDL_REGISTER_SERVICE=Y|N \
CTX_XDL_ADD_FIREWALL_RULES=Y|N \
CTX_XDL_AD_INTEGRATION=1|2|3|4 \
CTX_XDL_HDX_3D_PRO=Y|N \
CTX_XDL_VDI_MODE=Y|N \
CTX_XDL_SITE_NAME=dns-name \
CTX_XDL_LDAP_LIST=list-ldap-servers \
CTX_XDL_SEARCH_BASE=search-base \
CTX_XDL_START_SERVICE=Y|N \
/opt/Citrix/VDA/sbin/ctxsetup.sh
Remove configuration changes
In some scenarios, you might have to remove the configuration changes made by the ct xset up.shct xset up.sh script without
uninstalling the Linux VDA package.
Review Help about this script before proceeding:
sudo /opt/Citrix/VDA/sbin/ctxcleanup.sh --help

© 1999-2017 Citrix Systems, Inc. All rights reserved. p.125https://docs.citrix.com
To remove configuration changes:
sudo /opt/Citrix/VDA/sbin/ctxcleanup.sh
ImportantThis script will delete all configuration data from the database and will make the Linux VDA inoperable.
Configuration logs
The ct xset up.shct xset up.sh and ct xcleanup.shct xcleanup.sh scripts display errors on the console, with additional information written to the
configuration log file /t mp/xdl.configure.log/t mp/xdl.configure.log.
Restart the Linux VDA services to have the changes take effect.
Uninstall the Linux VDA software
Query Linux VDA inst allat ion st at usQuery Linux VDA inst allat ion st at us
To check whether the Linux VDA is installed and to view the version of the installed package:
dpkg -l xendesktopvda
To view more detailed information:
apt-cache show xendesktopvda
NoteUninstalling the Linux VDA software will delete the associated PostgreSQL and other configuration data. However, the PostgreSQL
package and other dependent packages that were setup prior to the installation of the Linux VDA will not be removed.

© 1999-2017 Citrix Systems, Inc. All rights reserved. p.126https://docs.citrix.com
TipThe information in this section does not cover the removal of dependent packages including PostgreSQL.
Once you have configured the Linux VDA using the ct xset up.shct xset up.sh script, you use the following commands to control the
Linux VDA.
St art t he Linux VDASt art t he Linux VDA
To start the Linux VDA services:
sudo systemctl start ctxhdx
sudo systemctl start ctxvda
St op t he Linux VDASt op t he Linux VDA
To stop the Linux VDA services:
sudo systemctl stop ctxvda
sudo systemctl stop ctxhdx
Rest art t he Linux VDARest art t he Linux VDA
To restart the Linux VDA services:

© 1999-2017 Citrix Systems, Inc. All rights reserved. p.127https://docs.citrix.com
sudo systemctl stop ctxvda
sudo systemctl restart ctxhdx
sudo systemctl restart ctxvda
Check t he Linux VDA st at usCheck t he Linux VDA st at us
To check the running state of the Linux VDA services:
sudo systemctl status ctxvda
sudo systemctl status ctxhdx
The process for creating machine catalogs and adding Linux VDA machines is very similar to the traditional Windows VDA
approach. For a more detailed description of how to complete these tasks, see Create Machine Catalogs and Manage
Machine Catalogs.
For creating machine catalogs that contain Linux VDA machines, there are a few restrictions that differentiates the
process from creating machine catalogs for Windows VDA machines:
For operating system, select:
Window Server OS or Server OS option for a hosted shared desktops delivery model.
Windows Desktop OS or Desktop OS option for a VDI dedicated desktop delivery model.
Ensure machines are set as not power managed.
As PVS and MCS are not supported for Linux VDAs, choose the Another service or technology (existing images)
deployment method.
Do not mix Linux and Windows VDA machines in the same machine catalog.
NoteEarly versions of Citrix Studio did not support the notion of a "Linux OS"; however, selecting the Windows Server OS or Server OS
option implies an equivalent hosted shared desktops delivery model. Selecting the Windows Desktop OS or Desktop OS option
implies a XenDesktop single user per machine delivery model.
© 1999-2017 Citrix Systems, Inc. All rights reserved. p.128https://docs.citrix.com
TipIf a machine leaves and is rejoined to the Active Directory domain, the machine will need to be removed and re-added again to the
machine catalog.
The process for creating a delivery group and adding machine catalogs containing Linux VDA machines is almost identical to
Windows VDA machines. For a more detailed description of how to complete these tasks, see Create Delivery Groups.
For creating delivery groups that contain Linux VDA machine catalogs, the following restrictions apply:
For delivery type, select Desktops. Linux VDA for Ubuntu does not support application delivery.
Ensure the AD users and groups you select have been properly configured to log on to the Linux VDA machines.
Do not allow logon of unauthenticated (anonymous) users.
Do not mix the delivery group with machine catalogs that contain Windows machines.
The Citrix documentation for creating machine catalogs and delivery groups is referenced below:
XenDesktop 7.12
XenDesktop 7.11
XenDesktop 7.9
XenDesktop 7.8
XenDesktop 7.7
XenDesktop 7.6
XenDesktop 7.5
XenDesktop 7.1
Earlier versions of XenDesktop are not supported.
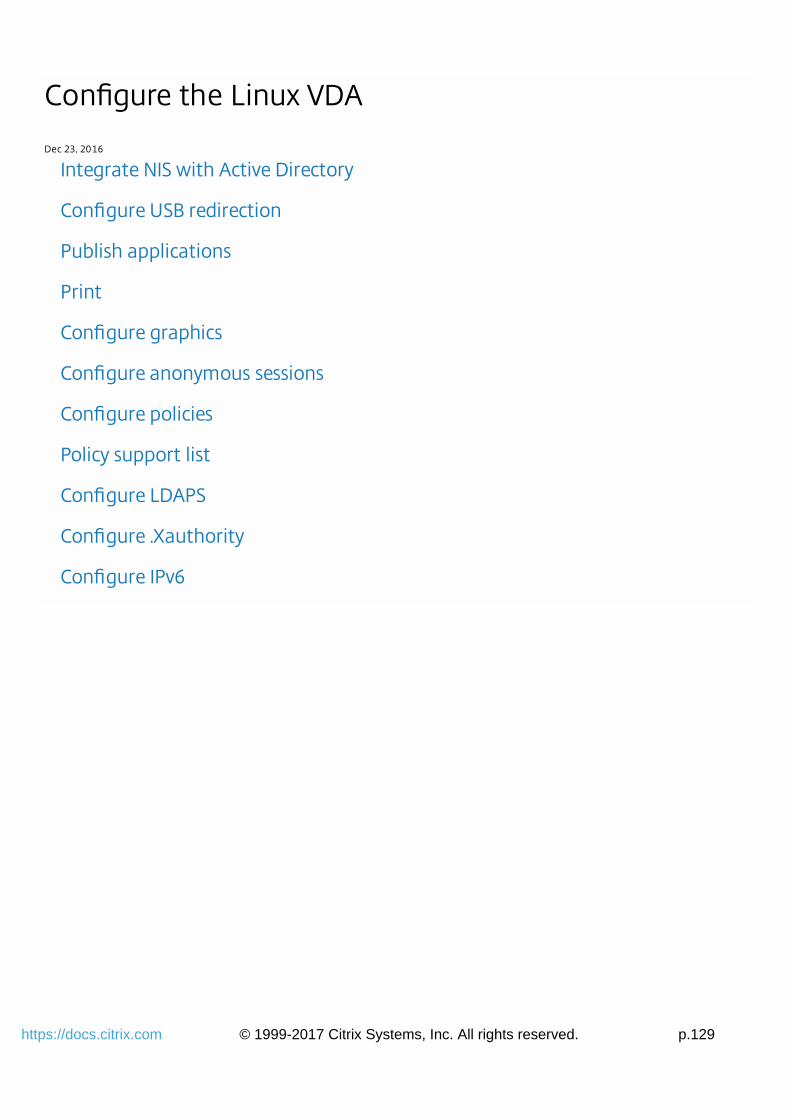
© 1999-2017 Citrix Systems, Inc. All rights reserved. p.129https://docs.citrix.com
Integrate NIS with Active Directory
Configure USB redirection
Publish applications
Configure graphics
Configure anonymous sessions
Configure policies
Policy support list
Configure LDAPS
Configure .Xauthority
Configure IPv6
Configure the Linux VDA
Dec 23, 2016

© 1999-2017 Citrix Systems, Inc. All rights reserved. p.130https://docs.citrix.com
Integrate NIS with Active Directory
Feb 06, 2017
This article describes how to integrate NIS with Windows Active Directory (AD) on the Linux VDA by using SSSD. The Linux
VDA is considered a component of Citrix XenApp & XenDesktop. As a result, it fits tightly into the Windows AD
environment.
Using NIS as a UID and GID provider instead of using AD requires that the account information (username and password
combinations) is the same in both AD and NIS.
NoteAuthentication is still performed by the AD server. NIS+ is not supported. If you use NIS as the UID and GID provider, the POSIX
attributes from the Windows server are no longer used.
TipThis method represents a deprecated way to deploy the Linux VDA, which should only be used for special use cases. For an
RHEL/CentOS distribution, follow the instructions here. For an Ubuntu distribution, follow the instructions here.
What is SSSD?What is SSSD?
SSSD is a system daemon. Its primary function is to provide access to identify and authenticate remote resources through
a common framework that can provide caching and offline support to the system. It provides both PAM and NSS modules,
and in the future will support D-BUS based interfaces for extended user information. It also provides a better database to
store local user accounts and extended user data.
The AD provider was first introduced with SSSD Version 1.9.0. If you are using an earlier version, follow the instructions
provided in Configuring the LDAP provider with AD.
The following environments have been tested and verified when using the instructions included in this article:
RHEL 7.2/CentOS 7.2
Linux VDA Versions 1.3, 1.4, 7.12
To integrate NIS with AD, you must:
1. Add the Linux VDA as a NIS client
2. Join the domain and create a host keytab using Samba
3. Set up SSSD
4. Configure NSS/PAM
5. Verify the Kerberos configuration

© 1999-2017 Citrix Systems, Inc. All rights reserved. p.131https://docs.citrix.com
6. Verify user authentication
Add the Linux VDA as a NIS client
Configure the NIS client:
yum –y install ypbind rpcbind oddjob-mkhomedir
Set the NIS domain:
ypdomainname nis.domain
echo "NISDOMAIN=nis.domain" >> /etc/sysconfig/network
Add the IP address for the NIS server and client in /et c/host s/et c/host s :
{NIS server IP address} server.nis.domain nis.domain
Configure NIS by authconfig:
sudo authconfig --enablenis --nisdomain=nis.domain --nisserver=server.nis.domain --enablemkhomedir --update
nis.domainnis.domain represents the domain name of the NIS server, and server.nis.domain server.nis.domain is the hostname of the NIS server,
which can also be the IP address of the NIS server.
Configure the NIS services:

© 1999-2017 Citrix Systems, Inc. All rights reserved. p.132https://docs.citrix.com
sudo systemctl start rpcbind ypbind
sudo systemctl enable rpcbind ypbind
Ensure that the NIS configuration is correct:
ypwhich
Validate that the account information is available from the NIS server:
getent passwd nisaccount
Notenis accountnis account represents the real NIS account on the NIS server. Make sure that the UID, GID, home directory, and login shell are
configured correctly.
Join the domain and create a host keytab with Samba
SSSD does not provide AD client functions for joining the domain and managing the system keytab file. There are a few
methods for achieving this, including:
adcli
realmd
winbind
samba
The information in this section describes the Samba approach only. For realmdrealmd, see the RHEL or CentOS vendor's
documentation. These steps must be followed before configuring SSSD.

© 1999-2017 Citrix Systems, Inc. All rights reserved. p.133https://docs.citrix.com
Join t he domain and creat e host keyt ab wit h SambaJoin t he domain and creat e host keyt ab wit h Samba
On the Linux client with properly configured files:
/etc/krb5.conf
/etc/samba/smb.conf:
Configure the machine for Samba and Kerberos authentication:
sudo authconfig --smbsecurity=ads --smbworkgroup=domain --smbrealm=REALM --krb5realm=REALM --krb5kdc=fqdn-of-domain-controller --update
Where REALMREALM is the Kerberos realm name in uppercase and domaindomain is the short NetBIOS name of the AD domain.
If DNS-based lookups of the KDC server and realm name is required, add the following two options to the above command:
--enablekrb5kdcdns --enablekrb5realmdns
Open /et c/samba/smb.conf /et c/samba/smb.conf and add the following entries under the [Global] [Global] section, but after the section generated
by the aut hconfigaut hconfig tool:
kerberos method = secrets and keytab
Joining the Windows domain requires your domain controller to be reachable and that you have an AD user account with
permissions to add computers to the domain:
sudo net ads join REALM -U user
Where REALMREALM is the Kerberos realm name in uppercase, and user is a domain user with permissions to add computers to

© 1999-2017 Citrix Systems, Inc. All rights reserved. p.134https://docs.citrix.com
the domain.
Set up SSSD
Setting up SSSD consists of the following steps:
install the sssd-ad sssd-ad and sssd-proxy sssd-proxy packages on the Linux client machine
make configuration changes to various f iles (for example, sssd.confsssd.conf )
start the sssd servicesssd service
/et c/sssd/sssd.conf/et c/sssd/sssd.conf
An example sssd.conf sssd.conf configuration (additional options can be added as needed):
[sssd]
config_file_version = 2
domains = example
services = nss, pam
[domain/example]
# Uncomment if you need offline logins
# cache_credentials = true
re_expression = (((?P<domain>[^\\]+)\\(?P<name>.+$))|((?P<name>[^@]+)@(?P<domain>.+$))|(^(?P<name>[^@\\]+)$))
id_provider = proxy
proxy_lib_name = nis
auth_provider = ad
access_provider = ad

© 1999-2017 Citrix Systems, Inc. All rights reserved. p.135https://docs.citrix.com
# Should be specified as the lower-case version of the long version of the Active Directory domain.
ad_domain = ad.example.com
# Kerberos sett ings
krb5_ccachedir = /tmp
krb5_ccname_template = FILE:%d/krb5cc_%U
# Uncomment if service discovery is not working
# ad_server = server.ad.example.com
# Comment out if the users have the shell and home dir set on the AD side
default_shell = /bin/bash
fallback_homedir = /home/%d/%u
# Uncomment and adjust if the default principal SHORTNAME$@REALM is not available
# ldap_sasl_authid = host/[email protected]
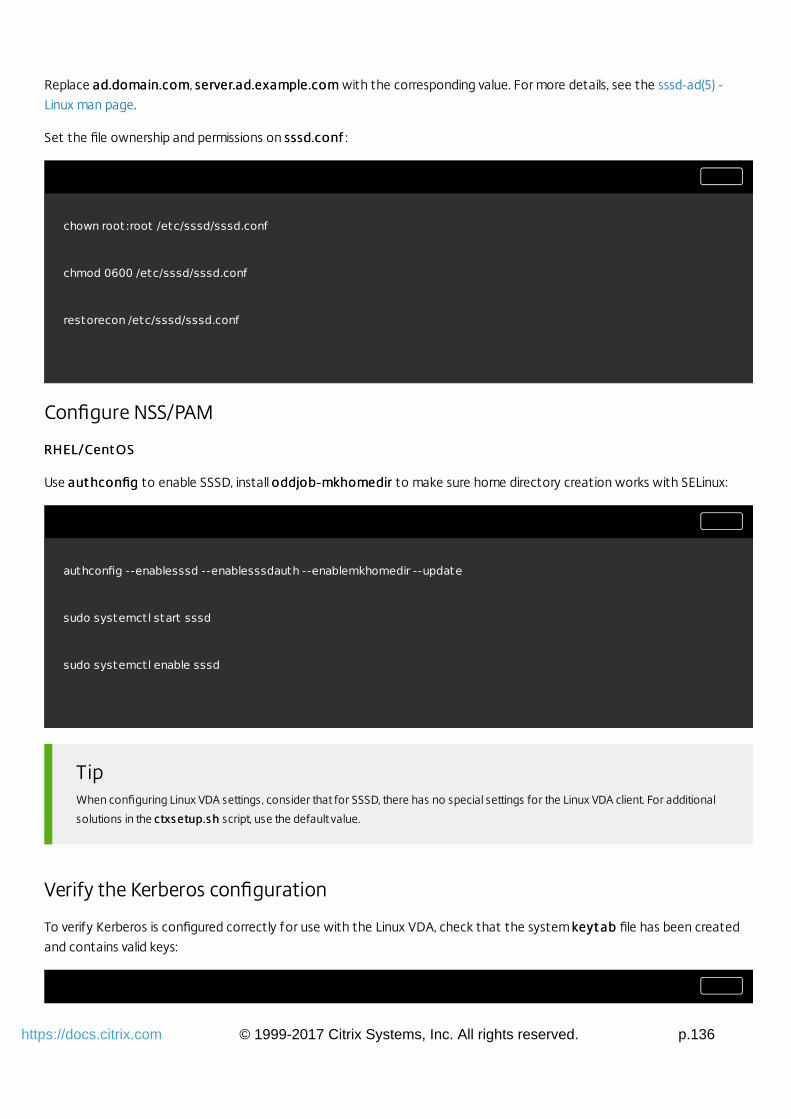
© 1999-2017 Citrix Systems, Inc. All rights reserved. p.136https://docs.citrix.com
Replace ad.domain.comad.domain.com, server.ad.example.comserver.ad.example.com with the corresponding value. For more details, see the sssd-ad(5) -
Linux man page.
Set the file ownership and permissions on sssd.confsssd.conf :
chown root:root /etc/sssd/sssd.conf
chmod 0600 /etc/sssd/sssd.conf
restorecon /etc/sssd/sssd.conf
Configure NSS/PAM
RHEL/Cent OSRHEL/Cent OS
Use aut hconfigaut hconfig to enable SSSD, install oddjob-mkhomediroddjob-mkhomedir to make sure home directory creation works with SELinux:
authconfig --enablesssd --enablesssdauth --enablemkhomedir --update
sudo systemctl start sssd
sudo systemctl enable sssd
TipWhen configuring Linux VDA settings, consider that for SSSD, there has no special settings for the Linux VDA client. For additional
solutions in the ctxs etup.s hctxs etup.s h script, use the default value.
Verify the Kerberos configuration
To verify Kerberos is configured correctly for use with the Linux VDA, check that the system keyt abkeyt ab file has been created
and contains valid keys:

© 1999-2017 Citrix Systems, Inc. All rights reserved. p.137https://docs.citrix.com
sudo klist -ke
This should display the list of keys available for the various combinations of principal names and cipher suites. Run the
Kerberos kinitkinit command to authenticate the machine with the domain controller using these keys:
sudo kinit –k MACHINE\$@REALM
The machine and realm names must be specified in uppercase, and the dollar sign ($) must be escaped with a backslash (\) to
prevent shell substitution. In some environments, the DNS domain name is different from the Kerberos realm name; ensure
the realm name is used. If this command is successful, no output is displayed.
Verify that the TGT ticket for the machine account has been cached using:
sudo klist -ke
Verify user authentication
Use the get entget ent command to verify that the logon format is supported and whether the NSS works:
sudo getent passwd DOMAIN\\username
The DOMAINDOMAIN parameter should be the short version domain name. If another logon format from Citrix Receiver is needed,
verify by using the get entget ent command first.
The supported logon formats are:
Down-level logon name: DOMAIN\username
UPN: [email protected]
NetBIOS Suffix format: username@DOMAIN

© 1999-2017 Citrix Systems, Inc. All rights reserved. p.138https://docs.citrix.com
To verify that the SSSD PAM module is configured correctly, log on locally with a domain user account that has not
previously logged on to the machine.
sudo localhost –l DOMAIN\\username
id -u
Check that a corresponding Kerberos credential cache file was created for the uiduid returned by the command:
ls /tmp/krb5cc_{uid}
Check that the tickets in the user’s Kerberos credential cache are valid and not expired:
klist

© 1999-2017 Citrix Systems, Inc. All rights reserved. p.139https://docs.citrix.com
Configure USB redirection
Feb 06, 2017
USB devices are shared among Citrix Receiver and the Linux VDA desktop. Once a USB device is redirected to the desktop,
the user can use the USB device as if it were locally connected.
USB redirection includes three main areas of functionality:
open source project implementation (VHCI)
VHCI service
USB service
Open source VHCIOpen source VHCI
This portion of the USB redirection feature develops a general USB device sharing system over an IP network. It consists of
a Linux kernel driver and some user mode libraries that allow you to communicate with the kernel driver to get all the USB
data. In the Linux VDA implementation, Citrix reuses the kernel driver of VHCI. However, all the USB data transfers between
Linux VDA and Citrix Receiver are encapsulated in the Citrix ICA protocol package.
VHCI serviceVHCI service
The VHCI service is an open source service provided by Citrix to communicate with the VHCI kernel module. This service
works as a gateway between VHCI and the Citrix USB service.
USB serviceUSB service
The USB service represents a Citrix module that manages all the virtualization and data transfers on the USB device.
Typically, if a USB device is redirected successfully to the Linux VDA, one or more device nodes are created in the
system /dev path. However, in some cases the redirected device cannot be used by an active Linux VDA session. USB devices
rely on drivers to function properly (and some devices require special drivers), and in some cases drivers are not provided,
which results in some redirected USB devices being inaccessible to an active Linux VDA session. When situations like these
occur, the drivers must be installed and the system must be configured properly to ensure USB device connectivity.
The Linux VDA supports a list of USB devices that are sucessfully redirected to and from the client. In addition, the device is
properly mounted, especially the USB disk, allowing the user to access the disk without any additional configuration.
A Citrix policy controls whether USB device redirection is enabled or disabled. In addition, the type of device can also be
specified using a DDC policy. When configuring USB redirection for the Linux VDA, the following policies must be configured:
Client USB device redirection policy
Client USB device redirection rules
Enable USB redirection policy
In Citrix Studio, enable (or disable) USB device redirection to and from the client (for workstation hosts only).

© 1999-2017 Citrix Systems, Inc. All rights reserved. p.140https://docs.citrix.com
In the Edit Setting dialog:
1. Select AllowedAllowed.
2. Click OKOK .
Setting USB redirection rules
After enabling the USB redirection policy, set redirection rules using Citrix Studio by specifying which devices are allowed (or
denied) on the Linux VDA.
In the Client USB device redirection rules dialog:
1. Click NewNew to add a redirection rule, or click EditEdit to review an existing rule.
2. After creating (or modifying) a rule, click OKOK .

© 1999-2017 Citrix Systems, Inc. All rights reserved. p.141https://docs.citrix.com
For more information about configuring generic USB redirection, see Citrix Generic USB Redirection Configuration Guide.
Use the information in this section to troubleshoot various issues that you might encounter when using the Linux VDA.
No devices on t he Receiver t oolbarNo devices on t he Receiver t oolbar
In some cases, you might not be able to see devices listed on the Citrix Receiver toolbar, which indicates that no USB
redirection is taking place. If this occurs, verify the following:
the policy is configured to allow USB redirection
the Kernel module is compatible with your kernel

© 1999-2017 Citrix Systems, Inc. All rights reserved. p.142https://docs.citrix.com
USB devices can be seen in t he Receiver t oolbar, but are labeled USB devices can be seen in t he Receiver t oolbar, but are labeled policy rest rict edpolicy rest rict ed, which result s in f ailed, which result s in f ailed
redirect ionredirect ion
This issue occurs because of the device's policy configuration. In such cases:
configure the Linux VDA policy to enable redirection
Verify whether any additional policy restrictions are configured in the Receiver registry; a device might be blocked by the
Receiver registry setting. Check DeviceRulesDeviceRules in the registry path to ensure that the device is not denied access by this
setting:
HKEY_LOCAL_MACHINE\SOFTWARE\Wow6432Node\Citrix\ICA Client\GenericUSB
For more information, see How to Configure Automatic Redirection of USB Devices on the Citrix Support site.
A USB device is redirect ed successf ully , but I cannot use it in my session A USB device is redirect ed successf ully , but I cannot use it in my session
In most cases, only USB devices in the supported devices list can be redirected. However, in some cases other kinds of
devices might be redirected into an active Linux VDA session. In these situations, for every redirected device, a node owned
by the user is created in the system /dev/dev path. However, it is the drivers and the configuration that determine whether the
user can use the device successfully. If you find a device owned (plugged in) but inaccessible, add the device to an
unrestricted policy.
NoteIn the case of USB drives, the Linux VDA configures and mounts the disk. The user (and only the owner who installed it) can access
the disk without any additional configuration. This might not be the case for devices that are not in the supported device list.
USB redirection depends on the VHCI kernel modules (usb-vhci-hcd.kousb-vhci-hcd.ko and usb-vhci-iocif .kousb-vhci-iocif .ko). These modules are part of
the Linux VDA distribution (as part of the RPM package). They are compiled based on the official Linux distribution kernels
and are noted in the table below:
Support ed Linux dist ribut ionSupport ed Linux dist ribut ion Kernel versionKernel version
RHEL 6.8 2.6.32-573.8.1.el6.x86_64
RHEL 7.2 3.10.0-327.22.2.el7.x86_64
SUSE 11.4 3.0.101-0.47.55-default
SUSE 12.1 3.12.60-52.6-default
Ubuntu 16.04 4.4.0-45-generic

© 1999-2017 Citrix Systems, Inc. All rights reserved. p.143https://docs.citrix.com
ImportantIf the kernel of your machine is not compatible with the driver built by Citrix for the Linux VDA, the USB service might fail to start. In
this case you cannot use the USB redirection feature unless you build your own VHCI kernel modules.
Verify whether your kernel is consistent with the modules built by Citrix
On the command line, execute the following command to verify whether the kernel is consistent:
insmod /opt/Citrix/VDA/lib64/usb-vhci-hcd.ko
If the command executes successfully, the kernel module has loaded successfully and the version is consistent with the one
installed by Citrix.
If the command executes with errors, the kernel is inconsistent with the Citrix module and must be rebuilt.
Rebuilding the VHCI kernel module
If the kernel module is inconsistent with the Citrix version, perform the following:
1. Download the LVDA source code from the Citrix download site. Select the file contained in the section "Linux Virt ualLinux Virt ual
Delivery Agent (sources)Delivery Agent (sources)."
2. Restore files from the citrix-linux-vda-sources.zip file; you can get VHCI source files in linux-vda-souces/vhci-hcd-linux-vda-souces/vhci-hcd-
1.15.t ar.bz21.15.t ar.bz2; you can restore VHCI files using t ar xvf vhci-hcd-1.15.t ar.bz2t ar xvf vhci-hcd-1.15.t ar.bz2.
3. Build the kernel module based on the header files and the Module.symversModule.symvers file. Use the following steps to install the
kernel header files and create Module.symversModule.symvers based on the appropriate Linux distribution:
RHEL 7 .2RHEL 7 .2
yum install kernel-devel
RHEL 6.8RHEL 6.8

© 1999-2017 Citrix Systems, Inc. All rights reserved. p.144https://docs.citrix.com
yum install kernel-headers
SUSE 12.1SUSE 12.1
zypper install kernel-devel
zypper install kernel-source
SUSE 11.4SUSE 11.4
zypper install kernel-source
Ubunt u 16.04Ubunt u 16.04
apt-get install linux-headers
TipIf the installation is successful, there will be a kernel folder resembling:
/usr/src/kernels/3.10.0-327.10.1.el7.x86_64
4. In the folder (/usr/src/kernels/3.10.0-327.10.1.el7.x86_64), verify that the file Module.symversModule.symvers is present. If this file is
not in the folder, you must build the kernel to get this file (e.g., make oldconfig; make prepare;make modules;make) or copy it
from /usr/src/kernels/3.10.0-327 .10.1.el7 .x86_64 -obj/x86_64 /def ault s/module.* /usr/src/kernels/3.10.0-327 .10.1.el7 .x86_64 -obj/x86_64 /def ault s/module.*
5. In the file vhci-hcd-1.15/Makefilevhci-hcd-1.15/Makefile , change the Makefile of VCHI and set KDIR to the kernel directory:
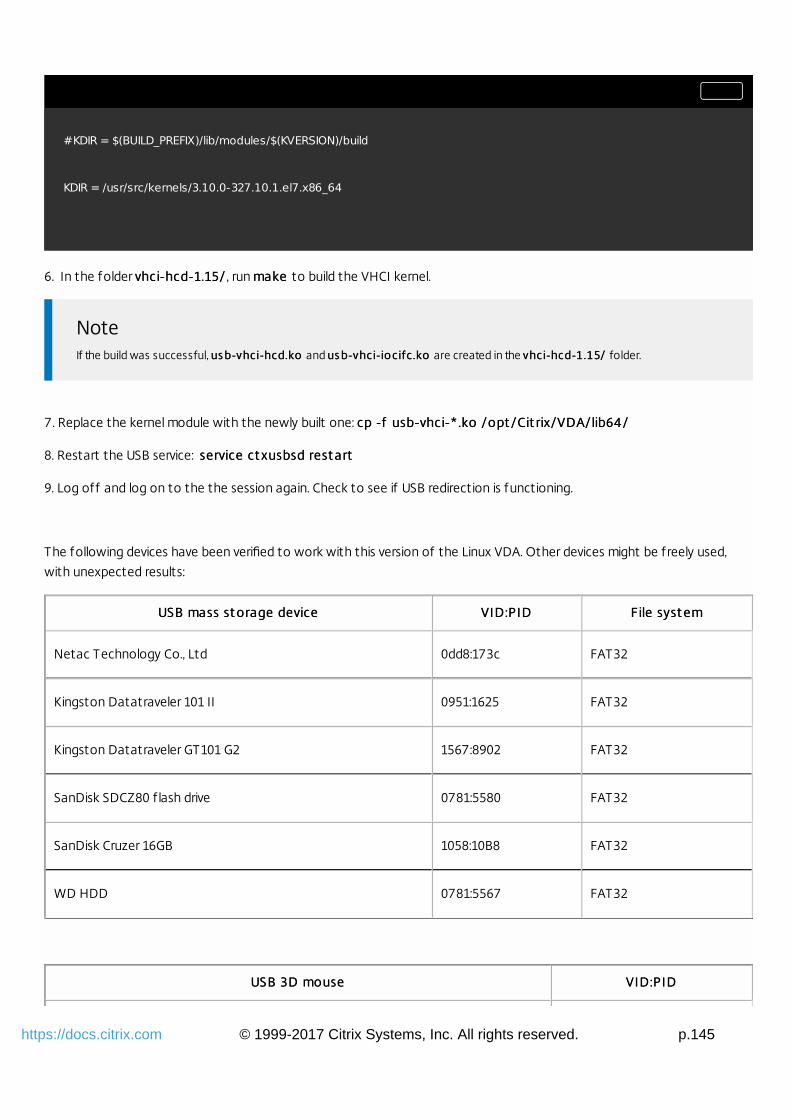
© 1999-2017 Citrix Systems, Inc. All rights reserved. p.145https://docs.citrix.com
#KDIR = $(BUILD_PREFIX)/lib/modules/$(KVERSION)/build
KDIR = /usr/src/kernels/3.10.0-327.10.1.el7.x86_64
6. In the folder vhci-hcd-1.15/vhci-hcd-1.15/ , run make make to build the VHCI kernel.
NoteIf the build was successful, us b-vhci-hcd.ko us b-vhci-hcd.ko and us b-vhci-iocifc.ko us b-vhci-iocifc.ko are created in the vhci-hcd-1.15/ vhci-hcd-1.15/ folder.
7. Replace the kernel module with the newly built one: cp -f usb-vhci-*.ko /opt /Cit rix/VDA/lib64 /cp -f usb-vhci-*.ko /opt /Cit rix/VDA/lib64 /
8. Restart the USB service: service ct xusbsd rest artservice ct xusbsd rest art
9. Log off and log on to the the session again. Check to see if USB redirection is functioning.
The following devices have been verified to work with this version of the Linux VDA. Other devices might be freely used,
with unexpected results:
USB mass st orage deviceUSB mass st orage device VID:PIDVID:PID File syst emFile syst em
Netac Technology Co., Ltd 0dd8:173c FAT32
Kingston Datatraveler 101 II 0951:1625 FAT32
Kingston Datatraveler GT101 G2 1567:8902 FAT32
SanDisk SDCZ80 f lash drive 0781:5580 FAT32
SanDisk Cruzer 16GB 1058:10B8 FAT32
WD HDD 0781:5567 FAT32
USB 3D mouseUSB 3D mouse VID:PIDVID:PID

© 1999-2017 Citrix Systems, Inc. All rights reserved. p.146https://docs.citrix.com
3DConnexion SpaceMouse Pro 046d: c62b
USB scannerUSB scanner VID:PIDVID:PID
Epson Perfection V330 photo 04B8: 0142
Unable t o unmount t he redirect ed USB diskUnable t o unmount t he redirect ed USB disk. For the access control of all USB disks redirected from Citrix Receiver, the
Linux VDA manages all of these devices under administrative privilege to ensure that only the owner can access the
redirected device. As a result, the user is not permitted to unmount the device without the administrative privilege.
F ile lost when you st op redirect ing a USB diskFile lost when you st op redirect ing a USB disk. If you redirect a USB disk into a session and try to modify it (for
example, create some files on the disk), then stop redirecting it immediately using the Receiver toolbar, the file you modified
(or created) can be lost.
This issue occurs because when you write data to a file system, the system mounts the memory cache in the file system,
the data is not actually written to the disk itself. If you stop redirecting using the Receiver toolbar, there is no time
remaining for the data being flushed into the disk, which results in lost data.
To resolve this issue, whenever you write data into the disk, use the sync command in a terminal to flush data into the disk,
then stop USB redirection.

© 1999-2017 Citrix Systems, Inc. All rights reserved. p.147https://docs.citrix.com

© 1999-2017 Citrix Systems, Inc. All rights reserved. p.148https://docs.citrix.com
Publish applications
Feb 06, 2017
With Linux VDA version 7.12, Citrix added technical preview for seamless applications to CentOS/RedHat 7.2. No specific
installation procedures are required to use this functionality.
TipWith Linux VDA version 1.4, Citrix added support for non-seamless published applications and session sharing. For more
information, see publish applications.
The seamless applications feature is disabled by default on the Linux VDA. To enable it, run the following command on your
VDA:
sudo ctxreg create -k "HKLM\System\CurrentControlSet\Control\Citrix" -t "REG_DWORD" -v "SeamlessEnabled" -d "0x00000001" --force
You can publish applications installed on a Linux VDA machine when you create a delivery group or add applications to an
existing delivery group. This process is similar to publishing applications installed on the Windows VDA. Refer to the
following pages for additional information (based on the version of XenDesktop being used):
XenDesktop 7.12
XenDesktop 7.11
XenDesktop 7.9
XenDesktop 7.8
XenDesktop 7.7
XenDesktop 7.6
XenDesktop 7.5
XenDesktop 7.1
TipWhen configuring delivery groups, ensure that the delivery type is set to Des ktop and applicationsDes ktop and applications or ApplicationsApplications .
© 1999-2017 Citrix Systems, Inc. All rights reserved. p.149https://docs.citrix.com
ImportantPublishing applications is supported with Linux VDA version 1.4 and later. However, the Linux VDA does not support the delivery of
desktops and apps to the same machine. To address this issue, Citrix recommends that you create separate delivery groups for app
and desktop deliveries.
NoteDo not disable seamless mode on StoreFront. Seamless mode is enabled by default. If you've already disabled it by setting
“TWIMode=Off”, remove this setting instead of changing it to “TWIMode=On”. Otherwise you can fail to launch a published desktop.
Make sure that the window manager is set to Mutter. Currently, seamless applications only support Mutter, the default window
manager of Gnome 3.
You might encounter that launching a published application takes more than two minutes and fails to show windows in
seamless mode. If this occurs, verify that seamless mode has been enabled on both Linux VDA and StoreFront, and check
whether you have completed all the configurations mentioned above.
The following issues are known when publishing applications:
Non-seamless published applications fail to launch when seamless mode is disabled on storefront but still enabled on
Linux VDA. It is recommended to enable/disable seamless mode on both Linux VDA and StoreFront at the same time.
Non-rectangular windows are not supported. The corners of a window might show the server-side background.
All the windows of seamless applications show the same icon on the client taskbar.
The application session cannot be logged out through Citrix Connection Center.

© 1999-2017 Citrix Systems, Inc. All rights reserved. p.150https://docs.citrix.com
Feb 06, 2017
This article provides information about printing best practices.
The Linux VDA requires both cupscups and f oomat icf oomat ic filters. Execute the following commands based on the Linux distribution.
RHEL 6 print ing supportRHEL 6 print ing support
sudo yum –y install cups
sudo yum -y install foomatic
RHEL 7 print ing supportRHEL 7 print ing support
sudo yum –y install cups
sudo yum -y install foomatic-filters
The Linux VDA functions for both published desktops and published applications. The printer name is different between
desktops and applications. Consider the following:
For published desktops:
CitrixUniversalPrinter:$CLIENT_NAME:dsk$SESSION_ID
For published applications:
CitrixUniversalPrinter:$CLIENT_NAME:app$SESSION_ID
NoteIf the same user opens both a published desktop and a published application, both printers are available to the session. Printing to a

© 1999-2017 Citrix Systems, Inc. All rights reserved. p.151https://docs.citrix.com
desktop printer in a published application session, or printing to an application printer in a published desktop fails.
Unable t o printUnable t o print
There are a number of items to check when printing is not working correctly. The print daemon is a per-session process and
must be running for the length of the session. Verify whether the printing daemon is running.
ps –ef | grep ctxlpmngt
If the ct xlpmngtct xlpmngt process is not running, manually start ct xlpmngtct xlpmngt from a command line. If printing is still not working,
check CUPS framework. The ct xcupsct xcups service is for printer management and communicates with the Linux CUPS framework.
This is a single process per machine and can be checked by:
service ctxcups status
Ext ra log when print ing CUPSExt ra log when print ing CUPS
As one of the components of the Linux VDA, the method of how to get the log of a printing component is similar to other
components.
For RHEL, some extra steps are necessary to configure the CUPS service file. Otherwise some logs cannot get logged in
hdx.lohdx.lo :

© 1999-2017 Citrix Systems, Inc. All rights reserved. p.152https://docs.citrix.com
sudo service cups stop
sudo vi /etc/systemd/system/printer.target.wants/cups.service
PrivateTmp=false
sudo service cups start
sudo systemctl daemon-reload
NoteThis configuration is only for collecting the full printing log when an issue arises. Normally this configuration is not recommended
because it breaks CUPS security.
Print out put is garbledPrint out put is garbled
Garbled output can be caused by an incompatible printer driver. A per-user driver configuration is available and can be
configured by editing the ~ /.Ct xlpProfile$CLIENT _NAME~ /.Ct xlpProfile$CLIENT _NAME configuration file:
[DEFAULT_PRINTER]
printername=
model=
ppdpath=
drivertype=
ImportantThe printernameprintername is a field containing the name of the current client side default printer. This is a read-only value and should not be
edited.

© 1999-2017 Citrix Systems, Inc. All rights reserved. p.153https://docs.citrix.com
The fields ppdpathppdpath, modelmodel and drivertypedrivertype should not be set at the same time because only one takes effect for the mapped
printer.
If the Universal Printer driver is not compatible with the client printer, configure the model of the native printer driver with
the modelmodel= option. You can find the current model name of the printer with the lpinf olpinf o command:
lpinfo –m
…
xerox/ph3115.ppd.gz Xerox Phaser 3115, SpliX V. 2.0.0
xerox/ph3115fr.ppd.gz Xerox Phaser 3115, SpliX V. 2.0.0
xerox/ph3115pt.ppd.gz Xerox Phaser 3115, SpliX V. 2.0.0
You can then set the model to match the printer:
Model=xerox/ph3115.ppd.gz
If the Universal Printer driver is not compatible with the client printer, configure the ppd file path of the native printer driver.
The value of ppdpat hppdpat h is the absolute path of the native printer driver file.
For example, there is a ppd driver ppd driver under /home/tester/NATIVE_PRINTER_DRIVER.ppd:
ppdpath=/home/tester/NATIVE_PRINTER_DRIVER.ppd
There are three types of Universal Printer Driver supplied by Citrix (postscript, pcl5 and pcl6). You can configure those in the
driver type if no native printer driver is available.
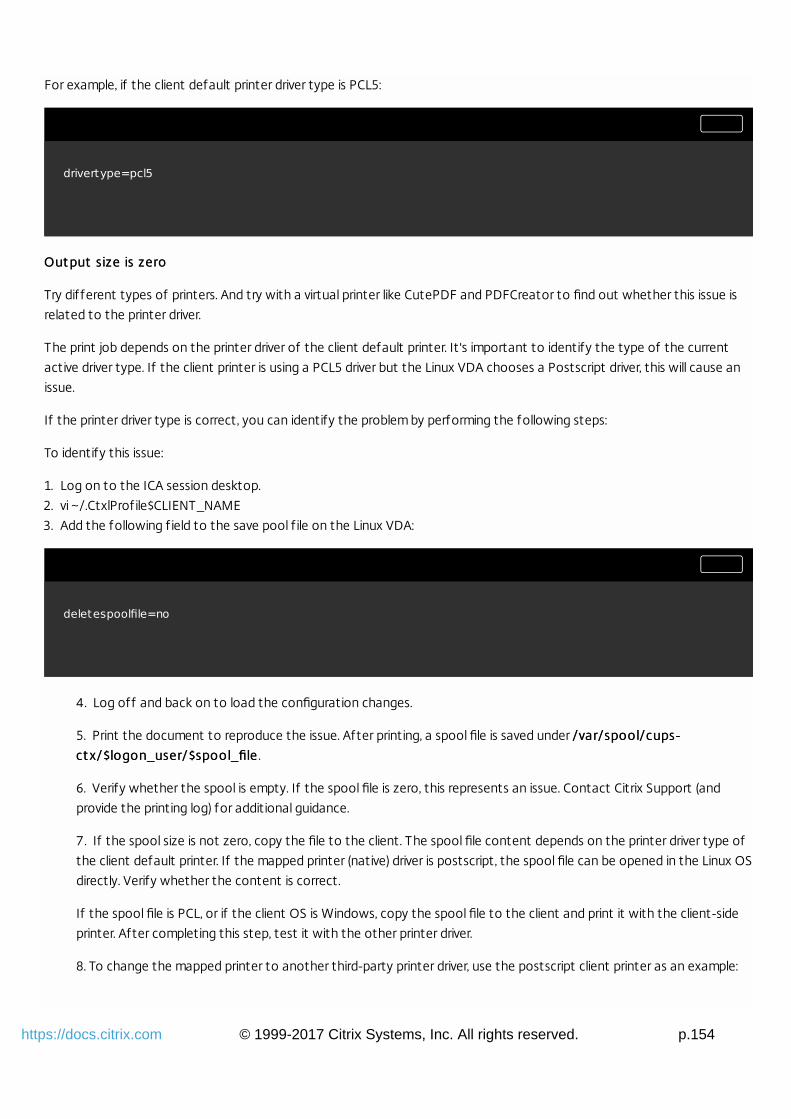
© 1999-2017 Citrix Systems, Inc. All rights reserved. p.154https://docs.citrix.com
For example, if the client default printer driver type is PCL5:
drivertype=pcl5
Out put size is zeroOut put size is zero
Try different types of printers. And try with a virtual printer like CutePDF and PDFCreator to find out whether this issue is
related to the printer driver.
The print job depends on the printer driver of the client default printer. It 's important to identify the type of the current
active driver type. If the client printer is using a PCL5 driver but the Linux VDA chooses a Postscript driver, this will cause an
issue.
If the printer driver type is correct, you can identify the problem by performing the following steps:
To identify this issue:
1. Log on to the ICA session desktop.
2. vi ~/.CtxlProfile$CLIENT_NAME
3. Add the following f ield to the save pool f ile on the Linux VDA:
deletespoolfile=no
4. Log off and back on to load the configuration changes.
5. Print the document to reproduce the issue. After printing, a spool file is saved under /var/spool/cups-/var/spool/cups-
ct x/$logon_user/$spool_filect x/$logon_user/$spool_file .
6. Verify whether the spool is empty. If the spool file is zero, this represents an issue. Contact Citrix Support (and
provide the printing log) for additional guidance.
7. If the spool size is not zero, copy the file to the client. The spool file content depends on the printer driver type of
the client default printer. If the mapped printer (native) driver is postscript, the spool file can be opened in the Linux OS
directly. Verify whether the content is correct.
If the spool file is PCL, or if the client OS is Windows, copy the spool file to the client and print it with the client-side
printer. After completing this step, test it with the other printer driver.
8. To change the mapped printer to another third-party printer driver, use the postscript client printer as an example:

© 1999-2017 Citrix Systems, Inc. All rights reserved. p.155https://docs.citrix.com
a. Log on to an active session and open a browser on the client desktop.
b. Open the printing management portal:
localhost:631
b. Choose the mapped printer Cit rixUniversalPrint er:$Client Name:app/dek$SESSION_IDCit rixUniversalPrint er:$Client Name:app/dek$SESSION_ID and Modif yModif y
Print erPrint er. This operation requires administrator privileges.
c. Retain the cups-ctx connection, then click Continue to modify the printer driver.
d. In the Make and Model page, choose some other postcript driver instead of the Citrix UPD driver (for
instance, Citrix Universal Driver Postscript). For example, if the CUPS-PDF virtual printer is installed, select the
Generic CUPS-PDF Printer. Save the modification.
e. If this process succeeds, configure the ppd file path of the driver in .Ct xlpProfile$CLIENT _NAME.Ct xlpProfile$CLIENT _NAME to allow
the mapped printer to use this third-party driver.
The following issues have been identified when printing using the Linux VDA.
CT XPS driver is not compat ible wit h some PLC print ersCT XPS driver is not compat ible wit h some PLC print ers
If you encounter printing output corruption, set the printer driver to the native one provided by the manufacturer.
Slow print ing perf ormance f or large document sSlow print ing perf ormance f or large document s
When you print a large document on a local client printer, the print file is transferred over the server connection. On slow
connections, this can take a long time.
Print er and print job not ificat ions seen f rom ot her sessionsPrint er and print job not ificat ions seen f rom ot her sessions
Linux does not have the same session concept as the Windows operating system. Therefore, all users get system wide
notifications. You can disable these notifications by modifying the CUPS configuration file: /et c/cups/cupsd.conf/et c/cups/cupsd.conf .
Locate the current policy name configured in the file:
Def ault Policy def aultDef ault Policy def ault
If the policy name is default, add the following lines into the default policy XML block:

© 1999-2017 Citrix Systems, Inc. All rights reserved. p.156https://docs.citrix.com
<Policy default>
# Job/subscript ion privacy...
JobPrivateAccess default
JobPrivateValues default
Subscript ionPrivateAccess default
Subscript ionPrivateValues default
… …
<Limit Create-Printer-Subscript ion>
Require user @OWNER
Order deny,allow
</Limit>
<Limit All>
Order deny,allow
</Limit>
</Policy>

© 1999-2017 Citrix Systems, Inc. All rights reserved. p.157https://docs.citrix.com
Configure graphics
Feb 06, 2017
Linux VDA 7.12 3D Pro supports vGPU for Nvidia Tesla M60 and M10. This article serves as a guide for Linux VDA 7.12
Graphics configuration and fine-tuning.
For more information, see system requirements and the installation overview section.
There are several graphics-related configuration parameters
under HKEY_LOCAL_MACHINE\Syst em\Current Cont rolSet \Cont rol\Cit rix\T hinwireHKEY_LOCAL_MACHINE\Syst em\Current Cont rolSet \Cont rol\Cit rix\T hinwire that you can tune with
the ct xreg ct xreg utility.
How to enable Thinwire Plus
Thinwire plus is enabled by default, for both standard VDA and 3D Pro.
How to enable H.264
In addition to the operating system requirement, H.264 has a minimum requirement for the Receiver version. If the client
does not meet the requirements, it falls back to Thinwire Plus.
OSOS WindowsWindows Mac OS XMac OS X LinuxLinux AndroidAndroid iOSiOS Chrome OSChrome OS
Minimum
requirement for
H.264
3.4 or later 11.8 or later 13.0 or later 3.5 5.9 1.4
The latest feature matrix for Citrix Receiver is available here.
Run the following command to advertise H.264 encoding on the VDA:
sudo ctxreg create -k "HKLM\System\CurrentControlSet\Control\Citrix\Thinwire" -t "REG_DWORD" -v "Advert iseH264" -d "0x00000001" --force
How to enable hardware encoding in HDX 3D Pro
For the HDX 3D Pro, the Advert iseH264Advert iseH264 setting only enables software H.264 encoding.
Run this command to enable hardware encoding:

© 1999-2017 Citrix Systems, Inc. All rights reserved. p.158https://docs.citrix.com
sudo ctxreg create -k "HKLM\System\CurrentControlSet\Control\Citrix\Thinwire" -t "REG_DWORD" -v "HardwareEncoding" -d "0x00000001" --force
NoteCurrently, hardware encoding supports only H.240 YUV420P.
How to tune Thinwire Plus for lower bandwidth
MaxColorDept hMaxColorDept h
Default 0x20, type DWORD
This option specifies the color depth of graphics transferred through the Thinwire protocol to the client.
To save bandwidth, set it to 0x100x10 (which represents the preferred color depth for simple graphics) or to 0x80x8 (the
experimental low bandwidth mode).
Qualit yQualit y
Visual quality
Default: 0x1(medium), type: DWORD, valid values: 0x0(low), 0x1(medium), 0x2(high), 0x3(build to lossless), 0x4 always lossless.
To save bandwidth, set Quality to 0x0(low)0x0(low).
Additional parameters
T arget FPST arget FPS
Target frame rate

© 1999-2017 Citrix Systems, Inc. All rights reserved. p.159https://docs.citrix.com
Default: 0x1e (30), Type: DWORD
MinFPSMinFPS
Target minimum frame rate
Default: 0xa (10), Type: DWORD
MaxScreenNumMaxScreenNum
Maximum number of monitors the client can have
Default: 0x2, Type: DWORD
For a standard VDA, you can set a maximum value of up to 10. For 3D Pro, the maximum value allowed is 4.
Check which encoding is in use
Use the following command to check whether H.264 encoding is in use (1 means H.264 and 0 means TW+):
sudo ctxreg dump | grep H264
The results should resemble:

© 1999-2017 Citrix Systems, Inc. All rights reserved. p.160https://docs.citrix.com
create -k "HKLM\Software\Citrix\Ica\Session\1\Graphics" -t "REG_DWORD" -v "H264" -d "0x00000001" --force
create -k "HKLM\System\CurrentControlSet\Control\Citrix\Thinwire" -t "REG_DWORD" -v "Advert iseH264" -d "0x00000001" --force
Check whether hardware encoding is in use for 3D Pro
Run this command (0 means not in use, 1 means in use):
sudo ctxreg dump | grep HardwareEncoding
The results should resemble:
create -k "HKLM\Software\Citrix\Ica\Session\1\Graphics" -t "REG_DWORD" -v "HardwareEncoding" -d "0x00000001" --force
Another way is to use the nvidia-sminvidia-smi command. When using this command, the output should resemble the following if
hardware encoding is in use:

© 1999-2017 Citrix Systems, Inc. All rights reserved. p.161https://docs.citrix.com
Tue Apr 12 10:42:03 2016
+------------------------------------------------------+
| NVIDIA-SMI 361.28 Driver Version: 361.28 |
|-------------------------------+----------------------+----------------------+
| GPU Name Persistence-M| Bus-Id Disp.A | Volat ile Uncorr. ECC |
| Fan Temp Perf Pwr:Usage/Cap| Memory-Usage | GPU-Util Compute M. |
|===============================+======================+======================|
| 0 GRID K1 Off | 0000:00:05.0 Off | N/A |
| N/A 42C P0 14W / 31W | 207MiB / 4095MiB | 8% Default |
+-------------------------------+----------------------+----------------------+
+-----------------------------------------------------------------------------+
| Processes: GPU Memory |
| GPU PID Type Process name Usage |
|=============================================================================|
| 0 2164 C+G /usr/local/bin/ctxgfx 106MiB |
| 0 2187 G Xorg 85MiB |
+-----------------------------------------------------------------------------+

© 1999-2017 Citrix Systems, Inc. All rights reserved. p.162https://docs.citrix.com
Verify whether the NVIDIA GRID graphics driver is installed correctly
To verify whether the NVIDIA GRID graphics driver is installed correctly, run nvidia-smi. nvidia-smi. The results should resemble:
+------------------------------------------------------+
| NVIDIA-SMI 352.70 Driver Version: 352.70 |
|-------------------------------+----------------------+----------------------+
| GPU Name Persistence-M| Bus-Id Disp.A | Volat ile Uncorr. ECC |
| Fan Temp Perf Pwr:Usage/Cap| Memory-Usage | GPU-Util Compute M. |
|===============================+======================+======================|
| 0 Tesla M60 Off | 0000:00:05.0 Off | Off |
| N/A 20C P0 37W / 150W | 19MiB / 8191MiB | 0% Default |
+-------------------------------+----------------------+----------------------+
+-----------------------------------------------------------------------------+
| Processes: GPU Memory |
| GPU PID Type Process name Usage |
|=============================================================================|
| No running processes found |
+-----------------------------------------------------------------------------+

© 1999-2017 Citrix Systems, Inc. All rights reserved. p.163https://docs.citrix.com
Set the correct configuration for the card:
etc/X11/ctx-nvidia.sh
HDX 3D Pro multi-monitor redraw issues
If you are seeing redraw issues on screens other than the primary monitor, check that the NVIDIA GRID license is available.
Check Xorg error logs
The log file of Xorg is named similar to Xorg.{ DISPLAY} .logXorg.{ DISPLAY} .log in the /var/log//var/log/ folder:
For vGPU, the XenServer local console shows the ICA desktop session screen
WorkaroundWorkaround: Disable the VM’s local VGA console by running the following command:
xe vm-param-set uuid=<vm-uuid> platform:vgpu_extra_args="disable_vnc=1"
NVENC API is not supported in vGPU profiles other than 8Q
Nvidia Tesla M60 card vGPU profiles other than 8Q do not support cuda, as a result, NVENC API and Citrix 3D Pro hardware
encoding are not available.
Gnome 3 desktop popups slow when logging on
This is a limitation of Gnome 3 desktop session startup.
Some OpenGL/WebGL applications do not render well upon resizing the Receiverwindow
Resizing the Citrix Receiver window will change screen resolution. The Nvidia proprietary driver changes some internal states
and might require applications to respond accordingly. For example, the WebGL library element light gl.jslight gl.js could spawn an
error saying that 'Rendering to this texture is not supported (incomplete framebuffer)'.

© 1999-2017 Citrix Systems, Inc. All rights reserved. p.164https://docs.citrix.com
Configure anonymous sessions
Feb 06, 2017
Use the information in this article to configure an anonymous session. No special settings are required when installing the
Linux VDA to use this feature.
NoteWhen configuring anonymous sessions, consider that session prelaunch is not supported. This functionality is also not supported
on Citrix Receiver for Android.
You must create an unauthenticated Store using StoreFront to support an anonymous session on the Linux VDA. Follow
the instructions for creating an unauthenticated Store based on the version of StoreFront:
StoreFront 3.8
StoreFront 3.7
StoreFront 3.6
StoreFront 3.5
StoreFront 3.0
StoreFront 2.6
After creating an unauthenticated Store, enable unauthenticated users in a Delivery Group to support an anonymous
session. To enable unauthenticated users in a Delivery Group, follow the directions based on the version of XenDesktop:
XenDesktop 7.12
XenDesktop 7.11
XenDesktop 7.9
XenDesktop 7.8
XenDesktop 7.7
XenDesktop 7.6
NoteUnauthenticated users are supported beginning with XenApp and XenDesktop 7.6.
An anonymous session has a default idle time-out of 10 minutes. This value is configured through the registry
setting AnonymousUserIdleT imeAnonymousUserIdleT ime. Use the ct xregct xreg tool to change this value. For example, to set this registry setting to 5
minutes:

© 1999-2017 Citrix Systems, Inc. All rights reserved. p.165https://docs.citrix.com
sudo ctxreg update -k "HKLM\System\CurrentControlSet\Control\Citrix" -v AnonymousUserIdleTime -d 0x00000005
To set the maximum number of anonymous users, use the registry key MaxAnonymousUserNumberMaxAnonymousUserNumber. This setting limits
the number of anonymous sessions running on a single Linux VDA simultaneously. Use the ct xregct xreg tool to configure this
registry setting. For example, to set the value to 32:
sudo ctxreg update -k "HKLM\System\CurrentControlSet\Control\Citrix" -v MaxAnonymousUserNumber -d 0x00000020
ImportantIt is essential that you limit the number of anonymous sessions. Too many sessions being launched simultaneously can create
problems on the VDA, including running out of available memory.
Consider the following when configuring anonymous sessions:
Failed t o log on t o an anonymous sessionFailed t o log on t o an anonymous session. Verify that the registry was updated to include the following (set to 0):
sudo ctxreg read –k "HKLM\System\CurrentControlSet\Control\Citrix" –v MaxAnonymousUserNumber
Verify that the ncsdncsd service is running and configured to enable passwdpasswd cache:

© 1999-2017 Citrix Systems, Inc. All rights reserved. p.166https://docs.citrix.com
ps uax | grep nscd
cat /etc/nscd.conf | grep 'passwd' | grep 'enable-cache'
Set the passwdpasswd cache variable to nono if it is enabled, then restart the ncsdncsd service. You might need to reinstall the Linux
VDA after changing this configuration.
T he lock screen but t on is displayed in an anonymous session wit h KDET he lock screen but t on is displayed in an anonymous session wit h KDE . The lock screen button and menu are
disabled by default in an anonymous session. However, they can still be displayed in KDE. In KDE, to disable the lock
screen button and menu for a particular user, you need to add the following lines to the configuration f ile
$Home/.kde/share/conf ig/kdeglobals$Home/.kde/share/conf ig/kdeglobals . For example:
[KDE Action Restrictions]
action/lock_screen=false
However, if the KDE Act ion Rest rict ionsKDE Act ion Rest rict ions parameter is configured as immutable in a global wide kdeglobalskdeglobals file such as
/usr/share/kde-set t ings/kde-profile/def ault /share/config/kdeglobals/usr/share/kde-set t ings/kde-profile/def ault /share/config/kdeglobals , the user configuration has no effect.
To resolve this issue, try to modify the system-wide kdeglobalskdeglobals file to remove the [$i][$i] tag at the [KDE Act ion[KDE Act ion
Rest rict ions]Rest rict ions] section or directly use the system-wide configuration to disable the lock screen button and menu. For details
about the KDE configuration, see the KDE System Administration/Kiosk/Keys page.

© 1999-2017 Citrix Systems, Inc. All rights reserved. p.167https://docs.citrix.com
Configure policies
Feb 06, 2017
Follow the installation articles to prepare the Linux VDA.
Dependencies
Make sure you install these dependencies before installing the Linux VDA package.
sudo yum -y install openldap
sudo yum -y install libxml2
sudo yum -y install cyrus-sasl
sudo yum -y install cyrus-sasl-gssapi
sudo zypper install openldap2
sudo zypper install libxml2
sudo zypper install cyrus-sasl
sudo zypper install cyrus-sasl-gssapi
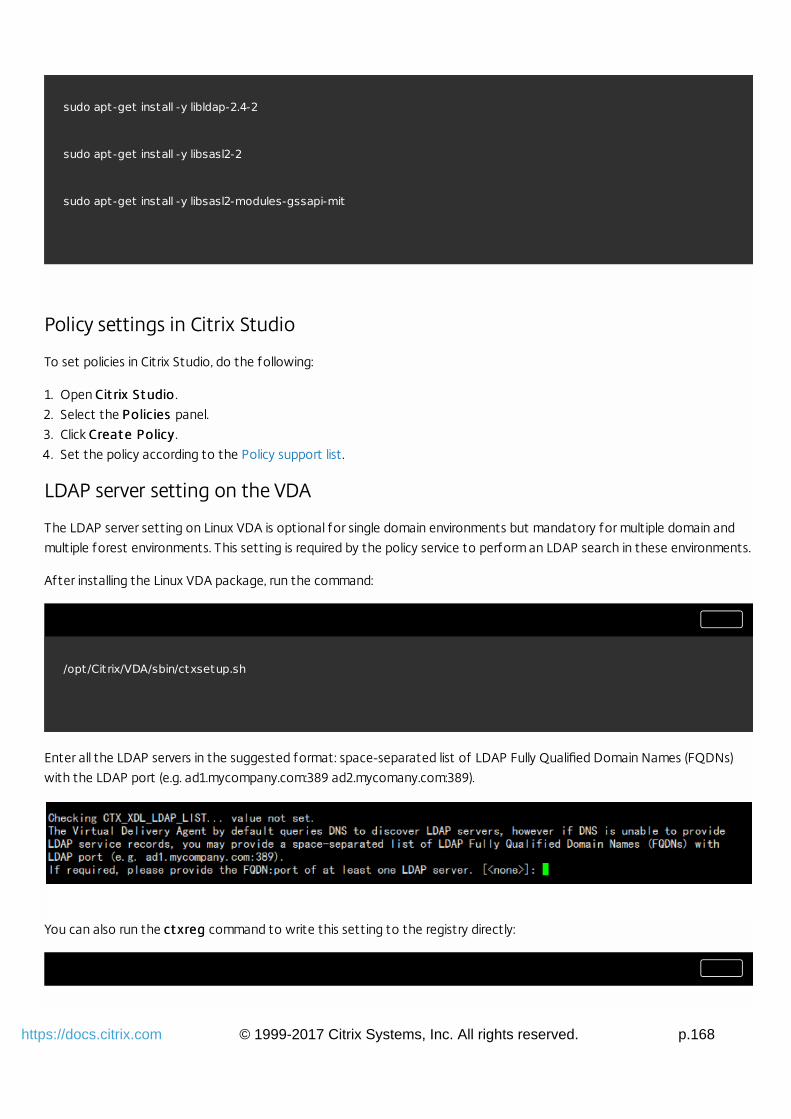
© 1999-2017 Citrix Systems, Inc. All rights reserved. p.168https://docs.citrix.com
sudo apt-get install -y libldap-2.4-2
sudo apt-get install -y libsasl2-2
sudo apt-get install -y libsasl2-modules-gssapi-mit
Policy settings in Citrix Studio
To set policies in Citrix Studio, do the following:
1. Open Cit rix St udioCit rix St udio .
2. Select the Policies Policies panel.
3. Click Creat e PolicyCreat e Policy .
4. Set the policy according to the Policy support list.
LDAP server setting on the VDA
The LDAP server setting on Linux VDA is optional for single domain environments but mandatory for multiple domain and
multiple forest environments. This setting is required by the policy service to perform an LDAP search in these environments.
After installing the Linux VDA package, run the command:
/opt/Citrix/VDA/sbin/ctxsetup.sh
Enter all the LDAP servers in the suggested format: space-separated list of LDAP Fully Qualified Domain Names (FQDNs)
with the LDAP port (e.g. ad1.mycompany.com:389 ad2.mycomany.com:389).
You can also run the ct xregct xreg command to write this setting to the registry directly:

© 1999-2017 Citrix Systems, Inc. All rights reserved. p.169https://docs.citrix.com
/opt/Citrix/VDA/bin/ctxreg create -k "HKLM\Software\Citrix\VirtualDesktopAgent" -t "REG_SZ" -v "ListOfLDAPServers" -d "ad1.mycompany.com:389 ad2.mycomany.com:389" --force
New policy settings for the Linux VDA
The following policies apply only to the Linux VDA and can be configured only from Citrix Studio Version 7.12 or later:
ClipboardSelectionUpdateMode
PrimarySelectionUpdateMode
MaxSpeexQuality
These policies are described in the Policy support list. If you are using Citrix Studio Version 7.11 or earlier, you must configure
these policies locally on the Linux VDA using the ct xregct xreg command:
/opt/Citrix/VDA/bin/ctxreg create -k "HKLM\System\CurrentControlSet\Control\Citrix\VirtualChannels\Clipboard\ClipboardSelect ion" -t "REG_DWORD" -v "Flags" -d "your value" --force
/opt/Citrix/VDA/bin/ctxreg create -k "HKLM\System\CurrentControlSet\Control\Citrix\VirtualChannels\Clipboard\PrimarySelect ion" -t "REG_DWORD" -v "Flags" -d "your value" --force
/opt/Citrix/VDA/bin/ctxreg create -k "HKLM\System\CurrentControlSet\Control\Citrix\VirtualChannels\Audio" -t "REG_DWORD" -v "MaxSpeexQuality" -d "your value" --force
NoteThe values are restricted to a certain range. For detailed descriptions, see the Policy support list.

© 1999-2017 Citrix Systems, Inc. All rights reserved. p.170https://docs.citrix.com
Policy support list
Feb 06, 2017
Linux VDA policy support list
Studio Policy Key Name Type Module Default Value
ICA keep alives SendICAKeepAlives computer ICA\Keep Alive Do not send ICA
keep alive
messages (0)
ICA keep alive
timeout
ICAKeepAliveTimeout computer ICA\Keep Alive 60 seconds
ICA listener port
number
IcaListenerPortNumber computer ICA 1494
Audio redirection
bandwidth limit
LimitAudioBw user Audio 0 Kbps
Client audio
redirection
AllowAudioRedirection user Audio Allowed (1)
Client printer
redirection
AllowPrinterRedir user Printing Allowed (1)
Client clipboard
redirection
AllowClipboardRedir user Clipboard Allowed (1)
Client USB device
redirection
AllowUSBRedir user USB Prohibited (0)
Client USB device
redirection rules
USBDeviceRules user USB “\0”
Moving image
compression
MovingImageCompressionConfiguration user ThinWire Enabled (1)
Target minimum
frame rate
TargetedMinimumFramesPerSecond user ThinWire 10 fps

© 1999-2017 Citrix Systems, Inc. All rights reserved. p.171https://docs.citrix.com
Target frame rate FramesPerSecond user ThinWire 30 fps
Visual quality VisualQuality user ThinWire Medium (3)
Use video codec for
compression
VideoCodec user ThinWire Use when
preferred (3)
Use hardware
encoding for video
codec
UseHardwareEncodingForVideoCodec user ThinWire Enabled (1)
Preferred color
depth for simple
graphics
PreferredColorDepth user ThinWire 24 bits per pixel
(1)
Audio quality SoundQuality user Audio High – high
definition audio
(2)
Client microphone
redirection
AllowMicrophoneRedir user Audio Allowed (1)
Maximum number of
sessions
MaximumNumberOfSessions computer Load Management 250
Concurrent logons
tolerance
ConcurrentLogonsTolerance computer Load Management 2
Enable auto update
of Controllers
EnableAutoUpdateOfControllers computer Virtual Delivery
Agent Settings
Allowed (1)
Clipboard selection
update mode
ClipboardSelectionUpdateMode user Clipboard 3
Primary
selection update
mode
PrimarySelectionUpdateMode user Clipboard 3
Max Speex quality MaxSpeexQuality user Audio 5

© 1999-2017 Citrix Systems, Inc. All rights reserved. p.172https://docs.citrix.com
Auto connect client
drives
AutoConnectDrives user ICA\File Redirection Enabled (1)
Client optical drives AllowCdromDrives user ICA\File Redirection Allowed (1)
Client fixed drives AllowFixedDrives user ICA\File Redirection Allowed (1)
Client floppy drives AllowFloppyDrives user ICA\File Redirection Allowed (1)
Client network drives AllowNetworkDrives user ICA\File Redirection Allowed (1)
Client removable
drives
AllowRemoveableDrives user ICA\File Redirection Allowed (1)
Client drive
redirection
AllowDriveRedir user ICA\File Redirection Allowed (1)
Read-only client
drive access
ReadOnlyMappedDrive user ICA\File Redirection Disabled (0)
New policies for Linux VDA
The following policies can be configured in version 7.12 of Citrix Studio.
Max Speex Quality
Applies to: Linux VDA 1.4 and later
Scope:
Value (integer): [0 - 10]
Use default value: 5
Details:
Audio redirection encodes audio data with the Speex codec when audio quality is medium or low (see the policy Audio
quality). Speex is a lossy codec, which means that it achieves compression at the expense of fidelity of the input speech
signal. Unlike some other speech codecs, it is possible to control the tradeoff made between quality and bit rate. The Speex
encoding process is controlled most of the time by a quality parameter that ranges from 0 to 10. The higher the quality is,
the higher the bit rate.
The max Speex quality chooses the best Speex quality to encode audio data according to audio quality and bandwidth limit
(see the policy Audio redirection bandwidth limit). If the audio quality is medium, the encoder is in wide band mode, which
means a higher sampling rate. If the audio quality is low, the encoder is in narrow band mode, which means a lower sampling

© 1999-2017 Citrix Systems, Inc. All rights reserved. p.173https://docs.citrix.com
rate. The same Speex quality has different bit rates in different modes. The best Speex quality is when the largest value
meets the following conditions:
It is equal to or less than the max Speex quality
Its bit rate is equal to or less than the bandwidth limit
Related Settings: Audio Quality, Audio redirection bandwidth limit
Primary Selection Update Mode
Applies to: Linux VDA 1.4 and later
Scope:
Value (enum): [0, 1, 2, 3]
Use default value: 3
Details:
PRIMARY selection is used for explicit copy/paste actions such as mouse selection and middle mouse button paste. This
setting controls whether PRIMARY selection changes on the Linux VDA can be updated on the client’s clipboard (and vice
versa). It can include one of the following selection changes:
Selection changes are not updated on the client or the host.PRIMARY selection changes do not update a client’s clipboard. Client clipboard changes do not update PRIMARY
selection.
Host selection changes are not updated on the client.PRIMARY selection changes do not update a client’s clipboard. Client clipboard changes update the PRIMARY selection.
Client selection changes are not updated on the host.PRIMARY selection changes update the client’s clipboard. Client clipboard changes do not update the PRIMARY
selection.
Selection changes are updated on both the client and host.PRIMARY selection change updates the client’s clipboard. Client clipboard changes update the PRIMARY selection.
Related Settings: Clipboard Selection Update Mode
Clipboard Selection Update Mode
Applies to: Linux VDA 1.4 and later
Scope:
Value (enum): [0, 1, 2, 3]
Use default value: 3
Details:
This setting controls whether CLIPBOARD selection changes on the Linux VDA are updated on the client’s clipboard (and
vice versa). It can include one of the following selection changes:

© 1999-2017 Citrix Systems, Inc. All rights reserved. p.174https://docs.citrix.com
Selection changes are not updated on the client or the host.CLIPBOARD selection changes do not update a client’s clipboard. Client clipboard changes do not update CLIPBOARD
selection.
Host selection changes are not updated on the client. CLIPBOARD selection changes do not update a client’s clipboard. Client clipboard changes update the CLIPBOARD
selection.
Client selection changes are not updated on the host.CLIPBOARD selection changes update the client’s clipboard. Client clipboard changes do not update the CLIPBOARD
selection.
Selection changes are updated on both the client and host.CLIPBOARD selection change updates the client’s clipboard. Client clipboard changes update the CLIPBOARD selection.
Related Settings: Primary Selection Update Mode

© 1999-2017 Citrix Systems, Inc. All rights reserved. p.175https://docs.citrix.com
Configure LDAPS
Feb 06, 2017
Secure LDAP (LDAPS) allows you to enable the Secure Lightweight Directory Access Protocol for your Active Directory
managed domains to provide communication over SSL (Secure Socket Layer)/TLS (Transport Layer Security).
By default, LDAP communications between client and server applications are not encrypted. LDAP using SSL/TLS (LDAPS)
enables you to protect the LDAP query content between Linux VDA and LDAP servers.
The following Linux VDA components have dependencies on LDAPS:
broker agent: Linux VDA registration to DDC
policy service: Policy evaluation
Configuring LDAPS involves:enable LDAPS on the Active Directory (AD)/LDAP server
export the root ICA for client use
enable/disable LDAPS on Linux VDA
configure LDAPS for third-party platforms
configure SSSD
configure Winbind
configure Centrify
configure Quest
Enable LDAPS on the AD/LDAP server
You can enable LDAP over SSL (LDAPS) by installing a properly formatted certificate from either a Microsoft certification
authority (CA) or a non-Microsoft CA.
TipLDAP over SSL/TLS (LDAPS) is automatically enabled when you install an Enterprise Root CA on a domain controller.
For more information about how to install the certificate and verify the LDAPS connection, see How to enable LDAP over
SSL with a third-party certification authority on the Microsoft Support site.
When you have a multi-tier (such as a two-tier or three-tier) certificate authority hierarchy, you will not automatically have
the appropriate certificate for LDAPS authentication on the domain controller.
For information about how to enable LDAPS for domain controllers using a multi-tier certificate authority hierarchy, see
the LDAP over SSL (LDAPS) Certificate article on the Microsoft TechNet site.
Enable root certificate authority for client use
The client must be using a certificate from a CA that the LDAP server trusts. To enable LDAPS authentication for the client,
import the root CA certificate to trust keystore.
For more information about how to export Root CA, see How to export Root Certification Authority Certificate on the

© 1999-2017 Citrix Systems, Inc. All rights reserved. p.176https://docs.citrix.com
Microsoft Support website.
Enable or disable LDAPS on the Linux VDA
To enable or disable LDAPS for Linux VDA, run the following script (while logged in as an administrator):
The syntax for this command includes the following:
enable LDAP over SSL/TLS with the root CA certif icate provided:
/opt/Citrix/VDA/sbin/enable_ldaps.sh -Enable pathToRootCA
fallback to LDAP without SSL/TLS
/opt/Citrix/VDA/sbin/enable_ldaps.sh -Disable
The Java keystore dedicated for LDAPS is located in /etc/xdl/.keystore. Affected registry keys include:
HKLM\Software\Citrix\VirtualDesktopAgent\ListOfLDAPServers
HKLM\Software\Citrix\VirtualDesktopAgent\ListOfLDAPServersForPolicy
HKLM\Software\Citrix\VirtualDesktopAgent\UseLDAPS
HKLM\Software\Policies\Citrix\VirtualDesktopAgent\Keystore
Configure LDAPS for third-party platform
Besides the Linux VDA components, there are several third-party software components that adhere to the Linux VDA that
might also require secure LDAP, such as SSSD, Winbind, Centrify, and Quest. The following sections describe how to
configure secure LDAP with LDAPS, STARTTLS or SASL sign and seal.
command COPY
command COPY
command COPY
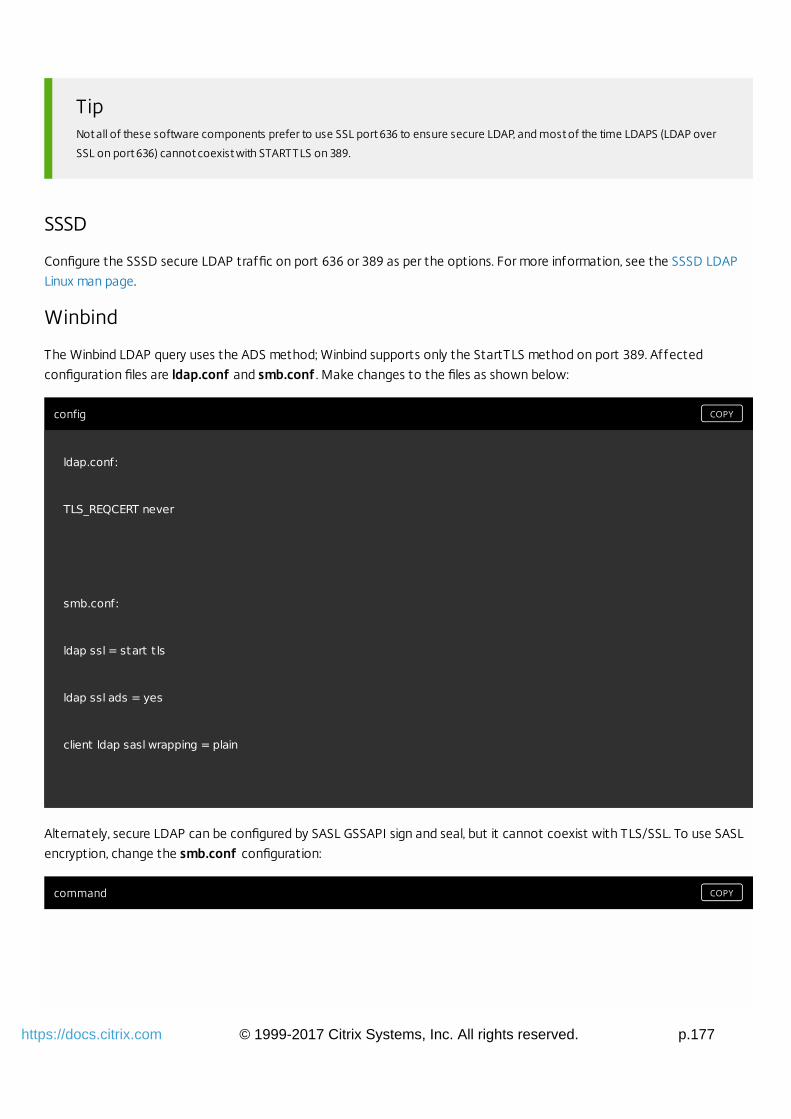
© 1999-2017 Citrix Systems, Inc. All rights reserved. p.177https://docs.citrix.com
TipNot all of these software components prefer to use SSL port 636 to ensure secure LDAP, and most of the time LDAPS (LDAP over
SSL on port 636) cannot coexist with STARTTLS on 389.
SSSD
Configure the SSSD secure LDAP traffic on port 636 or 389 as per the options. For more information, see the SSSD LDAP
Linux man page.
Winbind
The Winbind LDAP query uses the ADS method; Winbind supports only the StartTLS method on port 389. Affected
configuration files are ldap.conf and smb.conf . Make changes to the files as shown below:
ldap.conf:
TLS_REQCERT never
smb.conf:
ldap ssl = start t ls
ldap ssl ads = yes
client ldap sasl wrapping = plain
Alternately, secure LDAP can be configured by SASL GSSAPI sign and seal, but it cannot coexist with TLS/SSL. To use SASL
encryption, change the smb.conf configuration:
config COPY
command COPY

© 1999-2017 Citrix Systems, Inc. All rights reserved. p.178https://docs.citrix.com
smb.conf:
ldap ssl = off
ldap ssl ads = no
client ldap sasl wrapping = seal
Centrify
Centrify does not support LDAPS on port 636. However, it does provide secure encryption on port 389. For more
information, see the Centrify site.
Quest
Quest Authentication Service does not support LDAPS on port 636, but it provides secure encryption on 389 using a
different method. For more information, see the Quest authentication article.
Troubleshooting
The following issues might arise when using this feature:
LDAPS service availability
Verify that the LDAPS connection is available on the AD/LDAP server. The port is on 636 by default.
Linux VDA registration failed when LDAPS is enabled
Verify that the LDAP server and port(s) are configured correctly. Check the Root CA Certificate first and ensure that it
matches the AD/LDAP server.
Incorrect registry change by accident
If the LDAPS related keys (listed above) were updated by accident without using enable_ldaps.sh, it might break the
dependency of LDAPS components.
LDAP traffic is not encrypted through SSL/TLS f rom Wireshark or any other network monitoring tools
By default, LDAPS is disabled. Run /opt/Citrix/VDA/sbin/enable_ldaps.sh to force it.
There is no LDAPS traffic f rom Wireshark or any other networking monitoring tool
LDAP/LDAPS traffic occurs when Linux VDA registration and Group Policy evaluation occurs.
Failed to verify LDAPS availability by running ldp connect on the AD server
Use the AD FQDN instead of the IP Address.

© 1999-2017 Citrix Systems, Inc. All rights reserved. p.179https://docs.citrix.com
Failed to import Root CA certificate by running the /opt/Citrix/VDA/sbin/enable_ldaps.sh script
Provide the full path of the CA certificate, and verify that the Root CA Certification is the correct type. Generally speaking,
it’s supposed to work with most of the Java Keytool types supported. If it 's not listed in the support list, you can convert
the type first. Citrix recommends the base64 encoded PEM format if you encounter a certificate format problem.
Failed to show the Root CA certificate with Keytool -list
When you enable LDAPS by running /opt/Citrix/VDA/sbin/enable_ldaps.sh, the certificate is imported to
/etc/xdl/.keystore, and the password is set to protect the keystore. If you forget the password, you can rerun the script to
create a new keystore.

© 1999-2017 Citrix Systems, Inc. All rights reserved. p.180https://docs.citrix.com
Configure Xauthority
Feb 06, 2017
Environments that use interactive remoting using X11 display functionality (including xterm, gvim, etc.) are supported by the
Linux VDA. This feature provides a security mechanism necessary to ensure secure communication between XClient and
XServer.
There are two methods to secure permission for this secure communication:
Xhost . By default, Xhost allows only the localhost XClient to communicate with XServer. If you choose to allow a
remote XClient to access XServer, the Xhost command must be executed to grant permission on the specif ic machine.
Or, you can alternately use xhost + to allow any XClient to connect to XServer.
Xauthority. The Xauthority f ile can be found in each user's home directory and is used to store credentials in cookies
used by xauth for authentication of XServer. Once an XServer instance (Xorg) is started, the cookie is used to
authenticate connections to that specif ic display.
How it works
When Xorg starts up, an Xauthority file is passed to the Xorg. This Xauthority file contains the following elements:
display number
remote request protocol
cookie number
You can browse this file using the xauth command. For example:
# xauth –f ~/.Xauthority
# > list
# > us01msip06:107 MIT-MAGIC-COOKIE-1 fb228d1b695729242616c5908f11624b
If XClient connects to the Xorg remotely, two prerequisites must be met:
Set the DISPLAY environment variable to the remote XServer.
Get the Xauthority f ile which contains one of the cookie numbers in Xorg.
Configure Xauthority
To enable Xauthority on the Linux VDA for remote X11 display, you must create the following two registry keys:
command COPY
command COPY

© 1999-2017 Citrix Systems, Inc. All rights reserved. p.181https://docs.citrix.com
sudo /opt/Citrix/VDA/bin/ctxreg create -k "HKLM\System\CurrentControlSet\Control\Citrix\Xorg" -t "REG_DWORD" -v "XauthEnabled" -d "0x00000001" --force
sudo /opt/Citrix/VDA/bin/ctxreg create -k "HKLM\System\CurrentControlSet\Control\Citrix\Xorg" -t "REG_DWORD" -v "ListenTCP" -d "0x00000001" --force
After enabling Xauthority, pass the Xauthority file to XClient manually or by mounting a shared home directory:
Pass the Xauthority f ile to XClient manually
After launching an ICA session, the Linux VDA generates the Xauthority file (the filename is .Xauthority) for the XClient and
stores the file in the logon user's home directory. You can copy this Xauthority file to the remote XClient machine, and set
the DISPLAY and XAUTHORITY environment variables. DISPLAY is the display number stored in the Xauthority file
and XAUTHORITY is the file path of Xauthority. For an example, see the following command:
set DISPLAY={Display number stored in the Xauthority file}
set XAUTHORITY={the file path of .Xauthority}
NoteIf the XAUTHORITY environment variable is not set, the ~/.Xauthority file will be used by default.
Pass the Xauthority f ile to XClient by mounting a shared home directory
The convenient way is to mount a shared home directory for the logon user. When the Linux VDA starts an ICA session, the.Xauthority f ile is created under the logon user's home directory. If this home directory is shared with XClient, the user doesnot need to manually transmit this Xauthority f ile to XClient. After the DISPLAY and XAUTHORITY environment variablesare set correctly, the GUI is displayed in XServer desktop automatically.
Troubleshooting
If Xauthority fails to work, follow the troubleshooting steps below:
1. As an administrator with root privilege, retrieve all of Xorg cookies:
command COPY
command COPY

© 1999-2017 Citrix Systems, Inc. All rights reserved. p.182https://docs.citrix.com
ps aux | grep -i xorg
This command displays the Xorg process and the parameters passed to Xorg while starting. Another parameter displays
which Xauthority file is used. For example:
/var/xdl/xauth/.Xauthority110
Display the cookies using the Xauth command:
Xauth -f /var/xdl/xauth/.Xauthority110
2. Use the Xauth command to show the cookies contained in ~/.Xauthority. For the same display number, the displayed
cookies must be the same in the Xauthority files of Xorg and XClient.
3. If the cookies are the same, check the remote display port accessibility with the IP address of the Linux VDA (for
example, 10.158.11.11) and the published desktop display number (for example, 160).
Run the following command on the XClient machine:
telnet 10.158.11.11 6160
The port number is the sum of 6000 + <display number>.
If this telnet operation fails, the firewall might be blocking the request.
command COPY
command COPY
command COPY

© 1999-2017 Citrix Systems, Inc. All rights reserved. p.183https://docs.citrix.com
Configure IPv6
Feb 06, 2017
This release of the Linux VDA provides support for IPv6 to align with functionality previously provided by XenApp and
XenDesktop. When using this feature, consider the following:
For dual stack environments, IPv4 will be used unless IPv6 is explicitly enabled.
If IPv6 is enabled in an IPv4 environment, the Linux VDA fails to function.
ImportantThe whole network environment needs to be IPv6, not only for the Linux VDA.
No special setup tasks are required for IPv6 when installing the Linux VDA.
Configure IPv6 for the Linux VDA
Before changing the configuration for the Linux VDA, ensure that your Linux virtual machine has previously worked in an
IPv6 network. There are two registry keys related to IPv6 configuration:
“HKLM\Software\Policies\Citrix\VirtualDesktopAgent” -t “REG_DWORD” -v “OnlyUseIPv6ControllerRegistrat ion”
“HKLM\Software\Policies\Citrix\VirtualDesktopAgent” -t “REG_DWORD” -v “ControllerRegistrat ionIPv6Netmask”
OnlyUseIPv6ControllerRegistration must be set to 1 to enable IPv6 on the Linux VDA:
sudo /opt/Citrix/VDA/bin/ctxreg create -k "HKLM\Software\Policies\Citrix\VirtualDesktopAgent" -t "REG_DWORD" -v "OnlyUseIPv6ControllerRegistrat ion" -d "0x00000001" --force
If the Linux VDA has more than one network interfaces, ControllerRegistrationIPv6Netmask can be used to specify
which one is used for the Linux VDA registration:
registry key COPY
command COPY
command COPY

© 1999-2017 Citrix Systems, Inc. All rights reserved. p.184https://docs.citrix.com
sudo /opt/Citrix/VDA/bin/ctxreg create -k "HKLM\Software\Policies\Citrix\VirtualDesktopAgent" -t "REG_SZ" -v "ControllerRegistrat ionIPv6Netmask " -d "{IPv6 netmask}" --force
Replace {IPv6 netmask} with the real netmask (for example, 2000::/64).
For more information about IPv6 deployment in XenApp and XenDesktop, see IPv4/IPv6 support.
Troubleshooting
Check the basic IPv6 network environment and use ping6 to check whether AD and DDC are reachable.