linuxworld conference and expo august 6th 2007
TRANSCRIPT

LinuxWorld Conference and ExpoAugust 6th 2007
Kickstart Tips and TricksChip ShabazianVice President
Sr. Consultant – System EngineeringBank of America
E&O Operating System Services
Table of ContentsIntroduction................................................................................................................................................2Command Section......................................................................................................................................6%packages................................................................................................................................................12%pre.........................................................................................................................................................14Booting the system...................................................................................................................................20%post........................................................................................................................................................27Troubleshooting.......................................................................................................................................31Common Problems...................................................................................................................................33Tools.........................................................................................................................................................34Other provisioning technologies..............................................................................................................49Best Practices...........................................................................................................................................53Infrastructure Examples...........................................................................................................................54Resources.................................................................................................................................................56References................................................................................................................................................60Appendix A: Boot options........................................................................................................................61Appendix B: Starting kickstart options....................................................................................................67Appendix C: ks.cfg options......................................................................................................................75

Kickstart Tips and Tricks
LinuxWorld Expo San FranciscoMonday, August 6th, 2007
Chip ShabazianVice President
Sr. Consultant – System EngineeringBank of America
E&O Operating System Services
Page 2

What is kickstart
Kickstart is an automated method to build servers that utilize the anaconda build tools. By utilizing ks.cfg files, server builds can be consistent with no user interaction required to bring a machine from bare metal to fully functional and ready for deployment
Page 3

Why use kickstart
● Streamline builds
● Enforce build consistency
– Packages
– Partitions
– Configurations
– Monitoring
– Security
● Rapid bare metal deployment
● Reduce human errors
Page 4

Kickstart sections
A kickstart file is comprised of four sections:
● The Command Section
– System configuration
● %packages
– Package manifest
● %pre
– Commands run before the build
● %post
– Commands run after the build
Page 5

The command section
This is where system configuration items are set. Required items for new builds include:
● auth
– Authentication options for the system
● bootloader
– bootloader options (grub is now the only bootloader used)
● keyboard
– keyboard type, eg: us
Page 6
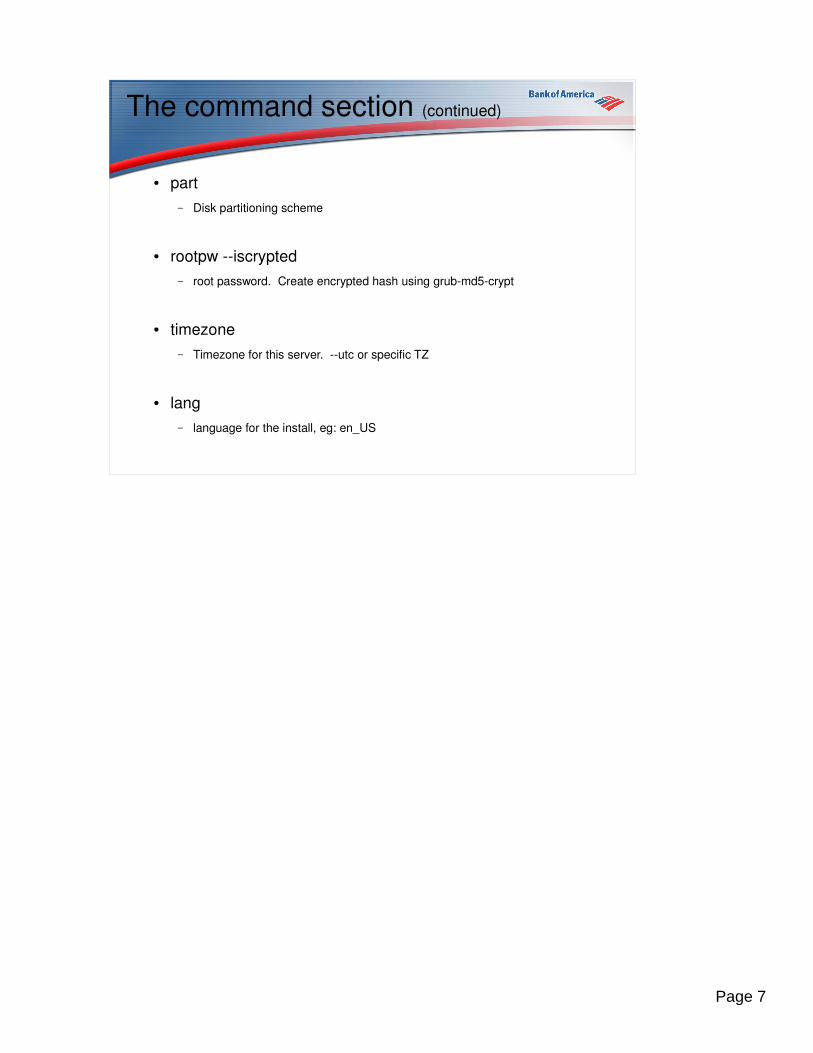
The command section (continued)
● part
– Disk partitioning scheme
● rootpw --iscrypted
– root password. Create encrypted hash using grub-md5-crypt
● timezone
– Timezone for this server. --utc or specific TZ
● lang
– language for the install, eg: en_US
Page 7

The command section (continued)
Other non-required but typical kickstart entries include:
● clearpart
– This will remove existing partitions for a clean install
● driverdisk
– Add drivers for additional components
● firewall
– --enabled or --disabled
– Specific rules can also be included
Page 8

The command section (continued)
● install
– Do a fresh install, not an upgrade
– Specify the install source
● network
– Configure one or more NIC's
● reboot
– Reboot the server after the install
● repo
– Add additional repo's for build currency and additional packages
Page 9

The command section (continued)
● selinux
– --disabled | --enforcing | --permissive
● skipx
– Don't configure X
● text
– Don't use the GUI
Page 10

The command section %include
%include can be one of the most powerful additions to any part of your kickstart file, and can be used in the command section to include information that is either dynamically generated or retrieved in the %pre
Page 11

%packages
The %package section is used to create your manifest of rpm packages:
● Default is Base
● Use --nobase to skip base packages– Not recommended without adding back in AT LEAST
● @core● yum● openssh-server
● Use --ignoremissing to avoid user interaction for missing packages and groups. Best to resolve all dependencies though.
Page 12

%packages (Continued)
● Use @ for groups– Both Base and groups can be viewed by examining the comps.xml
file
● Add or remove specific packages– add_this_packagename
– -don't_install_this_packagename
● Yes, you can use %include in %packages too
Page 13

%pre
● --interpreter
– To change from default bash
● /usr/bin/perl
● /usr/bin/python
LOTS of customization and automagic can be performed in the %pre section.
● Create the network line
● Partition the disks
● Retrieve configurations over the network
● What do YOU need to do?
Page 14

%pre - Create the network line
If you use dhcp, or even if you assign the IP address on the boot: line, you can statically assign the address to the server:
In the command section
%include /tmp/buildnet
In %PRE
ETH=`grep DEVICE /tmp/netinfo | cut -d = -f 2`
IP=`ifconfig $ETH | grep inet | cut -d : -f 2 | cut -d " " -f 1`
NETMASK=`ifconfig $ETH | grep inet | cut -d : -f 4`
GATEWAY=`route | grep default | cut -b 17-32 | cut -d " " -f 1`
HOSTNAME=`grep HOSTNAME /tmp/netinfo | cut -d = -f 2 | cut -d . -f 1`
cat << EOF > /tmp/buildnet
network --device $ETH --bootproto static --ip=$IP --netmask=$NETMASK
--gateway=$GATEWAY --hostname=$HOSTNAME
EOF
Page 15

%pre - Partition the disks
You can decision based on number/type/size of drives:
In the command section%include /tmp/buildnet
In %PRE# Determine how many number/type/size of drives we have
set $(list-harddrives)let numd=$#/2 # This will provide the total # of drivesd1=$1 # This is the device of disk 1
d2=$3 # This is the device of disk 2, etc.S1=$2 # This is the size of disk 1S2=$4 # This is the size of disk 2, etc.
Page 16

%pre - Partition the disks (continued)
You can decision based on number/type/size of drives:
In %PRE (continued)
# This would be a partition scheme for two or more drivesif [ $numd -ge 2 ] ; then cat << EOF >> /tmp/partinfo part pv.01 --size=1 --grow --fstype=ext3 --
ondisk=$d1 volgroup volgrp01 pv.01 part pv.02 --size=1 --grow --fstype=ext3 --ondisk=$d2 volgroup volgrp02 pv.02 #HOWEVER_YOU_WANT_TO_PARTITION EOF
else
cat << EOF >> /tmp/partinfo part pv.01 --size=1 --grow --fstype=ext3 --ondisk=$d1 volgroup volgrp01
pv.01 #HOWEVER_YOU_WANT_TO_PARTITION EOF
fi
Page 17

%pre - Retrieve configurations over the network
Using tools such as wget, you can retrieve items to be included in the command section
In the command section
%include /tmp/file_to_include
In %PRE
wget http://server/info_to_include -O /tmp/file_to_include
Page 18

%pre – More %pre
Get values from your kickstart filegrep /tmp/ks.cfg file
touch /tmp/kickstartingUse this as a trigger in your rpm's
Page 19

Booting the System
You may kickstart your system using any method to boot the system:
● Local Drive– Copy vmlinuz and initrd.img from boot.iso and add it to grub using grubby.
Great for upgradesgrubby --title=rebuild5 --add-kernel=/boot/vmlinuz5 \-c /etc/grub.conf --initrd=/boot/initrd5.img \--args="ks=http://path/to/ks.cfg text ksdevice=eth0 \
ramdisk_size=8192 noipv6"
● PXEBoot– This is the preferred method for kickstarting large numbers of systems.
PXEBoot is built into most modern systems and allows bare metal builds without the need for media.
Page 20

Booting the System (Continued)
● CD
– Disk 1 has a minimal boot.iso image that can be used to boot a system. If network connectivity is an issue, you can embed your kickstart file in the initrd:
mkdir initrd
cd initrd
gzip -dc path/to/unzipped/initrd.img | cpio -id
# Make the changes you need
find . | cpio -c -o | gzip -9 > /path/to/new/initrd.img
– You will need to use mkisofs to regenerate your boot.iso image after embedding a ks.cfg
Page 21

Booting the System (Continued)
●USB
– Disk 1 also contains diskboot.img which can be copied to a USB drive using dd:
dd if=/path/to/diskboot.img of=/dev/your_usb_drive
(if your usb drive is sda, use /dev/sda)
– Once the usb boot media is created, you can mount it and copy across your kickstart files without the need to embed them in the initrd
Page 22

Useful boot: options
● text
– Launches a text mode installation
● ks=
– Location of the kickstart file
● nofb
– Turns off frame buffer. Needed for HP DL installs
● dd=
– Load device drivers over the network for the build
● nostorage
– Prevents disk from loading. One solution to SAN issues
Page 23

Other boot: options
Documented options can be found in Appendix A. These boot: options aren't found in the online documentation, but may be useful:
● nicdelay and linksleep
– nicdelay=50 linksleep=50
– Supposed to delay bringing up the NIC for XX seconds to allow portfast negotiation. YMMV
● ethtool
– eth0_ethtool="autoneg=on speed=1000 duplex=full"
● latefcload
– Supposed to load fiber channel last to ensure you don't build over existing SAN data. YMMV
Page 24

Where to get your kickstart file
● NFS
– ks=nfs:ip_address:/path/to/ks.cfg
● Local Disk
– ks=hd:sda3:/ks.cfg (must be vfat or ext2)
● Floppy / CDROM
– ks={floppy,cdrom}:/ks.cfg # use floppy OR cdrom
● HTTP / FTP
– ks={http,ftp}://your.server.com/path/to/ks.cfg # use http OR ftp
● Embedded in initrd
– ks=file:/ks.cfg
Page 25

Yummy builds
New in RHEL 5
● Allows a stable base install, while providing a current build
● Can be used to load non distribution RPM's in %packages instead of %post
repo --name=updates --baseurl=http://your.server.com/updates/5
repo --name=my_extras --baseurl=http://your.server.com/extras/5
Page 26

%post
--nochroot
– Used in the pre-chrooted environement. Useful for copying over information from the build environment to the built environment
● --interpreter
– /usr/bin/python
– /usr/bin/perl
NOTE: You can run multiple %post sections. This is useful if you want to first run a --nochroot to copy information from the build environment to the built environment, Then want to run scripts in the chrooted environment.
Page 27

%post (continued)
Function to show something is actually happening in %post
function DIALOG_SPINNER {
MESSAGE="Please stand by while we run the post installation scripts" BOX_SIZE="6 36" state=0
while [ 1 ] do case $state in
0) dialog --infobox "\n $MESSAGE |" $BOX_SIZE > /dev/tty1; state=1; ;; 1) dialog --infobox "\n $MESSAGE /" $BOX_SIZE > /dev/tty1; state=2; ;; 2) dialog --infobox "\n $MESSAGE -" $BOX_SIZE > /dev/tty1; state=3; ;;
3) dialog --infobox "\n $MESSAGE \\" $BOX_SIZE > /dev/tty1; state=0 ; ;; esac sleep 1
done}
Page 28

%Post
Since Anaconda doesn't keep a log of what you do in post (or copy %post into the archive kickstart file it creates in /root) lets do it ourselves:
# Let's log everything:
tail -F /root/post-install.log &
(
All of your post commands
) 2>&1 >> /root/post-install.log
The hostname isn't set in the built environment until after the reboot:
# set the hostname for apps that need it
export HOSTNAME=`grep HOSTNAME /etc/sysconfig/network | awk -F= '{print $2}'`
hostname $HOSTNAME
Page 29
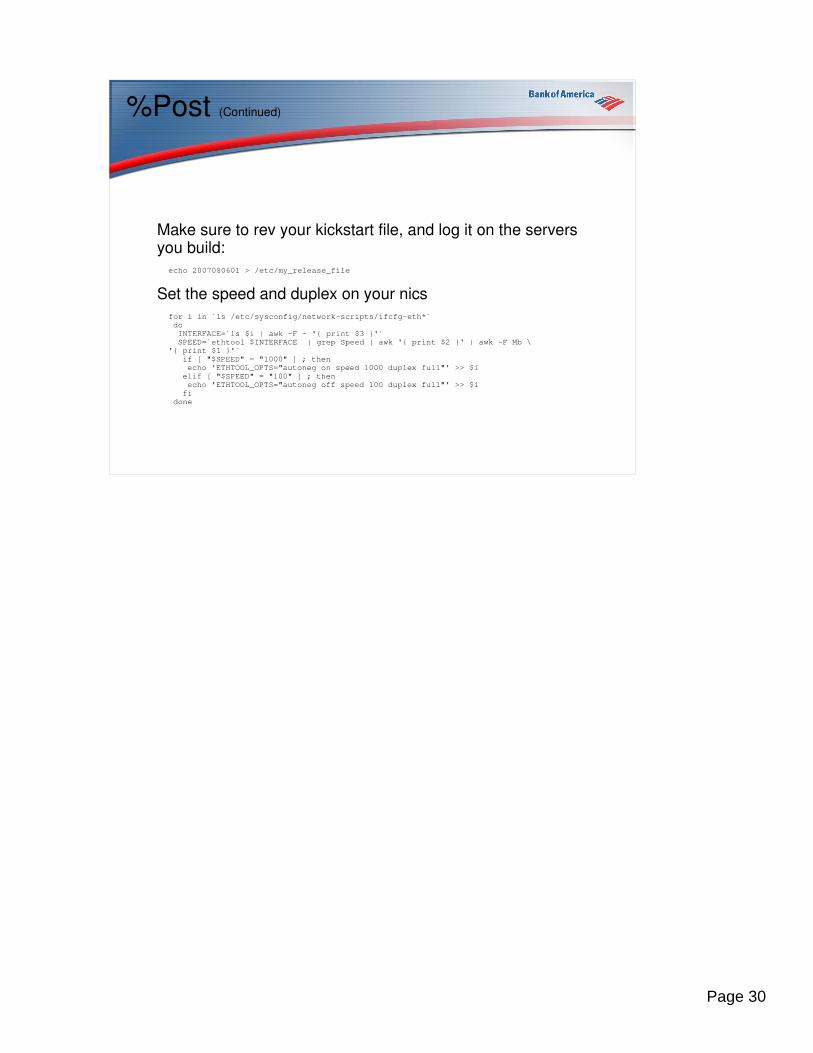
%Post (Continued)
Make sure to rev your kickstart file, and log it on the servers you build:
echo 2007080601 > /etc/my_release_file
Set the speed and duplex on your nics
for i in `ls /etc/sysconfig/network-scripts/ifcfg-eth*` do
INTERFACE=`ls $i | awk -F - '{ print $3 }'` SPEED=`ethtool $INTERFACE | grep Speed | awk '{ print $2 }' | awk -F Mb \'{ print $1 }'`
if [ "$SPEED" = "1000" ] ; then echo 'ETHTOOL_OPTS="autoneg on speed 1000 duplex full"' >> $i
elif [ "$SPEED" = "100" ] ; then echo 'ETHTOOL_OPTS="autoneg off speed 100 duplex full"' >> $i fi
done
Page 30

Troubleshooting
● Bus Enumeration RHEL 4.0 – 4.4. Changed back in 4.5
● put your %pre or %post to sleep
– sleep 999999999
– open a terminal with alt-f2 and manually walk through your build
● Alt-f{2,3,4}
● Portfast issues
Page 31

Troubleshooting
RHEL 5 now requires cpio to edit the initrd
mkdir initrd
cd initrd
gzip -dc path/to/unzipped/initrd.img | cpio -id
# Make the changes you need
find . | cpio -c -o | gzip -9 > /path/to/new/initrd.img
Page 32

Common problems
● Portfast issue
– Compounded by the NIC being cycled three times
● Drivers in the initrd need to be added or removed
– Bust open your initrd and edit the /modules/module-info file
● updating loader
– Allows a stable base build while taking advantage of newer anaconda options
● 255 character limit on boot: line
– Anything beyond 255 characters will simply be ignored. Use wget in %pre to work around
Page 33

Tools to make life easier
● RPM
– Package your stuff
● Cobbler
– Setup a powerful kickstart infrastructure
● Revisor
– Roll your own
● mRepo
– Setup and manage your repositories
Page 34
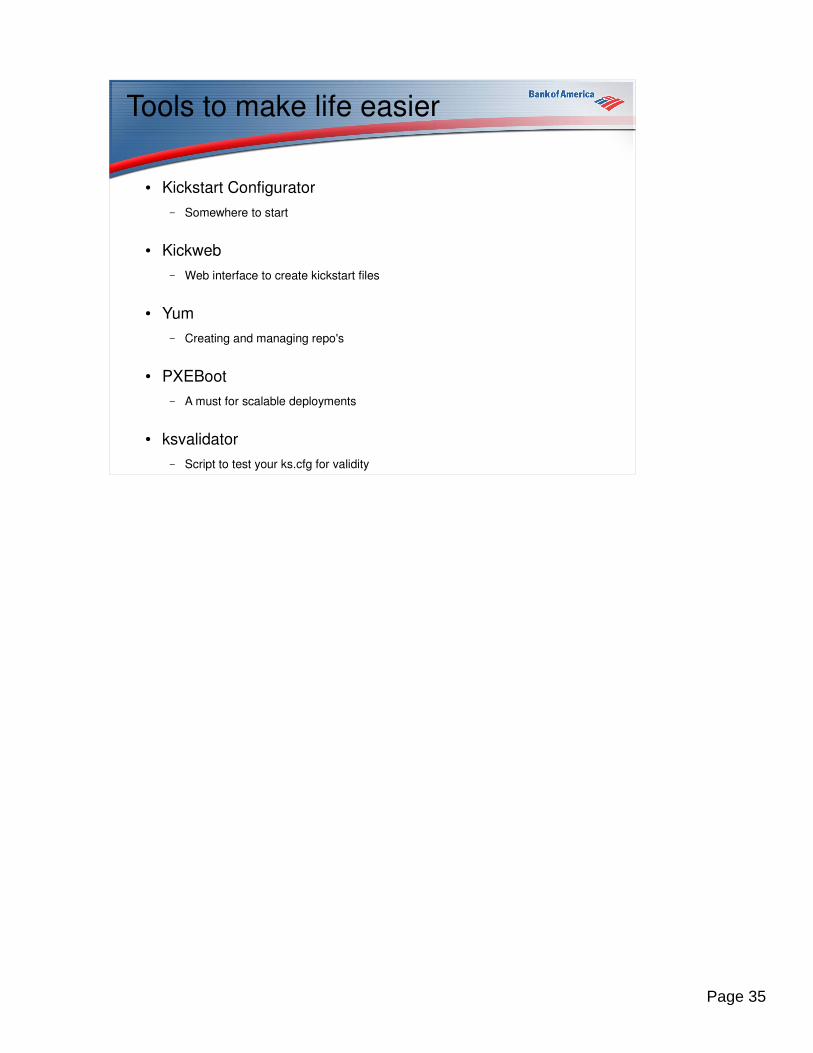
Tools to make life easier
● Kickstart Configurator
– Somewhere to start
● Kickweb
– Web interface to create kickstart files
● Yum
– Creating and managing repo's
● PXEBoot
– A must for scalable deployments
● ksvalidator
– Script to test your ks.cfg for validity
Page 35
RPM
Packaging your deployments is an excellent way to deploy and manage system configuration. Company specific configuration items can be wrapped into an rpm and deployed at build to ensure consistency and security from the outset.
Good packaging guidelines can be found at:
http://fedoraproject.org/wiki/Packaging/Guidelines
Page 36

Cobbler
Probably the best package available for building your own provisioning infrastructure:
● Imports a build tree
● Configures PXEBoot
● Can manage DHCP
● Can build via profiles
● Able to kickstart xen instances
● Remotely rebuild “enchant” systems
● Very active development
http://cobbler.et.redhat.com/documentation.php
Page 37

Revisor
From http://revisor.fedoraunity.org/1
Revisor enables you to customize and compose your own Fedora based installation and live media. It does so by presenting you a GUI with all options you can click you way through, and a CLI and extended configuration files for the more advanced users. Features that Revisor has vary from customizing the packages available during the installation and/or installed on the live media, to fully customizing the desktop environment for the live media.
Video demos: http://revisor.fedoraunity.org/media
Page 38

mRepo
From http://dag.wieers.com/home-made/mrepo/2
mrepo builds a local APT/Yum RPM repository from local ISO files, downloaded updates, and extra packages from 3rd party repositories. It takes care of setting up the ISO files, downloading the RPMs, configuring HTTP access and providing PXE/TFTP resources for remote network installations.
Features
● Easy Yum-alike configuration● Supports mirroring using FISH, FTP, HTTP, RSYNC, SFTP and RHN● Supports Smart, Apt, Yum and up2date (as well as synaptic, yumgui and other derivatives)● Can download and distribute updates from RHN channels● Can work directly from ISO images (so you don't need extra diskspace to store ISOs or copy RPMs)● Supports Red Hat, Fedora Core, Red Hat Enterprise (TaoLinux, CentOS) and Yellow Dog Linux out of
the box● Will probably work with other RPM based distributions (feedback needed, please mail me)● Allows for remote network installation (using a PXE-enabled NIC on target systems)● Support for 3rd party repositories and vendor packages● Allows to maintain your own customized (corporate) repository● Allow for chaining mrepo servers in large organisations with remote sites● Can hardlink duplicate packages (to save precious diskspace)
Page 39

Kickstart Configurator
May be useful in creating a
starting point for your
kickstart file. The real power comes in your customizations
Image copyright Red Hat, Inc.
Page 40

Kickweb
Project seems stalled or abandoned. Kickweb can be used to create a kickstart file similar to kickstart configurator, but as a cgi script, you can modify this as appropriate for you own use.
http://freshmeat.net/projects/kickweb/
Page 41

Yum
From http://linux.duke.edu/projects/yum/3
Yum is an automatic updater and package installer/remover for rpm systems. It automatically computes dependencies and figures out what things should occur to install packages. It makes it easier to maintain groups of machines without having to manually update each one using rpm.
NOTE: As of RHEL 5, Red Hat has moved from up2date to yum as the primary repository system. up2date tools now are a front end to yum
Page 42

PXEBoot
From Wikipedia:4
The Preboot Execution Environment (PXE, aka Pre-Execution Environment, or 'pixie') is an environment to boot computers using a network interface card independently of available data storage devices (like hard disks) or installed operating systems.
Page 43

PXEBoot DHCP Setup
Uses pxelinux.0 from:http://syslinux.zytor.com/pxe.php5
DHCP Configuration:
allow booting; allow bootp;
# Standard configuration directives...
option domain-name "<domain name>"; option subnet-mask <subnet mask>;
option broadcast-address <broadcast address>; option domain-name-servers <dns servers>; option routers <default router>;
# Group the PXE bootable hosts together
group {# PXE-specific configuration directives...next-server <TFTP server address>;
filename "/tftpboot/pxelinux.0";
# You need an entry like this for every host
# unless you're using dynamic addresses host <hostname> {
hardware ethernet <ethernet address>;
fixed-address <hostname>;}
}
Page 44

PXEBoot tftp Setup
● Install tftp-server
● Easiest is to run kickstart-configurator to build tree
● Change tftp-server to it's own daemon instead of an xinetd service if appropriate
● tftpboot directory structure:
/tftpboot
pxelinux.0 # This is the initial pxe bootstrap
/pxelinux.cfg # Contains individual and group pxeboot entries
/linux-install
/RHEL5
/x86
initrd.img
vmlinuz
/x86_64
initrd.img
vmlinuz
Page 45

PXEBoot Entries
Config files are searched for using the system UUID, followed by the MAC address, then the IP in hex, removing one character at a time, and finally loading default. For a system with a UUID of b8945908-d6a6-41a9-611d-74a6ab80b83d, a MAC address of 88:99:AA:BB:CC:DD and an IP of 192.0.2.91 (C000025B), the following search order would be used5:
/tftboot/pxelinux.cfg/b8945908-d6a6-41a9-611d-74a6ab80b83d/tftboot/pxelinux.cfg/01-88-99-aa-bb-cc-dd/tftboot/pxelinux.cfg/C000025B
/tftboot/pxelinux.cfg/C000025/tftboot/pxelinux.cfg/C00002
/tftboot/pxelinux.cfg/C0000/tftboot/pxelinux.cfg/C000/tftboot/pxelinux.cfg/C00
/tftboot/pxelinux.cfg/C0/tftboot/pxelinux.cfg/C/tftboot/pxelinux.cfg/default
Page 46

PXEBoot Config File
The PXEBoot config file contains the same options you would pass at the boot: prompt if you were going to build a system manually:
default mypxebuild
label mypxebuildkernel RHEL5/x86/vmlinuz
append initrd=RHEL5/x86/initrd.img nofb ramdisk_size=10000 ks="http://your.server.com/path/to/your/ks.cfg" ksdevice=eth0 eth0_ethtool="autoneg=on speed=1000 duplex=full"
Page 47

PXEBoot Menuing
You can create simple to powerful, nested menuing sytems using PXEBoot and syslinux. In fact, Cobbler will help you do this to avoid manually creating these menu's. For custom menus, refer to the syslinux page:
http://syslinux.zytor.com/faq.php6
Page 48

Other provisioning technologies
● System Imager
– Cloned installations
● Satellite
– Provisioning module does bare metal builds
● Levanta
– Intrepid product line
Page 49

System Imager
From http://systemimager.org/7
SystemImager is software which automates Linux installs, software distribution, and production deployment. SystemImager is a part of System Installation Suite.
SystemImager makes it easy to do automated installs (clones), software distribution, content or data distribution, configuration changes, and operating system updates to your network of Linux machines. You can even update from
one Linux release version to another!
It can also be used to ensure safe production deployments. By saving your current production image before updating to your new production image, you have a highly reliable contingency mechanism. If the new production enviroment is
found to be flawed, simply roll-back to the last production image with a simple update command!
Some typical environments include: Internet server farms, database server farms, high performance clusters, computer labs, and corporate desktop environments.
Page 50

Red Hat Satellite with Provisioning
From https://www.redhat.com/rhn/rhndetails/provisioning/8
The Provisioning Module allows you to:
● Manage the complete life cycle of your Linux infrastructure.● Deploy, configure, manage, update, and then re-deploy your Linux systems, all
from a single GUI console complete with all the necessary enterprise functionality and controls.
Functionality ● Bare metal provisioning● Existing state provisioning● Multi-state rollback (includes snapshot based recovery)● Configuration management● RPM based application provisioning● Kickstart configuration writer
Page 51

Levanta Intrepid M
From http://www.levanta.com/9
Levanta's Turn-Key Linux Management Appliance
The Intrepid M combines data center-proven Linux management technology with shared storage and Open Source software to create an all-in-one solution to your Linux systems management needs. The Intrepid M is preconfigured so you can be up and running in less than one hour.
Features
● Rapidly provision Linux OS and complete application stacks on a variety of hardware, including servers, diskless blades and virtual machines
● Track all changes made to your Linux systems without changing your current processes
● Recover broken systems, even unbootable ones, quickly and safely using our file-level restore
● Replace failed hardware by moving entire systems, in minutes● Seamlessly manage servers, diskless blades and virtual machines using a
single tool
Page 52

Best Practices
● Core Image should be minimal
● Secure from build via RPM
● Geographically distributed kickstart servers
● Web based kickstart interface for consistency
● Don't reinvent the wheel, leverage existing projects
● Log installation
● Copy across full ks.cfg file (remove password using perl/sed)
Page 53

Global Build Example
Data Center OneAsia
Kickstart Server
Data Center TwoUSA
Kickstart Server
Data Center ThreeEMEA
Kickstart Server
Corporate WAN
DMZKickstart Server
DMZ
Internet
Kickstart Server
DMZKickstart Server
Page 54

Global Maintenance Example
Page 55

Resources
● Kickstart mailing list
– https://www.redhat.com/mailman/listinfo/kickstart-list
● Official Red Hat Documentation
– https://www.redhat.com/docs/manuals/enterprise/
● RPM Packaging
– http://fedoraproject.org/wiki/Packaging/Guidelines
● Puppet
– http://reductivelabs.com/projects/puppet
● CFT
– http://cft.et.redhat.com/
● Managing RPM-Based Systems with Kickstart and Yum
– http://www.oreilly.com/catalog/9780596513825/index.html
Page 56

Resources (Continued)
● Extending Kickstart– http://fedoraproject.org/wiki/AnacondaExtendingKickstart
● Fedora “Other Technical Documentation”– http://docs.fedoraproject.org/install-guide/f7/en_US/ap-techref.html
● Kickstart Configurator– https://www.redhat.com/docs/manuals/enterprise/RHEL-5-manual/Installation_Guide-en-US/ch-redhat-config-kickstart.html
● Anaconda Network Issues– http://fedoraproject.org/wiki/AnacondaNetworkIssues
● Owl River tips page– http://www.owlriver.com/tips/
● Yum– http://docs.fedoraproject.org/yum/en/
● CFEngine
Page 57

Disclaimer
The views expressed herein are the views of the author and are based upon direct and indirect experiences with Kickstart and other provisioning technologies. They do not necessarily represent the views of the Bank of America Corporation.
Page 58

Thanks
● Red Hat, Inc
– Red Hat Training
– All the developers on Anaconda / Kickstart
● CentOS
– Russ Herrold (Owl River)
● Bank of America
– For allowing me to give this presentation and providing me the opportunity to learn kickstart so well
– Brad Crochet for additional kickstart tips
● Everyone on the kickstart mailing list
Page 59

References
1 Welcome to Revisor - Revisor. Retrieved June 27, 2007, from Welcome to Revisor - Revisor Web site: http://revisor.fedoraunity.org/
2 Wieers, Dag DAG: mrepo: Yum/Apt repository mirroring (fka yam). Retrieved June 27, 2007, from DAG: mrepo: Yum/Apt repository mirroring (fka yam) Web site: http://dag.wieers.com/home-made/mrepo/
3 Linux@DUKE: Yum: Yellow dog Updater, Modified. Retrieved June 27, 2007, from Linux@DUKE: Yum: Yellow dog Updater, Modified Web site: http://linux.duke.edu/projects/yum/
4 Preboot Execution Environment - Wikipedia, the free encyclopedia. Retrieved June 27, 2007, from Preboot Execution Environment - Wikipedia, the free encyclopedia Web site: http://en.wikipedia.org/wiki/Preboot_Execution_Environment
5 Anvin, H. Peter PXELINUX - SYSLINUX for network boot. Retrieved June 27, 2007, from SYSLINUX - The Easy-to-use Linux Bootloader Web site: http://syslinux.zytor.com/pxe.php
6 Anvin, H. Peter SYSLINUX - common documentation. Retrieved June 27, 2007, from SYSLINUX - The Easy-to-use Linux Bootloader Web site: http://syslinux.zytor.com/faq.php
7 Main Page - SystemImager. Retrieved June 27, 2007, from Main Page - SystemImager Web site: http://wiki.systemimager.org/index.php/Main_Page
8 redhat.com | Provisioning. Retrieved June 27, 2007, from redhat.com | Home Web site: https://www.redhat.com/rhn/rhndetails/provisioning/
9 Levanta Products - Levanta Intrepid M. Retrieved June 27, 2007, from Levanta - Linux Management On Demand Web site: http://www.levanta.com/products/intrepid-m.shtml
Page 60

Appendix A - Boot Options
Reprinted here with the permission of Red Hat Training.
Page 61

askmethod this command asks you to select the installation method you would like to use when booting from the Red Hat Enterprise Linux CD-ROM.
apic
this x86 boot command works around a bug commonly encountered in the Intel 440GX chipset BIOS and should only be executed with the installation program kernel.
apm=allow_ints
this x86 boot command changes how the suspend service is handled (and may be necessary for some laptops).
apm=off
this x86 boot command disables APM (advanced power management). It is useful because some BIOSes have buggy power management (APM) and tend to crash.
apm=power_off
this x86 boot command makes Red Hat Enterprise Linux shutdown (power off) the system by default. It is useful for SMP systems that do not shutdown by default.
apm=realmode_power_off
some BIOSes crash on x86-based systems when trying to shutdown (power off) the machine. This command changes the method of how this is done from the Windows NT way to the Windows 95 way.
dd
this argument causes the installation program to prompt you to use a driver diskette.
dd=url
this argument causes the installation program to prompt you to use a driver image from a specified HTTP, FTP, or NFS network address.
display=ip:0
this command allows remote display forwarding. In this command, ip should be replaced with the IP address of the system on which you want the display to appear.
On the system you want the display to appear on, you must execute the command xhost +remotehostname, where remotehostname is the name of the host from which you are running the original display. Using the command xhost +remotehostname limits access to
Page 62

the remote display terminal and does not allow access from anyone or any system not specifically authorized for remote access.
driverdisk
this command performs the same function as the dd command and also prompts you to use a driver diskette during the installation of Red Hat Enterprise Linux.
ide=nodma
this command disables DMA on all IDE devices and may be useful when having IDE-related problems.
linux upgradeany
this command relaxes some of the checks on your /etc/redhat-release file. If your /etc/redhat-release file has been changed from the default, your Red Hat Enterprise Linux installation may not be found when attempting an upgrade to Red Hat Enterprise Linux 5. Use this option only if your existing Red Hat Enterprise Linux installation was not detected.
mediacheck
this command gives you the option of testing the integrity of the install source (if an ISO-based method). this command works with the CD, DVD, hard drive ISO, and NFS ISO installation methods. Verifying that the ISO images are intact before you attempt an installation helps to avoid problems that are often encountered during an installation.
mem=xxxm
this command allows you to override the amount of memory the kernel detects for the machine. This may be needed for some older systems where only 16 mb is detected and for some new machines where the video card shares the video memory with the main memory. When executing this command, xxx should be replaced with the amount of memory in megabytes.
nmi_watchdog=1
this command enables the built-in kernel deadlock detector. This command can be used to debug hard kernel lockups. by executing periodic NMI (Non Maskable Interrupt) interrupts, the kernel can monitor whether any CPU has locked up and print out debugging messages as needed.
noapic
this x86 boot command tells the kernel not to use the APIC chip. It may be helpful for some motherboards with a bad APIC (such as the Abit BP6) or with a buggy bios. systems based on the nvidia nforce3 chipset (such as the Asus SK8N) have been known to hang during IDE detection at boot time, or display other interrupt-delivery issues.
Page 63

noht
this x86 boot command disables hyperthreading.
nofb
this command disables frame buffer support and allows the installation program to run in text mode. This command may be necessary for accessibility with some screen reading hardware.
nomce
this x86 boot command disables self-diagnosis checks performed on the CPU. the kernel enables self-diagnosis on the CPU by default (called machine check exception). Early Compaq Pentium systems may need this option as they do not support processor error checking correctly. A few other laptops, notably those using the Radeon IGP chipset, may also need this option.
nonet
this command disables network hardware probing.
nopass
this command disables the passing of keyboard and mouse information to stage 2 of the installation program. It can be used to test keyboard and mouse configuration screens during stage 2 of the installation program when performing a network installation.
nopcmcia
this command ignores any PCMCIA controllers in system.
noprobe
this command disables hardware detection and instead prompts the user for hardware information.
noshell
this command disables shell access on virtual console 2 during an installation.
nostorage
this command disables probing for SCSI and RAID storage hardware.
nousb
this command disables the loading of USB support during the installation. If the installation program tends to hang early in the process, this command may be helpful.
Page 64

nousbstorage
this command disables the loading of the usbstorage module in the installation program's loader. It may help with device ordering on SCSI systems.
numa=off
Red Hat Enterprise Linux supports NUMA (non-uniform memory access) on the AMD64 architecture. while all cpus can access all memory even without numa support, the numa support present in the updated kernel causes memory allocations to favor the cpu on which they originate as much as possible, thereby minimizing inter-CPU memory traffic. This can provide significant performance improvements in certain applications. to revert to the original non-NUMA behavior, specify this boot option.
reboot=b
this x86, AMD64, and Intel® EM64T boot command changes the way the kernel tries to reboot the machine. If a kernel hang is experienced while the system is shutting down, this command may cause the system to reboot successfully.
rescue
this command runs rescue mode. Refer to Chapter 26, Basic System Recovery for more information about rescue mode.
resolution=
tells the installation program which video mode to run. it accepts any standard resolution, such as 640x480, 800x600, 1024x768, and so on.
serial
this command turns on serial console support.
text
this command disables the graphical installation program and forces the installation program to run in text mode.
updates
this command prompts you to insert a floppy diskette containing updates (bug fixes) for the anaconda installation program. It is not needed if you are performing a network installation and have already placed the updates image contents in rhupdates/ on the server.
updates=
Page 65

this command allows you to specify a URL to retrieve updates (bug fixes) for the anaconda installation program.
vnc
this command allows you to install from a VNC server.
vncpassword=
this command sets the password used to connect to the VNC server.
Page 66

Appendix B - Starting kickstart Options
Reprinted here with the permission of Red Hat Training.
Page 67

askmethod
Do not automatically use the CD-ROM as the install source if we detect a Red Hat Enterprise Linux CD in your CD-ROM drive.
autostep
Make kickstart non-interactive.
autostep
Make kickstart non-interactive.
debug
Start up pdb immediately.
dd
Use a driver disk.
dhcpclass=<class>
Sends a custom DHCP vendor class identifier. ISC's dhcpcd can inspect this value using "option vendor-class-identifier".
dns=<dns>
Comma separated list of nameservers to use for a network installation.
driverdisk
Same as 'dd'.
expert
Turns on special features:
• allows partitioning of removable media
• prompts for a driver disk
gateway=<gw>
Gateway to use for a network installation.
graphical
Page 68

Force graphical install. Required to have ftp/http use GUI.
isa
Prompt user for ISA devices configuration.
ip=<ip>
IP to use for a network installation, use 'dhcp' for DHCP.
keymap=<keymap>
Keyboard layout to use. Valid values are those which can be used for the 'keyboard' kickstart command.
ks=nfs:<server>:/<path>
The installation program looks for the kickstart file on the NFS server <server>, as file <path>. The installation program uses DHCP to configure the Ethernet card. For example, if your NFS server is server.example.com and the kickstart file is in the NFS share /mydir/ks.cfg, the correct boot command would be ks=nfs:server.example.com:/mydir/ks.cfg.
ks=http://<server>/<path>
The installation program looks for the kickstart file on the HTTP server <server>, as file <path>. The installation program uses DHCP to configure the Ethernet card. For example, if your HTTP server is server.example.com and the kickstart file is in the HTTP directory /mydir/ks.cfg, the correct boot command would be ks=http://server.example.com/mydir/ks.cfg.
ks=floppy
The installation program looks for the file ks.cfg on a vfat or ext2 file system on the diskette in /dev/fd0.
ks=floppy:/<path>
The installation program looks for the kickstart file on the diskette in /dev/fd0, as file <path>.
ks=hd:<device>:/<file>
The installation program mounts the file system on <device> (which must be vfat or ext2), and look for the kickstart configuration file as <file> in that file system (for example, ks=hd:sda3:/mydir/ks.cfg).
Page 69

ks=file:/<file>
The installation program tries to read the file <file> from the file system; no mounts are done. This is normally used if the kickstart file is already on the initrd image.
ks=cdrom:/<path>
The installation program looks for the kickstart file on CD-ROM, as file <path>.
ks
If ks is used alone, the installation program configures the Ethernet card to use DHCP. The kickstart file is read from the "bootServer" from the DHCP response as if it is an NFS server sharing the kickstart file. By default, the bootServer is the same as the DHCP server. The name of the kickstart file is one of the following:
• If DHCP is specified and the boot file begins with a /, the boot file provided by DHCP is looked for on the NFS server.
• If DHCP is specified and the boot file begins with something other than a /, the boot file provided by DHCP is looked for in the /kickstart directory on the NFS server.
• If DHCP did not specify a boot file, then the installation program tries to read the file /kickstart/1.2.3.4-kickstart, where 1.2.3.4 is the numeric IP address of the machine being installed.
ksdevice=<device>
The installation program uses this network device to connect to the network. For example, to start a kickstart installation with the kickstart file on an NFS server that is connected to the system through the eth1 device, use the command ks=nfs:<server>:/<path> ksdevice=eth1 at the boot: prompt.
kssendmac
Adds HTTP headers to ks=http:// request that can be helpful for provisioning systems. Includes MAC address of all nics in CGI environment variables of the form: "X-RHN-Provisioning-MAC-0: eth0 01:23:45:67:89:ab".
lang=<lang>
Language to use for the installation. This should be a language which is valid to be used with the 'lang' kickstart command.
loglevel=<level>
Set the minimum level required for messages to be logged. Values for <level> are debug, info,
Page 70

warning, error, and critical. The default value is info.
lowres
Force GUI installer to run at 640x480.
mediacheck
Activates loader code to give user option of testing integrity of install source (if an ISO-based method).
method=cdrom
Do a CDROM based installation.
method=ftp://<path>
Use <path> for an FTP installation.
method=hd://<dev>/<path>
Use <path> on <dev> for a hard drive installation.
method=http://<path>
Use <path> for an HTTP installation.
method=nfs:<path>
Use <path> for an NFS installation.
netmask=<nm>
Netmask to use for a network installation.
nofallback
If GUI fails exit.
nofb
Do not load the VGA16 framebuffer required for doing text-mode installation in some languages.
nofirewire
Do not load support for firewire devices.
Page 71

noipv6
Disable IPv6 networking during installation.
nokill
A debugging option that prevents anaconda from terminating all running programs when a fatal error occurs.
nomount
Don't automatically mount any installed Linux partitions in rescue mode.
nonet
Do not auto-probe network devices.
noparport
Do not attempt to load support for parallel ports.
nopass
Don't pass keyboard/mouse info to stage 2 installer, good for testing keyboard and mouse config screens in stage2 installer during network installs.
nopcmcia
Ignore PCMCIA controller in system.
noprobe
Do not attempt to detect hw, prompts user instead.
noshell
Do not put a shell on tty2 during install.
nostorage
Do not auto-probe storage devices (SCSI, IDE, RAID).
nousb
Do not load USB support (helps if install hangs early sometimes).
nousbstorage
Page 72

Do not load usbstorage module in loader. May help with device ordering on SCSI systems.
rescue
Run rescue environment.
resolution=<mode>
Run installer in mode specified, '1024x768' for example.
serial
Turns on serial console support.
skipddc
Skips DDC probe of monitor, may help if it's hanging system.
syslog=<host>[:<port>]
Once installation is up and running, send log messages to the syslog process on <host>, and optionally, on port <port>. Requires the remote syslog process to accept connections (the -r option).
text
Force text mode install.
updates
Prompt for floppy containing updates (bug fixes).
updates=ftp://<path>
Image containing updates over FTP.
updates=http://<path>
Image containing updates over HTTP.
upgradeany
Don't require an /etc/redhat-release that matches the expected syntax to upgrade.
vnc
Enable vnc-based installation. You will need to connect to the machine using a vnc client
Page 73

application.
vncconnect=<host>[:<port>]
Once installation is up and running, connect to the vnc client named <host>, and optionally use port <port>.
Requires 'vnc' option to be specified as well.
vncpassword=<password>
Enable a password for the vnc connection. This will prevent someone from inadvertently connecting to the vnc-based installation.
Requires 'vnc' option to be specified as well.
Page 74

Appendix C - ks.cfg options
Reprinted here with the permission of Red Hat Training.
Page 75

autopart (optional)
Automatically create partitions — 1 GB or more root (/) partition, a swap partition, and an appropriate boot partition for the architecture. One or more of the default partition sizes can be redefined with the part directive.
ignoredisk (optional)
Causes the installer to ignore the specified disks. This is useful if you use autopartition and want to be sure that some disks are ignored. For example, without ignoredisk, attempting to deploy on a SAN-cluster the kickstart would fail, as the installer detects passive paths to the SAN that return no partition table.
The ignoredisk option is also useful if you have multiple paths to your disks.
The syntax is:
ignoredisk --drives=drive1,drive2,...
where driveN is one of sda, sdb,..., hda,... etc.
autostep (optional)
Similar to interactive except it goes to the next screen for you. It is used mostly for debugging.
--autoscreenshot
Take a screenshot at every step during installation and copy the images over to /root/anaconda-screenshots after installation is complete. This is most useful for documentation.
auth or authconfig (required)
Sets up the authentication options for the system. It is similar to the authconfig command, which can be run after the install. By default, passwords are normally encrypted and are not shadowed.
--enablemd5
Use md5 encryption for user passwords.
--enablenis
Turns on NIS support. By default, --enablenis uses whatever domain it finds on the network. A domain should almost always be set by hand with the --nisdomain= option.
Page 76

--nisdomain=
NIS domain name to use for NIS services.
--nisserver=
Server to use for NIS services (broadcasts by default).
--useshadow or --enableshadow
Use shadow passwords.
--enableldap
Turns on LDAP support in /etc/nsswitch.conf, allowing your system to retrieve information about users (UIDs, home directories, shells, etc.) from an LDAP directory. To use this option, you must install the nss_ldap package. You must also specify a server and a base DN (distinguished name) with --ldapserver= and --ldapbasedn=.
--enableldapauth
Use LDAP as an authentication method. This enables the pam_ldap module for authentication and changing passwords, using an LDAP directory. To use this option, you must have the nss_ldap package installed. You must also specify a server and a base DN with --ldapserver= and --ldapbasedn=.
--ldapserver=
If you specified either --enableldap or --enableldapauth, use this option to specify the name of the LDAP server to use. This option is set in the /etc/ldap.conf file.
--ldapbasedn=
If you specified either --enableldap or --enableldapauth, use this option to specify the DN in your LDAP directory tree under which user information is stored. This option is set in the /etc/ldap.conf file.
--enableldaptls
Use TLS (Transport Layer Security) lookups. This option allows LDAP to send encrypted usernames and passwords to an LDAP server before authentication.
--enablekrb5
Use Kerberos 5 for authenticating users. Kerberos itself does not know about home directories, UIDs, or shells. If you enable Kerberos, you must make users' accounts known
Page 77

to this workstation by enabling LDAP, NIS, or Hesiod or by using the /usr/sbin/useradd command to make their accounts known to this workstation. If you use this option, you must have the pam_krb5 package installed.
--krb5realm=
The Kerberos 5 realm to which your workstation belongs.
--krb5kdc=
The KDC (or KDCs) that serve requests for the realm. If you have multiple KDCs in your realm, separate their names with commas (,).
--krb5adminserver=
The KDC in your realm that is also running kadmind. This server handles password changing and other administrative requests. This server must be run on the master KDC if you have more than one KDC.
--enablehesiod
Enable Hesiod support for looking up user home directories, UIDs, and shells. More information on setting up and using Hesiod on your network is in /usr/share/doc/glibc-2.x.x/README.hesiod, which is included in the glibc package. Hesiod is an extension of DNS that uses DNS records to store information about users, groups, and various other items.
--hesiodlhs
The Hesiod LHS ("left-hand side") option, set in /etc/hesiod.conf. This option is used by the Hesiod library to determine the name to search DNS for when looking up information, similar to LDAP's use of a base DN.
--hesiodrhs
The Hesiod RHS ("right-hand side") option, set in /etc/hesiod.conf. This option is used by the Hesiod library to determine the name to search DNS for when looking up information, similar to LDAP's use of a base DN.
TipTo look up user information for "jim", the Hesiod library looks up jim.passwd<LHS><RHS>, which should resolve to a TXT record that looks like what his passwd entry would look like (jim:*:501:501:Jungle Jim:/home/jim:/bin/bash). For groups, the situation is identical, except jim.group<LHS><RHS> would be used.
Page 78

Looking up users and groups by number is handled by making "501.uid" a CNAME for "jim.passwd", and "501.gid" a CNAME for "jim.group". Note that the LHS and RHS do not have periods . put in front of them when the library determines the name for which to search, so the LHS and RHS usually begin with periods.
--enablesmbauth
Enables authentication of users against an SMB server (typically a Samba or Windows server). SMB authentication support does not know about home directories, UIDs, or shells. If you enable SMB, you must make users' accounts known to the workstation by enabling LDAP, NIS, or Hesiod or by using the /usr/sbin/useradd command to make their accounts known to the workstation. To use this option, you must have the pam_smb package installed.
--smbservers=
The name of the server(s) to use for SMB authentication. To specify more than one server, separate the names with commas (,).
--smbworkgroup=
The name of the workgroup for the SMB servers.
--enablecache
Enables the nscd service. The nscd service caches information about users, groups, and various other types of information. Caching is especially helpful if you choose to distribute information about users and groups over your network using NIS, LDAP, or hesiod.
bootloader (required)
Specifies how the boot loader should be installed. This option is required for both installations and upgrades.
--append=
Specifies kernel parameters. To specify multiple parameters, separate them with spaces. For example:
bootloader --location=mbr --append="hdd=ide-scsi ide=nodma"
--driveorder
Specify which drive is first in the BIOS boot order. For example:
bootloader --driveorder=sda,hda
Page 79
--location=
Specifies where the boot record is written. Valid values are the following: mbr (the default), partition (installs the boot loader on the first sector of the partition containing the kernel), or none (do not install the boot loader).
--password=
If using GRUB, sets the GRUB boot loader password to the one specified with this option. This should be used to restrict access to the GRUB shell, where arbitrary kernel options can be passed.
--md5pass=
If using GRUB, similar to --password= except the password should already be encrypted.
--upgrade
Upgrade the existing boot loader configuration, preserving the old entries. This option is only available for upgrades.
clearpart (optional)
Removes partitions from the system, prior to creation of new partitions. By default, no partitions are removed.
NoteIf the clearpart command is used, then the --onpart command cannot be used on a logical partition.
--all
Erases all partitions from the system.
--drives=
Specifies which drives to clear partitions from. For example, the following clears all the partitions on the first two drives on the primary IDE controller:
clearpart --drives=hda,hdb --all
--initlabel
Page 80

Initializes the disk label to the default for your architecture (for example msdos for x86 and gpt for Itanium). It is useful so that the installation program does not ask if it should initialize the disk label if installing to a brand new hard drive.
--linux
Erases all Linux partitions.
--none (default)
Do not remove any partitions.
cmdline (optional)
Perform the installation in a completely non-interactive command line mode. Any prompts for interaction halts the install. This mode is useful on IBM System z systems with the x3270 console.
device (optional)
On most PCI systems, the installation program autoprobes for Ethernet and SCSI cards properly. On older systems and some PCI systems, however, kickstart needs a hint to find the proper devices. The device command, which tells the installation program to install extra modules, is in this format:
device <type><moduleName> --opts=<options>
<type>
Replace with either scsi or eth
<moduleName>
Replace with the name of the kernel module which should be installed.
--opts=
Options to pass to the kernel module. Note that multiple options may be passed if they are put in quotes. For example:
--opts="aic152x=0x340 io=11"
driverdisk (optional)
Driver diskettes can be used during kickstart installations. You must copy the driver diskettes's contents to the root directory of a partition on the system's hard drive. Then you must use the driverdisk command to tell the installation program where to look for the driver disk.
Page 81

driverdisk <partition> [--type=<fstype>]
Alternatively, a network location can be specified for the driver diskette:
driverdisk --source=ftp://path/to/dd.img driverdisk --source=http://path/to/dd.img driverdisk --source=nfs:host:/path/to/img
<partition>
Partition containing the driver disk.
--type=
File system type (for example, vfat or ext2).
firewall (optional)
This option corresponds to the Firewall Configuration screen in the installation program:
firewall --enabled|--disabled [--trust=] <device> [--port=]
--enabled or --enable
Reject incoming connections that are not in response to outbound requests, such as DNS replies or DHCP requests. If access to services running on this machine is needed, you can choose to allow specific services through the firewall.
--disabled or --disable
Do not configure any iptables rules.
--trust=
Listing a device here, such as eth0, allows all traffic coming from that device to go through the firewall. To list more than one device, use --trust eth0 --trust eth1. Do NOT use a comma-separated format such as --trust eth0, eth1.
<incoming>
Replace with one or more of the following to allow the specified services through the firewall.
• --ssh
• --telnet
• --smtp
Page 82

• --http
• --ftp
--port=
You can specify that ports be allowed through the firewall using the port:protocol format. For example, to allow IMAP access through your firewall, specify imap:tcp. Numeric ports can also be specified explicitly; for example, to allow UDP packets on port 1234 through, specify 1234:udp. To specify multiple ports, separate them by commas.
firstboot (optional)
Determine whether the Setup Agent starts the first time the system is booted. If enabled, the firstboot package must be installed. If not specified, this option is disabled by default.
--enable or --enabled
The Setup Agent is started the first time the system boots.
--disable or --disabled
The Setup Agent is not started the first time the system boots.
--reconfig
Enable the Setup Agent to start at boot time in reconfiguration mode. This mode enables the language, mouse, keyboard, root password, security level, time zone, and networking configuration options in addition to the default ones.
halt (optional)
Halt the system after the installation has successfully completed. This is similar to a manual installation, where anaconda displays a message and waits for the user to press a key before rebooting. During a kickstart installation, if no completion method is specified, the reboot option is used as default.
The halt option is roughly equivalent to the shutdown -h command.
For other completion methods, refer to the poweroff, reboot, and shutdown kickstart options.
graphical (optional)
Perform the kickstart installation in graphical mode. This is the default.
The halt option is roughly equivalent to the shutdown -h command.
Page 83

For other completion methods, refer to the poweroff, reboot, and shutdown kickstart options.
install (optional)
Tells the system to install a fresh system rather than upgrade an existing system. This is the default mode. For installation, you must specify the type of installation from cdrom, harddrive, nfs, or url (for FTP or HTTP installations). The install command and the installation method command must be on separate lines.
cdrom
Install from the first CD-ROM drive on the system.
harddrive
Install from a Red Hat installation tree on a local drive, which must be either vfat or ext2.
• --biospart=
BIOS partition to install from (such as 82).
• --partition=
Partition to install from (such as sdb2).
• --dir=
Directory containing the variant directory of the installation tree.
For example:
harddrive --partition=hdb2 --dir=/tmp/install-tree
nfs
Install from the NFS server specified.
• --server=
Server from which to install (hostname or IP).
• --dir=
Directory containing the variant directory of the installation tree.
• --opts=
Page 84

Mount options to use for mounting the NFS export. (optional)
For example:
nfs --server=nfsserver.example.com --dir=/tmp/install-tree
url
Install from an installation tree on a remote server via FTP or HTTP.
For example:
url --url http://<server>/<dir>
or:
url --url ftp://<username>:<password>@<server>/<dir>
ignore disk (optional)
Used to specify disks that anaconda should not touch when partitioning, formatting, and clearing. This command has a single required argument, which takes a comma-separated list of drive names to ignore.
ignoredisk --drives=[disk1,disk2,...]
interactive (optional)
Uses the information provided in the kickstart file during the installation, but allow for inspection and modification of the values given. You are presented with each screen of the installation program with the values from the kickstart file. Either accept the values by clicking Next or change the values and click Next to continue. Refer to the autostep command.
iscsi (optional)
issci --ipaddr= [options].
--target
--port=
--user=
--password=
iscsiname (optional)
key (optional)
Page 85

Specify an installation key, which is needed to aid in package selection and identify your system for support purposes. This command is Red Hat Enterprise Linux-specific; it has no meaning for Fedora and will be ignored.
--skip
Skip entering a key. Usually if the key command is not given, anaconda will pause at this step to prompt for a key. This option allows automated installation to continue if you do not have a key or do not want to provide one.
keyboard (required)
Sets system keyboard type. Here is the list of available keyboards on i386, Itanium, and Alpha machines:
be-latin1, bg, br-abnt2, cf, cz-lat2, cz-us-qwertz, de, de-latin1, de-latin1-nodeadkeys, dk, dk-latin1, dvorak, es, et, fi, fi-latin1, fr, fr-latin0, fr-latin1, fr-pc, fr_CH, fr_CH-latin1, gr, hu, hu101, is-latin1, it, it-ibm, it2, jp106, la-latin1, mk-utf, no, no-latin1, pl, pt-latin1, ro_win, ru, ru-cp1251, ru-ms, ru1, ru2, ru_win, se-latin1, sg, sg-latin1, sk-qwerty, slovene, speakup, speakup-lt, sv-latin1, sg, sg-latin1, sk-querty, slovene, trq, ua, uk, us, us-acentos
The file /usr/lib/python2.2/site-packages/rhpl/keyboard_models.py also contains this list and is part of the rhpl package.
lang (required)
Sets the language to use during installation and the default language to use on the installed system. For example, to set the language to English, the kickstart file should contain the following line:
lang en_US
The file /usr/share/system-config-language/locale-list provides a list of the valid language codes in the first column of each line and is part of the system-config-language package.
Certain languages (mainly Chinese, Japanese, Korean, and Indic languages) are not supported during text mode installation. If one of these languages is specified using the lang command, installation will continue in English though the running system will have the specified langauge by default.
langsupport (required)
The langsupport keyword is deprecated and its use will cause an error message to be printed to the screen and installation to halt. Instead of using the langsupport keyword, you should now list the support package groups for all languages you want supported in the %packages section of
Page 86
your kickstart file. For instance, adding support for French means you should add the following to %packages:
@french-support
logvol (optional)
Create a logical volume for Logical Volume Management (LVM) with the syntax:
logvol <mntpoint> --vgname=<name> --size=<size> --name=<name><options>
The options are as follows:
--noformat
Use an existing logical volume and do not format it.
--useexisting
Use an existing logical volume and reformat it.
--fstype=
Sets the file system type for the logical volume. Valid values are ext2, ext3, swap, and vfat.
--fsoptions=
Sets the file system type for the logical volume. Valid values are ext2, ext3, swap, and vfat.
--bytes-per-inode=
Specifies the size of inodes on the filesystem to be made on the logical volume. Not all filesystems support this option, so it is silently ignored for those cases.
--grow=
Tells the logical volume to grow to fill available space (if any), or up to the maximum size setting.
--maxsize=
The maximum size in megabytes when the logical volume is set to grow. Specify an integer value here, and do not append the number with MB.
--recommended=
Determine the size of the logical volume automatically.
Page 87

--percent=
Specify the size of the logical volume as a percentage of available space in the volume group.
Create the partition first, create the logical volume group, and then create the logical volume. For example:
part pv.01 --size 3000 volgroup myvg pv.01 logvol / --vgname=myvg --size=2000 --name=rootvol
logging (optional)
This command controls the error logging of anaconda during installation. It has no effect on the installed system.
--host=
Send logging information to the given remote host, which must be running a syslogd process configured to accept remote logging.
--port=
If the remote syslogd process uses a port other than the default, it may be specified with this option.
--level=
One of debug, info, warning, error, or critical.
Specify the minimum level of messages that appear on tty3. All messages will still be sent to the log file regardless of this level, however.
mediacheck (optional)
If given, this will force anaconda to run mediacheck on the installation media. This command requires that installs be attended, so it is disabled by default.
monitor (optional)
If the monitor command is not given, anaconda will use X to automatically detect your monitor settings. Please try this before manually configuring your monitor.
--hsync=
Specifies the horizontal sync frequency of the monitor.
--monitor=
Page 88

Use specified monitor; monitor name should be from the list of monitors in /usr/share/hwdata/MonitorsDB from the hwdata package. The list of monitors can also be found on the X Configuration screen of the Kickstart Configurator. This is ignored if --hsync or --vsync is provided. If no monitor information is provided, the installation program tries to probe for it automatically.
--noprobe=
Do not try to probe the monitor.
--vsync=
Specifies the vertical sync frequency of the monitor.
mouse (required)
The mouse keyword is deprecated and its use will now cause an error message to be printed to the screen and installation to halt.
network (optional)
Configures network information for the system. If the kickstart installation does not require networking (in other words, it is not installed over NFS, HTTP, or FTP), networking is not configured for the system. If the installation does require networking and network information is not provided in the kickstart file, the installation program assumes that the installation should be done over eth0 via a dynamic IP address (BOOTP/DHCP), and configures the final, installed system to determine its IP address dynamically. The network option configures networking information for kickstart installations via a network as well as for the installed system.
--bootproto=
One of dhcp, bootp, or static.
It defaults to dhcp. bootp and dhcp are treated the same.
The DHCP method uses a DHCP server system to obtain its networking configuration. As you might guess, the BOOTP method is similar, requiring a BOOTP server to supply the networking configuration. To direct a system to use DHCP:
network --bootproto=dhcp
To direct a machine to use BOOTP to obtain its networking configuration, use the following line in the kickstart file:
network --bootproto=bootp
The static method requires that you enter all the required networking information in the kickstart file. As the name implies, this information is static and are used during and after
Page 89

the installation. The line for static networking is more complex, as you must include all network configuration information on one line. You must specify the IP address, netmask, gateway, and nameserver. For example: (the "\" indicates that this should be read as one continuous line):
network --bootproto=static --ip=10.0.2.15 --netmask=255.255.255.0 \--gateway=10.0.2.254 --nameserver=10.0.2.1
If you use the static method, be aware of the following two restrictions:
• All static networking configuration information must be specified on one line; you cannot wrap lines using a backslash, for example.
• You can only specify one nameserver here. However, you can use the kickstart file's %post section (described in Section 28.7, “Post-installation Script” ) to add more name servers, if needed.
--device=
Used to select a specific Ethernet device for installation. Note that using --device= is not effective unless the kickstart file is a local file (such as ks=floppy), since the installation program configures the network to find the kickstart file. For example:
network --bootproto=dhcp --device=eth0
--ip=
IP address for the machine to be installed.
--gateway=
Default gateway as an IP address.
--nameserver=
Primary nameserver, as an IP address.
--nodns
Do not configure any DNS server.
--netmask=
Netmask for the installed system.
--hostname=
Hostname for the installed system.
Page 90
--ethtool=
Specifies additional low-level settings for the network device which will be passed to the ethtool program.
--essid=
The network ID for wireless networks.
--wepkey=
The encryption key for wireless networks.
--onboot=
Whether or not to enable the device at boot time.
--class=
The DHCP class.
--mtu=
The MTU of the device.
--noipv4=
Disable IPv4 on this device.
--noipv6=
Disable IPv6 on this device.
multipath (optional)
multipath --name= --device= --rule=
part or partition (required for installs, ignored for upgrades)
Creates a partition on the system.
If more than one Red Hat Enterprise Linux installation exists on the system on different partitions, the installation program prompts the user and asks which installation to upgrade.
WarningAll partitions created are formatted as part of the installation process unless --noformat and
Page 91

--onpart are used.
For a detailed example of part in action, refer to Section 28.4.1, “Advanced Partitioning Example”.
<mntpoint>
The <mntpoint> is where the partition is mounted and must be of one of the following forms:
• /<path>
For example, /, /usr, /home
• swap
The partition is used as swap space.
To determine the size of the swap partition automatically, use the --recommended option:
swap --recommended
The minimum size of the automatically-generated swap partition is no smaller than the amount of RAM in the system and no larger than twice the amount of RAM in the system.
• raid.<id>
The partition is used for software RAID (refer to raid).
• pv.<id>
The partition is used for LVM (refer to logvol).
--size=
The minimum partition size in megabytes. Specify an integer value here such as 500. Do not append the number with MB.
--grow
Tells the partition to grow to fill available space (if any), or up to the maximum size setting.
--maxsize=
Page 92

The maximum partition size in megabytes when the partition is set to grow. Specify an integer value here, and do not append the number with MB.
--noformat
Tells the installation program not to format the partition, for use with the --onpart command.
--onpart= or --usepart=
Put the partition on the already existing device. For example:
partition /home --onpart=hda1
puts /home on /dev/hda1, which must already exist.
--ondisk= or --ondrive=
Forces the partition to be created on a particular disk. For example, --ondisk=sdb puts the partition on the second SCSI disk on the system.
--asprimary
Forces automatic allocation of the partition as a primary partition, or the partitioning fails.
--type= (replaced by fstype)
This option is no longer available. Use fstype.
--fstype=
Sets the file system type for the partition. Valid values are ext2, ext3, swap, and vfat.
--start=
Specifies the starting cylinder for the partition. It requires that a drive be specified with --ondisk= or ondrive=. It also requires that the ending cylinder be specified with --end= or the partition size be specified with --size=.
--end=
Specifies the ending cylinder for the partition. It requires that the starting cylinder be specified with --start=.
--bytes-per-inode=
Page 93

Specifies the size of inodes on the filesystem to be made on the partition. Not all filesystems support this option, so it is silently ignored for those cases.
--recommended
Determine the size of the partition automatically.
--onbiosdisk
Forces the partition to be created on a particular disk as discovered by the BIOS.
NoteIf partitioning fails for any reason, diagnostic messages appear on virtual console 3.
poweroff (optional)
Shut down and power off the system after the installation has successfully completed. Normally during a manual installation, anaconda displays a message and waits for the user to press a key before rebooting. During a kickstart installation, if no completion method is specified, the reboot option is used as default.
The poweroff option is roughly equivalent to the shutdown -p command.
NoteThe poweroff option is highly dependent on the system hardware in use. Specifically, certain hardware components such as the BIOS, APM (advanced power management), and ACPI (advanced configuration and power interface) must be able to interact with the system kernel. Contact your manufacturer for more information on you system's APM/ACPI abilities.
For other completion methods, refer to the halt, reboot, and shutdown kickstart options.
raid (optional)
Assembles a software RAID device. This command is of the form:
raid <mntpoint> --level=<level> --device=<mddevice><partitions*>
<mntpoint>
Location where the RAID file system is mounted. If it is /, the RAID level must be 1 unless a boot partition (/boot) is present. If a boot partition is present, the /boot partition must be level 1 and the root (/) partition can be any of the available types. The <partitions*> (which denotes that multiple partitions can be listed) lists the RAID
Page 94

identifiers to add to the RAID array.
--level=
RAID level to use (0, 1, or 5).
--device=
Name of the RAID device to use (such as md0 or md1). RAID devices range from md0 to md7, and each may only be used once.
--bytes-per-inode=
Specifies the size of inodes on the filesystem to be made on the RAID device. Not all filesystems support this option, so it is silently ignored for those cases.
--spares=
Specifies the number of spare drives allocated for the RAID array. Spare drives are used to rebuild the array in case of drive failure.
--fstype=
Sets the file system type for the RAID array. Valid values are ext2, ext3, swap, and vfat.
--fsoptions=
Specifies a free form string of options to be used when mounting the filesystem. This string will be copied into the /etc/fstab file of the installed system and should be enclosed in quotes.
--noformat
Use an existing RAID device and do not format the RAID array.
--useexisting
Use an existing RAID device and reformat it.
The following example shows how to create a RAID level 1 partition for /, and a RAID level 5 for /usr, assuming there are three SCSI disks on the system. It also creates three swap partitions, one on each drive.
part raid.01 --size=60 --ondisk=sdapart raid.02 --size=60 --ondisk=sdb part raid.03 --size=60 --ondisk=sdc
part swap --size=128 --ondisk=sda
Page 95

part swap --size=128 --ondisk=sdb part swap --size=128 --ondisk=sdc
part raid.11 --size=1 --grow --ondisk=sda part raid.12 --size=1 --grow --ondisk=sdb part raid.13 --size=1 --grow --ondisk=sdc
raid / --level=1 --device=md0 raid.01 raid.02 raid.03 raid /usr --level=5 --device=md1 raid.11 raid.12 raid.13
For a detailed example of raid in action, refer to Section 28.4.1, “Advanced Partitioning Example”.
reboot (optional)
Reboot after the installation is successfully completed (no arguments). Normally, kickstart displays a message and waits for the user to press a key before rebooting.
The reboot option is roughly equivalent to the shutdown -r command.
NoteUse of the reboot option may result in an endless installation loop, depending on the installation media and method.
The reboot option is the default completion method if no other methods are explicitly specified in the kickstart file.
For other completion methods, refer to the halt, poweroff, and shutdown kickstart options.
repo (optional)
Configures additional yum repositories that may be used as sources for package installation. Multiple repo lines may be specified.
repo --name=<repoid> [--baseline=<url>| --mirrorlist=<url>]
--name=
The repo id. This options is required.
--baseurl=
The URL for the repository. The variables that may be used in yum repo config files are not supported here. You may use one of either this option or --mirrorlist, not both.
--mirrorlist=
Page 96

The URL pointing at a list of mirrors for the repository. The variables that may be used in yum repo config files are not supported here. You may use one of either this option or --baseurl, not both.
rootpw (required)
Sets the system's root password to the <password> argument.
rootpw [--iscrypted] <password>
--iscrypted
If this is present, the password argument is assumed to already be encrypted.
selinux (optional)
Sets the state of SELinux on the installed system. SELinux defaults to enforcing in anaconda.
selinux [--disabled|--enforcing|--permissive]
--enforcing
Enables SELinux with the default targeted policy being enforced.
NoteIf the selinux option is not present in the kickstart file, SELinux is enabled and set to --enforcing by default.
--permissive
Outputs warnings based on the SELinux policy, but does not actually enforce the policy.
--disabled
Disables SELinux completely on the system.
For complete information regarding SELinux for Red Hat Enterprise Linux, refer to the Red Hat Enterprise Linux Deployment Guide.
services (optional)
Modifies the default set of services that will run under the default runlevel. The services listed in the disabled list will be disabled before the services listed in the enabled list are enabled.
Page 97

--disabled
Disable the services given in the comma separated list.
--enabled
Enable the services given in the comma separated list.
shutdown (optional)
Shut down the system after the installation has successfully completed. During a kickstart installation, if no completion method is specified, the reboot option is used as default.
The shutdown option is roughly equivalent to the shutdown command.
For other completion methods, refer to the halt, poweroff, and reboot kickstart options.
skipx (optional)
If present, X is not configured on the installed system.
text (optional)
Perform the kickstart installation in text mode. Kickstart installations are performed in graphical mode by default.
timezone (required)
Sets the system time zone to <timezone> which may be any of the time zones listed by timeconfig.
timezone [--utc] <timezone>
--utc
If present, the system assumes the hardware clock is set to UTC (Greenwich Mean) time.
upgrade (optional)
Tells the system to upgrade an existing system rather than install a fresh system. You must specify one of cdrom, harddrive, nfs, or url (for FTP and HTTP) as the location of the installation tree. Refer to install for details.
user (optional)
Creates a new user on the system.
Page 98

user --name=<username> [--groups=<list>] [--homedir=<homedir>] [--password=<password>] [--iscrypted] [--shell=<shell>] [--uid=<uid>]
--name=
Provides the name of the user. This option is required.
--groups=
In addition to the default group, a comma separated list of group names the user should belong to.
--homedir=
The home directory for the user. If not provided, this defaults to /home/<username>.
--password=
The new user's password. If not provided, the account will be locked by default.
--iscrypted=
Is the password provided by --password already encrypted or not?
--shell=
The user's login shell. If not provided, this defaults to the system default.
--uid=
The user's UID. If not provided, this defaults to the next available non-system UID.
vnc (optional)
Allows the graphical installation to be viewed remotely via VNC. This method is usually preferred over text mode, as there are some size and language limitations in text installs. With no options, this command will start a VNC server on the machine with no password and will print out the command that needs to be run to connect a remote machine.
vnc [--host=<hostname>] [--port=<port>] [--password=<password>]
--host=
Instead of starting a VNC server on the install machine, connect to the VNC viewer process listening on the given hostname.
--port=
Page 99

Provide a port that the remote VNC viewer process is listening on. If not provided, anaconda will use the VNC default.
--password=
Set a password which must be provided to connect to the VNC session. This is optional, but recommended.
volgroup (optional)
Use to create a Logical Volume Management (LVM) group with the syntax:
volgroup <name><partition><options>
The options are as follows:
--noformat
Use an existing volume group and do not format it.
--useexisting
Use an existing volume group and reformat it.
--pesize=
Set the size of the physical extents.
Create the partition first, create the logical volume group, and then create the logical volume. For example:
part pv.01 --size 3000 volgroup myvg pv.01 logvol / --vgname=myvg --size=2000 --name=rootvol
For a detailed example of volgroup in action, refer to Section 28.4.1, “Advanced Partitioning Example”.
xconfig (optional)
Configures the X Window System. If this option is not given, the user must configure X manually during the installation, if X was installed; this option should not be used if X is not installed on the final system.
--driver
Specify the X driver to use for the video hardware.
Page 100

--videoram=
Specifies the amount of video RAM the video card has.
--defaultdesktop=
Specify either GNOME or KDE to set the default desktop (assumes that GNOME Desktop Environment and/or KDE Desktop Environment has been installed through %packages).
--startxonboot
Use a graphical login on the installed system.
--resolution=
Specify the default resolution for the X Window System on the installed system. Valid values are 640x480, 800x600, 1024x768, 1152x864, 1280x1024, 1400x1050, 1600x1200. Be sure to specify a resolution that is compatible with the video card and monitor.
--depth=
Specify the default color depth for the X Window System on the installed system. Valid values are 8, 16, 24, and 32. Be sure to specify a color depth that is compatible with the video card and monitor.
zerombr (optional)
If zerombr is specified, and yes is its sole argument, any invalid partition tables found on disks are initialized. This destroys all of the contents of disks with invalid partition tables. This command should be in the following format:
zerombr yes
No other format is effective.
zfcp (optional)
zfcp [--devnum=<devnum>] [--fcplun=<fcplun>] [--scsiid=<scsiid>] [--scsilun=<scsilun>] [--wwpn=<wwpn>]
%include
Use the %include /path/to/file command to include the contents of another file in the kickstart file as though the contents were at the location of the %include command in the kickstart file.
Page 101