live steam manual - g scalegscale.net/images/manuals/aristo_mikadolive_manual.pdf · • hot water...
TRANSCRIPT

09/10//05 NEW
LIVE STEAM MIKADO 2-8-2INSTRUCTION MANUAL ART-84100-01
ARISTO-CRAFT TRAINS / Polk’s Modelcraft Hobbies, Inc.698 South 21st Street, Irvington, NJ 07111 USA
Tel: (973) 351-9800 Fax: (973) 351-9700http://www. aristocraft.com e-mail: [email protected]

WWW.ARISTOCRAFT.COM2
Dear Model Railroader,
Congratulations on your purchase of the Aristo-Craft 1:29 Live Steam Mikado!
The fun of running a locomotive as they wereintended to with real steam power is the key partof this locomotive and the technical hard work is
Congratulations!
done by the magic of our technology that takes work out of the projectand leaves more running time for enjoyment.
Should you have any questions regarding operation, proper usageor maintenance required on this or any other Aristo-Craft product,please do not hesitate to contact us at the following address:
ARISTO-CRAFT TRAINS / Polk’s Model Craft Hobbies, Inc.698 South 21st Street, Irvington, NJ 07111 USATel: (973) 351-9800 Fax: (973) 351-9700e-mail: [email protected]
Our customer service department phones are open from 10:00 AMto 5:00 PM Eastern time, Monday through Friday.
Visit our website: www.aristocraft.com
© 2005 Polk’s Modelcraft Hobbies, Inc.

WWW.ARISTOCRAFT.COM 3
Locomotive Features & Accessories
This locomotive has the following features and accessories which makes it look andoperate in a superior manner:
· An integrated radio control system for speed control, reversing, and to activateseveral sound effects. This R/C system operates on the universally accepted 49mhz frequency and is FCC-approved in the U.S.
· A well for a warm water bath for the butane gas.
· Auto-ignition for the flame using the tender control panel.
· Easy-to-use-and-find butane fuel.
· Wide-mouth oil access. (Oil not included)
· D.C. electric motors for radio-controlled reverse and speed controls.
· Two wall chargers for both 110v or 230v depending on the country where you arelocated. An adaptor plug may be necessary for your country if the supplied plug willnot fit your receptacle.
· A NiC_d battery pack to operate these electronic functions.
· Tools such as two syringes for filling and removing the steam oil, a metal funnel tofill the boiler and butane bath, two metal screwdrivers for the live steamer locomo-tive adjusments and others.
· Additional mechanical boiler functions to make maintenance as easy as possible.
· Insulated wheels for running on powered layouts with other locos.
· A Goodall valve and water bottle to refill the boiler under pressure before the watercools.
WWW.ARISTOCRAFT.COM4
· Live Steam Trains should not be used by anyone under the age of 14. This is not atoy, and while not any more dangerous then the use of a stove while boiling waterfor a cup of tea, it does take some common sense and the ability to make rationalactions if something doesn’t work as prescribed.
· Hot water is scalding and must be treated as such, so do not open a pressurizedlocomotive water tank until it has cooled sufficiently. To do so would create a reac-tion much like opening an auto’s radiator cap under full pressure. DON’T do this.
· Do not smoke when filling the butane into the tender. This is a flammable materialand is similar to the situation when relighting a gas stove burner when the pilot lightgoes out.
· Use only distilled water, available at supermarkets and drugstores widely, as regu-lar water has contaminates that could eat away at your copper boiler. This is espe-cially true if you do not thoroughly drain the water from the boiler after each use.The Aristo-Craft Live Steamer has a drain cock to allow you to do just that.
· Do tighten the hose to the boiler of the locomotive prior to adding the butane mate-rial to the input in the tender.
· Do not use boiling water in the supplemental hot water bath for the butane tank. It’snot necessary and could cause handling problems with the scalding water. If youlike you can drain this hot bath water after steam-up and before you actually beginrunning. This will provide a fresh hot water bath for the running period after thewater has reached the starting pressure.
· Do not run your loco without proper steam oil that is formulated for the super-hotconditions of running a steam locomotive. This is not included, but is available fromwhere you purchased your loco.
· Do not overfill your boiler beyond the two cups of distilled water (500 ml total).
Live Steam Operation Safety
Please read all of these warnings very carefully before using your Aristo-Craft LiveSteam Mikado for the first time!

WWW.ARISTOCRAFT.COM 5
· If your auto-igniter does not cause the flame to ignite and the butane container isfilled, then send the loco in for service and do not try to adjust the flame yourself.
· We have added spare O-rings that you can replace if the steam releases throughthose valves. Please write to us for spares rather than continue to operate withoutO-rings in top shape.
· Please check you loco after 30 minutes of running to see that the water level in thesight glass still indicates that you have sufficient water in the boiler. DO NOT RUNYOUR LOCO WITHOUT WATER IN THE BOILER.
· If your loco falls off the track, then immediately close the butane valve until allbutane flow is off and the flame thus shuts off.
· Do not use this loco indoors. It’s only for outdoor usage as there is residual oil andwater that falls to the track.
· Any modification of the loco will void our warranty and perhaps the safety of theloco. Do not modify the loco at all for proper safety.
Live Steam Operation Safety (continued)

WWW.ARISTOCRAFT.COM6
Locomotive History
The Mikado 2-8-2 steam locomotive was one of the most common of the steamlocomotives built and used in the United States and Canada. It was a workhorse, alocomotive that could do it all. Primarily used in freight operations, it was occasionallyemployed in passenger service, right up to the end of steam operations. Large and smallrailroads operated Mikados due to their extreme versatility. Some seemed to be light anddelicate, treading on small rail, others were plodding behemouths. It depended on thejob that needed to be accomplished.
During the age of the Iron Horse, the era of steam, almost 10,000 Mikados were built.The Pennsylvania Railroad alone possessed over 550 of these locomotives.
When the U.S.A. became involved in World War I, the United States Railroad Administrationdecided to standardize the design and manufacture of locomotives in order to save timeand materials. This gave birth to what is known as the USRA Mikado. Over 800 light andheavy USRA Mikados were erected by the 3 major locomotive builders: The AmericanLocomotive Company, Baldwin and Lima.
Some railroads used the boiler, cab and other components from existing Pacificlocomotives in order to save time and money in the construction of new Mikados.
Prototype Photo: Michael Hauptmann

WWW.ARISTOCRAFT.COM 7
R/C System / Battery Charging Preparation
The very first step is to charge the NiC_d battery pack located inside the tender of thelocomotive. There is an included wall pack that must be plugged into a wall outlet firstand has a jack plug to insert into a hidden receptacle jack beneath the cylindrical coalpusher on the top of the tender that unscrews (See fig. #1).
First remove the decorative coal load on top of the tender, revealing the control panelunderneath it. Then move the leftmost slide switch with the tender facing away from youto the “charger” position and then plug the charger lead into the battery charging con-nection power jack as illustrated (See fig. #2).
The red indicator light located in front of the coal pusher will turn to orange for theapproximate five-hour charge time and then the light will go out after the charge iscomplete. The first charge-up may take overnight, but will recharge faster the secondtime.
After the LED light goes out, the charge is complete and you can begin the testingphase of operation.
fig. #2Inserting the plug
fig. #1Receptacle jack location

WWW.ARISTOCRAFT.COM8
To begin the function testing process, link the plug in front of the tender to the socket atthe end of the wire coming from the rear of the locomotive (See fig. #3). This allows all ofthe R/C and electronic functions from the control panel of the tender to function in amanual mode without the use of the transmitter.
R/C System Testing
fig. #3Locomotive-to-tender connection
Manual mode testingRemove the pressure fit coal load from the top of the tender to expose the control panel.
1) Push the left slide switch to the “operation” position and you will see a red indicatorlight turn on.
2) Now you can test the sound buttons and the headlight button. These remain in opera-tion until depressed a second time.
3) Next test the forward or reverse direction buttons and you will see the radius rod armmove (see fig. #4).
fig. #4Radius Arm

WWW.ARISTOCRAFT.COM 9
R/C System Testing (continued)
A. Ignition Button - Press to ignite engine flame. IgnitionLED will light when button is pressed.
B. Speed and Directional Controls - Press to make yourengine speed up or slow down or change direction
C. Special Effects Controls - Press to active loco soundeffects or front lights
D. Mode Switch - Switches your loco to three differentphases - ignition, charger, and operation
Fig. 5 Tender Manual Control Panel
E. Remote/Manual Switch - Switches your loco frommanual control to R/C control.
F. Low Battery LED - Signals when your batterypower is running low.
G. Encoder Switch - Dipswitch location, must matchwith dipswitch in transmitter.

WWW.ARISTOCRAFT.COM10
R/C System Testing (continued)
1) Take your R/C transmitter, open it by removing the installed screws, and insert theprovided 9v alkaline battery (See fig. #6).
2) The extendable antenna needs to be screwed into the transmitter through the openingon the top right of the transmitter. The antenna should be extended when using duringthe test as well as during regular operation.
3) There is a six-position dip encoder switch on the tender that must be matched to theencoder switch order that is located on the inside of your transmitter. This dipswitchencoder allows for up to 620 people operating their Live Steam Train simultaneouslywithout one interfering with the other. Obviously, only several people are likely to operateat the same time, but the procedure is the same regardless of the number running (Seefig. #7).
4) Push the second from left slide switch on the tender from manual to remote and youwill see the indicator light turn green. The R/C hand-held transmitter will take over controlof your locomotive, allowing you to perform the same functions you just tested manually.
5) Repeat the same testing functions that you performed in the manual mode.
NOTE! The ignition switch for the butane is not on the transmitter for safety reasons, sothat you do not ignite the flame unintentionally. Please use the switch on the tender’scontrol panel for ignition.
Remote Mode TestingNow it is time to test the R/C system transmitter and functions...
fig. #6Inside the R/C transmitter or “throttle”
fig. #7Close-up of transmitter dipswitch panel

WWW.ARISTOCRAFT.COM 11
Adding Lubrication
The next step is adding steam oil to the loco...
This locomotive is a steam vapor-propelled device and as such REQUIRES A HIGH-TEMPERATURE LUBRICATING STEAM OIL ONLY! The steam oil is not included in thepackage, but should be found at the same retailer that has sold you the locomotive and/or from Aristo-Craft itself.
Two syringes are included with this locomotive for fill and removal of steam oil. Ignore theone-time use label as this note is for medical use only (See fig. #8).
Looking down on the locomotive with front facing away from you, on the left side on therunning board you will see a master valve for the oil. Unscrew the master valve in orderto fill the oil (See fig. #9).
Filling one of the syringes with 8ml of oil, you then insert the tip of the syringe into thehole where you removed the master valve from. As you release the oil make sure tomove the locomotive, by hand, slowly forward to push the oil into the cylinders and valves.DO NOT MOVE THE LOCOMTIVE BACKWARDS DURING THIS PROCESS, FOR ITWILL CAUSE THE OIL TO COME OUT INSTEAD OF BEING PUSHED THROUGH.
NOTE! The fill of the oil is done in stages and the cover of the master valve needs to bescrewed closed after the oil is inserted each time the process is done.
Repeat this process two or three times, and on the last fill, tighten the access coversecurely. A total of 8ml of oil, as indicated on the syringe side, is the most oil that shouldbe added every 3-4 runs depending on the lengths of the runs.
fig. #8Included syringes for oil insertion
fig. #9Removing the oil valve

WWW.ARISTOCRAFT.COM12
The lubrication, after the fill, is continuous and automatic during the operation of thelocomotive. This oil remainder needs to be sucked out via the same type of syringe usedto fill the oil reserve shown and needs to be refilled at least every four runs.
DO NOT RUN WITHOUT THE REQUIRED STEAM CYLINDER OIL! DO NOT USE MO-TOR OIL! DO NOT USE THREE-IN-ONE OIL!
Adding Lubrication (continued)
WWW.ARISTOCRAFT.COM 13
Adding Water
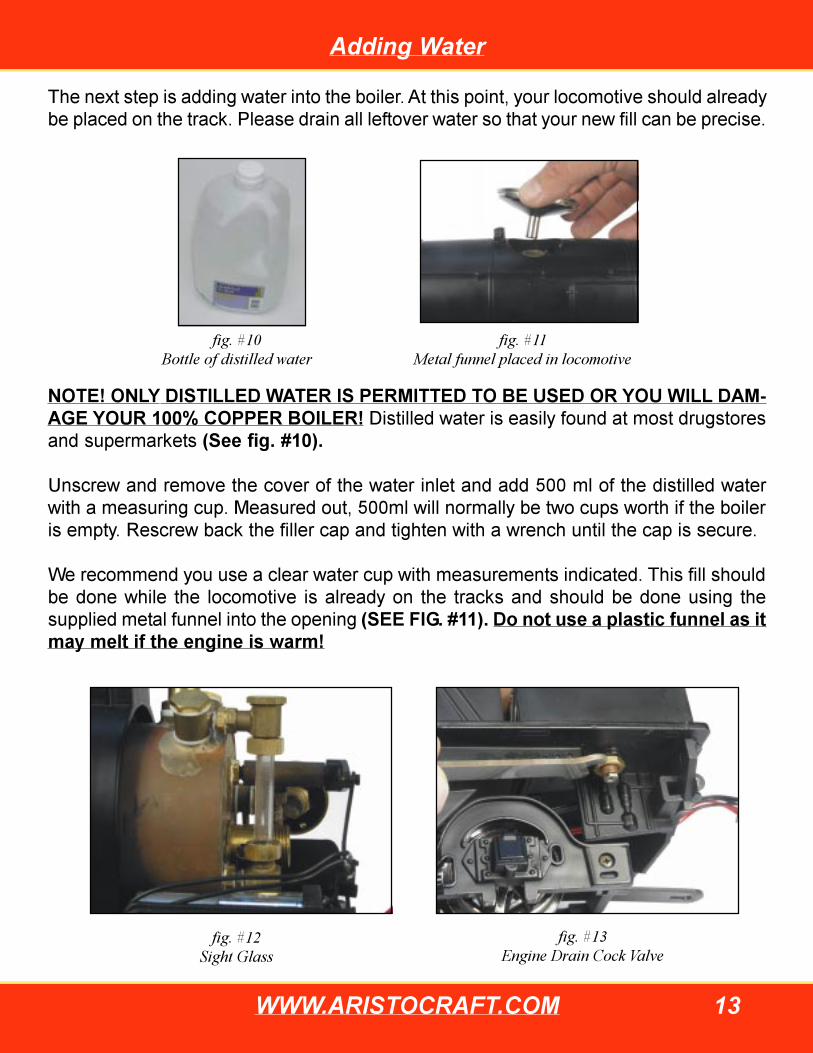
NOTE! ONLY DISTILLED WATER IS PERMITTED TO BE USED OR YOU WILL DAM-AGE YOUR 100% COPPER BOILER! Distilled water is easily found at most drugstoresand supermarkets (See fig. #10).
Unscrew and remove the cover of the water inlet and add 500 ml of the distilled waterwith a measuring cup. Measured out, 500ml will normally be two cups worth if the boileris empty. Rescrew back the filler cap and tighten with a wrench until the cap is secure.
We recommend you use a clear water cup with measurements indicated. This fill shouldbe done while the locomotive is already on the tracks and should be done using thesupplied metal funnel into the opening (SEE FIG. #11). Do not use a plastic funnel as itmay melt if the engine is warm!
The next step is adding water into the boiler. At this point, your locomotive should alreadybe placed on the track. Please drain all leftover water so that your new fill can be precise.
fig. #11Metal funnel placed in locomotive
fig. #10Bottle of distilled water
fig. #13Engine Drain Cock Valve
fig. #12Sight Glass

WWW.ARISTOCRAFT.COM14
As you add water to your Live Steam Mikado, the indicator on the inside of the cab, thesight glass (See fig. #12), will rise as well. Always make sure to monitor the water levelsof your Live Steam Mikado as you can seriously damage your unit if you run it dry.
Please check the sight glass to make sure the water level is no more than two-thirdsfilled. If you have added too much water or a residual amount had remained, causing anoverfill, the drain cock valve should be used to bring the water in the boiler to a correctlevel (See fig. #13).
Adding Water (continued )

WWW.ARISTOCRAFT.COM 15
Filling The Butane Gas Tank
Adding the butane gas is easy. At the front of the tender, you’ll notice a small valve. Thisis the place where the butane can is applied to fill the 150-milliliter butane gas tank. Justalign the valves, press the can down, and hold.
Fill using the stem valve on the tender and do not YET open the butane flow valve. Insertthe hose’s nozzle from the tender into the locomotive’s boiler (See. fig. #14). Screw thenozzle into the loco, so it does not separate accidentally. WARNING!! DO NOT FILLWHILE SMOKING OR NEAR A FLAME!
Well, the water is loaded, and the next thing we need to do is put in the butane gas. Butwhere does it go? On a Live Steam Mikado from Aristo-Craft, the butane gas goes in thetender.
WARNING! Butane is an extremely flammable gas. The content of thecan is under pressure and the vapors are harmful. Read warnings onthe back panel of your can before use. Do not fill your gas tenderaround any open flame or while smoking. Use only Butane gas forcigarette lighters found at most drugstores or general stores. DO NOTUSE PROPANE OR PROPANE & BUTANE MIXTURES AS THE TANKHAS BEEN PRESET FOR BUTANE ONLY!
fig. #14Connecting butane hose into the locomotive boiler
There is an enclosed and hidden water well surrounding the butane tank and this mustbe filled with warm water to help rapidly vaporize the butane. Please do not use boilingwater, but rather bathtub temperature water.

WWW.ARISTOCRAFT.COM16
It is recommended that you use a thermos bottle of water, easily brought to the runningsite, and this water need not be distilled and can come right from a tap. The warm waterneeds to be filled in to the warm water bath area with a funnel after removing the screw inthe corner of the depression at the front of the tender, near the butane insert nozzle (Seefig. #15).
Filling The Butane Gas Tank (continued)
Reinserting the screw is optional, but if you are going to transport the tender withoutdraining the water from the side cock, then you need to reinsert the screw and close itusing a flat-head screwdriver (not included). This will keep the water from spilling out andpossibly damaging the electronics. However, we really recommend draining the waterthoroughly before transport (See fig. #16).
fig. #15Filling the warm water bath with a funnel
fig. #16Location of tender side cock for draining of water
The fill needs to be done while on the track, rather than filling elsewhere and then carry-ing to the track. You can remove the cooled water through the release valve beforerefilling with warm water again before actually running and after the steam pressure hasindicated that the train is ready to go.

WWW.ARISTOCRAFT.COM 17
With all the required liquids in place and your locomotive on the track, it is time to sparkthe ignition flame...
Please be sure first that the gas jet tube is placed in the boiler of the locomotive from therear of the tender. The tender should be attached by the drawbar at the back of thelocomotive and the front of the tender to make sure the hose does not pull out of thelocomotive (See fig. #17). Also, remember to screw the hose to the boiler with the sup-plied connection. (See fig. #18)
Sparking the Ignition Flame
To start your Live Steam Mikado, put the mode switch in the ignition position. Open thebutane flow valve on the tender slightly to release the butane and then press the ignitionbutton manually. You will hear the rush of the flame ignition. Then you will hear a thumpand a steady whistle once the flame is in progress (See fig. #19).
Open the butane valve further and slowly until a steady flame is in use and this can onlybe determined by trial and error.
fig. #18Attaching butane hose to boiler
fig. #17Attaching tender drawbar to locomotive
fig. #19Opening the butane valve

WWW.ARISTOCRAFT.COM18
Next, turn the switch to the position. Turn on the remote control, and replace the cabcover and the tender as your engine warms up.
The heating process will take about 10 to 15 minutes. If you’ve put too much water in orthere was a residual amount added to in full, the extra water will flow through a drainvalve and exit on to the ground. NOTE! Please use a wrench and gloves or a rag whilehandling this valve as the hot water is boiling, not just warm. Never leave your Mikadounattended while it is warming up and getting up to pressure!
After this point, close the overflow valve. Continue to heat the water and you will noticethe pressure gauge going up. When it rises to 25 psi (pounds per square inch) or 0.25MPA and the front cylinder valves begins to release steam vapor, the heating process isover and your train is ready to run (See fig. #20).
Sparking the Ignition Flame (continued)
fig. #20Locomotive pressure gauge

WWW.ARISTOCRAFT.COM 19
Starting Your Locomotive
When the pressure gauge indication shows that the loco is ready to start, move the leftslide switch on the tender’s control panel to “operation” and you will see the indicator lightchange from red to green.
Replace the decorative coal load into position over the control panel (See fig. #21). Nowpress the speed-up button on the transmitter and the locomotive will begin to run. Seebelow for the functions available on the transmitter.
This locomotive can pull up to 12 freight cars at a high speed and go up 3% gradeswithout degradation of the pulling power of the locomotive. However, the running timemay be shortened from the normal 40 minutes with heavier loads.
The radio control transmitter can do the following functions wirelessly:
a) Fast— Increase loco speedb) Slow— Decrease loco speedc) Forward / Reverse— Directional controld) Headlight & Class lights— On/Offe) Bell soundf) Whistle soundg) Chuff sound
To add more water after your butane and water are depleted, you must use the suppliedGoodall valve or you will have the same dangerous reaction as removing a radiator capfrom an overheated radiator instead of refilling the water through an overflow container.
fig. #21Replacing the coal load

WWW.ARISTOCRAFT.COM20
There is a water bottle with a nozzle that will allow you to put cold water into the boilerand the special valve will open slightly to allow the cold water in and then reseal itselfwhen the flow of cold water stops. DO NOT BYPASS THIS STEP IF REFILLING COLDWATER! (See fig. #22)
Starting Your Locomotive (continued)
fig. #22Adding water through the Goodall valve
The butane can be refilled at any time before or when your engine slows down or stopsdo to running out of the water or gas.
WWW.ARISTOCRAFT.COM 21
Getting Help
If you need further assistance with your new Live Steam engine, we have manyways to get your questions answered!
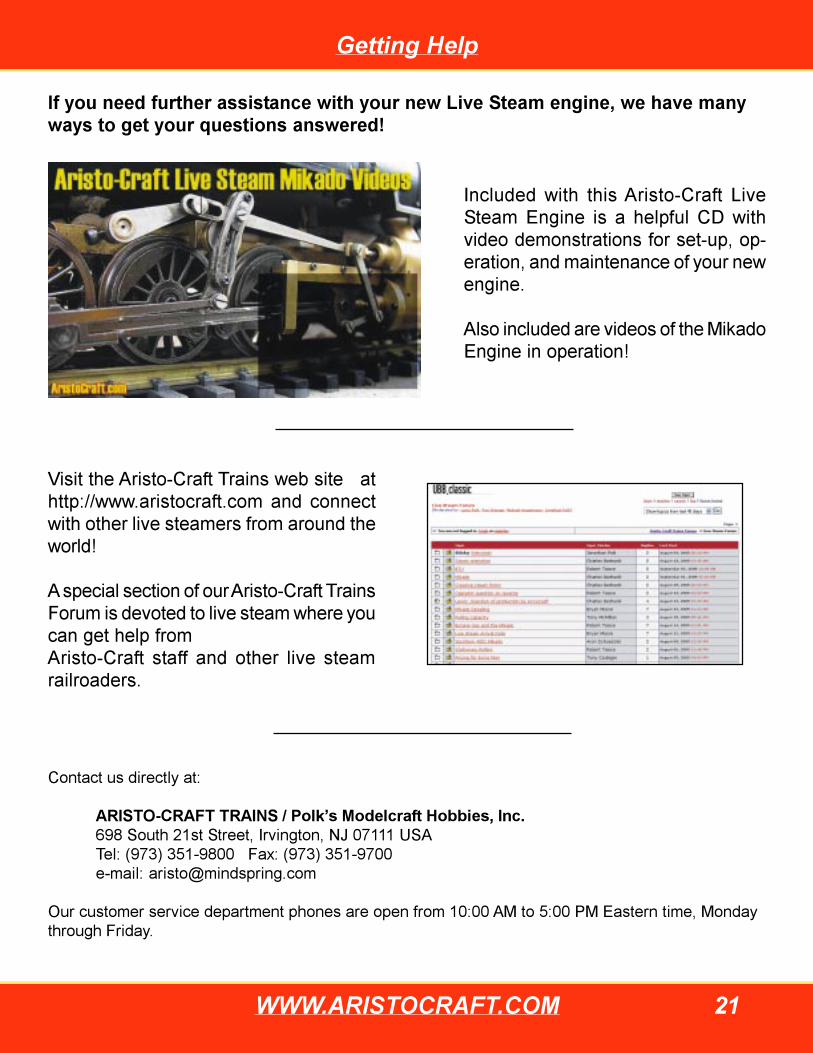
Included with this Aristo-Craft LiveSteam Engine is a helpful CD withvideo demonstrations for set-up, op-eration, and maintenance of your newengine.
Also included are videos of the MikadoEngine in operation!
Visit the Aristo-Craft Trains web site athttp://www.aristocraft.com and connectwith other live steamers from around theworld!
A special section of our Aristo-Craft TrainsForum is devoted to live steam where youcan get help fromAristo-Craft staff and other live steamrailroaders.
Contact us directly at:
ARISTO-CRAFT TRAINS / Polk’s Modelcraft Hobbies, Inc.698 South 21st Street, Irvington, NJ 07111 USATel: (973) 351-9800 Fax: (973) 351-9700e-mail: [email protected]
Our customer service department phones are open from 10:00 AM to 5:00 PM Eastern time, Mondaythrough Friday.

WWW.ARISTOCRAFT.COM22
LIMITED WARRANTYAll ARISTO-CRAFT TRAINS products are under warranty for one (1) year from the dateof purchase against defects in workmanship and/or materials. Proof of purchase may berequired by ARISTO-CRAFT TRAINS.
This warranty is void and does not apply to any product and/or parts and componentswhich have been improperly installed by the purchaser/owner, abused or damaged inany way through improper operation such as but not limited to derailment, repairs ormodifications performed by non-authorized service centers or technicians.
SERVICINGShould your ARISTO-CRAFT TRAINS product require warranty service, please return itin the original box, if possible, protected by a proper shipping carton. Send the productfully insured and prepaid. ARISTO-CRAFT TRAINS will not be responsible for any loss ordamage incurred during shipping.
Be sure to include a brief, but thorough explanation of the problem, together with yourname, street address (no Post Office box please), city state or province and country, ifoutside of the United States. Also include a daytime telephone number so that we maycontact you if necessary. Your return address should be clearly marked on the outside ofthe shipping carton.
Payment for shipping and handling, in U.S. funds, is $20.00 and should be included.Yourcheck or money order should be made payable to: Polk’s Modelcraft Hobbies, Inc. Do notsend cash.
If your item is not covered by warranty service, you will be contacted and a repair esti-mate given before any work commences. Warranty covers manufacturer defects, notnormal wear and tear.
The shipping address to be used for returns is as follows:ARISTO-CRAFT TRAINS / Polk’s Modelcraft Hobbies, Inc.Customer Service Department698 South 21st StreetIrvington, NJ 07111 USATel: (973) 351-9800
Written confirmation of receipt of returned items will be sent with estimated repair time bythe ARISTO-CRAFT TRAINS Customer Service Department.
Warranty & Servicing

WWW.ARISTOCRAFT.COM 23
{this page left intentionally blank)
