pto
TRANSCRIPT
R390A PTOs
Which are the best PTOís? What makes them that way?
• Progressitron - Best all around. Very linear, end points hold and theadjustment will compensate for about 8kc. This Collins design usescorrector stacks.
• Cosmos - Excellent PTO, very linear. However, the endpointadjustment will only accomodate about 4kc of error maximum. Witherrors greater than 5kc, a turn must be removed from the internalcompensator coil. A different design and patent than the others. TheCosmos PTO does not use corrector stacks.
• Collins - Good PTO but some are the least linear. Linearityadjustment very difficult due to the need to set the internal correctorstacks. This takes a jig do do correctly.
• Motorola - Same as the Collins
• Dubrow - Good PTO, sets up nicely and the linearity is excellent.A corrector stack design.
Identifying and correcting one type of PTO instability. Ever tune yourR390A through a carrier with the BFO on and get a "warble?": does thePTO seem unstable while tuning? If the answer is yes, this fix may apply:
First, test for the problem by turning the radio on and allowing it to warmup about 30 minutes. Tune in a calibrator point and turn on the BFO. Tunethe radio through the calibrator signal. The BFO note should changesmoothly and without any warble or instability. If it does not, the problemmay be as below:
There is an angled piece of metal fastened to the front of the PTO. It makesa 90 degree bend then engages the tuning shaft just in front of the forwardPTO shaft bearing. This piece of metal serves as the ground return for thePTO. The points where it engages the PTO turing shaft and its connectionpoint on the housing can become contaminated causing unstable PTOtuning. I have even seen well meaning but uninformed owners incorrectlyapply grease or oil to the point where the return strap engages the PTOshaft.
After unplugging the radio from the AC mains, try this easy fix:
Remove the PTO by first removing the shielded cable (center plug next toJ-208 on the left rear of the RF deck). Turn the receiver upside down and

unplug P109 on the back of the PTO. Loosen the two screws holding therear PTO bracket. Do not completely remove them. Loosen the 3 captive,green headed screws which hold the PTO to the chassis. Carefully removethe spring on the Oldham coupler and set it in a safe place. Carefullymanuver the PTO from the main chassis being careful to guide the shieldedcable which was attached to the RF deck past the antenna cables andthrough the hold in the main chassis. Place the now completely free PTOassy in a clean, well lighted place so it can be worked on.
Its a good time to clean out the PTO cavity in the main chassis with someWD-40 on a rag and apply a few drops of oil to the tuning shaft at thebearing in the main chassis located in front of the PTO. Because it willnever harden, I use synthetic Mobil-1 90W rear end lube.
Remove V-701, the 5749 tube from the PTO.
Using plenty of light, you should now be able to see the ground returnstrap. There are 2 small screws holding it on the the PTO housing. Theopposite end of the strap engages the PTO tuning shaft after making a 90degree bend. On some PTOís, this end of the strap rides in a small groovemachined into the PTO tuning shaft.
Remove the 2 screws holding the strap to the PTO housing. It is not aseasy as it looks due to the bracket being located directly above the screwswhich holds the PTO body to the mounting assy. Be sure not to loose thesmall screws and their lock washers.
Using De-Oxit or Flux-Wash, thoroughly clean the curved end of the strapwhere it touches the PTO shaft. Work you way slightly up the sides of thestrap to accomodate the sides of the groove. Next, use a toothbrush withDeOxit and clean the spot on the PTO housing where the strap attaches.Finally, clean first the side of the strap where it mates to the PTO housingthen clean the other where the two mounting screws seat.
Turing you attention to the PTO tuning shaft, clean area or groove wherethe strap ridest. Do NOT TURN THE PTO SHAFT or you will be realigningthe radio due to the cam positions v/s the PTO frequency being changed.Be very careful not to get any DeOxit or Flux Wash into the front bearing.To best do this, put some of the cleaner on a ìQî tip or small toothbrushfirst then clean the contact/groove area throughly. DO NOT GREASE OROIL THE CONTACT POINT.
Reinstall the ground return strap on the PTO. Be careful to insure that theturning shaft end is riding in the groove machined into the tuning shaft.
Reinstall the PTO in the radio chassis, grease and install the Oldham

coupler and reconnect the 2 plugs which were unplugged to remove thePTO. Make sure the PTO is mechanically aligned to the tuning shaft thentighten the 3 green captive mounting screws then finally, the 2 loosescrews on the PTO rear chassis bracket. Install the anti-backlash springon the Oldham coupler. Reinstall V-701 after first tightening the screwsin the tube socket and giving the tube pins a shot of DeOxit.
Turn the radio on. As it is warming up, put a single drop of (do NOT spray)DeOxit onto the PTO shaft where the ground return strap engages. Workthe ìKilocycle Changeî control back and forth about 50KCís to seat thestrap against the shaft.
Repeat the turning test above. The radio should now tune withoutinstability.
Should it not, you may have a Collins, Motorola or other PTO which has aninternal cam stack/follower assy that may be sticking. Repair of this isbeyond any explanation here and should be only attempted by someonecomfortable with doing ìsurgeryî on that PTO.
Future maintainence should simply require to annually re-apply the singledrop of DX-Oxit to the shaft/ground-strap contact point and rock thefrequency back and forth as above.---------------------------------------------------------------------------------------------Date: Fri, 7 Nov 1997 21:18:02 -0800From: Reid Wheeler <reid@...>Subject: RE: [R-390] Oven concerns
…>using the heaters causes permanent damage to the PTOs in the form of>accelerated end-point drift and mechanical distortion. The describeddamage >sounded to me like a paradigm case of a stuck heater thermostat.<snip>
Some of you may be aware of the large body of work concerning R-390A'sdone by long time and experienced user/repairer, Walter (Wally)Chambers. He as worked on and aligned more PTO's than most of us couldcount. Wally has occasionally contributed to HSN and in #37 stronglysuggests that the heater switch wires for the PTO be cut and taped! Overtime, the heater can distort the PTO coil and vaporize the grease and oil inthe two bearings. It is also not a rare occurence for the heater thermostatto stick and send the PTO temp right through the roof. Unless you areoperating in Arctic or Antarctic conditions, you don't need the heater.------------------------------------------------------------------------------------------------------------From: "Tom Bridgers" <Tarheel6@...>Date: Wed Dec 31, 1969 7:59 amSubject: [R-390] Lubricatiing the PTO?

One of my PTO's, a Dubrow (model 798, DM 101), was so hard to turn thatI decided to take it apart this afternoon and take a looksee. This PTO hadbeen overhauled by Tobyhanna sometime in its life, so I figured somethingdramatic must have occured since then to make it feel like it was binding.Once inside and looking at the guts of it, everything except the stainlesssteel shaft and bearing were corroded. What a mess. I guess the ovens hadbeen left on for an eternity, and the thing had cooked itself way beyondwell done. The two "wings", one with metal roller, the other with a plasticroller, on either side of the slider (located just in front of the iron core)were so corroded that they did not engage as they should. After a littlelubing, the rollers began to engage pretty well. After lubing the stainlesssteel screw over which the PTO iron core (and slider) travels, as I turnedthe PTO shaft through its course several times, it began to loosen ... but notall the way. And that is the reason for this email. Here's the weird part:
o Now when the shaft is turned causing the core to travel from rear tofront, the action is smooth and silky. When I say, from rear to front, Imean that the iron core goes from being largely exposed ... to being fullyinserted into the assembly chamber.
o When the shaft is turned (in the other direction) causing the core totravel from front to rear (emerging from the chamber as this happens),
a) for the first 1/2 of the distance, the action is rather tight causing themetal wing to lift from the cams until you stop turning. Then, it drops tothe surface of the cams ...and
b) for the remainder of the distance, the action is smooth and silky (andthe metal wing does not lift from the cams).
With all manner of lubing tried, I still cannot get the smooth action in thefirst 1/2 of the distance (as described above in a). Has anyone dealt withthis situation, and solved it? Would appreciate any help or suggestions,you might have. (Incidentally, after reassembling the PTO, it works justfine. And itappears to be stable. So one side of me says, forget it. But the perfectionistside of me, says hey, there has to be a way to fix this problem .....)---------------------------------------------------------------------------------------------------------From: hinec@... (Cory Hine)Date: Mon Nov 24, 1997 5:31 amSubject: Re: [R-390] Lubricatiing the PTO?
Fair Radio has Tobyhanna (thats an Army electronics base inPennsylvania) reconditioned PTOs for $45. I got one and it works quitewell.....

------------------------------------------------------------------------------------------------------------From: Don Reaves <dr@...>Date: Tue Jan 13, 1998 8:01 pmSubject: [R-390] PTO Instability
Ever tune your R390A through a carrier with the BFO on and get a"warble?" PTO seem un-stable while tuning? If the answer is yes, this fixmay apply:
Test for the problem by turning the radio on and allowing it to warm upabout 30 minutes. Tune in a calibrator point and turn on the BFO. Tune theradio through the calibrator signal. The BFO note should change smoothlyand without any warble or instability. If it does not, the problem may be asbelow:
There is an angled piece of metal fastened to the front of the PTO. It makesa 90 degree bend then engages the tuning shaft just in front of the forwardPTO shaft bearing. This piece of metal serves as the ground return for thePTO. The points where it engages the PTO turing shaft and its connectionpoint on the housing can become contaminated causing unstable PTOtuning. I have even seen well meaning but uninformed owners incorrectlyapply grease or oil to the point where the return strap engages the PTOshaft.
Here is the fix:
---> Unplug the radio <---
Remove the PTO by first removing the shielded cable (center plug next toJ-208 on the left rear of the RF deck) . Turn the receiver upside down andunplug P109 on the back of the PTO. Loosen the two screws holding therear PTO bracket. Do not completely remove them. Loosen the 3 captive,green headed screws which hold the PTO to the chassis. Carefully removethe spring on the Oldham coupler and set it in a safe place. Carefullymanuver the PTO from the main chassis being careful to guide the shieldedcable which was attached to the RF deck past the antenna cables andthrough the hold in the main chassis. Place the now completely free PTOassy in a clean, well lighted place so it can be worked on.
Its a good time to clean out the PTO cavity in the main chassis with someWD-40 on a rag and apply a few drops of oil to the tuning shaft at thebearing in the main chassis located in front of the PTO. I use syntheticMobil-1 90W rear end lube.
Remove V-701, the 5749 tube from the PTO.

Using plenty of light, you should now be able to see the ground returnstrap. There are 2 small screws holding it on the the PTO housing. Theopposite end of the strap engages the PTO tuning shaft after making a 90degree bend. On some PTO's, this end of the strap rides in a small groovemachined into the PTO tuning shaft.
Remove the 2 screws holding the strap to the PTO housing. It is not aseasy as it looks due to the bracket being located directly above the screwswhich holds the PTO body to the mounting assy. Be sure not to loose thesmall screws and their lock washers.
Using De-Oxit or Flux-Wash, thoroughly clean the curved end of the strapwhere it touches the PTO shaft. Work you way slightly up the sides of thestrap to accomodate the sides of the groove. Next, use a toothbrush withDeOxit and clean the spot on the PTO housing where the strap attaches.Finally, clean first the side of the strap where it mates to the PTO housingthen clean the other where the two mounting screws seat.
Turing you attention to the PTO tuning shaft, clean area or groove wherethe strap ridest. Do NOT TURN THE PTO SHAFT or you will be realigningthe radio due to the cam positions v/s the PTO frequency being changed. Be--> very <-- careful not to get any DeOxit or Flux Wash into the frontbearing. To best do this, put some of the cleaner on a "Q" tip or smalltoothbrush first then clean the contact/groove area throughly. DO NOTGREASE OR OIL THE CONTACT POINT.
Reinstall the ground return strap on the PTO. Be careful to insure that theturning shaft end is riding in the groove machined into the tuning shaft.
Reinstall the PTO in the radio chassis, grease and install the Oldhamcoupler and reconnect the 2 plugs which were unplugged to remove thePTO. Make sure the PTO is mechanically aligned to the tuning shaft thentighten the 3 green captive mounting screws then finally, the 2 loosescrews on the PTO rear chassis bracket. Install the anti-backlash springon the Oldham coupler. Reinstall V-701 after first tightening the screws inthe tube socket and giving the tube pins a shot of DeOxit.
Turn the radio on. As it is warming up, put a single drop of (do NOT spray)DeOxit onto the PTO shaft where the ground return strap engages. Workthe "Kilocycle Change" control back and forth about 50KC's to seat thestrap against the shaft.
Repeat the turning test above. The radio should now tune withoutinstability.
Should it not, you may have a Collins, Motorola or other PTO which has an

internal cam stack/follower assy which is sticking. Repair of this is beyondany explanation here and should be only attempted by someonecomfortable with doing "surgery" on that PTO.
Future maintainence should simply require to annually re-apply the singledrop of DX-Oxit to the shaft/ground-strap contact point and rock thefrequency back and forth as above.-------------------------------------------------------------------------------------From: "Mark Glusker" <glusk@...>Date: Fri Jan 30, 1998 9:10 amSubject: Re: [R-390] R390A Mechanical mayhem
<snip> - In my opinion, the best first step if you are removing the RFmodule is to remove the VFO. First of all, turn the KC knob until "+000"shows on the counter. From the top of the radio, undo the connector on theRF module for the VFO and feed the cable and connector through the holein the chassis. Turn the radio over and remove the spring on the coupler atthe front of the VFO shaft (may be missing - if so, don't worry). Remove thetwo frontmost green headed screws holding in the VFO. Instead ofremoving the single green headed screw at the back of the VFO, remove thetwo normal screws holding the VFO bracket to the chassis itself (you'll seewhat I mean when you get there). These screws are not captive, so be sureto catch them when they are fully unscrewed. Now you can slide the VFOdirectly towards the back of the radio without losing the synchronizationwith the RF module. The center disk of the shaft coupler will be loose atthis point - be sure not to lose it! Don't turn the VFO shaft more than about1/8 turn. If you leave it unturned, it will slide back in again when you aredone without needing any special synchronization (except tuning the RFmodule to +000 on the counter). If you do turn the shaft, you can alwaysreset it if you have a frequency counter. The +000 setting corresponds to aVFO frequency of 2455 kc. <snip> - To reinstall, reverse the procedure. Becareful not to damage the spring fingers on the chassis under the RFmodule. Reinstall the VFO with the counter on the RF module reading"+000", don't forget the Oldham coupler disk. <snip>-------------------------------------------------------------------------------------Date: Sat, 21 Mar 1998 07:59:50 +0000From: "Chuck Rippel" <[email protected]>Subject: R390A Alignment Note
The following is probably the single most important alignmentcomponent in the R390A receiver. It's relevence is not really spelled outin any of the technical manuals I have seen but it is the real key to gettingthe receiver properly aligned. PTO tracking on the R390A is veryimportant. Due to the tracking nature of the RF and IF circuitry, the PTOend points must be very carefully adjusted. If the PTO is "long" or "short," itwill not tune in the designed 1 mHz segments that match the mechanical

cam profiles which drive the slugs in the various coils. In as much as Irestore R390A's, I find that PTO mis-tracking by a little as 10 kHz cannoticably degrade overall performance. Don't believe it? Loosen the PTOcoupler then tune the radio on simple band noise. At this point, changingfrequency with the KILOCYCLE CHANGE knob will only tracking the camstacks and not the PTO. Observe that the band noise drops away at about(+-) 7 kc or so from your original frequency. That's is how tight themechnical tracking on the '390A is. Here is a quick check for proper PTOtracking:
Let the radio warm up for about an hour.
Tune the radio down to (-) 000 and zero beat the calibrator. Next,tune theradio up and note the frequency where it zero beats. The dial should readclose, say to plus or minus 3 kc's of (+) 000. If that is not the result, boththe PTO end points AND the dial over run need to be reset. This is followedby setting (timing, actually) the various cams which now need to bemechanically realigned. Follow this by an an electrical alignment asoutlined on top of the "Utah shaped" plate on top of the RF deck.
Successful completion will result in the mechanics of the receiver trackingwith the electronics.-------------------------------------------------------------------------------------------------------------Date: Tue, 20 Oct 1998 22:33:02 -0400From: John <[email protected]>Subject: Re: [R-390] A Cosmos PTO success story
Well I guess the group encourages alternate points of view... so flush this ifyou don't want to read it.
Let me start by saying that the alignment of A COSMOS was for me a toughdifficult and stress producing procedure. More than likely there areexperts out in the group who will take exception to this "simple" posting.So do not take it as anything but my individual hands-on experience.Candidly speaking I suggest that anybody who is considering this closelyassesses the performance of your PTO PRIOR to any opening up and set-screw adjusting, even though the performance might be off and you mightbe tempted to do so the as-is performance might just be as good or betterthan the following intervention you can likely make - You have beenwarned!
However For a learning experience, on a spare unit, or if you are bold GOFOR IT! Having said all that: I "tuned up" both a Collins and a COSMOS PTOon one of my R390A receivers about 9 years ago. Roughly this is whatwould be along the line of what I did ..for the COSMOS unit. (not knowingany better this turned out to be a very interesting educational experience)

It was a real pain in the rear and took me a lot of time but in the end, (nopun intended) performance was significantly improved. Today the receiverstill operates no more than one tick (200 Hz) on all the calibration points.
Bottom line, with enough time and some care and some special tools youcan work on the COSMOS PTO... Results are dependent on your overallsetup, equipment, time and finesse.Important ! You must have a good (stable and accurate) frequency counteror some other means of measuring the PTO output to say 10 Hz or soprecision.
Some tips:
I found I could obtain better results by slightly loading the output of thePTO under alignment into a non inductive load. Raise and maintain (for 4hours minimum prior to any sensitive work) the PTO to a warmtemperature by placing it under a 75 watt light bulb, mounted overhead,adjust the distance from the bulb to the PTO so that the unit runs at aboutthe (indoor) receiver in-use operating temperature. Try to keep thetemperature stable while you are working on the unit. If you must stopmid-stream you may have to back track and do it again, keep the light(heat) on at all times while you are working on it. If you keep the doorclosed on an inner work room I found the temperature variations arewithin a couple of degrees. As you start to get into the PTO guts diagrameverything you see as this is what will become your owner / operators andrecovery manual for your PTO. TAKE YOUR TIME
Mcmaster Carr sells adequate precision 6" and 8" diameter dial face plateswith reasonable precision index marks for around $10.
Mount this dial to an Aluminum backing plate which has been drilled forthe shaft diameter (0.185 inches) and secured (epoxy is OK) to some sortof a shaft clamp, mounting close to center (0.005") is somewhat important.Once your happy tighten up the clamp onto the PTO shaft, this gives you agood dial reference for making repeatable angular displacementmeasurements.
The 8 inch diameter dial, though bigger does a little better job to resolve,measure and enable a better than 400hz shaft angular result. If desired a10 turn counter (with lock) can be added to the alignment mechanism(such as the 400 series from Kilo International - Digi-Key page 376 incatalogue Q983 for $15.75 part number 412KL-ND)
PTO basics

PTO provides range of 3.455 to 2.455 mHz span.... therefore:
10 turns = 3,600 degrees ( 1,000 kHz)1 turn = 360 degrees (100 kHz)1/2 turn = 180 degrees ( 50 kHz)1/4 turn = 90 degrees ( 25 kHz)1/8 turn = 45 degrees ( 12.5 kHz)1/16 turn = 22.5 degrees ( 6.25 kHz)1/32 turn = 11.25 degrees ( 3.125 kHz)1/64 turn = 5.625 degrees ( 1.5625 kHz)1/128 turn = 2.813 degrees ( 781.25 Hz)1/256 turn = 1.406 degrees ( 390.625 Hz) 1/512 turn = 0.703 degrees ( 195.31 Hz)
* Operational Limit = 1.79 degrees ( 500 Hz) * (Reasonable) = 1.00 degree ( 277.78 Hz) * (Obtainable) = 0.50 degree ( 138.89 Hz)
Per TM 11-856A paragraph #150: ....Total End Point error on PTO not toexceed 500 Hz..... (or about 2 degrees of shaft rotation)
To proceed:
• Remove and open up the PTO• Remove the outer PTO can, heater and insulation (without trashing the
thermal insulation)• Unsolder where necessary• Be gentle• Once it is opened up examine the PTO closely, look for damage orexcessive lead screw wear. Lubricate the lead screw if absolutelynecessary with an acceptable lubricant.• Mount the PTO to a suitable stable test fixture, mount and insure thatthe dial face is securely mounted and rotates perpendicular to the PTOshaft.Verify the turn counter works (if used)• Insure you can gain access to and rotate the set screws. I had to makemy own set screw driver as the set screws are real small! One option isto obtain the smallest possible driver and stone it down.• Mount and check that the reference pointer is secure and that the dialclears the sharp pointer by giving the dial a full turn.• You can place a fixed magnifier lens and lamp to assist you in seeing thel ines as needed but with a 8 inches dial a 1/2 degree spacing is quite
readable.• Connect up the power to the PTO,• Connect the PTO output to a load resistor and the frequency counter.• Bring up and maintain the (exposed) PTO to a "warm to the touch"

condition with the lamp.• Turn on the PTO• Look for a frequency output.• Check the output vs. shaft rotation and move the shaft to get to the highend• Double check the output range (its still not to late to turn back :)• As you rotate the PTO you will see how the 40 or so adjustment screwsare mounted in a perimeter array and what they do. These screws act toset into a precise position a metal ring on which rotates a coil plunger.The plunger depth is "modulated", by the degree to which the set screwsdeflect the metal ring. These plungers are what "trims" the precise PTOoutput frequency. As you rotate the PTO shaft the 40 or so set screws areneed to be "adjusted" to precisely establish and define the mechanicalplunger depth (position) so that the desired precise frequency output isachieved.
• Keep track of which and how much you turn the set screws -make a diagram and keep good notes.
• If you mess up take a break and start over.• Always check the end to end (10 turns) as well as the 1 turnperformance.• After you are completed, turn the PTO off, let it cool off overnight,maintain the lamp in position, turn the PTO back on, let it heat soak foranother 4 hours and (re) measure the results.• Settle for a reasonable performance level and call it good enough• Reassemble with care-------------------------------------------------------------------------------------------------------------
THAT PESKY ENDPOINT.(Revised 6/6/99)by Dave Medley
When I do this I use a jig to make the procedure more accurate.. This jig is asimple mounting for the PTO with a separate mechanical counter tomeasure the shaft rotation. I can provide more information to anyoneinterested. The following assumes that the reader does not have such a jig.It yields acceptable results if you are careful.. The only catch is you need tohave access to a good frequency counter. Here is the procedure by thenumbers:
1. Remove the PTO mini BNC from J217.
2. Turn the radio on its back and remove the anti-backlash spring from theOldham coupler. Store this in a safe place.
3. Loosen the spline screw securing the front flange of the Oldham couplerto the gearbox and pull it back to release the center disc of the coupler.

Store this in a safe place.
4. Now remove the PTO. You do not need to pull the front panel to do this.Just loosen the two screws fastening the rear bracket to the chassis anddisengage the three green headed screws holding the PTO to the chassis.The PTO can now be withdrawn. Place it conveniently on the radio so thepower connector can remain connected.
5. Connect your frequency counter to the PTO output connector. To do thisyou need a mini-bnc to bnc adaptor. If you don't have one of these justremove the one that is attached to the rear apron and use that.
6. Switch the radio to standby and allow the PTO to stabilize for about anhour. Be sure the ovens switch is OFF.
7. Manually rotate the PTO shaft until the counter reads 2.45500 MHz.Mark the position of the shaft on the mounting plate. I use the anti-backlash spring post as an index.
8. Now rotate the PTO shaft 10 turns until the index lines up again. Thecounter should read 3.45500 MHz but of course it won't otherwise youwould not be going to all this trouble!! So now turn the end point adjustingscrew until the counter does read 3.45500 MHz. You need a thinscrewdriver to do this. Be careful not to lose the access cover screw,
9. Check the index once more at 2.45500 MHz. If it does not line up thenrepeat steps 7,8,9 until the range of the PTO is exactly 1 MHz for ten turnsof the shaft.
10. Before you replace the PTO check the setting of the 10 turn stop. In itsfully counterclockwise position the dial should read between -963 and -972. If it is outside this range adjust the ten turn stop until it does. If theerror is minimal the best way to do this is to loosen the small bevel gear onthe counter and reset it. After doing this be sure to check the mechanicalsynchronization. The check point is 2.000 MHz for the R-390 and 7.000+for the R-390A.
10 Now replace the PTO using the reverse procedure but do not tighten thespline screw on the Oldham coupler. Set the KHz readout to +000, rotatethe PTO shaft until the counter reads 2.45500 MHz and then carefullytighten the spline screw and reconnect J217. That is all there is to it andit should not take more than 10-15 minutes. If the end point adjustment isout of range then you have a much more difficult problem. This involvesdismantling the PTO and removing one turn from the appropriate coil.This is another subject. If you have such a problem let me know. I may beable to help.

----------------------------------------------------------------------------------------------------------Date: Sat, 03 Jul 1999 09:44:00 -0700From: [email protected]: Re: [R-390] problem with PTO
Disassembling the PTO is not difficult. Remove the outer can. Remove thefibreglass blanket (carefully so that you can reinstall it). Unsolder the (2)wires from the thermostat/heater that otherwise makes it impossible toremove the inner can. Remove inner can and clean away. The only trick inreassembly is getting the @#$% fibreglass to fit in properly without tuftssticking out around the edges like a bad haircut. That said, there is likelymore to your problem. I've seen PTOs with a lot of internal corrosion -probably lost their air tight seal years ago and have operated in acorrosive atmosphere. The elevated temperature would hasten thisprocess. If this is your situation, a careful and thorough cleaning may berequired. Also, as has been discussed on the list before, there are at leasttwo different internal arrangements for the linearity adjustment. I hadone PTO that had a similar problem to yours. Inside the PTO are littlesacks of silica-gel. The sacks look to be some kind of clear plastic, whichturns brownish and gets very brittle with age. The ones in mine had burst,spreading silica gel crystals throughout. Some had inevitably gotten intothe lead screw, and resulted in a sandy, gritty feel when tuning - especiallyin one direction. Getting all this stuff out was a challenge. Mostly what'srequired is care and attention, and an obsessive concern for tracking downthe grit! If I can advise further, just ask!--------------------------------------------------------------------------------------------------------------From: Bill Riches <[email protected]>Subject: Re: [R-390] PTO query
Last winter I purchased 10 of the potluck ones from Fair Radio - mostlyCosmos - have used 4 so far and all have worked 2 were within 100 hz ofeach 100 khz and 2 had endpoints out 500 hz brought down to within 100hz at each 100 khz. They seem ok. The other 6 are still in sealed boxes.-------------------------------------------------------------------------------------------------------------Date: Mon, 13 Sep 1999 18:50:13 EDTFrom: [email protected]: Re: [R-390] PTO query
I don't know about the Collins, but I bought one of the "refurbished" ones.It was a Cosmos and it worked well- smooth tuning. But, it had anendpoint error of several KHz, well ouside the nominal limit of 1.5 KHz. Ihave heard of others who found the same situation. Mine did not have anend point adjustment, but the classic Cosmos linearity adjustment every 25KHz. I finally figured out how to calibrate the unit and it's been verysatisfactory, accurate to about 300-400 Hz over the band.

------------------------------------------------------------------------------------------------------------Date: Mon, 13 Sep 1999 18:02:20 -0700 (PDT)From: Tom Marcotte <[email protected]>Subject: Re: [R-390] PTO query
The COSMOS does have an endpoint adjustment. It operates similar to theCollins et al endpoint adjust. When you look down at the front of the PTO, itwill be the adjustment behind the cap screw on the right (almost behindthe transformer). The linearity is the one on the left (actually there are40+ screws for linearity under the cap). I wrote an article about this inElectric Radio. If you contact Barry Wiseman at [email protected], I'm surehe can get you a copy (he has copyright). I usually set up the PTO's with alittle extra endpoint range as they "leak" range over time, just like alawnmower that burns oil, you give it a bit of lagniappe. I give it one extrakc (1001 kcs in ten turns) and it burns off one kc in a year or so, and thenit is right on without removal. This is a very predictable thing. It alwaysdrifts the same way.---------------------------------------------------------------------------------------------------------Date: Thu, 16 Sep 1999 17:38:36 -0700 (PDT)From: Tom Marcotte <[email protected]>Subject: [R-390] Cosmos Cal Procedure (long)
If you were wondering how to calibrate that confounded Cosmos PTO, hereis a procedure that I developed with some trial and much error. Note: Oneshould refer to the R-390A service manual before attempting to service thePTO, and should be experienced with either R-390A or other Collinsdesigns. Background: The Cosmos PTO does not use a compensating stackfor linearization as the other makes do. There are 40+ screws that can beadjusted from the front of the PTO through a little window. If you open thescrew cap cover on the left-front of the PTO, you will see a staggered row oftiny screws. As you turn the PTO, a new screw will appear with eachquarter turn. Endpoint adjustment (under the cap screw on the right) isdone just like a Collins PTO. So stop slammin' the Cosmos PTO and get towork :-)
Procedure:
The two things needed to calibrate the Cosmos PTO at 25 Kcs points are
1) an accurate means of measuring frequency, and2) an accurate means of turning the PTO shaft exactly 90 degree at a
time.
I use a frequency counter to measure the PTO output, and the Veeder-Rootcounter in the radio to measure the turns of the PTO. When using theradio's Veeder-Root counter to measure turns, take the time to tape

exposed 120 VAC power and fuse connections to prevent electrical shockwhilst performing the more than 40 PTO remove/install maneuvers. Thefrequency counter may be connected directly to the output connector of thePTO. A handy crossover connector from the mini BNC fitting to BNC canbe found on the back bulkhead of the radio. Simply borrow the adapterthat is present at the IF output jack. There are many alternatives to usingthe radio frame to measure turns, including using a sacrificial R-392 frameand various schemes featuring calibrated knobs.
Setting the endpoint on a Cosmos PTO is similar to the Collins PTOs. Testthe PTO to see how many turns it takes to achieve an output starting at3455 Kcs and ending at 2455 Kcs. Most aged PTO's that have not beenrecalibrated will typically require an additional 1-15 Kcs past the ten turnmark to achieve the proper range. To bring it back to 1000 Kcs output inten turns, adjust the endpoint screw (usually clockwise). The endpointscrew is under the screw cap that is behind the transformer (when lookingat the front end of the PTO, it is on the right). If the proper output cannotbe achieved within the adjustment range of the endpoint screw, one mustopen the PTO and remove one turn from the endpoint adjusting coil. Thischange in overall inductance of the coil will bring the endpoint back 7 Kcsor so. Once this is accomplished, setting the endpoint can usually beachieved with the endpoint adjustment screw. While the PTO is open, thelead screw and bearing can be lubricated. I usually take this opportunityto bake an open PTO in an oven at 150F for several hours to dry it out andregenerate the desiccant. Perform the calibration only after baking, andkeep the PTO in a zip lock bag if you plan to leave the adjustment windowscrews open for an extended length of time.
The linearization screws are under the screw cap on the left of the PTO(when looking at the front). There are more than 40 adjustment screws,one for each 25 kcs of range. The adjustment screws pass in front of thelittle open window as the PTO shaft is turned. To enable linearization, Ifind it best to set the desired point on the Veeder-Root counter, make noteof the error, and then physically uncouple the PTO from its coupler, tiltingit up to access the adjustment screws. The screws are very small, and thistechnique will make insertion of the screwdriver onto the screw head truewith minimal fuss. The steps for checking a calibration point are asfollows:
1) set the Veeder-Root Counter to the desired calibration point (ex: 000).
2) note the frequency output and error, and record both on a calibrationchart (ex: 3456 kcs, +1 kcs error). An example calibration chart will bedeveloped below
3) uncouple the PTO and tilt it up to access the adjustment screw (note this

may jostle the output reading a bit, don't worry about that, you justneed to work the error out with this screw no matter if it is jostled or not,trust me on this).
4) adjust the screw to remove the error (ex: -1 kcs, regardless of presentreading which may have been jostled due to PTO uncoupling maneuver).
5) re-couple the PTO, and go to step one, adding 25 kcs to the Veeder-Rootcounter reading. repeat until past 2445 kcs.
IMPORTANT!
When setting the 25 Kcs calibration points, it is extremely important thatthe screw being adjusted is directly lined up behind the adjustmentwindow. This need be checked only once, on the first screw being adjusted(the 25 kcs increments for the remaining screws will line them upautomatically). To accomplish this proper starting point, set the PTOshaft such that the output is 3455 kcs. Then simply rotate the PTO shaftslightly (left or right in 5 kcs increments) until the screw nearest thewindow is lined up with the window. Note the indication on the frequencycounter as a starting point for your calibration chart. The reason theinitial starting point for the first screw is so important is that the camfollower which rides on the compensating cam is directly behind thewindow, and will thus be directly under this screw at this point. If thiscaveat is not followed, apparent adjustment can still be made, but therewill be interaction between the point that one is attempting to adjust, andits two neighboring points. This will yield poor results and will be veryfrustrating. Be advised that if the screw being adjusted is directly behindthe window, the PTO position will likely not be at an exact 25 Kcscalibration point on the Veeder-Root counter dial, e.g. 000, 025, 050, etc.This is not a real problem, but it will be necessary to shift the startingpoint of the 25 Kcs check points (and the calibration chart) by 5, 10, or 15Kcs up or down. Simply remember that the PTO must have an output of3455 Kcs at dial indication 000, and 2455 Kcs at dial indication +000.Armed with this information, one can make a spreadsheet calibrationchart for all 40 (or 42 if you prefer some lagniappe on the ends)calibration points in 25 Kcs increments.
The above example is for a PTO that has the nearest linearity alignmentscrew falling at a frequency of 3465 Kcs on the frequency counter. Thiscorresponds to a starting point on the Veeder-Root counter of - -010. Notethat this starting point is not on an even 25 Kcs point, but that is OK as itis most important to start with the nearest screw directly lined up withthe adjustment slug at the center of the window. To complete the chart,subtract 25 Kcs from the frequency counter reading and add 25 units tothe Veeder-Root counter for each point out to or past (less than) 2455 Kcs.

Each screw will have an adjustment range of about 5 Kcs +/-. Clockwiserotation of the screws will reduce the PTO's frequency output at a givencheckpoint. One should avoid adjusting the screws to near their fullclockwise position as this will cause excessive drag in the PTO.
Advanced Procedure for the Stout Hearted
To remedy problems with excessive drag due to adjustment screwsreaching their clockwise limits, back all of the adjustment screws out totheir counter-clockwise stops, and then turn each screw one turnclockwise. This will give the adjusting cam an initial flat shape. Start PTOcalibration at the point nearest 3455 Kcs as described above, moving upthe dial (down in PTO output frequency) to 2455 Kcs (+000 on the Veeder-Root counter).
Remember to check each calibration point against the frequencies on thecalibration check chart you made (it is not hard to get 5 Kcs off). Somecheck points may require a touch-up calibration after completion of thefirst pass. This will be especially true if the PTO calibration was re-startedwith the cam in the initial flat position as described above. Extremeadjustment changes (greater than 5 Kcs) at any given point may causeoutput changes at neighboring points. These can be worked out withmultiple checks and further adjustments at problem checkpoints. With thislinearization procedure, it is possible to obtain checkpoint accuracies of +/-.100 Kcs with an initial dial calibration at 000 using the crystalcalibrator. This exceeds the specifications listed in MIL-R-13947B whichrequire a +/- .300 Kcs with a dial calibration at the nearest 100 Kcs checkpoint using the crystal calibrator. 73 Bonne Chance! Tom N5OFF--------------------------------------------------------------------------------------------------------------Date: Tue, 19 Oct 1999 04:56:29 -0700 (PDT)From: Tom Marcotte <[email protected]>Subject: Re: [R-390] Cosmos PTO chicken or egg?
You did the right thing by setting the endpoint first. The rest of the PTOshould be adjustable by the linearity screws, but 4 kcs is a bit of a stretchfor a single point. If the main inductor is wound true, more or less, thenthe single point adjustments will serve to flatten out the corrector cam, butif the main coil is flawed, then the corrector cam will have a steep bow in itat that extreme point. This may cause a bit of drag in the PTO at thatpoint. Don't sweat it and give it a try.
To answer your question, there will be little if any interaction between theendpoint and your erroneous mid-point, but you will have the opportuntiyto correct any last minute-minor endpoint error with the last lineartiy

screw (keep it small though by doing your best endpoint adjustment first).--------------------------------------------------------------------------------------------------------------Date: Tue, 11 Jan 2000 11:30:43 -0700From: "[email protected]" <[email protected]>Subject: [R-390] Cosmos PTO help...!!??
Hi for those who have sent e-mail... yes I have tried other tubes... the Ovensare off... the rig has been on for over 36 hours and the PTO still has a slowdrift...it does occasionally jump a few hundred kcs even after 36 hours...The tube and socket have been cleaned and this made no difference ... itseems to have settled down somewhat, and the linearity is OK...but thedrift is still present...-------------------------------------------------------------------------------------------------------------Date: Tue, 11 Jan 2000 11:09:45 -0800 (PST)From: Tom Marcotte <[email protected]>Subject: Re: [R-390] Cosmos PTO help...!!??
Sounds like classic bad cap in the PTO. You might also check the conditionof the cores.---------------------------------------------------------------------------------------------------------Date: Wed, 12 Jan 2000 10:10:43 -0500From: [email protected]: Re: [R-390] Cosmos PTO help...!!??
I cant speak from experience with that particular unit but the symptomsounds similar to a known fault of the 75A4 PTO. The cure was to replacethe dogbone style ceramic caps. I do not remember if it was with NPO discor silver mica; its been 30 yrs since I went into my PTO. The other primarycause of 75A4 instability was the shaft grounding spring, they just plainwore down over time and finally lost solid contact. I had to make anotherone about 5 years ago. GL Carl KM1H-------------------------------------------------------------------------------------------------------Date: Fri, 17 Mar 2000 09:48:36 -0800 (PST)From: Joe Foley <[email protected]>Subject: Re: [R-390] BFO Adjustment (n+1)
One of the tuneup details is to loosen the setscrew on the Oldham couplerand turn the shaft to peak the output, this aligns and centers the PTO tothe rest of the radio.----------------------------------------------------------------------------------------------------------Date: Sun, 19 Mar 2000 10:23:11 ESTFrom: [email protected]: Re: [R-390] VRC runout and PTO alignment question
Some information on the mechanical alignment- You probably should set

the PTO end points before aligning the RF. I don't have an exact referencebut check the archives under PTO and you should find lots of information.I did find the reference to the RF mechanical alignment which will set theoverrun on the counter: it's a post by Chuck Rippel dated 15 January,1998. Very clear description.-----------------------------------------------------------------------------------------------------------Date: Sun, 19 Mar 2000 08:46:44 -0800 (PST)From: Tom Marcotte <[email protected]>Subject: Re: [R-390] VRC runout and PTO alignment question
This is important to the performance of your rig. You should run the RFdeck out to it's stop (either side is OK) and give the VRC 35 kcs ofovertravel (make sure your zero set gadget is about in the middle of itslimited range). Then set the cams up at the prescribed frequency (7+000 or7999 + 1 kcs I think the freq is). Then, set your PTO endpoints to 1000 kcsin ten turns. After all this is done, you can proceed with alignment. If youskip the above steps your alignment will be sub-optimal.--------------------------------------------------------------------------------------------------------------Date: Sun, 19 Mar 2000 18:40:08 -0800 (PST)From: Tom Marcotte <[email protected]>Subject: RE: [R-390] VRC runout and PTO alignment question
OK Dale, that is a fair question. Perhaps I was typing too fast. To set theovertravel, you should disconnect or remove the PTO, and then run theKC's knob over to its clockwise stops. Your counter should now readsomething on the order of the high side of the band that the RF deck istuned to. With the knob at the stop, use your Bristo wrench to loosen thescrew on the VRC pinion gear, and make the counter read X+035. X is theband you are on. Example: If you are on the 7 Mcs band, make the counterread 7+035 (make sure your zero set adjustment is about at its center).Tighten the screw, and then never ever ever ever change this settingagain. If you get confused setting the PTO up, adjust something else. Notthis screw. See below. Then once this is set up, put the counter on 7+000(i.e. 7 999 plus one more kcs) and set the cams up in line with theirrespective alignment marks for each of the six RF sections (see manual),and then never ever ever change these again. Adjust your PTO for 1000 kcsin ten turns (see the manual). When reinstalling the PTO, I find it safe toset the dial on 000, and then drop the PTO in place with about two turnsfrom its own stop (or at 3455 kcs output if you have a counter or can listento the PTO signal on another HF rig). Once the PTO is in, you can true it upwith a local AM broadcast station.
Since the RF deck and counter are joined at the hip for life (see my ordersabove) the only adjustment you have available is on the PTO shaft. Looseneither end of this and correct the error (i.e make the broadcast staion read

properly on the counter holding the PTO shaft whilst turning the Kcs dial).
Piece of cake. Call me at 504-592-6181 if you have any questions.-----------------------------------------------------------------------------------------------------------Date: Wed, 29 Mar 2000 08:23 -0800 (PST)From: [email protected]: [R-390] Doing end point adjustment on PTO's
You read well. You will not find it in there or in the R390/A manuals. Thegoal is ten turns and exactly 1 million cycles. If low to high adjustmentdoes not work, do high to low.
Pull the PTO out of the chassis so you can grab the coupler. Hang yourfavorite counter on the PTO. Roll the shaft to get 2,455,000 on thecounter. Mark the coupler and case with a marker.
Spool off ten turns and line up your mark. Read a new number near3,455,000 but not exact or you would not be doing this. Adjust the endpoint to get closer. spool back ten turns if you are not at 2,455,000
Then do this adjustment from high to low. One end should set still whilethe other end changes. Erase your marks. Roll the shaft to get 2,455,000on the counter. Mark the coupler and case with a marker. Spool off tenturns and line up your mark.
Read a new number near 3,455,000 but not exact or you would not bedoing this. Adjust the end point to get closer. Spool back ten turns youshould be close. About 3 or 4 times and you can get a 1,000,000 change inexactly ten turns. with a good counter you can get within 20 hertz.
I have hit 2 or 3 hertz doing these on the bench in service.
You can stop along the way at one turn points and track your 100,000 calpoints. This will give you a clue to the linearity. You may record these forreference.----------------------------------------------------------------------------------------------------------Date: Wed, 29 Mar 2000 13:34:14 -0500 (EST)From: "Paul H. Anderson" <[email protected]>Subject: Re: [R-390] Doing end point adjustment on PTO's
Roger - that is a great summary! The key question I have is how do Iactually adjust the end point? What pot, slug, trimmer, am I supposed to betweaking?
The only obviously adjustable thing is the top of the transformer on thePTO - is that was I want to turn? The PTO I'm looking at is a Collins PTO

for a R-392 (so it is different than the 390 and 390-A, I think). Over lunch,I went home and aligned the PTO shaft using my new RF signal generator(URM-25F), as well as the internal calibration crystal, and I think the endpoints are actually ok. There is some non-linearity over the whole range -maybe +/- 1.5 KC, but this is livable for me. I'm learning more (andenjoying it a lot)... thanks for writing, folks!--------------------------------------------------------------------------------------------------------------Date: Wed, 29 Mar 2000 13:33:28 -0600From: "Bill Hawkins" <[email protected]>Subject: RE: [R-390] Doing end point adjustment on PTO's
Were you using a mechanical 10 turn stop when you did this? Twenty Hzin 1,000,000 in 10 turns is 20 in 100,000 for one turn or 1 in 5000,which is a little less than 1/10th of one degree mechanical rotation. If youdrew a circle ten inches in diameter and used a pointer 5 inches longattached to the PTO coupler, you'd have to line the pointer up within 1/200of an inch, or about 1/4 of 1/64 inch. I'd need a really steady hand and amagnifying glass, or maybe a microscope. What I did was to fasten the PTOto the bench, on top of a steel panel, and then bring a try-square up againstthe coupling ridges. You're not looking for absolute accuracy of theendpoints, but to get 1 MHz in exactly ten turns. So you line up thecoupling at the low end and write down the counter reading, turn thecoupling ten turns, line it up with the try-square to get exactly 10 turns,adjust it, go back ten turns, do it over again until you can't get any better.Then you set either endpoint mechanically when you put the PTO back inthe set, by moving the RF deck coupling on its shaft AFTER the set hasthoroughly warmed up. Even an R-392 warms up, with its sealed case. Theones I've done do not stay put at one end when the other is adjusted. That'swhy you do it several times. For an R-389 PTO it's 50 turns out and 50turns back. For a really good time, open up the PTO and use the correctorstack to improve the linearity. But don't open it if the air is humid.Minnesota in January is OK, when the dewpoint is well below freezing.----------------------------------------------------------------------------------------------------------Date: Wed, 29 Mar 2000 12:21 -0800 (PST)From: [email protected]: [R-390] Locating the end point adjustment on PTO's
>The key question I have is how do I actually adjust the end point? Whatpot, slug, trimmer, am >I supposed to be tweaking? The only obviouslyadjustable thing is the top of the transformer on >the PTO - is that was Iwant to turn? The PTO I'm looking at is a collins PTO for a R-392 (so it is>different than the 390 and 390-A, I think).
Oops I forgot to mention, there are several flavors.

Collins. you are looking for a 3/8 or 7/16 screw cover cap behind the tubethat covers the adjustment point. This cap looks like a big bolt top.
Cosmos. You have two covers. Behind one is a single adjustment, This oneyou want for the end point. Behind the other the adjustments will changeas you turn the PTO shaft. DO not adjust those if you are not working onthe linearity of the PTO.
You can do a end to end spread check real quick. Zero the cal at one end.Spin the ten turns to the other end and see where the zero is. 2Kc is fieldacceptable for mil use. There ain't no reason to get yours adjusted downunder a 100 hertz. You can get that close with the cal oscillator and justtaking the time. You run the KC know by hand and the PTO by hand andlisten to the zero beat.
Once you get the span correct you reassemble the PTO and set the shaftadjustment to go with the dial counter, cal xtal and zero beat.
The only obviously adjustable thing is the top of the transformer on thePTO - is that was I want to turn?
You need a good RF meter or a scope or time to adjust the transformer onthe PTO. Measure the PTO output. Adjust the transformer to give a best flatoutput level across the whole range of the PTO.
The PTO I'm looking at is a Collins PTO for a R-392 (so it is different thanthe 390 and 390-A, I think).
Only in some of the external mechanical forms. IE their not swapable offthe shelf. But from the maintenance point of view they are equal.
You know tires come in all shapes and sizes these days. But the guy at thetire shop gets them all on and off the rims the same way. So it is with theR3xx family of PTO's If you have studied one you can do them all.------------------------------------------------------------------------------------------------------------Date: Wed, 29 Mar 2000 13:13 -0800 (PST)From: [email protected]: Re:RE: [R-390] Doing end point adjustment on PTO's
We were in service and had nothing else to do for the whole damn shift. Sowe played with things a lot. Once we got done with the adjustment we putthem back in the receiver and did the mechanical alignment. You can rollfrom 000 to +000 and get a good repeatable results. We just used a felt penmarker and some care. Random shots in several thousand receiveralignment over 6 years and your amazed a few fell almost exact.-------------------------------------------------------------------------------------------------------------

-Date: Wed, 29 Mar 2000 13:22 -0800 (PST)From: [email protected]: [R-390] More Doing end point adjustment on PTO's
>The ones I've done do not stay put at one end when the other isadjusted...........
This is true. However as you do the adjustments, it seemed to work betterfrom one end to the other. After 25 years I do not remember which endwould set more still than the other end. I only found a few in six yearsthat needing adjustment would not adjust. The depot said most of the oneswe turned in were OK. We had just not let them warm up enough. Yea, likewe believed that. The ones we did get from depot were real close in the spanand we did not try to get them any better.-------------------------------------------------------------------------------------------------------------Date: Tue, 25 Apr 2000 17:12:52 -0400From: "Randall C. Stout" <[email protected]>Subject: [R-390] PTO Alignment
Thanks to those who commmented on my moaning PTO. I looked carefullyat the Oldham coupler. As it rotates, the alignment between the diskschanges a lot. Whenever the slot is vertical, so that the PTO side can slidein a vertical plane, the PTO coupler disk is about 30-40 thousands higherthan the KC knob side. This is true In any 180 situation, so I don't thinkthe KC shaft is bent, rather the PTO sits too far above the plane of the mainframe in relationship to the KC shaft. Remember, I have the radio upsidedown, so if you flip it into operating position, then the PTO side of theoldham coupler is actually lower, than the KC shaft side. The 3 greenscrews are tight. I noticed there are three screws which hold the PTO canto the 'frame'. IF those are either slotted or have some vertical clearance, Iwould think I could pull the PTO, adjust those screws, so the PTO wouldalign better in the vertical plane with the KC shaft. I think the moan I hearcomes from the oldham coupler as it rotates off having a vertical slot, itforces the PTO shaft to bend to accomodate the vertical mismatch. Sincethe Oldham coupler doesn't have free movement in all axises, I think ittorques on the PTO shaft when the slots aren't in a vertical axis.
Does any of that make sense? I stared at it for a while, and am ready topull the PTO and have at the alignment issue. Just wanted any collectivewisdom before I get out the dial indicators and see if I can change itsposition.
This is a depot/St.Julians creek dog from Fair, and perhaps Dave had tothrow a different PTO into it to get it to work. It is a Collins PTO, as is therest of the rig.

Hey Nolan, I know you put a lot of effort into your PTO alignment, what doyou think?--------------------------------------------------------------------------------------------------------------Date: Tue, 25 Apr 2000 17:09:35 -0500From: "Scott, Barry (Clyde B)" <[email protected]>Subject: RE: [R-390] PTO Alignment
Makes me wonder why the Oldham coupler was used. If the two shaft axesaren't co-linear, then it would seem there is going to be binding at twoplaces 180 degrees apart. If the coupler can't handle the misalignment,then what good are they?--------------------------------------------------------------------------------------------------------------Date: Tue, 25 Apr 2000 19:13:08 -0400From: Barry Hauser <[email protected]>Subject: RE: [R-390] PTO Alignment
I haven't seen that problem on any of my R-390(x)'s. Did you clean andgrease each side of the disk? Old lube may have become sticky. Also, itmay be preferable to give the connection some "slack". Don't jam thecouplings up against each other too tightly. Give the works some jiggleroom, but not sloppy. I suspect they're smooth up to some maximumamount of misalignment of the shafts. I've observed one or two with quitea bit of side motion, yet with no discernable drag spots.---------------------------------------------------------------------------------------------------------Date: Tue, 25 Apr 2000 19:41:41 -0400From: "Randall C. Stout" <[email protected]>Subject: Re: [R-390] PTO Alignment
Thanks for the input. After I posted, I went downstairs and stared somemore at the coupler. I believe that Nolan did some increibly complexalignment of his PTO, but afterall, this is a blue striper, and I just wanted tostop it from moaning at me all the time. I thought of calling it Mona.
Anyway, I figured that if I could help the coupler align itself, based on theshafts, I would be better off. I removed the PTO and looked at the 3 screwsthat hold the PTO to the vertical mounting bracket. What I wanted was away to allow just a little float in those screws, so that the rotation wouldself center the coupler. Problem was, once the PTO is back in the rig, youcan't get to those screws, clearance is too tight.
So, I replaced the top screw with the appropriate bolt(hex head) which Icould adjust with a wrench, plenty of clearance for that. I loosed the twolower screws so that you would be able to move the PTO as the shafts

turned. Cleaned the coupler and disc, which was full of hardened grease,and one of the couplers had some kind of cement or glue on one face. Isuspect some genius glued the disc to one side of the coupler! Thatcertainely helped it float as designed.
Put it back in the rig, tightened the green screws to normal tension,checked the misalignment again, just to be sure it was still there and notchanged from removing the PTO(it wasn't) I loosened my bolt just a bit,got out a medium brass drift, and very gently tapped on the faces of thecoupler where they misaligned. That quickly cured the verticalmisalignment, but I had a bit of side to side. I used the same strategy forthat, and had my total run out of the coupler down to ~5 thou. I will needto do some final setting of the overall clearance in the coupler, but, I amhappy to say that Mona has left for greener pastures. Not a squeak, chirpor creak to be heard.
Took it out again, tightened the lower screws, replaced the bolt with theorginal screw, put it back togethor, and am pleased as punch. John, wheredid you find the clearance info for the coupler? I thought I lookedeverywhere, but missed it.
I have learned more about these rigs working on this blue striper, figuringI couldn't hurt it compared to its sitting out in the weather for who knowshow long, then on my nicer rigs, which I don't feel so comfortable withripping into. I know Nolan wouldn't understand such timidity, based onwhat he did to his mint EAC, but to each his own.--------------------------------------------------------------------------------------------------------------Date: Tue, 25 Apr 2000 16:59:24 -0700 (PDT)From: Joe Foley <[email protected]>Subject: RE: [R-390] PTO Alignment
The problem here is that the Oldham Coupler was only meant to accountfor "SMALL" misalignments. Everyone here knows that if Art Collins wasgoing to be the only one to work on one of these he would have made themount out of 1/4" thick plate with drilled and tapped holes in the carefullymachined corners and bolted together with a solid shaft coupled to theknob on the front panel! Then someone would be whining about howtheir's would bind up if there was a fly's wing squashed under one corner.But he knew better. He knew that he'd get too many complaints if it wastoo hard to line up or if it was too expensive to build.
On the good side; look at how far off it can be and still work! It didn't justjam up and break.--------------------------------------------------------------------------------------------------------Date: Tue, 25 Apr 2000 16:42 -0700 (PDT)
From: [email protected]: Re:[R-390] PTO Alignment
>Thanks to those who commmented on my moaning PTO. I looked carefullyat >the Oldham coupler. As it rotates, the alignment between the diskschanges a lot. >Whenever the slot is vertical, so that the PTO side can slidein a vertical plane, the >PTO coupler disk is about 30-40 thousands higherthan the KC knob side. This is >true In any 180 situation, so I don't thinkthe KC shaft is bent, rather the PTO sits >too far above the plane of themain frame in relationship to the KC shaft. >Remember, I have the radioupside down, so if you flip it into operating position, >then the PTO side ofthe oldham coupler is actually lower, than the KC shaft side. >The 3 greenscrews are tight. I noticed there are three screws which hold the PTO >canto the 'frame'. IF those are either slotted or have some vertical clearance, I>would think I could pull the PTO, adjust those screws, so the PTO wouldalign >better in the vertical plane with the KC shaft. I think the moan Ihear comes from >the Oldham coupler as it rotates off having a verticalslot, it forces the PTO shaft >to bend to accomodate the vertical mismatch.Since the Oldham coupler doesn't >have free movement in all axises, I thinkit torques on the PTO shaft when the >slots aren't in a vertical axis. Doesany of that make sense? I stared at it for a >while, and am ready to pullthe PTO and have at the alignment issue. Just wanted >any collectivewisdom before I get out the dial indicators and see if I can change >itsposition. This is a depot/St.Julians creek dog from Fair, and perhaps Davehad >to throw a different PTO into it to get it to work. It is a Collins PTO, asis the rest >of the rig. Hey Nolan, I know you put a lot of effort into yourPTO alignment, >what do you think? Thanks Randy- ----The offset is why the coupler is in there. Your offset is not that much.Pull the thing and spin it by hand.Just keep track and spin both the PTO and the dial back the same.Is the squeek in the chassis?Is the squeek in the PTO?Is the squeek now gone (coupler)?Do you have a little gap in the coupler?There should be some clearance so the knob shaft does not push on thePTO shaft. The spring keeps the back lash out for you.Did you look at your dial lock yet?
When we give you guys a few dozen tips do tell us which ones you did checkand did not solve the problem.-----------------------------------------------------------------------------------------------------------Date: Tue, 25 Apr 2000 19:10:07 -0500From: "Bill Hawkins" <[email protected]>Subject: RE: [R-390] PTO Alignment

If your Oldham coupler is forcing the shaft to bend, something is wrongwith the coupler. There should be a disk between the chassis end and thePTO end of the coupler. The disk should have on slot on each side, and theslots should be at right angles to each other. The disk will move from beingcentered on one shaft to being centered on the other shaft as the assemblyrotates. It will take quite a lot of misalignment. But the more it ismisaligned, the more non-linear the rotation gets, throwing off thecounter/frequency linearity. I think there's nothing for it but to remove thePTO. Mark the couplings first so you can put it back in the same rotation.You did try Joe Foley's suggestion of the dial lock, right? My guess is thatthe PTO (and maybe the radio) was dropped hard enough to bend the leadscrew that moves the core through the coil form. The core dragging on thecoil form (linearly - the core doesn't rotate except for the linearitycorrector) causes the moan like a bow on a violin string. If a bent leadscrew is the cause, it would be pretty tricky to get it straight again.-----------------------------------------------------------------------------------------------------------Date: Tue, 25 Apr 2000 19:19:01 -0500From: Nolan Lee <[email protected]>Subject: Re:[R-390] PTO Alignment
>Hey Nolan, I know you put a lot of effort into your PTO alignment, what>do you think?
It shouldn't take an hour to set one up real close. Before you put a lot ofeffort into it, pull the PTO and throw a dial indicator on the drive anddriven flanges and verify that they are true as are the shafts.
If so, it's just a question of changing the up and down, in and out, and sideto side positioning of the PTO mounting brackets. It can be tedious withthree planes to deal with. <grin>
To be honest with you though, I'd be half-assed tempted to go ahead andpull the covers off of the PTO while you have it out of the chassis and take apeek inside. You might want to see just how much force is required torotate the shaft in the PTO. There's a chance that you might end up havingto pull the thing apart for a lube job.
If nothing else, verify the endpoint adjustment before you remove it and seeif you need to remove a coil turn to bring it back into specs. It's a lot easierto do it all while you've got it out of the chassis.------------------------------------------------------------------------------------------------------------Date: Tue, 25 Apr 2000 17:23:04 -0700 (PDT)From: Joe Foley <[email protected]>Subject: Re:[R-390] PTO Alignment
Also, if the PTO is forced to wobble because of a bent shaft, or if the shaft

coupler isn't free, the bolts holding the PTO will come loose! Like mine did,picture that falling out on the floor, but it didn't.----------------------------------------------------------------------------------------------------------Date: Wed, 26 Apr 2000 09:01:55 -0400From: "Tetrode" <[email protected]>Subject: Re: [R-390] PTO Alignment-Oldham coupler
Glad to hear that your mechanical re-alignment and coupler cleaningefforts paid off!
>John, where did you find the clearance info for the coupler? I thought I>looked everywhere, but missed it.
In TM 11-856A its Fig. 89, Oldham coupler details, page 157.In T.O. 31R1-2URR-452 (Army TM 11-5820-358-35) its Figure 70 onpage 113.
They are both the same drawing and it is only mentioned briefly duringVFO removal/replacement or synchronizing steps. It shows the Oldhamcoupler disk pressed flush against one side of the coupler plate, while theother side of the disk has a 1/32 (.031) free space between it and the othercoupler plate to allow it to move around.
The first time I set it I took a piece of #twenty-something buss wire thatwas close to the right size and flattened it a bit with a hammer taps until itmeasured the right amount on a micrometer, and then used it as a gauge toset the spacing. Now that I know what the spacing looks like I just eyeballit.----------------------------------------------------------------------------------------------------------Date: Wed, 26 Apr 2000 09:07:39 -0400From: Roy Morgan <[email protected]>Subject: Re: [R-390] PTO Alignment
>...I could pull the PTO, adjust those screws, so the PTO would align betterin the vertical plane >with the KC shaft.
The purpose of the Oldham coupler is to allow for exactly just such mis-alignment. That is, displacement perpendicular to the axis of the shafts. Itwill allow for modest angular mis-alignment. Just add a small drop of oil tothe moving surfaces and see if the moan goes away.
> it forces the PTO shaft to bend to accomodate the vertical mismatch.Since the Oldham coupler >doesn't have free movement in all axes, I thinkit torques on the PTO shaft when the slots aren't >in a vertical axis.
It does have ( or SHOULD have) free movement in the plane perpendicular

to the axis of the shafts. If by "torques on the PTO shaft" you mean appliesforces perpendicular to the axis of the shafts, then it is not working right.The slots in the disk are binding, OR there is excess force between thedriving and driven disks on the center disk. To correct this, just re-position the PTO a bit to the rear allowing a slight axial clearance.
To be really fussy, polish the tabs on the driving and driven disks and theinside edges of the center disk with some polishing compound, check forfree movement of the tabs in the slots, apply a coat of automobile wax,then a bit of soft grease, and re-assemble. The thing should then operatewith as much as a half inch of mis-alignment in the shafts. To be crude anddo the wrong thing, give it a squirt of WD-40.------------------------------------------------------------------------------------------------------------Date: Sat, 9 Sep 2000 08:52:42 EDTFrom: [email protected]: Re: [R-390] R-390A Advice
<< How many manufacturers were there for the PTO <snip>
PTO's were manufactured by the following:
1. Collins Radio Company 2. Motorola 3. Dubrow Electronics 4. Progressitron Corp.
These listed above are conventional corrector stack PTO's.
5. Cosmos, these are the most common, and have a different method oflinearizing the end points.
Since the PTO you has no markings, it's probably a Progressitron, theirdecals were delicate to say the least. Their pto's are considered my many,including myself to be the best manufactured.--------------------------------------------------------------------------------------------------------Date: Sat, 9 Sep 2000 15:51:58 EDTFrom: [email protected]: Re: [R-390] R-390A Advice
>A follow-up to the PTO. Is there a way to determine manufacturer byexternal >indicators or is it >really worthwhile knowing.
The four manufacturers of the conventional corrector stack PTO's, areidentical in construction.
The Progressitron's are the newest of those types, and consequently seem

to be the cream of the crop. That said, The Collins, Motorola's andDubrow's are all fine PTO's also. I would have no hesitation to use any ofthose.
But, some of the most " Linear " PTO's I have owned are the Cosmos. " yap[ays your money and ya takes your chances. But, not a real big chancewhen getting a PTO for a R-390A.--------------------------------------------------------------------------------------Date: Sat, 09 Sep 2000 22:23:58 -0400From: John <[email protected]>Subject: Re: [R-390] R-390A PTO electrical hookup delta
Agree with "identical" in construction (some small deltas) however PTOsare not identical in electrical hook-up. My COSMOS unit has only 4 wiresout to the J709 connector. I took the coverplate off of it to see where theyconnected. One difference is an internal jumper wire was added whichconnects the terminal normally connected to the RF-IF B+ line (J709-A)and feeds this from the P709-B V701 Regulated +150v line inside thesmall electrical junction box on the PTO. This eliminated the need for aseparate wire to the RF-IF B+ line. I do not think that this makes anysubstantive difference in the operation of the receiver however if you aretracing down the exact delta and where the 4 wires are landed (connectorto component) it is something I have learned.--------------------------------------------------------------------------------------------------------------Date: Mon, 18 Sep 2000 13:26:59 -0500From: "Dr. Gerald N. Johnson, electrical engineer" <[email protected]>Subject: Re: [R-390] PTO Failure modes..???
Tubes, paper capacitors, resistors, RF circuits (capacitors and coils) in thatorder. Tubes use sockets for a good reason. They are the most suspect ofparts. Though bad coupling capacitor can kill tubes and shorted bypasscapacitors can kill resistors.
Changing the oscillator tube can require realigning the PTO.-------------------------------------------------------------------------------------------------------------Date: Mon, 18 Sep 2000 15:10:38 -0500From: "Dr. Gerald N. Johnson, electrical engineer" <[email protected]>Subject: Re: [R-390] PTO Failure modes..???
I've no thoughts on aging of those parts. Could be either slug or anycapacitor, or resistor or wear on the screw or the moulded coil shrinking.Drift with aging is not a characteristic of good ceramic temperaturecompensating capacitors. I do have some of those Collins that are notencapsulated. Maybe it would be interesting to check their values on a goodbridge someday. Still I can't conceive that a capacitor value changing

should change the range of the oscillator. Maybe shift the range but notprevent meeting the end point spread. The endpoint spread adjustment isadjusting the ratio of the delta L in the main coil to the total L in theoscillator. My bet is on the slugs. 73, Jerry, K0CQ-------------------------------------------------------------------------------------------------------------Date: Thu, 2 Nov 2000 11:24:59 -0500 (EST)From: Norman Ryan <[email protected]>Subject: Re: [R-390] PTOs
> However, I'm still experiencing some warble or electromechanical>instability in the unit's Collins PTO. As per suggestions from this group,I've>cleaned the spring on the PTO shaft, and have cleaned and treated the>leadscrew with both Stabilant-22 and also Caig's deOxit. Although it'smuch>better than what it was originally, I'd still love to have a smoothlyrunning>PTO like the ones I remember when I serviced so many of these sets backin>my Signal Corps days of the mid-1960s (I was a US Army MOS-31E20field>radio repairman, pulling component-level maintenance on <snip>
Does the Oldham coupler have its spring? Is the assembly aligned straightand true? Does the disk have ~ 1/64" spacing between it and the twocoupler faces? Getting this right may be all you need to do to get your PTOto settle down. Cosmos made the best PTO, IMHO. 73... Norman-----------------------------------------------------------------------------------------------------------Date: Thu, 2 Nov 2000 12:36:01 -0500From: "AI2Q Alex" <[email protected]>Subject: FW: [R-390] PTOs
Thanks for your note Norman. Yes, the original spring is in place. I'll haveto check the mechanical alignment and spacing later, and let you knowwhat i find. Would the "alignment" be adjustable by slightly re-positioningthe PTO when the captive screws are loosened, or are you referring tosomething else? Could you clarify what you mean about the spacing?------------------------------(ed: Additional info in the RF tips section)---------------------------------------------------------------------------------------------------------Date: Wed, 15 Nov 2000 04:29:35 -0800 (PST)From: Tom Marcotte <[email protected]>Subject: Re: [R-390] Cosmos PTO question
> ----- Original Message -----> > What is the coil inside the Cosmos PTO that is beside the end-point

adjust> > coil? It looks to be in series with the end-point adjust coil. It seems> as if it could be used as a coarse-adjustment for the end point, but I have> not heard anyone mention it before. I only have two turns on the end-point adjust coil, and hate to remove one of those which would normally bethe recommended adjustment.> >> > The second coil is the same diameter as the end-point adjust coil, except> > that it has three turns on it. It is pictured here -> > http://www.knology.net/~wewilson/images/CosmosPTO.jpg .
The end point adjust coil is lower left, and the other coil sits above and tothe right,> > on the end of the metal sleeve that it fits into.
- --- Walter Wilson <[email protected]> wrote:> After a few replies an re-reading Tom Marcotte's article on the CosmosPTO,> I see that the "extra" coil is part of the Cosmos corrector stack design.> Now my only question is this: I have only two turns on the end-point>adjust coil, and the spread is about 990KC. Do I really remove a turn from>this coil and take it down to only 1 turn?
You would remove one turn from the end point coil. This will move theendpoint quite a bit, enabling you to then use the adjusting screw to nail it.-------------------------------------------------------------------------------------------------------------Date: Wed, 15 Nov 2000 07:49:32 -0800 (PST)From: Tom Marcotte <[email protected]>Subject: Re: [R-390] Cosmos PTO question
Good question! The article says to try the screw first, and if you can'tachieve the 1000 kcs in ten turns, THEN remove the turn. Thanks for theheads up.------------------------------------------------------------------------------------------------------------Date: Wed, 15 Nov 2000 09:49:03 -0700From: Jordan Arndt <[email protected]>Subject: Re: [R-390] Cosmos PTO question
Do NOT remove the entire turn.. unsolder about 1/2 of the turn and fold itback on itself... then resolder it... otherwise if you go the whole turn youwon't get linearity over the entire range...-----------------------------------------------------------------------------------------------------------Date: Fri, 17 Nov 2000 21:31:24 -0500From: "Walter Wilson" <[email protected]>Subject: Re: [R-390] Cosmos PTO question

I finished the adjustments on my Cosmos PTO tonight. I couldn't get theend-point adjustment with the screw, so unsoldered and folded a turn backon itself. This moved the end-point too far. I finally added a bit of wire toallow me to "loosely" wrap the original turn back around the coil. This gotme in range for an adjustment. After adjusting each of the linearizationscrews, it was within 100 Hz at each 25 KC point. It's in the oven bakingnow at 140 deg F prior to reassembly and final adjustment.------------------------------------------------------------------------------------------------------------Date: Fri, 17 Nov 2000 22:38:47 -0600From: Nolan Lee <[email protected]>Subject: Re: [R-390] Cosmos PTO question
Walter, before you close it up, hit the windings with some coil dope tosecure them. There's no telling for sure if the loose turns might cause anytype of drift or instability but a quarter of a cent coil dope will make surethat it won't.--------------------------------------------------------------------------------------------------------Date: Fri, 24 Nov 2000 14:58:27 -0500From: "Ronald Reams" <[email protected]>Subject: [R-390] PTO Problem
Sorry to be sooo long getting back to all y'all, It was the 6BA6 in the PTO.Got back from my parents in VA today and changed the tube and radioworks FB. The ole on went to ? in the tube checker and then fell almost to0.----------------------------------------------------------------------------------------------------------Date: Sat, 9 Dec 2000 13:09:03 -0600From: "Darrel Nichols" <[email protected]>Subject: [R-390] PTO Question
OK. Here's a dead list question to ponder. Put this on the shelf after havinga near tragic event with the BFH I had grabbed in desperation. Collins PTOhas the bearing slightly protruding from the front housing. Enough sothat the E-clip broke when I removed it for the initial cleaning. Now theshaft slot is about half covered by the bearing inner bore. Pulling on theshaft will open up the slot, but the assembly binds with a clip installed.From the condition of the PTO, I would guess it had never been opened andtherefore suspect the bearing is the correct one. Anybody have any hintson removal of the bearing, or seating it without damage? Or is it anormal condition and I'm missing something?-----------------------------------------------------------------------------------------------------------Date: Sat, 09 Dec 2000 15:50:58 -0600From: Nolan Lee <[email protected]>Subject: Re: [R-390] PTO Question
The bearing is preloaded in the housing with a couple of bellville springs. A

small arbor press and a tubular collar with a section cut out so you canaccess the retainer should work. A short length of PVC or CPCV pipe witha notch comes to mind as an easy one. Supporting the casting is a must.You may or may not have to fabricate a pair of arbor plates to match thecasting.------------------------------------------------------------------------------------------------------------Date: Wed, 27 Dec 2000 20:06:24 -0600From: Dave Metz <[email protected]>Subject: [R-390] Cosmos PTO's--mechanical observations; long
At the risk of boring this esteemed group, I wanted to pass on somecomments in the hope that someone might know the answer as to how torealign the Cosmos PTO mechanical adjustment.
It really started quite simple, the blue striper unit in question turned hard.So after a few tries to attempting to lube it smoother, I finally lookedcarefully at what remained and sort of came to the conclusion that theremust be omething under the cover between the front and rear bearingsthat support the shaft. As the Fair has replacements, I said go for it andreally take this thing apart because I had a hard turner and the endpointwas off a bunch. Not much to lose in case I lose the patient.
Step 1: after taking off the back support plate I rotated the tuning slug offthe shaft and then laid it aside. Then, it appeared that the shaft shouldpush out from the front to back so after removing the necessary stuff, sureenough, with a bit of force, the shaft pushed out the back. Then, a quickunsolder job on the two pins that have the nylon inserts to the next cavity.Then, remove the 4 screws on the base plate and it pulled apart very easily.To my surprise, there was a pinion and gear assembly inside that movedthe linearity screw ring. So far so good but it didn't last long. It dawned onme that there must be an initial alignment position similar to a cam in amotor but unfortunately ( or rather OOPS), I didn't know to mark theposition or see a couple of marks that would give a clue as to initialalignment. However, while apart, I couldn't see anything that seemedfrozen. The front and rear bearings worked very easy and smooth and thusthe hard turning must be coming from this pinion gear assembly.
Reassembly: Putting it back together in reverse order seems logical butthe critical problem of initial starting point remains elusive. Now I have aunit that is about a 9.5 turn PTO and cannot seem to get it right. Initially, Itook the one turn off the endpoint coil but hedged my bet as to cutting it offand merely doubled it back. It didn't seem to make a particle of difference--5turns or 6 turns. Then there is the problem that 2.455mhz and 3.455mhzare not equally spaced on the runout of the inductor. That is, it's about 1turn to the stop on one end and over 5 turns to the stop on the other end.In other words, not centered on the lead screw travel.

Thoughts: I know the difference between the end point coil and thelinearity coil but I was somewhat surprised that then both appear to haveabout 6 turns around the form. I have never seen any material onadjusting the slug on the linearity coil that is only accessible from the backof the PTO.
Questions:
1. What could I have done to cause this unit to go from about 10.25 turnsto a 9.5 turn PTO?
2. Would anybody have advice as to the initial settings as to the gearassembly/linearity screws before one starts screwing in the inductor slug?
It's really not a big deal to just walk away from it, but it's been aninteresting exercise that didn't yield any significant learning growthexcept to probably never do it again! Aside from the fact that the timehere isn't really worth it, I'm still curious as to whether I can get it backtogether reasonably close to a 10 turn PTO.------------------------------------------------------------------------------------------------------------Date: Fri, 29 Dec 2000 00:50:06 -0500From: "Barry Hauser" <[email protected]>Subject: Re: [R-390] Cosmos PTO's--mechanical observations
Actually, Al Tirevold has the working Acrobat master of the Y2K. I'm theeditor of The Hollow State Newsletter, not ER. But, do copy me -- plus Aland Pete Wokoun on any details and photos. Most likely, Pete will do theannotation with arrows, etc. There is a writeup on someone's site aboutthe Cosmos -- either Chuck R's or Dave Medley's. I also recall that someonedid a long post on a full blown linearity adjustment. I don't know aboutthat problem with the linkage/gearing thingus. Am I mistaken, or is theCosmos the most prolific PTO?--------------------------------------------------------------------------------------------------------------Date: Fri, 29 Dec 2000 05:37:01 -0800 (PST)From: "Tom M." <[email protected]>Subject: Re: [R-390] R390A Teledyne PTO calibration
You can go to Chuck Rippel's 390A site, and there are instructions for theCosmos over there. The Cosmos will have a screw cap to the left of theshaft when looking at the shaft from its end.----------------------------------------------------------------------------------------------------------Date: Fri, 29 Dec 2000 09:21:41 -0500From: "Walter Wilson" <[email protected]>Subject: Re: [R-390] Cosmos PTO's--mechanical observations

.......how to realign the Cosmos PTO mechanical adjustment............
Tom Marcotte's article on the rebuild of the Cosmos PTO is a good resource.http://www.avslvb.com/R390A/html/n5off_pto.html A more in-depth setof articles with a few diagrams was published in Hollow State News, issues45 and 46.
> As the Fair has replacements, ................
A man after my own heart. Dig in first, try to climb back out later.
> a unit that is about a 9.5 turn PTO and cannot seem to get it right.........
I also found that wrapping a half turn back on itself did not make muchdifference. I started out with only three or four turns instead of your sixturns. I added a short piece of stiffer wire that I shaped to be about 1/4inch away from the coil form, hence making the last turn a "loose" turn.That worked for me.
..........I have never seen any material on adjusting the slug ...............
If you mess with the linearity coil adjustment by moving it "in and out"using the adjustment from the back of this coil, you'll move the restingposition of the slug within this coil. This will move the endpoint spreadAND will impact how much effect the linearity screws have as you movethem through their full range. I played with this adjustment on mine, butset it back close to its original position.
> Questions:>> 1. What could I have done to cause this unit to go from about 10.25 turns> to a 9.5 turn PTO?
To move it that much, it may be that you didn't get the wires completelyresoldered to make a good connection, thus you "removed" six turns fromthe coil. You can only see 6 turns externally, but there are more turns thatare covered with a white cloth material. Tom's article suggests that oneturn on the coils equals about 7 KCs, but I found it to be closer to 10 KCson mine. Your 3/4 turn change is equal to about 75 KCs. So check thesolder connections really well. If you removed any wire (or broke it offremoving it from the coil), the end of the wire would still have an enamelcoating. A common trick when soldering this coated wire is to first tin thewire by pressing the coated wire into an aspirin tablet with a hot solderingiron. This works much better than trying to scrape the enamel off thewire.

> 2. Would anybody have advice as to the initial settings as to the gear> assembly/linearity screws before one starts screwing in the inductorslug?
You've come this far. Read Tom's article, and consider his "advanced"procedure for the "stout-hearted." After tinkering with mine a while, Idecided to take this "advanced" approach. This sets the linearity screws toa flat profile initially, with all screws backed all the way out, then turnedin 1 full turn. After setting a flat profile, I measured the frequency of thePTO every full turn, and found that the error looked like a bowl turnedupside down. With the endpoints set at 1000 KC, the frequency in betweenwas always above the desired value, and was off by over 5KC in the middleof the range. Tom's article indicates that only about 5KC of linearityadjustment is possible, so I was going to need all the adjustment I could getnear the middle of the range. So I backed out the screws near the twoendpoints to about 1/4 turn (instead of the initial setting of 1 turn), andset the endpoints 1000 KC apart. Then I began adjusting the intermediatefrequencies to get the flat profile. I had enough adjustment in the middle ofthe range, but just barely. Had I not first measured the frequency profilewith a flat linearity adjustment, I might have needed to start all over. Plus,the further you turn in the adjustment screw, the harder the PTO is torotate. End result: less than 200 Hz error at each 25 KC adjustment point.
But I wouldn't do this tedious task unless you can come up with a way tomeasure and set the frequency profile with the PTO out of the radio. I madea little scale that was divided into quarter turns, and mounted that to thePTO shaft. I had the PTO connected to the radio to receive power, butsitting on a wooden platform for easy adjustment with it's outputconnected to a frequency counter. This makes the adjustment tolerablyquick. If you had to keep taking the PTO out and putting it back in to makeadjustments, you could be there for days.
.........I'm still curious as to whether I can get it back together reasonablyclose to a 10 turn PTO.
Your Cosmos PTO is not a problem, but rather an opportunity. You'll learna lot, so start diggin in. If you dig your hole too deep and can't seem toclimb back out, box it up and send it my way. ;-)-------------------------------------------------------------------------------------------------------------Date: Fri, 29 Dec 2000 19:27:13 -0600From: Dave Metz <[email protected]>Subject: [R-390] Cosmos Pictures...mechanical questions
For those of you who asked, if you go to the following, you can see the gearsin question:

http://www.imagehosting.net/images/commo/Mvc001f.jpghttp://www.imagehosting.net/images/commo/Mvc006f.jpg
I hope this helps someone to tell me how to syncronize these gears withthe lead screw start point-----------------------------------------------------------------------------------------------------------Date: Fri, 29 Dec 2000 23:21:32 -0600From: Dave Metz <[email protected]>Subject: Re: [R-390] Cosmos Mechanical--final report
After too many hours, I half way solved the problem. To begin, the nowapparent 9.25 turn PTO, really is about a 10 if one puts the inner cover onFULLY. That extra 1/2 " makes a big difference. That's so obvious butsometimes my logic is really missing. The mechanical alignment will haveto elude me this time as I have too many other projects so I cannibalizedthis unit to make another unit work.
Lessons learned:
Don't take it apart unless you are really bored.
I did find out the reason for the hard turning however and hopefully thatdoesn't make the time spent a total waste. Inside that center section diskthat contains the linearity screws, there is a small gear held to the shaftwith a pin. It seems as if that pin has worked itself out a bit too much andwas coring the oilite bearing it was running in. Too much work to everjustify, just get another PTO! I still never got the alignment questionsolved. However, my suspicion is that one can repeatedly back theinductor off the back and add one turn to the lead screw and eventuallyline up the start of the linearity screws when the output is at the ends of2.455 or 3.455 mhz . Further turning of the lead screw through it'sjourney will keep a full set of screws in theaccess window. Logic seems to say that in 9 attempts, one should find themagic point.
Thanks to everyone for your support and I hope this and the pictures helpsomeone else to avoid this exercise. There probably is a TM for rebuildingthem somewhere, but until that surfaces or someone with a lot morepatience than me figures this out, it shall remain a mystery.----------------------------------------------------------------------------------------------------------Date: Sun, 31 Dec 2000 16:44:40 -0500From: "Walter Wilson" <[email protected]>Subject: Re: [R-390] More R-390A Newbie Questions
First, the AGC that the rig develops determines the carrier meter level. Ifyour AGC is not right yet, your carrier meter will also be low. Tune in the

strongest signal on the band (local AM broadcast) with the BFO off, andmeasure the voltage at the AGC terminals on the back. Something closethe -9 VDC would be about right. If AGC is correct, the meter is probablythe problem. Dr. Johnson has given you some good recommendations onthis.
> Also while troubleshooting the IF Module, I made resistancemeasurements on the large socket >J511 per the book. On pin 2 (B+) thebook says I should> get infinity for resiatance. Instead I get about 50K. I checked the> schematic and indeed there is a combination of resistors attached to theB+> rail that present about 50K to ground, so I think that is normal. What> gives with the depot manual saying infinity? Were there older/newer> versions of IF module that could give different readings?
Can I assume you meant J512? My book(s) shows 50K or 54K, dependingon which book I use. It looks like you have two circuits both with 27K plus82K in series to ground. 109K each, two of these in parallel, gives about54K. Sounds good to me if you meant J512. Look again, or find anotherbook. ;-)
> Second---The tuning calibration seems to be off by 15 khz everywhere, i.e.WWV tunes at >10.015, 15.015 and tha cal signals are all reading out 15kc higher. Fortunately, the error seems >constant from one end of the PTOrange to the other, so it appears I need to adjust some >mechanical offset.Any suggestions? (I do have the depot manual and Rippel's on-line manual>so eventuaslly I will go through all the alignment steps methodically.)
I'd normally guess that you've done the "zero adjust" to try and calibratethe dial, but since you said "newbie," I won't make that assumption. To dothis, you'd set the dial at one of the 100 KC marks, tighten the Zero Adjknob until the dial no longer moves, put the BRO on and the Functionswitch in CAL mode, and spin the KC knob until you hear the CAL signal.There is only about 35 KC of adjustment + or - when the rig was lastproperly "calibrated." If the PTO coupler gets removed and is put back inhalf a turn off, you would shift the adjustment by 50KC, which would leadto a 15 KC error even after you had made the maximum dial adjustment.But this would also throw off the calibration of the RF deck. Quick check:Set the dial to 7+000 KC (1 KC above 7 000 KC), and see if all the cams atthe front of the RF deck line up with their black alignment marks,especially the cams toward the right hand side of the deck. If they do not,there's a good chance that the PTO coupler is off by half a turn.
> Third - Occasionally with the BFO on and tuning through a carrier, I>notice a bit of jumpiness in the tuning and the change in tone as I tune

through the carrier, >perhaps something jumping in the PTO or gear train.What's the prognosis? It's a Cosmos PTO.
The KC knob is coupled directly to the PTO shaft through the Oldhamcoupler. If there's much mechanical drag causing this, I'd think you couldfeel it as you turn. Does the PTO warble any when you stop spinning theknob? There is a grounding strip that contact the PTO shaft to keep itgrounded that may be making an intermittent connection.--------------------------------------------------------------------------------------------------------Date: Thu, 4 Jan 2001 12:07:24 ESTFrom: [email protected]: Re: [R-390] Motorola PTO's
>Did Motorola make PTO's and if so where do they stand as far as qualityand >ease of alignment...Ben
Yes, they did......below is the list of PTO manufacturers:1. Collins Radio Co.2. Motorola3. Dubrow Electronics4. Progressitron Corp.5. Cosmos
The first four are conventionaal PTO's, ie: corrector stack type. The last istotally different. For information go here.http://www.avslvb.com/R390A/">R390A Receiver Home on the WWW.There are quite a few PTO's with a Raytheon sticker on them, the wererebuilds under a government contract. Les Locklear--------------------------------------------------------------------------------------------------------------Date: Thu, 4 Jan 2001 12:12:13 ESTFrom: [email protected]: Re: [R-390] Motorola PTO's
Sorry I forgot to answer your other question....many regard the MotorolaPTO's to be the best. They end points usually come right in without anyproblems. The only problems i have seen with the Motorola's is the endbearing is sometimes bad.--------------------------------------------------------------------------------------------------------------Date: Thu, 04 Jan 2001 21:05:07 -0600From: Dallas Lankford <[email protected]>Subject: [R-390] Jumpy Motorola PTOs
I have had two Motorola PTOs, and Mr. R-390A has had more. TheseMotorola PTOs have all been jumpy in the sense that when you tuned

across a carrier with the BFO turned on, the BFO pitch did not varysmoothly, but jumped in frequency. And when the Oldham coupler wasdisconnected and the PTO shaft rotated (slightly), the shaft did not rotatesmoothly, but rotated roughly or jumpily, as if a bearing were out of roundor broken. when the PTOs were removed from their R-390As anddisassembled, it was found that the "tension spring" (a hemispherical discwith a hole through it if I recall correctly... it has been 15 years) wasapplying too much tension to the "race," a flat disc that the balls of the ballbearing assembly ran on. The tension was so great that the ball bearingshad worn a circular path (irregular in depth) into the flat disc. Or was itdiscs (2)? I don't remember. Fortunately, the disc was symmetric andcould be turned over so that a new flat surface was made available to theball bearings. Tension was reduced by removing one (I think it was one)spacer from the PTO shaft. If you remove too many spacers, you will againget a jumpy PTO. Be sure to clean the discs and ball bearings, and lubricatethem with a good quality grease before reassembly. I don't know if allMotorola PTOs are like this. Other than this problem, which is fixable, Ihave found Motorola PTOs to have the best linearity and to have the leastend point spreading.----------------------------------------------------------------------------------------------------------Date: Fri, 5 Jan 2001 13:02:30 ESTFrom: [email protected]: [R-390] PTO's and missing decals etc.
In response to several inquiries about pto's with no decals, or bits andpieces left, not enough to identify it. If it is a conventional pto ( all butCosmos ) and the decal is missing, or a little bit of blue is left, it is aProgressitron PTO. Also, look at the mounting ( end plate ) if it is markedwith an Amelco stamp, it is a Progressitron PTO. Thankfully, theProgressitron PTO's were much better than their decals. Many, ( myselfincluded ) believe the Progressitron Corp. PTO's one of the best. Very linearand smooth. Incidentally, the Progressitron's were built by AmericanTrans Coil Corp.--------------------------------------------------------------------------------------------------------------Date: Sat, 06 Jan 2001 17:30:38 -0600From: Dallas Lankford <[email protected]>Subject: Re: [R-390] jumpy PTO
> This PTO is a Collins and it to feels jumpy............................
The answer is: I am not sure. I finally tracked down Mr. R-390A becausehe has done lots more PTOs than I have, and I could not remember some ofthe details. Well, he can't either. I did my PTO rebuilding before I startedwriting notes, and he doesn't write notes. So there we are. I will tell youwhat I can remember, and what I think I remember, and hope that is

enough for you to take the shaft apart.
You have, I believe, already removed the outer can, insulation, middle can,and inner can, and saved the cable lacing to use to retie the insulationwhen you put it back together. (I have a big "bobbin" of mil-spec blacklacing, waxed, fungicide impregnated, et al. that I use to retie theinsulation.) It is sometimes possible to remove the thermostat and/ormiddle can without unsoldering the thermostat leads. If I remembercorrectly, I unsoldered leads so as not to stress things tugging around onthem.
Next, I would disconnect the rear mounting bracket from the outer can(two Phillips screws). Then I would disconnect the nylon wiring "cable tie"on the side of the front bracket (if you haven't already done that as part ofremoving the outer case).
Then remove the front mounting bracket (three Phillips screws), and thehex spacer associated with the top mounting screw. And remove the rightangle shaft doodad, with two small Phillips screws and internal tooth (?)lock washers. Looking at my Collins PTO, I see some green on one of these2-56 screws. That may be Loc-Tite. If so, you should run your hair drieron the screws and surrounding area for several minutes to soften of theLoc-Tite before you try to loosen the screws. I believe I have seen it saidthat sometimes this right angle doodad can be associated with PTOfrequency jumping, but I am unfamiliar with that situation. Perhapssomeone who knows about that will post an update.
You might try removing that little right angle shaft doodad, cleaning it,cleaning the shaft where its "business end" sits, and put it back togetherbefore you do anything else. That is a lot less work than removinginternal bearings and races, cleaning them, and adjusting the shafttension.
O.K. Now we are ready to get down to business. Remove the rear bracket(three Phillips screws, I think) that supports the PTO shaft at its rear end.According to Mr. R-390A, the Collins and Dubro PTOs are the only PTOswith ball bearing shaft supports at the rear ends. The others merely havea hole in the bakelite which the shaft end fits into. I have seen both waysof mounting the end of the shaft, but I don't remember which method wasused by which manufacturer.
Now look at the front of the shaft where it exits the metal housing. Youshould see a C-ring. When the C-ring is removed (I used a small screwdriver blade), the shaft, powdered iron core, two flat "races," and ballbearing assembly should slide out the rear on the shaft. Buuuttt... this isthe part I cannot remember clearly. Mr. R-390A thinks everything will

slide out the back; I am not so sure. In my feeble memory (remember, thisis almost 20 years ago), I seem to recall that the "races" (flat metal discs)were too large to slide through the inside of the coil form. I hope I amwrong.
I don't remember and difficulty in overhauling the two Motorola PTOs, somaybe the coil does not have to be removed. If the coil has to be removed,you may wish you had never started this project. I'll just briefly tell youwhat could be involved. To remove the coil form (with coil), you will haveto unsolder 2 (?) wires and move them at least slightly. I mean move themno more than they absolutely have to be moved to get the coil out. Becauseif you don't get those wires back exactly as they were when you put it backtogether, your PTO will have been "de-linearized," and you will have to do acorrector stack alignment. I don't even want to talk about that. I did one,and one was enough for me. Mr. R-390A has a special test fixture that heuses to do corrector stack alignments. I would send him any PTO I hadthat needed a corrector stack alignment. In Cosmos PTO the correctorstack was finally replaced by a "corrector inductor" which is much easier toalign.
I don't remember how I removed the races and ball bearings. It seems likethere is another C-ring that holds the tension spring in place. Or maybe Islid the races and ball bearing off the front of the shaft. Assumingeverything slides out O.K., clean the flat discs and ball bearings. I useNAPA Break And Electric Motor Cleaner for these kinds of jobs, or throwthem in a small jar of Lacquer Thinner. If the front ball bearing assemblywill come out easily, clean it too. Otherwise, try to clean and regrease it inplace. Examine the discs surfaces. If you see a "bumpy" circle worn intothe discs, then you jumpiness is probably cause by too much tension fromthe tension spring, a small hemisphere shaped piece of bronze coloredmetal. Too much tension from the tension spring in turn caused the"bumpy" circle to be worn into the discs. The cure is simple. Turn over both"races" (discs) so that they both present new surfaces to the ball bearings,regrease the surfaces and ball bearings, remove one spacer (there will be abunch of thin copper (?) spacers somewhere on the shaft which determinethe tension), and check the "feel" of the PTO shaft rotation. (To put theshaft back together, Mr. R-390A uses a vise; I did it by hand, pressing therear of the shaft onto a piece of hardwood while I pushed the front C-ringback onto the shaft at the front with a small screw driver blade.) If you arenot happy with the "feel" of the shaft rotation, you may decide to removeanother spacer. But removing too many spacers will again result in"jumping" because of not enough tension.
If there is not a "bumpy" circle worn into the discs, I would not remove anyspacers.

When you took the PTO apart, hopefully you made a note of the frequencyto which it was set, and hopefully you did not move the powdered iron core.Generally, the best way to synchronize the PTO when you put it back intothe R-390A is the leave the middle piece of the oldham coupler off, and usethe R-390A tuning (antenna connected, on a low band with lots of noiseand signals) to bring the tuning aproximately in line. I would not rotatethe PTO shaft to synchronize it because you might accidentally cause thepowdered iron core "guide" to push through the rear bakelite shaft support,breaking it (gasp!).
I hope that this helps and that I haven't forgotten anything. Best regards,Dallas------------------------------------------------------------------------------------------------------------Date: Sat, 6 Jan 2001 22:52:00 -0600From: "Bill Hawkins" <[email protected]>Subject: RE: [R-390] jumpy PTO
If the ground 'brush' that rubs on the shaft outside the housing is notmaking good contact, the frequency may jump. De-oxit is the recommendedcure. As to removing the shaft, beware . . .
I have disassembled two R-389 Collins PTOs. The setup is as follows: Thefront casting contains two bearings that are rated for thrust as well asradial loads. The rear bearing keeps the shaft from coming out the front.The front bearing takes the load of the spring (Belleville) washers againstthe 'C' ring. Together, they keep the shaft from moving in and out withtemperature changes. Moving the shaft would move the core, which wouldchange the frequency. Then there is another bearing at the rear plate ofthe PTO, but this just keeps the shaft end from waving in the breeze. Thespring washers are intended to keep the shaft from moving over a widetemperature change (mil spec, don't'cha know). I think the loading isexcessive. Once you have popped the 'C' ring, it will be very difficult to put itback. If you remove one of the many washers, be careful of what the endwashers press against. Removing a pair of them would eliminate thatproblem, but that will leave too much slack, and the shaft will be able tomove in and out. This causes hysteresis in the frequency, and other things.There will be a dead spot of no frequency change when you reversedirection of the KC knob. The heavy axial (thrust) load on the bearingscould certainly cause some of them to fail. But I wouldn't mess with thatassembly until every other possibility has been eliminated. The R-389PTOs are 50 turns, not 10, so some of the details may be different. I'm surethe corrector stack is different. One final word, while you have the PTOopen, resist the urge to replace those funny looking temperaturecompensation caps with Orange Drops - or anything else.----------------------------------------------------------------------------------------------------------Date: Sat, 6 Jan 2001 23:18:43 -0600

From: "Bill Hawkins" <[email protected]>Subject: RE: [R-390] jumpy PTO
It just occurred to me that these days it is entirely possible that the PTOpassed through the hands of someone who did not know a Bellevillewasher from a car wash. Then two or more of them could have beenremoved to make it possible to replace the 'C' ring. If the shaft can bemoved in or out *at all*, this is the problem. Look in McMaster-Carr underBelleville Washers for something similar. If there's one pair of them left,you might get by with flat washers. Build then up until you have tocompress the spring washers somewhat in order to get the 'C' ring back on.----------------------------------------------------------------------------------------------------------Date: Mon, 8 Jan 2001 09:14:22 -0600From: "Steve Goode" <[email protected]>Subject: Re: [R-390] jumpy PTO and what lubricant to use for PTO?
I sure am grateful that Dallas replied to the reflector on Jeff's jumpy PTOquestion. Over the weekend I finally decided to test where the backlashwas coming from in my Imperial 390A. I pulled the RF deck off expectingthe backlash to stay with it as several gear loading springs are missing inthe RF gear train. Much to my surprise the backlash was not evident inthe RF deck and as soon as I turned the PTO it was obvious that theproblem was there. After some time trying to document where the PTOand RF deck were set relative to each other, I got up enough courage totake the outer can, middle can and inner can of the PTO off. At that point Icould see the problem. When the PTO was turned clockwise the camfollower that rides on the corrector stack is a metal arm off of the iron corebearing and shows no backlash. However, the cam follower in thecounterclockwise direction is spring loaded and you could see the springengage and cause the backlash. I do not know who made this PTO as thelabel is missing. All that is left is some orange remains. Since thebackplate of the PTO has a ball bearing I am guessing it is a Collins.
Since the PTO was hard turning and your email had just come out I figuredI may as well take it apart further and see if the front bearings were theproblem. To answer your main concern, the shaft just pulls out the backwhen you take the C-ring off the front. I was betting on this as I did notwant to take the coil out. I figured that pros had design this and they hadto build it. Also, I though I had an newer unit so if they did not initiallydesign it to take apart without removing the coil, they would havediscovered their error and fixed it by my unit. After the shaft pulls out theback the races, ball bearing and tension spring just slide off the front of theshaft.
In my case the front bearings were not the problem. The core on the leadscrew shaft is the problem. It is hard turning and needs to be removed and

lubricated. My question is what is the recommended lubrication for thelead screw? Also, what is the procedure? The core has two felt washerson each end. What is their propose? Are these suppose to be an oilreservoir or should you load grease into the core and these felt washerssomehow keep it in?? After lubing what is the procedure to put it backtogether? The inner cover seems to engage two o-rings at the front andback, should these somehow be revitalized? Should I bake the unit withthe middle and outer covers off? At what temp? Any guidance is greatlyappreciated, Best Regards, Steve, K9NG--------------------------------------------------------------------------------------------------------Date: Mon, 08 Jan 2001 21:05:09 -0600From: Dallas Lankford <[email protected]>Subject: Re: [R-390] jumpy PTO and what lubricant to use for PTO?
> when you take the C-ring off the front <cut> After the shaft pulls out theback >the races, ball bearing and tension spring just slide off the front ofthe shaft.
That's great. So you don't have to remove the coil to remove the races,bearings, tension spring, and threaded core. Where are the spacers, just forthe record?
> In my case the front bearings were not the problem. The core on the lead> screw shaft is the problem. It is hard turning and needs to be removedand> lubricated. My question is what is the recommended lubrication for thelead screw?
Mr. R-390A uses Mobile gear lube, like a 70 - 90 weight oil. If you take asmall glass jar to your local service station, they should give you some.Even a 40 or 50 weight synthetic oil should should suffice. I don'tremember what I used on my shafts. It is likely that your R-390A was runfor long periods of time with the ovens turned on. The PTO oven dried outthe PTO screw oil and made the shaft difficult to turn. Take off the crystalscover of the crystal oscillator and see if it also shows indications of thextal osc oven having been on for long periods of time. If the ovens are stillon, turn them off.
> Also, what is the procedure?
First, clean the screw and the threads inside the core. You will, of course,have to remove the core. Make a sketch and measurements so you can putthe threaded core back on the shaft in about the same place it was whenyou removed it. Mr. R-390A likes diesel fuel for cleaning off hardenedgrease. I like lacquer thinner. In either case, you will probably have to usesomething like a pipe cleaner soaked in the solvent you use to get the baked

grease off (if it is baked grease). I would not use an ultrasonic cleaner onthe threaded core because it night change its chemical or mechanicalcomposition. Grease the shaft, and thread it back on with the felt washerson each end. Wipe off any excess grease.
> The core has two felt washers on each end. What is their propose?
Your guess is as good as ours. Perhaps they are to keep the grease spreadevenly along the shaft as the threaded core moves back and forth.
> Are these suppose to be an oil reservoir or should you load grease intothe core and these felt washers somehow keep it in??
We didn't.
> After lubing what is the procedure to put it back together?
I don't understand. Put what back together? The shaft? I discussed thisin the previous posting. If you need more details, e-mail me and I will try.
> The inner cover seems to engage two o-rings at the front and back,should these somehow be revitalized?
No. Only the front is an O ring. The rear is a rubber "grommet" which fitsover the rear metal plate, probably to prevent electrical contact with theinner most can when it is installed.
> Should I bake the unit with the middle and outer covers off? At whattemp?
Bake the unit? Don't bake the unit. The only things you bake are theindicating silica gel cylinders. I think I used around 225 degrees andbaked them for about an hour. Mr. R-390A uses 135 to 150, and bakesthem for 24 hours or so.
Both of use a small pie tin to hold the indicating silica gel cylinders. Whileyou have the shaft out, clean and relubricate the bearings and races. If Imissed something, let me know.------------------------------------------------------------------------------------------------------------Date: Tue, 9 Jan 2001 12:24:27 -0600From: "Steve Goode" <[email protected]>Subject: Re: [R-390] jumpy PTO and what lubricant to use for PTO?
Many many thanks for the reply. This really is a help to me. To answeryour questions:

> Where are the spacers, just for the record?
I don't have the unit here at work and will check this tonight, but I believethe front ball bearing is housed in a cavity in the PTO housing. The orderfrom front to back is the C-ring followed by the bearing in its cavityfollowed by the spring washer followed by in my case one copper spacerfollowed by one bearing washer followed by a ball bearing thrust racefollowed by one bearing washer followed by another C-ring on the shaft.So the shaft is basically held between the two C-rings with the springwasher against the PTO bearing cavity taking out any end play. I hope mydescription makes sense. I have a Gravely tractor that uses 90 weight gearoil so I will just move to synthetic for it as I was thinking of anyway.
>.......If the ovens are still on, turn them off.
When I got the R390 I saw the recommendation not to use the ovens.When I went to switch them off I found the switch was broken. I was goingto remove the wire to the switch to make sure they are off. I figure I canmeasure where the core is relative to the end of the shaft and put it back atthat measurement when I am done. Hopefully getting back within 10 kHzof original setting. Then use an RF generator to find it and bring it in. Mymain concern would be as you said in your first email of running the coreagainst the back or front damaging something.
I think the silica gels are in two cylinders taped on the side of the PTOhousing. I guess I should remove these, open the cylinders and spread outthe gel on a pan and bake, or do I just bake the cylinders? Right now Ithink these are black. Should these get to a nice pink when baked out?----------------------------------------------------------------------------------------------------Date: Sun, 18 Feb 2001 01:43:41 -0500From: Jim Miller <[email protected]>Subject: [R-390] Cosmos Linearity Adjustment
I have the end point spread set nicely for 10 turns, after having to removea turn from the end point adj coil, but now the linearity in-band is notgood. I see the 40 or so little screws that do this. So I am going to give it atry. Problem is, these 40 little screws look like the world's smallest splineset screw. Not a normal screw head, but a microscopic hole or opening inthe end of each screw shaft. I've tried filing away at a small screw driver,but fit isn't good enough to turn the screws. Do these screws require aspecial ultra-small Bristol or other tool? Any help with ideas on how tofashion a tool to adjust these would be appreciated.-------------------------------------------------------------------------------------------------------------Date: Sun, 18 Feb 2001 13:13:53 -0500From: Jim Miller <[email protected]>Subject: [R-390] Cosmos PTO - Deep Waters

I'm in deep water now. Cosmos PTO completely disassembled here on thedesk. I mean down to the point where I am holding the little disk with the40-some linearity screws in my hand here. Not sure where this is heading,but maybe I'll take pictures and make them available just in case (lessonslearned). Found why the lead screw could be moved in and out lengthwise... A concentric gear collar insde the cavity that holds the linearity diskhad come loose. During manufacture, it looks like they slip it on the shaftand then spot weld it somehow. I guess sometime in its life the shaft hadbeen over stressed and the weld broke. The gear sleeve was what wassupposed to be holding the PTO shaft from sliding out the front. Not onlywas the PTO shaft free to move in and out, but the linearity disk wasn'teven turning consistently. Well I was able to secure it again by creating alittle "friction fit" rough spot on the shaft and tapping the sleeve back on,so the linearity disk now turns ok, and the shaft doesn't move, and the rearof the shaft mates with the bearing pad in the rear. Will it all go backtogether again and work? Who knows! I have faith. But if not, dust offany spare PTOs (working and linear ones only please) you may want to sellin a few weeks. Also, on the linearity disk, I seem to have an oddballCosmos, as the 40-some screw heads look like super small spline heads,about half the size of my smallest .048 bristol. I need to craft up a tool toadjust these, or find an original (any ideas?).-----------------------------------------------------------------------------------------------------------Date: Sun, 18 Feb 2001 13:20:28 -0600From: Nolan Lee <[email protected]>Subject: Re: [R-390] Cosmos PTO - Deep Waters
I'd be a bit worried about the long term viability of a friction fit for thisapplication. TIG would be better. If you don't have access to that, I'd score alittle bottle of top of the line stud and bearing locking compound and coatthe junction with that than then press it back together. You'd have to heatthe area to 400+ degrees to break the bond if you ever wanted to take itapartagain but it should last longer than any non welded repair short ofknurling the shaft.-----------------------------------------------------------------------------------------------------------Date: Thu, 22 Feb 2001 23:27:30 -0500From: Jim Miller <[email protected]>Subject: [R-390] Head Above Waters Again - Cosmos PTO
Well for those who have been following the trials and tribulations of thisR-390A newbie, I am proud to say that I can now claim some success, orpretty darn close, with this Cosmos PTO. At one time it was over 10 khznonlinear within the band, and the PTO shaft was loose, so it ultimatelyfound itself in pieces on the desk. Some radical surgery revealed a slippedgear sleeve that was supposed to be spot welded to the PTO shaft deep

inside its bowels (this gear is supposed to drive the linearity adjustmentdisk with the 40 screws, but in my case it was doing nothing, just slipping).That has been repaired, its back together, tuning shaft is secure andsmooth, (yes it still works!) and I just finished my first pass at end pointsetting (getting 10 turns exactly), and a first pass at pulling in thefrequency every 25 khz on every one of those 40 dastardly little screws. Irigged up a little jig using a 360 degree plastic protractor and some PVCtubing clamped to the PTO shaft to count degrees and turns. What a pain,(3 hours worth) but I now seem to be well within 100 hz at each of the 25khz points, except one spot near the low end where one screw is stuck, andwon't turn! My eyes are tied in knots. What a strange hobby we have.------------------------------------------------------------------------------------------------------------Date: Sat, 24 Feb 2001 12:21:54 -0500From: Jim Miller <[email protected]>Subject: [R-390] Journey Through The Cosmos
If anyone wants to see photos and the story of my recent (successful)adventure into my Cosmos PTO, you can see it all at:http://home.iu.net/~jmiller/cosmos.htm---------------------------------------------------------------------------------------------------------Date: Sat, 24 Feb 2001 15:07:12 -0500From: antipode <[email protected]>Subject: Re: [R-390] Journey Through The Cosmos
Man! Jim, those photos are excellent and a valuable source of informationfor future Cosmos teardowns. I hope these get archived in a stable site sowe can refer to them in the future.---------------------------------------------------------------------------------------------------------Date: Sat, 24 Feb 2001 16:36:57 -0500From: "Tetrode" <[email protected]>Subject: Re: [R-390] Journey Through The Cosmos
That's a great page, thanks! You are a great example of someone posting arequest for help to the group, and then later contributing several times asmuch info back. I've never seen the innards of a Cosmos before, so that wasa treat. The handful of PTOs I've seen have all been Collins, Motorola, andProgressitron, yet a friend of mine has 3 390As, and they all have Cosmosin them. Guess it's the luck of the draw. FYI, For those who want to make apermanent local copy of an interesting interesting page to your hard driveit's very easy. Create an appropriately named directory (don't really haveto do this but it helps to keep things organized and identified), and copyALL the page elements to it. The browsers File/"save as" command willcopy all the text/html stuff under whatever the native file extension is,such as .html or .htm. Then, save each and every graphic on that page (.jpg,.gif, etc) without altering the file name, to that same directory.

That's all there is to it. To view, use the browser's Open/browse filecommands to open the local .html (or whatever) page that was saved inthe previously created directory, and the browser will open it just like aregular web page with all the pictures and text in the right places.-------------------------------------------------------------------------------------------------------Date: Sun, 25 Feb 2001 08:26:36 -0500From: Jim Miller <[email protected]>Subject: Re: [R-390] Journey Through The Cosmos
I went through and added a sentence or two, and corrected some minortypos I found last night. If anyone saved it before then, you might want tograb it again (be sure to reload or refresh on the browser) to get thecorrections. They're minor (like the disk really has 48 screws, not 40 asoriginally stated...) http://home.iu.net/~jmiller/cosmos.htm-------------------------------------------------------------------------------------------------------Date: Sun, 25 Feb 2001 11:39:11 -0500From: "Barry Hauser" <[email protected]>Subject: Re: [R-390] Journey Through The Cosmos
Wow! Super job! Maximum kudos with oak leaf cluster. While much hasbeen written about the Cosmos PTO, this takes the documentation to newlevels of excellence. Makes it possible to follow the path you've beatenthrough the jungle and proceed with confidence if the need arises -- or tosavor vicariously even if we never open the thing. There ought to be anaward for stuff like this. Maybe the large R-390A mug withpersonalization in gold leaf, or a wall plaque with bombastic complimentsand some appropriate words in latin. Well, for now, many thanks willhave to do ...--------------------------------------------------------------------------------------------------------------Date: Sun, 25 Feb 2001 12:46:40 -0500From: "Jim Miller" <[email protected]>Subject: Re: [R-390] Journey Through The Cosmos
Thanks to all for the good feedback on the article. The reward of having itwork again is enough for me: having a 390a that now seems to perform(tuning wise) as it was originally designed. Some have asked aboutcamera, software etc. The camera is a Nikon Coolpix 990. Just aim andshoot...a no brainer. The software was Paintshop Pro, but all I used it forwas to reduce image sizes to be web compatible, and add annotations,... anypaint program can do that. It wasn't as hard as it looks. As I said beforeanyone wanting to add a link to this site (I believe it will be stable for awhile), or download it in full on their own site, and reproduce it there, oras a pdf file, or whatever, or print it for personal use, or to give away free,is welcome to. The operative word is FREE. Or if you want to make itbetter, go ahead. Someone needs to write a compendium of PTO

information covering all the models. Perhaps some PTOs that have beenpreviously considered hopeless wrecks could be brought back to life likenew. After all, they aren't making them anymore.--------------------------------------------------------------------------------------------------------------Date: Mon, 26 Feb 2001 12:07:05 -0500From: Gene Beckwith <[email protected]>Subject: Re: [R-390] Journey Through The Cosmos
Excellent work...even if I don't try this, it's a great insight as to theworkings of the Cosmos...and a commentary on high skills... Thanks forletting us ride along with you!-----------------------------------------------------------------------------------------------------------Date: Mon, 26 Feb 2001 12:11:03 -0500From: Gene Beckwith <[email protected]>Subject: Re: [R-390] Journey Through The Cosmos
I wasn't quite so skillfull...but did a simple "page print" to an HP 932C...tooka few minutes, but I too am adding the hard copy to my growing collectionof R390X references....--------------------------------------------------------------------------------------------------------------Date: Mon, 26 Feb 2001 11:57:21 -0600From: "Scott, Barry (Clyde B)" <[email protected]>Subject: RE: [R-390] Journey Through The Cosmos
If you go to that trouble, it seems you could just store them all in a bigdocument with a table of contents and print only what you need. Quickreference, no stale URLs, and it sure would save on the printer...-----------------------------------------------------------------------------------------------------------Date: Sun, 04 Mar 2001 19:46:18 -0600From: David Medley <[email protected]>Subject: [R-390] Cosmos PTO article
I have just published Jim Miller's article on my web page in case anyonewould need to refer to it. Jim's ISP is down right now and this is the onlyway you can access it. This is great material and a welcome addition to mypage.
For parts and information re R-390 radios please check my Web Page at:<http://home.att.net/~d.j.medley>---------------------------------------------------------------------------------------------------Date: Thu, 08 Mar 2001 21:03:56 -0500From: "Jim M." <[email protected]>Subject: [R-390] Tuning Nonlinear at 75khz points

OK here's one for you. I've been fine tuning this Cosmos PTO. Built up atest jig with an 8 inch graduated plexiglass disk (I used John Harvie's 360degree calibration sticker perfectly centered on the disk). Mounted thePTO in the jig, used a 3/16 inch brass shaft and plastic couplers to couplebetween the PTO shaft and this disk, with nice wooden frame to hold it allsecurely. Went through a lengthly alignment using a counter reading thePTO output. Tweaked all 40 corrector screws, until it was reading within80 hz of expected output frequency at each 25 khz point, and was givingexactly 10 turns from low to high end (2455-3455 khz). The graph Iplotted of the linearity (using an Excel spreadsheet) looked perfect. So Iput it back in the receiver, lined it up to the odometer counter, and thetuning is dead on at each 0, 25, and 50khz point, but exactly 635 hz off atevery 75 khz point, i.e. 7.000, 7.025, 7.050, 7.100 etc. are right on, but7.075, 7.175, 7.275, etc. is off by about 640 hz! Looks like it is off at justaround the .075 points. I checked the test jig again, checked the markingson the calibration wheel, they seemed to be right on. Either my calibrationscale would have to be distorted, or my eyeballs would have to berepeatedly off about 2.5 degrees at each 75 khz spot to have miscalibratedthe PTO in the jig, but the mechanism looked correct, double checked theangular markings with a draftman's protractor and it looked good. If it'snot the test jig, or a dumb operator error (again, I would have to berepeatedly injecting almost the exact same error at every xxx.x75 point,but not at the others!), then could it be the odometer counter or a geartrain anomaly? Before I take it out and try again, has anyone heard ofsuch an anomaly in the odometer or its associated gearing?-----------------------------------------------------------------------------------------------------------Date: Thu, 08 Mar 2001 22:47:48 -0500From: "Jim M." <[email protected]>Subject: Re: [R-390] Tuning Nonlinear at 75khz points
Well no sooner than I ask, that I discover.... The Oldham coupler waspressed together too tightly. There was also a slight misalignment of thePTO on its brackets, meaning the halves of the Oldham coupler weresliightly askew, and the same spot of every rotation, the coupler waspressing more on the PTO shaft than other parts of the rotation. Also, alocking collar on the outside of the PTO shaft wasn't snug up against itsshims allowing some undesirable free play. The coupler pressing in on thePTO shaft at the same point each rotation shifted shift its frequencyslightly, each time, and that just happened to be at the 75 khz marks.Reading the manual I see that there should be a slight gap (1/32 inch Ibelieve) between the oldham coupler and that slip disk within it to preventtoo much pressure on the PTO shaft...now I think we know why. Likewisethe retaining collars need to be snugged up on the PTO shaft, and the PTOmust be physically aligned properly with the coupler to prevent binding,etc. Failure to do these things could result in this cause for poor tracking.Should have known! It doesn't help if you skip even the simplest

instructions in the manual!-------------------------------------------------------------------------------------------------------------Date: Thu, 8 Mar 2001 23:37:42 -0500From: "Barry Hauser" <[email protected]>Subject: Re: [R-390] Tuning Nonlinear at 75khz points
> The Oldham coupler was pressed together too tightly.
All of mine are nice and snug .. uh-oh.
> There was also a slight misalignment of the PTO on its brackets, ..........
Nolan has posted on this in detail, as I recall, including the need to useshims if necessary. The tendency is to think the Oldham couplerscompensate for all ills.
> Also, a locking collar on the outside of the PTO shaft ............
Uh-oh #2. Somehow in umpty-up readings I missed this part. Now,where'd I put that feeler gauge? I suppose a worn coupler could also causea consistent offset. Might compensate with heavier grease, like the oldsawdust-in-the-differential trick.
> Likewise the retaining collars need to be snugged .............
Yup .... <sigh>. However, you do realize by fixing that up you've destroyedthe 635 HZ Consistent Offset Mechanism you accidentally created. Now it'slost to antiquity. Well, thanks a lot, Jim. Now I hafta go pull all my radiosand turn 'em upside down .... How much do you think they'd charge to MRIan R-390A? A hundred or so cross sections might .. nevermind.--------------------------------------------------------------------------------------------------------Date: Fri, 09 Mar 2001 00:53:43 -0500From: "Jim M." <[email protected]>Subject: Re: [R-390] Tuning Nonlinear at 75khz points
Well other PTOs may not have this sensitivity to pressure on the shaft. Alocking collar that was supposed to be flush with some shims on the shaftwasn't secure either so it allowed linear motion of the shaft, maybe amicroscopic amount but enough to pull the frequency. And most know myCosmos PTO has been through quite a lot of rebuilding so it is probablymore sensitive than others. Having secured the collar better on the shaftand relieved some pressure on the coupler, the anomaly has disappearedand the PTO is happily tracking at all of the 25 khz marks again. Thisobsession I seem to have with the accuracy of this old beast is killing me!But, yea indeed it is true that a Cosmos PTO can be made to track prettydang good across the entire range. If you want, check your own PTO, but

not at just the 100 khz calibrator points, but at each 25 khz. But watchout for that obsession with accuracy, it will bite you.---------------------------------------------------------------------------------------------------------Date: Fri, 9 Mar 2001 07:47:03 -0500From: "Warren, W. Thomas" <[email protected]>Subject: RE: [R-390] Tuning Nonlinear at 75khz points
A very public thanks to you Jim for publishing your experiences with theCosmos PTO. Some of the old timers likely will be nodding their heads andthinking "been there, done that." But for many of the rest of us, we're gladto hear the whole story of getting a Cosmos back in service. Many, manythanks. NOW, DOES ANYONE HAVE DETAILED EXPERIENCE WITH AMOTOROLA PTO? My understanding thus far is that it's not like theCosmos with the 48 little tuning screws, but has some other mechanism(not easily accessible) for linearizing the 25kHz points. Any help outthere?----------------------------------------------------------------------------------------------------------Date: Fri, 09 Mar 2001 13:41:29 -0500From: Gene Beckwith <[email protected]>Subject: Re: [R-390] Tuning Nonlinear at 75khz points
Interesting...I too have had trouble getting the PTO to line up on itsbrackets so the shafts are 'perpendicular' and with mimimun off-set...seemslike two possibilities... even though finally they look pretty good and seemto operate ok...I was never satisfied that there was perfect alignment. Thissurprises me, due to the mostly precision alignment of the main frame andthe brackets. But, maybe that's why there is an oldham coupler inthere...maybe there was an anticipated alignment problem...but, eitherway, even with shimming slightly, I could never get the alignement to"look" right...even though the gearing finally does run smoothly...??--------------------------------------------------------------------------------------------------------Date: Fri, 09 Mar 2001 14:24:19 -0600From: Roy Morgan <[email protected]>Subject: Re: [R-390] Tuning Nonlinear at 75khz points
The purpose of the Oldham coupler is to permit displacement perpendicularto the axis of the two shafts.. that is "mis alignment", "offset". Try it.. if youcan manage to get your shaft and PTO mis aligned by a BUNCH it will workanyway. That's why the coupler is there. It will also take care of someangular mis-alignment of the shafts, but that's harder to try out, unlessyou raise the rear end of the PTO a bit and move it back some.. Just allowfor the right amount of clearance in the direction of the shaft ( between thedisks) and add a bit of grease and see what happens.----------------------------------------------------------------------------------------------------------Date: Fri, 09 Mar 2001 14:37:14 -0500From: Jim Miller <[email protected]>

Subject: Re: [R-390] Tuning Nonlinear at 75khz points
Yes I think that's what the coupler is for. It looks like it can "absorb" acertain amount of mechanical misalignment and still couple the shaftsreliably. But it needs room to "breathe" and coupling it too snugly, at leastin my case, resulted in binding that pulled the PTO frequency off slightly(600 hz) at one spot of every rotation. When you think about the foresightof the designers was excellent.-----------------------------------------------------------------------------------------------------------Date: Fri, 9 Mar 2001 17:36:13 -0500 (EST)From: Norman Ryan <[email protected]>Subject: Re: [R-390] Tuning Nonlinear at 75khz points
You should be able to align the PTO shaft in all three directions, includingadding enough play for the Oldham disk to jiggle (about 1/32"). The PTOmounting brackets have slotted holes for the purpose. I believe getting itright adds a little more silkiness to the KC CHANGE knob action. Besides,it's a nice way to spend an evening. :-) Make sure there's an anti-backlashspring present on the Oldham coupler. It need not be too stretchy-- justenough tension to do the job. (Do the above adjustments with the springremoved.)------------------------------------------------------------------------------------------------------------Date: Fri, 09 Mar 2001 17:39:13 -0600From: Nolan Lee <[email protected]>Subject: [R-390] Oldham alignment in R-390A
>The purpose of the Oldham coupler is to permit displacementperpendicular>to the axis of the two shafts.. that is "mis alignment", "offset".
Correct. The maximum error that they can handle of the drive and drivenflanges not being parallel to each other is 1 degree. First, I'm not an ME. Ido know that if we take a shaft with an "cross type" universal in it andplace it on pillar blocks and position the blocks so that the universal jointin the shaft has a 5 degree angle to it that when you rotate one end of theshaft at a constant speed of say 100 rpm, the rotational speed of the otherend is not exactly 100 rpm except at two points in the rotation. It willaverage 100 rpm, but the speed will constantly vary. The other end speedsup and slows down. Maybe from 98 rpm to 102 rpm or whatever thecalculations would say depending on the shaft size, joint diameter, andjoint angle. I know of this from tweaking pinion angles in vehicles toreduce vibration. If say the angle of the front joint is 5 degrees and theangle of the rear joint is 0 degrees, vibration and roughness will occur.
I don't remember what this effect is called. Do any of you know?
Like I said, I'm not an engineer but to me it seems that it might be possiblethat a "positional error" could exist due to shaft plane misalignment of thePTO and the main frame of the receiver. Lets say that the drive and drivenshafts are in sync at 000 KHz, 100 KHz, 200 KHz, 300 KHz, etc. that whenrotated 180 degrees to the 50 KHz, 150 KHz, 250 KHz, 350 KHz, etc. thatthis error might cause the PTO to be setting at 50.5 KHz, 150.5 KHz, 250.5KHz, 350.5 KHz etc.internally? Maybe more, maybe less?
My attempt to prevent this possible occurrence from happening is why Ispent hours physically aligning the PTO in the EAC when I put it together.Was this a wasted effort, or does this "positional error" occur with twoshafts and a misaligned coupling? What about two oldham couplingflanges that are parallel but have a .010 difference in the height that theyset above the chassis. What kind of error results from that?--------------------------------------------------------------------------------------------------------Date: Fri, 9 Mar 2001 16:01:25 -0800 (PST)From: Joe Foley <[email protected]>Subject: Re: [R-390] Tuning Nonlinear at 75khz points
What's a good technique to achieve this? Should I use feeler gauges tocheck the gap between the disks at four points around its circumference?Not easy to do in the confined space available. A jig to clamp to the twoshafts with a gap to clear the coupler? That sounds expensive to make.What do you use?-----------------------------------------------------------------------------------------------------------Date: Fri, 9 Mar 2001 19:11:16 ESTFrom: [email protected]: Re: [R-390] Tuning Nonlinear at 75khz points
Try out a good old fashioned eyeball.........it works!!!-----------------------------------------------------------------------------------------------------------Date: Fri, 09 Mar 2001 20:46:18 -0500From: "Jim M." <[email protected]>Subject: Re: [R-390] oldham alignment in R-390A
In my case it was not an angular error. It was having the coupler tootight, combined with a misalignment of the two shafts (because I didn'tspend time shimming the PTO properly) causing pressure on the PTO shaftat each revolution. If you push in on the PTO shaft, it will changefrequency slightly, at least mine does. So I don't want the coupler so snugthat there is any possibility of pressure being applied to the PTO shaftanywhere in the rotation. Right now I have about 1/32 inch visibile gapbetween that slotted disk and the couplers, and I didn't try to perfectlyalign the PTO orientation. It seems to be tracking just fine now, andtuning smoothly. I personally don't expect that planar misalignmentwould cause much error from a purely geometric viewpoint. Look at a

universal joint in your car. The two shafts aren't perfectly colinear witheach other, yet the total mechanism rotates at exactly the same rate andproportion. Isn't the Oldham coupler a form of universal joint? Jim N4BE---------------------------------------------------------------------------------------------------------Date: Fri, 09 Mar 2001 20:09:55 -0600From: Nolan Lee <[email protected]>Subject: Re: [R-390] Tuning Nonlinear at 75khz points
>What's a good technique to achieve this?................
How about a bent piece of stiff wire that you know the diameter of. Easyenough to bend to whatever shape you need to fit into tight areas. MIGwire comes to mind if you need .023, .035, 040. etc.-------------------------------------------------------------------------------------------------------------Date: Fri, 09 Mar 2001 20:20:14 -0600From: Nolan Lee <[email protected]>Subject: Re: [R-390] oldham alignment in R-390A
>..........It was having the coupler too tight, combined with a misalignmentof the >two shafts (because I didn't spend time shimming the PTO properly)....
I spent hours setting mine up. It's a pain. ;-( Make sure that the two Oldhamflanges are true. I measured a bunch of the center sections and they wereall exact. It's the aluminum flanges that I had a problem with.
>I personally don't expect that planar misalignment .........
Actually, the AVERAGE speed is the same. The speed on the input end isdifferent than the rate on the output end in proportion to the angle. Theoutput side doesn't run at a constant speed like the drive side. The drivenside constantly slows downs and speeds up depending on the angle of thejoint or joints. I ain't no engineer but I know that it happens. Maybe one ofthe guys in the list can explain it better. I just remembered what this iscalled, it's called "cycle error".-------------------------------------------------------------------------------------------------------------Date: Fri, 9 Mar 2001 21:41:10 -0500From: "Howard Rawls" <[email protected]>Subject: Re: [R-390] Tuning Nonlinear at 75khz points
Any mis-alignment of the shafts should show up as "run-out" of the centerdisc, so.... Remove the center disc from the Oldham coupler. Use amachinist's dial caliper to verify the central location of the interlockingsurfaces. Reinstall the disc, then use a machinist's "last word" dialindicator on the circumference of the disc to check for run-out. Check at 3equal points around the circumference. When you get it down to .0000025"

true indicator reading, STOP. That's close enuff!!!--------------------------------------------------------------------------------------------------------------Date: Fri, 9 Mar 2001 19:19:19 -0800 (PST)From: Joe Foley <[email protected]>Subject: Re: [R-390] oldham alignment in R-390A
The characteristic that Nolan's talking about is true for a drive shaftwhere there is a rigid component like the spider in the center. But I don'tthink that is happening with the Oldham coupler because the center diskisn't rigidly mounted to either shaft, the center of the universal joint issolid to both shafts. Also, the universal joint is almost always used inpairs, which affects the final average speed at any point in its rotation.Especially if they aren't attached properly with respect to each other. WhatI want to know is how do we get this procedure down to something simple?Do we start with a guage block between shaft and radio frame to set bothshafts to the same "height" then, once that's set, shim the back of the PTOto match that by checking the gap between disks with a piece of weldingwire, for a feeler gauge, and at the same time check for angular alignmentof the shafts? The guage block would also be a quick way of checking theshaft for straightness, which I need to do on mine. That will give a goodstarting place for aligning the PTO shaft.------------------------------------------------------------------------------------------------------Date: Fri, 09 Mar 2001 21:38:38 -0600From: Nolan Lee <[email protected]>Subject: [R-390] PTO/Oldham alignment...
I've had several requests for my post on the "PTO" section of the overhaulreport on my EAC that I posted to the list back in October of 1998. Damn,time sure flies. ;-( It follows below:- -----<snip>-----PTO: Why bother? Chunked it in the R390A parts pile and installed anArmy rebuilt Cosmos that I've been sitting on for about ten years, sealed inthe box, to replace the Cosmos that was in there. It turned out that theendpoint was out a little less than 2 KHz, and linear within a little lessthan 200 Hz across the spectrum. I don't know what the specs on it wherewhen it left their hands in Feb. of 1984 but it sure aged well. :-) I guess thatI'll let it run a few weeks and then adjust the endpoint. I did power up theoven and verified that the thermostat worked, measured the resistance ofthe transformer, and tested the tube. I like the Cosmos PTO's. That bluelabel sure is pretty, bubba!
On a side note, I probably use a bit more complicated method than mostpeople do when fitting a PTO to a receiver. If you're going to do it right, itmight as well be done right the first time. Both halves of the oOldhamcoupler should be perfectly parallel to each other and the centerline of both

shafts should be perfectly in line with each other on both planes. I onlyspent about an hour adjusting the position and height of the PTO in thechassis, but spent several hours measuring the components and setting upthe fixtures to measure other aspects of the components.
I first measured the run out of each half of the couplings while installed ontheir shafts. The one on the PTO was true within .001. The one on the KHzshaft of the RF deck was machined improperly. the rib was .003 off to oneside and wasn't square with the bore either. I tossed it and pulled a fewothers out of spares. It took several before I found one that was squarewith the bore and only had a little more than 0.001 run out.
The next step was to check the center section. The width of the two grovesseems pretty consistent, but I was curious if the two groves were machinedat exactly 90 degree angles to each other. The groves were of a dimensionthat I didn't have any key stock for so I used two 12" long pieces of 1/4"ground steel rod. I centered the two pieces of rod, lengthwise, one in eachof the two grooves, clamped the three pieces together. Then by measuringand comparing the distances between the four rod ends, I could determinethe exact angle that the grooves were from each other. This part of theprocess was a wasted effort, the coupling center piece from the EAC was 90degrees like it should be and so where the ones in spares that I checked.
When I finally assembled the receiver and physically aligned the PTO tothe chassis, mechanically and electrically, the dial indicator measured atotal movement in the center section of the oldham coupling of .003 whenthe KHz knob is turned. Close enough! Put that spring on! Oh, I used a littledab of Penzoil wheel bearing grease to lube the coupling. It's red andcontrasts, in a pleasing fashion, the blue label of the Cosmos PTO. :-) ---<snip>----------------------------------------------------------------------------------------------------------------Date: Fri, 09 Mar 2001 22:15:52 -0500From: "Jim M." <[email protected]>Subject: Re: [R-390] Tuning Nonlinear at 75khz points
How about a spark plug gapping tool? It has a variety of blades of variousprecise diameters.-----------------------------------------------------------------------------------------------------------Date: Fri, 9 Mar 2001 23:00:54 -0500From: "Tetrode" <[email protected]>Subject: [R-390] Oldham coupler alignment epiphany
I just put the PTO back in a couple of weeks ago in the Fair Radio nonA I'vebeen working on, and was wondering the same thing. The idea of usingmeasuring devices was initially interesting, but that's a pretty crampedarea to work in. So I decided to use the old eyeball method, and came up

with an added twist to enhance the accuracy. Here's my logic......
1) The Oldham coupler uses a disc which slides in two directions to absorbthe shaft to shaft misalignment.
2) During normal operation, the disc will move in proportion to themisalignments as the shaft is rotated.
3) If there is no misalignment, the disc will not need to move during shaftrotation.
4) It's easy to observe the disc while rotating the shaft.
So there you have it, a visual indication of misalignments observable asthe shaft is rotated.
After I put the PTO/Oldham assembly back in the radio I used a carpenterssquare held to the X frame to make a straight-edge alongside the PTO canbody so that I could make a rough alignment to start with. I set the gap onone side of the coupler disk to be very small, so that any changes in gapspacing would be easily noticeable, and so that I could observe all the edgesof the disc and coupler body. I also put the knob back on the tuning shaft sothat I could spin it back and forth easier. (It's a good idea to have the PTOset at least a few turns away from either of its endpoint while doing this).With the initial misalignment present, I could see one side of one of the"grooves" of the disc protrude *past* the coupler body by a small amount,which represented an amount of error. When I gave the shaft a half a turn,I could see the opposite end of the "groove" protruding *into* the couplerby the same amount. The other "groove" that's 90 degrees off does the samething with the error that it is absorbing.
So basically my alignment method consisted of moving the PTO side to sidewhile turning the KC shaft and watching the groove/disc movements untilthey were all minimized and symmetrical as possible. Then I would tryadjusting the angle of the PTO body while repeating the above exercise inorder to align it on that axis. Come to think of it I probably kept an eye onthe gap symmetry while doing all this as well. After this was done Itightened down the PTO mounting hardware, checked for errors again, andthen set the coupler gap to 1/32 as shown in the manual.
When I was done things looked pretty good. Had there been a big error inthe Y axis I guess I would have had to try some shimming, but such wasnot the case here.
As an alternative to watching just the grooves, I also watched how theoutside edge of the disc lined up with the outside edges of the coupler plates

as the whole thing was rotated; this might be easier to see, and still showsany misalignment error. I also have an illuminated magnifierlens that I like to use for any inspection or detail work such as this.
So far I've only tried this method once, and there might be some errorsintroduced if the Oldham parts were machined way off center, but I figurethat by watching for relative movements and symmetry of movementsrather that absolute measurements, this technique might be useful.----------------------------------------------------------------------------------------------------------Date: Fri, 09 Mar 2001 22:26:03 -0600From: Nolan Lee <[email protected]>Subject: Re: [R-390] Oldham alignment in R-390A
I don't know the cycle error specs on the Oldham coupling. I do know thatwhen it's installed, the angular error between the two shafts must be 1% orless and the error in the centerline of the two shafts must be .010 or less.It's very possible that errors worse than these may create such a problem.I ain't no engineer. <grin>
>Also, the universal joint is almost always used in pairs, which affects thefinal >average speed at any point in its rotation.
Correct. The old double carden <sp?> joints with the ball between the twouniversal joints that GM used in it's full size products in the 70's and 80'swere supposed to either totally eliminate or greatly minimize this problem.
>Especially if they aren't attached properly with respect to each other.
I fought a drive shaft vibration for a half a day one time in 2WD full sizeJimmy. The joint angle at the slip yoke and the pinion were well withinspec and the joints themselves were smooth. I probably drove 50 milesroad testing the thing and stopping every half a mile or so to repositionthe hose clamps I was using for weights to see if it was an out of balanceproblem. As it turned out, the two universal joints were a few degrees out ofphase with each other. I've only seen this a couple of times but the secondtime was a hell of a lot easier to diagnose. The way I found it was byturning my drive shaft angle indicator 90 degrees. Simple as hell....once Ithought of it. ;-)
>What I want to know is how do we get this procedure down to something>simple?
Nah, everything pertaining to the R-390A has to be complicated or it isn't"right". <grin>
>Do we start with a guage block between shaft and radio frame to set both

shafts >to the same "height" then,
Calipers or snap gauges are more than enough for setting the height.
>once that's set, shim the back of the PTO to match that by checking thegap >between disks with >a piece of welding wire, for a feeler gauge, and atthe same t>ime check for angular alignment of the shafts?
That will allow you to correct for the ass end of the PTO being higher orlower than the end with the coupling, yes. Ditto for side to side being out.
>The guage block would also be a quick way of checking the shaft forstraightness, >which I need to do on mine.
I used a dial indicator.
>That will give a good starting place for aligning the PTO shaft.
Yep. After you rough it in. Throw a dial indicator on the center section ofthe coupling. Then you can tweak the exact positioning to give the leastmovement of the center section when the shaft is rotated. check it for bothup and down movement and side to side movement. Something to checkbefore you start is that the two aluminum halves of the coupling are squareand true in relationship to their respective shafts.-----------------------------------------------------------------------------------------------------Date: Fri, 09 Mar 2001 22:41:19 -0600From: Nolan Lee <[email protected]>Subject: Re: [R-390] Oldham coupler alignment epiphany
>.......... but that's a pretty cramped area to work in.
Yes. You'll need a mirror on a stick and a lever type extension for the dialindicator.
>.........the disc will move in proportion to the misalignments as the shaft isrotated.
Correct. It was seeing this movement in the center section that caught myattention in the first place.
>3) If there is no misalignment, the disc will not need to move during shaft>rotation.
Up and down or side to side errors in the position of the PTO will cause thecenter section to move. Angular alignment between the two shafts won'tcause the center section to move. But, you can check this easy enough by

comparing the difference in the gap from side to side between the centersection and one of the end sections. This will spot side to side angularerror. For up and down angular error, you'll need a mirror on a stick.
>4) It's easy to observe the disc while rotating the shaft.>So there you have it, a visual indication of misalignments observable asthe>shaft is rotated.
And more if you want to use a dial indicator.
>After I put the PTO/Oldham assembly back in the radio I used a carpenters>square held to the X frame to make a straight-edge alongside the PTO can>body so that I could make a rough alignment to start with.
Excellent idea, thanks!---------------------------------------------------------------------------------------------------------Date: Sat, 10 Mar 2001 00:17:39 -0600From: "Bill Hawkins" <[email protected]>Subject: RE: [R-390] oldham alignment in R-390A
For data on the Oldham coupler as a mechanical device, see:
http://www.allaboutmotion.com/couplings/huco_oldham.htm
Google could not find any pages that gave the rotation error as a functionof alignment error. Oldhams are also used in the drives that keep atelescope pointed at a star while a camera takes a time exposure of severalminutes.------------------------------------------------------------------------------------------------------------Date: Sat, 10 Mar 2001 08:40:28 -0500From: Jim Miller <[email protected]>Subject: Re: [R-390] Oldham coupler alignment epiphany
Has anyone noticed the maintenance access holes machined into thesubpanels behind the front panel? And also the four holes machined intothe large silver kc dial brake and drive gear? In my SW 390a, three ofthese holes appear to align with the three front mounting screws of thePTO. It appears that if you drop the front panel and line up the dial brakedisk with the various holes, you can access the three front PTO screwswith a long screwdriver, allowing some adjustments in that manner,without removing the PTO.
Likewise, another set of holes machined into the sub panels appear toallow access to the PTO endpoint adjustments while the PTO is in theradio! Again, it looks like if you line up one of the four holes in the dial

brake disk with this other larger access hole, a long tuning tool will reachthe end point adjustment port. This may allow you to set end point withthe PTO securely in the radio using the odometer. For the Cosmos PTO, thecorrector screws appear to also be accessible this way, if one can find along enough and small enough screwdriver. There are 4 holes pre-drilledin the dial brake which should let you turn the dial the necessary 1/4 turnto access each 25 khz tuning screw. I haven't actually tried this yet, just anobservation. I'm a newbie so this discovery may be old news to others, butit looks interesting. Sure wish I had my hands on whatever custom tuningdrivers they must have used in the factory to tweak these PTOs. Jim N4BE---------------------------------------------------------------------------------------------------------Date: Sat, 10 Mar 2001 10:34:41 -0500From: Al Solway <[email protected]>Subject: Re: [R-390] Oldham coupler alignment epiphany
I used the three holes you mention along with a a mechanical alignmenttool I made. A No. 2 Phillips screw driver tip 2 inches long from my electricscrewdriver was used to gain access to three screws on the PTO. This mademechanical alignment much easier and repeatable. I mean that when thePTO is removed and reinstalled it is very easy to achieve acceptablealignment.
This method was developed as result of Nolan,s "R-390A Overhaul Report".His description of the measurements made a lot of sense and is very wellwritten. the only problem was the equipment to make the measurements. Ihave some of the equipment but not all. So something had to be done. Theresults was the tool. I don't have the time today to describe the method andthe tool used.
But within the next day or two I will. I bought some BA equipment (Drake)and have to make major change to the shack to get it installed. And Nolan,engineer or not, bask in the glory of making like one. Results are whatcounts.----------------------------------------------------------------------------------------------------------Date: Sat, 10 Mar 2001 17:25:58 -0500From: Jim Miller <[email protected]>Subject: Re: [R-390] Oldham coupler alignment epiphany
I once straightened a bent shaft on a Smith & Wesson 38 revolver bytapping gently on the shaft with a wooden mallot (or using a small woodblock and a regular hammer, to "eyeball" it back straight again. Therevolver eventually worked OK but there was still a very minute deviationin the shaft rotation. For a PTO to work well after such a procedure wouldrequire a great deal of precision, patience and luck I believe.----------------------------------------------------------------------------------------------------------Date: Sat, 10 Mar 2001 17:25:06 EST

From: [email protected]: Re: [R-390] Oldham coupler alignment epiphany
I know the holes work, although I've used them without removing the frontpanel. I adjusted a Cosmos using a cut-down jeweler's screwdriver and asmall mirror. I undertook this after I found I couldn't get good enoughsettability by taking the VFO in and out, and I didn't want to go to thetrouble of building a jig.
By having the calibration done using the odometer, I knew it would be OKin the radio. However, it sure was tedious. I like the idea of dropping thefront panel, that might make things go a lot faster. I did get the Cosmos toread within 300 cycles at all 25KHz check points.----------------------------------------------------------------------------------------------------------Date: Mon, 12 Mar 2001 08:23:16 -0800From: "Roger L Ruszkowski" <[email protected]>Subject: Re: [R-390] Bent Shafts
>.......have any suggestions for straightening an obviously bent PTO shaft?...........
Hang a box end wrench over the shaft and lean on it. If you can get twowrenches on the shaft then you can work them against each other. Thenyou do not use the bearing, bushings, and ect attached to the shaft as alever. Different size holes will change the angle and force points you haveto work with. Drill small holes in some good bar stock and use the bar as alever. Slide the shaft through the hole in the bar. This will get a close fitwhere working angle is an isue. You want to get one force point at the bendand the second force point some distance away. Use heavy tubing, slip itdown over the shaft and use it as a lever.
Once you get it as close as you can, you may then want to take the canapart and work the shaft on a flat surface to get the last of the bend out.You may want to sand or polish the shaft at the bend point prior todisassembly of the shaft through a bushing or bearing. Sand and polishuntil it slides apart with out force. Pull the extra stuff off the front of thePTO as needed to get room to work on the shaft. You should be able to getback real close by eye ball. And good enough to get the PTO back in service.-----------------------------------------------------------------------------------------------------------Date: Mon, 12 Mar 2001 12:13:33 -0500From: Al Solway <[email protected]>Subject: Re: [R-390] Old Ham-- PTO
In my opinion you are most likely correct in your observations. There is anexplanation for the stated problem. The situations you refer to are mostlikely those where a PTO is removed to adjust endpoints or replace the

tube.
In the situations that are referred to, the PTO was completely dismantledto make internal repairs and linearity adjustments. To do this themounting bracket (3) were removed.
Doing this results in loss of all mechanical alignment. The brackets aremounted to the PTO. The screw holes in the brackets are enlarged. Thisprovides the ability to make adjustments in relative position of eachbracket to each other and to the R-390A KHz shaft. Once theseadjustments are made they should hold. The green headed PTO mountingscrews (3) should then be sufficient to maintain mechanical alignmentwhen the PTO is installed after routine maintenance.
That is my understanding of the PTO mechanical alignment. There othertechs/engineers on this reflector who may explain this in more elegant ortechnically correct way.-------------------------------------------------------------------------------------------------------------Date: Tue, 13 Mar 2001 16:34:05 -0700From: "Kurt" <[email protected]>Subject: [R-390] Cosmos PTO Types
While attempting to get brave and check end spread on a couple of CosmosPTO's I found two different types. On one there are the very small slottedscrew heads to linearize at the 25 Khz points and all of the wires come outof the front section of the PTO. This PTO does have a Cosmos label on it.The second type does not have slotted screws but some type of hex orspline head for the 25 KHz point adjustment. There is a series of these thatrotate into position just as the other PTO. Also some of the wire bundlecomes out of cylindrical cover. The cover is not slotted so some wires mustbe disconnected to remove the cover. Unfortunately this PTO does not havea label on it. A couple of questions. Has anyone seen this second type ofPTO before? Nothing I have will fit in the heads of the linearizing screwheads. Anyone have any ideas was to use? I have tried a .050 Allen wrenchand a Xcelite 99-61 (the smallest) Bristol. Both of these are way too big.Any suggestions and comments appreciated. Kurt Holbrook----------------------------------------------------------------------------------------------------------Date: Tue, 13 Mar 2001 20:10:55 -0700From: "Kurt" <[email protected]>Subject: Re: [R-390] Cosmos PTO Types
I have studied your work and greatly appreciate your effort. Have you seena Cosmos or any other for that matter, PTO that has some of the wirescoming out of the cover? This makes it more difficult to get the cover offbecause you have to take the connector apart to undo the wires.-----------------------------------------------------------------------------------------------------------

Date: Sat, 31 Mar 2001 12:27:58 -0500From: Jim Miller <[email protected]>Subject: [R-390] Re: [Fwd: thanks for cosmos photos]
Normally the gears behind the linearity adjust opening shouldnt need a lotof lube, or any at all. I did put a tiny touch of oil on my gears when I had itopen, but actually I don't think Cosmos had that in mind. I dont believe itwas not meant to be opened to that degree in normal practice. I dontthink it would hurt anything, but just dont overdo it. You definitely do notwant to pour a lot of oil in there...not a good idea. There is the risk that oilor grease could get into the little plunger actuated coil and affect the coilform or the core. I did put a tiny drop of light oil in the bearing where theshaft exits the PTO in the front. There are a couple of bearings there.
In terms of lubing the Cosmos PTO at all, I'm not sure what is appropriate,or what Cosmos or Collins would recommend as regular maintenance.Maybe someone on the list could comment. I went from my experiencewith the S-Line 70K2 PTO where you have to clean the threads of the leadscrew (the long shaft) and the core, and then coat it lightly with whitegrease. And also the bearing collars, etc. I did that with my Cosmos sinceI had it open anyway. But if you are not experiencng a lot of drag withyour Cosmos, then it may not be necessary to do that.
On that bracket, it is supposed to be there. It does offer some bracing to theshaft. In the R390 video, it was mentioned that there was a groove in theshaft that this bracket rides in, but mine had no such groove. I believe it isprimarily for grounding of the shaft to prevent slight frequency changeswhen the operator touches the tuning knob or other causes. So don't takeit off (I did and it took forever to get those tiny screws back in). Also it hasbeen discussed elsewhere that if you get lubricant on this that it couldaffect the electrical contact and cause some jumpiness or warbling of thefrequency as you tune. DeOxit has been recommended at this point.
Hope this helps. If others have comments about PTO lubing please let ushear.--------------------------------------------------------------------------------------------------------Date: Mon, 02 Apr 2001 17:26:46 -0400From: Jim Miller <[email protected]>Subject: Re: [R-390] Out in the Cosmos
I had the same problem Norman did with removing too much from the coil.I found that the small wirewrap wire from Radio Shack worked OK torepair the coil. It seems to be the right diameter and has a very thin, blueinsulation that is easy to remove. On the adjustment screws, I was asfrustrated as the others who have these strange looking heads. I used afiled down jewelers driver but it wasn't very reliable. the idea of a very

small socket type driver may make sense. You might also look inTechnitools or Jensen. If anyone figures this out please let the list know.Jim N4BE-------------------------------------------------------------------------------------------------------Date: Thu, 05 Apr 2001 21:45:42 -0500From: Nolan Lee <[email protected]>Subject: Re: [R-390] Out in the Cosmos
Snap-on did or still does offer a .015 Allen wrench. I've got one. I've alsogot one .010 one but do not know who the manufacturer was. 010 is thesmallest I've seen. It's easy enough to cut down an Allen wrench to the sizeyou need using a Dremel or just plain sandpaper and a micrometer.
>smaller. After looking far too long at the adjustment screw I don't think it>is a spline, torque or Allen. Looking at the outside edge of the screw>reveals what appears to me to be a super small nut that a suitably sizednut
After I finished the EAC, I took the Cosmos PTO that I had removed from itoriginally and went through it. The adjustments in mine were 4 splineBristol type. I had a wench to fit them but it wasn't long enough to extendout far enough for me to turn. Rather than cut it down and mount it in ahandle, I used a jewelers screwdriver to make the adjustments. I cut downon the width and thickness of the blade until it fit diagonally across thehead from one spline to the other. It worked like a champ.-------------------------------------------------------------------------------------------------------------Date: Fri, 27 Apr 2001 17:14:23 EDTFrom: [email protected]: Re: [R-390] Interesting Crystals
Check the thermostat..when they fail open it gets pretty warm. I have seenPTO's literally cooked and grease burned when the PTO thermostat failedopen.----------------------------------------------------------------------------------------------------------Date: Fri, 29 Jun 2001 22:31:53 -0700From: Dan Merz <[email protected]>Subject: Re: [R-390] PTO
Paul, when I think about your statement concerning +- 3 Khz on ptotracking, I start wondering whether the dog is chasing its tail. I recentlyobtained a 390a EAC in pretty nice condition (missing the oldham couplerbut worked ok otherwise once I found a coupler by good luck). TheCosmos pto wouldn't put out the 1 Mhz range so I followed Marcotte'sinstructions for taking a turn off the deeply hidden end point adjustmentcoil and this did the trick. However, I began to wonder why this might ormight not solve an apparent problem. What about all those other coils

that must have aged also and how do they track if the inductances alsochanged. A change in core permeability worries me most. Without somereal data on this issue - I'm guessing for instance that the aging of the ptocoil had more to do with aging of the core material than with coildimension changes - it's hard to know what's happend to the other coils.Has anyone addressed this issue and really established that tweaking thepto to track linearly and over the original range really helps overalltracking or does it just put the received frequency on the correct spot onthe dial? What I wonder is, "did I do the "right" thing by bringing the ptointo line or did I just adjust the frequency indication to be more accurate?"Of course, knowing the frequency of a signal being detected is prettyvaluable, tracking considerations aside. I haven't yet tried tweaking anyof the cam driven tuning coils according to manual procedures so I speakfrom little experience and I'm a beginner as far as this radio goes.However, I would guess that if the core materials of all those moving coilshave also aged, it may be difficult to get original tracking specs back,though tracking may be optimized in some sense. Moreover, I'd besurprised if +- 3khz would be significant in the tracking scheme of all thebands, maybe for the lower bands?? I would again guess that tracking isonly right at some selection of intermediate points, was pretty darnedgood with the cams designed to match the core material/coilcombinations, but may be not as good as the set gets older and thecoil/material age because the cam shape must have been experimentallydetermined to do just that for the materials at that date. Without knowingthe answer to the question about aging of all the coils in a 390a, it's hardto be convinced that +- 3 khz on the pto will make a difference, or more tothe point, that eliminating the +- 3 khz would really be significantlybeneficial other than frequency indication. Maybe I'm puffing wind aboutsomething that has already been explored and put to rest. If so, I hopesomebody might set me straight or lead me to the watering trough on thesubject.
As an aside, the only parts I've replaced so far are the caps leading to themechanical filters, which actually seemed ok but the risk was not worthtaking in light of advice given by others on this subject, and the very small8 mfd cathode bypass cap on an audio stage tube, which was actuallyfailed. I'm very happy with this radio and it's performing very wellcompared to the only other receiver that I've compared it directly to - aJRC 525, , especially with the diode load output taken to an external audioamp. I'd like to do something about the ssb reception but am balking at$200 for an external ssb detector and would just as soon leave the 390apretty much original inside, at least for the nice example that I have. Hasanyone published the circuit for an external ssb detector that I couldthrow together, thanks, Dan Merz------------------------------------------------------------------------------------------------------------Date: Sat, 30 Jun 2001 10:37:43 -0400

From: Bob Camp <[email protected]>Subject: Re: [R-390] reporting in (PTO)
There has been quite a bit published in the various magazines over theyears on the PTO and what it's design parameters. There is also asurprising lot of data on the various core materials out there. Based on allthat here's my *guess* on what is going on.
One reason the PTO's range drifts upwards is that the coil body isshrinking with time. A lot of materials do this and phenolic is one of them.As the coil body shrinks the turns get closer to the tuning core and therange of the coil increases. In order to make wider tuning PTO's Collinslater came up with a different construction technique to put the coilwindings much closer to the core than they are in the R-390. There are awhole series of Electric Radio articles on what they did.
Collins and several other companies did a bunch of testing on corematerials back in the 50's and 60's worrying about just the kind of driftyou are talking about. The conclusion was that some of the highpermeability ferrite materials drift with time, but that powdered iron coresdo not do so. All the stuff in the RF and IF deck racks is powdered iron asfar as I can tell so they should go on forever. The PTO core is a ferritematerial so it may drift a bit. If anybody out there has a copy of one of theold engineering reports on ferrite drift it might help out. I never saved acopy :(
Both of these effects are accelerated by heat. A good bet is that they followa normal "doubles for every 10C" type rate law past some activationtemperature. A PTO with the ovens on would be at > 80C. In a normal radiowith the ovens off it probably runs at 40C. Assuming a 40C to 50Cdifference and an activation temperature below 40C you would get anacceleration factor of 16 to 32. A year with the ovens on would equal 16to 32 years with the ovens off. Sounds like a good reason to turn off theovens :) It is also a good argument why a lot of PTO's got junked. Five orten years of normal service with the ovens on probably nuked them prettygood.
If you did have a problem with RF or IF deck tracking it should show up inthe standard alignment procedure. Assuming you re-check the standardpoints for peak sensitivity after you are done you should spot the problem.If you want to be absolutely sure you would check a point half way inbetween the two standard alignment points and see if the sensitivity wasthe same there.
The guys who designed this radio where pretty darn good at what they did.They had at least some of the data on these effects. Certainly much more

data was collected after the radio was designed. I suspect that even theywould be amazed that the darn things work as well as they do 30, 40 oreven 50 years later. Notice I didn't even mention the DMRO's efforts inthere ...
Don't know if that helps or not ...--------------------------------------------------------------------------------------------------------Date: Sat, 30 Jun 2001 11:43:17 EDTFrom: [email protected]: Re: [R-390] reporting in
Re: Cosmos PTO tracking I can't really answer the question about agingcomponents, but I did align one of these PTOs, and found some items ofinterest. I didn't know about trimming the coil, so I tried to linearize thePTO by tweaking the calibration screws. I found I could get a combinationof settings which corrected for the 3 Kc end point error, but I then had toadjust all the screws. I found that setting at the 100 Kc points wasinadequate, and that the 25 Kc points could be 1-2 Kc off unless they alsowere adjusted. I finally got it within 300 c at all 25 Kc points, but didn'tcheck in between to see how good it was. I now find that the end pointshave drifted about 1 Kc apart, but I have trouble working up theenthusiasm to take it all apart and do it again. The PTO, incidentally, wasone of the G0v't refurbished ones that Fair was selling a couple of yearsago. My guess is that the PTO will be within 1/2 Kc if aligned at the 25 Kcpoints.-----------------------------------------------------------------------------------------------------------Date: Sat, 30 Jun 2001 14:26:30 -0700From: Dan Merz <[email protected]>Subject: Re: [R-390] reporting in
Bob, thanks for getting to the point I was concerned about, mostly whatwas known about the aging of the other coils. I didn't realize iron powderin rack coils vs ferrite in the pto - must be more stable oxidation state inthe powdered iron cores -so it's encouraging that things would be expectedto better in these coils. I'm a retired materials scientist so this kind of infointerests me a lot. Your comment about 10C doubling the rate is one ofthose rules of thumb that flew around in a lot of meeting during my career.Your idea about checking the mid band sensitivity after alignment at theends was what I was starting to think about and this is the essence ofwhether tracking is maintained. One can always adjust two points on agiven band to be right on, but what happens over the rest of the band andhow well all the coils being simultaneously tuned match up is thechallenge of the design and I think the measure of how well the coils heldup over time. Why did I buy this creature in the first place? - mostlybecause I knew there were a lot of guys that have put a lot of time intoappreciating it, willing to pass info on and I wanted to see what it is all

about firsthand. And I've known guys who loved it, one good friend whotakes on just about any radio that comes along that wouldn't own oneagain if I gave it to him and a couple of collector friends who have a 390abut just let them sit there waiting in line as another project. Yourcomments are much appreciated, thanks. I'll be getting around to thealignment task before too long, Dan.------------------------------------------------------------------------------------------------------------Date: Sat, 30 Jun 2001 19:12:52 -0400From: [email protected]: Re: [R-390] reporting in
> What I wonder is, "did I do the "right" thing by bringing....................
They are not mutually exclusive. You did right on both. Variation incrystal frequency will still require you to zero when changing bands, butany other coil variation in the RF sections will only affect the linearity ofsensitivity in certain areas, and that depends upon how you tune. On theother hand, a radio like an SP-600 with a variable HFO WILL suffer dialinaccuracy due to such degradation, but it is usually minimal, and you havethe option of deciding WHERE it is most important for the dial to beaccurate.
> I'd like to do something about the ssb reception but am balking at $200for an external ssb.........
A poor man's SSB improvement is to use a baby monitor. I discovered thisquite by accident when I wired a baby monitor transmitter to a 390 so Icould listen remotely. The automatic volume control has such range thatyou can set your RF gain well down (to avoid distortion on strong signals)and still copy the weak signals easily. The fast attach/slow decay of theseunits is perfect, and with the low noise level in these radios it worksextremely well. Mine is a Radio Shack, and I just disconnected the internalmic and wired the input to a 50K pot accross the "line" output. I've oftenthought of making a little AVC amplifier to drive conventional speakersfrom the "line" output on these radios with about 10-20 watts. Maybe Ishould...I could even add reverb and disco light control.-------------------------------------------------------------------------------------------------------------Date: Tue, 17 Jul 2001 09:24:51 -0700From: David Wise <[email protected]>Subject: RE: [R-390] Restoration Bulletin 2: Gear Train again
And I reply to both: Certain. I have the radio all apart. Metaphoricallyspeaking, I have the PTO in my hands as I write this. It takes a lot of torqueto turn it, but it's smooth and uniform, no gritty spots or bumps. Like thebearings are ok but just super-tight. Roger's got the idea, but I was fishingfor advice on getting the unit apart and back together. My neighbor has a

press. I'm looking for tips like What size EMT (or whatever) makes theperfect jig?------------------------------------------------------------------------------------------------------------Date: Thu, 19 Jul 2001 17:04:22 -0400From: "Walter Wilson" <[email protected]>Subject: Re: [R-390] Zippo lighter/tube heaters commit
> Say, what numbers should be showing on the Veeder-Root?
03 885, of course. And make sure the BFO is in the OFF position,Bandwidth 8KC.------------------------------------------------------------------------------------------------------------Date: Fri, 03 Aug 2001 10:06:20 -0400From: Bob Camp <[email protected]>Subject: Re: [R-390] Ovens stay on with switch in off??
Based on talking to the guy who designed that part of the radio (for real, Iran into him at Collins ..) here's the problem. On the PTO the temperatureis as stable in a normal room as it is with the heaters on. On the crystalsthe temperature is roughly ten times more stable with the heaters off in anormal room than with the heaters on. They had to make somecompromises in the design of the crystal "oven" and it did not wind up quiteas good as it could have been. They did a *lot* better on later designs.
The ovens do a very nice job if you are running way below freezing and thetemperature in your tent is swinging every time the wind blows. The angleof crystal they used gets more sensitive to temperature swings as it getsreal cold so that can be a factor as well.
Since there is no advantage to running the ovens you leave them off sincethe parts will die faster at higher temperatures. It's not just the stuff in theovens that gets hot. Anything that puts more power into the radio willheat up a lot of stuff.--------------------------------------------------------------------------------------------------------------Date: Fri, 3 Aug 2001 22:05:03 -0500From: "Richard Biddle" <[email protected]>Subject: Re: [R-390] Ovens stay on with switch in off??
I am paranoid about excessive heat on components. I suppose that comesfrom playing with mil-grade silicon - nasty little boogers to keep runningfor a long time at 125C :) Like the MILSTAR guy told me, it's not the repaircost that kills you, it's the service call.
I run ovens switch off and have disconnected the heaters from the plug inoscillator on the RF deck. I use a 4" fan in a custom designed oak cabinet

for the R-390A. I don't see enough drift to be worth wondering about.-----------------------------------------------------------------------------------------------------------Date: Mon, 6 Aug 2001 23:36:25 -0400From: "Walter Wilson" <[email protected]>Subject: Re: [R-390] R-391 questions
That's an acceptable sub, but most folks avoid putting a new tube in thePTO. Put a good 5749/6BA6 from another location in the PTO. One of theCollins engineering reports goes into some detail about the benefits ofusing an aged PTO tube.
> The receiver came to life, but suffers from a bad hum on both the local.......
I guess you're using either a 600 ohm speaker or some kind of audiotransformer if you're driving an 8 ohm speaker. You also may want tocheck the DC voltage level at E206 and E207. You should have negativeDC voltage here on strong signals. If either of these is close to zero, theAGC would not be working for that stage and you'd get some distortion andblocking on stronger signals.
> I have checked the B+ and have 180 VDC at the test point, .........................
How large was the AC you measured when you dipped AC level with thehum balance adjustment? Is the rig grounded? If it is fed with coax, areyou using the balanced antenna input and tying one side to ground?
> The carrier meter seems to be somewhat stingy,
Switch the AGC between Fast and Slow and see if the resting carrier meterlevel on a local AM station is the same either way. If it's lower on Slow,you may have a leaky AGC capacitor. Is the carrier meter an originalmeter? If not, that would explain why it's stingy.
> or slow to respond as well.> I am thinking this receiver could benefit from a complete alignment.
The R390/391 seems to me a bit slower than the R390A, especially withAGC in the Slow position.
> Fortunately, it came with an original of the 1953 Collins TM, but is therea better alignment procedure than the one in this manual? Besides testingthe tubes and cleaning switches, should anything else be done before analignment?
If you have the green gear, set the frequency to 2.000 MC, install the greengear, pull the RF deck, and check the cams for proper mechanical

alignment. (Don't try this without the green gear, or else you'll have amessed up mechanical alignment for sure)
>Also, one of my R390 manuals does not talk about checking the PTOendpoints.
This is always a good idea, as the cams are cut expecting exactly ten turnsof the KC knob to equal 1000 KC. This is easy to check using the CALposition. If it's more than a couple of KC off, it's worth setting the endpointbefore proceeding with the alignment.------------------------------------------------------------------------------------------------------------Date: Wed, 15 Aug 2001 22:18:26 -0400From: "AI2Q Alex" <[email protected]>Subject: [R-390] "Warning, Sealed Unit, Do Not Remove This Cover"
"Warning, Sealed Unit, Do Not Remove This Cover" Over the years I've oftenlooked at that message on the label of various PTOs. When I restored aMotorola R-390A (Order No. 363-PH-54, SN 1857) last October Idisregarded that ominous-sounding label and opened the PTO. The reasonwas that although the set's Collins PTO didn't drift, and was reasonablylinear, it had an annoying warble at some points on the dial. It made ittough to tune SSB, and CW at narrow filter settings. In short, it was badnews. Anyway, I noticed last October that someone had been in therebefore me, as the PTO's seal was broken and I could see the telltale re-soldered wire on its heater element as I took it apart further. At that time Itried cleaning and lightly lubricating the internal dual linearization racks,to no avail. The warbling persisted. I also meticulously cleaned theinternal rack screw, but that didn't cure the mechanical instabilityproblem either. Having just installed a new Cosmos PTO (courtesy of a realgentleman, W5BVB, Phil), I finally got a chance to dig into the originalCollins unit.
What I did was set it up on the bench with 6.3-V ac for the filaments, andabout 150 volts dc fed to pins A (feeding V701's plate) and B (the screen)of the power connector. By the way, for the purpose of testing, this voltageisn't critical; it can be anywhere from about 80-V to 200-V or so. I have anold Heathkit variable bench supply that I use for these types of things. Ialso used a 51J-4 that's on the bench right now, with its BFO on, to listento the oscillator, and I simultaneously monitored the PTO output-frequencyusing a frequency counter while I poked around trying to discover thesource of the mechanical instability that was causing the warbling insidethe PTO.
Taking the bull by the proverbial horns, I removed the two large Philipsscrews holding the rear bearing plate, and then the smaller Philips screwthat holds the plate to the linearization rack. With the plate and bearing

assembly out of the way, I could unscrew the small brass stop-slug byholding it with a pair of pliers while I manually rotated the lead screw byrotating the PTO's Oldham coupler. Removing this small brass componentpermit me to rotate the Oldham couplerand run the core assembly up to the highest frequency end of its travel.Carefully holding back the spring-loaded dual track-bearings, I furtherunscrewed the core until it was free of the lead screw. I took the whole coreassembly entirely off the PTO. This exposes the threads at the oppositeend, and inside the core. They can then be inspected with a smallmagnifier. I could see some crud in there, likely from year's of wear, so Ipoked some dish detergent in there and washed the core thoroughly withvery hot water, getting the flow inside the critter. After drying it with ahairdryer, I put a small squirt of DeOxit on the core's threads. Next I stoodthe PTO assembly vertically with the Oldham coupler end face-down, andapplied a squirt of DeOxit to the lower internal CirClip that can be seenwith the core out. It's located down inside the coil form. I also checked thetightness of all the coil assembly's Philips head screws. They were all okay.
I also removed the rear bearing assembly and cleaned it, and applied adrop of DeOxit there as well. Next I used a mini-oiler to apply one drop oflight oil to the pivot point of the miniature spring-loaded tracking arm. Ialso loosened the three small slotted screws that hold the three tiny flatcopper leaf springs at 120-degree intervals. These are located at the metalplate affixed to the actual core material (can anyone tell me what these arefor?) I also burnished both linearization rack surfaces, and moved the fiberbearing 180 degrees in order to expose a new surface to the linearizationfingers. After re-assembling the core and installing the rear bearing, witha tiny drop of oil on the rear bearing surface, I positioned the three tinysprings so that they now bear on the leadscrew (again, does anyone knowwhat these were for originally, or what position they were originally in onthe shaft assembly?) Anyway, while open on the bench, I powered it upagain and ran the core up and down its range, proving conclusively thatTLC is a good thing. There's no more warbling, and the linearity is stillgood. I now have a spare PTO for...who knows? Another R-390A in thefuture? Vy 73, AI2Q, Alex in Kennebunk, Maine .-.-.
PS - I'll try to take a photo of the disassembled PTO for possible postinghere at some point.---------------------------------------------------------------------------------------------------------Date: Wed, 19 Sep 2001 15:08:04 -0700From: David Wise <[email protected]>Subject: [R-390] R-390A Restoration Bulletin 7: Smoke Test/CollinsPTO/Killer Sock et
...it worked. Whew. Did a really brief cal/carrier meter-only alignment,and picked up stuff on all bands. Noticed that the 8kHz filter is about 20dB

down (as I mentioned in another post), and that the PTO was a couple ofkHz long. I have one short diddle stick with a metal blade, with which Ican set the endpoints without pulling the front panel. Once I did that I dida frequency counter sweep and found that the linearity was off, by up to600Hz in some places, but always off in a systematic way. The PTO runshigh except at the endpoints. I decided to see for myself what a Collinscorrector stack looks like.
Removal of the outer can, the insulation, and the oven was uneventful.Don't breathe that crap! I did this part outdoors in a breeze. Went back inand pulled off the inner can. Ah-hah! I had never made sense of otherpeoples' descriptions, so unless someone asks me, I won't try either, exceptto point out what I don't remember hearing: there's a long thin screw thatgoes through the stack, which is normally tight. To move the disksaround, you loosen it. Don't loosen it unless the follower is parked at anend, or it will move some disks. Each disk is separated from its neighborby a thin shim. All the shims stay exactly in place due to their shape(which grips the backbone), so you can move each disk independently ofthe others. The disks are not exactly 25kHz each! Ten turns is actually 38or 39 disks not 40. What were they thinking?
The stack was bowed to one side. To bring the PTO back linear it wouldhave to bow a good deal further. This procedure took a lot of patience,because I didn't dare change things too much at a time. I'd take a reading,note areas that had to move and (relatively) how much, remove the PTO,pull the cover off, massage the stack, put the cover back on, replace thePTO, and take another reading. After about five cycles, I had it as good asit was going to get, only about 200Hz off at the worst point, and no morethan about 100Hz off from the nearest cal point.
Then I realized I hadn't baked it. Put it in the oven at 170 (the lowesttemperature it will go), and left it overnight. Put it back in next day andtook a reading. Way off! Not only was it about 5kHz long, I was going tohave to undo most of yesterday's stack work, because the main coil hadbecome more linear. Another couple nights of patient twiddling and I hadit pretty good again.
Baked it again. Next day: way off! Again. In the same direction: long, andstraighter. Now my corrector stack is almost a straight line, just a fewlittle wiggles. Should I bake this thing again? I'm afraid I'm pushing ittowards a state that won't last.
On a related note: something is wrong with V701's socket or shield. It haskilled two 5749Ws in three days. I come by and find that the base iscracked. Anybody seen this before? By the way, it's the crummy shinyshield, but I don't know if the problem is heat or mechanical. There's
certainly nothing obvious. Now I'm running without a shield and thelatest tube is holding up. Eh?----------------------------------------------------------------------------------------------------Date: Tue, 23 Oct 2001 11:46:08 -0700From: "Roger L Ruszkowski" <[email protected]>Subject: Re: [R-390] PTO tuning tool, R-390A
............... try to locate a suitable nonmetallic tuning tool..............
Use what ever fits.File the tool to fit if needed.Read the output indicator.Poke it.Stop poking it.Read the output indicator.Evaluate results of poking.Repeat until satisfied.
Just use a good metal screw driver for the flat screws. Finding the verysmall Allen wrench for some of the models is hard to do. You may have togrind one to fit if you need it. The tool will impact the setting. You let thething settle and then reach in and make a small adjustment. Then let itsettle again and see what happened. You just do not try to do a readingwhile tweaking. In fact just tweaking is not real good. You want to run theshaft off and back to the point a time or two to see how it will settle.------------------------------------------------------------------------------------------------------------Date: Thu, 25 Oct 2001 09:17:11 -0700From: David Wise <[email protected]>Subject: RE: [R-390] PTO tuning tool, R-390A
> Since the PTO on one of my R-390As stops oscillating at about 70 KHzfrom the bottom .............
Like many techs, I have a collection of diddle sticks. One very old one has ametal blade at the end. I accidentally broke it years ago. One piecehappens to be exactly the right length (about three inches) for in-situendpoint adjustment. It's short enough to slip into place without taking offthe front panel, but long enough to turn between thumb and forefinger.The metal blade turns that sticky little screw without warping. It's a file-to-fit situation. I do have to use a real screwdriver to remove the accessplug. If I go in at an angle with a thin one, there's just enough leverage tobreak it loose. That said, IMO endpoint adjustment won't help you. Itstopped oscillating because the loop gain fell below 1. You have:
1. A weak tube.2. An off-tolerance resistor.

3. A bad solder joint.4. A lossy deposit on the coil.5. A bad cap.
If your VFO has FC-7 installed (screen resistor 220k instead of 56k), it'salready near the edge and will not tolerate further losses. If you go insideZ701, do NOT damage the funny-looking ceramic caps. They were selectedwith exquisite regard to their temperature characteristics; if you have toreplace them it will never be the same.-----------------------------------------------------------------------------------------------------Date: Thu, 25 Oct 2001 09:35:30 -0700From: David Wise <[email protected]>Subject: RE: [R-390] PTO tuning tool, R-390A
Somebody wondered a while back which end to adjust at. It's the 3.455end. The 2.455 end will be affected too, but (observation) only about halfas much. I haven't done the algebra, but this suggests that if you want tochange the spread a certain amount, moving the 3.455 end by somemultiple of that amount will make the procedure converge faster. I've hadgood results with a multiplier of 2. Why 3.455? For the same reason youset trimmer capacitors at the high end. L701 (the adjustment) and L702(the main) are in series, so their inductances add, like trimmer capacitanceand main capacitance. In fact, you can think of L701 as a "trimmer coil", ifthat doesn't insult your sensibilities :-) How much does L701 affect thetotal? Depends on L702. L701 is a larger percentage when L702 is small(3.455) than when L702 is large (2.455). QED.---------------------------------------------------------------------------------------------------------Date: Mon, 12 Nov 2001 10:23:49 +0200From: "Bryce Ringwood" <[email protected]>Subject: [R-390] R390-A VFO Jitter
I notice when tuning AM stations for listening on USB that my 390-A VFOhas a slight jitter which is a bit annoying. I'm not sure if its just amplitudenoise or jittering around the frequency I'm trying to tune. Otherwise, Ihave no problem tuning SSB, and the VFO seems very stable.
Any suggestions? - Perhaps someone could tell me how the VFO works Is ita permeability tuned thing, or does it work on the same lines as a ten-turnpot? Taking it apart is something I'd rather avoid. Also - is there any wayof pulling the crystals to be 100% the correct frequency - or do we just buynew ones?
I see the photos of the 390-A on Dutch's web site appear to show a flywheelon the tuning shaft. If so, mine has gone AWOL, I think (Haven't taken thefront panel off YET, but I don't see one from underneath and the kHztuning doesn't feel like it has a flywheel. ).

BTW, Phase-locked loops were certainly around in the valve era. I have aTRT PLL "Master Oscillator" which I use as a frequency standard. Itcontains 16 valves ,is a beast to align and requires an unreasonable degreeof mental agility to work out what frequency will be produced.----------------------------------------------------------------------------------------------------------Date: Mon, 12 Nov 2001 07:49:16 -0500From: Bob Camp <[email protected]>Subject: Re: [R-390] R390-A VFO Jitter
Unfortunately there is no way to pull the crystals back on frequency. Theonly explanation I have ever gotten on this is "it wasn't in the Armyspecification". With an enormous amount of work and a lot of crystals youcan get them pretty darn close. I would say that anything under 300 Hztotal spread is worth bragging about.
I have never seen a flywheel on the tuning shaft of a 390A. I think thegizmo you are looking at is the locking plate for the kilocycle tuning shaft.The PTO should not hop as you tune it. If it is slipping you should see itfirst on SSB or CW signals. If you only notice it on AM then it's not the PTO.The PTO is an inductively tuned oscillator and it is kind of a pain to takeapart. One of Chuck's video's shows how to do it if you need to. Check theAGC voltage(s) and see if they relate to your AM problem.-----------------------------------------------------------------------------------------------------------Date: Mon, 12 Nov 2001 09:46:55 -0800From: "Roger L Ruszkowski" <[email protected]>Subject: [R-390] R390-A VFO Jitter
One place to look is the mechanical filter in the IF deck.
Try a different bandwidth, (another filter) and see if the problem ispresent. If the problem is only one or two filters then you have filterproblems. (Do a IF deck swap with some one who is not worried about thefilter band edge as much as the SSB users are.) The filters can havemicrophonics on the filter skirts. One side may have them while the otherfilter side may not have them. More than one filter in a receiver may havethe problem and you can spend weeks looking for a common failure that isin fact two problems. A real good sweep generator and proper setup willalso show the notches and anomalies in the filter skirts. It is a fairlycommon problem. Most times the problem is not annoying and gets livedwith. More filters get changed for this reason than the fact that they flatout fail either shorted (wide band) or open (no signal). Filter failure neednot change the input and output impedance of the filter. A meter checkneed not be a clue. It's a mechanical problem in the filter "stack" and"funny" thing happen on the skirts.

...............how the VFO works .............
The VFO is a slug tuned thing. The slug travels on a threaded rod inside thecan. The coil is not a tight wound limier coil. It is spaced to give a linearoutput as the slug moves liner through the coil form. One model uses acomb like slide rail for small liner adjustments. as the slug is moved in andout the rail varies the stop rotation and changes the linear thread motionsmall amounts by using variations in the resting stop. Another model usessmall bolts to change the pressure plate in the end shaft thrust bearing. asthe shaft and plate rotate different displacement is applied to the shaft endto effect small changes in the linearity of the VFO to smooth outvariations.
These things are very good.
Check yours from end to end. If its less than 3KC its in mil speck and canbe left alone. You can first adjust the band spread to get the 3KC down toreal good. ( a few hertz with a counter) Less than 500 hertz with a zerobeat and effort. Then you can measure the linearity and go into thoseadjustments if you are so inclined.-----------------------------------------------------------------------------------------------------------Date: Mon, 12 Nov 2001 11:51:54 -0800 (PST)From: Joe Foley <[email protected]>Subject: Re: [R-390] R390-A VFO Jitter
The first thing to do here, is to clean the ground contact on the shaft of thePTO. Its a small tab that runs in a groove on the shaft. This has to beCLEAN! And don't oil it.-----------------------------------------------------------------------------------------------------------Date: Mon, 12 Nov 2001 16:59:08 -0800From: "Roger L Ruszkowski" <[email protected]>Subject: RE: [R-390] R390-A VFO Jitter
.............Is 3kc the endpoint milspec, or the linearity spec?
If it's endpoint, then what's the spec for linearity? In other words, if I havezero at zero and 1000 at 1000, but 510 at 500, is this still in spec? (Idoubt it is, but I wonder what the linearity spec is.). Back when I wasteaching this stuff in school to receiver repairmen, 3KC was the spread.2.455 to 3.458 or 2.455 to 2.452 If the semi bench test fit this number.Test is done go to next test. If test did not fit these numbers you could trythree time on the bench to get the critter into conformance. If three triesdid not get it you passed it to depot for fix. It would always come back fromdepot as dead on and reported as no trouble found.
Define three tries as

Once by a nug.Once by a Elmer (short timer experienced)Once by the trick chief.
We never worried about the linearity.We never had the time or way to test it.If you did log it with a freq. counter you had no way to adjust it.
We only taught the Collins VFO with the rack if washers inside.
This was 1968 -1974, when R390's were new. We were doing fieldmaintenance.
Do all this to a receiver,load it into your 2 1/2 6x6drive 4 hours cross countrydrink a warm beerponder if work back on bench was still relevant to equipment.
I do not know what the spec is.But some fellows have some real dead on no BS units glowing in theirshacks.With time and effort you can get the units to operate real close.As in better than your freq counter and dial indicater can replicate in 100or so test events.How good is your back lash?How good is your counter?How close can you read that dial?
Your PTO can do better.Is your PTO better? (very likely)
If your PTO goes bump then it has a real problem. (some do) and it could bethat some one not knowing tweeked just one or more of those little boltsnot knowing what was happening. So you could have a PTO that needssome very tender care. Then again your receiver may have gone crosscountry and have shook a bolt or two loose.
When PTO are good they're real good.When their bad they can likely be fixed.
There are several problems that all exhibit exact symptoms.Each set of symptoms has an exact fix.Do not shot gun tour PTO.
Read the archives.

Post your problem here.Wait for all the E-mail to settle in.Proceed with care.
Without offense to Les or Nolan, save the beer for after PTO work.Beer is best enjoyed while in the operate mode.--------------------------------------------------------------------------------------------------Date: Mon, 12 Nov 2001 22:49:46 ESTFrom: [email protected]: Re: [R-390] R390-A VFO Jitter
If I look up MIL-R-13947, I find the following spec for the PTO. Whencalibrated at the nearest 100 Kc point, the frequency readout shall beaccurate within 300 cps. When the PTO is accurately set at the low end ofthe range, the high end reading shall be within -1500 to +200 cps. So youmight say end point adjustment is within 1500 cps, and linearity is within300 cps. also, the variation from band to band is spec'd at 4 Kc. Ed-------------------------------------------------------------------------------------------------------------Date: Tue, 13 Nov 2001 09:36:53 +0200From: "Bryce Ringwood" <[email protected]>Subject: Re: [R-390] R390-A VFO Jitter
Thanks for the swift and very helpful replies and links. I should be able tofix it now - I notice its only bad with strong stations 80db on the carriermeter and not really noticeable on stations with 40db or less. (Whatever Spoints that is - I'll have to look at the graph). The label on my VFO/PTO hasbeen scratched, so I don't know who made it. (Its a Capehart Rx). The PTOis about 3Kc out on end points - maybe a touch less. I was going to adjust it,but now - probably not. Now I put my glasses on, I see I do have a lockingdisk and its not a flywheel. Touch of Eddystonitis there. Re: cleaning - Oneproblem I have concerns cleaning fluids, since we don't have the same onesyou use here - with the exception of WD- 40. I use 'Servisol' for contacts andpotentiometers (Very sparingly indeed-this stuff has a bad reputation).Wynn's 'Clean Green' for general dirt removal. Some pink stuff called'Prepsol' for de-greasing and sprays based on trichloroethane on contactswhen I just want to clean away dirt. I sometimes use 300 thinners if I feelsure its not going to dissolve away anything nearby. Also air-duster andelbow-grease. Your De-Oxit sounds like good stuff.----------------------------------------------------------------------------------------------------------Date: Tue, 13 Nov 2001 08:40:35 -0800From: "Roger L Ruszkowski" <[email protected]>Subject: Re: [R-390] R390-A VFO Jitter
"..........If I look up MIL-R-13947, I find the following spec for the PTO."When calibrated at the nearest 100 Kc point, the frequency readout shallbe accurate within 300 cps. When the PTO is accurately set at the low end

of the range, the high end reading shall be within -1500 to +200 cps. Soyou might say end point adjustment is within 1500 cps, and linearity iswithin 300 cps. also, the variation from band to band is spec'd at 4 Kc."Ed"
The variation from band to band is spec'd at 4 Kc. This is a function of thecrystals in the Crystal osc deck. You use this value to decide if the crystalsneed swapping. The crystals are functioning OK or you have a dead band.Practice here was to pull about 4 sets of crystals and then by test sortthem into back into 4 sets.
For each frequency / crystal.put all the low value in one receiver
put all the high value in one receiver put all the center values in one receiver put set four back in the spare box.
Some real off center ones got replaced.It would be a 17 priority not an 05 or 02 dead line on part.Being more than 4KC off was just annoying not a mission stopper.
There were a lot of crystals pulled and worked good.They just would not put to frequency in the circuit.We always peaked the osc deck for Max output.We never tried to tweak for frequency.If the frequency and the peak were not the same point.(the crystal was off frequency a few hertz) the max output won.-------------------------------------------------------------------------------------------------------------Date: Tue, 13 Nov 2001 11:56:46 -0800From: "Roger L Ruszkowski" <[email protected]>Subject: RE: [R-390] R390-A VFO Jitter
Can you plug in a pair of 12BA6 for us? One in the BFO, one in the PTO andput a jumper in the ballast socket. How badly will this drift? This would bethe zero control standard. Then we can gauge what the ballast tube adds tothe mix. This could be a surprise. If room temp and tube temp are causingmore drift than filament variation we could be chasing the wrong doghere. If line voltage is causing drift, then all hell is loose. The B+ isregulated. The filament is regulated. Those two circuits should provide astable operation. Not an exact value, but stable where it is. If your localline varies (lights blink) enough to produce PTO shift, I do not know whatyou can do. Steady state high or low voltage can be adjusted with a lineauto transformer. Even good UPS will not filter out dips and surges.------------------------------------------------------------------------------------------------------------Date: Tue, 13 Nov 2001 14:11:28 -0800From: David Wise <[email protected]>

Subject: RE: [R-390] R390-A VFO Jitter
I'm replying to two Roger R. posts. It's long, sorry.
> Can you plug in a pair of 12BA6 for us?
I figure the series resistor version will give the same performance, so I'llreport on that when I get to it. I'll include the with-ballast figure so youdon't have to compare three old emails. Remember I only have this oneradio, so YMMV.
>If room temp and tube temp are causing more drift than filamentvariation we >could be chasing the wrong dog here.
I'm going to ignore tube temp per se and just concentrate on filament andZ701. Stick to stuff I can control or at least measure.
> If line voltage is causing drift, then all hell is loose.> The B+ is regulated. The filament is regulated.> Those two circuits should provide a stable operation.> Not an exact value, but stable where it is.
It's immune to B+ changes. As long as the filament is steady, you canswing the line all over the place. It'll stay on zero-beat. The twosensitivities are cathode temp (i.e. emission) and Z701 temp (coil/cap).During the day, my line slowly drifts about a volt, which is why I based mymeasurements on 1V. Of course I don't wait for it to drift, I use a variac :-)This lets me separate line voltage from temperature. For temp I open theback door and start a fan. I didn't have a thermometer handy but roughguess maybe 10 degrees plus wind chill from the fan. Who knows?Anyway, that was good for about 200Hz. The TC is positive, i.e. cold islower frequency than hot. My DVM is measuring filament voltage (eventhough I have the 7805 wired as a current regulator). A couple hundredthsof a volt is worth a few Hz. The TC is negative. More emission => lowerfreq. I'm going to try to make the current regulator have a positive TC,with a sensing diode or thermistor taped to the VFO can. If the curves arecongruent enough, I'll be able to get partial cancellation over theinteresting range. Remember, I'm just playing a game here, let's see howgood we can get it on the smallest budget possible. See if I can zero-beat,turn it off, turn it on next morning and be zero-beat ASAP. Or stay zero-beat all day. Unless you listen to music on SSB, none of this means a thing.Also remember. BIG CAVEAT. There's nothing special about a VFO thatsays it has to have a positive TC. That's just the way mine shook out at thefactory, based on the temp-compensating caps the guy put in it. I would notbe the slightest bit surprised to hear of other VFOs with zero (you shouldbe so lucky) or negative TC. Even if my design works, it might not be

applicable to anybody else's VFO. It might make a decent base fortweaking, and a slight variation can give a negative TC instead of positive.
> If your local line varies (lights blink) enough to produce> PTO shift, I do not know what you can do. Steady state
No, see above, only about 1V. I'd never notice it without the DVM.
> Would you be open to a sand state solution?> Could we do a 7 pin plug in replacement for the 5749 tube.
Where's Dr. Jerry when we need him? That's more along his line. I'm goingto be exhausted by just the filament regulator.
> If the Can L and C are suppose to set the frequency,> How come such a small change if B+ or filament produce so much drift?
It's the filament, not the B+. I think there's a discussion in the RCARadiotron Designers Handbook. Here's one cause: hotter cathode => moreelectrons => more charge near the grid => more grid-cathode capacitance.There's also something about space-charge-limited operation vstemperature-limited operation, I don't remember more than that, exceptthat it gets wierd fast. "Frequency-dependent negative capacitance". Thatbook's an eye-opener. Here's another factor: cathode-grid-plate geometrychanges slightly with temp, which changes the gain. Maybe the VFOfrequency is sensitive to gain.
> What is, is But why? Do we need to mod the can oven and hold a> temperature stability on the L and C? Do we need to move some of the Cinside the can? Do we need to strap a Zener on the B+ at the tube?> Do we need to replace some of the C with more modern temp stabledevices?> The solid state regulator will hold the filiment voltage constant.> but we can get drift from other changes (B+, Temp).
I'd rather keep the intrusion level below that. Nobody wants to rewire stuffinside the can, yecch. Remember, if you listen to AM, you don't even care. Ifyou listen to voice over SSB, you care only a little. The stock R-390A is anexcellent receiver.-------------------------------------------------------------------------------------------------------------Date: Thu, 29 Nov 2001 15:12:06 -0800From: David Wise <[email protected]>Subject: RE: [R-390] PTO non-linearity
> ..........trying to get another pto? Any better pto's out there?.................

It's no good. Give it to me :-) Ok, I'll be serious. Nobody else has answered.13kHz is larger than normal, but not drastic enough to shout "broken".Try the adjustment. If you run out of adjustment range before you get 1MHzin ten turns, you may still be able to save it by going inside and changingthe number of turns on the endpoint coil. Couple of other things to ponder.Is it extremely temperature-sensitive? If one of the compensating caps isbad, it would affect the base frequency, the range, and the TC all at thesame time. Once you're inside, the shape of the corrector stack shouldsuggest where the ten turns originally started and ended. Is it near thatnow? Is crud deposited on the coil? That will change its inductance. Is itnonlinear as your subject line suggests? Or merely not quite 10:1 scale?The corrector stack linearity adjustment, while doable, requires muchmore patience than the Cosmos design.------------------------------------------------------------------------------------------------------------Date: Sun, 23 Dec 2001 15:07:27 -0500From: James Miller <[email protected]>Subject: [R-390] MECO?
On the bottom cover of this 390a someone has written in pencil: "PTO Cal11/5 1986" and the letters "MECO" inside a hand drawn triangle.What/who is MECO? Was that a PTO manufacturer? (The PTO label ismissing).--------------------------------------------------------------------------------------------------------------Date: Tue, 15 Jan 2002 05:01:38 -0800 (PST)From: "Tom M." <[email protected]>Subject: Re: [R-390] R-390 end-point adjustment
> Hi, have a R-390 non-a with a Collins 70H-2 PTO, with mod.>> This one is out a bit, and I have attempted to adjust the end point. I have> removed the cover from S701. Inside is a hollow, threaded cylinder. The> cylinder seems to be threaded inside and out. Slots are cut in the end of> the cylinder presumably for screwdriver adjustment.>> I have attempted to rotate this adjustment, but it appears to be locked in> position. I used a small mirror to see if there was any other adjustment> inside the cylinder or a locking nut. None found.>> The low point of the PTO (at 000) can be set to 3.455 KHz. The upper end> then measures 2.467 KHz.>> Any ideas? I'd hate to force the adjustment any further without knowingI> won't break anything!

If I have the picture right you are messing with the oven adjustment. Toadjust the endpoint, one does not remove the cover. The endpointadjustment is under a screw cap on the upper right hand side of the front ofthe PTO as you look at the drive shaft. Is this what you are looking at?--------------------------------------------------------------------------------------------------------------From: "Bill Smith" <[email protected]>Subject: Re: [R-390] R-390 end-point adjustmentDate: Tue, 15 Jan 2002 08:59:04 -0800
Apparently I was trying to tweak the temperature compensation. Glad Iasked first! I have put the set back together, and will find another mini-moment to take a look at it. Along with miniature gear, time seems to haveshrunk also. Thanks for the notes, will carefully file them away for thenext attack. Noticed also, in tuning around that a couple of spurs haveappeared, one near 910 KHz and another at 610 KHz. They are not loud,but doubt they should be there. Thanks again. It is great to work onequipment this complex with an expert eye or two watching over one'sshoulder.------------------------------------------------------------------------------------------------------------From: "Mike Melland" <[email protected]>Date: Mon, 28 Jan 2002 16:13:14 -0500Subject: [R-390] More R-390A Questions...
I've been ringing my "new to me" R-390A out all weekend. I received it lastWednesday.... It's a Motorola, serial number 714 from the 1956 contract....parts inside have 1955/56 date stamps on them. I noticed that the PTO isa Collins. I have checked over most of the things all of you told me to checkand find that the radio works very well indeed. It is very clean inside andthe front is also in nice shape.... has all internal covers plus top and bottomas well as tube shields (silver ones) and has what appear to be the originalmeters. It does not appear to have any modifications at all. Everythingappears to work pretty much as it should. I do have a couple of questionsthat perhaps some of you could answer for me.
How linear is a Collins PTO ? If I calibrate against the calibrator at forexample 6.000 MHz and then turn up to 6.900 MHz and re-check againstthe calibrator It's off about 1.0 to 1.2 kHz high.
If I listen to my local AM station at 1.490 MHz and have the radio set upmedium AGC, RF gain up all the way at 10 I read about 80 dB of carrierlevel and the audio sounds fine. However if I leave the radio on for severalhours and return I notice the audio is distorted. If I then reduce RF gain abit I hit a point where the audio clears up and is fine. I can then turn upthe gain again after a bit and the audio remains fine.... but will eventuallydistort again. This seems to happen only on this very strong very local

signal and in the 4,8 and 16 kHz filter positions. MGC appears to worknormally. Is this overload when in AGC ? Is it normal ? What would belikely to fix this if it's a problem ? BTW.... I was checking Chuck's procedurefor adjusting IF gain. What is meant by "terminate antenna" ? If I put itinto a 50 ohm Bird load I hear nor see any receiver noise.... perhaps itmeans tune to 15.2 MHz with the antenna hooked up to hear backgroundnoise ? At any rate, the carrier needle on mine using the antenna hookedto a dead spot around 15.2 pins to the right when using the procedure tocheck the IF gain.... could that be part of the cause of the distortion whenlistening to a very strong signal in AGC if the gain is in fact set too high ?-----------------------------------------------------------------------------------------------------------Date: Mon, 28 Jan 2002 17:23:24 -0800 (PST)From: "Tom M." <[email protected]>Subject: Re: [R-390] More R-390A Questions...
There are two main modes of PTO error.
A) non-linear errorB) endpoint error
If a PTO is non-linear (it can happen) a graph of the output vs dial readingwould not be a straight line (within 200 hz at ea 100 kcs checkpoint). Ifthe PTO endpoint is off (very common to be "long") it has an output of otherthan the proper 1000 kcs in ten turns of the pto shaft. The PTO shouldhave an output of 3.455 kcs at 000 on the dial and 2.455 kcs tens turnshigher than 000. Yours is requiring more than ten turns to achieve the1000 kcs of full output. While not a major problem, it can harm sensitivityon the low bands as this can be a significant percentage out of tune when itis supposed to be joined at the hip with the RF deck and the variable IF's(less of a problem on the higher bands). It can also be a tuning hassle, andafter all if you fiddle with 390's at all this has to be right!
The endpoint adjustment is under a screw behind the transformer on thePTO. Turn it to the right to get more output is ten turns. It may also benonlinear, but fix the endpoint first and then regroup. You should have amanual handy when attempting this.--------------------------------------------------------------------------------------------------------Date: Sun, 7 Apr 2002 07:54:14 -0700 (PDT)From: "Tom M." <[email protected]>Subject: [R-390] 51J-3 PTO AGC Audio Fun
Gentlemen? I went back in to the 51J-3 PTO this weekend after setting itproperly in 1996. It was 4 kcs in the usual direction (I've been admonishedfor calling it "long" so I'll refer to it as the "usual direction" from now on toavoid confusion). This was on 120V supply. One turn of the endpoint screwremedied the 4kcs endpoint problem exactly (I'll tell you tomorrow what

the new endpoint error is after it drifts overnight).
This radio exhibits endpoint deltas with differing supply voltages. TheOA2 regulator is regulating, so I'm not sure if this is just my radio, or a51J-3 thing. I also slowed down the AGC (thanks group for the tips) byjumping the 0.1 uF C205B with an additional 0.5 uF to ground. Thisslowed the AGC down, and the S meter no longer pegs upon switch-on (butwhen going from stand by to on, I get an alarming arc in the on/offswitch!! Yikes, what is that? Charging of the new caps?). Also did anaudio mod by uping coupling caps C209 and C211 from 0.01 to 0.1 uF.C209 is behind the front panel, which I had access to from the PTO work,but otherwise this would be a P.I.T.A. to change. Audio is a little better. Inall, fun work on the 390's light weight brother. The 51J is a fine receiverIMHO.---------------------------------------------------------------------------------------------------------Date: Sun, 07 Apr 2002 19:41:31 -0500From: Francesco Ledda <[email protected]>Subject: [R-390] R-392 Dubrow PTO endpoint
All, I am struggling with a Dubrow PTO for my 392. The endpoint is about3 kHz off, and I am at the limit with the coil adjustment. Anysuggestions?-----------------------------------------------------------------------------------------------------------Date: Mon, 8 Apr 2002 05:56:43 -0700 (PDT)From: "Tom M." <[email protected]>Subject: Re: [R-390] R-392 Dubrow PTO endpoint
I've never worked on a Dubrow, but I think it is the same as a Collins. Thisis a very common problem. One author wrote that this mod is not worthdoing, but I can't disagree more. What you'll need to do is remove the cover,find the PTO endpoint adjusting coil, and remove one turn from it, and thenstart over. I find on some PTO's that it is easier to make a new coil than totrim the old (Cosmos in particular), but that will be your call. This willkeep you in business for the news 30 years or so.-----------------------------------------------------------------------------------------------------------From: David Wise <[email protected]>Subject: RE: [R-390] R-392 Dubrow PTO endpointDate: Mon, 8 Apr 2002 10:38:05 -0700
> What you'll need to do is remove the cover, find the PTO endpointadjusting> coil, and remove one turn from it, and then start over. The endpoint isabout 3 >kHz off, and I am at the limit with the coil adjustment.
Unlike most of the tuning slugs I've turned over the years, the R-390A'sPTO slug seems to lose permeability over time. (Usually I see them gain.)

When you tune a PTO down in oscillator frequency, you are changing thecoil from an air-core coil to an iron-core one. With a slug that's lesspermeable than it's supposed to be, this changes the coil inductance lessthan it should, giving you a smaller than expected frequency spread*.
The spread is trimmed by the endpoint coil, which is in series with themain one. Their inductances add. The endpoint coil has the largest effectwhen its inductance is the largest-possible fraction of the total. When isthis? At 3455 (i.e. dial 0), because the main coil is at minimum. (This isanalogous to the more common capacitive tuning scheme, with a trimmerin parallel with the main cap.) The subnormal inductance spread of themain coil dictates a small endpoint inductance. That's why you remove aturn instead of adding one.
It might also be possible to restore the spread by changing the size of thetank capacitor. To get a 3.455:2.455 frequency spread, the inductance hasto change over a 1.9806 ratio (3.455/2.455, squared). For any givenfrequency, a larger capacitance dictates a smaller inductance, which isachieved by translating the slug's 10-turn range in a direction away fromthe coil. With the inductance tending towards smaller values, themax/min ratio would be larger and you'd get a larger frequency spread,which is what you want.
I HAVE NOT TRIED THIS. The straight-line-frequency variable pitch of theR-390* PTO coil may throw my reasoning out the window. But sinceyou're already hacking, it's less intrusive to tack on a cap than to chop acoil. Note that with the main slug in a different relation to its coil, you willhave to do the dreaded linearity calibration. But the slug has alreadychanged (that's why you ran out of endpoint), so you might need toanyway. Take a linearity reading, add a cap, read again.
Note also that the Temperature Coefficient of the added cap is important,but don't freak out. My PTO turned out to pretty far off, which means thatyours might be too. It's not surprising; if a slug changes permeability, whynot TC? Experiment with different TCs until you get satisfactory overallstability.
* It seems to be accepted jargon here to call this "long", but as I mentionedto Tom, it makes me flinch, because I've always compared the electricalspread to a 10-turn mechanical baseline. The electrical spread is "short".If instead you take 1000KC as the baseline, you have to turn the dial"long"er than 10 turns. Say what you like; I'm going to footnote my usagefrom now on--------------------------------------------------------------------------------------------------------------From: David Wise <[email protected]>
Subject: RE: [R-390] 51J-3 PTO AGC Audio FunDate: Mon, 8 Apr 2002 12:13:46 -0700
I hope I didn't come across as the Endpoint Terminology Police.I onlymeant to express a preference, and I understand that everyone's used towhat they're used to. I chuckled at your coinage of "usual direction". If wehad a FAQ, that would fit in just fine. Maybe it should be capitalized, likethe Usual Suspects.
> This radio exhibits endpoint deltas with differing supply voltages. TheOA2> regulator is regulating, so I'm not sure if this is just my radio, or a 51J-3> thing.
It's probably related to oscillator heater temperature. We all know that thefreq can drift if the temperature changes. It never occurred to me that the*spread* could change, but it makes as much sense. That puts the last nailin the coffin of my attempt to linearize PTO warmup by controlling heatercurrent. Speaking of which, I suppose you could rig a filament regulator ala R-390A Solid-State Ballast.--------------------------------------------------------------------------------------------------------From: David Wise <[email protected]>Subject: RE: [R-390] 390A help...Date: Mon, 15 Apr 2002 13:36:38 -0700
<snip>................it doesn't work on the first part of ANY MHz, say about thefirst 80/120 KHz, then when you go over this point it start to work... If weincrease a bit the AC voltage power on the Variac, this receiver starts towork after the first 60 KHz (instead of first 80/120 KHz).........
My main guess is the VFO. First, here is a simple test.This will tell whether it is the VFO, or something else.
1. Put a second shortwave radio with antenna near V701.2. Tune the second radio to 2455.3. Tune the R-390A KC dial to +000. The second radio should "hear" the R-390A's VFO.4. Tune the second radio to 3455.5. Tune the R-390A KC to 000. The second radio should hear the R-390Aagain. If it does not, the troubles definitely the VFO, and you can concentrateon it.
You could also do the Oscillator Injection Voltage tests from the R-390Amanual, section 5.5.3 . If you have found that the VFO is bad, test V701. Ifit's ok, measure the voltages on V701. If RT510 is a 3TF7 as it should be,

V701 heater should be 6.3VAC. Plate should be around 200, and screengrid should be around 60. Let us know how it goes, Dave Wise------------------------------------------------------------------------------------------------------------From: [email protected]: Tue, 16 Apr 2002 17:35:58 EDTSubject: Re: [R-390] 390A help...
I had the same problem...the key is that the fault is on every band. Themost likely cause is the PTO running out of sufficient feedback to maintainoscillation. In my case the problem was cured simply by changing the PTOtube for a newer one with higher emission. Dont use brand new / NOS asthese tend to drift more. Swap with one from the IF strip, and put thenewer bottle in the IF. An alternative problem could be a capacitor in thePTO feedback circuit, but as I dont have the precise circuit schema to handI will leave it to others to pick up on this part. Try the tube first, its 95%odds on that!-----------------------------------------------------------------------------------------------------------Date: Tue, 21 May 2002 12:44:28 -0700 (PDT)From: "KC8OPP Roger S." <[email protected]>Subject: [R-390] PTO....Coming and Going
Hope that one of the learned masses can help with this PTO. I have aCollins 70H-2 PTO in an R-390 (real radio). It stopped working last week,so out of the rack and on the bench it went. New tube and it is back inoperation, so decided to check the end points. With just a bit of tweaking Iwas able to get 3455.247KHz at 000, and 2455.009 at +000. When Ichecked the 100KHz points from 000 to +000 the values were all over theplace, as much as 1.998KHz high but when I checked it starting at +000and going to 000 the freq was never more that 243 Hz out of bounds. Theproblem seems to be connected to the corrector stack and cam followersome how catching and hanging up when going from 000 to +000. Maybe Ishould just sneak up on all of the frequencies from the top down. Anyonehave any words of wisdom? Any cautions about adjusting the correctorstack? What lubricant (if any) should I use on the lead screw andcorrector stack? And finally, how do you get all of that fiberglassinsulation back in the can?!!! Thanks for your comments in advance.Roger-------------------------------------------------------------------------------------------------------------Date: Tue, 21 May 2002 16:39:46 -0400From: Roy Morgan <[email protected]>Subject: Re: [R-390] PTO....Coming and Going
Disassemble your PTO and lubricate it.
>Any cautions about adjusting the corrector stack?

Before you adjust the corrector stack, you should find or make a jig to dothe job. I know of only one person on the planet who has one. That isHoward Mills. You may not have to adjust the corrector stack if you getgood linearity in one direction. You need lubrication first, I think.
> What lubricant (if any) should I use on the lead screw and correctorstack?
See any of the articles that have been written on the topic.. The little rolleris important I suggest you clean that, then add lubrication. MolybdenumDisuphide grease may be best.
> And finally, how do you get all of that fiberglass insulation back in thecan?!!!
Wrap the inner can and the insulation with a piece of plastic, such as anoverhead projector slide, or clear notebook cover from the office supplystore.. squeeze the insulation down flat.. use rubber bands to hold it tight.then slip the cans together and then withdraw the plastic. Slitslengthwise in the plastic may help get it out around the tubes andframework.
Check your OVENS switch is OFF.-------------------------------------------------------------------------------------------------------------From: "Jim Temple" <[email protected]>Date: Sun, 23 Jun 2002 14:29:44 -0400Subject: [R-390] R-390-A fix summary
Recently, the bottom 350khz of ALL bands were found to be dead. Tuningto a point below 350khz produced an abrupt loss of signal. I confirmedthat the symptoms were present above and below 8mhz, and within all theband groups defined from the coil and RF deck positions. The likely suspectseemed to be the PTO, so I put the frequency counter on the output andconfirmed that the frequency abruptly disappeared below about 350khz. Ireplaced the PTO tube, the symptoms disappeared, and the unit now worksperfectly. Of course I will recheck the alignment after the tube burns in forawhile. For the newbies on the list, I hope this might be helpful in thefuture.------------------------------------------------------------------------------------------------------------From: [email protected]: Sun, 23 Jun 2002 11:44:30 -0700Subject: [R-390] Re: R-390-A fix summary
Hi Jim, Thanks for your post on this topic. I'm curious about why youreplaced the tube. Did you test the PTO tube and find it bad? Or does it testgood but fail in the receiver (I hate those kinds of problems)? I ask because
I have a URM25F signal generator that behaves similar to your 390. n--------------------------------------------------------------------------------------------------------------From: "Jim Temple" <[email protected]>Date: Sun, 23 Jun 2002 15:39:39 -0400Subject: [R-390] Re: R-390-A fix summary
I received a couple of very insightful questions.
1. Did I test the tube prior to replacement?
No, but I just tested the first tube on my Hickok 600A. The chartrecommended 3300Gm. The first tube measured 2300Gm. Thereplacement tube measured well above 3300Gm.
2. Did I try to adjust Z-702 prior to replacement? (Suggesting that Z-702will shift the effective distribution of the tube output in the center of theproper range, if it was originally out of range).
No I did not attempt to adjust Z-702. Perhaps the tube did not actuallyneed replacing if the Z-702 range was off center?? I intended, but forgot,to ask the list what the purpose of Z-702 is, since I can not find anexplanation in any of the pertinent manuals.
Question... The above response to my original post suggests that Z-702shifts the effective range of the PTO 5749 tube to a position that is morecentered, if it was off center in the first place. Is this a correct assumptionof the purpose of Z-702??---------------------------------------------------------------------------------------------------------From: "scott" <[email protected]>Date: Mon, 26 Aug 2002 20:33:39 -0400Subject: [R-390] PTO
I dropped the front panel and set the endpoints through the access hole towithin 50 HZ. The linearity is not so close. It is 530 Hz off at 250 on theKHZ dial, 600 off at 500 on the KHZ dial and 60 HZ off at 750 Khz on thedial. Is it worth messing with the linearity?? or is this pretty good. It is aDubrow PTO.------------------------------------------------------------------------------------------------------------From: "Al Parker" <[email protected]>Subject: Re: [R-390] PTODate: Mon, 26 Aug 2002 21:10:34 -0400
If I got one that close, I sure wouldn't mess with the linearity stuff, I'dprobably make it worse, and get real frustrated in the process. I think oneof the guys I pal with at Shelby 'fest, who's into 390's real deep, had tried it
once upon a time, I don't remember now what he said about it. I've beeninto a coupla the smaller,R-388 PTO's, I wouldn't try it there. I know there's a coupla systems.--------------------------------------------------------------------------------------------------------Date: Sat, 31 Aug 2002 15:48:59 +0000From: Philip B Atchley <[email protected]>Subject: [R-390] Collins PTO Set.
After advice from a couple folks I decided to leave the Collins PTO in this67EAC that I'm fixing up. I was a little concerned about it because the endpoint was so far off (over 6kHz). However, it came in nicely. The hardestpart of the entire job was getting that cap screw back into place! It keptwanting to land "upside down" and there wasn't enough room to hold itwith my small seizers while starting it.
1. End point adjusted to less than 50Hz error end to end (I had a longskinny screwdriver that let me adjust it without removing front panel).
2. Linearity "worst case" is about 600Hz in the 600kHz area. I think thebook says it should be under 500Hz. IS THIS TYPICAL FOR A COLLINSPTO? I can (will have to) live with it in any case.
Next step is to "Select in test" Crystals between the two sets to try to get a"closest match" band to band(Don said I could). THEN I'll start on the slugrack alignment!--------------------------------------------------------------------------------------------------------------From: [email protected]: Sat, 31 Aug 2002 13:12:47 EDTSubject: Re: [R-390] Collins PTO Set.
> 2. Linearity "worst case" is about 600Hz in the 600kHz area. I think>the book says it should be under 500Hz. IS THIS TYPICAL FOR ACOLLINS>PTO? I can (will have to) live with it in any case. >>
Specifications say 300 hz........ but, close enough I'd say. If it is 50 hz end toend, the problem is more than likely a x-tal Phil.-------------------------------------------------------------------------------------------------------------From: [email protected]: Sun, 1 Sep 2002 10:54:21 EDTSubject: [R-390] R-390 PTO calibration
The recent mail on adjusting end points reminded me of the specificationsI've got, which give some insight into how the radio should perform: Theoriginal specs (for the R-390 circa August 1950) called for a readout

accuracy of 500 cycles over the whole tuning range, and 200 cps aftercalibration at the nearest 100 Kc point. This was astounding for that day,and apparently too ambitious. A later spec, presumably done after theyhad built a few radios, called for 300 cps accuracy after calibration at thenearest 100 Kc point. Interestingly, the end points were allowed to be -1400 cps or +200 cps at the top of the readout, after setting the bottom atzero. Also, a separate tolerance for band change (4 Kc) was included. So ifyou're getting linearity of a few hundred cps across the entire range, you'redoing good. I don't know how well the units with the calibrator stackshold up. I did adjust one of the Cosmos units to be good to 300 cps over theentire range. I recall I had to allow the end points to be off in order to getno more than 300 cps error over all 42 measurements at 25 Kc spacing.Ed-------------------------------------------------------------------------------------------------------------Date: Wed, 4 Sep 2002 18:18:52 +0000From: Philip B Atchley <[email protected]>Subject: [R-390] Cosmos PTO question
Well, I still have Dons R-390A on the test bench being worked on. This isthe receiver that has the Cosmos PTO. As it turns out this sucker has theendpoint out by about 11kHz, and I thought the 6kHz on my Collins PTOwas terrible before I corrected it! Anyway, I read through the Cosmossetup that I downloaded and it looks like a REAL pain in the rump to align.I 'thought' that there might be an endpoint adjustment separate from thelinearity adjustments and so removed the cap screw. Apparently this isNOT the case. But I'll ask anyway. QUESTION: Is there a way to set up theendpoints separate from the linearity adjustments?-----------------------------------------------------------------------------------------------------------Date: Wed, 04 Sep 2002 17:33:38 -0400From: Roy Morgan <[email protected]>Subject: Re: [R-390] Cosmos PTO question
Below is an earlier post from Tom Marcotte which indicates that changingthe turns on the corrector inductor, or making a new inductor is the thingto do. I suspect that getting the thing out of the case and locating somewire the right size is the hardest part of this procedure. (Apparently thecorrector disk runs the slug of the corrector inductor in and out as thething goes through its range.)
Tom may well have a response.
If you are loathe to take the thing apart, email me. I might be talked intoworking on it for you. Roy Who recently got an unused Cosmos.--------------------------------------------------------------------------------------------------------------Date: Wed, 4 Sep 2002 14:39:06 -0700 (PDT)

From: "Tom M." <[email protected]>Subject: Re: [R-390] Cosmos PTO question
Yes, the Cosmos has two caps, one for linearity and one for endpoint.When looking at the front of the PTO, the cap to the left gives access tolinearity. Behind the transformer you'll find the cap on the right. Underthis cap will be a screw that adjusts endpoint. You do this one first,however 11 kcs will require removal of a turn from the endpointadjustment coil. This will require opening of the PTO to get at the coil. Lasttime I did this I just made a new coil with one less turn and replaced the oldone with the new. After removing a turn, the PTO should have new life andyou'll be able to get 1000 kcs in ten turns. The thing will drift in apredictable direction (I'll avoid the use of words like "long" and "short"because this list has long and short word police, equally rabid about "theirword" :-)
What I do is give the thing about 1000.5 to 1001 kcs in ten turns to avoidhaving to go back in there within the next 12 months. One extra kcsshould last you a few years, afterwhich the thing should be right on themoney (like a stopped watch I guess!).
Linearity adjustment is a whole other project. You can pull down someinstructions from Chuck Rippel's website.-------------------------------------------------------------------------------------------------------------Date: Wed, 04 Sep 2002 16:12:37 -0700From: Dan Merz <[email protected]>Subject: Re: [R-390] Cosmos PTO question
Phil, I did the "remove a turn" thing on my Cosmos pto per the descriptionby Tom. Getting into the unit was pretty straightforward after looking atthe nice pics that were posted by Jim Miller N4BE of the innards. Iremoved 1 turn and brought a 10 khz error down to within 1 or 2 khz,which was good enough for me. I haven't had any problems with the pto,though I haven't really checked it carefully since, Dan.------------------------------------------------------------------------------------------------------------Date: Thu, 5 Sep 2002 00:59:44 +0000From: Philip B Atchley <[email protected]>Subject: [R-390] Thanks all (Cosmos PTO.
A big thank you to all who had suggestions for the Cosmos setup. There isa lot of knowledge on this list.------------------------------------------------------------------------------------------------------------Date: Thu, 5 Sep 2002 00:57:23 +0000From: Philip B Atchley <[email protected]>Subject: [R-390] I'm a lucky fellow! (Cosmos PTO)

Earlier I posted a question about a Cosmos PTO that is in a receiver I'mfixing up for another ham (couldn't find the end point screw). Any-hoo....After posting the question and before any answers came in I did finallyfind a reference to said adjustment. These old eyes aren't what they used tobe and I missed it when I examined the PTO (and the cap screw wasmissing too). This PTO was over 11kHz "wide" and general consensus wasthat I'd probably have to remove a turn of wire. Having to "remove" thePTO to get to the end point adjustment with anything that I had (Jewelersscrewdriver) I decided to give it a shot anyway. I turned the screw 3/4turn anticlockwise (same direction I had to turn the one on my CollinsPTO). That made things worse, so I pulled the PTO, gave the screw about 23/4 turns clockwise, slapped the unit in and it's GOOD TO GO!! Yes,linearity could be a little better but "what the hey"?
Here are the readings I got when I "Zeroed" the PTO at 10000 kHz.
10000.010099.410200.510300.010400.010500.210600.410700.510800.410900.510000.4
Needless to say I didn't pull it out again. As I said, I'M A LUCKY FELLOW--------------------------------------------------------------------------------------------------------------Date: Mon, 4 Nov 2002 05:08:00 -0800 (PST)From: "Tom M." <[email protected]>Subject: [R-390] PTO Doesn't "O"
The PTO on my 51J-3 has gone kaput. I've checked the tubes, its gettingfilament and good B+ from the OA2 but still no output. I get nothing on thefreq counter at the PTO output where I ustacould. The radio makes all theproper noises other than those you would associate with PTO operation(like zero beat with cal). Before I dive into the innards, does anyone has alist of common failures in these PTO's?------------------------------------------------------------------------------------------------------------------------------------From: "Dan Martin" <[email protected]>Subject: Re: [R-390] PTO Doesn't "O"Date: Mon, 4 Nov 2002 19:20:31 -0500

Tom: I seem to remember Howard Mills >always< preemptively replacessome component (a cap or two?) inside J-series PTO's whenever he doeshis famous rebuilds, likely to avoid the very thing that has happened toyou. I cannot recall details but I've cc'd him on this message in hopes hemight respond.-------------------------------------------------------------------------------------------------------------Date: Sun, 17 Nov 2002 14:33:09 -0800 (PST)From: "Tom M." <[email protected]>Subject: [R-390] More 51J-3 PTO Fun
Gentlemen? Last week I reported that my PTO doesn't "O." I found that thePTO was missing its bypass caps (I went in to replace them and they weregone)." The unit actually had a crude solder job done on the cover so Ismelled a rat. When it worked, it also had the freq vary with operatingvoltage, so I figured a kluge was in there somewhere. Still not sure what iswrong with it, but since it acted funny all along and now did not work atall, I went to the parts bin for a spare.
The spare had a s.n. of > 9000, and the circuit cover was screwed downinstead of soldered down, a great improvement. I went into the spare andreplaced the bypass caps (which were set up differently than theschematic, not sure why) and then powered it up. The endpoint was 15 kcslong (or is it short?), anyway, in the usual direction.
I tried the one turn removal trick and this did not do the job. Still 9 Kcs outFor the first time I had to remove two turns to bring it in. This worked, butof course the adjustment range is very skinny (since the adjustment coil isalmost gone). Anyway, the PTO is in the oven right now getting HurricaneLili baked out of it (eat cereal for supper, this is important!).
This is all very difficult to explain to the neighbor why I'm doing this for aradio to listen to in the shop.------------------------------------------------------------------------------------------------------------Date: Thu, 26 Dec 2002 22:27:00 -0500From: "Jim M." <[email protected]>Subject: [R-390] Adjusting Linearity Stack Collins PTO
I am looking for instructions for adjusting the linearity stack in a CollinsPTO. I have the PTO in an external jog now with a frequency counter and acalibrated scale and have the end points pretty close, but there is still 1-2khz error midpoint. I suspect the stack needs adjusting. It seems to beconnected to a large screw that is accessible from the rear of the PTO (afteropening it. Any info out there?---------------------------------------------------------------------------------------------------------From: "Jerry Kincade" <[email protected]>

Subject: Re: [R-390] Adjusting Linearity Stack Collins PTODate: Fri, 27 Dec 2002 06:16:22 -0600
Start here http://www.r390a.com/ and branch out from there. More infothan most brains can absorb is available on this subject, including in thelist archives.--------------------------------------------------------------------------------------------------------------Subject: RE: [R-390] Adjusting Linearity Stack Collins PTODate: Fri, 27 Dec 2002 12:09:46 -0800From: "David Wise" <[email protected]>
I've done one. Start by taking data points, expected vs actual every 25kHz.If you have enough visual acuity (or a good lighted magnifier), pick astarting point that puts the rider exactly on top of one stack element (I callthem "chips"). Turn these data points into a graph of actual freq divided byexpected freq. If you have the endpoints set, the graph will intersect 1.0 ateach end. Ideally, it will be a horizontal line. It won't be!
However, if it's a smooth curve, you may be able to avoid the tedium ofadjusting the stack. Trimming the shunt capacitors will bow the curve upor down. Sorry, I can't remember which is which, just try it both ways.Each time, you'll have to redo the endpoints, but for the first few tries theonly other data you need will be at midpoint. When it's close to 1.0, do afull run to see the residual error. If it's small enough, smile! Then get readyto fix up the temperature coefficient you changed when you added orsubtracted capacitance. By the way, the originals may not be all that goodtoday even if they were spot-on in 1954. It's possible to calculate therequired tempco based on the percent change in capacitance you'veperpetrated, but I found that it doesn't match experimental results verywell. Cut and try. Don't forget that low VFO tempco isn't the goal, it's lowoverall tempco. Your crystals have tempcos too.
All this doesn't matter much if you're one of those hardheads who run24x7, but if you aren't, warmup drift is just another annoyance you can dosomething about. I wound up removing the small caps entirely andsubstituting a pair of trimmers, one NPO, the other N750. By adjustingthem suitably, you can get any capacitance at any tempco. (Withinphysical possibility, of course. Darn language lawyers!) To check systemtempco, I focused a tv camera on a frequency meter, and fed the video to aVCR with a six-hour tape. After the run, I'd fast-forward through the tapewriting down readings. Frequent readings at the beginning, spacingfurther and further apart as the radio stabilized. I got it down to around100Hz total (down from around 800Hz), but I suspect that this could onlybe maintained if you ran the radio on a schedule. If you leave it for a weekor so, it's off until it's been run a few times again.

Assuming you've read this far :-) the actual stack adjustment is simple inconcept but IMHO one of those skills you have to apprentice for. Thenuances can't be described. The basic motion is to loosen the hold-downscrew which compresses the stack. With the pressure released, the chipscan be slid up and down. You move the appropriate chips what you thinkare the appropriate amounts, close her up, and take your 40 data pointsagain. Adjacent chips interact, and there's a mechanical limit to theamount of change possible between them. If you set a couple on a steepslope or try to move one without moving the others, you'll see what I mean.It reminds me a lot of adjusting the delay line on a 53x-54x seriesTektronix oscilloscope.--------------------------------------------------------------------------------------------------------------Date: Fri, 27 Dec 2002 18:00:45 -0500From: Dave or Debbie Metz <[email protected]>Subject: Re: [R-390] Adjusting Linearity Stack Collins PTO
Right you are on the difference between Collins and Cosmos.
A long time ago, I tried it and had limited success on a PTO that was out 6-8 kc with a procedure that went something like this:
Take a junker PTO and cut a slit in the inner can above the camstack abouta 1/4" wide to allow you to insert a piece of insulated something to push onthe cam stack just above the roller. Then, adjust the tightening screw sothat you can move the stack. First, you need to find the worst offset fromend to end such that you are only going to push the stack down to eitherincrease or decrease the freq. ( could never quite figure out the way to pullthe stack up to go the opposite direction in frequency.) Then mount the ptointo the receiver with only the inner slotted can and push down at each25khz increment to either raise (or lower, I cannot remember). the freq tothe desired freq. I only used the inner can with the slit. This creates a bit ofa problem because you have no rear mount so you have to brace itsomehow. You should "T" in a counter to measure the freq with a counter.Remembering the PTO goes from 2.455--3.455 inversely as the freq isacending you need to set up a chart to know what is the desired PTO freq @each 25khz indicated.
I am sorry for the lack of detail but it's been a few years and I forgot thedetails. I am sure there must be a better way. However, I was not able tofigure a way to adjust the camstack short of pulling the PTO hundreds oftimes with a trial and error method. I seriously doubt that Collins didanything trial and error. I am so in awe of the engineering of this setup.What a sophisticated way to linearize a very delicate oscillator.

I know that there has been a lot of talk about the PTO manufacturers hereon the list but a long time ago I had a conversation with Paul Zechinno atMil Spec Communications, (Not Rick Mish) and he was less thancomplimentary on Cosmos compared to the Collins PTO's. He had years ofexperience with these and felt that the Cosmos was probably fine when itleft the factory but would not weather the years like the Collins units inthe non A 390's.
However, bottom line: Don't do it! If you have a PTO within one or twoKC, you have NO problem. It never was perfect and I doubt seriously thatyou can achieve anything better.--------------------------------------------------------------------------------------------------------Date: Fri, 27 Dec 2002 23:05:11 -0500From: "Jim M." <[email protected]>Subject: Re: [R-390] Adjusting Linearity Stack Collins PTO
Thanks much to all for the discussion of corrector stack adjustment on theCollins PTO. It sounds formidable, but worth a try. I wonder what wouldbe the effect of just leaving the can off the PTO during adjustment. Does theproximity of the can change the adjustment enough to worry about? Ihave linearized a Cosmos PTO quite nicely before...it's adjustment conceptis a good one, it can all be done with the unit sealed, and it comes out verylinear indeed. Cosmos seems to have taken a bad rap, but it does work wellin my opinion. This Collins PTO looks like a chore, but I want to keep mylatest "Collins" 390a "all Collins", so I will go for it and see what happens!---------------------------------------------------------------------------------------------------------From: "Bill Smith" <[email protected]>Subject: Re: [R-390] Adjusting Linearity Stack Collins PTODate: Sat, 28 Dec 2002 12:09:31 -0800
Has anyone tried this?
1. Set up a spread sheet with a list of frequency entries every 50 kHz. (nominal) from 3.455-2.455 mHz
2. Rotate the PTO from one frequency end to the other. At mechanical 50 kHz intervals, using a counter, document the measured PTOfrequency.
3. Remove the cover.
4. Repeat step 2, above with the cover off.
5. Subtract the frequency differences steps 2 and 4 for each measurementin the list. The result should be the error due to capacitance contributed bythe cover if this scheme is to have any merit.

6. Add (subtract) each result obtained in step 5 to each frequency in step This list becomes the calibration standard for the PTO.
7. Calibrate (adjust) the PTO at each mechanical 50kHz stop to thefrequencies obtained in step This is a predicted error + frequency so thatwhen the cover is replaced, the error will be compensated by the cover.
8. Replace the cover. If the calculated error values are correct, the PTOshould now be linear. Hopefully you won't have to go through a secondcalibration cycle.--------------------------------------------------------------------------------------------------------------Date: Sat, 28 Dec 2002 16:00:28 -0500From: Bob Camp <[email protected]>Subject: Re: [R-390] Adjusting Linearity Stack Collins PTO
Having spent most of the last 20 years doing this sort of thing there is oneother item to worry about. The inductance of the coil will change when youput the cover on it. It doesn't change a lot but it will change enough tonotice. I doubt that it will have a major affect but you will see it throwthings off a bit. The bottom line is that there is no easy way to set up aPTO. The people who built the radios still remembered that as being theworst job on the entire line 20 years after the last radio shipped .....----------------------------------------------------------------------------------------------------------Date: Sat, 28 Dec 2002 16:53:31 -0500From: "Jim M." <[email protected]>Subject: Re: [R-390] Adjusting Linearity Stack Collins PTO
I like this spreadsheet idea! I already have an Excel spreadsheet fromwhen I did my Cosmos PTO last year. It shows the expected frequencyoutput at each quarter revolution. Think I will do this for the Collins, onceI muster enough umph to get started. I also have a wooden test jig I madewhere the PTO mounts and a large calibrated wheel (a circular scale from aPDF file I downloaded from another site). This is how I know how much itis off. I will try to take some digital pics. and post them as I go. Thanks toall the replies here I think I can get started. We'll see how it goes. Staytuned. 73 Jim N4BE-------------------------------------------------------------------------------------------------------------From: [email protected]: Mon, 30 Dec 2002 10:18:47 ESTSubject: [R-390] Cosmos PTO
That last thread on PTOs got me going on mine. A couple of years ago Ireplaced the Progressitron with a rebuilt Cosmos, and aligned the Cosmosat that time. Over the years it had been gradually shifting, to where some
points were a Kc off. I pulled the radio and went through the alignmentagain and was very happy with the results. I haven't set up a jig foralignment, so I use a small screwdriver to adjust the 42 little screws withthe PTO in place. I found this time that I could set each 25 Kc point towithin 200 cycles, and that they didn't interact significantly. I set the endpoints, then did the fine adjustment. The result is that I got the PTO totrack to 2-300 cycles over the entire range. I just need to calibrate oncefor each band now. The ability to "easily" align the PTO is a significantadvantage for the Cosmos PTO. It took about 5 hours to do the adjustment,with most of the time being spent getting the little screwdriver into theappropriate screw slot!------------------------------------------------------------------------------------------------------------Date: Mon, 30 Dec 2002 08:22:57 -0800 (PST)From: "Tom M." <[email protected]>Subject: Re: [R-390] Cosmos PTO
I find that the most important thing to do to avoid interaction between thepoints is to insure that the screw being adjusted is directly above thecoil/plunger. This will not necessarily be at an even 25kcs point (unlessyou start from scratch and make it so with numerous iterations).---------------------------------------------------------------------------------------------------------From: "Tom Warren" <[email protected]>Date: Thu, 2 Jan 2003 07:12:10 -0500Subject: [R-390] Field Change No. 7, R390A
Anybody got clues to the intended and non-intended effects of Field ChangeNo. 7 to the R390A? This is the change where R702 (screen resistor onthe PTO) and R210 (screen resistor on the 1st crystal oscillator) arechanged from 56K to 220K, presumably to reduce radiation to the outsideworld (so the enemy can't listen for your PTO freq or your 1st oscillatorfreq and then bomb in that direction). My guess is that the firstconsequence is to reduce the output level of each of those oscillators.Secondly, there may be some harmonic reduction from each of thoseoscillators. However, what else happens? That is, is the sensitivity of thereceiver or the intermod performance reduced by the modifications? Alsois the birdy response affected by the modifications (e.g., less harmonicoutput from those oscillators leads to fewer internal mixer products). Anyother effects that folks have definitely found?
My reason for asking is that I'm working on a Motorola PTO with the 56Kscreen resistor and a later Cosmos PTO with the 220K screen resistor andwondering if I ought not to "re-convert" the Cosmos PTO to have a 56Kscreen resistor. R701, R702, and R703 are out of spec on the Cosmosanyhow, so I will probably change them out, but if a better choice for R702is 56K considering that I'm not worried about the enemy direction findingon my oscillator outputs, then maybe that's what I ought to do. For Tom

Bridgers and Al Parker, yes, the Motorola PTO is from the Charlie Taylor(hello Charlie, if you're out there) 390A. AND I'VE GOT THE CHARLIER390A MOSTLY WORKING. HOORAY AFTER ABOUT TWO YEARS.----------------------------------------------------------------------------------------Date: Thu, 02 Jan 2003 10:26:39 -0500From: "Jim M." <[email protected]>Subject: Re: [R-390] Field Change No. 7, R390A
I installed the mod. to my R-390a last year to see what would happen. Ifound that it decreased the sensitivity noticeably. By that I mean that a 40dB test signal now read 30 dB on the carrier meter. Not an exact test but itwas enough to convince me to remove the mod. I did not look at the moreesoteric effects such as harmonics or spurs. I like a "hot" receiver. If itwere me, I would remove the mod and go back to the original values. JimN4BE------------------------------------------------------------------------------------------------------------Date: Thu, 02 Jan 2003 11:39:46 -0500From: Bob Camp <[email protected]>Subject: Re: [R-390] Field Change No. 7, R390A
Did you try adjusting the IF gain after you put in the mod ? On most 390'sthe IF gain adjust has far more range than you would ever need. The mostsensitive point on the IF gain is not the full gain position on the pot. Ittook me quite a while to prove that to myself ....-------------------------------------------------------------------------------------------------------------Subject: RE: [R-390] Field Change No. 7, R390ADate: Thu, 2 Jan 2003 09:49:19 -0800From: "David Wise" <[email protected]>
I also installed FC7, and like Jim found that it decreased the sensitivity,even after adjustment of the IF gain for maximum S/N. I removed it. If Iacquired a radio or module that had it, I would remove it. We've neverfound the original documentation explaining the reason for FC7. Aftersome thought about the target ("radios in supplemental spaces"), I believeit was meant for less-important R-390As so they wouldn't interfere withmore-important ones. It obviously does not apply :-)------------------------------------------------------------------------------------------------------------From: "Al Parker" <[email protected]>Subject: Re: [R-390] Field Change No. 7, R390ADate: Thu, 2 Jan 2003 13:13:07 -0500
Well, I'm glad it's "mostly working." I know you've been at it for a long time.My Motorola 390A is also mostly working, sitting up on end on the bench,being listened to some, awaiting aome real attention. I guess, beingMotorola, the PTO probably doesn't have FC7, a good thing, from others'comments. Will be waiting for some more pix of yours, completed, at
Shelby. I've been working on SP-600's lately, just finished one for a friend,got another for myself in payment.-------------------------------------------------------------------------------------------------------------Date: Thu, 02 Jan 2003 14:46:30 -0500From: "Jim M." <[email protected]>Subject: Re: [R-390] Field Change No. 7, R390A
"Radios in supplemental spaces" is probably spook-speak for classifiedlistening posts. They (whoever "they" are) would want to reduce any localoscillator or PTO signal emissions that could be intercepted by an enemyin order to deduce the frequencies being monitored. I suspect the screenresistor changes helped reduce oscillator output. Alternatively, it was toreduce their output to prevent interference with other receivers.-------------------------------------------------------------------------------------------------------Date: Thu, 02 Jan 2003 17:35:16 -0500From: Bob Camp <[email protected]>Subject: Re: [R-390] Field Change No. 7, R390A
On the last go around on this one the "supplemental spaces" came out tooperating next to VHF / UHF radios. Apparently the R-390's would take offand nock out the WSC-3's or some such thing.-------------------------------------------------------------------------------------------------------------From: "Larry and Jody Cogan" <[email protected]>Date: Mon, 6 Jan 2003 18:48:09 -0500Subject: [R-390] Installing replacement PTO
I have just acquired a replacement Cosmos PTO. I have no real informationabout it, other than it "was removed from a working receiver". Is there amechanical way to determine if it is set at (or near) 2455 khz? Theoldham coupler on the PTO was "unrestrained", i.e., not taped to preventrotation, etc.------------------------------------------------------------------------------------------------------------From: "polaraligned" <[email protected]>Subject: Re: [R-390] Installing replacement PTODate: Mon, 6 Jan 2003 19:06:07 -0500
Forget it. You are going to have to put it in the radio and set it. Even if Iset my PTO at a certain value and shipped it to you it would not be alignedto your set. It is very easy to do with a frequency counter, but in a bind youcan set the PTO by shooting for maximum output when tuned to a localstation. See the Y2K manual for setup instructions.------------------------------------------------------------------------------------------------------------Date: Mon, 6 Jan 2003 16:15:54 -0800 (PST)From: "Tom M." <[email protected]>Subject: Re: [R-390] Installing replacement PTO

You are wise to be cautious. The PTO can be damaged if it installedimproperly. The PTO has a end to end range of about 16 turns if I recall.The "ten turn" stop has a range of 10.7 turns. So as long as you set the PTOup reasonably close to the logical starting point, +/- one turn you will besafe. If you have another receiver you can listen for the PTO signal.
Hookup the electrical connector and turn on your 390A. Set your secondreceiver to 3455 kcs (BFO ON) and listen for your PTO signal as you turnthe PTO dial a little left or right. 3455 will be about three turns clockwisefrom the counterclockwise stop (don't be too rough with the stops). 3455corresponds to the low end of the range, 2455 is the high end (it goesdown as you tuneup, in other words). Tune around and listen and you should hear thesignal. If you don't hear it you can rig a "transmit antenna" onto the MBconnector on the PTO for more signal.
Of course you could read it with a freq counter if you have one. Once youhave the PTO set to 3455, set the 390A dial to 000 (i.e. the low end) andhook up your PTO as best the coupler allows you to.
You can then tune to a local AM station of known frequency and check tomake sure it is set up properly. If you don't want to mess with the secondreceiver, you can use the local AM station but you'd need to be reasonablyclose in the initial setup so that the RF deck is cooperating with the PTO.Again, set it up about three turns from the counterclockwise stop (so whenyou tune up you know you won't be hitting a stop in the PTO), install it inthe 390A with the dial at 000, and then check it all against a local AMer.--------------------------------------------------------------------------------------------------------Date: Tue, 07 Jan 2003 08:09:40 -0500From: Jim Brannigan <[email protected]>Subject: [R-390] PTO endpoints
My COSMOS PTO endpoints were long by 6.5 Kc. I attempted to reset them"by the book". It quickly became an exercise in futility. Trying to thread atuning tool through the gears and into the hole behind the coil can wasnot going to work....
Finally, I pulled the PTO, set up a quick jig and connected it to a frequencycounter. Many iterations later I got the endpoints down to 1.5 Kc. long. Imay have to live with the 1.5 Kc. for a while. The top of the core seems tobe broken. (I really can't get a good look at it through the front) The "junkebox" has some cores that may fit the coil, but they are of unknownpermeability. Has anyone else run into this problem?--------------------------------------------------------------------------------------------------------------From: "Bill Riches" <[email protected]>

Subject: RE: [R-390] PTO endpointsDate: Tue, 7 Jan 2003 09:31:59 -0500
> I may have to live with the 1.5 Kc. for a while. The top of the core seemsto be broken. ......
Hi Jim - If you are adventurous you can remove one turn or less from thecoil - (the small one!!!) that will reduce the tuning range. I believe theprocedure is on Chuck's website.-----------------------------------------------------------------------------------------------------------Date: Tue, 07 Jan 2003 10:19:26 -0500From: "Jim M." <[email protected]>Subject: Re: [R-390] PTO endpoints
I just repaired a end point adj coil with similar broken screw slot. Open thePTO and remove the coil (help to the front by two screws). Use a Dremmelwith the smallest cutoff disc available to cut a new "slot" in the end of thetuning shaft, then clip off the remaining old burr. At the same time youcan remove a turn if you need to. Chances are someone tried to crank thecoil all the way in, but couldn't get enough adjustment range, and broke thescrewdriver slot.------------------------------------------------------------------------------------------------------------Date: Tue, 07 Jan 2003 08:05:32 -0800From: Dan Merz <[email protected]>Subject: Re: [R-390] PTO endpoints
Jim, I did about the same things you've done when I got my 390a andCosmos. I ended up opening the PTO and taking a turn off the coil - minewas about 8 khz long before I opened it. I don't know if I would have doneit for 1.5 khz. George Rancourt convinced me to go ahead and dig into thepto and I never regretted doing it. This gadget is worth exploring if that'syour cup of tea. There were detailed photos online of the insides of the unitwhich were very helpful. It's worked well for me since, Dan.------------------------------------------------------------------------------------------------------------Date: Tue, 07 Jan 2003 11:12:34 -0500From: Jim Brannigan <[email protected]>Subject: Re: [R-390] PTO endpoints
Interesting idea. I just hope that the slug isn't fractured----------------------------------------------------------------------------------------------------------Subject: RE: [R-390] PTO endpointsDate: Tue, 7 Jan 2003 12:58:07 -0800From: "David Wise" <[email protected]>
Since it's the endpoint coil and not the main one, linearity isn't important.You can use any slug that fits, and add or subtract turns to get the right

adjustment range. You might even get away with this on the compensatorcoil, if it were damaged.---------------------------------------------------------------------------------------------------------Date: Tue, 07 Jan 2003 17:10:46 -0500From: Jim Brannigan <[email protected]>Subject: [R-390] RE: PTO endpoints
Thanks Roy, The notes will be helpful. I've repaired S-line PTO's, so I'mover the nervous part. Dave Wise's note on the slug is good news. The PTOwill go on the back burner for now. The 3rd mixer on my deck waschanged to a 6BE6, I'm going to put the 6C4 back in.----------------------------------------------------------------------------------------------------------From: [email protected]: Tue, 7 Jan 2003 18:04:48 ESTSubject: Re: [R-390] PTO endpoints
I agree that adjusting the PTO endpoint trimmer coil is a pain in the neckusing the manual procedure. There is an easier way to make theadjustment with the VFO in place and without removing the receiver frontpanel. (1) Remove the VFO subchassis. (2) Remove the screw cap coveringthe end point adjustment. (3) Reinstall the VFO subchassis. (4) With theentire receiver upside down on the bench, rest your longest, thinnestscrewdriver against the outer edge of the gearbox plate and poke itthrough the access port from which you removed the screw. (Don't eventry to thread it through the holes cut in the gearbox plates for thispurpose.) It should just make it to the end of the slug screw. (5) Make theendpoint adjustment. (6) Remove the VFO subchassis. (7) Replace the capcovering the end point adjustment access. (8) Replace the VFOsubassembly in the receiver. In making the adjustment I use a 3/16"screwdriver 8" long sold by True Value Hardware under the MasterMechanic label bearing stock nos 127-399 TS322. (If you have exceptionaldexterity -- or luck -- and some means of holding the plug onto the end ofthe screwdriver, it may be possible to remove and replace the cover plugwhile leaving the VFO subchassis in situ, thus eliminating steps 1, 3 6 and8 above.)----------------------------------------------------------------------------------------------------------From: [email protected]: Tue, 7 Jan 2003 18:10:06 ESTSubject: [R-390] [R390] PTO Endpoints
There is an error in my last note, the spec on the screwdriver is 3/32 x 8inches NOT 3/16 x 8"-------------------------------------------------------------------------------------------------------Date: Tue, 07 Jan 2003 18:46:57 -0500From: Jim Brannigan <[email protected]>Subject: Re: [R-390] PTO endpoints

It was a lot easier to pull the VFO, and attach a frequency counter. I putpencil marks on the Oldham coupler and PTO body as reference points.wrote down the low frequency, counted ten turns, wrote down the highfrequency, count down ten turns, set to marks, adjust coil. Repeat andadjust as necessary. When I was done, I set the counter dial to thecalculated PTO frequency andreassembled. Final calibration can be done with the "ZERO SET"----------------------------------------------------------------------------------------------------------Subject: RE: [R-390] PTO endpointsDate: Tue, 7 Jan 2003 16:23:38 -0800From: "David Wise" <[email protected]>
I can do the endpoints in situ, using a *very* short screwdriver which isactually the broken-off end of an old metal-tipped diddle stick. It was abouttwo inches long and 1/4 inch diameter. The length has to be just right.Too long and you can't get it into position, too short and you can't grip it toturn. There's not much leverage, so it's important that it has good grip andyou have squeaky-clean, average- or small-sized fingers.
1. Tip the receiver onto its back.
2. Maneuver the screwdriver through the holes.
3. Loosen the cover screw. Use pliers on the screwdriver for leverage ifnecessary. You can also come in at an angle with a small, long, skinny screwdriver, but again,torque is limited.
4. Finagle it out of the way using another small, skinny screwdriver.
5. Adjust.
6. Fiddle the cover screw back into position.
7. Tighten. Yer done.--------------------------------------------------------------------------------------------------------------Date: Sun, 26 Jan 2003 17:30:26 +0100From: "Clemens S.Ostergaard" <[email protected]>Subject: [R-390] PTO 70H-12 problem
A "new" EAC R-390A being renovated (recapped, etc.) has turned out tohave a problem preventing calibration. The PTO variation is insufficient,with the end-point adjustment screw all CCW it covers 977.13 kcs, all CW983.55 kcs. A friend of mine, who has the sufficient skill and learning, took

it apart and it proves to have been tampered with: windings off theadjustment coil and the linearity-coil also seems to have been maltreated.White salt-like deposit all over the insides, but this is perhaps not so grave.I have (large) digital pictures if anyone wants. Mechanically it seems OKand it was functional, though sometimes with a kind of slight wobblingwhen tuning through a heterodyne.
Here in Europe, spares are not thick on the ground, so I reckon my bestchance is to ask the list if anyone has a spare PTO to sell. Payment inunmarked dollarbills, hi. Alternatively, does anyone havepositive/negative experiences with PTO's from Fair Radio?
And while I am asking questions: why not put either the training manualTM-4000 or the STP called "Troubleshoot the radio receiver R390A/URRto the faulty component" on the phenomenal R390A website?
Best, (and hope to hear from you)Clemens S.OstergaardAarhus, Denmark-----------------------------------------------------------------------------------------------------------From: "Steve Hobensack" <[email protected]>Subject: Re: [R-390] PTO 70H-12 problemDate: Sun, 26 Jan 2003 11:41:59 -0500
Hello Clemens, I had that problem a while back. I found a small solder globshorting the turns at the terminal point on one of the compensator coils(cosmos pto). You need a magnifying glass. There were only 3 or 4 turns.Be sure they are not shorted together. Hope this helps,------------------------------------------------------------------------------------------------------------From: [email protected]: Sun, 26 Jan 2003 13:32:31 ESTSubject: [R-390] Honey I Shrunk the VFO (tuning range)
<PRE>I have read discussions of the R-390 and other Collins VFO end-point-adjustment. I wonder if we could all settle on what happens with thetuning range? Some people say adding inductance "shrinks" the tuningrange, others say it "expands" the tuning range. To be correct wouldn'tadding inductance "shrink" the actual tuning range? If you have a VFO thatstarts out at 0000 and you have to crank it up to +0009 to get exactly 1MHz of change, the VFO tuning range has actually "shrunk". That meanswith exactly 10-turns of the tuning knob, the VFO RANGE of coverage wasonly 991 KHz. You will have to "expand" the tuning range so that 10-turnsof the VFO will cover a full 1 MHz. It sounds counter-intuitive from thenumbers on the counter dial. When you turn the endpoint adjustment slugclockwise you are LOWERING the inductance - thus "expanding" the rangeof the VFO = it will cover more frequency range in the same 10-turns of

rotation. Likewise if someone has to resort to removing 1-turn or morefrom the End-Point adjustment slug you are lowering the inductance =expanding the tuning range of the VFO. Hope I have this right! 73 ToddRoberts WD4NGG.-------------------------------------------------------------------------------------------------------------From: "Steve Hobensack" <[email protected]>Subject: Re: [R-390] Honey I Shrunk the VFO (tuning range)Date: Sun, 26 Jan 2003 14:29:40 -0500
Here's my way of reasoning on this; On the Cosmos pto, there are two littlecompensating coils. If the coil has four turns, and you remove one turn, thescrewdriver adjusting slug will not have as much coil to act upon. If youwant more "action" with the iron slug, there needs to be more turns. In mycase , the compensator coil had little range of adjustment. I found thesolder terminal had enough solder to short out the four turns. There's verylittle room there and its easy for that malfunction to happen. I can seewhere a huge number of pto's could have been made with this weakness.------------------------------------------------------------------------------------------------------------Date: Tue, 4 Mar 2003 10:03:36 +0200From: <[email protected]>Subject: [R-390] alignment assistance for an R-390A beginner
This is the first, but probably not the last time I write to you. I have justrecently acquired an R-390A receiver from Fair Radio. Having mybackground in humanities (linguistics), I chose the "checked" option inhope of a working unit. After having paid almost another USD 550 forshipping, value added tax and customs duties, I finally have my radio onmy desk here in my hometown of Nurmijarvi, Finland. I think I got a nicereceiver: it has an engraved front panel (without a manufacturer's tag),one fuse, the PTO is a Collins, power transformer from EAC, AF subchassisfrom Capehart... well, all in all, a nice example of the modular constructionprinciple! These all are from the 1960-1961, or thereabouts, contracts.
I resisted the temptation to apply power to it before I had changed thecritical capacitors in the IF subchassis (C-531, 547, 549, 553). Obviously,I also had to make the necessary changes in the power supply for our 230VAC. Further, I have now changed all the capacitors in the AF subchassislisted on KK4DF's homepage.
At this point, the receiver is working surprisingly well, taken into accountthe little work I have done so far. Signals are present on all bands, randomchecks into tube sockets show approximately the correct resistance andvoltage values, and test point E607 provides exactly 150 VDC. In fact, myR-390A receives just about every signal my other receiver, a Drake R8B,receives. Not bad, although I do notice that the Drake is more sensitive onthe medium wave band, at least so far... Of course, my R-390A probably has
who knows how old tubes and it probably is not perfectly aligned, whichbrings me to, yes, alignment issues:
I can at the moment adjust the frequency display to indicate the correctfrequency as described in the Operator's manual, but I notice that, usingthe "zero adj", I end up at the very limit of the KC knob's range of movementwithout the last three digits of the display changing. More specifically, Ican't move the KC knob to the right (higher frequencies). =20
Further, the mechanical alignment at the frequency reading of 07+000 isslightly off, with the cam plates (all of them) better in place at frequencyreading 07 990. Now, in such a case, the manual suggests the remedy is toset the cam plates to their correct position, and then manually change thefrequency reading to 07+000. In my case, then, I would have to add 10 kHzto the reading. But here's where my confusion already starts: if I add 10kHz to the frequency reading, I can't correct that using the "zero adj." as I'malready at the limit of its range. Further, the nice balance of approximately35 kHz above and below a "XX 000" reading on the frequency indicator willbe gone, right?
So, as you notice, I'm a bit confused as to what setting affects what othersettings and what the correct order of doing things is. Is there a proceduredescribed somewhere that corrects the frequency error, centers the "zeroadj." to the middle of its 15 kHz range, and restores the 35 kHz on bothsides of a "XX 000" reading? Of course, what I'm after is a non-techicaldescription using layman's terminology and definitely not using signalgenerators, oscilloscopes and other equipment that I don't happen to own!I have downloaded TM 11-5820-358-10 and -35, and the 21st centurytechnical reference, but can't seem to be able to extract the information I'mafter.
Any help you can provide is received with gratitude!Greetings from Finland, Antero Nordlund--------------------------------------------------------------------------------------------------------From: "Walter Wilson" <[email protected]>Subject: Re: [R-390] alignment assistance for an R-390A beginnerDate: Tue, 4 Mar 2003 06:04:05 -0500
Antero, It sounds like your PTO is not outputing 2445 KC when your KCknob is at 7+000 with the cams aligned at the marks. Here's what I woulddo:
1. Set the zero adjust mechanism in the center of it's range by tighteningdown the ZERO ADJ knob, spinning the KC knob one way and then theother until it stops, setting the KC knob near the center of that rangebetween the stops, and then loosening the ZERO ADJ knob. The zero adjust

mechanism is now near the center of its range.
2. Set the camshafts at their alignment marks. Don't worry aboutwhether the dial reads 7+000 or some other value.
3. Loosen the clamp that connects from the KC shaft to the oldhamcoupler, which ties the KC shaft to the PTO. This will decouple the KC shaftfrom the PTO.
4. Rotate the PTO shaft by spinning the oldham coupler until the PTO isoutputing 2445 KC. If you don't have a frequency counter, you can just usethe CAL function to find the carrier (at 8.0 MC). You now have thecamshafts aligned with the zero adjust near the center of its range and thePTO putting out 2445 KC.
5. Retighten the clamp connecting the KC shaft to the oldham coupler.
6. Look at the frequency readout. If it is very far from 7+000, you willhave to remove the front panel and adjust the veeder root (frequencyreadout) by loosening the gear clamp and rotating the gear on the rightside of the veeder root mechanism. If it's close to the correct reading, youshould be able to adjust it with the ZERO ADJ method.
This will get the camshafts aligned at their marks when the PTO is at2445 KC with the zero adjust range near center and the dial readout at7+000. That's your starting point. If the radio was aligned when thecamshafts were in their misaligned positions, the radio will now be in needof a good alignment.----------------------------------------------------------------------------------------------------------From: Buzz <[email protected]>Date: Sat, 22 Mar 2003 15:43:53 -0800Subject: [R-390] PTO to gear train alignment question
I have a R-392 that has had the KHz knob and PTO shaft rotated while thePTO was removed. How do you realign the two ??? Thanks in advance,--------------------------------------------------------------------------------------------------------------Date: Sat, 22 Mar 2003 16:30:07 -0800 (PST)From: "Tom M." <[email protected]>Subject: Re: [R-390] PTO to gear train alignment question
If it is working, set the rig dial to a known local station, and turn the PTOshaft until you hear the desired station. There are a lot fancier ways to doit, but this will get it for you. The tuning of the racks will hardly allow anyreception until you get real close, and then you'll hear it.------------------------------------------------------------------------------------------------------------

From: "Dave Faria" <[email protected]>Date: Tue, 22 Apr 2003 20:23:53 -0700Subject: [R-390] Question for Historians
GE List. I'm working on a very nice Capehart 1961 contract. All modulesare Capehart except the P.S.(Stewart-Warner) and the PTO(Progestron).Did Capehart ever make its own P.S. or PTO? A techincal question - thePTO seems to be very sensitive to vibration. I know this PTO is built likethe Collins but, don't recall a Collins PTO being this sensitive. I swappedout the 6BA6 and it helped some but, the sensitivity to vibration is stillthere. Its like the grids in the tube are vibrating or a bad ground(I hopenot).-------------------------------------------------------------------------------------------------------------From: [email protected]: Tue, 22 Apr 2003 21:38:35 EDTSubject: Re: [R-390] Question for Historians
No, they did not make their own PTO's. The only PTO manufacturerswere.... Collins, Motorola, Progressitron, Dubrow Electronics and Cosmos.The vibration probably is likely a bad solder joint on one of the minicaps(forget the capacitance) I have had three Progressitron PTO's and all threehad the same problem. A slight jarring would make it change frequency.Took it apart and lo and behold, a solder joint was making intermittentcontact. A quick reflow and it was working like new. ymmv. LesLocklear------------------------------------------------------------------------------------------------------Date: Tue, 22 Apr 2003 19:52:20 -0700 (PDT)From: Joe Foley <[email protected]>Subject: Re: [R-390] Question for Historians
That'd be very likely, check the ground strap on the PTO shaft.---------------------------------------------------------------------------------------------------------From: "Phil Atchley" <[email protected]>Date: Fri, 27 Jun 2003 00:14:03 -0000Subject: [R-390] Will it ever be the same?
Hi. Well, today I replaced the deadly capacitors in the IF strip as I wantedto check out the PTO thoroughly and didn't want to risk taking out amechanical filter. I'm going to have to wait till the first of the month toorder all the parts needed to re-cap this set properly, though I had enoughto do "most" of the IF strip. (I've been working to too many BA's lately andran out of new parts).
Anyway, to make a short story long, the endpoint of this Cosmos was offby about 6KHz. I thought, aha! I should be able to pull it that far.WRONG!!I got it to where the error is about 3 KHz and I think the slug

dropped down into the PTO 8^(( At least that is the way it appears and theunit "rattles" when I shake it. SO, now I have pulled the PTO, removed theouter cover and am faced with having to pull the entire unit apart.
I had previously downloaded a LOT (250 MB worth) of R-390 informationand found the two files on calibrating the Cosmos PTO. I rememberreading about removing a turn from the coil, I just haven't found that"page" yet. "thought" I had complete teardown/service information on thistoo but haven't found it yet. Anybody know where that info might belocated?
QUESTION; Will this poor thing ever be the same again? I was sorry to seea Cosmos PTO in this receiver and it looks like I wasn't far wrong. All mypersonal R-390A's to date had Collins PTO's, set the end point and forget it,they worked fine and were well within specs on linearity.-------------------------------------------------------------------------------------------------------------From: "Jim Miller" <[email protected]>Subject: Re: [R-390] Will it ever be the same?Date: Thu, 26 Jun 2003 21:19:05 -0400
Yes, and better! I have done that service on a Comos, it's not that bad onceyou get the can taken off. The slug can be screwed back into the coil whenyou open it. I have an article on Dave Medley's pagehttp://www.davemed.com/ showing how I had to completely rebuild aCosmos.
You arent faced with that much however just to remove a turn from theadjustment coil. However if the linearity or tracking is off, adjusting allthe little screws can be a daunting task. However, adjusting Cosmoslinearity with those screws is far easier (to me) than the linearity stack ina Collins PTO (I have done both). There is some PTO information on thispage:
http://www.r-390a.net/Pearls/
Also try http://www.r390a.com/-------------------------------------------------------------------------------------------------------------From: "Phil Atchley" <[email protected]>Date: Fri, 27 Jun 2003 04:26:04 -0000Subject: [R-390] Cosmos PTO end point coil
Hi. Earlier I tried to set the end points on this unit. I got it within 3 KC atwhich point the slug dropped into the PTO. SO, I bravely pulled the PTO andcarefully opened it up. I didn't observe any unusual escape of nitrogen gasas I pulled the inner shield!) Anyway, I reinserted the slug, removed 1 turnfrom the end point coil (it had 3 turns) and reassembled the PTO. NOW IT'S

WORSE THAN EVER. Best I get is within about 10KHz, that with the slugturned fully anti-clockwise. The 100 KHz markers are 1000 and 1990 KHzat the ends indicating that exactly 10 turns of the tuning dial are tuningfurther than 1MHz. I only removed one turn but that appears to have beentoo much. HOW MANY TURNS DOES THIS COIL TYPICALLY HAVE IN ACORRECTLY SET-UP UNIT? I wonder of someone previously removedturns? Stoopid Cosmos PTO's!------------------------------------------------------------------------------------------------------------From: "Jim Miller" <[email protected]>Subject: Re: [R-390] Cosmos PTO end point coilDate: Fri, 27 Jun 2003 09:14:37 -0400
If you have the slug fully counter clockwise, you may need to run it inclockwise more. The adjustment is an iterative process. See Dave Medley'sprocedure at http://www.davemed.com/pto.html----------------------------------------------------From: "Jim Miller" <[email protected]>Subject: Re: [R-390] Cosmos PTO end point coilDate: Fri, 27 Jun 2003 09:22:14 -0400
One more nit... just be sure you put the inner can cover back on the PTO.If the cover if off it will be way off. The proximity of metal can does affectthe tracking.-------------------------------------------------------------------------------------------------------------From: "Scott, Barry (Clyde B)" <[email protected]>Subject: RE: [R-390] Cosmos PTO SUCCESS!!Date: Fri, 27 Jun 2003 11:03:20 -0500
Phil, The radio was simply reminding you who is in charge. "Hmmmm,sensors indicate the human is attempting to enjoy the radio withouthaving produced any angst. Expectations of being able to place the radioin the rack and "plug-and-play" must be quashed immediately." MSG:R390A-TO-PTO. Change endpoint setting +3kc. If attempts are made tomodify, change endpoint setting to +4.1kc regardless of slug settings. Holdsetting for 36hrs. Revert to original setting. EOT Barry(III)-nonHW -N4BUQ
Good morning folks. Well, after sleeping on it all night (figurativelyspeaking ;-) I jerked this PTO out first thing this morning having decided torewind the coil This coil originally had three turns when I first opened it,though it appeared to have been "violated" before. I dug through my junkcoil tray and found a slug tuned coil that looked like it had the same gaugewire on it (close as I can determine via eyeball). I stripped a few inches offit and tinned one end. I then re-wound the end point coil (Yes, it was theend point coil, somebody inquired if I had the correct coil). I put three

turns on it, just like it had when I started. Close wound and nice snugturns. I then gave it a light coat of clear nail polish to hold the turns inplace and "cooked" it under a light bulb for a short time. Upon re-installingit and setting the starting point to 1000 KHz I checked the upper end.With the slug all the way counterclockwise it was 2.5KHz off end to end.(BEST I could get (before I dropped the slug in) was about 3 KHz. A coupleclockwise turns of the slug brought it dead on to 1000 to 2000 KHz,Plus/minus 100 Hz! Time will tell if it stays good! I really don't know whyit wouldn't tune up with the original coil (also 3 turns) but it wouldn't!The only thing I can think of is that the coil was rather loosely wound andsloppy, perhaps by a previous "tweaker". NOW FOR LINEARITY: Inchecking across the 100KC points I see about 2KCworst case. I don't have a frequency counter but I intend to use my Yaesudigital radio in SSB mode and tune each of the screws for "zero beat".Should be good for getting it within 100 CPS.-------------------------------------------------------------------------------------------------------------From: "Phil Atchley" <[email protected]>Date: Sat, 28 Jun 2003 00:43:43 -0000Subject: [R-390] Stinkin' PTO !!
Good afternoon all. well, the odyssey of the Cosmos PTO lives on. Irepaired the end point coil this morning and was able to set the end pointsF.B. However, earlier when I checked the linearity at the 100KC points itlooked 'pretty good, running typically 200 CPS to 1 KC off. However, the600 KC point was OVER 2 KC out and I figured I could correct this with thecorrection adjustments. WRONG! Taking my time and after tuning on thisthing for perhaps 3 hours in a radio room with an ambient temperature of95 degrees (WITH the Air Conditioner on full bore) I got up to thefrequency of +570 KC (that is with adjustment screws centered in thewindow). Up to this time the tuning had gone pretty good with mostadjustment screws only requiring a turn or two in one direction or theother.
At this point the PTO tuning became very stiff and the adjustment screwhad NO affect on frequency when tuned either way. I even backed theadjacent screws off to make sure they weren't binding or dragging. So Ichecked the next frequency, same way for the next couple steps. Stifftuning and the corrector has NO affect! At this point I stopped and threwin the towel. (The screws adjusted earlier were rechecked and are stillgood).
As I said before, though it looked nice on the outside, this PTO was novirgin, at least around the end point coil. I suspect that either the Teflondisk or the "screw disk" is damaged. That or there is another problem inthat area. I have no intention of going that deep into the PTO. The man Igot the R-390A from said he has another PTO and I'm going to give that

one a try. In the meantime, I have the time to pull the RF deck and check itout thoroughly.----------------------------------------------------------------------------------------------------------From: "Phil Atchley" <[email protected]>Date: Sat, 28 Jun 2003 04:22:55 -0000Subject: [R-390] Autopsy of a bad PTO.
Since there is another PTO coming I went ahead and took this one apart allthe way down to the corrector disk to see if I could determine the failuremode (not sure I can get it back together correctly!) Anyway, I was right.The 48 tuning screws are rotated one by one past a round spring loadedthingy made of spring steel that has a small piece of steel that looks kind oflike a "footbridge" spot welded to it. As the screw for a particular segmentof the frequency range (25 KHz steps) walks over the "footbridge" it pressesdown on it and pushes the slug under it further into the coil. The"footbridge" was damaged in two ways. First it had a BIG dent in it on oneside that would make screws riding on that side of the bridge (they'restaggered) not press down as hard on the bridge. Secondly, the spot weldthat holds one end of the bridge is broken loose so that it has lost some ofits "stiffness" and positive action. In trying to fix the "dent" in the bridgeI'm afraid that I also weakened it some more as spring steel doesn't takekindly to dents and trying to straighten them out. The third problem Ifound was that some of the screws had apparently been turned CCW"counterclockwise" too hard, spreading the slot and screw too wide tothread down into the disk far enough to reach the damaged bridge. Theseare the culprits that probably had no adjustment affect as they wouldn'treach the "footbridge". These are very tiny screws that are really only ascrew shaft with a "slot" in the end and a flat head on the backside to "walkacross the bridge". NOTE: A couple articles that I read said that there wasa flexible Teflon ring that these screws rode on forming kind of a cam.This one had no such ring, only the spring steel thingy that the screwheads walked across.---------------------------------------------------------------------------------------------------------Date: Fri, 27 Jun 2003 21:39:05 -0700 (PDT)From: John Kolb <[email protected]>Subject: Re: [R-390] Stinkin' PTO !!
I should repeat a tale I've relayed once or twice before - I once had aNational HRO-500 which was rather beat up. Some previous owner hadadjusted the tuning linearity until it was perfect NOT. Indeed it was on onthe 100 kHz calibrator points and 25? 50 kHz? However betweencalibration points it was as much as 5 kHz out. Looking at the slotted endplate of the tuning cap, it was bent up to look like a saw blade /\/\/\. Totweek it back into shape, I built a neat little crystal calibrator box.Starting with a 4 MHz crystal oscillator, I went through a chain of divideby 10 digital dividers, with a switch to select a tap on the chain, and then a

chain of divide by 2's, also switch selectable. Thus I could select 4 MHz,400, 40, 4 kHz, or selecting 400 kHz switch in divide by 2's to get 200,100, 50, 25, 12.5 kHz or selecting 40 kHz, get 20, 10 5, etc. This gave me areal multitude of spot frequencies to check the dial at. A perfect squarewave would have only odd hormonics in the output. If you instead of asquare wave out of a crystal calibrator, generate a very narrow pulse, theodd and even hormonics will be almost even in amplititude. The narrowerthe pulse, the higher higher frequency output/ Using 74S logic, the outputwent to almost 100 MHz before starting to fall off. With as manyadjustment screws as the Cosmos PTO has, it's necessary to check at freqsother than the 100 kHz xtal calibrator spots. Such a unit as I've describedwould be ideal. With the high speed digital logic available nowadays, itcould be made flat to very high freqs indeed.-----------------------------------------------------------------------------------------------------------From: "Barry Hauser" <[email protected]>Subject: Re: [R-390] Autopsy of a bad PTO.Date: Sat, 28 Jun 2003 07:28:18 -0400
I dunno, there was a time there would have been several posts withdetailed "been-there-done-that" posts to assist you. I've held back onreplying simply because I've never been that deep into a Cosmos. Soooo...in the absence of any experienced replies .... (maybe some were off-list?)Somehow, I'd also assumed that with all the downloading you mentionedyou had certainly come across Dave Medley's pages or another site withJim Miller's "A JOURNEY THROUGH THE COSMOS (PTO)". The direct URLon Dave M's site is http://www.davemed.com/cosmos.html
This includes detailed photos, though there's something wrong with one ortwo of the photos. Gonna try to shed some light on this, but again, bear inmind that I have no hands-on, so take it for what it's worth.
.......took this one apart all the way down ............
Somehow, I'm not surprised. I always take your "quit" and "throw in thetowel" declarations with a grain of salt. (about the size of a football ;-)While you were tearing into that PTO, I was probably searching for thatweb article (or copping some Z's).
...........The 48 tuning screws are rotated one by one ..............
The web site photo shows this. The spot welded piece looks more like atriangle, so I'm not sure what you mean by a footbridge. (Maybe like theones in Japanese gardens and Central Park?) Check out the photo for whatthe shape of it should be.
.........."footbridge" was damaged .............

From the photo, it would seem that bridge is supposed to be rigid, notflexible, even if it's made of the same spring steel as the ring. (Just amanufacturing convenience, vs. a solid piece of something, also avoidanceof dissimilar metals. Also, spring steel is fairly hard and less prone towear.) Wouldn't it be solid if that other weld weren't broken?
..........some of the screws had apparently been turned "counterclockwise" ....
Can't you turn them back down again while it's apart, to make sure they'llmake it through? Sounds like what you are describing is a false bottomingout of the adjustment screws. The "no adjustment" effect might also be dueto the "bridge" being out of shape, partly flattened and flexing flatter due tothe broken weld on one end and/or the dent. Actually, if that bridge orarch was flexing, that would have messed up your linearity adjustmentsand may have contributed to the other problem.
..............flexible Teflon ring.......
Was that a Cosmos PTO in the articles? May have been a different mfr.Again, keeping in mind the nature of the source, (not been-there-done-that) -- here's some partially lame advice: From the photo, it looks like thebridge should be solid, not flexible. I imagine the screws should just catchthe bridge on the rise, not at the base near the spot welds. If so, then youshould be able to repair the thing with epoxy, or perhaps a solder repair, ifthe spring steel will take soldering. One way would be to fill the void in thebridge -- basically an "arch support". Reshape the arch as best as possible,using the photo or another unit as a guide. Cut the corner off a piece ofsheet metal -- aluminum -- to make a small triangle support with a slightlyrounded apex to fit the underside of the bridge and secure the wholebusiness with epoxy, using a small clamp to hold in place until it sets.Basically -- an orthothic shoe insert. Then fix the screws somehow, if theyactually need fixing. The photo on the website shows that quite a fewscrews are either not present or in the fully backed out positioin. There'sanother thing. I was a bit confused as to how this setup could work if thescrews are riding up and down the arch, with gaps in between, causingreciprocating action. That would mean that it would be nearly impossibleto have smooth action in terms of degrees rotation to frequency. The keyis that the adjacent screws are straddled so that the tip of the bridge/archis always riding on a screw or none at all. But -- what that means is thatthe screw setting should end up with reasonably smooth transition fromone to the next. If there were too much of a differential from one (or apair) to the next, it could jam or cause roughness. I would think thatextreme differences between adjacent screws might be indicative of aproblem elsewhere -- worn lead screw or something. Also -- does it seempossible to run a screw down far enough to actually crush the bridge piece

(or snap a weld)? The photos on that site are of fairly high resolution. Iblew up the side view of the "bridge" and it certainly appears to me that itshould be fairly or completely rigid, not flexible, if both welds are intact.It's basically triangular in shape, but with a smooth bend at the apex. Withone weld broken, it will flatten under pressure and you won't get a reliableadjustment. That's my theory anyhow. Of course, as I'm typing the last ofthis speculative tract, Phil is waiting for the epoxy to cure or soldered thething, or maybe hand carved a new ring and "footbridge" out of somespring steel in his junk drawer. "Throw in the towel" -- yeah, right. Weknow you better than that. ;-)----------------------------------------------------------------------------------------------------------From: "Barry Hauser" <[email protected]>Subject: Re: [R-390] Autopsy of a bad PTO.Date: Sat, 28 Jun 2003 07:39:57 -0400
There is also a fine article on the Cosmos by John Harvie on Chuck R'swebsite: http://www.r390a.com/html/PTOS.htmSpeaking of the "role call" -- anyone hear from John lately. YO! John!-------------------------------------------------------------------------------------------------------------From: "Jim Miller" <[email protected]>Subject: Re: [R-390] Autopsy of a bad PTO.Date: Sat, 28 Jun 2003 08:38:23 -0400
I just noticed some of the photos in my Cosmos PTO article on Dave's pagehave become corrupted. If anyone's interested, the original article is at thefollowing url. Copy anything you want.
http://home.att.net/~jamesmiller20/cosmos.htmI tried emailing Dave but his email bounces. I guess I like the Cosmos overthe Colling PTO because it appears to be relatively easier to linearizedespite Phil's nightmare. I spent over a week (couple of hours a day) goingthrough the stack (trial and error) in a Collins PTO, taking the cover off,tweaking, putting the cover back on, over and over. I can see why theinventor of the Cosmos approach thought he had a better idea. Sounds likesomeone in a past life got heavy handed with a screwdriver and jammedsome of the little screws.--------------------------------------------------------------------------------------------------------------From: "Jim Miller" <[email protected]>Subject: Re: [R-390] Autopsy of a bad PTO.Date: Sat, 28 Jun 2003 08:58:15 -0400
By the way Phil's experience and Barry's theory with the PTO gettingtough to turn at one point jog's my memory. This happened to mewhenever I accidentally ran one of the screws too far in or out. A suddenjump in the height of adjacent screws did cause some jamming as I recallnow. The transitions should be fairly smooth from point to point. If a

screw is run too far in, it can also depress the flexible ring into the bodyand possibly crimp it. Also found that some of the screws tend to get verytight and won't always turn easily without some effort. They sit in athreaded teflon or plastic ring. I never saw any stripped threads in the oneI worked on, but I suppose this could happen leaving some screws inpermanently high or low positions...thus the binding effect. Maybe betterluck with the "new" one!-------------------------------------------------------------------------------------------------------------From: "Barry Hauser" <[email protected]>Subject: Re: [R-390] Autopsy of a bad PTO.Date: Sat, 28 Jun 2003 09:28:06 -0400
Hi Jim: Sorry ... I didn't notice your earlier post(s) in reply to Phil. Thanksfor the new URL. Those missing photos help make it clearer about theaction with the "footbridge" riding and straddling adjacent screws. Theoverlap/staggering of the linearity screws is intended to avoid jumpingwhich could otherwise cause up-down variations in frequency as the unitrotates. (and how an abrupt jump from one screw to the next could causeproblems.) The photos on your site seem to be clearer and larger as well.Even clearer to me that the little ramp or bridge should be rigid, notflexible. If the metal will take to soldering, Phil could solder the brokenweld and perhaps fill the void under the bridge (no boat traffic) with moresolder. Of course, it would have to be reshaped as well as possible first andthe final result deburred and lubricated with a small amount of non-running grease.--------------------------------------------------------------------------------------------------------------From: "Jim Miller" <[email protected]>Subject: Re: [R-390] Autopsy of a bad PTO.Date: Sat, 28 Jun 2003 09:56:40 -0400
I don't want to sound too negative, but if that bridge is broken, I'm afraidit's time for plan B (new PTO). That is spring steel which won't solder wellat all. Even if repaired, it may never be as smooth and repeatable as anundamaged one.------------------------------------------------------------------------------------------------------------From: "Barry Hauser" <[email protected]>Subject: Re: [R-390] Autopsy of a bad PTO.Date: Sat, 28 Jun 2003 10:19:20 -0400
You're probably right about Plan B, and a replacement is on the way. Sincethe present one would be a goner anyway, it might be worthexperimenting with epoxy as I first suggested. The entire space under thebridge would have to be filled to increase the surface area of the bond. Thesurfaces getting the epoxy - top of ring under the bridge and underside ofbridge would have to be roughened up to provide grab. Most epoxies are

fairly heat resistant. Wouldn't take much to try it. If you are going to try tofix that one, Phil, I would suggest pre-setting any of the 48 linearityscrews to remove any "cliffs". A key question has to do with how well youwere able to reshape that bridge. The flex would be fixed with the epoxy. Isuppose you could dress up the surface of the bridge if there are somebumps and ruts in it. You could try re-spot welding it -- maybe with a highcurrent battery and a couple of makeshift electrodes. Or maybe not. ;-)There's always Plan B. Barry-------------------------------------------------------------------------------------------------------------From: "Phil Atchley" <[email protected]>Subject: RE: [R-390] Autopsy of a bad PTO.Date: Sat, 28 Jun 2003 15:31:20 -0000
Hi Jim, Barry et al... I'll try answering all the messages posted here at once.First, thanks Jim for providing the alternate URL for the file download.Yes, I had previously downloaded that one along with a gazillion files onthe R-390A and the Cosmos in particular. That "Journey" was one of thefactors that motivated me to dig deeper into the Cosmos at hand. However,as you discovered, the picture I really needed of the "footbridge", perhapsmore correctly called an "arch" was corrupted and unusable here. (I stillthink that "footbridge is a better description as the screws march across itin succession). NOW, the bad news. As I mentioned, this unit's "arch" hadbeen "crushed", probably by some ham handed "mechanic" who thoughteverything needed to be torqued to 50 ft/lbs 8^(( Why else would some ofthose screws been spread out like they were? Instead of a nice arch orramp, what I have here is a ramp that has been crushed, with a severe"crink" on either side of the peak, a rather flattened peak with a deepdimple (comparatively speaking) on the inner half closest to the shaft. Allthis plus the broken spot welds on one side makes for a very rough andunreliable ride for the screw heads. Now, if the ramp was intact and justhad broken spot welds I could probably fill the entire area under the"bridge" with JB Weld or similar and it'd be rigid and good forever! Theonly way to fix this one would be to fill said void with JB Weld or similarand then rebuild the ramp and shape it with some more JB weld. However,I don't think that would be a very reliable long term "fix" as the JB is anadhesive, not designed to use as a "bearing". The constant (and I do meanconstant) friction with the screw heads would wear it down quicklymaking for a continuous change in linearity!! No, I'm afraid this one isdestined to be an "organ donor" unless I can eventually find a replacementfor the spring steel ring. ONE ADDITIONAL NOTE: This also explains theFrequency "jumpiness" that I experienced while trying to set the linearityscrews. I didn't mention it but I kept seeing the frequency "jump" back andforth erratically while setting the various screws. This got worse as Iprogressed up the band though I'm not sure why that would be except thatperhaps the linearity coil has more affect at one end of the band than theother (makes sense to me). I really thought maybe it was the "shaft

grounding" though I had cleaned it.-------------------------------------------------------------------------------------------------------------Date: Sat, 28 Jun 2003 11:15:11 -0700 (PDT)From: John Kolb <[email protected]>Subject: RE: [R-390] Stinkin' PTO !!
> However, to align a PTO it is much easier to use a counter (best)............
Indeed you are right - the counter is easier. I did the HRO-500 about 20years ago, when counters were rare and expensive beasties :) Even today,not everyone has one.--------------------------------------------------------------------------------------------------------------From: "Jim Miller" <[email protected]>Subject: Re: [R-390] Autopsy of a bad PTO.Date: Sat, 28 Jun 2003 22:51:40 -0400
What Barry said about presetting the screws woke up another brain cell inmy fading mmory. I recall reading in one of the other articles (Harvie'smaybe) that the first thing you want to do before starting the linearityalignment is to preset the 48 screws equally aboot half way in or maybe alittle less. There is a reason for this... If the screws are already pretty wellcranked in before you start aligning, then at some point you may run out ofadjustment range on the "upper" screws, which will bottom them out andstart them grinding into the "bridge"..
The hard part to me is presetting them all the same, you have to turn themfully in and than back off about half the turns (or is it fully out?). I don'trecall the exact number of turns. While you have that bad PTO open withaccess to the disc you might use it as a learning aid to see how many turnscan be expected on each screw to get a feel for the range of adjustmentpossible and how far to back them out to preset them.
This is a real hard introduction for a new 390a owner, but once you haveaccomplsihed the PTO initiation, you will be a true member of thefraternity. Good luck!-------------------------------------------------------------------------------------------------------------From: "Phil Atchley" <[email protected]>Subject: RE: [R-390] Autopsy of a bad PTO.Date: Sun, 29 Jun 2003 03:11:36 -0000
Well, this is R-390A number either 5 or 6 (you tend to lose count as you getolder) that I have had and overhauled here (one belonged to a friend). Infact, come to think of it, over the years this one may actually be number 7overall. That doesn't include one Junker that was parted out and an R-391autotune unit that I obtained and sold without repairing it. I just can't
stay away from the things!! When one arrives at the house one way oranother and I show it to my wife, she just looks at it and says, "Yep,another big gray radio". This is just the first one that I EVER had thismany problems with the PTO. All the others except one had Collins PTO's.The lone exception was an EAC belonging to a friend. That one had aCosmos PTO which, after a little tweaking lined up on the end points andthe 100 KHz calibration spots were in tolerance (didn't check the 25 KHzpoints). So, I've done a few of these critters.------------------------------------------------------------------------------------------------------------From: "Jim Miller" <[email protected]>Subject: Re: [R-390] Autopsy of a bad PTO.Date: Sat, 28 Jun 2003 23:18:22 -0400
Sorry. I assumed incorrectly you were new to this addiction. Yeah 5-6 orso is a good go at it. I have 3 here, one basket case, one "nea"r Collins, oneStewart Warner, 2 more than I really needed. I always dread the PTOwork.-----------------------------------------------------------------------------------------------------------From: "Phil Atchley" <[email protected]>Date: Mon, 7 Jul 2003 17:50:02 -0000Subject: [R-390] Replacement pto arrived.
This morning I picked the replacement PTO up at the post office.Examination disclosed the following.
1. No label but it is obviously a Cosmos PTO from the fact that it has the25KHz linearizing screws that only the Cosmos units have.
2. It's an older unit, the coax shield and outer covering (green instead ofwhite) around where the coax exits the PTO is cracked all the way around,with the shield basically non- existent. Some light corrosion on thehousing and around where the power cable exits the can.
3. Bent slug shaft on the output transformer (the small can).
4. The linearity adjust screws has those itty bitty hex or fluted screw holesinstead of the slots, the size nobody can find a tool to fit 8^) (I 'might' havea itty bitty fluted wrench that will do the job)
An electrical check of the unit showed that it's working but the end pointsare out by over 12 KHz, which means that I'll have to go into the unit andtweak the end point coil and check other things. While I'm inside it I'mgoing to do a thorough examination for overall condition etc. It maybehoove me to use the flexible linearity ring to repair the other unit sinceit's in otherwise pretty nice condition. A little more work but I want thebest possible PTO in this radio!

--------------------------------------------------------------------------------------------------------------From: "Phil Atchley" <[email protected]>Date: Wed, 9 Jul 2003 02:55:42 -0000Subject: [R-390] PTO SUCCESS!!
Hi. Well, I finally met with success in getting a PTO set up for this '67 EAC.If you recall this Cosmos PTO had a linearity ring with a crushed"footbridge". It's not perfect, but it is much, much better than when itarrived here. Smooth tuning and no minor frequency jumps when tuningeither!
Well, the PTO that arrived in the mail was also a Cosmos. It worked buthad a number of "issues" with it also. Notably the damaged Coax cable, thedamaged slug screw for the output transformer etc. BUT, the one thing itdid have was a good linearity ring. So, I decided to rebuilt the one thatcame with the receiver as it was otherwise in pretty nice condition. Firstorder of the day was to tear both PTO's all the way down to the innersanctum where the linearizing hardware resides. I then swapped thelinearizing rings, backed all the linearizing screws counterclockwise andthen one turn clockwise.Reassembling the unit it took about 4 tries beforeI got the disk in the right position so that I had screws at both ends of thetuning range. I had previously marked the tuning slug position for3455KHz to make it easier. I quickly discovered that I could pull theassembly far enough apart to reposition the disk without having to takethe lead screw all the way out of the tuning slug. This helps keep things inposition. While reassembling the unit one other problem reared it's uglyhead. I had previously mentioned this PTO was not "virgin". Somebodyhad worked on the coil tap for the main tuning coil. In the process oftaking the wire off the feedthru this same wire pulled loose from the coil,breaking the winding in two (previously repaired). So, my fix was tosolder a heavier piece of hookup wire to the feedthru, carefully positionthis over the two ends of the broken wire and solder them. Some clearfingernail polish then secured the fine wires to the coil form and thehookup wire. I was very careful how I positioned this wire, even so I wasafraid that it might affect the tuning range of the coil. However, I waspleasantly surprised that upon re-assembly the PTO tuned just fine, the3455 position being just about where it was when I removed it (A littledifference but I attribute that to the fact that I backed the linearizingscrews out).
You might ask, if I had two PTO's here and was using one for parts, whydidn't I rob the tuning coil out of the parts unit? Good question! Theanswer is simple. While both were Cosmos units there were significantdifferences in the two units, particularly around the tuning coil. I'm surethe coils were electrically the same, however the hook-ups were somewhat

different, the older unit having three feedthru wires to the oscillator, twoof which were from the coil. The other unit (one I used) had only twofeedthru wires.
All the above was THE EASY PART!! It took me a good 10-12 hours ofwork to set the end points AND all the linearizing screws. I had no test jigso I did it in the set, using the Veeder Root counter and lifting PTO out ofthe set for each adjustment. I quickly found out that if I left the backbracket on but not screwed to the chassis and left the front screwsunscrewed from the chassis I could hold it in position, tune up to the nextpoint, lift PTO out and tweak it and re-insert the PTO without knocking thePTO shaft out of position (I have a fine touch ;-) . It also took several tripsthrough the routine as I found that the first setting I did for end pointswas not optimum for having sufficient range on all the linearizing screws.The final results are that I have a couple screws that are backed all theway out, MOST in the mid-range and a couple in as far as I could go withoutgetting any binding on the PTO tuning. Where there was any problemthere I backed them out a little more than the optimum point as I figured acouple hundred Hz non-linearity was better than getting the screws tootight.
No, this is NOT a PERFECT PTO, worst case non-linearity is at 025 KHzwhere it actually reads 025.7 on the counter (000 and 050.1 on 25KHzpoints either side). AVERAGE non-linearity is probably better than 300Hz, this with the end points at 000 and +000 being dead on the money. Ithink some of the non-linearity may be due to the repairs that have had tobe made to the tuning coil etc. That and if I had a test jig where I couldEASILY adjust the critter it may have made a difference. Not having afrequency counter I used my Yaesu VR-5000 in LSB mode to Zero Beat thePTO when the Yaesu receiver was tuned to the desired frequency. However,I DO feel pretty good about rescuing what was otherwise a "Sows Ear" andwhich was useful only for parts! BESIDES, THEY DON'T MAKE PTO'S LIKETHEY USED TO!)
NOTES:DIFFERENCES BETWEEN THE TWO COSMOS PTO'S (#1 came in myreceiver).It appears that unit #1 is a much newer PTO than unit #2.
1. PTO#1 had two feedthru wires from coil to oscillator. PTO#2 had three feedthru wires from coil to oscillator.
2. PTO#1 had new style coax with clear jacket, good condition. PTO#2 had old green coax with cover and shield broken at body.
3. PTO#1 had slotted linearizing screw shafts for screwdriver.

PTO#2 had some sort of hex or fluted linearizing screw shafts.
4. PTO#1 Disk had a number of missing linearizing screws. PTO#2 Disk had linearizing screws in all holes.
5. PTO#1 Heater wires entered through front of PTO unit. PTO#2 Heater wires entered through side of outer can. =20-----------------------------------------------------------------------------------------------------------From: "Bill Smith" <[email protected]>To: "Phil Atchley" <[email protected]>, <[email protected]>Subject: Re: [R-390] PTO SUCCESS!!
Congratulations! Have been following your story with great interest.Goodwork.---------------------------------------------------------------------------------------------------------From: "Phil Atchley" <[email protected]>Date: Sat, 12 Jul 2003 00:51:17 -0000Subject: [R-390] 3rd Mixer noise, STINKIN' COSMOS PTO's!
Well, I located the source of the warm-up noise in my '67 EAC. When it wasfirst turned on it would snap, crackle and pop and just generally be noisy.I'd traced it to the 3rd mixer stage. So, I pulled the RF deck and replaced allthe resistors/capacitors in the 2nd and 3rd mixers as well as a "bulged"2.2K resistor in the plate coil circuit of the RF amplifier. That resistor hadmeasured 5.5K ( I had checked the PTO by listening to its signal onanother receiver. It appeared to be nice and quiet with no drift or noise.After re-assembling the unit (I'm getting to be a whiz at the RF deckremoval/installation) I again checked it with no apparent change instatus. Still noisy at turn-on. On a whim I disconnected the receivers PTOand patched in the "parts" PTO, not bothering to mount it in the frame.This PTO while operational is really only good for parts as I've swappedout the spring loaded linearizing disk, the heater wires are disconnectedand the output coil slug damaged. After tuning the PTO to roughly thesame frequency as the receiver was tuned to (as evidenced by the localstation on 1480KHz) I listened carefully. EUREKA!! Just the normalwhite noise or hiss of a normally functioning R-390A. To be sure I patchedin the original, SNAP, CRACKLE POP! On a hunch I pulled the 6BA6 tubeout of the parts unit and put it in the original PTO. EUREKA AGAIN! Nomore snap crackle pop! Now, you can ask, why didn't I test the tubeearlier? I DID, before doing an alignment of the PTO and it tested good.Checking it now shows a shorted tube with VERY low transconductance!THE SICKENING THING IS I AM PROBABLY NOW GOING TO HAVE TO GOTHROUGH A SEVERAL HOUR PROCEDURE TO SET ALL THOSE 48LINEARITY SCREWS again. . . =-------------------------------------------------------------------------------------------------------------From: "Barry Hauser" <[email protected]>

Subject: Re: [R-390] 3rd Mixer noise, STINKIN' COSMOS PTO 8^)Date: Sat, 12 Jul 2003 05:41:31 -0400
.....why didn't I test the tube earlier? ..........
I was going to suggest a bad tube as most likely, but you said that youtested them all. What probably happened is that the tube was good orperhaps becoming borderline with no initial shorts indication. But then,you were repeatedly installing, removing, fussing with, reinstalling, etc.that PTO. Tubes sometimes don't tolerate shock very well and they're mostprone when plugged into a chassis that's being moved around -- especiallyif the tube is still hot -- which I suspect happened as you were working onthe PTO from the way you described it at the time. BTW-- how do you knowthe transconductance/quality was low? If you get a shorts indication on atube tester, as a rule you should never go to the quality test, as you riskdamage to the tube tester. An exception might be if you can clear the shortwhile in the shorts test by allowing the tube to warm up and tapping on it.However, that kind of fiddling is basically pointless, as the tube should bediscarded. (The purpose of tapping on a tube is to check for anintermittant short in a suspect tube -- i.e. to force a short, not temporarilyfinesse it away.)
>THE SICKENING THING IS I AM PROBABLY NOW GOING TO HAVE TO GOTHROUGH A SEVERAL HOUR PROCEDURE TO SET ALL THOSE 48LINEARITY SCREWS again. . .
Go easy on the PTO as you do this and periodically check the tube if you aregoing to be repeatedly removing/installing the unit. Put a piece of foamdown on the table where you are going to set the PTO. When re-installing,avoid bumping it. Another consideration -- short-proneness and otherlatent defects tend to run in families -- production runs. So, if your supplyof 6BA6's all came from the same lot, it may well happen again.--------------------------------------------------------------------------------------------------------------From: "Don Reaves W5OR" <[email protected]>Subject: RE: [R-390] 3rd Mixer noise, STINKIN' COSMOS PTO!)Date: Sat, 12 Jul 2003 09:14:31 -0500
Let me comment about Phil's adventure with his 'new' EAC. It is preciselythis kind of narrative that makes this list unique and useful. Phil's story,which we all know is going to end with his success because he is goingbeyond the call of duty with a Cosmos PTO, gives us all a bit of inspirationto do battle with our own tough nuts. So, on behalf of the list, Phil, thanksfor sharing your trials and tribulations with us - you have 600 interestedonlookers in your workshop, looking over your shoulder, double checkingyour work, nodding our heads in approval. It does get a bit crowded,

doesn't it? OOPS, 1 percent of us stray for some unknown reason, and startbabbling about off the wall subjects, distracting the rest of us from the taskat hand. Those people will be shown the door! Don't worry about runningout of 6BA6 tubes - there are plenty of those available. So, good job, Phil.Don----------------------------------------------------------------------------------------------------------From: "Phil Atchley" <[email protected]>Date: Sat, 12 Jul 2003 18:32:01 -0000Subject: [R-390] COSMOS PTO, starting over again.
Hi. Y'all are gonna to get tired of all these Cosmos PTO's. But! Let me tellyou, you're not as tired of them as I am of working on the blasted thing. Intrying to adjust the linearity of it after having changed out the bad 6BA6tube I noticed that I wasn't getting "repeatability" on the linearity screws.I could tweak one, tune away and come back and it'd be off. In the mostsevere cases by a couple KHz, most of the time a couple hundred or so. Whatwas maddening is that it demonstrated no discernable pattern as to whenor where. . . So, I've stripped the PTO down completely AGAIN. All theway down to the inner sanctum where the linearity "guts" lie. Upon pullingthe "spring ring thingy" and checking the plunger of the linearity coil Inoticed just the tiniest bit of roughness or grittiness in its action. Veryminute, but possibly enough to prevent repeatability of the core position.So, I unsoldered the wires of the coil and removed it thinking that wouldallow me to remove the Plunger and clean/lube it. WRONG!! It is a sealedassembly with the coil. So I did the next best thing. I used some semi-synthetic grease and applied it to the part of the plunger that was visible(after wiping that part clean). I did this a couple times, each time workingthe plunger in as far as it'd go to spread it around. NOTE: DON'T use oil asit may run down the plunger and contaminate the coil core. The plungernow is smooth and silky. Don't know how many years it'll last before thegrease hardens some but I've had good luck with this Valvoline DuraBlendon many items. It "seems" to stay "greasy" and not harden any. Next, I ambacking all the linearity screws out again and pre-setting them one turnclockwise to give me a good starting point and the BIG job o tuning willstart again. Luckily I have that down rather pat. As I mentioned before, Itune it IN the receiver. I leave the rear mount attached to the PTO (but notscrewed to the receiver frame), leave the front screws unscrewed and thatallows me to hold it in place against the Oldham coupler for tuning andEASILY lift it out for tweaking. NOTE to Barry: This doesn't put any undueshock on the PTO as I lift it out very easily and tilt it back for adjustment. IHAVE to be gentle so as to not knock the tuning shaft position out of place.HEATER NOTE: This time upon disassembly I completely removed thethermostat and the heaters from inside the PTO. I NEVER use themanyway and they just complicate the teardown-rebuild of the unit. Yes, I'llkeep the insulation intact as I'm sure it adds to the thermal stability. OneFINAL note. IF this doesn't get it this time I'll be giving up on this PTO and
will be looking for a Collins or other unit ;-)--------------------------------------------------------------------------------------------------------------From: "Bob Tetrault" <[email protected]>Subject: RE: [R-390] COSMOS PTO, starting over again.Date: Sat, 12 Jul 2003 12:31:02 -0700
Pretty soon you'll be able to write THE book on Cosmos...--------------------------------------------------------------------------------------------------------------From: [email protected]: Sat, 12 Jul 2003 16:33:31 EDTSubject: Re: [R-390] COSMOS PTO, starting over again.
Phil, good luck with the (ugh) Cosmos PTO! I know perseverence is a goodthing but how many hours have you spent on this thing already? Let's see,at $30/HR labor minimum do you figure this PTO is worth about $500bucks by now? Oh well, keep up the good work - you will be THE expert onCosmos PTO's! Maybe someone will send you a Collins or Motorola PTOout of the goodness of their heart! I bet you are longing to see a corrector-stack again! 73-----------------------------------------------------------------------------------------------------------Date: Sat, 12 Jul 2003 16:36:42 -0400From: rbethman <[email protected]>Subject: Re: [R-390] 3rd Mixer noise, STINKIN' COSMOS PTO 8^)
I second this! I'm restoring a '52 Collins 390A. The ONLY non Collinscomponent is - you guessed it - a Cosmos PTO. I'm saving ALL this trafficfor my close future endeavor. It looks like THIS could be INTERESTING.----------------------------------------------------------------------------------------------------------From: "Jim Miller" <[email protected]>Subject: Re: [R-390] COSMOS PTO, starting over again.Date: Sat, 12 Jul 2003 19:22:23 -0400
Check to be sure the linearity disk isn't slipping on the shaft. That was thecause of the problem with the one in my Cosmos article on the web. Thedisk would slip and cause all kinds of problems with repeatability. Itappears to be welded to the shaft with some kind of tiny electronic weldthat can break loose. It can be repaired if this has happened. Also youwould be wise to build a little test jig for the PTO. It will save you a lot oftime in the long run. I built one with some cheap lumber, some metalbrackets with holes threaded to match the PTO mounting screws, a fewplastic couplings, a foot of brass stock shaft, and John Harvie's PTOcalibration sale attached to a plastic disk. I will take a picture and post iton the web for any who want to do the same. I used a counter attached tothe PTO, and a lapttop with an Excel spreadsheet that plots the tuning

curve (I type in the counter measurements at each quarter turn). The littletest jig eliminates the need to swap the PTO in and out of the receiver, andprovides relatively easy access to the tuning screws.. You will soon gobonkers if you keep doing that. I'll see if I can get that on the web also. Ittook me a few hours to build it, but saved a lot of hours in return. It's nicewith the spreadsheet to be able to "see" the linearity error on the screenand know what areas need tweaking. Before you decide that the CollinsPTO is better, keep in mind that it's stack of linearity "discs" inside the PTOare horrible to work with, and you have to keep taking the shield can offand back on again. I can linearize a Cosmos in an afternoon if it isworking. Took me a week to do a Collins (a few hours a day). Jim N4BE-------------------------------------------------------------------------------------------------------------From: [email protected]: Sat, 12 Jul 2003 20:45:39 EDTSubject: Re: [R-390] COSMOS PTO, starting over again.
Thanks for all the info, Jim. Not sure why a corrector stack was seeminglyhard for you to work on. I linearized a Collins PTO in an afternoon - got itto within 200Hz every 100KHz checkpoint. I did it outside of the R-390Ausing a degree wheel on the shaft. Just write down where it is off then youcan return to each spot with the shield cover off. Just slip the cover on-and-off when you reach inside and then check linearity. You can get a "feel"for how much to change the corrector stack for the desired change.-------------------------------------------------------------------------------------------------------------From: "Phil Atchley" <[email protected]>Date: Sun, 13 Jul 2003 02:53:21 -0000Subject: [R-390] Cosmos, I broke it :.((
Well, I guess with all the taking it apart and putting it back together it wasbound to happen. After this last surgery the poor thing is deader than adoornail! I've since pulled it apart twice and can find absolutely NOTHINGwrong.
All coils have continuity, I have both B+ and screen Voltages on the tube,tube lights up, tube is good but "she no worky". I replaced the 2.2K resistorin the B+ supply as the original was somewhat burned and while I was at itreplaced the capacitor that bypasses it to ground (as it was the only thingI could think of that would overheat that resistor).
I've had it open twice to try to figure out why it doesn't work. It is aSIMPLE one tube circuit and with 45+ years of tube experience it shouldn'tbe a challenge for me. But then engineers have a saying that the two mostmaddening things in engineering are "Oscillators that don't and amplifiersthat do" (oscillate). Anyway, I've put it aside for the evening. I'm going topick up the guitar and just have some "fun time" for a couple hours. Maybetomorrow after church I'll look at it one more time and if I can't resurrect

it I'll resurrect the parts unit I have here.
But I'll have to take the "spring thingy" and linearity disk out of theoriginal PTO as I don't have the tiny tools needed to tune the disk in theparts unit. Also I don't like the looks of the coax cable or the outputtransformer on that unit (but it does work).--------------------------------------------------------------------------------------------------------------From: "Jim Miller" <[email protected]>Date: Sun, 13 Jul 2003 01:52:52 -0400Subject: [R-390] PTO Test Jig
These are photos of the test jig I use to align PTO's. It is made of pieces ofstock lumber. As you can see it is rough but it works. The tuning circle iscut from plastic sheet stock with a PTO calibration template glued to it.Ifound this template as a printable download from the web, created by John(Harvie?) N3JKE. I can't seem to find that web page now however.. It ain'tpretty but it works. http://home.att.net/~jamesmiller20/ptojig.htm
Also my original Cosmos adventure story is at:http://home.att.net/~jamesmiller20/cosmos.htm
Hope these are useful to anyone interested.-----------------------------------------------------------------------------------------------------------From: "Jim Miller" <[email protected]>Subject: Re: [R-390] COSMOS PTO, starting over again.Date: Sun, 13 Jul 2003 01:58:30 -0400
Well maybe I was doing it wrong. You have to take the can off, then loosenthat clamp screw in the back and then nudge the one slice of the stack youneed to adjust, then tighten the screw again, then put the can back on, thencheck your frequency, and repeat those stepst every 25 khz... seemed likethe stack would squirm around whenever I loosened that clamp screwthrowing a bunch of them back out of alignment, and I'd have to repeat itall again... or if I tweaked one slice, it would mess up those either side. Ifthere's a better way I sure wouldlike to know. I have heard the rumor thatCollins had a few very unique people locked away who did nothing but PTOcalibration.---------------------------------------------------------------------------------------------------------From: Al Tirevold <[email protected]>Subject: Re: [R-390] PTO Test JigDate: Sun, 13 Jul 2003 07:43:04 -0400
John Harvie's PTO calibration label is at: http://r-390a.net/R-390A-PTO-label.PDF-----------------------------------------------------------------------------------------------------------

From: [email protected]: Sun, 13 Jul 2003 08:49:56 EDTSubject: Re: [R-390] COSMOS PTO, starting over again.
Jim, thanks for all the info AND PICTURES you posted on your web pageson repair and calibration of the Cosmos PTO. Now I have a much betterunderstanding of the inner workings of the Cosmos! When I recalibratedthe Collins PTO with the corrector stack, what I did was loosen thecorrector stack holding screw just enough so that with some force I couldslide the adjustment disks but not so loose that the corrector stack wouldloose its shape.
Instead of trying to slide one disc at a time I would gently curve the outlineof the discs at the correction point. I checked mine every 100 KHz but I'msure it would take more time and be more tedious if someone wanted tocheck every 25 KHz. The linearity seemed very good so I didn't bother tocheck every 25 KHz. Mine was off a half a KHz or so between about 3 or 4100KHz checkpoints in a row so it was not a real tedious job. I can see thebenefits of the Cosmos design - as long as it has not been abused or thering damaged along the way.
I can see how someone not familiar with the Cosmos might try to screwthose linearity adjustment screws in by mistake thinking it was the end-point adjustment. I bet that is how some of them got broken or damaged inthe past. Thanks to Al for posting the address for getting a copy of thedegree wheel - a handy item!--------------------------------------------------------------------------------------------------------------From: "Jim Miller" <[email protected]>Subject: Re: [R-390] PTO Test JigDate: Sun, 13 Jul 2003 09:34:18 -0400
Someone asked me about the equations for the little spreadsheet I used tograph the PTO error. I lost your email. Send to me again and I will emailan attachment. back to you Or go back to the web page and click on thelink I added to a sample .xls file (scroll down to the bottom). It calculatesexpected frequencies at each quarter turn. Then you have to manuallyenter the actual measured frequencies, and it uses the Excel chart functionto plot the differences, Pretty simple really.-----------------------------------------------------------------------------------------------------------From: [email protected]: Sun, 13 Jul 2003 14:17:25 EDTSubject: [R-390] Setting end points on Cosmos PTO
I'm aligning my first R390. I pulled the PTO to correct the 14 khz error ithad in it's 1 mhz travel. I turned the screw several times but it had no

effect on either end point. I removed the outer cover on the PTO and sawwhat I was turning was a brass screw with a fine thread on it's OD and a1/8" diameter hole through it. Any ideas? Is this screw supposed to movea slug in the coil like the schmatic shows or is this a variable cap? Thanksand 73 Tom k6lqi-----------------------------------------------------------------------------------------------------------From: "Phil Atchley" <[email protected]>Subject: RE: [R-390] Setting end points on Cosmos PTODate: Sun, 13 Jul 2003 23:59:29 -0000
It sounds to me like you're adjusting the thermostat instead of the endpoints. The thermostat is the far LEFT screw (left side of the tube) as youlook at the front of the PTO with tube UPRIGHT. The End point is on thefar RIGHT when looking the same way. The one in the middle is thelinearizing window to access those 48 screws! (BOY DO I KNOW ABOUTTHOSE 48 SCREWS!)--------------------------------------------------------------------------------------------------------------From: "Phil Atchley" <[email protected]>Subject: RE: [R-390] 3rd Mixer noise, STINKIN' COSMOS PTO 8^)Date: Mon, 14 Jul 2003 04:53:26 -0000
Well, I won't say that ALL Cosmos PTO's will give you as much trouble as Ihad. Remember, the first PTO I had contained some damaged components("Springy thingy") and a couple other problems and the 2nd unit had someother "multiple issues" with it. However, as evidenced by the relative ease Ihad after overhauling the second unit I will have to say that if your PTO isotherwise in good condition you may have little or no problems at alltuning it up. One thing that IS worth noting is that neither of my unitsneeded to have a turn removed from the end point coil though I did that tothe first unit and ended up having to rewind the coil with the proper 3turns. It appears, at least in the case of these units that cleaning andlubing them seemed to bring the end points in to where they could beadjusted with the end point coil. Good luck with your Cosmos.------------------------------------------------------------------------------------------------------------Date: Mon, 14 Jul 2003 15:05:47 -0400 (EDT)From: "Paul H. Anderson" <[email protected]>Subject: Re: [R-390] COSMOS PTO, starting over again.
> HEATER NOTE: This time upon disassembly I completely removed the> thermostat and the heaters from inside the PTO. I NEVER use themanyway and they just >complicate the teardown-rebuild of the unit. Yes, I'llkeep the insulation intact as I'm sure it >adds to the thermal stability.
Phil - it has been great reading all your notes about your rebuildexperience. I've got only Cosmos PTO's for my R-390A's, plus one spare

that I have taken partway apart. Regarding the fiberglass insulation... itmust be there to keep heat IN the PTO with the heater running. If theheater is off, or left out, the blanket slows the absorption of heat from theradio. Stability is reached when the temp is the same over time. Therefore,I suspect that it would be better to leave the blanket off, since you'd reachthermal soak more quickly (i.e. the radio heats the PTO to the same temp).------------------------------------------------------------------------------------------------------------Date: Wed, 16 Jul 2003 07:56:47 +1000From: Lionel Sharp <[email protected]>Subject: [R-390] Re: (R-390) PTO Test jigs
There is an article titled "New life for the Collins 51J receiver VFO" byWilliam Orr, W6SAI (now a SK) in the December 1969 issue of Ham Radiomagazine which features a "test jig" to operate on the PTO. The PTO is a70E - 15 which covers 2 to 3 Mhz with 10 turns of the tuning shaft. ThisPTO does not appear to be as complex as the ones used in the R390 &R390A receivers whose PTOs cover the range 2.455 to 3.455 Mhz..------------------------------------------------------------------------------------------------------From: "Merle" <[email protected]>Date: Thu, 17 Jul 2003 18:34:56 -0400Subject: [R-390] Collins PTO Identification Guide
You might find this site helpful when working on PTO's I use it often ! Goodluck.. Merle W1GZS http://www.militaryradio.com/pto.html-----------------------------------------------------------------------------------------------------------From: "Phil Atchley" <[email protected]>Date: Wed, 23 Jul 2003 20:45:33 -0000Subject: [R-390] Today I Tweaked my PTO endpoint and lubed gear train.
Hi After having used it for a week or so the end point had changed about1KHz. This gradually occurred during the first couple days of use after theset was put into full operation at the primary operating position andhadn't changed since. So today I removed the PTO and tweaked it back towhere it was. Linearity was still good after putting it back. This doesn'tsurprise me any as I kind of figured it might change a little after the setwas run many hours in its cabinet. It is probably the nail polish I used onthe coils etc curing. It was baked for a short period but doubt that tookcare of all curing. I suspect it won't happen again, at least not for quite along time. <snip>----------------------------------------------------------------------------------------------------------From: "John Page" <[email protected]>Date: Wed, 30 Jul 2003 02:00:27 +0000Subject: [R-390] bottom 200 kc dead
My Collins R390A just suddenly developed an odd ,to me, problem. Itsuddenly decided it would not receive anything from X.200kc down. This

on ALL bands. Really didnt have a clue as where to start as signals from200kc up were great. It was as though you flipped a switch when you tunedbelow 200kc on any band. I did check all tubes. Just to try something. Allchecked good. Thought a cam had slipped so I compared it with my StewartWarner which works great.
All seemed ok. Had a occasion to be talking to Jim Garland W8ZR thisevening and he thought I should check out the PTO. Jim knows his stuffso I went home and decided the easiest check was a new PTO tube. WOW itworks. Old tube still checks good and returning it to the PTO brings backthe problem So Thanks Jim, you fixed it. Not sure why that happens but atthis point, who cares. Just wanted to share this with the group. Might besome newbys to 390's like me on here.--------------------------------------------------------------------------------------------------------------From: "g4gjl" <[email protected]>Subject: Re: [R-390] bottom 200 kc deadDate: Wed, 30 Jul 2003 09:17:02 +0100
I had the same problem, and it turned out to be the 6BA6 in the PTO hadgonelow emission. Change it before you look any further.....could save a lot oftime!-------------------------------------------------------------------------------------------------------------From: <[email protected]>Subject: Re: [R-390] bottom 200 kc deadDate: Wed, 30 Jul 2003 09:01:51 -0400
Check the mixer rack and slugs to the right, rear of the rf deck. Usuallywhen something like you experienced happens to me, I find that the rack issticking. It may be a subtle binding, so look very carefully at whether therack is moving through its entire range.------------------------------------------------------------------------------------------------------------Date: Wed, 30 Jul 2003 09:59:07 -0400From: [email protected] (Todd Bigelow - PS)Subject: Re: [R-390] bottom 200 kc dead
Thanks for posting this, John - these are the kinds of things you'd (we'd?)not normally associate with this behavior (I was thinking somethingalong the lines of a crystal problem).
Just goes to show, you can never trust a tube even if it checks 'good'.There's a reason why they list "substitution with a known-good substitute"as being the best method for testing a tube or given circuit.-------------------------------------------------------------------------------------------------------Subject: RE: [R-390] bottom 200 kc dead

Date: Wed, 30 Jul 2003 12:26:05 -0700From: "David Wise" <[email protected]>
I bet that PTO has FC-7 installed.-------------------------------------------------------------------------------------------------------------From: "Drew Papanek" <[email protected]>Date: Thu, 31 Jul 2003 14:01:27 -0400Subject: [R-390] Bottom 200Kc Dead
<snip> it would not receive anything from X.200kc down. T.......
As Dave Wise (he truly is) pointed out, your PTO may have Field Change 7installed. That changes the value of the screen resistor with the intent ofreducing radiated signal. Low(er) screen voltage may cause the problemyou described. Someone else had the same problem a while back. The causeturned out to be low PTO tube heater voltage caused by a defectiveBallasTube. Replacement of the 6BA6 was the temporary solution. Verifycorrect heater voltage at PTO tube with tube in socket. Those BallasTubescan fail in ways other than going open, and some were out of spec to beginwith.--------------------------------------------------------------------------------------------------------------From: Doug McRae <[email protected]>Date: Sun, 30 Nov 2003 19:40:39 -0800Subject: [R-390] r-390a pto output voltage
Does anyone know what the correct output voltage is for R390a PTO? Aswell, where does it peak and what the correct adjustment procedure fortransformer Z-702? I have checked one with a HP3400A and it had a peakof 7.75 volts at 0 000 and 2.25 v at 0 500 and 0+000. I can't findanything in the manual or on-line.-------------------------------------------------------------------------------------------------------------From: "Ronnie Davis" <[email protected]>Date: Fri, 19 Dec 2003 17:48:25 -0500Subject: [R-390] Big Mistake Please Help
Well all was going well with the Capehart R-390A until last night. I pulledthe RF Deck out to start working on it, and after cleaning for sometime, Iremembered that I did not set the PTO to 8 Mhz before pulling the deck!After I remembered that I just thought about messing up big time! I hadalready been turning the Mhz change knob to clean the deck, and thekilocycle change knob has also been turned for cleaning.
So the problem is, that I have no idea where the PTO was at when I pulledthe RF Deck? I knew better than this, I knew from the manuals and thevideos that I should have put the PTO on 8 Mhz but while in the heat of

working on it I just slam forgot. Please tell me there is a way to find outwhere the PTO is so I can install the RF Deck when I finished with it. Surehope I did not mess up to bad? Again a Stupid Beginners Mistake-------------------------------------------------------------------------------------------------------------From: "Steve Goode" <[email protected]>Subject: Re: [R-390] Big Mistake Please HelpDate: Fri, 19 Dec 2003 17:35:13 -0600
If it is any consolation, I made careful measurements of my PTO before Itook it apart. I took digital pictures of it. I made marks on the shaft andhousing. Everything was done at 8 MHz. After I put it all together, IT WASSTILL WAY OFF! So don't feel bad. If I remember correctly, the way I got itback on was to take my signal generator and find where the receiver waswith the generator set very high. Then I walked the PTO back to where itshould be. Sure made a big difference in sensitivity! I guess you could alsocount the PTO with a freq counter to get it back on.------------------------------------------------------------------------------------------------------------From: David Hallam <[email protected]>Subject: RE: [R-390] Big Mistake Please HelpDate: Fri, 19 Dec 2003 19:32:08 -0500
Don't know about the 390A but on the 390 the end points of the PTO are3.455 and 2.455 MHz. If you use your frequency counter to set the PTO to2.955 MHz and set the counter to 500, you can lock the shaft to yourtuning knob.-----------------------------------------------------------------------------------------------------------From: "JamesMiller" <[email protected]>Subject: Re: [R-390] Big Mistake Please HelpDate: Fri, 19 Dec 2003 19:26:31 -0500
Set the band and the tune digits to your favorite AM stations frequency(say 1240 or whatever). Turn the PTO shaft by hand until you hear yourstation. If you get all the way to one end with nothing head, go the otherdirection. You will also hear the noise level peak up when you're more orless synchronized. Be careful not to turn it past its stops however. It's nobig deal, I have to do this every time I open mine up.----------------------------------------------------------------------------------------------------------Date: Fri, 19 Dec 2003 17:19:16 -0800 (PST)From: "Tom M." <[email protected]>Subject: RE: [R-390] Big Mistake Please Help
You did the right thing by asking for help, but this is not really a big deal(unless you proceed without help then it can become a big deal). Themethods mentioned herein all can work. You can do an initial setup byknowing this:

- the 10 turn stop on the RF deck has a range of 10.7 turns (what the? Ithought it was 10!).
- the PTO has a greater range, about 15 turns from its stop-stop (give ortake for different makers).
- So just set your RF deck on a known spot (like 000) and then install thePTO about 2.5 turns from its stop (from the proper end of course).
- now you can listen for you local AM stations and check for the amount ofKC error and correct it.
The 390 and 390A have the same output in frequency on the PTO, that ison 000 the PTO will generate 3455KC, at the top end of its range itgenerates 2455 KC. If you have a frequency counter, this is the safest wayto set it up.-------------------------------------------------------------------------------------------------------------From: "Dennis L. Wade" <[email protected]>Date: Fri, 19 Dec 2003 20:43:58 -0800Subject: Re: [R-390] Big Mistake Please Help
I am in the almost exact same position...I have my RF deck out for cleaningand recapping and I'm sure the PTO isn't where I left it. I've been looking atthe manual anticipating doing just what's been suggested...lining it up witha broadcast station or using the freq counter. Unless you've cranked thePTO way too far either way I'm sure you haven't ruined anything. I reallydon't know how you could avoid re syncing the PTO after removing the RFdeck. Good work...and good question! You beat me to it.--------------------------------------------------------------------------------------------------------------Date: Sat, 20 Dec 2003 01:44:44 -0500From: "Steve Modena, AB4EL" <[email protected]>Subject: Re: [R-390] Big Mistake Please Help
I showed the question from Ronnie to an R-390 fiend. The answer is:
"The R390 RF deck is set to 8MHz or 07+000 . "The PTO should be set to 2455kc with a freq. counter or anotherreceiver. "When the RF deck is on freq. 8MHz./07+000 all the cams should be ontarget."-------------------------------------------------------------------------------------------------------------Date: Sat, 20 Dec 2003 08:18:27 -0800 (PST)From: "Tom M." <[email protected]>Subject: [R-390] Cams and/vs PTO
The cam issue is a separate problem from the PTO issue.
The cams must be set at 7+000. The PTO can be set on either end oranywhereone can track down a reference.
The point is, the RF deck does not have to be at 7+000 to set the PTO.--------------------------------------------------------------------------------------------------------------Date: Mon, 22 Dec 2003 15:52:39 -0500From: Roy Morgan <[email protected]>Subject: RE: [R-390] Big Mistake Please Help
>Don't know about the 390A but on the 390 the end points of the PTO are3.455>and 2.455 MHz. If you use your frequency counter to set the PTO to 2.955>MHz and set the counter to 500, you can lock the shaft to your tuningknob.
CAREFUL! Note Tom M's later post. (the PTO frequency in the oppositedirection from dial frequency):
>The 390 and 390A have the same output in frequency on the PTO, that ison 000>the PTO will generate 3455 kcs, at the top end of its range it generates2455>KCS. If you have a frequency counter, this is the safest way to set it up.----------------------------------------------------------------------------------------------------------From: "Ronnie Davis" <[email protected]>Date: Mon, 22 Dec 2003 21:20:40 -0500Subject: [R-390] Big Mistake Update
First I want to say a BIG THANK YOU to all on the list who offered me helpwith my latest problem. I have found out what im going to do, afterlistening to several solutions from the members of this list. I have beencleaning, re-cleaning and cleaning again the entire RF Deck. I have all theslug racks done, but ended up breaking two slugs by dropping the last rack.I have a few spares and I'm glad I do now hi. I have been working on thegear train for several days on and off. I was afraid to dis-assemble the geartrain since this is my first one, but I have all the gears clean now. I havelined up all the cams at 7+000 and set the over travel on the dial to 7+035.I still have to do a little more cleaning and then im going to recap the RFDeck. Hopefully by this weekend I will have it ready to try and line up thePTO to the RF Deck. What I am going to do is set the radio to 7+000 thenim going to set the PTO to 2,455 with a frequency counter and hookeverything back up. I hope all is well, cause I have spent a lot of time

cleaning and working on this Capehart R-390A. I think I may have beenbitten by some bug? I never in my life would have thought that I wouldenjoy working on a radio as much as I have this one. Its been a great stressrelief, and it keeps the old radios glowing. Its great being able to stop whenyou want to and go back when you want to. Although my XYL thinks imcrazy working on the ole radio so much, it sure does make me happy. Againthanks for all the help and maybe by Sunday I will have a better update.Thanks Ronnie---------------------------------------------------------------------------------------------------------Date: Sun, 4 Jan 2004 18:50:47 -0500 (EST)From: "Paul H. Anderson" <[email protected]>Subject: [R-390] R-392 PTO output level?
What is the output level of the R-392 PTO supposed to be, and is it aboutthe same as the R-390/391/390-A PTO? I'm aligning a 392, and foundthat the PTO is drifting, so when I put a scope on the output, the signallooks noisy and weak (<10mv or so).----------------------------------------------------------------------------------------------------------> Paul,>> Data I have indicate 1.5 to 2.2 volts. (I assume this is RMS RF voltage.)> >I'm aligning a 392, and found that the PTO is drifting, so when I put a> >scope on the output, the signal looks noisy and weak (<10mv or so).>> Way too low. You have something to fix and you know where to start.>> - Roy Morgan, K1LKY since 1959 - Keep 'em Glowing!------------------------------------------------------------------------------------------------------------Date: Fri, 06 Feb 2004 11:48:17 -0500From: Roy Morgan <[email protected]>Subject: Re: [R-390] R-388 Info
One point that may not have been mentioned yet: the R-388 PTO's. The R-388 PTO's can be divided into two groups: those which do not drift andthose which do, always have and always will. By "drift", I mean the"endpoint spread" increases slowly over time. That means that it takesmore than 10 turns of the shaft to change the PTO frequency the onemegacycle it is intended to change.
Here are significant points about this situation:• - The only way you can know which you have is to get the radio andtry it out.• - Non-drifting PTO's are not rare but you don't know which you havetill you have it. Do not rely on any seller to tell you the truth. They may notknow what you are talking about.• - There is no cure for a drifting PTO. You can re-align it to bring thespread back to correct, but it will continue to drift. (Some folksovercompensate about 2 to 3 years worth of drift and then count on doing

it again after 4-6 years.)• - Careful overhaul of a PTO and correction of drift is not for thenovice, but is certainly doable if you are a capable technician and takeadvice well.• - This situation of a drifting PTO only bothers some people, not all.• - The receiver is still very useful, and normal operating procedurecompensates for the errors.--------------------------------------------------------------------------------------------------------------From: "Bernie Nicholson" <[email protected]>Date: Sun, 11 Apr 2004 16:12:25 +1000Subject: [R-390] 4KHZ filters
<snip> on a different subject I have just linearized a PTO by making alittle jig and using the dial from a ten turn pot to draw graphs untill I got astraight line response It took about 5 hours and when I put the cover on Ionly had to make a slight ajustment to the end stop and it is within 300 hzfrom one end of the dial to the other , A win for me anyway.--------------------------------------------------------------------------------------------------------------Date: Sun, 11 Apr 2004 11:10:47 -0400From: Bob Camp <[email protected]>Subject: Re: [R-390] 4kc filter
This is turning into two different threads ..... <snip> The PTO issue ....There is a well documented issue with the main coil in the R-390 PTO's.Collins figured out the problem and changed the design on the nextgeneration of radios. All of the subsequent Collins designs used the newercoil rather than the R-390 one. It's not at all clear why somebody didn'tput he newer coil into a 390 PTO ... I suspect that Collins kept quiet aboutwhat the fix was for competitive reasons. The guys that figured it out stilltreated as a big secret thirty or forty years later. A couple of things happento the coil over time: First the core material that tunes the coil changesvalue over time. Depending on the material this could go either way interms of inductance. Second the coil form it's self shrinks very slightly.This puts the windings of the coil closer to the core. The change in lengthis insignificant. When the turns get closer to the core the inductance goesup. The net result is that the tune range of the coil changes as it ages. Sinceno manufacturing process is perfect the coil turns are not quite spacedevenly over the length of the coil. As the value of the coil changes therelationship between the non linearity and the tune setting changes.
The nice thing about the gear train is that until you loose a tooth off of agear it keeps doing about what it always has done. The play goes up a littleon the counter as things wear with time but the rest of the system stayspretty tight. I have no problem at all with doing a linearity fix on a PTO. It

takes a lot more patience than most of us have. The thing that puts most ofmy 390's off frequency is the crystals. Getting to the point that they arenot a problem also takes a lot of patience and a very big bucket of crystals.If you wanted a radio that you could simply tune to frequency that wouldbe the way to go. No calibrate each time you switch the MHz knob. Ofcourse you could revive one of the Manson Labs. =46rom talking to thetech's who built them that would be a bit of a chore though.------------------------------------------------------------------------------------------------------------Date: Tue, 13 Apr 2004 03:09:35 -0700 (PDT)From: "KC8OPP Roger S." <[email protected]>Subject: Re: [R-390] PTO
I have a COSMOS built for the 390A that is now in one of my R390's. Youwill have to fabricate a new rear mounting bracket. I was able to pull thegreen screw and barrel out of the old bracket and press it into the newbracket. Rewire the the power connector to match and replace the signaloutput cable with some RG58 and a normal BNC. Good luck and let usknow how it works.----------------------------------------------------------------------------------------------------------From: "Jim Temple" <[email protected]>Subject: Re: [R-390] PTODate: Tue, 13 Apr 2004 11:37:50 -0400
I have four Cosmos PTO's in my R-390A's and spares. All have the "type"136-1 printed on the case. I own a R-390 that also has a Cosmos PTO.This PTO appears to have original wiring. The "type" printed on this PTOis 136/283. Perhaps there was a contract let for replacement PTO'smanufactured by the Cosmos people for the R-390?? Any thoughts?--------------------------------------------------------------------------------------------------------Date: Tue, 13 Apr 2004 10:55:41 -0700 (PDT)From: David Medley <[email protected]>Subject: Re: [R-390] PTO
There are 3 things you have to do to convert and R-390A PTO to an R-390.
• 1. Shorten the output cable and replace the mini BNC with a regularBNC, This is not as easy as it sounds as the cable in the R-390A is a minicoax and it is not easy to attach a full size BNC. If I had to do this I wouldreplace the whole cable assembly.• 2. The pinout in the power plug is different and has to be rewired.This should not be difficult.but be careful. It is easy to damage theseconnectors with too much heat.• 3 You will have to replace the rear mounting plate.
If you decide to go ahead with this I have some junk PTOs here and canprobably come up with a rear mounting plate and an output cable.

-------------------------------------------------------------------------------------------------------------From: "Jim Temple" <[email protected]>Subject: Fw: [R-390] PTODate: Sat, 17 Apr 2004 09:19:39 -0400
I have been thinking (oh-oh). The cable that outputs the frequency for theR-390A is tagged P717. The Cosmos PTO that is installed in my R-390 hasthe frequency cable tagged as P723. Is this more proof that, perhaps,Cosmos had a contract to provide replacement PTO's for R-390's??---------------------------------------------------------------------------------------------------------Date: Wed, 16 Jun 2004 18:57:30 -0400From: "Forrest Myers" <[email protected]>Subject: [R-390] Re chirping CW and low audio plus strange PTO problem.
<snip> Now, I have a strange problem with the PTO. If I tune up from 0 to1000, it is very linear, within a couple hundred hertz all the way. If I tunedown from 1000 to 0, it is very linear, within a couple hundred hertzexcept at 100khz where it is suddenly about a kHz off. Going on down to 0it is back on. If I approach the 100khz mark from about 10 kHz below, it'sright on the money. If I approach it from about 10 kHz above, it's about akHz off, low. Scratching my head for a while, I figure there must be somemechanical problem inside the PTO but can't imagine what it is unless thecore is dragging on the coil and causing it to move at around the 100 kHzmark. There is no play in the gear train or the PTO shaft coupling. Whentuning at the 100 kHz mark, any slight movement of the tuning knob willcause a change in the frequency of the PTO. Any ideas? Should I just livewith it?------------------------------------------------------------------------------------------------------------Date: Wed, 16 Jun 2004 21:43:26 -0400From: Bob Camp <[email protected]>Subject: Re: [R-390] Re chirping CW and low audio plus strange PTOproblem.
You don't mention whose PTO you have so this may not be exactly rightfor the PTO you have. The simple answer is that yes you have a simplemechanical problem with the PTO. With the original design the PTO islinearized by a bunch of little sliders that make up a zig zag track that runsthe length of the coil. There is a follower that runs along this track and itdrives the compensation process. If you have a steep spot on the trackaround the 100 KHz point and a weak follower spring then it will run "uphill" just fine. When you come back and try to go "down hill" thecompensation will not be repeatable. On a totally unrelated note the set upof the sliders on the track was still remembered twenty years later as "theworst job they ever made me do here" by the line workers who built theMotorola PTO's .... Talk about hard to explain your hobby to somebody ....------------------------------------------------------------------------------------------------------------

Date: Thu, 17 Jun 2004 09:34:31 -0400From: "Forrest Myers" <[email protected]>Subject: Re: [...plus strange PTO problem.
Thanks for the PTO information. My PTO is a Progressitron and isextremely linear except when going up hill at around the 100 khz point. Idid some more testing last night and found that it is worse than I'dthought. The worst point is at 105 khz where it is 2 khz low! Going uphill,the non linearity starts at 80 khz and gets worse up to 105 khz where it is2 khz low. Then, at 110 khz it is fine at only 200 hz low. Remember, whentuning downhill, the linearity is just fine from 1000 to 0. Do you know ifthe Progressitron PTO works the same as the Motorola? I'm seriouslythinking about taking the thing apart and looking at it. If the spring isweak, is it repairable?--------------------------------------------------------------------------------------------------------Date: Thu, 17 Jun 2004 07:47:38 -0600From: Jordan Arndt <[email protected]>Subject: Re: [....strange PTO problem.
It's entirely possible that the spring is weak, but it could also be that thepivot is gummed up with dried lubricant...if the 'bend' of the wafers in thecorrector stack is steep, it can cause the pinch rollers to 'open' and staythat way until some other contact cause it to close back up again andcontinue normally....whatever you do, don't change any of the correctorstack settings...! 73 de Jordan...------------------------------------------------------------------------------------------------------------Date: Thu, 17 Jun 2004 19:11:11 -0400From: Bob Camp <[email protected]>Subject: Re: ....strange PTO problem.
The PTO's are all repairable regardless of who made them. Since it's amechanical problem it should be pretty easy to figure out. You may find abunch of what used to be grease or you may find a spring that's past it'sprime. I doubt you will find anything more complex than that. Make sureyou do a read through one of the manuals before you pull the PTO from theradio. It's not real hard but if you do it right it's a lot easier to geteverything running after you drop it back in.---------------------------------------------------------------------------------------------------------Date: Thu, 17 Jun 2004 19:57:57 -0400From: "Forrest Myers" <[email protected]>Subject: Re: ....strange PTO problem.
Well, today I took the PTO apart. Inside it looked like a new one. All thelubricant was still very moist and the spring on the stack follower wasnice and strong. I figured out the problem but didn't fix it. It appears thatthe PTO was defective when manufactured and when it was linearized, it

was done only while tuning uphill.
The correction stack has a very sharp bend right around the 100khz point.I checked both rollers as they passed the sharp bend and they bothfollowed just fine. Looking closer, I noticed that there was a slight gapbetween the wafers in the stack. Looking even closer, I noticed that, whentuning uphill, there was so much pressure on the wafer at the peak of thebend that the wafer actually bent under the load and straightened out afterthe roller passed it. When tuning down hill, the wafer wasn't under muchpressure at all and didn't bend at all, thus the difference in the linearitybetween tuning up and tuning down.
I didn't see any easy way to fix it so just put it all back together. One nicething is that the rig still works and the linearity didn't change, whew!Guess I'll just live with it unless anyone on the list has a way to fix theproblem.
I suppose, I could change the wafers such that it tuned correctly goingdownhill and then fill the gaps between the disks with epoxy or somethingso that they wouldn't bend while tuning uphill. Sounds like a lot of tediouswork to me.---------------------------------------------------------------------------------------------------------Date: Thu, 17 Jun 2004 19:12:13 -0500From: mikea <[email protected]>Subject: Re: .....strange PTO problem.
Well, the easiest way to fix the problem would be to get a "new" (to you, atleast) PTO, from Fair or someone who's parting them out, or from one ofthe R-390/R-390A fixers. Good luck, whatever you choose to do.---------------------------------------------------------------------------------------------------------Date: Thu, 17 Jun 2004 22:14:31 -0500From: Tom Norris <[email protected]>Subject: Re: ....strange PTO problem.
>It's entirely possible that the spring is weak,
The spirit is willing, but the spring is weak???? Had the same problemwith one of my spare PTOs a couple years ago, it was indeed the spring onmine.---------------------------------------------------------------------------------------------------------Date: Fri, 25 Jun 2004 13:30:35 -0400From: "Forrest Myers" <[email protected]>Subject: [R-390] Non-Linear PTO
I had a problem with my Progressitron PTO where it had a bad spot rightaround 100khz Where it was suddenly almost 2khz off, depending on the

direction of tuning. Tuning uphill, it was fine. Tuning downhill, it went badat about 105khz and got back on track at about 80khz. Took the PTO apartand found it to be unrepairable due to the sharpness of the change in thestack at that point. Decided to get another PTO.
Bought a junker from Fair Radio. When it arrived, I took a look at it anddidn't have much hope. It was very beat up, dented and dirty. Took theouter can off to see if the dents reached the inner can and found that theydidn't. The shield on Z702 was badly dented and leaning at about a 10degree list to port. I took the cans and brackets off and gave them a goodwashing. Decided to to some body work on the Z702 can and got it backinto fair shape. Bent the works inside the Z702 can to where they stoodstraight up again. Noticed that T701 had never been soldered in! Wonderhow it ever worked reliably. Probably never did. Soldered T701 in. Theoutput co-ax was in bad shape and was almost cut in two in a few places.Replaced the co-ax. Made up a test jumper cable and hooked the PTO up topower to see what would happen. Hooked a frequency counter to the outputand fired it up. The PTO came up without any smoke and was on areasonable frequency. Turned the shaft and it seemed to be very stable.Maybe it was going to work! Adjusted the PTO to put out 3.4550 mhz andpowered it down. Installed the PTO in R-390 a Capehart SN #557, did theend point adjustments and it's just fine! The linearity is within spec andseems very stable. Hope it keeps working! I'm keeping the oldProgressitron for a backup but will probably never use it because of the badspot in its tuning range.------------------------------------------------------------------------------------------------------Date: Fri, 3 Sep 2004 22:41:35 +1000From: "Bernie Nicholson" <[email protected]>Subject: [R-390] 390a frequency readout
The cosmos PTO on one of my recievers has 4 linearity adjustments /turn Imade a jig using the dial from a ten turn pot and using a HP5245 counterand a couple of sheets of graph paper; and after a few adjustment runs myreciever after I calibrate it on any particular band the frequency read outis within 100hz , I have also checked it against my Racal/Danasynthesized sig gen, and that also supports the same conclusion Whoneeds better accuracy than this?-----------------------------------------------------------------------------------------------------------Date: Sat, 18 Sep 2004 09:35:54 -0400From: "James Miller" <[email protected]>Subject: [R-390] COSMOS PTO Article
For use in Dave Medley's page re-hosting, the full COSMOS PTO article is onmy web account at: http://home.cfl.rr.com/jmiller1706/cosmos.htm Thetwo corrupted images can be restored from there.---------------------------------------------------------------------------------------------------------

Date: Mon, 22 Nov 2004 15:29:15 -0500From: Bill Abate <[email protected]>Subject: [R-390] Cosmos PTO adjustment
I'm tackling the Cosmos PTO for linearity adjustment. I have Dave's articleon how to do it but I'm having problems in finding out what tool to use.Those darn small screws are hard to see especially at my age!! I was ableto determine (with an 8X magnifying glass!)that the cap screw is an Allenhead cap screw. The smallest allen wrench I have is .028" and it fits butjumps when I try to turn the screw. I have no idea what standard sizesallen wrenches come in. 1/16" is way to big. 1/32" is .032" but that doesnot seem like too much of a difference from the .028 that I have. Anybodyknow what size wrench I should be looking for?------------------------------------------------------------------------------------------------------------Date: Mon, 22 Nov 2004 17:16:48 -0500From: Roy Morgan <[email protected]>Subject: Re: [R-390] Cosmos PTO adjustment
I think the Cosmos PTO's I have here use screwdriver-slotted screws forthe linearity adjustment. I have no idea what standard sizes allenwrenches come in.
Check http://www.engineeringfindings.com/cat22/cat22pg364.pdf (SmallParts,Inc,) they seem to come in 28, 35 and 50 thousandths.----------------------------------------------------------------------------------------------------------Date: Mon, 22 Nov 2004 17:54:22 -0500From: Bill Abate <[email protected]>Subject: Re: [R-390] Cosmos PTO adjustment
Thanks for the info. It looks like I need the .035, unless it is a non-standard size which I doubt. I have a friend checking for one. Hope he cancome through. Also, it is my understanding that the Cosmos PTO usedallen, slotted hear and bristo head cap screws for the linearity adjustment.Go figure! At least they didn't use them all on the same PTO! HI HI..---------------------------------------------------------------------------------Date: Tue, 23 Nov 2004 05:56:20 -0800 (PST)From: "KC8OPP Roger S." <[email protected]>Subject: Re: [R-390] Cosmos PTO adjustment
Here is what I found and it fits a couple of the PTO's that I have been into.Some of them have slots for a tiny jewel screwdriver bit, but then there isthe allen type. Contact your Snap-On dealer and order up "MS2A". this is amulti spline L-shaped wrench. Four flutes at 0.033 inches. When it comesin take your magnifier with, it is very small. Good luck and let me knowwhat you find.

--------------------------------------------------------------------------------------------------Date: Sun, 28 Nov 2004 15:01:05 +0000From: "Gene Dathe" <[email protected]>Subject: [R-390] PTO connector
I have a damaged Cosmos PTO. I need J709, the blue 9 pin connector andassociatied hardware. You can sell me the connector alone or a completejunked pto of any vintage... Thanks!---------------------------------------------------------------------------------------------------------Date: Sun, 28 Nov 2004 12:15:43 -0500From: "David C. Hallam" <[email protected]>Subject: RE: [R-390] PTO connector
Try Bill Perry at William Perry Co. 502 893-8724 He has all kind sosurplus connectors.------------------------------------------------------------------------------------------------------------Date: Sun, 28 Nov 2004 21:25:12 +0000From: "Gene Dathe" <[email protected]>Subject: [R-390] PTO connector
A connector has been located. A big THANKS to Dave and all the otherswhoresponded off list. Gene, NA0G-----------------------------------------------------------------------------------------------------------Date: Fri, 17 Dec 2004 08:15:08 -0500From: [email protected]: [R-390] Comsos PTO
I have been trying to do an end point adjustment on my R390a 's ComsosPTO. Turning the endpoint adjustment screw has no effect on the PTO'soutput frequency although the adjustment screw appears to be moving inand out . Anyone got an idea as to what may be going on? I was thinkingoff removing the cover but the PTO's power cable splits into two with onehalf going though a access hole in the cover. It looks like I will have toundo the connections to the Cinch connector and split the cable harness sothat cover can be removed..... Thanks in advance for any comments orsuggestions,---------------------------------------------------------------------------------------------------------Date: Fri, 17 Dec 2004 07:48:24 -0600From: Jerry K <[email protected]>Subject: RE: [R-390] Comsos PTO
http://www.r390a.com/html/n5off_pto.htmlshould be a good starting point, Joe. A google on "cosmos pto" will turn upa ton of helpful info.-----------------------------------------------------------------------------------------------------------

Date: Sat, 22 Jan 2005 11:42:20 -0600From: Tom Norris <[email protected]>Subject: [R-390] Raytheon PTO?
I recently came across a Raytheon PTO for the 390A. Anything specialabout it? I will assume this is a rework by Raytheon. Date is 1977. Pixhere --http://www.hezbolllah.org/390A/ray1.jpghttp://www.hezbolllah.org/390A/ray2.jpg---------------------------------------------------------------------------------------------------------Date: Sat, 22 Jan 2005 12:56:32 ESTFrom: [email protected]: Re: [R-390] Raytheon PTO?
Raytheon "NEVER" manufactured PTO's, it was a rebuild contract.
The Manufacturers of PTO's are:
1. Collins2. Motorola3. Dubrow4. Progressitron5. Cosmos
Les Locklear-------------------------------------------------------------------------------------------------------------Date: Sat, 22 Jan 2005 13:57:14 -0500From: Bob Camp <[email protected]>Subject: Re: [R-390] Raytheon PTO?
The main problem with "Raytheon" PTO's is that you next have to find outwho *really* made the poor thing. The military went through a *lot* ofPTO's. They set up Raytheon to rebuild a bunch of them to keep the radiosin service.-------------------------------------------------------------------------------------------------------------Date: Sat, 22 Jan 2005 14:50:11 -0600From: Tom Norris <[email protected]>Subject: [R-390] Raytheon Rebuild Riddle Resolved
The Raytheon rebuilt PTO is a Cosmos. The cal label was over the linearityadjustment cover screw.------------------------------------------------------------------------------------------------------------Date: Sat, 22 Jan 2005 19:40:46 -0500From: [email protected]: Re: [R-390] Raytheon Rebuild Riddle Resolved

The majority that I have seen are Cosmos, of course, the Cosmos PTO's aremuch more abundant than the others. I have seen a couple of Dubrows andone Progressitron. Les Locklear----------------------------------------------------------------------------------------------------------Date: Sun, 27 Feb 2005 11:33:20 -0800From: "Dennis L. Wade" <[email protected]>Subject: [R-390] PTO Woes
I think I killed my PTO. Probable cause of death was excessive pressure onthe shaft while attempting to re-install the RF deck after cleaning andrecapping. Apparently the Oldham coupler wasn't aligned as I had thought,and after the deck was installed, I turned the Kc/s knob and noted anexcessive amount of drag. Upon inspection, the mis-aligned disk was*tightly* up against the VFO shaft. Next time I have to take out the RFdeck, the PTO is coming out first. Ah, the wisdom of hindsight.
Looking at the output on a counter, it wasn't near 2.45500 Mc/s. (It wasover 3). Turning the shaft clockwise brought the frequency *up*!Running the shaft the other direction brought it down to around 3..thenback up..then down consistently in the manner it should. My layman'shunch says the corrector stack and/or the core itself it toast. I've neverdone it that I know of, but it almost acts like it was run out beyond its 10turn stop given its symptoms. If I set it now at 2.455, and call that turn 0,it behaves ok till about turn 6 or 7 when the frequency goes amuck,jumping around hitting almost 6 mc and then, around turn 8 settles backapproximately the right frequency. However, it reaches 3.455 mc/s inabout 9.5 to 9.75 turns.
I'm not up to rebuilding a PTO (See what happened when I took out the RFdeck?). Unless I decide to do an autopsy, I have available a Motorola forsomeone who would like one to rebuild. :/
Maybe someone would like to rebuild mine? :D
Anybody have a good PTO available? I'd like one with linearity screws (asin the Cosmos) if possible. I'd like to find one here, but failing that...anyonehave any experience with the "as-is" PTOs from Fair? Also, please adviseappropriate penance for killing a PTO.-------------------------------------------------------------------------------------------------------Date: Sun, 27 Feb 2005 14:39:56 -0500From: Bob Camp <[email protected]>Subject: Re: [R-390] PTO Woes
I don't know if they still have them, but for a lot of years Fair Radio wouldsell you a replacement PTO pretty darn cheap. It was a "pot luck" sort ofdeal so you might have to buy more than one. I seem to remember them

being less than $30----------------------------------------------------------------------------------------------------------Date: Sun, 3 Apr 2005 22:20:08 EDTFrom: [email protected]: Re: [R-390] Cap leakage
>the original Progressitron failed PTO (it developed a warble).
There is an easy fix for that. The tiny caps (10 picofarads I think) insidethe can break loose from the solder connection, just reflow it and it will befine. Seen it on 7 different Progressitrons.------------------------------------------------------------------------------------------------------------Date: Sun, 3 Apr 2005 22:18:18 -0500From: "Barry" <[email protected]>Subject: Re: [R-390] Cap leakage
Isn't a dirty ground strap also one cause of PTO warble?------------------------------------------------------------------------------------------------------------Date: Sun, 3 Apr 2005 23:25:12 EDTFrom: [email protected]: Re: [R-390] Cap leakage
Yes. But in the Progressitron's case, I believe it was a quality controlproblem. I've owned R-390A's with 8 Progressitron PTO's, 7 of them hadthe bad solder joint on the caps. And, they all warbeled.------------------------------------------------------------------------------------------------------------Date: Mon, 4 Apr 2005 10:26:55 EDTFrom: [email protected]: Re: [R-390] Cap leakage
Yes it is, but I tried removing and cleaning the strap without solving theproblem. Always a good thing to try before disassembling the PTO.---------------------------------------------------------------------------------------------------------Date: Mon, 4 Apr 2005 12:43:07 -0400From: Walter Wilson <[email protected]>Subject: Re: [R-390] PTO extender cables
If you flip the R-390A up on it's side and get a small box about 10 inches orso high, you remove the PTO from the R-390A and set it right there on thebox. Works for me, without extender cables.-------------------------------------------------------------------------------------------------------------Date: Mon, 4 Apr 2005 13:09:07 EDTFrom: [email protected]: Re: [R-390] Adjusting Z702 Tools
>Is there a tool made to adjust the slug on Z702 (the can on the PTO)?

All the tools I have seen for Z702 were from the teletype side of the shop.We had a round soft iron rod that had a slot sawed into the end of it. Theslot was wide enough to fit the flats. Most guys had a wrap of tape (heatshrink sleeve) around the end of the rod over the slot to keep the tool fromslipping off it nut. The best one I seen was an El Cheepo screwdriver shaftcut off and slotted. I had been slotted with a Demerol tool grinding wheelbecause even cheap screwdriver shafts are fairly hard to saw.Roger KC6TRU-----------------------------------------------------------------------------------------------------------Date: Mon, 4 Apr 2005 13:35:02 EDTFrom: [email protected]: Re: [R-390] PTO extender cable
Thousands of old ASA 33's worked on these R390 and R390/A for years allover the world for years and never even seen an extender cable. Not oneNota. Old school knowledge was the extender cables introduced moreproblems in feedback, loss of shielding, flaky connections than was gainedby the extra working space.
Stand the receiver on it end. Use a 2x4 to level the back of the receiverwith its front panel. Pull the PTO connector bracket loose from the chassisso you have some wire harness freedom. It is still a short leash. Set thePTO on a small cardboard box so it does not have to hang on its wireharness. This setup was used to set the 10 turn end point adjustment.
If you just need to run the linear deviation, pull the Standard BNC to MiniBNC adapter off the 455 output on the rear panel and use it on the end ofthe R390/A PTO. The R390 is a bit more creative as it has the B+ on thecoax. You need to isolate the frequency counter from the B+ on the R390.Leave the PTO in place and use the dial read out to count PTO shaft turns.Set one end at 455 and zero the dial. Start rolling off turns. At each 100 onthe dial counter record the frequency counter reading.
Just hanging the PTO out the up ended receiver and using a pencil mark toindex to, we would get the end points to within 10 cycles or so.Considering the counters and power company (VietNam, Korea, 69-75) weknew we were kidding out selves with those numbers. But you can do it.
If you were really going to go into a PTO and try to adjust the bank of littleshins all stacked up along the PTO guide assembly, spring for theconnectors from Fair for the PTO harness. You likely have the coax BNCadapter and can extend that cable to the counter with no problem.
I have seen PTO that would not make end point spread and needed work. Ihave not seen one that was considered so non-linear as to warrant an

adjustment of the shim stack. However, these items are much older nowand who knows what would do them some good. Good Luck with this,Roger------------------------------------------------------------------------------------------------------------Date: Mon, 4 Apr 2005 13:45:13 EDTFrom: [email protected]: Re: [R-390] PTO warble
Chances are good your not running a ballast tube. So consider the BFO andPTO tubes. The filaments may be doing this to you. Just a hopeful idea.Like Les said there are those little caps inside that come loose. Notwanting to upset you with scary feeling I will not go into the subject of PTOthat have all the caps waxed together into a block like Zenith did in TVsets. Clean the strap, swap the tubes, stock the beer, clear the calendar,clear the bench. Prepare to enjoy you hobby to the fullest extent. Life hasdealt you a real puzzle and you need to savor solving it to the fullest extentpossible. Roger KC6TRU----------------------------------------------------------------------------------------------------------Date: Mon, 04 Apr 2005 19:49:06 +0000From: [email protected]: Re: [R-390] Adjusting Z702 Tools for R-390 PTO'S
I'll have to dig into and check all my alignment tools to see if I still have atool that fits this description. I vaguely remember a tool approximately 5-6 inches long that was made of dark brown fiber with a small metal slottedslit. Since I have not worked on a 390 in detail for over forty years, anddon't recall if I ever did any PTO re-work, I'm wondering if there is a list of"Required Tools" for FIELD or DEPOT rework listed in any of the servicemanuals for the R-389,R-390, R-390A, and R-391. Better yet, is there a picture of this tool, PartNumber, Stock Number available? Perhaps, one of the group members hasfabricated a similiar tool that passes the test. Personally, I think thatinserting any metallic object into the innerds of the PTO may possiblyupset the reactance of the circuit.------------------------------------------------------------------------------------------------------Date: Mon, 4 Apr 2005 20:56:36 -0400From: "Jim Miller" <[email protected]>Subject: Re: [R-390] PTO Rebuild?
http://home.cfl.rr.com/jmiller1706/cosmos.htm------------------------------------------------------------------------------------------------------Date: Mon, 4 Apr 2005 23:23:17 EDTFrom: [email protected]: Re: [R-390] PTO Rebuild?
If the decal is missing, chances are it is a Progressitron, good PTO's bad

decals. Look on the back cover, if it has an Amelco stamp, it is aProgressitron.----------------------------------------------------------------------------------------------------------Date: Tue, 5 Apr 2005 13:45:07 EDTFrom: [email protected]: Re: [R-390] PTO Rebuild?
Inside, it would look the same as a Collins, Motorola or Dubrow. AFAIK,the Progressitrons were used in the 1962 Amelco contract, whether or notTeledyne Systems continued to use them for the remainder of the 1962contract or not.. Perhaps someone who owns a Teledyne R-390A with the35064-PC-62 contract could tell me/us? The ones I have seen had bits andpieces of a blue decal left on the can and an Amelco stamp on the rear ofthe pto can. Trying to gather the history on the different contracts was achallenge as was the information on the different suffix numbers on theHammarlund SP-600 series. Whenever I think I have "ALL" theinformation, I am proven wrong.....................and continue to learn, eventhough my grown children have officially declared I am an "old fart." LesLocklear------------------------------------------------------------------------------------------------------------Date: Tue, 5 Apr 2005 22:21:17 EDTFrom: [email protected]: Re: [R-390] PTO Linearity
>Just out of curiosity, Roger, what was considered acceptable linearity for>working radios, considering that the factory spec was 300 cycles
Ed, We would not even try to tweek the end points if it was off less than 3Khz. As far as linearity went, if you could get a cal tone to zero on the 100KC within reach of the zero adjust it was good enough. Hay we werefighting a war abeit a cold one. We only checked the total spread end toend. If we could not get a fair end point adjustment, we sent the critter todepot exchange. We never tried to get inside one. You could still get brandnew units from the depot, who would ever want to fix one?
Most of them were pretty good within the 300 Hertz factory spec. We justexpected them to be linear and that was that nothing to inspect or test.The flip side was every shop did have a budget. We were putting hours ontubes 24 7 and needed lots of them. The teletype guys were also eatingmotor brushes, printer ribbons and paper. We would not go looking foritems to change. We had a fairly loose 10 : 1 signal to noise ratio and didnot work over time eeking the extra out of receiver. We hated to give theoperators real great receivers, they expected them to all work that well. Wecould spend time doing cleaning and alignment, theses were just timeconsuming and did not cost extra for parts. We were going to be on thebench for the hours so we did what we could with the time and tools to give

the best we could for the operators. PTO were pretty linear and not worththe effort and cost over head to swap out.
You just were not going to tell the Warrant Officer you were dead lining aR390/A and wanted a PTO because the operator would have to zero itevery 200 kHz. Roger KC6TRU-------------------------------------------------------------------------------------------------------------Date: Tue, 5 Apr 2005 23:08:12 EDTFrom: [email protected]: Re: [R-390] PTO Tenny Bolts and war strories
Seen a dozen examples of how to adjust the linearity ring, none tell thewrench size for that tiny screw that I've been able to find. Most likely Imissed that part of the instructions.Best 73 Tom NU4G_______________________
Tom, this is another one of the do it your self tool making adventures. Asmall slot in the end of a shaft.-------------------------Personally, I think that inserting any metallic object into the innards ofthe PTO may possibly upset the reactance of the circuit. 73,Glen Galati,KA7BOJ
Glen, the PTO assembly has a transformer on it. The can has an adjustableslug like the one on the top of the Crystal Osc deck. Some of the modelshave a round "nut" on the shaft with two flats. You need a slotted tool to fitthe flats, or you turn the shaft with a pair of pliers. A good home madeslotted tool is better. So you are not really going into the PTO to do anadjustment. Strange but some times running the PTO for maximum signalwill not give the best signal to noise. Mostly some where in the alignmentprocess, you peaked the PTO transformer for maximum signal through thereceiver. Usually some where above 8 MHz so the first mixer was not in thesignal path mix. Do it this way until you have a week or so and want toplay with your receiver. You can then try varying the coil adjustments andchecking the signal to noise. Tweak and measure and tweak and measureand find the real good settings.-----------------------------------------------------I don't have any B+ on the output cables of any of the 390's I currentlyhave on the bench. Once upon a time in Nam I had an R390 on the bench. Ithough I had an adapter cube from an AN/URM 25 that had a cap inside it.It in fact had been rewired straight through as a barrel connector. I didnot know this and it was the only reason I was not shot. Plugged thatcritter in between the receiver and the only frequency counter in the wholeshop. Smoked the front end resistors out of the frequency counter. It wasdead lined for almost 60 days until the parts come in.
That shop had no counter and there were 200 plus 33's that knew justwho it was that killed the important item of test equipment. We ran thePTO cabled up in circuit with a Tee and cap. We had no idea how the loadchanged and just did it that way. It was so much nicer to use the frequencycounter and not count cycles on the oscilloscope display.
Sorry I do not have an R390 schematic to detail the exact reason thefrequency counter will go up in smoke if not isolated. But I sure as hellbarely lived through one experience with an R390 PTO that did smoke afrequency counter. ------------------------------------------------------------------------------------------------------------Date: Wed, 06 Apr 2005 10:46:17 -0400From: Roy Morgan <[email protected]>Subject: Re: [R-390] PTO Rebuild?
May I clarify a bit? The Cosmos PTO uses a flexible disk with a series ofadjustment screws to make the frequency correction. These screws areadjusted from the outside of the PTO case. The other, "standard" design usesa stack of corrector plates and a corrector follower bearing to make thefrequency correction. These plates are adjusted inside the PTO case byloosening the clamp screw and moving the plate "up or down" with respectto the frame. The clamp screw holds all the plates in position. Provision ismade so that adjustments to one plate do not move the ones on either sideof it.
Congratulations on having a stout heart. No doubt you'll have a success.As I understand it, adjusting the linearity a normal-design, corrector stackPTO involves the following points:
- The PTO cover must be removed, either once being replaced by a coverwith an access slit cut in it, and a hole to get at the locking screw, orremoved and replaced each time a correction or series of corrections ismade to a plate or plates.
- a jig is very useful so the PTO does not need to be re-installed in a radio each time adjustments are made. The jig would allow setting the
shaft to close rotational tolerances, supply power to the PTO, andperhaps provide a proper load for the oscillator output.
- A frequency meter is extremely useful
- mechanical means of moving each plate, and only one plate, a known amount is very useful.
- likely a computer spreadsheet or paper table would be most useful to correlate changes in set point frequencies with the mechanical

movement made to each plate, in thousandths of an inch ormillimeters or whatever.
Likely, all this was done at the factory with the PTO brought up to oventemperature. Roy----------------------------------------------------------------------------------------------------------Date: Wed, 6 Apr 2005 10:33:51 -0500From: "Laird Tom N" <[email protected]>Subject: [R-390] RE: COSMOS PTO
>From the WC9M archives: Hope this helps, Tom Laird WC9M
The following is an old post from JB Harvie........
Let me start by saying that the alignment of A COSMOS was for me a toughdifficult and stress producing procedure. More than likely there are expertsout in the group who will take exception to this "simple" posting. Candidlyspeaking I suggest that anybody who is considering this closely assessesthe performance of your PTO PRIOR to any opening up and set-screwadjusting, even though the performance might be off and you might betempted to do so the as-is performance might just be as good or better thanthe following intervention you can likely make. For a learning experience,on a spare unit, or if you are bold GO FOR IT! I "tuned up" both a Collinsand a COSMOS PTO on one of my R-390A receivers about 9 years ago. Thisis what would be along the line of what I did for the COSMOS unit. It was areal pain in the rear and took me a lot of time but in the end, (no punintended) performance was significantly improved. Today the receiver stilloperates no more than one tick (200 Hz) on all the calibration points. Withenough time and some care and some special tools you can work onthe COSMOS PTO, results are dependent on your overall setup, equipment,time and finesse. You must have a good stable and accurate frequencycounter or some other means of measuring the PTO output to say 10Hzprecision.
Some tips:
I found I could obtain better results by slightly loading the output of thePTO under alignment into a non inductive load. Raise and maintain (for 4hours minimum prior to any sensitive work) the PTO to a warmtemperature by placing it under a 75 watt light bulb, mounted overhead,adjust the distance from the bulb to the PTO so that the unit runs at aboutthe (indoor) receiver in-use operating temperature. Try to keep thetemperature stable while you are working on the unit. If you must stopmid-stream you may have to back track and do it again, keep the light(heat) on at all times while you are working on it. If you keep the doorclosed on an inner work room I found the temperature variations are

within a couple of degrees. As you start to get into the PTO guts diagrameverything you see as thisis what will become your owner / operators andrecovery manual for your PTO.
TAKE YOUR TIME
Mcmaster Carr sells adequate precision 6" and 8" diameter dial face plateswith reasonable precision index marks for around $10. Mount this dial toan Aluminum backing plate which has been drilled for the shaft diameter(0.185 inches) and secured (epoxy is OK) to some sort of a shaft clamp,mounting close to center (0.005") is somewhat important. Once yourhappy tighten up the clamp onto the PTO shaft, this gives you a good dialreference for making repeatable angular displacement measurements. The8 inch diameter dial, though bigger does a little better job to resolve,measure and enable a better than 400hz shaft angular result. If desired a10 turn counter (with lock) can be added to the alignment mechanism(such as the 400 series from Kilo International - Digi-Key page 376 incatalogue Q983 for $15.75 part number 412KL-ND)
PTO basics
PTO provides range of 3.455 to 2.455 mHz span therefore:
10 shaft rotation = 3,600 degrees = 1,000 kHz 1 shaft rotation = 360 degrees = 100 kHz 1/2 turn = 180 degrees = 50 kHz 1/4 turn = 90 degrees = 25 kHz 1/8 turn = 45 degrees = 12.5 kHz 1/16 turn = 22.5 degrees = 6.25 kHz 1/32 turn = 11.25 degrees = 3.125 kHz 1/64 turn = 5.625 degrees = 1,562.50 Hz 1/128 turn = 2.813 degrees = 781.25 Hz 1/256 turn = 1.406 degrees = 390.625 Hz 1/512 turn = 0.703 degrees = 195.31 Hz
* Operational Limit = 1.79 degrees = 500 Hz * (Reasonable) = 1 degree = 277.78 Hz * (Obtainable) = 1/2 degree = 138.89 Hz
Per TM 11-856A paragraph #150: ..Total End Point error on PTO not toexceed 500 Hz....(or about 2 degrees of shaft rotation)
To proceed:
Remove and open up the PTO

Remove the outer PTO can, heater and insulation (without trashing thethermal insulation)
Unsolder where necessary
Be gentle
Once it is opened up examine the PTO closely, look for damage orexcessivelead screw wear. Lubricate the lead screw if absolutely necessary with anacceptable lubricant.
Mount the PTO to a suitable stable test fixture, mount and insure that thedial face is securely mounted and rotates perpendicular to the PTO shaft.Verify the turn counter works (if used) Insure you can gain access to androtate the set screws. I had to make my own set screw driver as the setscrews are real small! One option is to obtain the smallest possible driverand stone it down.
Mount and check that the reference pointer is secure and that the dialclearsthe sharp pointer by giving the dial a full turn.
You can place a fixed magnifier lens and lamp to assist you in seeing thelines as needed but with a 8 inches dial a 1/2 degree spacing is quitereadable.
Connect up the power to the PTO,
Connect the PTO output to a load resistor and the frequency counter.
Bring up and maintain the (exposed) PTO to a "warm to the touch"conditionwith the lamp.
Turn on the PTOLook for a frequency output.Check the output vs. shaft rotation and move the shaft to get to the highendDouble check the output range (its still not to late to turn back :)
As you rotate the PTO you will see how the 40 or so adjustment screwsaremounted in an perimeter array and what they do. These screws act to setintoa precise position a metal ring on which rotates a coil plunger. The plungerdepth is "modulated", by the degree to which the set screws deflect themetal

ring. These plungers are what "trims" the precise PTO output frequency.As you rotate the PTO shaft the 40 or so set screws are need to be"adjusted" to precisely establish and define the mechanical plunger depth(position) so that the desired precise frequency output is achieved.
Keep track of which and how much you turn the set screws - make adiagramand keep good notes.
If you mess up take a break and start over. Always check the end to end (10turns) as well as the 1 turn performance. After you are completed, turn thePTO off, let it cool off overnight, maintain the lamp in position, turn thePTO back on, let it heat soak for another 4 hours and (re) measure theresults.
Settle for a reasonable performance level and call it good enoughReassemble with care
Bottom line is: You will need to have a lot of time and patience howeveryou can obtain extremely good performance with the COSMOS PTO.---------------------------------------------------------------------------------------------------Date: Wed, 06 Apr 2005 21:20:16 -0400From: "Miles B. Anderson" <[email protected]>Subject: [R-390] PTO Rebuild
I'd like to caution against jumping to the conclusion that the correctorstack needs adjustment whenever the PTO can't be made to track at theintermediate points. I tried once to adjust the corrector stack on a CollinsPTO and made such a hash of it that the whole assembly wound up in myjunk box. I later discovered that the real problem is often much easier tosolve. The problem in my case was that one or more of the littleunencapsulated mica capacitors went west. There is no way to adjust theshunt capacitance of a Collins PTO. All you can do is adjust the start pointof the tuning slug and the little series inductor that is used to trim the endpoint. This means that there is a unique shunt capacitance which willmake the tuning equation come out right at both ends and the middle. Ifthat shunt capacitance changes because of aged components, no amount offiddling the inductances will make the tuning linear anywhere except atthe end points.
The procedure I followed was to adjust the start point and the end point asper the manual. Then tune the PTO to the midpoint (500). If the oscillatoris high at the midpoint, add more shunt capacitance. If it is low, removeshunt capacitance. Adjust both end points again per the manual and checkthe error at the middle. If it is still off, repeat the process. We are onlytalking about 10 to 30 pf difference, but that small capacitance difference

can knock the daylights out of the linearity by putting an "error bulge" inthe middle. When you think you have the middle and both endpoints "spoton," check the tuning error every 100 kHz. If there are two "error bumps"(at, say, 300 and 700) these can be washed out by simply over-compensating the middle so the error runs in the other direction. By theway, I replaced the inner shield cover before each measurement. The mainthing to bear in mind is that the corrector stack was set properly at thefactory. The main coil is heavily doped and is not likely to move or change.What IS likely to happen is a change in the shunt capacitance. The shuntcapacitors are intended to be temperature compensating, but this neverbothered me much. Ordinary NPO ceramics seem to work fine.----------------------------------------------------------------------------------------------------------Date: Thu, 7 Apr 2005 10:35:20 -0500From: "Barry" <[email protected]>Subject: Re: [R-390] PTO Rebuild
Hmmm. I'm familiar with setting the endpoint, but don't rememberanything about setting the start point. I simply crank the shaft until I getthe lower frequency, crank it 10 turns and adjust the endpoint to get 1Mc.Rethinking this, I may have been doing this backwards as well. PerhapsI'm supposed to be setting the endpoint at the lower end, not the upper end.Maybe it doesn't make any difference? At any rate, I'd like to read moreabout setting the start point. Can someone point me to the document forthis?------------------------------------------------------------------------------------------------------------From: [email protected]: Re: [R-390] PTO RebuildTo: "Miles B. Anderson" <[email protected]>
I went through a corrector stack adjustment last year and it took an entireweekend and some. It had to be changed quite a bit from factory setting. Isuspect you have described the real cause of the change in linearity here.My corrector stack now looks like a "sine wave" almost, big hump near oneend. Does anyone have an idea of what an ideal stack should "look like", oris it too hard to predict?-----------------------------------------------------------------------------------------------------------Date: Thu, 07 Apr 2005 20:31:11 -0400From: "Miles B. Anderson" <[email protected]>Subject: [R-390] PTO Rebuild
A couple of clarifications: The PTO "tunes backward." That is, the PTOfrequency is lowest (2.455 MHz) at the high end of the counter dial (999 or+000) and highest (3.455 MHz) at the low end of the counter dial (001 or -000). I used the terms "startpoint" and "endpoint" in my original post withreference to the alignment procedure in Paragraph 81 of TM 11-5820-358-35.

You can tweak the "startpoint" at 07+000 by slipping the Oldham couplerwith respect to the PTO shaft. This sets the low frequency end to 2.455MHz with the slug pushed most of the way into the main tuning coil L702.As you tune lower in frequency (per the counter dial), the slug is graduallywithdrawn from L702; and the PTO frequency increases. You adjust the"endpoint" at 07-000 by tweaking L701 so that the PTO frequency is 3.455MHz. L701 is in series with L702. Since the tuning slug is most of the wayout of L702 at the "low end" of the dial, its inductance is smaller and L701has a proportionally greater effect on the frequency. To use a mechanicalanalogy, the "startpoint" (how far into L702 the slug starts its travel)isthe point where you put the end of your "ruler." The "endpoint" (the settingof L701) establishes the "length of the ruler." The shunt capacitors C701(370 pF), C702 and C703 (10 pF each) affect the frequency at all points.The little 10 pF capacitors are naked mica squares with silver platesdeposited on each side and very thin wire leads. They corrode easily and inmy case they failed. The result was to create an "error bulge" midway downthe dial after both 07+000 and 07-000 were set dead on.------------------------------------------------------------------------------------------------------------Date: Fri, 8 Apr 2005 18:38:04 EDTFrom: [email protected]: Re: [R-390] PTO Rebuild
>Does anyone have an idea of what an ideal stack should "look like", or is it>too hard to predict?
The ones I looked at were fairly straight. Mostly even. The whole blog onsetting the end spread, (Hi to low of Low to Hi depends on which way youwant to spin the shaft first) and adjusting the caps to get the mid pointcorrect is the way to go. Then you can try to adjust the stack to get closerat the other points. You would expect the stack to take on a sine shape.You are just looking to get every thing else as close to expectations andthen get real close with the stack adjustment. The stack is the last thing toadjust not the first. Roger KC6TRU-------------------------------------------------------------------------------------------------------Date: Fri, 8 Apr 2005 20:09:56 EDTFrom: [email protected]: Re: [R-390] PTO Massive Deaths
>The 390A's have been "eating" PTO's since the mid 60's. There aredocumented stories of >mountains of dead PTO's piling up out behindvarious depot locations. Strange
Yup, The PTO was an exchange item not fixed at the organization level.New ones were to be had for exchange. So we just shipped one in and got abrand new one back if it even looked dusty. Prior to the 70's most units did
not have a frequency counter. So the unit had no way to do an end pointadjustment. If the spread got to far off, (300 Hertz) the tech just did thepaper work for a replacement. The PTO wound up in a stack at some Depot.Get a thousand stacked up and you consider a contract to refurbish. Untilthey went out of production, why bother just build me a new one please.Until the late 60's we did not understand how the crystal ovens werecooking the receivers. It was common practice to run the receivers withthe ovens on thinking it added something useful to crystal stability. Buy1972 even sites on the DMZ in Korea were well heated enough that thereceivers were run with the ovens off. If you had a Van full of receivers youjust turned every thing on and let the shelter heat up until it was warmenough to work in. We had a MLQ24 van in Korea. It was a 3/4 ton truckand shelter. Some nights the Van was the warmest place on the site and allthe off duty guys would sleep on the floor. Yup it was warmer in a Van fullof tubes than in a block building with space heater glowing as red as thefilaments in the vacuum tubes. I digress, back to PTO's.
PTO's were going to depot for all kinds of reasons. Lack of counters toadjust them. Killed from ovens being on in summer heat. Bounced downroads in Vans until something broke. Pulled coax connectors. The fairnumber of cold solder joints that would not be explored because the unitwas an exchange item. You just trouble shot your problem down to the PTOand exchanged it. If a tube swap did not cure a PTO problem, it went to thebig pile at the depot. Once the depot sent big bunches off to a contractor torefurbish because new ones were not coming off the assembly line anymore, the problems found were a variety of simple problems. Lucky for usso many got swapped out, there are lots spare units around today. Do youhave any idea how many PTO's have been built into home brew VFO's? Thecontractor bitched that more problems were from the poor handling thanactual problems with the PTO's. The issue became a good hour lecture onthe handling of PTOs in the R390/A class room by 1968. Most were justneeding end-point adjustment. The little wiper was dirty and PTOswarbled. Some were cooked from their own oven heaters. A few had brokencores from bad G's. Some had broken pins on the wire harness. There werea number of cold solder joints. The upshot was, techs started to inspectPTO's when problems occurred, and frequency counters were added to theR390 service bench.-----------------------------------------------------------------------------------------------------Date: Wed, 27 Apr 2005 09:59:47 -0700From: "Craig C. Heaton" <[email protected]>Subject: [R-390] Variable-Frequency Oscillator End-Point Adjustment
The other day while performing an end-point adjustment I realized there isa better way. For those who would like to add a new tool to their collection;add a Snap-On SSM5A. It is nothing more than a screw starter. Used oneyears ago (about 30 years) for those hard to reach places on motorcycles.

No need to remove the VFO subchassis just to remove the end-point-adjustment cover nut, reinstall VFO; then, repeat the same process all overagain when you are done with the end-point adjustment!
You still have to remove the front panel. Rotate the riveted locking plateby hand until the holes line up through the front of the receiver and allowaccess to the cover nut. I then used a screw driver long enough to justloosen the VFO cover nut. Leave the cover nut partially threaded into theVFO. The SSM5A is about 5 1/4 inches long. Long enough to reach thecover nut. If you have a screw starter or purchase one the next sentencewill make sense. Cock the screw starter and place it through the rivetedlocking plate hole and lower it until it reaches the cover nut. Line thescrew starter up with the notch in the cover nut and push. Rotate thecover nut until loose. Righty tightie, lefty loosie. The screw starter cannow be raised with the cover nut attached. The cover nut will NOT passthrough the hole in the riveted locking plate! You will have to grab on tothe cover nut with your fingers.
Access to the adjusting screw is now possible. Reverse the process whenthe end-point adjustment is complete. This should give R-390A ownersmore time to play Radio.
And of course you have my standard tail light guaranty this will work onyour R-390A, it has been tested on a 56 Motorola.---------------------------------------------------------------------------------------------------------Date: Wed, 27 Apr 2005 13:33:42 -0700From: "David Wise" <[email protected]>Subject: RE: [R-390] Variable-Frequency Oscillator End-Point Adjustment
I don't even remove the front panel. I broke an old metal-tip alignmentstick into two pieces. The short half is just short enough to maneuver intoplace. It's also just long enough to turn between thumb and forefinger. Ican't remember how I initially broke the cover nut loose; I probably tookout the VFO. If you get lucky, your right-angle screwdriver will have theright orientation to catch. I put it back on with the above alignment stick,which keeps it loose enough to get it back off the same way. I rock the radioonto its face to drop it out, and put it on its back to put it back in. Takessome poking around, but it still beats (with a stick!) pulling the frontpanel, unless you're rack-mounted.------------------------------------------------------------------------------------------------------------Date: Wed, 27 Apr 2005 14:11:08 -0700From: "Craig C. Heaton" <[email protected]>Subject: RE: [R-390] Variable-Frequency Oscillator End-Point Adjustment
Talk about working in tight spaces. I needed to slip the veeder root counter
after tweaking the VFO, so the front panel had to move a few inches. Thereis more than likely a better way, but I tweaked the VFO, slipped thecounter, and then checked to see how far off the VFO was end to end. Afterfinding the correct direction to turn the adjustment, it wasn't too bad.
Got a question for the group. I made my end-point adjustment with thereceiver standing up on its back panel. In this position it was easier to getthe cover nut out of the way and see what I was doing. Would there be anydifference with the receiver in its normal top side up vs. panel side up whileperforming the end-point adjustment. Or I'm I picking belly button lint,almost like discussing the replacement of capacitors.
I did notice some backlash with the R-390A front panel side up. In otherwords, checking 100KHz markers counting up vs. checking the markerscounting down was different. Always had to start at 000, calibrate, andcheck every 100KHz up to +000, counting up. Once the end-point was asclose as I could get it, I put the receiver front panel on. Today, checking the100KHzmarkers, and the receiver in normal position markers are repeatable goingin either direction.---------------------------------------------------------------------------------------------------------Date: Fri, 29 Apr 2005 12:27:46 -0400 (EDT)From: "William A Kulze" <[email protected]>Subject: Re: [R-390] Rats - There goes a pair of 26Z5W's
> As I was sticking the screwdriver into the PTO to adjust it, I heard the> sound like something was drawing excessive current.
I know this post was awhile ago, but I haven't seen this in the replies. Irecently did my PTO and noticed that the end point cap is hot. If youtouched the frame at all, it's shorted to ground. The procedure says to usean insulated screwdriver. A metallic tool doesn't seem to throw the freq offmuch, so I imagine that they tell you this to prevent shorting the circuit toground. I didn't have a non-ferrous tool so I used a standard tweaker. Inoticed it sparked a little if I hit the frame while adjusting. A littleheatshrink on the shaft should do the trick.------------------------------------------------------------------------------------------------------------Date: Fri, 15 Jul 2005 17:41:51 -0700 (PDT)From: "KC8OPP Roger S." <[email protected]>Subject: [R-390] PTO Desicant
I have finally dug into the PTO on a R-390 that has been here in the shackfor about 20 years. It has never indicated the right freq and I am tired ofremembering the offset. Overall the radio is in good shape but the PTO hasbeen off for a long time. I measured 6.3KHz non-linearity end to end so it istime. When I opened up the inner can I was surprised that there was not a

desiccant pack. Not too bad on the inside, a bit of dirt laying around andan ugly dark grease smeared all over the corrector stack, but it shouldclean up nice. What does the group think, should I put a desiccant packinside when I put it back together? I have a few laying around that I havecollected over the years and could dry them out and tie them to one of thesupport rods. Thanks for any thoughts and wish me luck with thecorrector stack. Done a few "A" PTO's with the screws out the front, butthis is the first corrector stack adjustment. Thanks for the thoughts------------------------------------------------------------------------------------------------------------Date: Sat, 16 Jul 2005 12:34:20 +0100From: "Peter Worrall, G4GJL" <[email protected]>Subject: Re: [R-390] PTO Desicant
Do it! The PTOs were originally built with dessicator packs included. I'veseen some with three packs. I presume you know the stuff can be re-activated by bakink in the oven. Watch out for the more modern bags, asthey are plastic based and melt at the reactivation stage. The older paperor cloth ones are the best in this respect, however they let dust particlesout from chipped dessicant granules. You choose!---------------------------------------------------------------------------------------------------------Date: Sun, 17 Jul 2005 17:02:57 +1000From: "pete williams" <[email protected]>Subject: [R-390] R-392 PTO end point
The Collins PTO in the R-392 appears not to be as sophisticated as thosein the other R-390-Xseries. no ovens for one. The manual does not tellanything about making an end point adjustment for linearity, and haven'ttaken the PTO out or apart to have a look. Anyone been this way beforeand can tell a story ? Incidentally those small red micas EL MENCO - 50,100 etc pf are trouble.. found a few leaky in the cal. osc. to the extent itwouldn't.---------------------------------------------------------------------------------------------------------Date: Tue, 26 Jul 2005 13:50:14 -0500From: "Barry" <[email protected]>Subject: [R-390] OT: R-388 questions
I'm pretty sure a lot of you guys have R-388's. I'm thinking of buying oneand was wondering what to ask about. I understand the PTO endpointsare an issue. From what I've read, it takes surgery to fix this in an R-388PTO. Any other known failure points I should be concerned about?---------------------------------------------------------------------------------------------------------Date: Tue, 26 Jul 2005 15:16:48 EDTFrom: [email protected]: Re: [R-390] OT: R-388 questions
There are only two kinds of R-388 PTO's, good ones and bad ones. Check

before buying if possible. If it is out over 8 khz, it is probably a bad one. Noway to tell by serial numbers either.-------------------------------------------------------------------------------------------------------------Date: Tue, 26 Jul 2005 16:50:58 -0400From: "Al Parker" <[email protected]>Subject: Re: [R-390] OT: R-388 questions
Don't apologize for R-388's being off topic, with all the other crap thatgoes on here ;-) Yes, the PTO's almost always need help, but it's not adifficult or life threatening surgery, there's info on it on my webpages, ref.below. I really like working on R-388's.Let me quote from a msg I just sentabout 30 min. ago to almost the same question:------------ The R-388's are very nice rcvrs, tho' not as easy to cruise with as an SP-600, but at least you do know just where you are. I've "done" 2 of them inthe last 6 mo.s or so, one of mine and one for a friend. The only capacitorsthat I've found to be worrisome are the HV filters (plug-in), some of thebathtubs, and a mica, C-204, the coupling cap from V-110 to the AGC ckt.
2 other guys have had problems with it also, so take a look. It may be thesensitivity problem. I've been into several Collins PTO's, usually they'vehad "vitamin Q's" (or is it D?) as bypasses, and didn't really needreplacement, but I did anyway. The span fix isn't hard, and the feedbackcap should be replaced. (Your 500kc xtal in the phasing can is probablybad, mine was, and I'm still looking for a replacement, as I borrowed onefrom another rcvr.) - that was in response to a particular question, it's notalways bad.You can take a look at the ones I've done, start at:
http://www.thecompendium.net/radio/R388sn58.htm
I sold this rcvr a week ago to a collector who really only wanted thecabinet, and the rcvr then showed up on ebay.---------------------------------------------------------------------------------------------------------Date: Wed, 24 Aug 2005 19:56:15 -0700 (PDT)From: Joe Foley <[email protected]>Subject: Re: [R-390] Pto Question
>....My PTO is lost, I did not note the frequency ..........
Nope, you're making it too difficult! Just loosen the Oldham coupler setscrew and turn the shaft until the frequency comes in. Loosen the screw onthe shaft going out to the knob so you can get a hold on the coupler itself.------------------------------------------------------------------------------------------------------------Date: Tue, 30 Aug 2005 21:39:09 -0700 (PDT)From: Mike Castellana <[email protected]>Subject: [R-390] Cosmos PTO and compensator stack ...

Had an interesting (and fun) afternoon today... The Cosmos PTO on my R-390A was binding slightly. Symptoms were sqeaks coming from insidePTO and more effort needed to adjust KC knob. This was the first time I'veattempted this procedure. I read everything I could find on PTO's includingJim Miller's excellent overview. (Thank you sir) I tore PTO down to it's twoseparate halves. I made notes as to number of threads visible on mainshaft before further disassembly. I tightened and lubricated where needed.With PTO back in, binding and noise is gone and it's easier than ever totwist KC dial...
This brings me to my question. When I had the PTO in two halves I stupidly<REMOVED> compensator stack without taking note of it's exactorientation on the shaft. This stack has 48 adjustment screws and 12empty holes (no screws) Before I tackle adjusting PTO's linearity, how do Iknow compensator stack is installed properly? I followed Mr Millerssuggestion of locating 15th set screw (from clockwise "end" on stack) inadjustment window. Radio is running fine tho' readout accuracy is maybe2kc +/- MORE off than I'm accustomed to. Please pardon my long-winded-ness and the fact that I'm not so clear here, I'm really on the curve!Thanks in advance for any help.------------------------------------------------------------------------------------------------------------Date: Wed, 28 Sep 2005 20:33:03 -0400From: "John Bunting" <[email protected]>Subject: [R-390] R-392 VFO End Point?
My R-392 VFO is almost 7Kc long between 000 & +000. Anybodyremember a thread about setting the end point of one of these critters? TIAfor any info you can supply. I've searched my manuals from cover to coverand can't find any reference to the end point correction.---------------------------------------------------------------------------------------------------------Date: Wed, 28 Sep 2005 21:47:24 EDTFrom: [email protected]: Re: [R-390] R-392 VFO End Point?
For luck the R390/URR R390A/URR and your R392 all share the samePTO.
I think 7 KC is still well within adjustment range. If you are 7 KC long youmay be needing to open the can, undo the heater wires, open the inner canand change the winding on a very small coil. Or add / subtract some small(2PF) caps. Watch the mail here, someone is already looking for thearchive thread and will post that for you also. On the front of the PTOthere are two cover caps. You want the inner one on the right betweenZ702 and the shaft. Behind cover cap 1 is an end point adjustment. LikeAlice, one way will make you longer (taller) and the other way will make

you shorter (smaller). Can you screw 7 KC out of that adjustment? Try itbefore you go opening cans of wires. If you have a frequency counter youare better off. You can make adjustments with the PTO hanging out of thereceiver. If not then you have to
1.) remember where you are.2.) Pull the PTO3.) make and adjustment.4. Remember if you went left or right5.) put in the PTO6.) set the PTO on one end7.) dial off to the other end8.) determine if this is better or not9.) consider if next adjustment will be left or right10.) consider how much to adjust11.) repeat until perfect.
If you have a counter it just goes faster.
Dial the PTO to X.455 and draw a mark across the coupler and the frame.Carefully rotate dial If you go the wrong way you will hit the stop beforeyou get 10 turns. So having learned which way to go, start over and dial itoff in thecorrect direction We think clock-wise is down in frequency and counter-clock- wise is up in frequency. Think about the KC knob and the way thefrequency conversion is done.
Rotate off 10 turns, line up your mark and see what the counter reads.
Every time you change the end span adjustment, the points will move. Somake an adjustment.
Line up for the counter at X.455Mark the dial to frameRoll off 10 turnsLine up the markRead the counterYou will either be getting closer or further off the exact 1Mhz
If you hit the end of the adjustment before you get exact there are twooptions
A.) accept what you get.B.) Read some more help from the archives and prepare for some PTOsurgery.

It is not hard to open the outer and inner can and do repairs.
Good Luck with the fix. Roger KC6TRU------------------------------------------------------------------------------------------------------------Date: Wed, 28 Sep 2005 21:56:10 EDTFrom: [email protected]: Re: [R-390] R-392 VFO End Point?
R392 were considered tactical radios and got treated different from theR390 receivers. If your R392 did not work, it was sent away from you forrepair. Your repair guy was likely a module swapper. If your PTO was out ofspec, it was just swapper. For a long time PTOs just piled up out back of theDepot. Then someone invented a "portable" frequency counter and it wasdiscovered that the PTO could be easily "refurbished". It is not amazingthere is nothing in the TM about making what is a simple adjustment. Weknow there are several good things missing from the R390 TMs. Backwhen there items were new, you could get 10 plus years on a PTO andnever need to adjust it. Once you get yours set, it may never needadjustment again. It likely has never been adjusted in its life or maybe onceor twice. Roger KC6TRU--------- -------------------------------------------------------------------------------------------------Date: Mon, 05 Dec 2005 14:08:13 -0700From: DW Holtman <[email protected]>Subject: [R-390] PTO
I stumbled on to an R-390 non A PTO. Are they the same as a R-390A PTOexcept for the BNC vise MB connector? Thank you for your help.-----------------------------------------------------------------------------------------------------------Date: Mon, 05 Dec 2005 14:37:57 -0700 (MST)From: Richard Loken <[email protected]>Subject: Re: [R-390] PTO
No they aren't the same but they are less common so you stand a goodchance of selling it or trading it for a 390A PTO. To me for for instance.---------------------------------------------------------------------------------------------------------Date: Mon, 5 Dec 2005 16:35:04 -0500From: "David C. Hallam" <[email protected]>Subject: RE: [R-390] PTO
According to the information I have, the only differences are the RFconnector and the power cable. I think the power connector itself is thesame.--------------------------------------------------------------------------------------------------------Date: Mon, 05 Dec 2005 15:06:41 -0700 (MST)From: Richard Loken <[email protected]>Subject: RE: [R-390] PTO

That is useful information. This means that I can now look at certainR390A parts with much more (malevolant) interest than I used to. Ialways thought that they were different and I was encouraged in this beliefby the 24V filament wiring more so than by the difference in RFconnectors. I would still recommend selling it and getting a much morecommon 390A (and probably newer) 390A PTO.-------------------------------------------------------------------------------------------------------------Date: Mon, 05 Dec 2005 17:25:03 -0500From: Roy Morgan <[email protected]>Subject: RE: [R-390] PTO
Do be careful here:Radio PTOR-390/URR: 70H-2R-390A/URR: 70H-12
The power plugs may be quite different: one having a different number ofcontacts than the other one, even though they are both the small hexshaped Winchester type. It's not clear to me but the B+ supply to the PTOmay be though the output coax in the R-390/URR PTO (70H-2). Theoutput voltage may be specified as different, but likely would work ok. Thefrequency span, plate voltage, heater voltage and current, filament voltageand number of turns are the same. I can't say about the physical size andmounting point dimensions. Any one with a 70H-1 PTO: It will *not* workin either of these radios, send it to me.-------------------------------------------------------------------------------------------------------Date: Mon, 5 Dec 2005 17:31:20 -0500From: "David C. Hallam" <[email protected]>Subject: RE: [R-390] PTO
The filament circuit for the VFO and BFO is identical in the R-390 and R-390A. The two tubes are in series with the ballast tube. IMO the R-390 ismuch the better of the two receivers. The mechanical filters in the R-390Ado not make that module superior to the R-390. I set up a R-390A IFmodule for use in my R-390. After a few hours of use, I took it out and putthe original back in. In general higher quality parts were used in themanufacture of the R-390. The R-390 does not normally need havewholesale replacement of capacitors (paper and electrolytic) as does the R-390A. The R-390A was designed to reduce cost. Longevity was not aconsideration.---------------------------------------------------------------------------------------------------------Date: Mon, 5 Dec 2005 18:34:04 -0500From: "David C. Hallam" <[email protected]>Subject: RE: [R-390] PTO
I guess I should review my notes before opening my mouth. It is not a plug

and play interchange but is readily doable. The R-390 get screen voltagesfrom a dropping resistor in the B+ line while the R-390A has a separate150 VDC regulated supply. Since you will have to rewire the power cableanyway (the R-390A cable is too short), the changes are minor. The R-390A mounting bracket will take some changes to mount in the R-390.Bottom line for me is that I would not hesitate to make what I believeminor changes to use a R-390A VFO to use in a R-390 if I had to.---------------------------------------------------------------------------------------------------------Date: Mon, 05 Dec 2005 15:34:19 -0800From: "Kenneth G. Gordon" <[email protected]>Subject: [R-390] 70-H1 PTO.
Roy is being too deferential: the 70-H1 PTO ONLY works in the R-389. Hishas been badly mauled, munched, and otherwise twisted into a pile ofunrecoverable junk, and he really NEEDS one. If any of you people have onesitting around being useless, it would be an act of extreme kindness to giveit to Roy. He will put it immediately to work. I've been watching for one forhim for a couple of years now. I recently ALMOST had one for a merepittance, but fell asleep before the auction ended. Ratz!------------------------------------------------------------------------------------------------------Date: Mon, 5 Dec 2005 19:06:22 -0500 (EST)From: "Paul H. Anderson" <[email protected]>Subject: Re: [R-390] 70-H1 PTO.
One went on eBay a few months ago for a few hundred bucks.----------------------------------------------------------------------------------------------------------Date: Mon, 5 Dec 2005 20:23:55 ESTFrom: [email protected]: Re: [R-390] 70-H1 PTO.
David at Fair Radio Sales who has put most of the R390A out their doorsover the last few years would also like one for his own R-389. Someone atFair let his get away one day thinking it was a R390 item. The customernever complained that his unit did not work so David has never had achance to get it back. Do not ask David why his PTO was out of his R389and just laying around. I do not need to know the bitter facts.----------------------------------------------------------------------------------------------------------Date: Tue, 6 Dec 2005 03:55:10 -0800 (PST)From: "Tom M." <[email protected]>Subject: Re: [R-390] PTO
The output frequencies are the same but be cautious about the connector.------------------------------------------------------------------------------------------------------------Date: Tue, 6 Dec 2005 14:45:56 -0500From: "David C. Hallam" <[email protected]>Subject: [R-390] PTO Stability

What PRACTICAL application does improving the PTO stability over theballast tube design have other than perhaps participating in the ARRLfrequency measuring contest? You notice I emphasize the word practical.------------------------------------------------------------------------------------------------------------
Date: Tue, 6 Dec 2005 12:39:50 -0800From: "David Wise" <[email protected]>Subject: RE: [R-390] PTO Stability
One day I wanted to listen to music on AFRTS SSB. Even a few Hz off, itgoes out of key something fierce.------------------------------------------------------------------------------------------------------------Date: Thu, 8 Dec 2005 01:14:17 ESTFrom: [email protected]: Re: [R-390] Christmas Wish List
Fellows Craig mentioned cleaning the gear trains. Back when we wouldtake them over to the teletype typewriter degreaser. We would hang thewhole receiver over the edge of the degreaser. Likely setting on a cart. Pourdegreaser fluid through the gears and elsewhere. Let it drip dry. Blow it outwith the air line. Return the unit to service. I am sorry I did this to manyreceivers in the past. I just know some of you who own receivers thatreceived this abusivetreatment. But those knobs sure spun nice when we finished up and thefront panels were clean. I had no idea how bad the degreaser fluid (K1 sonot to smell and additives to dissolve things.) trashed wire harness overtime. Hay they put the TTY stuff in there and closed the lid and spun itaround. How much was I hurting the poor R390's with just a rinse job?-----------------------------------------------------------------------------------------------------------Date: Thu, 15 Dec 2005 13:53:29 -0600From: Conard Murray <[email protected]>Subject: RE: [R-390] building new components (PTO)
Back when I was a young whippersnapper, my elmer was given a '390Afrom a batch that MARS was distributing without PTOs. This guy was abuild-it-yourself sort of ham and since PTOs weren't as available in 1978as they are now, he built up a solid state VFO for it using a 10 turn pot asthe tuning element. I especially remember this because we went throughwhat seemed like thousands of 10 turn pots at hamfests looking for a non-wirewound one for the tuning element. This lashup actually worked outwith fairly decent tracking, so it can be done.-----------------------------------------------------------------------------------------------------------Date: Thu, 15 Dec 2005 19:39:16 -0500From: "Dave Maples" <[email protected]>Subject: RE: [R-390] building new components (PTO)

Conard is talking about Bill Hoehl, WB4MUZ, and he did indeed build a PTOreplacement using a 10-turn pot and a diode linearizer. There's an articlepublished in the 1983-84 timeframe (QEX? Not sure). Today I'd do it witha DDS and either two encoders (one fast to handle fractional kHz andanother one to handle the higher steps with suitable gearing) or elserevert to something simpler and just ADC the 10-turn pot and use it todrive a lookup table for the DDS. The only thing I didn't like about the 10-turn pot is that if you forgot and turned past 000 going low or 999 goinghigh you were going to break the pot. A 15-turn pot would be the cat'smeow.-----------------------------------------------------------------------------------------------------------Date: Tue, 20 Dec 2005 07:33:07 -0600From: "tfrobase" <[email protected]>Subject: RE: [R-390] Cosmos PTO label
Here you go ... Tom, N3LLL http://www.kitparts.com/misc/cosmos.jpg------------------------------------------------------------------------------------------------------------Date: Tue, 27 Dec 2005 22:07:11 -0500From: "Jim M." <[email protected]>Subject: Re: Re:[R-390] More Ideas
If anyone would like to add my "Cosmos PTO Adventures" article to the mixplease feel free to do so.
The latest original is at: http://home.cfl.rr.com/jmiller1706/cosmos.htm
You should be able to download the files fromhttp://home.cfl.rr.com/jmiller1706/
If not I can zip them and ftp or email them. It was also on Dave Medley'spage but some of the image files were corrupted on Dave's copy.--------------------------------------------------------------------------------------------------------Date: Tue, 3 Jan 2006 08:29:12 -0500From: "Bob Young" <[email protected]>Subject: [R-390] question on R390A
I asked a guy on ebay if the endpoints were off and this is what he replied:"I just checked it with the internal cal... and I didn't warm it up. 3 MHz (notthat matters, it's mixed) and 4k IF, I set the zero on 3.00 and ran up to4.00, I saw around 9 kc total difference from one end to the other." it's forthis radio:http://cgi.ebay.com/ws/eBayISAPI.dll?ViewItem&item=5849372507&rd=1&sspagename=STRK%3AMEWA%3AIT&rd=1
Should I be concerned with this? I intend on having it done over

eventually when I buy one anyway, I think they may be a little toocomplicated for me to tackle myself, thanks much,----------------------------------------------------------------------------------------------------------Date: Tue, 3 Jan 2006 05:54:58 -0800 (PST)From: "Tom M." <[email protected]>Subject: [R-390] PTO question on R390A
Bob, 9 kcs is not abnormal for a radio that has not be aligned in a longtime. This can be adjusted out, either by plan a) the endpoint adjustmentscrew, or plan 2) removing one turn from the endpoint adjusting coil. Thisshould not prevent you from buying the radio.------------------------------------------------------------------------------------------------------------From: "bernie nicholson" <[email protected]>Sent: Thursday, January 05, 2006 8:56 AMSubject: Re: [R-390] PTO identification
Ok Gary the progesteron PTO transfers are particularly delicate and comeoff very easily, the Cosmos can be identified by its having an extra hole inthe front , if you don't have a Cosmos the other VFO s are very similar, thefirst thing to do is the endstop adjustment which just takes a few minutesyou need to establish that you are getting 1Mhz coverage in 10turnsexactly, if you can't achieve this you may have to remove a turn from thecoil , its not as hard as it sounds but you do have to remove the covers andthe oven assy. and unsolder a few wires, whilst inside you can checkresistor values ect, it then needs to be reassembled powered up and the endpoint set again ,THEN you need to check the linearity, START at either end1Mhz and check the 100khz CAL points they should be close, if not youneed to draw a graph of the response across the 1MHz band to see whereyou are" out " . I use the dial of a 10 turn pot.for this and do it outside theset but with the VFO connected to the 390, when you take it apart youwould have seen the corrector stack assembly , you need to look at thegraph and see where its out sometimes its only necessary to alter 1 or 2 ofthe cams, when you put the covers back on things change a bit , you willneed to set the end point again each time , Some times I have had to pullthem apart and repeat the process 15 times and I can tell you that it wouldtry the patience of a Jesus let alone a normal person , , But incrementallyyou see you are making progress , the linearity is stays put in myexperience for at least another 15 years , the Cosmos is easily adjusted anddoesn't even need to be removed from the set ,You just drop the front paneldown, The guys who designed the Cosmos new a lot about VFO s theyintroduced a transceiver that predated the Collins Called theCOSMAPHONE , you will see ads in QSTaround 1956.----------------------------------------------------------------------------------------------------------Date: Tue, 10 Jan 2006 15:41:32 -0600From: "Barry" <[email protected]>Subject: Re: [R-390] Amp 9 pin PTO connector R-390A, R-392 Needed

>Does anyone know of a source for the blue hexagon locking connector(male & female) used for the power connection to the R0390A and R-392PTO's. I'm trying to make up an extension cable so that I can work on thePTO on the bench.?
Following another "Barry's" suggestion, I made one from a spare harnessby using two female connectors (there are two of the same type as usedfor the PTO in a single harness) and used pins to change the "sex" of one ofthe female sockets. It works. I believe you can contact Barry Hauser onthis list to purchase a spare harness.---------------------------------------------------------------------------------------------------------Date: Sat, 14 Jan 2006 17:29:24 ESTFrom: [email protected]: Re: [R-390] Getting that winter project onto the front burner
To do PTO adjustments, you can just hang the PTO out of the receiverbottom. Turn the receiver up on one end. Use the mini BNC to BNCconnector to get the PTO output coupled into the frequency counter. Usethe Odham coupler on the PTO shaft for a knob. A simple pencil mark onthe PTO and frame let you align the shaft rotation. Once around is 100 KCten times and you get the meg. We did it on the bench that way back whenand got very close. (within a few cycles). No real jigs or setup is reallyrequired. Mostly you just need the time to slowly go through the Cosmosadjustment points and do the service work.------------------------------------------------------------------------------------------------------Date: Sat, 14 Jan 2006 16:50:30 -0600From: "tfrobase" <[email protected]>Subject: RE: [R-390] What I did on my winter vacation
I use a jewelers saw to cut the can, but like your pipe cutter approach. Ithen heat the upper area severed aluminum can with a propane torch, justenough to soften the goo and then pull the bottom out with the pinsattached. I make the cut just above the crimp to the octal socket. I haveused this process numerous times with consistent results ... Tom, N3LLL--------------------------------------------------------------------------------------------------------Date: Sat, 14 Jan 2006 18:44:14 -0600From: "Cecil Acuff" <[email protected]>Subject: Re: [R-390] What I did on my winter vacation
I got em unpacked with no problem but when I drilled out the aluminumpieces in the base the tap wouldn't cut threads because the aluminum wasso soft....it just augured out. I ended up driving the pins out from thebottom and considered pressing the octal base pins in their place but wasstruck with the idea of just plugging the caps with the octal base pins intothe socket and covering the whole thing with the cap shells.

---------------------------------------------------------------------------------------------------------Date: Sat, 14 Jan 2006 22:11:54 -0500From: "Michael Murphy" <[email protected]>Subject: [R-390] Metal Paper Caps?
I had to change out one of those round metal triple-caps on a command setRX myself, last weekend. It was on the the B+ feed of the BFO. The BFOwould run for a while, warble for a few minutes and then quit all together.Normal voltage on the cap was supposed to be about 180 VDC. It turns outthat the BFO had around 27 VDC when it was functioning "normally" and14 VDC when it would warble. Below that it would finally quit. Now that isoverdesign. With a new cap the voltage returned to the nominal 180 V. Thecommand set was last weekend's project.
This weekend I brought a Sky Buddy back to life for a "buddy" at work. Ithad some bad caps of course and a little creative modification or two whichhad to be undone, but it came back and I was listening to AM and CW allafternoon on it. What a simple box! I think this was a 1938 design, but itis a late model S-19R with the more modern tube lineup. 6K8, 6SK7, 6SQ7and a 41 in the PA. The BFO is a separate 76 tube. It has a "real" powersupply with a type 80. I am keeping it long enough to use it at the end ofthe month in the AWA Linc Cundhall Memorial OT Contest which is CWonly, pre-1946 only.
I see you are getting into HBR's. I have not done that yet, but I am on thelookout for a carcass to rebuild. My latest craze is re-discovering Q-Multipliers. I just built two, one for my TCS at 455kc using a single 6J5which is a "peaker" and one for the 3-6 McCommand set for 1415 kc IFsusing a 12AT7 which peaks and nulls. Wow! is all I can say; almost enoughto make my R390A a little nervous.---------------------------------------------------------------------------------------------------------Date: Sun, 29 Jan 2006 15:38:20 -0500From: [email protected] (Tim Shoppa)Subject: [R-390] VFO endpoint adjustment - stumped!
OK, I'm stumped.
I'm putting my yellow striper back together. Right now the VFO covers arange of 2.500MHz to 3.6MHz. At the low end it hits some sort of apparentmechanical stop. Didn't hit anything at the high end because I don't needto turn it that far :-). It is supposed to cover 2.455 to 3.455 MHz (and with25kHz of under-run it ought to go to 2.430 MHz) just as a reminder. Eventhough it doesn't span the right range, the linearity is pretty good, and inthe first ten turns it is always within 0.5kHz of being on the money. I lookin the Y2K manual, but the endpoint adjustment screw illustrated theredoes not match my unit physically. There is a plug-screw in mine, but it's

on the left hand side, outside the triangle frame as seen from the front. Theone in the Y2K manual is shown as being inside the triangle frame and abit on the other side. Inside the plug-screw, I find some sort of slug thatcan be turned with a 3/8" screwdriver bit. The slug seems to be hollow andprobably brass. Turning it does nothing, doesn't budge the frequency at all.
There is another access hole, inside the triangle frame, that has a bunch oflittle set screws in it that slowly scroll past as I turn the dial. I think theseare obviously the linearization screws. I do not want to screw up thelinearization of this PTO, I am very happy with it as is. Oh, and I pulled themetal rectangular cover from the box, and found some resistors. Hmm,that 2.2k resistor looks a little suspiciously brown, better check it out....actually 8K!!! This makes the score on this radio for a total of seven 2.2Kresistors that were too high in value by hundreds of percent! (Almost all ofthem in the plate lines). So I fixed that.
So how do I adjust the endpoint on this PTO? No maker's label on theoutside, but there is a refurb sticker from Raytheon, indicating a servicedate of Feb 7, 1976. At one point I brought it up and I think the suggestionwas that it was a Motorola? I could be recalling that incorrectly.------------------------------------------------------------------------------------------------------------Date: Sun, 29 Jan 2006 17:09:54 ESTFrom: [email protected]: Re: [R-390] VFO endpoint adjustment - stumped!
Sounds like you have a Cosmos PTO with the linearization adjustment. Theend point adjustment is to the RIGHT of the linearity adjustment, hiddenpartly behind the transformer housing. However, you're only going tomove the PTO tuning range a few KHz with the endpoint adjustment. Ifyou're off 50 KHz you either have a problem with the mechanical stops orwith the PTO capacitors. Is the mechanical stop you're hitting within thePTO itself or the 10-turn stops in the radio? You can change therealtionship of the PTO and 10-turn stop simply by loosening the shaftclamp on the PTO and turning it without adjusting the radio's geartrain.-------------------------------------------------------------------------------------------------------Date: Sun, 29 Jan 2006 17:35:59 -0500From: [email protected] (Tim Shoppa)Subject: Re: [R-390] VFO endpoint adjustment - stumped!
Ed - it's something inside the PTO. The PTO has not been reattached to theOldham coupler since the day I got this radio :-). But I will take your advicethat it's gotta be something mechanical inside the PTO. The endpoint (Iwould call it the slope, but everyone else calls it the endpoint) andlinearization are great, it's just that it doesn't go down to 2.455Mc butmakes this mechanical scrape inside, most of a turn short. And a word toeveryone: never ever trust a 2.2K 1/2W carbon resistor you see in a R-

390A. I started investigating in my other radio (which had seen muchbetter treatment over the years) and all of its 2.2K's were too high by acouple hundred percent too!--------------------------------------------------------------------------------------------------------Date: Sun, 29 Jan 2006 16:17:32 -0700From: DW Holtman <[email protected]>Subject: Re: [R-390] VFO endpoint adjustment - stumped!
Take a look at this link, it will give you an idea of the inner workings of theCosmos PTO. http://www.davemed.com/cosmos.html<snip>-------------------------------------------------------------------------------------------------------Date: Sun, 29 Jan 2006 16:57:40 -0800 (PST)From: Joe Foley <[email protected]>Subject: Re: [R-390] VFO endpoint adjustment - stumped!
If you're sure the stoppage is inside the PTO then the best course of actionis to open it up, no amount of guessing is going to verify what the problemis. You might check the run-out of the shaft just to see if there is anythingto see. It may show a bend that will let you know what to expect when youget inside, maybe. Someone mentioned in the past needing to leave the rearmount loose to accomodate movement in the shaft due to being slightlybent.-------------------------------------------------------------------------------------------------------------Date: Sun, 29 Jan 2006 22:57:26 -0500From: "Jim M." <[email protected]>Subject: Re: [R-390] VFO endpoint adjustment - stumped!
Probably a Cosmos PTO. The little coil you say doesn't change anything isthe end point adjustment. Maybe a previous owner turned it too far intrying to set the end points and pushed it out of its threads. The old PTOscores are notorious for changing permeability with age requiring moreand more aggressive end point tweaking until the "tweak" coil bottoms out,then you have to go in and remove a turn from the end point adjust coil.
Is the tuning repeatable from end to end, even though you can't reach theone extreme? Or does it seem like there is a large amount (10's kilohertsworth) of hysterisis or backlash as you go up and down? If so, the littledisk that holds the linearity screws could have broken loose from theshaft. Then you need to read my article posted on Medley's site (it has somebad images, I can provide originals if desired). One way or another itsounds like you are going to need to open it up and investigate. Or buy areplacement off of someone on this list. Goodluck.--------------------------------------------------------------------------------------------------------Date: Mon, 30 Jan 2006 05:31:29 -0500From: [email protected] (Tim Shoppa)
Subject: Re: [R-390] VFO endpoint adjustment - stumped!
Thanks all - I have solved the PTO range issue!
First: that brass thing I was turning with the screwdriver was the oventhermostat. Little to nothing to do with endpoint etc.! Nobody here seemsto care too much about the thermostat so I won't worry much either (afterI make sure that whatever I set it to doesn't make the PTO cook itself!)
Second: the pictures of the disassembled VFO inspired me to take mineapart. Took out the VFO, took off the mounting brackets, took off the outercan, took off the oven (unsoldering 4 wires), then I finally get to see theworks.
No apparent bending/etc. on the inside. The two "limits" I was feeling fromturning the shaft came from the core hitting the end of its travel (this isthe high end, at approx 3.7 MHz) and something else I never understoodon the low side (which was stopping me at 2.5 MHz). Visual inspectionshowed that physically there was at least 2 and probably 3 more turnsthat the core could go in. So all I did was crank the core to its outer end(where it emerges from the mechanism if you remove the end), take it off,and put it back on one turn earlier. Now the PTO covers 2.4 MHz throughabout 3.6 MHz, which is great. Linearity is not as spot-on as it was beforethe intervention, but now that adjustment seems trivial with a frequencycounter and whatever kind of tiny screwdriver fits those little screws.
Again, thanks everyone! Oh, and thanks for the confirmation that I am notinsane regarding 2.2K plate resistors. I am still astonished that almost allof them in my radio were high by a few hundred percent, while very few ofthe other resistors are out of tolerance.---------------------------------------------------------------------------------------------------------Date: Mon, 30 Jan 2006 18:57:50 -0500From: "Steve Hobensack" <[email protected]>Subject: Re: [R-390] VFO endpoint adjustment - stumped!
Don't confuse the brass thermostat adjustment as an end pointadjustment! I've adjusted several Cosmos PTO's. I once found one end-pointcoil that did absolutely nothing when adjusted. Upon close examinationunder a lightedmagnifier, the end leads on the small coil touched each other near thesolder tabs. Actually one small copper wire crossed around a solder tap toget to the next solder tab. The varnish had given way to a short. It musthave been a quality control defect.---------------------------------------------------------------------------------------------------------Date: Tue, 14 Feb 2006 20:36:55 -0500From: [email protected] (Tim Shoppa)

Subject: [R-390] Squirrely PTO
OK, you guys may remember my dissected PTO. It's mostly back together,but now I notice something else: If I tune continuously in one direction,then the frequency is nice and smooth.If I reverse and tune continuously inthe other direction, then the frequency is nice and smooth after a smallfraction of a turn. But... for a small fraction of a turn (say a few hundred Hzwhich would be like a degree or so) if I wiggle it back and forth it sounds"squirrely". Seeing how this only happens when I reverse direction, I'mguessing this is some form of backlash. "Squirrely" means that if I'm tuningthrough a carrier it does not smoothly go up and down, but jumps aroundby like 100 Hz or so from smooth. In the "reversing zone" I can turn theknob a bit with no noticable frequency change, and then it jumps a lot(maybe 100 Hz). After the reversing zone it seems to be nice and smooth.Pulling the covers off and looking inside I see no obvious anti-backlashspring. There is a ring holding tight the PTO slug to the threaded shaft,and maybe that's supposed be under tension to make the assembly be anti-backlash? What is the "official" anti-backlash mechanism for this PTO? It'sa Raytheon-refurbed Cosmos by my best reckoning. If I go to my other390A (also a Cosmos PTO) the behavior is not nearly so squirrely. Theremay be a very small amount but it's possibly my wrist :-). Or is it not anti-backlash, but something that the right grease cures? I've rebuilt Ten-TecPTO's and the usual cure for everything there is a few new plastic parts andmagic grease. I didn't really understand what I was doing but I was justfollowing Ten-Tec's directions. My feeling is that plastic pieces and greaseis not the answer for my 390A's PTO, but I will appreciate corrections! Oh,as to overall PTO alignment, after I "jumped a turn" the range was correctand with a little tweaking of the endpoint and a couple of the setscrews it'snice and linear, to within a few hundred Hz end-to-end. I do seem to be atthe very very end of the endpoint adjustment range: if I need more range, isthe endpoint inductor the inductor that folks remove a turn from? Iremember hearing about the procedure but didn't really relate to it, havingnever torn into the PTO when I was reading!--------------------------------------------------------------------------------------------------------Date: Tue, 14 Feb 2006 22:25:10 -0500From: "Jim M." <[email protected]>Subject: Re: [R-390] Squirrely PTO
The Oldham coupler between the PTO shaft and the front gears shouldhave a spring between the two posts. This is on the outside front of thePTO where it's shaft meets the front panel mechanisms. If you don't have aspring there, you will get backlash. The warble can be caused by either aloose, corroded or missing bracket on the front of the PTO that pressesagainst the PTO shaft to ground it. It's a little right angle bracket and itneeds tension to effectively ground the shaft.------------------------------------------------------------------------------------------------------------

Date: Wed, 15 Feb 2006 03:14:43 -0800 (PST)From: "KC8OPP Roger S." <[email protected]>Subject: Re: [R-390] Squirrely PTO
Just last week I had the same problem with a Cosmo PTO that I haddisassembled for maintenance and cleaning. When I check a PTO I use anExcel spreadsheet to plot measured freq at each 100KHz point againstdesired freq, and problems like this really show up on the graph. I startedwith about 300Hz difference, after some fixing managed to get it to over800Hz. After taking the PTO apart more times than I can count I think Ihave found the answer.
The lead screw is threaded into the tuning slug, at the end opposite theoldham coupler are two arms that reach out to the frame to keep the slugfrom turning. The bracket that holds the arms also has a washer with fourtabs. The four tabs are for backlash tension. Riding on that washer andthreaded on the lead screw is a castled nut that you can rotate toincrease/decrease tension. You may have to remove the tuning slug toclean and free up the castled nut. I thought about removing the screwsthat hold this assembly to the slug, but now would recommend againstdoing that. I was able to clean things up and re-lube in place. With allcovers off, I would move the PTO both ways to a pre-set point and measurethe off-set. Each time I would rotate the castled nut a little to increasetension (decrease backlash). I stopped when the backlash was in the50/100 Hz range. I did not want to put too much strain on the threadsinside the tuning slug. You do need to look at the Oldham coupler also. Ichanged to a stiffer spring which helped remove some of the backlashthere.
Hope this helps. I did take a few pictures but don't have anyplace on theweb to put them.------------------------------------------------------------------------------------------------------------Funny how some of us seem to experience the same type things at aboutthesame time.....at times. (confused yet?)
I have been fighting with my Cosmos PTO for the last week of availableevenings. Same problems...got the jitters with reversing direction or evenwhen fine tuning at times. Tap on the PTO cover with a small screwdriverhandle and the het tone would bounce all over the place. (most noticeablewith the bfo on and using a heterodyne tone for discernment) I've had thething apart so many times it's crazy. I finally completely removed theheater and associated wiring with no intents in putting any of it back. Wedon't use them anyway and I see no need for them to remain. I even put thething back in the radio with all covers removed so I could move thingsaround with a tuning tool with the radio tuned to a carrier and bfo on. All

seemed to center around the rear connection of the tuning slug to the leadscrew and anti rotation hardware.
I had remembered reading Rogers post but didn't remember the details.(wentback and looked this morning) Here is what I did.
I considered fully removing the tuning slug but had concerns about gettingthe slug back in sync with the compensating ring and it's already prettyclose adjustments. I pulled the rear end plate with the slug fully in thatdirection and removed the tiny screws (had to drop one on the carpetedfloor), the top brass ring, the lead screw to slug tensioning nut and finallythe inner brass ring. It appears that the slug is not actually threaded butprobably has some type of threaded fixture on the opposite end as well. Icleaned and scuffed the brass rings and the lead screw tensioner fingers(for lack of a better description). I washed them with spray contactcleaner and scrubbed them with a scotch brite pad to remove anyoxidation and re-washed. All was re-installed on the end of the tuningslug. There is a metal ring with a couple of arms that go to a piece ofsquare stock that is used to keep the frictional forces from rotating thetuningslug. (it is attached to the slug) It has twice or three times the number ofthreaded holes needed to attach the brass rings. Pick a set that don'tinterfere with the tabs on the tensioner once set as tightly as desired. Itorqued mine down a bit more than it was when I disassembled it toimprove electrical contact with the lead screw. (with fingers, not tools) Ihave no fear of it damaging the core as it is springy and should preventany damage. The top ring and screws lock everything in place and groundeverything by virtue of the shaft ground on the front of the PTO...whichwas also removed and treated to the cleaning and scotch brite padtreatment....shaft included, re-tensioned and re-installed.
I feel no added friction in tuning but the thing is dead on now...no morejitters period! I washed all lubricant off the lead screw ( I had placedthere)....it looked like stainless steel and the frictional components appearto be brass or copper so I consider it to be self lubricating....and obviouslythe RF ground at that point is very important.
I was watching the slug movement before disassembly and there was noperceivable backlash even under high magnification so I don't think thatwas too much of a contributing factor in mine. I could push slightly on theparts mounted on the end of the tuning slug and it would jump around infrequency like crazy but I couldn't see anything actually move so I attributeit to poor electrical contact....
It's all reassembled and back in the radio....minus the heater stuff! It is a

joy to tune! Very smooth sounding.... Now to fine tune all those littlescrews at the 100cps points...while in the radio! Still planning that one!Right now this SJC survivor tunes and hears as well as any radio in theshack and that includes an Icom 756 Pro II and a hot rod Leary SP-600...all sharing the same antenna through a military active multicoupler.The Pro II needs preamp 1 on to keep up...the Leary is still the winner withbest recovered audio and top notch sensitivity. (nice front panel IF gaincontrol)
Improved audio is next.....more power, less distortion...then on to adaptinglook alike meters with 100 ohm inputs. Remember this is the "lets see whatis possible within the scope of the technology" radio....never intended to bea museum piece! So far no extra holes...no modifications that wouldprevent module swaps beyond 12V tubes to eliminate the ballast tube andsolid state stuff limited to rectifiers in the power supply and replacement ofthe selenium which had failed. All molded paper caps replaced. New filtercaps and a few resistors replaced. Will need to go back and check moreresistors now that some of them have been flagged by others. Am runninga 6BZ6 in 1st RF amp. Can't measure any additional sensitivity but itsounds much cleaner, a bit quieter and is every bit as sensitive as original.Half turn removed from end point coil in PTO for end point adjustment.Stay tuned...more to come for those interested.....------------------------------------------------------------------------------------------------------------Date: Tue, 21 Feb 2006 13:23:36 -0500From: "Tim Shoppa" <[email protected]>Subject: Re: [R-390] Squirrely PTO & SJC update
I've been doing most of my testing with a receiver on the bench in CW modeto pick up the hetrodyne. It's a lot easier to hear the squirreliness than it isto see it on a frequency counter. That said, my squirrely PTO seems to havecured itself without me ever doing any of the dissection that Roger or Cecilsuggested. I did do a little cleaning on the square rod that the spider armrides on, and that may have been enough. It had some visible deposits(maybe grease turned into shellac?) that might have been hamperingsmooth action at some points on the dial. Looking inside the PTO I seesome greasy/shellacy gunk elsewhere but not on the mechanics. Afterreading Cecil's success I am tempted to tear down and scrub-bright andwash the whole innards. Could the grease been intended to make theairtight/nitrogen-tight seal of the cans against the O-rings? Is there anypurpose at all at this point to pump the PTO full of dry nitrogen again?--------------------------------------------------------------------------------------------------------Date: Tue, 21 Feb 2006 13:02:39 -0600From: "Bill Hawkins" <[email protected]>Subject: RE: [R-390] Squirrely PTO & SJC update
Well, you can get most of the way there by sending the PTO to me in

Minneapolis, where the dewpoint is around -20 at night. I'll open it up, letit fill with almost 80% nitrogen, then lightly grease the seal and send itback to you.---------------------------------------------------------------------------------------------------Date: Tue, 21 Feb 2006 16:16:06 -0600From: "Cecil Acuff" <[email protected]>Subject: Re: [R-390] Squirrely PTO & SJC update
My 2 cents worth is no! I even cut the silica gel bags out of there becausethey couldn't have been contributing to reducing the moisture after allthese years and I have read horror stories about them rupturing andspreading grit all over the inside of the PTO. These radio's are notoperated in the environment they saw during the wars....cold or hot. (warsthat is) Mine is in an air conditioned shop/shack and being in the south Iheat it by vacuum tube when necessary... not unusual to be running theA/C in December.... Be careful not to spray cleaners or lubricants on themain coil form....bad things could happen. I washed all my parts afterremoval and what cleaning I did with contact cleaner was done with Q-tips. I did flow some over the lead screw while running the core in and out.Just be careful...it wouldn't take much to reduce a perfectly good PTO tojunk quickly!-----------------------------------------------------------------------------------------------------------Date: Sun, 26 Feb 2006 13:12:40 -0500From: [email protected] (Tim Shoppa)Subject: [R-390] Cosmos PTO, spring-loaded core?
OK, my wife is sick, the kitchen is a mess, my three kids are runningaround the house screaming, and of course I've decided to pull apart myPTO. I've gotten roughly to where the pictures at http://www.r-390.com/cosmos.htm. But of course I've got some questions: I see the ringand ridge that ride the linearity adjustment screws. (Interestingly enough*all* the screws are present on mine. Looks like they take a 0.028" hexkey but can't find mine at the moment.) I see the core that is supposed toride the linearity adjustment core, and I find that it sits on the end of athreaded rod and presumably a black nub on mine (it's red in the picturesat the URL above) is supposed to ride the ring and move in and out with aspring pushing it. BUT... I don't feel any pressure when I press on the nub.Is it time for me to tear off the two screws holding the linearity adjustingcoil and look for the springs under there? Or do I have to "press harder"?-----------------------------------------------------------------------------------------------------------Date: Sun, 26 Feb 2006 19:52:49 -0500From: [email protected] (Tim Shoppa)Subject: Re: [R-390] Cosmos PTO, spring-loaded linearizing core?
OK, made that much progress :-). But now I have more time to write myreal question: How the heck is the linearization screws/plate/core/inductor

supposed to work in real life? "In principle" it's a spring loaded thing suchthat the core follows the 40-some linearizing screws through the rotation.
But this is what I find in my Cosmos:The linearizing inductor has a core in it.The core is on a leadscrew.The leadscrew goes through a threaded hole in the metal base of theinductor.On the other side of the leadscrew is a plastic nub that, I presume, issupposed to follow the 40- some screws. What I don't see: anyway for thenub to move the core in and out of the little linearizing inductor. There'sno spring. Nothing slides. Maybe, just maybe, the nub compresses/flexesthe metal base such that the tiny corrections are made. But it doesn't seemlikely. Maybe, just maybe, the pressurized nitrogen in the PTO provides therestoring force and the sliding is just the screw wiggling in its threads. Butthat doesn't seem likely either. Obviously my knowledge of how thelinearizing is supposed to work has a huge gap in it, because I don't seehow the screws move the nub or how the nub moves the little core. Cananyone PLEASE correct my mistaken reasoning here?---------------------------------------------------------------------------------------------------------Date: Mon, 27 Feb 2006 01:32:31 -0000From: <[email protected]>Subject: Re: [R-390] Cosmos PTO, spring-loaded linearizing core?
Hopefully, the following links will be of some value.http://web.webhost4life.com/barryhauser/index.asp?action=page&name=3
Take a look at issues 45 and 46 of Hollow State News. Also look at:http://www.r390a.com/html/body_n5off_pto.html
I have a Cosmos PTO, but have not yet tried to align it. Good luck, FredBray----------------------------------------------------------------------------------------------------------Date: Sun, 26 Feb 2006 18:41:14 -0800From: "Dan Merz" <[email protected]>Subject: RE: [R-390] Cosmos PTO, spring-loaded linearizing core?
Tim, you might want to look at www.davemed.com/cosmos.html if youhaven't. You can also find this by goggle search "cosmos pto miller 390a".Miller's pictures of the innards may be helpful. Dan.--------------------------------------------------------------------------------------------------------Date: Mon, 27 Feb 2006 00:25:21 -0500From: "Jim M." <[email protected]>Subject: Re: [R-390] Cosmos PTO, spring-loaded linearizing core?

If I recall correctly, and it has been a while, the core of the linearizing coilis spring loaded inside in some fashion so that it moves in and out as theadjustment screw heads push against the slide (I dont have better namesfor these parts). I dont recall if there was a lot of tension or not but whenyou push on the little "nub" the coil core should go in slightly, and thenspring back when you release the pressure. The pressurization inside thecan (if there ever was any) has nothing to do with it. What is going onthat you think this coild may be the problem?
The only adjustable coil I know of with screw threads is the end pointadjustment coil right next to the linearizing coil. There shouldn't be anywiggling threads. I have only opened one Cosmos PTO (the one on theURL) so I don't know what you may have there. If it doesn;t look likewhat's pictured on the URL inside, then maybe it is something different orit has been modified sometime in its life.-------------------------------------------------------------------------------------------------------Date: Mon, 27 Feb 2006 08:42:29 -0500From: "Tim Shoppa" <[email protected]>Subject:Re: [R-390] Cosmos PTO, spring-loaded linearizing core?
<snip>....the core of the linearizing coil is spring loaded inside in somefashion...
That was my understanding too. What I do NOT understand is why there'sno spring action and no spring and no slide inside this VFO's linearizingcoil.
<snip>...> when you push on the little "nub" the coil core should go inslightly...
Again, no spring action. Disassembly of the linearizing coil shows nospring.In fact the core sits on a screw that is threaded through the base. It isVAGUELY possible that the base is actually two pieces, and the threadedpart is supposed to be sliding in and out. But pushing and tugging firmly onit shows no sliding. And it looks like it's just one solid piece. (Andexternally looks just like all the pictures). If someone told me that thiscylinder was supposed to slide, I might start putting it in a vise hammeringon it or something. But short of that it's notgonna move.
<snip>...> The only adjustable coil I know of with screw threads is the endpoint> adjustment coil right next to the linearizing coil...........
Yeah, I've got the end point adjustment coil and it is threaded. (Actually

the threads are not on the coil but on a brass insert in the bulkhead thatthe coil attaches too.) BUT... my linearizing coil has a threaded base, and acore on the end of a threaded screw. No sign of any spring or slider at all.Thus my complete mystification as to how it ever worked. My pictures lookjust like those on the other websites of a Cosmos's innards, except thatnone of them ever got so far as unscrewing the linearlizing core to look forhow it was supposed to work. Oh, one difference: on mine the nub behindthe ring isn't red, it's black. Don't know what that means. It looks original,it's a very snug fit into the bottom of the linearizing coil's base, but so snugthat it never could've slid in and out. I'm tempted to tear down my otherCosmos PTO just to see what the heck is inside it.
<snip>...or it has been modified sometime in its life............................
Mine *had* been rebuilt by Raytheon (according to the maintenancesticker) sometime in the early 70's. But the coil base looks identical to theother Cosmos pictures I've seen around (of course they only show theoutside of the base and not the threads or the slug on a threaded screw onthe inside). The only obvious difference is that the nub that is supposed toride the back of the ring is black plastic on mine. The reduction drive forturning the screw plate in mine was pretty grungy. Not as much shellacand grit as the RF deck geartrain, but pretty bad for a sealed unit!--------------------------------------------------------------------------------------------------Date: Mon, 27 Feb 2006 09:45:39 -0500From: "Tim Shoppa" <[email protected]>Subject: Re: [R-390] Cosmos PTO, spring-loaded linearizing core?
<snip>..First let's be sure > you are looking at the right inductor.........
Oh, definitely.
<snip>...but I can't imagine the screws riding directly on the end of theshaft....
In my unit, the metal ring has a triangular "screw rider" that obviously isshaped so that it is riding at least one and usually two screws at any pointin its travel. Then I guess the back of the ring pushes up against the "slugrider" that is supposed to slide the slug in and out (I guess, in my case it'snot sliding!) As to the triangular screw rider: see how the screws zig-zagin and out? The backs of the screws look to be enlarged such that thetriangular rider is always on at least one and usually on two of the screwbacks.
<snip>....watched the movement of the alignment tool through thatprocess.....

Thanks Cecil, to verify that there is really supposed to be movement :-).Looking at how adjustable the screws are I would be surprised if therecould be an eigth inch of travel, but that's a good upper limit. If you turnedone in an eight of an inch it would probably fall off inside :-(. But I'mgetting no sliding. Maybe I should soak the metal inductor base in somekind of solvent to free up that so-far-hypothetical slider. I can sort ofconceptually see that there's a cylinder in there, with internal threads thatthe core sits in, and that the cylinder and thus the slug are supposed to besliding in and out. There's a lot of mechanisms with a lot of screw holesand I really don't understand how they kept all those holes closed topressurize this thing with nitrogen.--------------------------------------------------------------------------------------------------------Date: Mon, 27 Feb 2006 10:03:02 -0500From: "Tim Shoppa" <[email protected]>Subject: Re: [R-390] Cosmos PTO, spring-loaded linearizing core?
One further thought: my PTO is evidently a Cosmos PTO that had beenrebuilt by Raytheon in the 70's. I compare the innards of mine (coveredwith grease, goop, and shellac) to Jim's pictures at http://www.r-390.com/cosmos.htm..... and I'm stunned at how shiny his is. In mine thereducing gear was slopped in tan/grey grease, much of which was runningall over the feed-through wires. Much of this grease was also on thescrews/ screwplate etc. too. Some was leaking through into the back of thecan and seeping out of where the inductors screw down to the baseplate.I've been able to clean up much of it. I think Raytheon royally screwed myPTO up 30 years ago. But, if I can get the slug to slide again I'll be home-free!--------------------------------------------------------------------------------------------------------Date: Mon, 27 Feb 2006 10:36:35 -0600From: "Bill Hawkins" <[email protected]>Subject: RE: [R-390] Cosmos PTO, spring-loaded linearizing core?
The innards pictures show enough details for some educated guesses. Mostof my PTO work was on R389 PTOs with 50 ring corrector stacks. Thesolid ring that holds the slider that contacts the ends of the adjustingscrews must be attached to the frame at some point, probably opposite thelinearizing coil. It can't turn. That means it could be the spring that youare looking for. If it isn't springy, that could be the problem. Does the PTOlook like it had been overheated? You can't put a spring in the end of thecoil opposite the slider, or it would be detuned. Seems like you have toattach the screw from the slug to the ring with the slider, to get springaction. That means the relaxed spring must be well away from the frame(at the coil) when the frame is separated from the ring with the screws.You'd have to disassemble the PTO as shown in Jim's pictures. Once you'vedone that, you ought to be able to press gently on the slider, in thedirection of the coil, closing the gap between the slider and the frame

holding the coil. Can you do that? Do you feel spring action, so that the gapwidens when you remove pressure on the slider? If the slider ring is actinglike a spring, then the rod from the coil slug must be attached to the ring.Can you see if that's true? The detailed pictures don't show that detail. If itisn't attached, can you see how it might have been before it broke away?The adjuster screws don't hold nitrogen pressure. The case is sealed withthe big O-ring, the 2 feedthrus and the two screw caps for linearity andendpoint adjustment. Old silica gel packs have to be heated to dry them outbefore they may become useful again.----------------------------------------------------------------------------------------------------------Date: Mon, 27 Feb 2006 12:29:31 -0500From: "Tim Shoppa" <[email protected]>Subject: RE: [R-390] Cosmos PTO, spring-loaded linearizing core?
<snip>....The innards pictures show enough details.......
Yeah, your guesses are pretty good based on the pictures, but... :-).
<snip>......must be attached to the frame at some point, probably> opposite the linearizing coil. It can't turn...........................
You are correct, it is held on by two screws.
<snip>....... Does the PTO look like it had been overheated?.........
It is springy. But there's no way it can "pull" the slug out of the coil. Look atJim's pictures of the ring and its riders: vacing the outside is the metaltriangle that rides the screw, and on the inside you can see a red-with-white-cap thing that must ride the back. The PTO does not look overheatedbut it is way greased up compared to Jim's pictures. (He doens't say if itlooked that way when he opened it or if he cleaned it up to make it shiny).
<snip>.......Do you feel spring action, so that the gap widens when> you remove pressure on the slider?................................
My PTO is completely torn down. I've removed the linearizing coil (you seeit in Jim's pictures - there a phenolic form on a long metal base, and thereare two cheese-head screws that hold the base to the plate which youcannot see.) There is no spring aciton and no slide action either.
<snip>...... then the rod from the coil slug must be attached to the ring.........
It is not attached, and it does not slide. I don't think it was ever attached.There is a black plastic nub that must've ridden the back of the ring. Thering can push on the nub, but it cannot pull, so there must be a spring andslider to push the nub back out. My best theory (while I do not have the

PTO in front of me!) is that the sliding component must be seized inside thebase of the inductor. (You can see the base in Jim's pictures, it's the longmetal thing on which the phenolic coil form sits. You also see the nubsticking out and contacting the ring.) The base is long enough that it musthave the slide-spring mechanism in its base. My nub looks different thanthe one in Jim's picture (which now that I look at it again is RED with aWHITE tip). Mine is black. I don't think it's a "mismatched" part because itfits very snugly in the bottom of the metal inductor base. Although it isvaguely possible that the idiots at Raytheon modified mine, I'm surelyHOPING they did not.
<snip>.......> The adjuster screws don't hold nitrogen pressure. .............
OK, so the first time you do the endpoint adjustment the nitrogen poofs out.That's what it seemd like to me :-).------------------------------------------------------------------------------------------------------Date: Mon, 27 Feb 2006 12:30:27 -0500From: [email protected]: Re: [R-390] Cosmos PTO, spring-loaded linearizing core?
I think there's your problem. With all that goop in there it could be thatsome found its way into the linearizing coil and has dried hard, keepingthe coil from moving. Try a squirt of denatured alcohol to the insides ofthat little coil to see if it will start moving in and out better. BTW my PTOlooked like that on first being opened. There is not supposed to be largeamounts of grease in there. Just a dab on the main lead screw (that thelarge core runs on). I have also found dried grease in the main tuningshaft bearings and grease seals where the shaft exits the front. Thiscaused stiff tuning and backlash. As long as you have that apart, you canclean the bearings and produce a much smoother tuning action.----------------------------------------------------------------------------------------------------------Date: Mon, 27 Feb 2006 12:10:35 -0600From: "Bill Hawkins" <[email protected]>Subject: RE: [R-390] Cosmos PTO, spring-loaded linearizing core?
OK, the ring is not the main spring. I do see the red part with the white dotin Jim's pictures. What I can't see is how to remove the coil assembly, withthat long steel base that surely could contain a spring. The picture with"The two halves of the PTO being separated ..." shows what appears to be awrench flat at the end of the "steel" (or some gray metal) base that is closeto the frame. Have you disassembled it that far?
If you do have the coil assembly free of the PTO, can you see a way to lookin the steel barrel? The spring has to push the rod all the way out, so thefixed end of the spring is near the coil. The other end pushes on the rod,probably using a circlip snapped onto the rod.

OTOH, Cosmos didn't machine anything that didn't have to be machined.Perhaps the red rod is hollow. The inside end pushes against the spring.The outside end pushes against something like a rivet head on the end ofthe inner rod that attaches to the coil slug. If that's the way it's built, Iwouldn't expect the spring to be gunked up. More likely the rivet headbroke off - but you can see something extending from the outer rod. Youought to be able to push the rod a little further into the coil, or go aroundand push on the core to get the rod to move out. The core is probablyfragile.---------------------------------------------------------------------------------------------------Date: Mon, 27 Feb 2006 13:25:56 -0500From: "Tim Shoppa" <[email protected]>Subject: RE: [R-390] Cosmos PTO, spring-loaded linearizing core?
It's easier than you see. There are two cheese-head screws (which you donot see in Jim's photos) that hold the linearizing core base onto the mainplate. It's tight but not too hard to get to those screws. The material seemsto be aluminum for most of the PTO innards that are not phenolic/ plastic.
<snip>...can you see a way to look in the steel barrel?......<snip>
Yeah, I don't see a spring. I see a threaded hole in the base. The thread onthe screw attached to the core threads through that hole. Current theoryis that the threaded hole isn't part of the base but is part of a slidingcylinder that goes up and down in the base, and that the cylinder hassomehow seized up in mine.
<snip>.......Perhaps the red rod is hollow. .......<snip>
That's a good theory, and it may indeed be what's in other Cosmos PTO'sbut that's not what I see in mine. I am tempted to tear down my otherCosmos PTO (it is actually in much bigger need of linearization) just to seeif I can slide the core in that one! I looked at the Cosmos patent#3,098,989 and while the externals of the linearing inductor match mine,the innards of base #28 and core #31 do not look like mine. That's a reallywell-written patent BTW. Occasionally for work I have to look at moremodern patents and they are written like crap in comparison.--------------------------------------------------------------------------------------------------Date: Mon, 27 Feb 2006 14:04:11 -0500From: [email protected]: Re: RE: [R-390] Cosmos PTO, spring-loaded linearizing core?
Just to clarify my PTO was clean and shiny on first opening as in thephotos, although the grease on the main inductor lead screw hadblackened a bit. Sounds like somebody at Raytheon got a little heavy

handed with the grease gun. Another thing: I wonder if some coil partshave absorbed grease and expanded? This happens to the material of thecoil forms - they absorb lubricants, expand and then the slugs don't movein them too well any more. I don't recal what the coil form was made of forthe linearizing coil, but if it is paper based or easily absorbs moisture, itcould have expanded around the plunger and frozen it in place.--------------------------------------------------------------------------------------------------Date: Mon, 27 Feb 2006 14:46:25 -0600From: "Bill Hawkins" <[email protected]>Subject: RE: [R-390] Cosmos PTO, spring-loaded linearizing core?
OK, no more guesses. When you say there is a threaded hole in the base,does that mean that the red/black rod is threaded on the outside? It lookssmooth in the pictures. If it's smooth, it ought to slide.----------------------------------------------------------------------------------------------------Date: Mon, 27 Feb 2006 15:53:53 -0500From: "Tim Shoppa" <[email protected]>Subject: RE: [R-390] Cosmos PTO, spring-loaded linearizing core?
Your guesses have been pretty good and quite helpful in fact :-). Thatred/black rod in the picture isn't really present in mine. Mine has a blackplastic nub sticking (friction fit but pretty tight!) into the bottom of theinductor base. The threaded rod goes into the threaded hole into the base,and has the slug on the other end at about the right height to stick into thewinding area. If I screw it in far enough from the top, it eventually bumpsinto the black nub. Because I'm turning the slug at the top I stop turning atthat point (rather not break that slug!) My belief (unconfirmed by fact yet)is that the threaded hole is part of a cylindrical "piston" that should slideup and down the base body. The bottom of the metallic piston has the blacknub for riding the ring. And that the piston is seized in the body.-------------------------------------------------------------------------------------------------------Date: Mon, 27 Feb 2006 17:14:12 -0500From: [email protected] (Tim Shoppa)Subject: [R-390] Stuck linearity coil piston: SOLVED!
OK, I got home, gave the kids their snacks so I could have 5 minutes in thebasement, stuck a nail into the top of the linearity coil and gave it a coupleof whacks. Piston frees up and comes out the far end. It was coated by alayer of grease/shellac, some acetone and brake cleaner helped clean it upand now it works great. I do not NORMALLY use a hammer to solve my R-390A problems :------------------------------------------------------------------------------------------------------------Date: Wed, 01 Mar 2006 17:18:36 -0500From: Mark Huss <[email protected]>Subject: Re: [R-390] original Collins PTO

According to a conversation I had many years ago with the son of one ofthe Engineers that worked on the R-390 and R-390A design, there wasindeed something 'Special' about the Original 'Collins' PTO. From what Iremember, we had an R-390A with a PTO that was out of adjustmentrange. It was a low serial number PTO made by Collins, the first time I hadseen one. I had decided to try repairing it as the School was not exactlyhigh on the priority list for spare parts. That is when this fellow told meabout his history, and the solution to the problem. I.E., take a half turn offthe small coil in the PTO. The cause, according to him, was the materialused for the large coil form. It changed dimensions with age and heat,causing the inductance to change. He said his dad told him about it whenhe joined. Said that Collins discovered the problem in the 75A series, but itdid not show up until about the middle of the first year Collins R-390A runsince it took years to show up. They fixed the problem in the latter half ofthe Collins run, and all subsequent PTO's made by other manufacturers. Soyea, it is 'Special' in that it is one of the worst PTO's you can have. As for the bonifidies of this issue, I never met his father, just what hetold me. However, the solution did work. And later I heard that PTO's onthe 75A series Collins do have a problem with being out of adjustmentrange. And I never had the problem with any other PTO by othermanufacturers. If the tale is true, then Motorola also made PTO's before1957, so they may also have the same problem.--------------------------------------------------------------------------------------------------------Date: Wed, 01 Mar 2006 19:10:10 -0800From: "Dan Merz" <[email protected]>Subject: RE: [R-390] original Collins PTO's
Mark, can't be exactly as you say, or heard. My Cosmos in an EAC 390Arequired removal of a turn to get it back in the proper range. I have limitedexperience otherwise. Maybe because they're older, the Collins PTO's aremore apt to show up with this ageing problem.-------------------------------------------------------------------------------------------------------Date: Wed, 01 Mar 2006 19:18:54 -0800From: "Dan Merz" <[email protected]>Subject: RE: [R-390] original Collins PTO's
Mark, I don't think the ageing of the PTO that you described is limited toCollins PTO's. The Cosmos PTO in my EAC 390a also required removal of afull turn to get it back in the proper range. Time/temperature may be theenemy. That's not to say that there may not have been some effort to curethe problem but 30 odd years is apparently enough to have another typeof PTO (non-Collins) show the same symptom. Dan.------------------------------------------------------------------------------------------------------Date: Thu, 2 Mar 2006 00:50:02 -0600From: "Bill Hawkins" <[email protected]>Subject: RE: [R-390] Collins PTO's

Well, I worked on two R-389 PTOs for linearity. Can't get much moreCollins or much older than that. They were within 500 cps of linearwithout being touched. Maybe the "cost-reduced" (that is "cheaper") R-390A had that problem. They're gone now...----------------------------------------------------------------------------------------------------------Date: Thu, 02 Mar 2006 10:09:11 -0500From: Roy Morgan <[email protected]>Subject: RE: [R-390] Another "Close to Perfect" R-390a
The R-389 PTO is type 70H-1 (not 70H-2 or 70H-12). It makes FIFTYturns not 10 turns end to end. It is rumored to have been the most difficultPTO Collins ever made. I assume that they were all made at Collins, notcontracted out. I need one.------------------------------------------------------------------------------------------------------Date: Thu, 2 Mar 2006 09:32:36 -0600From: "Les Locklear" <[email protected]>Subject: Re: [R-390] Another "Close to Perfect" R-390a
It was /is a known problem with the 51J series PTO's, but they had otherproblems, 12 kc off wasn't uncommon. Theory seemed to be, you either hada good one, or you didn't. I must have been lucky, had several 51J3's (R-388) and 2 51J4's, all were good.-----------------------------------------------------------------------------------------------------Date: Thu, 02 Mar 2006 10:58:23 -0500From: "Tim Shoppa" <[email protected]>Subject: [R-390] Corrector plate PTO's,
I just googled for "R-389" and PTO and found Don Reave's pictures of theinternals of a 70H-1. Except for the corrector plate stack it looks a lot likethe innards of my 390A Cosmos PTO's (some of the parts look to beidentical or at least the same series) and elements of the chassis look verysimilar too (including those dessicant packs even!) Silly questions aboutcorrector plates (my very limited experience is with Cosmos-style PTO's):
What's the typical "range" of correction? It looks like a little less than 1/4of a turn is max (although typical seems to be far less and obviously youcan't go too far from one correction plate to the other.) Are the plates"slidable" to the correction, or is each correction plate machined to provideexactly that correction? If they're slidable it looks like it'd be tricky to slideone without disturbing others in the stack... If they're not slidable it wouldseem that re-linearizing would require either a machine shop or a largesupply of assorted corrector plates.--------------------------------------------------------------------------------------------------Date: Thu, 02 Mar 2006 11:23:31 -0500From: Roy Morgan <[email protected]>

Subject: Re: [R-390] Corrector plate PTO's
I found that at: http://www.r-389.com/ What's the typical "range" ofcorrection?
I have not done a corrector stack adjustment, but: Seems to me that therange of the stack plates is way less than one quarter turn, more like fiveor maybe 10 degrees of rotation. The change of rotational position of thethreaded part of slug mechanism imparted by the corrector mechanism isnot very much. Yes, the jump from one plate to the next cannot be toomuch, or the roller follower will not make the move. As I understand it:Each plate is separated from the next by a more or less fixed shim. Thusyou can move each plate independently of it's two neighbors. Themanufacturers had a jig with a PTO shield cut to allow entrance of amoveable set of jaws that could move one plate at a time. The stack ofplates is locked by a bolt through the whole stack, or by some similarclamping mechanism. The operation was: Move PTO to next plate, unlock,make correction, lock, then repeat 40+times. Then do it all over again. If*I* were setting up the ladies with linearization adjustment stations, Iwould automate the stack lock/unlock thing with a foot switch, andprovide a very easy to read center-zero meter readout for each 25 kc step,and likely an automated turn-a-quarter-turn mechanism.---------------------------------------------------------------------------------------------------Date: Sun, 05 Mar 2006 13:29:06 -0500From: [email protected] (Tim Shoppa)Subject: [R-390] VFO squirreliness solved FOR GOOD
OK, I went one step further and think I've solved all squirreliness issueswith my two Cosmos VFO's for good: The pics on the net show the lead-screw and slug. What may not be clear is that the bottom of the slug isthreaded, and the top (above the arm assembly) is threaded separately.
Backlash is removed by taking the three tiny screws off the top of the armassembly. You will find two rings (top with three holes, bottom with sixholes) and a threaded piece in between them. I removed the threaded piece,cleaned and polished the rings and the threaded piece (they seem to becopper or a copper alloy and had a good amount of green-red crud onthem), tighten the threaded piece back down, and reassemble the ring backon top. How tight? Well, I don't think I tightened mine down any morethan they originally were, but mostly removing the crud did the job. This isnot something you tighten with a wrench! Finger-tight seems to be morethan enough. Make it too tight and there will be too much "drag" as youturn, I guess (I didn't try tightening them that much.)
I am now deep in the math of optimizing the linearization. It is a ratherinteresting thing with a number of controls. Of course there are the 40-

some little linearization screws, but the effect of these screws is alsoaffected by the overall adjustment of the slug in the linearization coil (forMOST RANGE, you adjust this slug so that it is JUST ENTERING the coilregion; for LEAST SENSITIVITY you want to pick an area where the endhas ALREADY ENTERED the coil region.). The endpoint adjustment comesin too (and while setting end-to-end to be 1MHz is a good place to start, foroptimal adjustment the number may be a kHz higher or lower dependingon where the linearization deviations are, if they're in the middle or at theends.) To make things just a little bit trickier, the linearization setting isMOST SENSITIVE at the 3.455MHz end, where the fraction of inductanceprovided by the linearization coil is the largest, and it is the LEASTSENSITIVE at the 2.455MHz end, where the fraction of inductanceprovided by the linearization coil is the smallest.
I am PROBABLY OVERANALYZING the linearization issues. Maybe Ishould just tweak the little screws more rather than graphing all thisstuff! At least the squirreliness is gone. Before, when I tuned the VFOthrough while listening to the 2.455 through 3.455 MHz end on a nearbyreceiver, I could clearly hear some funny wiggles going on. Now, it'ssmooth as silk! Tim.--------------------------------------------------------------------------------------------------------Date: Sun, 05 Mar 2006 10:57:45 -0800From: "Dan Merz" <[email protected]>Subject: RE: [R-390] VFO squirreliness solved FOR GOOD
Tim, thank you for taking the time to relay your findings. I never messedwith the linearization on my Cosmos because it looked messy. And I don'trecall really cleaning mine like you did when I had it open to take a turnoff, which might be worth the effort. As far as "overanalyzing" goes,thishappens. I'm glad you took the effort. I wonder how much the linearizationscheme improves the linearity. How non-linear are the other pto's thatdon't have this feature? Or how much correction are you making as youtweak these? I'll now have to monitor my pto with a frequency meter tosee what I sacrificed by ignoring further adjustment of mine. Best regards,Dan.-------------------------------------------------------------------------------------------------------Date: Sun, 05 Mar 2006 15:27:03 -0500From: [email protected] (Tim Shoppa)Subject: Re: [R-390] VFO squirreliness solved FOR GOOD
I doubt that the grease-monkeys at Raytheon put so much oily goo insideyour PTO's, Dan :-). One of my two units has a nonlinearity of about +/-1.2kHz without linearity correction, and the other one (the one Raytheongooped all up inside) is about +/- 2.0kHz without linearity correction. (By"without linearity correction" I mean that all the little screws have beenadjusted to midrange and I've already optimized the endpoints.)

The maximum range of linearity correction by turning the little screws isabout 4kHz at the 3.55MHz end (and 2.something kHz at the 2.455 MHzend), so even the extreme one is still within correction. That's about twoturns of the little screw. To align at the 200Hz level the screws need to beadjusted to the tenth of a turn, and this is probably about as good as can bedone. (I'm sure somebody's gonna chime in here about how they linearizedtheirs to the 10Hz level...!) I don't think my PTO's are "cream of the crop"with respect to accuracy before correction.
Getting them much better than 200Hz is probably not feasible because thelinearity screws aren't flat to that level on the back. Hypothetically, I thinkthe correction range could be extended somewhat by taking turns (therearen't that many to start with!) off the endpoint inductor and movingthem to the linearity inductor. Just moving some of the flying wires insidethe PTO can will change linearity at the 1-kHz level. As to "overanalyzing"this, I've got a few dozen tables of frequencies vs dial positions as I tweakthe endpoint, sometimes at the 25kHz points but usually at the 100kHzpoints. It's interesting to an extent (but also realize that I spent manymany years in grad school graphing data and fitting curves so I'm notactually averse to the subject.)--------------------------------------------------------------------------------------------------------Date: Sun, 05 Mar 2006 13:05:03 -0800From: "Dan Merz" <[email protected]>Subject: RE: [R-390] VFO squirreliness solved FOR GOOD
Tim, same here on the "I like to graph things". Thanks for the hard dataon the amounts. I measured the pto on my Collins R-390 a few minutesago... The 390a Cosmos isn't as easy to get to at the moment. I found: theCollins pto output spans about 997.8 khz, or 2.2 khz short of the 1000 khzrange in going from 000 to 1000 on the dial. The error in dial readout isalmost all due to that problem.
If I correct the readings as though I stretched the pto span by adding aturn or whatever it would take to the coil, I estimate the non-linearity ofthe pto to be in the range of 0.1 to 0.2 khz, pretty darn good for somethingthat's probably not been messed with as far as I know. I'll check myCosmos unit sometime to see how it fares. I'm not going to try to improvethis particular unit, which spans 997.8 khz instead of 1000 khz..-------------------------------------------------------------------------------------------------------------Date: Sun, 05 Mar 2006 17:28:59 -0800From: "Dan Merz" <[email protected]>Subject: RE: [R-390] VFO squirreliness solved FOR GOOD
Tim, I checked my Cosmos pto in the EAC 390a with followingobservations: The pto output span was 1000.4 khz for 000 to 1000 on the

dial The non-linearity (after assuming I reduced the span from 1000.4 to1000.0) was typically about 0.3 khz but two points at 200 and 300 on thedial were about 0.5 and 0.6 khz away from linearity. Interestingly, the waythe pto is now, if I were to calibrate the dial to a known signal at midscale, 500, the indicated frequency would be within 0.2 khz over the entirerange except at 000 which would be off by 0.5 khz.That seems goodenough for me. I don't recall that I adjusted the linearity at all when I tooka turn off the coil about 5 years ago.-------------------------------------------------------------------------------------------------------Date: Mon, 6 Mar 2006 16:22:58 -0800From: "David Wise" <[email protected]>Subject: RE: [R-390] Corrector plate PTO's,
Caveat: I have linearized one Collins R-390A corrector plate PTO. I can'tremember the range of correction. There is a very real limit on rate ofchange of correction. If there's a valley, it has to be wider than thefollower, or it will never touch bottom. The plates slide individually quitewell, as each pair is separated by a thin stationary finger. A thumbnail is apretty good tool for sliding individual plates. Just thin enough and stiffenough, and always handy :)----------------------------------------------------------------------------------------------------------Date: Sat, 11 Mar 2006 22:03:41 ESTFrom: [email protected]: Re: [R-390] VFO squirreliness solved FOR GOOD
Thanks, Tim, for inspiring me to tackle one of my PTOs. I replaced myoriginal Progressitron PTO with a Cosmos because it was warbling as Ituned. I had cleaned the grounding wiper, and had disassembled the PTOand cleaned the threads, but couldn't solve the problem. Based on yourcomments, I pulled the PTO apart, removed the back plate, and removed theslug and cams (all in one piece). I didn't disassemble the slug, but I wasable to clean and lube the entire threaded shaft. I also resoldered thesmall caps as Les had suggested. I put it in the radio tonight, and it tunesgreat- no warbles. The only problem I have is that it's off about 2 Kc end-to-end, and the variation is not linear. I'll tweak the end point and seehow close I can come- it will probably meet the original specs whencompleted, but won't be as good as a tweaked Cosmos. Speaking of which, Ialso tweaked the end point on the Cosmos because it was out by 1 Kc.Fixed that right up, but now intermediate points are out by as much as 1.8Kc, where they were within 0.4 before I touched it. And the strange thingis that all the 25Kc points are off the same amount- 1.8 Kc. All the 100 Kcpoints are right on, and the 75 Kc points are out about 0.8 Kc, and also allthe same. Very strange. I'll look at the data tomorrow and decide if I wantto tweak all those little screws, or just put the end point adjustment back towhere it was. While I was in the radio, I found I had a bunch of BBODs inthe IF. I thought I had all Vitamin Q metal caps, but I was mistaken. I

don't have a full set of replacements, but I did replace C553 with anOrange Drop, so at least that is taken care of. Ed--------------------------------------------------------------------------------------------------------Date: Sun, 12 Mar 2006 17:48:09 ESTFrom: [email protected]: [R-390] PTO success
Thanks to all the lore collected through this group, I have gotten both myPTOs into shape. I adjusted the endpoint on the Progressitron, and it nowmeets original specs (300 cycle error after calibration at the nearest calfrequency. I'm impressed, for the most part it's within 100 cycles within50 KHz of a calibration point. Off by a max of 1 KHz if calibrated only atmid-range. I resolved the problem with the Cosmos after recollecting a listdiscussion about having pressure on the tuning shaft giving a cyclicvariation in error. Sure enough, I loosened the mounting screws, movedthings around a bit, and it looks good- almost all 25 KHz points within300 cycles without recalibrating. I wasn't looking forward to tackling allthose little screws again. Now I have to decide which one to leave in theradio. I wanted to see if the Progressitron was more stable, but I hate tomess up the setting on the Cosmos now that I've got it screwed in justright. Incidentally, calibration is easier with the synthesized HP generatorI got. Just dial up each 25 KHz increment and read the error on the radiodial.------------------------------------------------------------------------------------------------------------Date: Sun, 12 Mar 2006 13:12:57 -0500From: [email protected] (Tim Shoppa)Subject: Re: [R-390] VFO squirreliness solved FOR GOOD
The endpoint adjustment does interact at least a little with the calibration.A couple kc is the limit of adjustment possible with the little linearityscrews. I think that in some cases it may be wiser to add some smallamount of capacitance rather than tweak the endpoint. Maybe I'llexperiment with that tomorrow, AFTER replacing the toilet AND seedingthe lawn AND installing the ceiling fan... (meaning it probably won'thappen!) Was C553 a BBOD? The IF decks I've owned had BBOD's in a lot ofnot-so-critical-for-leakage places (e.g. screen and filament bypasses) butbetter quality metal cans - Vitamin Q's or Westcaps - at the filters.------------------------------------------------------------------------------------------------------Date: Sun, 19 Mar 2006 12:31:52 -0500From: <[email protected]>Subject: [R-390] Cosmos PTO
I know there is a lot about the Cosmos PTO out there, but nerves have gotthe best of me. I want to adjust the end point (out by about 1 kHz) and Itook off the screw to adjust the end point, but the end point adjustmentscrew looks like a spanner nut with a rubber center. Do I just take a 1/8

inch blade screwdriver and have ho or is there something I need to becareful of? I was expecting a slot and it looks like I should stone ascrewdriver to have parallel sides. Is this the case? Thanks in advance.----------------------------------------------------------------------------------------------------------Date: Sun, 19 Mar 2006 12:44:53 -0500From: [email protected] (Tim Shoppa)Subject: Re: [R-390] Cosmos PTO
There are three "holes". The endpoint one is the one that is partiallyobscured by the transformer can. Removing the can might help get youaccess (especially if you have a stiff-bladed driver). BUT... I think there is"hot" wiring inside the transformer can so be careful if you do so. If you donot remove the transformer can you can use a metal screwdriver withoutfear.The one next to the endpoint hole reveals all the little linearity adjustmentscrews. (I bought the 4-flute spline driver for these from McMaster, let meknow if any of you need the official McMaster part number.) And there's athird hole that reveals the thermostat set point. This is a BIG (incomparison) brass screw.
Not sure what a "spanner nut with a rubber center" is, but the endpointinductor has a brass three-wing section that has an external nut whichcan tighten down on the brass adjustment screw. I think the purpose of thethree-wing section is that it is adjusted to minimize wiggling/backlash ofthe internal brass adjustment screw. The brass screw is attached to theslug.
If you find you do not have enough adjustment range, you probably have toopen to the PTO can and adjust the turns on the inductor. Others talk aboutremoving whole turns, but for mine I found that removing half a turn(reversing the direction of the winding so it went from 2.75 turns to 2.25turns) was the best choice. In my case removing a whole turn took me toofar in the direction of increasing the span. But removing half a turn got mein the "sweet spot". Since you're only 1kHz off in endpoint, maybe you don'thave to do this surgery. But if you find yourself with the brass screw all theway inside the three-wing clamper, or sticking out so far it would interferewith the threaded cover, then maybe it's time.-----------------------------------------------------------------------------------------------------------Date: Mon, 03 Apr 2006 08:37:17 -0400From: "Tim Shoppa" <[email protected]>Subject: Re: [R-390] Question on COSMOS PTO
> 1. Zero beating against the calibration 100Khz signal at x.000 afterusing> the zero adjust knob to be exactly at x.000, I noticed that if I either dial> up or down from this calibration spot, coming back to this mark, I'm

always> either +/-100Hz off depending on the direction I'm turning. Is this whatyou> call backlash or hysterisis?
This is backlash, and it is probably in the gears coupling to the countermechanism. Assuming that all the springs are in place and tightened, theworst offender in the chain is the bevel gear that comes right before thecounter. This can be adjusted a little bit (setscrews) to tighten it up. If youwatch the bevel gears (either looking in from top/bottom or with the frontpanel off) you can see and feel the backlash as you wiggle the front knob.
> calibration. Am I approaching the design limit being off +/- 100Hz on the> calibration mark?
Pretty much. While the bevel gears can be squished into each other tightlythis still doesn't remove all the backlash (and it certainly isn't "right" interms of mechanical operation, you quickly start noticing a lot of rubbingfriction from those gears as you tighten things up.) See my thread fromlast month about a different problem, a "squirrely PTO", which I had to teardown the entire PTO for.-------------------------------------------------------------------------------------------------------Date: Sat, 29 Apr 2006 22:22:35 -0500From: "Barry" <[email protected]>Subject: [R-390] No Peak on T701
I've been doing some more tweaking on one of my R390As. T701 (outputtransformer from the PTO) will not peak. I'm getting slightly less then 2Vpeak to peak no matter how I adjust the slug. Anyone ever seen thisbehavior? If so, any ideas what's wrong? I've done some resistancechecking on V701 and nothing is all that far off. Since the slug tunes theplate tank, I'm wondering if the problem might be with C706. It's supposedto be adjustable, but how? Reading the Y2K manual, it states C706 is avariable glass dielectric cap. Not sure what that is, but with the PTO out ofthe radio and the cover off of Z702, I see a clear cylinder in which the slugmoves. Is that C706? Thanks for any help or advice on this.
By the way, FC7 (changing R702 from 56k to 220k and thereby reducingthe output of the PTO voltage) has not been done on this PTO.----------------------------------------------------------------------------------------------------Date: Sat, 29 Apr 2006 22:30:49 -0500From: "Bill Hawkins" <[email protected]>Subject: RE: [R-390] No Peak on T701
Ah, les'see, the output PTO coil will not peak. Doesn't seem like it would be agood idea for it to peak. The PTO generates 2.5 to 3.5 meggycycles, and

they've all got to be mixed with the masticated RF from the RF deck. Asharp peak at 3.0 MC would seem like a very bad idea. If you want areasonably level signal for 3 +/- 0.5 MC, you want a really low Q circuit.What have I missed?---------------------------------------------------------------------------------------------------------Date: Sat, 29 Apr 2006 22:54:31 -0500From: "Barry" <[email protected]>Subject: Re: [R-390] No Peak on T701
That's a good point; however, why is the transformer slug tuneable? Irealize that just because a component happens to have an adjustmentthat's not a reason to go about adjusting it (golden screwdriver syndrome),but it would seem they put adjustments on these components for somereason, right? I assumed the output of the oscillator should be maxedsomehow, even if it is a low-Q circuit. Although I don't see it in the Y2K file,I do seem to recall seeing something about adjusting this in one of myother manuals. I'll have to check.-------------------------------------------------------------------------------------------------------Date: Sat, 29 Apr 2006 23:09:55 -0500From: "Barry" <[email protected]>Subject: Re: [R-390] No Peak on T701
Hmmm. It appears the adjustment I *thought* I was making to thetransformer was not the transformer at all, but C706! Although theschematics are drawn with an arrow through T701 (which I always tookto mean an adjustable (usually slug-tuned) transformer), it appears thetransformer in Z702 is fixed (the windings are on top of each other withno slug tuning).Now, I'm still wondering what C706 is tuned for. Maximum output? If so,I'm not seeing any change with it. Thanks again, guys.------------------------------------------------------------------------------------------------------------Date: Sun, 30 Apr 2006 07:18:50 -0400From: [email protected] (Tim Shoppa)Subject: Re: [R-390] No Peak on T701
Check resistor values and DC voltages inside the PTO chassis. IIRC there'sone of them 2.2K's that are always off by a few hundred percent.--------------------------------------------------------------------------------------------------------Date: Sun, 30 Apr 2006 07:47:55 -0400From: [email protected] (Tim Shoppa)Subject: Re: [R-390] No Peak on T701
2V RMS is not awfully low. When I scope the PTO output I see 6-8V P-P, themax in the middle of the range and falling off towards the edges (especiallythe high freq/low counter edge). This is the raw unterminated PTO output;putting a 50-ohm terminator on it drops the value by a little more than a

factor of two.Let's see, 6V Pk-Pk is a little above 2V RMS. Maybe your PTO output is alittle bit low but I can't say that it's "bad".
It's been a while since I screwed around with it but IIRC there was not a lotof variation to be had by swapping PTO tubes around. (I was mostlylooking for frequency stability not PTO output level as I swapped tubesaround.)I seem to recall past postings on this list that suggested that the PTOoutput network was there to "squash" any resonances and make the outputroughly flat across the PTO range. So actually peaking it up for oneparticular frequency may be not good (may in fact be impossible! Asanother data point, most of my crystal oscillator band outputs are in the 8to 10V Pk-Pk range, with some going up to 12 or 13V and a few bands aslow as 5 or 6V (I guess the variations aredue to crystal activity or just the way picking off the harmonics works; theunits have been peaked up on each band.) Getting back to my mixer designobsession, I guess this means that most of the mixers were designed withLO inputs in therange of a few (1-3?) volts RMS in mind and that a factor of two variationin level throughout the frequency range is not out of design specs.
I'm not claiming that my values are golden reference standards either, justwhat I see on my two 390A's. Is there an official output level that the PTOis supposed to meet? And is that value into a terminator or not?----------------------------------------------------------------------------------------------------------Date: Sun, 30 Apr 2006 14:07:02 -0500From: "Barry" <[email protected]>Subject: Re: [R-390] No Peak on T701
I'm seeing about 1.8V peak-to-peak, unterminated into my 'scope. The moreI think about this, the more I'm wondering if C709 might be bad. Wouldn'tthis cause low output? It's spec'd as a 2% so I'm thinking if it has changed,even slightly, it might be causing a problem. If I recall, C327 (the capacross L230/T207) is of the same type and it has been known to cause lowoutput from the 1st crystal oscillator. I haven't found a 510pF, 2% cap yet,though. :-( Surplus Sales of Nebraska has them, but they also have a $10minimum order and I really don't need anything else from them right now.Any sources, anyone?-------------------------------------------------------------------------------------------------------Date: Sun, 30 Apr 2006 15:07:14 EDTFrom: [email protected]: Re: [R-390] No Peak on T701
Barry - N4BUQ Reports that he has done some resistance checking onV701 and nothing is all that far off. Since the slug tunes the plate tank, I'm
wondering if the problem might be with C706. It's supposed to beadjustable, but how? Reading the Y2K manual, it states C706 is a variableglass dielectric cap. Not sure what that is, but with the PTO out of the radioand the cover off of Z702, I see a clear cylinder in which the slug moves. Isthat C706? --- YES ---
Barry - N4BUQ Reports that he has been doing some more tweaking on aR390A's T701 transformer (output from the PTO) that will not peak.Getting slightly less then 2V peak to peak no matter how he adjust theslug. By the way, FC7 (changing R702 from 56k to 220k and therebyreducing the output of the PTO voltage) has not been done on this PTO. Heasks, Anyone ever seen this behavior? If so, any ideas what's wrong?"
Barry, R702 is the screen gird resistor, Changing the value from 56k To220K will just reduce the screen grid current. Maybe a bit less noise in theoscillator output. Like a little longer tube life. Not a lot of change in theoscillator output. Tim Shopp recommended that you check resistor valuesand DC voltages inside the PTO chassis. We know the 2.2K's are always offby a few hundred percent. The one in the plate circuit R703 could bedrooping B+ and thus giving your lowoutput. Figure 49 page 75 in TM 11-5820-358-35 8 December 1961 ShowsZ702 with both the cap and slug adjustment on the top of the can. If youare working on a Cosmos PTO or some other clone of the Collins VariableFrequency Oscillator then all bets are off.--------------Hmmm. It appears the adjustment I *thought* I was making to thetransformer was not the transformer at all, but C706! <snip>--------------Oops, Barry, you should have a C and a T to tune. Several photos anddrawing in the 1961 TM show both items. My R390/A is bolted in a caseand I can not get a look its internals. Some models of the PTO may have putthe C outside the Z702 can on the "subassembly chassis". The CosmosPTO's may have a fixed transformer with no adjustment. Some othermodels may also have no transformer adjustments. Is it time for every oneto look at their PTO and report what we find for models and setup?--------------------------------Both C706 and T701 of Can Z702 are variable. C706 will be a thread shaftthat gets longer and shorter when adjusted. T701 will have a nut on thecoil thread shaft like T401. What you want is a flat output from 3.455 to2.455 into the load of the V204. Any other test is just an educationalopportunity and has no relation to the actual operation of an R390/Areceiver. The cathode DC current of V204 flows through the secondary ofT701. The mixer output of V701 is imposed on the DC cathode current ofV204. For inspection purposes only, place a tube extender under V204,ground E211, and observe the peak to peak output of the oscillator signalon the plate of V204. As you run the VFO through ten turns watch the peak
to peak level on the plate of V204. The output should be flat from end toend. Oscillator peak to peak output likes to change with a change infrequency. The tuned circuits are to oppose the change and thus provide a"flatter" output across the tuning range. DO NOT expect the oscillatoroutput to peak at any point. DO expect a flat output across the full range.The 1961 TM offers no suggestions for tuning C706 or T701. The Y2KManual is based on this early publication and likewise offers on help withC706 and T701. We see that in the RF section we adjust the slugs on thebottom frequency and the cap on the top frequency. We see that in the RFsection we make these adjustments at the quarter band points. So 2.455plus 250 = 2.705. Thus 3.455 minus 250 = 3.205.
Use the procedure above with a tube extender. Watch the B+ on the plate ofV204. Ground the test point E211 just to keep the V204 mixer outputcontent down to a minimum number of mixed output signals. Adjust C706for maximum output with the KC knob at 705 on any MC band. Dial the KCknob through the ten turns and watch the output on the plate of V204.Adjust T701 for best equal output across the KC. Repeat the process untilyou get the output as flat as you can. If you find your receiver output islower at 1.750 than at 1.250 then the VFO Z702 may need adjusting. Or ifthe band has more output on the other end. Bad PTO adjustment will looklikes lower output or less sensitivity on one end of every KC than at theother end. Or you could have a peak where the middle is peaked or sags. Ifyou have a VFO you think has a low peak to peak output, by all means startchecking those resistors.
Most of us do not have a signal generator that we can run over 8 Meg (justto dodge the first mixer) with a flat output across a 1 meg band to checkthe output of the VFO through the mixer. The number of variables justmake the effort not productive. I am sure some one will be happy to tell methey can and did it. Most of us just do not care.
In summary, check the resistors, scope your VFO output once and thenleave C706 and T701 in Z702 on your receiver alone for the rest of yourlife.
Bill Hawkins added, Also recall past postings on this list that suggested thePTO output network was there to "squash" any resonance and make theoutput roughly flat across the PTO range. So actually peaking it up for oneparticular frequency may be not good (may in fact be impossible!)
Ah, les'see, the output PTO coil will not peak. Doesn't seem like it would be agood idea for it to peak. The PTO generates 2.5 to 3.5 megacycles, andthey've all got to be mixed with the masticated RF from the RF deck. Asharp peak at 3.0 MC would seem like a very bad idea. If you want areasonably level signal for 3 +/- 0.5 MC, you want a really low Q circuit.
Bill Hawkins asked, "What have I missed?"
Bill's right, the VFO output needs to have the same output level across theoutput range of 2.455 - 3.455.
Tim Shopp, tells us 2V RMS is not awfully low. When he scoped the PTOoutput he sees 6-8V Pk-Pk, the max in the middle of the range and fallingoff towards the edges(especially the high freq/low counter edge). This isthe raw unterminated PTO output; putting a 50-ohm terminator on itdrops the value by a little more than a factor of two.
Let's see, 6V Pk-Pk is a little above 2V RMS. Maybe your PTO output is alittle bit low but I can't say that it's "bad".
Tim Shopp's following is also relevant knowledge.
As another data point, most of my crystal oscillator band outputs are inthe 8 to 10V Pk-Pk range, with some going up to 12 or 13V and a fewbands as low as 5 or 6V (I guess the variations are due to crystal activityor just the way picking off the harmonics works; the units have beenpeaked up on each band.) Getting back to my mixer design obsession, Iguess this means that most of the mixers were designed with LO inputs inthe range of a few (1-3?) volts RMS in mind and that a factor of twovariation in level throughout the frequency range is not out of designspecs. I'm not claiming that my values are golden reference standardseither, just what I see on my two 390A's. Is there an official output levelthat the PTO is supposed to meet? And is that value into a terminator ornot?------------------------------------------------------------------------------------------------------Date: Sun, 30 Apr 2006 15:19:27 -0400From: "Jim M." <[email protected]>Subject: Re: [R-390] No Peak on T701
www.mouser.com takes small orders.---------------------------------------------------------------------------------------------------------Date: Sun, 30 Apr 2006 14:29:52 -0500From: "Barry" <[email protected]>Subject: Re: [R-390] No Peak on T701
I don't know the brand name of this PTO. Someone removed the labelbefore Igot it. It definitely has no T adjustment, though. The primary andsecondary are wound together on a "resistor-like" form. The glass cap isdefinitely there and I can see the slug in it moving as I turn the adjustmentnut (made a special tool to do this). I'll have to try the tests you describe.As you may have noticed my earlier reply, I'm wondering about the cap

across the output. Ever seen one of those go bad?-------------------------------------------------------------------------------------------------------Date: 1 May 2006 13:57:21 -0000From: "[email protected]" <[email protected]>Subject: Re: [R-390] No Peak on T701
I attempted to perform the "ground E211 and measure the output on theplate of V204" test. I'm not sure, but I may have 'scope problems. In orderto see the signal, I have to select a very small vertical deflection value (say0.1V/div or less). When I do this, the 'scope "wobulates" up and down onthe screen on the order of 0.05V or more. If I look at the output of the RF-IF output at F103, it is doing the same thing. I don't know if the power isdirty, the power supply is acting weird, the 'scope is flaking, or what. Ihave noticed this on other power supplies I've checked, so I'm not surewhat to make of it. At any rate, it makes seeing small differences in peak-to-peak on the plate of V204 very difficult to measure.Am I doingsomething incorrectly here or is this something others have seen? I'mstill thinking I could have 'scope problems. It's a TEK 561A and isdefinitely has its own set of problems, but this seems to be a repeatable,almost expected anomoly, at least with this 'scope.------------------------------------------------------------------------------------------------------------Date: Mon, 01 May 2006 10:28:12 -0400From: "Tim Shoppa" <[email protected]>Subject: Re: [R-390] No Peak on T701
Is the wobulation 60Hz/120Hz? Could be anything from real 60Hz powersupply hum in the radio, in the scope, ground dfference between the two,etc. As long as the wobulation isn't inside the scope, isolating the 60Hzhum can make a world of difference. Standard workaround is use smallishcapacitors in series with the scope probe that will block 60Hz you do notwant to see but not block the MHz signals you want to see. Typical valuesmight be 100pF to 0.005uF.-----------------------------------------------------------------------------------------------------------Date: 1 May 2006 14:38:45 -0000From: "[email protected]" <[email protected]>Subject: Re: [R-390] No Peak on T701
No, it isn't steady. That's why I called it "wobulating". It's almost like somecomponent is randomly, but rapidly, changing value causing the pattern toshift up and down at a varying rate and varying amplitude. Looks kind oflike it needs to check in down at the "nervious hospital" (reference to themovie Slingblade).-----------------------------------------------------------------------------------------------------------Date: 1 May 2006 18:15:23 -0000From: "[email protected]" <[email protected]>Subject: [R-390] Speaking of C709

The specs call for a 300V capacitor for C709. I assume this is just becausethis is what was commonly available, right? With only a few volts acrossthe output, is there any other reason to insist on a 300V capacitor here?-----------------------------------------------------------------------------------------------------------Date: Tue, 2 May 2006 22:49:13 -0500From: "Barry" <[email protected]>Subject: [R-390] More C709 info
I was able to carefully lift one side of C709 and watch the output of the PTOwith and without it connected. With it disconnected, the output nearlydoubles in amplitude. Is this expected behavior or is the capacitor mostlikely leaky? I'm just not sure of its intended function. I assume it andR704 limit/shape the output (but I may be waaay off on that). Any input orother info?-------------------------------------------------------------------------------------------------------Date: 3 May 2006 14:31:15 -0000From: "[email protected]" <[email protected]>Subject: Re: [R-390] More C709 info
> The 2.2k plate resistor in this PTO checks about 2.8k. I put a 10kresistor in parallel with it just to see what effect it would have (effectiveresistance should have dropped to just under 2.2k). It only made adifference of a couple of volts at best on the plate and very little (if any)difference in the PTO output. While it's technically out of tolerance, I don'tthink this is far enough out to warrant replacement (yet). I would replaceit now, but the gain-to-damage ratio to replace it in those tight quartersjust isn't worth it at this point.--------------------------------------------------------------------------------------------------------Date: 3 May 2006 18:30:16 -0000From: "[email protected]" <[email protected]>Subject: Re: [R-390] More C709 info
I bought a pack of 510pF, 5%, 500V capacitors today and will try onetonight. I'm curious to see what effect (if any) I see with a new capacitor inthere. I gave up on finding new 2% capacitors for this without having topay a large minimum order. I just checked the calculated frequency of thesecondary circuit of the output transformer in the PTO. 5.75uH and 510pFyield 2,933,264Hz. Pretty much in the middle of the PTO range. The Q,however, is quite low (0.01?)due to the 150-ohm resistor across the circuit. I'm curious if I'll see muchincrease (if any) signal level after installing the new capacitor. I assumethe output level would peak nicely at some frequency near 3MHz withoutthe resistor in place, though. It would be interesting to watch but unlessthe resistor is easily unsoldered, I don't want to do that just to see theresulting effects.
-------------------------------------------------------------------------------------------------------------Date: Wed, 3 May 2006 19:42:34 EDTFrom: [email protected]: Re: [R-390] No Peak on T701
Open up the sweep. Rather than try and see the wave pattern just go for abig blur. All you really care is the amplitude is equal across the range. Pickthe largest peak to peak point on the scope face. Run the VFO to the otherend and look at the peak to peak there. Expect the garbage on the trace tobe of equal amplitude from one end of the VFO to the other end of the VFOand to trash the wave form equally every where.
Let the wobble be. Grab a grease marker and mark the high point, markthe low point. Dial the VFO to the other end. Is the VFO output now thesame as larger than or smaller than the grease marking? Turn the scopeto a low voltage setting and shift the trace off the screen. Mark yourmaximum point as the trash on the wave form runs across the screen. Dialthe VFO to the other end and compare the output peak to your firstreference.
Just watch the maximum excursion on the scope as you dial the VFOthrough all 10 turns. The signal is in there and all you need is for it tohave the same amplitude across the band.
Stop trying for exact science and start trying for get er done. How is theoutput looking in terms of amplitude?
As an oscillator goes up in frequency, they mostly lose amplitude.Theoutput tuning circuit resonates higher than the oscillator and has low Q.At the low end the oscillator has high voltage and the tuned circuit haslittle effect. At the high end the oscillator has low voltage and the tunedcircuit tries to peak the voltage.
By playing with the tuned output parts (the cap and transformer) you arejusttrying to get the slope of the low Q output to be the exact opposite as theslope of the oscillator output. The differences cancel and the output is flatacross.
Your just looking for a setting of C and L that makes a good fit.
If you work with more stages of the receiver, then you start to introducemore variables into the mix and you wonder if you have a better VFOoutput or areyou tuning the VFO output to compensate for some other circuit non linearproblem. Worry not about your test equipment and your unshielded

unfilteredenvironment. Just let that stray stuff ride alone and be part of the picture.
Looking at 2 volt RF signals is a pain in the best of shop conditions. Thequestion is the mess on the scope more or less than the last mess on thescope?
Hope this helps. Roger.-----------------------------------------------------------------------------------------------------Date: Wed, 3 May 2006 19:50:10 EDTFrom: [email protected]: Re: [R-390] More C709 info
If you can unhook a cap and measure the output almost doubling, howcome you can not tell if the output is fault across the VFO tuning range?Roger.----------------------------------------------------------------------------------------------------------Date: Wed, 03 May 2006 20:05:42 -0400From: [email protected] (Tim Shoppa)Subject: Re: [R-390] More C709 info
> Why are you still trying to peak a VFO in the middle of its frequencyrange,> when you know you want a flat output across the range?
I believe that Barry's Q calculation was not correct: my scribblings put theQ at closer to 1. This is extremely consistent with my observation thatVFO output is highest near the center and falls off by 20-30% towards theedges.
>Why do you want more mixer noise at 500KC in every band than youwant>at say 100KC and 900KC?
If he has too low of a injection level, then mixer conversion drops like arock. Above a certain level, you are mostly insensitive to variations ininjection (although you are right, mixer noise does go up.) My guesstimateis that a "good place" is more than 6V pk-to-pk for the 390A mixers. Last Iheard he was struggling with a measly volt or two pk-to-pk, and at thatlow level conversion efficiency in the mixer is gonna be pretty rotten.----------------------------------------------------------------------------------------------------------Date: Wed, 3 May 2006 20:56:43 -0500From: "Barry" <[email protected]>Subject: Re: [R-390] More C709 info
I'm not trying to peak it for a certain frequency. I realize it needs to be as

flat as is possible; however, I want the PTO's output to be of sufficient levelso as not to have to compensate for that somewhere else in the receiver. AsTim said, my general voltage level is quite a bit lower than it probablyshould be anywhere in the tuning range. Lifting the capacitor and seeingthe voltage level rise like that is, to me, an indication of significantleakage. I'll know when I try the good capacitor. If I'm correct, I should seea slight rise in voltage level due to resonance. Thanks for the comments!----------------------------------------------------------------------------------------------------Date: 4 May 2006 13:36:05 -0000From: "[email protected]" <[email protected]>Subject: Re: [R-390] More C709 info
Well, sadly, replacing C709 didn't help one bit. I'm about to give it up. Ichecked R704 (lifted one side of the coil) and it's about 160 ohms. I'm notsure what else could be wrong. Someone suggested the coil might have ashorted turn. Possible. It shows no sign of physical damage, though.
The only thing I haven't been able to check are the bypass capacitors. Isuppose one (or more) of them could be leaking. I'm dreading replacingany of those, though. Not sure how many "brands" of PTOs did this, butthis PTO has a "bank" of about six 0.005 caps encased in a waxy substancethat holds them together into a single "block" of individual capacitors.Replacing one would be nearly mpossible unless one leaves the oldcapacitor in place and runs the new one in a different position. I'm eithergoing to leave it alone (the radio DOES work), or completely strip it andreplace everything I can still get parts for. I did this to the second crystaloscillator in my other R390A. It helped just a bit, but not all that much soI'm hesitant.
I'm still curious what other folks are seeing at the "raw" output of the PTO.I dragged down the ME-26D/U and I'm seeing about one volt at the outputconnector. I'm getting about 2.8V ptp on the 'scope, but since neither oneis calibrated (and the 'scope is acting up anyway), it's pretty much anyone'sguess as to the actual value, but suffice it to say, they both are bothshowing a pretty low voltage so neither one may be that far off.
Sorry for the long post, but it really bugs me not to be able to isolate aproblem and fix it (provided there really IS a problem and this voltageoutput isn't all that abnormal).----------------------------------------------------------------------------------------------------------Date: Thu, 04 May 2006 14:13:01 -0400From: Miles Anderson <[email protected]>Subject: [R-390] More C709 Info
Whoa! I wouldn't be so quick about digging into the PTO chassis. There isalmost no elbow room, and the unit was designed so that the bypass

capacitors have virtually zero lead length. This should be a last resort.First of all, you should really get a fix on your instruments before jumpingto the conclusion that the PTO output is too low. It probably is low, but Iwould try to calibrate your scope before coming to a definite conclusion. Ifyou have an accurately calibrated VOM or digital meter you can calibratethe scope at 60Hz using a filament transformer as a source. Unless there issomething radically wrong with the scope, the frequency response at 2-3MHz shouldn't be much different than at 60Hz.If the PTO output isdefinitely low you can check most or all of the bypass capacitors forleakage by unplugging the PTO power lead and tube and measuring theresistance to ground from the screen and the plate. I assume the plate &screen voltages of the PTO are correct. Check these if you have not alreadydone so.----------------------------------------------------------------------------------------------------Date: Thu, 4 May 2006 21:56:53 -0400From: "Jim M." <[email protected]>Subject: Re: [R-390] More C709 info
I dont recall if you said or not - did you try replacing the PTO tube? Thetube in my SW PTO went bad a few months ago, sensitivity dropped but itwould still tune. Checked fine in the tube tester. Decided to replace itanyway, and that fixed it! So even if the tube tester says its "OK" try a newone anyway. Jim------------------------------------------------------------------------------------------------------Date: 5 May 2006 13:22:45 -0000From: "[email protected]" <[email protected]>Subject: Re: [R-390] More C709 info
>I tried three different tubes, all with the same results. I have a sleeve ofNOS >5749's and I may try one of those, but I'm thinking the tube may beokay if all >three of the others produce very nearly identical results in thePTO.
I did check the PTO output from my other R390A ('56 Motorola). Thescope shows 8V p-p at its maximum point. It isn't flat, though. There is adefinite bell shape to the output that is not centered at 3MHz. It tapersdown to about 4V p-p at the endpoints. I suspect that when I built this one(my first), my "vast" knowledge of the R390A was not quite, well,,, so"vast". I probably tuned it for a maximum output and moved on. I might beable to do better now (although the radio does work just fine so I might besorting the pepper from the fly excrement). One thing I "discovered" lastnight. A tube extender won't fit in the stock PTO, but if you remove thelittle tube shield clamp bracket (2 small screws that go in threaded holesso no nuts fall off on the inside, at least not on this PTO), the extender doesfit. I checked all voltages and they are spot on (probably the only place inthis radio where all voltages check exactly what they should). Thanks for

all the help, guys. I have some good suggestions to try andsee where the problem is on this PTO. Maybe I'll track it down yet.--------------------------------------------------------------------------------------------------------Date: Fri, 5 May 2006 11:54:45 EDTFrom: [email protected]: [R-390] Re: R-390 Digest, Vol 25, Issue 6
Plz note this is my first post although I've been reading the mail for 5 yrs.The typical output voltage from a Cosmos PTO fed into the rcvr thrunormal connections and taken at the jack on the RF deck thru a X10 (10meg impedance) is about 2.6 Vac. I have taken the following readings on 4ea. Cosmos PTO's as follows:
1. 2455 2.49 Vac 2. 2455 2.78 Vac 3. 2455 2.72 Vac4. 2455 2.56 Vac
3455 2.59 Vac 3455 2.76 Vac 3455 2.75 V3455 2.48 vac
I adjust the output cap C706 for max output at 3455. This gives theflattest response. The most significant item regarding output volts is thetube. I have used only tubes which have tested good with highest emissionout of a bunch. I then put the best ones one at a time in the PTO and selectthe one which delivers the highest output. This can be a ratio of 2:1 foroutput voltage. It's surprising that it changes so drastically from tube totube.
I've been rebuilding these things for 5 years and have test cables, ovens,cal dial setups, and you name it. I've never seen a defective part in any PTOexcept R702 which is typically high and once in a while R702. AlthoughI've changed many in a shotgun attempt to achieve super stability whichyou can expect if everything is just right. I've rebuilt the 5ea. .005 bypasscap and found zero difference. I've almost given up on super stability onone and decided to clean up the tube socket a second time and that was theproblem. The 10 pf caps in the osc tank circuit often need changed becausethey've changed value and the endpoint won't adjust without adjusting theturns on L701 or changing the caps. I prefer changing the caps. Also the10 pf caps usually don't have the original temp compensation so wechange them on that basis. The 370 pf caps seem pretty good and I'venever found one of spec from a capacitance standpoint. Hope this helped.Rich WD2Q---------------------------------------------------------------------------------------------------------Date: 5 May 2006 16:29:05 -0000From: "[email protected]" <[email protected]>Subject: Re: [R-390] Re: R-390 Digest, Vol 25, Issue 6
Are those peak-to-peak readings or RMS? I assume since you are talking

about 'scope readings, they are peak-to-peak, but not sure. If so, that'sabout what I've been getting. I wonder if this is because the COSMOS uses afixed output transformer? As I mentioned, my Motorola has asignificantly higher output. I have a sleeve of NOS 5749 tubes. I may justtry those and see what results. Hey, post more often! This is very helpful,especially since you obviously have "been there, done that"!---------------------------------------------------------------------------------------------------------Date: Sat, 6 May 2006 08:03:34 EDTFrom: [email protected]: [R-390] Re: R-390 Digest, Vol 25, Issue 7
The voltage readings are RMS from a Fluke 192 scope thru a X10 probe atJ217. The P-P equivalent for the readings I gave you is approx 7.6 Vp-p.Another interesting point is that there is some flatopping at the 2455 endof the PTO range. This is a characteristic of all the Cosmos PTO's. Ihaven't taken a harmonic reading mainly because it's on all of them so itain't broke.-----------------------------------------------------------------------------------------------------Date: 8 May 2006 18:21:32 -0000From: "[email protected]" <[email protected]>Subject: [R-390] Z702 Adjustments
In light of the recent discussions of PTO output, it was mentioned thatsome PTOs have a slug-tuned T701 and others do not (case in point, theCosmos PTOs). For those of you that do have a slug-tuned T701, where isthe adjustment seen? I have looked on the WEB for pictures of variousPTOs and all I've seen are the adjustment point for C706. The Y2K manualalso only shows the single threaded shaft for C706 with no mention oflocating T701 for adjustment. For Z702s with a slug-tuned T701, Iexpected to see an additional hole for the slug but, so far, I've seen none. Isthe slug-tuned T701 similar to the slug-tuned transformes in the IF deckwhere the hole for the slug adjustment just wasn't included in the can? Itwas a busy weekend so I didn't get back to any more testing, but I still planto replace tubes and "sweep" the output can in hopes of finding what'scausing the output to be so low. According to Rich, his experience with allthose Cosmos PTOs yielded much better results than what I'm seeing, buthe also stated that he's never seen any common failures such as bypasscaps, etc., so I'm still left wondering what could be wrong here.-------------------------------------------------------------------------------------------------------Date: Mon, 08 May 2006 14:31:53 -0400From: Rbethman <[email protected]>Subject: Re: [R-390] Z702 Adjustments
I have NO slug tune inside Z-702 in MY Cosmos PTO either. I just pulled thecover and inspected it carefully. Haven't got to where you are YET. Stillrestoring this old Blue Striper!

------------------------------------------------------------------------------------------------------Date: Mon, 8 May 2006 22:24:47 -0500From: "Barry" <[email protected]>Subject: Re: [R-390] Z702 Adjustments
With the PTO disconnected, I hooked the signal generator to pin 5 of V701while watching the output of the PTO on the scope. There is a definite peakaround 2.9Mc so the resonant point is not far from the center of the PTOrange. I was thinking if it were resonant somewhere way off from thecenter point, then that might be the problem, but no dice. Will have to keeplooking...---------------------------------------------------------------------------------------------------------Date: Tue, 9 May 2006 11:41:51 EDTFrom: [email protected]: Re: [R-390] More C709 info
I have not been keeping up with my mail. Who wins in rock-scissors-pancake?
Stop and look what the receiver design is. The VFO varies across it range.That happens to be 2.455 to 3.455 mHz The idea is to drive a mixer withthe VFO output across that range. Coming out of the mixer we would likeevery thing to have the same performance level no matter which point theVFO is set to. The objective of C709 and the transformer is to compensatethe loss of oscillator output as the oscillator frequency goes up. If the VFOhas more than enough output to make the mix, then the exact output levelis a so what case. It is over the line, and more over the line is noise. If somewhere across the range, the output is lower than minimum mix level thenwe loose some of the incoming signal into the noise floor. No so good.Barry, why do you want a peak in the middle of your mixer range? Whyshould a tuned circuit not be flat across a span of 1MHZ? I think pancakesfall to rock and scissors.
Other than you have played with the C and T and would like to get themback to their optimal value, I do not think you have a problem with theVFO output circuit. Barry, every thing you have posted is right in line withhow I find the VFO circuit to behave. Roger.---------------------------------------------------------------------------------------------------------Date: Tue, 9 May 2006 11:50:25 EDTFrom: [email protected]: Re: [R-390] More C709 info
Fair radio does have VFO's in stock for about 35.00. It could be a lot easierto just try another VFO rather than rebuild all those caps. Maybe just leaveC709 open and see how the receiver aligns that way.-----------------------------------------------------------------------------------------------------------

Date: Tue, 9 May 2006 12:08:33 EDTFrom: [email protected]: Re: [R-390] Z702 C709 Adjustments
It looks like you are still dealing with a low output on your VFO. You getthis one solved and you are going to be the best of class on VFO. It soundedas if running with C709 open did provide a larger output signal. I do notfavor running VFO through the dish washer. However a good dry cleaningand some re soldering could be in order here. Get out the magnifying glassand start a good visual inspection. More of a shotgun approach ratherthan a logical approach. That slug of caps can be replaced. Several disk setup side by side to replace the original mass pack. That's do all replacementto get the things to fit As said lead length is a factor. I can envision a filmin C709 that would let that cap leak. I know not how to prove it is leaking.I know not how to clean it. I have all kinds of ideas. But a real solution I donot know.---------------------------------------------------------------------------------------------------Date: 9 May 2006 16:18:32 -0000From: "[email protected]" <[email protected]>Subject: Re: [R-390] More C709 info
I'm really not trying to get it to peak at a given frequency. The purpose of"sweeping" the transformer was to ensure that the LC[R] circuit wasn't sofar out of tune (due to a shorted winding, bad/leaking capacitor, whatever)that it was causing the the output to be substantially low. Since it did showa peak value somewhere near the center frequency of the PTO's range, I'msatisfied the coils are okay (at least the primary and most likely thesecondary). Sure, the receiver works with the output value what it is;however, it makes me suspicious that something in the PTO is not where itshould be and may be on the verge of going so bad that it stops working.I'd like to circumvent that if I can, that's all. I checked with Fair Radio foranother PTO in hopes of finding one more for spare parts than anything.A dented case with no connector is $22. I don't think I'd get enough goodout of it for that price so I'm going to contiue with this one. I tried a NOSPhillips (from a sleeve of NOS) 5749W last night. The output droppedslightly from the Sylvania that's in there so I don't think tubes are an issuehere. I'm determined... What I'd like to know is the expected value of theoscillating voltage on the grid. I'm wondering if that's not of sufficientvalue to get me a good "swing" on the plate? Thanks for all the input, guys!Barry - N4BUQ----------------------------------------------------------------------------------------------------Date: Tue, 9 May 2006 21:00:15 -0500From: "Barry" <[email protected]>Subject: Re: [R-390] Re: R-390 Digest, Vol 25, Issue 10
> Did you experiment with different tubes yet?

> There is only the one adjustment of the cap and not the coil>
Yes, I tried different tubes with little or no difference. I tried something abit different tonight. I connected the signal generator to the control gridof V701. At a 2.6V peak-to-peak signal, the PTO output shows a nicestrong 8V peak-to-peak signal. The same signal at the cathode producedvirtually no change on the output. Is it correct to assume that R701 shouldbe developing an AC voltage across it of a similar amplitude as the 2.6Vsignal from the generator (maybe 1.5V to 2V) in order to get 4V to 6V onthe output? Those are just ballpark figures, but I'm wondering if the gridvoltages I'm getting are insufficient to drive the output closer to thecorrect output level? I tried measuring the signal on the grid, but the 'scopetakes the wind out of the grid circuit's sails and it stops oscillating when Iattempt to view the signal on the 'scope. I'm seeing -1.7VDC on the gridjust as it should be so I'm wondering what AC voltages should be riding onthis.----------------------------------------------------------------------------------------------------Date: 10 May 2006 17:40:13 -0000From: "[email protected]" <[email protected]>Subject: [R-390] PTO Output Cable
Does anyone have some of the shielded wire used for the PTO output theywould be willing to sell to me? I'm considering rebuilding this PTO as I'mjust not satisfied that it's not performing as it should. The shielded wirehas been damaged near one end (not close enough to the end to simply cutit and discard the excess, though) and I'd like to replace it while I'm at it.
Looking at Jim Miller's article at <http://r-390.com/cosmos.htm> I see thecable looks rather new on that one. Anyone have some extra or can pointme to a source? I seem to recall someone quoting the RG number for thisand the RF-to-IF cables, but I don't remember the designation (and I'm notsure they're exactly the same cable). I thought Skycraft Parts and Surpluscarried this stuff <www.skycraftsurplus.com>, but I don't see it on theirwebsite now. I think they have a LOT of stuff that's not on their website,though, so they might still have it.-------------------------------------------------------------------------------------------------------Date: Wed, 10 May 2006 15:56:11 EDTFrom: [email protected]: [R-390] Re: R-390 Digest, Vol 25, Issue 12
I made a chart of AC voltages at various points in the PTO. I can email itto. It's now a jpg file.----------------------------------------------------------------------------------------------------Date: Wed, 10 May 2006 16:03:31 EDTFrom: [email protected]: [R-390] Re: R-390 Digest, Vol 25, Issue 12

Come to think of it, I once had a PTO that wouldn't oscillate and changingC704 fixed it right up. I measured that cap and it was way way low. Thatcould be your problem.-------------------------------------------------------------------------------------------------------Date: 10 May 2006 21:20:49 -0000From: "[email protected]" <[email protected]>Subject: Re: [R-390] Re: R-390 Digest, Vol 25, Issue 12
I'm thinking I'm going to go ahead and replace the capacitors in the can. Idon't seem to be able to find all the replacement values, though. 370pF isn'ta common value anymore (if it ever was). I may have to leave that onealone as the only place I've found one is at a place with a minimum orderand I don't need anything else from them at this time :(---------------------------------------------------------------------------------------------------------Date: Thu, 11 May 2006 07:28:50 -0400 (EDT)From: "William A Kulze" <[email protected]>Subject: Re: [R-390] PTO Output Cable
Barry, I think RG-174 is the cable you're thinking of. This is just a plainblack vinyl jacketed cable, not the exact stuff in the radio, but it is 50 ohmand the same size, although I think at these lengths, the impedance isn't ascritical.-----------------------------------------------------------------------------------------------------------Date: Thu, 11 May 2006 08:50:32 -0400From: Miles Anderson <[email protected]>Subject: Re: [R-390] Re: R-390 Digest, Vol 25, Issue 12
You are borrowing a lot of trouble!
(1) The values of the capacitors inside the PTO can are absolutely criticalin setting the linearity of the PTO tuning. If you don't get the totalcapacitance exactly right, you may be able to align both ends, but theerrors will be concentrated in the middle. Thus, at the "500" point you areeither going to have a huge amount of positive error or negative error(depending on whether you have too much total capacitance or too little)and this is going to be beyond the ability of the screws in the Cosmos ptoto compensate. It's 100 times more of a problem with a Collins "stackcompensator" type of PTO.
(2) All, repeat all, the capacitors inside the PTO can are temperaturecompensating. If you don't get the right delta C/delta T the PTO is going todrift on warm-up.
(3) Lead lengths and component dress are critical. They affect the totalcapacitance. Also, they affect the total series inductance, and the slug

tuned compensating coil is tiny. Too much lead length, too muchinductance and you are going to have to unwind turns on the littlecompensating coil.
Bottom line: Change components inside the PTO can only when the tuningis non-linear. I really don't think any of these components are going toaffect the output so long as the PTO is actually oscillating, which yours is.---------------------------------------------------------------------------------------------------------Date: 11 May 2006 13:28:46 -0000From: "[email protected]" <[email protected]>Subject: [R-390] More PTO stuff
Thanks for the warnings. I was thinking of attempting to replace only the15pF coupling capacitor. That one may not be as temperature sensitive asthe others in the "tank". Finding temperature compensating caps that areidentical to the originals may be almost impossible to find. I see where thecapacitance tolerances are 1% or 2% on the non- bypass capacitors in thePTO, especially the ones in the can. I don't see a temperaturecompensation designation so I'm not sure what I'd get to replace them.NPO, perhaps?
I did some further checking last night. With the PTO oscillating, thecontrol grid is seeing about 1.4VAC (as checked with my ME26D/U). WhenI connect the signal generator's 2VAC output (measures about 1.8V RMSon the ME26) to the control grid, the PTO output goes to nearly 8V peak-to-peak (as seen on the 'scope). It appears a very small increase in gridsignal causes a vast difference in output voltage. HOWEVER, I'm not surewhat effect connecting the signal generator directly to the grid does to thebias point. This may account for the increase in signal more thananything. Arghh?----------------------------------------------------------------------------------------------------------Date: 11 May 2006 13:29:38 -0000From: "[email protected]" <[email protected]>Subject: Re: [R-390] PTO Output Cable
Thanks for the designation number. Someone else on the list has offered tosend me a small length of cable so I guess I won't need to find it after all.-------------------------------------------------------------------------------------------------------Date: Thu, 11 May 2006 09:54:14 -0400From: "Tim Shoppa" <[email protected]>Subject: Re: [R-390] More PTO stuff
<snip>...replace only the 15pF coupling capacitor................................
Certainly it has a smaller total capacitance. Regulars will recognize that Ihad a lot of fun screwing around with Cosmos PTO innards several months

back. Investigating what small tweaks to endpoint inductors, cleaning upthe grease inside a godawful Raytheon rebuild, etc. If you want to replacePTO innards for fun and educational value, I'm sure there's a good amountto be had. But in terms of productivity, if all you want is a working alignedPTO in the end, then this kind of horsing around is EXTREMELY timeconsuming and probably not worth it because you'll end up with a non-alignable PTO most likely. Again, I don't want to discourage you doingexperimentation and posting the results. I myself am very interested in theintricancies of PTO alignment and calibration outside the goals of "just getit working right". But if you've got no problem with PTO alignment andonly problems with output level, then randomly subbing out tankcapacitors will cause you more problems than you solve.
>snip>.........I'm not sure what effect connecting the signal generatordirectly.....
Very general points: A one-tube oscillator is by its nature a "self-limiting"oscillator. If the gain was less than one with low/zero amplitude, itwouldn't oscillate. As oscillations start to build up, eventuallynonlinearities in the active element (in this case, it's supposed to be thetube) to limit the gain to one. The nonlinearities that limit amplitude areVERY closely related to bias points. Indeed, I think you've nailed theproblem at bias (including quiescent plate and cathode voltages/currents).Squirrely non-ohmic resistors (especially in the plate and cathode) canmake power-off ohmmeter readings not directly relevant. My one piece ofwisdom: if a carbon comp resistor exhibits being more than 20% off orshows evidence of past charring/swelling/overheating, then assume theworst and just sub it out. ALL 2.2K plate/cathode resistors are suspect.---------------------------------------------------------------------------------------------------------Date: Sat, 13 May 2006 03:57:41 -0700 (PDT)From: "KC8OPP Roger S." <[email protected]>Subject: Re: [R-390] Cosmos Linearity tool
This is what I use, fits great. Snap-On multi spline L-Shaped wrench#MS2A. This is a four flute spline wrench that measures .033 inchesacross. I cut it down and clamped it in pin drill handle so I could reach inand adj the screws.-------------------------------------------------------------------------------------------------------Date: Sat, 13 May 2006 13:17:52 -0400From: [email protected] (Tim Shoppa)Subject: Re: [R-390] Cosmos Linearity tool
>........recommend the tool for correcting the linearity of a COSMOS PTO.....
Is it possible that you ended up with a six-fluted 0.032" spline key? Ibought a "four-flute spline L-key, 0.033" Dia" from McMaster-Carr (part

#7048A11). It was not in stock at the local warehouse and they had toship it in from Chicago. It fits but it still isn't easy work (especially whenyou've got to repeat dozens and dozens of times.) Like Roger I find it easiestto use if I cut off the "L" and put it in a pin vise. Even then it takes a LOT ofskill and patience to stick it through the radio chassis, through the PTObracket, through the PTO can, and into the screw. It was just aboutimpossible when I was using it as a L-wrench (and I have some experienceworking tiny SMT stuff and watches and clocks. Easy to blame on my "fatfingers" but the same fat fingers let me solder 0201 SMT stuff...). Whatwould really make a world of difference, if I had one, was a pin vise thathad a little spotlight on the end of it. The hole in the screw is so tiny that alot of times it is hard to get the spline in especially if dust or oil (or worstboth!) are inhabiting the spline socket. When I was degreasing/degunkingmy PTO I took out all the spline screws and ran them through myultrasonic degreaser.----------------------------------------------------------------------------------------------------------Date: Sat, 13 May 2006 13:26:35 -0400From: [email protected] (Tim Shoppa)Subject: [R-390] Weird-ass PTO parts
OK, I've been into the deep jungle of the PTO can and back out.
I understand at least a little bit the oddball caps inside the can. I'mguessing that the big cylindrical one is some kind of fixed vacuum cap, andthat many of the others have special tempcos. But... what's with some ofthe weird componentry outside the can but around the tube socket? AsBarry was asking about, they'vegot a tiny glass piston cap in the plate circuit, although it's nominallydetuned with a resistor to a very low Q. I associate glass piston trimmerswith VHF/UHF high-Q (or at least "as higha of a Q as we can get") stuff, notwith low-Q broadbandish type stuff. And then there's that bizarre waxed-up stack of ceramic bypass caps. Clearly really smart and experiencedpeople, who understoodlots of complicated mechanical AND electrical compensation stuff, madethe PTO's. I'm not gonna try to second-guess what they put inside the canat all. BUT... the weird combination of stuff around the tube socket is justbizarre. Sort of like Gary Larson's "Cow Tools" cartoon
http://www.salon.com/people/portfolio/1999/12/21/larson/older4.html
I'm left trying to figure out the deep meaning and purpose of these oddconstructs. Any insights? (into either the PTO or cow tools, that is!)------------------------------------------------------------------------------------------------------------Date: Sat, 13 May 2006 12:49:41 -0500From: "Barry" <[email protected]>Subject: Re: [R-390] Weird-ass PTO parts

One thing I do find a bit odd is the lead-length on the bypass capacitors inthat wax stack. While the ground leads are certainly short enough, theysnake the "signal" end quite a way, at least for some of them. I wasthinking if I rebuilt this, I would make these lead-lengths shorter; however,like Tim says, I'm not in a position to second-guess why these guys didthings like they did. They knew more about this than I'll ever hope to.--------------------------------------------------------------------------------------------------------Date: Tue, 16 May 2006 11:27:12 EDTFrom: [email protected]: Re: [R-390] VFO Output Level
I acknowledge your concern that the VFO in hand has low output.Thinking that dealing with the problem now rather than later aftercomplete failure is very reasonable. Considering the thing could hang atthe current condition for the rest of your life and just living with it isequally unacceptable. I see your need to get the thing fixed.
As Tim pointed out any one of those resistors or caps could be the problemsource. In fact there may be more than one problem. Also suspect thechassis wire harness and connectors. Any connector point (tube socketpin) could be a resistive problem. Any solder joint could also be a problem.So its not just the parts that need inspection. You need to look at solderjoint and wire.
I was thinking of the ballast tube and BFO tube in the filament string. Asmall drop in filament voltage from a change of resistance in the filamentstring could be a cause for low tube emission. Any tube changed into theVFO would act the same (low output) because the problem could beelsewhere in the filament string circuit.
You may not be up against a sudden failure. Your VFO could hang like it isfor a long time. OK but not good enough. Tim's idea to check those resistorsis sound advice. I would pick an easy one to get to as a candidate foradjustment. You can get a larger output voltage by changing the grid,screen or plate resistor. But first I would do a whole rebuild. The schematicshows a set of four 5,000 caps as bypass caps on the screen and plate.Shoot my self in the foot here and suggest that their value and lead lengthare not critical. The figure in the TM is not the same as the as built circuit.(new models). The block of caps (Zenith TV) was just an easy assemblyprocedure. Some early production has the caps all set in the same locationside by side.
One common construction practice is to place all grounds to the exactsame point under a tube circuit. So likely all the caps have short leads tothe same ground point for the caps on the cap block package. Then the

other lead is what ever was needed to get the circuit built. Bunching thecap block near ground provided some extra working room on the otherside of the caps. These caps are in the decoupling circuits. As long as theywere in the box under the VFO tube and decoupled the VFO signal off theDC lines before it gets coupled elsewhere in the receiver it is OK.
You were looking for a new length of coax. One of the Fellows pointed out,that due to it's short length (under 24 inches) that the impedance of thecoax did not exactly matter. Nevertheless you found and went with somegood coax. Likewise, decoupling caps and lead length at the VFO frequencyis not as critical. While RF is a science you can still do a lot of cooking inthe kitchen without resorting to a cook book. Use good caps and goodresistor and just rebuild the circuit under the tube socket.
A shoot gun replacement of:R701 150K Grid resistor.R702 56k Screen resistorR703 2.2K Plate resistor
and the four by pass caps.C705, C714, C708, and C707 all 5,000 pf with some .0047
Some disk caps of better quality than a Radio Shack Value Pack would begood. The voltage rating is not critical. All these parts are out of thefrequency determining circuit. But they sure do impact signal size. I wouldround up the parts and plan a couple evenings work to just rebuild thecircuit under the tube socket. If you think the variable cap C706 is leakingto much signal to ground, you could run a cap in series with it. Any thingbigger than the 1.5 - 8 PF wouldleave you with an effective 1.5 - 8 PF. A 100 PF mica would do as a newisolation if you think the variable glass cap is leaking. You may justunmount and remount that item to ensure you have a good ground bondfor it. Time consuming and educational. Then again this is part of one ofyour recreational activities. Time invested and return on time have notangible metric. Go for it and enjoy your self along the way. RogerAI4NI--------------------------------------------------------------------------------------------------------Date: 16 May 2006 19:30:50 -0000From: "[email protected]" <[email protected]>Subject: [R-390] More PTO stuff
I would reply to your email, but since setting up Outlook Express on thisnew machine, it is deleting the messages from the server and it won't letme send new mail from this machine. Not sure why it's deleting messagesas I'm not deleting them or moving them to the DeletedItems folder. Ohwell.

But, as for your post, the parts you are suggesting to replace are mytargets. I went to the local parts store (not Radio Shack) and picked upsome resistors. I already have some 4700pF 1kV ceramic disk capacitorsthat are quite small for 1kV rating (bought at the same place). I got a packof 15pF, 300V, 5% capacitors too. If shot-gunning the aforementionedcomponents doesn't get it, I'm going into the can and replacing the gridcoupling capacitor. Hopefully this will all be worth it in the end. Like yousaid, this is a hobby. Spending this much time on it for any other purposewould most likely be a waste of time and effort. If it works better when I'mfinished, I'll be happy.---------------------------------------------------------------------------------------------------------Date: Tue, 16 May 2006 23:30:56 -0500From: "Barry" <[email protected]>Subject: [R-390] Interesting find in my Cosmos PTO
In order to facilitate replacement of the parts in this particular PTO, Iremoved the surrounding hardware (brackets, etc.). I then took a muchcloser look at the innards. Point your browsers to the following addressand look at the two pictures there. http://www.knology.net/~thelanding/
In PTO1.JPG, notice how the lead from the bypass capacitor appears to betouching the frame. Note that this is NOT the ground side of the capacitor.PTO2.JPG show the same area from the "top". I have not moved the lead yetnor checked anything else (too late in the evening), but I'm guessing if Imove this lead so that it isn't touching the chassis, I may see some rise inthe output level. At any rate, it looks like this has been there from thefactory and it's just a wonder to me it works at all. I'm actually surprisedthere isn't close to 200VDC on the PTO chassis, but I'm also guessing thatthe wire isn't actually making solid contact with the chassis since I havethe correct plate voltage; however, it sure is close to the chassis to notmake contact. Barry - N4BUQ------------------------------------------------------------------------------------------------------------Date: Wed, 17 May 2006 00:07:05 -0500From: "Bill Hawkins" <[email protected]>Subject: RE: [R-390] Interesting find in my Cosmos PTO
Wanna tell us how you took those pictures?------------------------------------------------------------------------------------------------------------Date: Wed, 17 May 2006 07:02:38 -0400From: "Jim M." <[email protected]>Subject: Re: [R-390] Interesting find in my Cosmos PTO
Sure looks suspect. Check solder connections too. I once had an IF deck inone radio (an EAC) where there were about 6 unsoldered connections!Poor workmanship can happen. Also be sure to tighten all screws that

hold ground lugs or tube sockets. They can work loose with heat cyclingover time and cause reduced performance in a circuit.------------------------------------------------------------------------------------------------------------Date: Wed, 17 May 2006 12:22:24 -0400From: "Tim Shoppa" <[email protected]>Subject: RE: [R-390] Interesting find in my Cosmos PTO
> Wanna tell us how you took those pictures?
> <snip> .......Nikon Coolpix 3000 I think it is...........................
Certainly it'd be interesting to do that and some other locations too. Theshots you've already made are way above average. Your 2.2K seems to bemore deeply buried than in my Cosmos PTO's. There are some trulyamazing techniques I've seen used to document complex mechanisms withMacro photography that uses progressive lighting/variable focus to dosome trulyamazing things with seemingly infinite depth of field. I'm not volunteeringto apply these to my 390A's but if they could be done the results areSTUNNING.
> I'm really curious if lifting this lead away from the chassis...................
I'm guessing that if it shorted to ground that you would have blown a fuse(or sacrificed a wiring harness) but it doesn't look right and it looks likeyou can do this at the same time as the 2.2K.-------------------------------------------------------------------------------------------------------Date: Wed, 17 May 2006 11:35:00 -0500From: "Cecil Acuff" <[email protected]>Subject: Re: [R-390] Interesting find in my Cosmos PTO
It's probably a pretty good capacitor though at RF frequencies....as close asit is....-----------------------------------------------------------------------------------------------------------Date: 17 May 2006 17:09:08 -0000From: "[email protected]" <[email protected]>Subject: RE: [R-390] Interesting find in my Cosmos PTO
Yeah, I figured it wasn't making contact as I'm getting correct platevoltage and the 2.2K isn't burned, etc., but it's amazing it isn't as close as itis. I'm going to try to slide a feeler gauge underneath it just to see how closeit is. Like someone else said, it's probably a pretty good capacitor the wayit is. I picked up both a 1/2W and 2W 2.2K resistors yesterday. Their 1Wversions were much larger than the 2W version - go figure. The 1Wprobably wouldn't have fit, but this 2W looks like it will. I have the 1/2Wjust in case it won't though. I have some closeup shots of my IF deck's
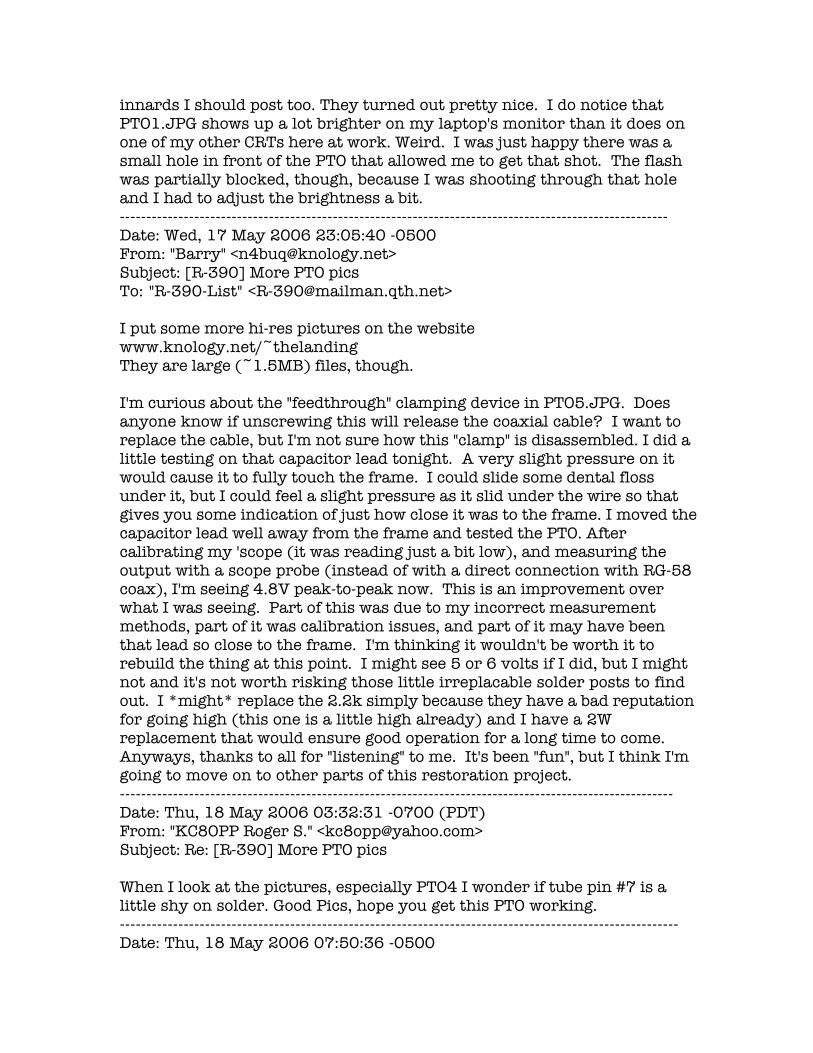
innards I should post too. They turned out pretty nice. I do notice thatPTO1.JPG shows up a lot brighter on my laptop's monitor than it does onone of my other CRTs here at work. Weird. I was just happy there was asmall hole in front of the PTO that allowed me to get that shot. The flashwas partially blocked, though, because I was shooting through that holeand I had to adjust the brightness a bit.-------------------------------------------------------------------------------------------------------Date: Wed, 17 May 2006 23:05:40 -0500From: "Barry" <[email protected]>Subject: [R-390] More PTO picsTo: "R-390-List" <[email protected]>
I put some more hi-res pictures on the websitewww.knology.net/~thelandingThey are large (~1.5MB) files, though.
I'm curious about the "feedthrough" clamping device in PTO5.JPG. Doesanyone know if unscrewing this will release the coaxial cable? I want toreplace the cable, but I'm not sure how this "clamp" is disassembled. I did alittle testing on that capacitor lead tonight. A very slight pressure on itwould cause it to fully touch the frame. I could slide some dental flossunder it, but I could feel a slight pressure as it slid under the wire so thatgives you some indication of just how close it was to the frame. I moved thecapacitor lead well away from the frame and tested the PTO. Aftercalibrating my 'scope (it was reading just a bit low), and measuring theoutput with a scope probe (instead of with a direct connection with RG-58coax), I'm seeing 4.8V peak-to-peak now. This is an improvement overwhat I was seeing. Part of this was due to my incorrect measurementmethods, part of it was calibration issues, and part of it may have beenthat lead so close to the frame. I'm thinking it wouldn't be worth it torebuild the thing at this point. I might see 5 or 6 volts if I did, but I mightnot and it's not worth risking those little irreplacable solder posts to findout. I *might* replace the 2.2k simply because they have a bad reputationfor going high (this one is a little high already) and I have a 2Wreplacement that would ensure good operation for a long time to come.Anyways, thanks to all for "listening" to me. It's been "fun", but I think I'mgoing to move on to other parts of this restoration project.--------------------------------------------------------------------------------------------------------Date: Thu, 18 May 2006 03:32:31 -0700 (PDT)From: "KC8OPP Roger S." <[email protected]>Subject: Re: [R-390] More PTO pics
When I look at the pictures, especially PTO4 I wonder if tube pin #7 is alittle shy on solder. Good Pics, hope you get this PTO working.---------------------------------------------------------------------------------------------------------Date: Thu, 18 May 2006 07:50:36 -0500

From: "Cecil Acuff" <[email protected]>Subject: Re: [R-390] More PTO pics
I'd agree with that....I see no flow at all...even can almost see through theloop on the left side of the pin.... Good catch....-----------------------------------------------------------------------------------------------------------Date: 18 May 2006 13:22:16 -0000From: "[email protected]" <[email protected]>Subject: Re: [R-390] More PTO pics
I noticed that last night when I put the pictures on the computer and sawthem "full size". I didn't notice that with my bare eyes or under themagnifier. I'll probably give that pin a touch-up. A poor cathodeconnection could certainly be an issue with low drive in this circuit.---------------------------------------------------------------------------------------------------------Date: 18 May 2006 20:39:39 -0000From: "[email protected]" <[email protected]>Subject: Re: [R-390] More PTO pics
I checked that solder joint at lunch. It's in a lot better shape than thatpicture makes it out to be. Must be the angle or lighting. I think what isthe appearance of a "hole" in the loop may be flux. I did pull the can back asfar as I could without disconnecting any wires the other evening. Theinnards are wrapped in an insulating material. Anyone know if this stuffis safe? I assume it's the same as the insulation around the crystal deck'sheater and I've been told that's just fiberglass (no asbestos), but was justwondering. It will make repacking it messy should I ever need to go inthere.--------------------------------------------------------------------------------------------------------Date: Fri, 19 May 2006 10:58:05 EDTFrom: [email protected]: Re: [R-390] More PTO pics
All the caveats apply. Do not eat it. Do not use it for eye wipe. It isfiberglass. Mostly it is a very nice blanket and un packs and re packs verynicely. During re assembly, grab a pair of her knee high nylon socks. Placeone over the insulation blanket and slide the whole thing back into thecan. You can use the second one as a temporary restraint and remove itjust as the can slides shut. The PTO is in a double can assembly. Inside isthe Oscillator parts in a can. Then there is the heater element andinsulation outside the inside can. Then there is the very nice cover we seeas the VFO. Those cans as 1950 extruded aluminum were then state of theart in extrusion.------------------------------------------------------------------------------------------------------------Date: 19 May 2006 15:39:56 -0000From: "[email protected]" <[email protected]>

Subject: [R-390] More PTO questions
Still poking around in this PTO. Were some PTOs manufactured withoutlinearity adjustments? I seem to recall some discussion a few years agothat some did not have them. This one doesn't have an access hole for anyadjustments. The large hex bolt plug on the "right" exposes only theendpoint adjustment. Also, there is another hex "bolt" on the "left" made ofthe same material as the bulkhead (bakelite perhaps?) that has "S701"labelled beside it. It exposes a hollow shaft with a slot that is assumablefor a screwdriver. Is this a way to disable the heater thermostat? A resetfor it, perhaps? I haven't seen it discussed anywhere or mentioned in anyof the manuals.----------------------------------------------------------------------------------------------------------Date: Fri, 19 May 2006 14:32:56 EDTFrom: [email protected]: Re: [R-390] More PTO questions
Only the Cosmos had "front-panel" linearity adjustments. Are you sayingyou've got a Cosmos with a stack adjustment? I believe the adjustment ontheleft set the temp of the oven.----------------------------------------------------------------------------------------------------------Date: Fri, 19 May 2006 14:44:49 -0400From: "Tim Shoppa" <[email protected]>Subject: Re: [R-390] More PTO questions
Some Cosmos PTO's have screws in the linearity disk "all the way around"and others only have "most of the way around". I've gone one of each. But Ithink they all had to have linearity adjustments. Non-Cosmos ones haveinternally-adjusted corrector stacks.
> This one doesn't have an access hole ................
The linearity hole isn't exactly behind the transformer can but is just alittle bit towards the center. Inside the hole you will see a circular zig-zagof little 4-flute socket screws.
> Also, there is another hex "bolt" on the "left" ...........................
Thermostat set point. I messed mine all up but it doesn't matter because Idon't ever plan on turning it on :-).---------------------------------------------------------------------------------------------------------Date: 19 May 2006 19:14:07 -0000From: "[email protected]" <[email protected]>Subject: Re: [R-390] More PTO questions

At this point, I'm not sure what I have. From other indications (no outputtransformer adjustment, stack of wax bypass capacitors), I was assumingit was a Cosmos. Someone relieved it of its label before I got it and I can'tfind anything else with a manufacturer's name. It does only havetemperature setting and endpoint adjustments from the front portholes,though.-----------------------------------------------------------------------------------------------------Date: 9 Jun 2006 18:55:53 -0000From: "[email protected]" <[email protected]>Subject: [R-390] Impedence Matching Question
While searching for some replacement coax for my PTO output cable(thanks again, Roy!), I got to wondering what the correct impedence of acable would be for this application. I realize the short length cable and therelatively low frequency make this not as much of an issue as it might be inother situations, but I was still curious. I calculated the reactances of theoutput coil and the parallel capacitor at 3 Mhz (close to the center point ofthe PTO range). Using Ohm's Law, I calculated the effective impedence ofthe three components -- the coil, the capacitor, and the resistor (150ohms) in parallel. Unless I did something wrong, this comes out veryclose to 40 ohms. Is this a correct method to calculate the outputimpedence of this circuit (and possibly why the output cable is most likely50 ohm coax)?---------------------------------------------------------------------------------------------------------Date: Sun, 11 Jun 2006 03:47:55 -0400From: [email protected] (Tim Shoppa)Subject: Re: [R-390] Cosmos question
Test Jig = "in the 390A chassis"? The mechanical phenomenon that causeshysterisis is "backlash". This is due to looseness in couplings, gearings,assemblies, etc. If it's in the 390A chassis, the first place to look is theOldham coupler and the anti-backlash springs. If it's off the 390A chassis,then I would suspect mechanical looseness in the PTO chassis itself,requiring a complete teardown/clean/reassembly.
There are gears in the front of a Cosmos driving the corrector stack butthe most relevant gear for fine-tuning is the worm gear that drives thecore in and out of the main inductor. Have you listened (as opposed to justwatching numbers on a fequency counter) to the PTO? Is it smooth exceptfor backlash, or does it sound "squirrely"? In the case of my gunked-up PTO,it was within a few hundred Hz of the dial but it never *sounded* rightwhen reversing direction, making lots of wiggly squirrely noises whenbeating a carrier or CW signal. I completely tore my PTO apart earlier thisyear, cleaned out a bunch of gunk, realigned and put it back together andam very happy. Was documented on this list.-------------------------------------------------------------------------------------------------------

Date: Mon, 12 Jun 2006 11:54:57 -0400From: Roy Morgan <[email protected]>Subject: Re: [R-390] Impedence Matching Question
>..........what the correct impedence of a PTO cable..........................
"correct" depends on the criteria you use.
Case A: You apply a very firm requirement that the cable be the same asexactly as possible as the original. This is impractical perhaps. Don'tbother.
Case B: You are practical and use what you can get. It will work fine.
Case C: You are practical, but inquisitive. You investigate the topic of"Characteristic Impedance" of coax cables and come to the conclusion thatthe impedance of a cable can be important when the length of the cable isgreater than perhaps a tenth of a quarter wavelength at the operatingfrequency, IF the system is unmatched. Then you calculate the wavelengthof 3 mc and decide that your one-foot piece of coax is WAY less than about60 feet and you realize that worrying about coax impedance is not needed.You revert to Case B.
> I realize the short length cable .........................
The cable impedance is simply not an issue. The capacitance it adds inparallel to the circuit *may* be an issue, if the adjustments cannotcompensate for the difference between the original cable and yoursubstitute.
>I calculated the reactances of the output coil and the parallel capacitor>at 3 Mhz...very close to 40 ohms. Is this a correct method to>calculate the output impedence of this circuit
Sounds about right. A way to test for output impedance is to run your PTOopen circuit and measure the RF output voltage, then load it with commonresistors till the output voltage drops to one half the original. The value ifthe added resistance is about the output resistance of the PTO. An AllenBradley Type J pot of 250 ohms or so is useful for this experiment.
>(and possibly why the output cable is most likely 50 ohm coax)?
Possibly, but it's my guess that the Collins engineers understood veryclearly that the coax characteristic impedance did NOT matter, and otherfactors were used in choosing it and the connectors. Note: the R-390/URRuses BNC connectors and larger coax. It's quite likely that the MB

connectors and smaller coax used in the A version, were part of the "CostReduction Program" that resulted in the R-390A/URR as we know it.--------------------------------------------------------------------------------------------------------Date: 12 Jun 2006 18:07:34 -0000From: "[email protected]" <[email protected]>Subject: Re: [R-390] Impedence Matching Question
Thanks, Roy. No, I wasn't worrying about whether or not the cable'simpedence was a close match to the output. I was just curious if this wasthe correct method to determine the output impedence of the oscillator. Isuppose if one were to worry about this, the impedence on the other end ofthe circuit would also be a factor (if they were different). For this shortrun, the coax is there to provide shielding and cable impedence isn't muchof a factor. It was more of an academic question than anything else soCase "C" applies. Thanks again for the cable. It's been pretty hot here thelast couple of days and my workshop (aka the utility room) is not verycomfortable, but hopefully I'll get this done very soon.---------------------------------------------------------------------------------------------------------Date: Sun, 18 Jun 2006 07:49:41 -0500From: "Les Locklear" <[email protected]>Subject: Re: [R-390] RE: Re: 807 Anyone?
PTO's were manufactured by:Collins Motorola Dubrow Progressitron CosmosRaytheon had a contract to refurbish PTO's.-----------------------------------------------------------------------------------------------------------Date: Sat, 19 Aug 2006 15:25:52 -0500From: Rick Brashear <[email protected]>Subject: [R-390] Dangling PTO
I realize this is a R-390 list, but I am sure the PTO in my R-388 is about thesame if not dentical. I have it dangling inside the 388 and I felt it better ifI ask a question or two before I go further. I need to adjust the endcalibration, I think that what it's called, as I am unable to correct the dialwith the "ZERO" adjustment on either end of all bands. The 388 manual isvery limited on information, suggesting to simply exchange the defectiveVFO for a properly functioning one. I understand there is an adjustmentunder the can to take care of this. I have yet to remove the can, so I' don'tknow. It is a Collins PTO #70E-15. Any help or direction would be mostappreciated. Do I need to remove the PTO completely from the circuit bytaking the wires loose or can the adjustment be performed as is?------------------------------------------------------------------------------------------------------------Date: Sat, 19 Aug 2006 14:40:58 -0700 (PDT)From: "Tom M." <[email protected]>Subject: Re: [R-390] Dangling PTO

The R-388 is not very PTO friendly, but that said, the endpoint can beadjusted from the outside. What I do is to uncouple the PTO (don't moveanything) and access and turn the endpoint adjusting screw on the front ofthe unit until the endpoint error improves. You may want to overshoot atad because the 388 PTO endpoint moves rapidly (in boatanchor yearsanyway). If you are out of adjustment range with the endpoint adjustingscrew then you'll need to open the PTO can and take one turn off theendpoint adjustment coil, and then start the endpoint adjustment all overagain.
Some purists don't like opening the PTO because you expose the inards tomoist air. What you can do before reassembly is to bake the PTO in anyoven at about 110 F for several hours to dry it (and the dessicant bag) outand then reassemble.-----------------------------------------------------------------------------------------------------------Date: Sat, 19 Aug 2006 20:20:34 -0400From: "Al Parker" <[email protected]>Subject: [R-390] re: Dangling PTO
If the end-to-end span is more than 7 or 8 kc off, you probably won't be ableto adjust it externally to get within reasonable dial "zero" adjustment.They drift over the yrs, usually by now at least 7kc. The compensating coilslug can be moved externally, without doing more than removing thepanel, or less if you have u-joint fingers and some small tools. There's ahex cap over the coil slug adjustment, on the front end, top, of the PTO. Ihave remedied a number of them, from R-388's, 51J-'s and 75A's, afterremoving them from the chassis, which can be a little dicey, but nothazardous to anything. 1 or 1-1/2 turns need to be removed from thecompensating coil. Take a look on my website under the "Collins" links tosee some of it. http://www.boatanchors.org There have been some articles written in past QST or CQ, etc., I havesome cc's, will scan for you if you'd like. Don't worry about the "WARNING"about breaking the seal, somebody's probably done it anyway, and even ifnot, the desiccant is long past it's usefulness, and I haven't been able toreclaim it ever.--------------------------------------------------------------------------------------------------------Date: Sun, 20 Aug 2006 11:35:59 EDTFrom: [email protected]: Re: [R-390] re: Dangling PTO
I agree - In fact I would make it a point not to replace the original plasticdessicant bag in an R-388, R-390 or R-390A PTO. The plastic bag isprobably brittle and could break making a mess inside the PTO asdescribed. The factory never intended for the chemical to last 40-50 yearsor more. The PTO has long since been exposed to air migrating into itevery time it heats and cools for the last 40 years probably and it won't

make any difference in performance to try to replace the dessicant. Best toleave it out and avoid future trouble and possible corrosion problems. 73Todd WD4NGG--------------------------------------------------------------------------------------------------Date: Sun, 20 Aug 2006 12:24:58 -0500From: "Bill Hawkins" <[email protected]>Subject: RE: [R-390] re: Dangling PTO
Desiccants remove moisture down to 30-40% relative humidity. If yourhouse maintains that, or less than 50% or so, then you don't need adesiccant. If your radio stays on all the time, then the PTO can doesn't"breath" much with changing temperature, and doesn't need a desiccant.The common desiccant today is silica gel - beach sand treated to have lotsof tiny water absorbing pores. Cobalt chloride (poisonous) is added toshow blue for dry and pink for wet.
Calcium chloride was used in the 50's as a desiccant. Father spread out afive pound bag of it on a few square feet of cloth over a wash tub to keep thebasement dry near Boston, Mass. Calcium chloride can be regenerated, butit breaks down into different chemicals if it stays wet. Silica gel can beregenerated, but after a while the cobalt chloride breaks down andbecomes colorless.---------------------------------------------------------------------------------------------------------Date: Sun, 20 Aug 2006 13:26:10 -0400From: "Al Parker" <[email protected]>Subject: Re: [R-390] re: Dangling PTO
I don't know why I haven't had any luck with dessicating the small tubes inthe PTO's. Maybe I didn't get them hot enough, I've tried a few times. Iknow it should be reactivateable, just figured it was too old. Craig'sexperience is the first I've heard of the tube breakage & corrosion problem,but it sure makes sense if it does break, the damage is worse than the cure.In the environment most of us have nowadays for our operating area, Idoubt that it would be much needed, and don't wory about pitching it out. Ifwe had bad conditions, like maybe in a storage shed, there's not enough ofit to be effective for too many cycles I suspect.----------------------------------------------------------------------------------------------------------Date: Sun, 20 Aug 2006 17:02:43 -0500From: "Cecil Acuff" <[email protected]>Subject: Re: [R-390] re: Dangling PTO
I have been making a habit of just cutting the strings loose and removingthe bag. If it ever gets loose inside the PTO it's a real mess. My radios arekept in an air-conditioned shop anyway. I think the idea was along thelines of the MFP coating used on the earlier SP-600. Just in case one endedup in a jungle environment....also I'm sure the Navy's were not in humidity

controlled compartments when on a cruise... We don't have to worry aboutthat type of exposure with most of these surplus units. I would guess theyare living the easy life at this point.-----------------------------------------------------------------------------------------------------Date: Wed, 30 Aug 2006 17:03:07 -0400From: "Jon" <[email protected]>Subject: [R-390] Cosmos Drift
If I had to write about my summer vacation at 44, I would tell the classhow I performed major surgery on a Cosmos PTO. How every night I turned40 screws,that are the size of an ant with a homebrewed tool, whichsometimes caused havoc in restricting the turning of the shaft to messingup the end points, to interaction between other cal points, how I must oftaken apart that $#%#$ thing 14 billon times. It is truly amazing that it isstill working. Sorry, I had to get that out of my system. Now I was curiouson what I will call long term drift. After installation of the PTO into theradio with it connected to a freq counter, I let it warm up for 48 hoursbefore I cal'd it. After which, I brought it back to the set point in this case,3.455000Mhz and let it sit. It is now over 3 days and the PTO has driftedover 1000Hz increasing in frequency. It seems to me that it will not settleout like I thought it would. I was wondering if anyone else has experiencedthis or knows any 'quick' remedies. I would appreciate any comments at all.Thanks for the bandwidth!---------------------------------------------------------------------------------------------------------Date: Wed, 30 Aug 2006 17:43:22 EDTFrom: [email protected]: Re: [R-390] Cosmos Drift
I have seen some R-390A PTOs with long term drift that were cured byplugging in a new 6BA6 tube. A weak 6BA6 could be the cause, might beworth a try replacing it. After 3 days does it continue to drift or does itever settle down? I would think after 3 days all the components would heatsoak to an even temperature. Could be a bad cap or other componentsomewhere. Not sure if it is possible to replace the negative tempcoefficient caps in there. Maybe at some point it is just not worth it tospend more time on that PTO and find a nice Collins or Motorola PTO withthe good old corrector stack.---------------------------------------------------------------------------------------------------------Date: Wed, 30 Aug 2006 18:05:55 -0500From: "Cecil Acuff" <[email protected]>Subject: Re: [R-390] Cosmos Drift
Still got a 3TF7 in it....or another solution such Kielbasa. Could be powerline fluctuations, room temp changes. You are not running the ovens areyou.... shouldn't be... Might be the tube but I've heard of more problems withnew tubes in PTO's than well seasoned ones...

-------------------------------------------------------------------------------------------------------Date: Wed, 30 Aug 2006 20:44:35 -0400From: "Jon" <[email protected]>Subject: [R-390] Cosmos Drift
Thanks for all the comments. Let me explain a little more on the setup. Theradio does not have the ovens on. In fact the oven cover internal to thePTO is not installed, just the inner one - the one with the value for nitrogenand of course the outer one along with the insulation. The output of thePTO goes directly in a counter. I did not fool with the BFO or the CAL forzero beating yet. Just sitting on freq and watching it drift. The first day itdrifted 95Hz, second day was 380Hz, the third day,330Hz and the fourthday (today), 250 Hz. A total of over 1000Hz, always increasing infrequency.
The radio room is down stairs in the cellar that was converted into tworooms, play room and a radio room. I have a dehumidifier always runningin the playroom. The door to the shack is always open however not fully. Ihave not monitored the temp or humidity but I'm positive the tempvariance is within 5 degrees F. The power supply has the conversion tosolid state. As for line variance, not sure but would this cause a steadyincrease in frequency? It would seem to me that at some point the tempinternal to the radio would reach some type of quiescent level along withthe capacitance and inductance with respect to the temperaturecoefficients of the components which would result in 'hovering' around acertain a freq. Maybe I'm not there yet. The onset of restoration I 'retubed'I'm sure that I put in a better tube,that is higher transconductance. I willcertainly tried other tubes. Hope this helps.---------------------------------------------------------------------------------------------------------Date: Wed, 30 Aug 2006 21:02:30 EDTFrom: [email protected]: Re: [R-390] Cosmos Drift
I think Cecil hit it with the new tube idea. However, as operators we nevertried to keep a R390/A on a frequency for days. A 1000 Hz drift over 3days ain't all that much unless you are doing SSB. All that care you gavethat PTO may take some time to settle in. Some of it may be your freqcounter settling down. How often do you run it 3 days at a time? Leave thereceiver on and get some time on the tubes.30 days 24 x 7 minimum. Thencheck the drift.-----------------------------------------------------------------------------------------------------------Date: Wed, 30 Aug 2006 19:07:35 -0600From: DW Holtman <[email protected]>Subject: Re: [R-390] Cosmos Drift
I would try listening to a time hack for three days. That takes your

counter, impedance mis-match to the counter out of the equation. If youstay on a time hack for a few days, I don't think you have anything toworry about. Just a thought.----------------------------------------------------------------------------------------------------------Date: Wed, 30 Aug 2006 21:48:42 -0400From: Barry Hauser <[email protected]>Subject: Re: [R-390] Cosmos Drift
I seem to recall reading in one of the manuals or a thread on this list a fewyears back, that it was not advisable to use a "hot" tube in the PTO. It wasbetter to select a new tube with more typical transconductance readings,or a used one rotated in from another socket in the rig that was wellbroken in. You might try that and repeat the readings and see if they'remore stable. Be sure to test for gas/grid emissions, not justtransconductance.------------------------------------------------------------------------------------------------------------Date: Wed, 30 Aug 2006 22:09:06 -0400From: Scott Bauer <[email protected]>Subject: Re: [R-390] Cosmos Drift
I bought 120 5749's all from the Philips contract dated 1987. These tubeshave been giving me a lot of trouble in the PTO as well as V505 (a) V508non a. The tube will work fine for the first 40-60 hours and then startacting up. Anybodywant to buy some NOS tubes? :-)-------------------------------------------------------------------------------------------------------Date: Wed, 30 Aug 2006 23:19:07 -0400From: "Jim M." <[email protected]>Subject: Re: [R-390] Cosmos Drift
Capacitors changing value with temperature? Believe it or not I have seenthe .005 bypass caps in a Collins PTO go bad with age, change values withtemperature. A change in screen or other bypass caps could cause a slightchange in frequency. Otherwise, a temperature compensated mica capinside the can could be failing. Maybe mechanical drift? If the Oldhamcoupler istoo tight against the PTO side, mechanical variations could cause drift.There should be about 1/32 inch gap both sides of the Oldham coupler.Maybe these could be causes other than the tube...--------------------------------------------------------------------------------------------------------Date: Thu, 31 Aug 2006 11:53:46 -0400From: "Tim Shoppa" <[email protected]>Subject: Re: [R-390] Cosmos Drift
I agree fully with Roger here: 1000 Hz drift on a PTO over 3 days is not abig deal, especially after a major overhaul (probably some parts are

outgassing etc.). This is exactly what the "ZERO SET" adjustment on thefront of the radio is for. If the PTO is wiggling up and down 100 or 200 Hzover a very short time frame (something that can seriously impair SSB orRTTY operation) then it IS a big deal if you care that much (listening toAM you'd probably never notice). ON THE OTHER HAND I've overhauledsome Cosmos PTO's and on the bench(NO KNOB, NO GEARTRAIN) they have stayed steady to 50 Hz over severaldays, but only AFTER many hours of burn-in. This is checked with a GPS-locked OCXO (to invoke an instrument that a technician of the 50's or 60'scould only dream about!) One factor that I allude to above, is that whenthe PTO is mounted in a 390A is that the PTO is hooked to the geartrain.Now the PTO shaft is supposed to drive the geartrain, but in real life therewill be some mechanical backlash feeding back into PTO shaft rotation.Very often the 17MHz crystal is a kHz or two off nominal and in real lifethat's going to be a bigger deal than the PTO drifting a kHz over days.---------------------------------------------------------------------------------------------------Date: Mon, 25 Sep 2006 10:27:39 -0400From: Roy Morgan <[email protected]>Subject: Re: [R-390] Cosmos PTO End Point Adjustment Tool
Do you mean (single) the end point adjustment, or the (many many)linearity adjustment screws? Apparently some but not all Cosmos PTO'shave linearity adjustment screws that accept a four flute spline wrenchthat measures .033 inches across. Folks have reported on the list thatthey cut off the short arm of one and put it in a pin vice, then fussed with itto get it into the right spot. The part numbers are: McMaster-Carr (part#7048A11) or Snap-On multi splineL-Shaped wrench #MS2A. It appears to me from a picture I have that theEND POINT inductor adjustment screw is a slotted screw like many IF canswe have in other radios. If you can't *see* the thing to get a small screwdriver into it, you may have to make a tool by soldering or epoxy-ing alittle metal cylinder around a jewelers screw driver tip of the right size tosimulate the more common plastic or metal adjustment tools with arecessed metal blade at the tip.--------------------------------------------------------------------------------------------------------Date: Mon, 25 Sep 2006 18:03:26 EDTFrom: [email protected]: Re: [R-390] Some practicalities on alignment of the R-390A/URR
What is a good insulated screwdriver to adjust the RF transformers andBFO neutralizing trimmer? --------------------------------------In the old days boys knew how to hold a screw driver without getting bit.Its not the insulation between the blade and receiver that counts, it's theinsulation between the blade and operator that counts. (;> We would turnthe power off and work the offending adjustment over with a real screw

driver and get it free. Then with the power on we could get it adjusted witha wood stick. The sticks were called orange sticks. They looked like a rounddowel to me. You keep them trimmed with your TL29. Tool Lineman 29 isa pocket knife to some. With a lot of work it could become sharp and lessdangerous that as issued. I liked to sand mine to shape on the grinder. Thewood stick that is.---------------------------------------------------------------------------------------------------------Date: Tue, 31 Oct 2006 12:54:09 -0600From: Tom Norris <[email protected]>Subject: [R-390] Cosmos Linearity Adjustment Tool Sizes?
I realize this has been asked a dozen times before, but I've searched the faqand the archive and can't find it --What size of tool do I need to perform thelinearity adjustment on a Cosmos PTO? Looks like a 4 flute, size"teenietiny"------------------------------------------------------------------------------------------------------------Date: Tue, 31 Oct 2006 14:35:09 -0500From: Roy Morgan <[email protected]>Subject: Re: [R-390] Cosmos Linearity Adjustment Tool Sizes?
My CosmosPTOnotes.txt file has info for you: CosmosPTOnotes.txt------------------------------------------------------------------------------------------------------------Date: Sat, 13 May 2006 03:57:41 -0700 (PDT)From: "KC8OPP Roger S." <[email protected]>Subject: Re: [R-390] Cosmos Linearity tool
This is what I use, fits great. Snap-On multi spline L-Shaped wrench#MS2A. This is a four flute spline wrench that measures 0.033 inchesacross. I cut it down and clamped it in pin drill handle so I could reach inand adjust the screws.-----------------------------------------------------------------------------------------------------------Date: Sat, 13 May 2006 13:17:52 -0400Subject: Re: [R-390] Cosmos Linearity toolFrom: [email protected] (Tim Shoppa)
Is it possible that you ended up with a six-fluted 0.032" spline key? Ibought a "four-flute spline L-key, 0.033" Dia" from McMaster-Carr (part#7048A11). It was not in stock at the local warehouse and they had toship it in from Chicago. It fits but it still isn't easy work (especially whenyou've got to repeat dozens and dozens of times.)
Like Roger I find it easiest to use if I cut off the "L" and put it in a pin vise.Even then it takes a LOT of skill and patience to stick it through the radiochassis, through the PTO bracket, through the PTO can, and into thescrew. It was just about impossible when I was using it as a L-wrench (andI have some experience working tiny SMT stuff and watches and clocks.

Easy to blame on my "fat fingers" but the same fat fingers let me solder0201 SMT stuff...). What wouldreally make a world of difference, if I had one, was a pin vise that had alittle spotlight on the end of it. The hole in the screw is so tiny that a lot oftimes it is hard to get the spline in especially if dust or oil (or worst both!)are inhabiting the spline socket. When I was degreasing/degunking myPTO I took out all the spline screws and ran them through my ultrasonicdegreaser.------------------------------------------------------------------------------------------------------------Date: Mon, 22 Jan 2007 20:58:15 +0000From: "Gene Dathe" <[email protected]>Subject: [R-390] Insulation
When rebuilding PTOs and crystal ovens, do most of you just throw awaythe fiberglass insulation? My guess is that since no one uses the ovens,lack of insulation in no way affects the hard core user or collector.Thoughts?---------------------------------------------------------------------------------------------------------Date: Mon, 22 Jan 2007 16:59:51 ESTFrom: [email protected]: Re: [R-390] Insulation
To extent that it is easy to get the pink stuff stuffed back in do it.It does help hold the ambient temp in the can a little more stable.---------------------------------------------------------------------------------------------------------Date: Thu, 22 Feb 2007 08:03:26 -0500From: Carole White-Connor <[email protected]>Subject: [R-390] New Project (PTO)
Thank you, everyone, for your help. As always, your knowledge staggersme. More than that, your willingness to help out shows just what a greatgroup you are. The problem is in the PTO linkage. The KC knob does notturn the PTO shaft. In looking at the Oldham coupler, I have a stainlesssteel disc between the KC knob drive and the PTO shaft. It has a groovethat mates with a ridge on the KC knob drive. There appears to be groovein the back that does not mate with the PTO shaft. The stainless steel discfits very loosely between the KC knob drive and the PTO shaft. It'sdefinitely more than the 1/32" gap shown in the Y2K manual. There is noanti-backlash spring.
1. My first question is whether there should be one or two discs betweenthosedrives. I'm looking at Pete Wokoun's diagram in the Y2K manual (Figure 6-4) and it's a little hard to tell.
2. If there is only supposed to be one disc, why is everything so loose and

whydoesn't the KC knob turn the PTO shaft? What's the fix?
3. I've never had to work on a PTO or Oldham coupler before so I needsimpleinstructions (very simple, might be more like it!).
4. When I turn the PTO shaft a little by hand, I receive stations loud andclear, so I'm pretty sure the linkage is the problem.----------------------------------------------------------------------------------------------------------Date: Thu, 22 Feb 2007 08:52:19 -0500From: [email protected]: Re: [R-390] New Project (PTO)
Sounds like a loose clamp on the PTO linkage. Check the clamps holdingthe coupler on the PTO shaft and also on the main drive shaft coming fromthe front panel. If they are loose the PTO shaft will slip. These clamps havebeen known to crack, or the screw threads have stripped, after prolongedmaintenance activity. Check for that also - someone may have broken aclamp in the past. You will need a "Bristol" type driver to tighten theclamps. If the clamp is bad, you will need a new one (you can probably geta spare from someone on the list). The spacings within the Oldhamcoupler and its two mating discs should be around 1/32. You can eyeball it.But not too close or too tight because then you can get PTO instability if itbinds. To correct the spacing you loosen one of the clamps and use a thinscrew driver to gently push the coupler surfaces together (or spread themapart as needed). There should also be a little tensioner spring betweenthe two little posts on the two coupler discs - this is to prevent tuningbacklash. It will tune without the spring but you will notice a slightamount of backlash. To initially get the PTO back synchronized with thecoil linkages again, tune the radio dial readout to the frequency a knownstation on the dial. WWV at 10 Mhz is good, or a local broadcast station.Loosen the coupler coming from the panel side, and then spin the PTOshaft by hand (using its coupler disc as a "knob") until you hear a peak innoise or you hear the station (but do not allow the dial readout to change)Then retighten the clamps. You should be OK from that point on.--------------------------------------------------------------------------------------------------------Date: Thu, 22 Feb 2007 13:48:14 -0500From: [email protected]: Re: [R-390] New Project (PTO)
Be sure not to turn past the end of travel on the PTO. Be very gentle and itshould be evident where the end is.-----------------------------------------------------------------------------------------------------Date: Thu, 22 Feb 2007 17:29:13 -0500From: "Steve Hobensack" <[email protected]>

Subject: RE [R-390] Diagnostic Help Needed
Make the frequency show 7+000. The egg shaped cams should all point topaint or scratch marks on the chassis. There should be a mark for eachcam. This shows that the rig is mechanically aligned. Electronic repairsshould be made after mechanical repairs.--------------------------------------------------------------------------------------------------------Date: Thu, 22 Feb 2007 22:33:38 -0500From: Carole White-Connor <[email protected]>Subject: [R-390] New Project (Progress)
Well, we're getting somewhere:
1. The PTO problem was a loose coupler. I loosened a clamp, fit the ridgesand indentations, tightened it up, and it works. It's 25 khz off but I'll fixthat later. You folks pointed me in the right direction there. Thank you.
2. I have reception on all bands. However, there is a lot of hiss/static andsensitivity is not where it should be. This may be a long-standing problemwith this radio. I see that the IF gain is set at max. If I back it off a bit, Ilose a lot of sensitivity. Any ideas? Reception is consistent on the bandsabove and below 8 mhz. The noise limiter works well to remove a fairamount of the hiss/static.
3. I tested the tubes and replaced 4-5 that were weak or had shortedelements. I noted minor improvement.
4. Reception on the 0-1 mhz band is really lousy. Strong BCB stations comein weakly. This is the only band that is this bad. (The 2-3 mhz band may bebad, too, but I haven't played with that band too much).
5. The crystal oven heats up even though the switch on the back is off. Idisconnected a lead from this switch to disable it, but the oven still heats.Is this a problem? Is there an easy way to disable it?
6. On a strong local AM station, the audio is strong and clear. On thestrong SW stations I receive, the audio is good, too.
I'm just wondering where I should go and what I should do next. Again, mytest equipment is limited to a VTVM, signal generator and tube tester. Sofar, I'm having fun with this set and am learning a lot. The Y2K manual isa amazing. I wish I had something comparable for every set I work on. Anyideas or suggestions would be gratefully appreciated!!-----------------------------------------------------------------------------------------------------------Date: Thu, 22 Feb 2007 23:15:53 -0500From: "Jim M." <[email protected]>
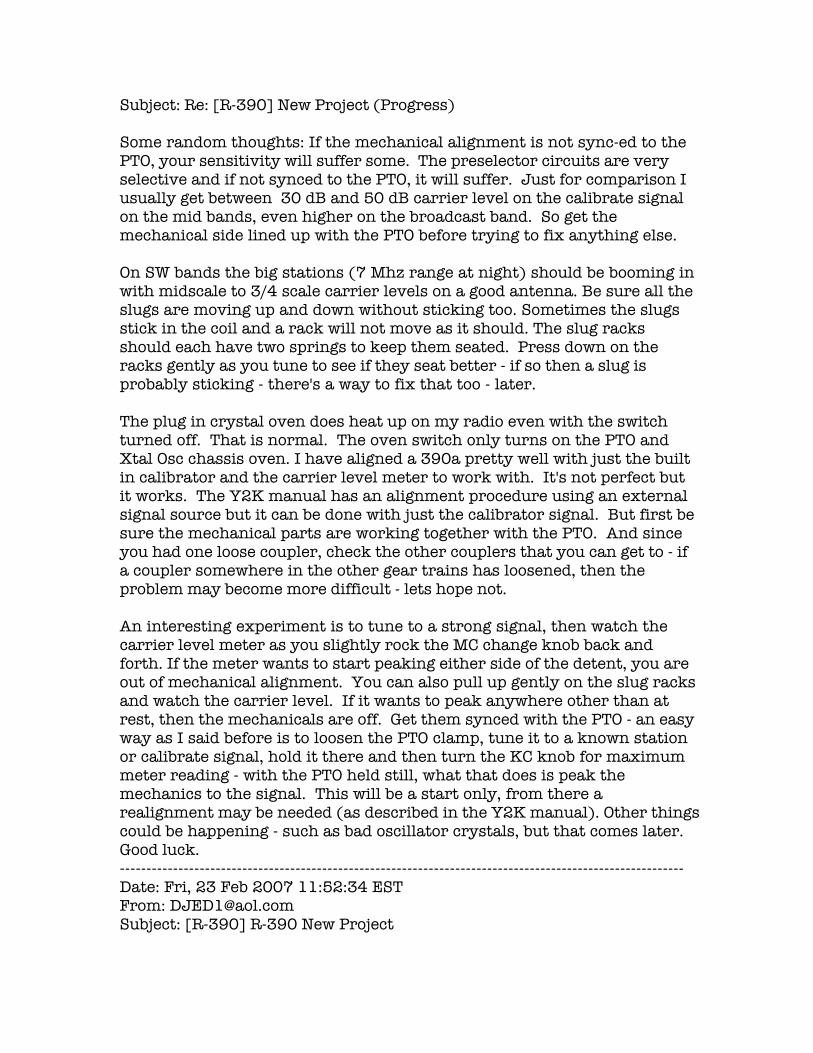
Subject: Re: [R-390] New Project (Progress)
Some random thoughts: If the mechanical alignment is not sync-ed to thePTO, your sensitivity will suffer some. The preselector circuits are veryselective and if not synced to the PTO, it will suffer. Just for comparison Iusually get between 30 dB and 50 dB carrier level on the calibrate signalon the mid bands, even higher on the broadcast band. So get themechanical side lined up with the PTO before trying to fix anything else.
On SW bands the big stations (7 Mhz range at night) should be booming inwith midscale to 3/4 scale carrier levels on a good antenna. Be sure all theslugs are moving up and down without sticking too. Sometimes the slugsstick in the coil and a rack will not move as it should. The slug racksshould each have two springs to keep them seated. Press down on theracks gently as you tune to see if they seat better - if so then a slug isprobably sticking - there's a way to fix that too - later.
The plug in crystal oven does heat up on my radio even with the switchturned off. That is normal. The oven switch only turns on the PTO andXtal Osc chassis oven. I have aligned a 390a pretty well with just the builtin calibrator and the carrier level meter to work with. It's not perfect butit works. The Y2K manual has an alignment procedure using an externalsignal source but it can be done with just the calibrator signal. But first besure the mechanical parts are working together with the PTO. And sinceyou had one loose coupler, check the other couplers that you can get to - ifa coupler somewhere in the other gear trains has loosened, then theproblem may become more difficult - lets hope not.
An interesting experiment is to tune to a strong signal, then watch thecarrier level meter as you slightly rock the MC change knob back andforth. If the meter wants to start peaking either side of the detent, you areout of mechanical alignment. You can also pull up gently on the slug racksand watch the carrier level. If it wants to peak anywhere other than atrest, then the mechanicals are off. Get them synced with the PTO - an easyway as I said before is to loosen the PTO clamp, tune it to a known stationor calibrate signal, hold it there and then turn the KC knob for maximummeter reading - with the PTO held still, what that does is peak themechanics to the signal. This will be a start only, from there arealignment may be needed (as described in the Y2K manual). Other thingscould be happening - such as bad oscillator crystals, but that comes later.Good luck.----------------------------------------------------------------------------------------------------------Date: Fri, 23 Feb 2007 11:52:34 ESTFrom: [email protected]: [R-390] R-390 New Project

"1. The PTO problem was a loose coupler. <snip>
That's your problem- you must correct the alignment of the PTO and thetuning racks- That's what is killing your sensitivity, especially on the lowband. Check the alignment process in the Y2K manual. Go through theprocess of setting the readout to 7.000+, that is, at the top of the 7 MHzband, and check that the cams are set on the calibration marks. If thatlooks OK, then use the signal generator or the calibrator to set a signal on8.000 MHz, loosen the PTO coupling at the front coupler, and manuallytune the PTO until you zero beat the 8 MHz signal. Then retighten thecoupler. This should improve your sensitivity a lot. Check that the readoutis now within a couple of KHz. Once you've checked out the rest of theradio, you can go through the entire mechanical and electrical alignmentto get best sensitivity. Ed-----------------------------------------------------------------------------------------------------------Date: Fri, 23 Feb 2007 11:16:07 -0600From: "Bill Hawkins" <[email protected]>Subject: RE: [R-390] R-390 New Project
"1. The PTO problem was a loose coupler.<snip>
The PTO covers 1 MC in 10 turns. 25 KC is exactly 1/4 turn. Just do that1/4 turn and then see if you went the right way. Then you can dig out thealignment instructions and finish the job.------------------------------------------------------------------------------------------------------------Date: Tue, 13 Mar 2007 21:19:35 -0500From: "Fred Stillwell" <[email protected]>Subject: [R-390] VFO end point adj.
I have a question on the R-390 (A) VFO. When performing the end pointadj. do you start at 7+000 and adj L-701 at 7.000 or is it the other way,starting at 7.000 and adj at 7+000. ? I'm sure this has been covered beforebut I can't find it. The original manual seems to center everything around7+000. BTW, is there a list or page that covers the changes to the originalY2K manual. I'd like to correct my original printed copy if possible.----------------------------------------------------------------------------------------------------Date: Thu, 15 Mar 2007 03:33:02 -0700 (PDT)From: "Tom M." <[email protected]>Subject: Re: [R-390] VFO end point adj.
If you're only adjusting the PTO endpoint, then it really doesn't matterwhere you start as long as it's at one of the ends. The 7+000 is really foralignment of the RF deck cams. The PTO needs to output 3.455 Mhz on thelow end and 2.455 Mhz on the high end after exactly 10 turns of the shaft.If you want a start point, start at 3.455 and turn clockwise to get to 2.455in ten turns. If you don't have a counter you can listen to the PTO on a HF

radio with an accurate dial.--------------------------------------------------------------------------------------------------------Date: Tue, 20 Mar 2007 21:42:42 -0600From: DW Holtman <[email protected]>Subject: [R-390] Cosmos PTO labels
Were the labels for the Cosmos PTO made in a several shades of blue overthe years of production? I have seen pictures of everything from lightrobin egg blue to dark almost navy blue. Maybe the differences are due tofading over the years? I'm trying to make some reproduction labels andI'm at a cross roads on the color of the Cosmos labels. Any pictures of themwould be a great help. Thank you for any help in this matter.-----------------------------------------------------------------------------------------------------------Date: Mon, 26 Mar 2007 01:40:05 -0400From: "Bob Young" <[email protected]>Subject: [R-390] R-390 zero adjust problem fixed and have more questions.
I fixed the problem with the zero adjust that I caused the other day byscrewing the shaft in too far. I took off the panel with the help of themanual which will be my 390 bible from now on. Basically the clutch wasnot releasing enough to engage again. I took a screwdriver and appliedpressure between the little round thing between the big gear nearest thepanel and the cotter(?) pins. I had to do this more than a few times, but itworked, it's back together again and working fine.Ok my first questions<snip>--------------------------------------------------------------------------------------------------------Date: Mon, 26 Mar 2007 13:09:37 -0400From: Mark Huss <[email protected]>Subject: Re: [R-390] R-390 zero adjust problem fixed and have morequestions.
For what it is worth, you have to be careful with the R-390 (non A) zeroclutch. They changed the design in the R-390A because it is so easy tobreak the clutch on the R-390 by overtightening it. <snip>-----------------------------------------------------------------------------------------------------Date: Mon, 26 Mar 2007 13:09:37 -0400From: Mark Huss <[email protected]>Subject: Re: [R-390] R-390 zero adjust problem fixed and have morequestions.
<snip> Go ahead and linearize the PTO, you will have to do it anyway.Another test, especially if you have a frequency counter, is this. Removethe shield from the Second LO Tube. Wrap about twenty or so turns of #28or #30 wire around it about in the middle. Secure with tape, or if it holdsits shape, just twist the ends to keep it compressed. Now, wire the ends tothe input of the frequency counter. This will let you read the frequency of

the second LO directly. Then run through the bands, monitoring how faroff each crystal frequency is. The results may surprise you. Crystals notonly drift with temperature, they age 2 to 5 ppm per year, and temperatureaccelerates this. After fifty years, drift would be about 4250 Hz on a 17 Mccrystal. Since heat accelerates this process, and the crystals are in anoven, you can expect more. Maybe more than 8 kHz. One of the designcompromises in the R-390 series was no trimmer. But then again, whoknew these things would have an operational life of better than 40 years,and still be going strong after fifty. :-)---------------------------------------------------------------------------------------------------Date: Mon, 02 Apr 2007 08:09:14 +0000From: "Gene Dathe" <[email protected]>Subject: [R-390] adapter
Thank you to all on the list who responded about my PTO problems,especially Dave Medley who went to the n th degree... I recently acquired a8640B and so am having the usual fun, alignment etc; and so the questionis:
What is the nomenclature the connectors J217 and J116? That is, tohook up the PTO to my frequency counter, I need an adapter from what toBNC? Also, do folks drill a hole in one IF can and move it around whenaligning all three, drill all three cans, or find a drilled spare?------------------------------------------------------------------------------------------------------------Date: Mon, 2 Apr 2007 07:48:38 -0400From: "David C. Hallam" <[email protected]>Subject: RE: [R-390] adapter
If you are referring to the connectors on the R-390A, the correctnomenclature is MB series. They are often referred to a "mini BNC" butthat is not correct. They were not widely used and a little difficult to find.The last I knew Skycraft Surplus in Winter Park, FL had some stock orWilliam Perry Co, in Louisville, KY may have them.-----------------------------------------------------------------------------------------------------Date: Mon, 02 Apr 2007 11:29:15 -0400From: "Bob Young" <[email protected]>Subject: [R-390] PTO question for R-390/URR
I bought an early Collins R-390/URR with a Cosmos PTO in it, can Iassume that this is not original and the receiver has to have beenmodified? (It is off about 9 KHz end to end) The reason I ask is I aminterested in a Collins PTO on epay but don't want to buy it if there will beextensive modifications involved, the receiver seems to be all originalotherwise. The PTO plug (6 prong?) seems the same but there are severalwires on the front of the Cosmos that run under the PTO that are not onthe Collins or I don't see them anyway (I also have one with a Collins PTO).

(These are both 390's they are not 390A's) Thanks,-------------------------------------------------------------------------------------------------------Date: Mon, 2 Apr 2007 14:20:40 EDTFrom: [email protected]: Re: [R-390] PTO question for R-390/URR
I have seen 3 or 4 R-390s with this mod. I suspect that it was in fact amilitary mod later in the radios service life, when Cosmos were in thepipeline, and not the original R-390 style PTO. The other possibility is thatsomeone published a hack to put them in the R-390. The fact that all of themods have used Cosmos PTOs, and not any other mfg., makes me think itwas a military mod. It seems to work just fine in the one I have had up andrunning, so wouldn't be in a big hurry to swap it back. I don't thinkhowever it would be prohibitly difficult to reverse engineer it.------------------------------------------------------------------------------------------------------------Date: Mon, 2 Apr 2007 17:48:56 EDTFrom: [email protected]: Re: [R-390] PTO question for R-390/URR
I've only had experience with the "A", but at one point I bought a PTO oneBay that was advertised as being from a R-390A, but I found the powerplug wouldn't fit, and it had a real BNC vs a mini-BNC on the RF cable. I'mpretty sure it was an original non-A PTO, which says someone eithermodified your radio or the Cosmos PTO in it. It's not hard to set theendpoint on the Cosmos, unless it need to have the coil modified because ithas used up all theadjustment range. Good luck with it-Ed-----------------------------------------------------------------------------------------------------Date: Mon, 2 Apr 2007 18:02:21 -0400From: "David C. Hallam" <[email protected]>Subject: RE: [R-390] PTO question for R-390/URR
I don't think there is any basic difference between the R-390 and the R-390APTO. There is a difference in the cables and plugs, both power andRF. As I remember there is also some difference in the mounting bracket.At one point I was looking at modifying a R-390A PTO to fit my R-390. Ididn't think any of the problems were going to be difficult to overcome. R-390A PTO's were both more plentiful and less expensive to buy than onesfor a R-390. Ultimately I found a R-390 PTO at a good price and theproject stopped.-----------------------------------------------------------------------------------------------------Date: Mon, 09 Apr 2007 12:06:23 +0000From: "Gene Dathe" <[email protected]>Subject: [R-390] PTO
Well, my pto project was successful and I now have a working spare.

Aligning the Oldham coupler on the PTO shaft took a bit of time, though.With the Khz set at -000, there were 3 1/2 turns left of travel. That got mewithin 25 khz, then rotating the Oldham coupler on the shaft got the sparewithin 2 khz of my original. The point being that I could drop in the sparewithout having to radically reset the zero. It seems to me that as long asthe 1 Mhz travel of the PTO is within the total mechanical travel betweenthe stops that the radio will work fine, just re-zero for that particular PTO.But say I accidentally installed it with 5 turns on the shaft, up about 200khz. I couldn't zero it before I hit the end of travel. Now a fanatic mightwant to "center" the 1 Mhz travel within the stops. My question to thosethat did this sort of thing for a living is: Did you have a SOP wheninstalling the PTO to mechanically align it?---------------------------------------------------------------------------------------------------Date: 9 Apr 2007 14:57:38 -0000From: "[email protected]" <[email protected]>Subject: Re: [R-390] PTO
> My question to those that did this sort of thing for a living is: Did you> have a SOP when installing the pto to mechanically align it?
I never did this for a living (thankfully, because I would have gone hungry)so you may not want to hear my advice, but if the PTO were to be 200kc off,the radio would behave very badly and you would know something waswrong. I use a frequency counter, set the dials to wherever they should be(based on where the frequency the counter says the PTO is currentlyrunning (usually at 2.455 or 3.455 but anywhere in its range will work)),center the clutch, and go from there.----------------------------------------------------------------------------------------------------------Date: Mon, 9 Apr 2007 12:37:07 EDTFrom: [email protected]: Re: [R-390] PTOTo: [email protected], [email protected]
Well, I never did it for a living, but here's my understanding of how toalign the PTO. Incidentally, the experts say it is critical to get the PTOcorrectly aligned with the geartrain, otherwise the gain suffers a lot. Youneed to be within a few Kc to get good performance.I just went throughthis alignment after consulting the archives:• 1. First, set the overrun on the dial so it's symmetrical at about 35Kc at top and bottom of the band.• 2. Center the zero adjust, then don't touch it.• 3. Set the PTO end point to within 2 or 3 Kc.• 4. Set the radio to 7.000+ (that is 8.000 on the 7 Mc band)• 5. Loosen the Oldham coupler at the front side, set the PTO to 2.455,then tighten the coupler.

The PTO should now track correctly with the rest of the radio. Thisassumes that the radio geartrain is in correct mechanical alignment tostart. If you don't have a frequency counter, and the PTO is close tocorrect, you can use the calibrator to do step 5. Loosen the coupler, turnthe PTO by hand until you zero beat the calibrator signal, then tighten thecoupler.-----------------------------------------------------------------------------------------------------------Date: Mon, 9 Apr 2007 09:46:36 -0700 (PDT)From: "Tom M." <[email protected]>Subject: Re: [R-390] PTO alignment
The mechanical stops and veeder root counter on the RF deck should be setup with about 35 kcs overtravel on each end. After that, put your dialcounter on 000 and set the PTO for an output of 3455 kcs (read on acounter or listen on another receiver for it) and you'll be real close toproper alignment. Doing this you should never hit the stops on the PTO.The PTO stops are much weaker than the stops on the RF deck. By design (Iguess) the RF deck stops hit first.-----------------------------------------------------------------------------------------------------------Date: Thu, 12 Apr 2007 09:04:37 -0400From: "Keith Densmore" <[email protected]>Subject: [R-390] Two questions
I have a Imperial unit which I will be getting into shortly. It works wellnow, and the PTO is all re-aligned and stable. I notice a couple of problemswith it, and I wonder if anyone on the list has had these and/or has anythoughts. Forewarned is forearmed!
1/ Sensitivity drops noticably going from the wider mechanical filters tothe narrower ones. The level meters are out of it but its probably morethan 10-15db from 16 to 2 kc. This is actual signal loss not just noise lossof a narrower filter. Anything to look for?
2/Lower sensitivity on the 7 mcs band compared to all other nearbybands. Does not appear to be the band switch, it makes positive contact onall ranges. I thought might be alignment of the 7-24 mcs crystal but itpeaks nicely with its trimmer. Any thoughts?------------------------------------------------------------------------------------------------------------Date: 12 Apr 2007 13:13:06 -0000From: "[email protected]" <[email protected]>Subject: Re: [R-390] Two questions
If your IF unit is equipped with trimmers on the input and output of thefilters, they may need to be adjusted. I had the same problem with mineand tweaking the trimmers helped greatly.------------------------------------------------------------------------------------------------------------

Date: Thu, 12 Apr 2007 09:25:04 -0400From: "Walter Wilson" <[email protected]>Subject: Re: [R-390] Two questions
Make sure it will peak in TWO spots during a full rotation. If it only peaksin one spot, that's not a true peak.------------------------------------------------------------------------------------------------------------Date: Thu, 12 Apr 2007 09:30:38 -0500From: "Cecil Acuff" <[email protected]>Subject: Re: [R-390] Two questions
Good point Walter....I ran into that a while back and when this happensyou need to change the fixed cap to get things into the range of thetrimmer. It made quite a difference. Got to have two peaks....don't matterwhich one you adjust to.-----------------------------------------------------------------------------------------------------------Date: Thu, 12 Apr 2007 11:50:40 -0400From: [email protected]: Re: [R-390] Two questions
Hopefully the narrower filters haven't gone bad - did you replace thecoupling capacitor in the IF unit that has a history of failing - anddestroying filters? And if you go to a narrower filter, you may need totweak the tuning to center the signal in the narrower filter passband -should be obvious but just wanted to mention it. <snip>-------------------------------------------------------------------------------------------------------Date: Mon, 16 Apr 2007 20:37:52 -0600From: DW Holtman <[email protected]>Subject: [R-390] PTO Question
I'm in the process of restoring a PTO for a friend. I have done about at adozen or more with good success, but they have all been Collins or Cosmos.This one is either a Progresstron or a Dubrow. I would like to know whichone?
It has a corrector stack similar to the Collins.The the internalcompensator coil (the end stop adjustment) has about 6 turns of wire visetwo turns on the Cosmos. The heating coil is a glued on red rubber matinstead of the coil being sort of inside of a metal Pocket on the middlecover.
It does not present any problems that I can see servicing it, I'm just veryinterested. Any help identifying this PTO would be greatly appreciated.Thank you in advance.--------------------------------------------------------------------------------------------------------Date: Mon, 16 Apr 2007 23:21:53 -0500

From: "Barry" <[email protected]>Subject: [R-390] Interesting R390A for auction on eBay
Seller claims no known modifications but that PTO cable doesn't lookoriginal to me. Anyone seen anything like it before? It appears therepairer didn't have the correct cable or connectors so he straight wired itto a regular BNC connector.----------------------------------------------------------------------------------------------------------Date: Tue, 17 Apr 2007 07:46:39 -0400From: Bob Camp <[email protected]>Subject: Re: [R-390] Interesting R390A for auction
The tape holding the power connector on the PTO looks very professional...The PTO has been fiddled quite a bit.----------------------------------------------------------------------------------------------------------Date: Tue, 17 Apr 2007 12:31:23 +0000From: "Gene Dathe" <[email protected]>Subject: [R-390] Interesting R390A for auction
The blue Amphenol connector that plugs into the PTO must have extensivedamage; otherwise why duct tape over it? ( I know, I just got donereplacing one!)--------------------------------------------------------------------------------------------------------Date: Tue, 17 Apr 2007 09:29:03 -0400From: Roy Morgan <[email protected]>Subject: Re: [R-390] Interesting R390A for auction
Auction interested folks, The 70H-2 PTO is meant for the R-390/URR (the"non-A"). It appears to have the original BNC output cable that has beenadapted to work in the R-390A/URR. The blue Amphenol connectors onthe 70H-2 (R-390/URR) and the 70H-12 (R-390A/URR) are not the same.So, it's possible that the PTO is as originally configured for the "non-A"radio and has been adapted for the "A" with the needed connectors for bothpower and PTO output.(I added brackets <...> around the long URL so it will work in mostbrowsers even if line-wrapped in transit.):---------------------------------------------------------------------------------------------------------Date: Tue, 17 Apr 2007 07:40:20 -0600From: DW Holtman <[email protected]>Subject: Re: [R-390] Interesting R390A for auction
Speaking of Ebay auctions, why did this auction go for so much money? Isthere something that I did not see? The antenna relay has been butchered,poor quality pictures, no pictures of the inside. He does not even say is itworks.-------------------------------------------------------------------------------------------------------

Date: Tue, 17 Apr 2007 11:09:18 EDTFrom: [email protected]: Re: [R-390] Interesting R390A for auction
Yep, it's a "non-A" PTO patched into an "A" radio. I bought a "non-A" PTOon eBay, advertised as an "A" PTO. I found it had a regular BNC connector,and the power connector did not mate with my radio. The telltale in thephoto is the cover on the transformer in the PTO- the non-A cover has asharp rectangular top, while the later A covers have a rounded edges of aformed can. You can see the adapter to the BNC, and the tape must cover aspliced powercable.-----------------------------------------------------------------------------------------------------------Date: Tue, 17 Apr 2007 12:30:31 -0400 (EDT)From: "Paul H. Anderson" <[email protected]>Subject: Re: [R-390] Interesting R390A for auction
My guess? A Collins tag with a 1 fuse chassis _may_ mean a relativelyclean original Collins unit... Who knows what pictures the seller sentbuyers in email. Otherwise, no clue...------------------------------------------------------------------------------------------------------------Date: 17 Apr 2007 17:01:53 -0000From: "[email protected]" <[email protected]>Subject: Re: [R-390] Interesting R390A for auction
Interesting. I didn't know the 70-H1 nd 70-H12 PTOs were mechanicallyand electrically compatible. It appears a fellow could make the an adapterfor the power plug and a suitable cable for the output and not have to hackthe R390A to use the 70-H1 but I suppose one uses what one has availableat the time.---------------------------------------------------------------------------------------------------------Date: Fri, 20 Apr 2007 22:22:32 -0500From: W Gladhart III <[email protected]>Subject: [R-390] 390-A VFO Rebuilders?
Hello Group, I've been awarded the care of a Collins R-390A. It wasreceived upside down with the VFO removed. The VFO shaft is stuck solid. Ipicked up a beater replacement from Fair mainly for a set of bearings(?)but I don't think I should attempt messing with it. Can anyone recommendsomeone that can repair and align this VFO so I can power the unit up andfind what other surprises it holds in store?------------------------------------------------------------------------------------------------------------Date: Sat, 21 Apr 2007 09:25:53 -0400 (EDT)From: "Paul H. Anderson" <[email protected]>Subject: Re: [R-390] 390-A VFO Rebuilders?

I suggest this strategy... Make sure it is the VFO and not the front panelbushings or other parts of the RF deck. Do this by removing the VFO fromthe radio. The tuning shaft should turn freely with light fingertip pressure(do not force). You have an example from Fair to help you see what mightbe normal. If it is stuck then, you are most likely doing triage on it - itlikely is corroded inside, badly bent, or otherwise generally unrepairable,IMHO. You can check for this by taking the cover off, which is fairly safe todo - in my opinion you're just looking to see if there is something grosslywrong that can be readily fixed. So, pull stuff off, save the parts, and see ifyou can locate the problem - bent shaft, corroded bushings, broken parts.
Another perfectly reasonable approach, if the VFO itself is stuck, is to set itaside as a spare (or mid-winter repair project), buy another one that can berestored or used, and go with that one.
I lean towards replacement rather than repair because R-390A VFO's arerelatively available at not too much money, and repair of this type ofproblem is best done 'because you want to' - not because it makes time ormoney sense to do so. This is all my opinion, and clearly, there are manyreasonable points of view on this.------------------------------------------------------------------------------------------------------------Date: Sat, 21 Apr 2007 09:58:52 -0500From: "Cecil Acuff" <[email protected]>Subject: Re: [R-390] 390-A VFO Rebuilders?
Also make sure it's not just driven hard against one of it's end stops whichcan happen if it is reinstalled out of sync and it reaches it's stop before themechanical drive train reaches the 10 turn stop point. That can make itappear to be locked up... It can also be permanently damaged that way alsoif taken too far. Disassembly and a visual inspection should help to figureout if it's stuck all the way in or all the way out.---------------------------------------------------------------------------------------------------------Date: Sat, 21 Apr 2007 11:06:38 -0500From: W Gladhart III <[email protected]>Subject: [R-390] Re; StuckR-390A VFO
Thanks Cecil and Paul for the responses. For clarification; The VFO iscompletely out, the plates are off (the coupler spring is long gone) andthere is no sign of corrosion (yet.) I backed the cover off the beat up Fairunit and saw the 2 pairs of wires being pulled tight and quit. I suppose Ijust mark them and unsolder to continue removal? The main reason Ihoped to save my original is it's visually clean like it was built last yearand it is a Collins ( I've drank the koolaid!) I have tried twisting the shaftwith a small pair of pliers, knowing I shouldn't need too much force to turnit. I guess I'll dive into the dissassembly but if you fellas are right, I guessI'm in the market for a good, checked spare. Any sources? The one I got

from Fair is by far the worst piece of junkbox filler they've ever sold me butthey did say it was "dented with cut wires..." Thanks again, Wes-------------------------------------------------------------------------------------------------------Date: Sat, 21 Apr 2007 20:14:39 -0400 (EDT)From: "Paul H. Anderson" <[email protected]>Subject: Re: [R-390] Re; StuckR-390A VFO
When pulling the cover back, the two wires are VFO heater wires - they cansafely be unsoldered, then the whole mess removed. Some people removethe whole mess and toss it, because the VFO doesn't usually benefit fromthe heater being on. There is a benefit, it is just a small one for most users(the radio was designed to operate in artic and desert regions equally welland remain stable across them). Plus, NOS looking or not, no one is goingto see inside the cover if you put it back on when fixed! I know what youmean about wanting to save the unit. You might get lucky and track itdown - heck you've really got nothing to lose!----------------------------------------------------------------------------------------------------------Date: Sun, 10 Jun 2007 20:57:33 -0500From: "Barry" <[email protected]>Subject: [R-390] R390A PTO?
That sure looks like an R390A PTO to me. Wrong?------------------------------------------------------------------------------------------------------------Date: Sun, 10 Jun 2007 20:33:04 -0600From: DW Holtman <[email protected]>Subject: Re: [R-390] R390A PTO?
I can't read the Type from the label, but it looks like a BNC connector fromanR-390 to me.------------------------------------------------------------------------------------------------------------Date: Sun, 10 Jun 2007 22:39:30 -0400From: rbethman <[email protected]>Subject: Re: [R-390] R390A PTO?
Only thing need to do is change the BNC to an MBNC. Same circuitry onfront INCLUDING naming on coil assembly T-702. It IS a Cosmos.------------------------------------------------------------------------------------------------------------Date: Sun, 10 Jun 2007 22:42:08 -0400From: rbethman <[email protected]>Subject: Re: [R-390] R390A PTO?
BTW, it has ALL parts of the Oldham coupling in place.THAT alone could be worth the price!---------------------------------------------------------------------------------------------------------Date: Sun, 10 Jun 2007 23:13:01 -0400

From: "Bob Young" <[email protected]>Subject: RE: [R-390] R390A PTO?
I have a 390 with a Cosmos PTO in it, looks identical to that one, I was toldit was maybe a depot mod later in it's life, he's also got a lot of other 390stuff for sale including a front panel.--------------------------------------------------------------------------------------------------------Date: Sun, 10 Jun 2007 22:07:05 -0600From: DW Holtman <[email protected]>Subject: Re: [R-390] R390A PTO?
To put it on a R-390A, the blue Power Plug would have to be changed also,they have a different pin arrangement.--------------------------------------------------------------------------------------------------------Date: Mon, 11 Jun 2007 07:31:09 -0400From: "David C. Hallam" <[email protected]>Subject: RE: [R-390] R390A PTO?
It is a R-390 PTO. It can be used in a R-390A but the RF connector has tobe changed as well as the power connector. The R-390 has a regulated B+supply so the plate and screen were fed from the same point. The R-390Aonly regulates the screen supply and so uses different B+ supplies for theplate and screen.--------------------------------------------------------------------------------------------------Date: Wed, 13 Jun 2007 09:25:43 -0400From: "Tim Shoppa" <[email protected]>Subject: Re: [R-390] PTO
The guy is clearly spit-and-polish and not a guy to technically recalibrate aPTO or even distinguish one from another. Having the endpoint out on arather "original" PTO is to be expected (although 40kc is more than I'veever seen - perhaps a misguided attempt at remedying?) This is just thedirection that the parts drift over time, and the reason that so many of ushave disassembled our PTO's to remove a turn or two and bring it back intoline.-------------------------------------------------------------------------------------------------------Date: Sat, 21 Jul 2007 06:26:24 -0400From: "Tim Shoppa" <[email protected]>Subject: [R-390] PTO: Why does endpoint shift over time?
Do we know why PTO endpoints shift so consistently in the same directionover time? (To the point where every PTO I've found has needed a turn ortwo removed from that little slug-tuned coil to get the endpoint right.) Itmust be either the fixed capacitors drifting in one direction, or thepermeability of the inductors drifting over time. I do know that caps aren'ttruly constant in value. And that there is, for example, some silver

migration in mica capacitors etc. but for mica capacitors, this migration isknown mainly by me for crackly audio, not a slow term drift in value. Idon't know what would make an inductor's slug drift so consistently intime. I know some are temperature sensitive, and some types of slugs go"bad" if over a certain temperature, but that's not what is happening here.How come, after 30-40-50 years, haven't things stabilized? I know for a lotof components there is some drift after manufacture and bake-out duringuse, but this period seems to be measured in days and weeks, not bigchunks of a century!-------------------------------------------------------------------------------------------------------Date: Sat, 21 Jul 2007 08:32:18 -0400From: "Jay Rusgrove" <[email protected]>Subject: Re: [R-390] PTO: Why does endpoint shift over time?
I went the route of removing one of the 10 mmF flat silver mica capacitorsto restore end point calibration(btw, this method appears to work well).The capacitor I removed measures 10.2 pF on the General Radio 516Cbridge.----------------------------------------------------------------------------------------------------------Date: Sat, 21 Jul 2007 08:39:16 -0400From: Bob Camp <[email protected]>Subject: Re: [R-390] PTO: Why does endpoint shift over time?
The PTO's in the R390's shift due to aging of the tuning coil. There was a*lot* of work done by Collins after the 390 was designed to eliminate thisproblem. One of my ex-bosses was part of that particular effort. When Iasked him why they didn't incorporate the "improved" coil in the laterradios the answer was pretty simple - "the contract didn't call for it". Thetwo main components of the drift are the aging of the particular materialused in the tuning slug and shrink of the coil form that the coil was woundon. Both essentially just keep moving forever and ever ....------------------------------------------------------------------------------------------------------Date: Mon, 23 Jul 2007 09:26:38 -0400From: "Tim Shoppa" <[email protected]>Subject: Re: [R-390] PTO: Why does endpoint shift over time?
If I knew some metallurgy I might be able to make some half-assedexplanation for why it should drift and keep on drifting over fifty years(and presumably, a hundred, and two hundred, and...). As it is, I could onlymake fully-assed explanations! Oxidation? Cumulative backgroundradiation causing crystal defects? I know, it must be that kryptonite in the0A2 that's doing it! (Sorry, that last one was more than fully assed, butreally the labels on 0A2's do talk about some small number of microcuriesof Krypton!) Shrink of the coil form - I guess this would fall under polymerscience. In my delving into the innards of PTO's the form seemed to bephenolic/bakelite. I do know that lots of plastics will for example swell in

the presence of humidity but I do not know of any examples where theswell continues on for half a century. Seeing as how we have to take turnsoff the endpoint adjustment inductor, I would guess that the direction istowards larger inductance which would mean larger diameter which isvaguely consistent with "swell", but you describe it as a "shrink" Bob, somaybe I don't understand everything!-------------------------------------------------------------------------------------------------------Date: Mon, 23 Jul 2007 12:04:26 -0700From: "Dan Merz" <[email protected]>Subject: RE: [R-390] PTO: Why does endpoint shift over time?
Hi, dimensional change of the order of 1/2% over 50 years doesn't surpriseme for a composite material like a reinforced phenolic, which is theamount of dimensional change to account for 10 khz change. That's on theorder of 1/2 mil for a 1 inch diam and proportionately less for a smallercoil. But I'm wondering what evidence pins the change on the coil form andnot thepermeability of the core material that moves in the coil? I suspect thatsuch drift in the other cores of the radio would mostly go undetected or beof little concern but the pto drift has been the subject of a lot of scrutinybecause it relates directly to tuning accuracy. Maybe we should begrinding a little off the core instead of pruning the coil. I pruned the coil inmine. The phenolic is probably paper or linen reinforced so this may bethe avenue to swelling over time. Dan.-----------------------------------------------------------------------------------------------------Date: Mon, 23 Jul 2007 16:17:13 EDTFrom: [email protected]: Re: [R-390] PTO: Why does endpoint shift over time?
I "fixed" a couple of R-388 PTOs by removing one or two turns from the endpoint coils back in the 1980s. Since then the PTOs have remained dead-on,exactly ten-turns for a 1MHz change in frequency. So assuming the radioswere built in the 1950s, in my cases the drift in the PTO end point seemedto stop after about 30 years from manufacture date.--------------------------------------------------------------------------------------------------------Date: Mon, 23 Jul 2007 19:37:29 -0400From: Bob Camp <[email protected]>Subject: Re: [R-390] PTO: Why does endpoint shift over time?
There is a very small gap between the turns in the coil and the core thatmoves in the coil. That magnifies the impact of the dimensional change.The material in the tuning slug oxidizes over time. For some interestingreason that changes its magnetic properties.---------------------------------------------------------------------------------------------------------Date: Wed, 25 Jul 2007 11:37:37 -0400From: "Tim Shoppa" <[email protected]>

Subject: Re: [R-390] Cosmos PTO Schematic?
> Anyone got a Cosmos schematic?
I've opened up two Cosmos's and as far as the 6BA6 and the resistors andcapacitors on its little subchassis go, it's the same as in the Y2K manual.There probably are some differences in corrector stack inductors and fixedcapacitors etc. inside the can between the Cosmos and the other cans, but Idon't remember these being actually specified to that extent.--------------------------------------------------------------------------------------------------------Date: Wed, 25 Jul 2007 12:23:21 -0700From: "David Wise" <[email protected]>Subject: RE: [R-390] Cosmos PTO Schematic?
Right, the Cosmos is a mechanical redesign, not an electrical one.------------------------------------------------------------------------------------------------------Date: Wed, 25 Jul 2007 15:46:53 -0400From: Barry <[email protected]>Subject: RE: [R-390] Cosmos PTO Schematic?
Could it be? http://en.wikipedia.org/wiki/Travelin'_Band Nah...-----------------------------------------------------------------------------------------------------Date: Mon, 30 Jul 2007 10:08:32 -0400From: Charles A Taylor <[email protected]>Subject: [R-390] decals and stencils? HELP!
I have here,
1. One PTO assembly with a defaced rework facility decal attached to it inplace of the original COSMOS decal (or whomever). The decal says:
SHOP 67 PART /O R-390A 4G 5870-327-4393 REPAIRED [blank] HPNS
Not sure of the FSN. May require some research.
Would anyone on this reflector be able to replicate this decal at areasonable price?-------------------------------------------------------------------------------------------------------------Date: Sun, 28 Oct 2007 09:11:28 -0700 (PDT)From: Joe Foley <[email protected]>Subject: Re: [R-390] R-390/URR

You need 1/32" between the parts of the Oldham coupler. BUT, if the shaftdoesn't run true or the mounting doesn't allow the shafts to align properlythen you will need more clearance. You might want to check that there issome clearance between the parts of the coupler as it turns through 360degrees, it may be binding somewhere.----------------------------------------------------------------------------------------------------Date: Sun, 28 Oct 2007 12:14:55 EDTFrom: [email protected]: Re: [R-390] Oldham Coupler Maintenance
Bob wrote about having to readjust an Oldham coupler after a maintenanceprocedure to the VFO. The VFO should run with the KC shaft with ease. TheKC knob in a good clean gear train should almost free wheel whenspinning the knob and the cams are dropping. That was long ago and yourmileage may vary in an older receiver. This implies it takes very littletorque to turn a VFO shaft. If you have an original strength Oldhamcoupler the spring should not stretch when the KC shaft is moved. Theresistance of motion in the VFO should be less torque than the torqueneeded to stretch the coupler spring. If you have a rubber band on thecoupler, or a very weak spring (ball point pen spring tailored to fit) thenthe springy thing you have employed may stretch. An over stiff spring maynot help as it may place side stress on the VFO shaft as they go aroundtheir respective corners.
You may not want to run the coupler end faces to tight. The angle of thetwo shaft alignments forms a high pinch point some where around theshaft axis. The coupler faces may not be true to the axis. You need to openup the faces. Some where between the coupler spacer falls out and thecoupler binds at some point. Run the shafts around a few turns and findthat close point between the two coupler end faces. Then adjust the endfaces up close at that pinch point.
With the spring off, anywhere in the rotation of the shafts, the couplerspacer should be a bit free between the two coupler end faces. With thespring on the coupler the resistance to rotation of the VFO shaft should beless than the force needed to stretch the spring. If not your VFO need itsshaft cleaned and lubricated. Not a hard thing to do. Most of that effort isto have a good oil on hand for the purpose. Mobil Synthetic lube is OK Ihear. Good sewing machine oil was used in the 70's Watch oil or whale oilis good.
To oil the shaft, just set the VFO up on end and oil the shaft. Run it by handboth way for a bit to see if that solves the problem. Most times in youngerreceivers it was not necessary to open the VFO and clean out the crud. Inthese now aged receivers, who knows what it will take to get a shaft andbearing cleaned up. Worry not it can be done. The job is just time
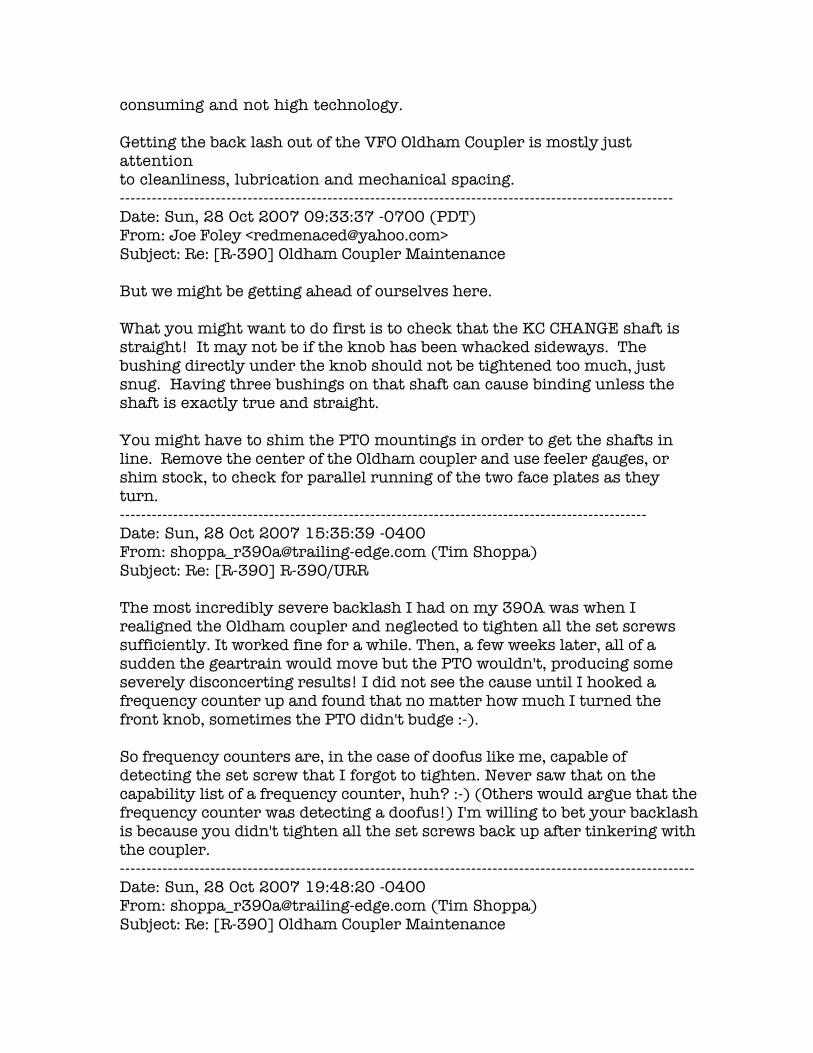
consuming and not high technology.
Getting the back lash out of the VFO Oldham Coupler is mostly justattentionto cleanliness, lubrication and mechanical spacing.--------------------------------------------------------------------------------------------------------Date: Sun, 28 Oct 2007 09:33:37 -0700 (PDT)From: Joe Foley <[email protected]>Subject: Re: [R-390] Oldham Coupler Maintenance
But we might be getting ahead of ourselves here.
What you might want to do first is to check that the KC CHANGE shaft isstraight! It may not be if the knob has been whacked sideways. Thebushing directly under the knob should not be tightened too much, justsnug. Having three bushings on that shaft can cause binding unless theshaft is exactly true and straight.
You might have to shim the PTO mountings in order to get the shafts inline. Remove the center of the Oldham coupler and use feeler gauges, orshim stock, to check for parallel running of the two face plates as theyturn.---------------------------------------------------------------------------------------------------Date: Sun, 28 Oct 2007 15:35:39 -0400From: [email protected] (Tim Shoppa)Subject: Re: [R-390] R-390/URR
The most incredibly severe backlash I had on my 390A was when Irealigned the Oldham coupler and neglected to tighten all the set screwssufficiently. It worked fine for a while. Then, a few weeks later, all of asudden the geartrain would move but the PTO wouldn't, producing someseverely disconcerting results! I did not see the cause until I hooked afrequency counter up and found that no matter how much I turned thefront knob, sometimes the PTO didn't budge :-).
So frequency counters are, in the case of doofus like me, capable ofdetecting the set screw that I forgot to tighten. Never saw that on thecapability list of a frequency counter, huh? :-) (Others would argue that thefrequency counter was detecting a doofus!) I'm willing to bet your backlashis because you didn't tighten all the set screws back up after tinkering withthe coupler.------------------------------------------------------------------------------------------------------------Date: Sun, 28 Oct 2007 19:48:20 -0400From: [email protected] (Tim Shoppa)Subject: Re: [R-390] Oldham Coupler Maintenance

The worst-lubed PTO I ever saw was a Cosmos that had been rebuilt(according to a sticker on it) by Raytheon in the mid-70's. It was severelygunked up with overlube. IMHO based on that experience, not getting a"Regular clean and lube" that's done by gunking everything up with toomuch lube is the worst thing that can be done to a PTO!------------------------------------------------------------------------------------------------Date: Sun, 28 Oct 2007 19:58:54 -0400From: Bob Camp <[email protected]>Subject: Re: [R-390] Oldham Coupler Maintenance
It's the clean rather than the lube that's the important part in my mind.-------------------------------------------------------------------------------------------------Date: Mon, 29 Oct 2007 11:04:38 EDTFrom: [email protected]: Re: [R-390] Oldham Coupler Maintenance
If you stretch the spring on the Oldham coupler while spinning the KCknob and thus change the relation of the rotation angle between the KCknob and cam shafts to the VFO position shaft then you have backlash. Toomuch friction causes the lash problem and maintenance fixes the lashproblem. Sorry to make this look like a binding problem. Sorry, the fix to alash problem is cleaning and lubrication. Read Tim's tales of the stuff hehas encountered. Backlash in gear trains is also a friction problem. It thegears have low friction then they are just sloppy and have play but notsuffering from back lash.--------------------------------------------------------------------------------------------------Date: Mon, 29 Oct 2007 10:11:45 -0500From: rbethman <[email protected]>Subject: Re: [R-390] Oldham Coupler Maintenance
The problem INDEED is binding! I was just trying tounderstand/IDENTIFY "which" it was!His PTO "MAY" be locked up, for lack of a better term and understanding.----------------------------------------------------------------------------------------------Date: Mon, 29 Oct 2007 10:18:49 -0500From: rbethman <[email protected]>Subject: Re: [R-390] Oldham Coupler Maintenance
Roger - NO APOLOGY NECESSARY!!! You were RIGHT! I took HIS "words" -tried to understand WHAT he meant. I've worked with gear systems for"ages".-------------------------------------------------------------------------------------------Date: Mon, 29 Oct 2007 12:09:51 EDTFrom: [email protected]: Re: [R-390] Oldham Coupler Maintenance

A much different problem than I was writing about under this subject. Theother Bob does have a locked up receiver. That could be anything from thedial lock engaged to lots of problems.---------------------------------------------------------------------------------------------Date: Mon, 29 Oct 2007 12:12:56 -0500From: "Bob Young" <[email protected]>Subject: [R-390] Re: R-390/URR
I looked at it today and the PTO is turning fine and there is no play there,the problem is in the big front clutch gear (counter drive gear?) rightbehind the front panel. There is a little space between the clutch and themating surface which is not in my other one. This allows the PTO to turn(had it opposite, sorry) but the whole rest of the mechanism doesn't turn,you can feel it in the kilocycle knob, there is a little play in it which is whyI called it backlash. I have loosened the clamp and moved the large gear tosee if the gears were worn but this had no effect. I would say there is about1Kc of play there in which the PTO turns but the readout doesn't, I judgesthis by the BFO. The PTO turns freely and there is no play there at all. TheOldham Coupler was fine. I founbd out something else today, there is nospring on the PTO oldham coupler on my other one, does anyone know of asource for these? Also I will measure those voltages on E210 today as Iplan to do a rough line up of this one today,---------------------------------------------------------------------------------------------Date: Mon, 29 Oct 2007 12:21:18 -0500From: rbethman <[email protected]>Subject: Re: [R-390] Re: R-390/URR
Do you by chance have the Dial Lock engaged? As if you were going toadjust the PTO to agree with the Veeder Root readout with the calibrator?---------------------------------------------------------------------------------------------Date: Mon, 29 Oct 2007 17:55:32 -0700 (PDT)From: Joe Foley <[email protected]>Subject: Re: [R-390] Re: R-390/URR
That would be the ZERO ADJUST clutch, the knob should be turned all theway counter-clockwise, but be careful, it may not be working correctly ifnot it may come apart. Take a look at your working receiver and see how itis supposed to work. Then verify that it does or doesn't. If not, prepare toremove the front panel. You'll want to do some research on how to repairthe clutch.-------------------------------------------------------------------------------------------Date: Mon, 29 Oct 2007 22:12:18 -0500From: "Bob Young" <[email protected]>Subject: [R-390] RE: R-390/URR
I have found the problem as far as the backlash (play actually) in my 390

but it is very hard to explain. I took the counter drive gear apart which ispart of the Kilocycle change control locking disc which is shown in figure#40 in TM 11-5820-357-35 and is right behind the panel. One side beingthe split gear and the other being the larger disc which is facing forwards.The problem is there is a little round piece of metal riveted to the outergear of the split gear, this goes through the other gear and goes into themiddle of two pieces of metal which are held together by a spring on theiropposite side and are on the shaft. This little round piece of metal is loosewhere it is riveted to the first split gear and is the cause of the play in thecontrol, it is worn and I doubt it can be fixed, it is supposed to be firm, thespring is supposed to absorb the play I think. Does anyone happen to haveone of these for sale?------------------------------------------------------------------------------------------------Date: Tue, 30 Oct 2007 11:17:59 -0500From: "Bob Young" <[email protected]>Subject: [R-390] RE:R-390/URR
I'm sorry if I mislead everyone with my hurried description, it is not aclutch at all, (I found this out when I took it apart). The Oldham coupler isfine, the PTO turns as it should (no play), the dial lock is not engaged andthe zero adjust clutch is fine. The problem is in the kilocycle change controllocking disc and split gears which is on the same shaft as the PTO but rightbehind the front panel. This disc turns the split gears which in turn drivethe veeder router. The backlash as I called it is caused by a loose rivet thatgoes from the split gear to the disc, the disc turns the split gears through ariveted little shaft, this little shaft is riveted to the split gear and is loosewhiuch is causing the play. It is shown on page 72, #40 of the Field andService Maintainance Manual for 390's, can also be seen on page 61 rightin the middle of figure #37, but I have not been able to find an explodedview of it anywhere in the book. You can feel it when turning the kilocyclechange knob back and forth, the PTO turns but the veeder router doesn't(just a little bit of back and forth play). I took the panel off and pulled thepart which consists of an approx 2 1/2" split gear and a disc, it is veryhard to explain without the correct terms, but I need a new kilocyclechange control locking disc with split gears (which is probablyunobtanium.)-----------------------------------------------------------------------------------------------Date: Tue, 30 Oct 2007 12:44:29 -0400From: Roy Morgan <[email protected]>Subject: Re: [R-390] RE:R-390/URR
It's possible that all you need is a light tap with a hammer to re-seat thatlittle pin.-------------------------------------------------------------------------------------------------Date: Tue, 30 Oct 2007 11:11:30 -0600From: mikea <[email protected]>
Subject: Re: [R-390] RE:R-390/URR
If that doesn't work, it might be possible to make a new pin out of suitablestock, drill-and-tap it for a small-enough screw, and fasten it down withscrew, lockwasher, Loc-Tite, suspenders, and belt. It all sounds like fun forsomeone with a Unimat or a jeweler's lathe.---------------------------------------------------------------------------------------------------Date: Sat, 03 Nov 2007 01:17:12 -0400From: Jon Schlegel <[email protected]>Subject: [R-390] PTO Problems
The PTO shaft seemed way too stiff so I opened it up and found thisamazing colony of crystalline entities growing all over inside. It's a realmess. It looks like it had a LOT of moisture in it at one time but the rest ofthe receiver doesn't really show signs of water problems. Nevertheless thePTO looks original to the receiver (both Motorola). Should some kind ofrepair attempt be made or should go out with next Thursday's trash? Ihave an interesting photo but I suppose that would be inappropriate forthe list.--------------------------------------------------------------------------------------------------------Date: Sat, 03 Nov 2007 01:56:23 -0400From: Jon Schlegel <[email protected]>Subject: Re: [R-390] PTO Problems
Well it's a consensus then. When I opened it up I finally understood thecorrector stack that I hear people talk about. Guess it's time warm up thecounter and generate some more gray hair.--------------------------------------------------------------------------------------------------Date: Sat, 3 Nov 2007 04:55:51 -0700From: "Craig C. Heaton" <[email protected]>Subject: RE: [R-390] PTO Problems
I had the same issue with a PTO in a Motorola R-390A. After applyingliberalamounts of elbow grease, life was good. The desiccant was scatteredthroughout the PTO, stuck to the shaft that moves the widget along thecorrector stack, ugly but fixable. First, I wouldn't do anything to move anyof the plates of the corrector stack! Clean the inside of the PTO as best aspossible. Check the condition of the little spring used to keep pressurebetween the widget and roller which moves along the corrector stack. Alittle De-Oxit here didn't hurt my PTO. A drop or two of synthetic 90weight on the threads of the shaft didn't seem to hurt either. Reassemblethe beast and adjust the end-point per Y2K manual. Keep your fingerscrossed, the linear points are close and the plates of the corrector stack arewhere they should be. If the plates need adjustment, it will be a long night.-------------------------------------------------------------------------------------------------

Date: Sat, 03 Nov 2007 08:31:57 -0400From: Jon Schlegel <[email protected]>Subject: RE: [R-390] PTO Problems
The desiccant. So that's what all that stuff is. There is no evidence of anytype of bag or container they use to contain that stuff and only now have Iput it all together as to what happened. Is there a specific procedure forsetting the compensation stack if it comes to that? Also how easily shouldthe shaft turn? With the Oldham coupler plate removed, the shaft isturnable with my fingers but with difficulty. This is the original reason Isuspected a problem in the PTO. What about desiccant? Should I insert anew pack and if so, where?---------------------------------------------------------------------------------------------------Date: Sat, 3 Nov 2007 09:18:07 -0400From: Bob Camp <[email protected]>Subject: Re: [R-390] PTO Problems
If you throw it away you will have a major hit in your Karma account. ThePTO is the crown jewel of the Collins design. Of course they also were themost replaced sub-assembly in the entire radio. Back when I worked forMotorola, our engineering assemblers were ex-R390 people. They had notmade R-390s for nearly 20 years at that time. The *one* thing theyremembered vividly was the PTO assembly process. I think I listened to anhour of "information" when Ihappened to mention R-390's to one of them. Never knew gray haired littleold ladies knew all those four letter words ....-------------------------------------------------------------------------------------------Date: Sat, 3 Nov 2007 07:02:49 -0700From: "Craig C. Heaton" <[email protected]>Subject: RE: [R-390] PTO Problems
Yes, I've heard the stories about a bag, etc., used to contain the desiccant.In my PTO there seemed to be a rubber seal towards the end of the PTOthat holds the bearing for the shaft. The seal broke and let the desiccantmove throughout the PTO. When I got to the third layer of disassemblingthe PTO; seal, desiccant, broken spring and all that good stuff dropped tothe work bench. After getting the desiccant out of the PTO and off of thesquare thread of the shaft, just a smidgen of 90W synthetic oil should dothe trick. The shaft will turn like hot butter, even after completereassembly of the receiver. (the bushings in which the shaft(s) pass mustbe in alignment) I didn't have to mess with the corrector stack! A goodcleaning, a little De-Oxit, seems to get everything back to square-one. As Icheck frequency at every 100KC, all is well within spec, after adjusting theend-point.--------------------------------------------------------------------------------------------------Date: Sat, 3 Nov 2007 09:31:20 -0500

From: "Cecil Acuff" <[email protected]>Subject: Re: [R-390] PTO Problems
I've started making it a habit of removing the desiccant bags from thePTO'sI go into to remove this possibility. The stuff has long since saturatedanyway. It could be regenerated I guess but no real point. Mine live in anair conditioned shop.....as opposed to the jungles of Southeast Asia.-----------------------------------------------------------------------------------------------Date: Sat, 3 Nov 2007 07:32:44 -0700From: "Craig C. Heaton" <[email protected]>Subject: RE: [R-390] PTO Problems
Only if the receiver will be installed in a submarine with leaks.--------------------------------------------------------------------------------------------------Date: Sat, 3 Nov 2007 13:08:02 EDTFrom: [email protected]: Re: [R-390] PTO Problems
You touched on adjusting the corrector stack in the VFO.
>From old war stories YMMV.
Once you get the end points adjusted the VFO is likely to be linear. As youlook down the adjusting stack it likely has a nice S or C curve. The curve isnot necessarily symmetrical from end to end. But the curve should benicely done with not sudden jumps. The stack is likely "sealed" with somevarnish. If your end points and if the linearity is not off by more than 100hertz at any 100KHz cal tone within a MHz band then just live with it.Never having had a good jig to help align the stack doing it has alwaysbeen a venture of trial and error.
Get the end point spread set first. Remember what your stack curve lookslike. The disassembled. cleaned, reassembled, tuned tightened and resealedstack will look very much the same. Take the stack all apart and clean outall the old varnish used to help keep the stack aligned after it was adjustedduring assembly. Run ample amounts of Vaseline on all the plates in thestack to stick them together.
Reassemble the stack and just snug up the bolts. Squeeze out the excessVaseline and wipe up all that is sticking out and all that is any whereexcept between the plates.
Using you sticks, pliers, levers and other improvised tools, get the stackstraight and about center from end to end.

If you get the bolts to tight you cannot get easy adjustments.If you get the bolts to loose the stack will move out of alignment inspite ofthe Vaseline.
Now it is a process of test, and adjust until yo are happy.Leave the Oldham coupler on the shaft as a knob and indicator.Mark the coupler to the face plate.
At a 1/2 turn you can get an exact alignment at each 50Khz.You then adjust the stack plates between the 50Khz points for a "smooth"curve.
When you are happy with the whole stack you tighten up the stack boltsand test the whole curve again.
The shaft position may change at the end points.The total spread should stay the same from end.Using the stack to trim the end points is not the way to go.
The stack is to provide a very linear change of the VFO from end point toend point. Once you get the stack reset and tight, clean out any Vaseline.The stack can now be resealed along the outside edge with varnish "glue".In (68- 75) We talked about doing the stack with slow drying varnish orpaint between the stack plates. The velocity of the wet varnish would holdthe plates, not dry before the adjustment was complete, form a seal afteradjustment was complete to hold the alignment. We never did it this way.We only did this stuff because we had the time to mess with it. Back thenwe just did the paper work and got a new VFO out of the box we receivedfrom the supply room.--------------------------------------------------------------------------------------------------Date: Sat, 03 Nov 2007 21:46:58 -0400From: Jon Schlegel <[email protected]>Subject: Re: [R-390] PTO Problems
I've discovered another possible problem with this (Motorola) PTOregarding the corrector stack follower. There appear to be two rollers thatfollow the compensator stack (both are now frozen). The one normallooking roller has what appears to be a fiber bushing, grayish tan in color.A domed cap appears to retain the bushing on its shaft. I can see verticalstriations around the circumference of the fiber bushing which would tendto indicate that this bushing did at one time roll as it followed thecorrector stack.
The other roller has neither a domed retaining cap nor a fiber bushing. Allthat appears to be present is a stainless roller. I found no evidence of theseseemingly missing parts when I opened the PTO. When the follower arm is

at a position on the corrector stack where it's ramping up or down, theredoes not seem to be any radial play of the arm on the lead screw. When thearm is dialed to a spot where the corrector stack is flat meaning no changein cam height, there is about 10 or 15 thousandths radial play of the arm.Is this play normal? Are there parts missing? I can only imagine that theplay I'm seeing could cause some nasty hysteresis in the tuning of thereceiver.----------------------------------------------------------------------------------------------Date: Sat, 3 Nov 2007 19:00:27 -0700 (PDT)From: GARY WEBB <[email protected]>Subject: RE: [R-390] PTO Problems
Or Guam, or the Canal Zone where I used R390A's for 3 1/2 years.Actually since those receivers were on 24 x 7 x 365 they didn't really needa dessicant at all.---------------------------------------------------------------------------------------------------Date: Sat, 3 Nov 2007 19:33:54 -0700From: "Craig C. Heaton" <[email protected]>Subject: RE: [R-390] PTO Problems
Going from memory here, I should of taken digital pictures, shame on me.Anyway, there should be a small spring pulling those two arms togetherpinching the corrector stack, (where the rollers, wipers, etc., are attached).I think mine had one rubber roller, it did have a shaft and rolled across thecorrector stack. The other arm might have had something more like awiper that slid across the corrector stack. In any event, search for twosmall holes on the arms where the spring was attached. The spring mightof rusted into tiny flakes long ago! A little penetrating oil, WD-40 usedsparingly where the two arms pivot should free things up where the rollerand wiper can function. A trip to the hardware store might be in yourfuture searching for a tiny extension spring.---------------------------------------------------------------------------------------------Date: Sat, 03 Nov 2007 22:56:40 -0400From: Jon Schlegel <[email protected]>Subject: RE: [R-390] PTO Problems
I'd say your memory is pretty good because it's just as you describe. Theentire arm thing is so corroded that I missed the fact that there is thatsmaller secondary arm that pivots on the main arm. I can just make outthe spring holes. As you suggested, the spring has long turned into someother iron compound and is no longer with us. Guess I'll have to playGoldilocks and find a spring that's just right. Thanks very much, Craig.That solves that problem.---------------------------------------------------------------------------------------------------------Date: Sat, 3 Nov 2007 20:10:36 -0700From: "Craig C. Heaton" <[email protected]>

Subject: RE: [R-390] PTO Problems
Don't ask me how I know, but a spring from a ball point pen will work.Granted it is a compression spring, with a little work; cut to length and ahook bent into each end you are in business. Later, after I got my PTO backtogether and the endpoints set I found an extension spring at a localhardware store. It is still in a little box just in case I ever get bored andwant to open the PTO again. I'd rather poke needles in my eye! But I'mready for the next go around.------------------------------------------------------------------------------------------------Date: Sun, 04 Nov 2007 16:07:19 -0500From: Jon Schlegel <[email protected]>Subject: RE: [R-390] PTO Problems
This PTO may be in pretty poor shape. After cleaning, the fiber roller'sstaked in shaft broke off with only a reasonably gentle wiggle to see ifthere was any play to allow things to get going again. I should be able tofix it if I can find suitable non-magnetic odds and ends to use to make anew shaft. There is what appears to be a stainless "roller" that follows theopposite side of the corrector stack. Is this "roller" supposed to spin or notas it follows the stack? Also, a few weeks ago I recall some list membersworking out some backlash problems. I can now see that I can seenumerous spots where backlash could creep in that might need adjustment.--------------------------------------------------------------------------------------------------Date: Sun, 4 Nov 2007 12:36:17 -0800From: "Craig C. Heaton" <[email protected]>Subject: RE: [R-390] PTO Problems
If things are rusted that much, I'd look for another PTO. Other parts mayhave failed inside or are about to. Booted my other PC to check some notes,didn't find any information as to the roller/wiper on the two arms. In all Ihad quite a bit of labor invested in fixing my PTO, I'd hate to put too muchtime into one rusted like yours, only to have it fail in a short time. Someoneon the list will have a repairable PTO to offer.-------------------------------------------------------------------------------------------------------------Date: Sun, 04 Nov 2007 18:00:50 -0500From: Jon Schlegel <[email protected]>Subject: RE: [R-390] PTO Problems
I still think its reliably repairable but with some work. The broken rollershaft is the only real bugaboo. The other effort is getting it cleaned well.There was a lot of corrosion and crystalline silica gel all over inside. If Ican get the roller repaired I should be home free (famous last words).----------------------------------------------------------------------------------------------Date: Mon, 05 Nov 2007 09:44:17 -0500From: Roy Morgan <[email protected]>

Subject: Re: [R-390] PTO Problems
> When the arm is dialed to a spot where the corrector stack is flat> meaning no change in cam height, there is about 10 or 15 thousandths> radial play of the arm.Is this play normal? Are there parts missing?
No, Yes.
There should be a spring that maintains pressure between the steel rollerand the corrector stack (Or between the steel roller and whatever pressesagainst the OTHER side of the corrector plates.) (I'd have to open one up torefresh my memory, so if this is either incorrect, or partly correct, Iapologize.) The little steel roller SHOULD ROLL FREELY!----------------------------------------------------------------------------------------------Date: Mon, 05 Nov 2007 11:12:50 -0500From: Jon Schlegel <[email protected]>Subject: Re: [R-390] PTO Problems
I'd be interested in a copy of the info on Simple Green. Please. Mail away.Thank you!
The steel roller is also frozen. Also, as I had just emailed Renée, I wascleaning parts I made a new unfortunate discovery. After removing thesurface scale, I found that what looked like a three washers corrodedtogether was actually a caged thrust ball bearing in the form of a coppercage (the center "washer") with little steel balls pressed into a radial set ofholes. I'll presume that the steel balls were at one time free to rotate <G>.Now they're just frozen rust balls. I cooked up a solution for the brokenfiber roller on the swing arm but this one's beyond me. Now I see that thestainless roller is also frozen (Thanks Roy). If I try to coax that intoturning I know it's shaft will break off. Looks like it's time to scavengeanother PTO for parts or repair.--------------------------------------------------------------------------------------------------Date: Mon, 5 Nov 2007 14:21:40 -0800From: "David Wise" <[email protected]>Subject: RE: [R-390] PTO Problems
>The curve is not necessarily symmetrical from end to end..But the curveshould >be nicely done with not sudden jumps.<snip>
If your PTO frequency curve has a bow, you may get away without acorrector stack recal by changing the tank circuit capacitance. Beware -the originals were selected for temperature compensation. For curiosity'ssake, I replaced the little ones with two trimmers with different tempco's,and got to where the curve was pretty much a horizontal line, and thefrequency drift was also low. Don't try this unless you have lots of time on

your hands, and patience too.--------------------------------------------------------------------------------------------------------Date: Mon, 12 Nov 2007 13:49:41 -0500From: Jon Schlegel <[email protected]>Subject: [R-390] PTO Connector
I'm looking for a source for the round, blue Amphenol connector that's partof the PTO assembly. It's the male connector, 9 pins that's mounted to thetriangular bracket attached to the back end of the PTO. An Amphenol partnumber for this connector would also be a help.
I got a scrap PTO from Fair Radio (appears to be a Progresstron) expectingto use it for parts. The condition of the unit inside is picture perfect. I'mnot able to check it's electrical functionality yet but the shaft hasobservable rotational backlash and I suspect that was why it was pulledfrom service.
I'm almost finished rebuilding the original PTO from my 390A but wouldlike to get this Fair Radio PTO running also. For our convenience however,the blue Amphenol connector has been smashed beyond repair, no doubt tomake sure the bad unit didn't get back into service. Anyway, if anyone hasa line on a source of these connectors or their Amphenol part number, Iwould certainly appreciate it.------------------------------------------------------------------------------------------------Date: Mon, 12 Nov 2007 15:22:47 -0600From: "Dave Merrill" <[email protected]>Subject: Re: [R-390] PTO Connector
Amphenol 126-220 Miniature Hexagonal ConnectorThis place claims to stock them : http://www.electronicplus.com/---------------------------------------------------------------------------------------------------Date: Mon, 12 Nov 2007 17:50:15 -0500From: Jon Schlegel <[email protected]>Subject: Re: [R-390] PTO Connector
They don't give them away, do they? Why it's almost 3/4 of what theentire PTO cost. Thanks again.----------------------------------------------------------------------------------------------------Date: Mon, 12 Nov 2007 16:22:06 -0600From: "Dave Merrill" <[email protected]>Subject: Re: [R-390] PTO Connector
If you want just the 9-pin connector without the shell, try 126-012 or 126-219.Newark has them in their catalog in the $8-9 range.Looks like they are sold under the Wire Pro name now.

---------------------------------------------------------------------------------------------------Date: Mon, 12 Nov 2007 14:31:56 -0800From: "James A. (Andy) Moorer" <[email protected]>Subject: Re: [R-390] PTO Connector
If you are ever in San Rafael, CA (Marin County, 35 mins North of SF), youMUST drop in at Electronics Plus. It has been run by two (twin) brothersfor about 40 years. It is the "old" style electronics store, with bin after binof components, kits, tools and books. Yes, they have a good selection ofvacuum tubes, as well as a free DIY tube tester. They have odd-sizebatteries, lamps, switches, and all the rest. They actually have a stock oftwist-lock can electrolytics. (I have no connection with them, except that Ihave spent enough there that I should be a part-owner by now). Yes, theyare expensive, but they have stuff that nobody else has. They are also greatwith kids' science projects - they have a rack of electric motors, gears, andwill actually take the time to explain things (what a concept!).---------------------------------------------------------------------------------------------------Date: Thu, 15 Nov 2007 15:25:54 -0600From: "Bill & Becky Marvin" <[email protected]>Subject: [R-390] A Few R390A Issues
Hello The restoring of my R390A nears completion I have a few issuesthat remain.
#1 The PTO won't stay zeroed. I put the dial on a calibration point then snug the "Dial Zero". Turn the PTO till I get a Zero Beat then totally release the "Dial Zero". If I turn the PTO upward 10-20 KHz upward thentune the PTO downward the zero point has now change 10 KHz. The PTOhas slop in that the when turning the VFO the Dial doesn't move withturning it. About a 1/5 of a turn slop.........is this typical?
#2 What are the wire colors that are attached to the Audio Level Meter?
Left Terminal Red/Wht Right Terminal ???? as viewed front panel.------------------------------------------------------------------------------------------------------Date: Thu, 15 Nov 2007 16:39:43 -0500From: "Jim M." <[email protected]>Subject: RE: [R-390] A Few R390A Issues
#1 There is supposed to be a little spring across the two halves of theOldham coupler (on the PTO shaft). If it is missing, there will be some play.Sometimes it gets lost when others have worked on the radio.----------------------------------------------------------------------------------------------------Date: Thu, 15 Nov 2007 16:57:35 -0500From: "Tim Shoppa" <[email protected]>Subject: RE: [R-390] A Few R390A Issues

One fifth of a turn slop is not at all explainable by the Oldham couplerspring. It must be a loose clamp or gear between the knob and the counter.Or maybe the "Dial Zero" setting isn't totally releasing - a lot of old greasecan cake up around there!-----------------------------------------------------------------------------------------------Date: Thu, 15 Nov 2007 15:26:35 -0700From: "DW Holtman" <[email protected]>Subject: Re: [R-390] A Few R390A Issues
That is a lot of slop. The first thing I would check is the Non-Mar clamps onthe Oldham coupler. There are two of them, one in each of the sides of theoldham coupler. Make sure they are not cracked or loose. Cracked clampsare very common. If your PTO is slipping internally that much, you havesome serious PTO issues. <snip>------------------------------------------------------------------------------------------------------Date: Fri, 16 Nov 2007 10:08:59 -0600From: "Bill & Becky Marvin" <[email protected]>Subject: RE: [R-390] A Few R390A Issues
I think the Dial Zero adjust is the problem. I only have a quarter turn CCWor CW adjustment right now. How do I release the DZ adjust withoutcausing damage?-----------------------------------------------------------------------------------------------Date: Fri, 16 Nov 2007 12:20:28 ESTFrom: [email protected]: Re: [R-390] A Few R390A Issues Zero Adjust
You say you only have a 1/4 turn on the zero adjust shaft.
The knob has been jammed back against the bushing.Remove the knob, move it out on the shaft.The zero adjust should have about three turns or more.The shaft is threaded and the panel bushing is a threaded nut inside.The shaft screws in to apply pressure to the clutch release pins and openthe
clutch.The shaft screws out to release the pressure and engage the clutch.It is just like the clutch pedal on manual transmission vehicles.
The zero adjust should disengage until the disk on the zero adjust shaft isfree of the clutch pins. This saves wear on all the parts, reduces friction,(wrist injury from dialing receivers all day is no joke, Its right there withfinger injury from pounding mills) [mills are typewriters with no lowercase]. {mills are not electric}.

Someone engaged your zero adjust until the knob skirt bound on thebushing.
If you have original knobs, the knob has a tab inside the skirt, On themidsize knobs the tab hits a knob stop. The knob stop is a special washerthat goes between the panel bushing and the front panel. On the smallknobs the tab stop hits a knob stop. There is one under the limiter knob asan example.
So the tab is in every knob. The zero adjust screws in. The tab runs over acorner of the hex bushing. It takes a bit of force. But the corners have beenrounded off because this has happened often in the receivers life time. Sogetting the dial lock jammed is easy. Now the knob and shaft are lockedwith the angle of rotation limited to 60 or 120 degrees. More or lessdepending on clearance. You cannot just crank the knob CCW over thetight spot because the burr from forcing the knob CW forms a nice squarecorner. You get a ratchet effect.
You need to remove the knob and reset it.
The zero adjust shaft really sticks out when the dial lock is fullydisengaged. So folks like to set the knob as close to the front panel as theycan. Thus as the zero adjust is rotated CW to disengage the dial lock, Theclutch just slips when the knob and shaft are screwed in to where the knobskirt smacks the panel bushing. A bit of file on the tab in the knob will letyou get the knob a bit closer to the front panel and reduce how far the knobhangs out when the zero adjust is disengaged.
A good clean set up only needs about one turn of the zero adjust. One turnin with the knob against the clutch pins with enough force to let the clutchslip. One turn out with the knob leaves the knob hanging free of the frontpanel. The knob is looking good, while not looking like the knob is about tofall off the shaft. The zero adjust shaft disk is clear of the zero adjust clutchpins. You can spin the zero adjust out a couple more turns but it just leavesthe shaft and knob sticking out.
Some times a chunk of rubber hose is cut as a washer to fit the zero adjustshaft between the disk and the bushing. Split the hose to slip it over theshaft without doing a whole front panel disassembly to get it installed.This washer then limits how far the zero adjust shaft can be screwed out.Now you want to look either down into or up into the receiver behind thefront panel and check the zero adjust shaft operation.
As you rotate the zero adjust knob on the front panel, the shaft screwsthrough the front panel bushing. The inside end of the shaft has a largefender washer disk. This disk pushes three pins in the zero adjust clutch to
release the clutch.
The test you want to conduct is to ensure that the disk comes free from thepins when the zero adjust knob is used to rotate the zero adjust shaft(CCW) to the dial unlock position.
If this test fails, some adjustment of the zero adjust knob on the shaft maybe in order. Knob skirts will catch on the bushing and you cannot getenough turns on the zero adjust shaft to get a full clutch disengagement.The knob gets jammed against the bushing.
If this test passes then you need to go with Tim's input that the clutch isgummed up and slipping..................Or you have a broken loose clamp.
Turn the receiver up on end, get out the interrogation lights, get mean andgo looking. When you turn the KC knob, The VFO shaft (Oldham coupler)and dial counter should both run in exact no slop relation with the KCknob. There are clamps, gears, and other things that can come loose in themechanical links between the KC knob input and the two observableoutputs. There is also a link to the many cams. The VFO is direct to the KCshaft. There should be no slip between the KC knob and the VFO.
Turn the receiver to CAL, BFO on and find a cal point at 100KHZsomewhere.As you rotate the KC knob the BFO pitch should change. Noslop. No backlash. No binding. If you have a problem here, then you arelooking for missing Oldham coupler spring, binding VFO, loose or brokenclamps.
As you rotate the KC knob the dial counter should move. Gear clearance inthe bevel gears can allow a small play. This can be adjusted to minimum.
If you have about a 90 degree (or less) of slop between the dial and theknob as you change the direction of knob rotation then you have a slippingzero adjust clutch. Mostly this is solved by cleaning the clutch, or adjustingthe zero adjust shaft and knob to get it located properly.
In the last year, we are starting to have reports of broken rivets in theclutch assembly. These can be fixed. Parts are available if you need them.Mostly this problem just needs a good eyeball and understanding of howthe mechanism is supposed to work. You may want to drop the front panelto do some of the cleaning and inspection. The term is drop the front panel,because the panel slips off the antenna shaft and two frequency selectshafts to swing down on the wire harness. You pull the panel forward andit drops. There are a couple harness clamps on the chassis that need to beunbolted to help provide some extra harness slack. The IF shafts are bestseparated at the shaft couplers like you were going to remove the IF deck. I

hope this helps. Roger AI4NI-------------------------------------------------------------------------------------------------------------Date: Fri, 16 Nov 2007 12:41:37 -0500From: <[email protected]>Subject: RE: [R-390] A Few R390A Issues
Try removing the DZ knob and then loosening the bolt that holds the DZshaft to the front panel. Loosen it enough that the DZ mechanism can bemoved and twisted by hand. Look at how the DZ clamp interacts with thedisk behind the front panel. A previous owner may have reinstalled the DZincorrectly in the process of removing and replacing the front panel.-----------------------------------------------------------------------------------------------------Date: Fri, 16 Nov 2007 17:23:42 -0600From: "Bill & Becky Marvin" <[email protected]>Subject: Re: [R-390] A Few R390A Issues
Hi Jim Thanks for the info. I think I fighting two issues.............the DZmechanism and the 1/5 turn slop before the digits rotate............PTO ismoving properly, reacts immediatelyI took the DZ parts off the front panel,reinstalled the knob and found the adjustment still 3/4 before the outerbushing starts to rotates............rotates the same with hardware is inplace?? Stripped????housing shaft? Put lubricant outside/insidebushings.......no change however tuning is easy with only a half turn of theDZ knob. The tuning play is about 1/5 Pto knob before the readoutstart........left or right turn the same. DLk is off.. OH Coupler spring is inplace (correct one?) I'll have to track the gears from the OH to the readoutgears. This is fun...................thanks to all with solutions provided.---------------------------------------------------------------------------------------------Date: Sat, 17 Nov 2007 18:22:26 -0500From: Jon Schlegel <[email protected]>Subject: [R-390] Oldham Coupler Idea
I was just looking at the three Oldham coupler pieces and the effect that theantibacklash spring has on them. The single spring has a tendency to putthe two shafts into shear which would seem to create an unnecessaryradial load on both shafts. The gears on the RF module have two springs.Why didn't the coupler designer add a second set of pins for a secondspring? I was thinking of adding a second set of springs myself. Anythoughts on this?-----------------------------------------------------------------------------------------------Date: Sat, 17 Nov 2007 19:09:27 -0800 (PST)From: Joe Foley <[email protected]>Subject: Re: [R-390] Oldham Coupler Idea
That does not need to be done.-----------------------------------------------------------------------------------------------

Date: Sat, 17 Nov 2007 22:54:09 -0500From: Jon Schlegel <[email protected]>Subject: Re: [R-390] Oldham Coupler Idea
Is there a likelihood that this will degrade backlash or is there somethingelse that I'm missing here?-------------------------------------------------------------------------------------------------------Date: Sat, 17 Nov 2007 23:09:31 -0500From: Bob Camp <[email protected]>Subject: Re: [R-390] Oldham Coupler Idea
With a normally functioning PTO the Oldham coupler works just fine.There's not a lot of torque involved. The spurious loads on the shaft(s) arequite small. There are other things in the drive train that I would worryabout ahead of that coupler.----------------------------------------------------------------------------------------------------Date: Sat, 17 Nov 2007 20:10:48 -0800 (PST)From: Joe Foley <[email protected]>Subject: Re: [R-390] Oldham Coupler Idea
It likely will have no effect on anything. Like Roger said, backlash is afunction of friction, properly maintained that coupler should give noproblems. If you want to improve its operation the best move would be totake out any mis-alignment by shimming the PTO mounts so that theshafts are as close to parallel as possible, then the Oldham coupler isbasically out of the equation as it's only function is to make up forsloppiness in the shaft alignment. Backlash isn't a problem there as muchas binding is. Even if the coupler sections are excessively worn the springwill take out any backlash IF there is no friction on the PTO shaft. Don'tforget to loosen the bushing on the front panel, under the KC CHANGEknob, it should be only snug.------------------------------------------------------------------------------------------------------------Date: Sun, 18 Nov 2007 13:04:01 ESTFrom: [email protected]: Re: [R-390] Oldham Coupler Idea
On most receivers the shaft alignment is very good. The shafts and couplerhave more than enough mechanical stiffness. With the original specifiedspring, the spring provided enough tension to keep the coupler parts"lashed" together to remove slop but not so much tension as to deform theshafts. In mechanical assemblies, the order in which retainers aretightened often have a big effect on the final alignment. You may want toconsider "resetting" your VFO if you feel yours is too far out of alignment. Ifthat work still leaves your VFO with more offset in the coupler than youwould like, you can start to file mounting holes to get more freedom andrange of adjustment. You should be able to reset the VFO to remove all

angle off set so the coupler faces set flat to each other.
Most couplers are die cast and the face of each side is not real square to thebore. This is an effect of cooling casting or not an exact drill press to jigalignment during manufacturing. It is close enough for government work.Live with this. Some times flopping one coupler side around 180 degreewill get a better fit. You get the error in each side to complement for a bestfit.
There is some shaft to shaft offset.You can adjust out the side to side offset.
If the off set is from the VFO setting to close to the chassis it can beshimmed to remove the off set. If the VFO sets to high, you will likely haveto live with that offset or do a major overhaul of the front box assembly tocan front plate on the VFO to adjust the offset. Mostly life is good enoughand we just live with it as is. That coupler with one spring will compensatefor the range of offset.
I hope this provides enough depth to help you get your receiver into amechanical condition you can live with without modifying your coupler.
Once you get the alignment correct, more springs just are not needed. Thecoupler becomes a method to effect module disassembly and repair, asopposed to a device to compensate for poor part fabrication.------------------------------------------------------------------------------------------------------Date: Sun, 18 Nov 2007 13:32:01 -0500From: "Jim M." <[email protected]>Subject: RE: [R-390] Oldham Coupler Idea
In case it hasn't been said, the surfaces of the coupler should NOT be snugtight. There should be about 1/32 spacing between the surfaces accordingto the technical manual I have. If they touch or are too tight, the pressureon the PTO shaft can cause instability and warble (in CW signals) whentuning. The coupler disc should be able to move freely. I think the wholepurpose of the coupler is to accommodate slight misalignments betweenthe PTO shaft and the main tuning shaft, which are inevitable.-------------------------------------------------------------------------------------------------------Date: Sun, 18 Nov 2007 17:31:55 ESTFrom: [email protected]: Re: [R-390] Oldham Coupler Idea
I think Nolan is another fellow with far to much time on his hands. He forsure would have gotten the KC shaft and VFO shaft into alignment nomatter how many time he had to pull the VFO and readjust the parts untilthe VFO module shaft set into alignment with the KC shaft. He would

certainly have gotten the KC shaft to run true. If he thought the end of aVFO shaft was bent he would have gotten it straight. Someday I would liketo have the skills Dave Medley, Nolan and Rick have developed. And theyare not the only fellows I aspire to be as skilled and knowledgeable as.--------------------------------------------------------------------------------------------------------Date: Wed, 21 Nov 2007 21:47:57 -0800From: "Chris Kepus" <[email protected]>Subject: [R-390] Cosmos PTO for 390A - newbie - Help requested
This is a bit long but I would really appreciate your taking a look. I have tooperate on a PTO, I believe, and this is the first one I've put a handon.....yep....I haven't taken one apart...yet.
I just picked up a Cosmos PTO that is intended as a spare for my R-390A. Ihave a Collins built R-390A but I am unwilling to pull anything out of it atthis time. It is working quite well. I got the Cosmos because I like the factthat Cosmos came up with a PTO design that didn't require tinkering witha corrector stack in order to adjust linearity. Others have pointed out thatrepairing and calibrating the Cosmos (or any PTO) isn't for the faint ofheart, but it can be done. (I know, fools rush in..) And, as I have read in thearchives about the repairs that have been done by you all, you "git itdone"!
Back to my Cosmos. Although the seller said it was dusty (it is), he didn'tsay the outer cover of the PTO had numerous scratches suggesting a rather"rough" storage environment. Nonetheless, the fragile elements on top ofthe output transformer are in good shape with no observable damage... Itis also evident that someone had pulled the external cover since only oneof the screws had the accompanying lock washer. And the heater and/orthermostat was possibly removed. The screws that retain the inner coverare missing. Is it possible to remove the heater without unsoldering any ofthe leads? The 11-856A Tech Manual talks about unsoldering thethermostat leads when replacing it but nothing else except a warningabout not removing the inner cover. The heater or ther mostat wires didnot look as they had been unsoldered although under a magnifying glass, itis possible a resoldering job was done that was equal to the original One ofmy heater leads crosses behind the inner cover and has what appears to beshrink wrap over about an inch where it is routed across the rear of theinner cover assembly (could they have been cut at the top?). I have posteda number of photos at http://www.flickr.com/photos/w7jpg/. When youclick on a photo, it gets larger. Just above the picture on the top left side isa small "All Sizes" and magnifying glass icon. Click on that for yet anotherenlargement.
How should the PTO shaft feel when rotated by finger power? I expectedlowresistance and a smooth feeling rotation. Mine is quite stiff and when

rotated, has an odd feeling, similar to rotating a shaft with "soft"detents...kinda lumpy and not smooth at all.
Is there a manual that shows how to disassemble the PTO (and othermodules) in detail? My 11-856A Tech Manual doesn't except. Cansomeone tell me what's necessary to remove the heater and insulation? Itsounds like the thermostat leads may have to be unsoldered but I hate tounsolder something if it's not necessary. Once past that, I can pull theinner cover and take photos of the innards. And, Miller's article on "AJOURNEY THROUGH THE COSMOS (PTO)" should be very helpful.Hopefully, I won't find an exploded dessicant pack or rusted out assemblies.
I am encouraged by the writing on this list and the articles on R390.comand elsewhere by authors like John Harvie, J Miller Dallas Lankford, andTom Marcotte. There doesn't seem to be many conditions that cannot berepaired. Is there anything I mentioned or that you see in the photos thatcauses you experienced folks to be concerned to the point that I shouldperhaps have a discussion with the seller before proceeding further? ThePTO was described as "pulled from a working unit" by the seller (no, it's notMartyn! <g>) in response to my question about where it came from.Otherwise, it's time for me to get my feet wet.------------------------------------------------------------------------------------------------------------Date: Thu, 22 Nov 2007 10:59:56 -0500From: Bob Camp <[email protected]>Subject: Re: [R-390] Cosmos PTO for 390A - newbie - Help requested
There may be some magical twist / turn / tug / bend combination that getsthe cover off without unsoldering the leads. The simple answer is tounsolder them. You certainly do not want them to break while you areworking on the rest of the unit.
Electrically all of the PTO's are basically the same. Mechanically they canbe very different. There were pictures of the insides of a Cosmos up on thenet a few years back. There also were basic instructions on working withthe corrector on them. The PTO was replaced as a unit by the militarywhen it went out. If they re-did correctors it was at some kind of 9th leveldepot. I don't think you will find a lot of PTO alignment stuff in the TM's.The Cosmos PTO's exist mostly because of large replacement orders placedafter the radios were in service.The PTO should turn under finger pressure. How easy / hard depends on alot of things. In an older unit, you probably have a lot of caked up greaseinside everything. Once you get that out it should smooth out some.---------------------------------------------------------------------------------------------------Date: Thu, 22 Nov 2007 13:12:14 -0500From: "Jim M." <[email protected]>Subject: RE: [R-390] Cosmos PTO for 390A - newbie - Help requested

The PTO shaft passes from the inside to the front outside through abearing assembly. This can collect dried out grease. A drop or two of lightweight oil may loosen it up a bit. The "soft detent" feel may be the effect ofthe corrector screws (on the corrector disk) rubbing against the springloaded slug of the corrector coil (which it should). You probably wont feelthis when the unit is installed and you tune from the front panel knob. Icleaned my PTO by removing the shaft entirely and cleaning out the driedgrease. BUT----Be careful if you remove the shaft. The corrector diskposition relative to the unit is critical. Also if the unit was ever tunedbeyond its range, or there was excessive pressure on the shaft, thecorrector disk can come loose... it is spot welded to the shaft internally. Ifyou can get relatively good end point alignment, then the calibrationshould be acceptable between end points. Unless it is excessively off, Iwouldn't mess with the screws. I was a perfectionist with mine, tweakingeach screw against an accurate signal source every 10-20 khz...but it wasliterally an all-weekend job. What's worse is that the screws tend tointeract. Tweak one and the calibration either side of it may get pulled offslightly. Be happy if you are within a few khz across the band. That's whythey included the dial zero adjust - to correct for inaccuracies. You can getbetter, but be prepared for a long time of tweaking. Good luck. Jim N4BE-------------------------------------------------------------------------------------------------------------Date: Thu, 22 Nov 2007 23:55:21 -0500From: Jon Schlegel <[email protected]>Subject: Re: [R-390] PTO Connector
The one I got from Fair came from the link below. I still have it (aProgresstron) and installed a new power connector I found here in thejunk bin to replace the smashed connector that came with the unit. Inside,the PTO looks physically perfect. How similar a unit you might get fromFair is anybody's guess. I have yet to actually try it but I initially suspectedit was removed from service because of excessive backlash. If you put theOldham coupler plate on and turned the shaft, you could see it springbackwards a little upon letting go. Since talking with Bob Camp in somedepth I find out that many of these PTOs had problems with endpointadjustment and now I have to consider that as a possible reason as to whyit was pulled. I'll know more when I get the radio up and running.Endpoints will probably be the first thing I scrutinize...-----------------------------------------------------------------------------------------------------------Date: Thu, 29 Nov 2007 15:24:54 -0600From: "Bill & Becky Marvin" <[email protected]>Subject: [R-390] Dial Zero Adjustment (cont)
About a week ago I wrote about the DZ problem, jammed adj.......little or noclutch release...... high amount of backlash. I dropped the front down andremoved the DZ assembly from the panel. The inner shaft was jammed

inside the outer bushing. I soaked the shaft- bushing in mineral spiritsovernight........... the assembly then unjammed and turned in and out freely.Spent sometime lubricating a gears,cams, guides etc. The VFO now tuneswith one finger...... very very smooth. PROBLEM After reassembly, the DZstill doesn't retract (CCW) enough outward to fully release! Does theclutch have an adjustment to move the gear back away from the panel(Finger Plate). The Fender plate is retracted outward maximum???---------------------------------------------------------------------------------------Date: Fri, 30 Nov 2007 13:28:46 ESTFrom: [email protected]: Re: [R-390] Dial Zero Adjustment (cont)
There should be plenty of clearance between the plate on the end of thezero adjust shaft and the pins on the clutch assembly. The zero adjustbushing in the front panel should be assembled with the nut of the bushingto the outside of the front panel. Your bushing may be in backwards. Theclutch gear assembly meshes with many other items in the gear train. It isnot likely that the assembly is moved forward and is out of line with therest of the assembly.
Is your zero adjust disk on the end of the shaft about 1/8 inch thick. Aboutthe same thickness as a gear in the gear train? The disk may be areplacement thing and make from some metal that's to thick. The shaftshould screw back into the front panel bushing until the disk comes flushagainst the bushing. Most of that bushing goes on the outside of the frontpanel and under the knob.-------------------------------------------------------------------------------------------------------------Date: Fri, 11 Jan 2008 12:53:40 -0800 (PST)From: Michael OBrien <[email protected]>Subject: [R-390] PTO setup ?
I have 2 R-390A with their PTO's removed and need to know what is thebest way to set them up with PTO's both machanicaly and electricaly. AlsoI am missing the springs for the couplings . Do I need them and wherewould I find them---------------------------------------------------------------------------------------------Date: Fri, 11 Jan 2008 19:31:47 -0500From: Bob Camp <[email protected]>Subject: Re: [R-390] PTO setup ?
The spring is pretty easy to replace. A spring from a ball point pen is a bitmore than you need, but it works. Are you missing PTO's - as in you need tobuy a pair? I assume they are simply out of the radio. 1) Get the PTO on thesame frequency as the radio. A frequency counter is a good thing here. 2)Drop the PTO in and line up the axis of the PTO with the tuning shaft inthe radio as best you can 3) Put in the coupler and spring 4) Check to be

sure the coupler is a bit loose (not binding) 5) Tighten down the screws6) Re check everything
That should do it------------------------------------------------------------------------------------------------------Date: Sat, 12 Jan 2008 04:59:20 -0800 (PST)From: "Tom M." <[email protected]>Subject: Re: [R-390] PTO setup ?
If you don't have a freq counter you can listen for the PTO signal onanother receiver. The signal should be at 3455 kcs when the dial is at 000and should decrease to 2455 as you tune up. Align your dial at 000, withthe PTO uncoupled listen for it at 3455, then couple it up.-------------------------------------------------------------------------------------------------Date: Mon, 14 Jan 2008 21:40:10 -0600From: "Bill & Becky Marvin" <[email protected]>Subject: [R-390] R390A Local Gain Pot (R105)
Having taken the front panel down numerous times I find the lower Pot(s)(RF & AF) wires are breaking. I fixed the RF Gain wiring but the AF Gainwiring is causing problems. They are:The Y2K wiring shows Pin 1 Wht/Blk - Wht/Blk Pin 2 Wht? Pin 3 (3) Whts-Shields
My question is this...........I have a Red/Wht wire, not Wht for Pin2. Both theY2k Manual, R390A Service show Wht for Pin 2 (R105) perhaps a Typo??Is Pin 1 away from the bottom edge? My Unit is a "55" Collins.-------------------------------------------------------------------------------------------------------------Date: Tue, 15 Jan 2008 07:28:55 -0500From: Steve Hobensack <[email protected]>Subject: RE: [R-390] 75A4 PTO Repair
Look for a shorted screen capacitor.------------------------------------------------------------------------------------------------------Date: Fri, 18 Jan 2008 08:34:40 -0700From: "DW Holtman" <[email protected]>Subject: [R-390] PTO Plug
I'm in the process of swapping out a broken plug on a PTO. The good one isstill attached to a parts PTO so it gives no clue as to its removal. How doesthe plug come apart? After removing the screws for the metal cableclamps, the blue plastic parts seem to be glued together. Does it unscrew?Don't want to force anything. Has anyone replaced this before?-----------------------------------------------------------------------------------------------------------Date: Fri, 18 Jan 2008 10:55:20 -0500

From: Jon Schlegel <[email protected]>Subject: Re: [R-390] PTO Plug
Yes, the blue shell unscrews from the connector. The first step is removingthe clamps as you have already done. Carefully hold the connecter andunscrew the shell. It's a standard right hand thread. Be very careful of thepins. They are exceedingly brittle and if become bent will likely breakwhen you try to straighten them. Insert the pins in a stiff piece of foam orperhaps the mating connector to protect the pins while you work. If theshell does not unscrew, try tapping the the shell very lightly with a lightscrewdriver handle or such. TLC is most important when handling theseconnectors.--------------------------------------------------------------------------------------------------------Date: Thu, 14 Feb 2008 16:40:03 -0500From: Jon Schlegel <[email protected]>Subject: [R-390] Cosmos PTO - No Teflon Disk???
Just opened a Cosmos PTO expecting to find a Teflon disk as described in"Calibration of the COSMOS PTO" by Tom Marcotte, N5OFF athttp://www.r390a.com/html/n5off_pto.html. I found no Teflon disk inside.Is the disk really missing or is Tom using the idea as a visualizationtechnique? I see that the slug driven by the cam follower is itselfscrewdriver-adjustable. Among other things, no doubt, I can see that thisslug's baseline adjustment would affect the sensitivity of the linearizationadjustments. Is there any accepted procedure for the baseline adjustmentof this slug? Also, the "varnish" on the main coil shows signs of breakdowndue to either due to mild corrosion or perhaps some sort of fungus amongus. About 1/8 of the surface of the coil is affected. Should I attempt toclean/re-coat it or just leave it alone. If re-coat, then with what? ThisCosmos unit is mechanically kind of on the edge - some worn surfaces,buggered screw heads, even a bent 370 uuF mounting stud - but probablysalvageable.-------------------------------------------------------------------------------------------------------------Date: Thu, 14 Feb 2008 16:22:02 -0700From: "Tony Casorso" <[email protected]>Subject: Re: [R-390] Cosmos PTO - No Teflon Disk???
Check out this one. Lots of pictures of the deep innards.http://www.r-390.com/cosmos.htm-------------------------------------------------------------------------------------------------------Date: Thu, 14 Feb 2008 20:24:11 -0500From: Jon Schlegel <[email protected]>Subject: Re: [R-390] Cosmos PTO - No Teflon Disk???
That pretty much lays it all out.-----------------------------------------------------------------------------------------------------

Date: Fri, 15 Feb 2008 09:23:07 -0600From: "Les Locklear" <[email protected]>Subject: Re: [R-390] Cosmos PTO - No Teflon Disk???
Some of the earlier Cosmos PTO's did not have the teflon disk.-------------------------------------------------------------------------------------------------------Date: Fri, 15 Feb 2008 10:33:51 -0500From: Jon Schlegel <[email protected]>Subject: Re: [R-390] Cosmos PTO - No Teflon Disk???
If that's the case, I might consider cutting and installing a disk myself. Thelittle spring steel cam follower is showing wear and the edges of theadjustment screws are rather sharp.---------------------------------------------------------------------------------------------------Date: Wed, 18 Jun 2008 20:30:17 -0700 (PDT)From: C E <[email protected]>Subject: [Collins] R390A Oldham coupler assembly dimensions wanted
Can anyone provide the dimensions of the Oldham coupler assembly forthe R-390A PTO? I'm considering making/sourcing a new set of theseunits. I need the shaft distances, the diameter of the middle plate and thetwo end plates, and the thickness of the middle plate. Thanks. Cal, n6KYR-----------------------------------------------------------------------------------------------------------Date: Thu, 19 Jun 2008 09:06:12 -0600From: "Dr. Gerald N. Johnson" <[email protected]> (from Collinslistserv)Subject: Re: [Collins] R390A Oldham coupler assembly dimensions wanted
The drawings for those parts are sure to be in the drawing set that wasavailable on CD-ROM a few years ago. I have one, it will take somesearching on another computer after I find the CD-ROM. But first I haveover a million soybean seed to plant today.-------------------------------------------------------------------------------------------------------------Date: Thu, 19 Jun 2008 05:27:58 -0600From: "DW Holtman" <[email protected]>Subject: Re: [Collins] R390A Oldham coupler assembly dimensions wanted
As far as sourcing goes, McMaster-Carr sells a line of Oldham couplers.They are not identical, but will work to couple a PTO. Type oldham couplerin their search engine. http://www.mcmaster.com/--------------------------------------------------------------------------------------------------------Date: Thu, 19 Jun 2008 18:39:54 -0600From: "Dr. Gerald N. Johnson" <[email protected]>Subject: Re: [Collins] R390A Oldham coupler assembly dimensions wanted
Its entirely possible that the original Oldham coupling was a purchased

assembly, not made by Collins or the other 390A vendors. Lookingthrough the selection of couplings in the McMaster-Carr catalog Iwondered if maybe a bellows coupling would have been used had it been anoption when the 390A was designed. It would have required a larger gapbetween the shaft ends than the Oldham coupling though. I don't know ofany reason that could not have been accomplished simply by shorteningthe two shafts and leaving a bit more room in that area of the gear train.---------------------------------------------------------------------------------------------------------Date: Thu, 19 Jun 2008 19:10:19 -0600From: "DW Holtman" <[email protected]>Subject: Re: [Collins] R390A Oldham coupler assembly dimensions wanted
Isn't a bellows coupler used on the BFO linkage?-----------------------------------------------------------------------------------------------------Date: Fri, 20 Jun 2008 11:36:06 -0600From: "Dr. Gerald N. Johnson" <[email protected]>Subject: RE: [Collins] R390A Oldham coupler assembly dimensions wanted
Being that I approach being an old ham, (licensed nearly 53 years) I'dconsider an Oldham coupler in some situations, but those situations wouldrequire both shafts to be anchored axially so the center disk of the couplerinvented by some one named Oldham would be kept in place. For myprojects, I might tend to think of a Millen (if I had a sufficient supply in myparts collection) molded insulated flexible coupling or a WW2 surplusceramic insulated coupling from a BC-375 tuning unit. or if all I neededwas shaft extension I might use a simple brass shaft coupler and take careto line up the shafts. The beauty of an Oldham coupler is that it smoothlytakes care of shafts that are nearly parallel and not quite aligned. It allowsfor offset and a little bend. If my supply permitted and the transmittedtorque admitted, I might even use an Oldham coupling in my partscollection with a nylon center washer. Providing the shafts had constraintso they couldn't slide apart and I thought the nylon insulator could handlethe applied voltage.------------------------------------------------------------------------------------------------------Date: Fri, 20 Jun 2008 12:12:35 -0600From: "Dr. Gerald N. Johnson" <[email protected]>Subject: [Collins] R390A Oldham coupler assembly dimensions wanted]
> It is fairly complex. I've found it in the drawings. The coupler is spring> loaded with a little spring having square hooks.>> These parts:> SM-B-178481 spring.> SM-B-178491 insulator (3/16" i.d., 1/4" o.d. cemented to PTO shaft)> SM-C-178492 Guide. This is the center washer. 1-3/32" O.D. I didn't> note the thickness. One groove is square, one is tapered at 30 degrees.

> SM-B-178665 Coupler assembly. Two parts, mounted to shafts withservo> clamps (SM-B-178414 plus screws and nuts). One with square (though> beveled) bar, one with tapered bar. Made of SM-C-178666 plates and SM-> B-343637 pins.>> This CD-ROM has its own drawing formats, that it won't convert to> anything known by other programs. Its all scanned drawings, sometimes> tough to read. It allows printing but I don't have a working printer at> the moment. I wonder how many R-390A have the coupler loadingspring.----------------------------------------------------------------------------------------------------Date: Thu, 23 Oct 2008 22:50:18 +1000From: "Pete Williams" <[email protected]>Subject: [R-390] Collins PTO Linearity adjust
G'Day List...having rejuvenated a couple of Collins 70-H2 PTO's, is thereinfo available as to how best adjust the internal cams for linearity.? I haveread Ray Osterwalds comments ex past issue of ER but this only addressesthe 100kHz -one turn of the shaft-calibration points. It would seem to belaborious process to adjust these cams as there are in excess of 60 for thecomplete travel of the core, although, they are not all required foradjustment for the 1 mHz range . How the factory did it is one thing-- howone might do it now is another... My preliminary excursion into thisfinesse appears to show that adjusting at the 100kHz points seems to takereasonable care of what's in between, bit I'm sure there was a bit more toit, albeit labor intensive . A bit more light on this would be appreciated.----------------------------------------------------------------------------------------------------------Date: Thu, 23 Oct 2008 09:27:39 -0400From: ews265 <[email protected]>Subject: Re: [R-390] Collins PTO Linearity adjust
I've pondered the same issues. Came to the conclusion that for the kind ofmechanical resetability needed to make the job manageable a steppingmotor was needed. Granted a complex solution but the most exactarrangement I could come up with. To that end I've got all the mechanicsof a fixture built; PTO mount, stepper, driver, etc. It's very solid and shouldwork well. I've yet to write the software to run everything so I can't offerdirect help now but throw the idea out to you or anyone interested.------------------------------------------------------------------------------------------------------Date: Fri, 24 Oct 2008 14:43:43 -0700 (PDT)From: "Drew P." <[email protected]>Subject: [R-390] Re: PTO
My version goes something like this:

1. Remove linearizing cam assembly (also known in R-390speak as a"corrector stack"), stash in a safe location and replace with anappropriately-dimensioned straight bar.
2.Using fancy fixture or even just the radio, record PTO frequency for each90 degrees (corresponding to 25 Kc points) of rotation.
3.Enter recorded data into computer program which spits out G-codewhich is then loaded into CNC machining center. CNC mills a bar havingthe required correction contour for entire frequency range of PTO.
4. Replace just-installed straight bar in PTO with contoured bar and enjoynew found linearity.
I'll do all this in another lifetime, perhaps. Note that if one uses anaftermarket DRO (EDRO, not the radio's stock MDRO) to display frequency,all this linearizing becomes moot.-------------------------------------------------------------------------------------------------Date: Sat, 25 Oct 2008 12:18:16 +1000From: "Bernard nicholson " <[email protected]>Subject: [R-390] Re: PTO
Re PTO linearity . Guday Pete & List , I think how it would have beendone in the Collins factory - They would have used a Dummy PTO Coverwith holes strategically placed to make the adjustments , This way thecapacity of the cover would be taken into account, So one needs to find atin can at the supermarket that's the same dia ,That would be myapproach to the problem !----------------------------------------------------------------------------------------------------------Date: Fri, 28 Nov 2008 19:21:12 -0500From: Roy Morgan <[email protected]>Subject: Re: [R-390] new guy
Yes. And there is a very uncommon and little documented condition whosesufferers may be members of a group known variously as:
- The Knights of the R-389 PTO- The 70H-1 Society- The 70H-1 Reclamation and Memorial Society and Support Group- The Ancient and Honorable Society of the 50 Turns
To explain somewhat:
The R-389 is the VLF version of the R-390 family of radios. It has someparts in common with the R-390/URR (which is sometimes known as "TheNon-A"). One of the unique parts in the R-389 is the type 70H-1 PTO, and

the drive system that it lives behind. The PTO operates over FIFTY turns,not ten as in most other main tuning PTO's designed by Collins. It has aunique frequency coverage, and a unique corrector stack mechanism. Thedrive system involves a main manual tuning knob with a friction clutchbuilt into it, and an electric tuning motor operated by a toggle switch onthe front panel. It appears that there is a great possibility of seriouslydamaging the PTO under certain circumstances.
There are at least two of us who have hopelessly damaged PTO's inotherwise would-be-working R-389's. This would not be a problem exceptthat 70H-1's are essentially unobtainable. I know of only two that wereoffered for sale in the last 10 or more years. One was auctioned fromGreece on ebay some years ago. It turned out to be munched. The secondone I know of having been offered for sale was on ebay just recently, andthe auction was ended prematurely by the seller. Sooo... if you think youshould belong to the above named societies, do let me know. Roy
Roy Morgan [email protected] Cobb St. Groton NY, 13073---------------------------------------------------------------------------------------------------------Date: Fri, 6 Mar 2009 17:44:46 -0800 (PST)From: wli <[email protected]>Subject: Re: [R-390] setting the PTO endpoints (long)
Over the last 10 years, there have been many posts about the PTO. Halfdealt with the non-linear PTO, which is clearly a challenging and time-consuming task. The others have been more elementary: dealing withsetting end-points. Chuck Rippel correctly points out that setting theendpoints is probably the most important thing to do to get these receiversfunctioning as they were designed to operate. Recently, I set the endpointsin my 62 Capehart PTO. What follows depends on using a counter, andavoids dropping the front panel. The Y2K, Navy, and Army manuals use adifferent approach that does not require a counter, but I felt that approachwas too cumbersome. Furthermore, they drop the front panel in theirmethod. I used the wisdom contained in previous postings to this list to tryto get everything everyone said on one piece of paper. There were valuabletips contributed by all. To that end, I documented each step in my task...trying not to forget anything or goof it up. I managed to get my PTO tocover 1000.2KC over exactly 10 turns, so I was happy.
So here is how I did it: <SNIP>
SEE REVISED METHOD ON NEXT PAGES-----------------------------------------------------------------------------------------------------Date: Tue, 10 Mar 2009 12:06:46 -0700From: David Wise <[email protected]>

Subject: Re: [R-390] setting the PTO endpoints (long)
I adjusted my endpoints with the PTO in the radio. I only removed it toremove the endpoint cover nut; then I reinstalled it. The key is a sawed-offdiddle stick. Plastic with metal screwdriver tip. Short enough to finagleinto position, long enough to grip between the fingertips. It just barely fits,but it's SO much easier. I'll measure it and report back.----------------------------------------------------------------------------------------------------Date: Tue, 10 Mar 2009 17:27:03 EDTFrom: [email protected]: Re: [R-390] setting the PTO endpoints (long)
Yep, adjustments can be done with the PTO in the radio. As noted, Iremoved the PTO to take out the nut which covers the adjusting screw,then used a cut down jewelers screwdriver to do the adjustment. I evenwent one better and did all 42 adjustments on a Cosmos with the PTO inthe radio. In that case, adjustment was unmanageable while pulling thePTO out, as I was trying to get resettability to 100 cycles or so. It was acase of doing it in the radio or making a special test fixture. But it was anundertaking, using a small mirror to see where the slot was on eachadjusting screw. By the time I got done, I swore I would do whatever ittook to build a test fixture next time. Ed---------------------------------------------------------------------------------------------------------Date: Tue, 10 Mar 2009 15:18:17 -0700From: David Wise <[email protected]>Subject: Re: [R-390] setting the PTO endpoints (long)
So you can even do Cosmos linearity in the radio, though it's hard. Howabout a frame to suspend it a foot or so off the floor, and you go in on amechanic's creeper? Of course the consequences are dire if the frame isn'tsolid... Were you able to use the same tool for linearity and endpoint? Iseem to remember that Cosmos used more than one screw-head type.------------------------------------------------------------------------------------------------------------Date: Wed, 11 Mar 2009 08:15:49 -0700 (PDT)From: wli <[email protected]>Subject: Re: [R-390] revised PTO endpoint adjustment (long)
Hi. Have revised the previous post thanks to the comments received. Hereis version 2.0--------------------------------------------------------PTO End-point adjustment by W. Li v2.0
1. From top of receiver, disconnect mini-BNC plug P217 and drop it thruthe chassis hole to the bottom side. This coax carries the PTO output.
2. Disconnect P116 mini-coax from rear panel

3. Remove J116 from rear panel
4. Tune the MC dial to 7MC (I did this in anticipation of further RF work)
5. Tune the KC dial up to (+) 000
6. Turn receiver over so it is up-side-down on the bench
7. Remove Oldham spring using a fine forceps clamp (may have to rotatethe KC dial a few degrees so that you can get at both ends of the Oldhamspring). Tie a string on the spring before it flies off.
8. Do not touch the KC dial again until step 28. Consider locking it.
9. Remove both stainless steel 6-32 screws off of the trapezoidal metalsupport bracket on the back of the PTO. This support secures the rear ofthe PTO to the chassis. Do not disturb the single green captive screw.
10. Loosen both front green 8-32 captive screws. The entire PTOsubchassis should now be free to slide aft.
11. Wiggle the PTO subchassis and slide it aft about an inch to free it fromthe KC shaft. The Oldham coupler will come apart and the center disc willfall free... save it. You now have one Oldham disc attached to the KC shaft,and the other Oldham disc attached to the PTO shaft, and the middle oneloose somewhere.
12.. Tilt PTO chassis upwards 45 degrees. Rest it on small plywood shelf sothe rear bracket sits down in its compartment, and the front rests up onthe chassis cable loom. This exposes the front of the PTO . Note: the cablein the back with the blue plug carries power to the PTO and is left attached.
13. Use J116 to adapt the PTO's mini-BNC to a standard BNC jack.
14. Hook up your frequency counter to J116 using a short BNC cable
15. On the front face of the PTO, remove the large hexagonal adjustingscrew cover behind Z702. This cover screw has a very shallow thread, andcomes out in 2 turns. Store it with the small Oldham spring for later.
16. Plug in the receiver and counter and allow an hour or longer to warmup and stabilize the electronics.
17. Using your hand, slowly twist the Oldham disc on the PTO shaft untilthe counter reads exactly 2455. Look at the counter to figure out which

way to turn. Note: the PTO has its own stop, which can be easily damaged.GO SLOW.
18. Using the Oldham spring post as a point of reference, mark the frontPTO plate with a pencil as your start point.
19. Now manually rotate the Oldham disc on the PTO shaft exactly tenturns. Watch the counter readout rise as you turn. Stop at exactly tenturns lining up the spring post with your pencil mark. The counter nowreads something fairly close to 3455KC.
20. Without any further rotation of the PTO, turn the tiny PTO adjustingscrew with a fine screwdriver until the counter reads exactly 3455KC.
21. Go back about ten turns, stopping when the counter reads exactly2455KC..
22. Chances are your start point will not align with the spring post, soerase the old pencil mark and make a new one. Changing one end-pointalters the other.
23. Now hand rotate the PTO shaft exactly 10 turns the other way and seehow close you end up to 3455KC. Chances are you will be off a bit.
24. Readjust the PTO adjusting screw again, so that the counter readsexactly 3455KC
25. Repeat steps 21-24 as often as necessary until 10 turns gets you fromprecisely 2455KC to 3455KC.(this took me 6 cycles of fooling around).Note all the PTO adjusting screw tuning is at the 3455KC end. All you doat the 2455KC end is redraw your pencil mark.
26. OK, now the PTO has the correct frequency range of 1000KC in exactlyten turns of the PTO shaft
28. Be sure the KC dial is unlocked. Gently turn the KC dial down as far asit will go until it is stopped by the 10-turn stop. The Veeder-Root shouldnow read between -963 and -972. If it does not, adjust the ten-turn stopuntil it does (another issue entirely).
29. Rotate the PTO until the counter reads exactly 3455KC
30. Rotate the KC dial up a few turns until the Veeder-Root reads exactly (-) 000, and lock it in place.
31. Stick the middle Oldham coupler disc to its mate on the PTO shaft with

a blob of grease.
32. Replace the large cover screw you took off in step 15.
33. Now loosen the Bristo screw clamp nearest the KC dial, so that theOldham coupler nearest the front may rotate on the KC dial shaft to mateprecisely with the Oldham coupler disk of the PTO shaft. Since the KC dialis locked, only the Oldham disc and its clamp will rotate. Take great careNOT to rotate the PTO shaft. You can tell if you do inadvertedly rotate it,because the counter will show a change in frequency.
In some cases, there is no room to access the Bristo clamp on the KC shaft.Plan B is to loosen the Bristo clamp on the PTO shaft, so that it can rotateto mate with the other Oldham disc. Here again, you must not allow thePTO shaft to rotate whilst you fiddle with the Oldham disc. There is no wayto lock the PTO shaft, so great care must be taken not to move it. Again thecounter will detect any rotation of the PTO shaft at this time.
34. Now you can slide the entire PTO subchassis forward to mechanicallyre-engage the Oldham coupler........ this step is to mechanically synchronizethe PTO to the rest of the RF gear train. This will require minute fiddling ofthe now loose Oldham coupler disc as the fit is very close. Take your timein getting all the Oldham discs to mate.
35. Loosely start both 8-32 green screws in, to stabilize the PTO chassis
36. Now that the coupler is together, both the PTO shaft and the KC dialshaft will rotate together. The KC dial is at (-)000 and the counter shows3455KC.
37. Unlock the KC dial now.
38. Rotate the KC dial up slowly and gently until the spring posts areaccessible for you to replace the Oldham spring. Note that the PTO shaftwill also rotate the same amount since the coupler is now mechanicallyengaged.
39. Wiggle the PTO such that both PTO and dial shafts line up, and so thatthere is a small gap visible between the Oldham coupler discs. At this point,if things are tight, you can gain an extra mm by loosening the single reargreen screw.
40. Tighten the Bristo spline clamp on the shaft of the KC dial
41. Secure things by tightening down both front green screws, andreinstalling both rear deck 6-32 screws.

42. Now that the PTO is physically secured, do a final electrical check onthe PTO with the counter. Turn the KC dial to (-)000. The counter shouldread exactly 3455KC. Now run the KC dial up to (+)000. The countershould read exactly 2455KC. This is the whole reason for setting the PTOendpoints.
43. If you can not get exactly 1000KC in ten turns, go back and redothings until you can.44. Disconnect the counter, and restore the mini-coax interconnections.45. Final check: tune in WWV, it should come in exactly at 5MC, 10MC etc46. You are done-------------------------------------------------------------------------------------------------Date: Wed, 11 Mar 2009 08:49:49 -0700 (PDT)From: "Tom M." <[email protected]>Subject: Re: [R-390] revised PTO endpoint adjustment (long)
Good procedure. I just wanted to add that if you do not have a frequencycounter, you can "listen" to the PTO on a calibrated HF receiver by listeningto the 2455 and 3455 signals, either with BFO on or SSB mode.--------------------------------------------------------------------------------------------------------Date: Wed, 11 Mar 2009 12:16:28 -0400From: "Tim Shoppa" <[email protected]>Subject: Re: [R-390] setting the PTO endpoints (long)
Every PTO I've ever met needed a turn or two removed from the endpointadjusting coil. Maybe I'm being overly pessimistic but I thought that simpleaging of the PTO pretty much guaranteed that any PTO would require thisturn-sectomy.
HSN's #45 and #46 addressed the subject quite thoroughly.-------------------------------------------------------------------------------------------------------Date: Wed, 11 Mar 2009 12:27:56 -0400From: Barry <[email protected]>Subject: Re: [R-390] setting the PTO endpoints (long)
Of the two R390As I rebuilt, neither needed this. Guess I was just lucky.--------------------------------------------------------------------------------------------------------Date: Wed, 11 Mar 2009 10:07:50 -0700From: David Wise <[email protected]>Subject: Re: [R-390] setting the PTO endpoints (long)
My cut-down diddle stick is 3-1/4".
"Mechanic's creeper"... Need to warm up brain before engaging mouth.Turn the set over, duh. But it's still hard to see, and if your eyes can't

handle the mirror and close quarters, then you have little choice but toremove the PTO. (I wouldn't drill an adjustment port in the front panel.)My set has a Collins PTO.
I bought a Cosmos spare a while back, and looking at it now, I can see thatit would be harder to do in situ. (Mine needs repair first; the slug must havefrozen, because the slot is completely chewed away.) My Cosmos has theodd linearity screws.
I didn't put a magnifier on them, but they look like Robertson (square)head. I'll put it under a microscope and report back.-------------------------------------------------------------------------------------------------------Date: Wed, 11 Mar 2009 12:51:53 -0700 (PDT)From: "Tom M." <[email protected]>
The 51J PTO moves faster than kudzu weed. I have to lead mine like whenbird shooting so that it is spot on at some random time in the future.Attempting to keep the 51J3 PTO perfect is futile.------------------------------------------------------------------------------------------------------Date: Fri, 13 Mar 2009 07:55:00 +1100From: "Pete Williams" <[email protected]>Subject: [R-390] PTO endpoints
I've done over 20 PTO for R-390's- both types...never done end points orlinearity in the receiver and always use an external PS with the two HT forthe R-390A or the 180V only for the R-390/URR-- so much easier, Yeshave taken a turn off on occasions... have also reduced the 10p to -say 5pf...... no long term obvious effect on stability. Linearity in the COSMOStype a real PITA,, some of the screws are Bristol wrench type heads andthe perfect tool is the smallest wrench in the Bristol spline key kit # SS-508. I break it at the right angle bend and fit the shank into a small pinvice. For the ones with slotted heads I use a long thin Allen key ground tofit. It's worth the trouble to make up /get an external PS tho.------------------------------------------------------------------------------------------------------Date: Sat, 9 May 2009 08:28:37 EDTFrom: [email protected]: Re: [R-390] Second R-725 on ebay
It looks like a true R-725 has a mu-metal shield added around the outsideof the round PTO shield can. Does anyone know if it really makes adifference in the performance of the PTO? I know mu-metal shielding isadded around small audio transformers to reduce the chance of any humpickup. Is the R-390A PTO susceptible to hum pickup from the powertransformer next to it on the underside of the chassis? I see it looks likethere is some kind of added transformer next to the regular powertransformer on the underside also on the R-725? If adding a mu-metal

shield is beneficial there are places that sell mu-metal foil that one couldwrap around the PTO can.----------------------------------------------------------------------------------------------------------Date: Sat, 9 May 2009 12:01:46 -0400From: Roy Morgan <[email protected]>Subject: Re: [R-390] Second R-725 on ebay
It COULD be that the shield was needed in aircraft installations because ofthe use of 400 cycle power in other nearby equipment. The 400 cyclefields might cause more trouble than the same power at 60 cycles.
> i... are places that sell mu-metal foil that one could wrap around the PTOcan.
Likely, though I don't know about them.. Note: the Mu Metal sheets areformed carefully in manufacture, and mis handling the material can reducethe shielding quality quite a bit. Some oscilloscopes resorted to mu metalshields around the CRT. Low acceleration voltages may have made thatnecessary. So look for that kind of thing in derelict oscopes at hamfests.---------------------------------------------------------------------------------------------------------Date: Sat, 09 May 2009 14:33:19 -0400From: "David C. Hallam" <[email protected]>Subject: Re: [R-390] Second R-725 on ebay
The magnetic shielding properties of Mu metal are very sensitive to coldworking such as bending, etc. I believe Mu metal shields were annealedafter forming to obtain maximum effect.-------------------------------------------------------------------------------------------------------Date: Wed, 22 Jul 2009 14:07:36 +0200From: sigmapert <[email protected]>Subject: [R-390] Role of the 3TF7 in PTO frequency changes
I was an active member of this list for several years in the mid-nineties.After my retirement I'm back. In context with building a jig for themeasurement and alignment of PTOs I began to experiment with the 3TF7.I measured the effect of power line voltage variations on PTO frequency.The results are in accordance with the findings of Dallas Lankford. I candocument that the current regulator 3TF7 is the main cause for theobserved PTO frequency changes. Follow the link to get more informationabout my recent experiments.
http://schmid-mainz.de/3TF7-Results.pdf----------------------------------------------------------------------------------------------------------Date: Wed, 22 Jul 2009 08:23:57 -0400From: "Shoppa, Tim" <[email protected]>Subject: Re: [R-390] Role of the 3TF7 in PTO frequency changes

I think something gets lost in the translation from German to English.This is like saying that fire trucks cause fires.------------------------------------------------------------------------------------------------------------Date: Wed, 22 Jul 2009 14:47:25 +0200From: sigmapert <[email protected]>Subject: Re: [R-390] Role of the 3TF7 in PTO frequency changes
More precisely, the measurements prove that the observed power linevoltage induced PTO frequency changes result from poor regulation offilament currentby the 3TF7 current regulator.-----------------------------------------------------------------------------------------------------------Date: Wed, 22 Jul 2009 14:54:17 +0200From: Heinz Breuer DH2FA <[email protected]>Subject: Re: [R-390] Role of the 3TF7 in PTO frequency changes
I don't see it that way. Kurt confirms Dallas' observation, that a change ofthe mains voltage will cause a variation in PTO frequency due to variationof the PTO tube's filament supply which is regulated by the 3TF7. A 12Hzjump for a 9% mains voltage change is probably nothing serious to worryabout and the 3TF7 might have been the best regulator available in themid 50s to achieve this. Nevertheless a solid state regulator can even avoidthis 12 Hz jump. I am not into digital modes, a 12 Hz jump doesn't botherme.---------------------------------------------------------------------------------------------------Date: Wed, 22 Jul 2009 14:54:39 +0200From: sigmapert <[email protected]>Subject: Re: [R-390] Role of the 3TF7 in PTO frequency changes
The following link describes the the plug-in in more detail:http://schmid-mainz.de/Flyer.pdf.---------------------------------------------------------------------------------------------Date: Wed, 22 Jul 2009 08:57:36 -0400From: "Shoppa, Tim" <[email protected]>Subject: Re: [R-390] Role of the 3TF7 in PTO frequency changes
> the measurements prove that the observed power line voltage induced> PTO frequency changes result from poor regulation of filament current> by the 3TF7 current regulator.
I'm sure that filament current changes can make the PTO and BFO shiftfrequency. In fact Dallas wrote some recommendation on picking 6BA6'swhich would be less sensitive to any such changes.
IMHO the 3TF7 is more than good enough in the real world. Meaning it's

overkill already, especially if you aren't using the 390A in a truck run fromunregulated generators in the middle of nowhere. You were measuring +/-6 Hz changes around nominal line voltage and those aren't really audibleto me (I am not a particularly musical person) in my usage.
For me, the shift in the crystal oscillator frequencies due to AGC action ismuch more noticeable and annoying (I'm a big CW junkie). I've made somemods and measurements but haven't written them up, mostly because I'mnot satisfied with the results.--------------------------------------------------------------------------------------------------Date: Wed, 22 Jul 2009 16:47:44 EDTFrom: [email protected]: Re: [R-390] Role of the 3TF7 in PTO frequency changes
Will you please conduct two more experiments and report the results forus.
Test 1. Short the ballast tube out and install 12BA6's in the BFO and VFO.
Test 2. Use 5749's in the VFO and PTO and use a 12BY7 as a ballast tube.
The question is, does the ballast tube really regulate the current shorttermand long term better than lower filament current of the 12BA6's or anyother filament at 0.6 amps. I see the argument for the ballast tubesmoothing short changes when the receivers were run off generatorpower. Also the ballast would smooth line transient from devices beingswitched on or off. I do not see any long term regulation as the linevoltage drifts several volts do to power line sag as the neighborhoodchanged demand during the day. ThanksRoger Ruszkowski----------------------------------------------------------------------------------------------------Date: Thu, 23 Jul 2009 00:46:07 +0200From: sigmapert <[email protected]>Subject: Re: [R-390] Role of the 3TF7 in PTO frequency changes
Hi Roger, THX for your suggestions. As far as I remember a huge number ofpost have dealt with 3TF7 substitutes of all sorts. Most of them tried toimprove current regulation of the filament supply.
It has shown by Dallas and me that voltage regulation is the betteralternative to achieve constant VFO frequency when power line voltagechanges. Similar to the perfect regulation of B+ using constant voltagedevices (R-390A: 0A2, R-390: 2 x 5651) constant voltage supply of thefilaments leads to perfect results. Why go back? Besides the the betterregulation of my replacement device power dissipation is reducedsubstantially. Touch the 3TF7 with your finger after touching the solid

state device for several minutes and count the seconds you can grip the3TF7 (LoL).
Now a comment to the replacement of original parts with new ones. Iwould e.g. NEVER replace original capacitors with orange drops. In myeyes they are oversized and look unaesthetically (the orange drop loverswill kill me).
If possible I'd avoid any soldering in the radio. That was the 'ultima ratio'when designing the 3TF7 replacement. But if a replacement (even a solidstate device, Hallo Heinz Breuer) fits well into the look of the radio I see noproblem to install it. The 3TF7 replacement with the medium size IERCtube shield installed (http://schmid-mainz.de/Flyer.pdf) to my feeling isn'trecognized as a foreign body even by the purist.
Currently I'm experimenting with solid state replacements of the two6082 tubes in the R-390 non A. These beasts cook the radio. As I statedabove I'd never tolerate to do any soldering in the radio. I've good evidenceto succeed in the design of a direct plug-in replacement of small size andlow power dissipation using most recent switching voltage regulators.
So Roger, I've plenty of projects to deal with. Voltage regulator issues was adeviation from my long-time project 'Measurement and alignment of PTOs'.I have built a jig that uses an absolute rotary encoder to quantify therotary angle of PTOs with high precision together with the related outputfrequency of the PTO. Here a picture of my setup. (http://schmid-mainz.de/Jig.jpg) For this subject I'm preparing a manuscript for 'ElectricRadio'.
Regards to you and all list members. I hope you like my work and myenthusiasm for our beloved R-390(A) radios.-------------------------------------------------------------------------------------------------------------Date: Wed, 22 Jul 2009 19:06:57 -0500From: "Cecil Acuff" <[email protected]>Subject: Re: [R-390] Role of the 3TF7 in PTO frequency changes
True to form Lankford fan.... Dallas wasn't the first to look at voltageregulation. If you go back far enough in the archives and also check theChuck Rippel pages you will find him building a solid state voltageregulated replacement many years ago. You will also find Lankford's laststand on cap failures and their direct lineage to the blue striper pile whichdon't hold water. He has gone as far as to boil some on the stove, and thenfreezing them in his analytical testing to prove that as the cause andposted the results on the site he now frequents. Sorry but I'm not a bigfollower..--------------------------------------------------------------------------------------------------------

Date: Wed, 22 Jul 2009 17:13:27 -0700From: "Craig C. Heaton" <[email protected]>Subject: Re: [R-390] Role of the 3TF7 in PTO frequency changes
So, you would leave failed components in a radio? Inquiring minds wouldliketo know? Long live BBOD's!------------------------------------------------------------------------------------------------------Date: Tue, 4 Aug 2009 17:46:06 -0700From: David Wise <[email protected]>Subject: Re: [R-390] Role of the 3TF7 in PTO frequency changes
I offered a similar plug-in replacement (proudly named the "3DW7" aftermy initials) a few years ago and was mostly ignored. My design does notneed grounding. I regulate RMS current (necessary to avoid the groundpin) by switching individual cycles of AC. I figure that Kurt rectifies, andthen regulates the output with a high-frequency switcher. This has beendone before, but not in a 3TF7-size package. Is your output smooth DC,Kurt, or pulsating DC who’s RMS value is 12.6v ?------------------------------------------------------------------------------------------------Date: Wed, 5 Aug 2009 08:06:27 +0200From: sigmapert <[email protected]>Subject: Re: [R-390] Role of the 3TF7 in PTO frequency changes
THX for another NON-OT msg. You are right that the main component is ahigh frequency high efficiency (95%) switching voltage regulator. Theoutput is pure DC. Maximum ripple & noise is 30mVpp. Thorough testings(e.g. using a network analyzer) showed no signs of spurious harmonics ofthe switching frequency in the receiver. Kurt Schmid----------------------------------------------------------------------------------------------------Date: Mon, 14 Sep 2009 17:38:01 -0500From: <[email protected]>Subject: [R-390] [KA9EGW] progress
Well, I attacked what is [for me] the scariest thing first--PTO endpointadjustment. Piece of cake. I don't know if my rx is typical, it's a Collins8719-p-55 unit, but there's an original [anodized bore same as the rest ofthe chassis] hole in the exact right spot in the subchassis so if yourscrewdriver is the right length and diameter [it is now] nothing but theendpoint screw cover plug [missing on my radio anyway] need be removed.I could make another one, or several, if I had the dimensions. Well, it tookabout 20 minutes to get it within a couple-three hundred cps, such thatbacklash is now the bigger linearity issue...good enough for now and lotsbetter than the 5 kc it was off. [it was 1000.5-kc-worth-of-turns for 1000kc when I started].

Which creates a new problem. I have exactly 1000.3 kc from a reading ofx.002 mc to +x.002 mc. The pto is doing close enough to 1000kc-in-10turns for now, but it seems that the 'zero adjust slipper clutch' [dunno theright name, it's the wave washer thingy the 'zero adjust' mechanismcompresses] well anyway it quits slipping before i can get any closer thanreading 2kc high across the band. If I could get one end spot-on the other'dbe within a couple hundred cps and I'd be happy for now. I can easily usethe zero adjust to go to reading 20kc high across the band, then it runs outof range in that direction too.
It's almost like a gear slipped a couple teeth. Next I will check that thenominal 70kc of overrange is even split between the ends of the range. If itisn't, what do you guys recommend? Or should I not worry about it furtherat this preliminary pre-resto checkout? Gads, I hope I explained that right.--------------------------------------------------------------------------------------------------------Date: Mon, 14 Sep 2009 18:07:41 -0500From: <[email protected]>Subject: [R-390] [KA9EGW] pto ok now?
So I zeroed the calibrator, went up 5kc, locked the dial, loosened the clamp,disengaged the driven bevel gear, rolled the veeder-root to .010, re-engaged and tightened the bevel gear, unlocked the dial, tuned to .000,locked the zero adjust, tuned in the calibrator, unlocked the zero adjust.Just as a sanity check my local 1000kc powerhouse and wwv on 5 and 10are right where you'd expect. So I checked overrun and I have 45 kcoverrun on the low end and 20 kc overrun on the top end. The pto appearsto be covering the right range with acceptable linearity, but it would seemthe end-stop mechanism is out of sync with everything else. Is thisnormal, to have asymmetrical overrun?-----------------------------------------------------------------------------------------------------Date: Tue, 15 Sep 2009 08:59:10 -0400From: "Shoppa, Tim" <[email protected]>Subject: Re: [R-390] [KA9EGW] pto ok now?
> <snip>..........Is this normal, to have asymmetrical overrun? <snip>
There's multiple physical end-of-run stops. There's one made of discs rightbehind The front panel. This is to prevent you from physically hitting thePTO's end of Run which could (if you apply too much force) potentiallydamage it or knock it out of kilter. These are the stops that you aresupposed to hit! The PTO's physical range is more than ten turns, butthere's an optimal range over which the linearization adjustments do themost good, go to the wrong ten turns, and you may not only has linearitygone out of whack, but that it cannot be adjusted back into whack. To"center" the overrun you can loosen the screws on the Oldham coupler turna fraction of a turn in the correct direction, and Rezero the counter. All

assuming you aren't coming close to the internal-to-PTO end of travel.There's probably also some way to tweak the front panel disc stops, but theOldham coupler is the usual place.
Most of us have unintentionally had the Oldham coupler screws be lessthan tight :-).
You're doing great, IMHO, if you've got the thing zeroed and 1000kc isexactly 10 turns. Before messing with the overrun I'd check the linearityand after adjusting the overrun I'd recheck it to see if it got worse or better.Could go either way. Adjusting the linearity screws on a PTO is do-able butif it's "good enough" I'd say just to leave it. How good "good enough" is toyou I don't know. It is conceivable to linearize The PTO until it's within afew hundred Hz over the whole dial, but it's a lot of tweaking of correctorscrews or stacks and charting.-----------------------------------------------------------------------------------------------------Date: Tue, 15 Sep 2009 19:20:39 EDTFrom: [email protected]: Re: [R-390] PTO Mechanical Alignment.
The usual sequence is to proceed in the following order on the mechanicalalignment.
Run the KC dial from end to end and remember the dial over run on eachend.Add those two numbers together and divide by two. (about 35).Run the KC Knob off the end point.Engage the zero adjust.Run the KC knob to both ends without moving the zero clutch.Feel the middle point of the zero range. (its a learned thing as you cannoteyeball it).Pencil marks between knob and face plate do help.Set the KC knob to the center of the zero adjust.Release the zero adjust with the KC knob center.Roll the KC knob to the hard stop end point (top or bottom your choice).
Open the veeder root counter dial cover and set the over run to the numberyou need.
(about 35 over or under).
Tighten that all back up and run the KC knob end to end the over runshould
be equal on both ends.
If not, think how many numbers you are off and which way you want to go.Pick a number somewhere off the end points.

Mark the KC knob against the front panel plate with your pencil.Dial the number off set you need in the opposite direction.Engage the zero adjust, move the KC knob back to the mark, release the zero adjust shaft.Go to an end point.Adjust the veeder root dial back to the end point over run number.Tighten every thing up again.Run to both ends and see if you have equal over run on each end.Get to with in 5 and quit this. You have other things to do in life.Put the dial cover back on.Do not play with the zero adjust clutch any more in this procedure.Go to 7+000 and align the cams (.5 - 1) should be the only one thatchanges.But do what ever RF deck mechanical alignment is needed.
You may need to position the clamp bolt on the Oldham coupler so you canloosen and tighten it when the dial counter is at 000.
You can loosen position and retighten the Oldham coupler clamp withoutchanging the relation of the VFO shaft to the KC knob shaft.
Dial up 000 on either end.Lock the KC shaft with the dial lock.Loosen the Oldham coupler clamp.If you have a counter loosen the VFO oldham coupler and set the VFO to
3.455 or 2.455 which ever end you selected.Tighten up the coupler.
Or else:Go to WWV at 10.000 or 9.+000. or where ever you find it in propagationrange.Rock WWV into max signal.Change the band width down to 0.1 and peak WWV.Loosen the Oldham coupler clamp.Try the KC shaft side if you can.Hold the VFO shaft with a pair of pliers.Dial the KC knob back to zero.Retighten the clamp.
If you think your BFO is close you can use the 0.1 IF band width, the BFOzero beat and position the VFO to within about 50 hertz or better. You canwatch the meter twitch down to zero. But how close is the BFO to startwith? You can rock the BFO to under a 100 hertz with a signal generatorand the 0.1 IF band width through the 455 crystal in Z501.
This should get:Zero adjust centeredOver run even on both ends.

Mechanical cams aligned.VFO set.
And you are good until a clamp slips. Roger------------------------------------------------------------------------------------------------------and from the Collins listserv-----------------------------------Date: Sun, 22 Nov 2009 11:29:04 -0500From: [email protected]: [Collins] R-390A frequency measurement - in service
I am searching for a way to connect my HP 5316A frequency counter tothe R-390A so I can get an accurate measurement of what frequency it istuned to while in operation. I searched around and it looks like I need toconnect to the PTO output. If this is the best way, what should I use tomake the connection w/o effecting the circuit operation?-----------------------------------------------------------------------------------------------------------Date: Sun, 22 Nov 2009 17:11:54 -0500From: Jim-2 <[email protected]>Subject: Re: [Collins] R-390A frequency measurement - in service
If you only count the PTO then you will have to guesstimate the heterodyneoscillator frequencies. To use a counter directly requires mixing all theoscillators and reading the resultant output. A few pf of capacitance shouldcouple enough RF to count the PTO output.----------------------------------------------------------------------------------------------------------Date: Sun, 22 Nov 2009 12:23:40 -1000From: pete wokoun <[email protected]>Subject: Re: [Collins] R-390A frequency measurement - in service
A few turns of insulated wire on the outside of the PTO oscillator tube(inside the tube shield) is usually enough to couple the pto signal to asensitive counter. You might want to use teflon wire as some insulationsmay melt.---------------------------------------------------------------------------------------------------------Date: Sun, 22 Nov 2009 18:34:15 -0600From: "Dr. Gerald N. Johnson" <[email protected]>Subject: Re: [Collins] R-390A frequency measurement - in service
You need to measure three frequencies, and add or subtract themaccording to the band. You have to take account also if a crystal injectionis used on the second harmonic. You have to measure the PTO, the BFO andthe crystal injection frequencies, taking sums or difference. If on AM, youhave to add the IF frequency to the count even if the BFO isn't running.
Some vintage receivers do all that by using band data to preset the V/PTO

counter to the negative of the appropriate sum or difference frequency ofthe crystal and the BFO. And they are right once in a while.
There have been mixers made for that purpose, maybe AAST electronicswasone, probably intended more for the S-line, but it might be customized forthe 390 except the S-line always has the crystal on the high side. And onsome bands the 390 has an extra mixing, like the 1/2 to 2 MHz ranges andthat LO has to be included in the sum or difference to the counter.
It might be easiest to program a PIC chip that had four built in counters tocount each oscillator, check the band switch position by some othermeans, then to compute and display the appropriate sums and differences.Its not a trivial project.
> I searched around and it looks like I need to connect to the PTOoutput............
For coupling you want a small coupling capacitor to a high impedancebuffer amp near the sample point. For each oscillator. Four of them.-------------------------------------------------------------------------------------------------------------Date: Fri, 4 Dec 2009 11:00:24 -0800 (PST)From: Perry Sandeen <[email protected]>Subject: [R-390] VFO Heater Questions
I read an article in ER magazine on the Collins VFO and learned it had anadjustable thermostat.
1. Does anyone know what is the nominal temperature setting as well asthe high and low limits?
2. Does anyone know what is the nominal current draw of the VFO heater.
3. Although the Y2K-R3 BFO schematic shows no heater, is that correct?------------------------------------------------------------------------------------------------Date: Fri, 04 Dec 2009 14:03:24 -0500From: rbethman <[email protected]>Subject: Re: [R-390] VFO Heater Questions
Remember the R-390A does have a heater on the PTO.It does not have one on the BFO.-----------------------------------------------------------------------------------------Date: Fri, 04 Dec 2009 14:39:10 -0500From: rbethman <[email protected]>Subject: Re: [R-390] VFO Heater Questions

The PTO heater is HR-701. It ONLY runs when the rear OVENS switch isturned ON. The heater is a 45W rating.--------------------------------------------------------------------------------------------------------Date: Fri, 4 Dec 2009 12:21:56 -0800From: David Wise <[email protected]>Subject: Re: [R-390] VFO Heater Questions
I don't know how much of the R-390 VFO oven design was carried over tothe R-390A (It's not discussed in the Cost Reduction Report), but the R-390 FinalEngineering Report suggests on page 71 that the oven runs at 70 degreesC. As Bob Bethman mentioned, it, and the second oscillator's crystal oven,run only when the OVENS switch is on. This is not recommended fornormal use due to reduction in component life. The only always-on oven isthe one containing the calibrator crystal and the 17MHz first oscillatorcrystal. The BFO is unheated.------------------------------------------------------------------------------------------------Date: Mon, 21 Dec 2009 14:59:56 -0600From: "Bob" <[email protected]>Subject: [R-390] R-390A PTO sync
I have an R-390A that I have been working on. The receiver does notreceive and in the process of cleaning and reassembling the RF deck thePTO is no longer in sync with the RF mechanics. I have heard that there isa way using a freq counter that it can be aligned at 7.000+. Can anyoneexplain this procedure.? And yes I will have more questions-----------------------------------------------------------------------------------------------------------Date: Mon, 21 Dec 2009 16:46:14 ESTFrom: [email protected]: Re: [R-390] R-390A Cosmos pto value
Fair Radio in Ohio is still selling them for $35.00. Tested working.Cosmetic condition as is.
If you have a counter you can count either of the PTO's in your receiver.Count the BFO PTO off a tube socket pin through a capacitor.
To count the VFO PTO remove the adapter from the back panel so you cancouple the VFO output cable to the counter BNC cable. Do a bit of math todecide what the VFO output needs to be compared to the dial readout.Watch out that you do not run the VFO hard against an internal endbecause the VFO is way out of alignment with the KC dial read out.
Set the KC dial to the center of the zero adjust.Read the VFO where it sets.Do some math (the VFO is upside down)

Where +000 is 2.455 and -000 is 3.455.Think about where the KC dial needs to be.Loosen the Oldham coupler, hold the VFO shaft, dial the KC as needed.
You can set the VFO with the calibration osc, BFO set to zero and the KCdial at any 100 KHz. It will get you close. Be care full not to jam the VLFagainst its end points and you can get the alignment close enough to usethe receiver. It may take a time or two to get on the right 100Khz and getWWV at 5, 10 or 20 Mhz. But the process works well.------------------------------------------------------------------------------------------------------------Date: Wed, 17 Feb 2010 12:44:14 +1100From: "Pete Williiams" <[email protected]>
List.... Checking end point and linearity on a COSMOS is time consumingand everyone I've done needs the one turn off the end point coil.--- untilnow. The last one I've just done was very recalcitrant and I opted toremove one of the 10pf N300 caps across the main coil to bring it intoline. One turn didn't make the appropriate distance. There 'appears' to beno ill effects --- endpoint adjust OK and easily achieved linearity.
I realize that clever engineers spent time and money designing/provingtheir product but what ill effects might accrue from this heresy anddeletion ! I would expect temperature stability might suffer at extremesboth + and –
Comments/dissertations welcomed .-------------------------------------------------------------------------------------------------------------Date: Wed, 17 Feb 2010 19:01:04 ESTFrom: [email protected]: Re: [R-390] R-390 Oldham Springs
You are good to go as is.
If you squint just right and pear into the R390 long enough, you will seethere is not two little pegs on the Oldham coupler between the RF deck andthe Crystal oscillator deck. Thus no place to hang a spring. Or your couplermay not be original. It could happen! The Osc deck coupler should be asmaller dia than the VFO coupler. The coupler sets so close to the deck youcannot run a spring under it.
The crystal deck is in fact a switch and "continuous" It also has a reductiongear so some slop in the shaft is not a problem. As long as the "backlash,slop, play" does not keep the switch in the oscillator deck from switchingon each megahertz change, the mechanism is OK and needs not repair.
A lot of VFO's are running with no spring on the coupler. A good receiver

has very little play in the coupler. Most operators would never know iftheir receiver had the spring missing or not.
Better to space the coupler faces apart a bit to keep from jamming a shaftinto the VFO and getting more frequency off set from the deforming of theVFO mechanism. This again is not a lot but nice smooth operation is morefun to work with day in day out.
Any small spring you can work into the VFO Oldham coupler space will dothe job.
Some children wear dental braces that use small rubber bands. These alsowork nice but only last a couple years before they give out.-------------------------------------------------------------------------------------------------------Date: Wed, 17 Feb 2010 19:10:14 ESTFrom: [email protected]: Re: [R-390] PTO -COSMOS query
Worry not. Go forward and enjoy your more linear receiver.You gatta do what ya gatta do.-----------------------------------------------------------------------------------------------------Date: Sat, 27 Feb 2010 09:55:22 -0500From: Norm - WA3KEY <[email protected]>Subject: [R-390] Powering PTO's out of circuit
Has anyone on the list powered an R-392 PTO out of the receiver? Iconstructed a simple fixture using a Heath IP-17 power supply andfrequency counter for setting end points and have used it successfully withR-390A and R-390 PTOs, but have been unable to get an R-392 PTO to runout of circuit. Perhaps it has something to do with the 26D6 servingdouble-duty as an oscillator/mixer. Attached are the pin-outs I'm using onall three.
R-390 (Non-A) Range: 3.455-2.455MHz
A - +180vdc B+ B - n/c C - 6.3vac filament D - Filament ground E,F - n/c Oven H - Ground
R-392 Range: 3.455-2.455MHz
A,B,C,D - n/c E - +28vdc filament

F - +28vdc B+ H - Ground
R-390A Range: 3.455-2.455MHz
A - +180vdc B+ B - +150vdc Screen C - n/c Spare D,E,J,K - n/c Oven F - Ground H - 6.3vac filament-------------------------------------------------------------------------------------------------------Date: Sat, 27 Feb 2010 13:54:22 -0500From: Paul Anderson <[email protected]>Subject: Re: [R-390] Powering PTO's out of circuit
I went through this with one of mine. It has been awhile, so I am fuzzy onthe precise details. However, unlike the R-390 and R-390A PTO's, I think Ifigured out that it needed to be in circuit in order to oscillate. Someonesmarter than I am should be able to confirm this by looking at the circuitdiagram.
The symptom I had was that it would oscillate fine in circuit, but removingit from the circuit made it not oscillate cleanly (it did have a waveform, butit was very unclean).
I would like to be able to operate it externally as well (for alignment andtesting)... so if someone has ideas as to how to accomplish that, I'd begrateful if they shared.--------------------------------------------------------------------------------------------------Date: Sun, 14 Mar 2010 21:26:19 -0600From: <[email protected]>Subject: [R-390] R-390A Tuning issue
If this issue has been covered I missed it, and I am betting more than one ofyou guys (gals) know the answer: My 390A has been doing perfectly fine. Ihad an antenna issue and was too lazy to go out and fix it until thisweekend so I had not been listening to the Receiver for 2 or 3 weeks -although it is ON all the time. What I find today is that it appears the lower500Khz in each Mhz range is dead. (I tried several different Mhz settingsall with same response). And yes above and below 8Mhz. If I tune to say11.820 it receives perfectly, tune down to 11.500 and then it's dead as adoornail. The same for say 8.920 and 8.500 as so on. Hints anyone?Thanks in advance. David / WB5UOM----------------------------------------------------------------------------------------------------Date: Mon, 15 Mar 2010 00:07:55 -0400

From: Roy Morgan <[email protected]>Subject: Re: [R-390] R-390A Tuning issue
Get another receiver that can hear the PTO, follow the PTO signal withthat (A little wire stuck into the PTO oscillator tube shield for a pickup) asyou tune. You may find that the PTO is quitting about mid-range. If so,start with a new oscillator tube.--------------------------------------------------------------------------------------------------------Date: Wed, 14 Apr 2010 22:25:40 -0400From: [email protected]: [R-390] R390A Cosmos disassembly question and a secondquestion too!
I've decided to keep going in my efforts to restore my R390A. So far I'vebeen able to get the front panel off and that was a lot less complicated thanI thought that it would be. I've also removed the RF deck, cleaned andchecked the position of the RF bandswitch and the crystal oscillatorbandswitch. So far so good. Now, I'm working to open my Cosmos PTO as Iam going to have to remove a turn, maybe two, from the endpointadjustment coil so I can correctly set the endpoint. In doing so, I've found alot of documentation on how to adjust the endpoint but not a lot ofdocumentation on how to get into the inner sanctum. I've gotten as far asunsoldering the two heater wires and the heater system is free BUT now Ican't figure out of the final metal chamber is just stuck or is a tight fit or ispossibly a screw on. I'm not about to use maximum force as I don't have agood backup plan if thing go badly. So, is there a trick? Any advice isappreciated.
Also, I was surprised to find that my Cosmos was assembled and thenpressurized with 15 pounds of dry nitrogen. (This was on the warninglabel). The nitrogen has long since dissipated but I'd like to know if othershave repressurized after assembly or not. Interesting to note that I haven'tseen this mentioned in any document I've read so far.-------------------------------------------------------------------------------------------------------------Date: Wed, 14 Apr 2010 22:41:29 -0400From: Roy Morgan <[email protected]>Subject: Re: Cosmos disassembly question and a second question too!
Likely it's just stuck. There is an O-ring that the can slides over at the lastquarter inch of travel as it's installed. Llikely the O-ring is stuck. I suggestyou slip a modestly small thin screwdriver under the lip of the can and pry- do this at a number of places and the thing may well loosen up and comeoff. A tiny bit of wax or sillicone grease might be right as you re-assemble.
> ... pressurized with 15 pounds of dry nitrogen. (This was on the> warning label). The nitrogen has long since dissipated but I'd like

> to know if others have repressurized after assembly or not.
I've never heard of anyone putting pressurized nitrogen in there, or evenunpressurized nitrogen. I suggest you ignore the pressure and thenitrogen altogether. You may well find some dessicant capsules in there.These can be dried out in a 200 degree oven for an hour or so and re-installed if you like.------------------------------------------------------------------------------------------------------Date: Thu, 15 Apr 2010 09:19:21 EDTFrom: [email protected]: Re: Cosmos disassembly question and a second question too!
I haven't had a Cosmos apart, but the PTO I disassembled just had the threescrews holding the inner cover on. There was a gasket which may beholding the inner cover closed. I have never heard of anyone trying to repressurize the PTO. Some do bake the unit at low heat to drive anymoisture out. I assume you have found some of the information on the webabout the Cosmos (linearity adjustment vs end point adjustment)? I didthe linearity adjustment and it worked fine, but the end point seemed todrift after a year, then I would have to readjust.------------------------------------------------------------------------------------------------------------Date: Thu, 15 Apr 2010 10:25:21 -0400From: [email protected]: [R-390] An update - R390A Cosmos disassembly question
Thanks to everyone for their feedback. Now inside. It was quick work onceI knew that the final chamber was held by a rubber gasket and not screwedinto place. Happy to report that the interior is pristine. The valve stemappears to have a manufacturing defect so it's very doubtful that this PTOwas pressurized for longer than a few minutes. The two dessicant capsulesare still tied in place and are blue. I'm not sure from a quick scan of thedocumentation if blue is good or bad.------------------------------------------------------------------------------------------------------------Date: Fri, 16 Apr 2010 12:27:13 -0500From: Tisha Hayes <[email protected]>Subject: [R-390] Cosmos Dis-Assembly
At least you didn't open the case to the nice aroma of roasted PTO with thecommensurate melted components from a heater that was stuck on. "I lovethe smell of roasted PTO in the morning.. it's like.. victory"------------------------------------------------------------------------------------------------------------Date: Fri, 16 Apr 2010 13:51:47 -0400From: rbethman <[email protected]>Subject: Re: [R-390] Cosmos Dis-assembly
No, you are NOT lost! Someone simply posted a description directly from a

"reference". Thereby unintended but overkill in "honing" your very apt andcorrect post! We didn't "need" to know the chemical "structure" andreactant means. The bloody desiccant is a bright deep blue when firstdried/manufactured. It goes through a progression of of changes in coloras it absorbs water vapor/humidity. Eventually it is indeed very pinkwhen it has done its job. We had dozens of these packages about a quart insize that used to go into the Engine containers when we either shipped are-manufactured gas turbine engine, or a new one to whom needed it. Wehad these bags by the case. Once the smaller box was opened, we had tobake the dozens needed to deal with the next engine. We always had aBUNCH sitting in an oven purchased off the commercial market that any ofus would have loved to take home! I don't believe that it was shut off thewhole time the shop ran. <snip>-----------------------------------------------------------------------------------------------------Date: Fri, 16 Apr 2010 14:07:04 -0400From: Gord Hayward <[email protected]>Subject: Re: [R-390] Cosmos Dis-assembly
One neat thing I've found is that all of the dessicant bags I've seen have thewords DO NOT EAT in big letters. I guess there's a regulation that comesfrom the little bags you find in pill bottles. Some people think you have toeat those first ;-). I save those little bags too.-------------------------------------------------------------------------------------------------------------Date: Fri, 16 Apr 2010 14:35:44 -0400From: rbethman <[email protected]>Subject: Re: [R-390] Cosmos Dis-assembly
Yep! I was mostly replying about the desiccant and the nitrogenpressurization. I was trying to put it into ANOTHER context. Sorry - Got alittle carried away! <snip>----------------------------------------------------------------------------------------------------------Date: Sun, 18 Apr 2010 14:14:58 -0400From: rbethman <[email protected]>Subject: Re: [R-390] Cosmos Dis-assembly
I'm confused!How can you use the PTO if the slug is off its track?It may be that the PTO was turned too far while NOT installed.Please enlighten us. <snip>
>> Hi Bob, Thanks for your message. I've been inside, tried some> adjustments but was not successful as the tuning slug looks to be> damaged. It appears to be off its track and too far down in the> endpoint adjustment inductor. So, I've close things up and put my> R-390A back in use temporarily. I need a nice solar flare, something

> that knocks the HF signals off the air for a few hours, so that I can> go back in and unsolder the two leads on the endpoint adjustment> inductor and see what it will take to get the variable inductor to vary.> While things were opened, I did unscrew the cap to see what the screws> looked like associated with linearizing the PTO. They sure are tiny!> First things first. Once the endpoint adjustment has been completed, I> do plan to take a look at linearization.> Thanks and 73 Russ WA3FRP>> -----Original Message-----> From: rbethman <[email protected]>> To: [email protected]> Cc: [email protected]> Sent: Sun, Apr 18, 2010 11:46 am> Subject: Re: [R-390] Cosmos Dis-assembly>> Russ!>> Okay! Now the "original" post finally got the can off.>> Now - How is it going?>> Any reall issues with the endpoints?>> How about all the "intermediate" alignment screws? ( Yes - they ARE a> pain! )>> Don't worry about pressurizing it after you are done. BTW - it is an> everyday schrader valve, just like on the car tires.-------------------------------------------------------------------------------------------------------------Date: Sun, 18 Apr 2010 15:03:05 -0400From: [email protected]: Re: [R-390] Cosmos Dis-assembly
Sorry that I was not clear. The PTO works but now that I've removed aturn on the midpoint adjustment coil, the PTO tunes 1000 Hz in slightlyless than 10 turns. So, I tried to turn the adjustment screwcounterclockwise only to find that the core turns but is not coming backtoward me as I face the screw slot in the coil from the front of the PTO. Inchecking further, I see that I am turning the slug (why does this have to beslightly behind the transformer?) and with a light and some extramagnification, it looks to me that the screw is past the screw track or atleast that it what it looks like to me. So, I figure the next step is to removethe midpoint adjustment coil by unsoldering the two attached wires andthen backing off the locking nut and removing the entire coil to see if I canget a better look at what is happening and to see if I can get the screw backin the screw track. Except for this problem, the PTO is in excellentcondition. Thanks and 73 Russ WA3FRP-----------------------------------------------------------------------------------------------------Date: Sun, 18 Apr 2010 19:58:23 -0700 (PDT)From: "Drew P." <[email protected]>

Subject: Re: [R-390] Cosmos Dis-assembly
> Don't worry about pressurizing it after you are done. BTW -> it is an everyday schrader valve, just like on the car tires.
Let's see...remove the 3 screws securing the inner can, then applycompressed air to the Schrader valve - KaPOW!!!, just like removingpistons from automotive disc brake calipers. On second thought, maybebest not to attempt this method...------------------------------------------------------------------------------------------------------------Date: Sun, 18 Apr 2010 23:11:07 -0400From: Roy Morgan <[email protected]>Subject: Re: [R-390] Cosmos Dis-assembly
A bit of strapping or nylon line would allow the thing to unseat and not flyacross the room. BY the WAY: I don't remember any schrader valves onCosmos PTO's here. Do all of them have such a valve? Maybe I did not lookin the right place.---------------------------------------------------------------------------------------------------------Date: Mon, 19 Apr 2010 21:08:55 +1000From: "Pete Williiams" <[email protected]>Subject: [R-390] COSMOS Pto EP ADJUSTMENT
Russ... once the endpoint adjustment slug is fully in and out of thread.you've got to have the PTO apart and put back in. I've done a few COSMOSand in lieu of removing a turn off the EP coil I've now opted for addinganother 10 pf in series with the one already there...
The resulting 5 pf then across the coil does the trick with no obvious sideeffects . The linearising screws are a PITA--- you may be lucky and findyours have slotted heads... I'm usually unlucky and find that mine have aminiature Bristo flute socket head. If you go the whole way anddisassemble, make sure you get the disc with these linearising screws isback in the same position.... some models don't have screws in all theholes so you end up with a problem.
Get full story on revival of a COSMOS from the archival information 'AJourney through the Cosmos' (PTO) by Jim Miller.------------------------------------------------------------------------------------------------------Date: Mon, 19 Apr 2010 12:38:23 -0400From: [email protected]: Re: [R-390] Cosmos Dis-assembly
Yes, my Cosmos PTO did have a schrader valve. In my case, it can be seenat the back of the Cosmos once the outer case has been removed. I assumedthat they were all made that way. I'm thinking that I will try to

repressurize the unit if I can find a source of dry nitrogen in the area. Myfirst thought is to approach the Chemistry Department of a localUniversity. 73 Russ WA3FRP-----------------------------------------------------------------------------------------------------Date: Mon, 19 Apr 2010 12:53:36 -0400From: rbethman <[email protected]>Subject: Re: [R-390] Cosmos Dis-assembly
While they originally used dry nitrogen, you "may" want to consider Argon,available at welding shops. Why the change? Argon is much less reactivethan Nitrogen, and most likely easier to obtain.
Either of these gases is normally supplied in 300 cubic foot cylinders, andcomes pressurized at about 2700 - 3000 psi. (I used to do welding and am aScuba Diver. Used to large volume high pressure gases. Scuba tanks getfilled from a bank of these large cylinders while placed in a plasticcontainer of water. Just in case the tank lets go! )--------------------------------------------------------------------------------------------------------Date: Mon, 19 Apr 2010 12:55:34 -0400From: [email protected]: Re: [R-390] Cosmos Dis-assembly
Thanks for your comments and advice. I like your idea about addcapacitance as my search of the literature on the subject shows that this isnot a once and done adjustment. Instead, I see that the endpoint needs tobe looked at annually as the endpoint frequency continues to decrease overten turns as a funtion of time.
Also, I was happy to see slotted screws so I MAY try to adjust linearization.I have a frequency counter. The question is do I have the patience.--------------------------------------------------------------------------------------------------------Date: Mon, 19 Apr 2010 14:35:22 -0500From: <[email protected]>Subject: Re: [R-390] Cosmos Dis-assembly
A lot of hot-rod and chopper and crotch-rocket [...er, sportbike] shops havenitrogen for 'airing' up tires, makes for less change in the vehicle'shandling as a function of tire temp, supposedly.----------------------------------------------------------------------------------------------------------Date: Mon, 19 Apr 2010 15:58:47 -0400From: rbethman <[email protected]>Subject: Re: [R-390] Cosmos Dis-assembly
Costco also is using Nitrogen for the tires it sells. They even put a "green"cap on the valve stem.
I only suggested Argon since it is one of the "Noble" gases. This means thatit does NOT react with other elements, at least not in a detrimental way.
Nitrogen is NOT a noble gas. It DOES react with things. To keep itemsprotected with a gas "blanket" or such that constantly varies, Nitrogen isfine. Very long exposure periods without BIG variations in temp andpressure are "usually" better served with a "Noble" gas, as there will not becorrosion.
No one is worried about the steel wheels of your car to be protected againstcorrosion when you see the outside is exposed to temp extremes alongwith salt, sand, and the like. We've changed since these radios have comeout. Now we are trying to preserve, restore, and use them. ( A bit of amixed bag! )------------------------------------------------------------------------------------------------------------Date: Mon, 19 Apr 2010 16:24:37 -0400From: rbethman <[email protected]>Subject: Re: [R-390] Cosmos Dis-assembly
Being completely honest, I wouldn't even bother with pressurization withANY gas. I would most likely consider pulling a vacuum. All you and I aretrying to do is to keep it dry and corrosion free. You could bake the entirePTO at 200 Deg F, with the covers off. Using oven mitts, IMMEDIATELYplace the inner cover on. The O-ring should be able to stand this - it used tobe heated! Pop the screws in along the front. By then the remaindershould be cool enough that you can take it to the bench and continue re-assembly. The cooling will pull the inside to a pressure below that of"normal" at room temp. Yep! It is a mixture of Oxygen, Nitrogen, and allthe other traces. I bet that when Roger and crew worked on them, theydidn't play with nitrogen.---------------------------------------------------------------------------------------------------Date: Mon, 19 Apr 2010 13:42:39 -0700From: David Wise <[email protected]>Subject: Re: [R-390] Cosmos Dis-assembly
If it's dry enough, that's a neat tip for members; probably get a little shotfor next to nothing. But I don't think it makes any difference over the longrun. The seal is far from perfect, so with every change in temperature oratmospheric pressure, the PTO will "breathe" out or in, a little, and everyinhalation will dilute the interior gas with whatever's out there.Eventually the interior will just be air. An initial load of dry air gives thedessicant a little boost, but that's all.------------------------------------------------------------------------------------------------------------Date: Tue, 20 Apr 2010 10:39:57 +1000From: "Pete Williiams" <[email protected]>Subject: [R-390] FW: COSMOS Pto EP ADJUSTMENT

Russ... once the endpoint adjustment slug is fully in and out of thread.you've got to have the PTO apart and put back in. I've done a few COSMOSand in lieu of removing a turn off the EP coil I've now opted for addinganother 10 pf in series with the one already there... The resulting 5 pfthen across the coil does the trick with no obvious side effects. Thelinearising screws are a PITA--- you may be lucky and find yours haveslotted heads... I'm usually unlucky and find that mine have a miniatureBristo flute socket head. If you go the whole way and disassemble, makesure you get the disc with these linearising screws is back in the sameposition.... some models don't have screws in all the holes so you end upwith a problem. Get full story on revival of a COSMOS from the archivalinformation 'A Journey through the Cosmos' (PTO) by Jim Miller.------------------------------------------------------------------------------------------------------Date: Mon, 19 Apr 2010 20:23:53 -0500From: Tisha Hayes <[email protected]>Subject: Re: [R-390] Cosmos Dis-assembly
I do not think it matters if you use nitrogen, argon or any other inert gas.If you have it available to you that is fine. If you have just dried air and adecent desiccant package that should be fine too.
On large substation transformers we use a nitrogen blanket in place of airabove the transformer oil. We keep it under a very low positive pressurejust so if there is a leak it is away from the transformer and it does notsuck moisture in. If you look at a giant substation transformer you will seea pressure gauge that shows -/+ pressure of only a few PSI.
Argon is more inert than nitrogen and it is also denser so maybe theleakage rate across seals may be slightly less. Keeping a pressure seal onany type of vessel is going to require very good shaft seals and the coverseal will need to be in great shape. I doubt that any of the seals on any ofour PTO's are in great shape any more.
If you have it, and it makes you feel better than by all means use it. I wouldnot go running out to buy a tank of gas just so I could put an inert gas inthe PTO. Heck, if it did not dissolve things and totally screw up thedielectric constant you might as well fill the entire PTO with transformeroil. That is something else to consider, gasses that significantly vary fromatmospheric may alter the dielectric of the PTO assembly. Who knows towhat degree. Nitrogen is 78% of our normal atmosphere so it would havethe least impact.------------------------------------------------------------------------------------------------------Date: Tue, 20 Apr 2010 09:53:56 -0400From: [email protected]: Re: [R-390] COSMOS PTO EP ADJUSTMENT
One question for you (and anyone else on the list who may wish tocomment) as I want to go in, fix the problem and get back out quickly. Ican't afford to have a lot of downtime as this R-390A is my primaryreceiver. And, knowing how things work, something that I haven't workedis sure to show up if I am off-the-air.
You said "...once the endpoint adjustment slug is fully in and out of thread,you've got to have the PTO apart and put back in..."
Are there any hints or things that I should know in working to get theendpoint adjustment slug screw back in the threads. Or, is this fairlystraightforward once I've removed the coil from the PTO? I have triedturning the screw counterclockwise with a hope that the threads wouldsimply re-engage - without success.---------------------------------------------------------------------------------------------------------Date: Tue, 20 Apr 2010 13:04:05 -0400From: [email protected]: [R-390] COSMOS - Sources for Nitrogen
I located this site that gives locations that will supply nitrogen forinflating tires (tyres). http://www.getnitrogen.org/index.php
I'm not going to get into the issues related to nitrogen vs. air in tires but itwill beinteresting to see if the handling improves on my R-390A after inflation.---------------------------------------------------------------------------------------------------------Date: Wed, 21 Apr 2010 12:40:32 +1000From: "Pete Williiams" <[email protected]>Subject: Re: [R-390] COSMOS PTO EP ADJUSTMENT
G'day Russ. You will have to take off the outer and inner covers. Thethreaded slug in the EP coil is easily screwed back in again if you wereunlucky enough to screw it right through. No other disassembly isrequired.
To make the EP adjustment approximately correct on the bench, Isuggest you make up/acquire apower supply to give you the 150 and 250V plus 6.3 for heater . Make the appropriate connections. Just put theinner cover on pro tem and do the 10 turn trick checking both points.
When you find you have sufficient adjustment range by doing the 1 turnremoval or a series capacitor on the EP coil, a more deliberate /accuratesetting can be got when it's all back together.
I am fortunate that I have a dual adjustable two voltage supply and have

made up a test cable with a spare plug to do EP and linearization.
Let the PTO warm up at room temp for an hour or so..DON"T use the oven- you'll go ballistic trying to keep the freq from moving around ( lots of HZ)----------------------------------------------------------------------------------------------------------Date: Tue, 20 Apr 2010 20:28:08 -0700 (PDT)From: "Drew P." <[email protected]>Subject: [R-390] COSMOS PTO EP ADJUSTMENT
One design feature of the receiver which suited the military, who, like youdesire equipment with minimum downtime, was modularity. This enables aswap of an entire subsystem with minimum time and effort to get thereceiver back on line. You might do well, therefore, to keep a few sparemodules available. If you had a spare PTO, you could quickly swap out theone in your receiver and immediately be back on line. You would thenrepair the errant, swapped-out PTO at your leisure.--------------------------------------------------------------------------------------------------Date: Wed, 21 Apr 2010 10:54:32 -0700From: David Wise <[email protected]>Subject: Re: [R-390] COSMOS PTO EP ADJUSTMENT
I have concerns about your series cap approach to endpoint adjustment.But first, let's make sure I understand. You propose adding a small cap inseries with C702 or C703, right? If so, there are two problems.
First, those caps are for temperature compensation. All three caps (C701,C702, and C703) are negative-TC ceramics. Their decrease as the PTOwarms up balances the increase in L701 and L702 as their forms and wireexpand. C702 and C703 were selected at the factory to trim the overallTC. Unless your cap is just right, it will throw off the TC, which increasesdrift.
Second, you may go outside the linear range of L702, or even run out ofslug travel. Reducing C requires a corresponding increase in L, effected byrunningthe L702 (main tuning) slug deeper into the coil. With L702 now making alarger percentage of the L701+L702 total, the frequency range swept byten turns becomes wider. This gets your endpoint back, but does notcorrect the root cause, namely, increase in L701's inductance. The cure forthat is cutting off a turn, or (perhaps) shaving the slug.-----------------------------------------------------------------------------------------------------------Date: Wed, 21 Apr 2010 13:33:38 -0400From: Barry <[email protected]>Subject: Re: [R-390] COSMOS PTO EP ADJUSTMENT

I wonder if anyone has attempted to replace the PTO with an encoder-drivern LO? Yeah, it's "heresy", but it sure would put an end to endpointand linearity problems...----------------------------------------------------------------------------------------------------------Date: Wed, 21 Apr 2010 14:18:33 -0400From: rbethman <[email protected]>Subject: Re: [R-390] COSMOS PTO EP ADJUSTMENT
I believe the very first hurdle would be the need for ten turns of the KCknob. Since this not only turns the PTO for frequency adjustment, but tunesthe slug racks, and the Veeder-Root counter. This would become asignificant engineering task. I for one am not about to go that path. It issimpler to work on the PTO.......-----------------------------------------------------------------------------------------------------------Date: Wed, 21 Apr 2010 14:18:48 -0400From: "Shoppa, Tim" <[email protected]>Subject: Re: [R-390] COSMOS PTO EP ADJUSTMENT
That would be taking what is perhaps one of the lowest phase noise PTO'sever manufactured, and replacing it with the cacophony of digitalcircuitry. I don't see the point. And after you're all done you would stillhave the 17MHz oscillator pulling under AGC action (a weak point of the390A that occasionally bothers me).
An unobtrusive low-noise (even better, no noise!) frequency counterreplacing the veeder root and the window, used with the existing PTO, thatI could see. Wouldn't do it, but I could see it. It would change the knob feelbecause there wouldn't be the slap-slap-slap-slap as the decades whip by inthe veeder root... for some this would be a loss, maybe for others a gain.---------------------------------------------------------------------------------------------------------Date: Wed, 21 Apr 2010 14:07:10 -0400From: Barry <[email protected]>Subject: Re: [R-390] COSMOS PTO EP ADJUSTMENT
I was talking about only from the Oldham coupler back (just the PTO) so itwouldn't involve the slug racks, counter, etc. As for the noise, yes, that's apoint; however, it could be viewed as a trade-off between being spot-onfrequency every time all the time (or at least as "spot-on" as the 17mcoscillator allows) versus some noise. It was just a thought...------------------------------------------------------------------------------------------------------Date: Wed, 21 Apr 2010 15:13:25 -0400From: rbethman <[email protected]>Subject: Re: [R-390] COSMOS PTO EP ADJUSTMENT
Yes, from the coupler back takes out "some" of the engineering and designissues. You still have a ten turn encoder system. It would require "another"

frequency source, and at a very odd start and stop point(s). I use encodersin VHF radios, I have one in an HF dedicated receiver. (SS) Birdies all overthe place! My other use is in the guidance and tracking of a telescope. Theyindeed have their place. I'm just trying to balance the function vs. theeffort, issues, and $$$ to get there. As to heresy. I've probably committedit in the restoration process so far. To some I've gone too far already! I'veremoved the "Blue Stripe" in the process of restoration. I guess I'll getburned at the stake in Salem!----------------------------------------------------------------------------------------------------------Date: Wed, 21 Apr 2010 11:22:29 -0700From: Dan Rae <[email protected]>Subject: Re: [R-390] COSMOS PTO EP ADJUSTMENT
Barry, using an accurate frequency counter, something that is fairlycommon these days, these adjustments become very easy, I did mine inabout 30 minutes, no jigs, obscure foodstuffs or anything difficult at allneeded. This may be as heretical as your suggestion and of course was notthe way it was done way back when but I'm sure it would have been had thetools been available.----------------------------------------------------------------------------------------------------------Date: Wed, 21 Apr 2010 15:57:38 -0400From: rbethman <[email protected]>Subject: Re: [R-390] Cosmos PTO end point adjustment
Encoders in and of themselves, do NOT normally cause spurs.
One of the issues that IS directly a side effect of removing the PTO andreplace with an encoder system - It *IS* a "Permeability Tuned Oscillator".Therefore, you must ALSO create a "new" oscillator with oddball start pointand endpoint since it WILL become a VFO, albeit a digital one.
Issues with digital encoders in HF (SS) equipment does turn up inYaeComWood receivers. It is one of those I currently have that has thespurs. They have now become MUCH worse since I performed analignment and improved its sensitivity. Everything has its good points andits bad points.
I'm "still" not leaving the "Blue Stripes"! *MUST* be time to make anotherbatch of Kielbasa and Pierogi!---------------------------------------------------------------------------------------------------------Date: Wed, 21 Apr 2010 16:22:50 -0500From: Tisha Hayes <[email protected]>Subject: Re: [R-390] COSMOS PTO EP ADJUSTMENT
<snip> There are real heretics who dissect a perfectly good radio so theycan sell the parts for more than the sum of the radio. Just buy a spare PTO
and keep one in the radio and the other ready to go at a moment's notice.Then you can mess around with endpoint adjustments and linearity screwsuntil the cows come home. I have collected enough spare modules to build acomplete radio (or two). the ePay place is a good source and you can waituntil something shows up at bargain basement prices (like 10 minutesbefore an auction ends. I purchased good Tascam DAT recorder for $1.99that way, it only needed a new belt. Patience grasshopper, and snipingbids!------------------------------------------------------------------------------------------------Date: Wed, 21 Apr 2010 17:45:50 EDTFrom: [email protected]: Re: [R-390] COSMOS PTO EP ADJUSTMENT
I thought about a synthesized PTO replacement, although I'm really an RFengineer by trade. I found two problems I couldn't solve- maybe someoneelse can help out. First, you need better than 100 Hz resolution, whichmeans either an encoder with better than 1000 bits/rotation (veryexpensive), or a gear driven encoder. You definitely need two encoders-one to count in Hz and one to count in 100 KHz. Finally, if you solve allthat, you need to retain the settings in memory on power down so youdon't lose the synchronization between the - and the rest of the RF module.Probably a simple micro could do that. I thought it would be really neat tohave an absolutely linear PTO accurate to 100 Hz over the whole range,but it's beyond me. If anyone wants to help out, just jump in.-------------------------------------------------------------------------------------------------------Date: Wed, 21 Apr 2010 18:04:12 -0400From: "Bernie Doran" <[email protected]>Subject: Re: [R-390] COSMOS PTO EP ADJUSTMENT
If one thinks they have some need to read frequency that close, would itnot be simpler to simply buy a POS jap rx and either use that, or zero beatwhat ever it is you are listening to? Or better yet, buy a SDR-IQ and telleveryone that you are looking at the band for signals.-------------------------------------------------------------------------------------------------------------Date: Wed, 21 Apr 2010 19:03:35 EDTFrom: [email protected]: Re: [R-390] COSMOS PTO EP ADJUSTMENT
I have to agree, Bernie, I finally decided it was working fine just the way itis. Settability to 300 Hz is close enough to find any signal. The only "fix" Inow use for my R-390A is an outboard SSB adapter, since that is thedominant mode of operation these days. (It's interesting that in theheyday of the R-390 most of the intercept work was on CW signals, forwhich the radio is well suited).------------------------------------------------------------------------------------------------------------Date: Wed, 21 Apr 2010 19:24:54 -0400

From: rbethman <[email protected]>Subject: Re: [R-390] COSMOS PTO EP ADJUSTMENT
Yep! Between the R-390A, SP-600, and the BC-610 (plus a T-213), I figurethat the 100KC calibrator on the R-390A gets me more than close enoughto get everything synced and where I want to be for AM. The SS Digital RXis for "portable" in the house or on the deck.---------------------------------------------------------------------------------------------------------Date: Wed, 21 Apr 2010 22:02:21 -0700 (PDT)From: "Drew P." <[email protected]>Subject: [R-390] COSMOS PTO EP ADJUSTMENT
On Barry's pondering replacement of a PTO with a systhesized VFO, TimShoppa wrote: [snipped] "An unobtrusive low-noise (even better, no noise!)frequency counter replacing the veeder root and the window, used with theexisting PTO, that I could see. Wouldn't do it, but I could see it."
And if you wanted to really see it, and to truly appreciate it, the displaydevice of choice would be Nixie Tubes. Truly Beautiful!
"It would change the knob feel because there wouldn't be the slap-slap-slap-slap as the decades whip by in the veeder root... for some this would be aloss, maybe for others a gain."
And for still others, a challenge. I can envision list heavyweight Dave Wise(perhaps best known for his high tech, microcontroller based 3DW7"tubester" ballast replacement) putting together a microcontroller basedsound synthesizer to replace the missing slapitty-slap of the Veeder-Rootcounter. All in an enclosure the size of a thimble.--------------------------------------------------------------------------------------------------------Date: Thu, 22 Apr 2010 13:40:24 +0000From: <[email protected]>Subject: Re: [R-390] COSMOS PTO EP ADJUSTMENT
You don't need that accurate of shaft encoder, you just need to adjust thetuning rate according to the speed at which you rotate the shaft encode.-------------------------------------------------------------------------------------------------------------Date: Thu, 22 Apr 2010 12:39:24 -0400From: Barry <[email protected]>Subject: Re: [R-390] COSMOS PTO EP ADJUSTMENT
> <snip> "An unobtrusive low-noise (even better, no noise!) frequencycounter> replacing the veeder root and the window, used with the existing PTO,that> I could see. Wouldn't do it, but I could see it." <snip>

Essentially, that would be this: http://www.aade.com/dfd3.htm
Of course, you'd have to convert the readout to NIXIEs...---------------------------------------------------------------------------------------------------------Date: Thu, 22 Apr 2010 12:47:32 -0400From: Barry <[email protected]>Subject: Re: [R-390] COSMOS PTO EP ADJUSTMENT
> Of course, you'd have to convert the readout to NIXIEs...
After I sent this, something occurred to me. While this would allow thePTO endpoints to go wherever they want, linearity can go out the window,and you'll still see the correct frequency, it does not take into considerationthe position of the slug racks. I could see where eventually one could seesome degradation in performance due to end point movement and/orlinearity and it wouldn't be obvious as to why.-----------------------------------------------------------------------------------------------------Date: Fri, 23 Apr 2010 12:48:43 -0600From: Robert Harding <[email protected]>Subject: [R-390] Nixie Tube Freq Readout
Try a "Systron Donner" Model 6152A Frequency Counter. Has lots of otheruses around the shack and uses bright Nixie tubes. Used in the late '60s tomid '80s, these counters are military/cal lab grade and can be found indecent shape for $50-$150.---------------------------------------------------------------------------------------------------------Date: Sat, 24 Apr 2010 07:54:44 -0700 (PDT)From: Masters Andy <[email protected]>Subject: [R-390] Nixie Tubes
The venerable HP-5245L should not be overlooked.? With its tunneldiodes, you could spend perhaps months of daily repair...built like a sunkenbattleship!----------------------------------------------------------------------------------------------------------Date: Sat, 24 Apr 2010 11:06:40 -0400From: rbethman <[email protected]>Subject: Re: [R-390] Nixie Tubes
Why fight the daily repair? Use and HP-312 or 312A?Also built like battleship. Only tubes in one ARE the Nixie Tubes!-------------------------------------------------------------------------------------------------------------Date: Sat, 24 Apr 2010 14:27:38 -0700 (PDT)From: "Drew P." <[email protected]>Subject: [R-390] Nixie Tube Freq Readout
> ...........With its tunnel diodes,......................
Are tunnel diodes even manufactured anymore? Methinks that they areonly available as NOS now. The tunnel diode - that miracle device whosemiracle never materialized.------------------------------------------------------------------------------------------------------Date: Fri, 3 Sep 2010 19:36:59 -0500From: <[email protected]>Subject: [R-390] PTO
The saga continues...it goes without saying the RF deck is now horribly outof alignment. I can get the rx to hear my sig/gen on the antenna input, butthat's about it.
Lacking access to a freq counter, but having a decent sandstate generalcoverage rx, [a Rat Shack DX390 which is possibly too sensitive for thisuse] how do I go about telling where the pto is really at? I've got morethan my share of intermod and spurious mixing products and can blankthe receiver 50 times when tuned through 10 turns starting at thecounterclocksise. [When I say 'stop' I mean that point where the resistanceof the bare pto shaft to my bare fingers just starts to increase marginally, Iam being very careful not to run the pto past it's physical limits...]
Assuming I'm at the full CCW stop on the pto, where should it be? It's aCollins PTO FWIW. I won't even go into my planned 'someday' change to theCosmos I have on the shelf... Any help would be appreciated.-----------------------------------------------------------------------------------------------------Date: Fri, 3 Sep 2010 18:22:11 -0700From: "Craig C Heaton" <[email protected]>Subject: Re: [R-390] PTO
Looking back, I think this is still about an "A". So if it is get a copy of theY2K, print the beast and follow along. The mechanical alignment has to bedone first, check cam position at 7 +000,etc. If the receiver can hear signals, set it for one of WWV's TX's; 5 10 15 or20 MHz. Loosen a clamp on the PTO, keep the veeder root, cams, etc frommoving, turn PTO shaft only until WWV is zero beat. (BFO on)
This should get you in the ball park.---------------------------------------------------------------------- ----------------------------------Date: Fri, 3 Sep 2010 21:11:03 -0500From: <[email protected]>Subject: Re: [R-390] PTO
Nah, the only thing it can hear is my sig/gen at an absurd input level, at7.035 and 8.035 [seemingly verifying what visual inspection told me

when I reassembled the RF deck...although that jibes with the displayindications...and some spurs at indicated 0+000 and 1+000 and a birdie at910. I haven't looked higher than that. The cam alignment at 7+000 isspot-on, the rf bandswitch rolls over between 7 +000 & 8 +000 just like inthe tutorial, and 7+000 equates to the 7 showing in the window on thecrystal oscillator deck, and visual inspection before reinstalling the rfdeck/crystal deck assembly confirmed the contacts were right in line. Is itsomehow possible to have the crystal oscillator bandswitch mis-indexed tothe indicator drum inside the crystal deck, without having done anythingto the crystal deck on a previously-working receiver?By the way, I'm using a known-good, plug-and-play IF deck just receivedfrom Fair Radio. The known-good PnP RF deck should be here Tuesday. Orcould I have the MHz side of the...I dunno. I need to walk away from it for afew hours. I'll be yanking the blankety-blank rf deck again tomorrow.------------------------------------------------------------------------------------------------------Date: Fri, 3 Sep 2010 21:11:03 -0500From: <[email protected]>Subject: Re: [R-390] PTO
I did find the 2455 and 3455 points on the PTO; there was a ton of spursand trash audible on the general-coverage sandstate ersatz freq counter,but every 100khz I can find the signal from the pto [which appears to havea much slower tuning rate than the intermodded trash]. 3455 is about 3or 4 turns clockwise from the end stop; does that seem about right for acollins pto?
Sanity check: 2455 equates to +000, yes?---------------------------------------------------------------------------------------------------------Date: Fri, 3 Sep 2010 21:41:26 -0500From: <[email protected]>Subject: Re: [R-390] PTO
I just had the rf deck out again, and the RF bandswitch is right, crystalswitch is spot-on, cam positioning is right at 7+000. I'm planning when/ifI go back to it to start looking for a failure elsewhere in the system.----------------------------------------------------------------------------------------------------Date: Sat, 04 Sep 2010 00:11:30 -0400From: Jon Schlegel <[email protected]>Subject: Re: [R-390] PTO
As a reality check, you might consider injecting a signal more towards theback end of the receiver. Insert the hot lead of the sig gen output down inbetween a selected stage's tube and its shield. Use a wire with high tempinsulation like teflon. Be careful not to let the end of the wire touch any ofthe tube pins. Some tape or heat shrink on the wire end would help here.

Likewise, to use your DX390 to sniff oscillator frequencies, connect asuitable length of coax and expose a stub of the insulated center conductorat the far end. Again, use tape or heat shrink on the very end. With thisyou should be able to sniff oscillator signals without overloading theDX390. If you need more attenuation, try adding additional shunt C orshunt R at the input of the DX390.-----------------------------------------------------------------------------------------------------------Date: Sat, 4 Sep 2010 00:26:56 EDTFrom: [email protected]: Re: [R-390] PTO
The cam alignment at 7+000 is spot-on.The rf band switch rolls over between 7 +000 & 8 +000 just like in thetutorial.7+000 equates to the 7 showing in the window on the crystal oscillatordeck.Visual inspection before reinstalling the rf deck/crystal deck assemblyconfirmed the contacts were right in line.
Is it somehow possible to have the crystal oscillator bandswitch mis-indexed to the indicator drum inside the crystal deck, without having doneanything to the crystal deck on a previously-working receiver?
No. you are likely good here.
Tubes and alignment.It worked yesterday.Today it does not.Only one thing is likely wrong.
As you will learn, alignment is everything.A little bit goes a long way in the RF deck.
Sanity check: 2455 equates to +000, yes? TrueConversely 3455 equates to 000.
Assuming I'm at the full CCW stop on the pto, where should it be? It's aCollins PTO FWIW. (FWIW is good money) Something more than 3455.Three turn should get you 300 K hertz more than 3455. Its still linear(well mostly). Like wise the other end should get you 100 K hertz less than2455 for every turn of the shaft. The real value at the limits will vary withevery VFO.
I won't even go into my planned 'someday' change to the Cosmos I have onthe shelf. Once you get the receiver operating, you may want to swap in theCosmos just to make sure it works. From an electric point of view the

models are equal. The Cosmos may have a higher output thus higher mixerlevel and may or may not provide an overall better signal to noise ratio.You do not know until you can compare what you have on hand and see.
There are two PTO's in any R390.Which do you speak of? (BFO VFO)They both have like stops and get treated the same.Finger resistance is the end point.
When I say 'stop' I mean that point where the resistance of the bare VFOshaft to my bare fingers just starts to increase marginally I am being verycareful not to run the VFO past it's physical limits
3455 is about 3 or 4 turns clockwise from the full CCW end stop.Does that seem about right for a Collins pto? True
Lacking access to a freq counter, but having a decent sandstate generalcoverage rx, [a Rat Shack DX390 which is possibly too sensitive for thisuse] how do I go about telling where the pto is really at?
The VFO puts out a nice 4 plus volt signal from 3455 to 2455.
On the back panel of the R390/A should be a mini BNC to BNC connector.Most days it couples the 455 K hertz IF out to the back panel. Pull thisconnector off the back panel and use it to couple the VFO to a BNC cableand then a wire to your receiver. The connector will match the VFO cableto BNC cable. Do include a cap in the line between the VFO and the receiver.The VFO should put out more than 4 volts and easily over drive thereceiver. The VFO should have a nice output from 3455 to 2455. youshould be able to tune the VFO and receiver along nicely.
Expect all kinds of mixing between the VFO and every signal in theuniverse. As you have no way to isolate the antenna input of the Rat ShackDX390 receiver, the receiver will accept every signal and the VFO and thenmix every combination you can imagine. Only if you can couple the VFOthrough a good attenuate and directly into the receiver antenna input andisolate all that from any outside sources, will you get just the nice VFO.
As you have found the 3455 and 2455 points, you can say the VFO is goodand it is time to proceed.
Put the VFO back into the R390 and perform the best mechanicaladjustment and alignment you can. Mechanical adjustment is green screwsand Oldham coupler spacing. Alignment is getting 3455 at 7000 or 2000depending on model.

Now you must ask your self, Self, why am I trying to shot gun a receiverwith a rifle?
Indeed jam one frequency into the antenna input, listen for one signal outof the head phones and believe you can determine the exact ill of a verycomplex receiver. Not knowing what the problem is, it is time tosystematically trouble shoot the receiver one stage at a time until youisolate all the problems and resolve each of them. Easy can do with a 4hour time horizon. Because any R390 can be fixed in 4 hours by anexperienced repairperson. Caveat, parts are on hand to effect the repair.
Tools required, head phones, signal generator, analog volt meter (twopreferred), 600 ohm resistor (1 watt [2ea 1200 ohm 1/2 watt]), tweakerfor caps, magic spline wrench. Other things are nice, but not required, butmay make the task more fun. All real time experiments have shown thatother item only divert time into superfluous tasks. When your done withthe extra fun toys, the receiver does not receive any additional signals asdetermined by a human with head sets. It just takes longer to get the jobdone while playing with the toys. You need not start with a set of knowngood tubes. The "inspection and alignment process" will select and gradeall the tubes you wish to include in the process and should leave the besttubes in the receiver in the optimum location.
You may not be able to hear any signal from / through your receiverbecause it cannot pass any signal through itself, for any number of reasonsthat have nothing to do with the VFO.
By the way, I'm using a known-good, plug-and-play IF deck just receivedfrom Fair Radio.
So you used the IF output cable and that back panel adapter to put 455 intothe IF deck like it shows in the Y2K manual or any of the TM's. You get 455to peak through the .1 Kilohertz band width and thus the 455 crystal. Youdid look under the lid of the first IF can and did find a crystal?
Then set the bandwidth switch to 2 KC.
Not having a calibrated signal generator, you find something around 150micro volts will provide - 7 volts on the diode load. When you hang the 600ohm load on the local output you can measure about 1/2 watt of powerwhen you use a modulated signal from the signal generator. Your metermay read in power watts (nice), or DB (ok) or just AC volts (some mathrequired 14 volts = 27 db = 500 mili watts)
The IF gain is about mid adjustment. The diode load is -7 volts the BFO isoff.

With the modulation on you get 1/2 watt out.
Wiggle the generator level to get 24.493 AC volts across 600 ohm load onthe local audio output.
Turn the modulation off. The AC volt meter must drop to .775 volt. At most1 volt.
This is a 30 DB difference in level between a modulated and unmodulatedoutput. If you cannot get this difference, then the IF deck and audio deckneed tubes replaced and or additional work until you can get 30 DBdifference and a 1/2 watt out put.
If you cannot get the receiver to pass this test, post some mail and moredetails will come your way.
Put the RF to IF cables back to gather and put the 455 through a cap andinto the 3rd mixer test point. The gain should be 10 times the level thatgoes into the IF deck. The 1 volt CW should become 2.449 volts CW and youwill need to back the generator level down before you turn on themodulation.
With 30 % modulation on, adjust the generator for 24 volts on the localaudio output.
Turn the modulation off and the level should be under 2 volts (about a 25DB difference).
Now you have to get out the manual and start moving back through thestages.
You have the mechanical alignment good. Bad tubes will stop everything.Just because a tube reads good on a tester does not mean it will providegoodlow noise performance in the receiver. A tube can read good on a tester andgenerate so much noise it swamps any signal. Having trimmed the cams toexact alignment you can expect all of the RF deck alignment to be off. Youmay have to drive high levels of signal through the RF deck and make morethan one pass to get the alignment close enough to start receiving signalfrom an antenna. You may have to inject signals into the mixer test pointsand align the second and first variable IF stages of the RF deck before youcan get signals through the RF deck.
You can set the signal generator to your other receiver to help you get iton frequency close enough to help you peak it through the R390.

Let us know where you are at and how its going and we can offer somemore specific detail.-------------------------------------------------------------------------------------------------------------Date: Wed, 23 Feb 2011 10:04:37 -0600From: Paul Staupe <[email protected]>Subject: [R-390] Non-A alignment question
I recently got a R-390/URR (non-A) that was working properly when itwas put in storage about 20 years ago. When I received it, there was audiohiss, but no stations received. I tried tuning it up using the manual withmy URM-25D and a VTVM on the diode load to no avail. I finally gave upand tried to peak a 1500 kc signal directly to the unbalanced input. What Igot was a band of BCB stations that was received about 630 kc higher thanindicated on the Veeder Root counter... eg. WHO, Des Moines at 1040 wouldbe received at 1670 kc, WLOL on 1330 would be at 1975 etc... Doesanybody have any suggestions as to what this could be?--------------------------------------------------------------------------------------------------------Date: Wed, 23 Feb 2011 10:09:54 -0600From: "Les Locklear" <[email protected]>Subject: Re: [R-390] Non-A alignment question
I had that happen on a R-390A many years ago, turned out to be one ofthose tiny temperature compensating caps 10 mmf? Inside the PTO(progressitron pto) it had broken the solder joint, but would makeintermittent contact. If I remember this one was consistently 120 kc upthe band. YMMV---------------------------------------------------------------------------------------------------------Date: Wed, 23 Feb 2011 11:13:25 -0500From: "Shoppa, Tim" <[email protected]>Subject: Re: [R-390] Non-A alignment question
Severely out-of-whack PTO, as in broken wire or cracked capacitor ormaybe just a loose shaft clamp between main tuning knob/Oldhamcoupler/PTO?
The original R-390 docs don't reference a frequency counter because thatwas only a gleam in anyone's eye at the time, but it's a very handy tool for2011 :-).----------------------------------------------------------------------------------------------------------Date: Thu, 24 Feb 2011 00:07:25 -0500From: Roy Morgan <[email protected]>Subject: Re: [R-390] Non-A alignment question
See if the IF strip is working (inject 455 kc in to the in put of the IF stripfrom the URM). Then see what frequency the PTO is really on: use anotherreceiver with a bit of wire as antenna stuck down into the PTO oscillator

tube shield, A bit of manual study will reveal what the PTO frequencyshould be. <snip>--------------------------------------------------------------------------------------------------------Date: Thu, 24 Feb 2011 19:05:05 -0600From: Paul Staupe <[email protected]>Subject: Re: [R-390] Non-A alignment question
After several days of running down clues, I'm listening to jazz on the R-390right now after all your help, and some phone conversations with DonHeywood.
Long story short, it appears as though someone tuned it past the highband stop, and the PTO was completely off. I noticed that there was a redband between the MC and KC which should have alerted me to the problem,but I just thought that the display was different. I had never a pure redband before.
I took the RF deck out of the radio, and thanks to Don's help, I was able tosee that the cams in the rear aligned up, but in a completely different spotthan they were supposed to in the manual. However, once I saw that thecams were lining up, it was only a matter of time....
I went though the alignment process this afternoon, and was successful inthe 455 kc alignment steps, but I was less successful with the 2nd IF andtotally stymied by the first IF procedure. I then tried to pump a 1500 kcsignal directly into the balanced antenna input, but really wasn't gettinganywhere, so I brought it back upstairs to plug into my 160M dipole whichshould have melted the front end with BCB RF.. but nothing.
Then, I brought up the counter and attached it directly to the PTO output.At the top stop "931" the readout was 2.2096 and I discovered a bottomstop at -869 which was 3.221 The normal PTO output is 3.455 kc at thelow end of the band and 2.455 kc at the high end of the KC band (10 turns)
Out came the Bristol wrench, and I hand turned the PTO until I was getting3.455 at "000." Sure enough, I was getting a het with the BFO on a localBCB powerhouse at 1330 kc, and knowing that I had my 2nd IF tuningway out of whack, I started dropping the slugs back down, and the radiocame to life!
Tomorrow, I'll go though a proper alignment, since it is completely hot at1500 kc and above, but pretty deaf at the low end which would be expectedsince I tuned it up at the top end without test equipment to do the same atthe low end of each band . Thanks so much for all your help.---------------------------------------------------------------------------------------------------------Date: Sat, 26 Feb 2011 20:50:25 -0500

From: Curt Nixon <[email protected]>Subject: Re: PTO
Collins PTO in R390A ser 3981. I am hunting down all sources of frictionin the KC change chain and decided to pull and inspect the PTO. It issmooth but stiffer than I would expect with ball bearings. So it is apartand looks to be in clean condition.. pix on my blog site. One thing I noticedis the stack follower rollers....the fiber side rolles fine. The opposite side,the steel roller, does not roll at all. It is greased lightly and the grease isstill soft, but it looks like that roller should spin freely. Is this correct?Also, as the followers ride along the travel length of the stack shims, itwould seem that both rollers should ride on the shims--in this case, thefiber side roller is not in contact with the stack. The spring is in place andthe arms for the followers are free.There was no rebuild sticker or data onthe PTO. the original Collins security sticker over the cover seam wasintact..so I am the first to be inside since new I suspect. PTO Pics athttp://curtsworkshop.blogspot.com/---------------------------------------------------------------------------------------------------------Date: Sun, 27 Feb 2011 01:26:38 -0800 (PST)From: "Drew P." <[email protected]>Subject: Re: [R-390] Friction in KC Change Chain
"I am hunting down all sources of friction in the KC change chain anddecided to pull and inspect the PTO. It is smooth but stiffer than I wouldexpect with ball bearings. So it is apart and looks to be in cleancondition..pix on my blog site."
On both Cosmos and non-Cosmos design PTO's, there is a small o-ring in agroove in the bore in the housing through which the lead screw shaftpasses. The function of that o-ring is to provide a seal to prevent thepressurized nitrogen from escaping. The small o-ring is in addition to thelarger one around the outside of the housing between it and the can.
Removal of the shaft o-ring will quite noticeably reduce PTO shaft drag.The o ring would not be needed by most of us as the nitrogen leaked outlong ago. To remove the o-ring will require disassembly of the PTO andremoval of the tank coil, slug, and lead screw. Once these parts areremoved, the o-ring may be removed with a sharp hooked tool such as anappropriate dental pick. I have also found that the anti-backlash nut onthe slug can be set somewhat looser and this will reduce drag further andmake tuning smoother as well. If too loose, there will be annoyingbacklash.
It has been recommended to remove the dessicant packs inside the can asthese have been known to disintegrate, filling the PTO mechanism with anapparently corrosive grit, as mentioned in forum postings past.

-----------------------------------------------------------------------------------------------------------Date: Sun, 27 Feb 2011 10:55:50 -0500From: Curt Nixon <[email protected]>Subject: Re: [R-390] Friction in PTO
Thanks Drew: The seal O-ring is EXACTLY what it feels like. I mentionedthat toanother tech off list and said it was smooth but felt like an shaft sealedwith an O-ring. I have dry nitrogen here purge with but being there is novalve, it must have been assembled in a nitrogen chamber which I DON'Thave :). knowing what is involved to get that O-ring removed, I might justleave it in there and live with the friction at this point. I can always pickup another PTO assembly and do the disection on it instead of this originalone.
I looked and searched a lot but never saw any type of drawing or internalsinformation on the non-cosmos PTO.
BTW, sorry for the messed up subject line..it was late. I attached the rest ofmy original post here so it would show up with the good information youoffered.
I re-looked at the stack follower and believe they are both riding on thestack. It must have been a light reflection making it look otherwise.
The metal roller does not rotate..the stack edge is simply greased. It surewould seem that they would have made that a roller and not a slider. Canyou confirm this one way or the other. Also, is there a referencesomewhere on the internals and assembly, etc of the Collins PTO..I havehad no success finding anything.
I did find the reference to removing the dessicant bags. Wonder if itsworth adding one of the current generation no-plastic dessicantcontainers?---------------------------------------------------------------------------------------------------Date: Sun, 27 Feb 2011 11:38:04 -0800 (PST)From: "Drew P." <[email protected]>Subject: Re: [R-390] Friction in KC Change Chain
In my Progressitron unit, the steel "roller" did not roll.
There is an excellent online reference for the Cosmos unit but I have notyet seen any for the non-Cosmos type. You have started the process withthe series of photographs on your blog site. It would appear that asidefrom the aforementioned ER article that you will be the trailblazer for non-cosmos PTO documentation.

Thank you for posting photographs and starting the documentationprocess. The excellent online references we have for other aspects of theseradios have all been the work of generous individuals such as you. All of usin the R-390x community look forward to referencing your completedwork.-------------------------------------------------------------------------------------------------------Date: Mon, 28 Feb 2011 11:20:49 +1100From: "Pete Williams" <[email protected]>Subject: [R-390] PTO friction ?
G'day all..from my experience,over both Cosmos and Collins PTO somefriction/resistance to rotation is inevitable ---- question is one of relativity.Those who can 'freely' turn the kHz knob with one finger have hithertoundisclosed digital muscle development in my view, or definition of'freely'somewhat elastic!
The lead screw and sliding restraint have non negligible resistance.. Itwould be better if there was a turning torque stated as so many inch- ozs.to a pull point on the spigot that connects to the Oldham coupler. Anyonegot or want to quote a figure ?-------------------------------------------------------------------------------------------------------------Date: Mon, 28 Feb 2011 16:10:28 -0600From: Randy and Sherry Guttery <[email protected]>Subject: Re: [R-390] Friction in KC Change Chain
Of course you do... with a bit of imagination... Here's a small blurb onnitrogen "purging" and/or charging...http://www.comcents.com/radios/PTO.html
Since there is quite a bit on repairing, linearizing, etc. I didn't get into anyof that - but there wasn't much on nitrogen - so here 'tis.... HTHs...------------------------------------------------------------------------------------------------------Date: Mon, 28 Feb 2011 21:41:23 -0500From: Curt Nixon <[email protected]>Subject: Re: [R-390] Friction in KC Change Chain
That link was exactly what I needed. It answered a couple of questions onthe Nitrogen purge process.. Also, it got me to search through all 255pages of the PTO archive for references to non-Cosmos version.
So..here is where I got to:
Dis-assembled the PTO down to pulling the slug and leadscrew assembly.Cleaned all that with the end bearings and thrust bearing/Bellevillewasher, etc. and evaluated the drag in the assembly.

I found the front end shaft seal O-ring to be brittle and cracked and wasoffering very little detectable drag. After cleaning and relubing andassembling the leadscrew and slug and its preload nut, I found that themajority of the drag I could feel was not the O-ring but the screw preloadnut. I re-assembled with the minimum preload availkable--ie run the nutdown all the way to the slug and then back it out only far enough to alignthe first available hole pattern---less than 1/3 of a turn. This was 1/3 lessthan the original preload amount but did not reduce the drag significantly.I tried several types of lubricant on the screw. Phil Wood teflon, pureteflon grease, light oil, etc. The pure teflon grease seemed the best but wasstill not real free.
I left the O ring out of the re-assembly
I am in process of building an adapter to use in quantifying the torque toturn using a special small dial torque meter..more to follow on this.
Also, as I mentioned earlier, the "roller" follower for the linearization stackdid not rotate. After studying the construction, I am convinced that it issupposed to rotate. It has a steel roller over a plastic bushing over astaked-in pin. I forced it to turn and tried to free it up but the whole pinturns in the bracket so I gave up. Even tried heat cycling it withpenetrating oil..no go. I suspect the thing is either over staked, or theplastic bushing has been affected by heat, or it was just bad from scratch.When opened up, the stack had grease along the contact area of thefollower and no wear is noticeable, but I still think it should turn.
I re-assemble it all with clean grease there and left it frozen in place. I willinvestigate later when I get ahold of another Collins PTO to experimentwith. I have sourced some miniature roller bearing cam followers that willreplace the staked-in unit with a real ball bearing roller.
I will also experiment later with putting washers under the screw pre-loadnut spring leafs to reduce the preload and drag more than simple backingit off 1/3 of a turn. (reducing the spring tension on the pre-load nut)
No particular problems encountered in the process..thanks to havingpieced together numerous tid bits from the archive.
One problem I anticipate, and others will need to be aware, the holes in theforward and rear mounting brackets (the green screw brackets) are muchlarger than the screws to allow for significant movement of the PTO bodyupon re-assembly into the radio. Alignment of the Oldham coupling can betedious but is critical to the free operation of the assembly.

I left the heater wires disconnected inside the enclosure as I believe theadvice about the ovens not being needed. I will be monioring the overallstability later and may choose to re-connect them and run all the ovens forFMT events. Also decided to put off the nitrogen purge until I have achance to verify the PTO linearity and operation. I have some ideasregarding the stack adjustment process that I would like to try later with asecond PTO. It should be possible to correlate the amount of stack offset tofrequency error at a series of points andcreate a "template" of sorts for adjusting the entire stack at once.
So thanks to all for the inputs so far. I will be finishing up the gearboxcleaning this week and should have my cap order by then.---------------------------------------------------------------------------------------------------Date: Mon, 12 Dec 2011 10:28:02 -0800 (PST)From: Garry Stoklas <[email protected]>Subject: [R-390] Motorola PTO
I recently aquired a Motorola R-390A at a yard sale. It looked good overalland all knobs turned. After getting it home and taking a closer look, I sawthat theoldham coupler to the PTO had been backed off and the PTO shaft wouldn'tturn. I pulled the PTO which had the decal seal still intact. Since it wouldturn, Idecided to open it up. What I found is that it had been turned so hard thattheslug was at the far end and the tuning shaft had been bent. Hard to believethatsomeone could turn it that hard.
I am looking for two things: a replacement PTO, but also a replacementtuningshaft as I plan to try and rebuild the one I have as a spare. The gentlemanthatrebuilt his COSMOS PTO has inspired me. I would also appreciate anyadvice on the subject.-----------------------------------------------------------------------------------------------------Date: Mon, 12 Dec 2011 13:56:18 -0500From: Curt <[email protected]>Subject: Re: [R-390] Motorola PTO
Not sure of which mfg, but Fair Radio is still advertising PTO's. They arealso usually available via eB&*Y. See some additional Collins PTO internalrework.
www.curtsworkshop.blogspot.comDepending on condition, you can check out a local electric motor repairshop. They straighten small motor shafts all the time.

-----------------------------------------------------------------------------------------------------Date: Mon, 12 Dec 2011 15:02:29 -0500 (EST)From: [email protected]: Re: [R-390] Motorola PTO
I have straightened out an R-390A PTO shaft- end by hand before. Theshaftis made of stainless steel I think and not hard at all to bend. It was the endof the shaft protruding from the PTO. I used a set of Vise Grips and justcarefully bent it back into shape as close as I could get it to perfect bysighting along the shaft and turning the shaft. It now turns just fine withgood precision and no binding. Not sure if your situation is similar but theshaft can be bent by hand using simple tools and patience.-----------------------------------------------------------------------------------------------------Date: Mon, 12 Dec 2011 16:33:21 -0500From: Barry <[email protected]>Subject: Re: [R-390] Motorola PTO
It's probably fairly soft and an engine lathe, a soft hammer, and a dialindicator, and some finesse would bring it back pretty easily.-----------------------------------------------------------------------------------------------------Date: Tue, 13 Dec 2011 21:15:50 -0500From: Steve Hobensack <[email protected]>Subject: Re: [R-390] Motorola PTO
Anything less than perfect results would cause a slight wobble. Calibrationwould vary with the same pattern within each 100 khz segmentof thetuning range. If it were me, I'd try to locate a junker and salvage the shaft.Is the shaft the same in other pto driven receivers/transmitteers?-----------------------------------------------------------------------------------------------------Date: Wed, 18 Jan 2012 22:25:10 +1100From: "Pete Williams" <[email protected]>Subject: [R-390] COLLINS PTO
G'day List... My efforts over several days to endpoint and linearise a CollinsPTO-- specifically one from a R-388 (51J-3) have been an abject failure .---procedures documented tried with limited success with results way out ofuseful spec. At the risk of boring readers, what I have done is documentedbelow and pose points requiring better engineering background to supplyanswers/explanation.
DONE...1. Trimmer coil turn removed -- end point acceptable with slug right in,but linearity at 100 kHz points(each 360 deg. urn) can vary from 8 to 12kHz from one point to the next,

2. . ... reducing the 20 pf cap to say 10 or 15 pf across the coil assistssetting end points but linearity still varied per above comment. Smallvariations in that cap from 10 to 15 pf change all aspects – endpoints andlinearity but still unacceptable Even very small incremental changes up ordown similar results .
3. It is a fact that linearity starts with the design of the main tuning coil,but what is not obvious is that the total capacitance across the coils INCONJUNCTION WITH THE POSITIONING OF THE TUNING SLUG MUSTDETERMINE THE CORRECT CONDITIONS FOR LINEARITY OVER THEFULL 10 TURNS... is this interpretation correct ? ? It is obvious then , thatif the total capacitance is reduced, the tuning slug must have to be movedthat little bit more within the tapered coil to achieve resonance--- thuschanging the design parameters .
4. Therefore ..not tried is changing the 250 pf pf capacitor, the majorcontributor to the tuning range. It probably determines the pointcoincident with linearity over the range and where the slug is positionedwithin the coil.
5,The shims set the frequency at any given point in the tuning range...their effect is minimal and at any given point, the maximum change that ispossible is only a few kHz to set that point of rotation accurately . TheyDO NOT have any major effect in providing linearity. In conclusion...arethere knowledgeable folks that can give an explanation as to how linearityis achieved with special reference to my comment in point 3 aboveApologies for being so pernickety !------------------------------------------------------------------------------------------------Date: Wed, 18 Jan 2012 18:20:16 -0500 (EST)From: [email protected]: Re: [R-390] COLLINS PTO
Inside secret R388 VFO were never as linear as R390 or R390/A VFO's.That little tidbit never made the TM. If you needed to receive thosefrequencies you were happy to have a R388 to get the job done. Other thanbeating the receiver against a calibration tone you would never know thefrequency of the signal being received. This problem lead to the use of splitheadphones. Here listen for this signal where ever you find it around somedial number.
No one wanted to try and lay tapered winding on the form with moreexactness. The specified wind pattern was just the best average to makeproduction. I do not suggest you start your education into VFO's byreinventing a R388 VFO.
First worry not about end points.

End points are second.
In any VFO adjustment, the last thing we do is reinstall the VFO.The second last thing we do is set the end points.Logically then linear must come before these two steps.
Every thing that follows is just stuff I have read elsewhere and have neverhad to do my self. But R388 VFO's are not real available and thus thisrestoration must be done.
Back when the shim stacks were "factor set" the secret ingredient was ahigh viscosity slow drying varnish. This let the shims be set and sort ofstuck in place while other shims were brought into adjustment. The endresults is that a good VFO has an S curve to the shim stack.
You would like the ten turns to be 1 megahertz. You do not care where itstarts or ends as that will come later. The trim caps, and the end pointadjustment in about the middle of its range needs to give you 1 megahertzover ten turns. Set the end point coil device to about mid range. Add orremove caps to get a 1 megahertz span. Sort of close to 455.
Then the non linear deviation needs to be where the shim stack will bringthe 100 K hertz points into range. This is a very well aged VFO and exactmay not be possible.
Pull the stack apart and clean all the shims.
You will need to build a template S curve. (soft pine and sand paper. Bondoand resand. A stiff but soft aluminum strip that can be formed. Hammeredcopper.
The template needs to set against the shims to set the stack. With thetemplate in place you loosen the shim stack and use the template to giveform to the shim stack curve. Tighten the stack. Test the VFO. Think aboutthe template adjustments that need to be made. Modify the template. repeatthe process. Once that template was found at Collins. It was just applied toevery VFO. Not having that original factory jig in hand you get to reinventand re calibrate it.
At the factory, one had a template and slow drying varnish. The VFO wasdetermined to be working and needing its shims set for final assembly. Theshim stack was loose. The shims were varnished. This stuck them to eachother. The template was applied. the shim stack was tightened. With a slowvarnish the points could be checked and the process repeated. Likelyseveral templates were on hand in a set so the best fit could just beapplied and "experienced" tuners could hand set a section as needed.

Then the end point was set.
Select a slow drying varnish (hours) Find a thinner that will dissolve thevarnish. (Undo).
You have a feel for how far you can move a point with the shims. Put allthe shims over to one or the other limits. You can add / remove turns tothe trim coil, and add / remove small caps from the circuit. You have towork that mix until you feel the VFO runs ten turns and tracks closeenough so that you can "shim" the mid points. You have to move the circuitback onto the fit of the PTO coil taper. When you get there you will see themid points draw close to where they are expected to be. As you are off the"sweet spot" you see one end or the other of the VFO range fans fast out ofrange. This will tell you if you need to drive the trim caps and coil up ordown in frequency to get the VFO back on to the sweet spot of the VFO coil.
Take Care. Stay with it. A simple frequency counter and a pencil mark forthe ten turns should get the job done. Like the R390's you can turn theR388 up on end and work the VFO while hanging out of the chassis. Dopull it out and get the outer cover and heater off it just to make the processeasier. You ca pull all the cans off so you can work the shim stack.
Last resort you may want to file the shims (holes or ends) to get somemore range. You may want to invest in a R390/A Collins VFO for parts soyou do not have to file on R388 shims.
Pete, I do not read my mail every day, But I will get back to you if you needmore info. Roger Ruszkowski AI4NI (68-74 R390 Radio Repair PersonUSASA)------------------------------------------------------------------------------------------------Date: Wed, 20 Jun 2012 23:10:37 -0400From: Bob Young <[email protected]>Subject: [R-390] 390 Oldham coupler springs
I just pulled a 390 I've had for a few years out of retirement and adjustedthe end points and found that the springs on the Oldham coupler aremissing. Does anyone have any spares or can anyone point me towardgood substitutes for the real thing? Thanks,----------------------------------------------------------------------------------------------------Date: Thu, 21 Jun 2012 05:13:15 -0700 (PDT)From: Michael OBrien <[email protected]>Subject: Re: [R-390] 390 Oldham coupler springs
I have heard that the springs out of old ball point pens will work(Modified)

----------------------------------------------------------------------------------------------------Date: Fri, 22 Jun 2012 07:57:02 -0500 (CDT)From: [email protected]: Re: [R-390] 390 Oldham coupler springs
That's a super idea! Much like the original spring -- you only have to bendloops on each end. (Only one spring is to be found on the oldham coupler,BTW.)----------------------------------------------------------------------------------------------------Date: Fri, 22 Jun 2012 09:19:34 -0400From: Barry <[email protected]>Subject: Re: [R-390] 390 Oldham coupler springs
A small o-ring or two would work as a temporary solution.----------------------------------------------------------------------------------------------------Date: Fri, 22 Jun 2012 10:21:57 -0400From: Bob Young <[email protected]>Subject: Re: [R-390] 390 Oldham coupler springs
I'd like to thank everyone for their suggestions on using ball point pensprings for the Oldham coupler which worked great. I thought I'd read thatsomewhere but said no that can't be, haha!----------------------------------------------------------------------------------------------------Date: Tue, 17 Jul 2012 13:42:52 -0400From: Bob Young <[email protected]>Subject: [R-390] R-390A PTO ground strap screw
I took the ground strap off that touches the shaft to clean it and droppedone of the little screws and lock washers onto the floor to be found inmaybe a few years. Does anyone have a junker PTO hanging around withthese screws on it? I only need the one screw but would take the whole PTOif need be. The PTO is working well with only one screw but I really want itto stay that way, thanks,------------------------------Date: Tue, 17 Jul 2012 14:07:09 -0400From: "David C. Hallam" <[email protected]>Subject: Re: [R-390] R-390A PTO ground strap screw
I have learned to do as watch makers do. When disassembling small itemswith tiny bits and pieces, do in a tray with a rubber mat. I am still lookingfor a small plastic gear from a Johnson Invader VFO that fell from thebench to the floor several years ago. My work bench is raised about 3"above the floor. Even with a rubber mat on the floor, parts always rollunder the bench. Watch makers often worked at desk with a lined drawer.Watches were disassembled in the drawer.----------------------------------------------------------------------------------------------------

Date: Tue, 17 Jul 2012 13:57:49 -0600 (MDT)From: Richard Loken <[email protected]>Subject: Re: [R-390] R-390A PTO ground strap screw
I recently invented that one independently, I was replacing the bearings insome fans that were held together with a miniscule snap-spring and (afterchasing a washer across the floor) concluded that I would have fewer lostparts if I did the disassembly in the lid off a Xerox printer paper box. I willdo that with many things after this.------------------------------Date: Tue, 17 Jul 2012 19:51:55 -0500From: "chacuff" <[email protected]>Subject: Re: [R-390] R-390A PTO ground strap screw
How can you possibly loose any screws when falling from a work benchonly 3"from the floor... Yea...Yea I know theres one in every crowd. I feel yourpain...I put dirt colored carpet on my shop floor...everything gets lost. It anindoor/outdoor type very low pile but still loose things. You would thinkthey wouldn't bounce as easily but it does..------------------------------Date: Tue, 17 Jul 2012 22:31:42 -0400From: Roy Morgan <[email protected]>Subject: Re: [R-390] R-390A PTO ground strap screw
Trick developed while overhauling an SX-88, which has two gear trainsloaded with anti-backlash gear sets, and very little room to get thingstogether. Pass a length of dental floss through one or two of the middleturns of the small spring (or in the case above, through the teensy hole inthe snap ring if it has them, or around the middle of the snap ring). Fastenthe ends of the dental floss to the radio or some moderately heavy thing onthe bench: the string can be as long as needed for this. After assembly iscomplete, you can pull the dental floss out of the spring easily, not so sureabout the snap rings but the thinnest kind of floss might work best.------------------------------Date: Tue, 17 Jul 2012 21:46:43 -0500From: n4buq <[email protected]>Subject: Re: [R-390] R-390A PTO ground strap screw
Bet you wish you'd had all this advice _before_ you lost the screw that noone seems to have a replacement for... :-) Isn't it just a standard stainlesspanhead Phillips #4-40 or #2-56, etc.? I can't remember as it's been a fewyears since I looked at one.----------------------------------------------------------------------------------------------------Date: Tue, 17 Jul 2012 23:12:17 -0400From: "Charles P. Steinmetz" <[email protected]>

Subject: Re: [R-390] R-390A PTO ground strap screw
I used bright white polyamide epoxy (with a matting agent -- not full gloss)on my [concrete] shop floor. Makes it easy to clean, and easy to spotanything that falls. If I had a wood floor, I'd put down bright whitelinoleum sheets (not tiles -- too many cracks for things to fall into). I have,in the past, put several magnetic bench mats on the floor where parts tendto land, but of course that only helpsfor ferromagnetic parts, and only if they land on a mat.
A related point -- I had the contractor install twice as many light fixturesas he had planned (he told me he had already doubled the number he woulduse for a kitchen, which he makes the brightest room in a residence). 24,40 watt fluorescent tubes in a 9' x 15' room with a 10' ceiling. Walls,ceiling, and floor are all bright (matte) white, which gives a beautiful,shadowless light everywhere. Best shop lighting I've ever had. I havesome task lights, but don't need to use them often, even to find stuff on thefloor.
Finally, I use sturdy (8 mil or thicker), clear plastic storage bags largeenough to contain the item I'm working on if I'm really concerned aboutlosing tiny parts. Industrial suppliers have them large enough to containwhole radios, if need be. I use these to keep dust off equipment that is justsitting on a shelf, as well, including disassembled equipment that iswaiting for parts or waiting for inspiration. None of these tricks is veryexpensive -- anyone can use them to make their life easier.------------------------------Date: Wed, 18 Jul 2012 15:15:35 -0400From: Bob Young <[email protected]>Subject: [R-390] R-390A PTO ground strap screw
>Isn't it just a standard stainless panhead Phillips #4-40 or #2-56,etc…………
I don't know but will check today at the hardware store, thanks, (Let meput it this way: I knew when I had the PTO up over my head and the littlescrew balanced on my screwdriver that it wasn't a real smart thing to do,haha!)------------------------------Date: Wed, 18 Jul 2012 19:28:47 +0000From: "Webb, Gary" <[email protected]>Subject: Re: [R-390] PTO groundstrap screw
I use a magnet from a junked hard drive to find most of my dropped items.But if the screw is non-ferrous..... which is probable in a PTO. A lot offasteners in the medical equipment I work on are stainless which also are
immune to the magnet. So some items never are retrieved.----------------------------------------------------------------------------------------------------Date: Wed, 18 Jul 2012 18:39:49 -0400From: "KR4HV" <[email protected]>Subject: Re: [R-390] R-390A PTO ground strap screw
Hi Bob. When you find out exactly what type screw it is you may want totryFastenal(www.fastenal.com/). I am not connected with them, just acustomer.They are an industrial supplier and can get just about any screw & boltmadewith any thread count, US, course or fine and metric) . They don't cater tothe individual trade but will sell to us. Most of their locations (check thecomputer, they are all over the US) stock down to 4-40 or 6-32 instainless, cadmium and brass but I have just gotten some 3-48s, 2-56s, 0-80s & M3s in different lengths in stainless from them (they ordered themfor me and it took all of 3 days delivered to their store). I particularly likethe stainless nuts with captive star washers in 4-40, 6-32 & 8-32, etc.Work great in tight places. They sell them in bags of 50 or 100 in thesesizes.. You may have to order 25 or 50 of a part number as they typicallydon't sell by "each". They are much more affordable than the hardware orbuilder's mart.----------------------------------------------------------------------------------------------------Date: Wed, 18 Jul 2012 23:22:55 -0400From: Barry <[email protected]>Subject: Re: [R-390] R-390A PTO ground strap screw
Actually, the local store here will sell just about any quantity to me if it's instock. If they don't stock it, then they may have a minimum on very smallscrews, etc., but typically it's a very reasonable quantity (not like a $25minimum or anything like that). I've started using them more as the storeis right on my way to work and, like you say, they have just about any kindof fastener. Watch out which kind of stainless fasteners you order, though.One grade is vastly more expensive than the other.----------------------------------------------------------------------------------------------------Date: Thu, 19 Jul 2012 11:46:14 +0000From: William A Kulze <[email protected]>Subject: Re: [R-390] R-390A PTO ground strap screw
Do you think they would have the square 4-40 nuts used on the shaftclamps? I lost the one for the BFO shaft a long time ago. I've since put on ahex, which seems to work well enough, but it doesn't seat down into theclamp.----------------------------------------------------------------------------------------------------Date: Thu, 19 Jul 2012 13:28:21 -0400

From: "KR4HV" <[email protected]>Subject: Re: [R-390] R-390A PTO ground strap screw
Bill, just checked with my contact at Fastenal. They have the square #4-40Stainless Steel nut. Their computer showed about 5000 in stock at variouscompany locations. The Fastenal part # is 0170846. They sell these in"each" quantities for about $0.45ea. May take your local Fastenal storeabout 3 days or so to get one or more for you from another branch store ifthey don't stock them. BTW, the price is a lot more per unit for this squarenut than standard SS#4-40, #6-32, #8-32, etc. hardware in bags of 50. Guess they don't sellmany square ones nationwide. Hope this makes your day a littlebrighter!!!------------------------------Date: Thu, 19 Jul 2012 12:57:59 -0500From: n4buq <[email protected]>Subject: Re: [R-390] R-390A PTO ground strap screw
Doubtful as those aren't very common anymore. You can check theirwebsite, though.------------------------------Date: Thu, 19 Jul 2012 13:34:29 -0500From: n4buq <[email protected]>Subject: Re: [R-390] R-390A PTO ground strap screw
Well, well, well. I didn't think they had them, but:http://www.fastenal.com/web/products/detail.ex?sku=0170846
They have many other sizes as well.----------------------------------------------------------------------------------------------------Date: Thu, 19 Jul 2012 13:28:21 -0400From: "KR4HV" <[email protected]>Subject: Re: [R-390] R-390A PTO ground strap screw
Bill, just checked with my contact at Fastenal. They have the square #4-40Stainless Steel nut. Their computer showed about 5000 in stock at variouscompany locations. The Fastenal part # is 0170846. They sell these in"each" quantities for about $0.45ea. May take your local Fastenal storeabout 3 days or so to get one or more for you from another branch store ifthey don't stock them. BTW, the price is a lot more per unit for this squarenut than standard SS#4-40, #6-32, #8-32, etc. hardware in bags of 50. Guess they don't sellmany square ones nationwide. Hope this makes your day a littlebrighter!!!------------------------------Date: Thu, 19 Jul 2012 12:57:59 -0500

From: n4buq <[email protected]>Subject: Re: [R-390] R-390A PTO ground strap screw
Doubtful as those aren't very common anymore. You can check theirwebsite, though.----------------------------------------------------------------------------------------------------Date: Tue, 24 Jul 2012 10:34:19 -0400From: Tom Bridgers <[email protected]>Subject: [R-390] Newark Electronics sells square nutsTo: Barry N4BUG <[email protected]>, R-390 Group
Newark Electronics sells Vector square nuts.See: http://tinyurl.com/c546fnwExcellent: Have used these for years.Best,-Tom KE4RHH------------------------------Date: Sun, 7 Oct 2012 04:20:46 +0200From: sigmapert <[email protected]>Subject: [R-390] Discovery of a genuine COSMOS PTO for the R-390receiver
Recently we stumbled across a box containing three PTOs produced byCosmos Industries, Inc. that a few years ago had come from a Japanesemilitary gear dealer. To our surprise one of these PTOs turned out to be anuncommon COSMOS PTO for the R-390 Non-A receiver. The PTO showsoriginal wiring without any sign of modification.
For further info:http://schmid-mainz.de/Genuine_COSMOS%20_PTO%20_for_the_R-390_Non-A.htmQualified discussion of the above presented data is welcome.----------------------------------------------------------------------------------------------------
<snip> Y----------------------------------------------------------------------------------------------------

----------------------------------------------------------------------------------------------------D
----------------------------------------------------------------------------------------------------
D

D

D


9
D
D
Y
Date: Thu, 27 Jun 2013 12:15:21 -0300

From: PY1NB - Felipe Ceglia <[email protected]>Subject: [R-390] How to identify pto
I need to identify a pto which had the labels badly removed. It is slipping afew khz while tunning. Like a loose axle, Oldham coupler is ok.I haven’t yet checked its linearity.


Date: Tue, 9 Jul 2013 15:12:47 -0300From: PY1NB - Felipe Ceglia <[email protected]>Subject: Re: [R-390] How to identify pto
Here are the pictures of my PTO:http://goo.gl/ahwWC http://goo.gl/UChnQ
I noticed that when I rotate its axle CCW it has a spring tension feel, butit feels OK turning CW. Is this normal?
Date: Tue, 9 Jul 2013 15:38:01 -0400From: Bob Young <[email protected]>Subject: Re: [R-390] How to identify pto
I'm not an expert by any means but I've never felt any difference in a PTOturned either way. Incidentally was there a bluish tinge left on that PTOfrom the label?
Date: Tue, 9 Jul 2013 19:41:34 -0400 (EDT)From: Roger Ruszkowski <[email protected]>Subject: Re: [R-390] How to identify pto
>From the photo we get real no clues.
It is not your fault. The only question of importance is does it or does it notwork. We do not hold it against Collins, Motorola or even Cosmos formaking the things. We only care if they work. Once you slide that receiverback into a rack no one will ever know what parts are inside.
It should turn equally free either way. You may want to try easy with someWD40 on the front bushing letting the critter stand on end so the solventhas a chance to soak in. and see if that helps the ease of operation. Longroad is to do a disassembly so you can work some solvent in from theinside into the shaft bushing. You do not want to take it apart to whereyou pull the shaft out of the bushing. Aggravation exceeds return oninvestment. Mostly some select solvents and oils applied to the front withgravity assist and time (days) will resolve the problem of friction. It willalways be stiff as that is part of the antilash. but it should run smooth inboth directions for a good 11 plus turns (only ten used). As long as youhave it this far apart take the time to soak the shaft and bushing clean.
Date: Tue, 9 Jul 2013 21:54:36 -0300

From: PY1NB - Felipe Ceglia <[email protected]>Subject: Re: [R-390] How to identify pto
I wanted to identify the PTO so I could search for an exploded view and seewhat could be happening on my unit. I disassembled it to the point ofremoving the external can, and got pretty much scared to proceed...
Date: Tue, 9 Jul 2013 18:26:47 -0700From: "Craig Heaton" <[email protected]>Subject: Re: [R-390] How to identify pto
Years ago I disassembled a Motorola PTO. Sort of felt gritty upon turning.From memory; under the outer can is a layer of insulation, then a couple ofwires to remove (heater), then another can covering the corrector stack &roller assembly. The desiccant bag had broken and the gritty stuff waseverywhere. DO NOT mess with the corrector stack if it is a Motorola PTO.Clean the insides as best as possible, make sure the spring/scissorassemble is ok. Maybe a little Deoxit on the corrector stack & a drop ofyour favorite lube on the shaft.
Date: Wed, 10 Jul 2013 18:14:35 -0300From: PY1NB - Felipe Ceglia <[email protected]>Subject: [R-390] my PTO problem, part II
To illustrate what is happening here, I uploaded these 2 videos to youtube:This one tries to show the "spring loaded" feel on the axle, while turningCCW: http://www.youtube.com/watch?v=hAZf9bn1Dnw
And this is what happens with the rig turned on and audio:http://www.youtube.com/watch?v=6atQplq69Ms
I made a black dot on the pto axle, so we can see when it is moving. Theoldham coupler spring is missing, but I wouldnt blame it.
Date: Wed, 10 Jul 2013 17:46:35 -0400 (EDT)From: Barry <[email protected]>Subject: Re: [R-390] my PTO problem, part II
Something is very wrong with that PTO. I can tell from watching that youare having to exert quite a bit more torque than is normal. You should beable to turn that disc easily with your little finger.
Date: Wed, 10 Jul 2013 18:03:07 -0500From: Les Locklear <[email protected]>Subject: Re: [R-390] my PTO problem, part II

Possibility of a bent pto shaft, there was something about a fix severalyears back in the Hollow State Newsletter.
Date: Thu, 11 Jul 2013 11:11:27 -0500From: Tisha Hayes <[email protected]>Subject: Re: [R-390] PTO problem, part II
Since it appears there is some sort of internal binding you may want to buya spare PTO and put it in service. They are not unavailable; even on eBayyou can get one for $30-$80. Then you will feel less hesitant about openingup the funky one you have to see what is binding.
You can probably fix it but it is going to be a "learning experience" andmay be like the wire reattachment saga on the mechanical filters a fewweeks ago. If you could not get replacement parts (all of the spare PTO'sin the world suddenly vanished) then you could go to heroic lengths afteryou taught yourself to be a machinist and metallurgist.
If they had been "cooked" by stuck-on heaters or turned way past their endlimits you can have a bent shaft, stipped parts or a melted plastic piece(if you saw the inside it would be immediately obvious)
I would rather listen to the radio than to spend weeks working on one itemwhere I have spares. The PTO would become a rainy day project but theproblem would not keep me from having the receiver on the air.
That is just my personal opinion, YMMV (your mileage may vary) but I ambeing a bit pragmatic about it.
Date: Thu, 11 Jul 2013 11:20:04 -0700 (PDT)From: Norman Ryan <[email protected]>Subject: Re: [R-390] PTO problem, part II
Tisha's mention of "stuck-on heaters" reminds me that it is a good idea todisconnect the heater wires permanently while one has the PTO open.There have been instances where the PTO heater's thermostat gets stuckwith disastrous results to the innards.
A special foray into the PTO isn't necessary just to disconnect the heaterwires; a simple fix is to remember to keep the Heaters On/Off switch locatedbehind the receiver in the "Off" position. At normal room temperatures thereceiver is exceptionally stable after a thorough warm-up.
Check behind the receiver and see where the heater switch is set and tryoperating with it "Off" if it isn't already; the difference likely will not beperceptible in most instances.

If you operate with the heaters off, change the main 3 amp fuse to a 2 ampfuse for maximum protection of the B+ circuits.
Date: Thu, 11 Jul 2013 13:39:23 -0500From: Les Locklear <[email protected]>Subject: [R-390] Info from HSN Issue 37 on repairing a bent PTO shaft
STRAIGHTENING A BENT R-390A KCS CHANGE SHAFT [ShawnMerrigan] An R-390A purchased "as is" from Fair Radio had a bent KCS(vfo) change shaft which wobbled visibly when rotated. This causedbinding at the bushing in the gear plate and at the front panel bushing.The result was a hard to turn KC’s change control. I could have simplyloosened the front panel bushing lock nut slightly, allowing the shaft andbushing to float, but I decided to do the right thing and replace the shaft.This is a fairly straightforward job, but there are a couple of things towatch, and keeping them in mind will help:1. A taper pin indexes the dial lock hub and gear to the KCS change shaft.This pin has to come out to remove the shaft. Drive the pin out from thenarrow side! This is a small taper pin.2. A larger taper pin holds the ten-turn stop assembly on the KCS changeshaft. This pin must also be driven out from the narrow side. Look for thesmaller of the two holes in the ten-turn stop end block (looks like a bigthick washer) and drive the pin out from that side.3. When driving out the pins, particularly the larger one, counterbalancethe shaft with a large mass so you will not bend it. Use WD-40 to loosenthe pin and tap gently. In fact, I wound up straightening out the old shaftusing machinist's V -blocks and a brass drift. I then polished the shaft toremove any burrs and blew out the taper pin holes with WD-40 to preventbinding' The run out of the straightened shaft was very small and, after re-assembly, there was no binding evident and the shaft turned smoothly.
Date: Thu, 11 Jul 2013 14:25:01 -0500From: Tisha Hayes <[email protected]>Subject: Re: [R-390] PTO problem, part II
Maybe it is the "DO NOT OPEN" warning on the can but the PTO is just aprecision tuned variable inductor (Permeability Tuned Oscillator) there isa threaded rod that drives a slug into a coil and a few other compensatingdevices in there (caps and inductors). It definitely sounds like amechanical binding issue if you are getting drag in one direction orspringiness when tuning it. The electrical connections to the PTO areminimal, it is just an oscillator, you could rig it up on the bench andconnect it to a good frequency counter to see it in action.
Maybe the threaded rod is all gooed up with residue of 60 year old grease

or someone else had been playing with it or the rod is bent or the carrierfor the slug is canted out of alignment (from someone forcing it past itsstops).
Carefully cleaning it out. using a little bit of mild solvent to wash away thecrud, cleaning up the o rings (on the case and the tuning shaft) and beingvery sparing in putting lube on the right spots is usually all it takes.Sometimes you need to remove a turn on one of the variable inductors ifyou cannot reach the end-point (there is an entire procedure out there thatshows you how to do that with pictures and step by step instructions). Asit has been said, that thing should tune very freely and if done right, theentire mechanical tuning assembly (racks, slides, gears, shafts, PTO) canbe worked on so you can tune the radio with the tip of your finger on theknob.
If you were enterprising you could take out the little desiccant capsule andbake it under low heat to dry it out completely (the color will change) andput that back in right when you are ready to button the thing back up.
I would dread the idea of adjusting that swash-plate compensating disk.There is a special type of masochist who will tackle that. Fifty-million littlescrews to adjust linearity... euck!
Date: Thu, 11 Jul 2013 15:48:27 -0400From: rbethman <[email protected]>Subject: Re: [R-390] PTO problem, part II
I'd *much* rather tweak the Cosmos PTO linearity screws than to eventhink about a Collins corrector stack! There really isn't that much toopening a PTO and cleaning out the dried out lube. One can make aconcerted effort to dry out the desiccant capsule. However, unless youKNOW the O-rings really seal, then there isn't much sense in doing so. It isjust like going through the drill of pressurizing the PTO with dry nitrogen.There isn't much need for that either. You would be assuming the Shradervalve core was still supple enough to seal. You could replace that valvewith a new one from a bicycle shop or automotive parts place. IOW, yourmileage may vary, and how far does one want to go? I'm at the point that Iam debating whether to even finish restoring the blue striper that I'vebeen working on. <snip>
Date: Thu, 11 Jul 2013 22:50:18 -0400 (EDT)From: Roger Ruszkowski <[email protected]>Subject: Re: [R-390] my PTO problem, part II
I think you just got a good sample of very good advice.Tisha's idea that you could be ahead to just buy another PTO is in line.

I watched your two videos. (nice job).You are moving the shaft and the guts have a back lash inside.
We all know this is not good. PTO's do not have internal backlash.That is part of what makes PTO so wonderful.OK a couple hertz backlash, but not like your video.As posted by the other Fellows do not let those cans scare you.Do not disassemble the corrector stack.
Find some other method to make your self feel bad before you unbolt acorrector stack inside a PTO. Ok with all the mental health warnings out ofthe way we can proceed. Do some more video as you go. The next stage inR390 archiving.
We do not have photos of VFO guts in color or moving video.We have not been in there since the camera was inventedWe would all like to see what ever video you can get up on the web.
And we thank you in advance for taking the time.You are about to become famous if you take on this mission.No money and little fame but we know who you are and will always thankyou. You will have to unsolder some heater wires as you go. Not a big dealits just part of the disassembly process.
Inside, the shaft is just a nice acme thread on the shaft.On the shaft is a carrier with a matching set of threads in it.
Turning the shaft moves the carrier along the axis of the can.The carrier slides a slug through a core not unlike watching a slug movein one of the RF deck's tuning coils with cores.
The PTO slug is a bit larger than the RF deck slugs.
The corrector stack acts as the device that keeps the carrier from goinground and round as the shaft is turned and thus forces the carrier to movealong the threaded shaft.
I am thinking gummed up thread on the carrier mechanism.The runner on the carrier must follow the stack and not backlash.
Yours does. The carrier runs one side against the stack. Theback side is spring loaded against another rail.
As you change direction the shaft to carrier threads are so gummed up,that instead of the spring having enough strength to hold the carrieragainst the stack, the spring gets compressed, the carrier torques over to

the other rail (back lash) before it meets enough resistance that thethreads begin to move.
The shaft bushing is also gummed up or when you dialed the PTO back andlet go, the spring would push the carrier back against the stack and youwould get a counter lash effect.
I think you just need some cleaning inside the PTO to restore the VFO togood operation.
The stack we describe is like an S Curve. as it is not straight, over thetuning range. It lets the threads get a little ahead or behind the curve toprovide a more linear operation. Once you get the PTO open you will see thecoil has a magic non linear wind. The coils got wound on the form bymachine (lathe). A simple pattern lathe. The pattern was hand made andtweaked to get it as linear with the PTO slug as possible. Real black magicin the manufacturing process. It was tried and retried to get it almostperfect. Then the stack was adjusted by hand during assembly for awesomegood behavior.
The secret to getting the stack together in manufacturing was the exactred color of the stick-em. Not true it was air dry time of the stick em. Thestuff was sticky enough to hold the mess in place but not so loose it wouldlet things slide out of adjustment. Not so stiff to make adjustment hard. Notto fast drying to prevent you from getting the adjustment done.
Things were painted up and bolted loosely together. Then the unit was letset on the line until it was about the right dry state. Then you selected theunit when it had "cured" just right and popped it into the jig. Hooked it upand with a gauge block S curve in one hand and a stick in the other handyou sweep the corrector stack into perfect adjustment as you dialed thePTO through 11 turns or so from stop to stop. And then tighten everything up and run one more pass for a check.
It took longer to type this than it took to do it on the production line.
Not having the magic red stuff in hand with S curve guide, do not loosenthe corrector stack and thus cause it to come un-adjusted.
Some brave souls have been down this path. You can read about them inthe same history book you are about to be recorded in if you do some video.These wonderful Fellows tell us that when they were done the linearity ofthe PTO under maintenance was no better than when they started. Thewomen at Collins aligned them as good as could be done.
And Fellows should not try and out-do the women.

Thus we tell you do not undo the corrector stack.But have fun with the rest of it.You can likely save in an afternoon.And be happy that you did.
You will likely spend more time doing video for every one than it takes toclean the PTO up. Take the time and point out all the parts and what youfind/found as you go.
Honest this is an effort that needs to be done.Good luck with fixing the PTO and doing a video.I hope there is enough info here to guide you through the process,I do not hang on my mail like I should.But I will get back to you if you need more help.If you have problems do some more posts.The Fellows will jump in and get you some timely responses.
If you are looking for some history or good words to put with the video justask the Fellows here. You can see from the mail there is plenty ofexperience to help you along.
Date: Fri, 12 Jul 2013 08:33:20 -0300From: PY1NB - Felipe Ceglia <[email protected]>Subject: Re: [R-390] my PTO problem, part II
Thank you for the email, advice and all information.
I am scared about messing with the corrector stack. I hope it is solidlyheld in place so I cant accidentally mess it. I will take pictures and makevideo on the way.
Date: Fri, 12 Jul 2013 08:47:29 -0300From: PY1NB - Felipe Ceglia <[email protected]>Subject: Re: [R-390] PTO problem, part II
Thank you for the information.I will take a deep breath and go for it, I hope I don’t mess much with it :)
Date: Fri, 12 Jul 2013 10:48:01 -0400 (EDT)From: Roger Ruszkowski <[email protected]>Subject: Re: [R-390] my PTO problem, part II
Worry not about the corrector stack. It will not just fall apart. You have towork at several bolts (small) to get the adjustment plates to come loose.You will see when you get there. If you ever do get a stack loose, no one willever know without a good counter. The fine tuning is only 10 - 20 hertz on

any plate in the stack.
Date: Thu, 7 Nov 2013 11:47:58 -0200From: PY1NB - Felipe Ceglia <[email protected]>Subject: [R-390] PTO disassembly and mechanic fix
Regarding my previously posted video of my PTO problem, I took a deepbreath and plunged into fixing (or breaking) it.
The videos:http://www.youtube.com/watch?v=hAZf9bn1Dnwhttp://www.youtube.com/watch?v=6atQplq69Ms
I had just included on picasa a folder with pictures of its guts. One of thepics is commented, showing what was wrong with it. You guys can helpfinding out which kind of PTO it is. I havent included pictures of re-assembly, as it didn't ended as beautiful as started, hihi.https://picasaweb.google.com/111512966454328879960/R390ASloppyPTOFix-------------------------------------------------------------------------------------------------------Date: Wed, 25 Dec 2013 08:19:02 +0100From: djelatnik slavonija <[email protected]>Subject: [R-390] VFO assembly wash or not to wash
Currently my process of restoring and rebuilding of R390A receiver is instep on gear cleaning and after this only part, beside main chasis, is VFO.Please advice me on this mather..it is recomended procedure to wash entireVFO (inside and outside) with water/detergent solution or it is better toleave VFO intact (covered with dust and other particles)?-----------------------------------------------------------------------------------------------------Date: Wed, 25 Dec 2013 10:50:41 -0500From: "quartz55" <[email protected]>Subject: [R-390] VFO (PTO)
If the VFO(PTO) is working fine, I'd leave it alone. I'd only get into it if ithad serious problems, I understand they are very hard to work on and putback together, not that I've tried. You can clean the outside with a brushand maybe a little alcohol.-----------------------------------------------------------------------------------------------------Date: Wed, 25 Dec 2013 11:23:01 -0500From: Curt Nixon <[email protected]>Subject: Re: [R-390] VFO (PTO)
I would be very careful about getting any liquid in around the shaft. Theseals can dry up and moisture can get itn. These are dry air purgedoriginally but the seals wont still be intact. I removed the seals on mine so

it would free up the shaft somewhat but if it is working, I wold only cleanthe exterior. See the internals of an collins A style here:www.curtsworkshop.blogspot.com-----------------------------------------------------------------------------------------------------Date: Wed, 25 Dec 2013 12:03:23 -0600From: Tisha Hayes <[email protected]>Subject: [R-390] VFO (PTO)
You want to keep the insides of the PTO bone-dry. It is not an environmentwhere dirt or moisture would ever get inside of, if you have a reason toopen the case because of a lack of tuning range or mechanical binding thenit might need a gentle cleaning with a light-solvent similar to WD-40 andthen to be blown dry with compressed air.
Things like shaft seals and the O-rings can be lubricated with a siliconegrease that is very inert.
The most that I have ever heard of us doing inside of the PTO is to cleanup the threaded rod, careful lubrication (like one drop) or to take a partof a turn off of the variable inductor inside of the can to give youadjustment range. It you are doing more than that you are either trying torescue a hopeless case or to make modifications to the device that willthrow performance way outside of the window of usefulness.
Water inside of the PTO is "BAD". In normal operation that is a sealedenvironment with the express purpose of keeping water away from theinsides. If you wash it down then you will probably never drive enough ofthe moisture out (even with baking) to be certain that it will performbetter than it is right now.-----------------------------------------------------------------------------------------------------Date: Thu, 26 Dec 2013 12:29:11 -0500From: rbethman <[email protected]>Subject: Re: [R-390] Gear train rebuild help needed......
Let's find out if this is a R-390A or an R-390. Phil wrote R-390A. IF that isthe case, there is NO green, Geneva Gear. We can manage to scramble themessages, and confuse the information.-----------------------------------------------------------------------------------------------------Date: Thu, 26 Dec 2013 12:48:08 -0600From: "Phil Mills" <[email protected]>Subject: Re: [R-390] Gear train rebuild help needed......
My mistake.....I thought that the geneva gear was the planetary gearassembly.....it is an R-390A.-----------------------------------------------------------------------------------------------------Date: Thu, 26 Dec 2013 14:03:02 -0500

From: rbethman <[email protected]>Subject: Re: [R-390] Gear train rebuild help needed......
That okay! We all get mixed up at times. I was just trying to get us ontrack. It would appear that one of the gears is not "exactly" lined up. Thiswill prove to be a royal PIA, and take a trial and error approach todetermine which and where. I've got one apart now, and to make it worse -it has been that way for far too long. I am really going to have to keep myhead buried in manuals and pictures to get it all together again. Not tomention praying that all works as it should.-----------------------------------------------------------------------------------------------------Date: Thu, 26 Dec 2013 15:00:46 -0500From: Charles Steinmetz <[email protected]>Subject: Re: [R-390] Gear train rebuild help needed......
>Phil wrote R-390A. IF that is the case, there is NO green, Geneva Gear.
More misinformation. The Geneva Drive used in both the R390 and theR390A is not the same as the Green Gear in an R390. The Green Gearis not called a "Geneva Gear."
The Geneva Drive is what has been suggested as a possible problem inPhil's radio. It is shown and discussed on pp. 1-2 of Scott Seickel's R390Agear train rebuild tutorial.
The Geneva Drive is a mechanical mechanism that moves a shaft (inthis case, the bandswitch shaft) in small steps for each rotation of thedriving shaft (in this case, the MC Change shaft). The 390 manual calls ita Geneva mechanism, while the 390A manual calls it an "intermittentgear." Geneva mechanisms typically have a pin that engages a slot in thedriven wheel. As the drive wheel rotates, the pin enters the slot and turnsthe driven wheel some fraction of its rotation. See<http://en.wikipedia.org/wiki/Geneva_drive>, especially the "internalGeneva drive."
The Green Gear in an R390 is a convenience tool that keeps the KC Changegear train in alignment with the Veeder-Root counter while youhave the radio disassembled.-----------------------------------------------------------------------------------------------------Date: Thu, 26 Dec 2013 15:07:27 -0500From: rbethman <[email protected]>Subject: Re: [R-390] Gear train rebuild help needed......
I appreciate your input and correction. My intent was to take the "GreenGear" out of the conversation. It was that simple. Yes, there AREequivalent gears in the R-390A.

-----------------------------------------------------------------------------------------------------Date: Thu, 26 Dec 2013 13:19:45 -0800 (PST)From: Joe Foley <[email protected]>Subject: Re: [R-390] Gear train rebuild help needed......
Just for fun, check the ten-turn counter on the MC Change shaft.? Theleaves may not be coordinated properly.-----------------------------------------------------------------------------------------------------
Date: Thu, 26 Dec 2013 14:46:28 -0800 (PST)From: Norman Ryan <[email protected]>Subject: Re: [R-390] Gear train rebuild help needed......
Thanks for that link to the Wiki article on Geneva drives.? Fascinatingreading! Will capitalize the G from now on.? :-)-----------------------------------------------------------------------------------------------------Date: Fri, 27 Dec 2013 02:47:38 -0500From: Charles Steinmetz <[email protected]>Subject: Re: [R-390] Gear train rebuild help needed......
>My intent was to take the "Green Gear" out of the conversation. It>was that simple.
But the Green Gear wasn't IN the conversation until you brought it up.Nobody had said anything about the Green Gear, or about R390/URRs, inany of the previous posts in this thread. The only person who wasconfused was you. You mistakenly thought that a Geneva Gear is the samething as a Green Gear -- as you put it, a "green, Geneva Gear" -- when, infact, there is no such thing.
There is a Geneva Drive/Geneva Gear, and there is a Green Gear, but neverthe twain shall meet. This stuff is hard enough for beginners to learnwithout subjecting them to posts that spread confusion, like that one.
I know it must seem that I live only to scold you on-list, but that is reallynot the case and I sincerely apologize for it looking that way. However,you have a long-running habit of posting comments about radiotechnology that are just plain wrong and must be corrected --unfortunately, on-list -- so that beginners and people searching thearchives will not be misled by them. (This time, you had the OPapologizing for misunderstanding, when in fact he had a perfectly correctunderstanding of the Geneva Drive until you posted.)-----------------------------------------------------------------------------------------------------Date: Fri, 27 Dec 2013 21:57:43 +1100From: Pete Williams <[email protected]>Subject: [R-390] Gear box...MHz out of whack!

Hi ... I would suggest that the intermittent switch drive assembly needs tobe reset.. I had to do this and only info I found was in an article inElectric Radio by Jan Skirrow . I have article but no date ..I can email a copy of the sketch but it has to be set up with cams etc in the7 +000 position. The 8-16MHz gear meshes with another gear to its leftand by loosening the collar on this on this shaft, the intermittent switchdrive assembly can be set correctly. It's too hard to explain without a pic,but happy to give info as required.-----------------------------------------------------------------------------------------------------Date: Fri, 27 Dec 2013 08:14:33 -0500From: Charles Steinmetz <[email protected]>Subject: Re: [R-390] Gear box...MHz out of whack!
>…intermittent switch drive assembly needs to be reset..
Not sure if it is the article you mean, but one of Jan's ER articlesabout restoring R390A RF decks is here:
<http://skirrow.org/Boatanchors/TechTalk1.pdf>
It has some discussion of the bandswitch. Some old list posts (1995era) also have some comments, including Jan's. The synchronizationprocedure is covered in the various maintenance manuals: TM 11-856A (1956) -- pp. 153-154 and Fig. 87 on p. 186 TM 11-5823-358-35 (1961) -- pp. 110-112 Y2K_R3 manual -- pp. 6-7, 6-8. See also pp. 9-63, 9-64, 10-25, 26, 27
These manuals can be easily found on-line.-----------------------------------------------------------------------------------------------------Date: Sat, 14 Jun 2014 02:15:37 -0700 (PDT)From: Larry H <[email protected]>Subject: [R-390] R-390A Cosmos PTO has erratic linearity
I'm restoring a Stewart Warner R390A with a cosmos pto type 136-1.Although I've had to fix a number of problems on the R390A, it looks andoperates well now except for 1 issue (or I think it's an issue). I've graphedthe linearity of the pto numerous times every 25 KC, and it tracks mostly+/- 100 - 200 cycles (with a few exceptions up to 300 cycles), but afteradjusting the linearity bad spots numerous times, different ones keeppopping up. IE, the measurement repeatability is poor, but still mostly within +/- 300 cycles. ?This is after letting it warm up for 2 hours. ?Thefrequency stability is very good. Also, if I graph the pto linearity, use it fora few minutes, and graph the linearity again (without making anyadjustments to the pto) its different than the previous graph. Everything

inside the pto seems tight and the gear train to the readout is tight (IE:very little slack). I have cleaned the pto shaft grounding contact andchecked the contact pressure. ?The endpoint also varies about +/- 100cycles. I have the prescribed spacing in the oldham coupler (its in verygood condition) and it is ligned up very closely with the KC shaft and thespring is installed correctly. The gear train and the pto operate verysmoothly.
Should this be better or is this normal? Any suggestions would be mostwelcome. Thanks.-----------------------------------------------------------------------------------------------------Date: Sat, 14 Jun 2014 16:40:41 -0400 (EDT)From: Roger Ruszkowski <[email protected]>Subject: Re: [R-390] R-390A Cosmos PTO has erratic linearity
Read all the mail on the topic before you jump in.
I propose a bad cap with a couple PF shift on temperature or voltage orvibration. Also consider a cold solder joint.
For the cold solder joint I would go through the connections on thetube base outside the PTO can. Then do the inside of the can.
Isolating an offending cap will be a shotgun approach. Eye ball for likelysuspects. If it looks like it has been run over it may be unstable.
Cold air may not be real diagnostic as changing the temp of any cap maypull the frequency as far as it is drifting. But you could get lucky. The badcap may go real off the reservation for you and give itself away.
Good luck the problem is very fixable
Any mechanical slop can be taken into consideration when doing themeasurements.
Always come up on the way point from the same direction.Get close and roll slowly up to the point from the same side.Roll up to or down to the point you want to measure.
It when you find the difference between points keep moving orthe frequency counter keeps drifting around as the PTO is left setting still.
You will have to get the PTO stable first. Then you can try and trim it up.Do set the end to end span before you work on the mid point linearity.-----------------------------------------------------------------------------------------------------Date: Sat, 14 Jun 2014 22:06:48 -0500

From: "Bill Hawkins" <[email protected]>Subject: Re: [R-390] R-390A Cosmos PTO has erratic linearity
Well, 200 parts in 2 million is 0.01% accuracy. I'd say that was amazingfor a mechanical, analog device. The answer to your question may be inthe Collins Engineering Report, if it states the accuracy for the PTO. I seemto remember +/- 500 cycles, but you should find that in print. The age ofdigital calculators does make one think that all of the digits ought to beaccurate, with no regard for percent error.-----------------------------------------------------------------------------------------------------Date: Sun, 15 Jun 2014 04:11:52 -0700 (PDT)From: "Tom M. via R-390" <[email protected]>Subject: Re: [R-390] R-390A Cosmos PTO has erratic linearity
This is an article I wrote about how to calibrate the Cosmos PTO.Take a look and see if you find any nuggets. Tom-------------------------------Calibration of The Cosmos Permeability Tuned Oscillator for the R-390Aby Thomas Marcotte, P.E. N5OFF
This article will focus upon the calibration of the Cosmos permeabilitytuned oscillator (PTO) for both linearity and endpoint adjustments. Fewdevices have been so maligned or poorly understood than the Cosmos PTOemployed in the R-390A HF receiver. This device has been mentioned inarticles about the R-390A many times, as well as on several Internetmailing lists, often negatively. The features of endpoint and linearityadjustments for this PTO have often been misunderstood, leading one tosuspect it may be a poor device. This article will attempt to convincethatthe Cosmos PTO is worthy of service in the R-390A when adjustedproperly.
Collins designed and built the first R-390A receivers utilizing its own 70H-12 PTO. This PTO covers a frequency range of 3.455 Kcs to 2.455 Kcs inten clockwise turns. It is a robust device constructed of the highest qualitymaterials, including an encapsulated main coil, sturdy compensatingstack, and a temperature controlled oven.
The R-390A receiver was produced by many manufacturers other thanCollins. These manufacturers were at liberty to employ the PTO's ofsuppliers other than Collins, as long as their performance met thespecification MIL-R-13947. Consequently, PTO's employed in the R-390Awere supplied by many other manufacturers including Motorola,Progresstron, Dubrow, Cosmos and Raytheon. Of all PTO types, theCosmos seems to be the most common. Electronics AssistanceCorporation used these PTO's exclusively in its production run of 11,000R-390A's around 1967.

Cosmos Industries was a New York manufacturer of radio equipmentlocated at 31-28 Queens Boulevard, Long Island. Among its products wasthe well known Cosmophone HF-SSB transceiver. The improvementsmade in the Cosmos PTO over the original Collins device were designed byLewis Metzger and Harold Goodman, both instrumental in thedevelopment of the Cosmophone. They received US patent number3,098,989 in July, 1963 for their idea and working model of a PTO thatcould be linearized with external adjustments, unlike the Collins PTO.Anyone who has ever worked on a R-390A PTO soon finds out that thereare two important adjustments that can be made. The first is that the PTOmust be adjusted such that its output is exactly 1000 Kcs in ten turns. Thisis commonly referred to as the endpoint adjustment, and is as far as mostusers will go in PTO calibration. Endpoint adjustment is important as itnot only affects dial calibration, but can also compromise front end tracktuning on the lower bands.
The second important adjustment is linearity. If one were to graph theideal PTO output frequency versus the shaft position in number of turns,the graph would make a straight line. This was the goal of Collins Radio inall of its designs of the era, including the 75A, 32V and all of the latermodels. Art Collins wanted a linear output, and that was that. The CollinsPTO was famous for being able to achieve this goal, as well it had to,because the inherently linear Veeder-Root counter of the R-390A exposednonlinear PTOs with errors as low as 0.1 Kcs.
All PTO's employed in R-390A service have an endpoint adjustment screw.This screw is typically located underneath a sealed screw hole behind thePTO' s transformer can. As a PTO ages, its output will typically decrease,i.e., it will have an output of less than 1000 Kcs in ten turns. To remedythis, the endpoint adjustment screw must be turned (usually clockwise)until the PTO's output is increased to exactly 1000 Kcs in ten turns. Theturning of this screw moves a tuning core into a second coil in the PTO tomake the adjustment. PTO's of the Collins design will have two inductorcoils, a main coil and an endpoint adjustment coil.
Adjustment of the PTO's linearity is another matter entirely. In the CollinsPTO, the company employed an internal corrector stack whichaccomplished this task. This stack is constructed from a set of adjustableshims upon which a cam follower rides. As the PTO shaft is turned, themain tuning slug is advanced axially on a lead screw, and the cam followeris simultaneously advanced on the corrector stack. Naturally,advancement of the main slug on the lead screw is exactly linear, butunfortunately the coil and powdered iron tuning slug do not usuallycooperate in linear fashion. The cam follower mechanism allows thetuning slug to either increase or decrease the overall rate of advancement

on the lead screw by imposing a slight twist of the tuning slug. Thisincrease or decrease in tuning rate is determined by the shape of thecorrector stack and is what accomplishes the linearity correction. If agraph were made of the nonlinear response of the PTO, it might look verymuch like the profile of the Collins corrector stack when properly adjusted.
Linearity correction is necessary because it is virtually impossible to windthe main tuning coil and match it with an iron slug for an overall linearoutput. The only problem with the Collins design is that the correctorstack is inside the PTO cover. Naturally, adjustments must be done withthe cover off, but unfortunately, replacement of the cover influences theadjustment requiring multiple attempts and no shortage of frustration.Metzger and Goodman solved this problem by improving the Collins PTOdesign. The Cosmos endpoint adjustment is similar to the Collinsadjustment, however the real innovation is found in their externaladjustment for linearity. This is the most misunderstood feature of theCosmos PTO.
Upon careful examination of the Cosmos PTO, one will find the endpointadjustment in its usual location as described above. To the left of theendpoint screw hole will be found an additional screw cover. Underneaththis second screw cover will be found a series of very small screws. Duringclockwise rotation of the PTO shaft, this series of screws passesunderneath this window from left to right. One screw will pass with every90 degree turn (25 Kcs) of the PTO shaft. It is this series of screws thatare used to adjust linearity of the Cosmos PTO.
The Cosmos PTO has three inductor coils instead of two employed byCollins. There is the familiar main tuning coil, an endpoint adjustmentcoil, and a third coil that is part of the linearizing device. Like theendpoint coil, the linearizing coil is in series with the others. Theinductance change of the corrector coil is controlled by a core which goesin or out as the PTO is rotated through its ten turns.
To help visualize the corrector mechanism, picture if you will a Teflon disklaid onto the front face of the PTO. This disk acts as a cam. A camfollower contacts the slug of the third coil. The corrector disk rotatesthrough a reduction drive as the PTO is advanced its ten turns. Under thisdisk is a series of screws which are laid out in a staggered fashion all alongits circumference, forming a circle. The flat heads of the screws, which areadjusted to varying heights in close proximity to their neighboring screw,make up a (typically uneven) surface upon which the flexible Teflon diskrests. As the screws are adjusted in or out, the Teflon disk (formerly andinitially flat) is shaped into a wavy surface (a cam) upon which a camfollower rides. You've seen the kiddy motorcycle rides at the carnivalwhere the miniature vehicles go round and round, and also make a gentle

up/down motion on the wavy surface of the merry-go-round floor. It is thisslight vertical displacement of the vehicles that is analogous to the in/outmotion of the core in the compensating coil. Note: One should refer to theR-390A service manual before attempting to service the radio.
The two things needed to calibrate the PTO at 25 Kcs points are 1) anaccurate means of measuring frequency, and 2) an accurate means ofturning the PTO shaft exactly 90 degrees at a time. The author uses afrequency counter to measure the PTO output, and the Veeder-Root counterin the radio to measure the turns of the PTO. When using the radio'scounter to measure turns, take the time to tape exposed 120 VAC powerand fuse connections to prevent electrical shock while performing themore than 40 PTO remove/install maneuvers. The frequency counter isconnected directly to the output cable of the PTO. A handy crossoverconnector from the PTO fitting to BNC can be found on the back bulkheadof the radio. Simply borrow the adapter that is present at the IF outputjack. There are many alternatives to using the radio frame to measureturns, including using a sacrificial R-392 frame (credit Wally Chambers,K5OP), and various calibrated knobs.
Setting the endpoint on a Cosmos PTO is similar to the Collins PTOs. Testthe PTO to see how many turns it takes to achieve an output starting at3455 Kcs and ending at 2455 Kcs. Most aged PTO's that have not beenrecalibrated will typically require an additional 1-15 Kcs past the ten turnmark to achieve the proper range. To bring it back to 1000 Kcs output inten turns, adjust the endpoint screw (usually clockwise). If the properoutput cannot be achieved within the adjustment range of the endpointscrew, one must open the PTO and remove one turn from the endpointadjusting coil. This change in overall inductance of the coil will bring theendpoint back 7 Kcs or so. Once this is accomplished, setting the endpointcan usually be achieved. While the PTO is open, the lead screw and bearingcan be lubricated. The author usually takes this opportunity to bake anopen PTO in an oven at 150F for several hours to dry it out and regeneratethe desiccant.
Perform the calibration only after baking, and keep the PTO in a zip lockbag if you plan to leave the adjustment window screws open for anextended length of time.
When setting the 25 Kcs calibration points, it is extremely important thatthe screw being adjusted is directly lined up behind the adjustmentwindow. This may be accomplished by simply rotating the PTO shaft untilthe nearest screw is lined up exactly with the window. The reason this isso important is that the cam follower which rides on the compensatingcam is directly behind this window, and will thus be directly under thisscrew at this point. If this caveat is not followed, adjustment can still be

made, but there will be interaction between the point that one isattempting to adjust, and its neighboring points. This will yield poorresults and will be very frustrating. Be advised that if the screw beingadjusted is directly behind the window, the PTO position may not yield anexact 25 Kcs calibration point on the dial, e.g. 000, 025, 050, etc. This isnot a real problem, but it may be necessary to shift the starting point ofthe 25 Kcs check points by 5, 10, or 15 Kcs up or down. Simply rememberthat the PTO has an output of 3455 Kcs at dial indication 000, and 2455Kcs at dial indication +000. Armed with this information, one can make aspreadsheet calibration chart for all 40 calibration points in 25 Kcsincrements. An example chart might look like this:
FrequencyVeeder-Root Error ( Kcs)Counter(Kcs)3465-0103440-0153415-0403390-065And so on . . . for 40 to 42 calibration pointsThe above example is for a PTO that has the nearest linearity alignmentscrew falling at a frequency of 3465 Kcs on the frequency counter. Thiscorresponds to a starting point on the Veeder-Root counter of -010. Notethat this starting point is not on an even 25 Kcs point, but that is OK as itis most important to start with the nearest screw directly lined up withthe adjustment slug at the center of the window. To complete the chart,subtract 25 Kcs from the frequency and add 25 units to the Veeder-Rootcounter for each point out to 2455 Kcs.
Each screw will have an adjustment range of about 5 Kcs +/-. Clockwiserotation of the screws will reduce the PTO's frequency output at a givencheckpoint. One should avoid adjusting the screws to near their fullclockwise position as this will cause excessive drag in the PTO.
Advanced Procedure for the Stout Hearted
To remedy problems with excessive drag due to adjustment screwsreaching their clockwise limits, back all 40+ screws out to theircounterclockwise stops, and then turn each screw one turn clockwise. Thiswill give the cam an initially flat position. Start PTO calibration at thepoint nearest 3455 Kcs moving up the dial toward 2455 Kcs (+000 on theVeeder-Root counter).
Remember to check each calibration point against the frequencies on thecalibration check chart (it is not hard to get 5 Kcs off). Some check pointsmay require a touch-up calibration after completion of the first pass. Thiswill be especially true if the PTO calibration was re-started with the cam inthe initial flat position as described above. Extreme adjustment changes

(5 Kcs) at any given point may cause output changes at neighboringpoints. These can be worked out with multiple checks and adjustments atproblem checkpoints.
With this linearization procedure, it is possible to obtain checkpointaccuracies of +/- .100 Kcs with an initial dial calibration at 000 using thecrystal calibrator. This greatly exceeds the specifications listed in MIL-R-13947B which require a +/- .300 Kcs with a dial calibration at the nearest100 Kcs check point using the crystal calibrator.
In conclusion, the reader should be left with these points.- the Cosmos PTO can be calibrated for both endpoint and linearity.- calibration can be done at 25 Kcs points, typically exceeding militaryspecifications.
References:
Military Specification MIL-R-13947B, "RADIO RECEIVER R-390 ( )/URR",26 October 1960
TM 11-5820-358-35, "Field and Depot Maintenance Manual, RadioReceiver R-390A/URR", pp. 107-108.
"Serially Connected Course and Fine Inductors with ContinuousAdjustment", U.S. Patent number 3,098,989 awarded to Metzger andGoodman, 23 July 1963
Also credit: Discussions with Wally Chambers, K5OP, Memphis, TN.-----------------------------------------------------------------------------------------------------Date: Mon, 16 Jun 2014 12:15:43 +1000From: Pete Williams <[email protected]>Subject: [R-390] Cosmos PTO'S
I'm no hot shot on these but having done about 30 over the years can onlyoffer what I have gleaned and applied from others who have been this waybefore.. First, I have never tried to calibrate a Cosmos or any other 'in situ'----i,e in the receiver. I went to the trouble of using a dual HT supply andseparate heater supply, getting the appropriate connnector, and treatingthe assembly on the bench. Output connected to a counter of course.
Secondly resetability and ability to reproduce a previously documentedsetting is difficult--- 'fraught' seems an appropriate word.. Do the math andyou will see that a change of 1.406 degrees in rotation is a shift of390.625 Hz.! As a minimum the setting measurement needs to be preciseand my PRACTICAL/realistic and achievable method is a 6 inch circularprotractor mounted on a PTO shaft connector and an indicator mounted

as best possible to correct for parallax error.
IF, repeat IF, you can set and reset to a 1 degree then good luck goes withyou, or you have made yourself an exemplary turning mechanism...... 1degree represents 277.78 Hz. I'd be happy to take advice on moresophisticated indicators but apart from the purist approach, what I do issomewhat better than an 'agricultural' approach via mechanical system inthe rx ..... The proof of the pudding is in the eating---- and all my clientshave never complained of setting indigestion!.-----------------------------------------------------------------------------------------------------Date: Sun, 15 Jun 2014 21:58:14 -0700From: Norman Ryan via R-390 <[email protected]>Subject: Re: [R-390] R-390A Cosmos PTO has erratic linearity
Probably the best written article ever on the Cosmos PTO. Bravo, TomMarcotte!-----------------------------------------------------------------------------------------------------Date: Wed, 24 Dec 2014 16:14:33 -0500From: Roger Ruszkowski <[email protected]>Subject: [R-390] R390A VFO backlash problem,
I was asked this question and I do not know how to cure the back lashproblem in these VFOs. May we have some help please?
Roger, You are going about the end point adjustment the right way. Ittakes timeand is boring. Tweak it a big bit to get closer faster. You may find startingfrom the other end helps you get the adjustment done.
Hi Roger,I hope you can shed some light on this PTO problem. I'm asking youbecauseyou seem to have had more experience than anyone else on the 390 list.I have a Collins type PTO manufactured by Progressitron Corp. forCapehart.The PTO seems to have some backlash. If I set it for zero beat, it will jumpback about 300Hz when I let go of the knob or shaft (with PTO removed). Ihave cleaned and lubricated the lead screw and put a drop of oil in thefrontbearing, but it still does this. Any suggestions??
I have the PTO on the bench, coupled to a counter. The freq. was off quite abit (~2kHz) after 10 turns. I have adjusted the endpoint slug and now haveit within 700Hz. I have a pointer knob on the shaft, and have been settingthe PTO at 3455.0 and marking the front plate, then after exactly 10 turns(2455.) I see where I am relative to the starting mark and make another

tweek of the slug. Back to 3455.0, another mark and do it all over again. Isthere an easier way to make this adjustment? I'd like to get it closer, butall this back and forth is driving me to drink ! Looking forward to yourcomments and suggestions. Roger Gates, W7KVT
Thank you Fellows, Merry Christmas to all
Roger Ruszkowski AI4NI------------------------------------------------------------------------------------------------------Date: Wed, 24 Dec 2014 13:49:56 -0800From: "Craig Heaton" <[email protected]>Subject: Re: [R-390] R390A VFO backlash problem,
Merry Christmas and a Happy New Year!! A random thought: I'm not anexpert on types of PTO's used in the R-390/A; but here is what was found ina PTO inside a Motorola. There is a gizmo sort of like a scissor. A smallspring pulls two thingies in contact with the corrector stack. One of thesethingies is the electrical contact. The other is along for the ride and onlyrubs the other side of the stack. If the spring breaks there is mucho slop!Will drive grown men to crytrying to make all well again!
If this is the cause, the only hope is to open the PTO and inspect the worksinside. My PTO also had the desiccant bag broken with said stuff makingtheturning of the PTO shaft gritty. More to the story, but at times this can befixed if the corrosion inside hasn't ruined the scissor.------------------------------------------------------------------------------------------------------Date: Wed, 24 Dec 2014 14:09:44 -0800From: "Roger Gates" <[email protected]>Subject: Re: [R-390] R390A VFO backlash problem,
Well guys, the problem has been resolved. Like Craig suggested thelinearizing mechanism might cause the backlash issue, but mine was infineshape and no sign of it causing the problem.
I recleaned the leadscrew and relubed it with Mobil 1/WS2, also placing adrop of oil on the rear bearing. I then removed the circlip on the frontbearing (hoping to remove the bearing), but had to be content withwickingsome oil into the shaft and bearing. I wonder how this bearing comesout??After working the tuning shaft a bit it seemed to loosen up and quit actingas if it had a mind of it's own. I could not detect any backlash tuning itagainst a signal from the 8640B and monitoring the signals in another

receiver.
The end point adjustment is tedious at best and downright maddening attimes. After much back and forth, I finally got the 10 turn spread down to1.00mHz + about 100Hz. Good enough for me!!
I hope this info helps someone else with the backlash problem. By the way,does anyone know of an exploded view of the Collins PTO??------------------------------------------------------------------------------------------------------Date: Thu, 25 Dec 2014 09:41:49 -0800From: "Drew P. via R-390" <[email protected]>Subject: Re: [R-390] R390A VFO backlash problem
[snipped] "I have a Collins type PTO manufactured by Progressitron Corp.for Capehart. The PTO seems to have some backlash. If I set it for zero beat,it will jump back about 300Hz when I let go of the knob or shaft (with PTOremoved). Ihave cleaned and lubricated the leadscrew and put a drop of oil in the frontbearing, but it still does this. Any suggestions??"
I have found that if the anti-backlash nut affixed to the leadscrew nut is settoo tight, excessive torque will be applied to the spring loaded guide whichrides on the guide bar. Turning the VFO shaft / leadscrew will then"windup" the spring guide slightly, and cause the problem you described whenthe spring "unwinds". This also will contribute to "R-390A Sore Wrist-itis".
I have remedied this problem by disassembling the anti-backlash nut fromthe leadscrew nut, then lubricating and reassembling with less tension.The anti-backlash nut has spring "petals" protruding radially, clamped inplace to the leadscrew nut by a ring secured by screws. The "petals" providetension, and this may be reset by loosening/removing the small screws,rotating the anti-backlash nut, and then tightening the screws. If the anti-backlash nut has too much spring tension applied by the "petals", there willbe excessive drag, with attendant "jump back" problem you described. Iftension is insufficient, there will be simple mechanical hysteresis, thebacklash we all know and love.
Aside: Some of the drag which can cause tuning the R-390A to be less thanpleasant is attributable to the o-ring sealing the shaft where it passesthrough the front housing of the VFO. A new o-ring, lubricated, helps here.For the ultimate in low-drag tuning, it should also be possible (I haven'ttried it) to operate with the o-ring removed entirely - we don't pump up ourVFO's with dry nitrogen anymore, do we? Comments, anyone?------------------------------------------------------------------------------------------------------Date: Sun, 8 Feb 2015 16:01:02 +1100From: Pete Williams <[email protected]>

Subject: [R-390] COSMOS PTO ..E.Point and Linearity
My take... having done about 20+ over the years, I have yet to find one thathas never been touched internally, let alone satisfactorily linearised orendpointed. There's always someone that has been there before me,compounded by drift in capacitor value changes to permeability of the coreor a combination. The end point adjustment usually gets the advice toremove a turn from the end point coil. I can't recall an instance where thisproved to solve the problem and always ran out of slug on the EP coil whengoing through the procedure Like I said, others have been that waywithout success, and I don't tolerate a few kHz out at the ends At the riskof raising eyebrows, what I have done for remedy is as follows ..
1.. disassemble and remove the EP coil.
2.. rewind with equivalent gauge wire and put on 3 turns - seal with nail polish.
3..remove the 10pf NPO capacitor....
4. return the slug in the EP coil to full in position. ACW. Lower valuecapacitors have been tried but eliminating 10 pf works for me .. I powerthe PTO being worked over from a dual voltage ,adjustable and regulatedpower supply with pto output to a counter. The EP and linearizingprocedure is then done per previously recorded info on this list and ERarticles. No major change in stability with temperature ..cold start toheating to too hot to hold no worse than about 50 Hz at 3.455Mhz.Maybe others have done something similar, but I've not read of it..------------------------------------------------------------------------------------------------------Date: Wed, 25 Mar 2015 19:20:02 -0700From: wli via R-390 <[email protected]>Subject: Re: [R-390] bad audio
Symptom: severe audio distortion in all filter positions except 16kc.
Cause: loose PTO coupling! Looked fine externally, but upon closeinspection, turning the KC knob, observed obvious slippage of the couplingto the PTO shaft. Solved by re-setting the PTO to 3455KC, and rotated thecoupler so it mated exactly to the KC shaft locked at 7(-)0000. Retightenedboth Bristol screws on the coupler. Shimmed the rear of the PTO so thatboth shafts were aligned straight in both dimensions.----------------------------------------------------------------------------------------------------------Date: Sun, 17 Jan 2016 11:37:36 -0500From: Jacques Fortin <[email protected]>Subject: [R-390] J709 on R390A PTO

I am actually trying to rebuilt a Collins R390A PTO and J709 have somebroken pins. Can anyone provide advice about where I can find areplacement--------------------------------------------------------------------------------------------Date: Mon, 18 Jan 2016 14:42:05 -0600From: James Green <[email protected]>Subject: [R-390] PTO Oldham anti-backlash spring recommendations
I am putting my R-390A back together and have lost the anti-backlashspring for the PTO Oldham coupler. What what should I be looking for toreplace it. I'm could look inside my R-390/URR, but it's in the cabinet andI'd rather not pull it out.--------------------------------------------------------------------------------------------Date: Mon, 18 Jan 2016 14:44:23 -0600From: Cecil Acuff <[email protected]>Subject: Re: [R-390] PTO Oldham anti-backlash spring recommendations
A spring out of an old ball point pen can be easily made to work...--------------------------------------------------------------------------------------------Date: Tue, 19 Jan 2016 01:37:51 +0000 (UTC)From: "Tom M." <[email protected]>Subject: Re: [R-390] PTO Oldham anti-backlash spring recommendations
I once used the spring from a ball point pen.Go down to your local old timey hardware store and ask for the cabinetwith all the springs in it and buy a variety with loops on each end. It's notreal critical.It looks like this: http://www5a.biglobe.ne.jp/~jh2clv/main2/r390a_oldham&pto.jpg--------------------------------------------------------------------------------------------Date: Mon, 9 May 2016 04:25:58 +0000 (UTC)From: Larry H <[email protected]>Subject: [R-390] PTO VFO End Point Adjustment tool
Some time ago I started working on an R-390A Cosmos PTO that neededend point adjustment. After reading the immense amount of doc graciouslyposted about PTOs, I decided to make the adjustment tool suggested bysomeone (whose name I can not locate). I thank you! They suggestedmaking it about 3.5" long, so it could be inserted into the adjustment holewhile the VFO and the front panel were still installed. This made the EPadjustment very easy. Thank you!
Here's what I ended up with:http://s32.postimg.org/pxqpdph51/IMG_7204s.jpgAs you can see, its 3 13/16" long. That's as long as I could make it and still

sneak it into place to make the adjustment. The shaft is aluminum so as tonot distort the tuning. There is tape and tubing on the adjustment end. Itdid not start out that way, but I found that the tool usually found its waybetween the EP adjustment shaft and the access hole. That is not good asthe adjustment coil could be damaged. So I added the tape and tubing tokeep it centered in the access hole. Now the adjustment is so easy. I've usedit on 3 different PTOs: Collins, Cosmos, and Progressitron, and it was easyto use. I am very glad I made the tool, as getting the Cosmos EP correctwas a long drawn out painful experience.----------------------------------------------------------------------------------------------------Date: Sun, 28 Aug 2016 00:31:18 +0000 (UTC)From: Larry H <[email protected]>Subject: [R-390] R-390A Cosmos PTO repair and adjustment
I went through a Cosmos and got it working quite well. I'd like to share myexperience with you. There was a lot of great information online, and Istudied it carefully. Thank you all very much who contributed. I like thedesign when the linearity mechanism is in good condition and workingcorrectly. If not it can be a big head ache. Opening it up is like any otherPTO. Before you do, check the end play on the main shaft. There should benone that you can feel. If there is and it goes unrepaired, you will haveforward/backward tracking issues, and probable warbles trying to zerobeat a station or trouble tuning in CW or SSB stations. You should alsocheck the rotational freedom and smoothness of the shaft. You need aslight resistance, but it must be absolutely smooth from end to end. If not,it will have the same tuning and wear issues.
To help you locate a couple key components, look at these photos:
P1. https://s22.postimg.org/ul7jtkbgh/IMG_5889s.jpgP2. https://s16.postimg.org/56s9uzjyt/IMG_5899s.jpg
The EP adjust is the slotted screw on the right. The linearity screws are onthe left right above the tuning shaft. Note that the hole is centered aboveit. One screw should be centered in the large hole with the 3 visible, ateach 25 kc point on the dial. The centered one is the currently active one.Do not adjust the ones on either side. This is the one pressing on the metalspring that is pushing on the spring loaded core of the linearity adjustingcoil. As the KC knob is rotated 25 KC, the next adjusting screw willbecome centered. There are 2 rows of screws on the disc. One from the toprow will be centered, then one from the bottom row, etc.
Once it's open, here's the 3 inductors I saw:
P3. https://s3.postimg.org/4gbsaf01f/IMG_5589s.jpgP4. https://s21.postimg.org/ikdk0v2zb/IMG_5594s.jpg

The short one is the EP adjustment on the bottom. The one right above itis the linearity compensating coil. It is a spring loaded core controlled bythe adjusting screws. This is the linearity mechanism:
P5. https://s16.postimg.org/7h6y7xl4l/IMG_6112s.jpgP6. https://s21.postimg.org/oc1n30u07/IMG_6115s.jpg
The first one shows the red phenolic button the cam actuates to move thecore inside of the linearity inductor. The second shows my screw drivermanually moving the core by pushing on it. I'm making sure it is movingfreely and has good spring resistance.
The next photos show the PTO opened up at the cam operating area. It'sthe round flat metal spring with the cam on it on the opposite side fromthe red button in the first photo. The cam is moved by the position of theadjusting screws shown in the second photo.
P7. https://s9.postimg.org/twbll51ov/IMG_6162s.jpgP8. https://s13.postimg.org/4n7xow1o7/IMG_6164s.jpgP9. https://s13.postimg.org/rn875v6dz/IMG_5978s.jpg
I believe that the linearity adjusting screws can turn a total of 5 turnsbefore falling out. Be very careful that they don't fall, as it is difficult to getthem back in. You will probably have to take it apart. The third photoshows a close up of the adjusting screws. When they are unscrewed as faras possible CCW, they will stop on the disc that holds them due to the flathead being larger than the threads. I used a jewelers screwdriver to adjustthem, but be careful to not damage the splines. If one is stuck, you willneed to use a .033 inch 4-spline wrench.
Here's pictures of the inside showing the moving tuning core:
P10. https://s21.postimg.org/cbroii8vb/IMG_6106s.jpgP11. https://s12.postimg.org/807j8rn99/IMG_5597s.jpg
The photo P10 shows the linearity inductor pulled away from the frame.You will also see 2 flat compensating caps. They are very fragile. Be verycareful with them. In order to bring the EP adjustment into range, one ofthese needs to be reduced in value by 1.5 to 2 pf.
The next one shows the split nut on the end of the tuning core. It has aspring clamp around the end of it to maintain the correct pressure on theshaft. The purpose of this mechanism is to eliminate end play between thecore and the tuning shaft. This is a critical point for minimizingforward/backward tracking alignment and creating smooth frequency

change when the tuning shaft is turned. It needs to fit just right.
P12. https://s15.postimg.org/91cx5zk4b/IMG_6158s.jpg
The next two pictures show the flat ring retainer held in place with threeround head screws, has been removed in order to unscrew the split nut alittle. I did this in order to check the tightness and play on the shaft. Thenut can be removed for adjustment, if necessary.
P13. https://s21.postimg.org/z3i7lf7nb/IMG_6152s.jpgP14. https://s4.postimg.org/fzl51ljot/IMG_6155s.jpg
If you need to remove the core from the shaft, you might loosesynchronization between the core position and the linearity disc position.If this positioning is lost, you will need to go through the linearizationfrom the start.
It is imperative that the metal guide arms and the base for the split nutattachment plate are rigidly attached to the core. If not, it needs to berepaired or replaced. One guide arm is rigid and the other has a springattached to it in order to keep a reasonable amount of pressure on thealuminum guide bar (it should be lubed very lightly with a very thinslippery lube (not oil)).
After it's in good condition and before you put the covers back on it, see ifyou can operate it on the bench. A good test is to hook up your counter toit and put forward and backward pressure on the core to see if it will move.Don't worry about the actual frequency, as it will change 40 to 50 cycleswhen the cover is put on. It should move about 7 to 10 cycles and then goback to the original reading when pressure is released. Do not use a lot ofpressure, but enough to move it at least 1 cycle. If it moves about 15 cyclesand goes back to the original setting, it's probably ok. Ideal would be about7 cycles. If it does not go back to the original reading within 1 or 2 cycles,repair is needed.
Also check the guide arm operation. Rotate the tuning shaft slowly andquickly in both directions and make sure the arm contacts do not moveaway from the guide bar. If they do, repair is required.----------------------------------------------------------------------------------------------------------Date: Sat, 27 Aug 2016 19:49:56 -0500From: Cecil Acuff <[email protected]>Subject: Re: [R-390] R-390A Cosmos PTO repair and adjustment
Great stuff Larry...this will probably end up in the "Pearls".----------------------------------------------------------------------------------------------------------Date: Sun, 28 Aug 2016 16:36:56 -0400

From: <[email protected]>Subject: [R-390] Cosmos PTO
Well I lucked out on the PTO. Seems there was a large error in the countersetting. I corrected that. My error now is a few kcs. So I am now able todo a zero adj. at the 100kc intervals. Linearity seems pretty good. Larry, thanks for all the pictures. There is some similarity to theDubrow, but I think as most do, the Cosmos is a better unit. I will leave itfor now, maybe get back to it at a later date. I have 4 other R-390As thatare running, but have issues. So I will be going to one of these. I think itwill be one with a sensitivity issue on 1st 2 bands. 73s Russ.----------------------------------------------------------------------------------------------------------Date: Fri, 9 Sep 2016 10:07:18 +0000 (UTC)From: Larry H <[email protected]>Subject: Re: [R-390] connectors- PTO-RF deck
>Are the PTO connectors the same as the RF deck
Yes, those 2 connectors are the same. Sorry, no spare osc.----------------------------------------------------------------------------------------------------------Date: Wed, 12 Oct 2016 18:25:02 -0400From: <[email protected]>Subject: [R-390] Progressitron
So hey guys, a friend of mine says Progressitron made the best of the390As. My friend also said they were made just for NASA. I know theymade some of the PTOs, did they make any complete 390As I do think myfriend has a lot of hot air. 73s Russ.----------------------------------------------------------------------------------------------------------Date: Thu, 13 Oct 2016 00:00:12 +0000From: Les Locklear <[email protected]>Subject: Re: [R-390] Progressitron
Progressitron made R-390A/URR PTO's, they didn't produce any R-390Areceivers.----------------------------------------------------------------------------------------------------------Date: Wed, 12 Oct 2016 23:59:33 +0000 (UTC)From: Larry H <[email protected]>Subject: Re: [R-390] Progressitron, R-390A Manufacturers
Hi Russ, Here's a link to a list that looks to be correct:http://www.jvgavila.com/r390a_4.htm
This same info is in the Pearls/History p21. I don't see Progressitronlisted.----------------------------------------------------------------------------------------------------------

Date: Thu, 13 Oct 2016 00:23:17 +0000 (UTC)From: Larry H <[email protected]>Subject: Re: [R-390] Progressitron, R-390A Manufacturers
Oops - I meant p53 in History. Sorry.----------------------------------------------------------------------------------------------------------Date: Thu, 20 Oct 2016 03:53:45 +0000 (UTC)From: Larry H <[email protected]>Subject: [R-390] R-390A VFO/PTO Quality
Stan, Take a look at the Pearls here:http://www.r-390a.net/Pearls/PTO.pdf----------------------------------------------------------------------------------------------------------Date: Fri, 7 Apr 2017 08:16:10 +0000 (UTC)From: Larry H <[email protected]>Subject: Re: [R-390] ADVICE ..... PSE, Cosmos linearity tool
Hi Pete, I assume you're referring to the bristo head screws for thelinearity adjustment. They are a .033" 4 spline bristo wrench. Micro Toolsmakes one. I got mine from Moody Tools on Amazon, part # 4-49-8130.However, if the screws are not locked down tight, I prefer to use a # 4 flatjewelers screwdriver, .040" blade. It fits very nicely. Remember, you cankeep turning them clockwise until they fall down inside. Then, they are alittle difficult to recover. There's a lot of info written about the Cosmos, ifyou have not read it yet.----------------------------------------------------------------------------------------------------------Date: Tue, 18 Apr 2017 12:06:32 +1000From: Pete Williams <[email protected]>Subject: [R-390] TECHY Q.
The COSMOS pto main coil is logarithmically wound. Can someoneimprove my view that it must contribute to linearity in tuning....... If sohow? I assume tuning core positioning approximates what the shape ofthe tuning capacitors are in broadcast tuning linearity receivers toachieve low frequency linearity.----------------------------------------------------------------------------------------------------------Date: Tue, 18 Apr 2017 04:21:22 +0000 (UTC)From: Larry H <[email protected]>Subject: Re: [R-390] TECHY Q., coils wound logarithmically
Pete, Because the resonant frequency of an L/C network varies inverselywith the square root of L x C, a linear change in frequency is accomplishedby an exponential change in L or C. So, yes, the L or C needs to changelogarithmically, so all the variable core tuned coils in the 390’s are woundthat way.----------------------------------------------------------------------------------------------------------

Date: Tue, 20 Feb 2018 13:35:40 -0700From: "Gary I. Biasini" <[email protected]>Subject: [R-390] 1967 EAC S/N 4998 Cosmos PTO Question
I recently added a 1967 EAC S/N 4998 to my radios. It was a bit dirty butotherwise seemed in good condition and the purchase included thescrewdriver and bristo drive.
In checking the PTO however, it was about 5 KHz long so I decided to alignthe endpoints. Unfortunately, when removing the cover screw, I didn't seean adjustment screw. The picture at the link below shows what I found.Any help as to what to do next would be greatly appreciated.
https://1drv.ms/u/s!AhXaYQRsUlJ0gclJ7iti9grLEpfMxg------------------------------Date: Tue, 20 Feb 2018 18:26:33 -0700From: "Gary I. Biasini" <[email protected]>Subject: Re: [R-390] 1967 EAC S/N 4998 Cosmos PTO Question
Thanks to you and to the others that responded.
I wasn't very clear in my original message. On the picture, where Iexpected to see the adjustment screw after having removed the coverscrew, there was instead what looked like a red rubber washer. I decidedthat I would try to remove it with a dental pick but only ended upshredding the washer. Once enough of the washer was out, I could see theadjustment screw. After adjusting it twice for 1 1/2 turns in total, theendpoint remains 7KHz long, i.e. no change at all.
I was hoping that I wouldn't have to open up the PTO and remove a turnfrom the particular coil as noted in the various articles. I recently saw anold post (maybe on the PTO Pearls document) where the contributormentioned that when he replaced the capacitors in the PTO (I think theywere temperature compensating capacitors) the end point adjustmentworked without having to take a turn off the coil. I am going to look forthat post hope I can find that again.
Unfortunately, my time to work on the two R-390a receivers that I have inArizona has come to an end. When I next get back here in mid-March, Ihope to have more time. Again, thanks to all that have helped. I trulyappreciate it.------------------------------Date: Wed, 21 Feb 2018 01:44:56 +0000 (UTC)From: Larry H <[email protected]>Subject: Re: [R-390] 1967 EAC S/N 4998 Cosmos PTO Question

Gary, I've not seen what your picture shows. Did you look at 'A JOURNEYTHROUGH THE COSMOS (PTO)' by Jim Miller? Here's the link:http://www.r-390.com/cosmos.htm
Hope you got my write up on the Cosmos ok. In the ones I've worked on, Ifound that although removing a winding does help, it misaligns theadjusting screws. I needed to change the capacitance, instead.------------------------------Date: Tue, 20 Feb 2018 19:23:06 -0700 (MST)From: Gary Biasini <[email protected]>Subject: Re: [R-390] 1967 EAC S/N 4998 Cosmos PTO Question
Thanks. I have seen it. Could I trouble you to elaborate further on thecapacitance change?------------------------------Date: Wed, 21 Feb 2018 05:09:53 +0000 (UTC)From: Larry H <[email protected]>Subject: Re: [R-390] 1967 EAC S/N 4998 Cosmos PTO Question
Gary, Here's the info you asked for about reducing cap inside instead ofremoving 1 turn to obtain EP: after removing 1 turn on the e/p coil, thelinearity disk no longer placed the adjusting screws close to the center ofthe linearity cam on each 25 kc point. It does not need to be dead on, butclose is good. Must avoid having the transition between linearity screwson the center of the linearity cam. This will cause erratic frequency at the25 kc check points due to the play in the linearity gear train. I tried adding1pf to the main tuning to move the e/p adjustment to regain alignment, bute/p was just 500 cycles out of reach. So, had to replace the 1 turn that Iremoved and add an 82pf N200 in series with one of the two 10pf capsinside. This reduced the overall capacitance by 1.5pf and this did move thelinearity screws so they are close to center at each 25 kc point.------------------------------Date: Wed, 21 Feb 2018 05:17:33 +0000 (UTC)From: [email protected]: Re: [R-390] 1967 EAC S/N 4998 Cosmos PTO Question
Thanks. I will try your method in March when I next am near my radio.------------------------------Date: Wed, 21 Feb 2018 12:50:08 +0000 (UTC)From: "Tom M." <[email protected]>Subject: Re: [R-390] 1967 EAC S/N 4998 Cosmos PTO Question
Everyone has opinions so I'll give you this free; get your money's worth.- I would not touch any capacitors-
I wrote a procedure for calibration in 1995.? Here it is. This article will

focus upon the calibration of the Cosmos permeability tuned oscillator(PTO) for both linearity and endpoint adjustments. Few devices have beenso maligned or poorly understood than the Cosmos PTO employed in the R-390A HF receiver. This device has been mentioned in articles about the R-390A many times, as well as on several Internet mailing lists, oftennegatively. The features of endpoint and linearity adjustments for this PTOhave often been misunderstood, leading one to suspect it may be a poordevice. This article will attempt to convince that the Cosmos PTO isworthy of service in the R-390A when adjusted properly. Collins designedand built the first R-390A receivers utilizing its own 70H-12 PTO. ThisPTO covers a frequency range of 3.455 Kcs to 2.455 Kcs in ten clockwiseturns. It is a robust device constructed of the highest quality materials,including an encapsulated main coil, sturdy compensating stack, and atemperature controlled oven.
Cosmos Industries was a New York manufacturer of radio equipmentlocated at 31-28 Queens Boulevard, Long Island. Among its products wasthe well known Cosmophone HF-SSB transceiver. The improvements madein the Cosmos PTO over the original Collins device were designed by LewisMetzger and Harold Goodman, both instrumental in the development ofthe Cosmophone. They received US patent number 3,098,989 in July,1963 for their idea and working model of a PTO that could be linearizedwith external adjustments, unlike the Collins PTO. Anyone who has everworked on a R-390A PTO soon finds out that there are two importantadjustments that can be made. The first is that the PTO must be adjustedsuch that its output is exactly 1000 KC’s in ten turns. This is commonlyreferred to as the endpoint adjustment, and is as far as most users will goin PTO calibration. Endpoint adjustment is important as it not only affectsdial calibration, but can also compromise front end track tuningon the lower bands.
The second important adjustment is linearity. If one were to graph theideal PTO output frequency versus the shaft position in number of turns,the graph would make a straight line. This was the goal of Collins Radio inall of its designs of the era, including the 75A, 32V and all of the latermodels. Art Collins wanted a linear output, and that was that. The CollinsPTO was famous for being able to achieve this goal, as well it had to,because the inherently linear Veeder-Root counter of the R-390A exposednonlinear PTOs with errors as low as 0.1 Kcs.
All PTO's employed in R-390A service have an endpoint adjustment screw.This screw is typically located underneath a sealed screw hole behind thePTO' s transformer can. As a PTO ages, its output will typically decrease,i.e., it will have an output of less than 1000 Kcs in ten turns. To remedythis, the endpoint adjustment screw must be turned (usually clockwise)until the PTO's output is increased to exactly 1000 Kcs in ten turns. The

turning of this screw moves a tuning core into a second coil in the PTO tomake the adjustment. PTO's of the Collins design will have two inductorcoils, a main coil and an endpoint adjustment coil.
Adjustment of the PTO's linearity is another matter entirely. In the CollinsPTO, the company employed an internal corrector stack whichaccomplished this task. This stack is constructed from a set of adjustableshims upon which a cam follower rides. As the PTO shaft is turned, themain tuning slug is advanced axially on a lead screw, and the cam followeris simultaneously advanced on the corrector stack. Naturally,advancement of the main slug on the lead screw is exactly linear, butunfortunately the coil and powdered iron tuning slug do not usuallycooperate in linear fashion. The cam follower mechanism allows thetuning slug to either increase or decrease the overall rate of advancementon the lead screw by imposing a slight twist of the tuning slug. Thisincrease or decrease in tuning rate is determined by the shape of thecorrector stack and is what accomplishes the linearity correction. If agraph were made of the nonlinear response of the PTO, it might look very much like the profile of the Collins corrector stack when properlyadjusted.
Linearity correction is necessary because it is virtually impossible to windthe main tuning coil and match it with an iron slug for an overall linearoutput. The only problem with the Collins design is that the correctorstack is inside the PTO cover. Naturally, adjustments must be done with thecover off, but unfortunately, replacement of the cover iinfluences theadjustment requiring multiple attempts and no shortage of frustration.Metzger and Goodman solved this problem by improving the Collins PTOdesign. The Cosmos endpoint adjustment is similar to the Collinsadjustment, however the real innovation is found in their externaladjustment for linearity. This is the most misunderstood feature of theCosmos PTO.
Upon careful examination of the Cosmos PTO, one will find the endpointadjustment in its usual location as described above. To the left of theendpoint screw hole will be found an additional screw cover. Underneaththis second screw cover will be found a series of very small screws. Duringclockwise rotation of the PTO shaft, this series of screws passesunderneath this window from left to right.? One screw will pass with every90 degree turn (25 Kcs) of the PTO shaft. It is this series of screws that areused to adjust linearity of the Cosmos PTO.
The Cosmos PTO has three inductor coils instead of two employed byCollins. There is the familiar main tuning coil, an endpoint adjustment coil,and a third coil that is part of the linearizing device. Like the endpointcoil, the linearizing coil is in series with the others. The inductance change

of the corrector coil is controlled by a core which goes in or out as the PTOis rotated through its ten turns.
To help visualize the corrector mechanism, picture if you will a Teflon disklaid onto the front face of the PTO. This disk acts as a cam. A cam followercontacts the slug of the third coil. The corrector disk rotates through areduction drive as the PTO is advanced its ten turns. Under this disk is aseries of screws which are laid out in a staggered fashion all along itscircumference, forming a circle. The flat heads of the screws, which areadjusted to varying heights in close proximity to their neighboring screw,make up a (typically uneven) surface upon which the flexible Teflon diskrests. As the screws are adjusted in or out, the Teflon disk (formerly andinitially flat) is shaped into a wavy surface (a cam) upon which a camfollower rides. You've seen the kiddy motorcycle rides at the carnivalwhere the miniature vehicles go round and round, and also make a gentleup/down motion on the wavy surface of the merry-go-round floor. It is thisslight vertical displacement of the vehicles that is analogous to the in/outmotion of the core in the compensating coil.
Note: One should refer to the R-390A service manual before attempting toservice the radio.
The two things needed to calibrate the PTO at 25 Kcs points are 1) anaccurate means of measuring frequency, and 2) an accurate means ofturning the PTO shaft exactly 90 degrees at a time. The author uses afrequency counter to measure the PTO output, and the Veeder-Root counterin the radio to measure the turns of the PTO. When using the radio'scounter to measure turns, take the time to tape exposed 120 VAC powerand fuse connections to prevent electrical shock while performing themore than 40 PTO remove/install maneuvers. The frequency counter isconnected directly to the output cable of the PTO. A handy crossoverconnector from the PTO fitting to BNC can be found on the back bulkheadof the radio. Simply borrow the adapter that is present at the IF outputjack. There are many alternatives to using the radio frame to measureturns, including using a sacrificial R-392 frame (credit Wally Chambers,K5OP), and various calibrated knobs.
Setting the endpoint on a Cosmos PTO is similar to the Collins PTO’s. Testthe PTO to see how many turns it takes to achieve an output starting at3455 Kcs and ending at 2455 Kcs. Most aged PTO's that have not beenrecalibrated will typically require an additional 1-15 Kcs past the ten turnmark to achieve the proper range. To bring it back to 1000 Kcs output inten turns, adjust the endpoint screw (usually clockwise). If the properoutput cannot be achieved within the adjustment range of the endpointscrew, one must open the PTO and remove one turn from the endpointadjusting coil. This change in overall inductance of the coil will bring the

endpoint back 7 Kcs or so. Once this is accomplished, setting the endpointcan usually be achieved. While the PTO is open, the lead screw and bearingcan be lubricated. The author usually takes this opportunity to bake anopen PTO in an oven at 150˚F for several hours to dry it out andregenerate the desiccant. Perform the calibration only after baking, andkeep the PTO in a zip lock bag if you plan to leave the adjustment windowscrews open for an extended length of time.
When setting the 25 Kcs calibration points, it is extremely important thatthe screw being adjusted is directly lined up behind the adjustmentwindow. This may be accomplished by simply rotating the PTO shaft untilthe nearest screw is lined up exactly with the window. The reason this isso important is that the cam follower which rides on the compensatingcam is directly behind this window, and will thus be directly under thisscrew at this point. If this caveat is not followed, adjustment can still bemade, but there will be interaction between the point that one isattempting to adjust, and its neighboring points. This will yield poorresults and will be very frustrating.?= Be advised that if the screw beingadjusted is directly behind the window, the PTO position may not yield anexact 25 Kcs calibration point on the dial, e.g. 000, 025, 050, etc. This isnot a real problem, but it may be necessary to shift the starting point ofthe 25 Kcs check points by 5, 10, or 15 Kcs up or down. Simply rememberthat the PTO has an output of 3455 Kcs at dial indication 000, and 2455Kcs at dial indication +000. Armed with this information, one can make aspreadsheet calibration chart for all 40 calibration points in 25 Kcsincrements.
An example chart might look like this:
FrequencyVeeder-Root Error ( Kcs)Counter(Kcs)3465-0103440-0153415-0403390-065and so on . . . for 40 to 42 calibration points
The above example is for a PTO that has the nearest linearity alignmentscrew falling at a frequency of 3465 Kcs on the frequency counter. Thiscorresponds to a starting point on the Veeder-Root counter of -010. Notethat this starting point is not on an even 25 Kcs point, but that is OK as itis most important to start with the nearest screw directly lined up withthe adjustment slug at the center of the window. To complete the chart,subtract 25 Kcs from the frequency and add 25 units to the Veeder-Rootcounter for each point out to 2455 Kcs.
Each screw will have an adjustment range of about 5 Kcs +/- Clockwise

rotation of the screws will reduce the PTO's frequency output at a givencheckpoint. One should avoid adjusting the screws to near their fullclockwise position as this will cause excessive drag in the PTO.
Advanced Procedure for the Stout Hearted
To remedy problems with excessive drag due to adjustment screwsreaching their clockwise limits, back all 40+ screws out to theircounterclockwise stops, and then turn each screw one turn clockwise. Thiswill give the cam an initially flat position. Start PTO calibration at thepoint nearest 3455 Kcs moving up the dial toward 2455 Kcs (+000 on theVeeder-Root counter).
Remember to check each calibration point against the frequencies on thecalibration check chart (it is not hard to get 5 Kcs off). Some check pointsmay require a touch-up calibration after completion of the first pass. Thiswill be especially true if the PTO calibration was re-started with the cam inthe initial flat position as described above. Extreme adjustment changes (5Kcs) at any given point may cause output changes at neighboring points.These can be worked out with multiple checks and adjustments at problemcheckpoints.
With this linearization procedure, it is possible to obtain checkpointaccuracies of +/- 0.100 Kcs with an initial dial calibration at 000 using thecrystal calibrator. This greatly exceeds the specifications listed in MIL-R-13947B which require a +/- 0.300 Kcs with a dial calibration at thenearest 100 Kcs check point using the crystal calibrator.
In conclusion, the reader should be left with these points.- the Cosmos PTO can be calibrated for both endpoint and linearity.- calibration can be done at 25 Kcs points, typically exceeding military specifications.---------------------------------------------------------------------------------------------------Date: Wed, 21 Feb 2018 13:27:56 +0000From: Steve Hobensack <[email protected]>Subject: [R-390] Cosmos PTO Linearity
I have a Cosmos that was once out of endpoint adjustment. I found one ofthe endpoint coils was shorted out. It seems one of the copper wire leads tothat coil was in contact with a grounded screw and the varnish finallywore off. Check for that.
On another note, I have found different screw heads on the teflon screwdisk linearity adjustment, allen square or maybe it was bristol square,phillips, & slotted. I made an adjustment tool using a small steel wire and aDremmel wheel (with the aid of a magnifing lamp and jewelers loupe).

------------------------------Date: Fri, 23 Feb 2018 05:22:25 +0000 (UTC)From: Larry H <[email protected]>Subject: [R-390] R-390A Changing VFO PTO EP adjusting range
As we know, the aging of our PTO's has often caused the End Pointadjustment to fall out of range and can no longer set the VFO range to 1MH in 10 turns. A relatively easy solution is to remove 1 turn of wire off ofthe adjusting coil, thus reducing the overall inductance and bringing itback into the 1 MHz range. This solution is probably OK on a Collins PTO,because its adjusting coil has 5 turns of wire on it originally. Removingone turn only reduces the adjusting range by 20%. This should still provideenough adjustment range for another 30 - 40 years.
The question is will someone have to go into it again in the future andmake another change so that it can be brought back into adjustment.Maybe.
As for the Cosmos, we all know that it's adjusting range is not near aslarge as the other PTO's. That's because they added another coil in serieswith the original two in the Collins. The 3rd inductor is necessary to allowfor external linearity adjustment (see a few other write ups by Jim Miller,Tom Marcotte, John Harvie and myself) about the Cosmos). In order to usethe same capacitor scheme as in the Collins, the inductance of the EPinductor had to be reduced (thus reducing its range of adjustment). So theEP inductor in a Cosmos only has 3 turns of wire on it, making its rangesmaller than the Collins. Unfortunately, I've done two Cosmo’s recentlywhere removing one turn would not bring it back into range sufficiently,and the range is also reduced by 33%. It would have been barely usable (itwas within 1 KHz), but that's really not good enough. And, in a few years,someone would have to go back in and make another fix in order to obtain1 MH. So instead, I put the one turn I removed back on and reduced thecapacitance. I know that the two 10 pf flat wafer caps in there areextremely fragile, so I very carefully added an 82 pf N200 in series withone of them. This reduced the total capacitance by 1.5 pf, making the EPadjustment work quite well again. I did not see any side effects from doingthis.------------------------------Date: Fri, 23 Feb 2018 10:00:22 -0500From: [email protected]: Re: [R-390] R-390A Changing VFO PTO EP adjusting range
I've also tweaked the Cosmos by changing the linearity trimmers. You canget a final tweak of several KHz on the endpoint, but at the expense ofgoing through a laborious realignment of all the linearity screws. Since Iwas going to do the linearity anyway, it wasn't a problem. I cut down a

jeweler's screwdriver such that I could do the linearity adjustment withoutremoving the PTO from the radio. I found there was enough variation inremounting the PTO that it was hard to get to 0.1 KHz adjustments. Myconcern with changing the cap is that it changes the temperaturecompensation to some unknown degree. Probably not enough to worryabout with 60 year old radios.------------------------------Date: Sat, 24 Feb 2018 01:12:32 +0000 (UTC)From: Larry H <[email protected]>Subject: Re: [R-390] R-390A Changing VFO PTO EP adjusting range
Thanks for the comments and good question on the NTC of 200. I didn't doany calculations to arrive at 200. It was mostly an estimate. Most of theVFO's I've seen drift on warm up and take quite a while to stabilize, and Ibelieve more so now than when they were new. This is due to a fewreasons (seal leakage (humidity penetration), nitrogen depletion, andcomponent degradation).
These two Cosmo’s were drifting a little, so I estimated N200. The two NTCcaps in most PTO's are 10 pf at N100. If I would have put in an NPO, thatwould have reduced the NTC effect a little, but probably would not benoticed. Because they were drifting, I wanted to increase the effect slightly,but not a lot. The drifting was improved, although they still did drift some.The value to use depends on the PTO.
I have tried calculating the correct NTC value in the past, and have not hadmuch success at it. Once I tried a rather elaborate formula and it was notas good as an educated guess. If someone has a good method of estimatingor calculating it, I'd be interested. Before I work on a working PTO, Imeasure the drift with a counter to get an idea of how much drift is there.You can't use the BFO as a basis because they drift quite a bit sometimes(unless you've measured it with a counter and know what you have). Itshould be installed in the rx, because of temperature considerations.
All things considered, I like a good working Cosmos better than the Collinsbecause it's easier to linearize. I too, make the adjustment while it'sinstalled. The Collins liniarization stack is very hard to work with. It'sdifficult for me to determine which shim needs to be moved and how much.------------------------------Date: Sun, 20 May 2018 13:02:24 -0500From: Stan Gammons <[email protected]>Subject: [R-390] Progressitron PTO
I finally made some time to start on a better alignment of my R-390A andwas checking the PTO linearity. At 000 it's within about 50 hertz of3.455 Mhz. At +000 it's 2.464634 Mhz per my Leader LDC-823S counter.

Seems like I have to add a Kc every 100 Kc I go up. i.e in order forthe output to be 3.355 Mhz, the dial is 101 Kc. In order for the outputto be 3.255 Mhz the dial is 202 Kc and so for all the way to +000.Although it's not off exactly 10 Kc at +000. Suggestions on how I mightget the PTO a might bit more linear------------------------------Date: Sun, 22 Jul 2018 18:46:37 -0700From: Larry H <[email protected]>Subject: [R-390] R-390A Collins PTO Observations
I went through a Collins style PTO and documented what I found. Al waskind enough to put it on the R-390A disk in the 'Tutorials' area of the'Refenence' section. Here's a direct link:
http://www.r-390a.net/R390A_My_Collins_PTO_Observations.pdf
Or you can start at the FAQ page:http://www.r-390a.net------------------------------Date: Sun, 7 Oct 2018 19:09:46 -0400From: dog <[email protected]>Subject: [R-390] Dial off 50KHz
I put the original RF section back in after finding the cap I left outthat makes the calib osc work. So now the calib osc works. But I'm notsure what I did, other than I put the other RF section I had in, itdidn't work, so I removed it and after I fixed the cap in the old RFsection, now the dial is off by 50KHz reading low. Actual 10.1 reads10.05 so the 10M band shows up below 10.1. I always turn the PTO anddial to far left like the book says and I'm wondering if I got it offsomehow Should I try to turn the PTO maybe 1/2 a turn, I'm not surewhat 50KHz is in relation to a half turn on the PTO I guess I couldfigure it out. At least the calibrator is working now. Maybe I can getrid of this thing.
I've found it easiest to turn the RX upside down to get the Oldhamcoupler and spring back in. And loosen up the PTO. I can get the RFsection in and out in about a half hour now with all the cables and screws.----------------------------------------------------------------------------------------------------Date: Sun, 7 Oct 2018 17:31:25 -0700From: Larry H <[email protected]>Subject: Re: [R-390] Dial off 50KHz
Since the frequency discrepancy is also above 8 MH, that rules out the 1stosc. I assume you are using the same 2nd xtal osc, so it must be caused bythe PTO shaft moving a little. 50kc is exactly a half turn.

----------------------------------------------------------------------------------------------------Date: Sun, 7 Oct 2018 22:15:05 -0400From: dog <[email protected]>Subject: Re: [R-390] Dial off 50KHz
I'll turn the PTO 1/2 a turn. I'm sure it got messed in all mymasegnations. I also replaced those orange drop .1uF with something abit more manageable. I used some Panasonic Films. I've got the AM siggen going into it at 40dB on the carrier meter for several hours now andit's holding gain fine. Haven't heard a glitch out of it yet. I'll turnit off tonight and start it up again tomorrow when I get home late inthe morning and keep an eye on it. Thanks again.----------------------------------------------------------------------------------------------------Date: Mon, 8 Oct 2018 20:32:46 -0400From: dog <[email protected]>Subject: Re: [R-390] Dial off 50KHz
I turned the PTO a half a turn and it's back to normal. I should havenoticed when I took it apart the spring on the Oldham coupler was on thetop and I put it on the bottom when I put it back together. I must havesomehow turned the PTO. Anyhow all is good and the RX is working goodon 10MC WWV at the moment with the original RF section, calibration oscworking and all.----------------------------------------------------------------------------------------------------Date: Mon, 29 Apr 2019 18:15:30 -0400From: <[email protected]>Subject: [R-390] PTO learnings and sensitivity un-mod
I've been tracking down a sensitivity issue with my R390A. I found a fewbad 2.2K resistors which I changed, but sensitivity still wasn't up to thegain stage charts in the TM. Slowly I came to the conclusion that my PTOwas feeble (apart from having endpoint drift). This is where it gets good.The PTO was indeed weak and putting in a new tube just made it worse. So,I got under the hood and found the 220k screen resistor came in at 290k.It was the subject of a change from 56k to 220k at some point. Changedthat out, but got a far from flat amplitude vs. frequency. So, I began towonder what that 220k change was all about... After some reading Idecided to experiment. Put in a resistor substitution box and found outputamplitude got better and flatter vs frequency with a decrease in value. Imade the decision to revert back to the 56k pre-mod value. Wow! What adifference!!!! PTO output went from 750 mV to 3.3Vp! It is virtually flatfrom 2.4 to 3.5 MHz. The receiver is WAYYYY more hot too! I haven'tgone back and checked stage gains, but this is very promising. Carriermeter picked up 12-15 db! Very pleased. The 56k un-mod also made thePTO much more insensitive to tube changes...

As far as endpoint drift, this seems to be related to mechanical stress onthe Oldham coupling. As far as I can speculate, the two ends and the centerplate shouldn't be tightly sandwiched together. I learned all about how theCosmos PTO is linearized and yes I had to take off a turn of the endpointcoil, but now I have a drift free (so far) PTO linear from end to end within<300 Hz. 40 little tiny screws and a few hours and I'm a happy camper. It'sa good R390A day! John------------------------------------------------------------Date: Mon, 29 Apr 2019 20:04:19 -0400From: "Jacques Fortin" <[email protected]>Subject: Re: [R-390] PTO learnings and sensitivity un-mod
For sure that reverting to the original design value help the PTO output alot (and the conversion gain by the same event). Isn't it written in the Y2Kmanual that all those modified R-390As should be put back to the originaldesign values ? R210 (V207, 1st Xtal Osc) have to be 56k too..------------------------------Date: Mon, 29 Apr 2019 21:54:58 -0700From: Larry H <[email protected]>Subject: Re: [R-390] PTO learnings and sensitivity un-mod
John, You're right about the Oldham coupler, it should have about 1/32"space between the center piece and the end piece. Also, the mountingbrackets on the VFO should be adjusted so that the VFO shaft and the KCknob shaft line up as best as possible.------------------------------Date: Wed, 1 May 2019 15:19:25 +0200From: <[email protected]>Subject: [R-390] R: PTO learnings and sensitivity un-mod
>As far as endpoint drift, this seems to be related to mechanical stress on>the Oldham coupling. As far as I can speculate, the two ends and the>center plate shouldn't be tightly sandwiched together.
They should have a clearance of 1/32".------------------------------Date: Wed, 1 May 2019 18:56:34 +0000 (UTC)From: Roger Ruszkowski <[email protected]>Subject: Re: [R-390] VFO tube circuit changes increase receiver performance
<clip> The BFO PTO is also a suspect we wish produced more output. TheCosmos flavor VFO is a candidate for change as reported above.The TMschematic diagrams only has one VFO oscillator circuit in them. All PTOshall match the diagrams as built and delivered. That's the rules.OMG thepart values were picked from the stock parts list and not the performance

list from design testing At least the Cosmos PTO's can receivereplacement parts that help to meet the users needs. Many owners haveexpressed a desire for a stronger BFO output. The circuit for the two PTOoscillators share the same tube. Thus some BFO output gain could beachieved with some selective resistor changes. Most of us have been of themind set not to go hacking around just because we can. But somethoughtful hands on experiments show improvements can be made to theproduction stock quite easily. Over the years some rebuilders have quietlybeen tucking some better value parts into their rebuilds. A resistor hereand resistor there, with a very good cleaning, cherry-picked tube set andalignment produces a smarter than average bear. The report from the fieldas related above lays down a methodology to explore circuit changes.Respectfully Roger AI4NI ------------------------------Date: Wed, 1 May 2019 22:38:35 +0000From: David Wise <[email protected]>Subject: Re: [R-390] VFO tube circuit changes increase receiver performance
The 220K PTO screen resistor was a MWO (Modification Work Order) to beapplied only to installations that were radiating too much LO andinterfering with other equipment. When my BFO faded out, I found that thetube was fine, as were the surrounding R's and C's. I concluded that thecoil had become just lossy enough to damp out oscillation. The coil puts aheavy load on the cathode. I increased the available power, by adding atransistor, wired as an emitter follower. A "silicon prosthesis", if you will.Now it is strong. Schematic sketch on request.------------------------------Date: Mon, 10 Jun 2019 16:29:01 -0400From: <[email protected]>Subject: [R-390] R390 PTO endpoint
I've started to look into doing the PTO endpoint on my R390. The PTO iscompletely different than the Cosmos one on my R390A which I wassuccessful in calibrating, including linearity. Where is the endpointadjustment on the Collins R390 PTO? I can barely see a plug behind thetransformer can. Is that where it's hiding?
My PTO also has a plastic plug screwed into a hole marked S701. Behindthe plug is a hollow shaft with two notches to allow it to be turned with ascrewdriver. What is that for? It does nothing as far as varying thefrequency.
There is so much wealth of information online about the R390A and itsvarious PTO flavors, but not much about the R390 PTO.------------------------------

Date: Mon, 10 Jun 2019 20:01:37 -0400From: "Jacques Fortin" <[email protected]>Subject: Re: [R-390] R390 PTO endpoint
The PTO end-point adjustment is at the same place in the 70H-2 for theR-390 that it is in the 70H-12 for the R-390A. See the green coloured hexscrew in the attached picture. The Plastic Plug S701 is the access to thePTO heater temp. adjustment!------------------------------Date: Tue, 11 Jun 2019 14:17:43 +0000From: [email protected]: [R-390] 390-390A PTOs
Folks, if you would, please state the differences in the PTOs[390-390A] i thought they were the same.------------------------------Date: Tue, 11 Jun 2019 11:24:28 -0400From: "Jacques Fortin" <[email protected]>Subject: Re: [R-390] 390-390A PTOs
Long time! Hope you are well.
There is two variants of the Collins 70H-2 PTOs for the R-390, the originalone and the "MOD 1". This MOD 1 variant is close to the Collins 70H-12used in the R-390A, but not in every aspect. See attached p. 12 and 14 ofthe TM11-5820-357-35. Apart of the output connector that is a full-sizeBNC in the 70H-2 compared to the "mini" one of the R-390A version, thescreen grid bias resistor for the 5749 has a different value(s) and thepower connector pinout is different. Despite this, I believe that a 70H-12(or any other brand of R-390A PTO) can be "adapted" to a R-390, providingthat the mechanical mounting parts of the R-390 are used.The other way round, the a R-390A PTO is NOT a straight drop-in solutionfor the R-390.------------------------------Date: Tue, 11 Jun 2019 16:11:01 +0000 (UTC)From: Roger Ruszkowski <[email protected]>Subject: Re: [R-390] 390-390A PTOs
The R390 VFO is a permeably tuned oscillator. There is only one model ofR390 VFO and it is the better Collins design for linear operations. TheR390 VFO output cable has a regular BNC connector. The mounting frameof the R390 VFO is different in shape and an R390/A VFO, and will not boltinto an R390 receiver. The tube circuit passive components have differentdesign and operating values than the R390/A VFO. The R390/A VFO is apermeably tuned oscillator. There are two stock numbers that will get youone of the two models of R390/A VFO. One model is a Collins design that

follows the R390 design. The second model is the Cosmos VFO. TheCosmos VFO's obviously work, and are in use. The part was a reduced costitem injected in latter production contracts that were open bid buildcontracts, and not won by Collins. Other than the maintenance fellowadjusting end-point spread of the oscillator, the VFO parts difference istransparent. If you need to diddle the linear curve of a VFO, then you willprefer a Cosmos VFO to work on. The stack in the original R390 andR390/A Collins VFOs were assembled with slow drying sticky varnish. Theassembly was jigged in a fixture. The shaft was spun. The little slide plateswere ‘oozed’ into their needed places to lay the curve needed into thetracking alignment stack. Now the varnish is dry and the stack is gluedinto shape.You just do not try and improve the tuning curve of a VFO if youdo not have to. The factory build, jig setup, tighten the bolts, and let thevarnish dry got the job done; and it had been good ever since. Parts docome loose and some times things need to be repaired. An impact can causea crack in the stack and small misalignment of linier tracking to result.Some detectives have found this problem and repairs were conducted.Aggravation exceeded the return on the investment. As you own thecritter you can do it yourself for the education and experience. While inservice you did not seek this education and you exchanged your suspectVFO for another package you expected to perform better than the VFO inhand. The Cosmos VFO was introduced to meet this diddling need of thosewho can not live with some one else's prior work. The checking need had tobe meet. An alignment jig in every tool box was not the solution Collinsproposed for this end play. The Cosmos VFO never made any of themaintenance manuals the alternate part number for the Cosmos VFO waspublished as a change page note to the parts manual. If not in stock thenuse this alternate number. Your first VFO was a Cosmos and you think thatis the majority common part in the Field. To the casual procuring officerthese things all look alike and please sign here. Respectfully, Roger AI4NI------------------------------------------------------------Date: Tue, 11 Jun 2019 21:33:00 +0000 (UTC)From: "Tom M." <[email protected]>Subject: [R-390] Cosmos Patent Application
This is what engineers consider exciting reading.See the patent app for the Cosmos PTO.https://patentimages.storage.googleapis.com/eb/39/e5/74f9e06263332a/US3098989.pdf------------------------------------------------------------Date: Wed, 12 Jun 2019 16:46:06 -0400From: "Lester Veenstra" <[email protected]>Subject: Re: [R-390] R390 PTO endpoint
http://r-390.com/pto.htm------------------------------
Date: Wed, 12 Jun 2019 20:02:15 -0400From: <[email protected]>Subject: Re: [R-390] R390 PTO endpoint
I came up with a simpler method once I learned where the EP adjustmentscrew was hiding. The R390 and R390A has everything you need built-in:no jigs needed. Calibration oscillator, a 10-turns counter, etc. So, it's verydesirable to be able to do the adjustments while the PTO is in the radio.Problem is, with the R390, the front mounting bracket for the PTO blocksaccess to the adjustment screw. To get around this and not have make anyfunky tools, I just made up a simple surrogate bracket to use to set theendpoint. Made the bracket last night, installed it and had my PTOendpoint set in less than 15 minutes this AM. Add another 10 minutes toreinstall the OEM bracket, reinstall the block plug, and reinstall the PTO.Came ou once and back in once. With the surrogate bracket, the endpointscrew can easily be reached with a small screwdriver.
*I have a mechanical drawing for the bracket I made if anyone isinterested.* You can make it with a vise, a hammer, sheet metal shears, adrill press (maybe even a hand drill), and careful layout with a machinists'scale (ruler). See attached pic... This was done on my Bridgeport mill butit didn?t have to be. I have two versions of the drawing: fractional inchesand decimal inches. If you want a copy let me know your preference (as ahome shop machinist I prefer decimal and hate fractional)
I didn't use the cal. oscillator since I have a very accurate digitalfrequency counter, but the calibration oscillator could be used instead. MyPTO was very well linearized thankfully, but the endpoint was off about 6kHz. It came right in with adjustment alone and no endpoint coil turnremoval. I'm glad of this because my R390 PTO remains factory sealed.My R390A was another story... The R390A needed a turn removed,linearization etc. Thankfully it's a Cosmos so linearization is not too badto do.
Basically, when adjusting the endpoint, the start point changes too, so youneed to go back and forth a few times to get it spot on. You zero the dialat the low end and dial up to 3.455 and make adjustments at the high PTOfrequency which is the low end of the dial. Go back to 2.455, re-zero thedial, go back to 3.455 adjust and repeat until both ends are 2.455 and3.455. Easy.------------------------------Date: Wed, 30 Oct 2019 23:47:05 +0000From: David Olean <[email protected]>Subject: Re: [R-390] R-390A frequency stability
I am working on an R-390A and have the Cosmos PTO out of the unit for

repair. The end point was off by 17 kHz! Yes the R-390A is old (52years) but I was surprised to see such a variation. In line withLarry's questions, I checked the VFO stability from a cold start and itstarted at 2.455193. In a few minutes it had drifted up to 2.455218 orso, then drifted back down to the starting point at 193. I left it fora few hours and it is now at 2.455228. So I have seen a drift of under40 Hz from a cold start. The VFO oven is off, BTW. I view this as rather FB!
As for the end point fix, I messed around with the end point coil andhave the end point at about 1 kHz error, with no room for any moreadjustment. The Cosmos end point coil is only 3 turns on my unit and Ihave removed two of them! I feel happy to reduce the error from 17 to 1but I am wondering if the problem is not within the coils, but possiblya capacitor problem. The linearity screws look like they could useadjusting at the high end (3.155-3.455 MHz)? All the other points arewithin +/- a few hundred Hz. I am boning up on the best way to proceedwith adjustments. For my tests, I have the PTO outboard in a testfixture with a vernier dial driving the PTO shaft. My freq counter is ahigh stability HP type. This sure is fun!------------------------------Date: Wed, 30 Oct 2019 20:13:47 -0700From: Larry H <[email protected]>Subject: Re: [R-390] R-390A Cosmos EP adjustment
Hi Dave, There are a few docs on the 390 disk that talk about VFOs. Mineon the Cosmos is here in the Pearls menu:https://www.r-390a.net/Pearls/PTO_Cosmos_Observations.pdf
I talk about adjusting the EP range by adjusting the capacitance. In thereI added an 82 pf ntc 200 cap in series with one of the two 10 pf caps tobring the existing EP coil into range. That moved it about 5 kh, which inyour case would not be enough. 17 kh is a very large offset, even for aCosmos. I'd recommend putting the EP coil back to original (so it can beadjusted in the future) and adding a 60 pf ntc 200 in series with one ofthe 10 pf caps.
Although the drift on your Cosmos is good, it could be better, so Isuggested an ntc of 200. You can play around with that if you want. But,you will not see the final drift offset until you reinstall it in the390A. It will be less in open air.------------------------------Date: Sat, 2 Nov 2019 05:42:50 +0000 (UTC)From: Perry Sandeen <[email protected]>Subject: [R-390] VFO end point off 17 KHz
I agree about returning the end point coil to its original 3 turns. I disagree

with fixing the drift with adding caps. With that amount of drift there issomething wrong with one or more of the OEM caps. As you said they're 50plus years old. IMNSHO, you should shotgun the caps a well as the resistorsusing 1% MF replacements. Even in small quantities there about 25 centseach from Mouser with no minimum order.
Members are reporting that tiny silver migration is causing havoc withold SM caps that test OK. Dan's Small Parts carries a nice selection statingat 1pF so you can get just what you need with series and/or parallelcombinations. You'll probably still need a N200 cap as well. Fixing PTO's isas much art as science with patience being your best tool.------------------------------Date: Sat, 2 Nov 2019 13:48:17 +0000From: David Olean <[email protected]>Subject: Re: [R-390] VFO end point off 17 KHz
Hello Mr. Bottled Water, (Perrier)
OK on all the advice. It sure does sound like there is something wrong,but with ferrites that are 50+ years old, you can get some significantdrift too. I have an old 144 MHz Tecraft xmtr from my boyhood that hadall the slugs drift so far down that it stopped working. I had to modifyall of the multiplier coils to get it back on 24 and 72 MHz. That is apretty drastic change. That is what prompted me to diddle with the endpoint coil. So now it is working great with nice linearity across 950kHz and only 500 Hz off at one end. I'll come back to this problemsoon. Getting the PTO out is sorta simple, so I will order some newcapacitor parts and come back to it on some cold winter night. In themean time, I am re aligning the entire set and fixing a few problems.The carrier meter has stopped working and the RF gain control is actingfunny. This R-390A had the antenna relay removed and an (ugh) SO-239connector installed in its' place. I just bought a relay and am lookingfor the wires to re install it, but can't find them ? I am not sure,but think they must have been clipped and removed. I'll run new wires tothe rectifier and get it all working.
I also found that the 15.000 MHz crystal has died. This only affectsthe 27 MHz band. It will not oscillate, or if it does, it is very weak.I need a replacement crystal. I found a 7.500 MHz one in my junque boxand it actually works, but output is a bit low and injection is notenough.? Fair Radio does not list any. I am looking for a replacement.
If anyone has a Cosmos PTO I would be interested in getting another oneto work with as well. They do get addicting.------------------------------Date: Tue, 26 Nov 2019 19:48:46 +0000

From: Bob Young <[email protected]>Subject: [R-390] R-390/URR PTO calibration
My PTO is about 3khz off end to end, is the check point 7.000+ or is it2.000? I've seen the former for 390A's and the latter for 390's but haveseen 7.000+ for both, does it even matter?------------------------------Date: Wed, 27 Nov 2019 00:56:30 +0000 (UTC)From: "Tom M." <[email protected]>Subject: Re: [R-390] R-390/URR PTO calibration
Bob, I think you are talking about two different things. The most commonproblem is the endpoint adjustment.? You want your PTO to have anoutput range of exactly 1000 kcs in 10 turns. You can detect this withyour crystal calibrator (provided it is accurate). Typically as the PTO agesit takes a tad more than ten turns to get the full 1000 kcs of output range.It sounds like yours is doing about 997 kcs in ten turns. The way to adjustthis is to turn the endpoint adjustment screw at the front of the PTO andcheck it again. If this is in fact your problem it is separate from the 7000+or 2.000 stuff you mentioned. Look up endpoint adjustment in theliterature.------------------------------Date: Wed, 27 Nov 2019 04:59:35 +0000From: Bob Young <[email protected]>Subject: [R-390] Fw: R-390/URR PTO calibration
I sent an email to Tom but want to also send it to the list: <clip>
Thanks Tom, I got that from this: " Before you replace the PTO check thesetting of the 10 turn stop. In its fully counterclockwise position the dialshould read between -963 and -972. If it is outside this range adjust the tenturn stop until it does. If the error is minimal the best way to do this is toloosen the small bevel gear on the counter and reset it. After doing this besure to check the mechanical synchronization. The check point is 2.000MHz for the R-390 and 7.000+ for the R-390A."http://r-390.com/pto.htm
I did use 7.000+. I have two PTO's and neither of them seem to adjust verymuch if at all using S701 to adjust the endpoint. I took the cover off one ofthem and the round inductor doesn't seem to be attached to the roundmetal cover and the whole thing twists when you turn the shaft, I assumethis is not the way it is supposed to work but can't see how it is supposed tobe attached, glued maybe? I have adjusted R-390A's before and had noproblems setting the end point with them. I assume it should work as in anR-390A. Could I be doing something wrong? Maybe I used too muchpressure turning it in and broke whatever bond was there? I have looked
up the procedure in two different places, this is the one I'm using:
http://amfone.net/Amforum/index.php?topic=25191.0;wap2
Thanks, Bob kb1okl
Collins 390 PTO calibration for newbies - AMFone<http://amfone.net/Amforum/index.php?topic=25191.0;wap2>Collins 390 PTO calibration for newbies (1/2) > >> iw5ci: I would like toalign the pto linearity in my collins 390 non A. From start to end of anymhz segment i have 3 - 4 khz of disalignment on the mechanical digitalreadout.amfone.net
pto - r-390.com<http://r-390.com/pto.htm>THAT PESKY ENDPOINT. (Revised 6/6/99) When I do this I use a jig tomake the procedure more accurate.. This jig is a simple mounting forr-390.com------------------------------Date: Sat, 30 Nov 2019 01:28:32 +0000From: Bob Young <[email protected]>Subject: [R-390] R-390/URR PTO Mod 1
One of the (2) 70H-2 R-390 PTO's I have says Mod 1 on it and has a slug inthe box where the output cord comes out, anyone know what this slug isfor, there isn't one on my other one.------------------------------Date: Sun, 21 Mar 2021 17:51:43 +0000From: Kevin Schuchmann <[email protected]>Subject: [R-390] R390/URR PTO Bearings
The bearings in my Collins built PTO have a pronounced rumble to them,dried out grease is my bet. Does the group have any words of wisdom orwarning to flushing them out and re-greasing or is replacement the onlyoption?------------------------------Date: Sun, 21 Mar 2021 22:03:54 -0700From: Larry H <[email protected]>Subject: Re: [R-390] R390/URR PTO BearingsContent-Type: text/plain; charset="UTF-8"
I think there's a good chance that the ball bearings or the racings arepitted. But, if cleaning and greasing them brings them back to life, thenthey should be ok for quite a while. Do they come out of the housing prettyeasily?------------------------------Date: Mon, 22 Mar 2021 15:17:09 +0000 (UTC)

From: "Drew P." <[email protected]>Subject: Re: [R-390] R390/URR PTO Bearings
These bearings are relatively lightly loaded and should last a very longtime, and so pitting due to wear is not so likely. The other cause for pittingwould be corrosion. There have been on this forum reports of the PTO'sinternal dessicant packs breaking open and making a corroded mess ofthe PTO's insides - such could include the bearings. If your PTO's internalsare clean and uncorroded, chances are that the bearings are not pitted.
With a good cleaning and relubrication, I fixed a similar problem, hard-to-turn tuning knob, cause of the infamous R-390A Wrist Syndrome, in aCosmos PTO (R-390A). I soaked the lead screw, lead screw nut, and leadscrew bearing for several days in lacquer thinner. The lubricant of choicewould be a light synthetic grease. Synthetic is preferred as it does not gumup or solidify as readily as does conventional grease.------------------------------Date: Mon, 22 Mar 2021 18:01:45 +0000From: Kevin Schuchmann <[email protected]>Subject: Re: [R-390] R390/URR PTO Bearings
Well I decided to take the plunge and pull it apart, very clear I am not thefirst 2nd or 3rd here. No dessicant packs were found inside but it lookslike it's suffering from a poor cleanup of a broken dessicant bag in thepast. Nothing corroded inside but a overabundance of grease mixed withgraphite and something gritty. Good news is the front bearing is smoothand in good shape, expected a rear bearing but it's only a bushing which isalso in good shape. What is not good is a rear thrust bearing which is thesource of the rumble, the bearing itself is in OK shape once cleaned, it's theplates it rides against that are in bad shape. I'm somewhat confused atwhat I see, one plate has what looks to be a raceway the other plate doesnot, the one that does not is the one that is chewed up the worse. Are bothof these plates suppose to have a raceway? are neither suppose to have araceway and this is just damage and wear I see. Flipping the one plate andusing the raceway in the other the bearing is much smoother but is still alittle rough, flipping both plates then it is smooth as glass. At this pointI'm thinking the best option is a thorough cleaning, flip both plates,grease and reassemble. Here is a link if anyone wants to see the thrustbearing I'm talking about.
https://www.dropbox.com/s/r3we7ohxb793q3s/bad%20bearing.jpg?dl=0------------------------------Date: Mon, 22 Mar 2021 19:36:46 +0000 (UTC)From: Steve Toth <[email protected]>Subject: Re: [R-390] R390/URR PTO Bearings

Not being a PTO expert, I think your idea of cleaning, and lubing andflipping the plates looks like the best option. After closely looking at thephoto it appears that the raceway was not machined but worn in due tothe uneven surface of the groove and also the ridges along the grooveedge.------------------------------Date: Mon, 22 Mar 2021 15:04:15 -0700From: Renee K6FSB <[email protected]>Subject: Re: [R-390] R390/URR PTO Bearings
Sorry for being late-- those look soooo much better than the one irebuilt..clean everything really well. flip both, grease and forget it. enjoythe smooth ride..... I had to machine two new washers ( mine were warpedtoo) then heat treat..... I no longer have access to heat treating i once didnor the precision shop....------------------------------------------------------------------------------------------Date: Mon, 22 Mar 2021 22:40:49 +0000From: Kevin Schuchmann <[email protected]>Subject: Re: [R-390] R390/URR PTO Bearings
Well it's all back together and is very smooth now. I'm happy to reportthat it does not look like I messed up the linearity and the end point is stillwhere it was when I started. Thanks for the help everyone!------------------------------