macromedia flash tutorial
TRANSCRIPT
The Ball game
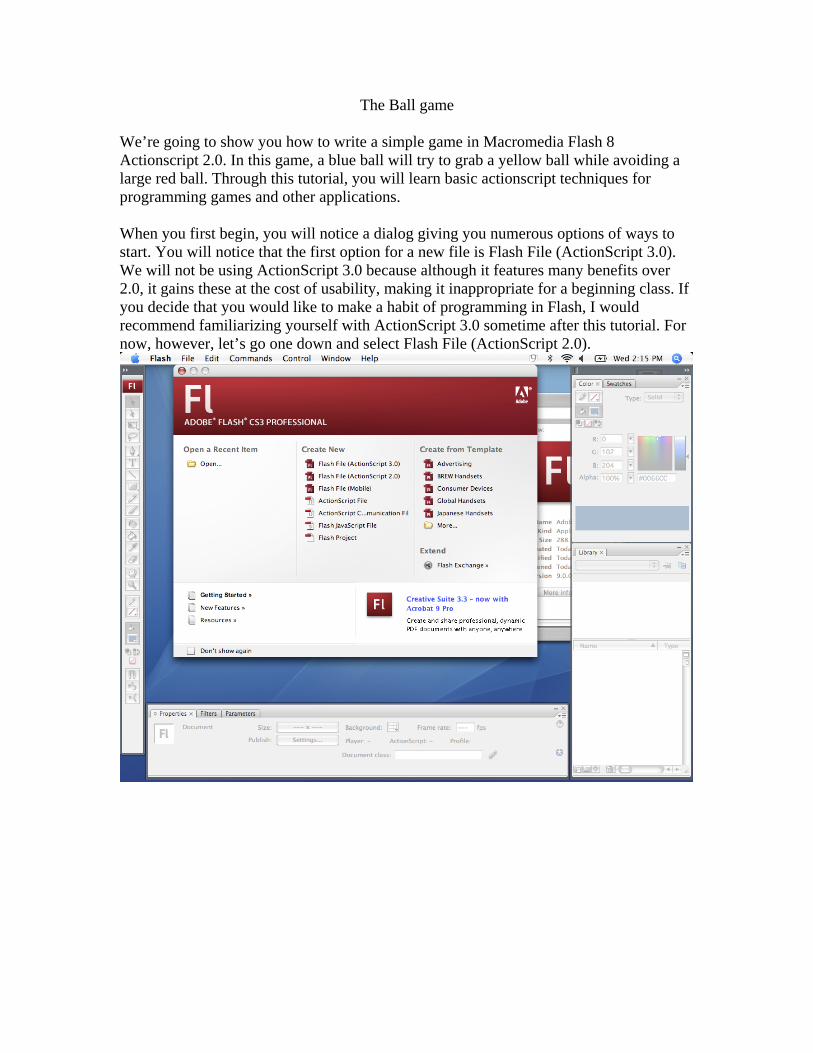
We’re going to show you how to write a simple game in Macromedia Flash 8 Actionscript 2.0. In this game, a blue ball will try to grab a yellow ball while avoiding a large red ball. Through this tutorial, you will learn basic actionscript techniques for programming games and other applications. When you first begin, you will notice a dialog giving you numerous options of ways to start. You will notice that the first option for a new file is Flash File (ActionScript 3.0). We will not be using ActionScript 3.0 because although it features many benefits over 2.0, it gains these at the cost of usability, making it inappropriate for a beginning class. If you decide that you would like to make a habit of programming in Flash, I would recommend familiarizing yourself with ActionScript 3.0 sometime after this tutorial. For now, however, let’s go one down and select Flash File (ActionScript 2.0).
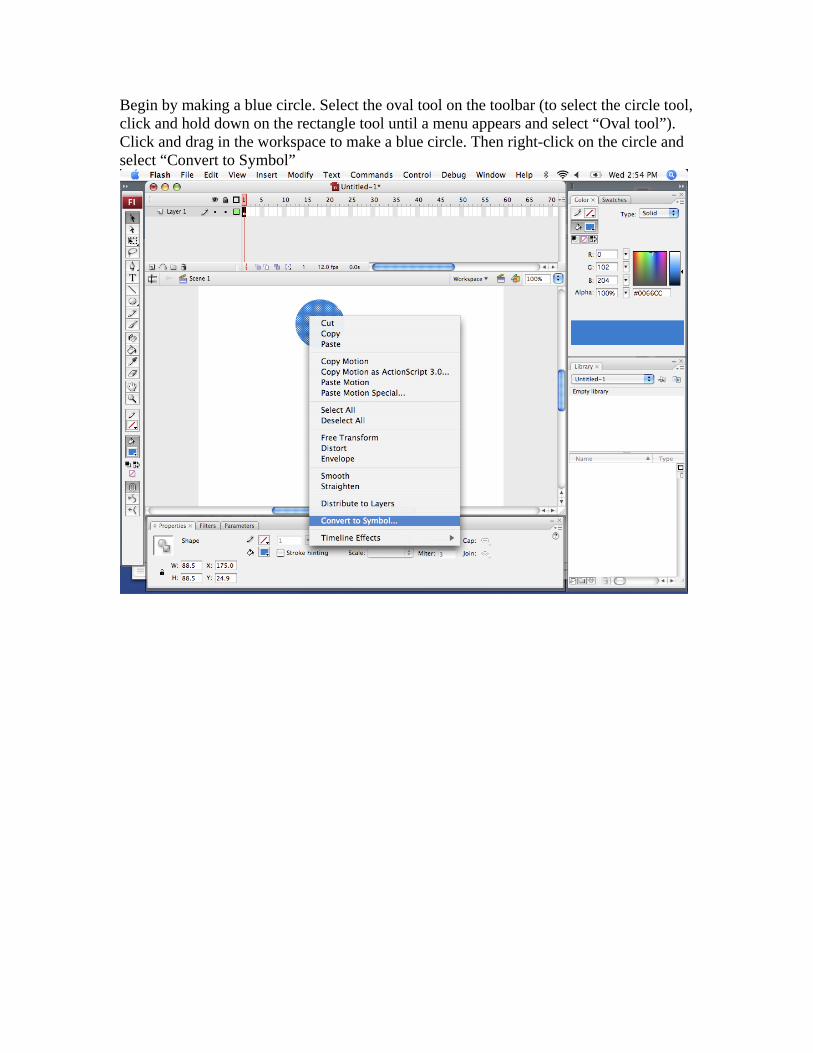
Begin by making a blue circle. Select the oval tool on the toolbar (to select the circle tool, click and hold down on the rectangle tool until a menu appears and select “Oval tool”). Click and drag in the workspace to make a blue circle. Then right-click on the circle and select “Convert to Symbol”
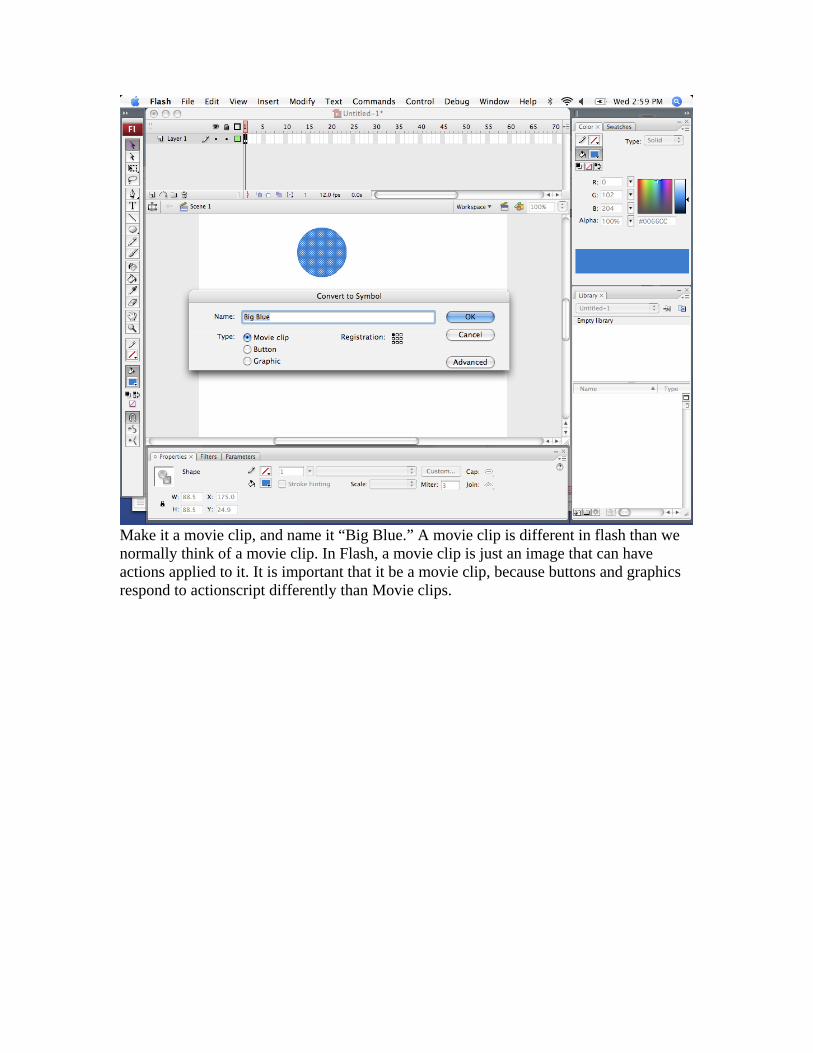
Make it a movie clip, and name it “Big Blue.” A movie clip is different in flash than we normally think of a movie clip. In Flash, a movie clip is just an image that can have actions applied to it. It is important that it be a movie clip, because buttons and graphics respond to actionscript differently than Movie clips.
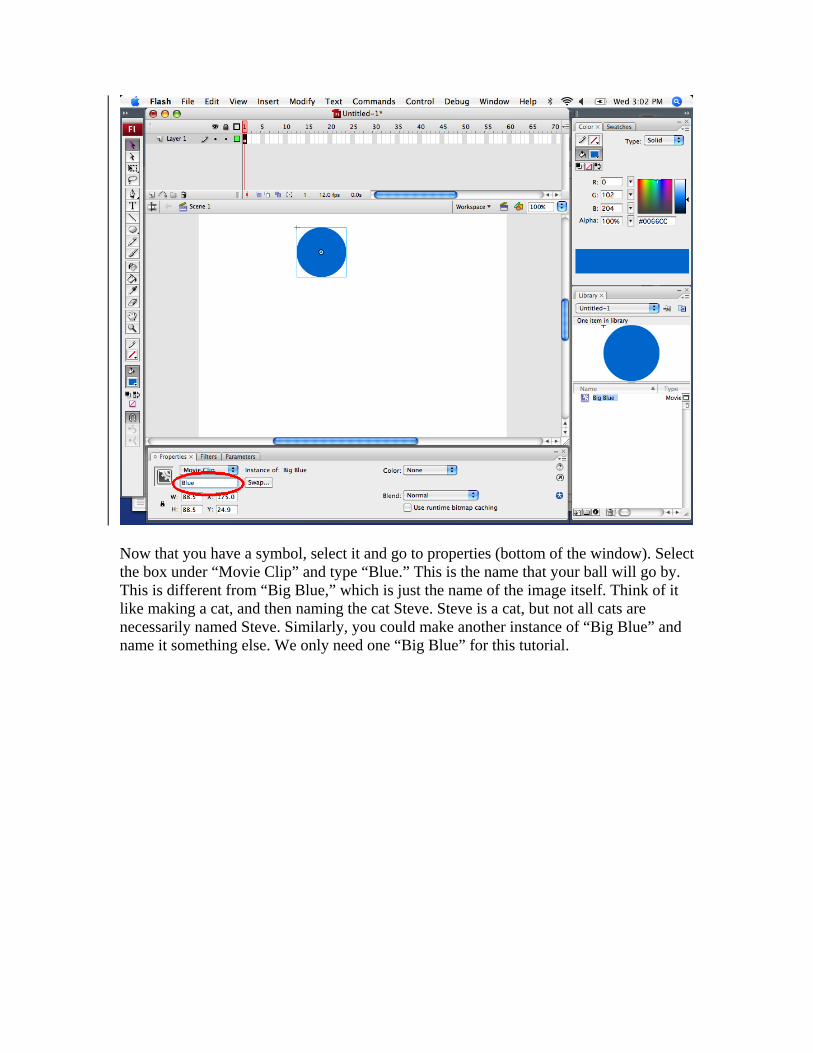
Now that you have a symbol, select it and go to properties (bottom of the window). Select the box under “Movie Clip” and type “Blue.” This is the name that your ball will go by. This is different from “Big Blue,” which is just the name of the image itself. Think of it like making a cat, and then naming the cat Steve. Steve is a cat, but not all cats are necessarily named Steve. Similarly, you could make another instance of “Big Blue” and name it something else. We only need one “Big Blue” for this tutorial.

Now go to the window menu at the top of the screen and open the actions toolbar. This is where you will write the commands that tell the ball what to do.
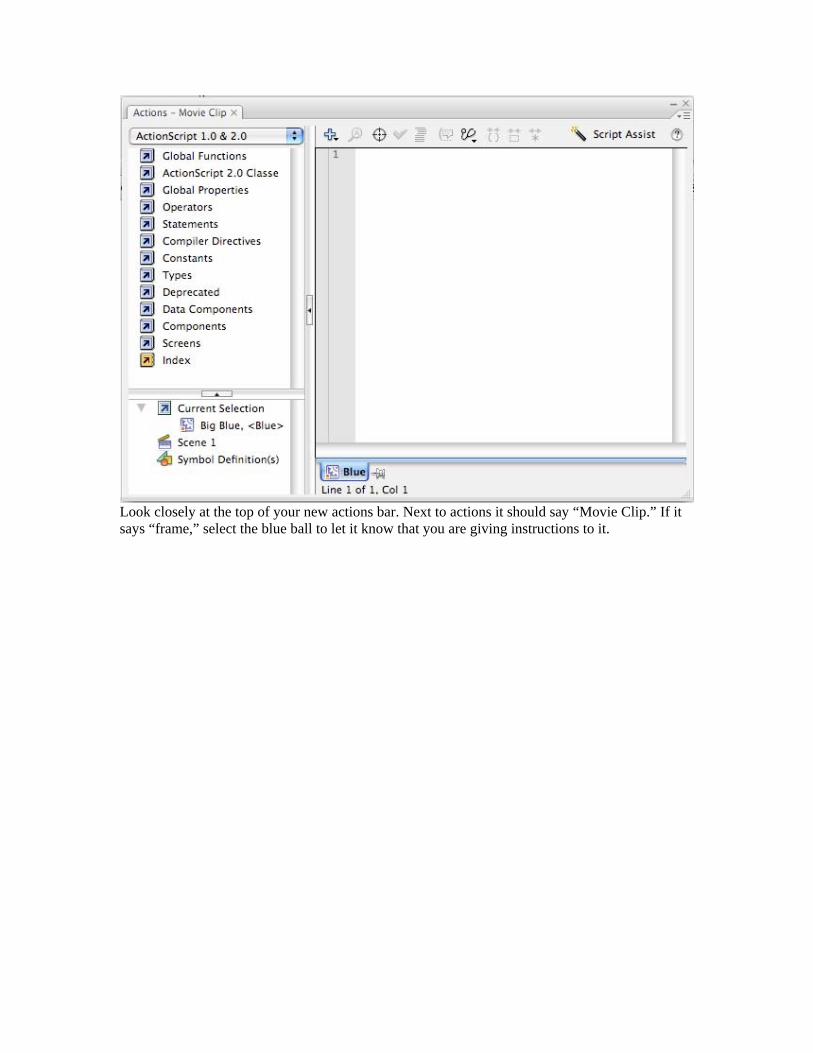
Look closely at the top of your new actions bar. Next to actions it should say “Movie Clip.” If it says “frame,” select the blue ball to let it know that you are giving instructions to it.
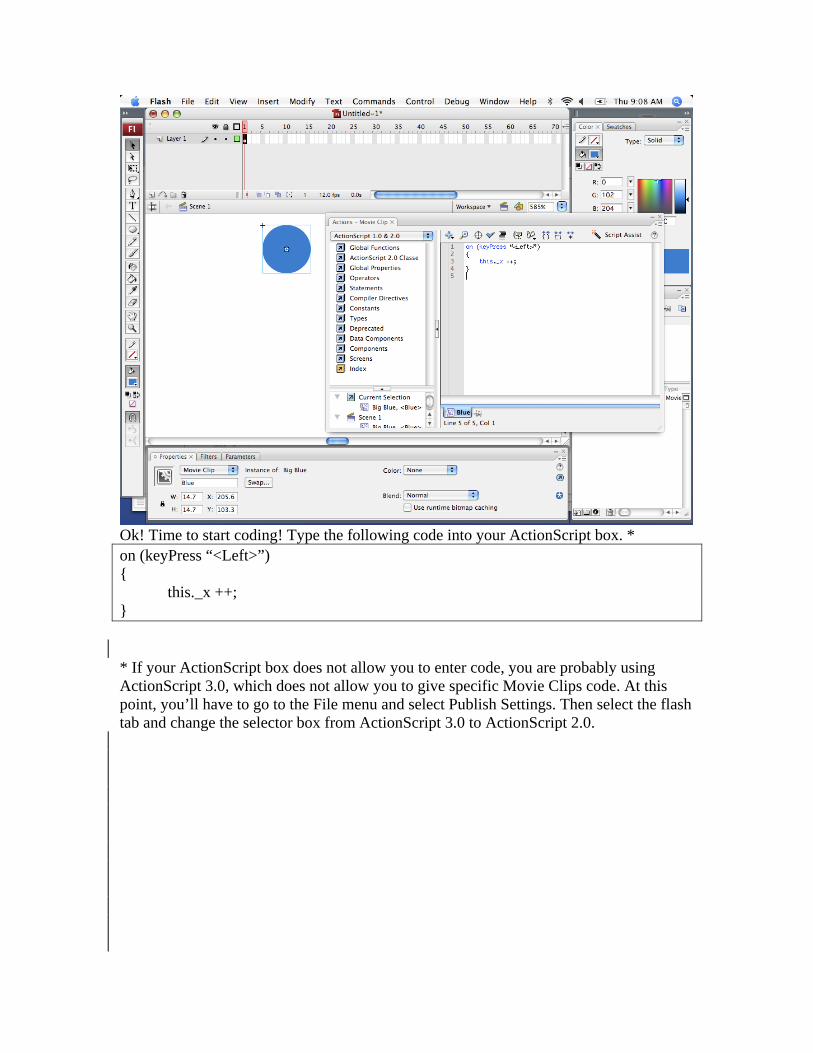
Ok! Time to start coding! Type the following code into your ActionScript box. * on (keyPress “<Left>”) { this._x ++; } * If your ActionScript box does not allow you to enter code, you are probably using ActionScript 3.0, which does not allow you to give specific Movie Clips code. At this point, you’ll have to go to the File menu and select Publish Settings. Then select the flash tab and change the selector box from ActionScript 3.0 to ActionScript 2.0.
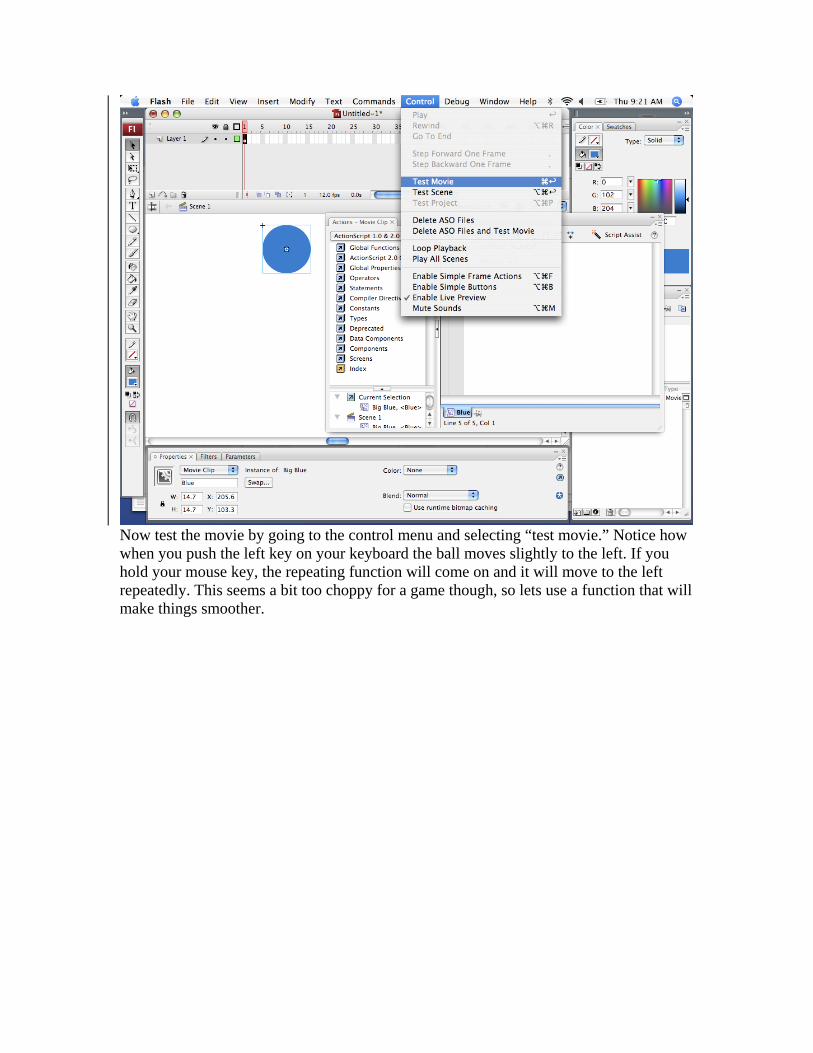
Now test the movie by going to the control menu and selecting “test movie.” Notice how when you push the left key on your keyboard the ball moves slightly to the left. If you hold your mouse key, the repeating function will come on and it will move to the left repeatedly. This seems a bit too choppy for a game though, so lets use a function that will make things smoother.
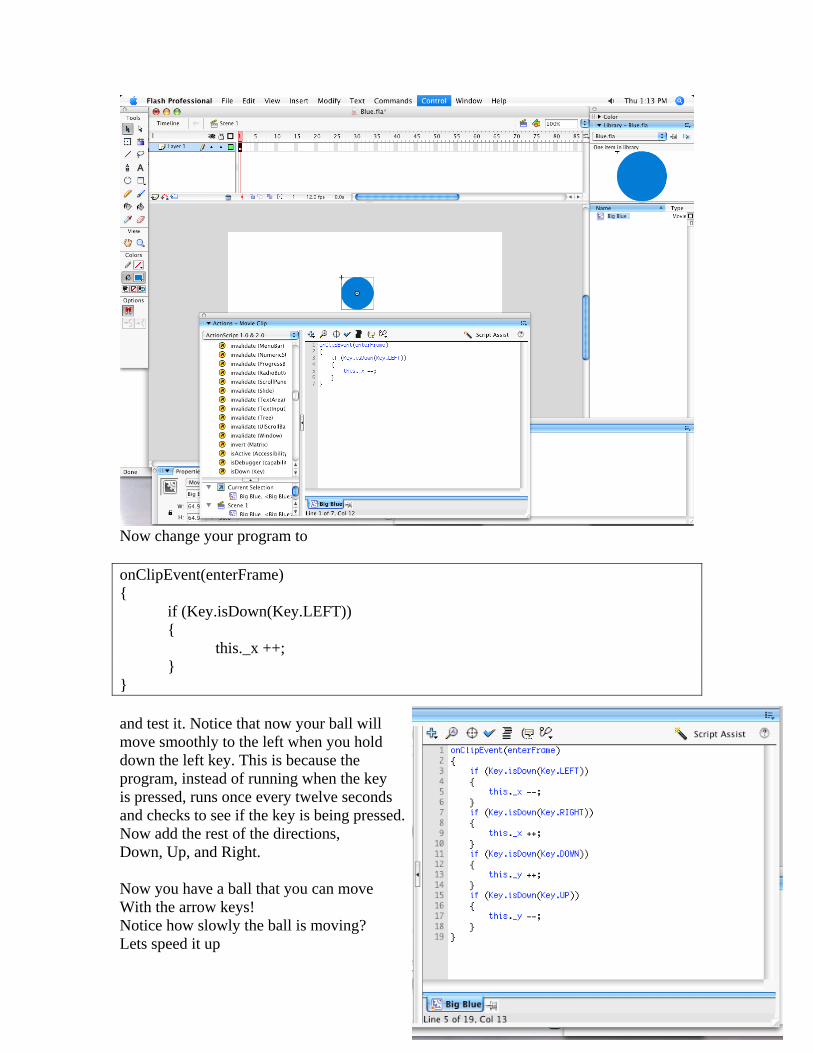
Now change your program to onClipEvent(enterFrame) { if (Key.isDown(Key.LEFT))
{ this._x ++; }
} and test it. Notice that now your ball will move smoothly to the left when you hold down the left key. This is because the program, instead of running when the key is pressed, runs once every twelve seconds and checks to see if the key is being pressed. Now add the rest of the directions, Down, Up, and Right. Now you have a ball that you can move With the arrow keys! Notice how slowly the ball is moving? Lets speed it up
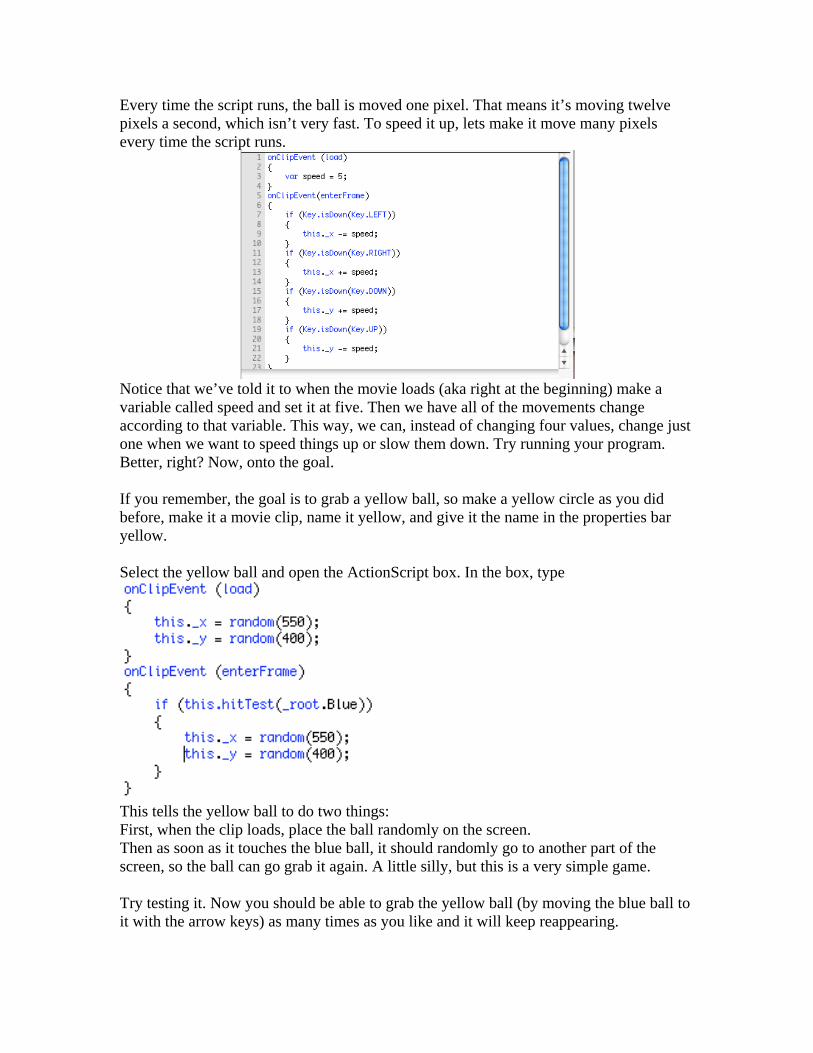
Every time the script runs, the ball is moved one pixel. That means it’s moving twelve pixels a second, which isn’t very fast. To speed it up, lets make it move many pixels every time the script runs.
Notice that we’ve told it to when the movie loads (aka right at the beginning) make a variable called speed and set it at five. Then we have all of the movements change according to that variable. This way, we can, instead of changing four values, change just one when we want to speed things up or slow them down. Try running your program. Better, right? Now, onto the goal. If you remember, the goal is to grab a yellow ball, so make a yellow circle as you did before, make it a movie clip, name it yellow, and give it the name in the properties bar yellow. Select the yellow ball and open the ActionScript box. In the box, type
This tells the yellow ball to do two things: First, when the clip loads, place the ball randomly on the screen. Then as soon as it touches the blue ball, it should randomly go to another part of the screen, so the ball can go grab it again. A little silly, but this is a very simple game. Try testing it. Now you should be able to grab the yellow ball (by moving the blue ball to it with the arrow keys) as many times as you like and it will keep reappearing.

Now for the villain: the red ball. Make a big red ball on the screen and call it “Red”. Go to the properties and make its personal name “Red.” We want the red ball to slowly move towards the blue ball, and when it catches it the blue ball disappears and the game must be restarted. There are slicker ways of dealing with game-overs, but we are not going to be discussing those in this lesson. Select the red ball and type the following code into the actionscript box.
You may recognize the first piece of code from the yellow ball function; the red ball will also place itself randomly at the beginning of the game. Next, it will, twelve times a second, if it is higher than the blue ball it will move down, if it is lower than the blue ball move up, if it is to the right of the blue ball move left, and etc. This will give the impression of chasing the ball. Finally, there’s another hitTest like the one in the yellow ball. This one tells it to set the blue ball’s “alpha” or visibility to zero, in other words, make it invisible, making it appear to be destroyed. The _root. is an absolute locator. It lets the red ball know that the blue ball is not a part of it, but a part of the greater game. Now you can play your game! Have fun! Feel free to edit the actionscript to try and make the game more interesting! Perhaps change how the balls move, or make the yellow ball move as well as the other balls. You can even change the images in the game to whatever you would like! You could have a mouse chasing cheese while avoiding a cat, or a cat chasing a mouse while avoiding a dog! There is no limit to what you can do with this program! Program away!