make a custom kindle cover - quilting board€¦ · web viewbut first, a word about kindle...
TRANSCRIPT
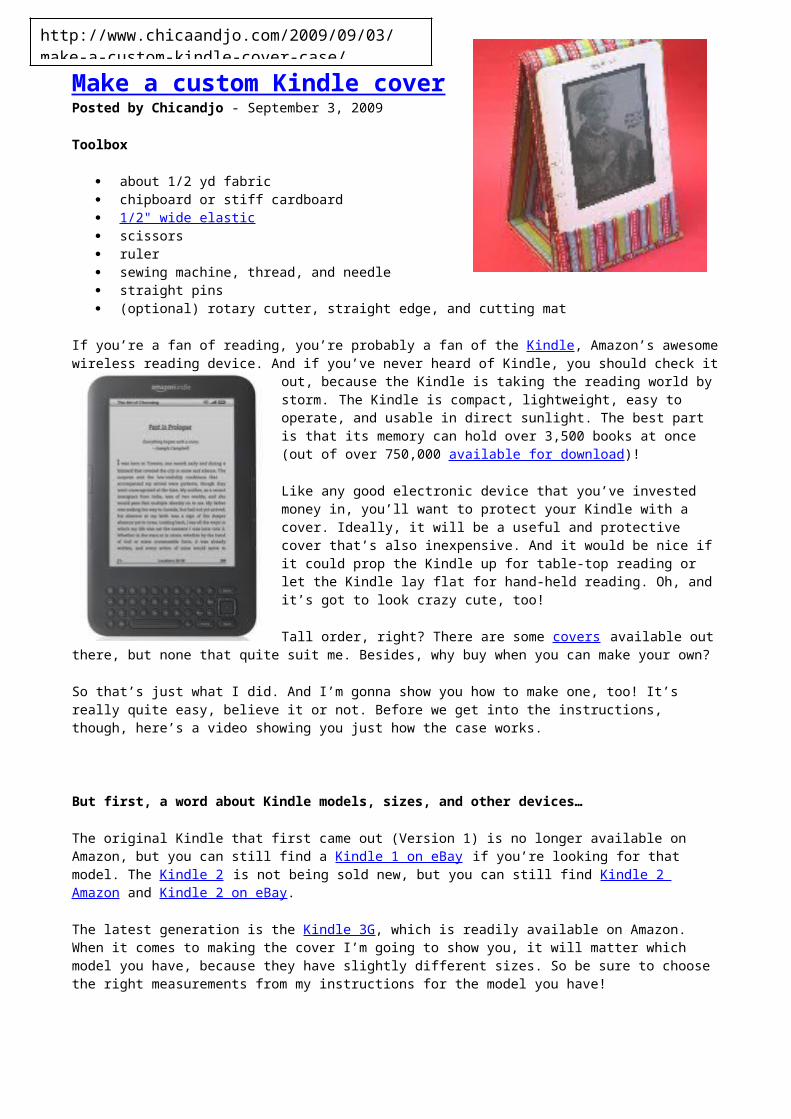
Make a custom Kindle coverPosted by Chicandjo - September 3, 2009
Toolbox
about 1/2 yd fabric chipboard or stiff cardboard 1/2" wide elastic scissors ruler sewing machine, thread, and needle straight pins (optional) rotary cutter, straight edge, and cutting
mat
If you’re a fan of reading, you’re probably a fan of the Kindle, Amazon’s awesome wireless reading device. And if you’ve never heard of Kindle, you should check it out, because the Kindle
is taking the reading world by storm. The Kindle is compact, lightweight, easy to operate, and usable in direct sunlight. The best part is that its memory can hold over 3,500 books at once (out of over 750,000 available for download)!
Like any good electronic device that you’ve invested money in, you’ll want to protect your Kindle with a cover. Ideally, it will be a useful and protective cover that’s also inexpensive. And it would be nice if it could prop the Kindle up for table-top reading or let the Kindle lay flat for hand-held reading. Oh, and it’s got to look crazy cute, too!
Tall order, right? There are some covers available out there, but none that quite suit me. Besides, why buy when you can make your own?
So that’s just what I did. And I’m gonna show you how to make one, too! It’s really quite easy, believe it or not. Before we get into the instructions, though, here’s a video showing you just how the case works.
But first, a word about Kindle models, sizes, and other devices…
The original Kindle that first came out (Version 1) is no longer available on Amazon, but you can still find a Kindle 1 on eBay if you’re looking for that model. The Kindle 2 is not being sold new, but you can still find Kindle 2 Amazon and Kindle 2 on eBay.
The latest generation is the Kindle 3G, which is readily available on Amazon. When it comes to making the cover I’m going to show you, it will matter which model you have, because they have slightly different sizes. So be sure to choose the right measurements from my instructions for the model you have!
Now what do you do if you have one of the newer, larger Kindle DX versions (with a 9.7″ screen), or another electronic reader such as a Barnes and Noble NOOK ereader or a Sony Pocket digital reader? Well, we don’t have access to every model to test with and create patterns, but I came up with a formula that should work for any reader you’ve got. Check out the end of this post for my formula that you can use to generate measurements to adapt this case for any device!
Now you just HAVE to have one, right? Okay, let’s get to it!
http://www.chicaandjo.com/2009/09/03/make-a-custom-kindle-cover-case/
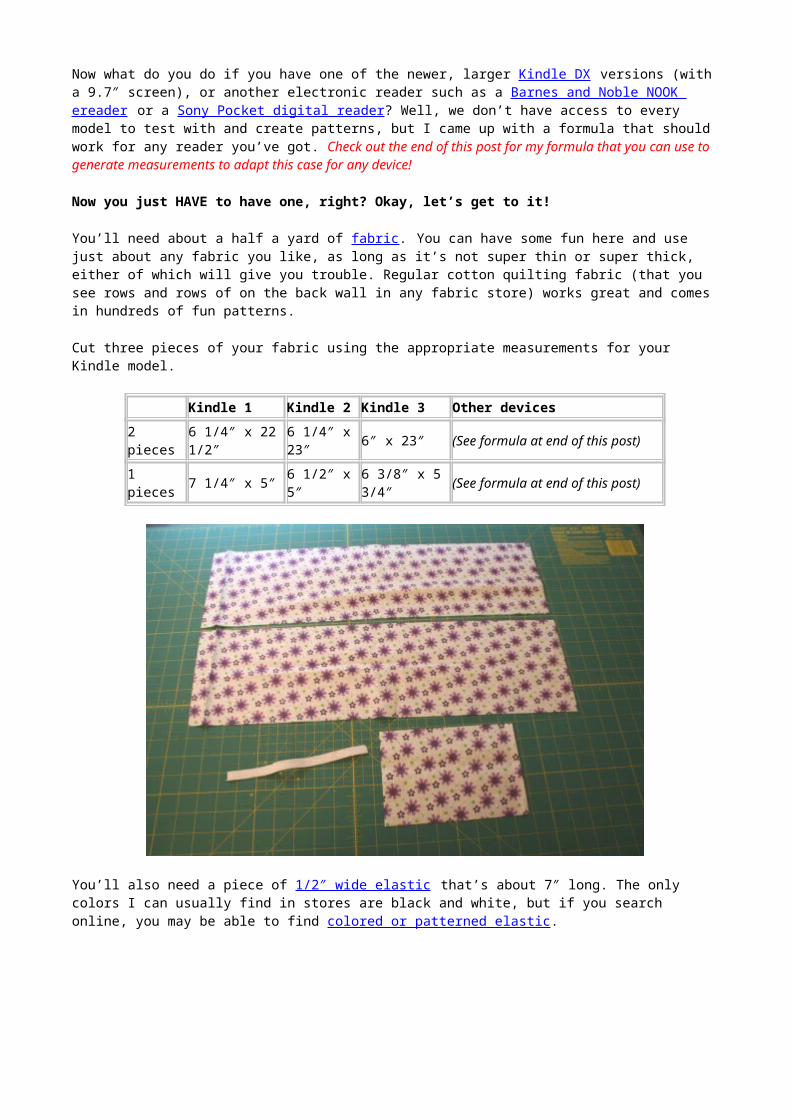
You’ll need about a half a yard of fabric. You can have some fun here and use just about any fabric you like, as long as it’s not super thin or super thick, either of which will give you trouble. Regular cotton quilting fabric (that you see rows and rows of on the back wall in any fabric store) works great and comes in hundreds of fun patterns.
Cut three pieces of your fabric using the appropriate measurements for your Kindle model.
Kindle 1 Kindle 2 Kindle 3 Other devices
2 pieces 6 1/4″ x 22 1/2″
6 1/4″ x 23″ 6″ x 23″ (See formula at end of this
post)
1 pieces 7 1/4″ x 5″ 6 1/2″ x 5″ 6 3/8″ x 5 3/4″
(See formula at end of this post)
You’ll also need a piece of 1/2″ wide elastic that’s about 7″ long. The only colors I can usually find in stores are black and white, but if you search online, you may be able to find colored or patterned elastic.
Several readers have given us some great ideas for alternatives to white elastic. One suggestion is to sew a narrow tube of fabric and slide the elastic inside, creating a fabric-covered elastic
that matches your case. The other suggestion is to use an elastic headband, which can be found in many colors in the hair accessory section of most stores, or sometimes at the dollar store.
Next you’ll need some really stiff cardboard, or ideally, some thick chipboard. You want something sturdy and strong, that won’t fold easily (which means regular cardboard boxes are a big no-no). You can find good cardboard on the back of a notebook or in the cover of a composition book, but my favourite place is the inside of an old binder.
Just slice the cover of the binder open with a craft knife and remove the perfect chipboard that’s waiting inside. What a great use for an old binder that was headed for the trash!
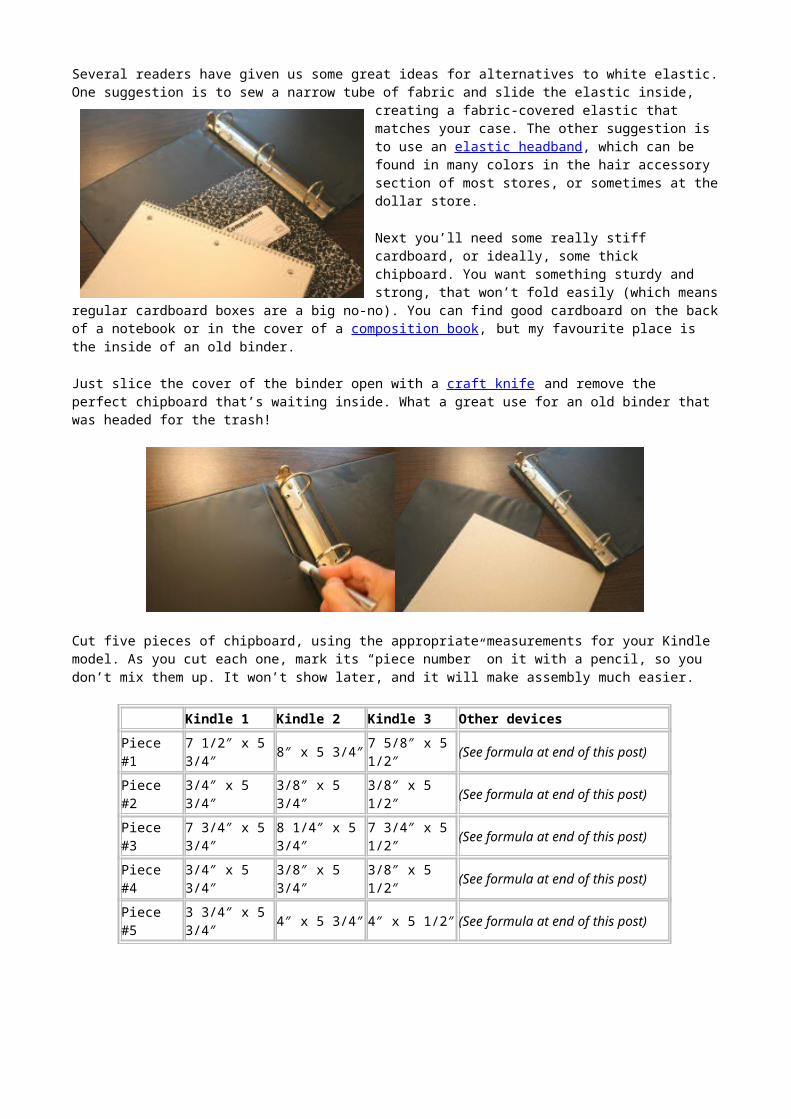
Cut five pieces of chipboard, using the appropriate measurements for your Kindle model. As you cut each one, mark its “piece number” on it with a pencil, so you don’t mix them up. It won’t show later, and it will make assembly much easier.
Kindle 1 Kindle 2 Kindle 3 Other devices
Piece #1 7 1/2″ x 5 3/4″ 8″ x 5 3/4″ 7 5/8″ x 5
1/2″(See formula at end of this post)
Piece #2 3/4″ x 5 3/4″ 3/8″ x 5 3/4″ 3/8″ x 5 1/2″ (See formula at end of this post)
Piece #3 7 3/4″ x 5 3/4″
8 1/4″ x 5 3/4″
7 3/4″ x 5 1/2″
(See formula at end of this post)
Piece #4 3/4″ x 5 3/4″ 3/8″ x 5 3/4″ 3/8″ x 5 1/2″ (See formula at end of this post)
Piece #5 3 3/4″ x 5 3/4″ 4″ x 5 3/4″ 4″ x 5 1/2″ (See formula at end of this
post)
With you’re pieces all cut, you’re now ready to sew! Note that all my measurements assume that you will use 1/4″ seam allowances on all sewing. Anything more than that will cause too much bulk in the corners.
Take the smallest piece of fabric and fold it in half, wrong sides together, so that the longer sides are at the bottom and the shorter sides are on the left and right. Make sure the folded edge is at the top. Then fold each corner down so that it meets the bottom edge, and pin in place.
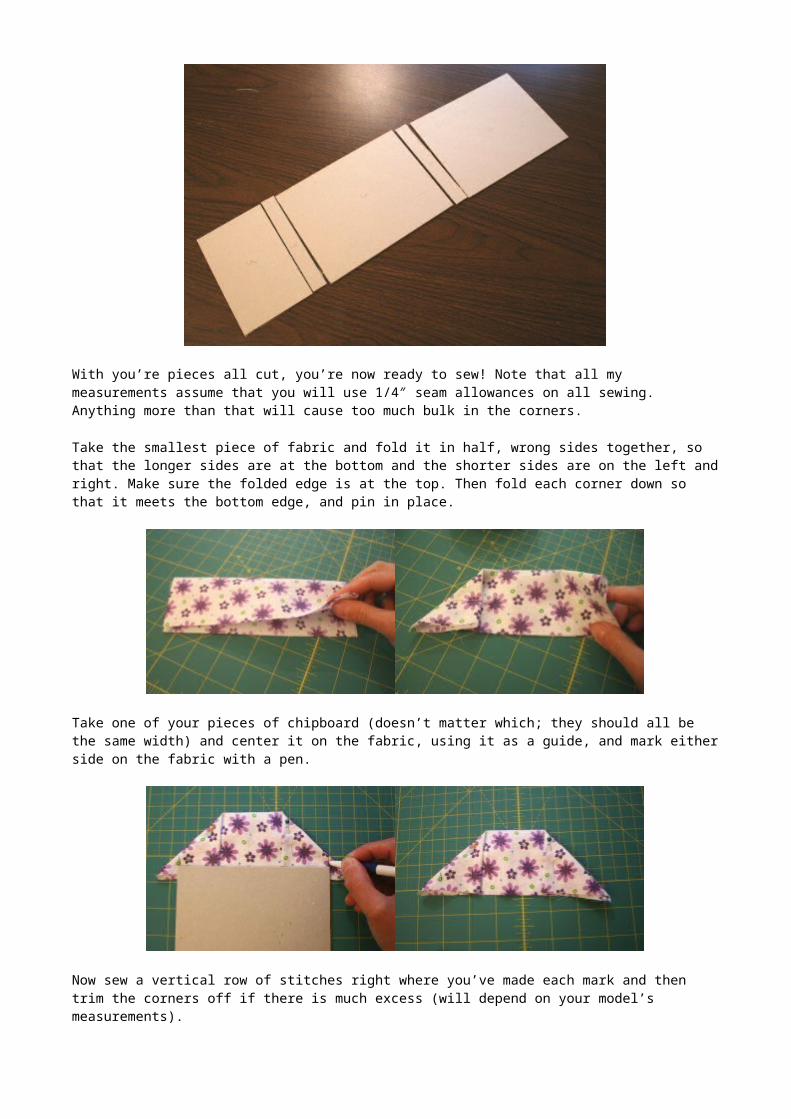
Take one of your pieces of chipboard (doesn’t matter which; they should all be the same width) and center it on the fabric, using it as a guide, and mark either side on the fabric with a pen.
Now sew a vertical row of stitches right where you’ve made each mark and then trim the corners off if there is much excess (will depend on your model’s measurements).
You’ll now have a pocket that looks something like this:
Now take one of your long pieces of fabric and place it face up on the table, with one of the ends in front of you. Place your pocket on top, lining up the bottom edge with the bottom of the long piece of fabric. Pin it in place, then flatten out the corners to get the bottom edge as smooth and flat as you can.
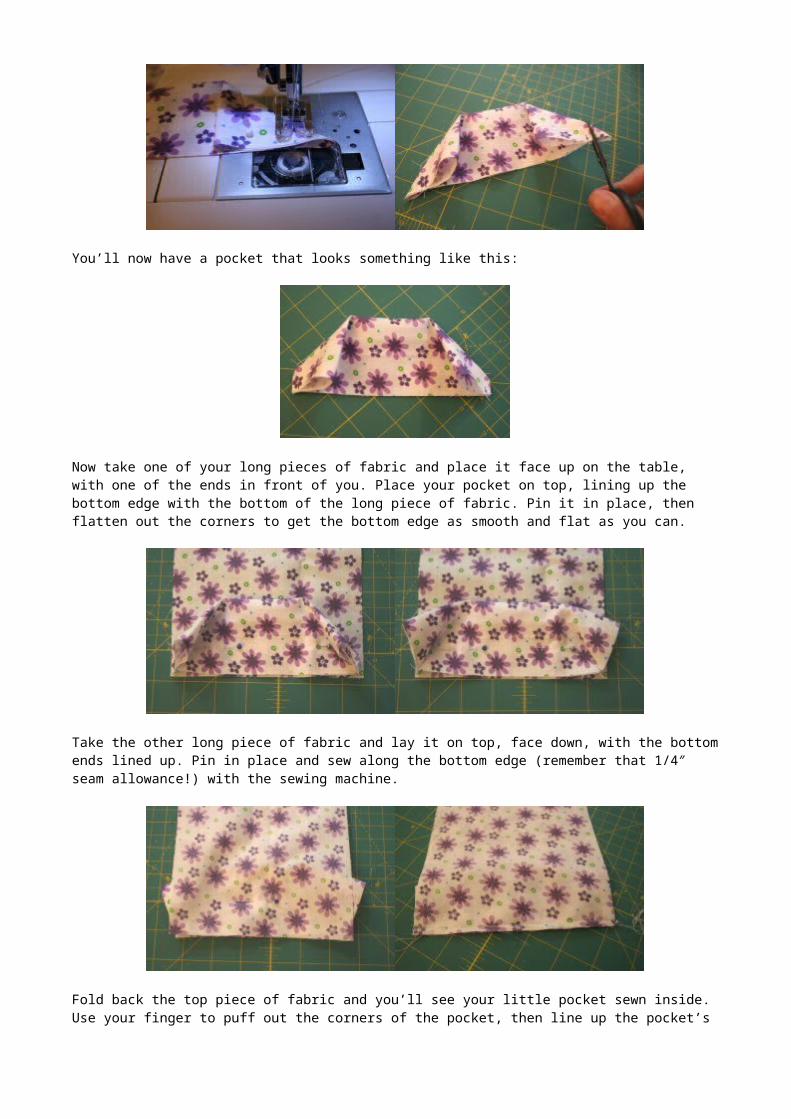
Take the other long piece of fabric and lay it on top, face down, with the bottom ends lined up. Pin in place and sew along the bottom edge (remember that 1/4″ seam allowance!) with the sewing machine.
Fold back the top piece of fabric and you’ll see your little pocket sewn inside. Use your finger to puff out the corners of the pocket, then line up the pocket’s sides with the sides of the bottom piece. Pin in place. It will look a little squished, but just focus on the side edges and make them as square as possible.
With the pocket pinned in place, it’s time to add the elastic band. Start by folding the top piece of fabric back in place and smooth it out.
Then on the right side, use a ruler to measure 2 1/2″ up from the row of stitches and mark it. Do the same on the left side. Slip the elastic in between the two long fabric pieces (like meat in a sandwich) and line it up with your marks. Let it stick out either end, and pin it in place.
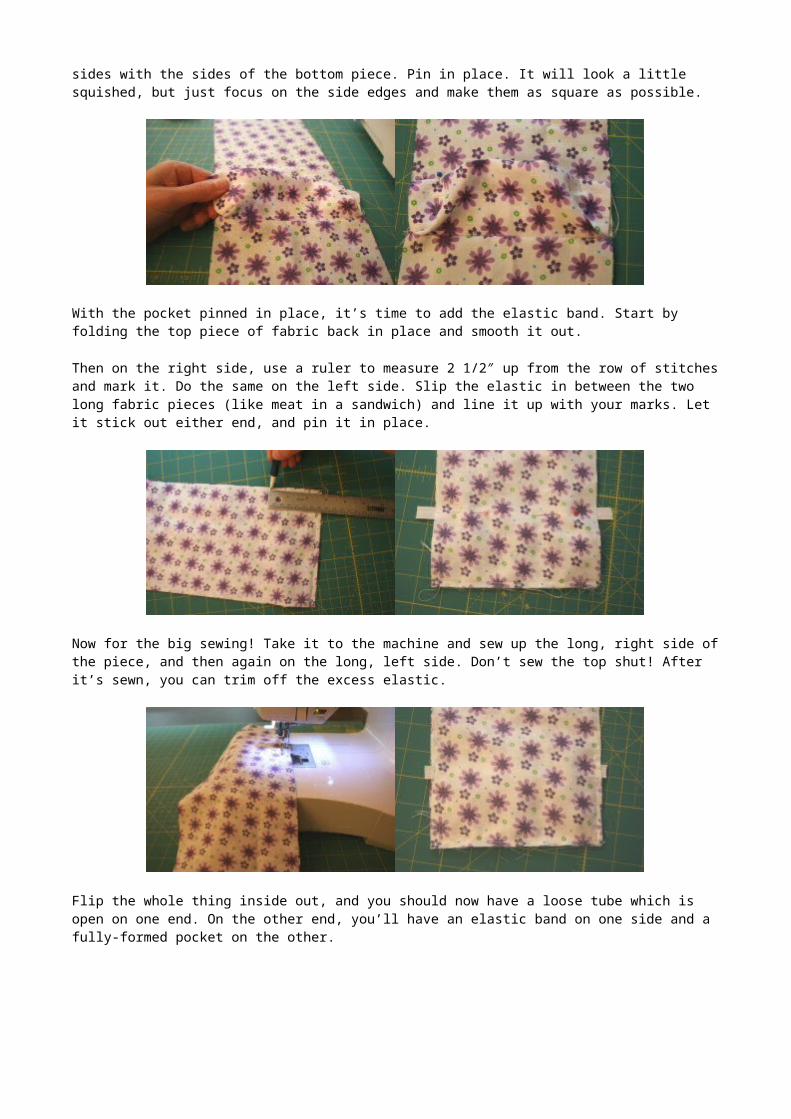
Now for the big sewing! Take it to the machine and sew up the long, right side of the piece, and then again on the long, left side. Don’t sew the top shut! After it’s sewn, you can trim off the excess elastic.
Flip the whole thing inside out, and you should now have a loose tube which is open on one end. On the other end, you’ll have an elastic band on one side and a fully-formed pocket on the other.
Now take piece #1 of your chipboard and stuff it inside the tube. It should be very snug, and if your measurements are all right and you used 1/4″ seam allowances, it should fit just right.
Push the chipboard all the way down to the bottom of the tube, nice and tightly, and you should have a good, firm base.
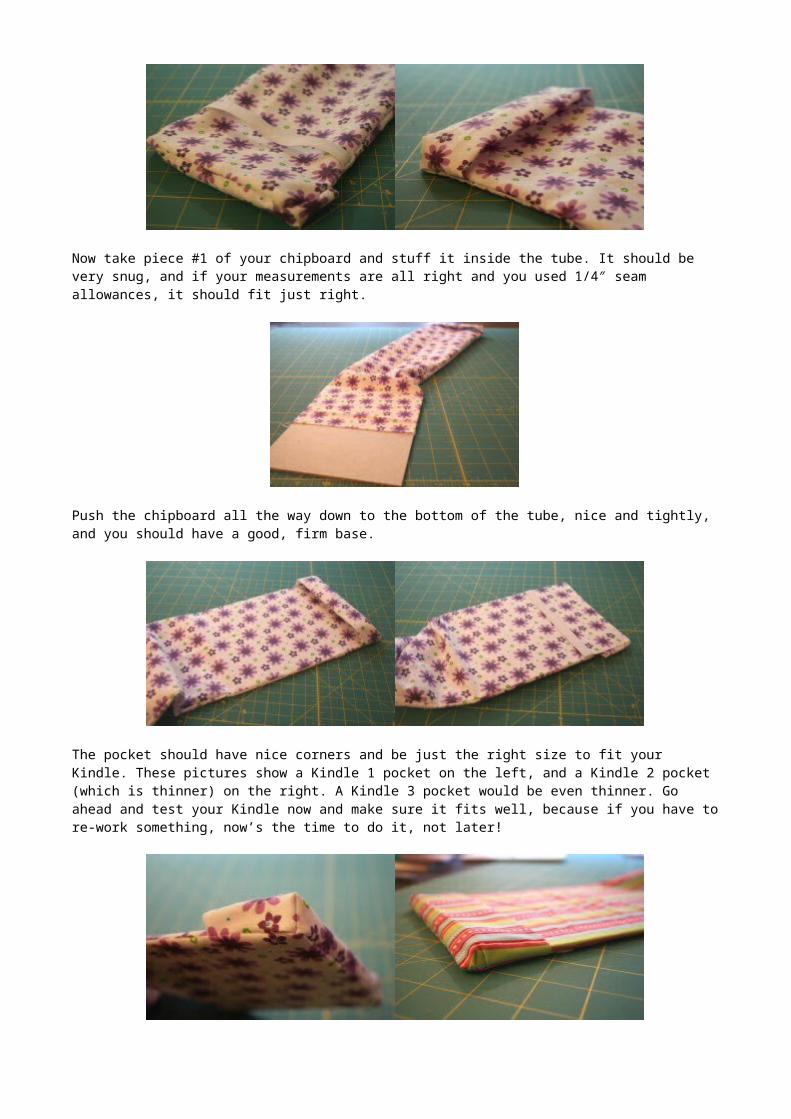
The pocket should have nice corners and be just the right size to fit your Kindle. These pictures show a Kindle 1 pocket on the left, and a Kindle 2 pocket (which is thinner) on the right. A Kindle 3 pocket would be even thinner. Go ahead and test your Kindle now and make sure it fits well, because if you have to re-work something, now’s the time to do it, not later!
Make sure the chipboard is still all the way at the bottom of the tube, then take the piece to the sewing machine and run a row of stitches all the way across the top of the chipboard, as close as possible to the board. You might find it helpful to use a zipper foot on your sewing machine, but the regular foot worked fine for me.
Now put piece #2 of the chipboard into the tube, and shove it all the way down to the row of stitches you just did. Then take it to the machine and sew another seam as close as possible to this new piece of chipboard.
Continue with pieces #3 and #4, sewing a row of stitches after each one. Finally, put piece #5 in place. (Aren’t you glad you numbered these?) With all pieces in place, there should be about an inch or so of fabric hanging off the edge. Use scissors to trim that to about a half inch.
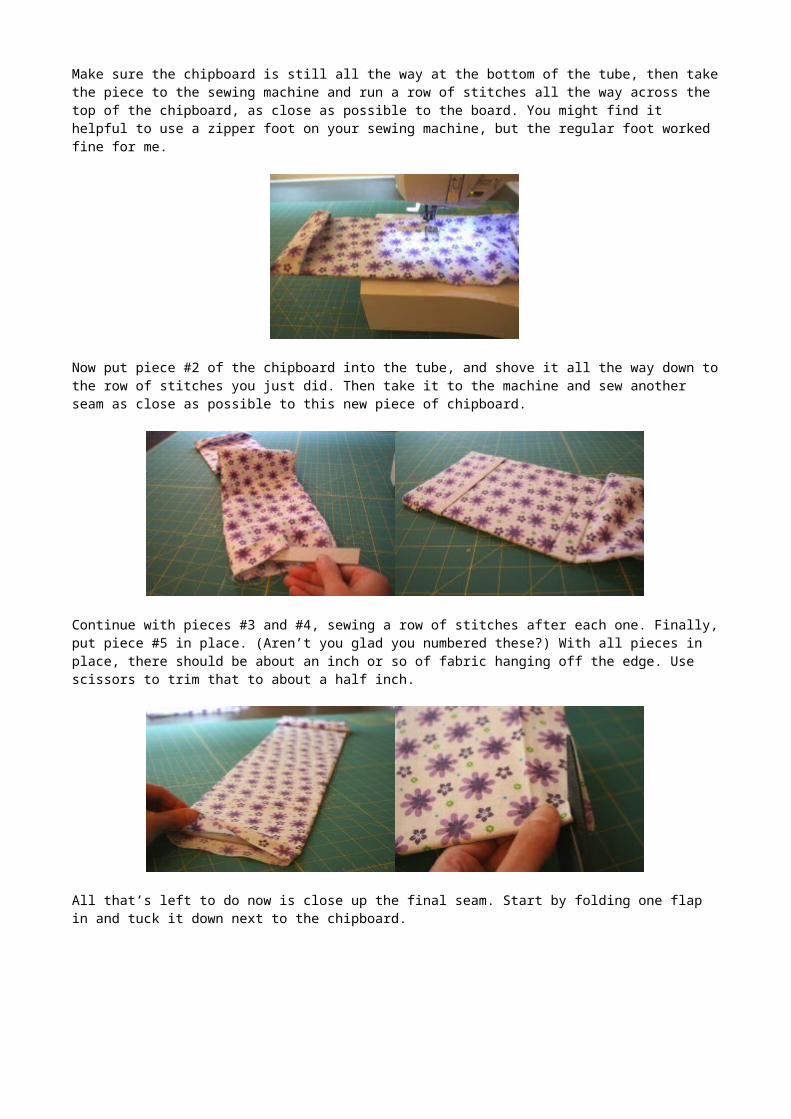
All that’s left to do now is close up the final seam. Start by folding one flap in and tuck it down next to the chipboard.
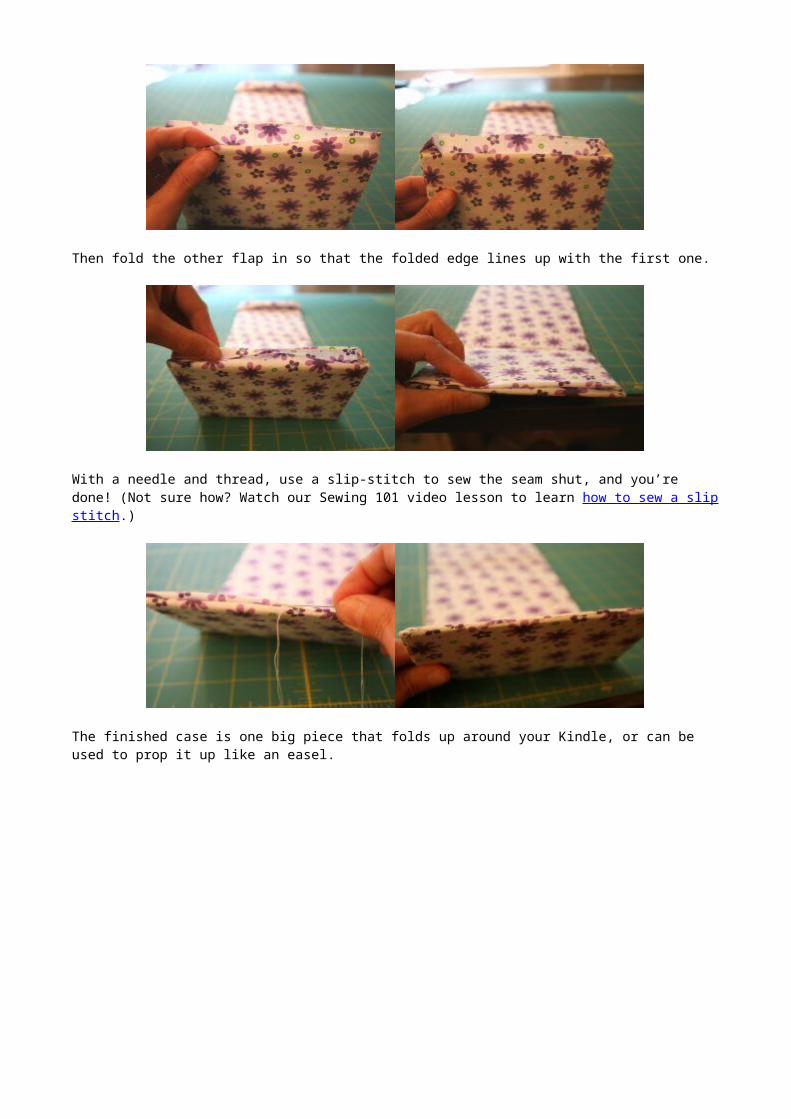
Then fold the other flap in so that the folded edge lines up with the first one.
With a needle and thread, use a slip-stitch to sew the seam shut, and you’re done! (Not sure how? Watch our Sewing 101 video lesson to learn how to sew a slip stitch.)
The finished case is one big piece that folds up around your Kindle, or can be used to prop it up like an easel.
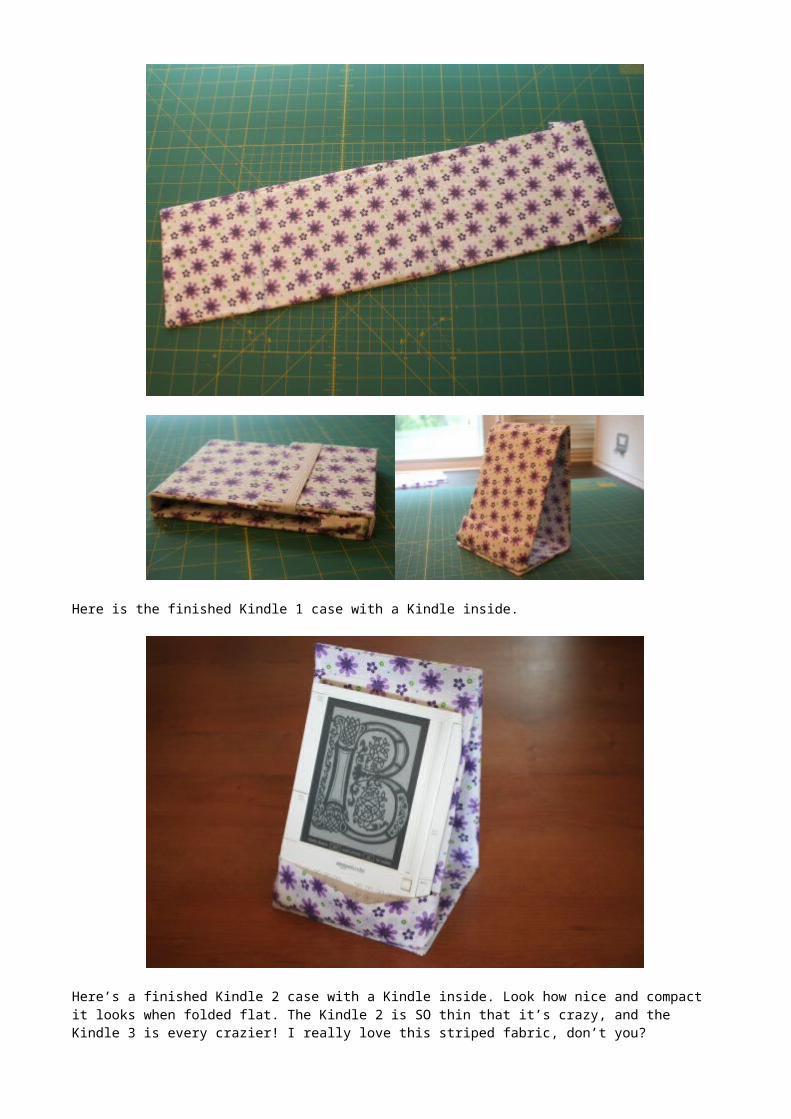
Here is the finished Kindle 1 case with a Kindle inside.
Here’s a finished Kindle 2 case with a Kindle inside. Look how nice and compact it looks when folded flat. The Kindle 2 is SO thin that it’s crazy, and the Kindle 3 is every crazier! I really love this striped fabric, don’t you?
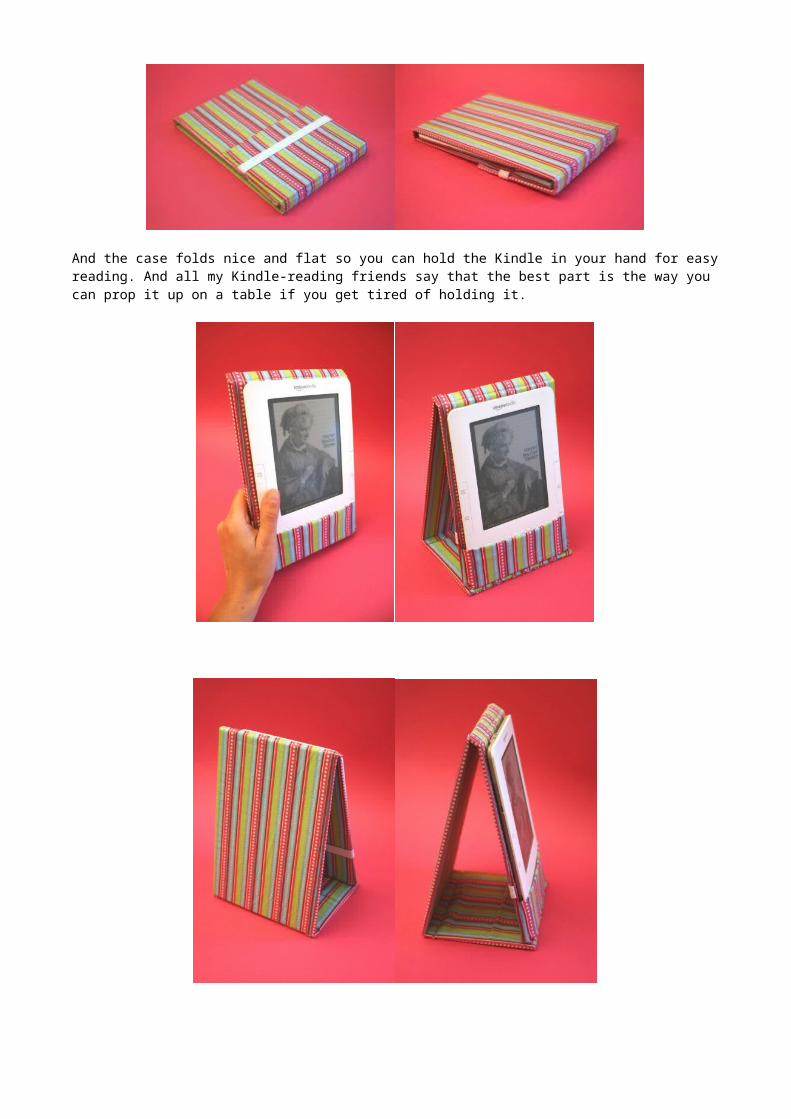
And the case folds nice and flat so you can hold the Kindle in your hand for easy reading. And all my Kindle-reading friends say that the best part is the way you can prop it up on a table if you get tired of holding it.
Jo’s husband has a Kindle that he loves, and he often likens it to the fictional handbook after which the “Hitchhiker’s Guide to the Galaxy“ series of books is named. So when his birthday came up recently, I knew I had to make him a Kindle cover emblazoned just like the original Hitchhiker’s Guide, with the famous title “Don’t Panic”. He loved it!

SPECIAL ADDITION – Formula for other devices
As I mentioned at the beginning of this post, I’ve come up with a formula that I think will work for any electronic reader device you have. I’ve already heard from one reader that it works for the Sony reader, and if anyone else tries it out, please let me know!
Here’s what you need to do:
1. For the cardboard, the width of all pieces should be 1/2″ wider than the device.2. For the length of each cardboard piece:
o Cut piece #1 to the same as the height as the device.o Cut piece #2 to 1/2″ more than the thickness of the device.o Cut piece #3 to 1/4″ more than the height of the device.o Cut piece #4 to 1/2″ more than the thickness of the device.o Cut piece #5 to half the height of the device
3. For the two larger pieces of fabric, the width should be 1/2 inch more than the width of the cardboard. That will allow for a 1/4″ seam allowance on each side, and it should fit the width of the cardboard snugly.
4. To determine the length of the two larger pieces of fabric, I would lay out all of your cardboard pieces, end to end, like I did in this picture. Then measure how long that is total, and add about 3 inches to that. Cut your fabric that long and it should be enough to handle the seams and the flap at the end.
5. For the smaller (pocket) piece of fabric, the width will depend on the width and thickness of your device. To determine the measurement, start by measuring how thick the device is. Then double that. Then add 1/2″ for seam allowances. Then add the width of the device. (For example: A Kindle 2 is .36 thick and 5.3″ wide, so the measurement would be (2x.36)+.5+5.3=6.5″
6. The length of the smaller piece will depend on how far up the front of the device you want it to come. You want it to be secure, but not up so high that it covers the screen or buttons. To determine the measurement, start by measuring up the front of the device to see how much of it you want the pocket to cover. Then double that. Then add 1/2″ for seam allowances. Then add three times the thickness of the device. (For example: If you want to cover three inches on the front of the device and your device is 1/2″ thick, then your measurement would be (3×2)+.5+(3x.5) = 8″
I hope this formula works for you, and we hope you enjoy your reader and its new cover!
UPDATE! Want to buy a cover already made?Do you like this cover but are hesitant about your sewing skills? Would you rather just buy one rather than sew your own? Well, here’s a list of our Authorized Sellers who we have approved to make and sell covers using our design. Each seller has a different style, so check them all out, and feel free to contact them to see if they can make just the right cover for you!
Sewing B – [email protected] Twineries – [email protected] Picperfic – [email protected] Devil Dog Designs – [email protected] BeautifulPeace Art and Design – [email protected] Tanderwen Crafts – [email protected] here and there. – [email protected] Sew Sassy by Ashley – sewsassybyashley@com cast.net Way2Crafty – [email protected] Kiva’s Threads by Angela Lorio – [email protected] Thimbles & Needles – [email protected] Maureen Lewis – [email protected]
Are you interested in making and selling Kindle covers using our design and pattern? Send us an e-mail at [email protected] to learn about becoming an Authorized Seller.