managed switch configuration for dante
TRANSCRIPT
Managed Switch Configurationfor Dante

Login to switch• Login to switch via web browser.• If your network is not currently on a
192.168.0.x subnet, you may need to temporarily set your computer to a static IP subnet of 192.168.0.x It is also recommended to change the IP address of the switch to match the subnet of your network.
• Default IP address of the switches are:• AMS-2600 = 192.168.0.2• AMS/XMS-1208P = 192.168.0.3• All other AMS/XMS models = 192.168.0.4• SW-510/610 Series – DHCP by default
• Default username = admin• Default password = admin*
• Firmware will require a password change upon initial setup

DSCP Based QoS Configuration
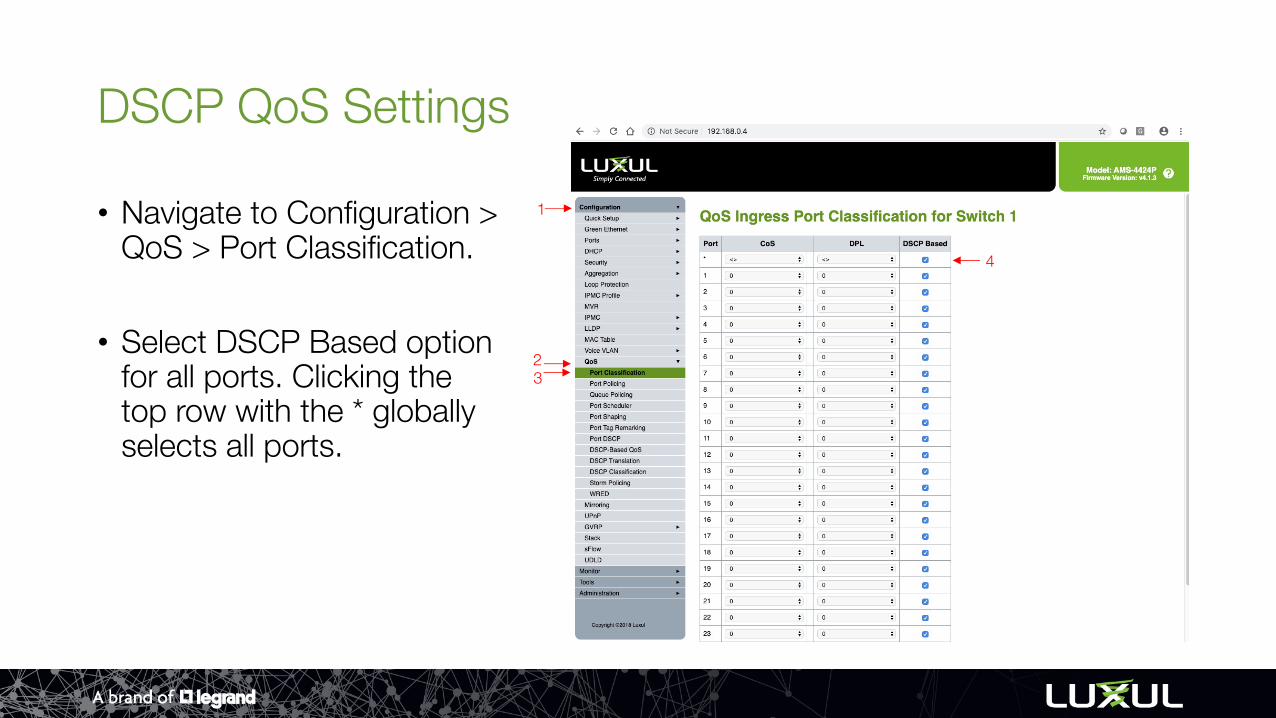
DSCP QoS Settings
• Navigate to Configuration > QoS > Port Classification.
• Select DSCP Based option for all ports. Clicking the top row with the * globally selects all ports.
1
23
4

Save DSCP Settings
• Scroll to bottom of screen and click Save

DSCP Based QoS
• In the same QoS menu section, navigate to DSCP-Based QoS
• Select Trust for all DSCP classes. It is also acceptable to select Trust only on the classes that are required for Dante. Those classes are specified on the next page.
1
2

Select QoS Class• Set Class 0 to priority 0
• Set Class 8 to priority 5
• Set Class 46 to priority 6
• Set Class 56 to priority 7
• Click Save at bottom of screen
Class info can be found at https://www.audinate.com/faq/how-does-dante-use-dscp-diffserv-priority-values-when-configuring-qos
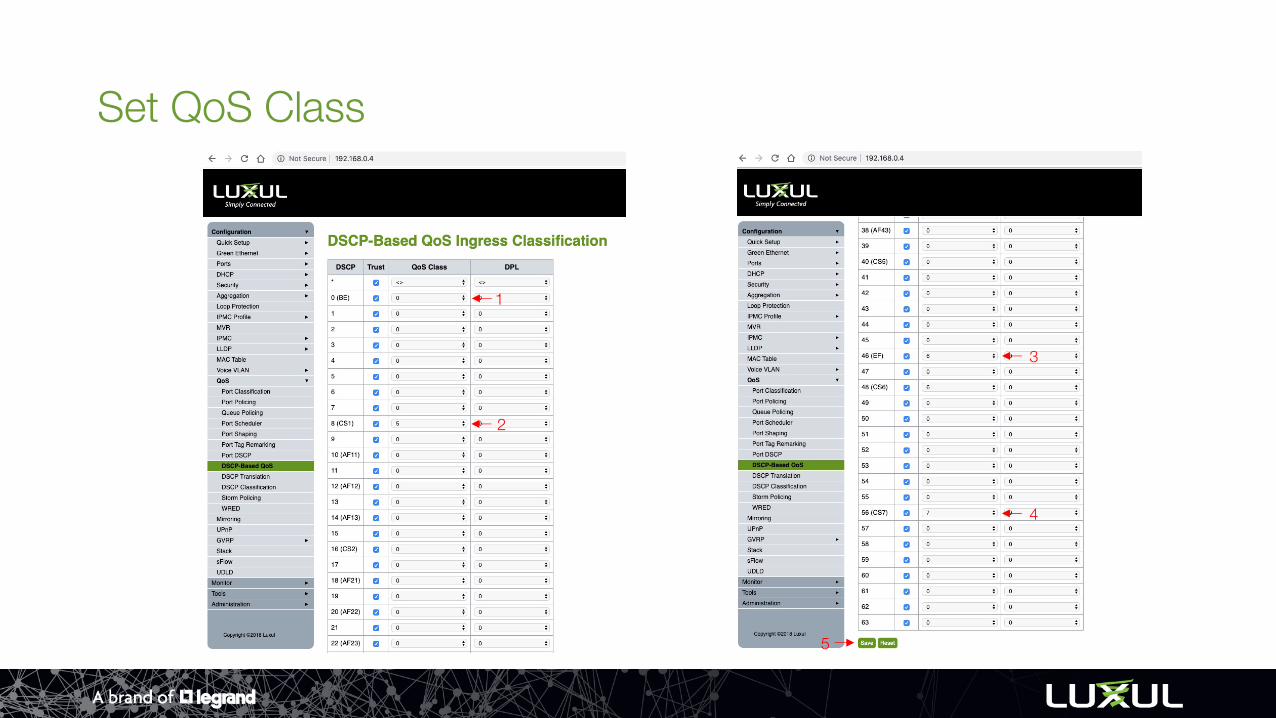
Set QoS Class
2
1
3
4
5

IGMP Multicast Configuration
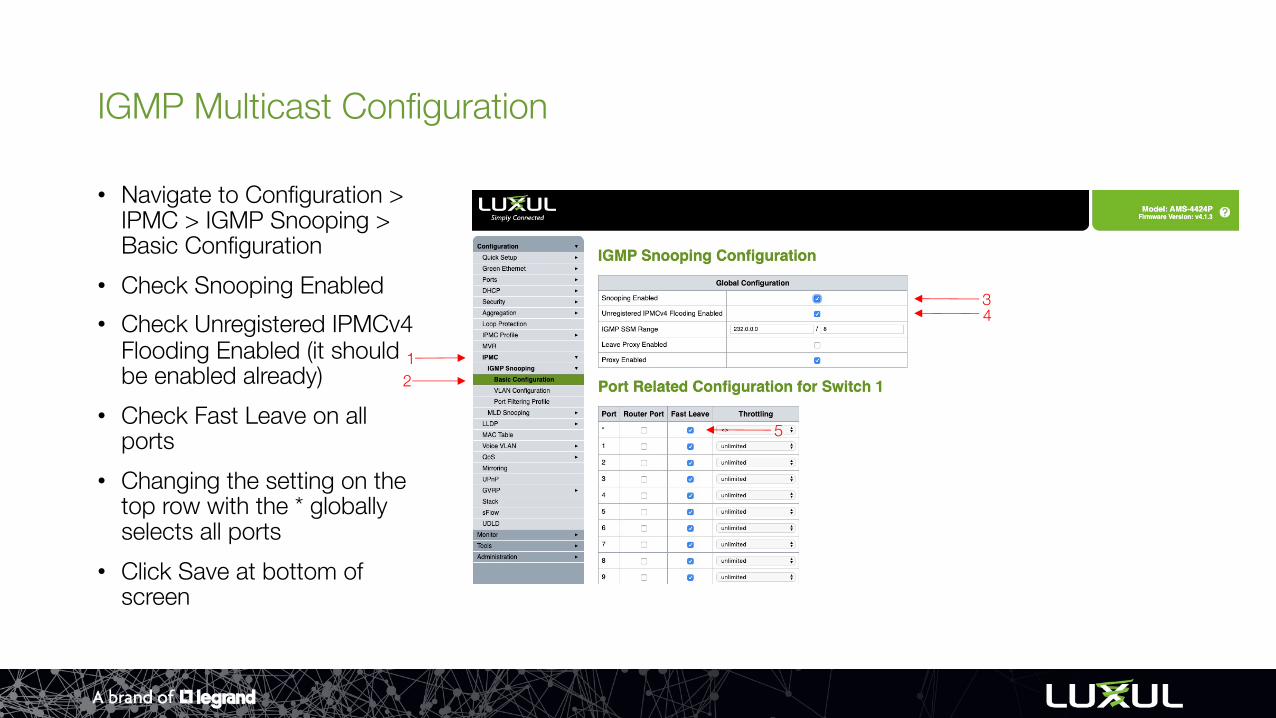
IGMP Multicast Configuration
• Navigate to Configuration > IPMC > IGMP Snooping > Basic Configuration
• Check Snooping Enabled• Check Unregistered IPMCv4
Flooding Enabled (it should be enabled already)
• Check Fast Leave on all ports
• Changing the setting on the top row with the * globally selects all ports
• Click Save at bottom of screen
12
34
5

IGMP Multicast VLAN Configuration
• Navigate to Configuration > IPMC > IGMP Snooping > VLAN Configuration
• Click Add New IGMP VLAN if no VLAN table is created. Firmware 4.1.3 and higher will have already created the table for you
• Check Snooping Enabled• Check Querier Election• IP Address can be left at 0.0.0.0 or
can be the IP address of the switch• Set IP as IP address of the switch if
using more than one switch in network
• Change Compatibility to Forced IGMPv2
• Set QI to 30 seconds• Click Save
132 54
7
6
30

Save Startup Config
• Navigate to Administration > Configuration > Save startup-config
• Click Save Configuration to make settings permanent in the switch
32
14