manley voxbox - tu graz
TRANSCRIPT

MANLEY
VOXBOXOWNER’S MANUAL
TUBES RULE
REV. MVBXXAxxxx rev3/15/2011cd

CONTENTS
SECTION PAGE
INTRODUCTION 3
QUICK START 4
MAINS CONNECTIONS 5
FRONT PANEL MIC PRE 6 COMPRESSOR 7 EQ & DE-ESSER 8
REAR PANEL 9
GENERAL DISCUSSION OVERVIEW AND BLOCK DIAGRAM 12 MIC PREAMP & COMPRESSOR 13 EQ & DE-ESSER 15
ADDENDUM 18
TECHNICAL DETAILS TUBE, TRIMMER LOCATIONS 19
CALIBRATION 20
TROUBLESHOOTING 21
SPECIFICATIONS 23
CURVES 24
APPENDIX 1 - TEMPLATE FOR STORING SETTINGS 26

INTRODUCTION THANK YOU!... for choosing the Manley VOXBOX. This unit is the result of our customers asking us to make a vocal oriented combination from some favorite Manley designs. We combined the Manley Mic Preamplifier, Electro-Optical Limiter, and Mid Pultec and then went further. Uniquely, we put a compressor before a minimalist mic preamplifier. This can substantially reduce distortion while having no more sonic imprint on the signal than the mic pre by itself because the compressor is just a passive light dependent clamping resistor. For those who want the shortest path to tape, but use compressors, this has to be the ideal solution. We added attack and release controls to the com-pressor with some “very special” settings such as one that simulates a LA-2A, another “tuned” for drums and a setting that works like a great engineer “riding” a fader. Then we extended the PULTEC MEQ down to 20 Hz and up to 20 kHz so its not just a mid EQ anymore. To this we added a new de-esser circuit and gave it a “Limiter” setting. This final de-esser / limiter is com-pletely independent of the compressor and is post EQ.
We wanted the VOXBOX to be “Manley quality” and the first and only “analog combo” (other than consoles) to make a serious entry into the major studios. We provided our style of balanced inputs and outputs and used fewer but better parts. It only required five Manley audio transformers, six multi-tapped inductors, two expensive Multi-Caps, four low noise graded tubes, four Vactrol opto-isolators, three regulated power supplies, six Bournes conductive plastic pots & seven Grayhill gold contact rotary switches. A few of these items are likely to cost more than other manufacturer’s total parts. With all these serious transformers we even provided ways to go transformerless,the minimalist and purist way to go. We went to great lengths to eliminate typical clicks and pops from switches. The compressor and limiter can be switched in while recording and the change happens smoothly. We added auto-mute circuitry to eliminate the turn-on & turn-off thump and regulated all the power supplies. Many of these developments have since been incorporated into revisions of our other pro products.
While we were designing the VOXBOX we couldn’t help but notice how well it would work on other instruments besides voice. There were some great settings for drums (unusual), bass, guitar and keys. So don’t just use it for voice - you can use it everyday and in any situation regardless of how well equipped the studio may be. The name “VOXBOX” represents only the beginning and the most obvious application.
Please take a few moments to read through this manual carefully as it contains information essential to proper operation of this unit and we scattered little hints all over. Thank you again, and please enjoy!
GENERAL NOTES
LOCATION & VENTILATION The Manley VOXBOX must be installed in a stable location with ample ventilation. It is recom-mended, if this unit is rack mounted, that you allow enough clearance on the top and bottom of the unit such that a constant flow of air can move through the ventilation holes.
WATER & MOISTURE As with any electrical equipment, this equipment should not be used near water or moisture.
SERVICING The user should not attempt to service this unit beyond that described in the owner’s manual.
Refer all servicing to your dealer or Manley Laboratories.
3

MICROPHONE TO VOXBOX, ALL SECTIONS OF VOXBOX AVAILABLERear Panel: Microphone in via XLR to MIC INPUT. Line level out via EQ OUT.Front Panel:- “Phase” set to 0° or 180° (not LINE)- Meter set to EQ OUT- EQ INPUT set to PRE O/P
MICROPHONE TO VOXBOX, PREAMP/COMP ONLYRear Panel: Microphone in via XLR to MIC INPUT. Line level out via PREAMP OUT.Front Panel:- “Phase” set to 0° or 180° (not LINE)- Meter set to PRE O/P
LINE LEVEL TO VOXBOX, ALL SECTIONS OF VOXBOX AVAILABLERear Panel: Line in via XLR or 1/4” to LINE INPUT. Line level out via EQ OUT.Front Panel:- “Phase” set to LINE- Meter set to EQ OUT- EQ INPUT set to PRE O/P.
LINE LEVEL TO VOXBOX, PREAMP/COMP ONLYRear Panel: Line in via XLR or 1/4” to LINE INPUT. Line level out via PREAMP OUT.Front Panel:- “Phase” set to LINE- Meter set to PRE O/P- EQ INPUT set to PRE O/P.
LINE LEVEL TO VOXBOX, EQ ONLYRear Panel: Line in via XLR or 1/4” to LINE INPUT. Line level out via EQ OUT.Front Panel:- “Phase” set to LINE- Meter set to EQ OUT- EQ INPUT set to LINE IN.
So you just got your VOXBOX (congratulations!), and all you want to do is plug it in and get on with recording. But there are so many darn switches and input/output jacks all over the dang thing! Where to even begin?!?
Don’t panic. Described below are a few quick-start I/O configurations and settings so you can start making music right away. Feel free to experiment, and remember - if you don’t hear any sound, make sure your front-panel settings correspond with your Ins and Outs. 98 out of 99 times, “fixing” your VOXBOX involves flipping one switch.
QUICK START
4

MAINS CONNECTIONS
Your VOXBOX has been factory set to the correct mains voltage for your country. The voltage setting is marked on the serial badge, located on the rear panel. Check that this complies with your local supply. Exportunitsforcertainmarketshaveamouldedmainsplugfittedtocomplywithlocalrequirements.Ifyourunitdoesnothaveaplugfittedthecolouredwiresshouldbeconnectedtotheappropriateplugterminalsinaccordancewith the following code:
GREEN/YELLOW EARTHBLUE NEUTRALBROWN LIVE
As the colours of the wires in the mains lead may not correspond with the coloured marking identifying the termi-nals in your plug proceed as follows:
The wire which is coloured GREEN/YELLOW must be connected to the terminal in the plug which is marked by the letter E or by the safety earth symbol or coloured GREEN or GREEN and YELLOW.
The wire which is coloured BLUE must be connected to the terminal in the plug which is marked by the letter N or coloured BLACK.
The wire which is coloured BROWN must be connected to the terminal in the plug which is marked by the letter L or coloured RED.
DO NOT CONNECT/SWITCH ON THE MAINS SUPPLY UNTIL ALL OTHER CONNECTIONS HAVE BEEN MADE.
Note: Units are purpose built for original destination country’s mains voltage: 100V, 120V, or 220-240VAC as indicated on the serial number badge. Power transformer must be replaced in order to change mains operating voltage.
120VAC units may NOT be rewired to put the primaries of the power transformer in series for 220-240V operation or a large radiated field of hum will develop. If changing locations/voltages, the power transformer must be replaced with the dedicated one for the voltage at which it will operate.
Waste Electrical and Electronic Equipment (WEEE)
Informationforcustomers:TheEuropeanParliamentandtheCounciloftheEuropeanUnionhaveissuedtheWasteElectricalandElectronicEquipmentDirective.ThepurposeoftheDirec-tiveisthepreventionofwasteofelectricalandelectronicequipment,andtopromotethereuseandrecyclingandotherformsofrecoveryofsuchwaste.Assuchthe Directive concerns producers, distributors and consumers.
TheWEEEdirectiverequiresthatbothmanufacturersandend-consumersdisposeofelectricalandelectronicequipmentandpartsinanenvironmentallysafeman-ner,andthatequipmentandwastearereusedorrecoveredfortheirmaterialsorenergy.Electricalandelectronicequipmentandpartsmustnotbedisposedofwithnormalhouseholdwastage;allelectricalandelectronicequipmentandpartsmustbecollectedanddisposedofseparately.
Productsandequipmentwhichmustbecollectedforreuse,recyclingandotherformsofrecoveryaremarkedwiththefollowingpictogram:
Smallproductsmaynotalwaysbemarkedwiththispictograminwhichcasethisispresentintheinstructionsforuse,ontheguaranteecertificateandprintedonthe packaging. Whendisposingofelectricalandelectronicequipmentbyuseofthecollectionsystemsavailableinyourcountry,youprotecttheenvironment,humanhealthandcontributetotheprudentandrationaluseofnaturalresources.Collectingelectricalandelectronicequipmentandwastepreventsthepotentialcontaminationofnaturewiththehazardoussubstanceswhichmaybepresentinelectricalandelectronicproductsandequipment.
YourMANLEYorLANGEVINretailerwillassistwithandadviseyouofthecorrectwayofdisposalinyourcountry.
5

FRONT PANEL
A B C D E H J K N W X Y Z
F G I L M O P Q R S T U V A. INSTRUMENT INPUT: 100K ohm input impedance. The PHASE switch should be in the middle po-sition to use this input so that the mic input transformer is disconnected. Inserting a phone jack here will interupt the back panel LINE INPUT. Compression will lower this impedance and can cause some HF loss on guitars but a few dB of compression is OK. Two ways around this are use a preamp or effects pedal between this input and the guitar or use the limiter part of the de-esser.
B. PHANTOM POWER SWITCH: This is a “locking switch” for safety - Pull out to toggle. Turn down the monitors before toggling. Use the 48 volt phantom power with FET CONDENSOR MICS but not with dynamic or tube mics. See page 13 for more on phantom power.
C. PHANTOM LED: Lit when phantom power is on.
D. LOW FILTER: This is a minimum phase shift “high pass” filter that is available for the mic, line and instrument input. The slope is a gentle 6 dB per octave. FLAT = BYPASS
E. PHASE SWITCH: A more correct term is polarity. This function is only available for the mic input. The “0” position is normal (non-inverting). The “180” position reverses the phase of the mic signal. The mid-dle position marked “LINE” disconnects the mic transformer and optimizes the LINE and INSTRUMENT inputs. One might also use that line position to act as a “mute” if no line input is used (or better, the 1/4” jack is shorted). One uses the 180 position, for example, on the bottom of a snare or with vocalists if the headphones or mic is out of phase.
F. INPUT: This is the main level control for all inputs to the preamplifier. It is before the compressor and preamplifier. It allows hot signals to be attenuated before any significant distortion can happen.
G. GAIN SWITCH: This is not a “pad”. It sets the amount of negative feedback which has an effect on gain, transient accuracy, noise, clipping characteristics, etc. It is normally used as a tone control and/or to optimise noise. See page 13 for more on this control.
H. VU METER: This is a true standard VU. It is not supposed to “agree” with peak meters. The VU is preferred for recording to analog tape and is intended to show a reasonable representation of how “loud” the signal will be heard. Use your tape machine’s meters to safely set an output level.
I. METER SELECT SWITCH: The VU meter shows 3 isolated audio inputs and 2 positions that are used to indicate the amount of gain reduction from the compressor and de-esser / limiter. Because the VU meter is a little slow it may not show some fast peak reduction that is actually occurring but will tend to show the “audibility” of gain changes by the amount and rate of needle swing.
6

COMPRESSOR SECTION
J. COMPRESSOR BYPASS: With this switch up the compressor is engaged. This switch is uniquely designed to be used during music. No clicks, no pops and the change of level occurs smoothly. The compressor is uniquely before the preamp so that transients are “tamed” before the signal enters the tube circuit. This makes it possible to have exceptionally clean, smooth tracks. It also allows the normal “mic preamp into outboard compressor into tape” to be essentially “purist mic pre direct to tape” with compression invisibly taking place. We use a passive opto-isolator for the gain control element which adds no measurable distortion or noise and only 0.1 dB of inser-tion loss.
K. COMPRESSOR THRESHOLD: Turning this control clockwise increases compression. This control is after the INPUT control. There is no “make-up gain” control so some degree of balanc-ing between INPUT and THRESHOLD is expected. Adding the make-up gain or output level would have compromised the sonic integrity for the sake of conventionality. The compressor “ratio” is program dependent and non-linear but is generally similar to 3:1 ratios on VCA based compressors.
L. ATTACK: This controls how the compressor reacts to transients such as explosive consonants or drums. Slower settings tend to “ignore” transients and let them through untouched. Faster set-tings tend to reduce transients which has an audible effect of reducing, for example, the strike of a drum or the “P”s as in “puppy”. Vocals will usually be best with medium settings. Engineers most familiar with compressors will notice the unusual way the “attack” rides above the reduc-tion set by the release. Attack changes are most noticable on slower releases on this unit.
M. RELEASE: This controls how fast or slow the compressor returns to full volume. Because various RC networworks are switched in this control also has some effect on attack rates. The final release as reduction approaches 0 dB is a “bonus” function of the Opto. Each setting is actually a separate complex set of “tuned” time constants. The FAST setting mimics the Manley Electro-Optical Limiter and works best in the range of 3 to 8 dB of compression. The MED FAST setting is much like old LA-2A’s but is also tuned for drums and bass and works well with dynamic broadcast audio. This setting is designed to pump a bit with the Attack at Slow. MED and MED SLOW are the usual choices for vocals. SLOW is a very slow release and is for the most inaudible compression. RELEASE SLOW + ATTACK SLOW uniquely mimics a good engineer “riding” a fader. Good for great singers, questionable for dynamic material. LA-2A = FAST ATTACK & ME-
DIUM FAST RELEASE or FAST RELEASE (or LIMITER) LA-3A = SLOW or MEDIUM ATTACK &
MEDIUM SLOW RELEASE
N. LINK: Switching up connects or links a second VOXBOX for stereo applications. It ensures that when either compressor channel reduces gain that both units will reduce the same number of dBs. This is so that a center image does not drift when a peak is on one side. Both sets of controls should normally be set to the same positions. It links both the compressor and the de-esser to the second VOXBOX if RCA LINK interconnects are between both units. The RCA male to male interconnect can be any typical stereo hi-fi type.
7

EQ and DE-ESSER SECTION
O. EQ BYPASS: Switching this up engages the EQ section. This is a passive PULTEC MEQ style EQ with only one capacitor, one inductor (coil or choke) a conductive plastic pot and a gold contact switch in the audio path for each band of EQ. There are no tubes in the EQ and certainly no ICs or transistors. The tube circuit is only used for flat, fixed make-up gain and is always in circuit. The EQ is before the de-esser / limiter and before the tubes.
P. EQ INPUT: Three inputs are available to feed the EQ / De-esser / Line amp. The LINE IN is a split from the same LINE IN that can feed the mic preamp section. The PRE O/P is the output of the mic preamp / compressor section and is not through the output transformer. When using a line input into the compressor, these two positions allow you to compare compression to no compression without the drop of gain you get just using the compressor BYPASS switch. The INSERT setting allows yet another line input to feed this section. It allows you to insert (or bypass) an external device such as a noise gate between the preamp output and the EQ section. It also allows you to use the VOXBOX for two different tracks. These 3 inputs are switched with high quality sealed relays near the back panel & transformers for the shortest signal path.
Q. LOW PEAK FREQUENCY: This simply selects the center frequency to be boosted with the LOW PEAK con-trol. The “Q” or bandwidth is fixed and consistant with the original PULTEC MEQ. There are now 11 positions between 20 Hz and 1 kHz. The settings below 200 are new and were not on PULTEC MEQs. See page 14 for a few tips if you want.
R. LOW PEAK: Adjusts between 0 or flat and typically up to 10 dB of maximum boost.
S. MID DIP FREQUENCY. 11 frequency bands between 200 Hz and 7 kHz (7,000 Hz). 1K5 is “British” for 1,500 hz or 1.5 kilohertz or kilocycles.
T. MID DIP: Adjusts between 0 (flat) and up to (minus) 10 dB of maximum cut. Many top engineers suggest that by using cut EQ (mostly from 200 to 1K5) rather than boost reduces phase shift problems and improves the gen-eral clarity and punch. Cutting a bit at 5 or 7 kHz can reduce the resonance of some vocal mics. (It helps to boost 16 or 20 kHz on the High Peak to compensate for lost brightness.)
U. HIGH PEAK FREQUENCY: Again 11 positions but from 1,500 Hz (1K5) to 20 kHz. The settings above 5 kHz are new. Some frequencies may cause sibilance problems.
V. HIGH PEAK: Adjusts between 0 (flat) and up to 10 dB of maximum boost.
W. DE-ESS BYPASS: Switching up engages the de-esser or limiter. This function is also passive and can be switched in silently during music!
X. DE-ESS SELECT: This rotary switch selects frequency band the de-esser will dip or notch. The 3 KHz posi-tion is may be used for occasional de-essing or may help control sounds that tend to “hurt”. Our hearing is most sensitive in that band. The LIMIT position removes the frequency selection and works as a “flat” electro-optical limiter much like an LA2-A.
Y. THRESHOLD: This sets how loud an “ess” (or transient in Limit) has to be before it can be reduced. Turn clockwise for more de-essing. Normally we try to make the sibilance natural rather than removing the ”esses” entirely. A good way to set the threshold when limiting is to look at the tape machine peak meters and set it to prevent overloads.
Z. POWER. The meter will light immediately. There is a relay that mutes the outputs for about 20 seconds after power is turned on and immediately after power is turned off to prevent “thumps”. The LED marked READY lights when audio can pass. This circuit will ignore quick “blackouts” for live sound work. This feature can be to-tally bypassed (or the delay shortened). The VOXBOX should be turned off between sessions to extend tube life.
8

REAR PANEL Q P O N M L K J I H G F
A B C D E A. IEC POWER CONNECTOR: Use the IEC detachable power cable that was packed with the VOXBOX. The correct mains voltage is factory wired for your country. The third pin ground is connected to the chassis internally.
B. MAINS FUSE: Replace only with the same value and type which is 1 AMP SLO BLO. A generic type is MDL 1 and its size is 1 1/4” X 1/4”. A second or third blown fuse may indicate an electronic problem need-ing repair especially if it has turned black. If it appears to be a serious problem, you should send the VOX-BOX to your dealer or to MANLEY LABS for repair.
C. GROUND TERMINALS: These are used to find or fix hum or to prevent ground loops with a variety of studio wiring techniques. The CIRCUIT GROUND may be also called audio ground or “technical earth” and it simply is the common ground of the audio circuits in this unit. The CHASSIS GROUND is the third pin mains ground and the chassis. Separating CHASSIS GROUND and CIRCUIT GROUND is the same as breaking off the third pin of the AC plug except that it includes the chassis which is also probably grounded to the rack. These two terminals are normally joined by a small piece of metal called a ground strap. If you loosen the posts you can move the strap to the side - you can also lose the strap if you don’t re-tighten the posts. For some studio grounding techniques the AUDIO GROUND can be connected to the console with a piece of wire. If you have a hum, experiment here first.
D. BLOCK DIAGRAM: Shows a simplified drawing that shows the basic signal flow. This diagram is also on page 12 in this manual.
E. CONNECTOR PIN-OUT: A list of how the XLR and phone jacks are wired that might help the person building the cables. This info is also in detail below.
F. MIC INPUT: The mic cable gets plugged in here. 48 volt Phantom Power is available on this connector (see page 6). The input impedance is 2400 ohms and is matched for most professional mics. The PIN-OUT of all the XLRs is as follows:PIN 1 = CIRCUIT GROUND = SHIELD PIN 2 = HOT = positive going signal + PIN 3 = LOW = negative going signal -
G. LINE INPUT. For balanced or unbalanced +4 line level sources. Transformer coupled 1/4 inch phone jack.
The PIN-OUT is : BALANCED - (using a stereo phone plug ) UNBALANCED - (using a mono or stereo plug)TIP = HOT = positive + TIP = SIGNAL = HOTRING = LOW = negative - (RING = GROUND = SHIELD)SLEEVE = GROUND = SHIELD SLEEVE = GROUND = SHIELD
9

H. LINE INPUT. XLR For balanced or unbalanced +4 line level sources. Transformer coupled. The PIN-OUT is: PIN 1 = CIRCUIT GROUND = SHIELD PIN 2 = HOT = positive going signal + PIN 3 = LOW = negative going signal -
I. PREAMP OUT (PHONE JACK). The signal from the mic preamplifier and compressor before the trans-former. It is designed to be the cleanest output for direct to tape recording. The output phone jacks are dif-ferent from the inputs. The phone jack outputs can only be unbalanced and are designed to bypass the output transformers. Some people don’t like transformers. One of our favorite studio owners sez “I hate the sound of bad transformers and love the sound of good ones”. These are great transformers and have very little color. You can verify this by comparing the phone and XLR output one at a time. At “worst” the XLR out-puts seem to have slightly more bottom and punch. When you insert a phone plug it cancels the XLR output because it removes the transformer right out of the circuit. This unbalanced output is coupled with a MULTI-CAP for you audiophiles out there. It will be fine driving balanced inputs as well as unbalanced inputs and is designed for pro +4 dBu nominal levels The PIN-OUT is: TIP = SIGNAL SLEEVE = GROUND and if you must use stereo plugs connect the RING to SLEEVE and/or if you are sending to a balanced input connect LOW or negative to the SLEEVE at either end.
J. PREAMP OUT (XLR): A transformer balanced version of the mic preamplifier and compressor output. Note that a 1/4 inch phone plug in the jack below will kill this output. The PIN-OUT is: PIN 1 = CIRCUIT GROUND = SHIELD PIN 2 = HOT = positive going signal + PIN 3 = LOW = negative going signal -
K. INSERT INPUT (PHONE JACK): Like the LINE IN can be used balanced or unbalanced. This input only goes to the EQ section. It is intended as a return for a noise gate or other processor between the mic pre and EQ. It is also a way to bring in a second input to use the VOX BOX for two separate tracks. The PIN- OUT is the same as the LINE INPUT and the same electronically. BALANCED - (using a stereo phone plug ) UNBALANCED - (using a mono or stereo plug)TIP = HOT = positive + TIP = SIGNALRING = LOW = negative - (RING = GROUND = SHIELD)SLEEVE = GROUND = SHIELD SLEEVE = GROUND = SHIELD
L. INSERT INPUT (XLR): For balanced or unbalanced +4 line level sources. Transformer coupled XLR. The PIN-OUT is: PIN 1 = CIRCUIT GROUND = SHIELD PIN 2 = HOT = positive going signal + PIN 3 = LOW = negative going signal -
M. EQ OUT (PHONE JACK). The signal from the EQ and De-Esser before the transformer. The phone jack outputs can only be unbalanced and are designed to bypass the output transformers. When you insert a phone plug it cancels the XLR output because it removes the transformer right out of the circuit. This output is also coupled with a MULTICAP. It will be fine driving balanced inputs as well as unbalanced inputs and is designed for pro +4 dBu nominal levels The PIN-OUT is: TIP = SIGNAL SLEEVE = GROUND and if you must use stereo plugs connect the RING to SLEEVE and/or if you are sending to a balanced input connect LOW or negative to the SLEEVE.
N. EQ OUT (XLR): A transformer balanced version of “M”. This is also the final output or main output. Note that a 1/4 inch phone plug in the jack below will kill this output. The PIN-OUT is: PIN 1 = CIRCUIT GROUND = SHIELD PIN 2 = HOT = positive going signal + PIN 3 = LOW = negative going signal -
10

On a light note, the bit on the back panel
“An EveAnna Manley Production”. EveAnna spearheaded this project and invited input from some of our favorite dealers and customers for this unit. She also fed her parameters to the engineers, supervised all aspects of the design and created the cool front panel. She produced and directed this one.
“Inspired by David Manley”- David’s well proven design phi-losophies, techniques and style were used throughout. He wrote the book.
“Engineered by Craig Hutchison”.Hutch contributed the new com-pressor and de-esser designs, new EQ frequencies and a few other electronic bits. You can blame him for this crazy manual.
“Mastered by Baltazar Hernandez”.Balta handled the mechanical designs, printed circuit board designs and cleaned up all of our little pieces and put them neatly together.
Auto-mute and HV regulators - Richard Schroeder Transformers and inductors - Michael Hunter Printed circuits - Elias Guzman Metal machining - Miguel Tovar Assembly supervised by - Marcelino Tornez
11
O. LINK COMPRESSOR: This RCA is used for connecting to a second VOXBOX. The signal on this con-nector is a changing DC voltage from the compressor section. It is both an input and an output. You can link the second VOXBOX with any typical hi-fi RCA interconnect as long as it is not longer than 6 feet.
P. LINK DE-ESSER: This RCA is used for connecting to a second VOX BOX. You can link the second VOXBOX with any typical hi-fi interconnect and a stereo interconnect can be used to do both the compres-sor link and de-esser link. The signal on this connector is low level audio from the de-esser section. It is both an input and output. As an output the signal is after the band-pass filter and threshold control used to sense the “esses”. Audio fed into this jack may drive the de-esser opto but the threshold control will not be usable and generally it will kill the normal de-esser path.
Q. SERIAL NUMBER: Write this down somewhere - like the warranty registration near the back page of the manual. You need it if the unit is “lost” and we need it for repairs to happen.

MIC IN
INST IN
PHASE
INPUT LEVEL
OVERVIEW and BLOCK DIAGRAM
COMPRESSOR
NEW PASSIVE OPTO CIRCUIT
GAIN SWITCH
MIC PRE
OUR 60dB TUBE PREAMP
BALANCED OUTPUT
LINE IN UNBALANCED OUTPUT
INSERT INPUT
EQUALIZER
PASSIVE EQ PULTEC STYLE
DE-ESSER LIMITER
PASSIVE OPTO
LINE AMPLIFIER
TUBE CIRCUIT
BALANCED OUTPUT
UNBALANCED OUTPUT
TUBE GAIN STAGES
This block diagram is intended to give you a reasonable view of the signal flow in the VOX-BOX. A few interesting aspects can be seen at a glance. First notice that when an instrument is plugged it that it disconnects the LINE input. After the INPUT (level) control (which is a con-ductive plastic pot) the signal goes into the COMPRESSOR which is the first major block in the chain. Normally this is impossible because mic signals are so low that the noise introduced by a compressor would be a problem even if the the threshold control could see such a low signal. How do we do it ? We use a light dependent resistor called an opto-isolator. This part is designed for audio applications and is the same part we have been using in the Manley Electro-Optical Limiters. When light shines on this special resistor some of the signal is shunted to ground which reduces the level. Adding this part to the basic mic pre reduced the preamp gain by 0.1 dB and did not affect any other specification even when compressing 15 dB. From the compressor the signal goes to the MIC PREAMP. Uniquely this compressor up-stream can prevent mic signal clipping before the first tube. The PREAMP is where the mic signal gets boosted to line levels. This all-tube gain block is the same as the Manley Mono Microphone Preamplifier and quite similar in topology to the circuit in the Manley Pultec EQs and Opto-Limiters. Notice how the GAIN is a feedback circuit, getting the signal from the output and sending it back to the input. The signal is injected out-of-phase so that it acts to reduce gain, distortion and noise. We chose a respectable range of operation for the feedback select. Not too little and not too much which can cause problems with transient accuracy and imaging. You get to choose the optimum amount for “your” sound. It is also not in the main signal path which we try to keep simple and pure. At the end of this section is a transformer, that you can see, gets switched out to prevent any loading, if you use the phone jack output. These out-puts are intended to send to tape.
The first thing in the EQ section is a switch to select the input. You can choose the LINE INPUT (normally going to the first stage Mic Preamp) or the output of the Preamp or a third input called INSERT. INSERT is intended to be used so that this section is in the monitor path between the tape output and the console. This way you can EQ and de-ess safely and not record them. Maybe save it for the mix.. INSERT is also used to “insert” an outboard processor in the middle of things. Another use for this input select switch is to compare the LINE in with the PRE OUT be-cause there is no “make-up gain” control (rather than just using the “Bypass”). This is a good, level consistant, alternative. Yet another gain control here would have compromised the signal integrity and maximum available gain on the mic preamp. Too bad.
The signal goes into the EQ and actually loses gain because the EQ is a simple passive cir-cuit. The signal later gets amplified by the next tube stage so that the full signal comes back to nor-mal levels. But first..... it hits the DE-ESSER / LIMITER. Once again, this is a passive stage with far less signal quality loss than outboard rack mounted devices. And once again we use our proven tube amplifier circuit to restore levels and drive long cables.
TRANSFORMER SYMBOL
SWITCHING PHONE JACK
12

THE MIC PREAMP & COMPRESSOR
The VOXBOX can be divided into two main sections. The first is the Compressor and Mic Preamplifier. The input signal can be a microphone, instrument or line level signal. The mic and line inputs are on the back panel. The mic input is transformer balanced with 48 volt phantom power available, switched from the front. The line input has both XLR and 1/4 inch phone jacks and will accept balanced or unbalanced signal at either of the jacks. To use the line or instrument input, the phase/polarity switch should be set to the middle position to disconnect the mic input transformer. The instrument input on the front panel will over-ride the line input so to use the line input, you must not have a jack plugged into the instrument input. You will probably need to really turn up the gain to get a reasonable output with a guitar. We also suggest that you rely on the limiter in the EQ section rather than compress because the impedance may lower from 100K ohms to 50K ohms and this eats highs. Whichever input you use, the next thing the signal sees is the Filter which allows you to cut lows at 80 or 120 Hz to help reduce room rumble or pops. The next thing is the INPUT control which is the main level adjustment. This is followed by a passive opto-isolator that does the “work” of the compressor. Up to this point the signal has only gone through passive components - no gain, no clipping, no noise. The signal then goes to the all-tube amplifier which is the standard Manley Mono Mic Preamplifier that has been winning shoot-outs for years. The GAIN switch is not a pad. This control sets the overall gain by setting the amount of negative feedback. Besides gain, this affects several aspects of the “sound” of a pre-amp including transient speed, & accuracy, distortion, noise, output impedance and clipping characteristics. At lower gains (40 dB setting) the Pre Amp has a very clean quality, in some ways like solid state and is the best at minimizing tube hiss. “50” is a normal setting because it tends to sound most like the source, and is very musical and real. The “40” settings can sound slightly slower, further back and more mellow by comparison. The 60 dB setting uses almost no feed-back and can give a slightly more punchy and forward or aggressive sound. It may be a little “hot” (more than simply warm) for some tastes. Experiment to discover your own descriptions. You will likely find a few settings that you prefer for your style of music. The preamplifier has two outputs. The first is the unbalanced (and trans-formerless) 1/4 inch phone jack. It interrupts the signal before the transformer balanced XLR output. Use one or the other, but you cannot use both outputs.
A few words about PHANTOM POWER. It is a rare occurance but a few ribbon mics and PZMs can be damaged by the 48 volts of phantom power. We suggest to ALWAYS have PHANTOM switched off when switching mics, cables, patches that involve mics etc. You ONLY need phantom power for SOLID STATE (FET) CONDENSOR MICS. You should have phantom switched “off” for tube mics, dynamic mics, ribbon mics and battery powered mics. This is true for all mic pre’s. With this MIC PRE you “PULL THE TOGGLE to SWITCH PHANTOM”. It is a locking toggle to prevent “accidents”. The second great reason for not using phantom if you don’t have to is that - if you change a connection with phantom on, then the preamp will be fed a quick burst of 48 volts (when it normally is amplifying about a hundredth of a volt), which may be monitored - usually once. After you have replaced your speakers, you have learned a valuable lesson about turning down the volume of the monitors before changing mics or mic patches. This is a good habit with phantom on or off. Consider a variation of this - any slightly intermittant mic connection, will be super noisy with phantom turned on. This goes for cables, patchbays and patch cords.
Suggestion #2 - Avoid running mic signals through patchbays. Some patchbays “ground” all the “sleeves” which can add a ground loop into your delicate mic signal. Ground loops usually cause hum.
Suggestion #3 - You can set up the VOXBOX in the studio near the mic and use a short mic cable. Why? Microphones often have “light duty” line drivers and you can lose an audible amount of signal in long cables. You can get the best fidelity by having the mic pre close to the mic at the “cost” of having to walk into the stu-dio to adjust a level control. You also avoid almost all of that phantom power / patching problem because now you have the mic plugged in directly to the mic pre and are patching the hefty line level output at the console. Suggestion #4 - If it sounds good, no problems - fine - record.
The PHASE switch is very important when more than one mic is picking up a particular instrument. A good example is a snare drum with a mic on the top and another on the bottom. The two mics are out of phase acoustically and unless one of the mic signals is flipped 180 degrees one can expect some cancellation of lows. For vocals, we often assume that the PHASE switch is unimportant (only one mic) and we don’t hear a signifi-cant difference in the control room - but the singer will. If the headphones are out of phase with thier own voice, it sounds pretty strange. Flip the switch - ask them what they prefer. This might explain why sometimes you just couldn’t satisfy the singer’s headphone complaints. A fair amount of older gear (especially mics) may be pin 3 hot (out of phase) because the pin 2 hot standard was not developed yet...
13

The LOW FREQUENCY ROLL-OFF switch works on mic, line and instrument inputs. We use it to reduce room rumble, excessive proximity effect and sometimes to achieve hotter overall levels. It reduces bass a bit gentler and smoother than most mic pre filters. It is 6 dB per octave, rather than 18 dB per octave.
A little note about the INPUT control. This control is before any other circuitry that might distort. In a sense, it is a variable pad. Manley mic preamps can handle very hot signals cleanly because of this. The GAIN switch, that many mistake for a pad, sets the amount of negative feedback. We sometimes use this to optimise noise but more often use it to control how “forward” or “aggressive” we want it to sound. There is no typical setting for the LEVEL control with mics but you will find that with line level signals, “unity gain” is near 12:00. You may find that guitars and basses, through the front panel 1/4” input, will require, what seems to be a high setting.
The compressor starts off being unusual in that it is before the mic pre. The attack and release are conventional enough that any engineer familiar with compressors will be at home and may not notice these controls are a bit unusual. As usual, ATTACK adjusts how percussive transient sounds affect compression. At the slowest settings, (ex)plosive consonants, pops or drums should not really “trigger” the compressor. Faster settings allow these peaks to cause compression & makes them quieter. RELEASE is the time the compressor takes to get back to no compression or full volume. “Slow” release makes the gain creep back to full and “fast” release brings the gain back up as quickly as possible. This is how the VOXBOX and most compressors operate but we added a few new twists.
Normally a compressor uses this one pair of attack and release times to provide some degree of control. Uniquely, we used 4 pairs to get it better. One pair is the light dependent resistors own attack and release characteristic which is the basic attack and release of the original Manley Electro-Optical Limiter. You get this winning characteristic in the VOXBOX if you dial up FAST RELEASE & FAST ATTACK.
Try this; dial up SLOW RELEASE and SLOW ATTACK and feed it some music. This combination is set up to look like a good engineer riding a fader (a “great” engineer would anticipate a loud note but we couldn’t quite design that in). As you move the ATTACK to MED and FAST, notice how the compres-sor quickly handles transients like drums but for the slower sounds has very slow release. In other words it combines the best parts of conventional controls and “auto” settings. It sounds liquid smooth and very transparent.
MED RELEASE with MEDIUM ATTACK is for vocals - that easy.
LA-2A = FAST ATTACK & MEDIUM FAST RELEASE
LA-3A = SLOW ATTACK & MEDIUM SLOW RELEASE
MED FAST RELEASE & MED FAST ATTACK is the most complex setting. Here is four pairs of time constants set up to be cool for drums and bass. We wanted it to be punchy with a good amount of thump and click. You could spend hours trying to get that from most compressors. It also works nicely on “announcers” and “commercials”. It can be a bit “pumpy” on a music mix - but without the wimpiness that usually goes with it.
The THRESHOLD control is designed so that as you turn clockwise more compression happens. BYPASS simply stops the light hitting the opto’s. It can be switched in and out smoothly during music !
Unlike many compressors, this one has no “make-up gain” control. The INPUT level is before the threshold because it is a mic preamp. It makes comparing compression (in and out) not ideal when used as a mic pre because pure compression always reduces volume. In line input mode we gave you one way to compare. Use the EQ INPUT toggle switch between “LINE IN” (no compress) and “PRE OUT” (com-press). You can also hear the “color” of the Manley tube circuits this way (not easily).
How much compression to use? Well it depends on the singer and other factors including taste and experience. Most freelance engineers record vocals using the very best mic & mic pre they can get, put it through an optical limiter and record direct to tape - no EQ, no gate, no console. A singer with wonderful mic technique probably won’t need much compression, if any. Singers with perfect mic technique are as rare as virgin nightclub singers ;-) Most often you can expect needing 3 to 6 dB of compression. The idea is, use as little as possible but the vocal should stay reasonably level and not jump out and bite you or disap-pear into the track. As you get into deeper compression you can make the quiet phrases louder along with louder leakage from other instruments, more headphone leakage and audible room rumble. In a very quiet room you might get away with 10 or 15 dB. The usual idea for recording is that you need to keep the vocal sounding natural yet level controlled. A few other common problems of over-compressing are less natural dynamics and mic technique and faster session burn-out. Serious squashing, if needed, may be better in the mix stage. Distortion on the other hand may be better recorded on a second track. Here the vocalist has to interact with the distortion to get the best effect. Record one signal clean and one track from the distortion device. This gives most options in the mix. You can switch in one for some lines, or re-distort a better way, or not. You can put a fuzz box in the Insert Loop but we suggest post EQ & Limit.
14

A note regarding how we’ve described LA-2A’s as fast and LA-3A’s as slower. Your experience may disagree with our generalization. They both used the same opto part # and should be the same. We believe there was a fair amount of variation over the years and we know of slow and fast versions in both models. The LA-2A we used to compare was a faster type and the LA-3A was slower. Perhaps a better de-scription is simply “slow and fast vintage opto” but we did emulate and compare with real vintage units.
THE EQ & DE-ESSER
The first part of the EQ & De-Esser section is the “EQ INPUT” select switch. The three inputs are:
1) LINE IN - from “Line In” XLR and phone jack - transformer balanced - The signal “splits” to both the preamp and EQ sections and also to the meter.
2) PRE OP - The Mic Preamplifier and Compressor output. This signal does not pass through a transformer but the preamplifier may still be affected by the output transformer unless you insert a plug into the PREAMP OUT phone jack. The Pre O/P can be metered. These first two positions allow one to com-pare the LINE IN signal with and without compression and gain. Of course assuming you are listening to the EQ OUTPUT.
3) INSERT - This is a line input direct into the EQ. It can be used to “insert” an external device such as a gate, delay, distortion or even more EQ and compression. It can also be used as a way to use the VOX BOX as two separate channels. You could use the preamp for vocal and the EQ for bass. This input is transformer balanced. With no jacks plugged into either the INSERT XLR or 1/4 inch phone jack there will be no input when switched to this position. If you were to patch a short mic cable between the PREAMP OUT and INSERT IN, it would add two transformers into the signal path when you switch to “INSERT”. Some people like the “sound” of good transformers - some don’t. You judge.
The EQ is based on the MANLEY MID FREQUENCY Equalizer which was based on the PULTEC MEQ. The original passive circuit was designed by Western Electric to improve the sound of voice through tel-ephone lines. Pulse Technologies (Pultec) licensed it from Western Electric and Manley was given full permis-sion and “blessing” from retired Eugene Shenk who owned the Pultec name.
For the VOXBOX, we left the original frequencies untouched so that there is still a lot of mid control but we extended the range of frequencies so that it could hardly be called a mid EQ anymore. It remains a pas-sive EQ meaning that there is only a capacitor, inductor, rotary switch and conductive plastic potentiometer for each band. There is no tube in the EQ circuit and there is definately no ICs or transistors. There is a vacuum tube circuit following the EQ & De-esser which is used to make up gain lost in the passive EQ. The original Mid EQ stopped at 200 Hz in the lows - we added 6 more frequencies so that it goes all the way down to 20 Hz now. The LOW PEAK is a boost only control from 0 to 10 dB with 11 “center frequencies” from 20 Hz to 1K (1000 Hz). The MID DIP is cut only also with a 10 dB range. There are 11 center frequencies from 200 Hz to 7 K (7000 Hz). Similarly the HIGH PEAK is boost only and has been extended from 5 frequencies to 11 frequencies ranging from 1K5 (1500 Hz) to 20K (20,000 Hz). The BYPASS switch turns off the EQ function by eliminating the EQ components from the path. Why does each band only give either cut or boost but not both? It’s a Pultec. It’s passive. It would require twice as many components or a bunch of op-amps in the audio path (like most EQs that will be forgotten 3 years from now). We prefer the approach that stands the test of time to one that compromises sound for the sake of conventional controls. Each approach has advantages.
EQ techniques: The best place to adjust EQ should be mic choice and positioning and possibly room choice. The better the mic choice the less EQ needed or wanted. This seems to be an effect that travels all the way through to mastering and broadcast. If you start out right, you will save everybody a lot of correction work - especially yourself. Some great engineers do not use EQ for the lead vocal track, even at mixing. Most do not EQ to record but some may do a bit in the monitor path. Why? Quite often vocals are “a work in progress” recorded on different days and different rooms and they compile phrases from each session.
If you gotta EQ, the place to start is cutting or dipping rather than boosting, according to the best engineers. Before you boost highs and lows, dip a bit in the mids. It can be less intuitive because most of us want to hear more “something” than less “something else”. Try it sometime.
15

The MID DIP section has a number of typical uses. Most condensor mics have a peak in the frequency response. It is the normal resonance of the diaphram and is typically in the 5 kHz to 10 kHz range on the large diaphram mics that we tend to favor for vocals. Sometimes you can often get a sweeter sound by dipping a lit-tle at 5K or 7K and then boosting frequencies above 12K. It may be important to find a good balance between “presence” or “cut” and “breath” or “air”. Sibilance will be focussed on in the De-Esser section. The “Old Brit-ish Sound” according to those who created it, was not so much a function of the gear used but often how it was used. Mids were cut. Pre-mixing tracks and bouncing was a necessity and cutting some mids selectively allowed “space” for each sound in the bounces. Cutting a bit of 700 to 1K5 reduces the squawk and honk that is all too easy to get. Another very useful trick is to cut in the 200 to 500 Hz area on some instruments. These lower mids can sound right when an instrument is “solo-ed” but can “muddy” a mix real fast. Drums, piano and bass are the usual culprits. Generally, you can get a clearer, punchier sound with fewer mastering problems by trying to cut in the 200 to 1K5 bands than by boosting highs and lows. Try cutting 300 or 500 on “direct” guitars and basses to simulate a clean amp sound. Boosting 3 or 4 kHz with the high peak will help too.
The LOW PEAK section is pretty straight forward. The only warnings might be that if you are monitoring with small nearfield speakers and boosting 20 Hz or even 50 Hz you might be in a dangerous position. It sounds good now but wait till you hear it in the car. At least check the lows on speakers or headphones that reproduce deep lows even if most people’s systems won’t. That killer bottom might explode subwoofers. Check it and you’ll be OK.
The HIGH PEAK is even simpler. We only have two warnings. Analog tape and especially cassettes can only handle so much highs (especially HF peaks) before a nasty sounding distortion occurs. The other warning has to do with sibilance and “esses”. You should be aware that boosting yet more highs later in the mix may give you sibilance problems unless initial frequencies have been well choosen.
DE-ESSER. These are used to remove too much highs after somebody put too much on. At least that’s the general consensus. Most de-essers are like a combination limiter and high frequency notch filter. When the circuit sees “too much” highs it reduces them. The “too much” point is set by the THRESHOLD control. The offending frequencies are choosen by a rotary switch on the VOXBOX. The “ess” frequencies given are 3 kHz, 6 kHz, 9 kHz and 12 kHz. We also gave you a LIMITER position. The 3 kHz, while low for a de-ess function, can really help make screamers and sounds that hurt bearable. Our hearing is most sensitive in the 2K to 4K band. The Limiter is another version of our Electro-Optical Limiter and while quick, it is not a perfect “brick wall”, “zero overshoot”, “micro-second fast” limiter - it workspretty damn well, though, and it sounds better than the “geek” limiters. We don’t quite follow why some people insist on wrecking the sound with a question-able sounding limiter rather than turning the volume down a bit. “More is better” they say. We agree “less is more”.
OK, so back to de-essing basics. Most de-essers are based on VCAs and cheap op-amps which can do a lot of damage to a well recorded and important vocal track. The VOXBOX uses a de-esser that not only works great, but (if used properly) will not mess up the original vocal quality. It is a passive notch filter combined with another Opto. This allows the fine detail of the original sound to be left as intact as possible. The de-esser / limiter is after the EQ and before the final line driver. The side chain is solid state but, as in all Manley gear, the signal path is entirely vacuum tube and never hybrid.
Hints - Don’t kill the natural sibilance, just tame it. Natural: like a real voice, or the produ’er may ‘lap you ‘illy. Some vocalists may be “thrown” by hearing the effects of the de-esser while singing. Safest to give them a straight signal or better yet de-ess in the mix as the last process. Compress (and EQ) before de-essing.
De-essers are not so intelligent that they only react to esses. Loud peaks and high notes may fool them a bit. If you don’t have two VOXBOXes, you might use the De-esser Link output to a spare console channel to hear the de-ess frequency. The gain will likely have to be turned up. It was not designed to be a sidechain moni-tor output. You may only “need” to do this a few times to know what it does.
The best time and way to de-ess is the mix on the final comped (combined) vocal track after all EQ and compression. It may not be easy to EQ while de-essing. It is far easier to remove harsh sibilance on an indi-vidual vocal track than to have the mastering engineer try to remove vocal esses surrounded by hi-hats, cymbals, snares, guitars and keys without doing some damage. Boosting overall highs in mastering is easy but not de-essing. Too many other instruments.
16

Is there a way to prevent the sibilance problems and still get an airy bright vocal sound without resorting to a de-esser? Usually, yes.
“Boosting too much highs “ normally gets the blame but that may be an over-simplified view and not always accurate. Modern pop productions almost demand that bright airy sound that can only be arrived at by boosting highs. The wrong boost frequencies are those that correspond to the resonance of the mic or “whistle” caused by a gap in the singers teeth. Pick a higher frequency. Don’t boost too much or too early. Remember, it is easy to boost highs in the mastering process and they have monitors and ears to die for. If you make the vocal extra brite when you start mixing, you may find yourself boosting the highs of everything , then later after hear-ing fatigue sets in, boosting more highs on the vocals to make them cut through. A lot of nearfield monitors have sibilance problems as well.
A big cause of harsh “esses” is gear choice. Everything from mics and preamps to tape machines and consoles can mess up high frequency transients so that when you do boost the highs the sibilance is nasty and electronic. There are distortions (for instance, transient intermodulation distortion or TIM) that can make sibilance harsh, makes shakers sound like pink noise and essentially makes everthing with highs sound cold and sterile. Unfortunately a lot of gear has this problem and manufacturers and magazines would rather not discuss it. It usually comes from low-cost or poorly designed solid state gear but we have heard it in some rather expen-sive tube mics as well. It usually comes from non-linear or slow circuits and too much negative feedback.
There will be simply less need for a de-esser by just using the VOXBOX and avoiding the cheap stuff. If you start off with a great mic like the Manley Gold Reference and use this mic preamp and compressor - you probably won’t need to boost highs. If you choose to boost highs - you can boost without typical sibilance prob-lems. Some gear avoids the problem by being clean and fast.
Another thing to watch out for is pop filters. While you cure the pop problem you are probably killing some highs and particularly the ultra high “air” frequencies. This may require more boosting. Mic positioning or a high pass filter or even cutting lows may have been a better solution than 2 pop filters and a foam condom.
Last trick - Some singers have a gap in their teeth that whistles a bit and sounds like a sibilance problem. If the singer is OK with it, maybe a bit of cotton or wax between the teeth is the best solution. Another case of fixing the source in 30 seconds rather than struggling for 30 minutes to make some electronic device cure a problem that it really won’t “solve” anyways. At best it should hide it.
One thing we all have a bit of fun playing with is working the EQ and de-esser against each other. Pick a de-ess frequency like 3kHz (because there are less choices), pick the closest EQ frequency (3K) and boost, while adjusting the de-ess to cut a similar amount. Our first attempts are typically drastic and we find it near impossible to get it right. The trick is to keep it subtle - not use too much EQ or de-essing. On some material this can even out some nasty stuff. on some it becomes an effect and alas on some material it sucks. Only goes to show no basic EQ setting works on everything. This is a pretty dangerous technique to record but if you are careful, subtle and not wrapped up in how clever your technique is - it can be pretty slick. If in doubt, wait till the mix, keep an eye on the de-ess meter and listen all the way through for wierdnesses.
The De-esser / Limiter can be metered by turning the meter switch to DS. It shows how many dBs are being reduced. If de-essing, it shows how many dBs at that frequency. It is worth checking because too much and you are generally reducing highs. Also, if limiting, be sure that the rotary switch is set to LIMIT. Unlike many limiters this one won’t kill the top end unless one forgets to set it to limit and it is actually de-essing. Oops.
There is a LINK switch in the COMPRESSOR section. It is used if you have two VOXBOXes (VOX-BOX’S? or is it VOXBOXEN?). It forces the compressors (and de-essers) to reduce the same number of dBs. This ensures that the center image stays rock solid and doesn’t drift because of peaks on either side. On the back panel there are two RCA phono jacks (like on your hi-fi). Any common RCA interconnect cable is all that is needed to join the two VOXBOXes. One RCA links compressors and one links de-esser/limiters. Both “Boxes” are “normally” set up with the same settings. Better trick - when linked, set up one for slow attack / med fast release and the other for slowest release and less compression. This gives a complex compressor with the” best of” and then you can always add some limiting for final peaks and set up one meter to show compression, the other to show limiting. You can even switch them live. Too much fun. The compressor link is not audio but the de-esser/limiter is. Someone may find some “side-chain trick” for the de-ess RCA. It might involve a split signal off the EQ output jack through an outboard processor and into the de-esser link. Maybe they want a narrower de-esser or a de-popper.
17

ADDENDUM
Originally this page was supposed to show some user settings and we invited everybody to
contribute. Nobody did, so this page was blank for 3 years. So now, we can use it for some col-lected comments and hints we have had since the introduction and for some info on versions and updates.
The single biggest unexpected rave is from bass players - they want us to rename it “The Bass-Box”. It turns out the VOXBOX is pretty amazing as a direct box for bass. If you haven’t tried this yet, please do. Apparently, the compressor and EQ are voiced well to complement today’s bass sounds and a number of top session bass players carry one around as their only processor.
It also has become a choice piece for some tours as a vocal processor and didn’t just end up as a studio unit. For example, CSNY used 5, one for each voice and one on the vocal sub-mix. U2 used one for Bono’s vocals. After 3 years and countless “vocal channels” and “channel strips” the VOXBOX still seems to be the one to beat.
The only common confusion-call we get has to do with the “EQ INPUT” toggle. (see page 8, item P). To simplify; the typical most-used position for that toggle is the center, which routes the Mic-Pre / Compressor into the EQ / Deesser-Limiter. The toggle-up position is for splitting the VOX-BOX into 2 paths and uses “INSERT INPUT” to feed the EQ. The toggle-down position allows the “LINE INPUT” XLR to feed the EQ directly. Maybe we weren’t clear enough originally, maybe some guys never read manuals, maybe some guys didn’t notice it was a 3 position switch. Regardless, we wrote a QUICK START page for this manual that might help too.
In the summer of 2000, we made our only requested update for those guys mostly doing spoken voice-over work who needed more gain and more compression. We changed the Mic Pre circuitry to allow for more gain by changing a few resistors associated with the”GAIN” switch which reduced the negative feedback on 2 settings (ser # MVBX 738). This changed the older settings of “40,42.5,45,47.5,50” to “40,45,50,55,60”. We replaced the 6072A which we were having trouble getting good quiet tubes for that stage, for a Sovtek 12AX7LPS which is generally less noisy and has slightly more gain, and it works very well as a preamp in the VOXBOX. See pg. 18 to see a tube substitutions list. It also required a few resistor changes at the plates of the 12AX7LPS. The old R values at the “GAIN” switch were 10K, 17K, 25K, 47K, 75K which are now 10K, 25K, 64K9,140K, 324K. The first plate (pin 1) resistor was 22K and changed to 56K and the second plate (pin 6) resistor changed from 100K to 220K. We also changed the pick-off point for the compressor sidechain from the first grid (pin 2) to the VU pick-off point at the pre-amp output. All this added 10db to the gain and added some greater sensitivity on the Compressor Threshold. The downside is a bit more expected noise with higher gains (physics). For those recording typi-cally loud vocals these mods will have little value but for those working with quieter voices or less sensitive mics, these are worthwhile mods.
We can do this mod for older VOXBOX’s at the factory, and while we do it replace tubes as needed and re-tweak for original calibration. As usual our repair turn-around is very quick and inexpensive.
Thanks again for everybody’s support, reviews and positive feedback !
18

L LINE IN
E
PRE OUT
M
TUBE & TRIM LOCATIONS
INSERT IN
E E
EQ OUT
M
EQ IN SELECT & MUTING 6414 6414
Low noise graded 12AX7 / ECC83
OPTOS
MIC IN
MULTICAP OP COUPLING
ME
TER
GR
ZE
RO
SE
T
3
ME
TER
DS
GR
CA
L
12AX7 / ECC83
OPTOS
7 6 DS
/ LI
M C
AL
SUPER YELLOW LED LIGHTS (remove 2 small phillips screws on meter back to access)
D1 ON = No mute D2 ON = Shorter mute time
D1,D2 OFF = Factory default mute timer ON
ON D1 D2
Power turn on delay
MULTICAP OP COUPLING
1
EQ
= U
NIT
Y G
AIN
GND
METER COMP GR CAL COMP AUDIO CAL
VU METER = +4.0 dB
12V FILAMENT REGULATOR
5 4 2
POWER TRANSFORMER
TUBES: We use 4 tubes in the VOXBOX. The substitutions listed just might work in a pinch but may not give optimum performance. Get selected tubes from Manley Labs. A tube that does not glow or has turned white inside needs to be replaced. A tube that makes too much audio noise when tapped (microphonic) or is causing increased hiss should be replaced. The life of these tubes averages more than 5 years but individual tubes cannot be predicted and may work 3 weeks or 30 years. Let the tubes cool before handling to prevent burns. The list is:
12AX7 MIC PRE GAIN STAGE; very low noise tube; a good quiet, ECC83 may work but expect more noise & microphonics and uncalibrated gain.
12AX7 EQ GAIN STAGE; bettter 5751, ECC83 or12AU7WA may work OK. 6414 LINE DRIVER; high current 12BH7A may work OK but are hard to find now, 12AT7A is the next best choice but does not have as much “poke”.
TRIMS: Each VOXBOX has been factory calibrated and tested at least four times. These trims should not be re-adjusted unless absolutely needed and should only be done by a qualified technician. The function of each trim is labeled on the diagram above each trimmer and the order is below. The complete procedure is on page 20. The technician will need these pages.
DIP SWITCHES: D1 if on, bypasses the turn-on delay. May be desired for live gigs or mobile record-ing. D2 if on, shortens the turn on delay. If the unbalanced outputs are not used, then this setting will be OK. There is only a small and “quick” thump that gets through the trans-formers to XLRs.
19
EQ CAPS ANDINDUCTORS
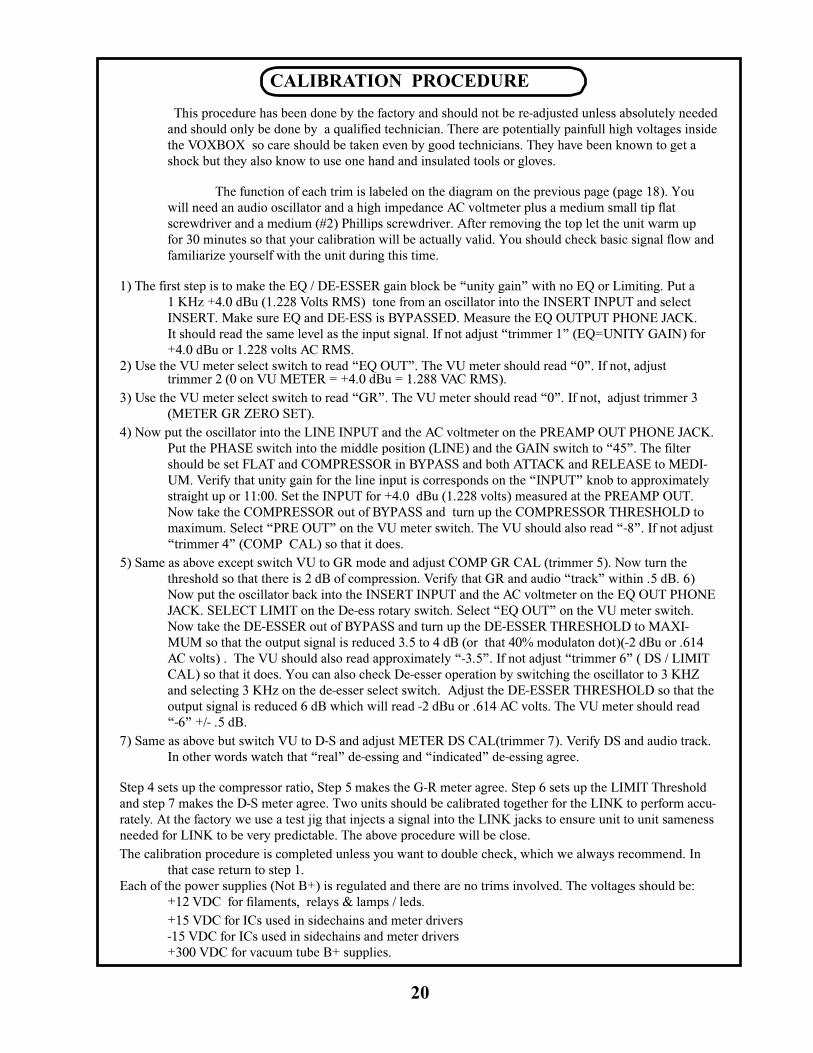
CALIBRATION PROCEDURE This procedure has been done by the factory and should not be re-adjusted unless absolutely needed
and should only be done by a qualified technician. There are potentially painfull high voltages inside the VOXBOX so care should be taken even by good technicians. They have been known to get a shock but they also know to use one hand and insulated tools or gloves.
The function of each trim is labeled on the diagram on the previous page (page 18). You will need an audio oscillator and a high impedance AC voltmeter plus a medium small tip flat screwdriver and a medium (#2) Phillips screwdriver. After removing the top let the unit warm up for 30 minutes so that your calibration will be actually valid. You should check basic signal flow and familiarize yourself with the unit during this time.
1) The first step is to make the EQ / DE-ESSER gain block be “unity gain” with no EQ or Limiting. Put a 1 KHz +4.0 dBu (1.228 Volts RMS) tone from an oscillator into the INSERT INPUT and select INSERT. Make sure EQ and DE-ESS is BYPASSED. Measure the EQ OUTPUT PHONE JACK. It should read the same level as the input signal. If not adjust “trimmer 1” (EQ=UNITY GAIN) for +4.0 dBu or 1.228 volts AC RMS.
2) Use the VU meter select switch to read “EQ OUT”. The VU meter should read “0”. If not, adjust trimmer 2 (0 on VU METER = +4.0 dBu = 1.288 VAC RMS).
3) Use the VU meter select switch to read “GR”. The VU meter should read “0”. If not, adjust trimmer 3 (METER GR ZERO SET).
4) Now put the oscillator into the LINE INPUT and the AC voltmeter on the PREAMP OUT PHONE JACK. Put the PHASE switch into the middle position (LINE) and the GAIN switch to “45”. The filter should be set FLAT and COMPRESSOR in BYPASS and both ATTACK and RELEASE to MEDI-UM. Verify that unity gain for the line input is corresponds on the “INPUT” knob to approximately straight up or 11:00. Set the INPUT for +4.0 dBu (1.228 volts) measured at the PREAMP OUT. Now take the COMPRESSOR out of BYPASS and turn up the COMPRESSOR THRESHOLD to maximum. Select “PRE OUT” on the VU meter switch. The VU should also read “-8”. If not adjust “trimmer 4” (COMP CAL) so that it does.
5) Same as above except switch VU to GR mode and adjust COMP GR CAL (trimmer 5). Now turn the threshold so that there is 2 dB of compression. Verify that GR and audio “track” within .5 dB. 6) Now put the oscillator back into the INSERT INPUT and the AC voltmeter on the EQ OUT PHONE JACK. SELECT LIMIT on the De-ess rotary switch. Select “EQ OUT” on the VU meter switch. Now take the DE-ESSER out of BYPASS and turn up the DE-ESSER THRESHOLD to MAXI-MUM so that the output signal is reduced 3.5 to 4 dB (or that 40% modulaton dot)(-2 dBu or .614 AC volts) . The VU should also read approximately “-3.5”. If not adjust “trimmer 6” ( DS / LIMIT CAL) so that it does. You can also check De-esser operation by switching the oscillator to 3 KHZ and selecting 3 KHz on the de-esser select switch. Adjust the DE-ESSER THRESHOLD so that the output signal is reduced 6 dB which will read -2 dBu or .614 AC volts. The VU meter should read “-6” +/- .5 dB.
7) Same as above but switch VU to D-S and adjust METER DS CAL(trimmer 7). Verify DS and audio track. In other words watch that “real” de-essing and “indicated” de-essing agree.
Step 4 sets up the compressor ratio, Step 5 makes the G-R meter agree. Step 6 sets up the LIMIT Threshold and step 7 makes the D-S meter agree. Two units should be calibrated together for the LINK to perform accu-rately. At the factory we use a test jig that injects a signal into the LINK jacks to ensure unit to unit sameness needed for LINK to be very predictable. The above procedure will be close.
The calibration procedure is completed unless you want to double check, which we always recommend. In that case return to step 1. Each of the power supplies (Not B+) is regulated and there are no trims involved. The voltages should be:
+12 VDC for filaments, relays & lamps / leds.
+15 VDC for ICs used in sidechains and meter drivers-15 VDC for ICs used in sidechains and meter drivers+300 VDC for vacuum tube B+ supplies.
20

TROUBLESHOOTING There are a number of possible symptoms of something not quite right. Some may be interfacing, others we will
touch on as well. If you suspect a problem the following paragraphs should help.
NO POWER, NO INDICATORS, NADA - Probably something to do with AC power. Is it plugged in? Check the fuseon the back panel. A blown fuse often looks blackened inside or the little wire inside looks broken or it’s resist-ance measures higher than 2 ohms. A very blackened fuse is a big hint that a short occured. Try replacing the fuse with a good one of the same value and size. If it blows too, then prepare to send the unit back to the dealer or factory for repair. The fuse is a protection device and it should blow if there is a problem. If the unit works with a new fuse, fine, it works. Sometimes fuses just blow for unknown reasons.
LIGHTS BUT NO SOUND - First try plugging the in and out cables into each other or some other piece of gear to verify that your wires are OK. If not fix them or replace them. Assuming that cables passed sound - it probably is still a wiring thing. The XLRs are transformer balanced outputs which require both PIN 2 and PIN 3 to be connected somewhere. When driving an unbalanced input ( inserts on some consoles) PIN 3 needs to be grounded or connected to PIN 1. Same with the unbalanced 1/4 inch jacks - if driving a balanced input you can’t ignore the negative side. It needs to be connected to the sleeve of the phone plug. Another way to do basically the same thing is join PIN 1 and PIN 3 on the XLR male at the destination. Easiest way - Use the balanced output on the VOXBOX and use a normal mic cable to drive that balanced input.
LEVELS SEEM TO BE WRONG, NO BOTTOM - Several possible scenarios. Manley uses the professional stand-ard of +4 dBm = Zero VU = 1.23 volts AC RMS. A lot of semi-pro gear uses the hi-fi reference of -10 dBm = Zero VU. This is a 14 dB difference that will certainly look goofy and may tend to distort. Often there are switches on the semi-pro gear to choose the pro reference level. We do not provide that kind of switch because of inevitable compro-mises in the signal path. If the loss looks close to 6 dB and it sounds thin then one half of the signal is lost. The cause is probably wiring again. One of the two signal carrying wires (the third is ground / shield on pin 1) is not happening. Check the cables carefully because occasionally a cable gets modified to work with a certain unit and it seems to work but its wrong in other situations. If only one side of the VOXBOX (only the Micpre, or only the EQ) exhibits this problem, it may be a problem in the VOXBOX. See the next item.
ONE SIDE WORKS FINE BUT THE OTHER SIDE IS DEAD - Let’s assume this is not wiring. We are pretty sure it is the VOXBOX. If it were solid state you would generally send it back for repair. Being a tube unit, you can prob-ably find the problem and fix it yourself in a few minutes. Not too many years ago, even your parents could “fix” their own stuff by taking a bag of tubes down to the corner and checking the tubes on a tube tester - but these testers are hard to find today. A visual inspection can usually spot a bad tube just as well. Be careful - there are some high volt-ages inside the chassis and tubes can get pretty warm, but if you can replace a light bulb you should be able to cruise through this. Before you remove a tube, just take a look at them powered up. They should glow a bit and they should be warm. If one is not, you have already found the problem. The tube’s filament (heater) is burnt out or broken like a dead light bulb. The other big visual symptom is a tube that has turned milky white - that indicates air has gotten into the tube or we’ve joked “the vacuum leaked out”. Either way replace the tube. Manley can ship you a tested one for a reasonable price. Before you pull a tube, pull the power out, let the unit sit and cool and discharge for a minute or two, then swap the new tube in, then power, then check. Gentle with those tubes, don’t bend the pins by trying to insert the tube not quite right. A little rocking of them as you pull them out or put them in helps. The two taller tubes are the same so you can swap them. If the problem follows the tube you found the problem - a bad tube. No soldering, no meters, one screwdriver - easy. See page 19 for a diagram of tube locations.
HUM - Once again - several possibilities - several cures. Most likely it is a ground loop. Ideally each piece of gear should have one ground connection and only one. However, the short list of grounds include the AC mains plug, the chassis bolted to a rack with other gear, each input and each output. The two most common procedures are: try a 3 pin to 2 pin AC adapter (about a dollar at the hardware store).This while legal in many countries can be danger-ous- We went one better; Method two - On the back panel loosen the GROUND TERMINALS and slide the small metal ground strap to one side. This is way better than “method one” because it is safer and removes another possible source - the chassis grounding via the rack. Method three - cutting the shield on oneend of each cable. This is done by some studios at every female XLR to “break” all ground loops. All the other gear in the rack is “dumping” ground noise onto the ground. Try removing the VOX BOX from the rack so that it is not touching any metal. You just may have cured a non-loop hum. Some gear radiates a magnetic field and some gear (especially if it has audio transform-ers) might receive that hum. A little distance was all it took.
21

IT MAKES NOISES WHEN THE FRONT PANEL IS TAPPED - An easy one. Some tubes become microphonic over time. That means they start acting like a bad microphone. Vibration has caused the supports for the little parts in the tube to loosen and now the tube is sensitive to vibration. Easy - Replace the tube. Which one? The one that makes the most noise when you tap it. Usually this will be one of the smaller (gain stage) tubes closest to the front. The VOXBOX will have to be on, connected and speakers up but not too loud for the sake of your speakers.
IT GOT HISSY - Also easy. This is again a common tube symptom. You could swap tubes to find the culprit but an educated guess is OK too. Generally the first tube in the path is the one with the most gain and dealing with the soft-est signals. The usual suspect is the shorter tubes - the 12AX7 in the preamp or EQ. You may find that you need to choose the quietest tube out of several of that type - like we do at the factory.
DISTORTION - This might be a tube. Swapping is a good way to find out. It may be a wiring thing or mismatch as well. Wiring problems usually accompany the distortion with a major loss of signal. Mismatches are a bit tougher. The VOX BOX has a high input impedance and low output impedance that can drive 600 ohm inputs of vintage “style” gear. Best place to start is check your settings and meters. It may not be your first guess.
DC OR SOMETHING AT THE OUTPUT THAT IS INAUDIBLE - The 1/4” unbalanced outputs have a frequency response that goes way down to below 1 Hz. A little very low frequency noise may be seen as speaker movement when monitors are pushed to extreme levels. The XLRs do not exhibit this because the transformers filter below 8 Hz. Also the unbalanced outputs do not like long cheap high capacitance cable. Occasionally a very high frequency oscilla-tion (200 kHz to 400 kHz) may occur in these conditions. Once again use the XLR outputs. Problem solved.
THE METERS ARE OUT OF CALIBRATION - If the problem only seems to be when the unit is just turned on it’s normal. It should warm up. It might be a half dB out for 15 minutes - relax. Everything should stabilize within 15 minutes as the temperature reaches “normal”. Your unit will have been factory calibrated and tested at least 4 times before you received it. Sometimes parts drift a bit in value over the years, or you have repaced tubes and want the unit calibrated at the same time, or you just want it as perfect as it can be. These are good reasons t go through the calibra-tion procedure or sent it to a technician or the factory for a tweak. If you send the unit to a tech, you should include this manual because they will need it. If you do it yourself, you will need an audio oscillator and good voltmeter and a few screwdrivers and it would be nice to have a Scope but not necessary. 4 out of 5 of the trims are just for metering and the audio trim just sets unity gain for the EQ. A little advice: if its not broke - don’t fix it. We get a number of units back because someone thought they should tweak and couldn’t.
Once in a while we get a call from a client with a “digital studio” with confusion about levels. They usually start out by using the digital oscillator from their workstation and finding pegged VU meters the first place they look and they know it can’t be the workstation. Even a -6 level from their system pegs the meters. Some of you know already what ‘s going on. That -6 level is referenced to “digital full scale” and the computer might have 18 or 18.5 or 20 dB of head-room built in. That -6 level on the oscillator is actually a real world analog +12 or +14 and those VU meters don’t re-ally go much further than +3. There are a few standards and plenty of exceptions. One standard is that pro music (non-broadcast) VU meters are calibrated for 0VU = +4 dBm =1.228 volts into 600 ohms. Another standard is that CDs have a zero analog reference that is -14 dB from digital full scale or maximum. This allows sufficient peak headroom for mixed material but would be a bad standard for individual tracks because they would likely distort frequently. This is why digital workstations use higher references like 18 and 20 -to allow for peaks on individual sounds. It may be too much in some cases and too little in others. Add two other sources of confusion. Peak meters and VU meters will al-most never agree - they are not supposed to. A peak meter is intended to show the maximum level that can be recorded to a given medium. VU meters were designed to show how loud we will likely hear a sound and help set record levels to analog tape. By help, we mean that they can be only used as a guide combined with experience. They are kinda slow. Bright percussion may want to be recorded at - 10 on a VU for analog tape to be clean but a digital recording using a good peak meter should make the meter read as high as possible without an “over”. Here is the second confu-sion: There aren’t many good peak meters. Almost all DATs have strange peak meters that do not agree with another company’s DAT. One cannot trust them to truly indicate peaks or overs. Outboard digital peak meters (with switchable peak hold) that indicate overs as 3 or 4 consecutive samples at either Full Scale Digital (FSD) are the best. They won’t agree with VU meters or Average meters or BBC Peak Programme (PPM) meters either. Each is a different animal for different uses. The Compressor and Limiter in the VOXBOX should help digital and analog achieve consistent levels but if you are recording to digital, use your machines meters for the recording level. The VU meter on the VOX BOX is great for analog tape, establishing “loudness” decisions and for calibrating levels using an oscillator but not for digital peaks. Some engineers can interpret a VU and get near ideal digital levels but it takes years of experience because it depends on the sound. We sometimes think about adding an accurate and useful peak LED but that question of “accurate to what” comes up. If it were just an LED indicating when our units reached clipping you’d probably find the machines’s meters would be pegged.
22

SPECIFICATIONSMANLEY VOXBOX
PREAMPLIFIER EQ SECTION BOTH
Maximum Output : 1.5% THDUnbalanced: 20-20K +31 dBv Balanced: 1 KHz +31 dBv`
Headroom (referenced to +4 dBv) 27 dB
THD & Noise (1kHz @ +20 dBm) .3%
Frequency Response: +/- 1 dB 20 Hz to 60 kHz
Noise Floor (settings to minimum) -86 dB (A Weight)
Signal to Noise 113 dB typical
Maximum input level MIC +20
Input Impedance MIC 2000 ohmsLINE 3000 ohmsINST 100,000 ohms
Maximum Gain MIC 60 dBLINE 20 dBINST 20 dB
Maximum Compression/Limiting 16 dB
Maximum Limiting with +4 dBm sine 8 dB
Attack Times 4 mS - 70mS
Release Times .3, .5, 1, 2, 5 Sec
Compress / Limit Ratios 3:1
+31 dBv+31 dBv
27 dB
.3%
10 Hz to 100 kHz
-89 dB (A Weight)
116 dB typical
LINE +40
3000 ohms
INSERT 0dB (internal trim)
32 dB
5 dB
2 mS
.5 Sec
10:1
+31 dBv+31 dBv
27 dB
.35%
20 Hz to 60 kHz
-84 dB
110 dB typical
Power Consumption 24 watts 200 mA @ 115VAC
Fuse Mains 120VAC= 1 Amp Slo-BloMains 240VAC= 1/2 Amp Slo-Blo
Size (3U) 19” x 5.25” x 10”
Actual Weight 14 Lbs
Shipping Weight 21 Lbs
(gain pot & compressor before tubes and these allow much range, however transformers may saturate)
23

24

20
15
10
5
0
-5
-10
-15
-20 -20 -15 -10 -5 0 5 10 15
20
15
10
5
0
-5
-10
-15
-20
+20
-20 +20
0
-2
-4
-6
-8
-10
-12
-14
-16
-18
-20 1K
-15 -10 -5 0 5 10 15
COMPRESSOR THRESHOLD AT MAXIMUM MED ATTACK / MEDIUM RELEASE SHOWS 3:1 SLOPE
LIMITER THRESHOLD AT MAXIMUM
Slope starts at 5:1 quickly becomes 10:1 then towards 20 dB of limiting begins to return to normal. Opto has 20 dB range
DE-ESSER NOTCHES ( the sense filters are shown are 3K and 12K) METER SHOWS NOTCH DEPTH
1.25 2K 2K5 1K6 4K 5K 8K 10K 12K5 3K1 16K 20K 25K 6K2
3K 6K
25
9K 12K
MORE VOXBOX CURVES

ARTIST
SONG
INSTRUMENT / TRACK
MIC NOTES
DATE
ENGINEER
NOTES
ARTIST
SONG
INSTRUMENT / TRACK
MIC NOTES
DATE
ENGINEER
ARTIST
SONG
INSTRUMENT / TRACK
MIC NOTES
DATE
ENGINEER
TEMPLATES FOR STORING SETTINGS
26
COPY THIS PAGE DO NOT WRITE ON THIS MASTER