manual - cooler masterassets.coolermaster.com/gaming/download/mice/reaper/reaper-manual... · this...
TRANSCRIPT

MANUAL

1
TABLE OF CONTENTS
INTRODUCTION ………………………………………………… 2
PACKAGE CONTENTS …………………………………………. 3
TECHNICAL REQUIREMENTS …………………………………... 3
PRODUCT SUPPORT ………………………………................ 3
SPECIFICATIONS ………………………………………………… 4
INSTALLATION GUIDE ………………………………................ 5
DEVICE LAYOUT ………………………………………………… 6
SOFTWARE GUIDE ………………………………………………… 7
LEGAL INFORMATION ………………………………................ 18

2
INTRODUCTION
The CM Storm Reaper is the first mouse from the new Aluminum series performance
peripherals by Cooler Master. This mouse has been built with the combined strength of
durability, utility, capability, and style. This manual is here to help make you comfortable
with both your mouse, its available software and to ensure you are getting the most out
of what the mouse has to offer.
Cooler Master has a strong history with aluminum. Thanks to case lines like the
Cosmos or ATCS, we are very comfortable with aluminum and we know how to form it
into high quality designs and high quality products. That same attitude is being brought
into the CM Storm line with the Aluminum series of peripherals. We’re combining both
form and function to make something fantastic.
We want to make sure you have the best hardware available to you. The Reaper
contains the same sensor used in our exceptional CM Storm Havoc and CM Storm
Sentinel II Advanced mice, the Avago ADNS-9800 laser sensor. The Avago ADNS-9800
is a high precision sensor that we’ve had a lot of time to perfect. This allows us to give
you everything you could want out of the Reaper.
The CM Storm Reaper software is a thing of beauty. Each of the 8 buttons are
customizable allowing for standard mouse functions, media control keys, and fully
programmed macros. You can utilize up to three button and DPI profiles to be active on
the mouse. This will allow for easy switching with a press of a button or in the software
so you have multiple configurations for whichever game or spreadsheet you are tearing
through.
If this guide does not answer a question about this device or you have any questions
about any other Cooler Master product, please do not hesitate to find help at
http://support.coolermaster.com

3
PACKAGE CONTENTS
CM Storm Aluminum Reaper Mouse
CM Storm Reaper Software
User manual
TECHNICAL REQUIREMENTS
PC with USB port
Windows 8 / 7 / Vista / XP
75MB of free disk space
Internet connection for software and firmware updates
PRODUCT SUPPORT
2 years limited manufacturer warranty
General and technical support at http://support.coolermaster.com
4
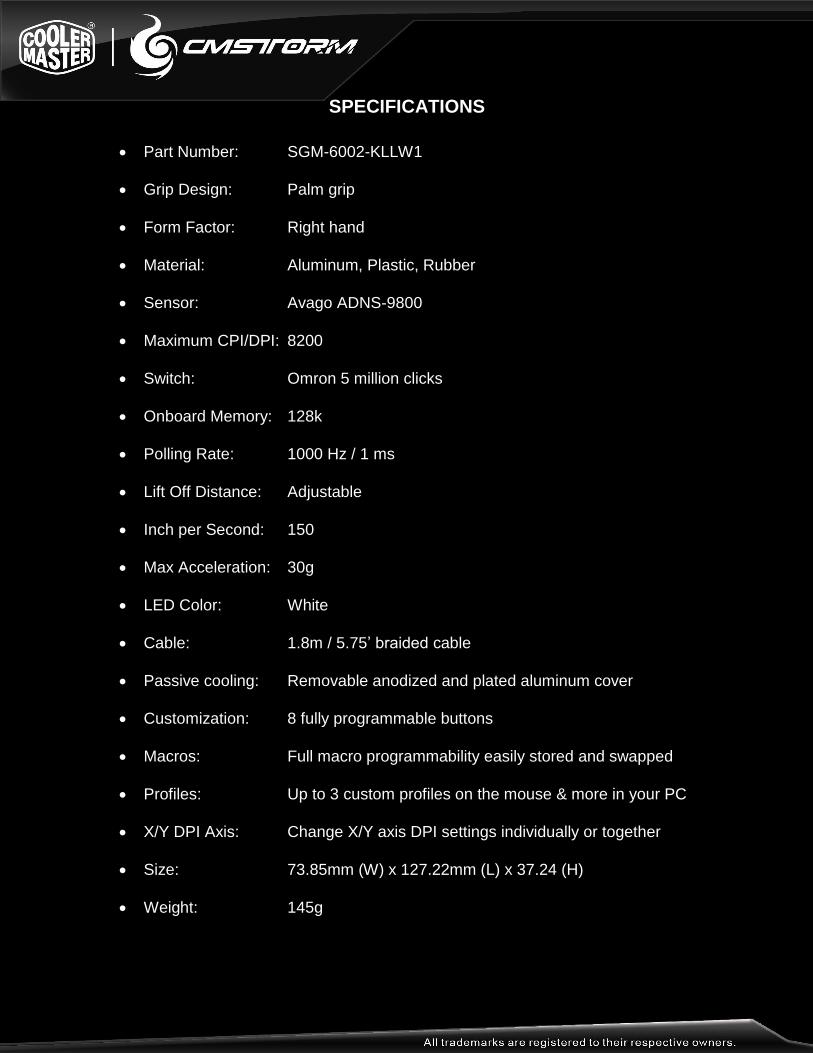
SPECIFICATIONS
Part Number: SGM-6002-KLLW1
Grip Design: Palm grip
Form Factor: Right hand
Material: Aluminum, Plastic, Rubber
Sensor: Avago ADNS-9800
Maximum CPI/DPI: 8200
Switch: Omron 5 million clicks
Onboard Memory: 128k
Polling Rate: 1000 Hz / 1 ms
Lift Off Distance: Adjustable
Inch per Second: 150
Max Acceleration: 30g
LED Color: White
Cable: 1.8m / 5.75’ braided cable
Passive cooling: Removable anodized and plated aluminum cover
Customization: 8 fully programmable buttons
Macros: Full macro programmability easily stored and swapped
Profiles: Up to 3 custom profiles on the mouse & more in your PC
X/Y DPI Axis: Change X/Y axis DPI settings individually or together
Size: 73.85mm (W) x 127.22mm (L) x 37.24 (H)
Weight: 145g

5
INSTALLATION GUIDE
1. Plug in the CM Storm Reaper into your computer
2. Obtain the software at http://www.cmstorm.com or http://www.coolermaster-
usa.com
3. Run the installer and follow its instructions (includes .Net 4.0)
4. Launch the Reaper software and allow it to configure
5. Refer to the Software Guide below for support on use 6. Enjoy!

6
DEVICE LAYOUT
1. Left Click button 2. Right Click button 3. Scroll Wheel and Middle Click button 4. Mouse button 4, default to DPI + 5. Mouse button 5, default to DPI – 6. Removable aluminum plate for passive hand cooling 7. Mouse button 6, default to 200 DPI when held 8. Mouse button 7, default to navigation forward 9. Mouse button 8, default to navigation backward 10. Front facing LEDs 11. Avago ADNS-9800 Laser sensor 12. Super slick mouse feet

7
SOFTWARE GUIDE Main Tab
The Main Tab is the default tab when you first open the Reaper software. On this page, you can change the functions of every button your Reaper. The profile change options at the bottom are available on every tab view.

8
Advanced Tab
The Advanced Tab allows you to adjust the DPI of your mouse, LED settings, and other advanced mouse settings. You can adjust the DPI levels available to switch on the mouse with the DPI + and DPI – button functions.

9
DPI can be adjusted for the X and Y axes of the mouse separately or together using the chain link icon between the X and Y columns and adjusting the DPI slider’s top and bottom half once unlinked.
You can adjust the USB polling rate up to a maximum of 1000 Hz.
The LED controls allow you to adjust the brightness of the LEDs and how they act on your mouse. You can keep the LEDs on, off, in a dimming and brightening “breathing” state, or have them turn off and on with your button clicks (Rapid Fire option)
The other mouse options available are the Windows OS mouse sensitivity and double click speed adjustments as well as the response time for button clicks. You may lock the OS settings to the Reaper software so other Windows settings cannot change them. You can also turn on/off Angle Snapping here. The black area to the right allows you to test your Double Click speed settings.

10
Macro Tab
The Macro tab is where you can program button combinations to run on a single click, release, hold, or trigger a loop until clicked again to stop the loop. The macro programming allows you to do everything from perform a particular button combination once or to rapidly click your left mouse button until you tell it not to. You can also assign macros to certain buttons and profiles directly from here without going to the Main tab and changing the profile at the bottom.

11
The New, Delete, Load, and Save allow you to make adjustments to the macro list available in the software. All Macros are stored as files on your computer.
New creates a new macro file.
Delete removes the macro file from your computer and from the list on the left.
Load current macro to the mouse
Save needs to be pressed to save any changes to the currently highlighted macro before doing anything else.
The Execution dropdown affects how the macro is triggered and how it runs:
Press to run once – The macro is run through a single cycle as soon as the button is pressed down
Release to run once – The macro is run through a single cycle as soon as the button is released from a click
Press to loop – The macro runs and repeats on continuous cycles as soon as the button is pressed down. Pressing again will stop the cycle.
Release to loop – The macro runs and repeats on continuous cycles as soon as the button is released from a click. Press and release to stop the cycle.
Hold to loop – The macro will run and repeat on a continuous cycle as long as the button is held down. Releasing the button will stop the loop.
You select which macro you want to see or edit using the Macro name field and clicking once on the macro. The window to the right shows the macro in full form and what buttons are programmed into it with timing between the actions.

12
The With Time function will include any time delay (or lack of) between button presses when programming the keyboard.
The Insert option allows you to put in a command in the middle of an already programmed macro in case you missed a key or needed to tweak something.
The Cycle dropdown changes the delay before the macro repeats when looping.
The Record button with the red circle begins recording any and all keystrokes and button clicks to record actions for the macro.
The Stop button with the black square stops macro recording when clicked (the left clicking of the Stop button is not recorded in the macro).
The Delete Action with the black X deletes a highlighted action in the right window of a macro in case a wrong button was pressed or timing needs to be redone.
The Up and Down arrows move a highlighted action in the right window up and down the list so you can change which actions happen in which order without having to re-record.
The bar with # / 256 shows how full your macro is, as each macro can handle up to 256 actions.

13
Profiles Tab
The Profiles tab allows you to manage what profiles are loaded into your mouse so you can switch between them. You are able to save profiles to your PC, including profiles from other users, and then load them into your mouse with this tab.

14
The left window master list indicates what profiles are saved on your system and loaded into the CM Storm Reaper software program. The window on the right indicates the four profiles loaded into the mouse. The arrows in the center control the import and export of profiles to and from the Reaper mouse.
Highlighting a profile in the left master list and one of the four options in the right window, then clicking the Right arrow will program the Master list profile into the highlighted profile on the mouse.
Highlighting a profile on the right window and clicking the Left arrow button will export the profile off the mouse if it is not in the master list.
The New, Delete, Import, and Export buttons allow you to control the list on the left:
New creates a new profile save file and list it with the name you choose
Delete will remove a profile from the list and your computer
Import allows you to add a profile from file, such as one from a friend
Export allows you to save a profile elsewhere on your PC for backup or sharing

15
Library Tab
The Library Tab allows you to manage your macro database. You can import macro files from other sources into your database and export your macros to other locations, including the mouse, for sharing or backup. You can also delete macros on this page similar to the Macro Tab. This screen also allows you to view various profile and button setups with the dropdown menus on the right. It will only show you what, if any, macros are attached to that button.

16
The left window is your stored macro database in the Reaper software folder. The right area allows you to navigate to particular buttons on the different loaded profiles on the mouse to apply macros or import them to the PC using the center arrow buttons.
The first dropdown on the right selects the Profile on the mouse
The second dropdown on the right selects the Button in that profile
The third box is where the macro on that button, if there is one, will show up to tell you

17
Support Tab
The support tab will give you information on further support with a button to the CM Storm page which contains the latest drivers and FAQs for your Reaper and other CM Storm products. The Version Info button will provide you a box noting the version information for both the software and the firmware on the mouse.

18
LEGAL INFORMATION
Cooler Master Warranty Warranty all (non-networking) products purchased from COOLER MASTER as free from defects in material and workmanship for normal use by the original purchaser for warranty period. The Cooler Master Warranty would like to assure all of the users of Cooler Master Products to be free from any defects as a result of faulty manufacturing or faulty components under the following terms and conditions: COOLER MASTER is not responsible for damage to or loss of any programs, data, or removable storage media. You are responsible for backing up any programs or data on removable storage media. Except for the warranties set forth herein, COOLER MASTER disclaims all other warranties, expressed or implied or statutory, including but not limited to the implied warranties of merchantability or fitness for a particular purpose. Any implied warranties that may be imposed by applicable law are limited to the terms of this limited warranty. In no event shall COOLER MASTER be liable for any incidental, special or consequential damages, including but not limited to loss of business, profits, data or use, whether in an action in contract or tort or based on a warranty, arising out of or in connection with the use or performance of the product, even if COOLER MASTER has been advised of the possibility of such damages. You agree that repair, replacement, as applicable, under the warranty services described herein is your sole and exclusive remedy with respect to any breach of the COOLER MASTER limited warranty set forth herein. if, despite the foregoing limitations, for any reason COOLER MASTER becomes liable to you for damages incurred by you in connection with this agreement, then, the liability of COOLER MASTER will be limited to the amount equal to the latest distributors price. Some states or provinces/jurisdictions do not allow the exclusion or limitation of incidental or consequential damages for consumer products, and some states or provinces/jurisdictions do not allow limitations on how long an implied warranty lasts. In such states or provinces/jurisdictions, the exclusions or limitations of this limited warranty may not apply to you. This limited warranty gives you specific legal rights. You may also have other rights that vary from state to state/jurisdiction to jurisdiction. You are advised to consult applicable state and provincial/local laws.
19
1. Warranty Length All products from Cooler Master at least carry 1 year warranty from the date of purchase, with the exception of power supply units which carry a 2-5 year warranty. If no proof of purchase (receipt or invoice of purchase) can be presented upon request, Cooler Master cannot be held responsible for warranty service. 2. Who is Protected? The original customer purchasing the Cooler Master Product is covered under the Cooler Master Warranty Program. 3. What is and is NOT Covered It is important to note that our warranty is not an unconditional guarantee for the duration of the Program. Any replaced parts become the property of Cooler Master. The Program does not apply to the software component of a product or a product which has been damaged due to accident, misuse, abuse, improper installation, usage not in accordance with product specifications and instructions, natural or personal disaster, or unauthorized alterations, repairs or modifications.The Program does not cover any events such as below:
Any damages unrelated to manufacturing defects.
Any unsuitable environment or use of the product in Cooler Master Opinion.
Any product which has been modified without official permission from Cooler Master, or on which the serial number or warranty sticker has been defaced, modified, or removed.
Damage, deterioration or malfunction resulting from:
Accident, abuse, misuse, neglect, fire, water, lightning, or other acts of god, commercial or industrial use, unauthorized product modification or failure to follow instructions included with the product.
Third party products using Cooler Master Components will not be covered by warranty. See your vendor or the manufacturer for information about servicing.
Repair or attempted repair by anyone not authorized by Cooler Master, Inc.
Any shipment damages (claims MUST be made with the carrier).
Unauthorized repairs to a Cooler Master product (power supplies) will void the warranty offered by the Program. Cooler Master reserves the right to refuse to service any product which has been altered, modified or repaired by non-Cooler Master Service personnel.
Cooler Master does not warrant that this product will meet your requirements. It is your responsibility to determine the suitability of this product for your purpose.
Removal or installation charges.
You are responsible for the cost of shipping the product to Cooler Master. Cooler Master pays the cost of returning a product to you.
Cooler Master reserves the right to replace the product with a service product at their sole discretion at any time.

20
4. Local Law and Your Warranty This warranty gives you specific legal rights. You may also have other rights granted under local law. These rights may vary. 5. Limitations of Implied Warranties There are no other oral or written warranties, expressed or implied, including but not limited to those of merchantability or fitness for a particular purpose. The duration of implied warranties is limited to the warranty length specified in Paragraph one. 6. To Obtain Technical Support If you need help installing or troubleshooting a product please submit a technical support request form here. 7. Shipping Based on company policy, customers are responsible for shipping costs to ship back the defective item for RMA repair/replace. Once the item is repaired/replaced, Cooler Master will ship the item back to the customer. Shipping methods will be at Cooler Master's discretion.Cooler Master will not be able to ship repaired/replaced items in the same method as the customer's because not only would this not be efficient, but it may delay the return of the repaired/replaced item. Therefore, Cooler Master reserves the rights to ship according to what it deems the most efficient standard method of shipping. 8. Exclusion of Damages (Disclaimer) Cooler Master's sole obligation and liability under this Program is limited to the repair or replacement of a defective product at our discretion. Cooler Master shall not, in any event, be liable to the purchaser or any third party for any incidental or consequential damage, (including, but not limited to, damages resulting from interruption of service and loss of business), or liability in tort relating to this product or resulting from its use or possession.