manual ftp / webdeploy / webdav - webland.ch · ftp / webdeploy / webdav 4 select “connect”...
TRANSCRIPT

FTP / WebDeploy / WebDAV
Manual
Copyright © Webland AG

FTP / WebDeploy / WebDAV
Table of Contents
Introduction
FTP
WebDeploy
FrontPage
WebDAV
Instructions
FTP
Windows
Mac
WebDeploy
Windows
FrontPage
Windows
WebDAV
Windows
Mac
FTP / WebDeploy / WebDAV
IntroductionFTP
If you have selected access via FTP, you can download your data to our server using any FTP program.
FTP is a file transfer protocol that makes it easy to download files from servers anywhere in the world - or the
reverse - to upload them to servers all over the world.
You have one or more password protected FTP access points of your own to our or your virtual server. Password
protection is necessary to keep unauthorised persons from accessing your directory and changing or deleting
your data. The advantage of your own FTP access is that you can change your pages without our assistance, as
often as you want. All changes are available online in the internet immediately after you transfer them!
You can manage FTP-users directly in the System Configurator.
WebDeploy
WebDeploy (Web Deployment Tool) makes migration, management and supply of IIS-webservers, web
applications and websites easier.
Microsoft WebMatrix is available to implement it.
Using Microsoft WebMatrix, you can easily create new websites based on a template or an existing, free open-
source application. These websites can then be published in the internet.
WebDAV
WebDAV (Web-based distributed authoring and versioning) is an open standard for preparing data in the
internet. With it, users can access their data as they would on an online hard drive. Technically speaking,
WebDAV is an expansion of the protocol HTTP/1.1, that removes certain restrictions from HTTP. Until now,
online forms have for the most part only offered the ability to upload single files (HTTP-POST). With WebDAV
entire directories can be transferred.
WebDAV, you can directly activate in the System Configurator (from wl34 or higher).
3

FTP / WebDeploy / WebDAV
InstructionsFTP
Windows
FileZilla
Proceed as follows:
1 If you do not have an FTP program, download e.g. the program FileZilla. You can find the
program under the following link:
FileZilla Download
2 Install the FileZilla FTP-program according to the manufacturer’s instructions.
(The installation of additional software is not necessary and can usually be deactivated during the
installation.)
3 Start the FileZilla FTP-program.
4 Under “Server”, enter your domain name without www.
(Note: Until your domain name is activated, use your RealTime host name. You will find this under your
access confirmation (e.g. WL15WWW23.WEBLAND.CH).
As “username” enter the username according to your access confirmation (WebServer Login Data, e.g.
www23)
As password, enter the password according to your access confirmation (WebServer Login Data).
Click on “connect” in order to establish the FTP connection.
4

FTP / WebDeploy / WebDAV
5 You will see the files in your local directories in the left window. On the right side you will see the
directory structure for your web server. Click on the “plus” sign.
Now go into the left window and select the directories and files that you want to load on your server.
You can now “drag & drop” the files (onto the right side) and load them on your server.
You can get additional support under FileZilla quick guide
Attention! It may be necessary to set up a proxy for some online services. If you cannot establish a
connection with our server, contact your ISP’s help hotline in order to find out what you need to do in
order to set up an FTP connection to upload files to an external server. Companies that have a network
that directly connects with the internet use so-called firewalls for their own protection. These firewalls can
be set up such that FTP connections are not possible or are only possible with highly specialised settings.
In this case, you need to contact your system administrator.
5

FTP / WebDeploy / WebDAV
WS_FTP
Proceed as follows:
1 If you do not have the WS_FTP program yet, then contact us by e-mail so that we can send the software
to you:
2 Establish the internet connection with your ISP or online service.
3 Start the FTP-program.
6

FTP / WebDeploy / WebDAV
4 Click on “New” in order to establish a new FTP connection.
Give this connection a name under “Profile Name”, e.g. your domain name.
Enter your domain name without www under “Host Name/Address” (Note: Until your domain name is
activated, use your RealTime host name. You will find it on your access confirmation (e.g.
WL15WWW23.WEBLAND.CH)).
Under “Host Type”, select “Automatic Detect”.
Enter your username according to our access confirmation (WebServer Login data) as your “User ID”
(e.g. www23).
Enter your password according to our access confirmation (WebServer Login data) as your “Password”.
Click on “OK” in order to establish the FTP connection.
7

FTP / WebDeploy / WebDAV
5 In the left window you will now see the files in your local directories. On the right side, you will see the
directory structure for your server.
Go into the left window and select the directories and files that you want to load on your server.
You pages will be downloadable on the internet immediately after the upload.
Attention! It may be necessary to set up a proxy for some online services. If you cannot establish a
connection with our server, contact your ISP’s help hotline in order to find out what you need to do in
order to set up an FTP connection to upload files to an external server. Companies that have a network
that directly connects with the internet use so-called firewalls for their own protection. These firewalls can
be set up such that FTP connections are not possible or are only possible with highly specialised settings.
In this case, you need to contact your system administrator.
8

FTP / WebDeploy / WebDAV
WebMatrix
Proceed as follows:
1 If you do not yet have a copy of the WebMatrix program, download it using the following link:
WebMatrix Download
2 Install the program following the manufacturer’s instructions.
3 Start the WebMatrix program.
4 Select the icon “Publish” in the directory “Starting Page”
5 Select “FTP” under “Protocol”.
Enter your domain name without www. under “Server”.
(Note: Until your domain name is activated, use your RealTime host name. You will find it on your access
confirmation (e.g. WL15WWW23.WEBLAND.CH)).
Leave the field “Website Pathway” empty.
Enter your username according to our access confirmation (WebServer Login data) as your “Username”
(e.g. www23).
Enter your password according to our access confirmation (WebServer Login data) as your “Password”.
Under “Target URL”, enter your domain name in the form: “http://yourdomain.ch/”.
You may activate the control box “Save Password” if you want.
9

FTP / WebDeploy / WebDAV
6 Now check the connection by selecting the button “Test Connection”.
7 A successful connection will be shown with “Connection successfully established”.
8 Select “Save” to save your data.
10
FTP / WebDeploy / WebDAV
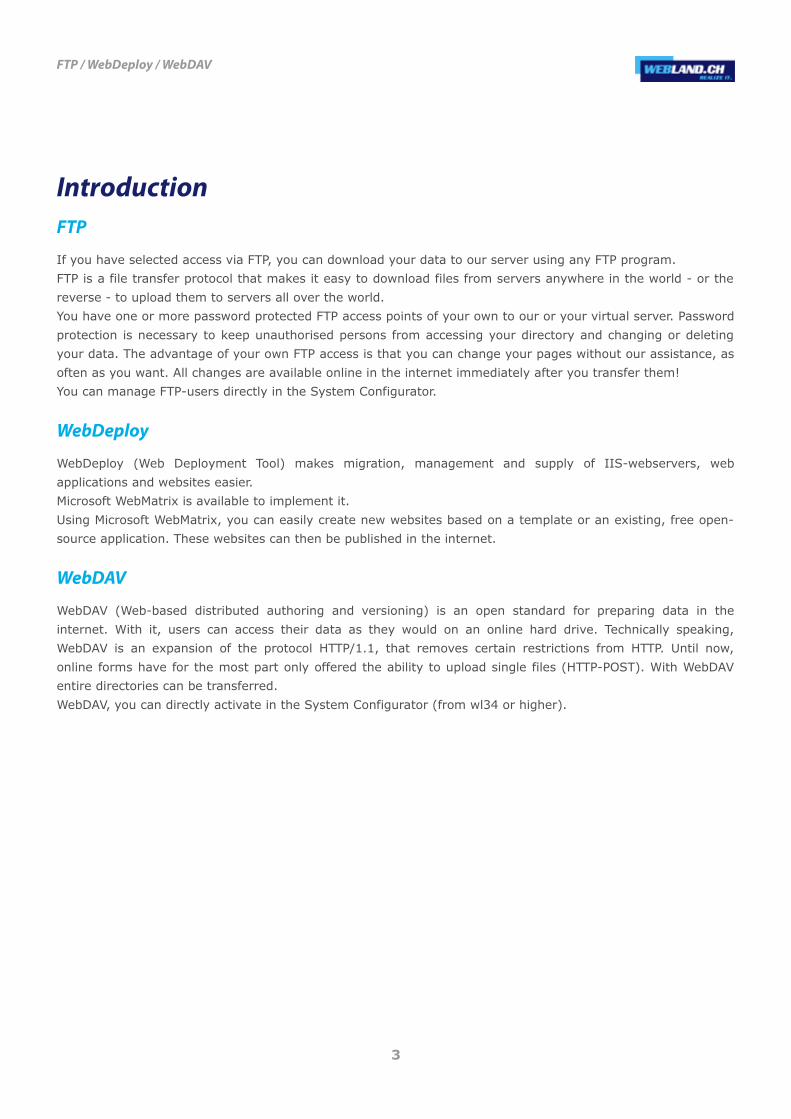
9 A test will now be run automatically. Answer with “Yes”.
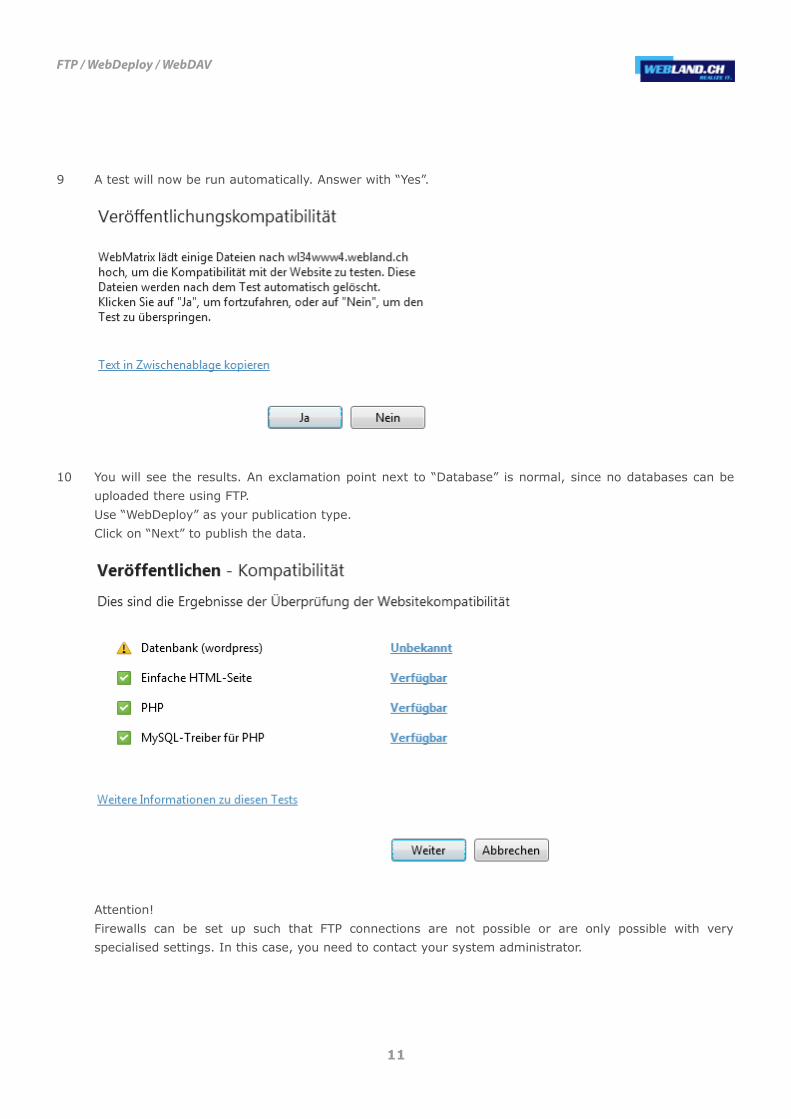
10 You will see the results. An exclamation point next to “Database” is normal, since no databases can be
uploaded there using FTP.
Use “WebDeploy” as your publication type.
Click on “Next” to publish the data.
Attention!
Firewalls can be set up such that FTP connections are not possible or are only possible with very
specialised settings. In this case, you need to contact your system administrator.
11

FTP / WebDeploy / WebDAV
Dreamweaver
Proceed as follows:
1 Establish the internet connection to your ISP or online service.
2 Start Dreamweaver.
3 Under the “Site” -> “Edit Sites” menu, select the site you want to edit. In the “Advanced” Tab, enter the
following:
Under “Access”, select FTP.
Enter your domain name as the FTP host.
(Note: Until your domain name is activated, use your RealTime host name. You will find it on your access
confirmation (e.g. WL15WWW23.WEBLAND.CH))..
Under “Login” enter the username according to our access confirmation (Webserver login data, e.g.
www.23).
Enter the password according to our access confirmation as “Password” (Webserver login data).
Then click on “OK” to establish the FTP connection.
12

FTP / WebDeploy / WebDAV
4 Establish the FTP connection with your server
Select the directories and files that you want to transfer using your mouse and click on the arrow that
points from the directory on your computer to the directory on our server (generally the arrow from
bottom to top). Now all of the selected files will be transferred.
Your pages will be available on the internet immediately after the upload.
Attention! It may be necessary to set up a proxy for some online services. If you cannot establish a
onnection with our server, contact your ISP’s help hotline in order to find out what you need to do in
order to set up an FTP connection to upload files to an external server. Companies that have a network
that directly connects with the internet use so-called firewalls for their own protection. These firewalls can
be set up such that FTP connections are not possible or are only possible with highly specialised settings.
In this case, you need to contact your system administrator.
13

FTP / WebDeploy / WebDAV
GoLive
Proceed as follows:
1 Establish the internet connection to your ISP or online service.
2 Start GoLive.
14

FTP / WebDeploy / WebDAV
3 Select “Server” in the “Edit” menu.
Click on the “New Object” icon.
You can give this connection a name under "Pseudonym", e.g. your domain name.
Enter your domain name without www but with the ftp:// prefix, e.g. ftp://YourDomain.ch.
(Note: Until your domain name is activated, use your RealTime host name. You will find it on your access
confirmation (e.g. WL15WWW23.WEBLAND.CH)).
Under “Username” enter the username according to our access confirmation (Webserver login data, e.g.
www.23).
Enter the password according to our access confirmation as “Password” (Webserver login data).
Click on “OK”.
15

FTP / WebDeploy / WebDAV
4 Select “Connect” under the “Website”-> “FTP-Server” menu.
Select the directories and/or files that you want to transfer using your mouse and drag them from the left
window to the right. Now all of the selected files will be transferred.
Your page will be available on the internet immediately after the upload.
Attention! It may be necessary to set up a proxy for some online services. If you cannot establish a
connection with our server, contact your ISP’s help hotline in order to find out what you need to do in
order to set up an FTP connection to upload files to an external server. Companies that have a network
that directly connects with the internet use so-called firewalls for their own protection. These firewalls can
be set up such that FTP connections are not possible or are only possible with highly specialised settings.
In this case, you need to contact your system administrator.
16

FTP / WebDeploy / WebDAV
CuteFTP
Please proceed as follows:
1 Establish an internet connection to your ISP or Online Service.
2 Start the FTP program CuteFTP.
17

FTP / WebDeploy / WebDAV
3 Select “Site Manager” under the “File” menu and enter the following data:
You can give this connection a name under “Label for site”.
Under “FTP Host Address”, enter your domain name without www.
(Note: Until your domain name is activated, use your RealTime host name. You will find it on your access
confirmation (e.g. WL15WWW23.WEBLAND.CH)).
Under “FTP site User Name” enter the username according to our access confirmation (Webserver login
data, e.g. www.23).
Enter the password according to our access confirmation as “Password” (Webserver login data).
Then click on “Connect” to establish the FTP connection.
18

FTP / WebDeploy / WebDAV
4 In the left window you will see the files in your local directory. On the right side you will see the directory
structure of your webserver.
Select the directories and/or files you want to transfer using your mouse and click on the arrow that
points from the directory on your computer to the directory on our server (generally the arrow from
bottom to top). All the files selected will now be transferred.
Your pages will be available on the internet immediately after the upload.
Attention! It may be necessary to set up a proxy for some online services. If you cannot establish a
connection with our server, contact your ISP’s help hotline in order to find out what you need to do in
order to set up an FTP connection to upload files to an external server. Companies that have a network
that directly connects with the internet use so-called firewalls for their own protection. These firewalls can
be set up such that FTP connections are not possible or are only possible with highly specialised settings.
In this case, you need to contact your system administrator.
19

FTP / WebDeploy / WebDAV
NetObjects
Proceed as follows:
1 Establish the internet connection to your ISP or online service.
2 Start NetObjects Fusion.
3 Click on Publish.
Now click on Server.
20

FTP / WebDeploy / WebDAV
4 Under “Type”, select “Remote”.
Enter your domain name without www as the FTP host.
(Note: Until your domain name is activated, use your RealTime host name. You will find it on your access
confirmation (e.g. WL15WWW23.WEBLAND.CH)).
Under “User Name” enter the username according to our access confirmation (Webserver login data, e.g.
www.23).
Enter the password according to our access confirmation as “Password” (Webserver login data)
Then click on "OK".
21

FTP / WebDeploy / WebDAV
5 Click on "Generate".
22

FTP / WebDeploy / WebDAV
6 Select Remote Publication Server under “Save Generated Files in”.
Select Whole Site in “Generate Pages”.
Click on “Generate”.
Your pages will be available on the internet immediately after the upload.
Attention! It may be necessary to set up a proxy for some online services. If you cannot establish a
connection with our server, contact your ISP’s help hotline in order to find out what you need to do in
order to set up an FTP connection to upload files to an external server. Companies that have a network
that directly connects with the internet use so-called firewalls for their own protection. These firewalls can
be set up such that FTP connections are not possible or are only possible with highly specialised settings.
In this case, you need to contact your system administrator.
23

FTP / WebDeploy / WebDAV
Mac
Transmit
Proceed as follows:
1 If you do not own transmit yet, you can get the program here.
2 Establish an internet connection to your ISP or online service.
3 Start the FTP-program.
24

FTP / WebDeploy / WebDAV
4 Enter the following data::
Enter your domain name without www under “Address”.
(Note: Until your domain name is activated, use your RealTime host name . You will find it on your access
confirmation (e.g. WL15WWW23.WEBLAND.CH)).
Under “User Name” enter the username according to our access confirmation (Webserver login data, e.g.
www.23).
Enter the password according to our access confirmation as “Password” (Webserver login data).
The field “Directory” must remain empty.
Then click on “connect” to establish the FTP connection.
25

FTP / WebDeploy / WebDAV
5 In the left window you will now see the files in your local directories. On the right side, you will see the
directory structure of your webserver.
Go into the left window and select the directories and files that you want to load onto your server. Drag
them into the right window using your mouse.
Your pages will be available on the internet immediately after the upload.
Attention! It may be necessary to set up a proxy for some online services. If you cannot establish a
connection with our server, contact your ISP’s help hotline in order to find out what you need to do in
order to set up an FTP connection to upload files to an external server. Companies that have a network
that directly connects with the internet use so-called firewalls for their own protection. These firewalls can
be set up such that FTP connections are not possible or are only possible with highly specialised settings.
In this case, you need to contact your system administrator.
26

FTP / WebDeploy / WebDAV
iWeb (2.0.4)
Proceed as follows:
1 Establish the internet connection with your internet service provider.
2 Start iWeb.
27

FTP / WebDeploy / WebDAV
3 Select "file" – "Publish to a folder..."
4 Enter your domain in the form "http://www.yourdomain.ch" as the URL for your website.
28

FTP / WebDeploy / WebDAV
5 Specify your local folder (e.g. "yourwebsite").
6 Now load the entire content of the local folder to your webserver on webland via FTP.
7 We recommended you use FileZilla for FTP-access.
29

FTP / WebDeploy / WebDAV
iWeb (3.0.4)
Proceed as follows:
1 Establish the internet connection with your internet or online service provider.
2 Start iWeb.
3 Select your locally-generated Website.
30

FTP / WebDeploy / WebDAV
4 Next to "publish" select "FTP-Server".
Define a name for your website (e.g. yourdomain.ch).
Leave the field "contact e-mail" empty.
Enter your domain name without www as the "server address"
(Note: Until your domain name is activated, use your RealTime host name. You will find this on your
access confirmation (e.g. WL15WWW23.WEBLAND.CH).
Enter your "user name" according to our access confirmation (WebServer login data) (e.g. www23).
Enter the password (webserver login data) from our access confirmation as the "password".
You can leave the field "directory/pathway", so that your can upload your web data directly into the root
directory.
31

FTP / WebDeploy / WebDAV
5 Click on "connection test" in order to test the FTP connection.
6 If the connection text was successful, confirm with the "OK" button.
7 Select "File" – publish "complete website" and your website will be uploaded to Webland Webserver.
32

FTP / WebDeploy / WebDAV
WebDeploy
Windows
WebMatrix
Proceed as follows:
1 If you do not already have a copy of WebMatrix, download it using the following link::
WebMatrix Download
2 Install the program following the manufacturer’s instructions.
3 Start WebMatrix.
4 Select the “Publish” icon in the “Start Page” Tab.
5 You can enter the data manually or import the publication data, which is easier
For instructions on manual entry, continue to Step 9.
For instructions on importing publication data, proceed to the next step.
6 On the right side of the window, select “Import Publication Settings”.
33

FTP / WebDeploy / WebDAV
7 WebMatrix will now request the data file.
You will have received this data file as an attachment to your access confirmation.
Save this file on your computer first.
Then select the file and select “Open”.
8 All data will now be automatically imported.
9 Manual entry:
You select your data under “Protocol” “Web Deploy”.
Enter your domain name without www. under “Server”.
(Note: Until your domain name is activated, use your RealTime host name. You will find it on your access
confirmation (e.g. WL15WWW23.WEBLAND.CH)).
Under “User Name” enter the username according to our access confirmation (Webserver login data, e.g.
www23).
Enter the password according to our access confirmation as “Password” (Webserver login data).
Under “Website Name” enter the username according to our access confirmation (Webserver login data,
e.g. www23).
Under “Target URL” enter your domain name in the form “http://yourdomain.ch”.
You may activate the “Save Password” control box if you want.
If you want to publish on the database, enter the connection string under Application.
You can find the connection string in the System Configurator under your database (c.f. also instructions
“Import Publication Settings”).
34

FTP / WebDeploy / WebDAV
10 Test the connection by selecting the “Test Connection” button.
11 A successful connection will be confirmed with “Connection Successfully Established”.
12 Now select “Save” to store the data..
35

FTP / WebDeploy / WebDAV
WebDAV
Windows
Please proceed as follows:
1 Select Start, right click on Computer and then Map Network Drive.
36

FTP / WebDeploy / WebDAV
2 Select an available drive letter and enter the folder in the form http://YourDomain.ch/webdav.
Activate the function Reconnect at logon.
Select Finish.
37

FTP / WebDeploy / WebDAV
3 Enter your username and password according to confirmation of access data for your WebDAV access.
Complete the configuration with OK.
38

FTP / WebDeploy / WebDAV
Mac
Please proceed as follows:
1 Select Go and then Connect to Server.
39

FTP / WebDeploy / WebDAV
2 Enter the Server Address in the form http://YourDomain.ch/webdav.
3 Enter Name and Password according to confirmation of access data for your WebDAV access.
Complete the configuration with Connect.
40

FTP / WebDeploy / WebDAV
Copyright © Webland AG
41