mark mdv blue ec - markclimate.be · en 3.0 maintenance the fan is fitted with maintenancefree ball...
TRANSCRIPT
Technical manual
Technisches Handbuch
Livret technique
Technisch boek
Instrukcja techniczna
NL
MA
RK
MD
V B
LUE
EC06
60
003_
R04
EN
DE
FR
PL

2
EN
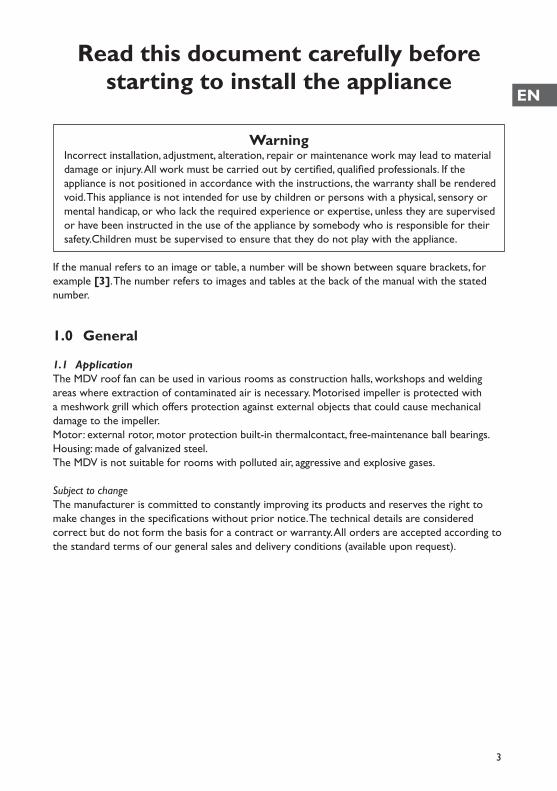
Read this document carefully before starting to install the appliance
WarningIncorrect installation, adjustment, alteration, repair or maintenance work may lead to material damage or injury. All work must be carried out by certified, qualified professionals. If the appliance is not positioned in accordance with the instructions, the warranty shall be rendered void. This appliance is not intended for use by children or persons with a physical, sensory or mental handicap, or who lack the required experience or expertise, unless they are supervised or have been instructed in the use of the appliance by somebody who is responsible for their safety.Children must be supervised to ensure that they do not play with the appliance.
If the manual refers to an image or table, a number will be shown between square brackets, for example [3]. The number refers to images and tables at the back of the manual with the stated number.
1.0 General
1.1 ApplicationThe MDV roof fan can be used in various rooms as construction halls, workshops and welding areas where extraction of contaminated air is necessary. Motorised impeller is protected with a meshwork grill which offers protection against external objects that could cause mechanical damage to the impeller. Motor: external rotor, motor protection built-in thermalcontact, free-maintenance ball bearings. Housing: made of galvanized steel. The MDV is not suitable for rooms with polluted air, aggressive and explosive gases.
Subject to changeThe manufacturer is committed to constantly improving its products and reserves the right to make changes in the specifications without prior notice. The technical details are considered correct but do not form the basis for a contract or warranty. All orders are accepted according to the standard terms of our general sales and delivery conditions (available upon request).
3
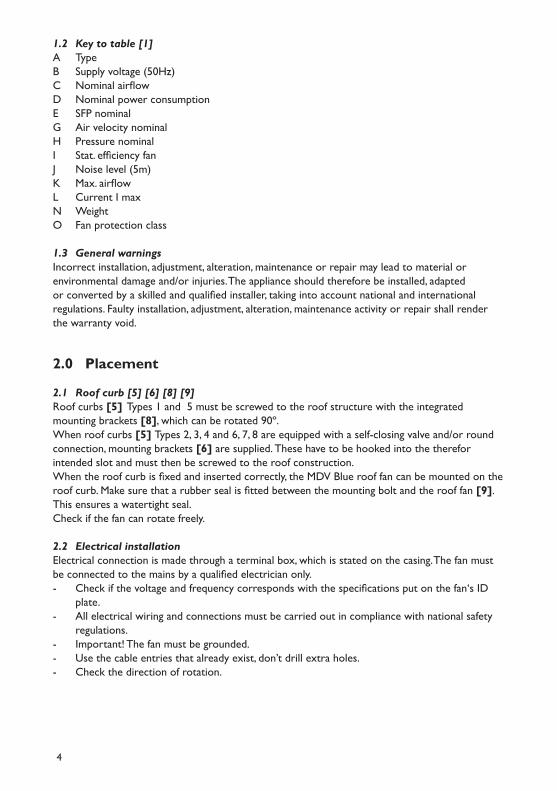
1.2 Key to table [1]A TypeB Supply voltage (50Hz)C Nominal airflowD Nominal power consumptionE SFP nominalG Air velocity nominalH Pressure nominalI Stat. efficiency fanJ Noise level (5m)K Max. airflowL Current I maxN WeightO Fan protection class
1.3 General warningsIncorrect installation, adjustment, alteration, maintenance or repair may lead to material or environmental damage and/or injuries. The appliance should therefore be installed, adapted or converted by a skilled and qualified installer, taking into account national and international regulations. Faulty installation, adjustment, alteration, maintenance activity or repair shall render the warranty void.
2.0 Placement
2.1 Roof curb [5] [6] [8] [9]Roof curbs [5] Types 1 and 5 must be screwed to the roof structure with the integrated mounting brackets [8], which can be rotated 90º.When roof curbs [5] Types 2, 3, 4 and 6, 7, 8 are equipped with a self-closing valve and/or round connection, mounting brackets [6] are supplied. These have to be hooked into the therefor intended slot and must then be screwed to the roof construction.When the roof curb is fixed and inserted correctly, the MDV Blue roof fan can be mounted on the roof curb. Make sure that a rubber seal is fitted between the mounting bolt and the roof fan [9]. This ensures a watertight seal. Check if the fan can rotate freely.
2.2 Electrical installationElectrical connection is made through a terminal box, which is stated on the casing. The fan must be connected to the mains by a qualified electrician only.- Check if the voltage and frequency corresponds with the specifications put on the fan‘s ID plate.- All electrical wiring and connections must be carried out in compliance with national safety regulations.- Important! The fan must be grounded.- Use the cable entries that already exist, don’t drill extra holes.- Check the direction of rotation.
4

EN
3.0 Maintenance
The fan is fitted with maintenancefree ball bearings. The only maintenance required is cleaning of the impeller. We recommend inspection of the impeller every six months. Before cleaning disconnect the fan from the mains and block the mains switch. Remove the fan. Do not obstruct fan‘s balance. Do not use strong detergents or cleaning agents for cleaning. Internal insulation may be wiped with a damp cloth.
In the case of malfunction:- Check the mains power is reaching the fan.- Disconnect from the mains and ensure that the impeller is not blocked.- If the thermo-contact has been activated, turn off the mains power. Wait until the motor chills and reconnect the mains power.- Check if the capacitor is connected (single-phase, refer to the wiring diagram).- If the fault persists, change the capacitor. If that does not help, contact the supplier.
4.0 Wiring diagram [2] [3]
[2] For controlling one MDV Blue roof fan. [3] For controlling multiple MDV Blue roof fans (maximum 8) with one Potentiometer or 0-10VDC signal.
5.0 Roof curbs [5](all measurements are in mm)
(1) Roof curb(2) Roof curb with self-closing valve(3) Roof curb with round fitting(4) Roof curb with self-closing valve and round fitting(5) Roof curb with silencer(6) Roof curb with silencer and self-closing valve(7) Roof curb with silencer and round fitting(8) Roof curb with silencer, self-closing valve and round fitting(9) 0-30º adjustable roof curb
6.0 AccessoriesA sound demping plate [10] is available for all MDV Blue roof fan types. The plate gives an aesthetic finish to the intake opening and provides a sound reduction of approx. 3 dB.
5

6

DE
Lesen Sie sich dieses Dokument sorgfältig durch, bevor Sie mit der Installation des Geräts beginnen
WarnhinweisFehlerhaft durchgeführte Installationen, Einstellungen, Änderungen, Reparaturen oder Wartungsmaßnahmen können zu Sachschäden und Verletzungen führen. Alle Arbeiten müssen von geprüften, qualifizierten Fachleuten durchgeführt werden. Falls das Gerät nicht vorschriftsgemäß aufgestellt wird, erlischt die Garantie. Dieses Gerät ist nicht für den Gebrauch durch Personen (einschließlich Kindern) mit verminderter körperlicher, Sinnes- oder geistiger Leistungsfähigkeit oder mangelnder Erfahrung und mangelnden Kenntnissen bestimmt, sofern sie nicht unter Aufsicht stehen oder durch eine Person, die für ihre Sicherheit verantwortlich ist, im Gebrauch des Geräts angeleitet werden. Kinder müssen vom Gerät ferngehalten werden.
Wenn in der Anleitung auf eine Abbildung oder Tabelle verwiesen wird, wird eine Zahl in eckigen Klammern angegeben, beispielsweise [3]. Die Zahl verweist auf die Abbildungen und Tabellen mit der entsprechenden Nummer am Ende der Anleitung.
1.0 Allgemeines
1.1 EinsatzbereichDachventilatoren, sie werden für Abluft aus dem Raum verwendet. Der untere Flansch wird mit dem Gehäuse durch Schrauben verbunden. Laufrad ist mit Netzgrill abgedeckt, der es vor Gegenständen schützt, die aus der Umgebung gelangen und Laufrad mechanisch beschädigen können. Nicht geeignet für die Beförderung von verschmutzter Luft, aggressiven, explosiven Gasen.Der Motor: Außenrotor, Direktantrieb, integrierter Thermokontakt-Motorschutz, dauerhafte, keine Pflege erfordernde Lager. Das Gehäuse: aus verzinktem Blech.
Änderungen vorbehaltenDer Hersteller strebt eine kontinuierliche Verbesserung der Produkte an und behält sich das Recht vor, ohne vorherige Mitteilung Änderungen an den technischen Daten vorzunehmen. Die technischen Angaben werden als korrekt angenommen, bilden aber keine Grundlage für einen Vertrag oder Gewährleistungsansprüche. Alle Bestellungen werden gemäß den Standardkonditionen in unseren allgemeinen Verkaufs- und Lieferbedingungen (auf Anfrage erhältlich) angenommen.
7
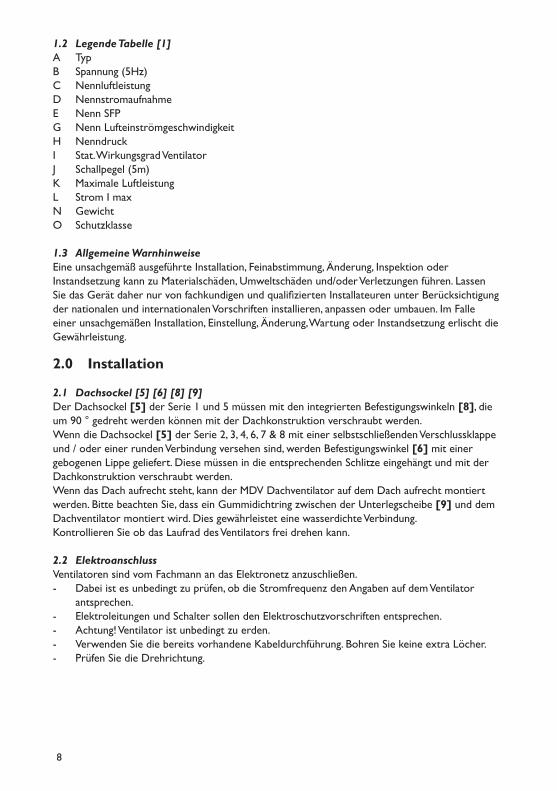
1.2 Legende Tabelle [1]A TypB Spannung (5Hz)C Nennluftleistung D NennstromaufnahmeE Nenn SFPG Nenn LufteinströmgeschwindigkeitH NenndruckI Stat. Wirkungsgrad VentilatorJ Schallpegel (5m)K Maximale LuftleistungL Strom I maxN GewichtO Schutzklasse
1.3 Allgemeine WarnhinweiseEine unsachgemäß ausgeführte Installation, Feinabstimmung, Änderung, Inspektion oder Instandsetzung kann zu Materialschäden, Umweltschäden und/oder Verletzungen führen. Lassen Sie das Gerät daher nur von fachkundigen und qualifizierten Installateuren unter Berücksichtigung der nationalen und internationalen Vorschriften installieren, anpassen oder umbauen. Im Falle einer unsachgemäßen Installation, Einstellung, Änderung, Wartung oder Instandsetzung erlischt die Gewährleistung.
2.0 Installation
2.1 Dachsockel [5] [6] [8] [9]Der Dachsockel [5] der Serie 1 und 5 müssen mit den integrierten Befestigungswinkeln [8], die um 90 ° gedreht werden können mit der Dachkonstruktion verschraubt werden.Wenn die Dachsockel [5] der Serie 2, 3, 4, 6, 7 & 8 mit einer selbstschließenden Verschlussklappe und / oder einer runden Verbindung versehen sind, werden Befestigungswinkel [6] mit einer gebogenen Lippe geliefert. Diese müssen in die entsprechenden Schlitze eingehängt und mit der Dachkonstruktion verschraubt werden. Wenn das Dach aufrecht steht, kann der MDV Dachventilator auf dem Dach aufrecht montiert werden. Bitte beachten Sie, dass ein Gummidichtring zwischen der Unterlegscheibe [9] und dem Dachventilator montiert wird. Dies gewährleistet eine wasserdichte Verbindung.Kontrollieren Sie ob das Laufrad des Ventilators frei drehen kann.
2.2 ElektroanschlussVentilatoren sind vom Fachmann an das Elektronetz anzuschließen.- Dabei ist es unbedingt zu prüfen, ob die Stromfrequenz den Angaben auf dem Ventilator antsprechen.- Elektroleitungen und Schalter sollen den Elektroschutzvorschriften entsprechen.- Achtung! Ventilator ist unbedingt zu erden.- Verwenden Sie die bereits vorhandene Kabeldurchführung. Bohren Sie keine extra Löcher. - Prüfen Sie die Drehrichtung.
8

DE
3.0 Wartung
Diese Ventilatoren haben einen drehzahlsteuerbaren Aussenläufermotor mit wartungsfreien Kugellagern. Die einzige Forderung der Ventilatorwartung ist seine Reinigung. Es ist zu empfohlen, das Ventilatorlaufrad je sechs Monate zu reinigen. Vor Reinigung unbedingt den Elektrostrom ausschalten und den Schalter blockieren, damit jemand den Strom im Arbeitslauf nicht einschaltet. Die Reinigung muss vorsichtig erfolgen, damit die Laufradauswuchtung nicht gestört wird. Chemische Reinigung sowie tauchen des Motors ins Wasser oder andere Flüssigkeiten im Laufe der Reinigung ist ausgeschlossen.
Bei Betriebsausfall:1 Prüfen, ob der Elektrostrom den Ventilator erreicht.2 Der Elektrostrom ausschalten und sich überzeugen, dass Laufrad nicht blockiert ist. 3 Nachdem Thermokontakte gegen Motorüberhitzung sich aktiviert haben, ist der Elektrostrom auszuschalten; abwarten, bis der Motor abkühlt und wieder ins Netz einschalten.4 Den Kondensator prüfen (für 1- Phasenmotoren gemäß dem Schaltplan).5 Wenn Betriebsausfälle wieder auftreten, Kondensator ersetzen. Wenn das nicht hilft, sich an den Lieferanten wenden.
4.0 Schaltplan [2] [3]
[2] Zur Steuerung eines MDV Blue Dachventilators.[3] Zur Steuerung mehrerer MDV Blue Dachventilatoren (max. 8) über ein Potentiometer oder 0-10 VDC Signal.
5.0 Sockel [5](Alle Abmessungen sind in mm)
1 Sockel2 Sockel mit selbstschließender Verschlussklappe3 Sockel mit Verlauf auf Rund4 Sockel mit selbstschließender Verschlussklappe und Verlauf auf Rund5 Sockel mit Schalldämpfer6 Sockel mit Schalldämpfer und selbstschließender Verschlussklappe7 Sockel mit Schalldämpfer und Verlauf auf Rund8 Sockel mit Schalldämpfer, selbstschließender Verschlussklappe und Verlauf auf Rund9 0-30° einstellbarer Schrägdachsockel
6.0 ZubehörFür alle MDV-Dachventilatoren ist eine Schalldämmplatte [10] erhältlich. Diese Schalldämmplatte verleiht und eine Schalldämmung von ca. 3 dB.
9

10

FR
Lisez attentivement ce document avant d’installer l’appareil
AttentionUne installation imparfaite, un ajustement, une altération, une réparation peut entraîner des dommages matériels ou des blessures. Toutes les manipulations doivent être faites par un professionnel reconnu et qualifié. Si l’appareil n’est pas positionné comme dans les instructions, la garantie sera déclarée nulle. Cet appareil n’est pas fait pour être utilisé par des enfants ou des personnes avec un handicap physique, sensoriel ou mental ou qui manque d’expérience ou d’expertise à moins d’être supervisé ou avoir été instruit par quelqu’un qui qui est responsable de leur sécurité. Les enfants doivent être supervisés pour assurer qu’ils ne jouent pas avec l’appareil.
Si ce manuel se réfère à une image ou un tableau, un numéro sera écrit entre crochet, par exemple [3]. Les nombres se réfèrent à des images et à des tableaux au dos du manuel avec le nombre stipulé.
1.0 Général
1.1 InstallationLe ventilateur de toit peut être utilisé dans divers pièces comme des halls de construction, des ateliers et des zones où l’on soude avec une extraction d’air pollué si nécessaire. La turbine est équipée d’une grille en maille qui protège contre les objets externes qui pourrait causer des dommages mécaniques à la turbine. Moteur : rotor externe, protection moteur avec contact thermal intégré, roulement à bille sans maintenance. Boitier fait de métal galvanisé. Le MDV n’est pas fait pour les pièces avec de l’air pollué, toxique ou explosif.
Sujet à changement. Le fabriquant ne s’est pas engagé à constamment améliorer ses produits et se réserve le droit de faire des changements dans les caractéristiques sans en informer. Les détails techniques sont considérés comme corrects mais ne font pas partie d’un contrat où d’une garantie. Toutes les commandes sont acceptées selon nos termes de ventes générales et nos conditions de livraisons (disponible sur demandes).
11

1.2 Légende pour le tableau [1]A TypeB Voltage d’alimentation (50Hz)C Flux d’air nominalD consommation nominal d’énergie E SFP nominal G Vélocité nominale de l’air H Pression nominaleI Stat. d’efficacité du ventilateurJ Niveau de bruit (5m)K Flux d’air maxL Courant I maxN Poids O Classe de protection du ventilateur
1.3 Dangers générauxUne installation imparfaite, un ajustement, une altération, une réparation peut entraîner des dommages matériels ou des blessures. L’appareil doit donc être installé, adapté ou modifié par un professionnel qualifié et compétent, en prenant en compte les régulations nationales ou internationales. Une mauvaise installation, ajustement, une altération, une mauvaise maintenance ou réparation mettre fin à la garantie.
2.0 Placement
2.1 Chapeau de toiture [5] [6] [8] [9]Chapeau de toiture [5] Types 1 et 5 à fixer à la structure de la toiture avec les brides de raccordement intégré [8], qui peuvent être tournés à 90°.Quand les chapeaux de toiture [5] Type 2,3,4 et 6,7,8 sont equipés avec une vanne de fermeture automatique et/ou connection ronde, des brides de raccordement [6] avec rebord courbé sont fournis. Ils doivent être accrochés dans la fente prévu à cet effet et après être vissés à la structure de la toiture.Quand le chapeaux de toiture est fixé et inséré correctement, l’extracteur MDV Blue peut être monté sur le chapeau de toiture. Veuillez toutefois vérifier que le joint de fermeture [9] est monté entre l’anneau de montage et l’extracteur. Ainsi le raccordement est étanche. Vérifier que le ventilateur tourne librement.
2.2 Connexion électriqueLa connexion électrique se fait via la boîte de terminal, qui se situe dans le boîtier. Le ventilateur doit être connecté au secteur par un électricien qualifié.- Vérifiez si le voltage et la fréquence correspondent avec les caractéristiques affichées sur le fiche d’identité du ventilateur.- Tout le câblage électrique et les connexions doivent être en suivant les régulations nationales de sécurité- Important Le ventilateur doit être mis à la terre.- Utilisez les entrées de câbles qui existent déjà, ne faites pas de trous supplémentaires.- Vérifiez la direction de rotation.
12

FR
3.0 MaintenanceLe ventilateur est équipé d’un roulement à bille ne nécessitant pas de maintenance. La seule maintenance requise est le nettoyage du rotor Nous recommandons l’inspection du rotor tous les 6 mois. Avant de nettoyer, déconnectez le ventilateur du secteur et fermez le courant. Enlever le ventilateur. Ne pas gêner l’équilibre du ventilateur. Ne pas utiliser de détergents ou des agents nettoyants pour le nettoyage. L’isolation interne peut être nettoyée avec un linge humide.
En cas de dysfonctionnement :- Vérifiez que le branchement secteur atteint le ventilateur.- Débranchez le secteur et assurez-vous que le rotor n’est pas bloqué. - Si un contact thermal est activé, coupez le raccordement au secteur. Attendez jusqu’à ce que le moteur refroidisse et reconnectez le secteur. - Vérifier que le condensateur est connecté (phase simple, se référer au diagramme de câblage)- Si le dysfonctionnement persiste, changez le condensateur. Si cela ne change rien, contactez le fournisseur.
4.0 Diagramme de câblage [2] [3]
[2] Pour la régulation de un extracteur MDV Blue.[3] Pour la régulation de plusieur extracteur MDV Blue (max. 8) à partir d’un potentiomètre ou signal 0-10 VDC.
5.0 Chapeau de toiture [5](Toutes les mesures sont en millimètres)
(1) Chapeau de toiture(2) Chapeau de toiture avec volet de fermeture automatique(3) Chapeau de toiture avec raccord rond(4) Chapeau de toiture avec volet de fermeture automatique et raccord rond(5) Chapeau de toiture avec silencieux(6) Chapeau de toiture avec silencieux et volet de fermeture automatique(7) Chapeau de toiture avec silencieux et raccord rond(8) Chapeau de toiture avec silencieux, volet de fermeture automatique et raccord rond(9) Solin réglable de 0-30°
6.0 AccessoiresPour tous les type d’extracteurs MDV, un tôle insonorisante [10] est disponible. Cette tôle rend une finition esthétique à l’ouverture d’aspiration et réduit le niveau sonore de plus ou moins 3 dB.
13

14

NL
Lees dit document door voordat u aande installatie van het toestel begint
WaarschuwingEen foutief uitgevoerde installatie, afregeling, wijziging, reparatie of onderhoudsbeurt kan leiden tot materiële schade of verwondingen. Alle werkzaamheden moeten door erkende, gekwalificeerde vakmensen worden uitgevoerd. Indien het toestel niet volgens voorschriftwordt geplaatst, vervalt de garantie. Dit apparaat is niet bedoeld voor gebruik door personen(inclusief kinderen) met verminderde lichamelijke, zintuiglijke of geestelijke vermogens, of gebrek aan ervaring en kennis, tenzij zij onder toezicht staan of worden geïnstrueerd over hetgebruik van het apparaat door een persoon die verantwoordelijk is voor hun veiligheid. Kinderen moeten gecontroleerd worden om ervoor te zorgen dat ze niet met het apparaat spelen.
Indien in de handleiding wordt verwezen naar een afbeelding of tabel, dan wordt een getal tussenvierkante haken vermeld, bijvoorbeeld [3]. Het nummer verwijst naar afbeeldingen en tabellenachterin de handleiding met het vermelde nummer.
1.0 Algemeen
1.1 ToepassingDe MDV dakafzuigventilator kan worden toegepast bij verschillende ruimten zoals constructiehallen, werkplaatsen en fabriekshallen waar afzuiging van de verontreinigde lucht noodzakelijk is. Om de ventilator te beschermen tegen beschadiging van buitenaf is er een beschermrooster geplaatst. De buitenpool motor is voorzien van een thermisch contact en heeft onderhoudsvrije kogellagers. De behuizing is gemaakt van gegalvaniseerd plaatwerk. De MDV is niet geschikt voor ruimtes waarin zich corrosieve en / of explosieve dampen bevinden.
Wijzigingen voorbehouden.De fabrikant streeft continu naar verbetering van producten en behoudt zich het recht voor om zonder voorafgaande kennisgeving veranderingen in de specificaties aan te brengen. De technische details worden als correct verondersteld maar vormen geen basis voor een contract of garantie. Alle orders worden geaccepteerd onder de standaardcondities van onze algemene verkoop- en leveringsvoorwaarden (op aanvraag leverbaar).
15

1.2 Legenda tabel [1]A TypeB Voedingsspanning (50Hz)C Debiet nominaalD Opgenomen vermogen nominaalE SFP nominaalG Aanstroom snelheid nominaalH Druk nominaalI Stat. efficientie ventilatorJ Geluidsniveau (5m)K Debiet maximaalL Stroom I maxN GewichtO Beschermingsklasse
1.3 Algemene waarschuwingenEen foutieve installatie, inregeling, wijziging, onderhoud of reparatie kan leiden tot materiële schade, milieuschade en of verwondingen. Laat daarom het toestel door een vakbekwame en gekwalificeerde installateur installeren, aanpassen of ombouwen met inachtneming van plaatselijke en/of landelijke regelgeving. Bij een foutieve installatie, afregeling, wijziging, onderhoud of reparatie vervalt de garantie.
2.0 Plaatsen van het toestel
2.1 Dakopstand [5] [6] [8] [9]Dakopstanden [5] Types 1 en 5 moeten met de geïntegreerde bevestigingsbeugels [8], welke 90º verdraaid kunnen worden, aan de dakconstructie vastgeschroefd worden. Wanneer de dakopstanden [5] Types 2, 3, 4 en 6, 7, 8 zijn voorzien van een zelfsluitende klep en/of een ronde aansluiting worden er bevestigingsbeugels [6] meegeleverd met een gebogen lip, welke ingehaakt moeten worden in de daarvoor bestemde sleuf en daarna aan de dakconstructie vastgeschroefd moeten worden.Wanneer de dakopstand is gefixeerd en op de juiste wijze is ingeplakt kan de MDV dakafzuigventilator op de dakopstand gemonteerd worden. Let hierbij wel op dat tussen de sluitring [9] en de dakafzuigventilator een rubberen afdichtring gemonteerd wordt. Deze zorgt voor een waterdichte aansluiting.Controleer of de ventilator vrij kan draaien.
2.2 Elektrische installatieHet toestel dient door een vakbekwame en gekwalificeerde installateur geïnstalleerd teworden.- Controleer of de elektrische spanning en de frequentie corresponderen met de gegevens op de typeplaat van het toestel.- De installatie moet voldoen aan de geldende plaatselijke en/of landelijke voorschriften.- Let op! De ventilator moet geaard zijn.- Gebruik de kabeldoorvoering die reeds aanwezig is, boor geen extra gaten.- Controleer de draai richting.
16
NL
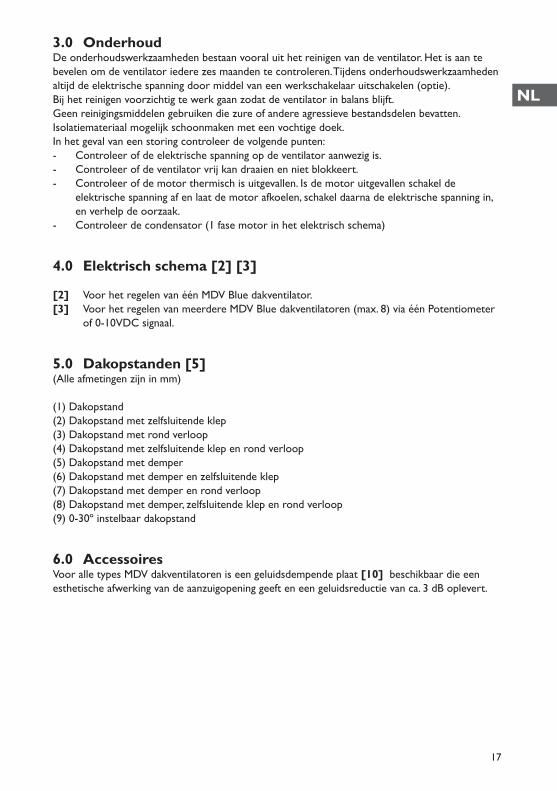
3.0 OnderhoudDe onderhoudswerkzaamheden bestaan vooral uit het reinigen van de ventilator. Het is aan te bevelen om de ventilator iedere zes maanden te controleren. Tijdens onderhoudswerkzaamheden altijd de elektrische spanning door middel van een werkschakelaar uitschakelen (optie).Bij het reinigen voorzichtig te werk gaan zodat de ventilator in balans blijft.Geen reinigingsmiddelen gebruiken die zure of andere agressieve bestandsdelen bevatten. Isolatiemateriaal mogelijk schoonmaken met een vochtige doek.In het geval van een storing controleer de volgende punten:- Controleer of de elektrische spanning op de ventilator aanwezig is.- Controleer of de ventilator vrij kan draaien en niet blokkeert.- Controleer of de motor thermisch is uitgevallen. Is de motor uitgevallen schakel de elektrische spanning af en laat de motor afkoelen, schakel daarna de elektrische spanning in, en verhelp de oorzaak.- Controleer de condensator (1 fase motor in het elektrisch schema)
4.0 Elektrisch schema [2] [3]
[2] Voor het regelen van één MDV Blue dakventilator.[3] Voor het regelen van meerdere MDV Blue dakventilatoren (max. 8) via één Potentiometer of 0-10VDC signaal.
5.0 Dakopstanden [5](Alle afmetingen zijn in mm)
(1) Dakopstand(2) Dakopstand met zelfsluitende klep(3) Dakopstand met rond verloop(4) Dakopstand met zelfsluitende klep en rond verloop(5) Dakopstand met demper(6) Dakopstand met demper en zelfsluitende klep(7) Dakopstand met demper en rond verloop(8) Dakopstand met demper, zelfsluitende klep en rond verloop(9) 0-30º instelbaar dakopstand
6.0 AccessoiresVoor alle types MDV dakventilatoren is een geluidsdempende plaat [10] beschikbaar die een esthetische afwerking van de aanzuigopening geeft en een geluidsreductie van ca. 3 dB oplevert.
17

18

PL
Proszę przeczytać niniejszy dokumentprzed instalacją urządzenia
OstrzeżenieNieprawidłowy montaż, regulacja, modyfikacje, naprawa lub konserwacja mogą prowadzić dostrat materialnych, obrażeń ciała lub wybuchu. Wszystkie czynności muszą być wykonywaneprzez upoważnionych, kwalifikowanych specjalistów. Gwarancja traci ważność w przypadku,gdy urządzenie nie zostanie zainstalowane zgodnie ze wskazówkami.Niniejsze urządzenie nie jest przeznaczone do użytku przez dzieci lub osoby o obniżonychmożliwościach fizycznych, sensorycznych czy umysłowych ani też osoby nieposiadające odpowiedniego doświadczenia czy wiedzy, chyba że osoby takie pozostają pod nadzorem lub zostały przeszkolone w zakresie użytkowania urządzenia przez osobę odpowiedzialną za ich bezpieczeństwo. Należy dopilnować, aby dzieci nie używały tego urządzenia do zabawy.
Jeżeli niniejsza instrukcja techniczna odnosi się do ilustracji czy tabeli, w nawiasach kwadratowychbędzie to oznaczone w postaci numeru, na przykład [3]. Numer odnosi się do ilustracji i tabel nakońcu podręcznika, które mają ustaloną numerację.
1.0 Informacje ogólne
1.1 ZastosowanieWentylator dachowy z wydmuchem pionowym zaprojektowany w celu wyciągu powietrza z różnych pomieszczeń. Łopatki wentylatora są ochronione za pomocą siatki ochronnej zapewniającej ochronę przed zewnetrznymi przedmiotami mogacymi spowodować mechaniczne uszkodzenia wirnika. Wentylator nie jest przystosowany do pracy w warunkach agresywnego otoczenia i pomieszczeniach w których wystepują wszelkiego rodzaju substancje wytworzone lub ich pochodne. Silnik: Zewnetrzny wirnik, ochrona silnika wbudowana w kontakt termiczny, bezobsługowe łożyska kulkowe.Obudowa: Wykonana ze stali galwanizowanej.
Przedmiot zmianyProducent jest zobowiązany do ciągłego ulepszania swoich produktów i zastrzega prawo do wprowadzania zmian w specyfikacjach bez uprzedniego powiadomienia. Szczegóły techniczne są brane pod uwagę jako właściwe, lecz nie stanowią podstawy dla umowy czy gwarancji. Wszystkie zamówienia są akceptowane według standardowych warunków sprzedaży i dostaw (dostępne na życzenie).
19

1.2 Klucz do tabeli [1]A TypB Napięcie zasilające (50Hz)C Nominalny przepływ powietrzaD Nominalny pobór mocyE Nominalna wartość SFP G Nominalna prędkość powietrzaH Ciśnienie nominalneI Sprawność statyczna wentylatoraJ Poziom hałasu (5m)K Maksymalny przepływ powietrzaL Natężenie prądu I maxN WagaP Klasa ochrony
1.3 OstrzeżeniaogólneNieprawidłowy montaż, regulacja, modyfikacje, naprawa lub konserwacja mogą prowadzić do strat materialnych, awarii środowiskowej, albo wypadku i/lub eksplozji. Z tego względu wszystkie zynności instalacyjne, adaptacyjne, a także związane z wymianą muszą być wykonywane przez upoważ-nionych, kwalifikowanych specjalistów, z uwzględnieniem przepisów krajowych oraz międzynarodowych. Niewłaściwy montaż, regulacja, modyfikacje, konserwacja lub naprawa będą skutkowały utratą przez gwarancję producenta mocy prawnej.
2.0 Montaż
2.1 Podstawa dachowa [5] [6] [8] [9]Podstawy dachowe [5] Typy 1 1 5 należy przykręcić do struktury dachu przy pomocy wbudowanych zawiesi [8], które można obracać o 90º.Jeśli podstawy dachowe [5] Typy 2, 3, 4 i 6, 7, 8 są wyposażone w samozamykający zawór i/lub okrągłe przyłącze, dostawa obejmuje zawiesia [6]. Należy je zamontować w przeznaczonym do tego otworze, a następnie przykręcić do konstrukcji dachu.Po poprawnym zamocowaniu i posadowieniu podstawy dachowej, można zamontować na niej wentylator dachowy MDV Blue. Upewnij się, że pomiędzy trzpieniem montażowym a wentylatorem dachowym [9] znajduje się gumowa uszczelka. Zapewni to wodoszczelność. Sprawdź, czy wentylator swobodnie się obraca.
2.2 Instalacja elektrycznaPołączenia elektryczne są połaczone do listwy zaciskowej, która znajduje się na obudowie wentylatora. Podłączenie wentylatora do napięcia musi być wykonane przez wykwalifikowanego elektryka.- Sprawdź czy napięcie i czestotliwość są zgodne ze specyfikacją znajdującą się na tablicy znamionowej urządzenia.- Wszystkie połączenia elektryczne jak i okablowanie muszą spełniacwymogi narodowych i lokalnych przepisów bezpieczeństwa.- Ważne! Wentylator musi być uziemiony.- Prosimy o wykorzystywanie istniejących przepustów kablowych, nie należy wywiercać dodatkowych otworów. - Sprawdź kierunek obrotu wentylatora.
20

PL
3.0 Konserwacja
Wentylator wyposażony jest w bezobsługowe łozyska kulkowe. Jedyna czynność jak jest wymagana przez producenta to utrzymywanie w czystości wirnika wentylatora. Zalecamy prowadzenie konserwacji/inspekcji wirnika wentylatora co 6 miesięcy. Przed rozpoczeciem czynności konserwacyjnych (głownie czyszczenie) należy odłączyć wentylator od napięcia i zablokować wyłącznik główny. Następnie zdejmij wentylator. Należy uważać aby nie spowodować zakłócenia równowagi wentylatora. Nie wolno uzywać mocnych dtergentów do czynności konserwacyjnych. Wewnętrzna izolacja może być wytarta za pomocą wilgotnej szmatki.
W przypadku awarii:1 Sprawdź czy zasilanie dochodzi do wentylatora.2 Odłącz wentylator od napięcia i upewnij się, że wirnik nie został zablokowany.3 Jeżeli kontakt termiczny został aktywowany, wyłącz główne zasilanie. Poczekaj dopóki silnik wychłodzi się i ponownie podłącz zasilanie.4 Sprawdź czy kondesator jest podłączony (jednofazowy, odnieś się do schematu elektrycznego).5 Jeżeli awaria utrzymuje się, należy wymienić kondensator. Jeżeli to nie pomaga proszę skontaktować się z dostawcą.
4.0 Schemat elektryczny [2] [3]
[2] Do sterowania wentylatorem dachowym MDV Blue. [3] Do sterowania większą liczbą wentylatorów dachowych MDV Blue (maksymalnie 8) Potencjometrem lub sygnałem 0-10VDC.
5.0 Roof curbs [5](mm)
(1) Podstawa dachowa(2) Podstawa dachowa z zaworem samozamykającym się(3) Podstawa dachowa z okrągłym otworem montażowym(4) Podstawa dachowa z zaworem samozamykającym się i okrągłym otworem montażowym(5) Podstawa dachowa z tłumikiem hałasu(6) Podstawa dachowa z tłumikiem hałasu i zaworem samozamykającym się(7) Podstawa dachowa z tłumikiem hałasu i okrągłym otworem montażowym(8) Podstawa dachowa z tłumikiem hałasu, zaworem samozamykającym się i okrągłym otworem montażowym(9) Regulowana (0-30º) podstawa dachowa
6.0 AkcesoriaPokrywa tłumiąca [10] dostępna jest dla wszystkich typów wentylatora dachowego MDV Blue. Pokrywa nadaje otworowi wlotowemu estetyczny wygląd i zapewnia redukcję głośności o ok. 3 dB.
21

22
[1]
MDV Blue ECA 225 311 355 400 450 500 560 630
B V 230 230 230 230 230 400 400 400
C m3/s 0,25 0,56 0,84 1,16 1,61 2,50 3,05 3,89
D kW 0,07 0,154 0,315 0,264 0,32 0,824 1,508 1,408
E W/m3/s 277 275 375 228 199 330 494 362
G m/s 6,69 13,37 15,95 16,73 18,73 23,77 23,38 24,03
H Pa 72 105 230 120 120 142 284 178
I % 26,0 38,2 61,3 52,7 60,4 43,1 57,4 49,2
J dB(A) 63 65 65 63 67 72 70 72
K m3/h 1200 3150 3500 4300 5300 10750 11500 15000
L A 1,4 2,2 2,2 3,0 2,2 4,0 3,7 4,2
N kg 13 17 27 30 46 52 55 70
O IP 54 54 54 54 54 54 54 54

23
[2]

24
[3]
25
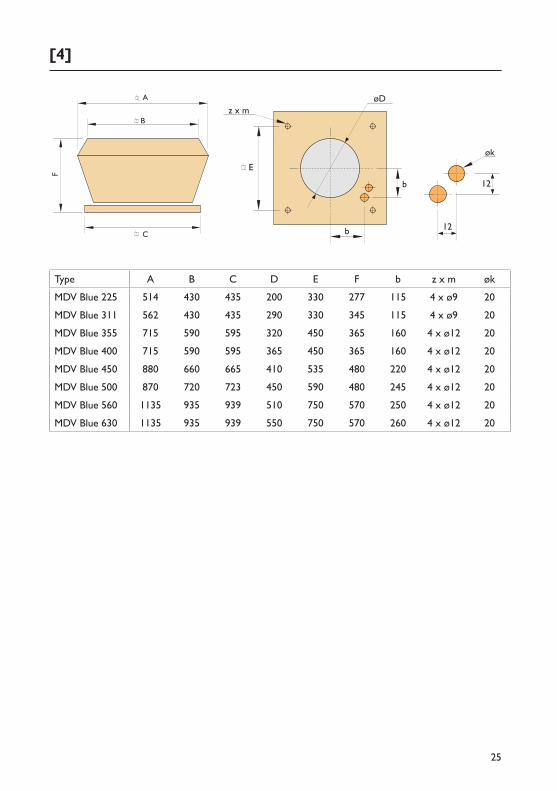
[4]F
C
A
B
øk
E
z x m
b
b
12
12
øD
Type A B C D E F b z x m øk
MDV Blue 225 514 430 435 200 330 277 115 4 x ø9 20
MDV Blue 311 562 430 435 290 330 345 115 4 x ø9 20
MDV Blue 355 715 590 595 320 450 365 160 4 x ø12 20
MDV Blue 400 715 590 595 365 450 365 160 4 x ø12 20
MDV Blue 450 880 660 665 410 535 480 220 4 x ø12 20
MDV Blue 500 870 720 723 450 590 480 245 4 x ø12 20
MDV Blue 560 1135 935 939 510 750 570 250 4 x ø12 20
MDV Blue 630 1135 935 939 550 750 570 260 4 x ø12 20

26
[5]
MN
32 4
NO
6
NM
7
ØMN
8
O
1
F
E
ABC
D
5
E
AKC
D
G
9
U
V
RS
T
ØM
Type A B C D E F G K M N O
225/311 mm 610 390 328 330 M8 150 648 392 200 43 83
355/400 mm 728 510 448 450 M10 150 733 514 355 53 93
450 mm 815 595 533 535 M10 150 733 598 400 53 93
500 mm 870 650 588 590 M10 150 698 656 450 53 93
560/630 mm 1030 810 748 750 M10 150 698 816 600 63 103
Type 225/311 355/400 450 500 560/630
1 kg 6,3 8,4 9,9 10,9 13,7
2 kg 7,6 10,4 12,5 13,8 18,2
3 kg 7,8 10,4 12,7 14,0 18,1
4 kg 8,4 11,0 14,2 15,8 21,1
5 kg 19,6 29,2 33,1 37,4 46,6
6 kg 20,8 31,1 35,7 40,3 51,2
7 kg 21,1 31,2 35,8 40,6 51
8 kg 21,7 32,3 37,4 42,3 54,1

27
Type R S T U V kg
225/311 mm 515 372 330 M8 255 6,6
355/400 mm 635 490 450 M8 316 10
450 mm 720 575 535 M10 372 13,5
500 mm 775 630 590 M10 372 15
MN
32 4
NO
6
NM
7
ØMN
8
O
1
F
E
ABC
D
5
E
AKC
D
G
9
U
V
RS
T
ØM
[6]

28
[8]
1
2

29
[9]

30
[10]
A B
MDV 225/311 710 710
MDV 355/400 874 874
MDV 450/500 900 900
MDV 560/630 1200 1200

31
MARK BVBENEDEN VERLAAT 87-89VEENDAM (NEDERLAND)POSTBUS 13, 9640 AA VEENDAMTELEFOON +31(0)598 656600FAX +31 (0)598 [email protected]
MARK EIRE BVCOOLEA, MACROOMCO. CORK P12 W660 (IRELAND)PHONE +353 (0)26 45334FAX +353 (0)26 [email protected]
MARK BELGIUM b.v.b.a.ENERGIELAAN 122950 KAPELLEN (BELGIË/BELGIQUE)TELEFOON +32 (0)3 6669254FAX +32 (0)3 [email protected]
MARK DEUTSCHLAND GmbHMAX-PLANCK-STRASSE 1646446 EMMERICH AM RHEIN (DEUTSCHLAND)TELEFON +49 (0)2822 97728-0 TELEFAX +49 (0)2822 [email protected]
MARK POLSKA Sp. z o.oUL. JASNOGÓRSKA 2742-202 CZĘSTOCHOWA (POLSKA) PHONE +48 34 3683443 FAX +48 34 3683553 [email protected]
S.C. MARK ROMANIA S.R.L.STR. KOS KAROLY NR. 1 A540297 TARGU MURES(ROMANIA)TEL/FAX +40 (0)[email protected]
CERTIFICATION N°: 17.07.011 AIRSTREAM
CERTIFICATION N°: 17.07.011 AIRSTREAM
CERTIFICATION N°: 17.07.011 AIRSTREAM
CERTIFICATION N°: 17.07.011 AIRSTREAM