md editor 2 - minidisc · 2001. 6. 22. · 3-867-380-11(1) 1999 sony corporation pclk-md2 md editor...
TRANSCRIPT

3-867-380-11(1)
1999 Sony Corporation
PCLK-MD2
MD Editor 2
Operating Instructions GB
FRMode d’emploi
Owner’s RecordThe model and serial numbers are located on the connector. Record theserial number in the space provided below. Refer to them whenever youcall upon your Sony dealer regarding this product.
Model No. PCLK-MD2 Serial No. ___________
Declaration of ConformityTrade name: SONYModel No.: CAV-50CResponsible Party: Sony Electronics Inc.Address: 1 Sony Drive, Park Ridge, NJ. 07656 USATelephone No.: 201-930-6970This device complies with Part 15 of the FCC Rules. Operation is subjectto the following two conditions: (1) This device may not cause harmfulinterference, and (2) this device must accept any interference received,including interference that may cause undesired operation.

2GB
• Duplication of any or all of the contents ofthis software and instruction manual orlending of this software to third partieswithout the express permission of thecopyright holder is strictly prohibited bycopyright law.
• Sony cannot be held liable in any way formonetary losses, lost profits or claims fromthird parties arising from the use of thissoftware.
• Should any manufacturing defects occur,Sony’s responsibility shall be limited solelyto replacing said defective merchandise.
• This software is approved for use only withthe specified equipment.
• Sony reserves the right to change softwarespecifications without prior notice.
Program 1999 Sony CorporationDocumentation 1999 SonyCorporation 1999 Sony Corporation All rightreserved.
• MD Editor 2, PictureGear and VAIO arethe registered trademarks of SonyCorporation.
• Microsoft, MS-DOS and Windows are theregistered trademarks of MicrosoftCorporation.
• IBM and PC/AT are the registeredtrademarks of International BusinessMachines Corporation.
• Macintosh is the registrated trademark ofApple Computer Inc.
• Adobe and Adobe Acrobat Reader arethe trademarks of Adobe SystemsIncorporated.
• Other companies and product names arethe trademarks or the registeredtrademarks of each company.
NOTICE FOR THE CUSTOMERS IN THEU.S.A.
INFORMATIONThis equipment has been tested and found tocomply with the limits for a Class B digitaldevice, pursuant to Part 15 of the FCC Rules.These limits are designed to providereasonable protection against harmfulinterference in a residential installation. Thisequipment generates, uses, and can radiateradio frequency energy and, if not installedand used in accordance with the instructions,may cause harmful interference to radiocommunications. However, there is noguarantee that interference will not occur in aparticular installation. If this equipment doescause harmful interference to radio ortelevision reception, which can be determinedby turning the equipment off and on, the useris encouraged to try to correct the interferenceby one or more of the following measures:— Reorient or relocate the receiving antenna.— Increase the separation between the
equipment and receiver.— Connect the equipment into an outlet on a
circuit different from that to which thereceiver is connected.
— Consult the dealer or an experiencedradio/TV technician for help.
CAUTIONYou are cautioned that any changes ormodification not expressly approved in thismanual could void your authority to operatethis equipment.
NOTICE FOR THE CUSTOMERS INCANADAThis Class B digital apparatus complies withCanadian IEES-003.

3GB
Getting startedOverview .............................................. 4
System requirements .................. 5Notes ............................................. 5
PreparationChecking the supplied items.............. 6Connections .......................................... 7
Connecting a CD player to theMD deck ............................... 9
About this manual ............................. 10Using the on-line manual ......... 10Using the help ............................ 11
Installing the software ...................... 12Installing the MD Editor 2 ....... 12Installing the Label Maker ....... 13Setting up the On-line Manual 13Installing the Adobe Acrobat
Reader ................................. 14Uninstalling the software ......... 14
Starting up the software ................... 15Starting up the software for the
first time ............................. 16Starting up the software for the
second and subsequenttimes .................................... 16
Additional InformationTroubleshooting ................................. 17
Table of contents
GB

4GB
Getting started
Overview
The MD Editor 2 allows you to control an MD deck from your personalcomputer. You can also use it to listen to CDs in your personalcomputer’s CD-ROM drive*1 or in a Sony CD player*2 connected to theCONTROL A1 (or CONTROL A1) jack(s) of the MD deck.
• Operate the CD and MD player (playback) from the computer.• Input disc names and track names using the computer’s keyboard.• Edit MDs while viewing the computer’s display.• Enjoy easy recording by performing a drag and drop from a CD to an
MD.• Enjoy making and printing MD (or other) labels*3.
*1 This software does not work with CD-ROM changers.*2 This software works with CD players equipped with a CONTROL A1 (or
CONTROL A1) jack. (Compatible models: CDP-CX70ES/CX88ES/CX90ES,CDP-CE515, CDP-CX55, CDP-CX200/CX205/CX210/CX220/CX240/CX250/CX255/CX260, CDP-XB930/XB930E/XB630, CDP-XE530, CDP-CA80ES/CA70ES, CDP-CE525/CE535, CDP-CX230, CDP-CX57/CX53, CDP-CX350/CX300/CX225/CX333ES/CX555ES). To connect the CD player, use amonaural (2P) mini-plug cord (supplied with the CD player or purchasedoptionally).
*3 Before you print labels, you must first install the Label Maker softwaresupplied with the MD Editor 2 (page 13).

5GB
System requirements
The following hardware and software are necessary to use the MDEditor 2 software.
π IBM PC/AT or compatibles (This software does not run onMacintosh.)
π RAM Memory: 16MB or more (32MB or more is recommended.)π Video board and display driver:
VGA (640 × 480 pixels), 65,536 colors or moredisplayable.
π Hard disc space: 20MB or more (When installing both MD Editor 2and Label Maker.)
π CD-ROM driveπ Serial port: 1 or moreπ OS : Windows 95/Windows 98 (This software does not
run on Microsoft Windows 3.1 or Windows NT.)π Video monitor: VGA (640 × 480 pixels), 65,536 colors or more
displayable.
Notes
• Set up the serial port that is to be used for this kit so that it isunavailable to the other softwares.
• To verify that the serial ports of your computer are enabled, call thevendor of your computer.

6GB
Preparation
Checking the supplied items
Check to make sure that you have received the following supplieditems with the MD Editor 2. If anything is missing, please contact theshop where you purchased this unit or your nearest Sony dealer.
• Connector (RS-232C˜monaural mini-jack) (1)• Monaural (2P) mini-plug cord (1)
• MD Editor 2 CD-ROM (1)• Operating instructions (1)• Warranty card (1)
Connector
Monaural (2P) mini-plug cord

7GB
Connections
Connecting your computer to the MD deck• Connection for controlling the MD deck from your computer
Use the supplied connector and monaural (2P) mini-plug cord to connect yourpersonal computer to the MD deck.
DIGITAL CONTROLA1
(VARIABLE)
IN1 OUTIN2
LINE (ANALOG)OUT (OPTICAL)
L
R
IN
Notes• Different brands of personal computers refer to their RS-232C serial terminals
with different terminal names. For further information, refer to theinstruction manual of your computer.
• Match the orientation of the connector with that of the serial connector onyour computer when plugging the cable. The orientation of a serial connectordiffers from computer to computer.
• Plug the cord in straight when connecting. Plugging the cord in at an anglemay result in damage.
• Do not insert any metal objects into the connection jacks. Shorting may occurresulting in damage.
MD Deck Computer
Connector
To the CONTROLA1 jack Computer
Insert the plug deeplyinto the matching jack. Match the orientation of the connectors
and insert the plug deeply into thematching connector then secure the plugwith the retaining screws on both sidesof the plug.
To the computer’sRS-232C serialconnector

8GB
• Connection for recording from a CD in the CD-ROM driveThe connections below are possible if your computer has the LINE OUT jack orPHONES jack. Connect the computer to the MD deck using an optional audioconnecting cord* (pin-plug ˜ stereo mini-plug).— If your computer has the LINE OUT jack
MD deck Computer
(VARIABLE)
LINE (ANALOG)OUT
L
R
IN
jack type: stereo mini-jack
— If your computer has the PHONES jack
MD deck Computer
2
(VARIABLE)
LINE (ANALOG)OUT
L
R
IN
jack type: stereo mini-jack
• Connection for listening to the MD deck output from your computer’sspeakersConnect the LINE IN jack on your computer to the LINE (ANALOG) OUT jacks onthe MD deck using an optional audio connecting cord* (pin-plug ˜ stereo mini-plug).When using this connection, open the “Volume Control” window, click “Options”to display the “Properties” window, click “Recording,” and then check “Line In” in“Show the following volume controls.” For details on the “Volume Control”window, refer to the Windows operating instructions.
MD deck Computer
(VARIABLE)
LINE (ANALOG)OUT
L
R
IN
jack type: stereo mini-jack
* Sony RK-G129HG (1.5 m (approx. 5 ft), no load resistance) or equivalent.

9GB
Connecting a CD player to the MD deck
Use a monaural (2P) mini-plug cord (either supplied with your CD player orpurchased optionally) to connect a Sony CD player equipped with CONTROL A1(or CONTROL A1) jacks directly to the MD deck. This allows you to control the CDplayer as well as the MD deck from your computer. When controlling the MD deckfrom the computer, make sure that only one CD player is connected and that the CDplayer’s command mode is set to “1.”The audio cord connection (either digital or analog) should also be made between theCD player and MD deck. For details, refer to the operating instructions of the MDdeck.

10GB
About this manual
This manual explains how to use the basic functions of MD Editor 2.For additional information about software functions and operations,refer to the on-line manual in the supplied CD-ROM.The latest information about this software can be found in the“Readme.txt” file in the supplied CD-ROM.
Using the on-line manual
Before you use the on-line manual, Adobe Acrobat Reader (AdobeSystems Incorporated) must be installed in your computer. If it is not,do the procedure “Installing the Adobe Acrobat Reader” on page 14.
, To open the on-line manual, click “Start,” point to “Program,”point to “MD Editor 2,” and then click “On-line manual.”
The cover page appears in the display.

11GB
Using the help
NoteHelp exists only in English.Operating instructions in other languages can be found in the on-line manual(page 10).
Opening the table of contents of HelpClick the Help button on the Main Bar, and a table of contents of MDEditor 2 will be opened.
• Double-click , and the titles of the items contained in it appear.• Double-click , and an explanation of that item is displayed.• Click an underline in the explanation, and the page of the related
explanation is displayed.• Click the displayed image of the picture above “Item,” and the
pertinent item is displayed in a balloon.
Searching by KeywordsClick the “Index” tab in the above search topic dialog box, and the tableof contents disappear and a list of keywords are displayed.To search for a keyword, enter the word by which you want to searchor scroll the list of keywords.To view the explanation on a keyword, select the keyword from the listof keywords and click “Display.”
12GB
Installing the software
Use this procedure to install this software onto your computer’s harddisc. Set the computer to the operation mode before proceeding.
Installing the MD Editor 2
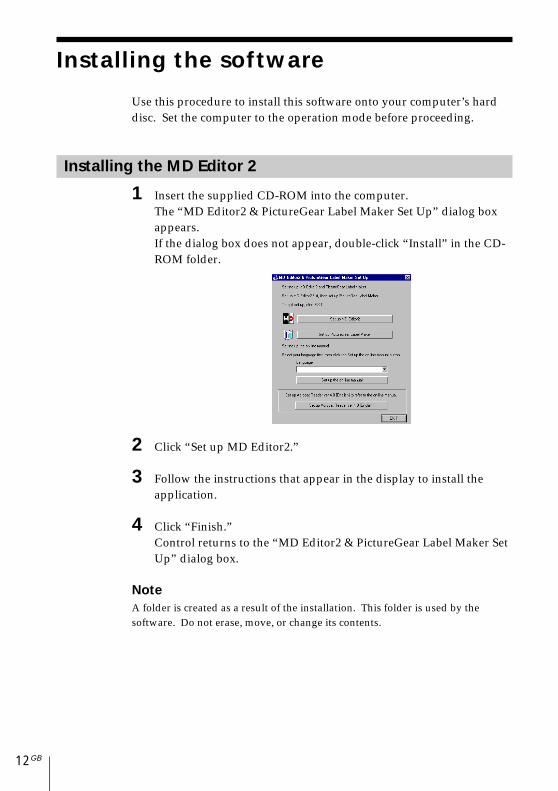
1 Insert the supplied CD-ROM into the computer.The “MD Editor2 & PictureGear Label Maker Set Up” dialog boxappears.If the dialog box does not appear, double-click “Install” in the CD-ROM folder.
2 Click “Set up MD Editor2.”
3 Follow the instructions that appear in the display to install theapplication.
4 Click “Finish.”Control returns to the “MD Editor2 & PictureGear Label Maker SetUp” dialog box.
NoteA folder is created as a result of the installation. This folder is used by thesoftware. Do not erase, move, or change its contents.

13GB
Installing the Label Maker
When installing version 4.0 of PictureGear Label Maker, if an olderversion already exists in your computer, the older version will beoverwritten by version 4.0.
1 Click “Set up PictureGear Label Maker” in the “MD Editor2 &PictureGear Label Maker Set Up” dialog box.
2 Follow the instructions that appear in the display to install theapplication.
NoteIf you restarted your computer by selecting “Yes, I want to restart my computernow” in the dialog box that appeared at the end of the Label Maker installation,you should double-click “Install” in the CD-ROM folder to set up the on-linemanual or install the Adobe Acrobat Reader.
Setting up the On-line Manual
English version of on-line manual is automarically installed when youinstall MD Editor 2.To install another language version, do the procedure below tooverwrite the English version with the language version that you select.
1 Select the language in the “MD Editor 2 & PictureGear Label MakerSet Up” dialog box.
2 Click “Set up the on-line manual.”
3 Follow the instructions that appear in the display to set up the on-line manual.

14GB
Installing the Adobe Acrobat Reader
You must install the Adobe Acrobat Reader in your computer in orderto open the on-line manual.
1 Click “Set up Adobe Acrobat Reader 4.0 [English].”
2 Follow the instructions that appear in the display to install theapplication.
After you have completed installation, click “EXIT” and remove theCD-ROM.
Uninstalling the software
If you do not need the MD Editor 2, Label Maker, or Adobe AcrobatReader, uninstall the software as follows:
1 Click “Start,” point to “Settings,” and then click “Control Panel.”
2 Double-click “Add/Remove Programs.”The “Add/Remove Programs Properties” dialog box appears.
3 Select and click “MD Editor 2,” “PictureGear Label Maker 4.0,” or“Adobe Acrobat Reader 4.0” from the program list below.
4 Click “Add/Remove.”The “Confirm File Deletion” dialog box appears.
5 Click “Yes.”Uninstaller starts up and the software selected in step 3 is deletedautomatically.
NoteIf you uninstalled the Label Maker from the computer in which the PictureGearsoftware is already installed, it become impossible to print labels through thePictureGear as well. If this happens, uninstall the PictureGear, and then reinstallit.

15GB
Starting up the software
If the softwares listed below are already installed in yourcomputer, do not start them up while the MD Editor 2 is active.
Softwares for controlling the MD deck
• MD Editor Supplied with the PCLK-MD1personal computer connecting kit,or the MD deck MDS-PC1 whichincludes a personal computerconnecting kit.
• MD Editor (VAIO) Supplied with Sony VAIO personalcomputers.
• Media Bar Supplied with Sony VAIO personalcomputers.
• Media Communicator Supplied in the PCLK-PX1 andother kits for connecting an MDdeck to a personal computer.
Starting up the MD Editor 2 with any of these programs activewill result in a malfunction.
If you are using several CD-ROM drives, you may need to select thedrive to be used for playing music CDs before starting up MD Editor 2.
Selecting the CD-ROM drive1 On the desk top, double-click “My Computer,” double-click
“Control Panel,” and then double-click “Multimedia” to display the“Multimedia Properties” window.
2 Click the “CD Music” tab and select the CD-ROM drive to be usedfor music CD playback.

16GB
Starting up the software for the first time
/ Click “Start,” point to “Programs,” point to “MD Editor2,” and then click “MD Editor 2.”This software is then started and the MD Editor 2 Main Barappears.When you start the software, the following display appears:
If a dialog appears instead of the Main Bar, select a serialport.On the serial port selection dialog box, select one of options COM1,COM2, COM3, and COM4 that is available for your computer. Alsocheck that the MD deck is connected to the serial port you selected.
Notes• Set up the serial port that is to be used for this kit so that it is
unavailable to the other software.• To verify that the serial ports of your computer are enabled, call the
vendor of your computer.
Starting up the software for the second and subsequent times
/ Click “Start,” point to “Programs,” point to “MD Editor2,” and then click “MD Editor 2.”The software is started and the MD Editor 2 Main Bar appears.
Notes• Be sure to quit MD Editor 2 before turning off the MD deck.• Do not use a bi-directional remote while MD Editor 2 is active.• If an MD Editor 2-compatible component other than a CD player is
connected to the MD deck through the monaural (2P) mini-plug cord,do not use any of the controls other than the volume control whilethe MD deck is active. Using these controls may result in amalfunction.

17GB
Troubleshooting
If you experience any of the following difficulties while using thissoftware, use this troubleshooting guide to remedy the problem.Should any problem persist, consult your nearest Sony dealer.Please also refer to your computer’s manual, as well as the“Readme.txt” file installed on the hard disc with the software.
Problem Cause/countermeasure
Additional Information
The message “Communicationport cannot be opened.” appears.
Another application may be using the serial port.n Quit the other application.
The message “Port not registeredin System was used.” appears.
You selected a port that is not available on yourcomputer during serial port setup.n Select a valid port while referring to the
instruction manual for your computer.
The message “Cord ConnectionError” appears.
The connector from the computer adapter is notconnected properly to the serial port of thecomputer, or connected to a port that is notselected during serial port setup.n Check the connector for normal connection.The monaural (2P) mini-plug cord from thecomputer connector is not connected properly tothe MD deck, or MD deck power cord is notconnected to a power outlet.n Check the monaural (2P) mini-plug cord for
normal connection.n Make sure that the power cord from the MD
deck is connected to a power outlet.
No screen response or screenerror.
Character input, recording,editing etc., cannot be done.
The disc’s protect tab may be set for write protect.n Slide the tab so that recording is possible.The MD may probably be a commercial playback-only MD (an MD with prerecorded tracks).n Character input, recording, editing, etc., are
not possible on commercial playback MDs.
n Turn the power of the MD deck off and on,and then restart the MD Editor 2.n Start up another application often used and
check if computer functions properly.n After uninstalling (page 14), try re-installing
(page 12).

18GB
Problem Cause/countermeasure
The MD deck does not respondas a whole.
n Check the cables are connected properly (page7).n Check that “Serial Setup” has been done
properly (page 16).n Disconnect cables of the connector and then
reconnect them.
Displayed name of MD or CDdoes not match the disc’s data.
n Click the Reload button.n Restart the MD Editor 2.
Recording from a CD in the CD-ROM drive to an MD in the MDdeck cannot be done.
n Check that the audio connecting cord iscorrectly connected (page 8).n Check that the settings for the devices in the
“Volume Control” window are correct.
Troubleshooting (Continued)
Sound from the MD in the MDdeck connected to the LINE INjacks of a computer is not outputfrom the computer’s speakers(page 8).
n Check that the audio connecting cord iscorrectly connected. Check that the settings forthe devices in the “Volume Control” windoware correct (page 8).


2FR
• La copie de tout ou partie de ce logiciel etdu mode d’emploi, ou le prêt de ce logicielà un tiers, sans l’autorisation expresse dudétenteur des droits d'auteur, sontstrictement interdits par la loi sur les droitsd'auteur.
• Sony n’assume aucune responsabilité, dequelque nature que ce soit, pour les pertesfinancières, les pertes de bénéfices ou lesplaintes de tiers, émanant de l’utilisation dece logiciel.
• En cas de défaut de fabrication, laresponsabilité de Sony se limiteuniquement au remplacement de laditemarchandise défectueuse.
• L’utilisation de ce logiciel n’est approuvéequ’avec l’équipement spécifié.
• Sony se réserve le droit de modifier sanspréavis les spécifications de ce logiciel.
Programme 1999 Sony CorporationDocumentation 1999 SonyCorporation 1999 Sony Corporation - Tous droitsréservés.
• MD Editor 2, PictureGear et VAIO sont desmarques de fabrique déposées de SonyCorporation.
• Microsoft, MS-DOS et Windows sont desmarques de fabrique déposées de MicrosoftCorporation.
• IBM et PC/AT sont des marques defabrique déposées d’International BusinessMachines Corporation.
• Macintosh est une marque de fabriquedéposée d’Apple Computer Inc.
• Adobe® et Adobe® Acrobat® Reader sontdes marques de fabrique déposées d’AdobeSystems Incorporated.
• Les autres noms d’entreprise ou de produitsont des marques de fabrique ou marquesde fabrique déposées de chaque entreprise.
NOTICE POUR LES CLIENTS AU CANADACet appareil numérique de la classe B estcomformeala norme NMB-003 du Canada.

3FR
Table de matières
PréparatifsAperçu ................................................... 4
Système requis ............................. 5Remarques .................................... 5
PréparatifsContrôle des articles dans la boîte ..... 6Raccordements ..................................... 7
Raccordement d’un lecteur CD àla platine MD ....................... 9
A propos de ce mode d’emploi ....... 10Utilisation du manuel en ligne 10Utilisation de l’aide ................... 11
Installation du logiciel ...................... 12Installation du MD Editor 2 ..... 12Installation du Label Maker ..... 13Implantation du Manuel
en ligne ............................... 13Installation d’Adobe Acrobat
Reader ................................. 14Désinstallation du logiciel ........ 14
Lancement du logiciel ....................... 15Premier lancement du logiciel . 16Second lancement et lancements
ultérieurs du logiciel ......... 16
Informations additionnellesGuide de dépannage ......................... 17
FR

4FR
Préparatifs
Aperçu
Le MD Editor 2 vous permet de contrôler une platine MD à partir devotre ordinateur personnel. Vous pouvez aussi l’utiliser pour écouterdes CD dans le lecteur CD-ROM*1 de votre ordinateur ou dans unlecteur CD Sony*2 raccordé à la ou aux prises CONTROL A1 (ouCONTROL A1) de votre platine MD. Les opérations suivantes sontpossibles:
• Opérer lecteurs CD et MD (lecture) à partir de votre ordinateur.• Entrer des titre de disque et de plage au clavier de votre ordinateur.• Editer des MD en visionnant leur contenu sur l’écran de l’ordinateur.• Enregistrer simplement en effectuant un glisser-déposer d’un CD à
un MD.• Créer et imprimer des étiquettes de MD (ou autres)*3.
*1 Ce logiciel ne fonctionne pas avec les changeurs CD-ROM.*2 Ce logiciel fonctionne avec les lecteurs CD pourvus d’une prise CONTROL
A1 (ou CONTROL A1). (Modèles compatibles: CDP-CX70ES/CX88ES/CX90ES, CDP-CE515, CDP-CX55, CDP-CX200/CX205/CX210/CX220/CX240/CX250/CX255/CX260, CDP-XB930/XB930E/XB630, CDP-XE530,CDP-CA80ES/CA70ES, CDP-CE525/CE535, CDP-CX230, CDP-CX57/CX53,CDP-CX350/CX300/CX225/CX333ES/CX555ES). Pour raccorder le lecteurCD, utilisez un cordon à mini-fiche mono (2P) (fourni avec le lecteur CD ouacheté séparément).
*3 Avant d’imprimer les étiquettes, installez le logiciel Label Maker fourni surMD Editor 2 (page 13).

5FR
Système requis
Les éléments matériels et logiciels suivants sont requis pour pouvoirutiliser le logiciel MD Editor 2.
π IBM PC/AT ou compatible (Ce logiciel ne fonctionne pas surMacintosh.)
π Mémoire RAM: 16MB ou plus (32MB ou plus sont recommandés.)π Carte vidéo et pilote d’affichage:
VGA (640 × 480 pixels), 65.536 couleurs ou plusaffichables
π Espace libre sur le disque dur: 20MB ou plus (pour l’installation duMD Editor 2 et du Label Maker)
π Lecteur CD-ROMπ Port série: 1 ou plusπ Système d’exploitation:
Windows 95/Windows 98 (Ce logiciel nefonctionne pas sur Microsoft Windows 3.1 ouWindows NT.)
π Moniteur vidéo: VGA (640 × 480 pixels), 65.536 couleurs ou plusaffichables
Remarques
• Réglez le port série de sorte qu’il soit utilisable pour ce kit etinutilisable pour d’autres logiciels.
• Pour vérifier que les ports série de votre ordinateur sont validés,consultez votre vendeur d’ordinateur.

6FR
Préparatifs
Contrôle des articles dans la boîte
Vérifiez que tous les éléments ci-dessous fournis avec MD Editor 2 sontdisponibles dans la boîte. Si l’un d’entre eux manque, contactez lemagasin d’achat de cet appareil ou le revendeur Sony le plus proche.
• Connecteur (RS-232C ˜ miniprise mono) (1)• Cordon à mini-fiche mono (2P) (1)
• CD-ROM MD Editor 2 (1)• Mode d’emploi (1)• Carte de garantie (1)
Connecteur
Cordon à mini-fiche mono (2P)

7FR
Raccordements
Raccordement de votre ordinateur à la platine MD• Raccordement pour contrôler la platine MD à partir de votre ordinateur
Utilisez le connecteur et le cordon à mini-fiche mono (2P) fournis pour raccordervotre ordinateur personnel à la platine MD.
DIGITAL CONTROLA1
(VARIABLE)
IN1 OUTIN2
LINE (ANALOG)OUT (OPTICAL)
L
R
IN
Remarques• Les bornes série RS-232C des ordinateurs personnels de marques différentes
portent des dénominations diverses. Pour de plus amples informations,consultez le mode d’emploi de votre ordinateur.
• Alignez correctement le connecteur sur le connecteur série de votre ordinateurpour le raccordement du câble. L’orientation du connecteur série varie d’unordinateur à l’autre.
• Branchez le cordon tout droit lors du raccordement. Le branchement inclinépeut causer des dommages.
• N’insérez aucun objet métallique dans les prises de raccordement. Le court-circuit résultant pourrait provoquer des dommages.
Platine MD Ordinateur
Connecteur
A la priseCONTROL A1 Ordinateur
Insérez la fiche à fond dansla prise correspondante. Alignez correctement les connecteurs et
insérez la fiche à fond dans leconnecteur correspondant, puis fixez lafiche avec les vis de retenue sur ses deuxcôtés.
Au connecteursérie RS-232C devotre ordinateur

8FR
• Raccordement pour l’enregistrement à partir d’un CD placé dans le lecteur CD-ROMLes connexions ci-dessous sont possibles si votre ordinateur est pourvu d’une priseLINE OUT ou PHONES. Raccordez l’ordinateur à la platine MD à l’aide d’uncordon de raccordement audio* en option (fiche à broches ˜ mini-fiche stéréo).— Si votre ordinateur est pourvu d’une prise LINE OUT
Platine MD Ordinateur
(VARIABLE)
LINE (ANALOG)OUT
L
R
IN
Type de prise: miniprise stéréo
— Si votre ordinateur est pourvu d’une prise PHONES
Platine MD Ordinateur
2
(VARIABLE)
LINE (ANALOG)OUT
L
R
IN
Type de prise: miniprise stéréo
• Raccordement pour l’écoute du son de la platine MD fourni par les enceintesde l’ordinateurRaccordez la prise LINE IN de votre ordinateur aux prises LINE (ANALOG) OUTde la platine MD avec un cordon de raccordement audio* en option (fiche à broches˜ mini-fiche stéréo) fourni.A l’utilisation de cette connexion, ouvrez la fenêtre “Volume Control” (Contrôle duvolume), cliquez sur “Options” pour afficher la fenêtre “Properties” (Propriétés),cliquez sur “Recording” (Enregistrement), puis pointez “Line In” (Entrée de ligne)dans “Show the following volume controls” (Visionner les contrôles de volumesuivants). Pour les détails sur la fenêtre “Volume Control” (Contrôle du volume),consultez le mode d’emploi Windows.
Platine MD Ordinateur
(VARIABLE)
LINE (ANALOG)OUT
L
R
IN
Type de prise: miniprise stéréo
* RK-G129HG Sony (1,5 m (approx. 5 pieds), sans résistance de charge) ou équivalent.

9FR
Raccordement d’un lecteur CD à la platine MD
Utilisez un cordon à mini-fiche mono (2P) (fourni avec le lecteur CD ou achetéséparément) pour raccorder un lecteur CD Sony pourvu de prises CONTROL A1(ou CONTROL A1) directement à la platine MD. Cela vous permet de contrôler lelecteur CD ainsi que la platine MD à partir de votre ordinateur. Au contrôle de laplatine MD à partir de votre ordinateur, vérifiez qu’un seul lecteur CD est raccordé etque le mode de commande du lecteur CD est réglé à “1”.Le cordon audio (connexion numérique ou analogique) doit être raccordé entre lelecteur CD et la platine MD. Pour les détails, consultez le mode d’emploi de la platineMD.

10FR
A propos de ce mode d’emploi
Ce mode d’emploi explique l’utilisation des fonctions de base du MDEditor 2. Pour de plus amples informations sur les fonctions etopérations du logiciel, consultez le manuel en ligne CD-ROM fourni.Les dernières informations concernant ce logiciel sont disponibles dansle fichier “Readme.txt” du CD-ROM fourni.
Utilisation du manuel en ligne
Avant d’utiliser le manuel en ligne, Adobe Acrobat Reader (AdobeSystems Incorporated) doit être installé dans votre ordinateur. S’il nel’est pas encore, procédez comme indiqué sous “Installation d’AdobeAcrobat Reader” à la page 14.
, Pour ouvrir le manuel en ligne, cliquez sur “Start” (Démarrer),amenez le pointeur sur “Program”, puis “MD Editor 2”, puiscliquez sur “On-line manual” (Manuel en ligne).
La page de couverture s’affiche.

11FR
Utilisation de l’aide
RemarqueL’aide est disponible seulement en anglais.Le mode d’emploi dans les autres langues se trouve dans le manuel en ligne(page 10).
Ouverture de la table des matières de l’aideCliquez sur le bouton d’aide (Help) sur la barre principale, et la tabledes matières de MD Editor 2 s’ouvrira.
• Double-cliquez sur pour faire apparaître les titres des articlescontenus.
• Double-cliquez sur pour obtenir une explication de l’article affiché.• Cliquez sur la ligne de soulignement d’une explication pour afficher
la page concernant l’explication.• Cliquez sur l’image affichée de l’image au-dessus de “Item” (Article)
pour afficher l’article concerné dans une bulle.
Recherche par mots clésCliquez sur l’onglet “Index” dans la boîte de dialogue de recherche derubriques ci-dessus pour faire disparaître la table des matières etafficher la liste des mots clés.Pour rechercher un mot clé, entrez le mot avec lequel vous souhaitezeffectuer la recherche ou faites défiler la liste des mots clés.Pour visionner l’explication d’un mot clé, sélectionnez-le dans la listedes mots clés et cliquez sur “Display” (Afficher).

12FR
Installation du logiciel
Procédez comme suit pour installer le logiciel sur votre disque dur.Mettez l’ordinateur en mode d’exploitation avant d’effectuerl’installation.
Installation du MD Editor 2
1 Insérez le CD-ROM fourni dans l’ordinateur.La boîte de dialogue “MD Editor2 & PictureGear Label Maker SetUp” (Implantation de MD Editor2 & PictureGear Label Maker)apparaît.Si elle n’apparaît pas, double-cliquez sur “Install” dans le dossierCD-ROM.
2 Cliquez sur “Set up MD Editor 2” (Installation de MD Editor 2).
3 Suivez les instructions apparaissant sur l’affichage pour installerl’application.
4 Cliquez sur “Finish”.L’appareil revient à la boîte de dialogue “MD Editor2 &PictureGear Label Maker Set Up” (Implantation de MD Editor2 &PictureGear Label Maker).
RemarqueUn dossier est créé suite à l’installation et utilisé par le logiciel. Ne supprimezpas, ne déplacez pas et ne changez pas son contenu.

13FR
Installation du Label Maker
A l’installation du PictureGear Label Maker de version 4.0, si uneversion plus ancienne est déjà installée dans l’ordinateur, elle seraécrasée par la version 4.0.
1 Cliquez sur “Set up PictureGear Label Maker” dans la boîte dedialogue “MD Editor2 & PictureGear Label Maker Set Up”.
2 Suivez les instructions apparaissant sur l’affichage pour installerl’application.
RemarqueSi vous avez redémarré votre ordinateur en sélectionnant “Yes, I want to restartmy computer now” dans la boîte de dialogue apparue à la fin de l’installation deLabel Maker, double-cliquez sur “Install” dans le dossier CD-ROM pourimplanter le manuel en ligne ou installer Adobe Acrobat Reader.
Implantation du Manuel en ligne
La version anglaise du manuel en ligne est automatiquement installéequand vous installez MD Editor 2.Pour installer la version dans la langue de votre choix, procédez commesuit pour écraser la version anglaise avec cette version.
1 Sélectionnez la langue dans la boîte de dialogue “MD Editor2 &PictureGear Label Maker Set Up” (Implantation de MD Editor2 &PictureGear Label Maker).
2 Cliquez sur “Set up the on-line manual” (Implantation du manuelen ligne).
3 Suivez les instructions apparaissant sur l’affichage pour implanterle manuel en ligne.

14FR
Installation d’Adobe Acrobat Reader
Vous devez installer Adobe Acrobat Reader dans votre ordinateur pourouvrir le manuel en ligne.
1 Cliquez sur “Set up Adobe Acrobat Reader 4.0 [English]”(Implanter Adobe Acrobat Reader 4.0 [English]).
2 Suivez les instructions apparaissant sur l’affichage pour installerl’application.
L’installation terminée, cliquez sur “EXIT” et retirez le CD-ROM.
Désinstallation du logiciel
Si vous n’avez pas besoin des logiciels MD Editor 2, Label Maker ouAdobe Acrobat Reader, désinstallez-les comme suit:
1 Cliquez sur “Start” (Démarrer), amenez le pointer sur “Settings”(Paramètres), puis cliquez sur “Control Panel” (Panneau deconfiguration).
2 Double-cliquez sur “Add/Remove Programs” (Ajout/suppressionde programmes).La boîte de dialogue “Add/Remove Programs Properties”(Propriétés d’Ajout/suppression de programmes) apparaît.
3 Sélectionnez et cliquez sur “MD Editor 2”, “PictureGear LabelMaker 4.0” ou “Adobe Acrobat Reader 4.0” dans la liste deprogrammes ci-dessous.
4 Cliquez sur “Add/Remove” (Ajouter/Supprimer).La boîte de dialogue “Confirm File Deletion” (Confirmer lasuppression de fichier) apparaît.
5 Cliquez sur “Yes” (Oui).La désinstallation démarre et le logiciel sélectionné à l’étape 3 estautomatiquement supprimé.
RemarqueSi vous désinstallez Label Maker de l’ordinateur dans lequel le logicielPictureGear est déjà installé, il sera aussi impossible d’imprimer des étiquettesavec PictureGear. Dans ce cas, désinstallez PictureGear, puis réinstallez-le.

15FR
Lancement du logiciel
Si les logiciels ci-dessous sont déjà installés dans votreordinateur, ne les démarrez pas quand MD Editor 2 est actif.
Logiciels pour le contrôle de la platine MD
• MD Editor Fourni avec le kit de raccordementde l’ordinateur personnel PCLK-MD1, ou le MDS-PC1 de la platineMD incluant un kit deraccordement d’ordinateurpersonnel
• MD Editor (VAIO) Fourni avec les ordinateurspersonnels VAIO Sony
• Media Bar Fourni avec les ordinateurspersonnels VAIO Sony
• Media Communicator Fourni avec le PCLK-PX1 etd’autres kits pour le raccordementd’une platine MD à un ordinateurpersonnel
Le démarrage du MD Editor 2 quand l’un des ces programmesest actif peut se traduire par un mauvais fonctionnement.
Si vous utilisez plusieurs lecteurs CD-ROM, il faudra sélectionner lelecteur à utiliser pour la lecture de CD musique avant de démarrer MDEditor 2.
Sélection du lecteur CD-ROM1 Sur l’ordinateur de bureau, double-cliquez “My Computer” (Poste
de travail), double-cliquez “Control Panel” (Panneau deconfiguration), puis double-cliquez “Multimedia” pour afficher lafenêtre “Multimedia Properties” (Propriétés multimedia).
2 Cliquez sur l’onglet “CD Music” (CD musique) et sélectionnez lelecteur CD-ROM à utiliser pour la lecture des CD musique.

16FR
Premier lancement du logiciel
/ Cliquez sur “Start” (Démarrer), amenez le pointeur sur“Programs” (Programmes) puis sur “MD Editor 2”,ensuite cliquez sur “MD Editor 2”.Ce logiciel démarre alors et la barre principale de MD Editor 2apparaît.Au démarrage du logiciel, l’affichage suivant apparaît.
Si une boîte de dialogue apparaît au lieu de la barreprincipale, sélectionnez un port série.Dans la boîte de dialogue de sélection de port série, sélectionnez unedes options COM1, COM2, COM3 ou COM4 disponibles sur votreordinateur. Vérifiez aussi que la platine MD est raccordée au port sériesélectionné.
Remarques• Réglez le port série à utiliser pour ce kit de sorte qu’il ne soit pas disponible
pour les autres logiciels..• Contactez le vendeur de votre ordinateur pour vérifier que les ports série de
votre ordinateur sont validés.
Second lancement et lancements ultérieurs du logiciel
/ Cliquez sur “Start” (Démarrer), amenez le pointeur surPrograms” (Programmes) puis sur “MD Editor 2”, ensuitecliquez sur “MD Editor 2”.Ce logiciel démarre et la barre principale de MD Editor 2 apparaît.
Remarques• N’oubliez pas de quitter MD Editor 2 à la mise hors tension de la platine MD.• N’utilisez pas de télécommande bidirectionnelle quand MD Editor 2 est actif.• Si un composant compatible MD Editor 2 autre qu’un lecteur de CD est
raccordé à la platine MD via un cordon à mini-fiche mono (2 broches),n’utilisez aucune commande autre que la commande de volume quand laplatine MD est active. Cela pourrait se traduire par un mauvaisfonctionnement.

17FR
Guide de dépannage
Si vous rencontrez l’un des problèmes ci-dessous pendant l’utilisationde ce logiciel, consultez ce guide de dépannage pour le résoudre. Si leproblème persiste, consultez le revendeur Sony le plus proche.Référez-vous également au mode d’emploi de l’ordinateur, ainsi qu’aufichier “Readme.txt” installé dans le disque dur avec le logiciel.
Problème Cause/solution
Informations additionnelles
Le message “Communicationport cannot be opened.” (Le portde communication ne peut pasêtre ouvert.) apparaît.
Une autre application utilise peut-être le portsérie.n Fermez l’autre application.
Le message “Port not registeredin System was used.” (Un portnon enregistré dans la système aété utilisé.) apparaît.
Vous avez sélectionné un port qui n’est pasdisponible sur votre ordinateur lors du réglage duport série.n Sélectionnez un port valide en consultant le
mode d’emploi de votre ordinateur.
Le message “Cord ConnectionError” (Erreur de raccordementpar cordon) apparaît.
Le connecteur de l’adaptateur d’ordinateur n’estpas raccordé correctement au port série del’ordinateur, ou bien raccordé à un port nonsélectionné lors du réglage du port série.n Vérifiez la connexion du connecteur.Le cordon à mini-fiche mono (2P) du connecteurd’ordinateur est mal raccordé à la platine MD, oule cordon d’alimentation de la platine MD n’estpas branché sur une prise murale.n Vérifiez la connexion du cordon à mini-fiche
mono (2P).n Vérifiez que le cordon d’alimentation de la
platine MD est branché sur une prise murale.
Aucune réponse sur écran ouerreur d’écran
n Mettez la platine MD hors tension, puis ànouveau sous tension, et redémarrez MDEditor 2.n Démarrez une autre application que vous
utilisez fréquemment pour vérifier sil’ordinateur fonctionne correctement.n Après la désinstallation du logiciel (page 14),
essayez de le réinstaller (page 12).

18FR
Problème Cause/solution
La platine MD ne répond pas dutout.
n Vérifiez que les câbles sont correctementbranchés (page 7).n Vérifiez que le “Serial Setup” (Réglage série) a
été effectué correctement (page 16).n Déconnectez les câbles du connecteur, puis
reconnectez-les.
Le titre de MD ou CD affiché necorrespond pas aux données dudisque.
n Cliquez sur la touche de rechargement.n Redémarrez MD Editor 2.
L’enregistrement d’un CD dans lelecteur CD-ROM à un MD dans laplatine MD est impossible.
n Vérifiez que le cordon de raccordement audioest bien raccordé (page 8).n Vérifiez que les réglages des dispositifs dans la
fenêtre “Volume Control” (Contrôle duvolume) sont corrects.
Guide de dépannage (suite)
Le son du MD dans la platine MDraccordée aux prises LINE IN del’ordinateur n’est pas fourni auxenceintes de l’ordinateur (page 8).
n Vérifiez que le cordon de raccordement audioest correctement raccordé. Vérifiez que lesréglages des dispositifs dans la fenêtre“Volume Control” (Contrôle du volume) sontcorrects (page 8).
Le taquet d’interdiction d’écriture du disque estpeut-être réglé à l’interdiction d’enregistrement.n Faites glisser le taquet pour permettre
l’enregistrement.Le MD est probablement un MD prévuuniquement pour la lecture (MD avec plagespréenregistrées).n L’inscription de caractères, l’enregistrement,
l’édition etc. sont impossibles sur les MD delecture disponibles dans le commerce.
L’inscription de caractères,l’enregistrement, l’édition etc.sont impossibles.


Sony Corporation Printed in Japan