mitel 5540 ip console - teamextenda.com
TRANSCRIPT

MITEL
5540 IP Console
User GuideRelease 1.0
NOTICE
The information contained in this document is believed to be accurate in all respects but is not warranted
by Mitel Networks™ Corporation (MITEL®). The information is subject to change without notice and should not be construed in any way as a commitment by Mitel or any of its affiliates or subsidiaries. Mitel and its affiliates and subsidiaries assume no responsibility for any errors or omissions in this document. Revisions of this document or new editions of it may be issued to incorporate such changes.
No part of this document can be reproduced or transmitted in any form or by any means - electronic or mechanical - for any purpose without written permission from Mitel Networks Corporation.
Mitel Networks is a trademark of Mitel Networks Corporation.
Other product names mentioned in this document may be trademarks of their respective companies and are hereby acknowledged.
NOTICE TO CANADIAN CUSTOMERS
This Class A digital apparatus complies with Canadian ICES-003.
NOTICE TO U.S. CUSTOMERS
This equipment has been tested and found to comply with the limits for a Class A digital device, pursuant to Part 15 of the FCC Rules. These limits are designed to provide reasonable protection against harmful interference when the equipment is operated in a commercial environment. This equipment generates, uses, and can radiate radio frequency energy and, if not installed and used in accordance with the instruction manual, may cause harmful interference to radio communications. Operation of this equipment in a residential area is likely to cause harmful interference in which case the user will be required to correct the interference at his own expense.
Changes or modifications not expressly approved by Mitel Networks™ Corporation may void the user’s right to operate the equipment.
Mitel 5540 IP Console User Guide (for Mitel Communications Director (MCD))October 2010
®, ™Trademark of Mitel Networks Corporation.© Copyright 2010, Mitel Networks Corporation
All rights reserved.
Table of Contents
iii
Chapter 1: Getting Started
Introduction . . . . . . . . . . . . . . . . . . . . . . . . . . . . . . . . . . . . . . . . . . . . . . . . . . . . . . . . . . . . . . . . . . . 3
Using this Guide . . . . . . . . . . . . . . . . . . . . . . . . . . . . . . . . . . . . . . . . . . . . . . . . . . . . . . . . . . . . . . . 3
Conventions . . . . . . . . . . . . . . . . . . . . . . . . . . . . . . . . . . . . . . . . . . . . . . . . . . . . . . . . . . . . . . . . . 3
About the Console . . . . . . . . . . . . . . . . . . . . . . . . . . . . . . . . . . . . . . . . . . . . . . . . . . . . . . . . . . . . . 4
Before you begin . . . . . . . . . . . . . . . . . . . . . . . . . . . . . . . . . . . . . . . . . . . . . . . . . . . . . . . . . . . . . 4
Console Components . . . . . . . . . . . . . . . . . . . . . . . . . . . . . . . . . . . . . . . . . . . . . . . . . . . . . . . . . 4
Corded Handset and Headset Ports . . . . . . . . . . . . . . . . . . . . . . . . . . . . . . . . . . . . . . . . . . . . 5
Console Rear Ports . . . . . . . . . . . . . . . . . . . . . . . . . . . . . . . . . . . . . . . . . . . . . . . . . . . . . . . . 5
Console Keys . . . . . . . . . . . . . . . . . . . . . . . . . . . . . . . . . . . . . . . . . . . . . . . . . . . . . . . . . . . . . 6
Adjusting the Console. . . . . . . . . . . . . . . . . . . . . . . . . . . . . . . . . . . . . . . . . . . . . . . . . . . . . . . . . . . 8
Adjusting the Ringer Volume . . . . . . . . . . . . . . . . . . . . . . . . . . . . . . . . . . . . . . . . . . . . . . . . . . . . 8
Adjusting the Handset and Headset Receiver Volume . . . . . . . . . . . . . . . . . . . . . . . . . . . . . . . . 8
Adjusting the Contrast Control . . . . . . . . . . . . . . . . . . . . . . . . . . . . . . . . . . . . . . . . . . . . . . . . . . . 8
Adjusting the Display Brightness . . . . . . . . . . . . . . . . . . . . . . . . . . . . . . . . . . . . . . . . . . . . . . . . . 9
Turning the Console Bell (Ringer) Off/On . . . . . . . . . . . . . . . . . . . . . . . . . . . . . . . . . . . . . . . . . . 9
Switching to Night/Day Service . . . . . . . . . . . . . . . . . . . . . . . . . . . . . . . . . . . . . . . . . . . . . . . . . . 9
Setting the Console Language . . . . . . . . . . . . . . . . . . . . . . . . . . . . . . . . . . . . . . . . . . . . . . . . . 10
Changing the Attendant Present/Absent Status . . . . . . . . . . . . . . . . . . . . . . . . . . . . . . . . . . . . 10
Programming Firmkeys . . . . . . . . . . . . . . . . . . . . . . . . . . . . . . . . . . . . . . . . . . . . . . . . . . . . . . . 10
Using a Cordless Headset with the Console . . . . . . . . . . . . . . . . . . . . . . . . . . . . . . . . . . . . . . . . 12
Connecting the Cordless Headset . . . . . . . . . . . . . . . . . . . . . . . . . . . . . . . . . . . . . . . . . . . . . . . 12
Using the Cordless Headset for Operational Mode . . . . . . . . . . . . . . . . . . . . . . . . . . . . . . . 13
Using the Cordless Headset for Training Mode . . . . . . . . . . . . . . . . . . . . . . . . . . . . . . . . . . 14
Guidelines for Cordless Headset Operation . . . . . . . . . . . . . . . . . . . . . . . . . . . . . . . . . . . . . . . 15
Answering Calls Using a Cordless Headset . . . . . . . . . . . . . . . . . . . . . . . . . . . . . . . . . . . . . . . 15
Making Calls Using a Cordless Headset . . . . . . . . . . . . . . . . . . . . . . . . . . . . . . . . . . . . . . . . . . 15
Powering the Console . . . . . . . . . . . . . . . . . . . . . . . . . . . . . . . . . . . . . . . . . . . . . . . . . . . . . . . . 15
Chapter 2: Call Handling
Answering Calls . . . . . . . . . . . . . . . . . . . . . . . . . . . . . . . . . . . . . . . . . . . . . . . . . . . . . . . . . . . . . . 19
New Call Indication . . . . . . . . . . . . . . . . . . . . . . . . . . . . . . . . . . . . . . . . . . . . . . . . . . . . . . . . . . 19
When Multiple Calls are Waiting . . . . . . . . . . . . . . . . . . . . . . . . . . . . . . . . . . . . . . . . . . . . . . . . 20
Transferring Calls . . . . . . . . . . . . . . . . . . . . . . . . . . . . . . . . . . . . . . . . . . . . . . . . . . . . . . . . . . . . . 20
Table of Contents
iv
Misdialed Numbers . . . . . . . . . . . . . . . . . . . . . . . . . . . . . . . . . . . . . . . . . . . . . . . . . . . . . . . . . . 20
Reaching a Busy Destination or an Extension with Do Not Disturb Activated . . . . . . . . . . . . . . 20
Reaching an Extension with an Advisory Message . . . . . . . . . . . . . . . . . . . . . . . . . . . . . . . . . . 21
Placing Calls . . . . . . . . . . . . . . . . . . . . . . . . . . . . . . . . . . . . . . . . . . . . . . . . . . . . . . . . . . . . . . . . . 21
Placing a Call on Hold . . . . . . . . . . . . . . . . . . . . . . . . . . . . . . . . . . . . . . . . . . . . . . . . . . . . . . . . . 21
Hold Recall . . . . . . . . . . . . . . . . . . . . . . . . . . . . . . . . . . . . . . . . . . . . . . . . . . . . . . . . . . . . . . . . 22
Stacked Hold . . . . . . . . . . . . . . . . . . . . . . . . . . . . . . . . . . . . . . . . . . . . . . . . . . . . . . . . . . . . . . . 23
Setting up Conferences and Call Splitting . . . . . . . . . . . . . . . . . . . . . . . . . . . . . . . . . . . . . . . . . . 23
Answering Recalls . . . . . . . . . . . . . . . . . . . . . . . . . . . . . . . . . . . . . . . . . . . . . . . . . . . . . . . . . . . . 24
Answering Intercepts to the Console . . . . . . . . . . . . . . . . . . . . . . . . . . . . . . . . . . . . . . . . . . . . . . 24
Paging from the Console . . . . . . . . . . . . . . . . . . . . . . . . . . . . . . . . . . . . . . . . . . . . . . . . . . . . . . . 25
PA Paging . . . . . . . . . . . . . . . . . . . . . . . . . . . . . . . . . . . . . . . . . . . . . . . . . . . . . . . . . . . . . . . . . 25
Extension Paging . . . . . . . . . . . . . . . . . . . . . . . . . . . . . . . . . . . . . . . . . . . . . . . . . . . . . . . . . . . . 26
Call Park . . . . . . . . . . . . . . . . . . . . . . . . . . . . . . . . . . . . . . . . . . . . . . . . . . . . . . . . . . . . . . . . . . 26
Placing Ringing or Paging Intercom Calls . . . . . . . . . . . . . . . . . . . . . . . . . . . . . . . . . . . . . . . . . . 27
Setting and Canceling Do Not Disturb on an Extension . . . . . . . . . . . . . . . . . . . . . . . . . . . . . . . . 27
Setting and Canceling Message Waiting on an Extension . . . . . . . . . . . . . . . . . . . . . . . . . . . . . . 28
Overriding Busy or Do Not Disturb . . . . . . . . . . . . . . . . . . . . . . . . . . . . . . . . . . . . . . . . . . . . . . . . 28
Redialing the Last Number . . . . . . . . . . . . . . . . . . . . . . . . . . . . . . . . . . . . . . . . . . . . . . . . . . . . . . 28
Phonebook . . . . . . . . . . . . . . . . . . . . . . . . . . . . . . . . . . . . . . . . . . . . . . . . . . . . . . . . . . . . . . . . . . 29
Setting up a Serial Call . . . . . . . . . . . . . . . . . . . . . . . . . . . . . . . . . . . . . . . . . . . . . . . . . . . . . . . . . 30
Using Tone Signaling . . . . . . . . . . . . . . . . . . . . . . . . . . . . . . . . . . . . . . . . . . . . . . . . . . . . . . . . . . 31
Flashing on Trunks . . . . . . . . . . . . . . . . . . . . . . . . . . . . . . . . . . . . . . . . . . . . . . . . . . . . . . . . . . . . 31
Answering a Call with Night Service Enabled. . . . . . . . . . . . . . . . . . . . . . . . . . . . . . . . . . . . . . . . 31
Using Directed Call Pickup . . . . . . . . . . . . . . . . . . . . . . . . . . . . . . . . . . . . . . . . . . . . . . . . . . . . . . 32
Last Call Retrieve . . . . . . . . . . . . . . . . . . . . . . . . . . . . . . . . . . . . . . . . . . . . . . . . . . . . . . . . . . . 32
Multiple Console Operation . . . . . . . . . . . . . . . . . . . . . . . . . . . . . . . . . . . . . . . . . . . . . . . . . . . . . 32
Inter-Console Calls and Transfers . . . . . . . . . . . . . . . . . . . . . . . . . . . . . . . . . . . . . . . . . . . . . . . 32

Table of Contents
v
Centralized Attendant Service (CAS) . . . . . . . . . . . . . . . . . . . . . . . . . . . . . . . . . . . . . . . . . . . . . . 33
Voice mail . . . . . . . . . . . . . . . . . . . . . . . . . . . . . . . . . . . . . . . . . . . . . . . . . . . . . . . . . . . . . . . . . . . 33
Chapter 3: Using System Functions
Viewing System Alarm Information. . . . . . . . . . . . . . . . . . . . . . . . . . . . . . . . . . . . . . . . . . . . . . . . 37
Viewing 911 Call Alarms. . . . . . . . . . . . . . . . . . . . . . . . . . . . . . . . . . . . . . . . . . . . . . . . . . . . . . . . 38
Emergency Call Notification and Cordless Headsets . . . . . . . . . . . . . . . . . . . . . . . . . . . . . . . . 38
Setting System Date and Time . . . . . . . . . . . . . . . . . . . . . . . . . . . . . . . . . . . . . . . . . . . . . . . . . . . 39
Canceling Call Forwarding . . . . . . . . . . . . . . . . . . . . . . . . . . . . . . . . . . . . . . . . . . . . . . . . . . . . . . 40
Canceling Do Not Disturb . . . . . . . . . . . . . . . . . . . . . . . . . . . . . . . . . . . . . . . . . . . . . . . . . . . . . . . 40
Displaying the Console Identity . . . . . . . . . . . . . . . . . . . . . . . . . . . . . . . . . . . . . . . . . . . . . . . . . . 41
Chapter 4: Using Extension Functions
Viewing Extension Status . . . . . . . . . . . . . . . . . . . . . . . . . . . . . . . . . . . . . . . . . . . . . . . . . . . . . . . 45
Setting/Canceling Call Forwarding . . . . . . . . . . . . . . . . . . . . . . . . . . . . . . . . . . . . . . . . . . . . . . . . 45
Setting/Canceling Do Not Disturb . . . . . . . . . . . . . . . . . . . . . . . . . . . . . . . . . . . . . . . . . . . . . . . . . 46
Setting/Clearing Message Waiting . . . . . . . . . . . . . . . . . . . . . . . . . . . . . . . . . . . . . . . . . . . . . . . . 46
Setting/Clearing Advisory Messages . . . . . . . . . . . . . . . . . . . . . . . . . . . . . . . . . . . . . . . . . . . . . . 47
Clearing All Features . . . . . . . . . . . . . . . . . . . . . . . . . . . . . . . . . . . . . . . . . . . . . . . . . . . . . . . . . . 47
Taking an Extension Out of Service . . . . . . . . . . . . . . . . . . . . . . . . . . . . . . . . . . . . . . . . . . . . . . . 48
Chapter 5: Using Trunk Functions
Viewing Trunk Status . . . . . . . . . . . . . . . . . . . . . . . . . . . . . . . . . . . . . . . . . . . . . . . . . . . . . . . . . . 51
Viewing Trunk Group Busy Status . . . . . . . . . . . . . . . . . . . . . . . . . . . . . . . . . . . . . . . . . . . . . . . . 51
Accessing Specific Trunks . . . . . . . . . . . . . . . . . . . . . . . . . . . . . . . . . . . . . . . . . . . . . . . . . . . . . . 53
Taking a Trunk Out of Service . . . . . . . . . . . . . . . . . . . . . . . . . . . . . . . . . . . . . . . . . . . . . . . . . . . 53
Chapter 6: Hotel/Motel Features
Displaying and Changing Room Data. . . . . . . . . . . . . . . . . . . . . . . . . . . . . . . . . . . . . . . . . . . . . . 57
Listing/Counting Rooms by Occupancy and Condition Status . . . . . . . . . . . . . . . . . . . . . . . . . . . 58

Mitel 5540 IP Console - User Guide
vi
Changing Room Occupancy and Condition Status. . . . . . . . . . . . . . . . . . . . . . . . . . . . . . . . . . . . 59
Checking-In/Checking-Out . . . . . . . . . . . . . . . . . . . . . . . . . . . . . . . . . . . . . . . . . . . . . . . . . . . . . . 60
Setting/Canceling Wake-up Calls . . . . . . . . . . . . . . . . . . . . . . . . . . . . . . . . . . . . . . . . . . . . . . . . . 60
Setting Room Call Restrictions . . . . . . . . . . . . . . . . . . . . . . . . . . . . . . . . . . . . . . . . . . . . . . . . . . . 61
Blocking Room-to-Room Calls . . . . . . . . . . . . . . . . . . . . . . . . . . . . . . . . . . . . . . . . . . . . . . . . . . . 61
Monitoring Guest Rooms . . . . . . . . . . . . . . . . . . . . . . . . . . . . . . . . . . . . . . . . . . . . . . . . . . . . . . . 62
Displaying/Clearing a Message Register . . . . . . . . . . . . . . . . . . . . . . . . . . . . . . . . . . . . . . . . . . . 62
Printing Reports . . . . . . . . . . . . . . . . . . . . . . . . . . . . . . . . . . . . . . . . . . . . . . . . . . . . . . . . . . . . . . 63
Chapter 7: Reference
Telephone Directory . . . . . . . . . . . . . . . . . . . . . . . . . . . . . . . . . . . . . . . . . . . . . . . . . . . . . . . . . . . 67
Class of Service/Restriction . . . . . . . . . . . . . . . . . . . . . . . . . . . . . . . . . . . . . . . . . . . . . . . . . . . . . 68
Console Display Abbreviations . . . . . . . . . . . . . . . . . . . . . . . . . . . . . . . . . . . . . . . . . . . . . . . . . . . 69
Advisory Messages for Display Telephones. . . . . . . . . . . . . . . . . . . . . . . . . . . . . . . . . . . . . . . . . 70
Glossary . . . . . . . . . . . . . . . . . . . . . . . . . . . . . . . . . . . . . . . . . . . . . . . . . . . . . . . . . . . . . . . . . . . . 71
Busy out . . . . . . . . . . . . . . . . . . . . . . . . . . . . . . . . . . . . . . . . . . . . . . . . . . . . . . . . . . . . . . . .71
Camp-on . . . . . . . . . . . . . . . . . . . . . . . . . . . . . . . . . . . . . . . . . . . . . . . . . . . . . . . . . . . . . . . .71
Central Office (CO) . . . . . . . . . . . . . . . . . . . . . . . . . . . . . . . . . . . . . . . . . . . . . . . . . . . . . . . .71
Class of Restriction (COR) . . . . . . . . . . . . . . . . . . . . . . . . . . . . . . . . . . . . . . . . . . . . . . . . . .71
Class of Service (COS) . . . . . . . . . . . . . . . . . . . . . . . . . . . . . . . . . . . . . . . . . . . . . . . . . . . . .71
DISA (Direct Inward System Access) . . . . . . . . . . . . . . . . . . . . . . . . . . . . . . . . . . . . . . . . . .71
Hardware . . . . . . . . . . . . . . . . . . . . . . . . . . . . . . . . . . . . . . . . . . . . . . . . . . . . . . . . . . . . . . .71
Hunt Group . . . . . . . . . . . . . . . . . . . . . . . . . . . . . . . . . . . . . . . . . . . . . . . . . . . . . . . . . . . . . .71
LDN Keys (Listed Directory Number) . . . . . . . . . . . . . . . . . . . . . . . . . . . . . . . . . . . . . . . . . .72
PABX (Private Automatic Branch Exchange) . . . . . . . . . . . . . . . . . . . . . . . . . . . . . . . . . . . .72
Recall . . . . . . . . . . . . . . . . . . . . . . . . . . . . . . . . . . . . . . . . . . . . . . . . . . . . . . . . . . . . . . . . . .72
Software . . . . . . . . . . . . . . . . . . . . . . . . . . . . . . . . . . . . . . . . . . . . . . . . . . . . . . . . . . . . . . . .72
Trunk . . . . . . . . . . . . . . . . . . . . . . . . . . . . . . . . . . . . . . . . . . . . . . . . . . . . . . . . . . . . . . . . . . .72
Trunk Identification . . . . . . . . . . . . . . . . . . . . . . . . . . . . . . . . . . . . . . . . . . . . . . . . . . . . . . . . . . . . 73
Index . . . . . . . . . . . . . . . . . . . . . . . . . . . . . . . . . . . . . . . . . . . . . . . . . . . . . . . . . . . . . . . . . . . . . . . 75

Chapter 1
Getting Started

Mitel 5540 IP Console - User Guide
2
Introduction
3
Introduction
Take a few minutes to explore this guide – it contains all the information you need to operate the 5540 IP Console.
The first section introduces you to the console. You will learn what each group of keys does and how to interpret information on the console display. This section also contains information about how to use this guide.
A note about feature availability
The features available on your telephone system have been selected by your company and may not include all the features described in this guide.
Using this Guide
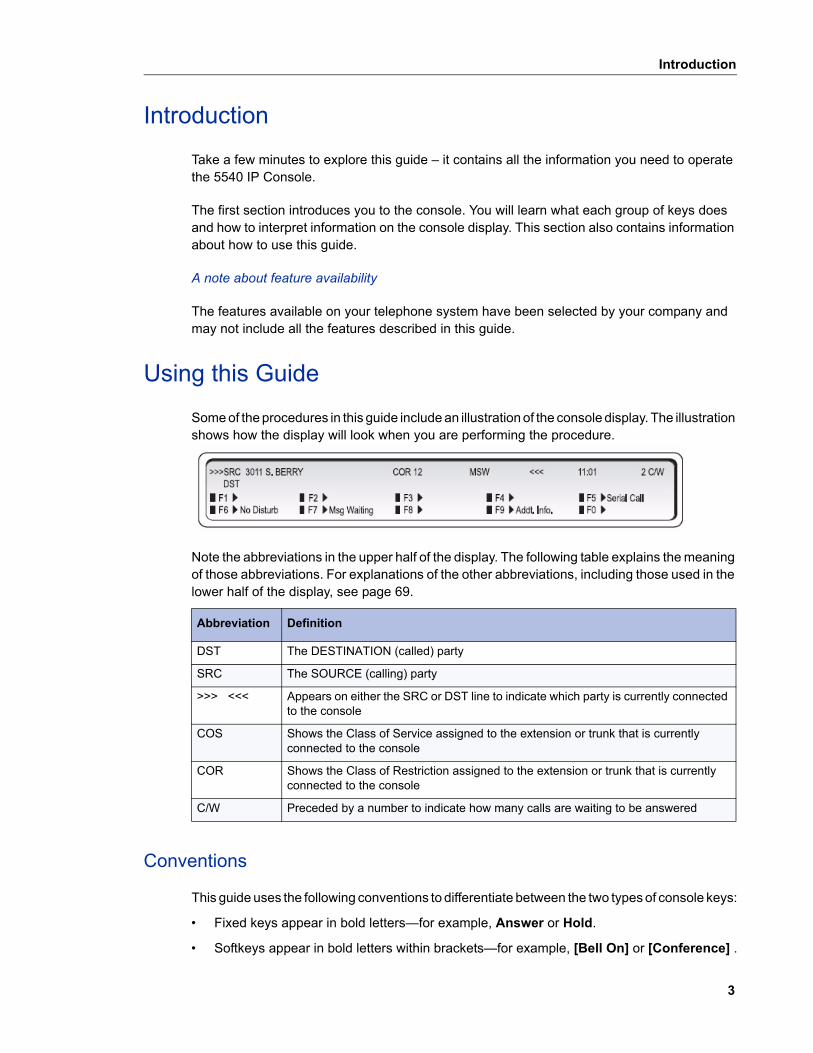
Some of the procedures in this guide include an illustration of the console display. The illustration shows how the display will look when you are performing the procedure.
Note the abbreviations in the upper half of the display. The following table explains the meaning of those abbreviations. For explanations of the other abbreviations, including those used in the lower half of the display, see page 69.
Conventions
This guide uses the following conventions to differentiate between the two types of console keys:
• Fixed keys appear in bold letters—for example, Answer or Hold.
• Softkeys appear in bold letters within brackets—for example, [Bell On] or [Conference] .
Abbreviation Definition
DST The DESTINATION (called) party
SRC The SOURCE (calling) party
>>> <<< Appears on either the SRC or DST line to indicate which party is currently connected to the console
COS Shows the Class of Service assigned to the extension or trunk that is currently connected to the console
COR Shows the Class of Restriction assigned to the extension or trunk that is currently connected to the console
C/W Preceded by a number to indicate how many calls are waiting to be answered
Mitel 5540 IP Console - User Guide
4
About the Console
Before you begin
Before operating the console, check that the display shows [F1> through [F0> and the correct time and date. Also, make sure the handset is plugged into the side of the console.
If any problems occur, contact your communications department for assistance.
Console Components
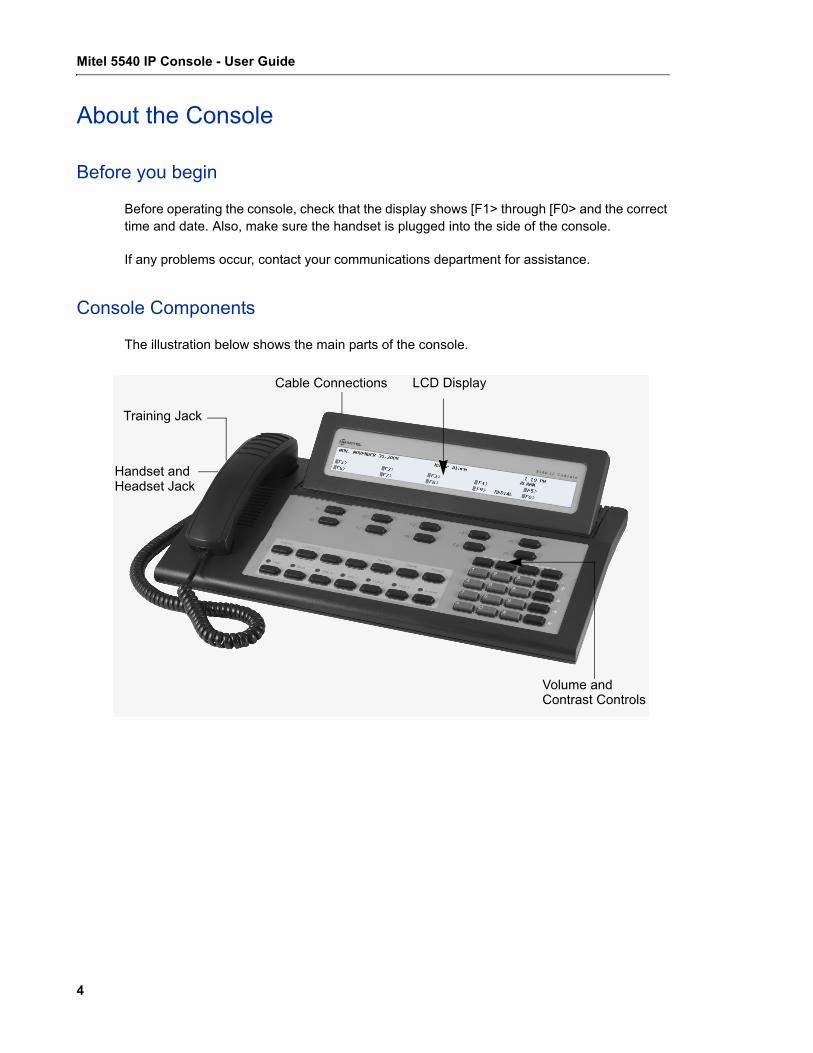
The illustration below shows the main parts of the console.
Training Jack
Cable Connections
Handset andHeadset Jack
LCD Display
Volume andContrast Controls

About the Console
5
Corded Handset and Headset Ports
There are two jacks on the left side. One is for the handset or headset that you use; the other is for the handset or headset used by the person training or monitoring new attendants.
Console Rear Ports
The cabling required to connect the console to the telephone system is located at the rear of the console. The cables should be connected by a qualified system installer and should not be adjusted by unauthorized personnel. The Cordless Headset port is the last port on the right side. For more information on cordless headset operation, see “Using a Cordless Headset with the Console” on page 12
Note: The PKM is currently not supported on Mitel Communications Director (MCD).
Mitel 5540 IP Console - User Guide
6
Console Keys
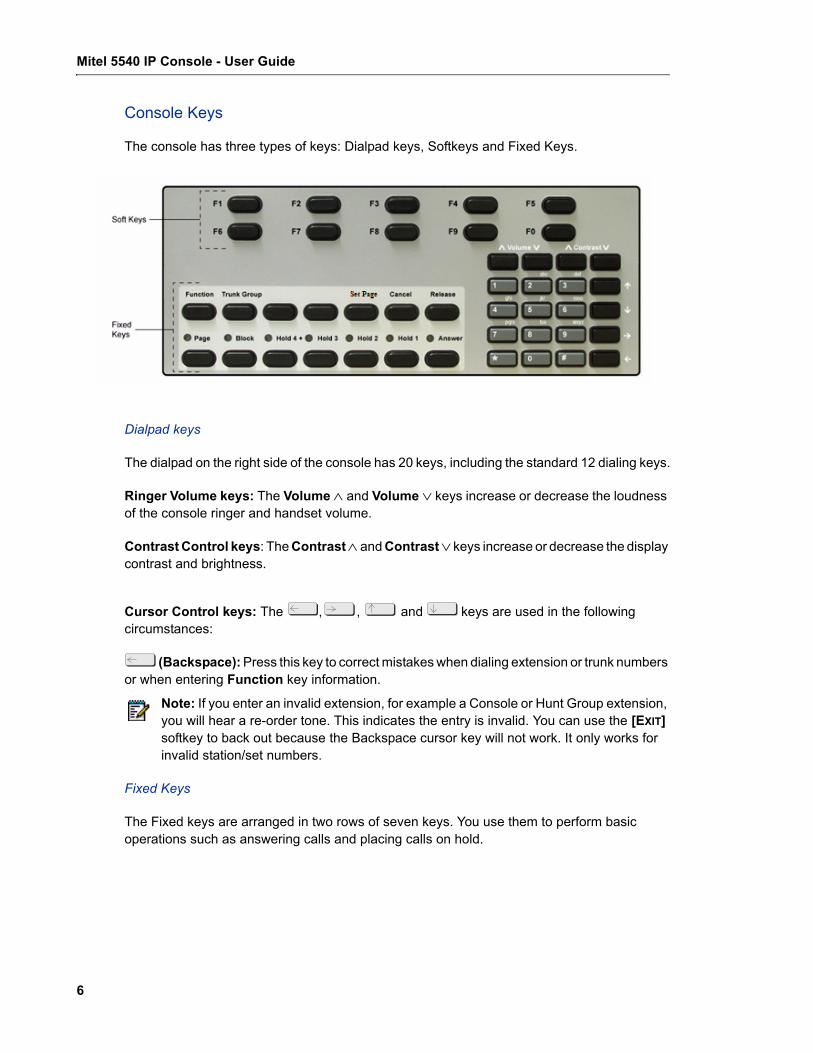
The console has three types of keys: Dialpad keys, Softkeys and Fixed Keys.
Dialpad keys
The dialpad on the right side of the console has 20 keys, including the standard 12 dialing keys.
Ringer Volume keys: The Volume and Volume keys increase or decrease the loudness of the console ringer and handset volume.
Contrast Control keys: The Contrast and Contrast keys increase or decrease the display contrast and brightness.
Cursor Control keys: The , , and keys are used in the following circumstances:
(Backspace): Press this key to correct mistakes when dialing extension or trunk numbers or when entering Function key information.
Fixed Keys
The Fixed keys are arranged in two rows of seven keys. You use them to perform basic operations such as answering calls and placing calls on hold.
Note: If you enter an invalid extension, for example a Console or Hunt Group extension, you will hear a re-order tone. This indicates the entry is invalid. You can use the [EXIT] softkey to back out because the Backspace cursor key will not work. It only works for invalid station/set numbers.
About the Console
7
Each key in the bottom row has a lamp that indicates the status of a call or feature. For example, when you use a Hold key to place a call on hold, the lamp above the key lights.
Softkeys
Softkeys have functions that change depending on the state of the call you are handling or the feature you are using. For example, when you call a busy extension the display will show the softkey functions that are available for handling the call. One of these functions is Override, another is Msg Waiting.
The [F1> to [F0> labels on the display correspond to the [F1> to [F0> keys on the consoles. To use a softkey function, press the [F1> to [F0> key that corresponds to the display label for that function.
Console Display
During call handling, the upper two lines identify the SOURCE or calling party [SRC] and the DESTINATION or called party [DST].
The two lower lines, labeled [F1> to [F0>, show the current softkey labels. For example, if [F8> is labeled [Override], pressing [F8> lets you override a busy extension’s conversation. At another time, the same key, [F8>, could be labeled [Night 1]. Now, pressing [F8> places the console in Night 1 operation.
Use this key… When you want to…
Function activate softkeys (explained in the next section), which are used for operations such as setting the console date and time and switching the console to Night Service.
Trunk Group see which trunk groups are busy.
Cancel clear misdialed information.
Set Page page extension users using their telephone speakers.
Release disconnect or transfer calls.
Page make an announcement over the paging system.
Block restrict selected extensions/guest rooms from callingeach other.
Hold place calls to the console on hold. Hold 1 through 3 are direct holds. Pressing Hold 1, Hold 2, or Hold 3 places a call on hold at that location. Pressing Hold 4+ accesses five additional hold slots.
Answer answer incoming calls to the console on a “first-come, first- served” basis.
Mitel 5540 IP Console - User Guide
8
Adjusting the Console
Adjusting the Ringer Volume
To raise or lower the ringer volume while the console is ringing:
1. Press and release the Volume key to increase or the Volume key to decrease the volume.
2. Repeat until the ringing is at the volume you want.
Adjusting the Handset and Headset Receiver Volume
The Volume keys adjust the volume of the console ringer and the volume of the handset and headset receiver. Although you can have a handset and a headset connected to the console at the same time, the receiver volume for each is not individually adjustable; any volume adjustments you make affect both the handset and the headset.
To adjust the handset and headset receiver volume while a call is in progress and the console is not ringing, or while the console is idle:
• Press Volume repeatedly to increase the volume or Volume to decrease it.
WARNING: Because continuous exposure to loud sounds can contribute to hearing loss, keep the volume at a moderate level.
Adjusting the Contrast Control
To adjust the display contrast:
1. Press the Contrast key until you reach the desired level of contrast.
2. Press the Contrast key to decrease the contrast to the desired level.
!

Adjusting the Console
9
Adjusting the Display Brightness
To dim or brighten the display:
1. Press and hold Function.
2. Press the Contrast key until you reach the desired level of brightness.
3. Press the Contrast key to decrease the brightness to the desired level.
4. Press F1 when finished.
Turning the Console Bell (Ringer) Off/On
When the bell is off, a flashing Answer key and the C/W indicator on the display are the only indications that calls are waiting to be answered.
To turn the bell on or off:
1. Press Function.
2. Press [Bell Off] or [Bell On].
Switching to Night/Day Service
Incoming calls that normally ring the console during the day can ring another answering point at night. Your system may have one or two night service modes called Night 1 and Night 2. The mode you should select depends on system programming.
Any attendant can switch the system into night or day service. When the system is in night service, the night status indicator (Night 1 or Night 2) displays on all consoles.
To switch to night or day service:
1. Press Function.
2. Press [Att Function].
3. Press [Chg Service].
4. Press [Night 1], [Night 2], or [Day] as required.
Note: When the Function key is pressed, the display shows the available softkeys. These softkeys can be ignored as the display will revert to normal when the F1 key is pressed.
Note: The backlight on the 5540 IP console is always on and does not dim.
Mitel 5540 IP Console - User Guide
10
Setting the Console Language
The console can display call-handling information and softkey prompts in English, French or Spanish. (Other languages may be available depending on system programming.)
To change languages:
1. Press Function.
2. Press [Att Function].
3. Press [Language].
4. Press the softkey that corresponds to the language you want.
Changing the Attendant Present/Absent Status
You can change the Attendant status to "Absent" when you plan to be away from your desk and want calls to the console directed to an alternate answering position.
To change the Attendant Present/Absent status:
1. Press Function.
2. Press [Att Function].
3. Press [Att Absent] to place the console in Attendant Absent mode or [Att Present] to return to Attendant Present mode.
Programming Firmkeys
You can program the Firmkeys (two unlabeled keys next to Trunk Group) to access various optional feature packages. The feature packages your company has purchased determines which of the following functions are available for you to program to a key. For more information about the features, see the cross-reference provided, or ask your communications department.
• “Phonebook” on page 29
• “Hotel/Motel Features” on page 55
• “Viewing Trunk Status” on page 51
• SMDA - Station Message Details Accounting
• Direct Page
• Autovon Trunk
• Select Opt - Selection Option (Used when you need more than four Firmkeys)
You can also program a Firmkey to provide quicker access to Alarm information, a standard feature described in “Viewing System Alarm Information” on page 37.
Adjusting the Console
11
To program Firmkeys:
1. Press Function.
2. Press [Att Function].
3. Press [Firmkeys].
The display shows the current Firmkey programming.
4. Press the blank Firmkey (not the softkey) you want to program repeatedly until the desired options appears at that location.
For example, to program the Phone Book option to the third Firmkey from the left, continue pressing that key until [Phonebook] appears at the [F3> location on the display.
5. Press [Save].
6. Repeat steps 4 and 5 to program the next firmkey.
7. Press [Exit].
To use the Select Options key (when more than four Firmkeys are required):
1. Press the firmkey you programmed as the Select Opt key.
2. Press the softkey that corresponds to the feature you want.
Mitel 5540 IP Console - User Guide
12
Using a Cordless Headset with the Console
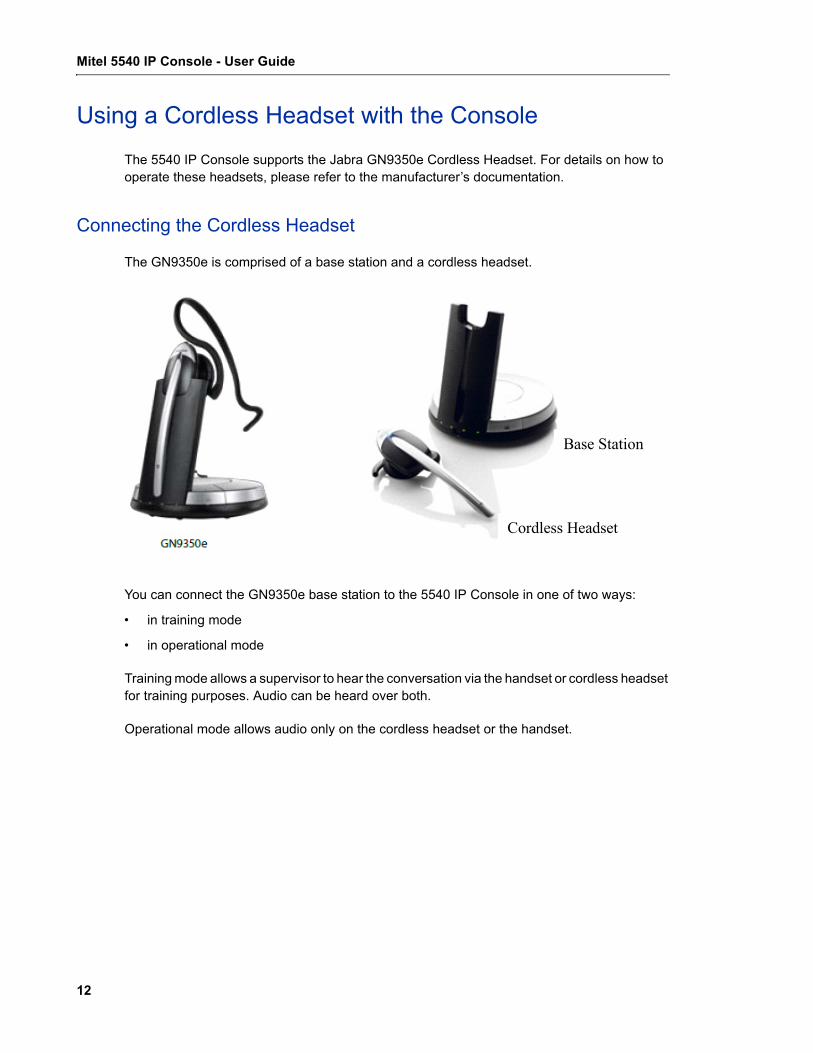
The 5540 IP Console supports the Jabra GN9350e Cordless Headset. For details on how to operate these headsets, please refer to the manufacturer’s documentation.
Connecting the Cordless Headset
The GN9350e is comprised of a base station and a cordless headset.
You can connect the GN9350e base station to the 5540 IP Console in one of two ways:
• in training mode
• in operational mode
Training mode allows a supervisor to hear the conversation via the handset or cordless headset for training purposes. Audio can be heard over both.
Operational mode allows audio only on the cordless headset or the handset.
Base Station
Cordless Headset
Using a Cordless Headset with the Console
13
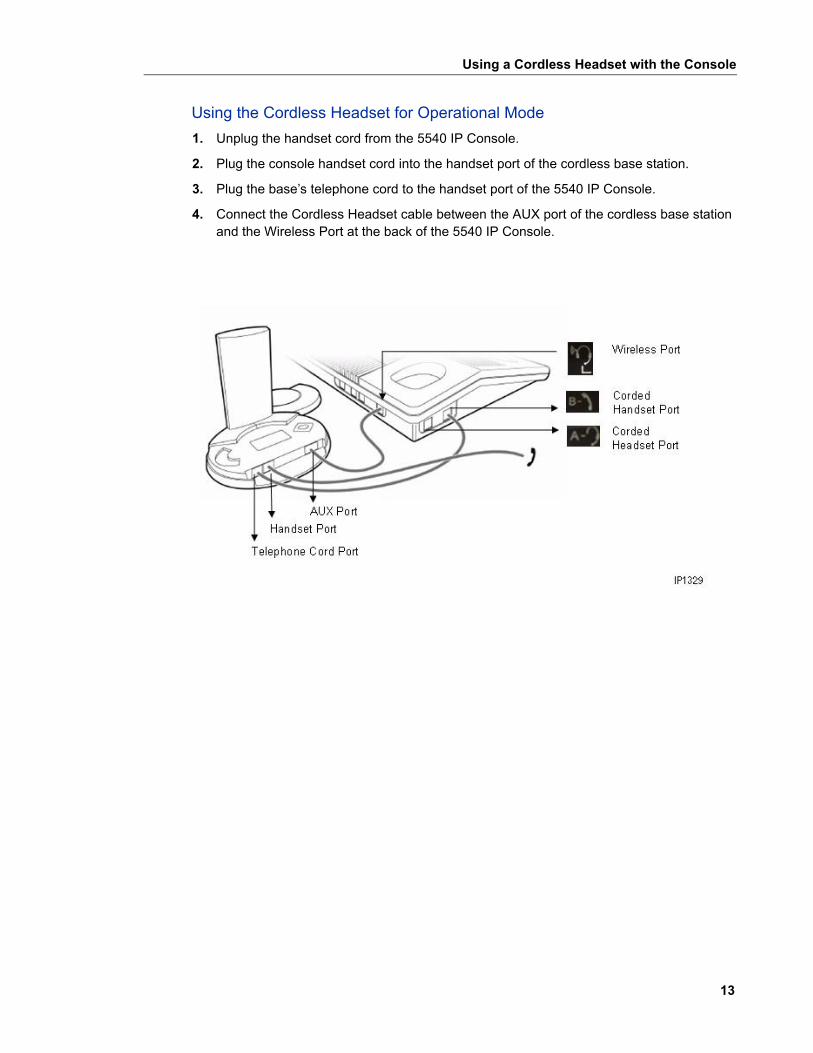
Using the Cordless Headset for Operational Mode
1. Unplug the handset cord from the 5540 IP Console.
2. Plug the console handset cord into the handset port of the cordless base station.
3. Plug the base’s telephone cord to the handset port of the 5540 IP Console.
4. Connect the Cordless Headset cable between the AUX port of the cordless base station and the Wireless Port at the back of the 5540 IP Console.

Mitel 5540 IP Console - User Guide
14
Using the Cordless Headset for Training Mode
1. Unplug the handset cord from the 5540 IP Console.
2. Plug the console handset cord into the headset port of the 5540 IP Console.
3. Plug the base station’s telephone cord to the handset port of the 5540 IP Console.
4. Connect the Cordless Headset cable between the AUX port of the cordless base station and the Wireless Port at the back of the 5540 IP Console.
Using a Cordless Headset with the Console
15
Guidelines for Cordless Headset Operation
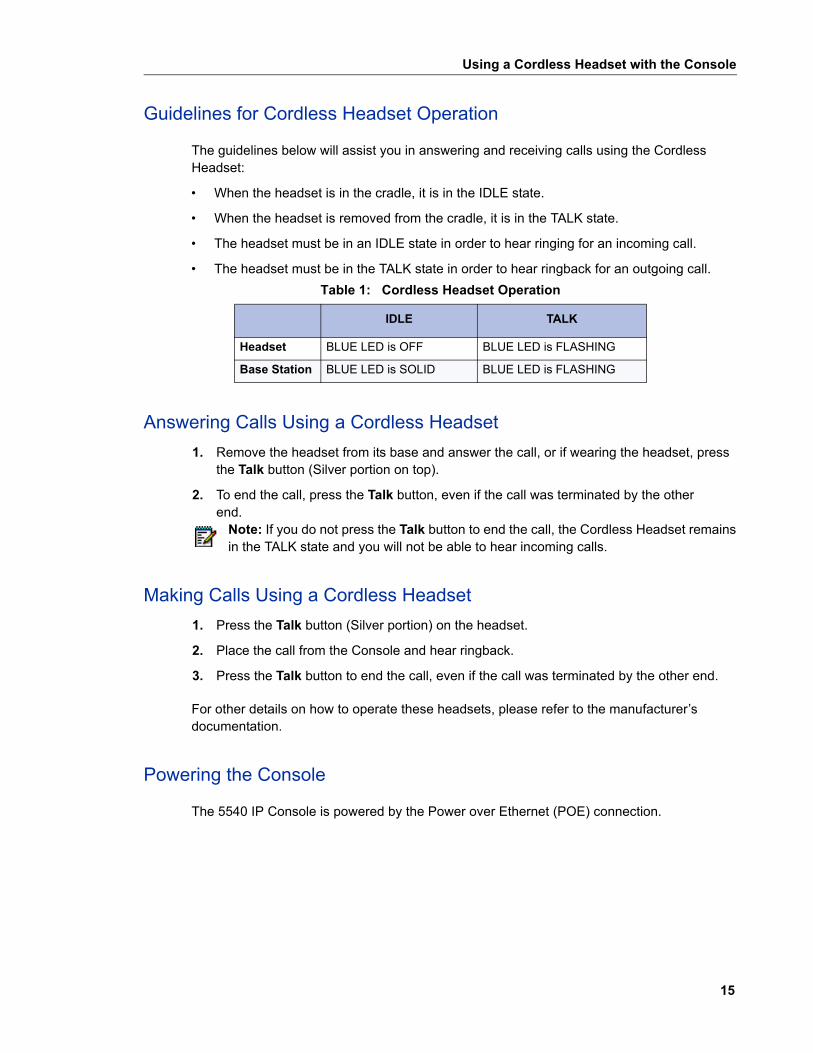
The guidelines below will assist you in answering and receiving calls using the Cordless Headset:
• When the headset is in the cradle, it is in the IDLE state.
• When the headset is removed from the cradle, it is in the TALK state.
• The headset must be in an IDLE state in order to hear ringing for an incoming call.
• The headset must be in the TALK state in order to hear ringback for an outgoing call.
Answering Calls Using a Cordless Headset
1. Remove the headset from its base and answer the call, or if wearing the headset, press the Talk button (Silver portion on top).
2. To end the call, press the Talk button, even if the call was terminated by the other end.
Making Calls Using a Cordless Headset
1. Press the Talk button (Silver portion) on the headset.
2. Place the call from the Console and hear ringback.
3. Press the Talk button to end the call, even if the call was terminated by the other end.
For other details on how to operate these headsets, please refer to the manufacturer’s documentation.
Powering the Console
The 5540 IP Console is powered by the Power over Ethernet (POE) connection.
Table 1: Cordless Headset Operation
IDLE TALK
Headset BLUE LED is OFF BLUE LED is FLASHING
Base Station BLUE LED is SOLID BLUE LED is FLASHING
Note: If you do not press the Talk button to end the call, the Cordless Headset remains in the TALK state and you will not be able to hear incoming calls.

Mitel 5540 IP Console - User Guide
16
Chapter 2
Call Handling

Mitel 5540 IP Console - User Guide
18

Answering Calls
19
Answering Calls
Ringing and a flashing Answer key indicate the arrival of a call. The number next to C/W in the display indicates how many calls are waiting to be answered.
The information displayed next to the softkeys [F1> to [F0> indicate the actions you can take by pressing the corresponding softkey.
For example, you can answer an outside (trunk) call by pressing [Ldn 1] (Listed Directory Number 1), or an internal (extension) call by pressing [Dial 0].
The following softkey prompts can accompany an incoming call:
• [Recall]
• [Redial]
• [Ldn 1], [Ldn 2], ... [Ldn 6] in positions F2-F7.
• or any pre-programmed customer-specific information (for example, your company may choose to display [Line 1] instead of [Ldn 1].
To answer calls:
Do one of the following:
• Press Answer to answer the first call in the queue.
• Press a softkey (F1 – F0) to answer a specific type of call.
The first line of the display shows >>> SRC followed by an extension number and name for an internal call, or a trunk number for an external call. The DST line (the second line) remains blank until you dial a destination number.
New Call Indication
When you are engaged in a call, a single burst of ringing signals the next incoming call. Subsequent calls do not ring the console—even with the New Call Ring turned on. The only way to tell that calls are waiting is by the C/W indicator on the console display.
Mitel 5540 IP Console - User Guide
20
When Multiple Calls are Waiting
You cannot answer a new call until the one you are engaged in is transferred, disconnected, or put on hold.
Transferring Calls
When a caller requests to speak to someone, ask the caller to wait a moment, and then transfer the call to the requested destination.
To transfer a call:
1. Dial the destination number.
The caller is automatically placed on hold while you complete the transfer.
2. When you hear ringing, press Release to connect the caller to the destination and release the console from the call.
Misdialed Numbers
If you do not want to complete dialing, or if you misdial a number, either
• Press to erase the misdialed digits, and then dial the correct number.
- or-
• Press Cancel to return to the Source party, and then redial the number.
Reaching a Busy Destination or an Extension with Do Not Disturb Activated
If the called destination is busy or the extension has Do Not Disturb activated, the display will show “Busy” or “DND” on the DST line.
In both cases, your options for handling the call are the same, except for the Callback option, which only applies when calling a busy destination.
To handle a call to a busy destination or an extension with Do Not Disturb activated:
• Press [Source] to return to the caller requesting the transfer.
• Press Cancel to disconnect the destination so that you can dial a new one.
• Press Release to camp the caller on to the busy destination or disconnect the source. (For an explanation of camp-on, see page 71.) If the transfer is not allowed, you will hear a beep. Press [Source] to retrieve the original party.
• Press [Override] to break into the busy extension. For more information on using Override, see page 28.

Placing Calls
21
• Press [Msg Waiting] to send a message waiting indication to the called extension. For more information on Message Waiting, see page 28.
• Press [Callback] to receive notification when the destination is free.
• Press [Addt. Info] to display COS of Destination and Source.
If you reach a busy extension or you are placing an outside call and all of the trunks are busy, you can request an automatic Callback. The system monitors the line and rings the console when the line becomes free. When you answer a Callback at the console, the top line of the display will show “CALLBACK.” Callbacks on outside calls are used when all system trunks are busy, not when the called party is busy.
Reaching an Extension with an Advisory Message
Users with a display phone can show a short message, called an Advisory Message, on other display phones or consoles that call their phone. When you call an extension with an Advisory Message, the message appears on the DST line of the console display as follows:
>>>DST 3070 S.BERRY IN A MEETING RINGING<<<
In this example, the user has left the message “In a meeting” on his or her phone. For a list of other Advisory Messages, see page 70. See also Setting/Clearing Advisory Messages on page 47.
Placing Calls
To place a call:
1. Dial the destination number using the dialpad keys.
The dialed number appears on the second line of the display.
2. After completing the call, press Release to disconnect it from the console.
Placing a Call on Hold
You can place up to three calls on hold using the fixed Hold keys. If you need to place more calls on hold, use the Hold 4+ key in combination with the softkeys.
To place a call on hold:
1. Inform the caller that you are placing the call on hold.
2. Press Hold 1, Hold 2 or Hold 3.
Its lamp lights indicating the call is on hold.

Mitel 5540 IP Console - User Guide
22
To retrieve a call on hold:
• Press Hold that was used to place the call on hold.
To access the five Hold slots available on the softkeys:
1. Press Hold 4+.
The display changes as follows:
The display shows that Hold slots 5, 6, and 8 are free, Hold 7 is in use, and Hold 4* is "recalling" the console.
2. Press a free [Hold] softkey.
The lamp above the Hold 4+ key lights whenever any of the softkey hold slots are in use.
The display returns to the information that was showing before you pressed the Hold 4+ key.
To retrieve a call at a softkey Hold slot:
1. Press Hold 4+.
2. Press Hold softkey that was used to place the call on hold.
Hold Recall
If a call is left on hold longer than a specified time, it returns to the console as a recall. The lamp above the Hold key used to place the call on hold flashes and the console beeps once to indicate a recall at Hold 1, twice for Hold 2, three times for Hold 3, and four times for calls on hold at any of the softkey Hold slots.
To answer the recall, follow the procedure above for retrieving a call on hold.
Setting up Conferences and Call Splitting
23
Stacked Hold
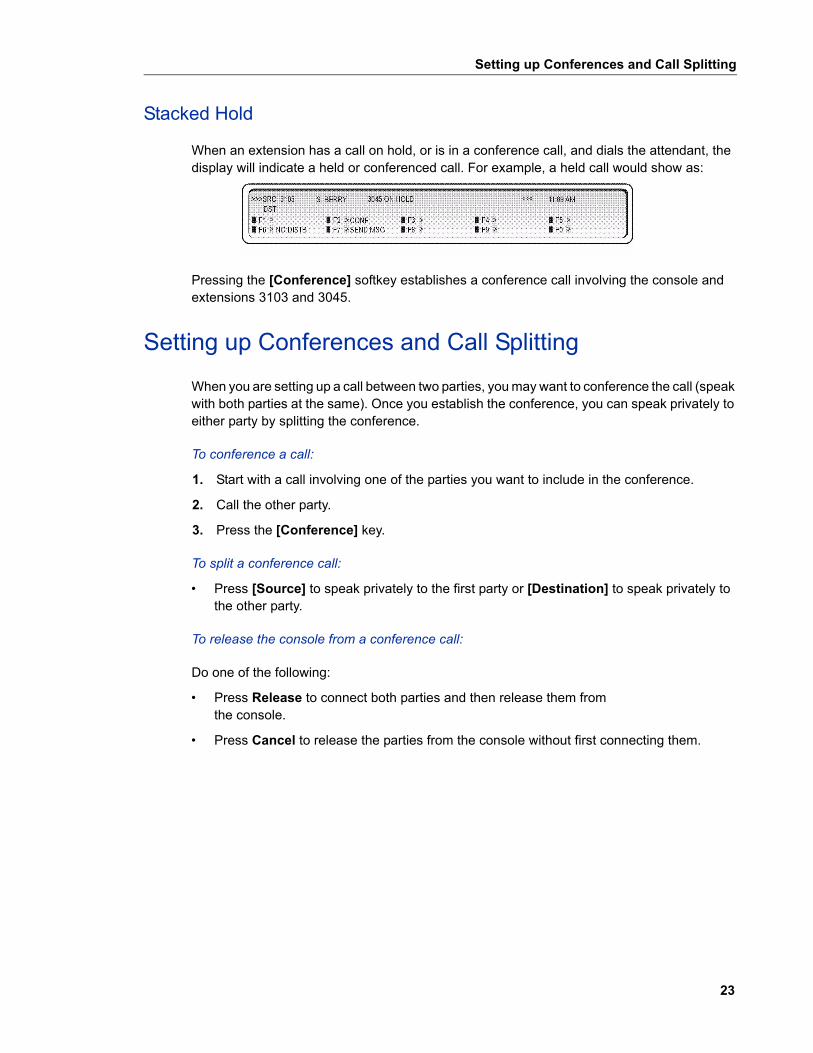
When an extension has a call on hold, or is in a conference call, and dials the attendant, the display will indicate a held or conferenced call. For example, a held call would show as:
Pressing the [Conference] softkey establishes a conference call involving the console and extensions 3103 and 3045.
Setting up Conferences and Call Splitting
When you are setting up a call between two parties, you may want to conference the call (speak with both parties at the same). Once you establish the conference, you can speak privately to either party by splitting the conference.
To conference a call:
1. Start with a call involving one of the parties you want to include in the conference.
2. Call the other party.
3. Press the [Conference] key.
To split a conference call:
• Press [Source] to speak privately to the first party or [Destination] to speak privately to the other party.
To release the console from a conference call:
Do one of the following:
• Press Release to connect both parties and then release them fromthe console.
• Press Cancel to release the parties from the console without first connecting them.
Mitel 5540 IP Console - User Guide
24
Answering Recalls
When an external call is transferred and the extension is busy or does not answer, the call either returns to the console within a specified time or is directed to the extension’s voice mailbox (if available).
To answer a “No Answer” recall:
1. Press Answer or [Recall].
2. Inform the caller that the destination is not answering.
3. Do one of the following:
• Press [Redial Dst] to redial the same destination.
• Dial a new destination, and then press Release.
• Press Cancel to disconnect the Source party.
To answer a “Busy” recall:
1. Press Answer or [Recall].
2. Inform the caller that the destination is busy.
3. Do one of the following:
• Press Cancel to disconnect the Source party.
• Press Release to transfer the call to the same destination again.
• Press [Redial Dst] to reconnect with the busy destination.
4. If you pressed [Redial Dst], do one of the following:
• Press [Override] to break into the busy extension.
• Press [Msg Waiting] to send a message waiting indication to the busy extension.
• Press [Source] to connect to the Source party.
• Press [Callback] to receive notification when the extension is free.
• Press Release to camp the source on to the destination again. (See page 71 for an explanation of camp-on.)
• Press Cancel to clear the destination and dial a new extension number.
Answering Intercepts to the Console
Misdialed calls from extensions, or calls to extensions with Do Not Disturb activated, could ring the console depending on system programming.
When you answer the call, the display will show the reason for the interception.
Paging from the Console
25
Paging from the Console
Three types of paging are available from the console: Public Address (PA) Paging, Extension Paging, and Park and Paging.
PA Paging
If your system has external paging equipment, you can place a call on hold, and then page for someone to pick up the call from the console Hold slots. You can also use PA Paging to make public announcements.
Your paging equipment may be set up to access several areas or “zones.” If so, you use the Page key to speak to all zones at once and access codes to speak to individual zones. These codes are available from your communications department.
To page someone to pick up a call on hold at the console:
1. Place the Source call on hold. (See page 21.)
2. Press and hold Page.
The lamp above the Page key lights.
3. Do one of the following:
• If you have only one paging zone, announce the Hold Pickup access code and the Hold slot number appearing on the top line of the display.
• If you have more than one page zone, dial the two-digit paging code (dial 00 for all zones), and then announce the Hold Pickup access code and the Hold slot number.
• If any of the paging zones are busy, the display shows “Busy” on the second line. Press [Override] to interrupt the page in progress.
4. Release Page.

Mitel 5540 IP Console - User Guide
26
Extension Paging
Extension Paging allows you to page extension users using their telephone speakers. This feature is available only for paging telephones that are programmed as key system telephones.
You can use Extension Paging to page a specific extension (Directed Page), multiple extensions assigned to a group (Group Page), or all extensions (All Set Page).
To page an extension:
1. Press Set Page.
2. Do one of the following:
• To page a specific extension, dial the extension number.
• To page a group of extensions, dial the page group directory number.
3. Make the page.
Call Park
To park an active call:
1. Press the Call Park softkey.
2. Dial the directory number on which to park the call.
3. To inform a user that a parked call is waiting, do one of the following:
• If automatic paging is enabled, announce the call and the park retrieve digits shown on the display.
• If automatic paging is disabled, press Page for loudspeaker paging or enter the Direct Page feature access code and the DN of the set. Then, announce the call and the digits required to retrieve it.
To retrieve a parked call:
1. Do one of the following:
• Dial the Call Park – Retrieve feature access code.
• Press a programmed ParkRetrieve firmkey.
2. Dial the directory number that the call is parked on. When prompted to enter the Parking Slot, enter the two-digit index number to retrieve a specific call or # to retrieve the longest parked call
Placing Ringing or Paging Intercom Calls
27
Placing Ringing or Paging Intercom Calls
A called party can be either paged or rung when receiving an intercom call.
To place either paging or ringing intercom calls:
1. Make a call.
2. Press Set Page.
Setting and Canceling Do Not Disturb on an Extension
Do Not Disturb (DND) prevents calls from ringing a user’s extension. You can set and cancel DND on a user’s extension while you are on a call with the user.
To set or cancel DND on an extension:
1. While connected to the extension, press [No Disturb].
“DND” appears next to the extension information on the display to indicate that Do Not Disturb is set.
2. Press Release.
You can also set and cancel DND without calling the extension. For more information, see page 46.
Mitel 5540 IP Console - User Guide
28
Setting and Canceling Message Waiting on an Extension
If an extension is busy or the user does not answer, you can send a notice to let the user know a message is waiting at the console. You can also cancel messages you left at an extension.
To set or cancel Message Waiting on a ringing or busy extension:
1. Press [Msg Waiting] to set Message Waiting or [Clear Msg] to clear it.
“MSW” appears next to the extension information on the display to indicate that Message Waiting is set.
2. Press Release.
Overriding Busy or Do Not Disturb
The Override feature allows you to intrude into a busy extension or an extension with Do Not Disturb (DND) active.
To use Override:
1. Press and hold [Override].
If you are overriding a busy extension, both parties hear a long beep, and then you enter the conversation. You will remain connected to the conversation until you release the [Override] softkey.
If you are overriding an extension with DND active, you will hear ringing.
2. Press Cancel or Release to disconnect the console from the busy extension.
If the busy extension hangs up while you are pressing [Override], you will hear fast busy tone and the display will show “Hung Up” instead of “Busy.”
Redialing the Last Number
You can redial the last manually dialed number (internal or external) by pressing a single key.
To redial the last number:
• Press [Redial].
Phonebook
29
Phonebook
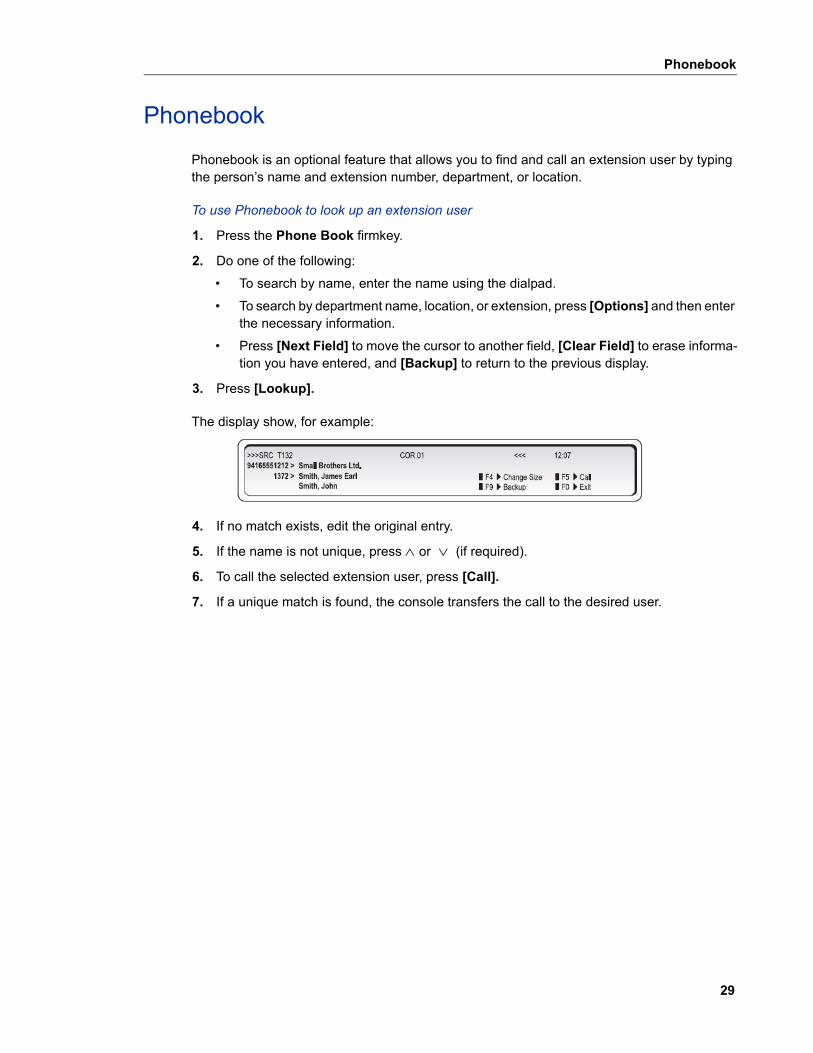
Phonebook is an optional feature that allows you to find and call an extension user by typing the person’s name and extension number, department, or location.
To use Phonebook to look up an extension user
1. Press the Phone Book firmkey.
2. Do one of the following:
• To search by name, enter the name using the dialpad.
• To search by department name, location, or extension, press [Options] and then enter the necessary information.
• Press [Next Field] to move the cursor to another field, [Clear Field] to erase informa-tion you have entered, and [Backup] to return to the previous display.
3. Press [Lookup].
The display show, for example:
4. If no match exists, edit the original entry.
5. If the name is not unique, press or (if required).
6. To call the selected extension user, press [Call].
7. If a unique match is found, the console transfers the call to the desired user.
Mitel 5540 IP Console - User Guide
30
Setting up a Serial Call
The Serial Call feature allows outside callers to talk to more than one extension user in sequence without redialing the main business number each time.
To set up a serial call while connected to an outside call:
1. Tell the caller to remain on the line after completing each call.
2. Press [Serial Call].
3. Dial an extension number.
4. Press Release.
When the extension user hangs up, the outside call returns to theconsole as a recall.
5. When the call returns to the console, press [Recall].
6. Dial the next extension number, and then press Release.
7. When all calls are completed, press [Serial Call] and then Release.
Using Tone Signaling
31
Using Tone Signaling
You may have noticed that when you dial a number at the console, you do not hear any of the tones or pulses normally associated with telephones. This is because the console “communicates” with the rest of the telephone system using a different type of signaling.
However, there are times when telephone equipment, either in or outside your office, needs to receive tones to complete a call. Typically, special services such as Voice mail systems (described on page 33) require information in the form of tones before allowing access.
To enable tone signaling while connected to a service requiring tones:
1. Press [Tones On].
2. Dial the required code.
3. When you complete the call, press [Tones Off] to turn off tone signaling.
Flashing on Trunks
A trunk flash is a signal sent to another telephone system to do something such as place a call on hold. You may need to use this feature when you have a call from another PABX in your own company network, and you want to transfer it to the originating PABX or to a third one.
You can flash only when you are talking on a trunk to another trunk in a two-party call.
To flash on a trunk for further dialing:
1. Press [Single Flash] or [Double Flash].
2. Dial the required number.
3. Press Release.
Answering a Call with Night Service Enabled
When the console is in Night Service, incoming calls ring night bells or some other night answering point. These calls can still be answered from the console even though they do not ring the console bell.
The night answer point is programmed at the system level.
To answer a call when the console is in Night Service:
• Press [Night Ans].
Mitel 5540 IP Console - User Guide
32
Using Directed Call Pickup
Directed Call Pickup allows you to answer a call ringing at an extension. You can also use this feature to retrieve a call that you transferred to the wrong extension.
To pick up a call ringing at an extension:
1. Dial the Directed Call Pickup code. (Your communications department can provide the code.)
2. Dial the extension number of the ringing extension.
3. Speak to the calling party.
Last Call Retrieve
This feature allows you to recover a call you transferred to the wrong extension. The call must still be ringing the original extension to be recovered.
To retrieve the last call transferred from the console:
• Press Cancel.
Multiple Console Operation
When more than one console is in use at the same time, they will operate in one of two ways:
1. Independent Operation
Consoles in this arrangement operate independently. Each console has unique hold slots and incoming calls ring a specific console. A recall to the attendant returns only to the console that initially handled the call.
2. Transparent Operation
With transparent operation, all consoles operate the same way. An incoming call rings all consoles, though, recalls return to the individual console that handled the call.
The consoles are also given privileges to read or cancel messages left at an extension by other extension users or the attendant. For more information about reading and canceling messages, see page 47.
Inter-Console Calls and Transfers
An attendant can make and transfer calls to another attendant by dialing the console’s directory number, but not by dialing 0 (zero). Whether you are transferring calls to an extension or another attendant, the procedure is the same—see page 20 for instructions.
Note: Inter-console calls cannot be put on hold.
Centralized Attendant Service (CAS)
33
Centralized Attendant Service (CAS)
CAS allows an attendant at one PABX to answer calls that arrive at another interconnected PABX. Except for recalls, CAS has no effect on the way you handle calls from the console. When a call from another PABX in a CAS system recalls the console, it appears as a “Dial 0” call. Keep this in mind when answering the recall as it may affect how you greet the caller.
Voice mail
A voice mail system connected to your telephone system does not affect the operation of the console. If a call is answered by such a system, you may be prompted to enter an access code or an identification number. Before responding to the prompt, you must turn on tone signaling using the [Tones On] softkey. For more information, see “Using Tone Signaling” on page 31

Mitel 5540 IP Console - User Guide
34
Chapter 3
Using System Functions

Mitel 5540 IP Console - User Guide
36
Viewing System Alarm Information
37
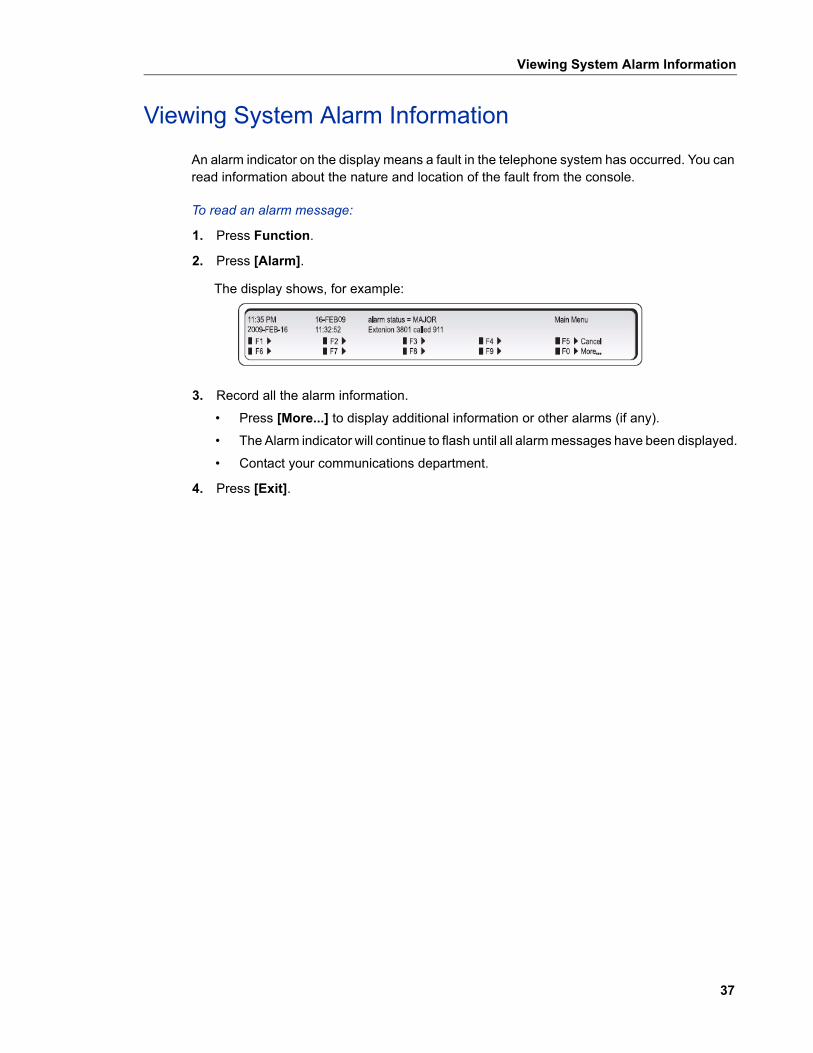
Viewing System Alarm Information
An alarm indicator on the display means a fault in the telephone system has occurred. You can read information about the nature and location of the fault from the console.
To read an alarm message:
1. Press Function.
2. Press [Alarm].
The display shows, for example:
3. Record all the alarm information.
• Press [More...] to display additional information or other alarms (if any).
• The Alarm indicator will continue to flash until all alarm messages have been displayed.
• Contact your communications department.
4. Press [Exit].
Mitel 5540 IP Console - User Guide
38
Viewing 911 Call Alarms
This feature raises an alarm at the console when an extension user places a 911 (or other designated Emergency Services number) call and identifies the extension that placed the call. With this information, you can direct emergency services (for example, police or ambulance personnel) to the location from which the call was placed.
When a 911 Call alarm is raised, the console rings and the display shows“Emergency Call <Press Function Key for Details>”.
To read a 911 Emergency Call alarm message:
1. Press Function.
2. Record the number of the extension from which the 911 call originated.
To delete the 911 alarm, press [Clear].
3. Contact the appropriate emergency services.
4. Press [Exit].
If an attendant console is in Attendant Console Lockout state, you can still access 911 alarm information, but you cannot clear the alarms.
Emergency Call Notification and Cordless Headsets
If you are on a cordless headset and active on a call, you will not receive Emergency Call Notification (ECN) on the cordless headset. The ECN notification is available on the console, though.
Note: Although the console alarm indicates the calling extension's location, the emergency could be somewhere else—for example, in another room or on a different floor. Therefore, it is important to get verbal confirmation from the caller about where help is needed.
Setting System Date and Time
39
Setting System Date and Time
You can change the date and time appearing on the console display. The time displays either in 12- or 24-format depending on system programming.
To set the time:
1. Press Function.
2. Press [Att Function].
3. Press [Date/Time].
4. Press [12/24 Hr] to select either the 12-hour or 24-hour format.
"AM" or "PM" will appear after the time in the 12-hour format.
5. Press [Set Time].
6. Enter the current time using four digits (hh:mm).
For example, for 9:30 enter 0930.
7. Press [PM] if applicable.
[PM] appears only if the system is set to 12-hour format, and the hour entered is in the range 01 – 12.
8. Press [Set] (24-hour format only).
You can use the key to make corrections.
9. Press [Exit].
To set the date:
1. Press Function.
2. Press [Att Function].
3. Press [Set Date].
4. Enter the current date in YY/MM/DD format.
For example, for December 12, 2009, enter 091212.
5. Press [Set].
6. Press [Exit].
Mitel 5540 IP Console - User Guide
40
Canceling Call Forwarding
You can cancel Call Forwarding on all extensions in the system.
To set or cancel Call Forwarding on an extension:
1. Press Function.
2. Press [Att Function].
3. Press [Cncl All Fwd].
4. Press [Confirm].
5. Press [Exit].
You can also set up Call Forwarding for individual extensions from the console. See “Setting/Canceling Call Forwarding” on page 45
Canceling Do Not Disturb
You can cancel Do Not Disturb (DND) on all extensions in the system.
To set or cancel DND on an extension:
1. Press Function.
2. Press [Att Function].
3. Press [Cncl All Dnd].
4. Press [Confirm].
5. Press [Exit].
You can also set up DND for individual extensoin from the console. For more information see “Setting/Canceling Do Not Disturb” on page 46.
Displaying the Console Identity
41
Displaying the Console Identity
The system is identified by a software release and version number and the console by an extension.
Dialing the console extension number is an alternative to dialing "0" (zero) to call the attendant.The Attendant Hold ID number is part of the Attendant Hold - Remote Retrieve feature. A user can "pickup" a call on hold at the ocnosle by dialing the Attendant Hold - Remote Retrieve feature access code, followed by the Attendant Hold ID and Hold slot number. The call and the code are usually announced using page.
The console has an extension number which extension users can dial instead of "0" (zero) to call you. You can display the console extension number along with the system software version.
To display the console extension number and the system software version:
1. Press Function.
2. Press [Identity].

Mitel 5540 IP Console - User Guide
42
Chapter 4
Using Extension Functions

Mitel 5540 IP Console - User Guide
44
Viewing Extension Status
45
Viewing Extension Status
You can view extension status information to determine the current assignment of services and features at an extension.
To view the current status of an extension:
1. Press Function.
2. Press [Stn Function].
3. Enter the extension number.
4. Press [Enter].
5. Press [Upd Status].
The display shows the extension’s Class of Service (COS), Class of Restriction (COR), and whether features such as Do Not Disturb (DND) are activated.
6. Press [Exit].
Setting/Canceling Call Forwarding
You can set up and cancel Call Forwarding on individual extensions fromthe console.
To set or cancel Call Forwarding on an extension:
1. Press Function.
2. Press [Stn Function].
3. Dial the number of the extension for which you want to set or cancel Call Forwarding.
If you dial an invalid number, press [Clear No.].
4. Press [Enter].
5. Press [Call Fwd].
6. Do one of the following:
• Press the softkey corresponding to the type of call forwarding required, for example, Always, No Answer, and so forth.
• Press [Cancel] to cancel the current call forwarding.
7. If you selected [Always], dial the destination and then skip to step 10.
8. If you selected an option other than Always, press [Internal] or [External] to specify which type of calls you want to forward.
9. Dial the destination or press [Current No.] to forward calls to previously specified destination.
10. Press [Save].
Mitel 5540 IP Console - User Guide
46
Setting/Canceling Do Not Disturb
Do Not Disturb (DND) prevents calls from ringing an extension. You can set and cancel DND on any extension in the system.
To set or cancel DND on an extension:
1. Press Function.
2. Press [Stn Function].
3. Dial the extension number.
4. Press[Enter].
5. Press [No Disturb].
The first line of the display shows "DND" to indicate that DND is set.
6. Press[Exit].
You can also set and cancel DND while on a call to an extension. For more information, see page 28.
Setting/Clearing Message Waiting
You can notify extension users that a message is waiting for them at the console. When the user returns and calls the console, the display shows “MSW” to indicate that there is a message waiting for that extension.
Use this feature if you know that the person you are trying to contact is out of the office. If you know that the person is in the office, use the Callback feature described on page 20.
To set or clear Message Waiting on an extension:
1. Press Function.
2. Press [Stn Function].
3. Press [Stations].
4. Dial the extension number.
5. Press [Enter].
6. Press [Msg Waiting] to set or clear message waiting.
7. Press [Exit].
Setting/Clearing Advisory Messages
47
Setting/Clearing Advisory Messages
You can read Advisory Messages left on a phone and clear or change an existing message.
To read, set, or clear an Advisory Message:
1. Press Function.
2. Press [Stn Function].
3. Dial the extension number.
4. Press [Enter].
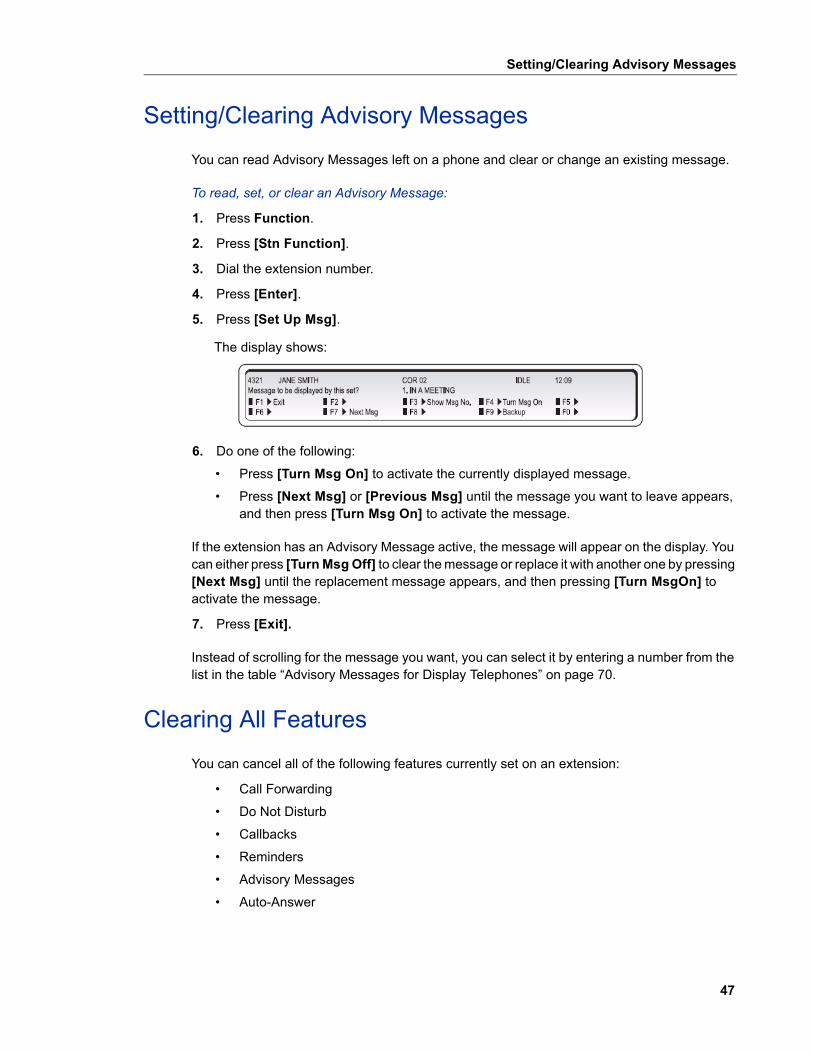
5. Press [Set Up Msg].
The display shows:
6. Do one of the following:
• Press [Turn Msg On] to activate the currently displayed message.
• Press [Next Msg] or [Previous Msg] until the message you want to leave appears, and then press [Turn Msg On] to activate the message.
If the extension has an Advisory Message active, the message will appear on the display. You can either press [Turn Msg Off] to clear the message or replace it with another one by pressing [Next Msg] until the replacement message appears, and then pressing [Turn MsgOn] to activate the message.
7. Press [Exit].
Instead of scrolling for the message you want, you can select it by entering a number from the list in the table “Advisory Messages for Display Telephones” on page 70.
Clearing All Features
You can cancel all of the following features currently set on an extension:
• Call Forwarding
• Do Not Disturb
• Callbacks
• Reminders
• Advisory Messages
• Auto-Answer
Mitel 5540 IP Console - User Guide
48
To clear all features that are currently set on an extension:
1. Press Function.
2. Press [Stn Function].
3. Dial the extension number.
4. Press [Enter].
5. Press [Clear Feat].
6. Press [Exit].
Taking an Extension Out of Service
You can take an extension out of service (busy it out) if there is a problem with that extension or the system. An out-of-service extension can neither make nor receive calls.
To busy out an extension:
1. Press Function.
2. Press [Stn Function].
3. Dial the extension number.
4. Press [Enter].
5. Press [Busy Rts].
6. Do one of the following:
• Press [Busy] to take an idle extension out of service.
• Press [Courtsey Down] to take a busy extension out of service when it becomes idle.
• Press [Force Down] to take a busy extension out of service and disconnect its call.
• Press [Ret To Serv] to return the extension to service.

Chapter 5
Using Trunk Functions

Mitel 5540 IP Console - User Guide
50
Viewing Trunk Status
51
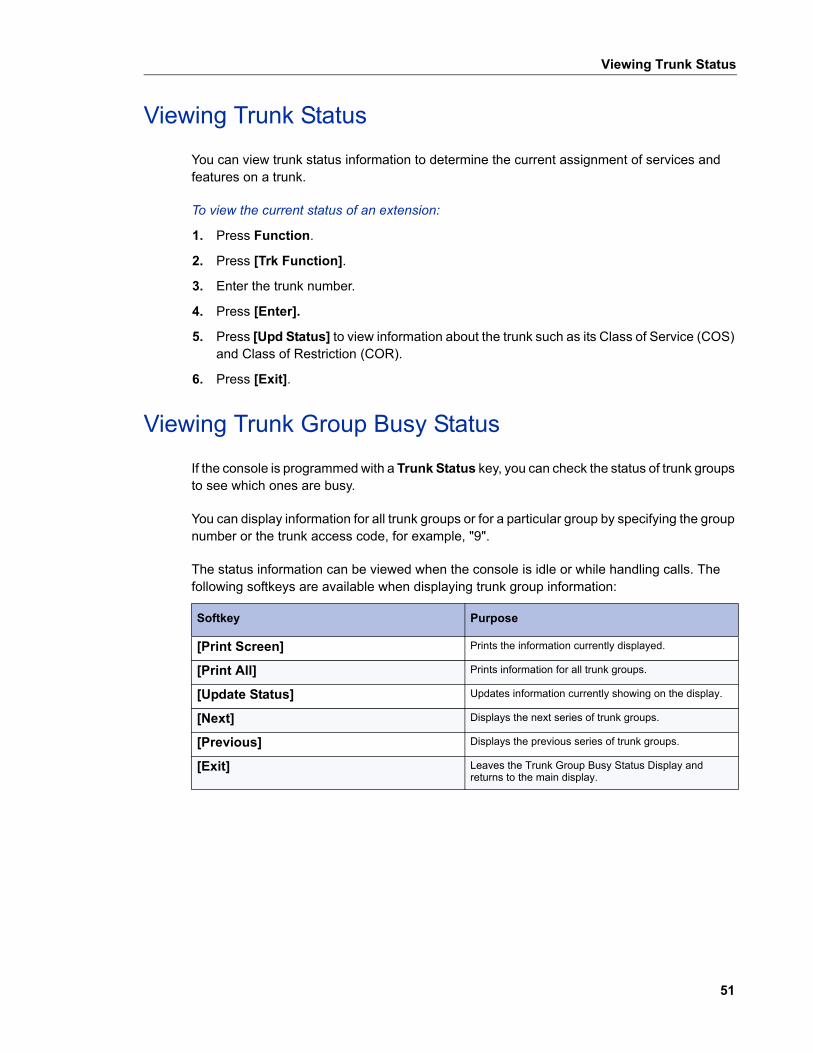
Viewing Trunk Status
You can view trunk status information to determine the current assignment of services and features on a trunk.
To view the current status of an extension:
1. Press Function.
2. Press [Trk Function].
3. Enter the trunk number.
4. Press [Enter].
5. Press [Upd Status] to view information about the trunk such as its Class of Service (COS) and Class of Restriction (COR).
6. Press [Exit].
Viewing Trunk Group Busy Status
If the console is programmed with a Trunk Status key, you can check the status of trunk groups to see which ones are busy.
You can display information for all trunk groups or for a particular group by specifying the group number or the trunk access code, for example, "9".
The status information can be viewed when the console is idle or while handling calls. The following softkeys are available when displaying trunk group information:
Softkey Purpose
[Print Screen] Prints the information currently displayed.
[Print All] Prints information for all trunk groups.
[Update Status] Updates information currently showing on the display.
[Next] Displays the next series of trunk groups.
[Previous] Displays the previous series of trunk groups.
[Exit] Leaves the Trunk Group Busy Status Display and returns to the main display.
Mitel 5540 IP Console - User Guide
52
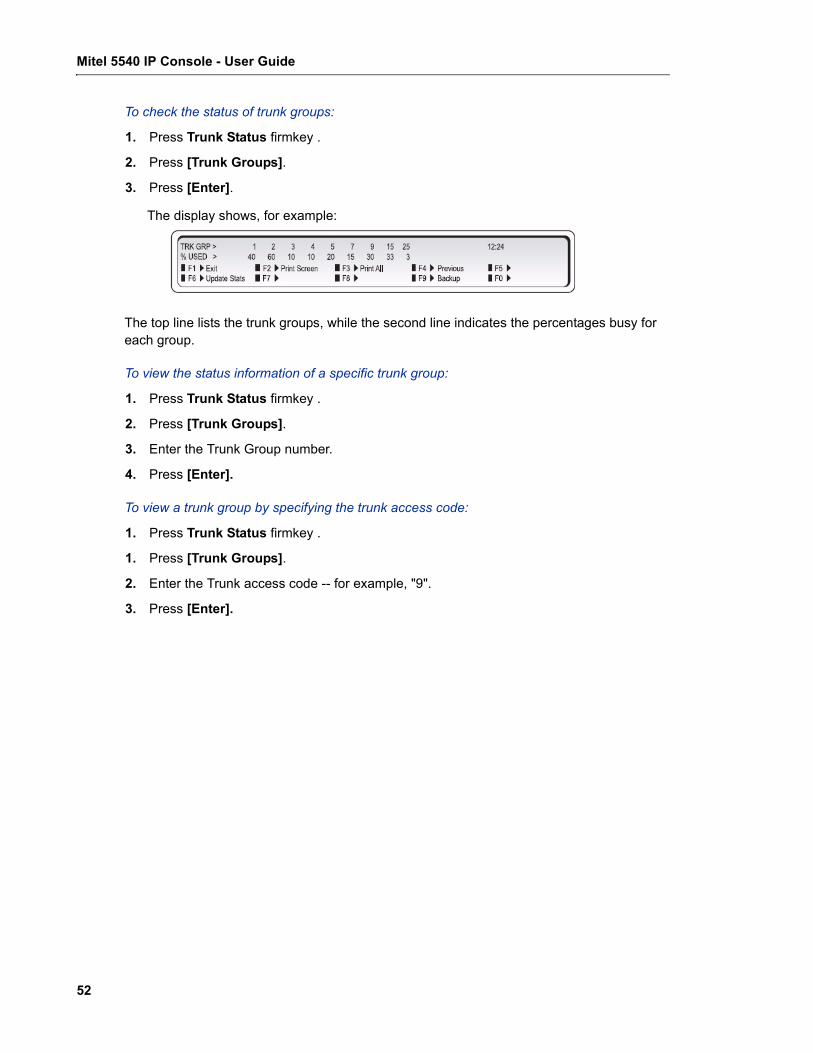
To check the status of trunk groups:
1. Press Trunk Status firmkey .
2. Press [Trunk Groups].
3. Press [Enter].
The display shows, for example:
The top line lists the trunk groups, while the second line indicates the percentages busy for each group.
To view the status information of a specific trunk group:
1. Press Trunk Status firmkey .
2. Press [Trunk Groups].
3. Enter the Trunk Group number.
4. Press [Enter].
To view a trunk group by specifying the trunk access code:
1. Press Trunk Status firmkey .
1. Press [Trunk Groups].
2. Enter the Trunk access code -- for example, "9".
3. Press [Enter].
Accessing Specific Trunks
53
Accessing Specific Trunks
You can access a specific trunk and use it to make an outgoing call.
To access a specific trunk:
1. Press Function.
2. Press [Trk Function].
3. Enter the trunk number.
4. Press [Enter].
5. Press [Att Access].
6. Do one of the following:
• If the trunk is free (as indicated by dial tone), dial the outside number.
• If the trunk is busy, either press [Override] to barge into the call. Both parties will hear a long beep before you enter the conversation.
Trunks that are designated as dictation trunks (M/MM leads), and in use, cannot be accessed.
Taking a Trunk Out of Service
If may be necessary to take a trunk out of service (busy it out) if there are problems with that trunk or the system. You can busy out an idle trunk or one that is in use. Afterwards, you can return the trunk to service.
To busy out a trunk or return a trunk to service:
1. Press Function.
2. Press [Trk Function].
3. Enter the trunk number.
4. Press [Enter].
5. Press [Bsy/Rts].
6. Do one of the following:
• Press [Busy] to take an idle trunk out of service.
• Press [Courtsey Dwn] to take a busy trunk out of service when it becomes idle or [Force Busy] to busy it out immediately.
• Press [Ret To Serv] to return the trunk to service.

Mitel 5540 IP Console - User Guide
54
Chapter 6
Hotel/Motel Features

Mitel 5540 IP Console - User Guide
56
Displaying and Changing Room Data
57
Displaying and Changing Room Data
Room data includes occupancy and condition status (Vacant, Clean, Outgoing Call Restrictions, etc.) and the status of message waiting, wake-up call, and other services. You can change room data while the console is idle, or when you are connected to the room.
To display or change data for a room:
1. Press the Guest Service firmkey.
2. Dial a room number (not necessary if you’re already connected to the room).
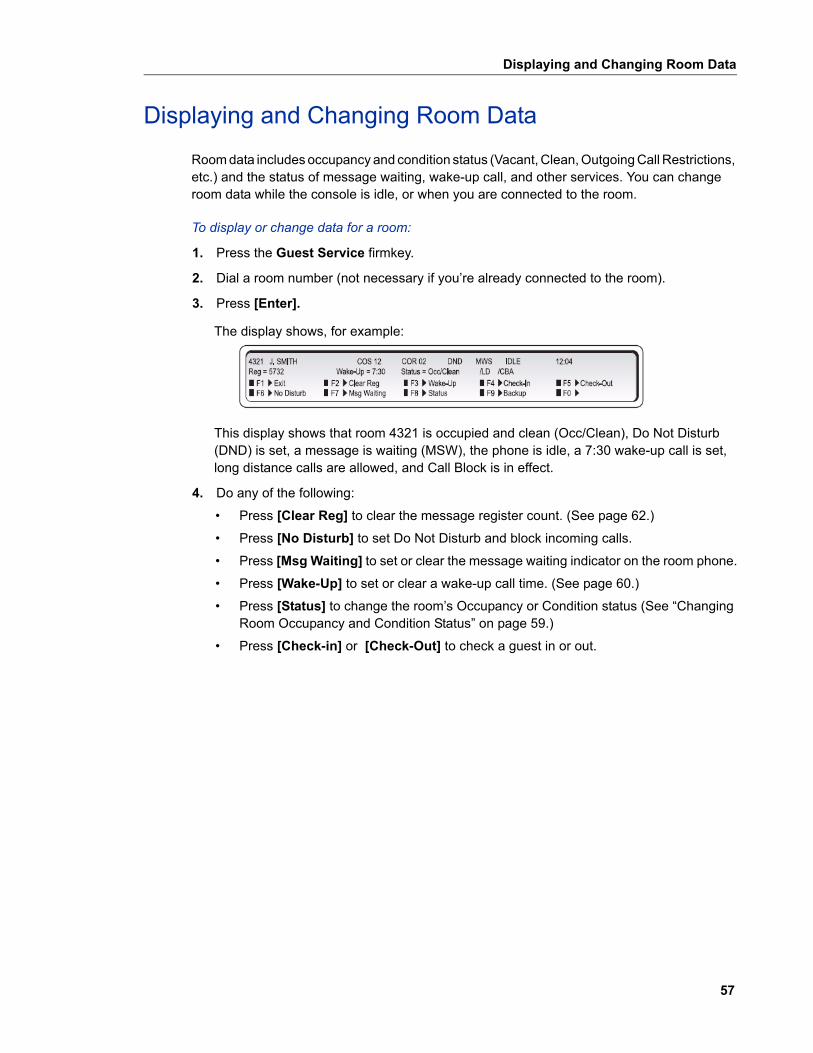
3. Press [Enter].
The display shows, for example:
This display shows that room 4321 is occupied and clean (Occ/Clean), Do Not Disturb (DND) is set, a message is waiting (MSW), the phone is idle, a 7:30 wake-up call is set, long distance calls are allowed, and Call Block is in effect.
4. Do any of the following:
• Press [Clear Reg] to clear the message register count. (See page 62.)
• Press [No Disturb] to set Do Not Disturb and block incoming calls.
• Press [Msg Waiting] to set or clear the message waiting indicator on the room phone.
• Press [Wake-Up] to set or clear a wake-up call time. (See page 60.)
• Press [Status] to change the room’s Occupancy or Condition status (See “Changing Room Occupancy and Condition Status” on page 59.)
• Press [Check-in] or [Check-Out] to check a guest in or out.
Mitel 5540 IP Console - User Guide
58
Listing/Counting Rooms by Occupancy and Condition Status
You can display a list of rooms by occupancy and condition status—for example, Vacant and Not Clean, or Occupied and Maid Present. The system also reports the total number of rooms that are in the state you specify. You can cycle through all rooms or start with a particular room number—for instance, the first room on the third floor.
To list all rooms by occupancy and condition status:
1. Press the Guest Service firmkey.
2. Do one of the following:
• To list all vacant and clean rooms, press [Vac/Clean].
• To list all rooms in which a maid is present, press [Maid].
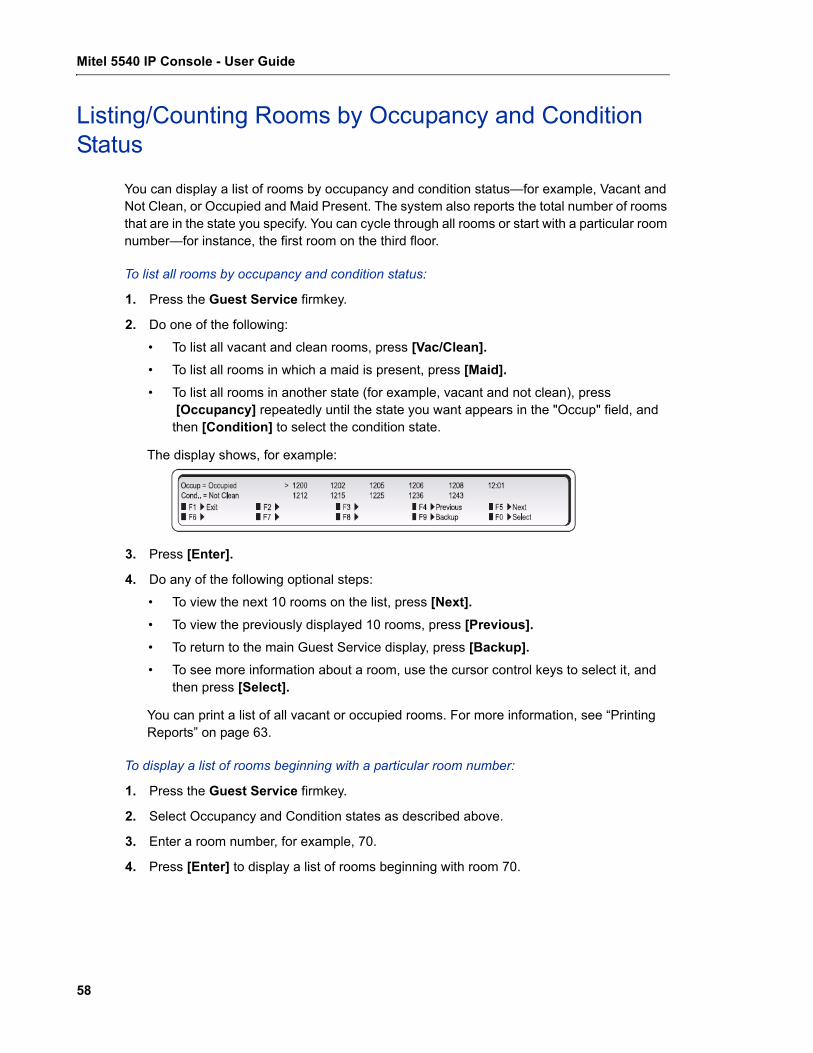
• To list all rooms in another state (for example, vacant and not clean), press [Occupancy] repeatedly until the state you want appears in the "Occup" field, and then [Condition] to select the condition state.
The display shows, for example:
3. Press [Enter].
4. Do any of the following optional steps:
• To view the next 10 rooms on the list, press [Next].
• To view the previously displayed 10 rooms, press [Previous].
• To return to the main Guest Service display, press [Backup].
• To see more information about a room, use the cursor control keys to select it, and then press [Select].
You can print a list of all vacant or occupied rooms. For more information, see “Printing Reports” on page 63.
To display a list of rooms beginning with a particular room number:
1. Press the Guest Service firmkey.
2. Select Occupancy and Condition states as described above.
3. Enter a room number, for example, 70.
4. Press [Enter] to display a list of rooms beginning with room 70.
Changing Room Occupancy and Condition Status
59
Changing Room Occupancy and Condition Status
You can change the occupancy and condition status of a room while the console is idle or while you are connected to the room.
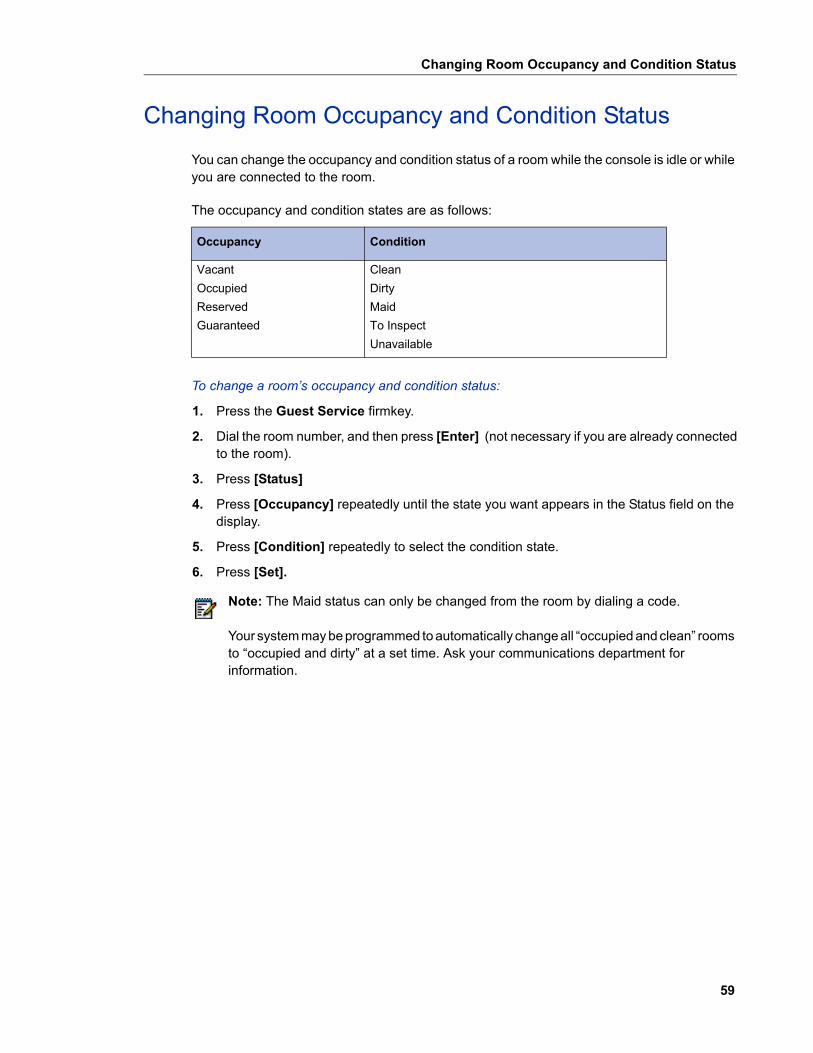
The occupancy and condition states are as follows:
To change a room’s occupancy and condition status:
1. Press the Guest Service firmkey.
2. Dial the room number, and then press [Enter] (not necessary if you are already connectedto the room).
3. Press [Status]
4. Press [Occupancy] repeatedly until the state you want appears in the Status field on the display.
5. Press [Condition] repeatedly to select the condition state.
6. Press [Set].
Occupancy Condition
Vacant
Occupied
Reserved
Guaranteed
Clean
Dirty
Maid
To Inspect
Unavailable
Note: The Maid status can only be changed from the room by dialing a code.
Your system may be programmed to automatically change all “occupied and clean” rooms to “occupied and dirty” at a set time. Ask your communications department for information.
Mitel 5540 IP Console - User Guide
60
Checking-In/Checking-Out
Checking a guest into a room changes the room status to "Occupied". Checking a guest out of a room changes the status to "Vacant". The Call Block and Call Restriction parameters in effect for the room also change to values determined by system programming. For example, when a guest checks in, the system might remove restrictions that would prevent the guest from dialing long distance calls.
To check in or check out a guest:
1. Press the Guest Service firmkey.
2. Dial the room number.
3. Press [Check-in] or [Check-out].
4. Press [Enter].
5. Press [Exit].
Setting/Canceling Wake-up Calls
Both you and the guest can set, change, and cancel wake-up calls for a guest room. The system does not distinguish whether a wake-up call is set, changed, or canceled from the attendant console or guest room telephone. So, for example, a guest can cancel a wake-up call that you set and vice versa.
You can set or cancel a wake-up call while the console is idle or while connected to the guest room.
If a printer is attached to the network, a report may print each time you set, change, or cancel a wake-up call.
To set or cancel a wake-up time while connected to the guest room:
1. Press the Guest Service firmkey.
2. Press [Wake-up].
3. Do one of the following:
• To set a wake-up call time, enter the four-digit time in 12- or 24-hour format. If you entered the time in 12-hour format, press [AM] pr [PM].
• To cancel a wake-up call, press [Clear Time].
• To change a wake-up call time or correct an entry error, press [Clear Time] and then re-enter the time.
4. Press [Set].
5. Press [Exit].
Setting Room Call Restrictions
61
To set or change a wake-up time when NOT connected to the guest room:
1. Press the Guest Service firmkey.
2. Dial the room number.
3. Press [Enter].
4. Press [Wake-Up].
5. Follow steps 1-3 from the previous procedure.
Setting Room Call Restrictions
You can restrict guests from placing local or long distance calls from their room phones. The procedure you use to set call restrictions depends on whether the hotel/motel is using a Property Management System.
If the hotel/motel is NOT using a Property Management System
1. Press the Guest Service firmkey.
2. Dial the room number.
3. Press [Status].
4. Do one of the following:
• Press [Call Rest.] repeatedly until the desired restriction is displayed.
• Press [Call Block] to prevent or allow room-to-room calling when call blocking is in effect. The display shows "Affected" when Call block is set.
5. Press [Set].
Blocking Room-to-Room Calls
You can use the Block key on the console to bar calls between guest rooms. Only room phones programmed with call blocking will be affected by this; ask your communications department for further information.
The system can also be programmed to turn Call Blocking on and off for all affected rooms at certain times of the day and for individual rooms at check-in/check-out time.
To block room-to-room calls:
• Press the Block firmkey.
Note: Some display sets can set their own timed reminder. The above procedures will also clear or change a reminder already set by the user.
If the guest fails to answer the wake-up call, the system will ring the room twice more at five-minute intervals. If a third wake-up call goes unanswered or reaches a busy line, the system may generate a minor alarm at the console.
Mitel 5540 IP Console - User Guide
62
The lamp above the Block key lights and stays lit until blocking is canceled.
Monitoring Guest Rooms
Guest can use their room phone as a listening device to monitor their room from a remote station. The remote station can be an attendant console, an extension, or an outside phone calling into the system on a DISA trunk.
You can only monitor a room from an idle console.
To use the console to listen in on a room that has monitoring activated:
1. Press the Guest Service firmkey.
2. Press [More].
3. Dial the number of the room.
4. Press [Monitor room] or [Enter].
5. Listen for three short beeps followed by audio from the room.
If room monitoring is not activated on the room phone, the display will show "FTr Disald". If another extension is monitoring the room, the display will show "MntrBusy."
To disconnect the console from the room:
• Press Cancel or Release.
Displaying/Clearing a Message Register
The message register is a record of all external calls placed from a guest room telephone. You can display and clear a room’s message register while the console is idle or while connected to the guest room.
To display or clear a room’s message register:
1. Press the Guest Service firmkey.
2. Dial the room number (not necessary if you are already connected to the room).
3. Press [Clear Reg].
Printing Reports
63
Printing Reports
If a printer is connected to the same network as the console, you can request printed reports (audits) of message registers, room status and automatic wake-ups.
Each audit has its own format and some are printed automatically. For example, when a wake-up call is set, changed or canceled, the printer automatically records it.
To print a report:
1. Press the Guest Service firmkey.
2. Press [Print].
3. Select the report you want to print.
4. Press [Exit].

Mitel 5540 IP Console - User Guide
64

Chapter 7
Reference

Mitel 5540 IP Console - User Guide
66
Telephone Directory
67
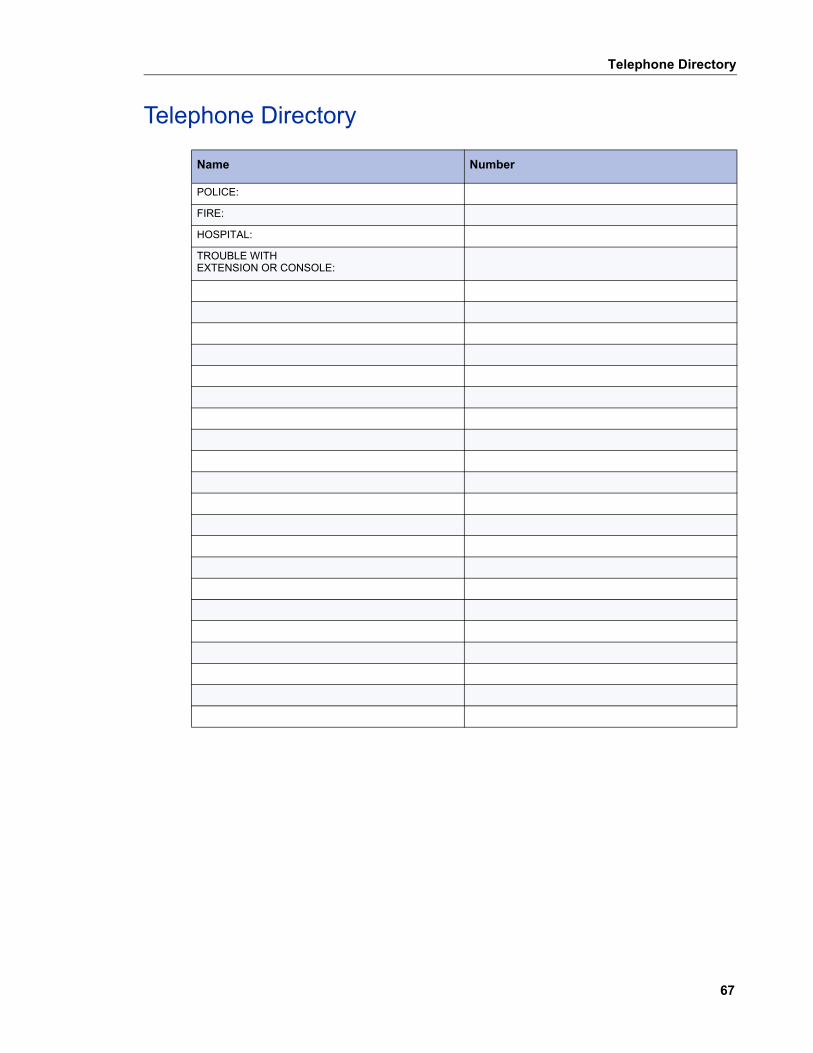
Telephone Directory
Name Number
POLICE:
FIRE:
HOSPITAL:
TROUBLE WITHEXTENSION OR CONSOLE:
Mitel 5540 IP Console - User Guide
68
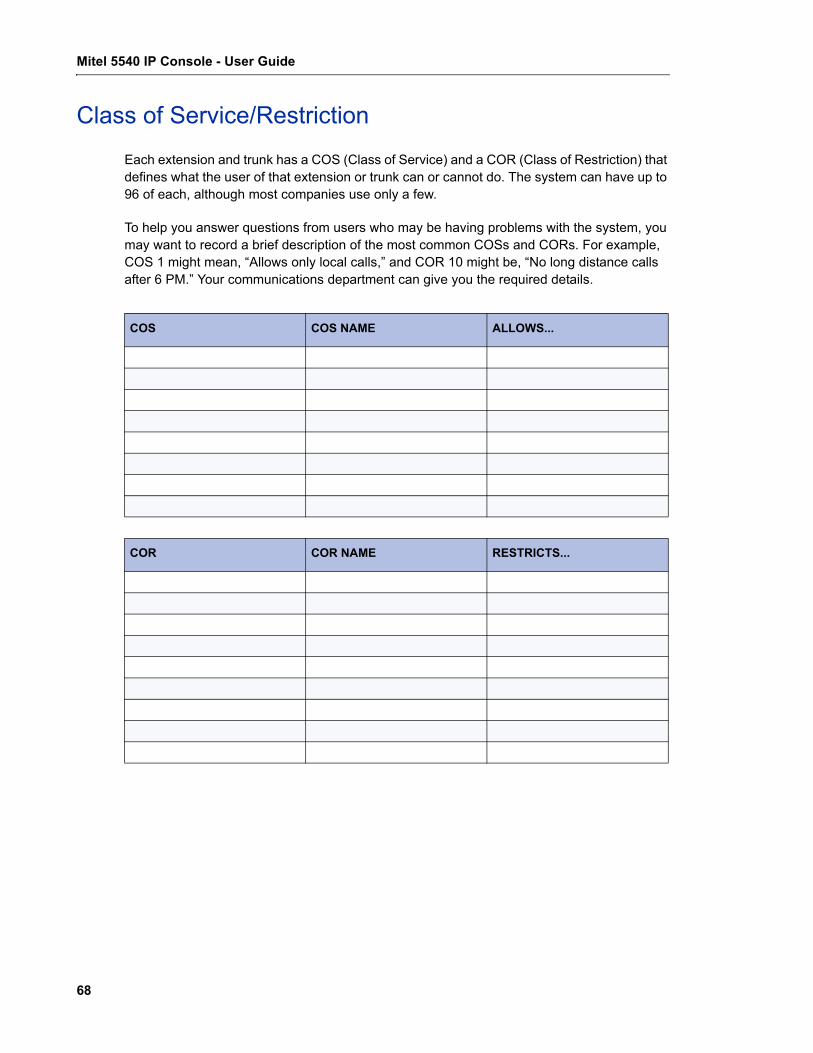
Class of Service/Restriction
Each extension and trunk has a COS (Class of Service) and a COR (Class of Restriction) that defines what the user of that extension or trunk can or cannot do. The system can have up to 96 of each, although most companies use only a few.
To help you answer questions from users who may be having problems with the system, you may want to record a brief description of the most common COSs and CORs. For example, COS 1 might mean, “Allows only local calls,” and COR 10 might be, “No long distance calls after 6 PM.” Your communications department can give you the required details.
COS COS NAME ALLOWS...
COR COR NAME RESTRICTS...
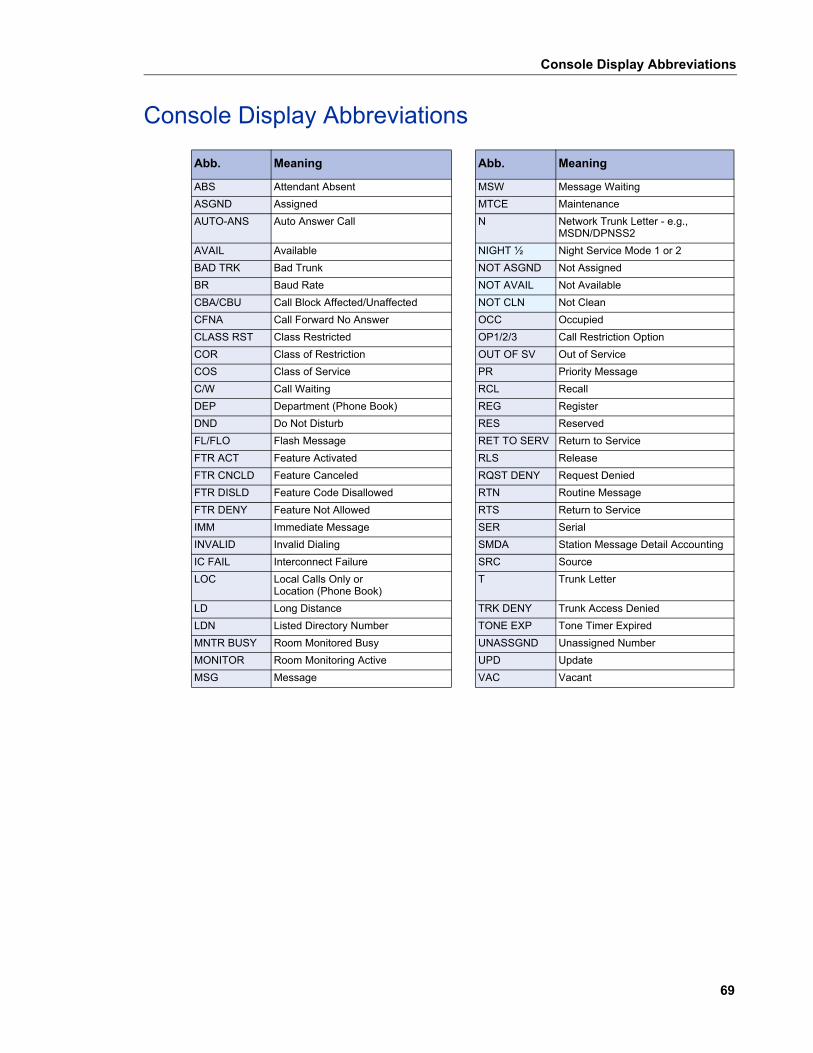
Console Display Abbreviations
69
Console Display Abbreviations
Abb. Meaning Abb. Meaning
ABS Attendant Absent MSW Message Waiting
ASGND Assigned MTCE Maintenance
AUTO-ANS Auto Answer Call N Network Trunk Letter - e.g., MSDN/DPNSS2
AVAIL Available NIGHT ½ Night Service Mode 1 or 2
BAD TRK Bad Trunk NOT ASGND Not Assigned
BR Baud Rate NOT AVAIL Not Available
CBA/CBU Call Block Affected/Unaffected NOT CLN Not Clean
CFNA Call Forward No Answer OCC Occupied
CLASS RST Class Restricted OP1/2/3 Call Restriction Option
COR Class of Restriction OUT OF SV Out of Service
COS Class of Service PR Priority Message
C/W Call Waiting RCL Recall
DEP Department (Phone Book) REG Register
DND Do Not Disturb RES Reserved
FL/FLO Flash Message RET TO SERV Return to Service
FTR ACT Feature Activated RLS Release
FTR CNCLD Feature Canceled RQST DENY Request Denied
FTR DISLD Feature Code Disallowed RTN Routine Message
FTR DENY Feature Not Allowed RTS Return to Service
IMM Immediate Message SER Serial
INVALID Invalid Dialing SMDA Station Message Detail Accounting
IC FAIL Interconnect Failure SRC Source
LOC Local Calls Only orLocation (Phone Book)
T Trunk Letter
LD Long Distance TRK DENY Trunk Access Denied
LDN Listed Directory Number TONE EXP Tone Timer Expired
MNTR BUSY Room Monitored Busy UNASSGND Unassigned Number
MONITOR Room Monitoring Active UPD Update
MSG Message VAC Vacant
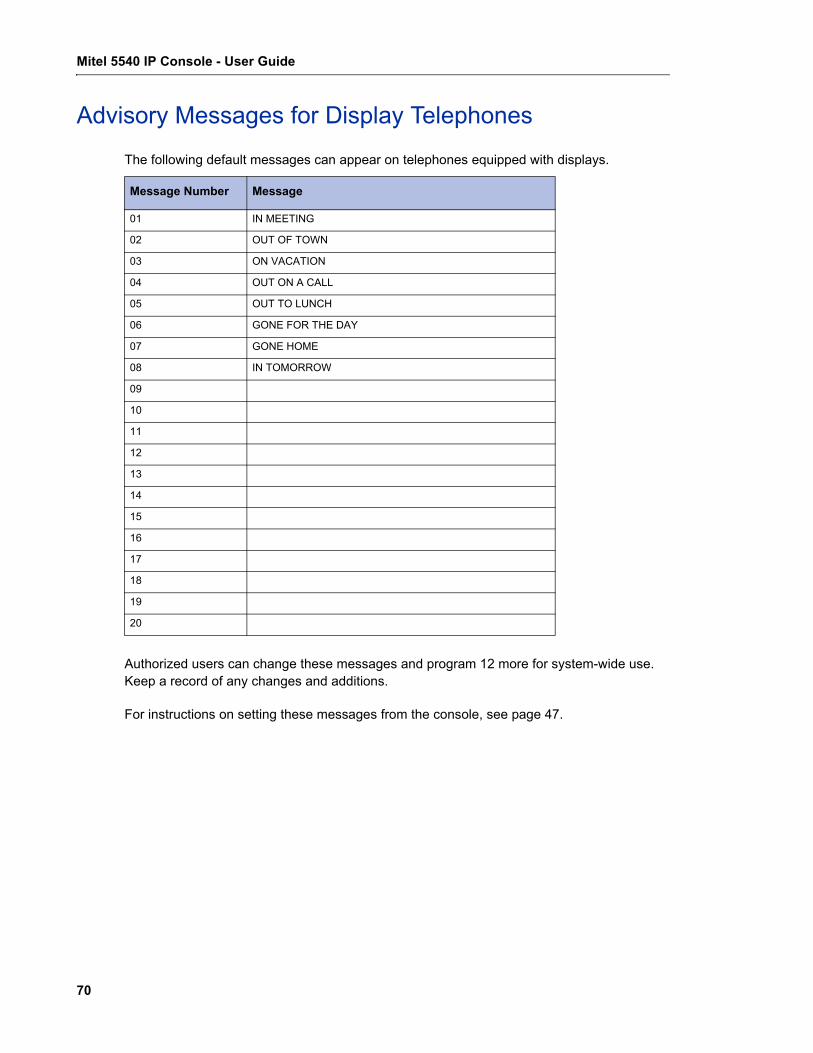
Mitel 5540 IP Console - User Guide
70
Advisory Messages for Display Telephones
The following default messages can appear on telephones equipped with displays.
Authorized users can change these messages and program 12 more for system-wide use. Keep a record of any changes and additions.
For instructions on setting these messages from the console, see page 47.
Message Number Message
01 IN MEETING
02 OUT OF TOWN
03 ON VACATION
04 OUT ON A CALL
05 OUT TO LUNCH
06 GONE FOR THE DAY
07 GONE HOME
08 IN TOMORROW
09
10
11
12
13
14
15
16
17
18
19
20
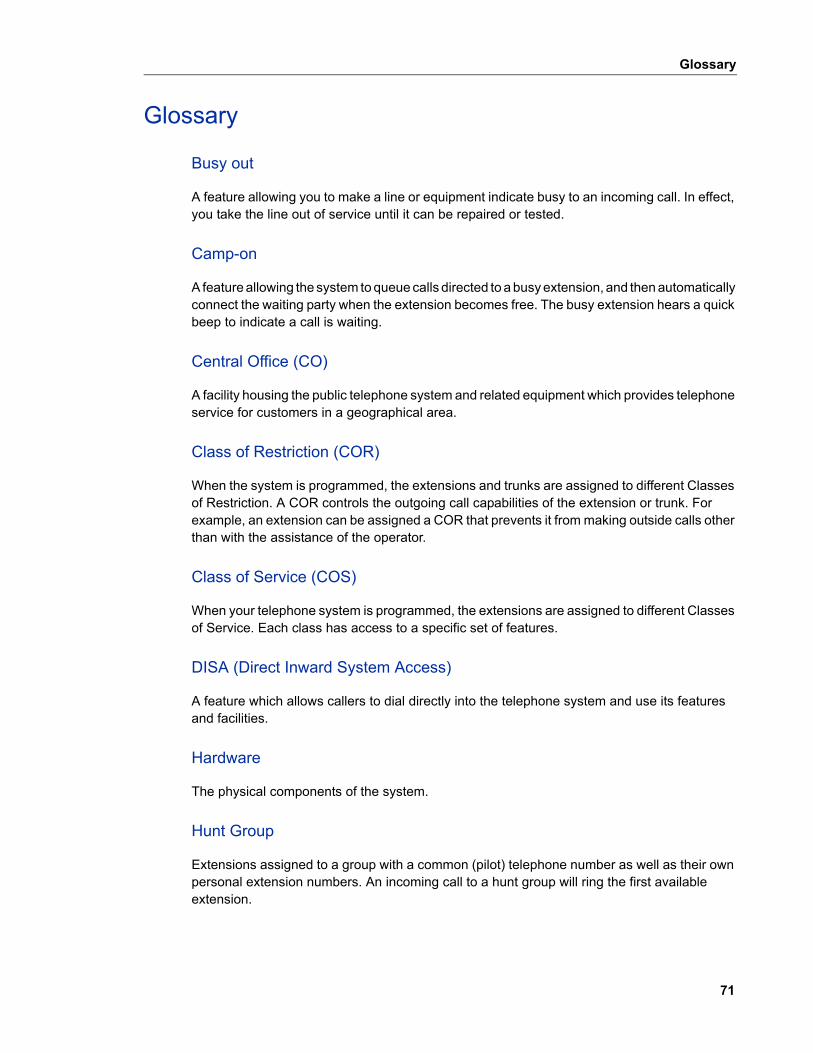
Glossary
71
Glossary
Busy out
A feature allowing you to make a line or equipment indicate busy to an incoming call. In effect, you take the line out of service until it can be repaired or tested.
Camp-on
A feature allowing the system to queue calls directed to a busy extension, and then automatically connect the waiting party when the extension becomes free. The busy extension hears a quick beep to indicate a call is waiting.
Central Office (CO)
A facility housing the public telephone system and related equipment which provides telephone service for customers in a geographical area.
Class of Restriction (COR)
When the system is programmed, the extensions and trunks are assigned to different Classes of Restriction. A COR controls the outgoing call capabilities of the extension or trunk. For example, an extension can be assigned a COR that prevents it from making outside calls other than with the assistance of the operator.
Class of Service (COS)
When your telephone system is programmed, the extensions are assigned to different Classes of Service. Each class has access to a specific set of features.
DISA (Direct Inward System Access)
A feature which allows callers to dial directly into the telephone system and use its features and facilities.
Hardware
The physical components of the system.
Hunt Group
Extensions assigned to a group with a common (pilot) telephone number as well as their own personal extension numbers. An incoming call to a hunt group will ring the first available extension.
Mitel 5540 IP Console - User Guide
72
LDN Keys (Listed Directory Number)
Call-handling keys which allow you to select the sequence in which you answer calls from outside the PABX.
PABX (Private Automatic Branch Exchange)
Telephone switching system for private use by a company.
Recall
A call which returns to the console after being transferred to a busy or unanswered extension.
Software
The routines, programs, and instructions required to run the system.
Trunk
A trunk (outside line) is the external communications link between two switching systems. This link can be between one or more telephone systems (PABXs) or the PABX and Central Office equipment.
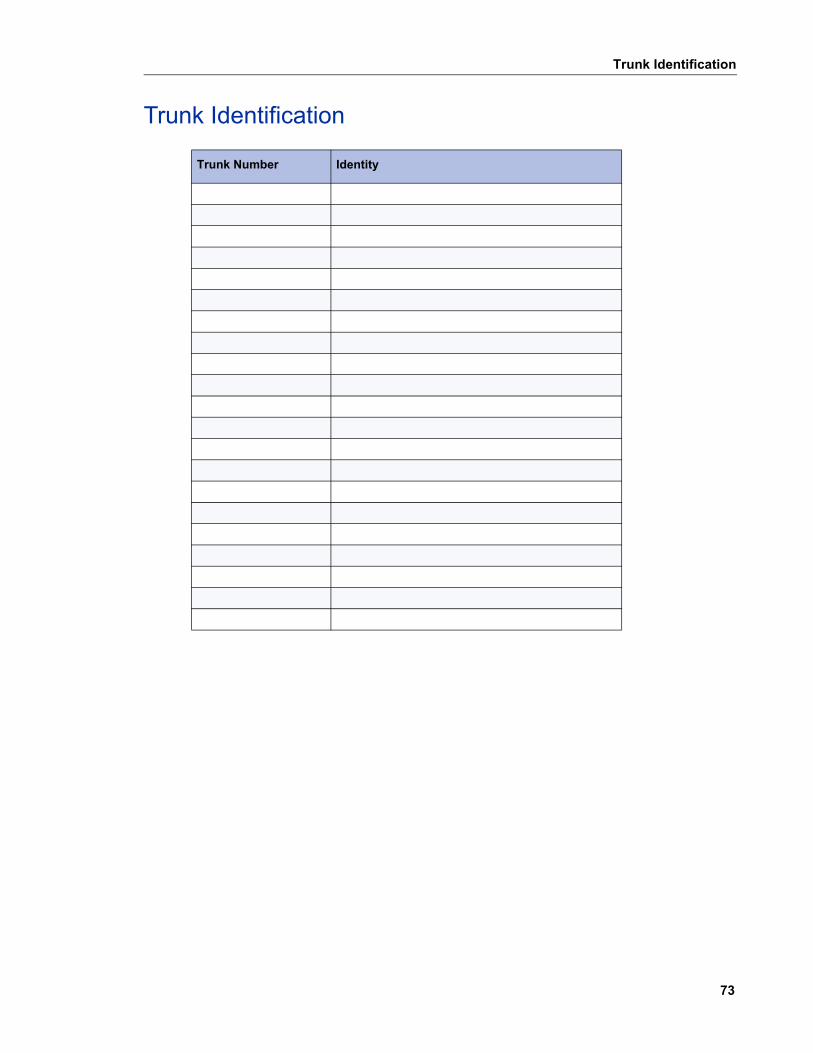
Trunk Identification
73
Trunk Identification
Trunk Number Identity

Mitel 5540 IP Console - User Guide
74

Index
75
Index
Numerics911 call alarms, viewing and clearing, 38
Aabbreviations, console display, 70accessing individual trunks, 55Advisory Messages
calling extensions with Advisory Messages 21list of Advisory Messages, 71setting and clearing on extensions, 48
alarms, viewing and clearing, 37All Set Page, 25Answer key, 7, 19answering calls
multiple calls waiting, 20new call indication, 19new calls, 19when Night Service enabled, 31
audits (printouts) for guest rooms, 64
Bbell, <italic>See ringerBlock key, 7blocking calls between guest rooms, 63busy
recalls, 24transferring to busy extensions, 20
busy outdefinition, 72extensions, 49trunks, 55
CCall Block, 63call forwarding
setting and cancelling on individual extensions, 40, 45
call logging 33Call Monitoring 49call parking 32call restrictions for guest rooms, 63call splitting, 23Callback
about, 21leaving at an extension, 20
Camp-on, definition, 72Cancel key, 7canceling
Advisory Messages, 48Call Forwarding on individual extensions, 40, 45Do Not Disturb on individual extensions, 27, 46
Message Waiting on individual extensions, 28, 46CAS, <italic>See Centralized Attendant ServiceCentral Office, definition, 72Centralized Attendant Service, 33Class of Restriction, definition, 72Class of Service, definition, 72conferences, setting up, 23console
components, 4directory number, displaying, 40display abbreviations, 70display, 7handset/headset jacks, 5intercepts, 24keys, 6language, changing, 10lockout, 10Night/Day Service, switching, 9ringer, adjusting, 8ringer, turning on/off, 9
Cursor control keys, 6
Ddate, setting, 39Day Service, switching, 9Dial pad keys, about, 6dialing mistakes, correcting, 20Directed Call Pickup, 31directory number, display console, 40DISA
definition, 72display
abbreviations, 70about the console, 7changing language, 10language, changing, 7
DNDoverriding, 20, 28setting and canceling on an extension, 27, 46
Do Not Disturb, <italic>See DNDDoor Opener 34
Eemergency 911 call alarms, viewing and clearing, 38extending calls, <italic>See transferring callsexternal calls, allowing/restricting from guest
rooms, 63
FFixed function keys, 6flashing on trunks, 31
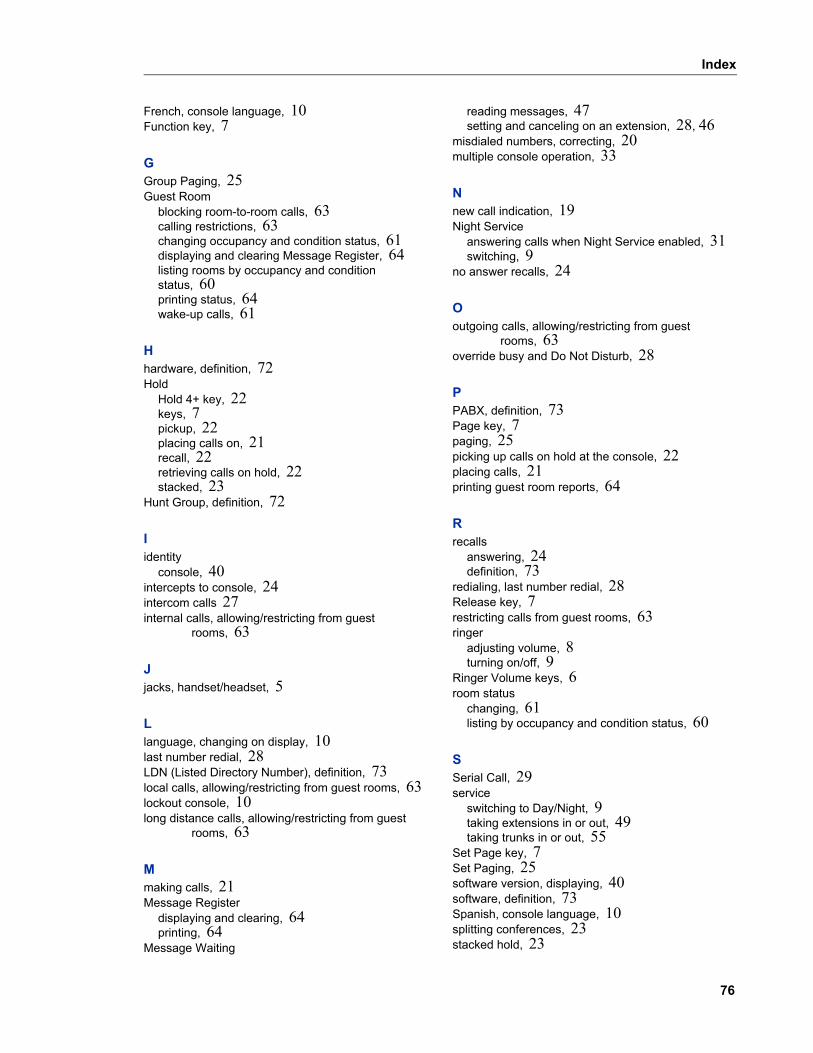
Index
76
French, console language, 10Function key, 7
GGroup Paging, 25Guest Room
blocking room-to-room calls, 63calling restrictions, 63changing occupancy and condition status, 61displaying and clearing Message Register, 64listing rooms by occupancy and condition status, 60printing status, 64wake-up calls, 61
Hhardware, definition, 72Hold
Hold 4+ key, 22keys, 7pickup, 22placing calls on, 21recall, 22retrieving calls on hold, 22stacked, 23
Hunt Group, definition, 72
Iidentity
console, 40intercepts to console, 24intercom calls 27internal calls, allowing/restricting from guest
rooms, 63
Jjacks, handset/headset, 5
Llanguage, changing on display, 10last number redial, 28LDN (Listed Directory Number), definition, 73local calls, allowing/restricting from guest rooms, 63lockout console, 10long distance calls, allowing/restricting from guest
rooms, 63
Mmaking calls, 21Message Register
displaying and clearing, 64printing, 64
Message Waiting
reading messages, 47setting and canceling on an extension, 28, 46
misdialed numbers, correcting, 20multiple console operation, 33
Nnew call indication, 19Night Service
answering calls when Night Service enabled, 31switching, 9
no answer recalls, 24
Ooutgoing calls, allowing/restricting from guest
rooms, 63override busy and Do Not Disturb, 28
PPABX, definition, 73Page key, 7paging, 25picking up calls on hold at the console, 22placing calls, 21printing guest room reports, 64
Rrecalls
answering, 24definition, 73
redialing, last number redial, 28Release key, 7restricting calls from guest rooms, 63ringer
adjusting volume, 8turning on/off, 9
Ringer Volume keys, 6room status
changing, 61listing by occupancy and condition status, 60
SSerial Call, 29service
switching to Day/Night, 9taking extensions in or out, 49taking trunks in or out, 55
Set Page key, 7Set Paging, 25software version, displaying, 40software, definition, 73Spanish, console language, 10splitting conferences, 23stacked hold, 23
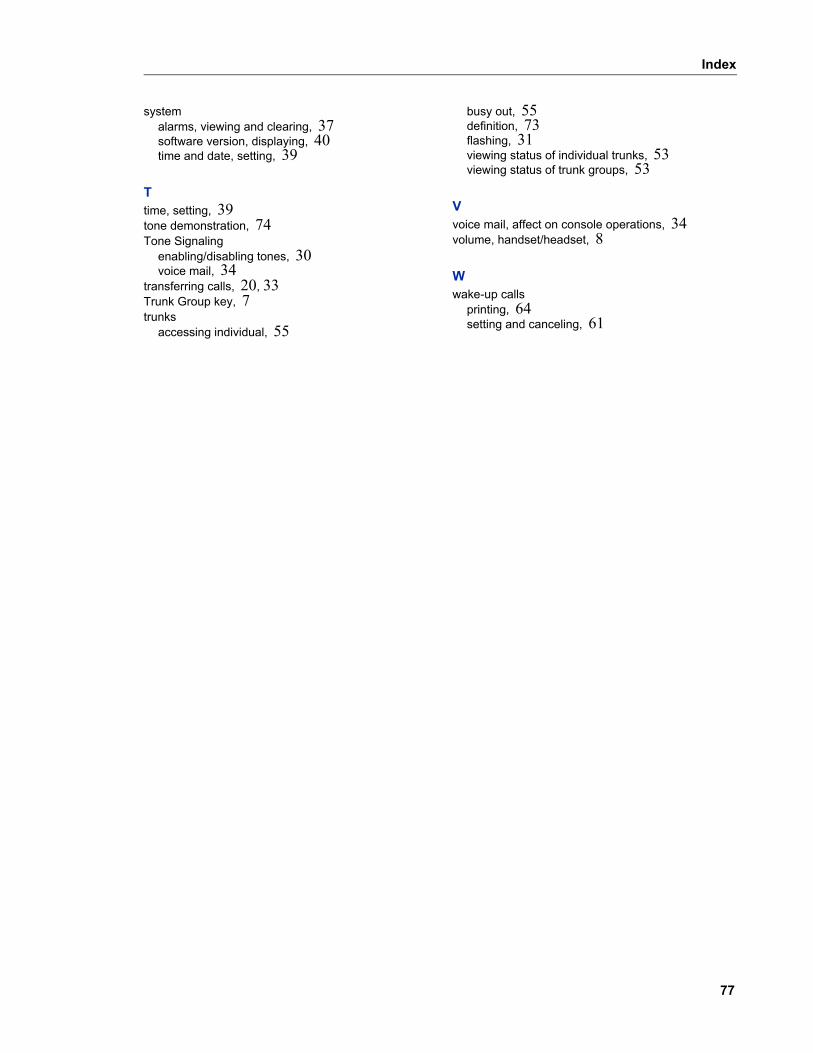
Index
77
systemalarms, viewing and clearing, 37software version, displaying, 40time and date, setting, 39
Ttime, setting, 39tone demonstration, 74Tone Signaling
enabling/disabling tones, 30voice mail, 34
transferring calls, 20, 33Trunk Group key, 7trunks
accessing individual, 55
busy out, 55definition, 73flashing, 31viewing status of individual trunks, 53viewing status of trunk groups, 53
Vvoice mail, affect on console operations, 34volume, handset/headset, 8
Wwake-up calls
printing, 64setting and canceling, 61

Mitel 5540 IP Console - User Guide
78